How to Connect an AI Model to MySQL in 4 Steps
AI is fast becoming an integral part of all kinds of development projects. At the most basic level, this requires us to know how to connect various elements of our applications to AI tools and models.
As you might expect, interactions between our app’s data layer and LLMs are probably the most important component to this.
The challenge is that this can take a number of different forms. This depends on what kind of data we’re using, our use case, and how widespread or varied the interactions we require are.
Today, we’re examining one of the most common examples of this by checking out how we can connect MySQL to AI models.
More specifically, we’ll be covering:
- Why would we connect MySQL to an LLM
- Options for connecting AI models and databases
- Building an AI-powered incident report form with MySQL and OpenAI
Let’s jump right in.
Why would we connect MySQL to an LLM?
For over thirty years, MySQL has been at the center of all kinds of applications, from large-scale enterprise solutions to hobbyist projects.
This ubiquity means that, at some point, there’s a good chance you’re going to need to connect it to an LLM.
A large part of MySQL’s popularity comes from its reputation for performance, ease of use, and scalability. It’s also open-source, making it free to use and distribute.
However, in recent years, MySQL has lost a certain amount of ground to other database options, including Postgres and a variety of NoSQL tools. These may be better positioned for many AI use cases, including offering more flexibility and support for unstructured data.
Despite this, MySQL still powers a huge number of production systems, and it remains a popular choice for developers that need a fast, reliable way to implement a SQL database.
Some of the most common scenarios where we might need to connect an LLM to MySQL include introducing AI capabilities to existing workflows, legacy app modernization, data lookup and retrieval, and more.
You might also like our guide to agentic AI workflows .
Options for connecting AI models and databases
As we said earlier, one area where this gets difficult is that there are several different ways that we can go about connecting databases and models. Which of these is suitable depends on our requirements, use case, and technical skills and resources.
Often, what this comes down to is the scale and complexity of the interactions we require. Naturally, there’s often a tradeoff between the complexity of a solution and the development resources we need to implement it.
So, for some use cases, such as digital workers or enterprise chatbots , we may need an AI system to be able to autonomously determine which database actions are required in a given context and then execute them.
Generally, this will rely on agentic AI frameworks, such as LangChain. We can think of these as toolkits for building complex AI systems that can act independently in order to achieve a given goal.
Often, in these cases, integrations are handled with a Model Protocol Context (MCP) server. This offers a secure, standardized way to connect models to a range of tools and functions, so systems can determine for themselves which actions are appropriate in specific contexts.
However, just as many real-world solutions rely on more traditional methods to connect SQL databases to AI models.
This means defining logic or events using automation tools, and then passing data to an LLM in response to this via a HTTP request, populating values in a predefined prompt. This can be hard-coded, or it may rely on visual automation tools.
Essentially, this resembles a traditional workflow automation solution, but leverages an LLM for some element of processing, transformation, or decision-making.
Example use cases include things like translation, categorization, performing calculations, data enrichment, and more, within existing workflows.
Building an AI-powered incident report form with MySQL and OpenAI
To better understand how we can connect an LLM to MySQL, we’re going to build out an example of how we can achieve this in Budibase.
More specifically, we’re going to use Budibase’s OpenAI automation action alongside a MySQL database to create an AI-powered form for reporting IT incidents.
Each time a new incident report is submitted, our AI system will use the provided data to triage it, determine an impact level according to defined business rules, and update the database row with this enriched information.
We’ll do this in only four steps:
- Connecting our MySQL database
- Configuring our OpenAI integration
- Building an AI-powered automation rule
- Creating an incident report form UI
If you haven’t already, sign up for a free Budibase account to start building as many applications as you need.
Note that today, we’re using a self-hosted instance of Budibase, but you can also take advantage of a range of AI features alongside our internal database within our cloud platform.
We’ll provide the queries you need to create a look-alike database a little later, so that you can build along with this tutorial.
The first thing we need to do is create a new application project. We have the options of using a pre-built template or importing an existing app export, but today we’re starting from scratch.
When we choose this option, we’ll be prompted to give our new app a name. This will also be used to generate a URL extension. For demo purposes, we’re simply going with Connect LLM to MySQL.
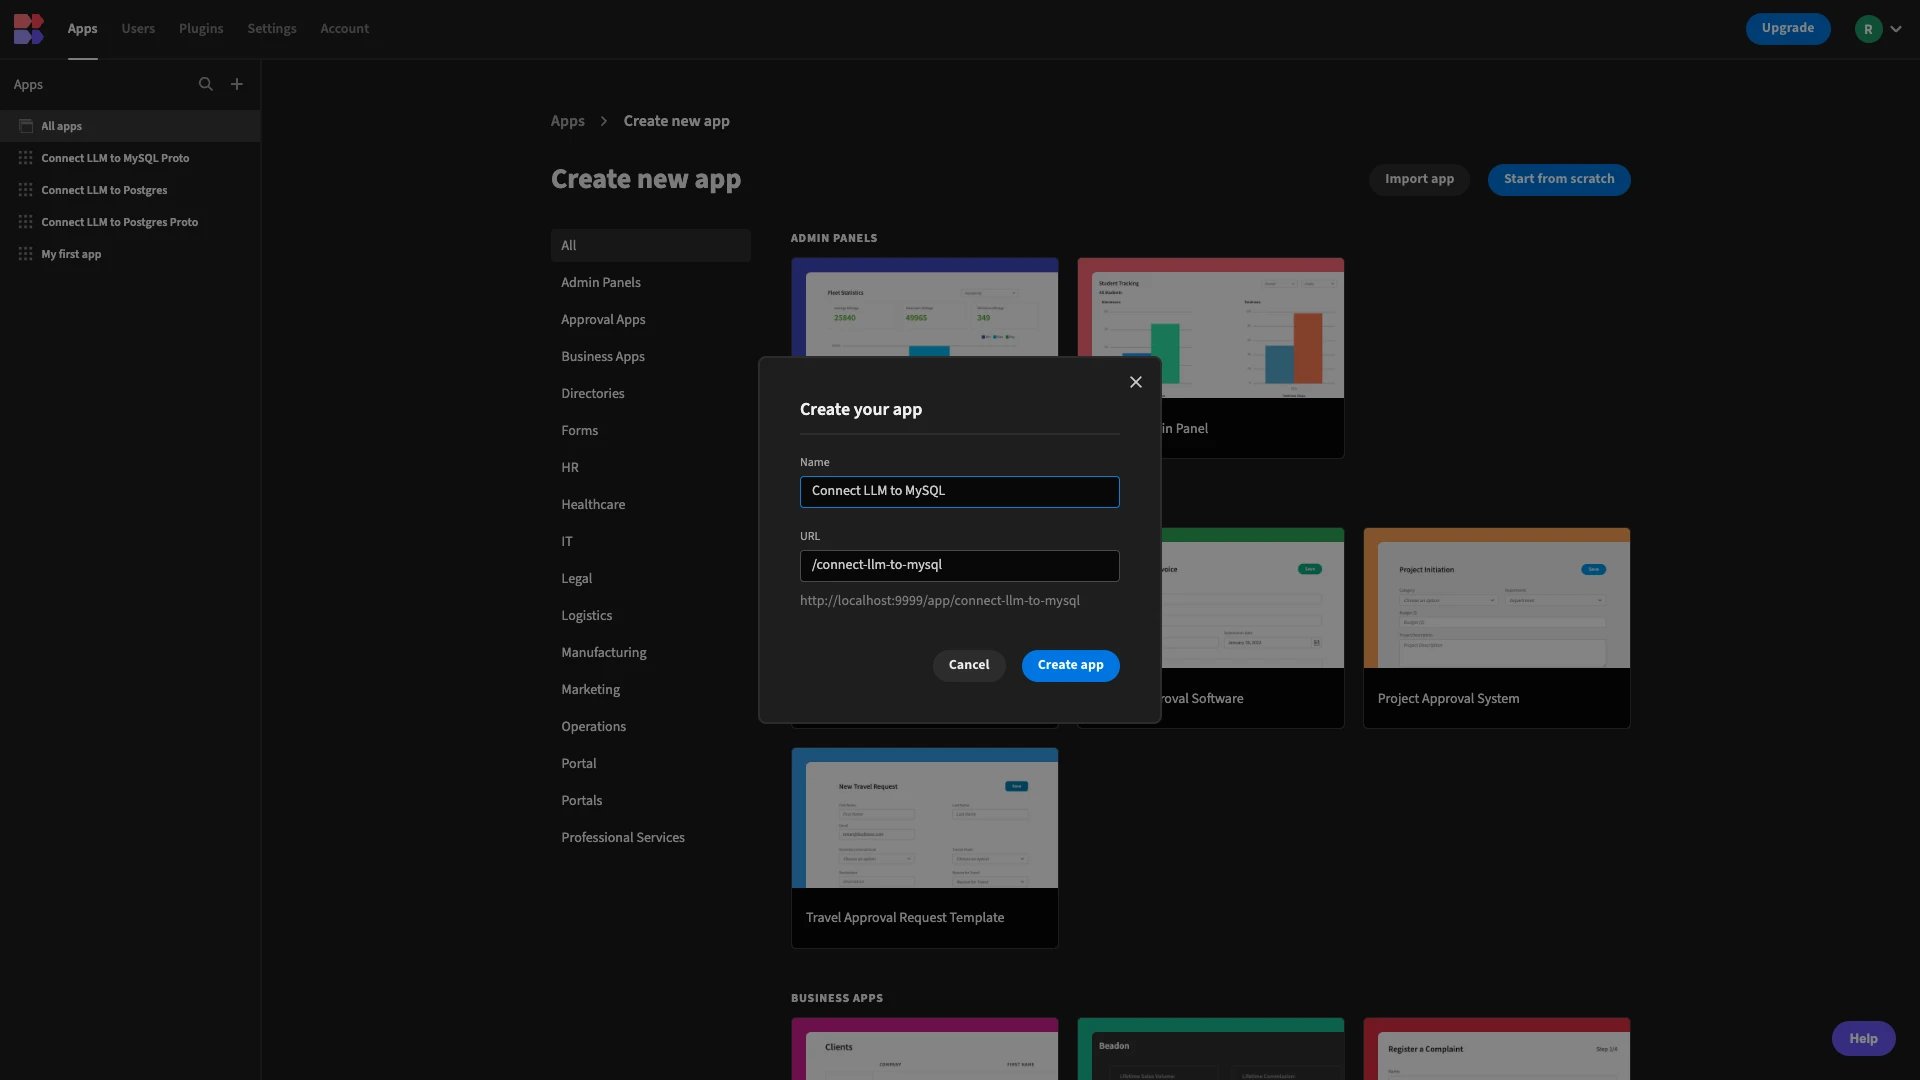
When we create a new Budibase app, it will load with sample data and UIs. We won’t use these today, so we can simply delete them.
1. Connecting our MySQL database
Once we’ve done this, we’ll be prompted to choose a data source for our app. Budibase offers dedicated connectors for a range of RDBMSs, NoSQL tools, spreadsheets, and APIs, acting as a proxy to query data, without storing it.
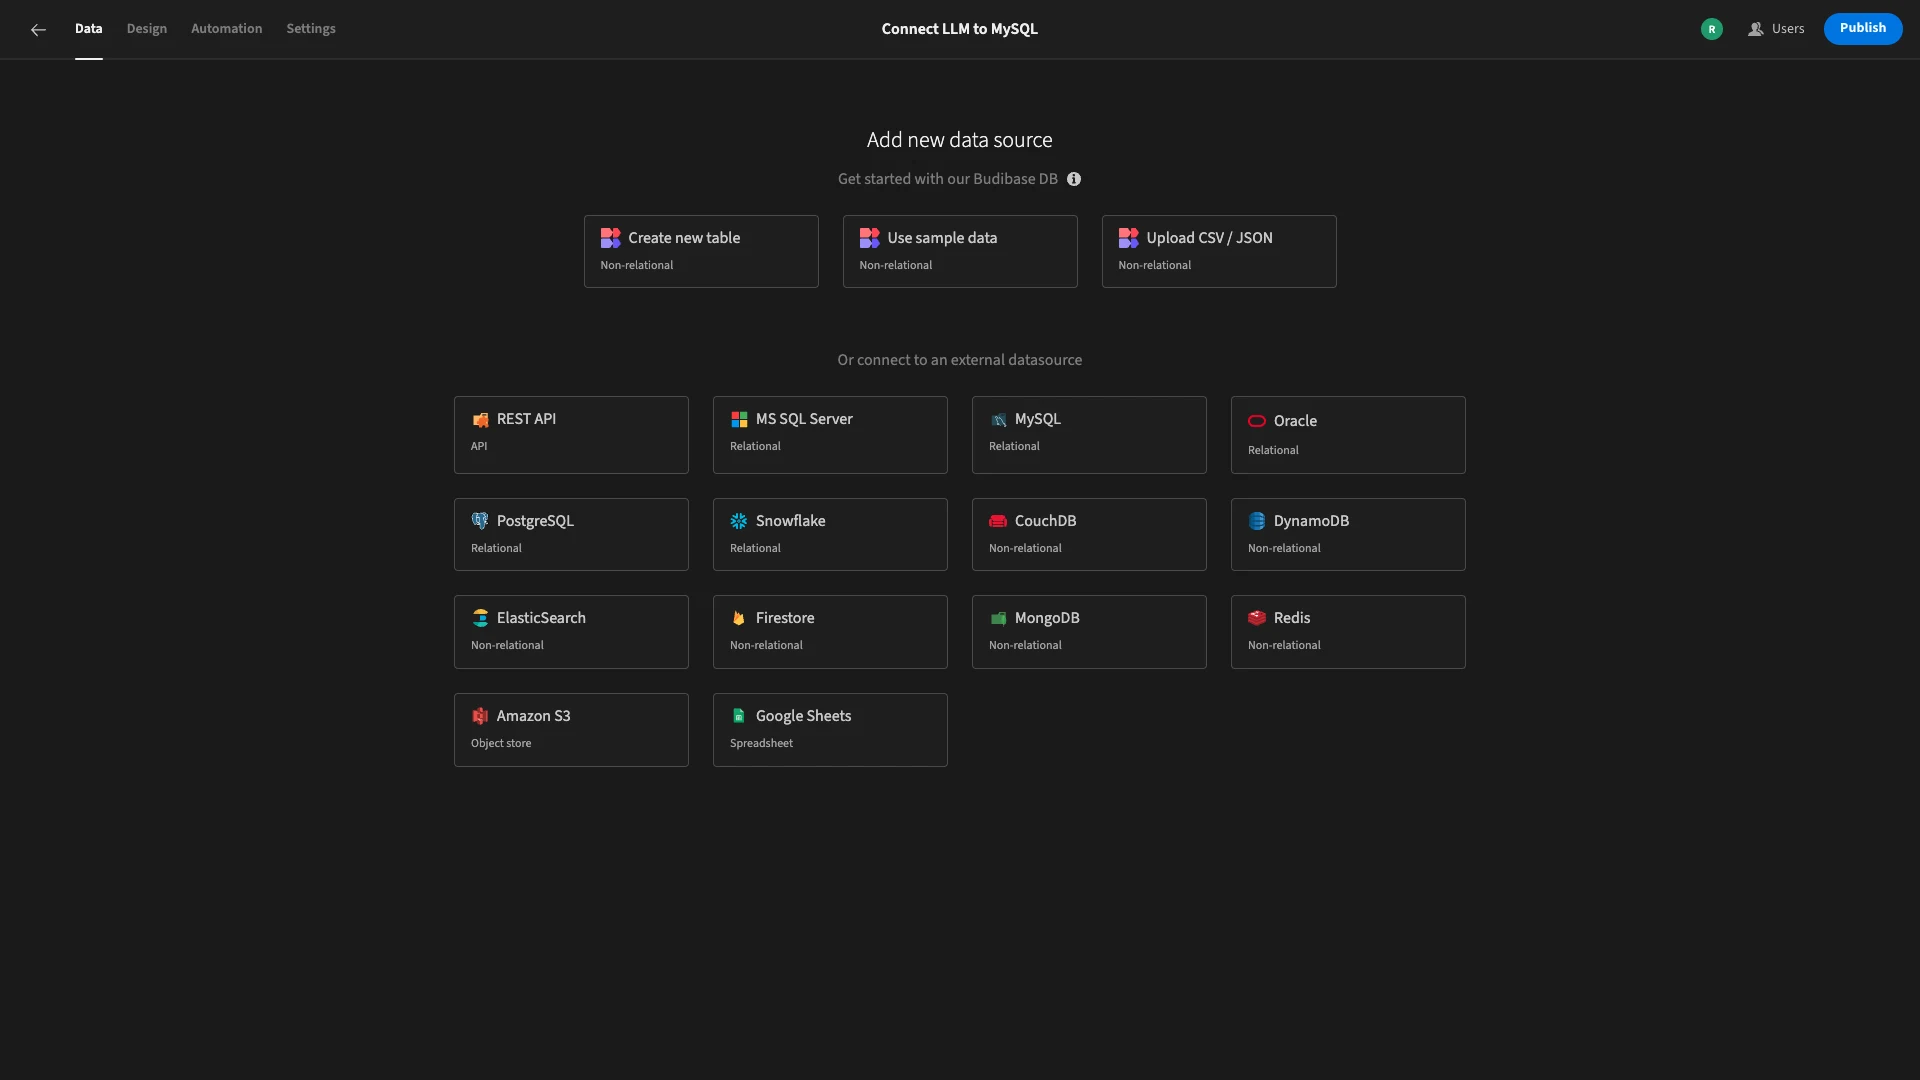
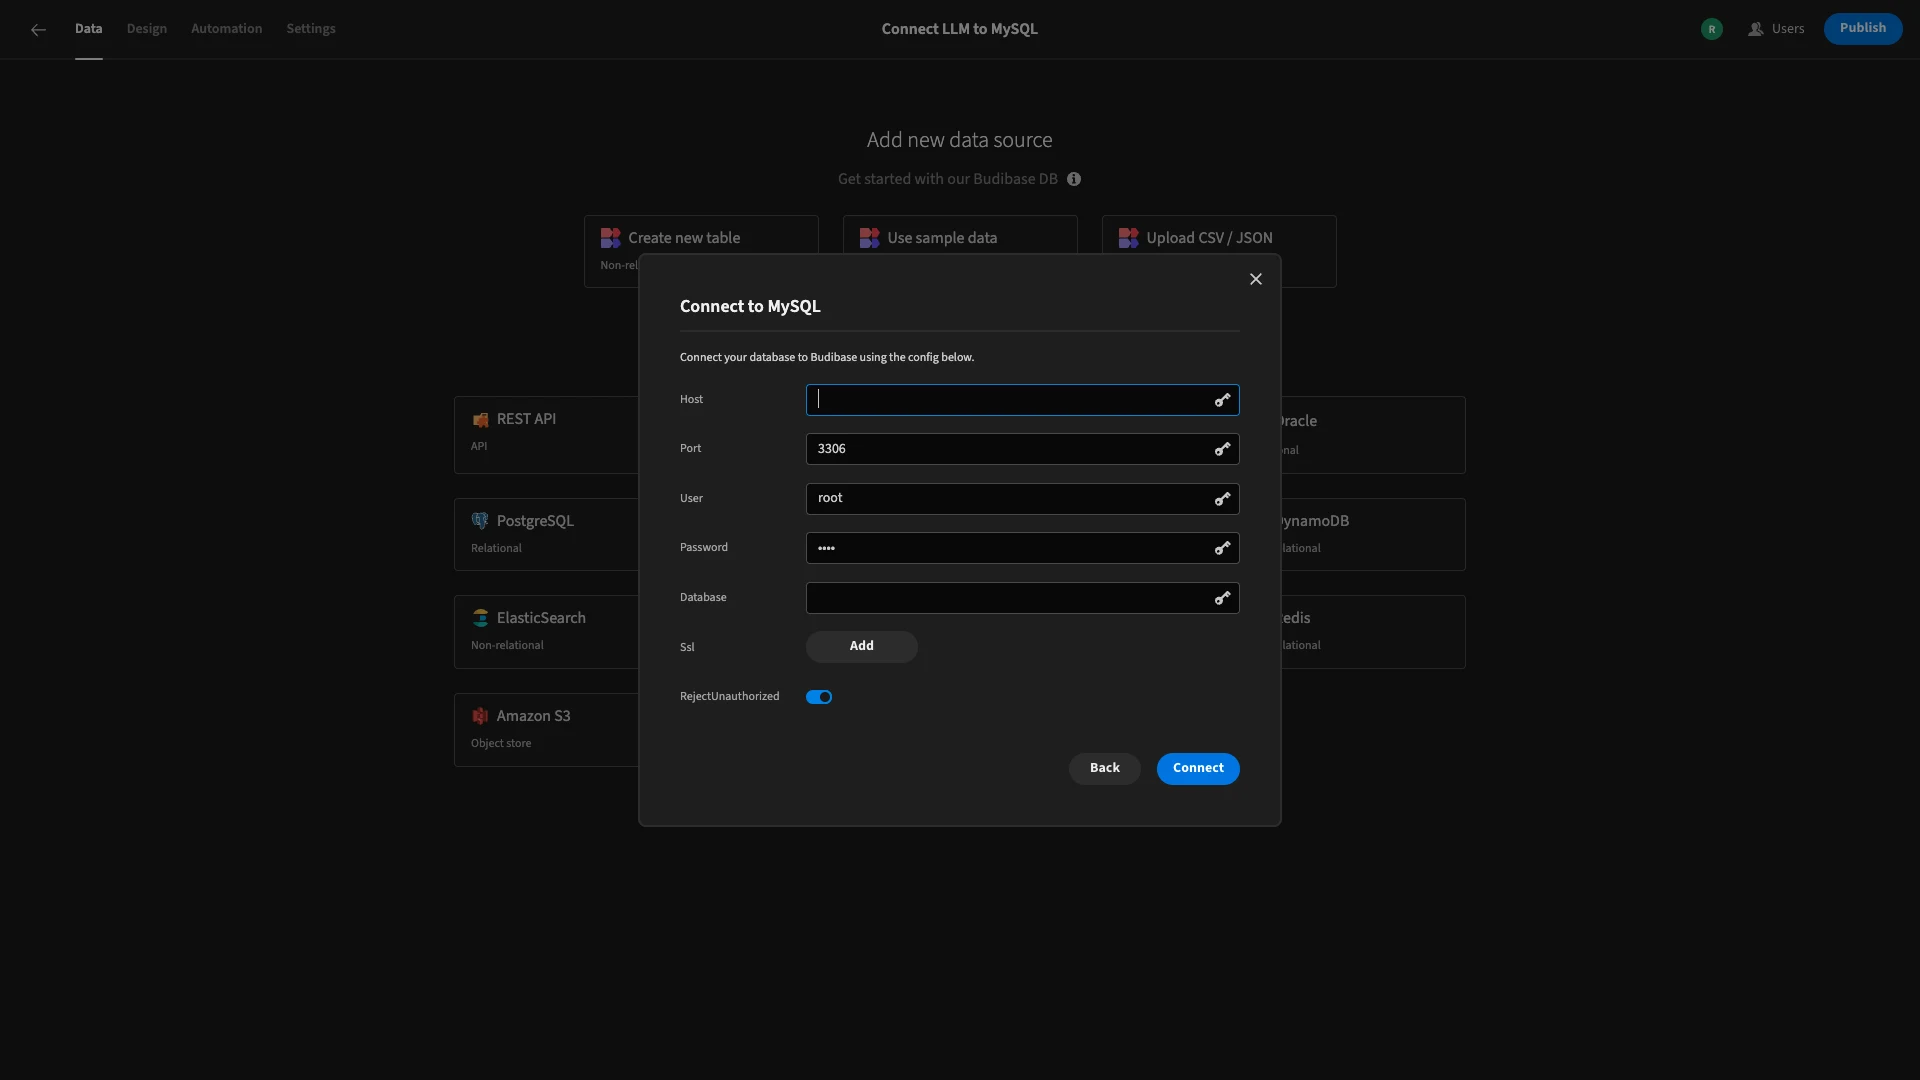
Today, we’re choosing MySQL, although the process for adding an alternative database is largely similar. When we choose this option, we’ll be presented with the following modal, where we can add our configuration details.
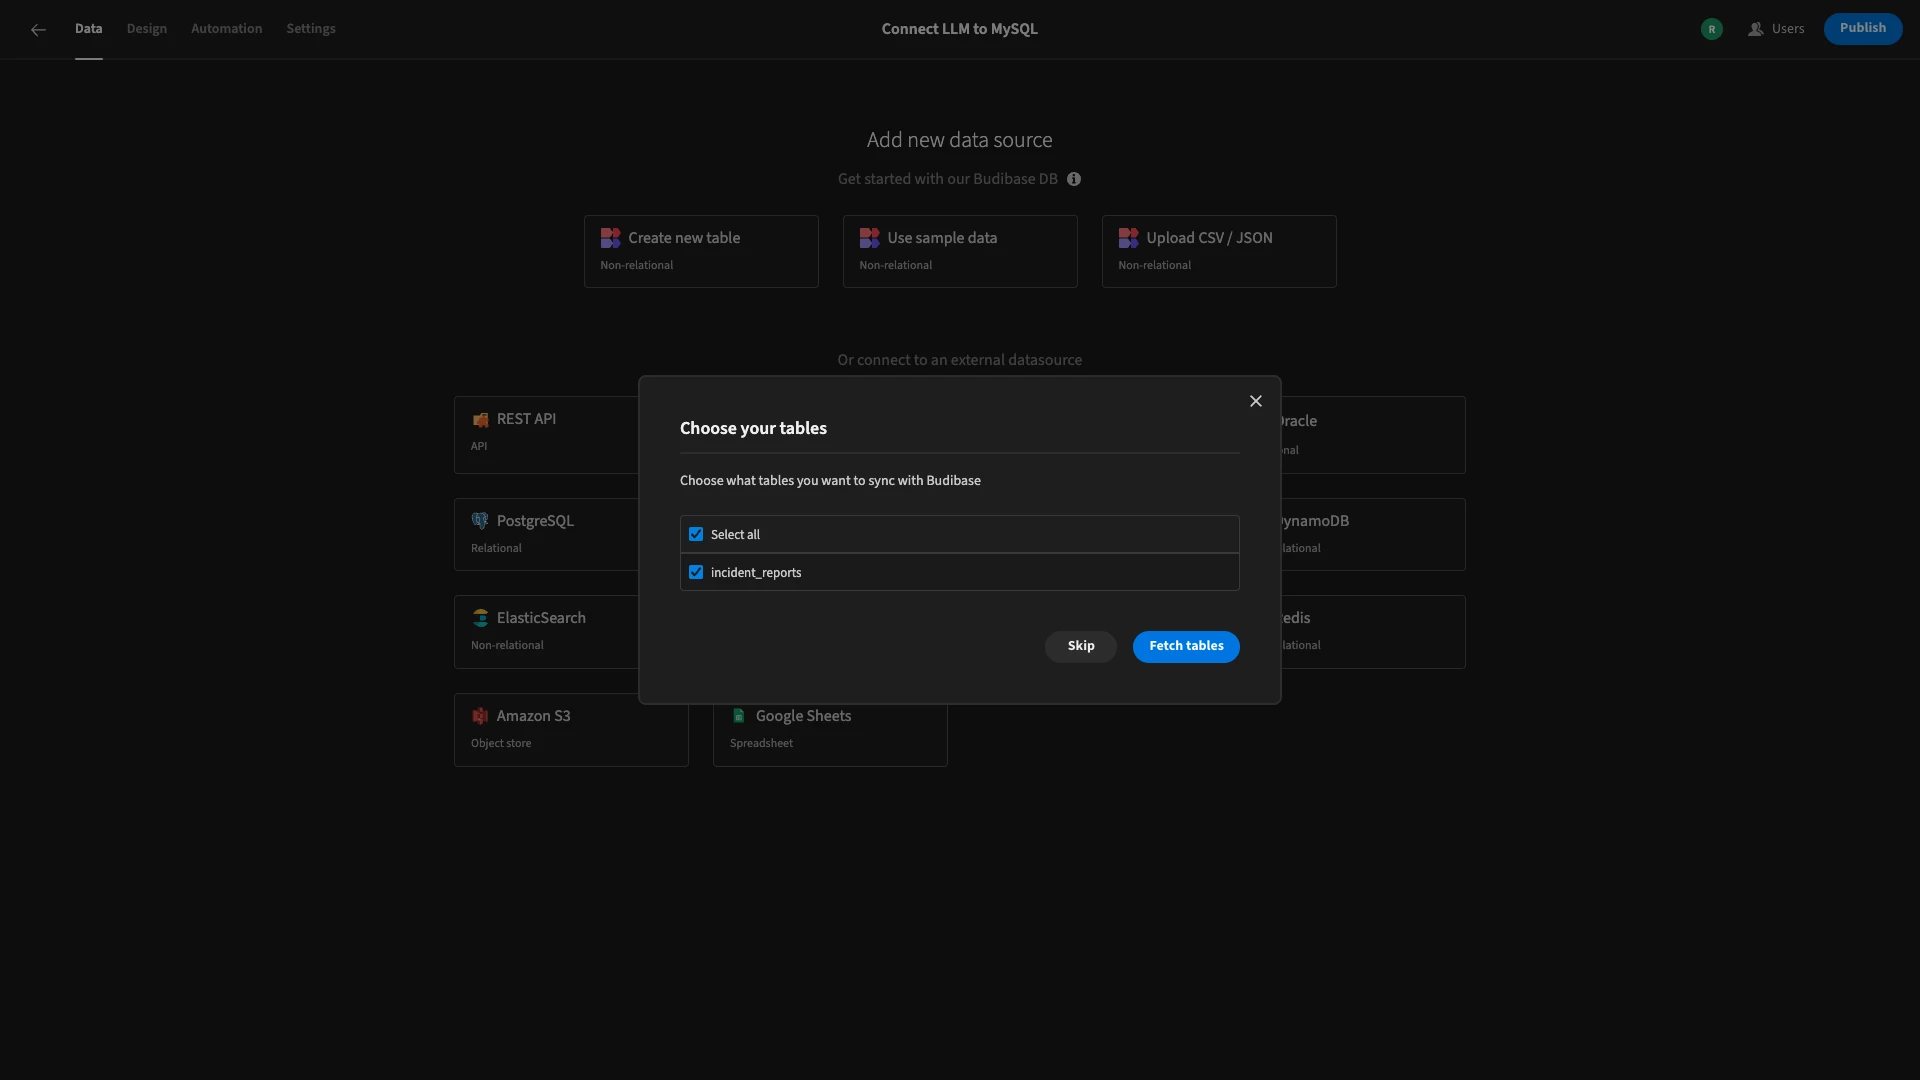
We’re then asked which of our database’s tables we’d like to Fetch, making them queryable within Budibase. We’re selecting our database’s one and only table, incident_reports.
Here’s how this will look in Budibase’s Data section.
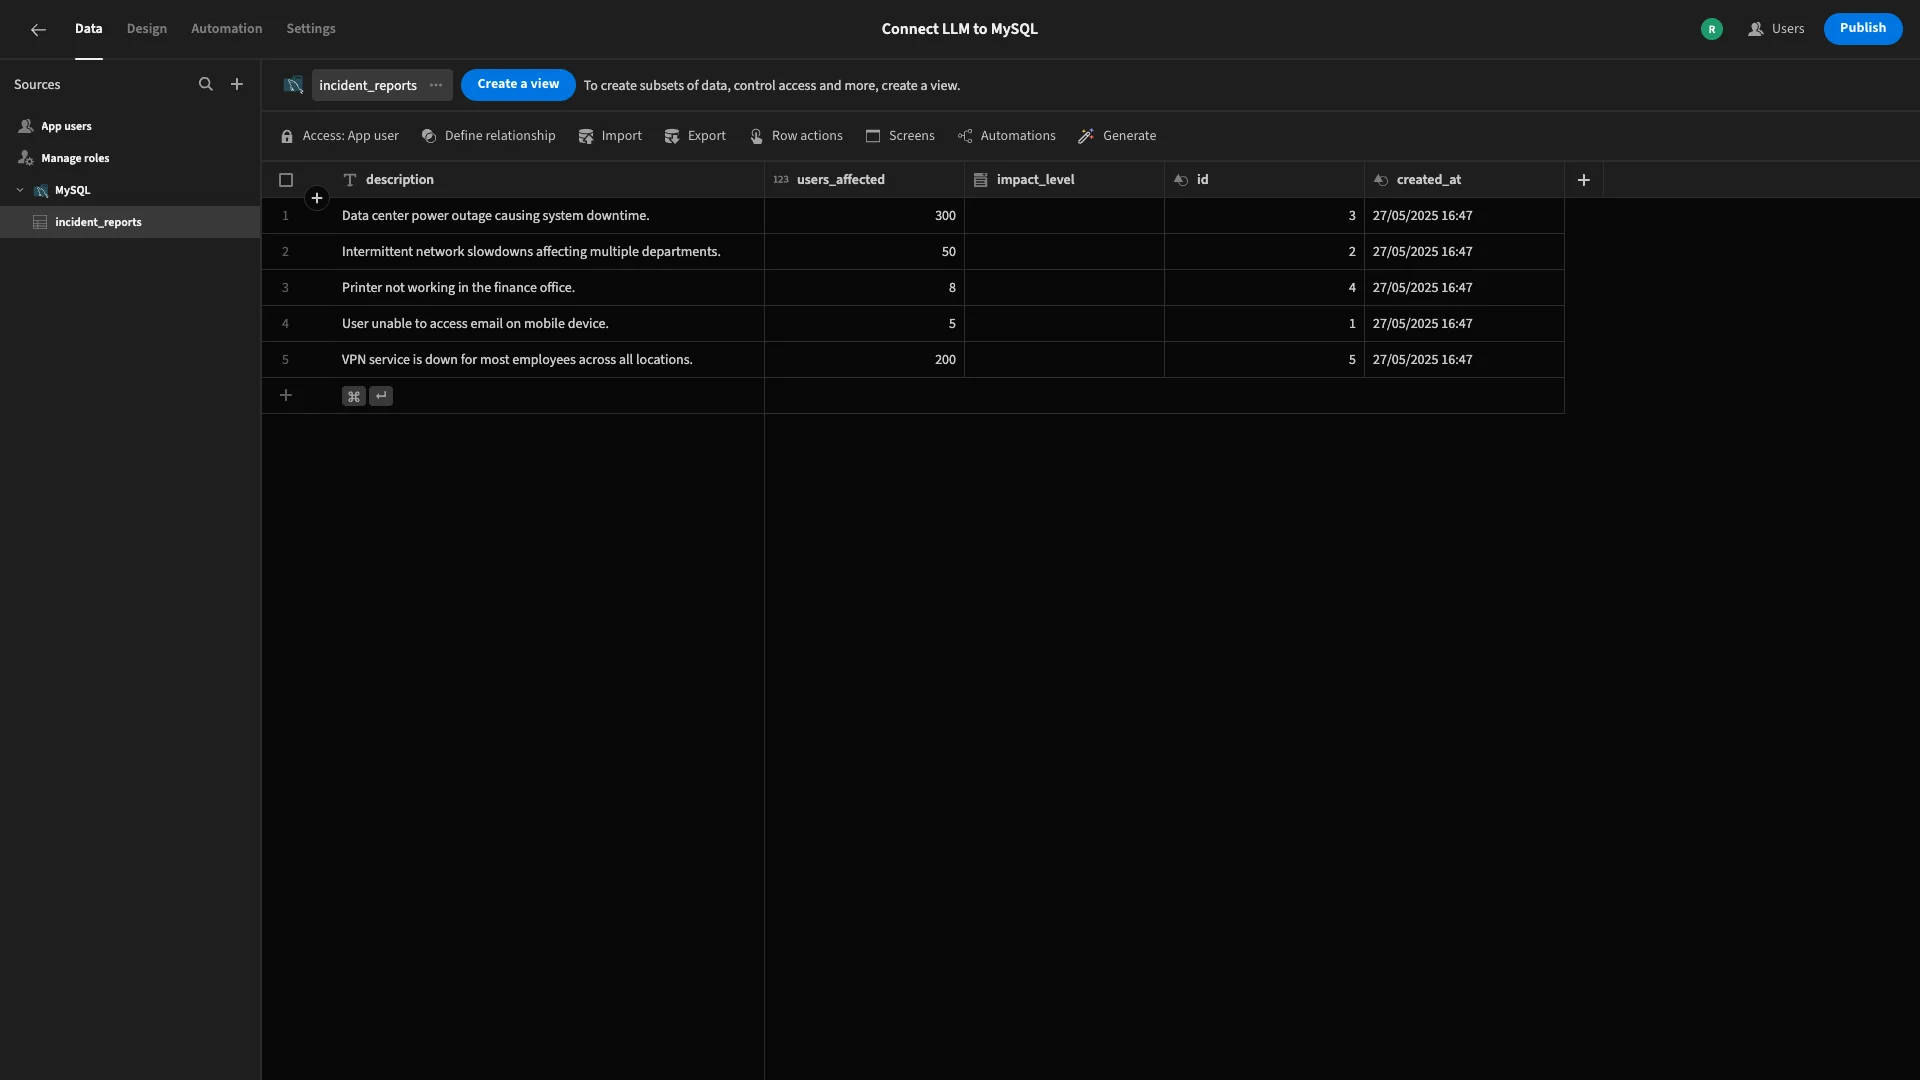
Already, we can use the spreadsheet-like interface to edit values or make key changes such as enforcing access control rules.
Today, we’re going to make one small change in the Data section that will make our life a little easier when it comes time to autogenerate a form UI.
Specifically, our description field currently has the Text type. We’re going to update this to Long Form Text, changing how Budibase handles it, in order to provide more space to record incident details in our end-user app.
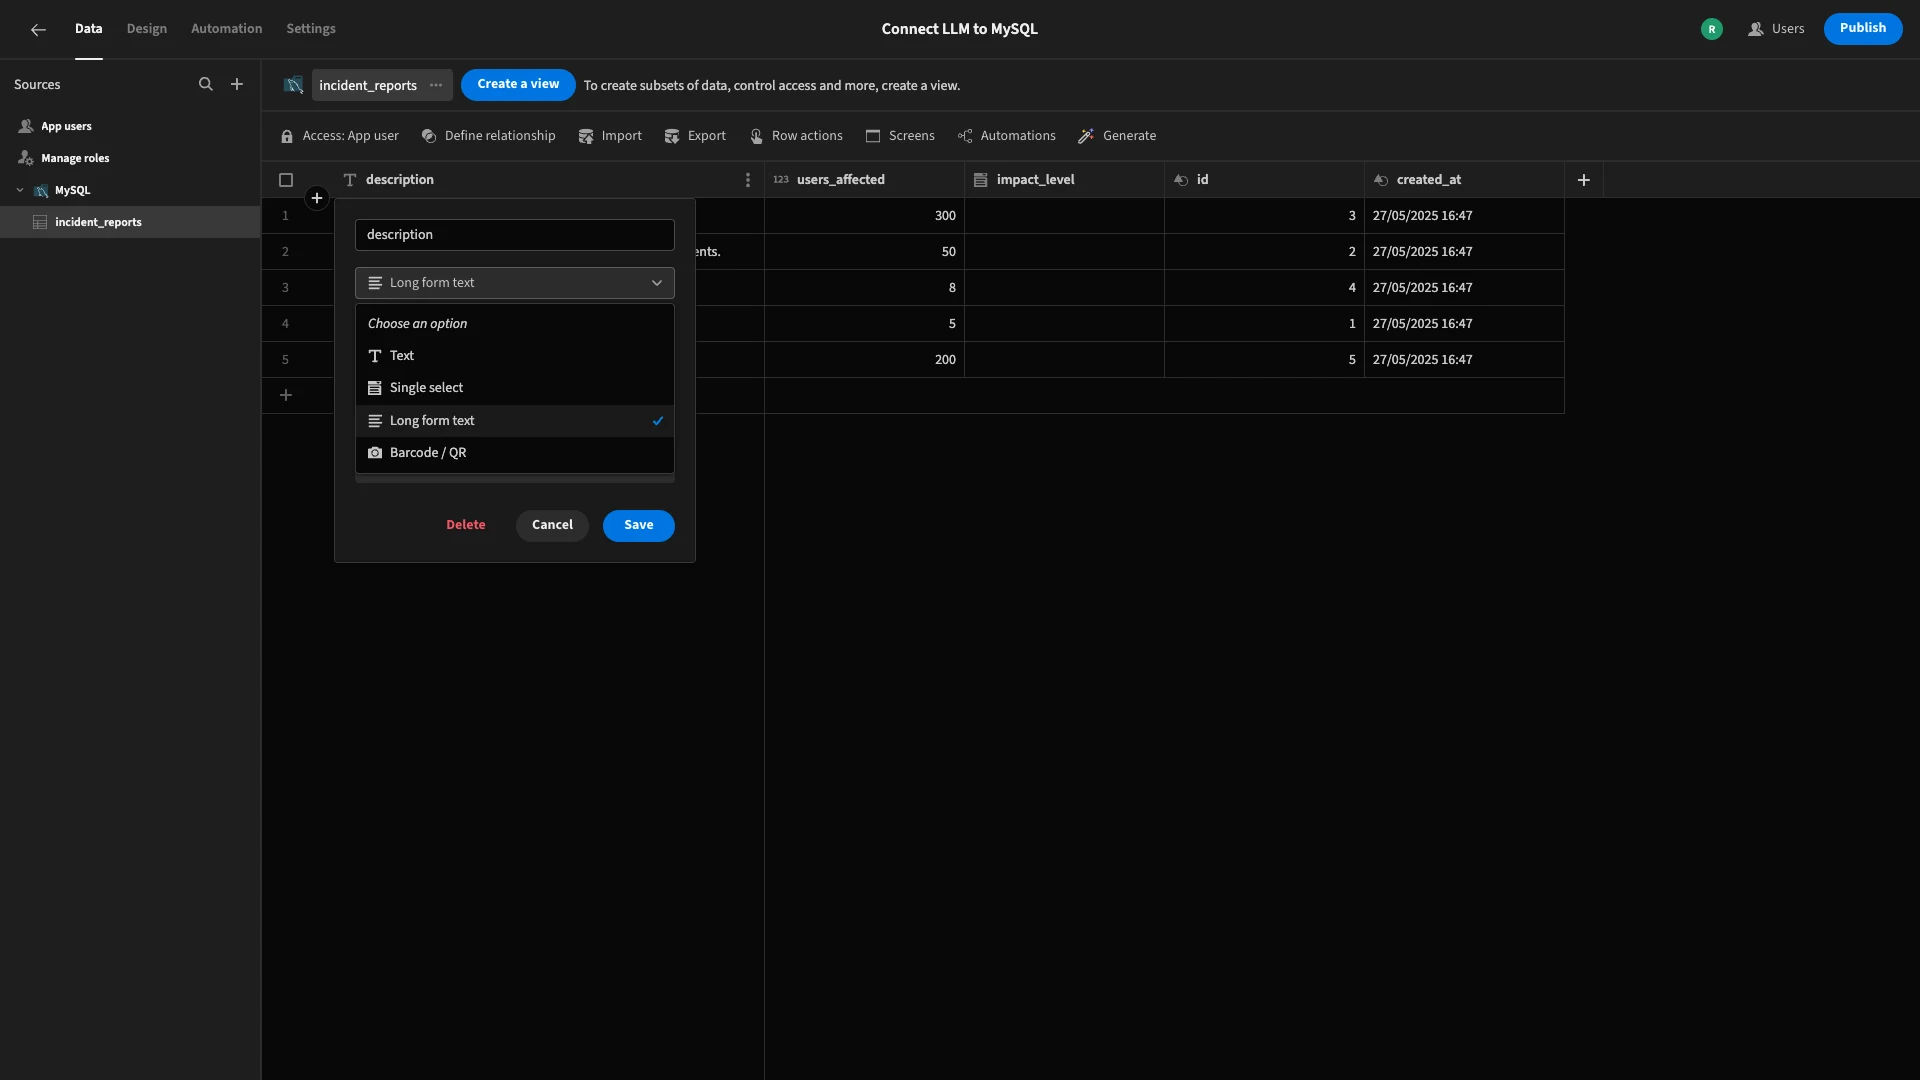
Of the other columns, id and created_at will be automatically generated by the database when a row is added, while description and users_affected are the fields we’ll populate with user-submitted data.
So, that’s our data model ready to go.
2. Configuring our OpenAI integration
Next, we need to do a little bit of configuration to access Budibase’s OpenAI integration. Budibase offers connectivity for LLMs, including OpenAI and Azure, as well as custom AI configs for enterprise customers.
To set this up, we need to exit our app project and head to the Settings tab within the Budibase portal.
Here, we’re presented with the AI sub-menu, where we can enter configuration details for different models.
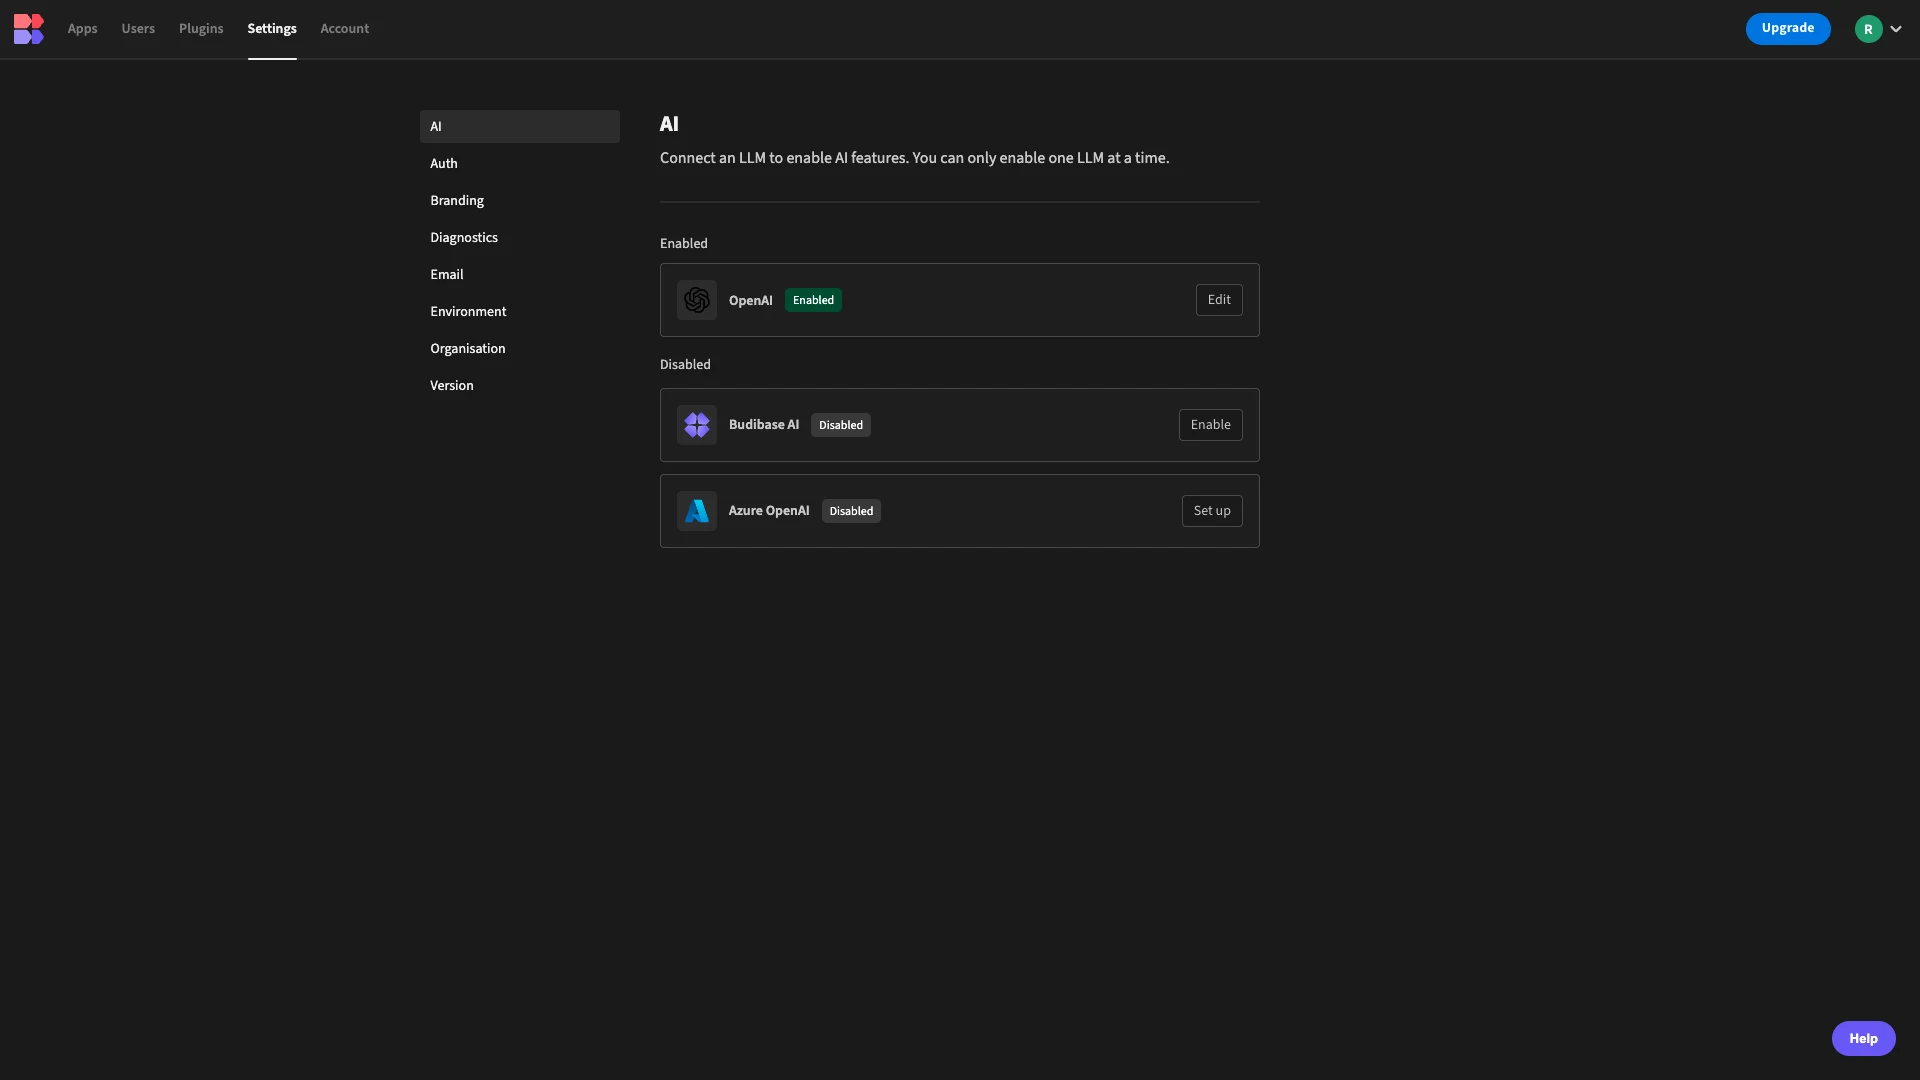
To enable a connection to OpenAI, we can hit edit. We’re then shown a dialog where we can enter our API key and select a model. For demo purposes, we’ll use GPT-3.5 Turbo.
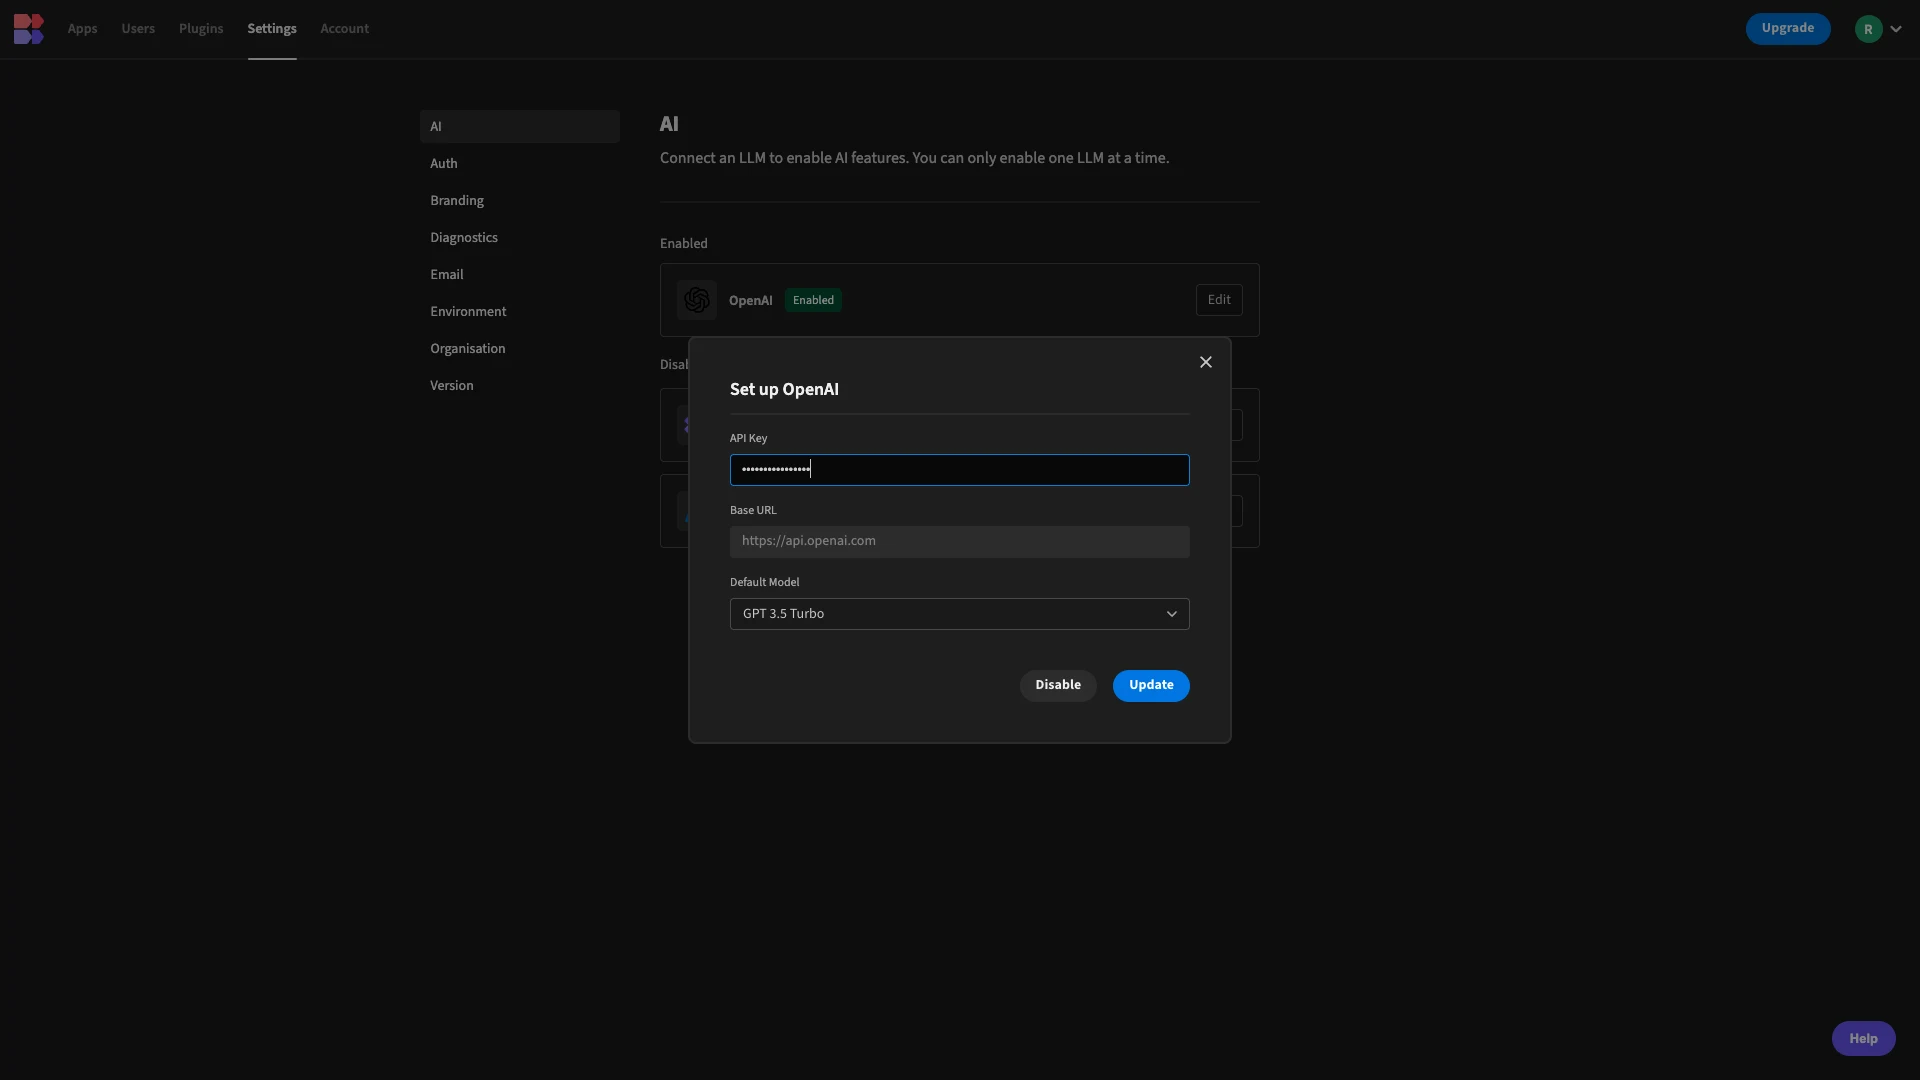
And that’s all we need to do.
3. Building an AI-powered automation rule
Now, we’re ready to start building the automation logic that will connect our LLM to our MySQL database.
Here’s a quick overview of how this will work:
- The automation is triggered when a new row is added to the
incident_reportstable. - The
descriptionandusers_affectedvalues will dynamically be added to a pre-written prompt containing instructions for the LLM on how to determine a value for theimpact_levelcolumn. - We’ll update the original trigger row, using the returned value to populate the
impact_levelcolumn.
The first thing we need to do is head to Budibase’s Automation section. Here, we’ll see a CTA to build our first automation flow.
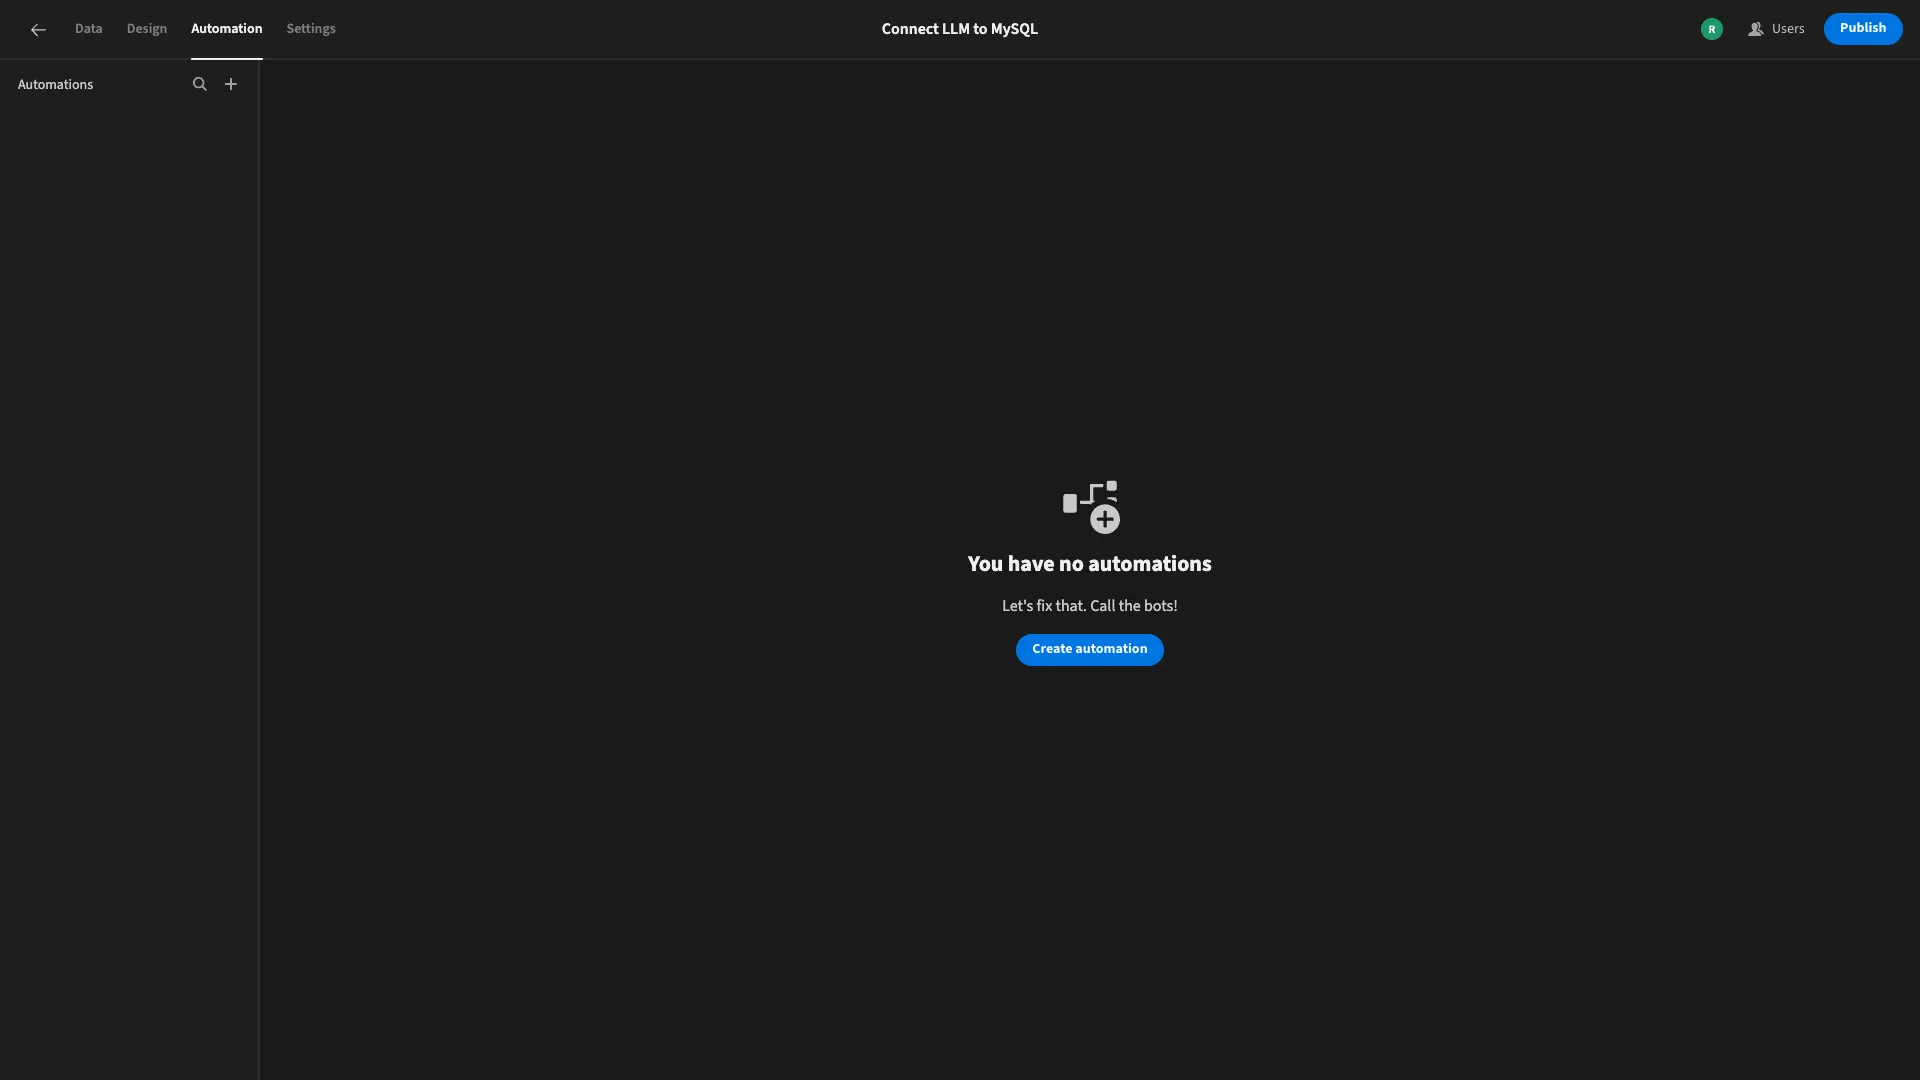
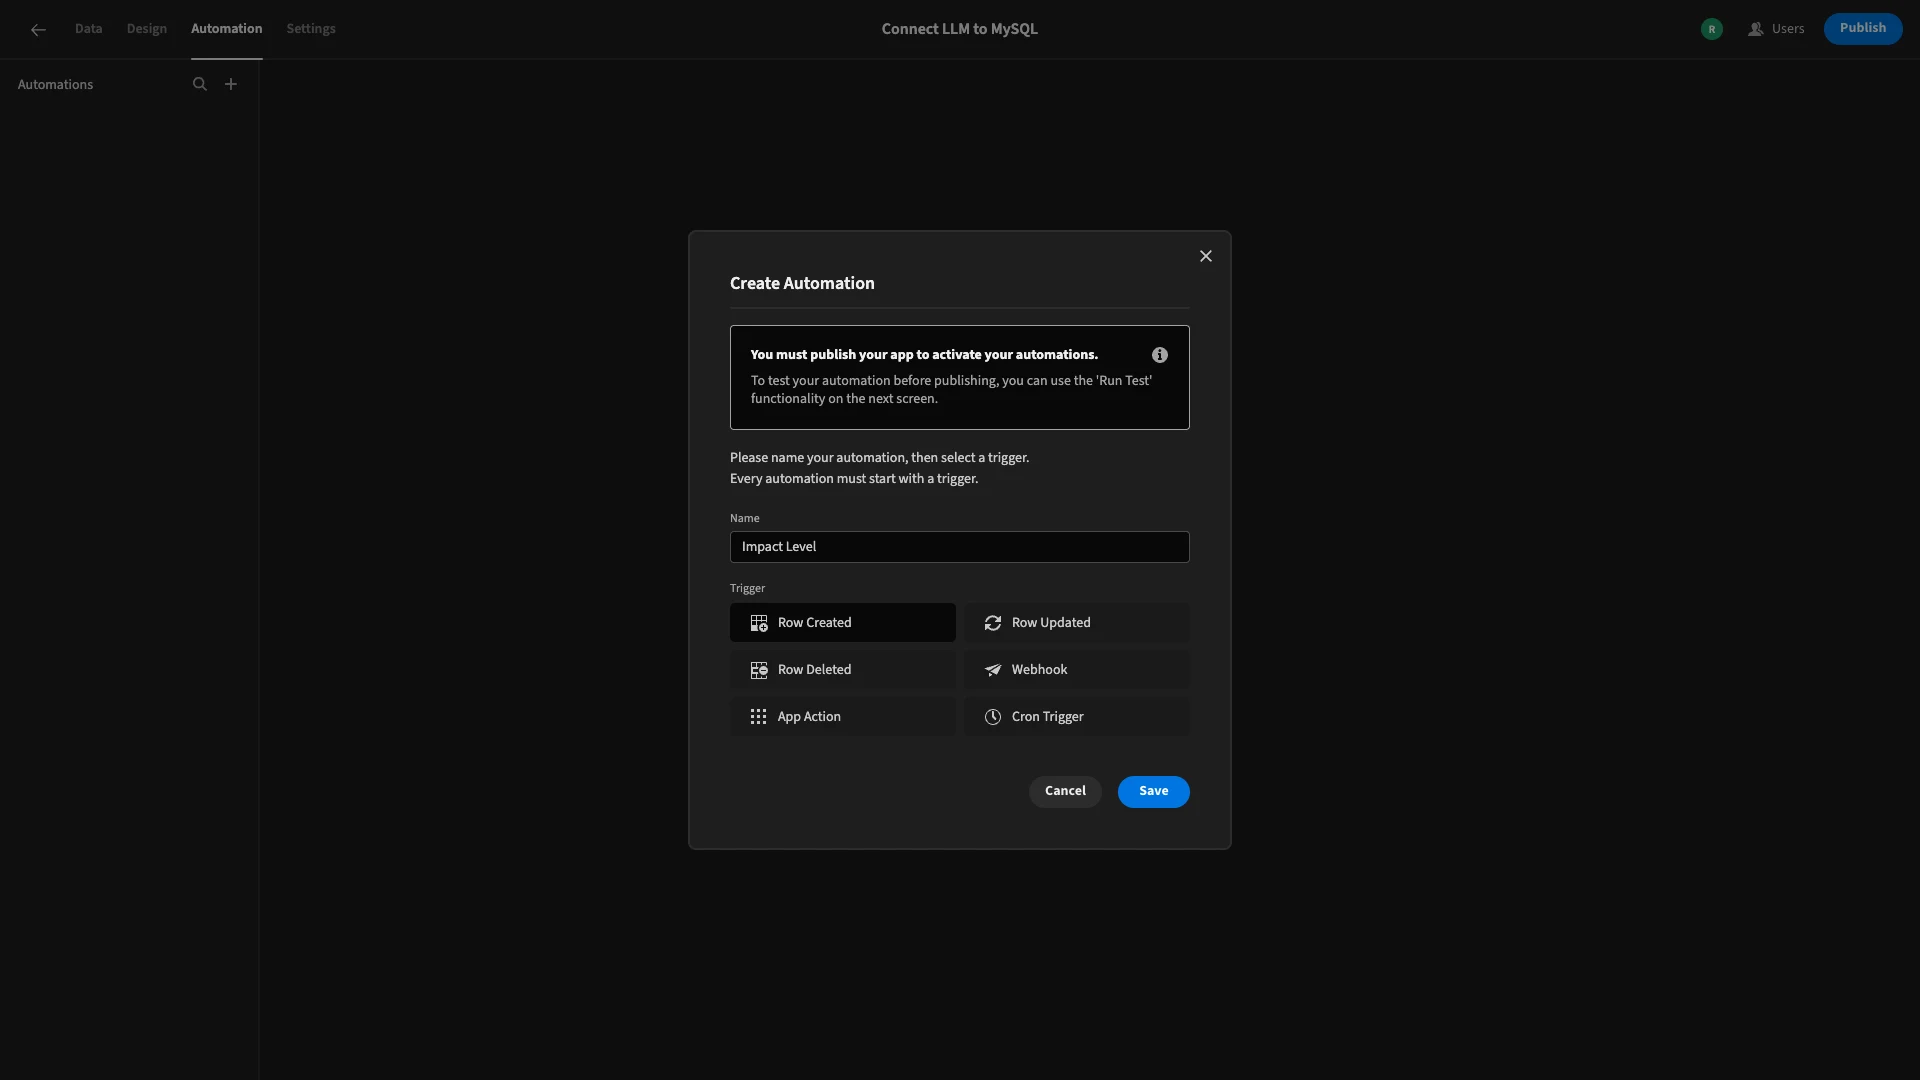
When we click on this, we’re prompted to give our new rule a name and choose a trigger. We’ll call our rule Impact Level and select the Row Created trigger.
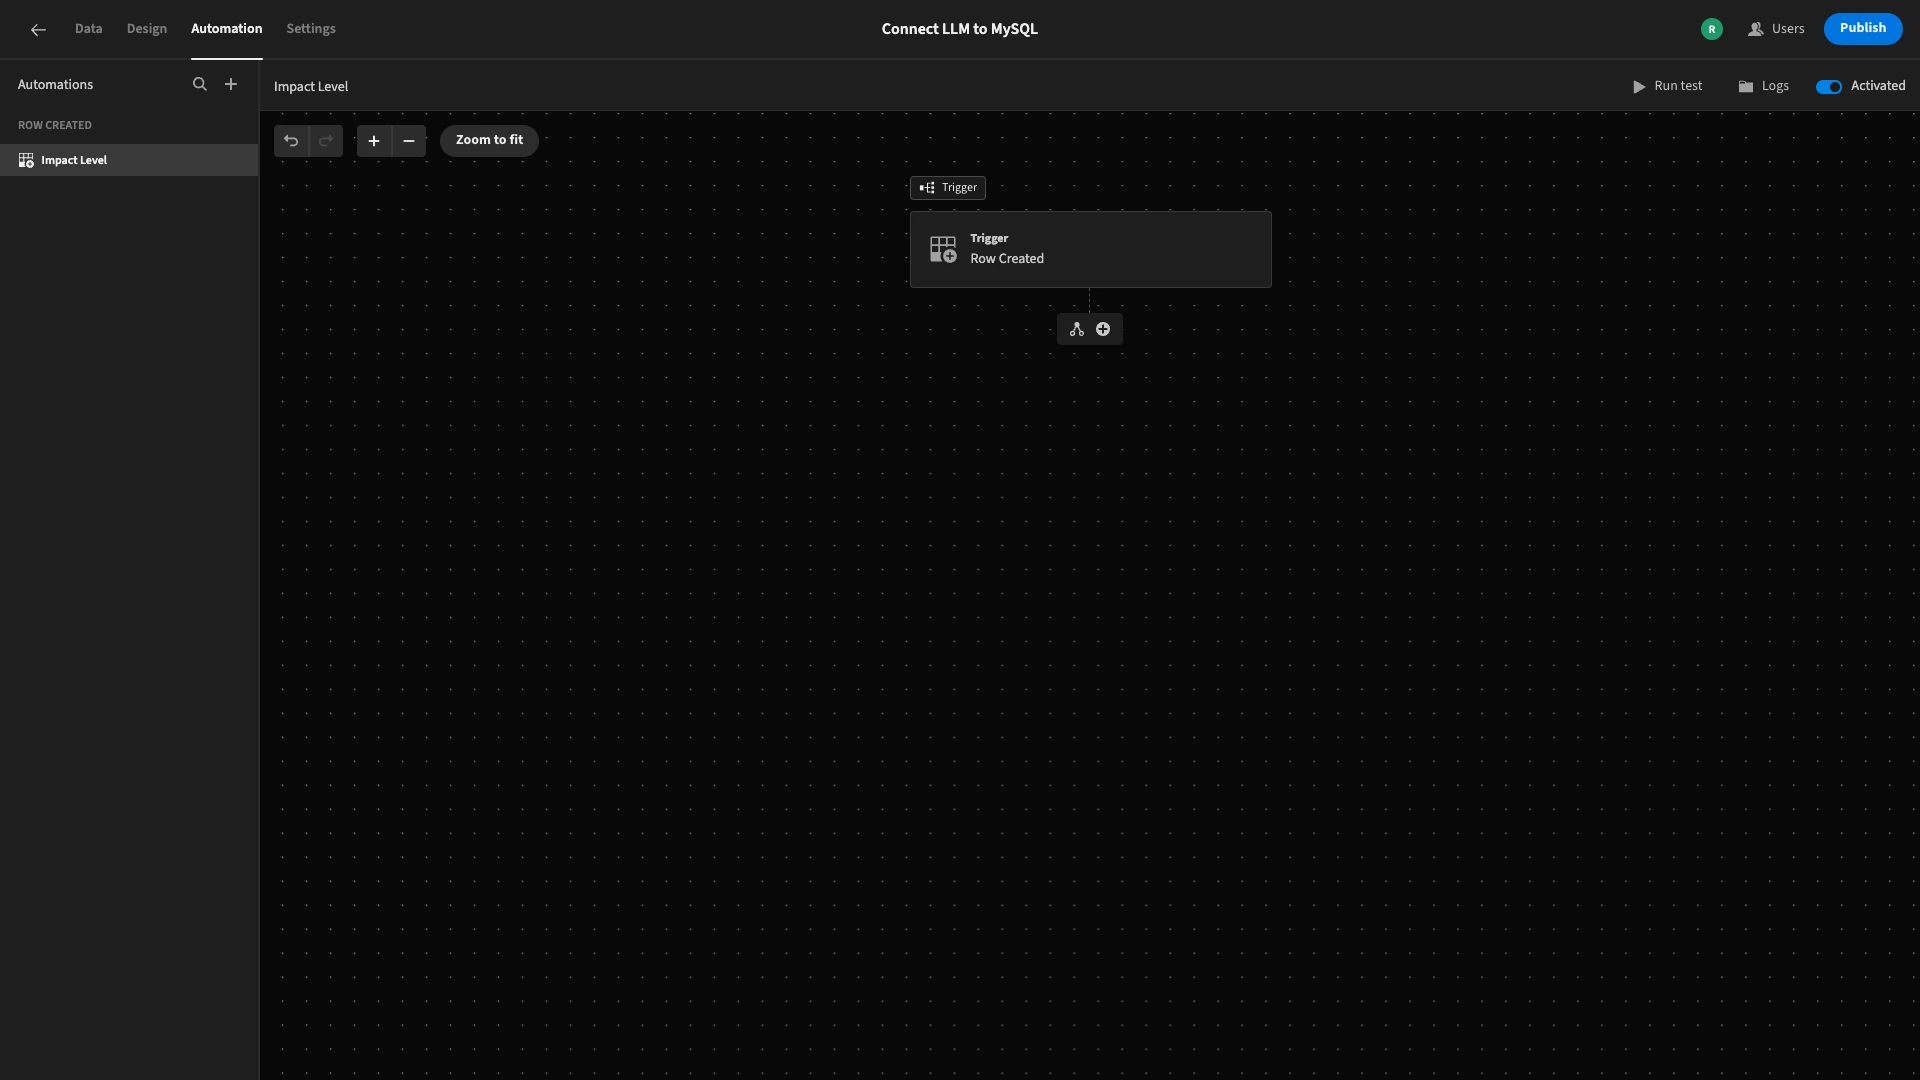
Here’s what this will look like.
We’ll click on our trigger to access its configuration options. Here, all we need to do is set the Table to our incident_reports table.
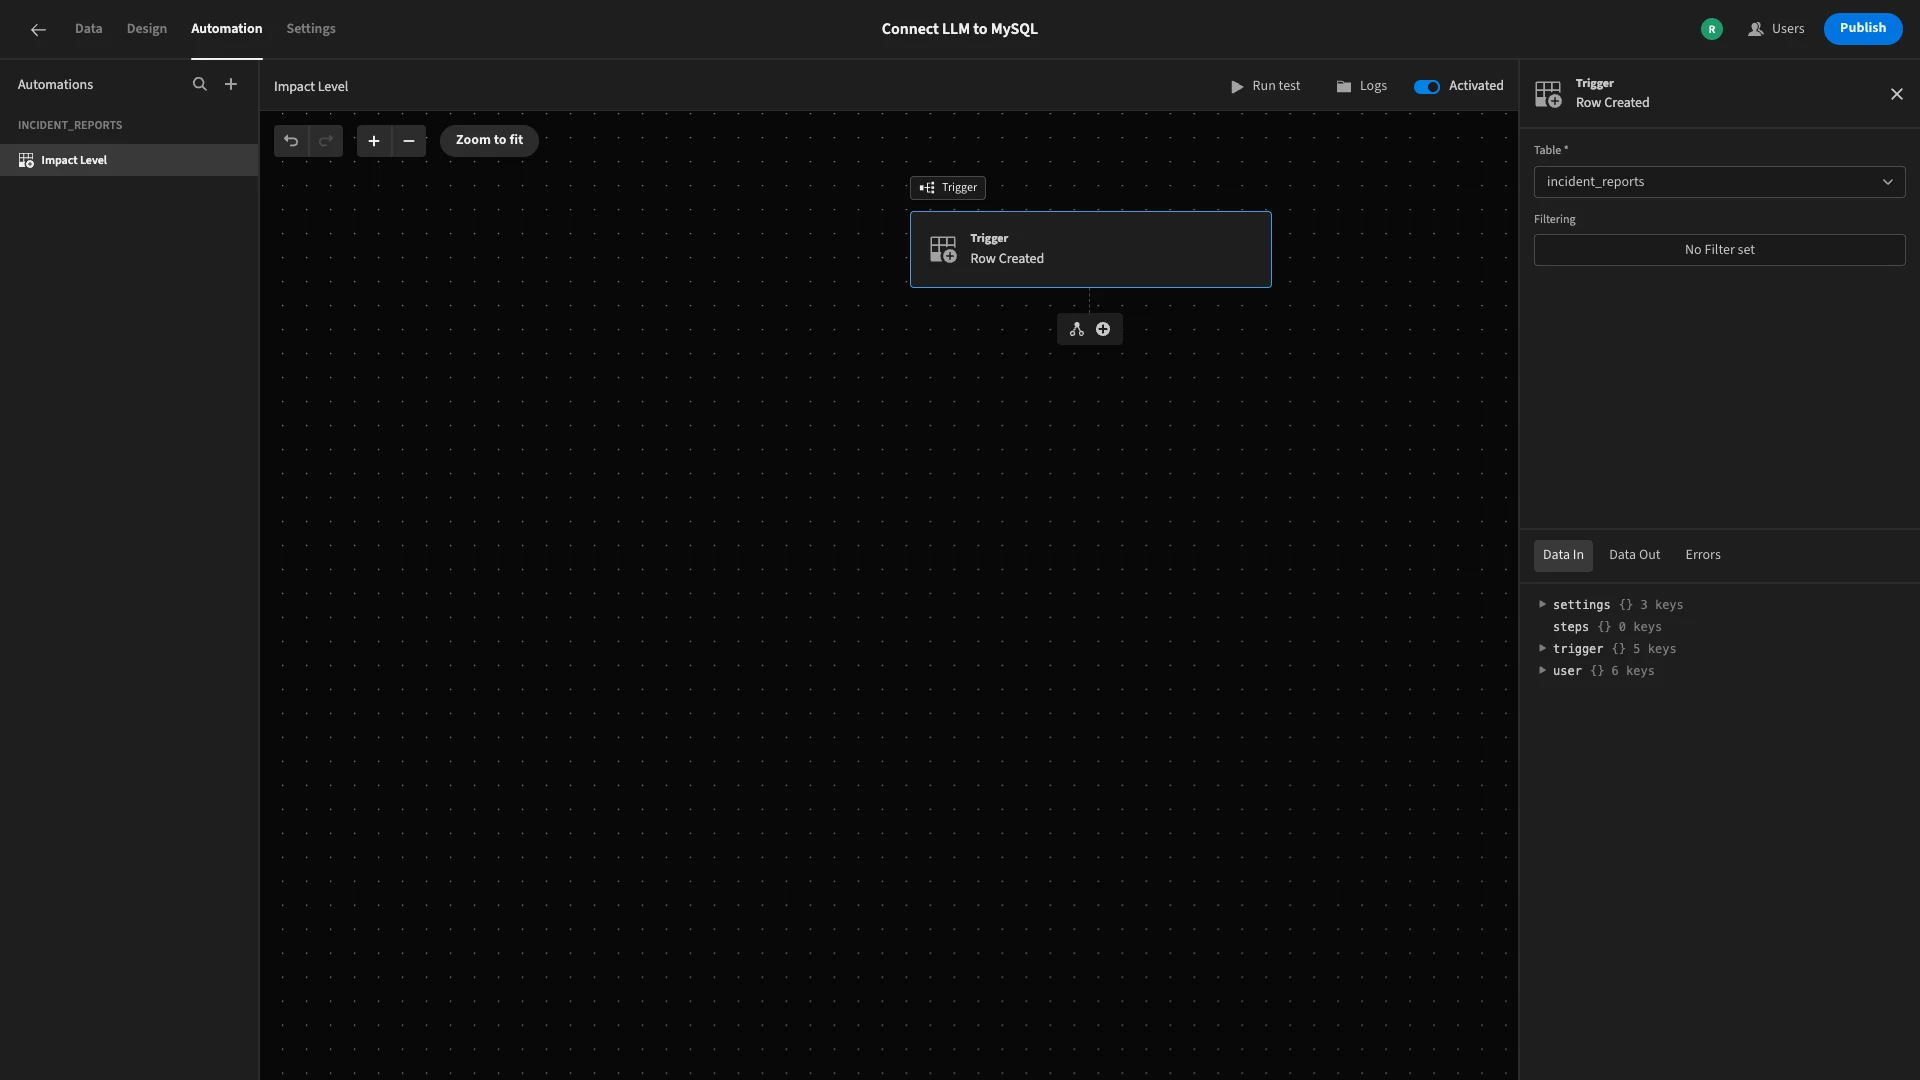
There’s also an option to add a filter, which would allow us to specify additional conditions for when our automation should fire, but today, we want it to execute any time a row is added, regardless of its contents.
Now, we can start defining which actions should be taken in response to our trigger.
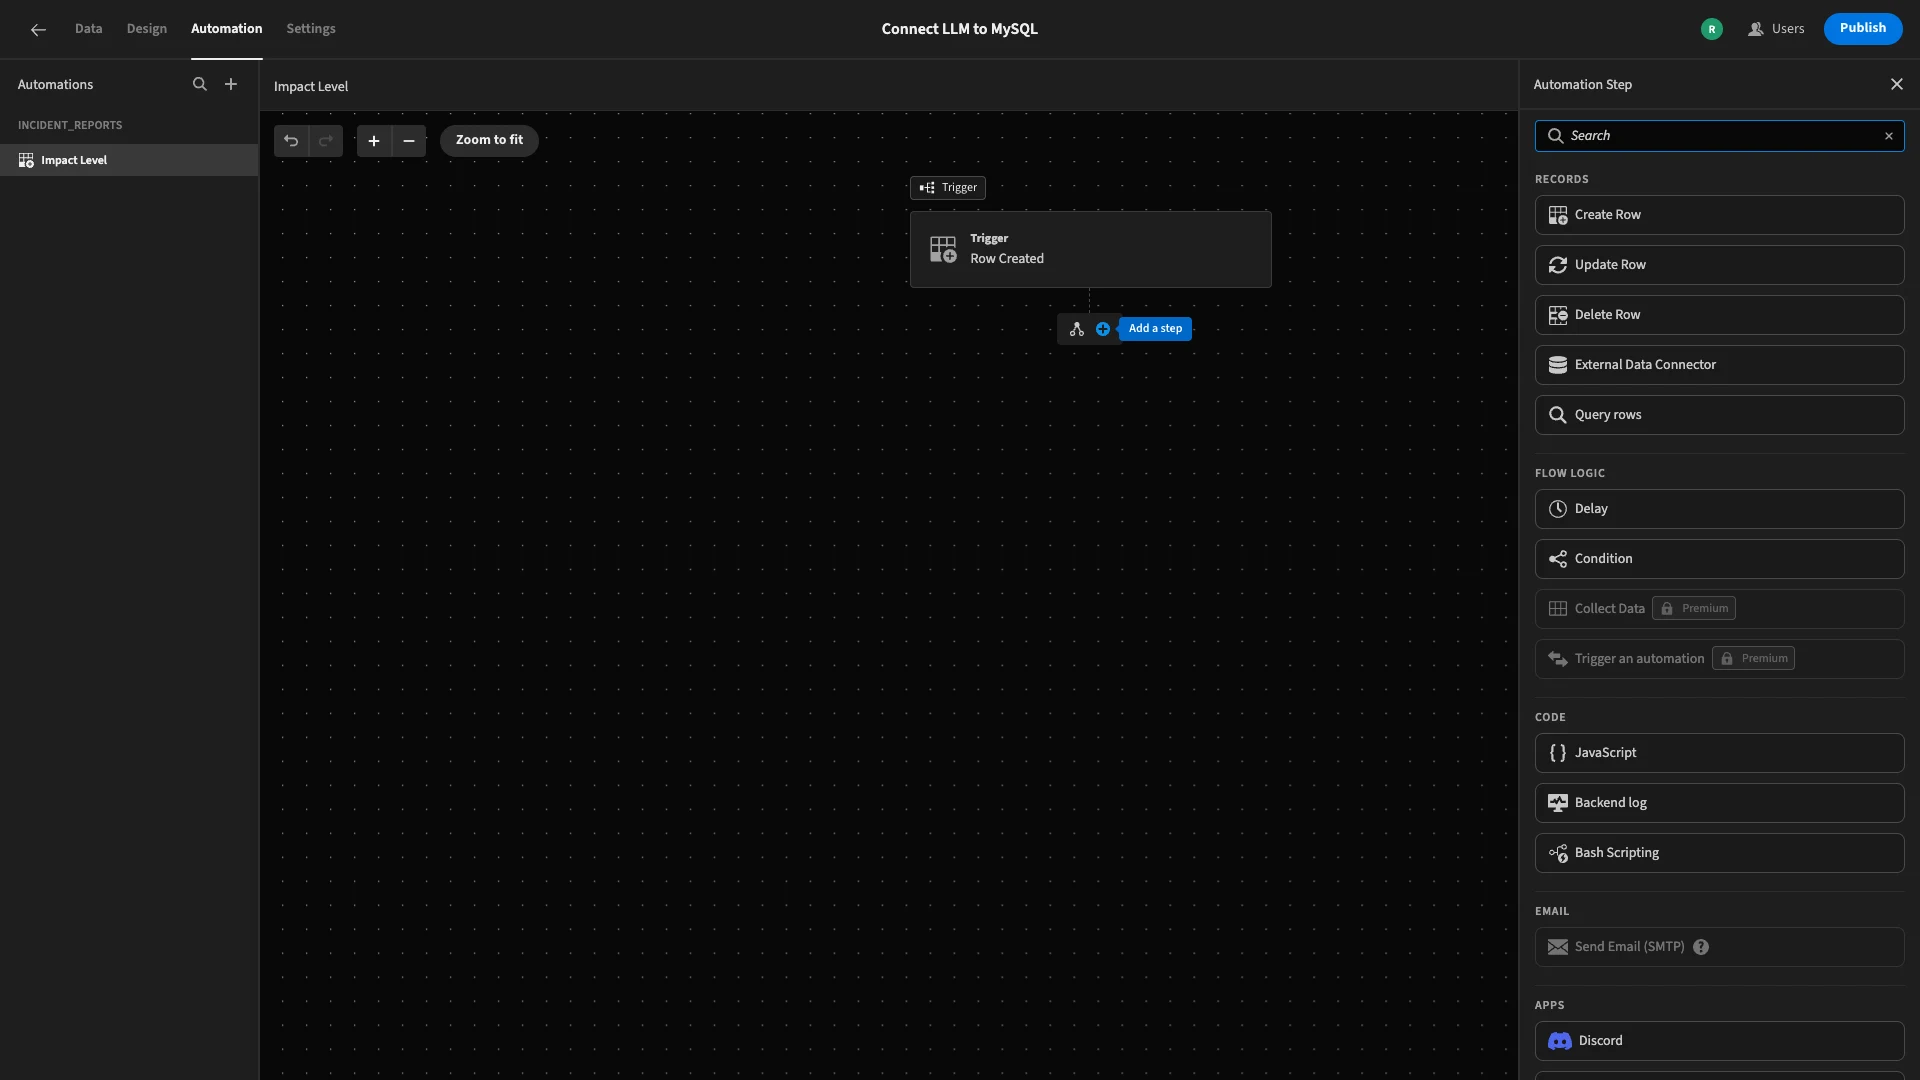
First, we’ll hit the + icon to access a list of available automation actions.
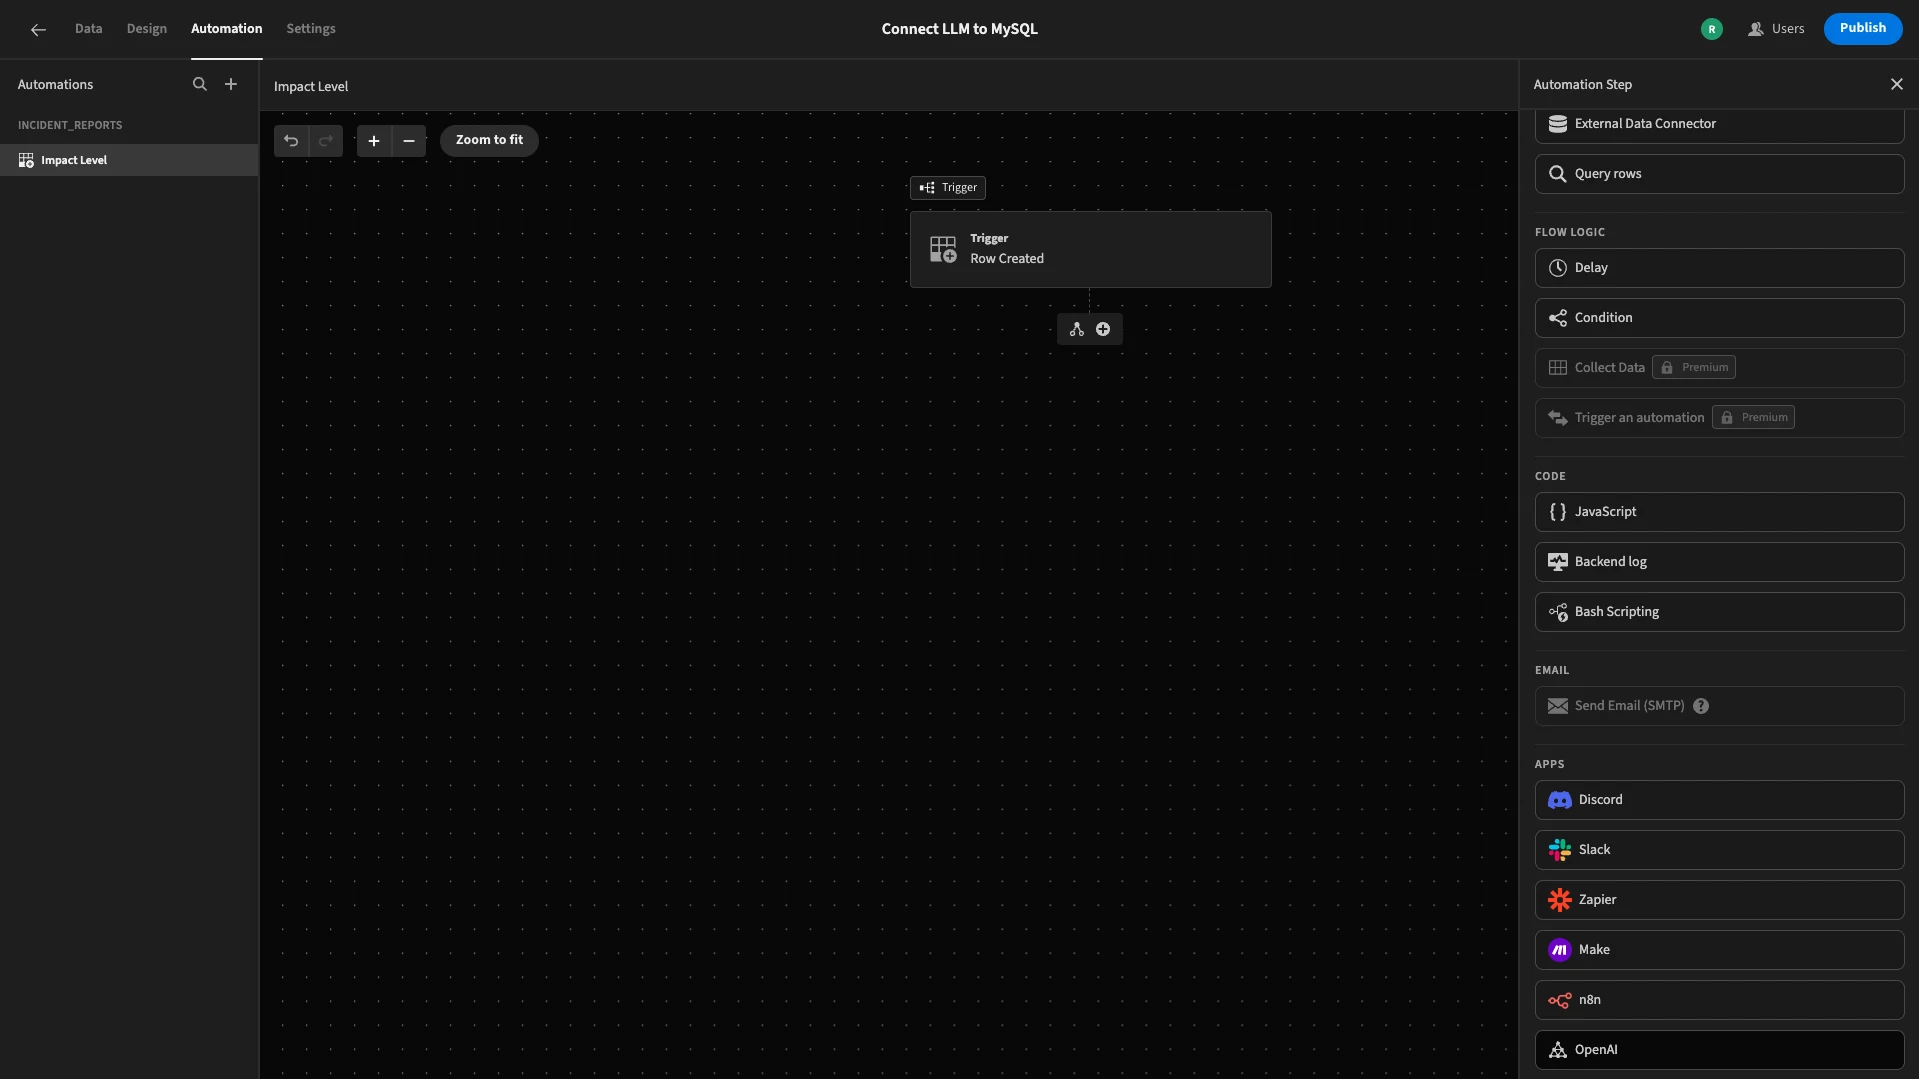
At the bottom, we’ll select OpenAI.
Again, we can access the settings for this in a side panel to the right of the screen.
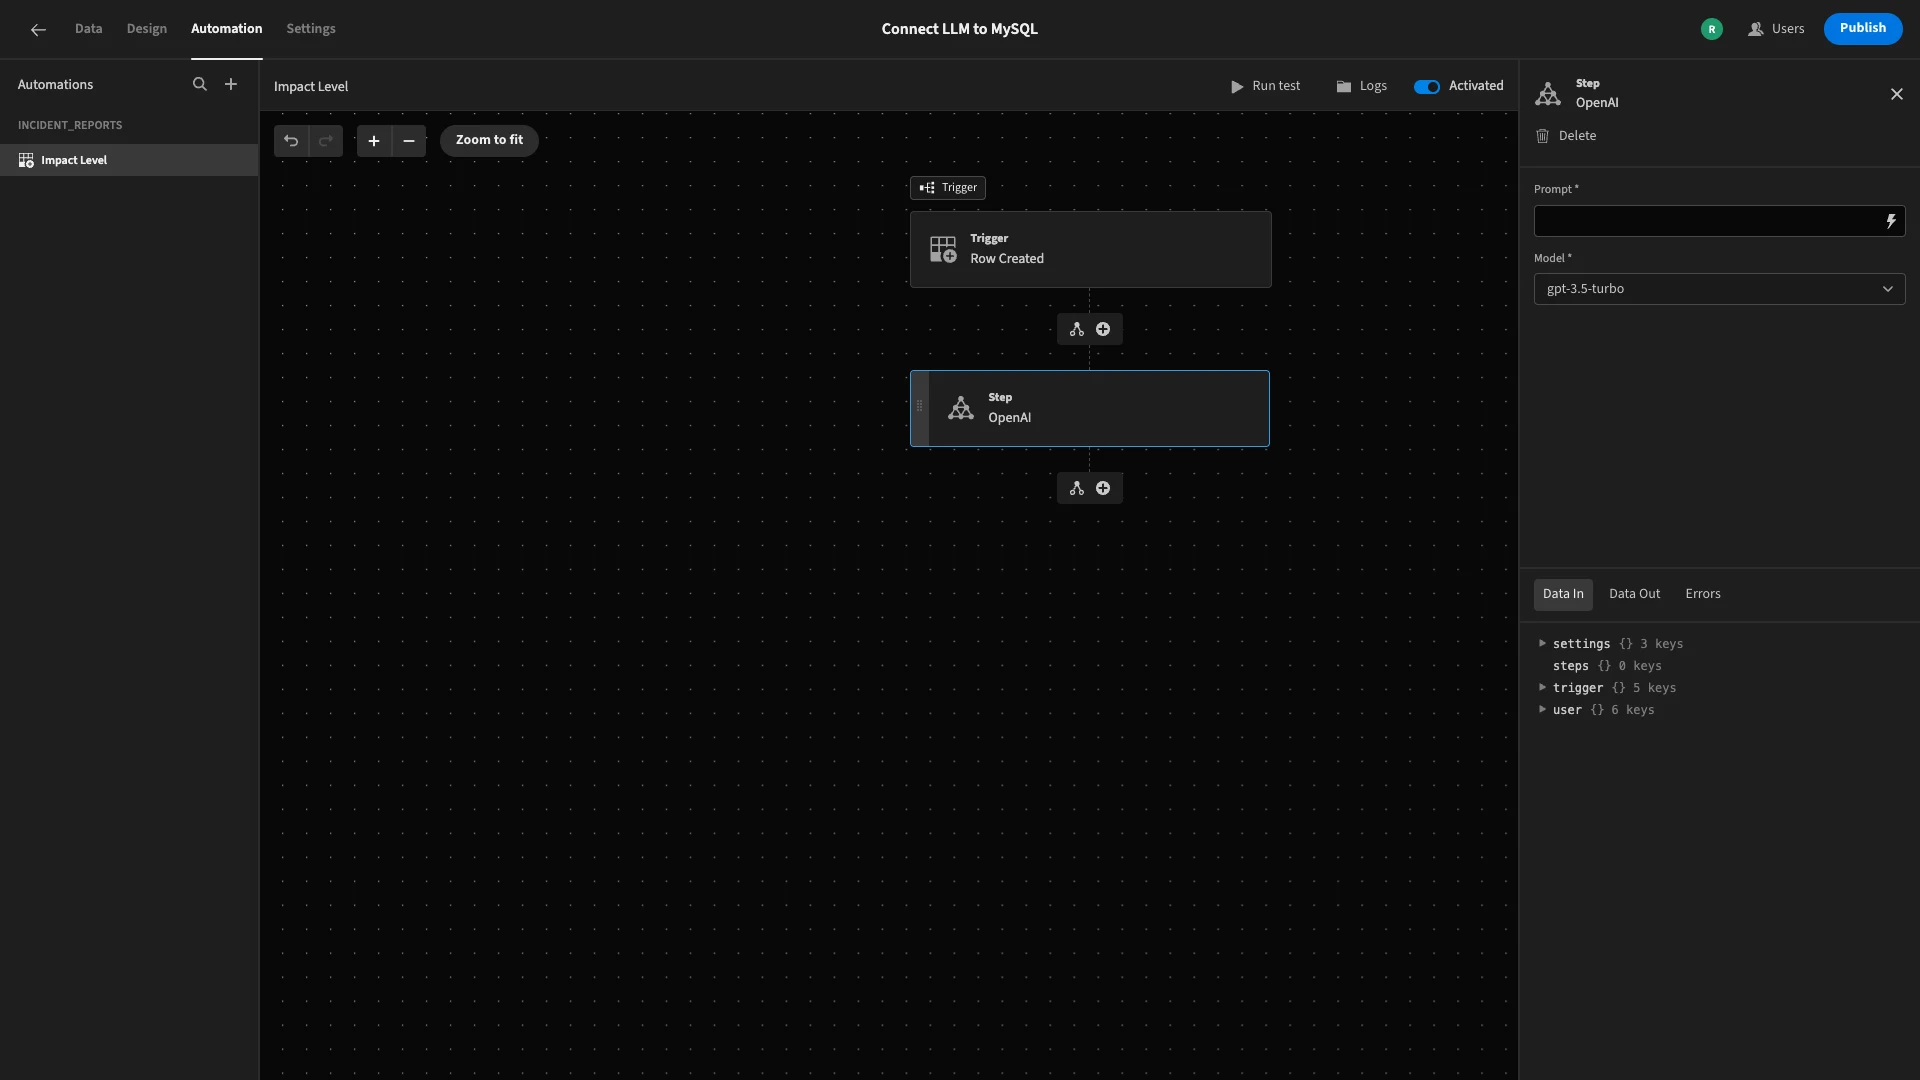
Here, we can write our prompt and select a model. We’re sticking with GPT-3.5 Turbo.
We’ll hit the lightning bolt icon in the Prompt field to open the bindings drawer.
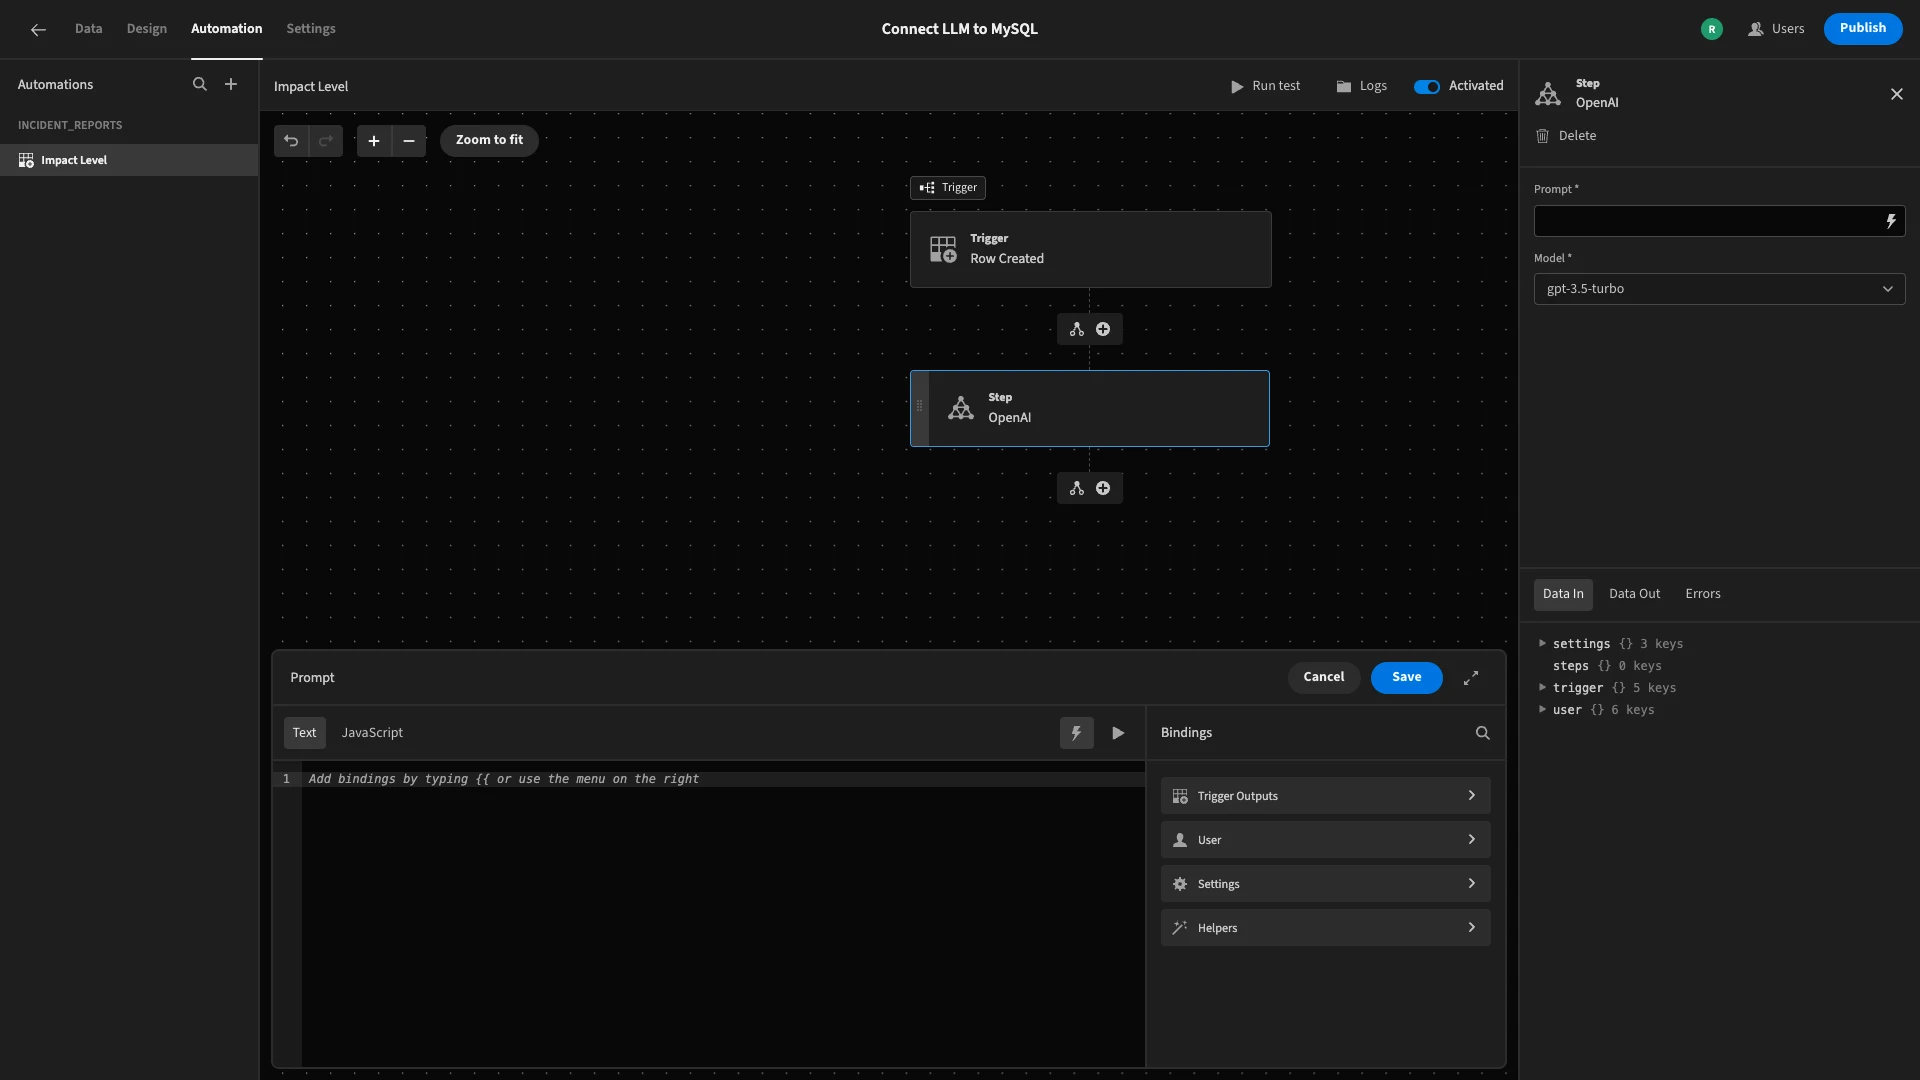
Our prompt will do three separate things.
- Determine the logic for how a value for the
impact_levelcolumn should be derived. - Provide values for the
descriptionandusers_affectedcolumns. - Specify the format we need our response to be returned in.
For demo purposes, we’re using the following basic logic to assess the submission, although you could modify this however you need to match your own workflow.
1You are an IT incident triage assistant.
2
3Classify the impact level of the following incident as one of: Low, Medium, or High.
4
5\- Low: Minor issue affecting few users or no major disruption.
6
7\- Medium: Noticeable issue affecting some users or business functions.
8
9\- High: Major disruption affecting many users or critical systems.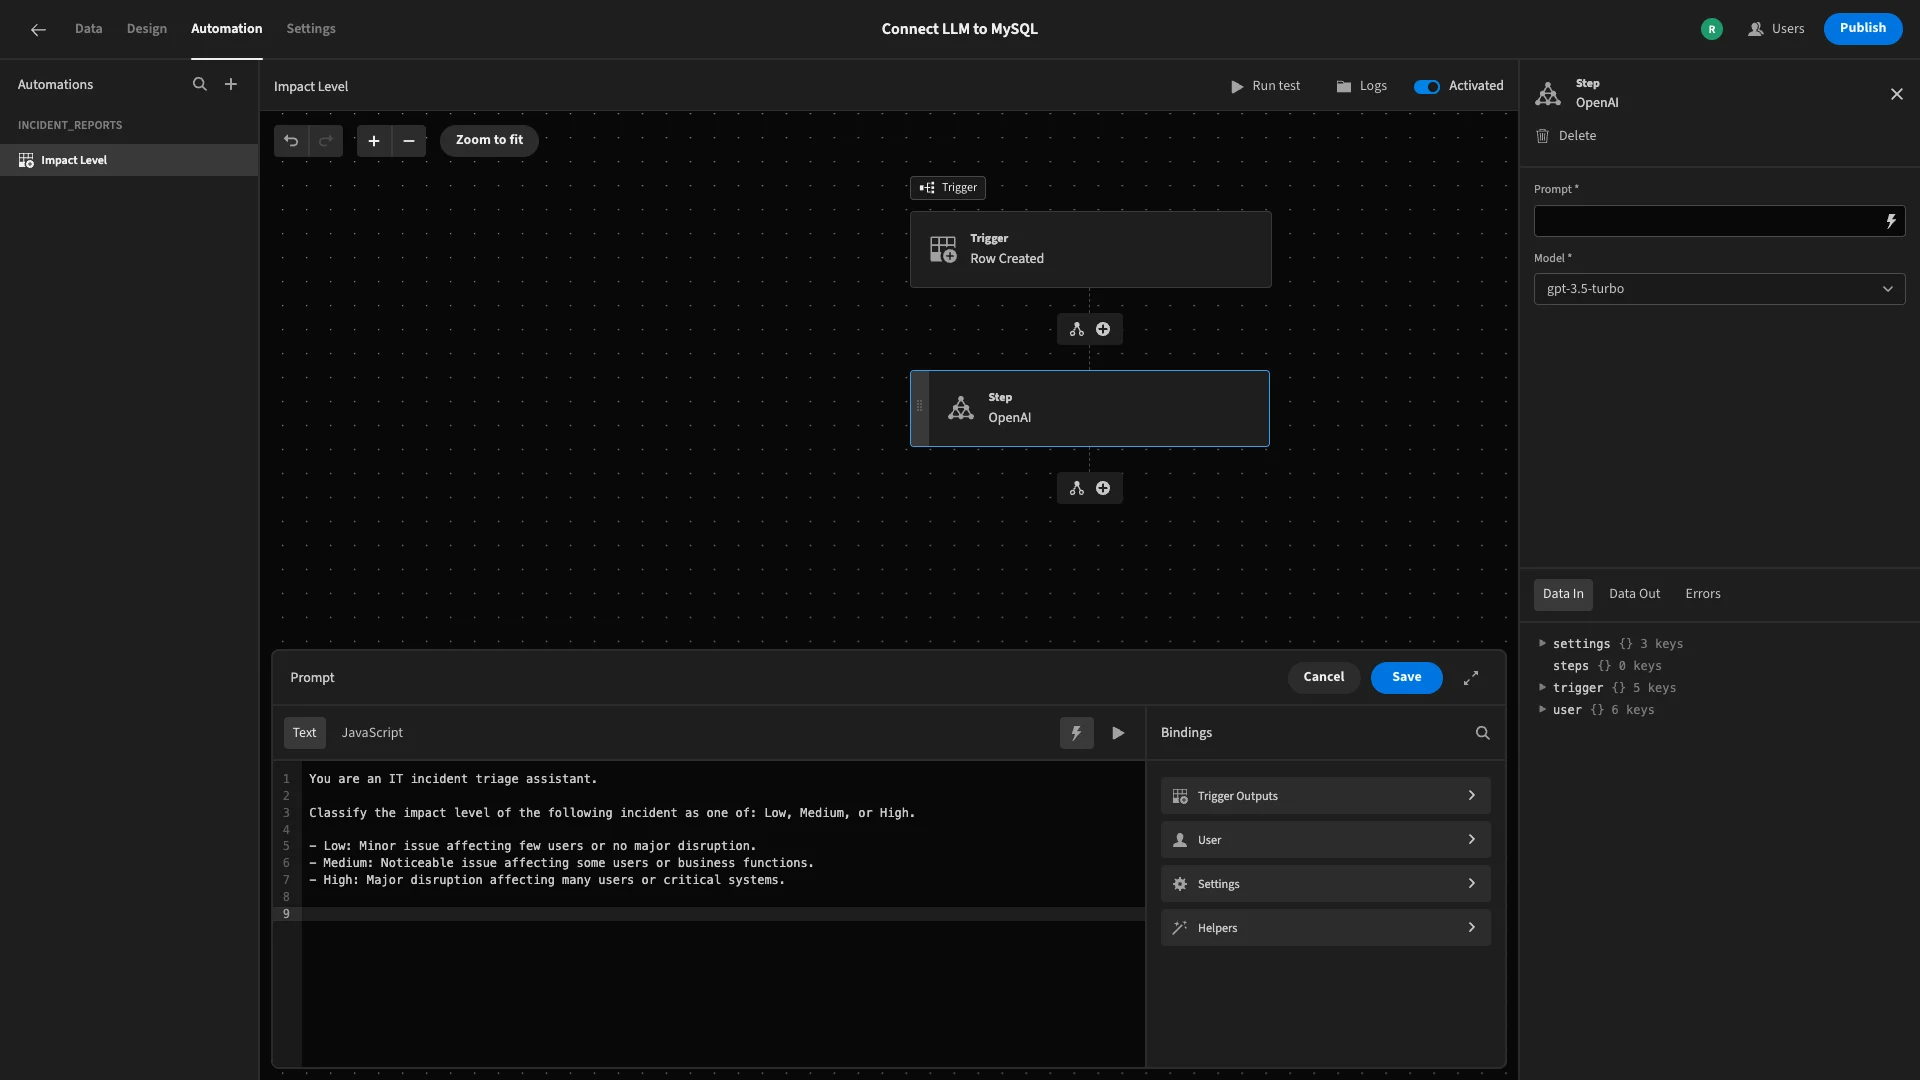
We can access the values we need from our trigger row under Trigger Outputs. We’ll add the following to our prompt to signpost these for the model.
1Incident description:
2
3{{ trigger.row.description }}
4
5Number of users affected: {{ trigger.row.users_affected }}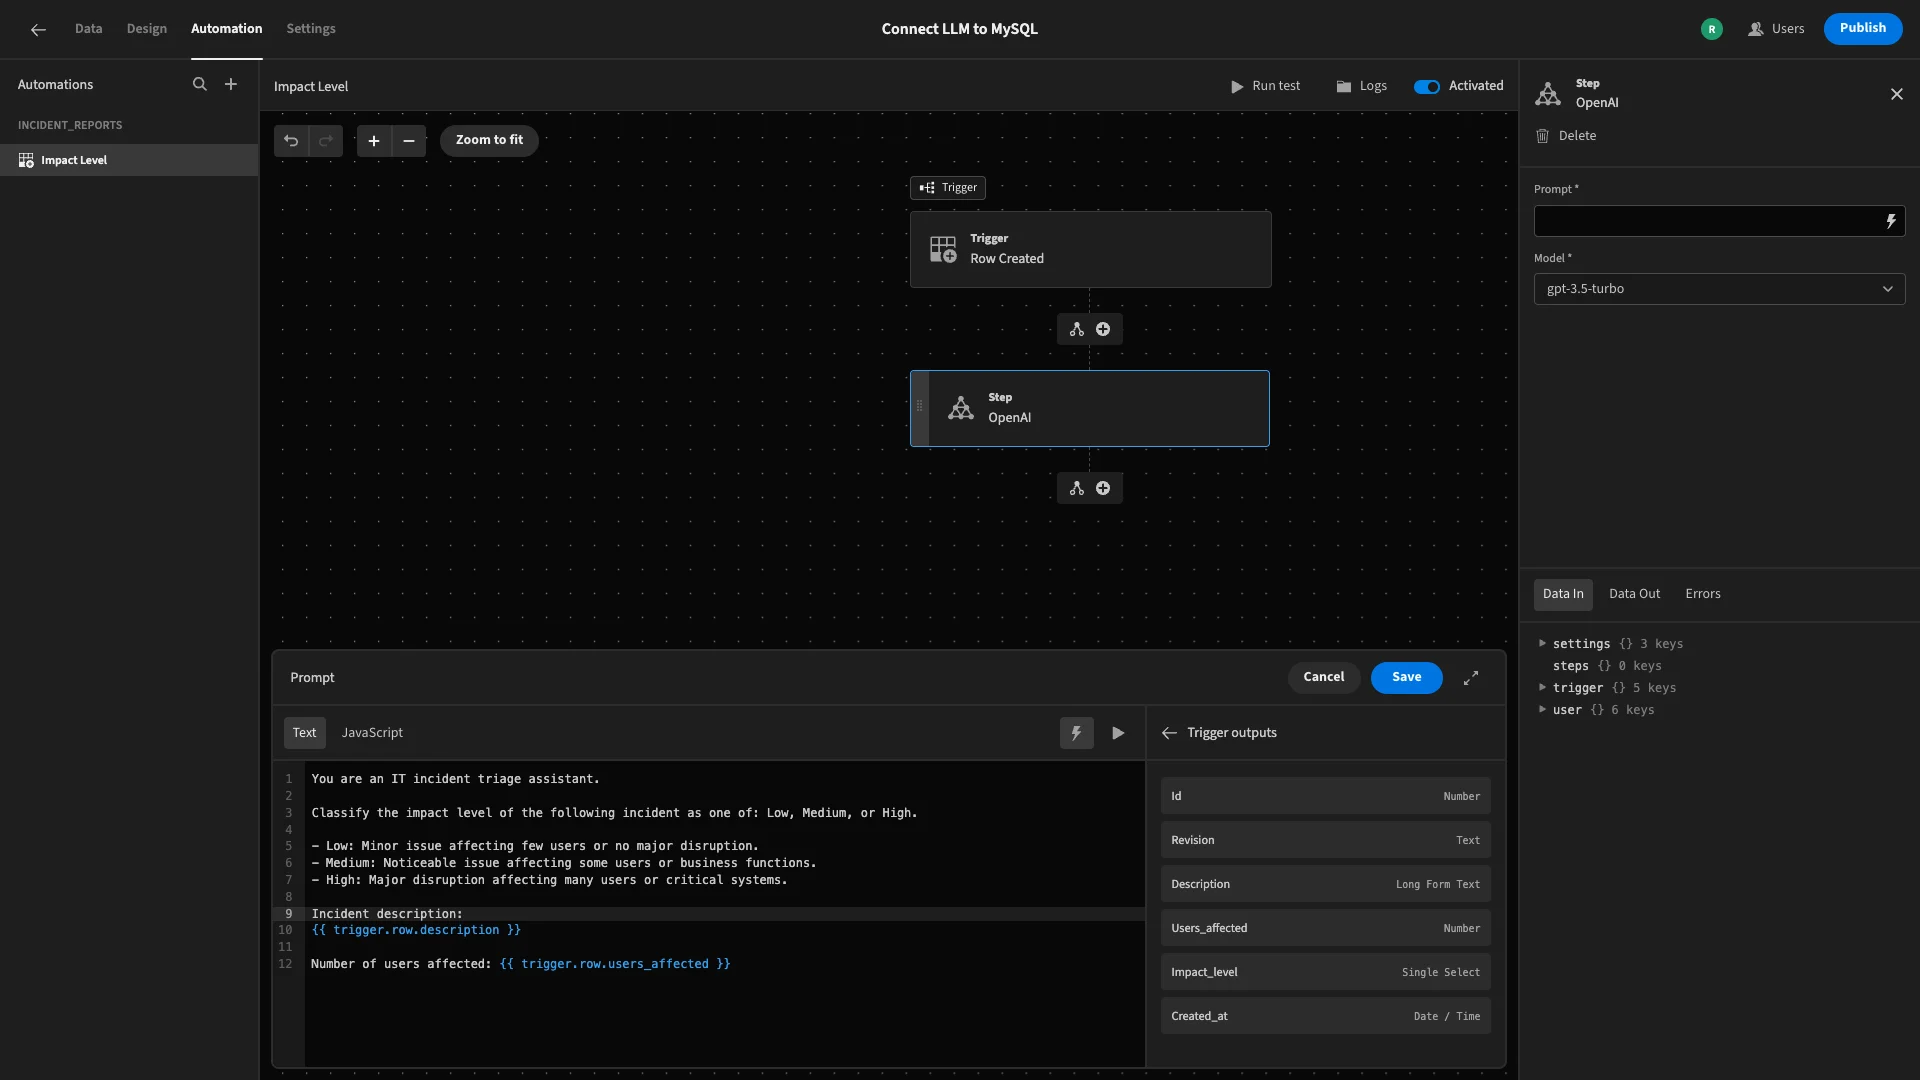
Lastly, we’ll provide an example of the JSON object we’d like returned.
1Respond ONLY with a JSON object in the following format:
2
3{
4
5 "impact_level": "<Low|Medium|High>"
6
7}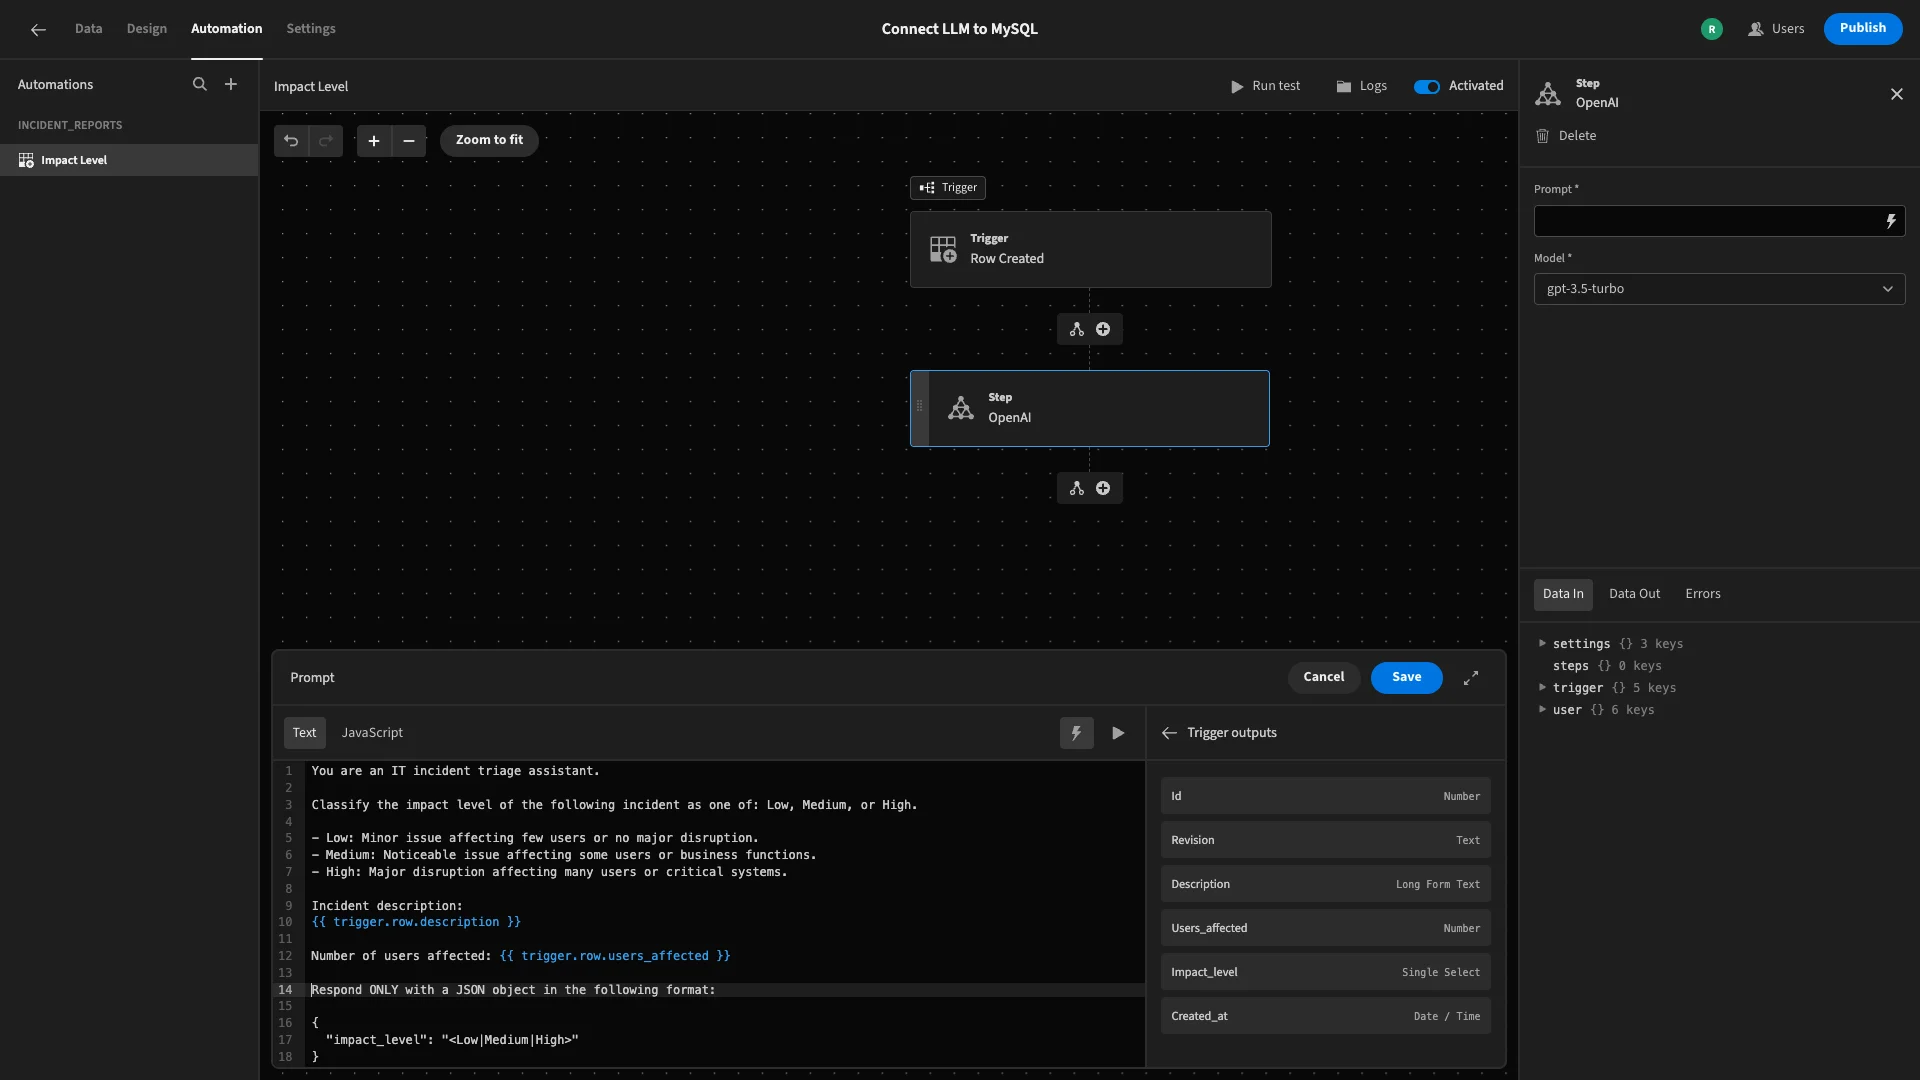
To recap, here’s the final prompt.
 1You are an IT incident triage assistant.
 2
 3Classify the impact level of the following incident as one of: Low, Medium, or High.
 4
 5\- Low: Minor issue affecting few users or no major disruption.
 6
 7\- Medium: Noticeable issue affecting some users or business functions.
 8
 9\- High: Major disruption affecting many users or critical systems.
10
11Incident description:
12
13{{ trigger.row.description }}
14
15Number of users affected: {{ trigger.row.users_affected }}
16
17Respond ONLY with a JSON object in the following format:
18
19{
20
21 "impact_level": "<Low|Medium|High>"
22
23}
We’ll finish by hitting Save.
The last thing we need to do is take our LLM’s response, and use it to populate the impace_level attribute in our trigger row.
We’ll achieve this by adding a new action step, this time selecting Update Row.
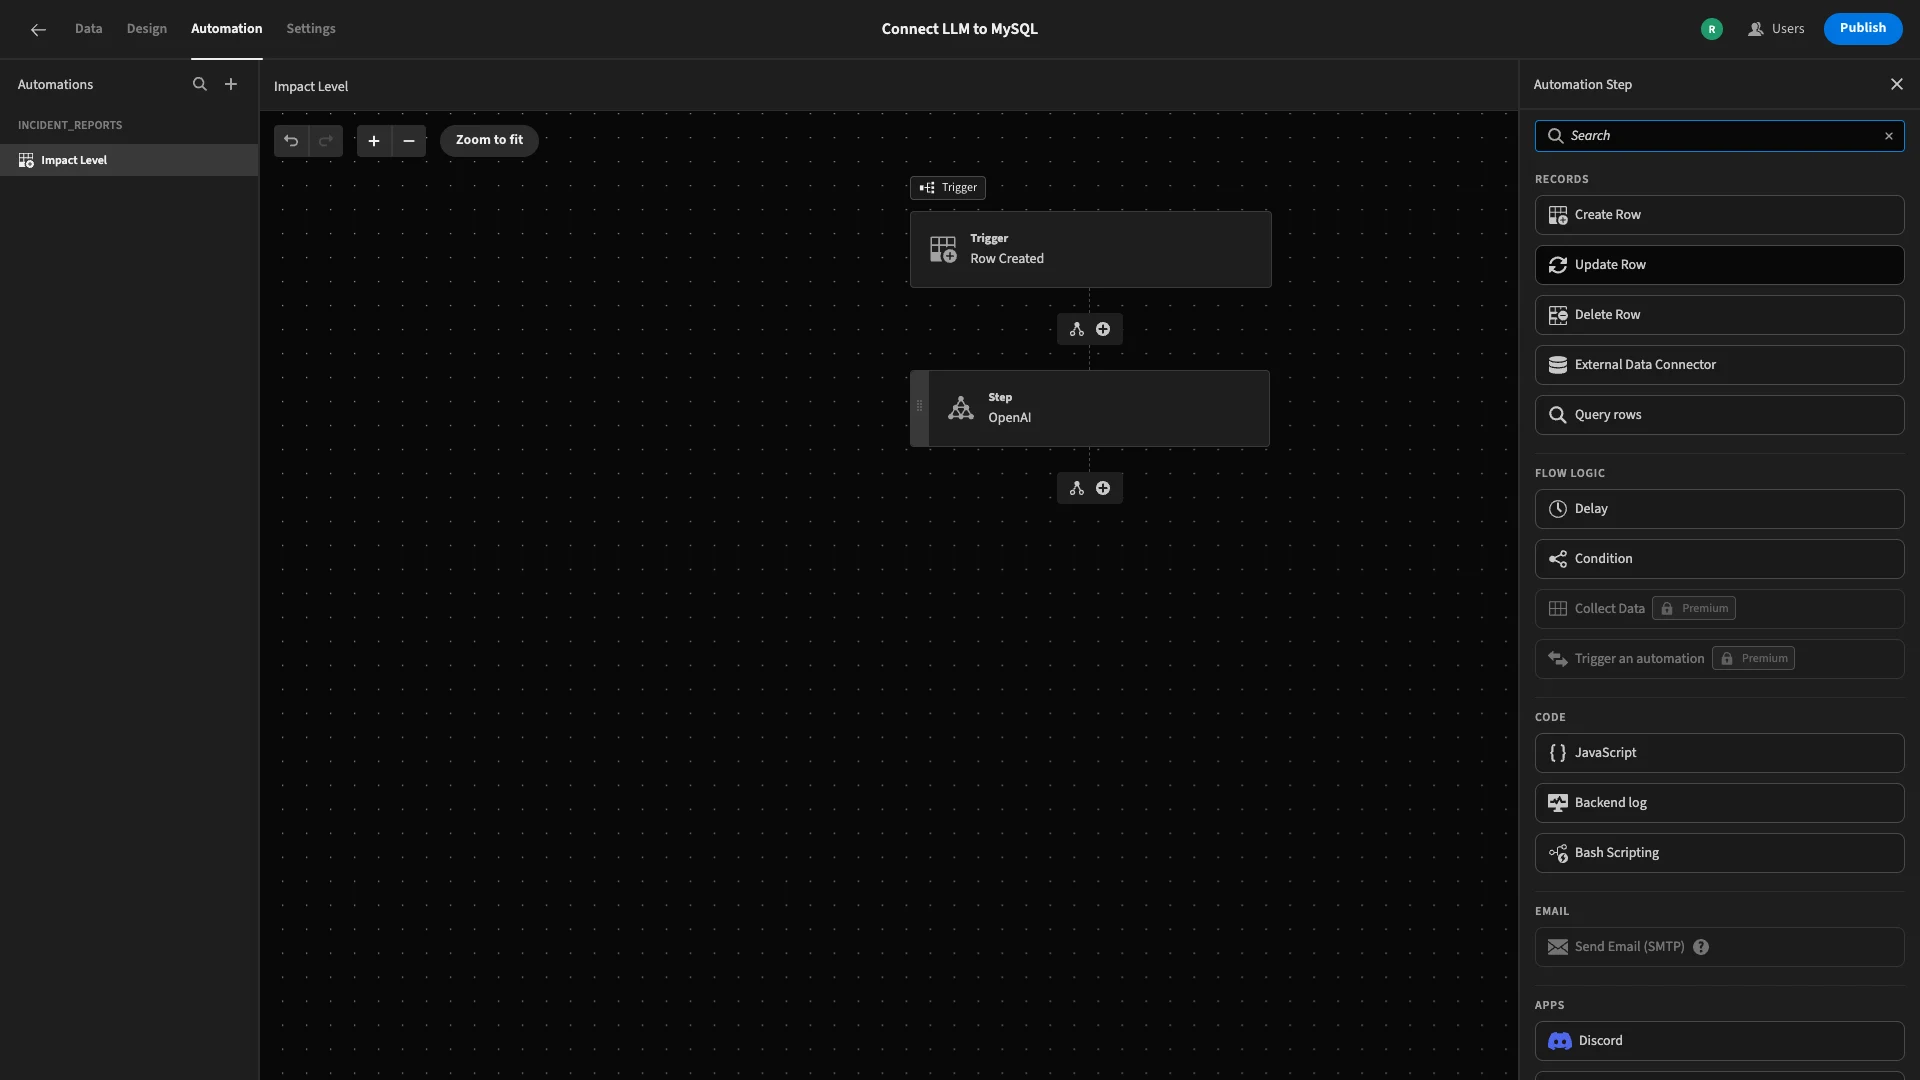
As before, we’ll select incident_reports as our table.
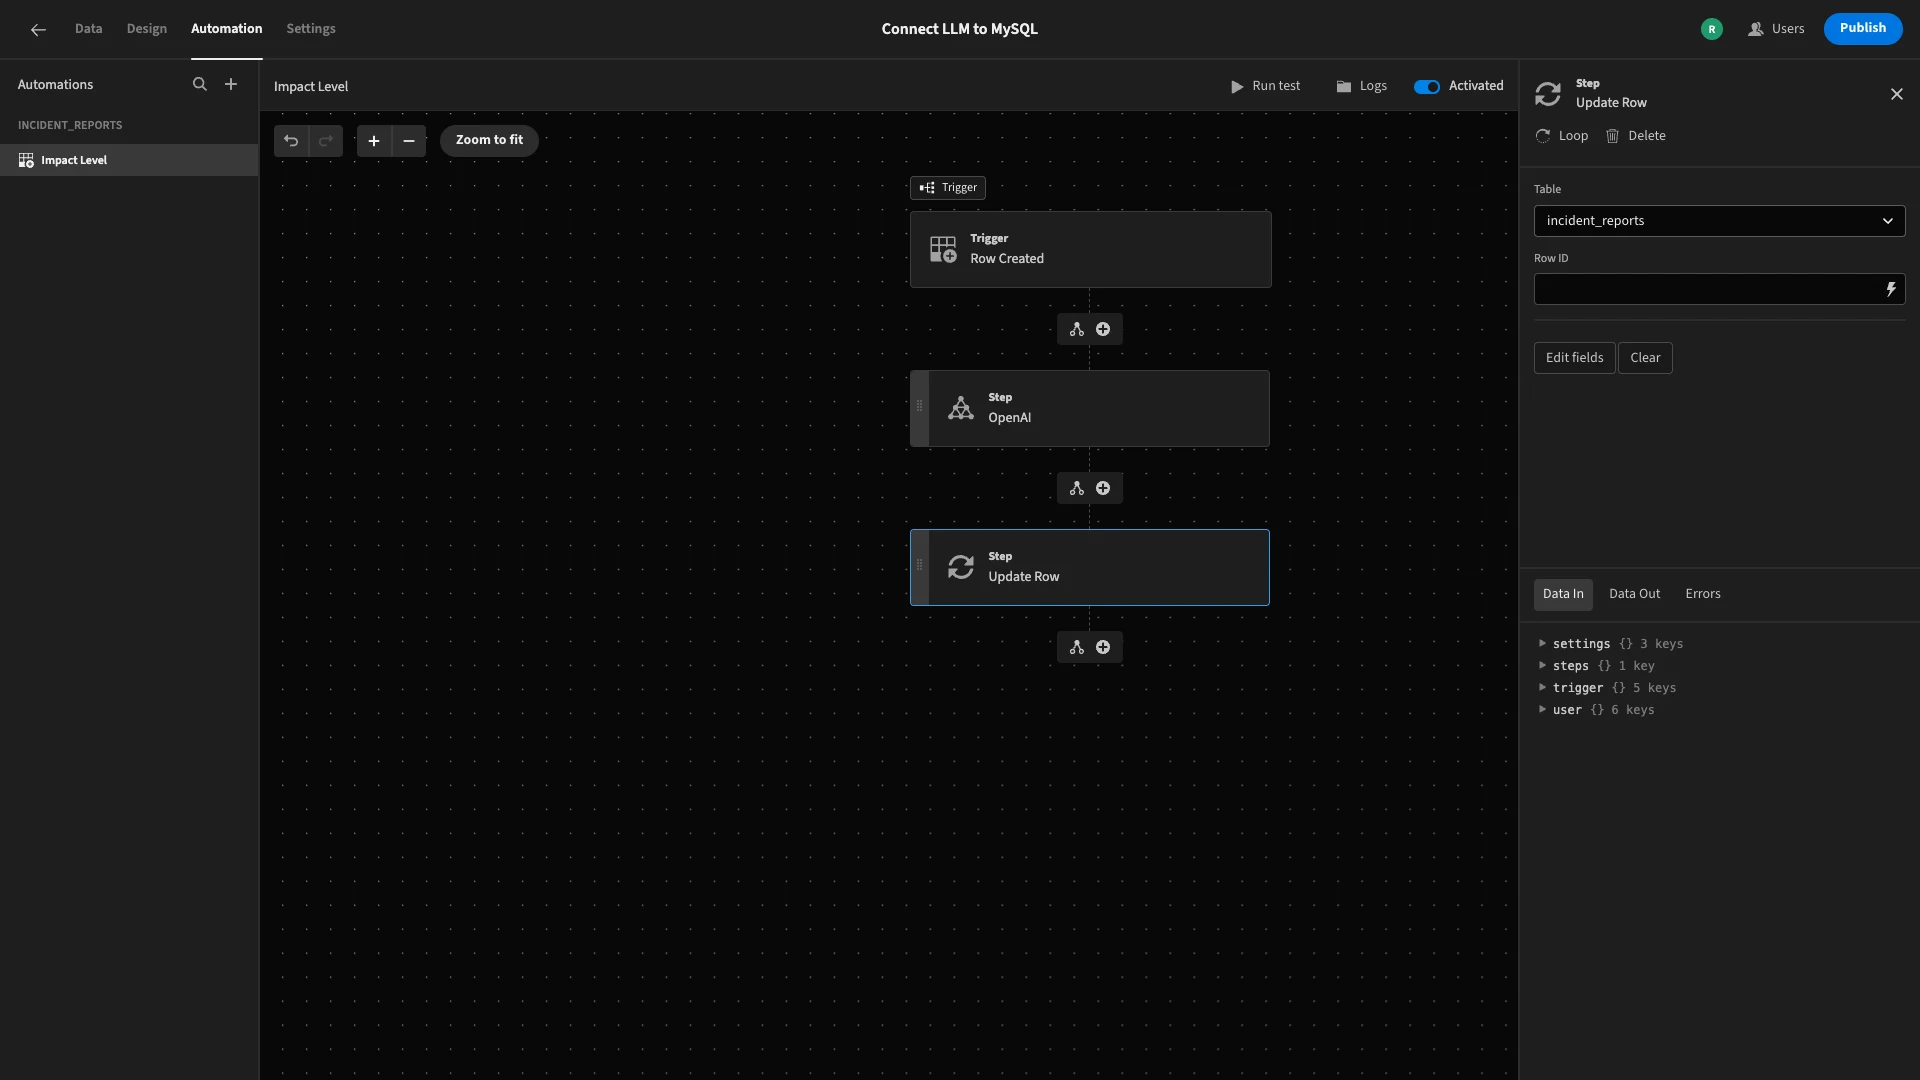
This action step also has a setting called Row ID. This enables us to specify the particular row in our database that will be updated.
As we know, we want to target the original row that triggered our automation run.
To do this, we’ll bind our Row ID to {{ trigger.id }}.
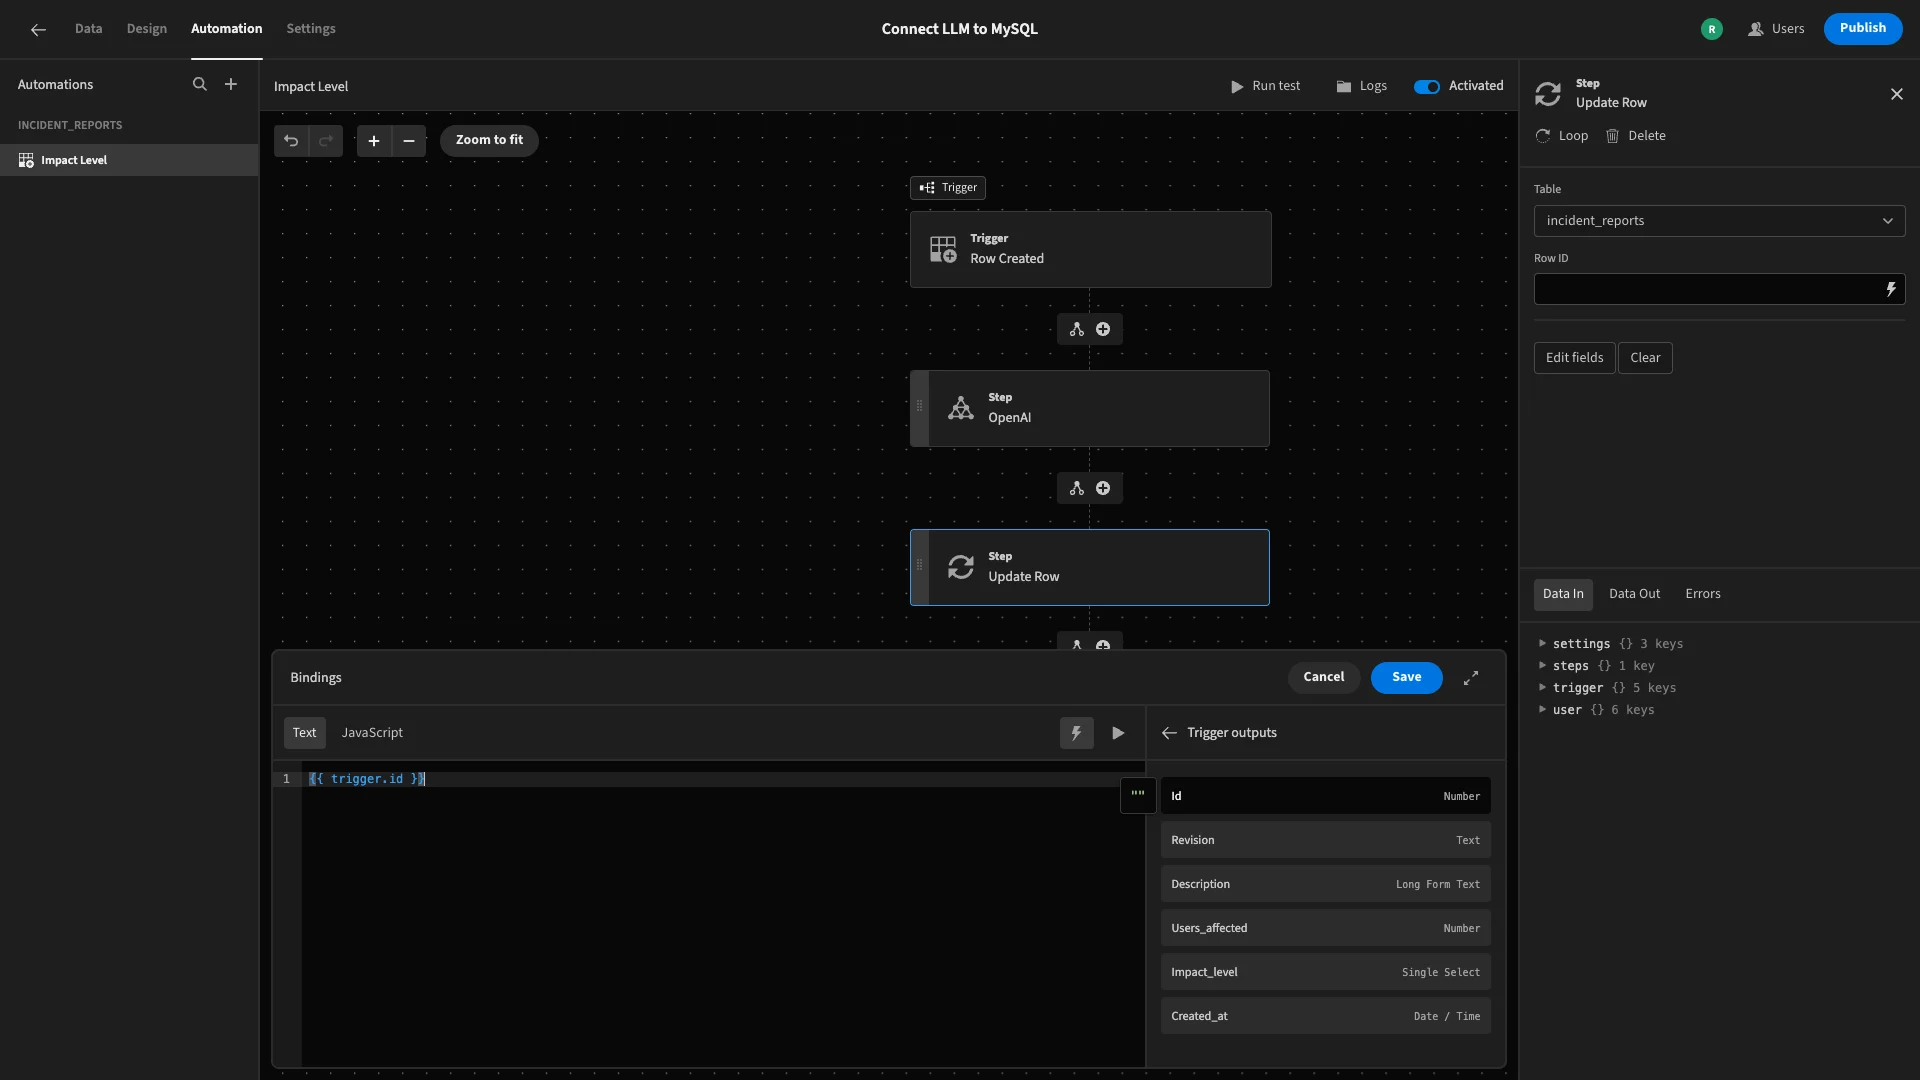
Then, we’ll hit edit fields and select `impact_level.
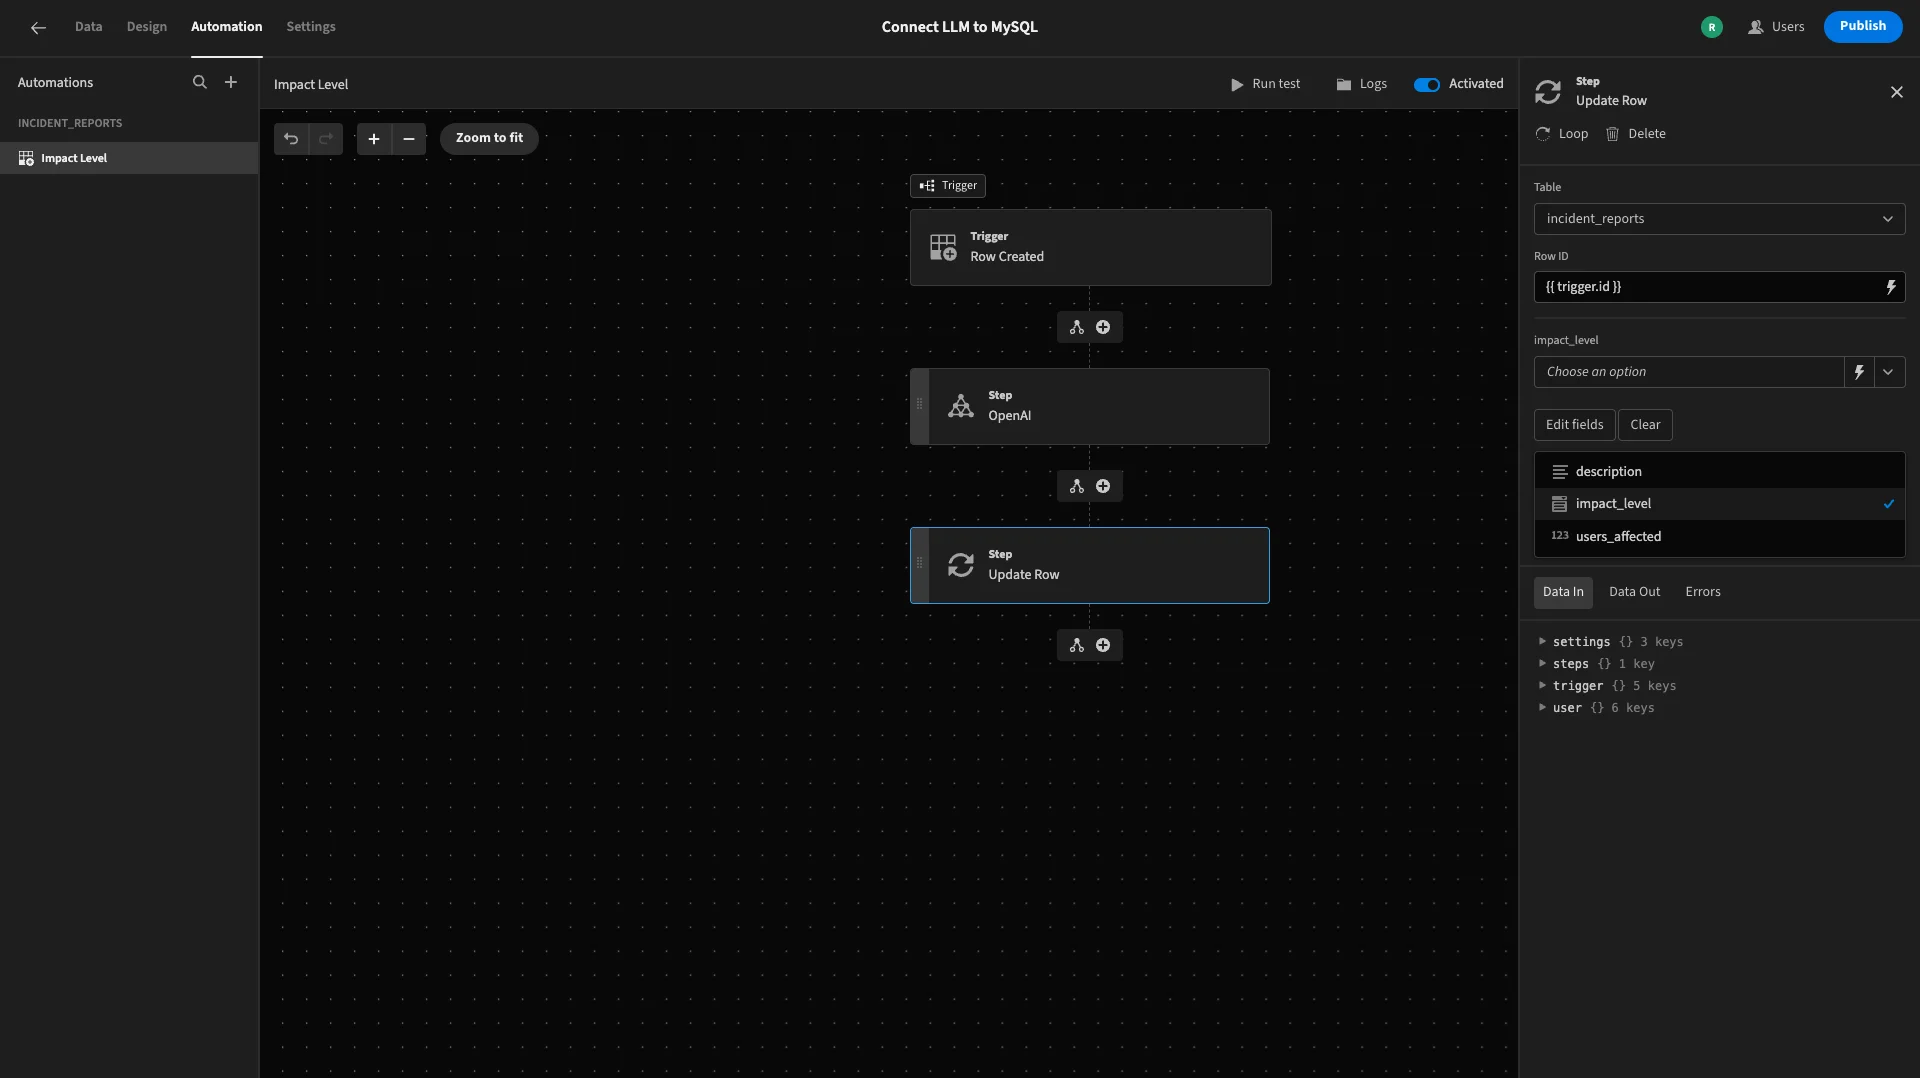
We want to bind this to the value that our LLM determined. However, there’s an additional challenge here, in the sense that the value we need is wrapped in a JSON object.
So, we’ll start by opening the bindings drawer, but this time we’ll select the JavaScript editor.
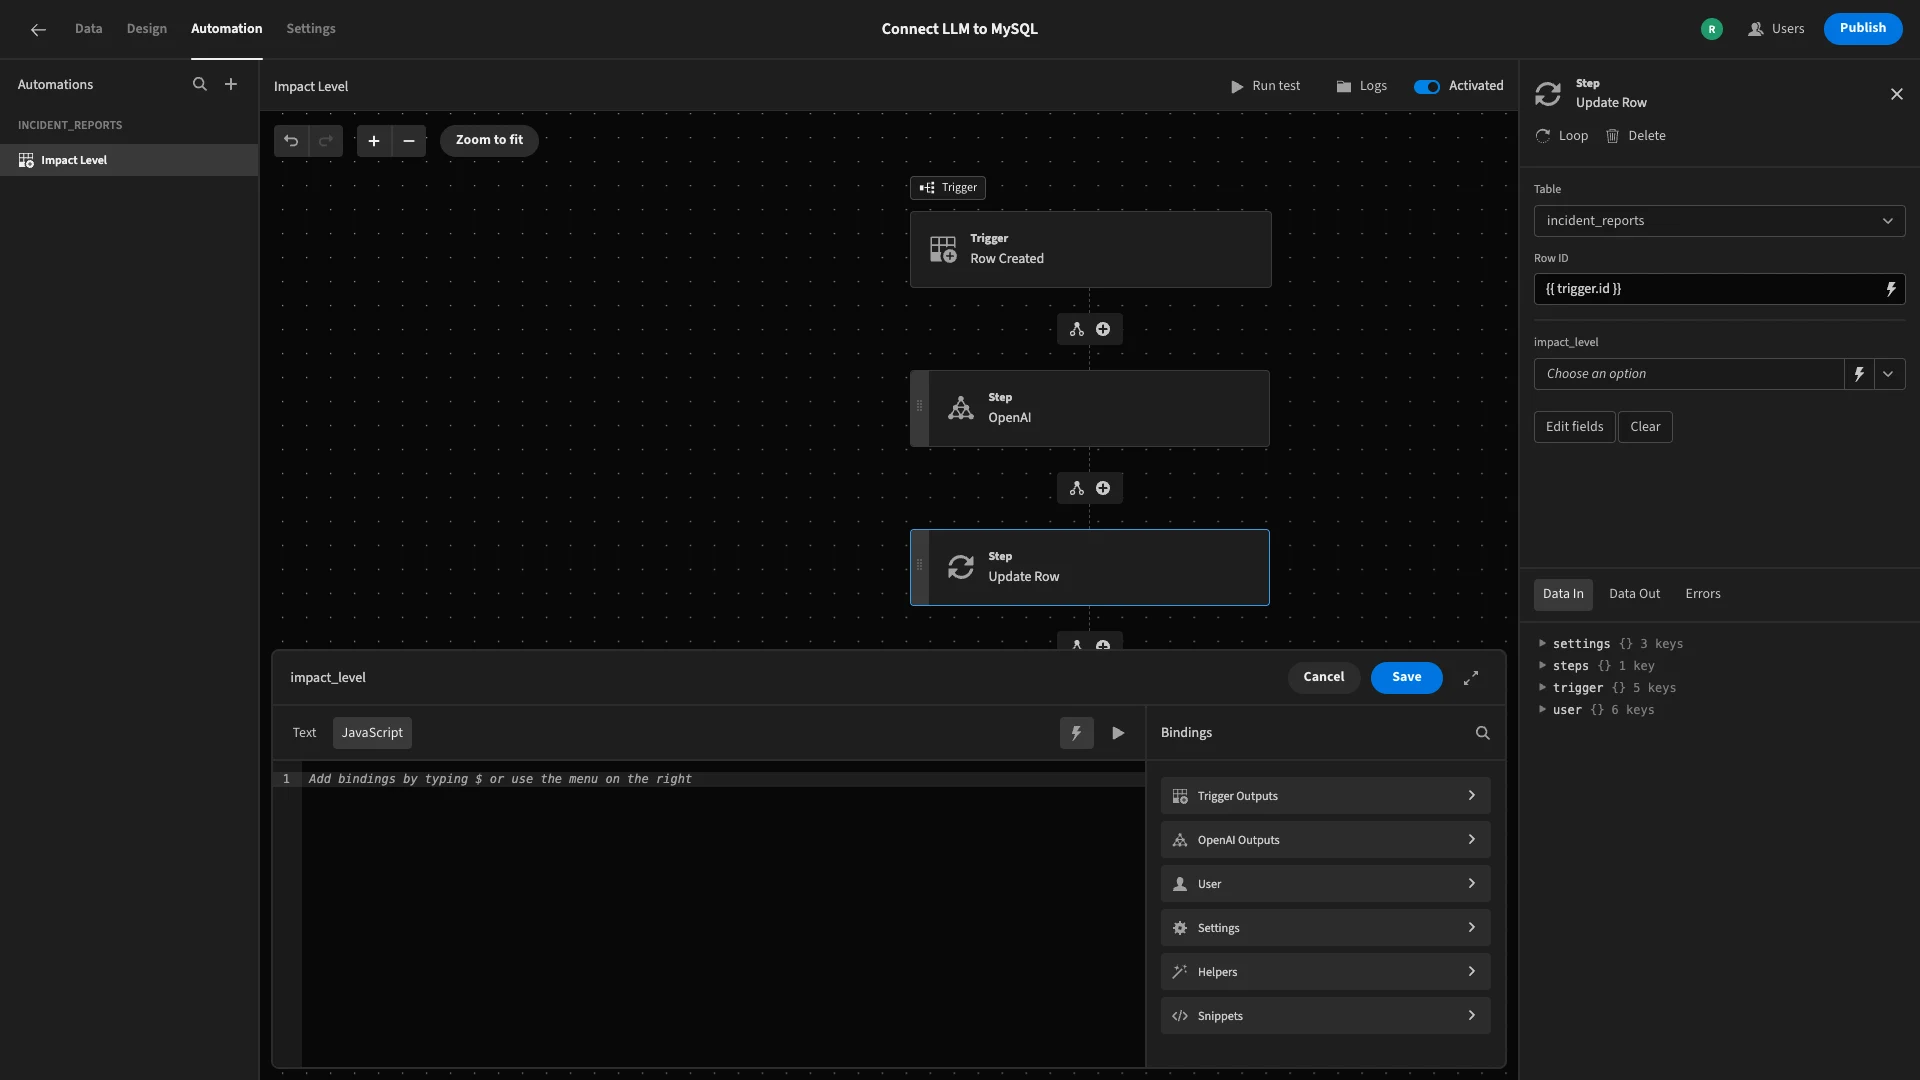
We’re going to declare a variable called response, and use the JSON.parse() method to set its value to the output of our OpenAI step. We’ll then return the impact_level value within this.
We’ll do this with the following code.
1var response = JSON.parse($("steps.OpenAI.response"))
2
3return response["impact_level"];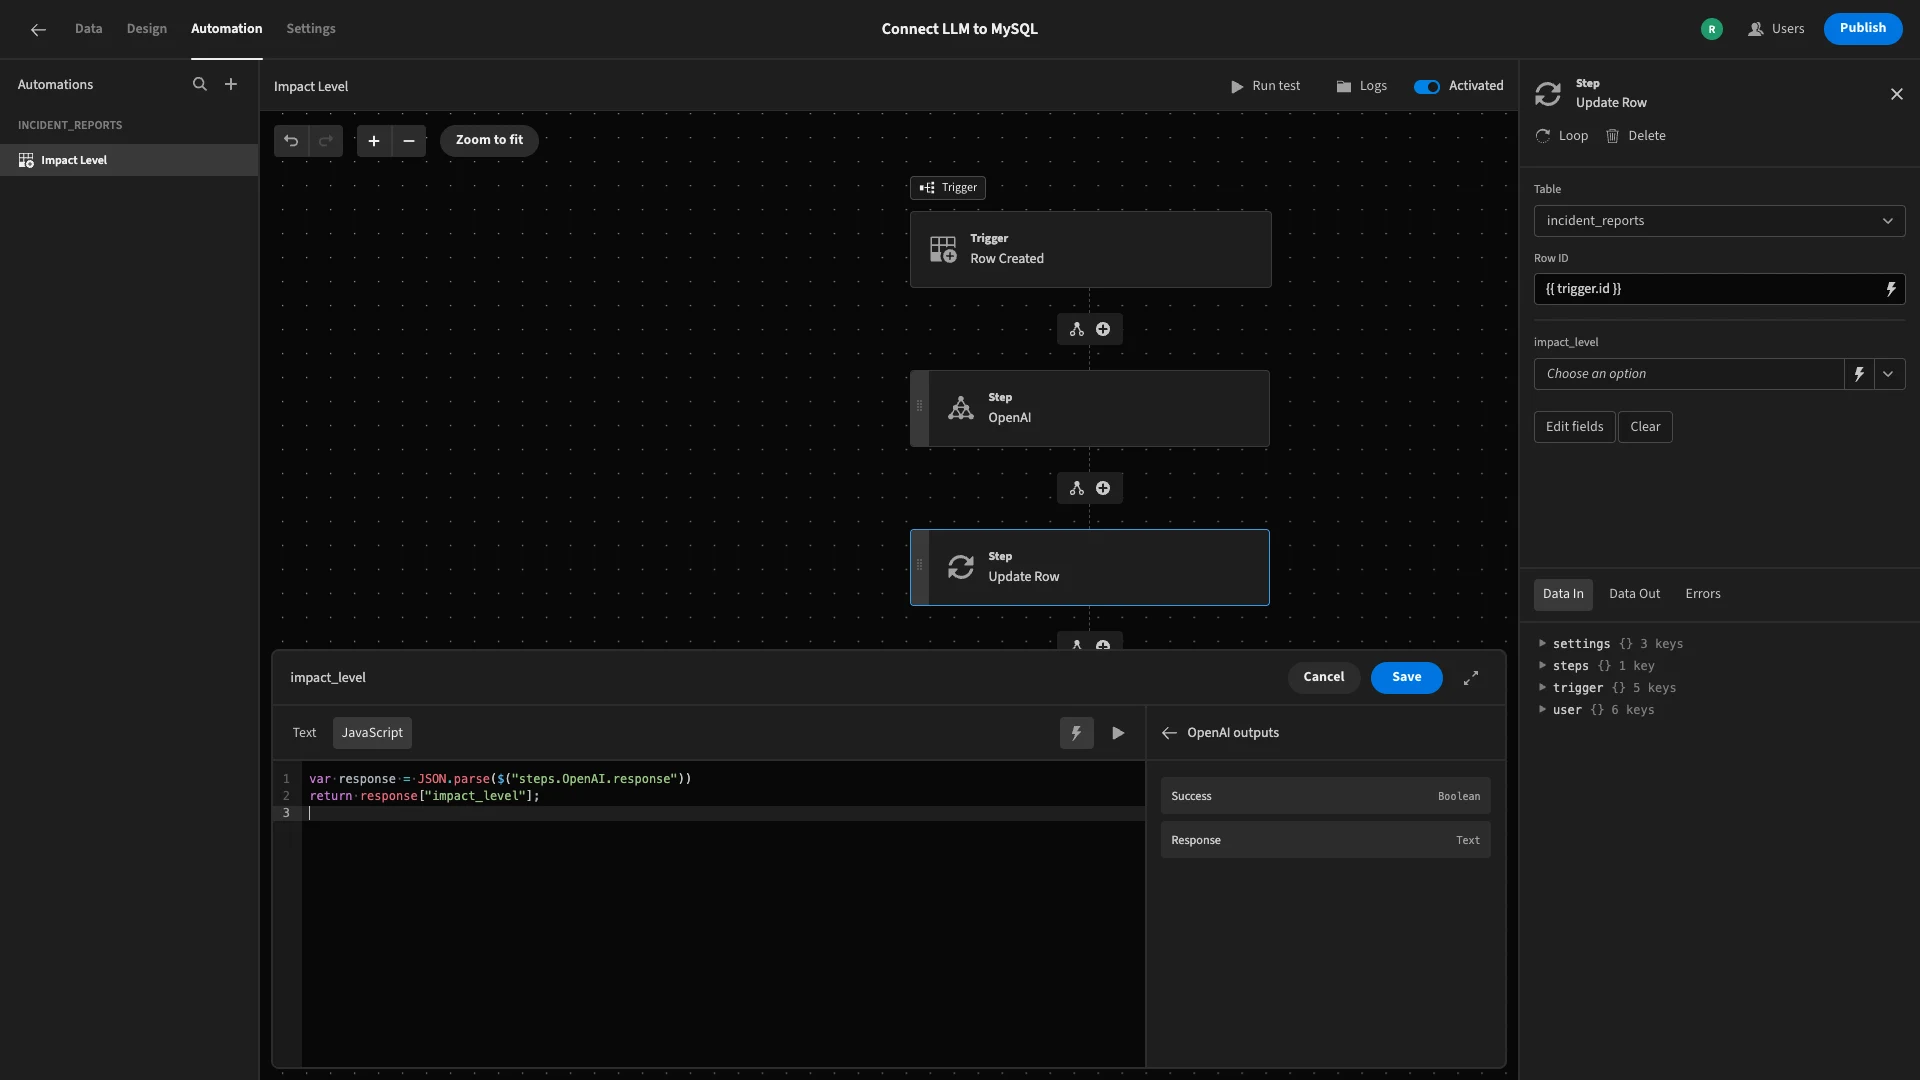
And we’ll hit save.
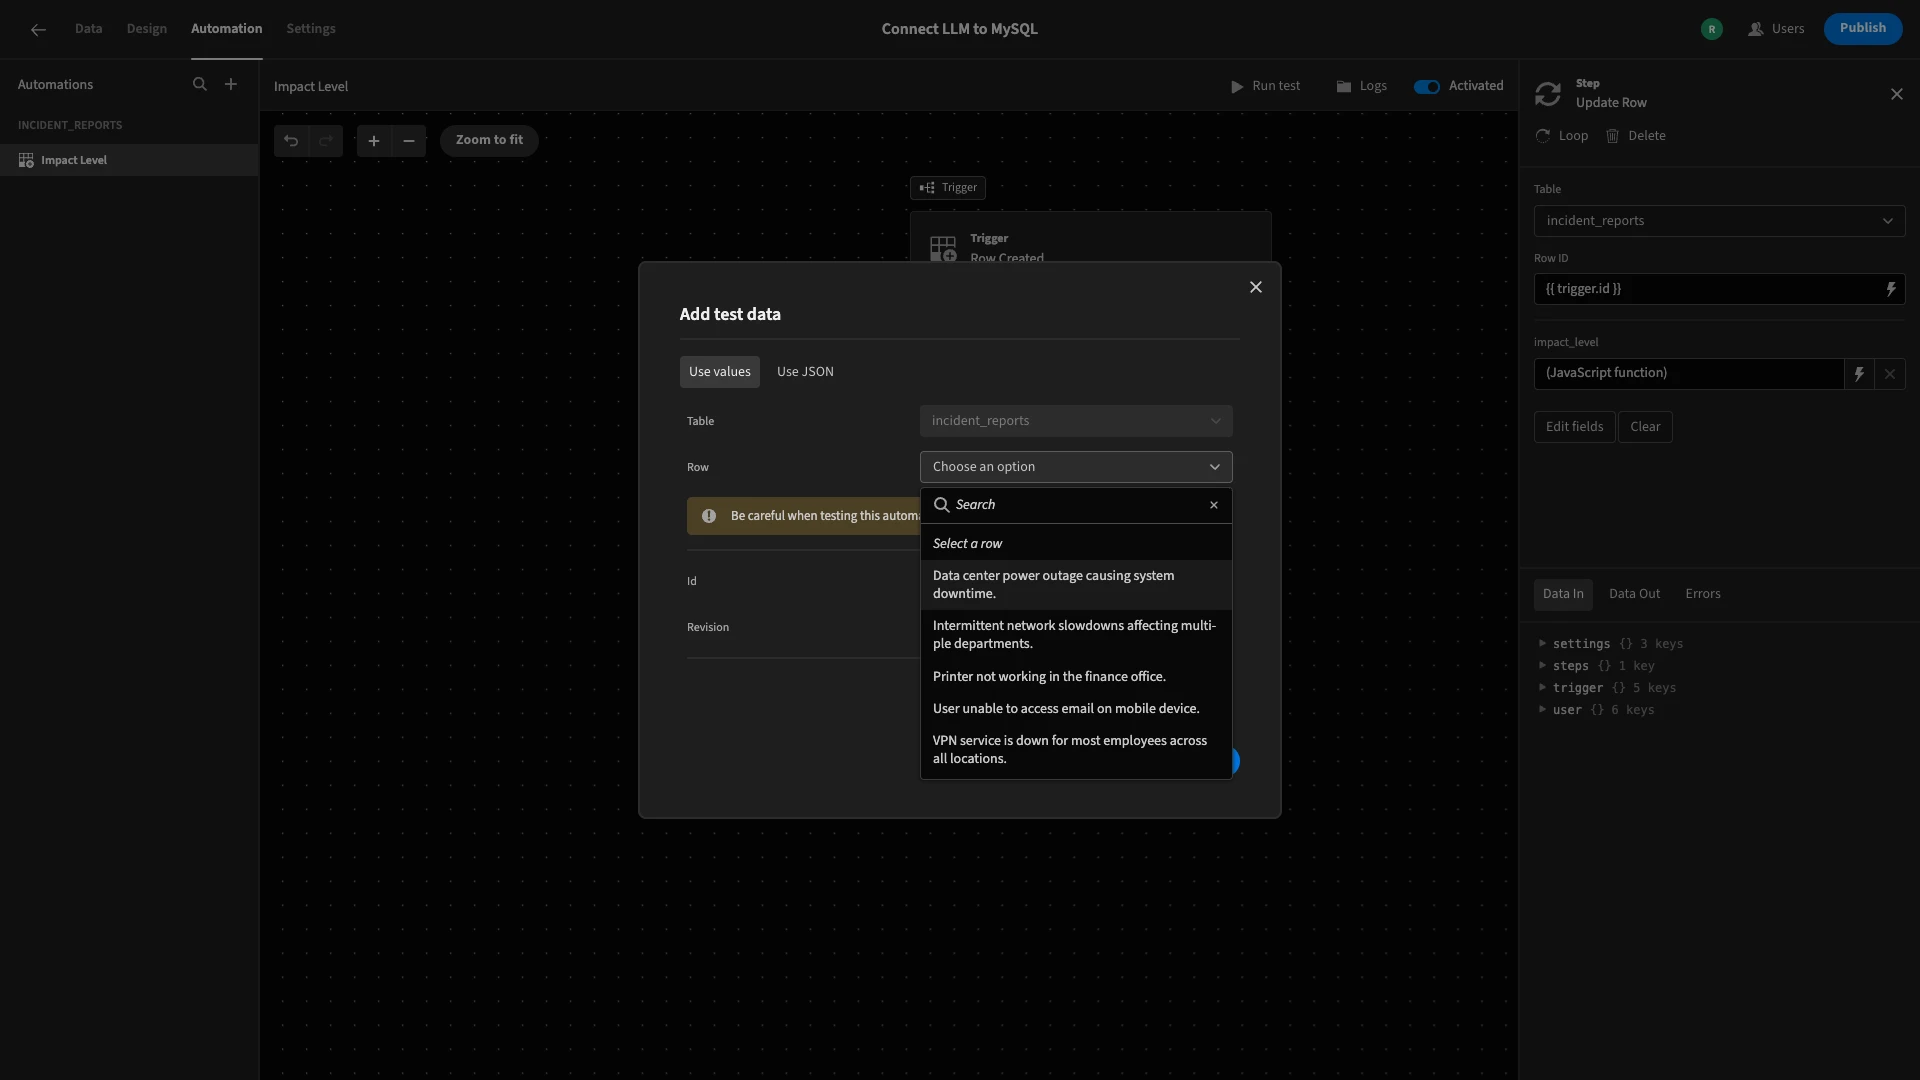
To finish, we can hit Run Test to verify everything works as we expect it to.
When we do this, we can choose an existing row to use as our test data.
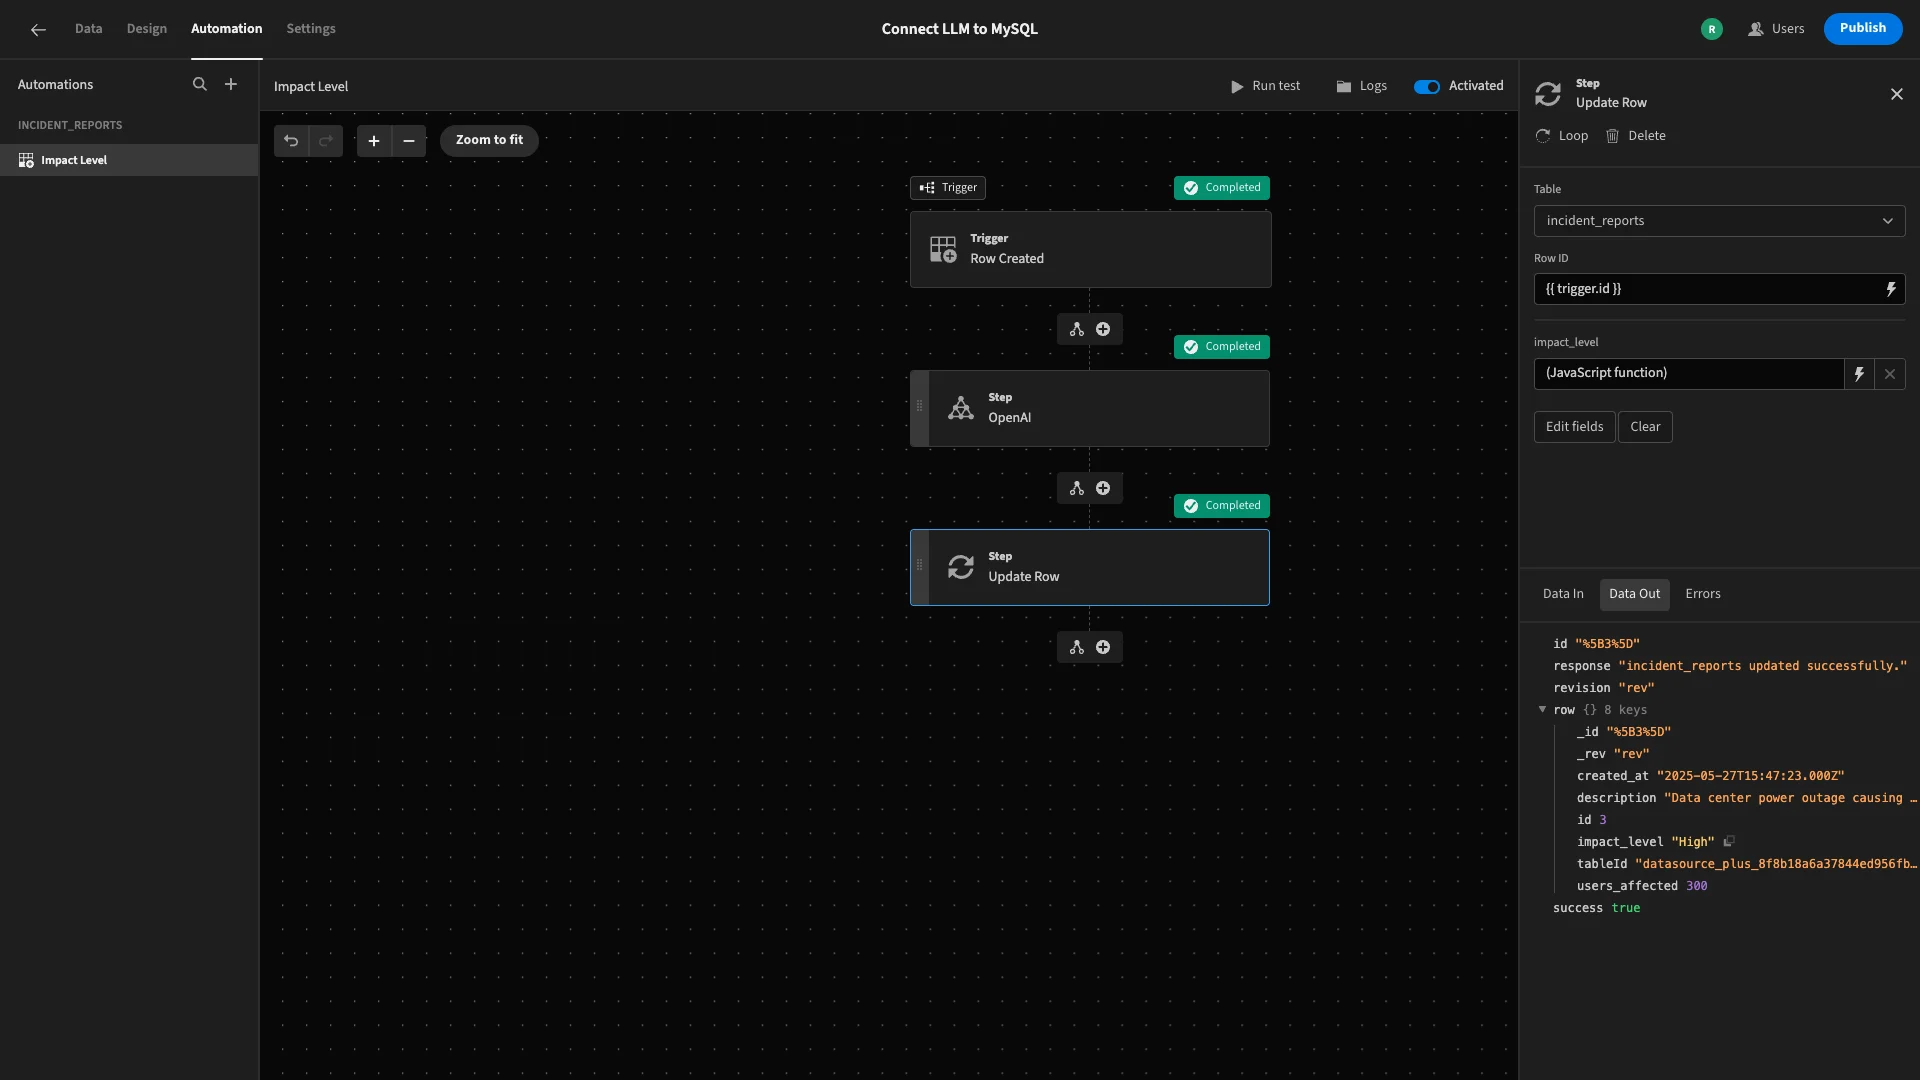
In our test details, we can see that the automation has successfully populated an impact_level for our row.
4. Creating an incident report form UI
With our automation logic completed, we can move on to building a UI for our end users to report incidents. With Budibase, we can autogenerate customizable UIs based on connected data sources.
We’ll start by heading to the Design section. Here, we’re offered a choice of several layouts.
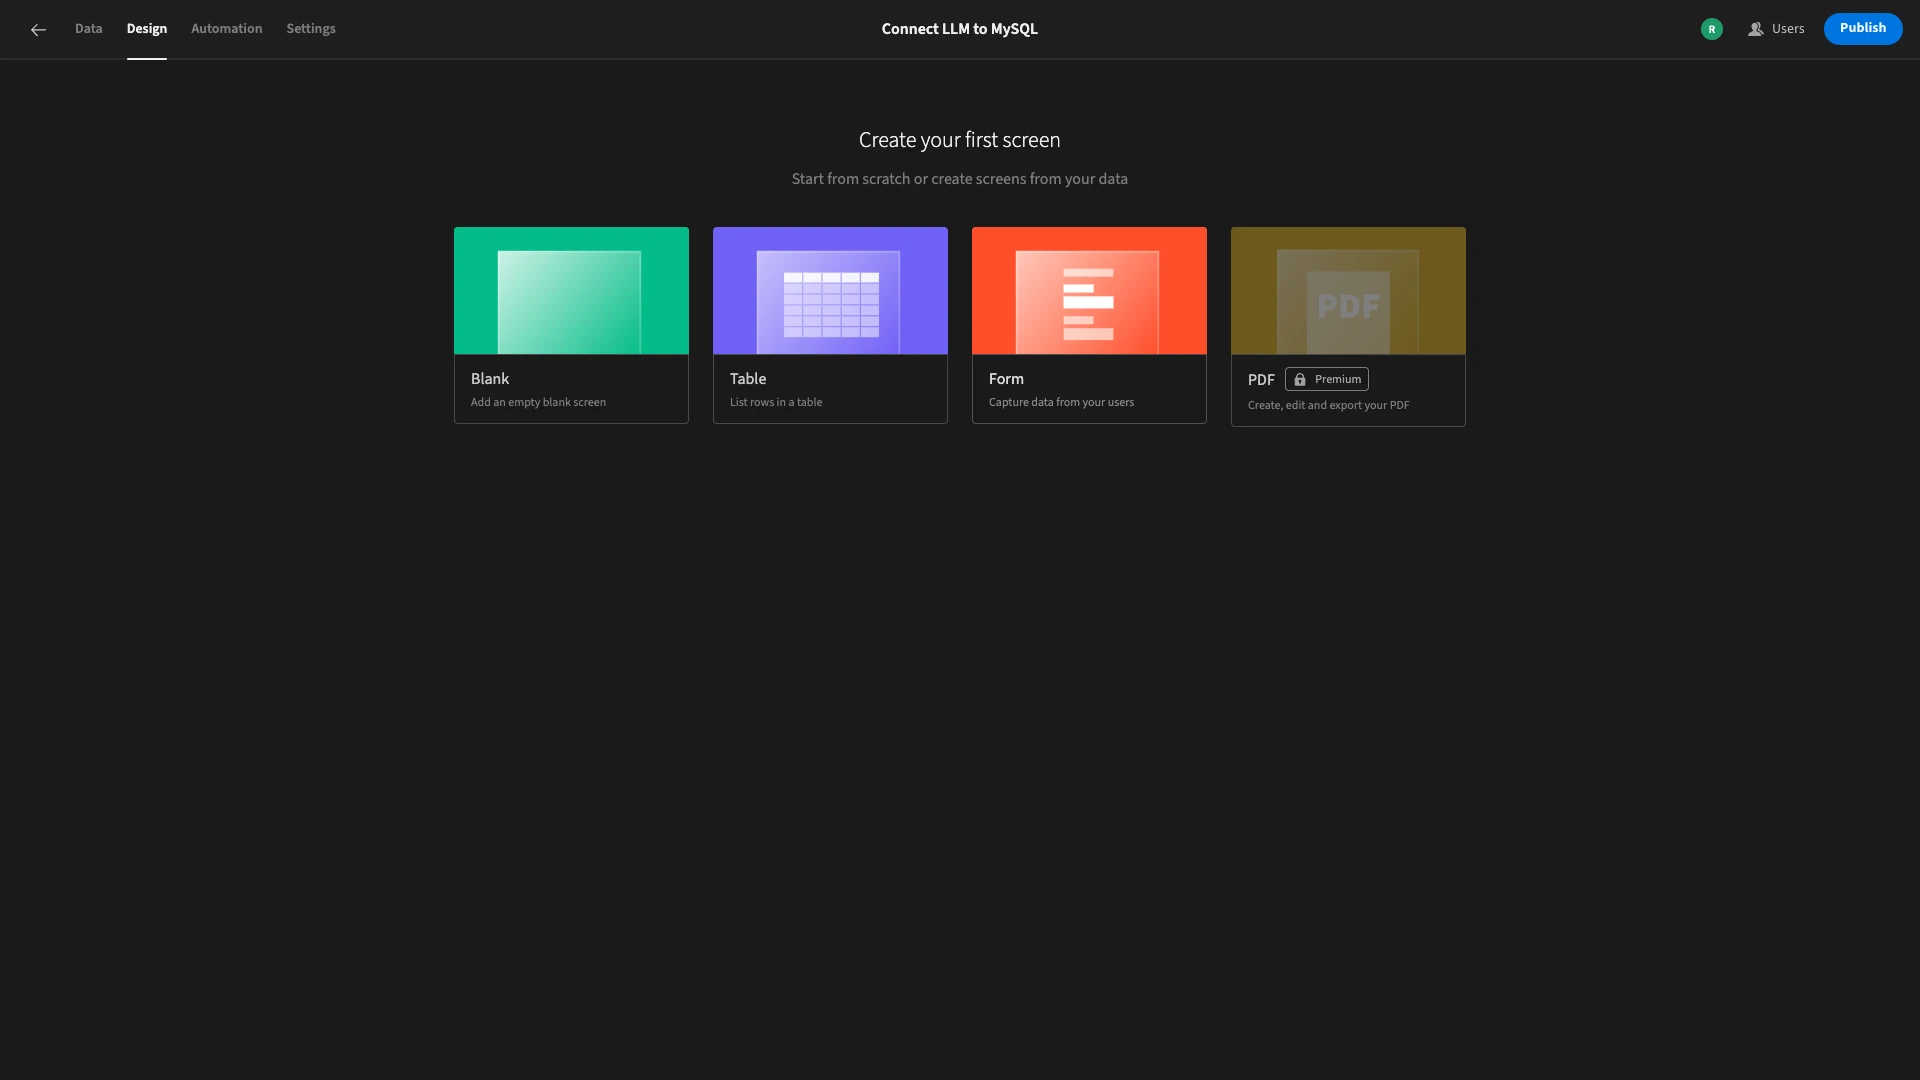
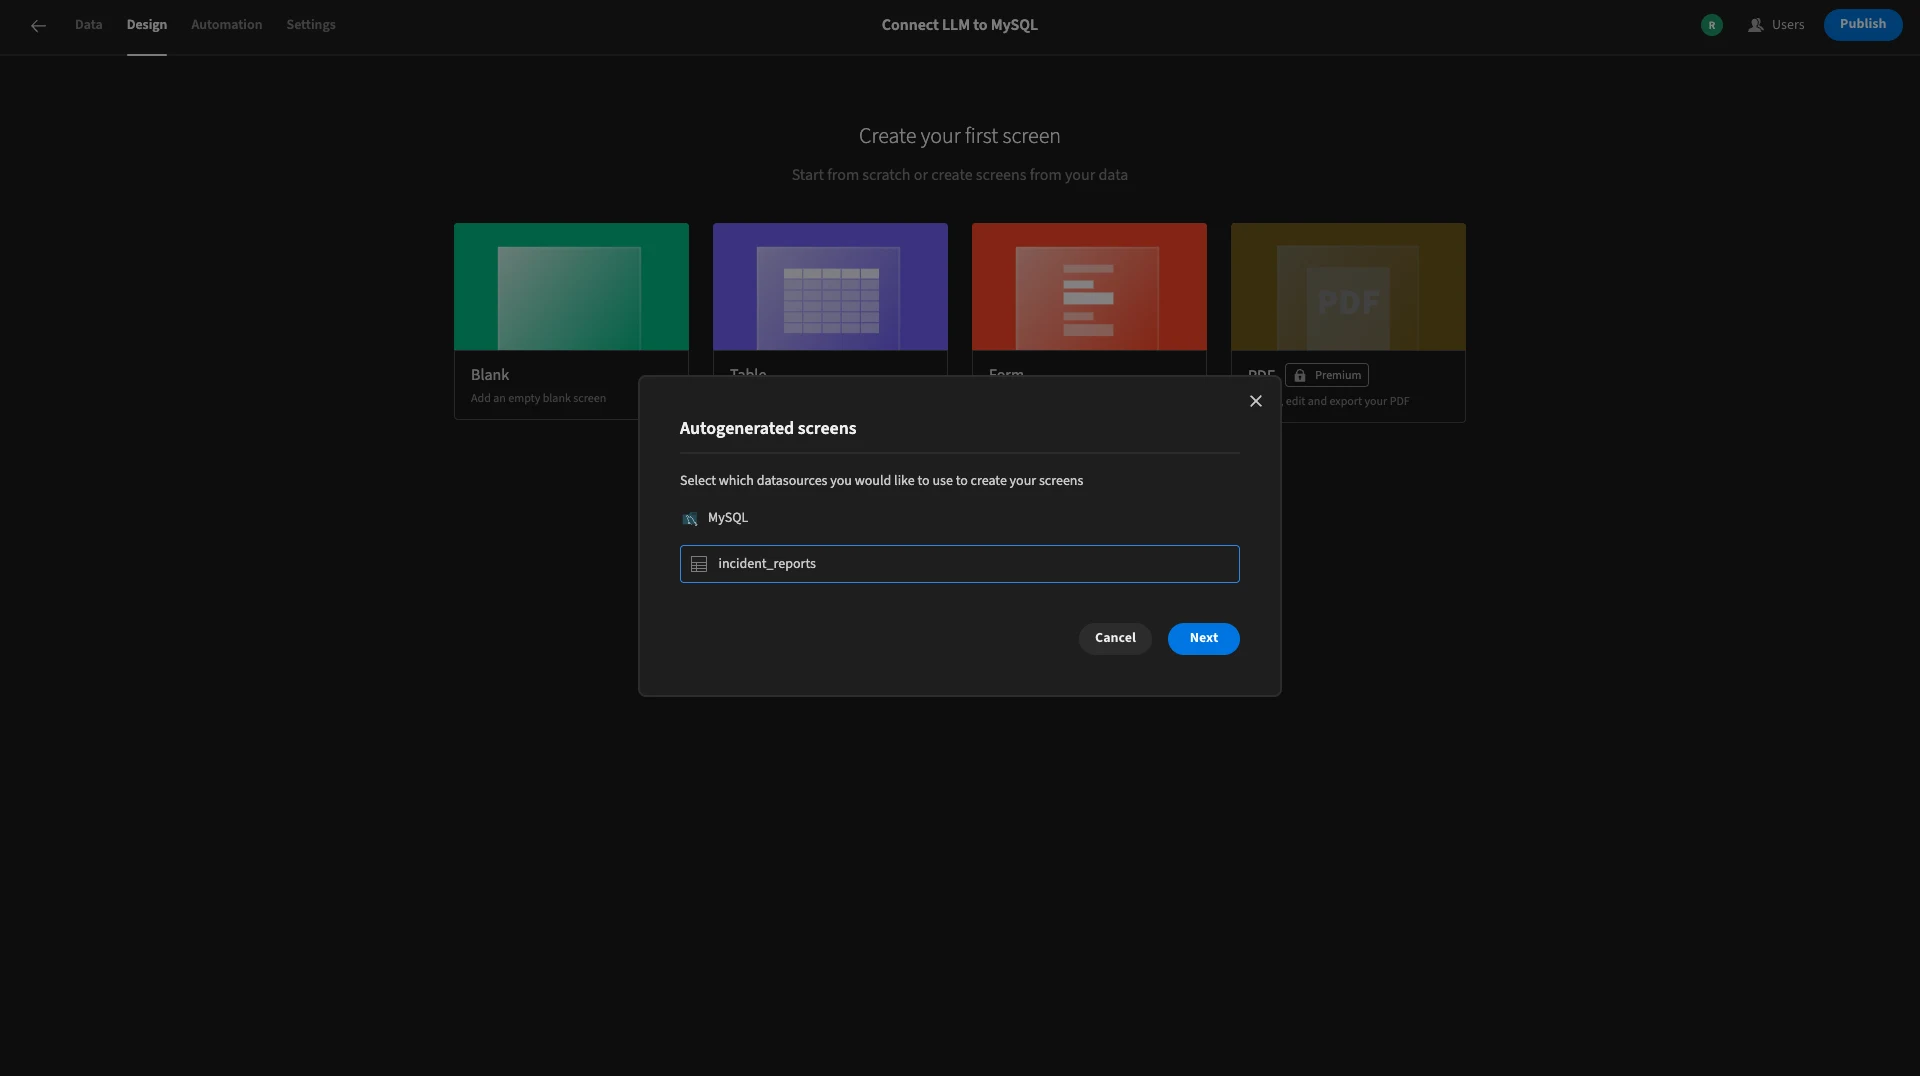
We can then choose which table we want to base this on.
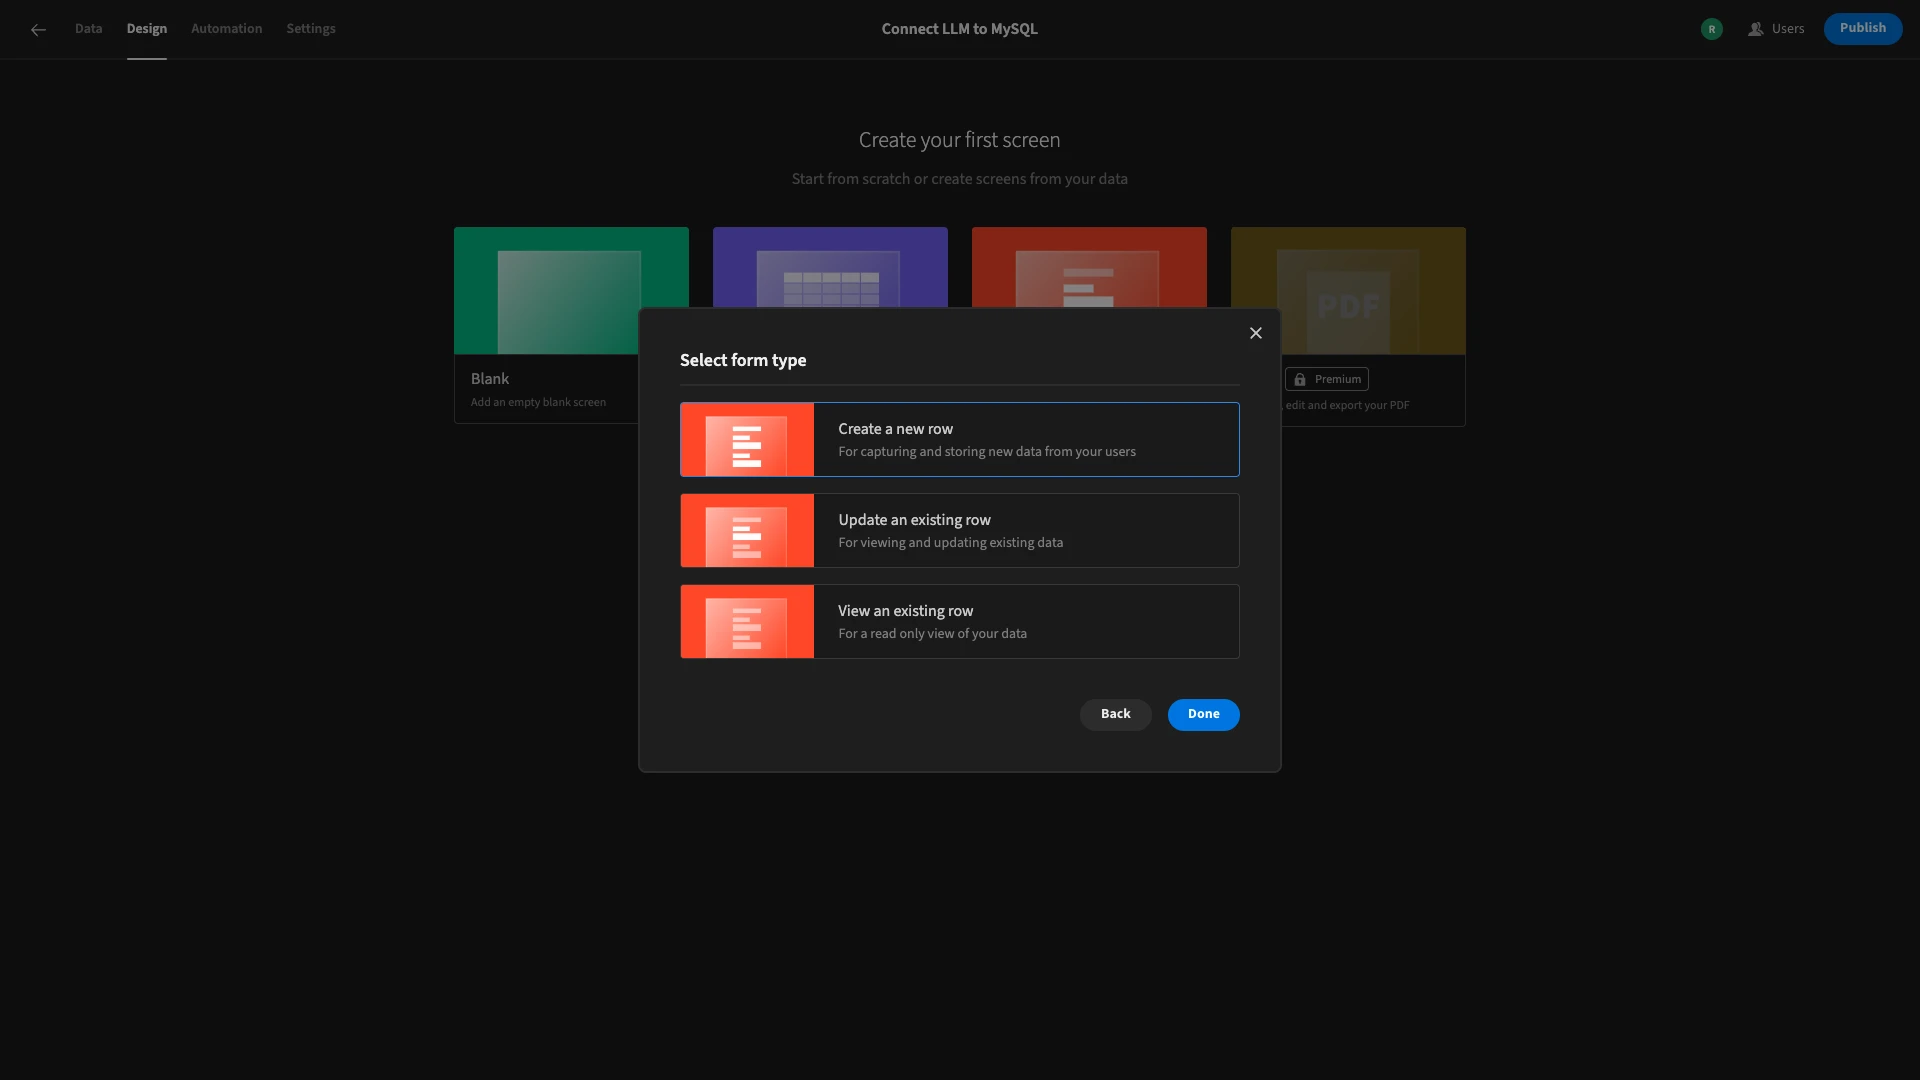
We also need to choose which database operation our form will perform. We want a form that will create a new row.
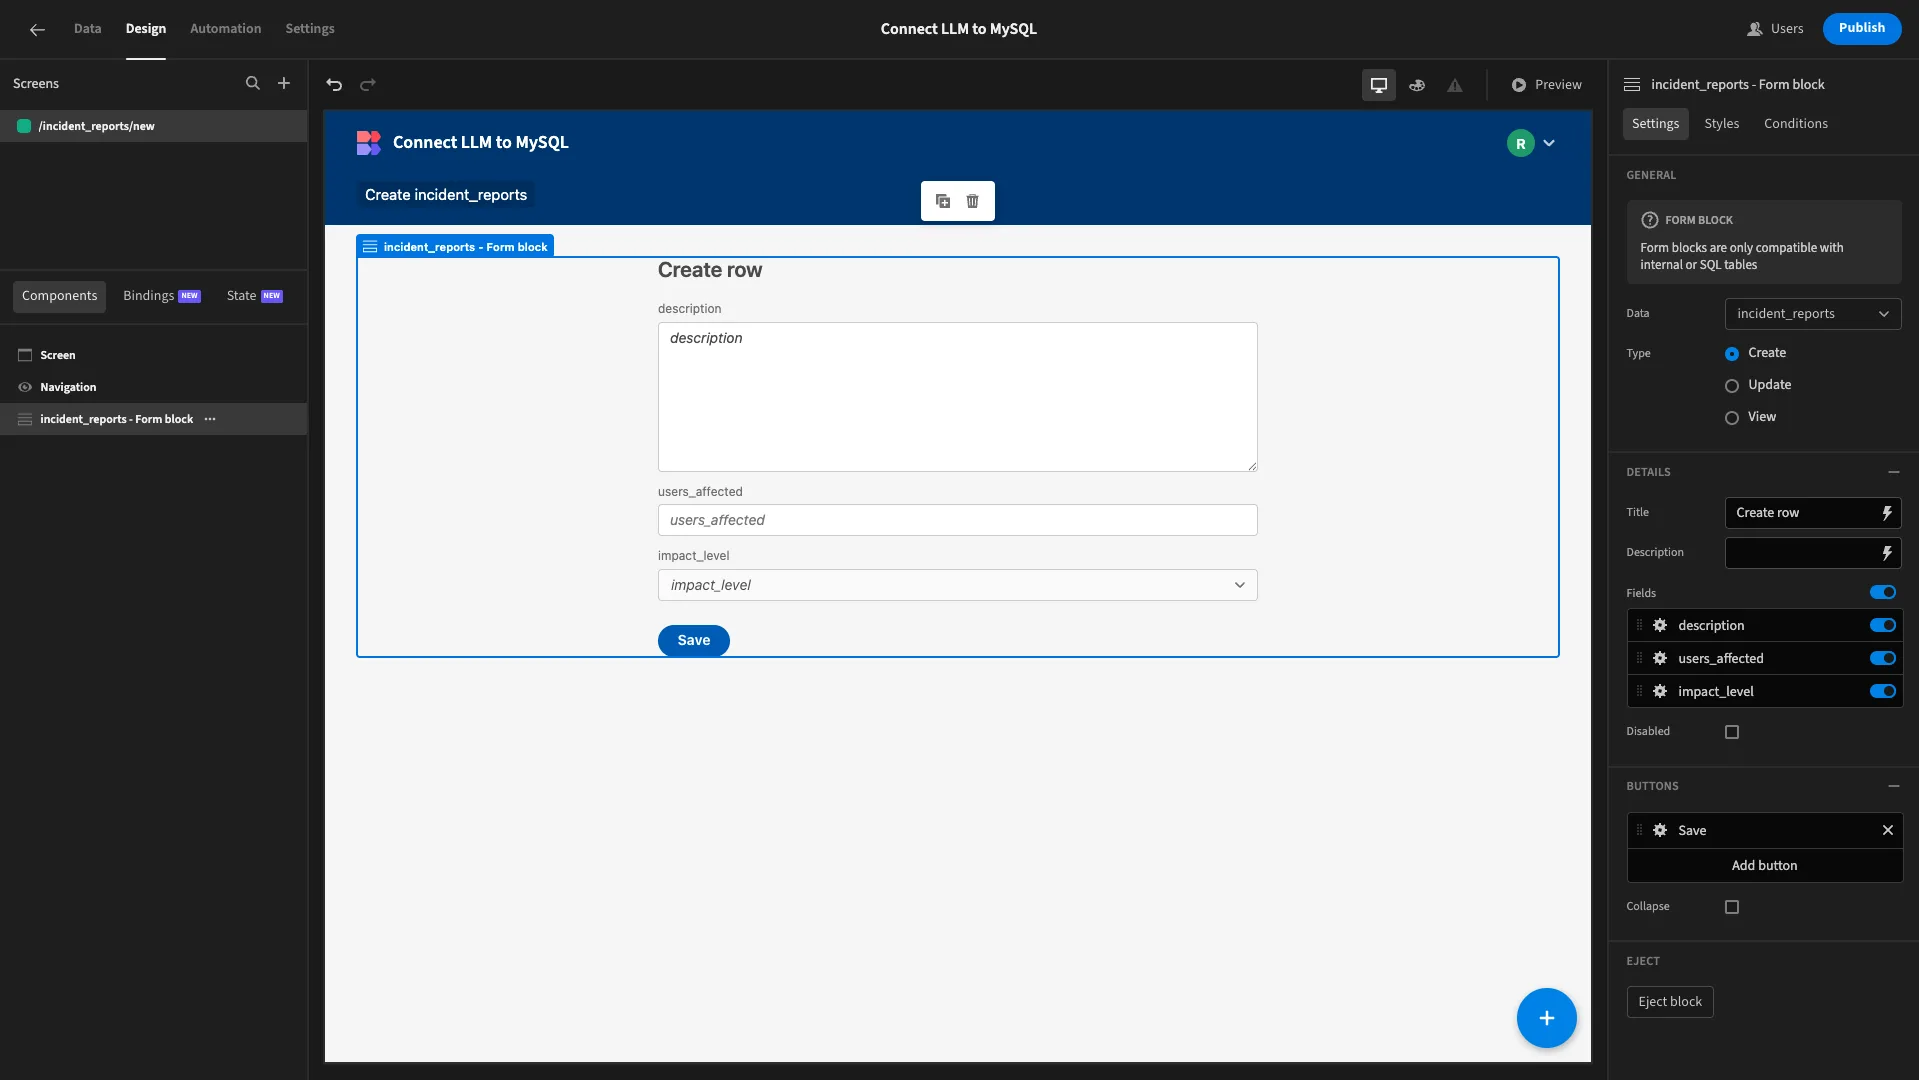
Here’s how this will look.
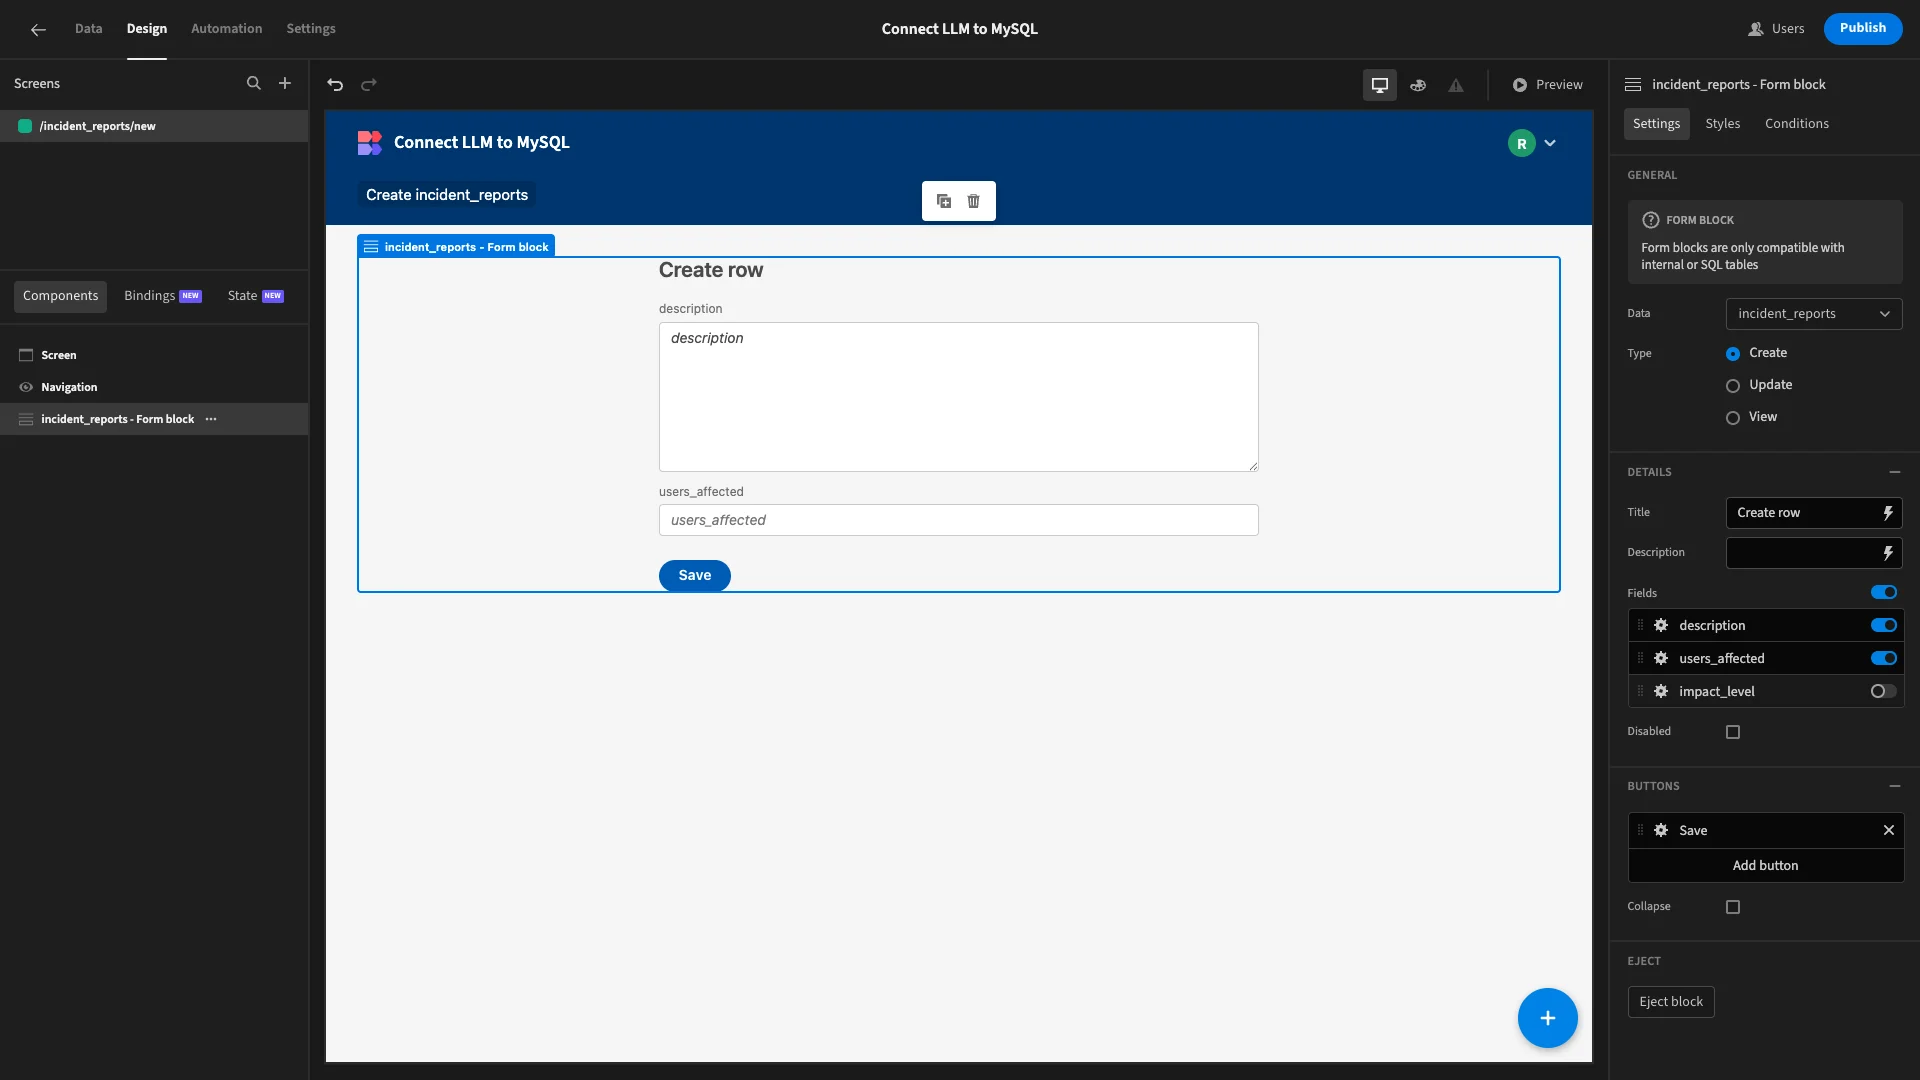
The first change we’ll make is to remove the impact_level field, as we don’t need users to provide this manually.
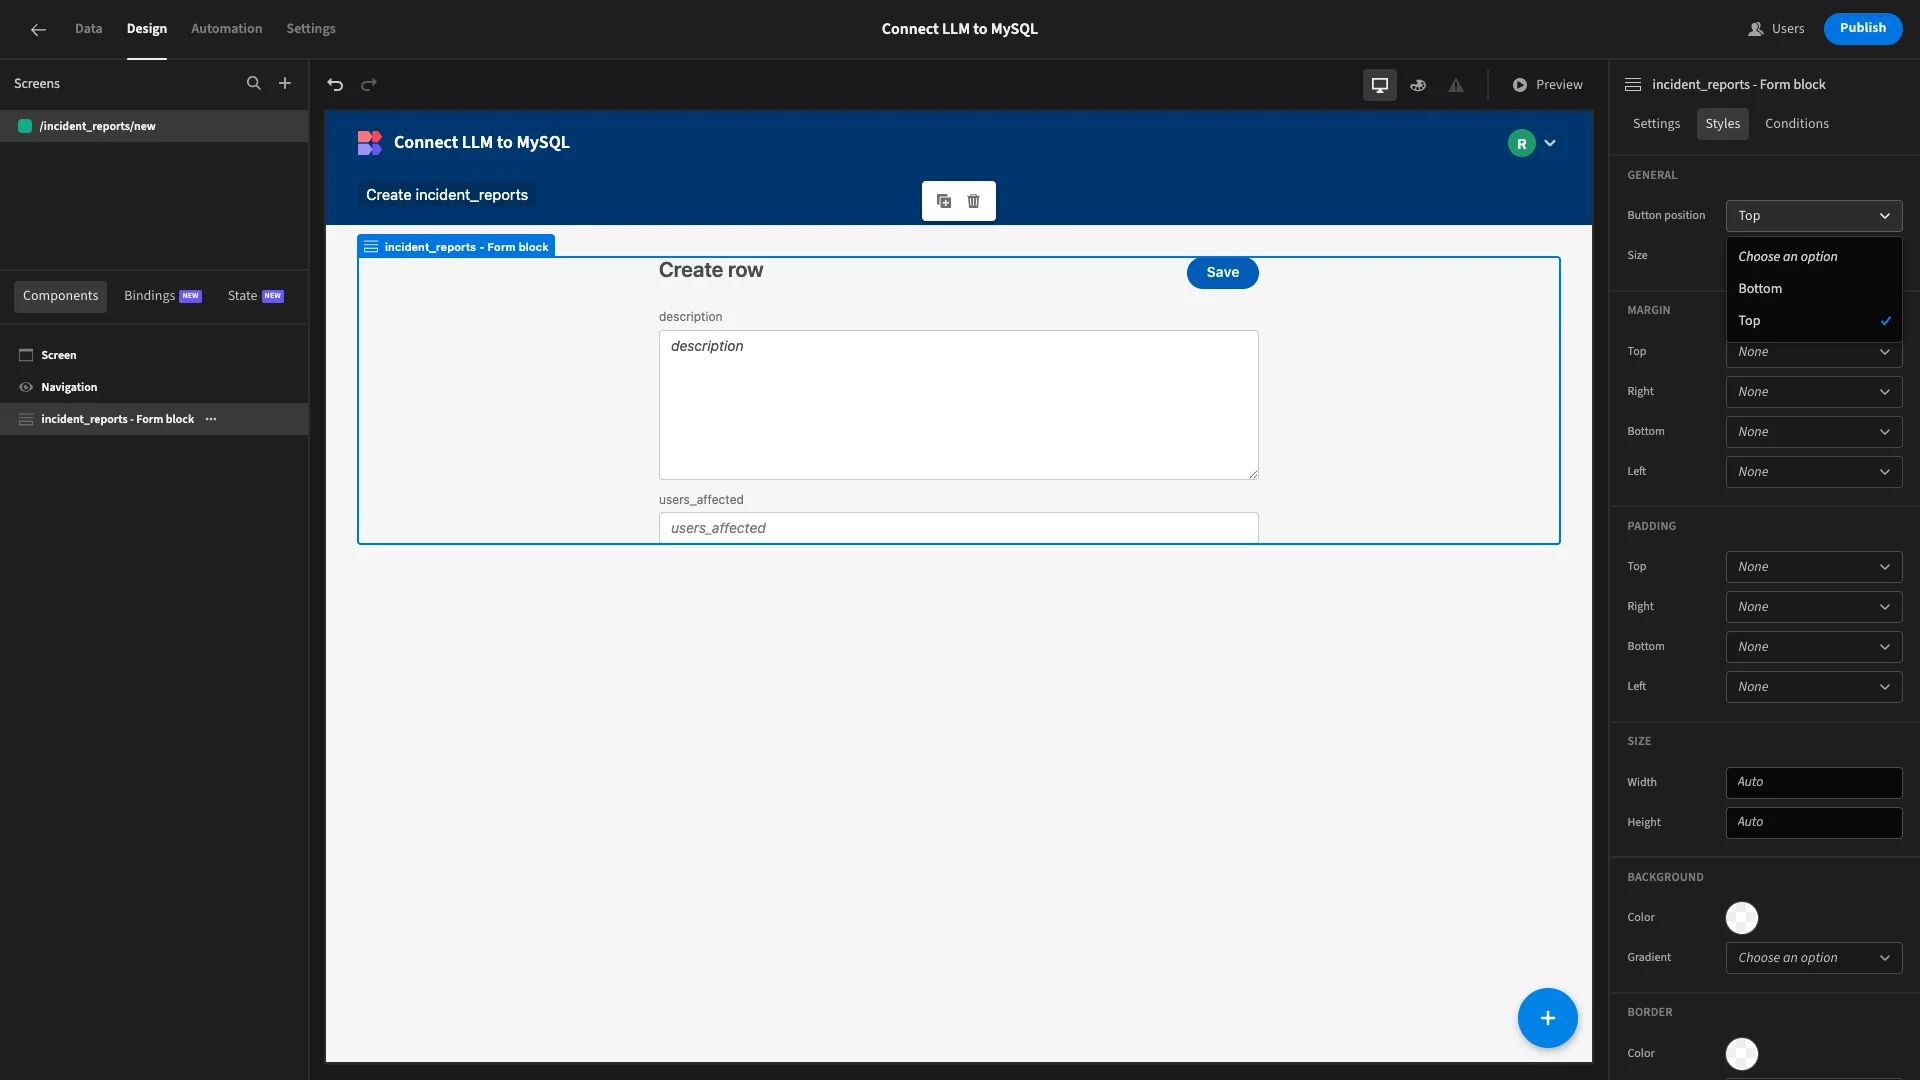
Under Styles, we’ll set our Button Position to Top.
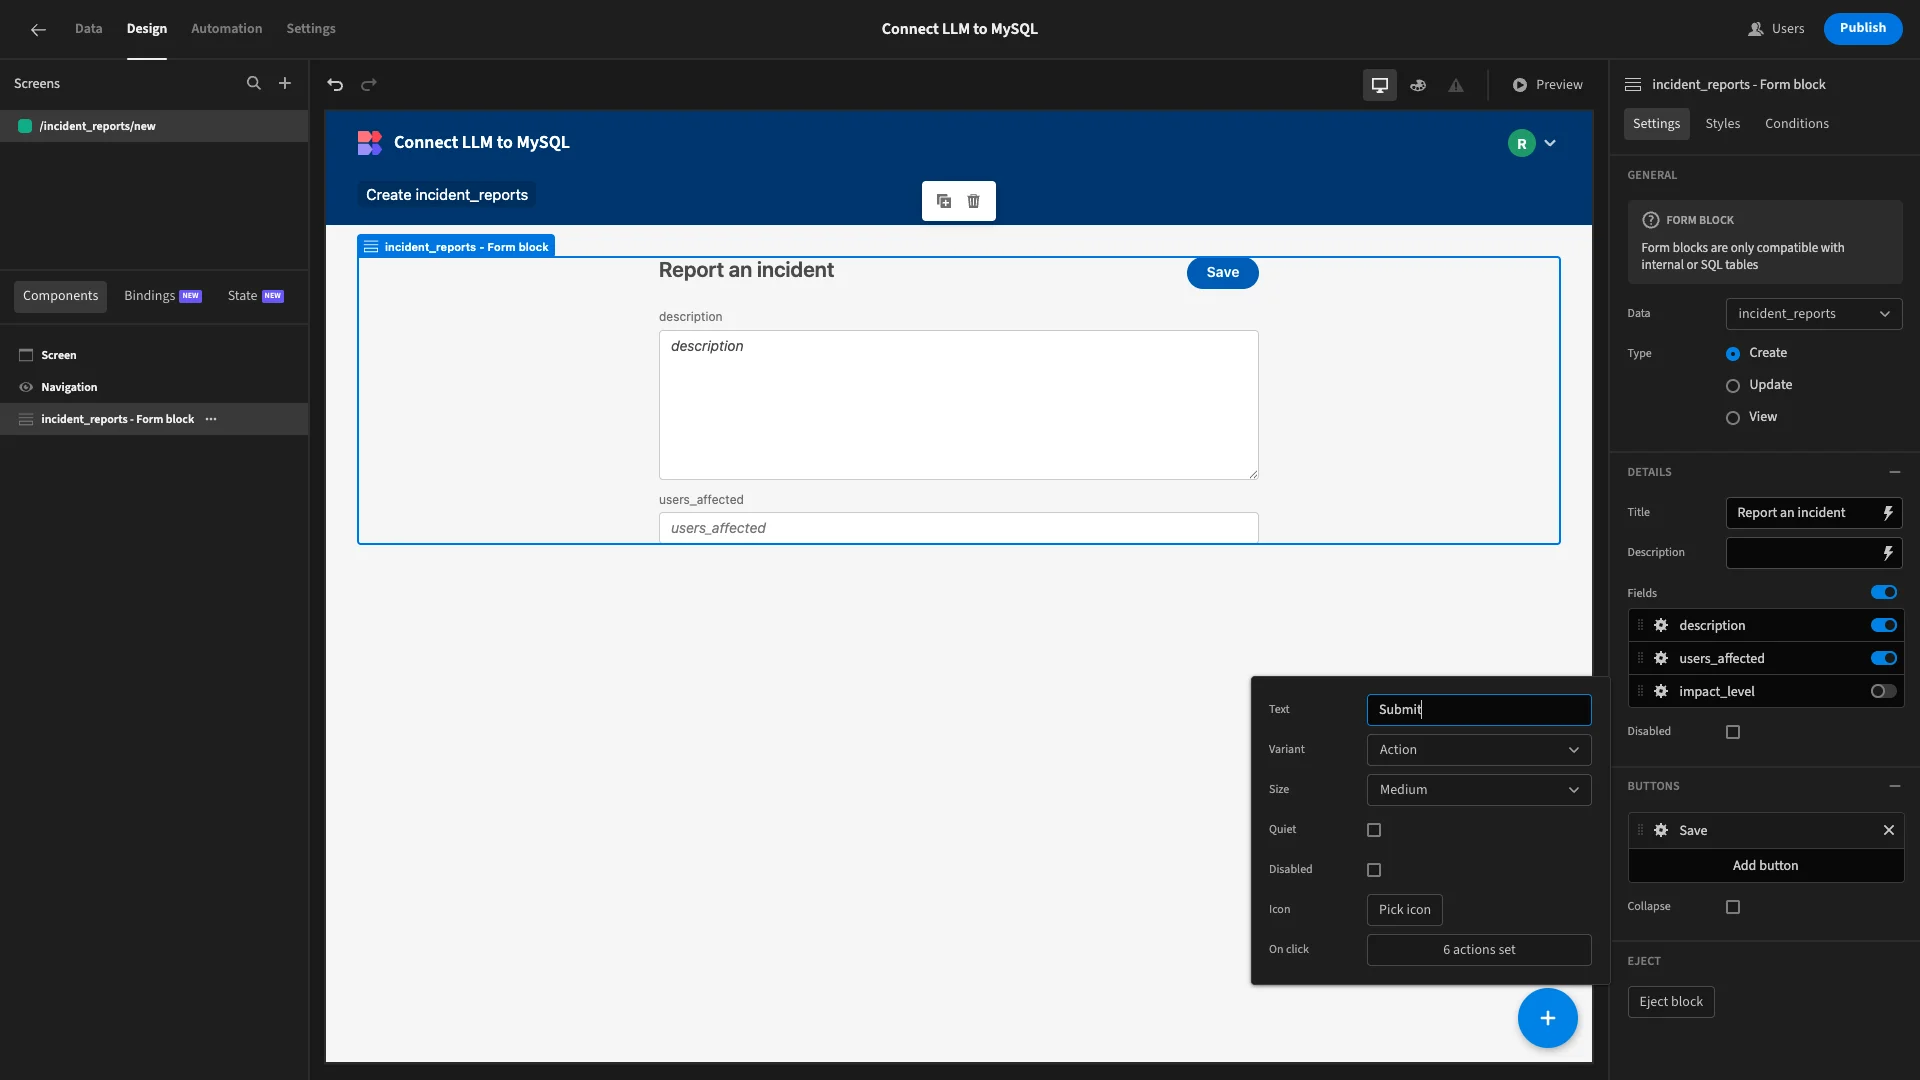
We’ll also make a few adjustments to our display text to make things a bit more user-friendly. Firstly, we’ll update our Title and Button Text.
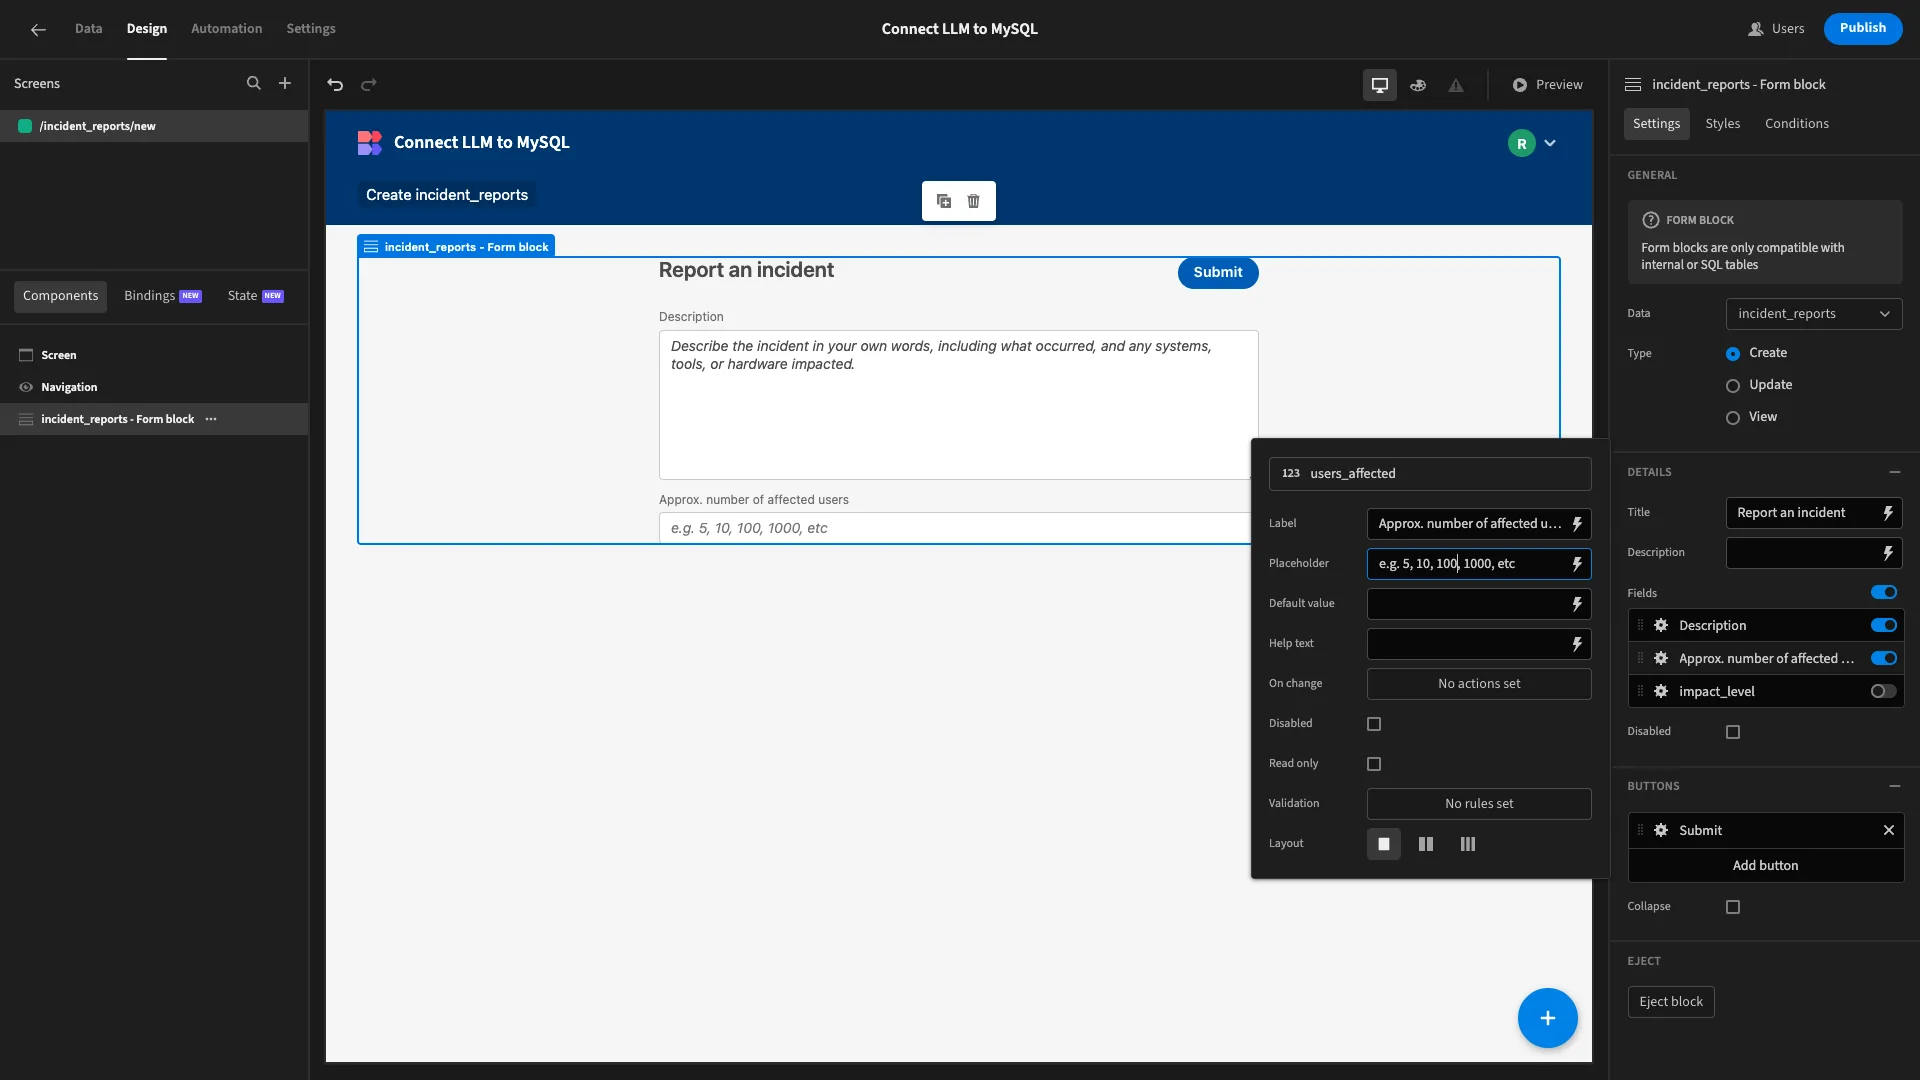
We’re also going to update the Label and Placeholder settings for each of our fields to better reflect the information we need users to provide.
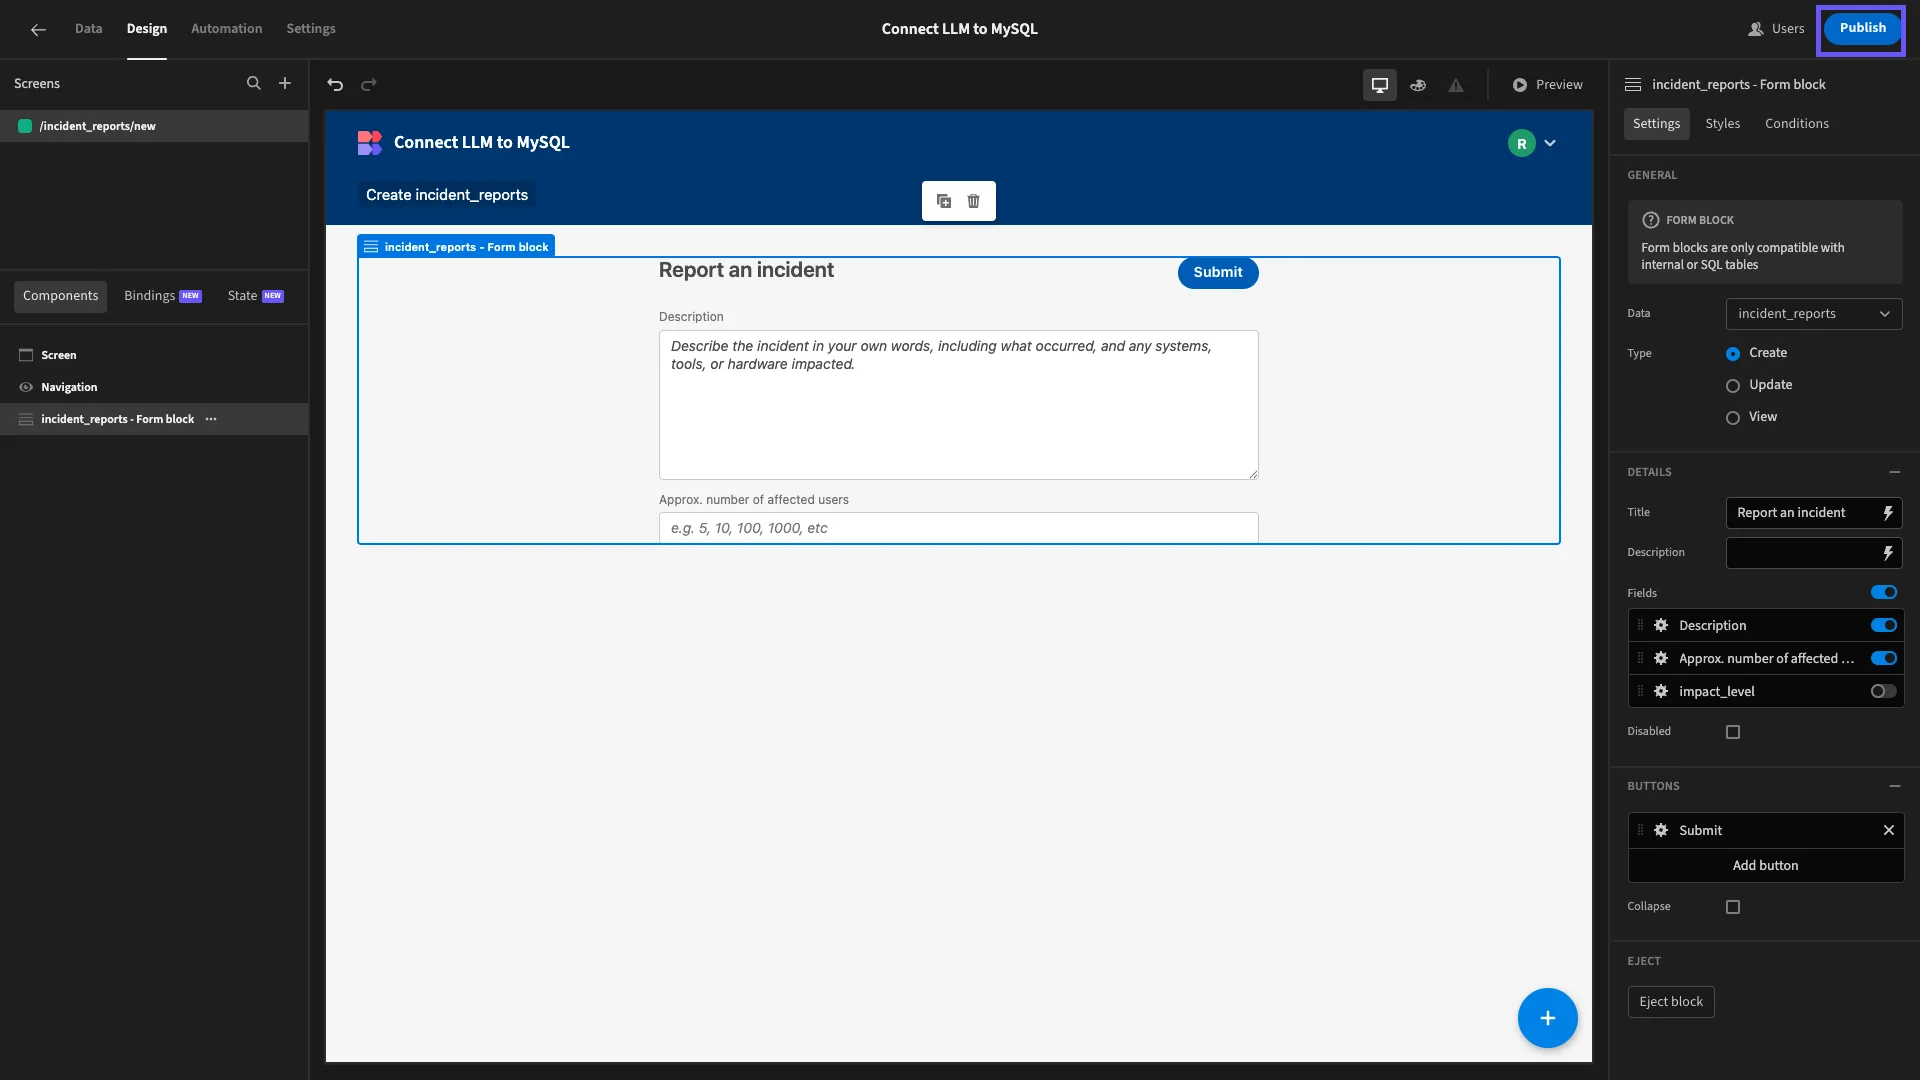
When we’re satisfied, we can hit Publish to push our app live.
Turn data into action with Budibase
Budibase is the open-source, low-code platform that empowers IT teams to turn data into action.
We offer leading connectivity for a huge range of LLMs, RDBMSs, NoSQL tools, APIs, and more, alongside autogenerated UIs, powerful visual automations, free SSO, option self-hosting, and custom RBAC.
There’s never been a better way to ship secure, performant workflow tools at pace. Take a look at our features overview to learn more.