How to Build Conditional Logic Forms + 5 Examples
Implementing conditional logic is one of the most common ways to make our form tools more effective. On the one hand, conditionality enhances user experiences. More importantly, though, it helps us to gather the right information - even when this varies from case to case.
Today, we’re checking out how Budibase makes building conditional logic forms a breeze.
Specifically, we’re going to look at how we can build five of the most common use cases for conditional forms using our open-source, low-code platform.
Even better, Budibase empowers teams to build advanced forms on top of just about any kind of data - whether it’s an API, RDMBS, NoSQL tool, spreadsheet, or our built-in database. So, we can apply the same principles to an almost limitless range of forms.
Let’s jump right in.
What are conditional logic forms?
Conditional logic means applying rules to determine how our app behaves. Most conditionality rules follow an “if/then” structure. So, if a particular condition is met, then something defined happens.
As you know, today, we’re specifically interested in how we can apply this principle to forms.
There are two broad types of conditional logic forms we need to consider:
- Forms where conditions affect the design and UI.
- Forms where conditions affect the functionality.
In other words, we can use conditional logic to control how our form looks - or what happens when users interact with it.
The most common example of conditional forms is what’s called “branching logic”.
Basically, this is when a form displays different fields to a user based on their previous answers.
With most traditional form builder tools, this is the limit of what can be achieved using conditional logic.
With Budibase, we can achieve so much more. You might also like our guide to web application development .
How to build forms with conditional logic
Before we dive into some practical examples, it’s worth going a bit deeper into the two key elements of a conditional form. That is, the condition itself and what we want our form to do when this is met.
Conditions
Conditions are the “if” part of our “if/then” statements. In computing terms, this is a statement that we define and then evaluate. If this evaluates to true, then we’ll carry out whichever action we’ve set.
In the case of conditional logic forms, this can be based on a number of different kinds of variables, including:
- Responses to the form itself.
- User attributes.
- Access control rules.
- Contextual factors.
- System variables and other more advanced conditions.
We might even build very complex rules based on a combination of these factors.
In Budibase, each form component has its own dedicated configuration section for building conditionality rules.
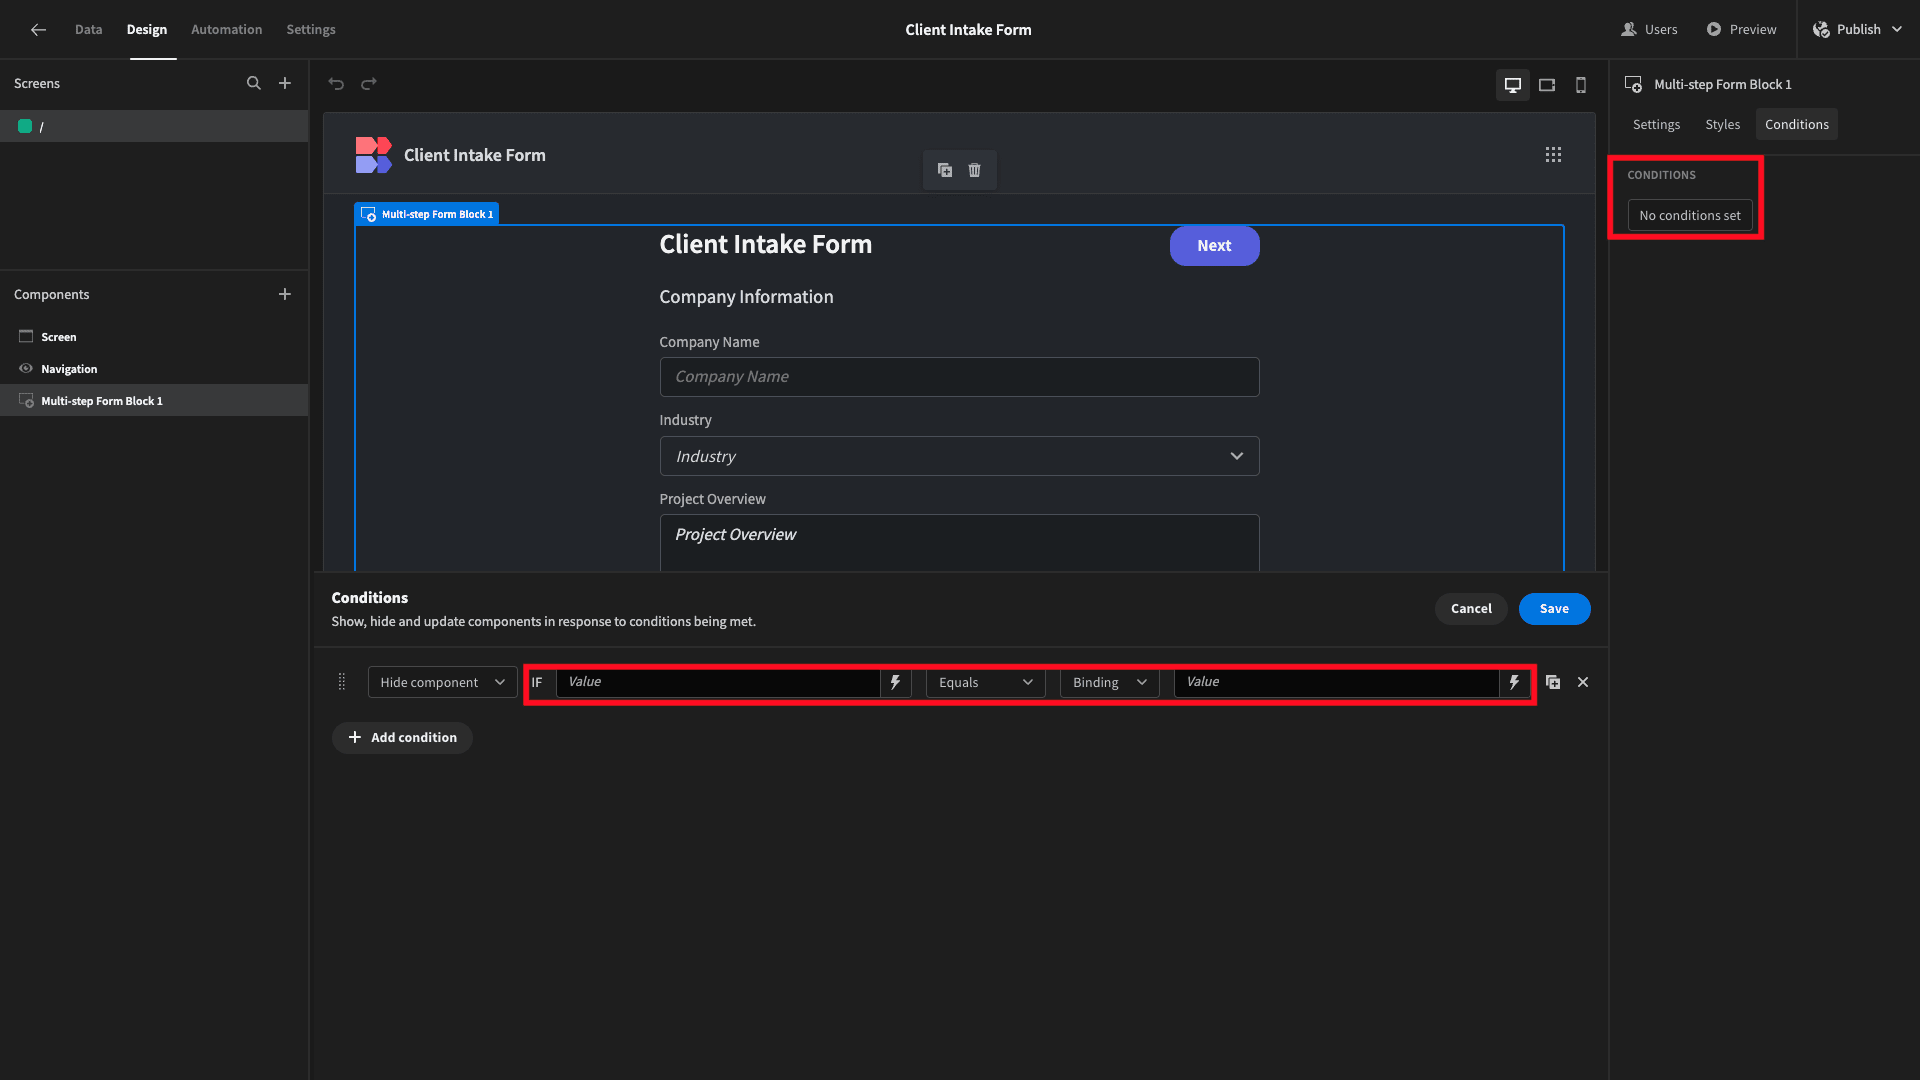
To create a condition, we need three things:
- A reference value,
- An operator,
- A comparison value.
So, we might have an expression along the lines of If X equals Y… or If A is greater than B...
With Budibase, we have two ways of setting reference and comparison values:
- Providing static values as regular text expressions.
- Creating dynamic values by adding bindable JavaScript or Handlebars expressions.
When we bind values, we can access a range of variables relating to the current user, their device, the environment, user roles, system variables, and values from any data source a particular component is exposed to:
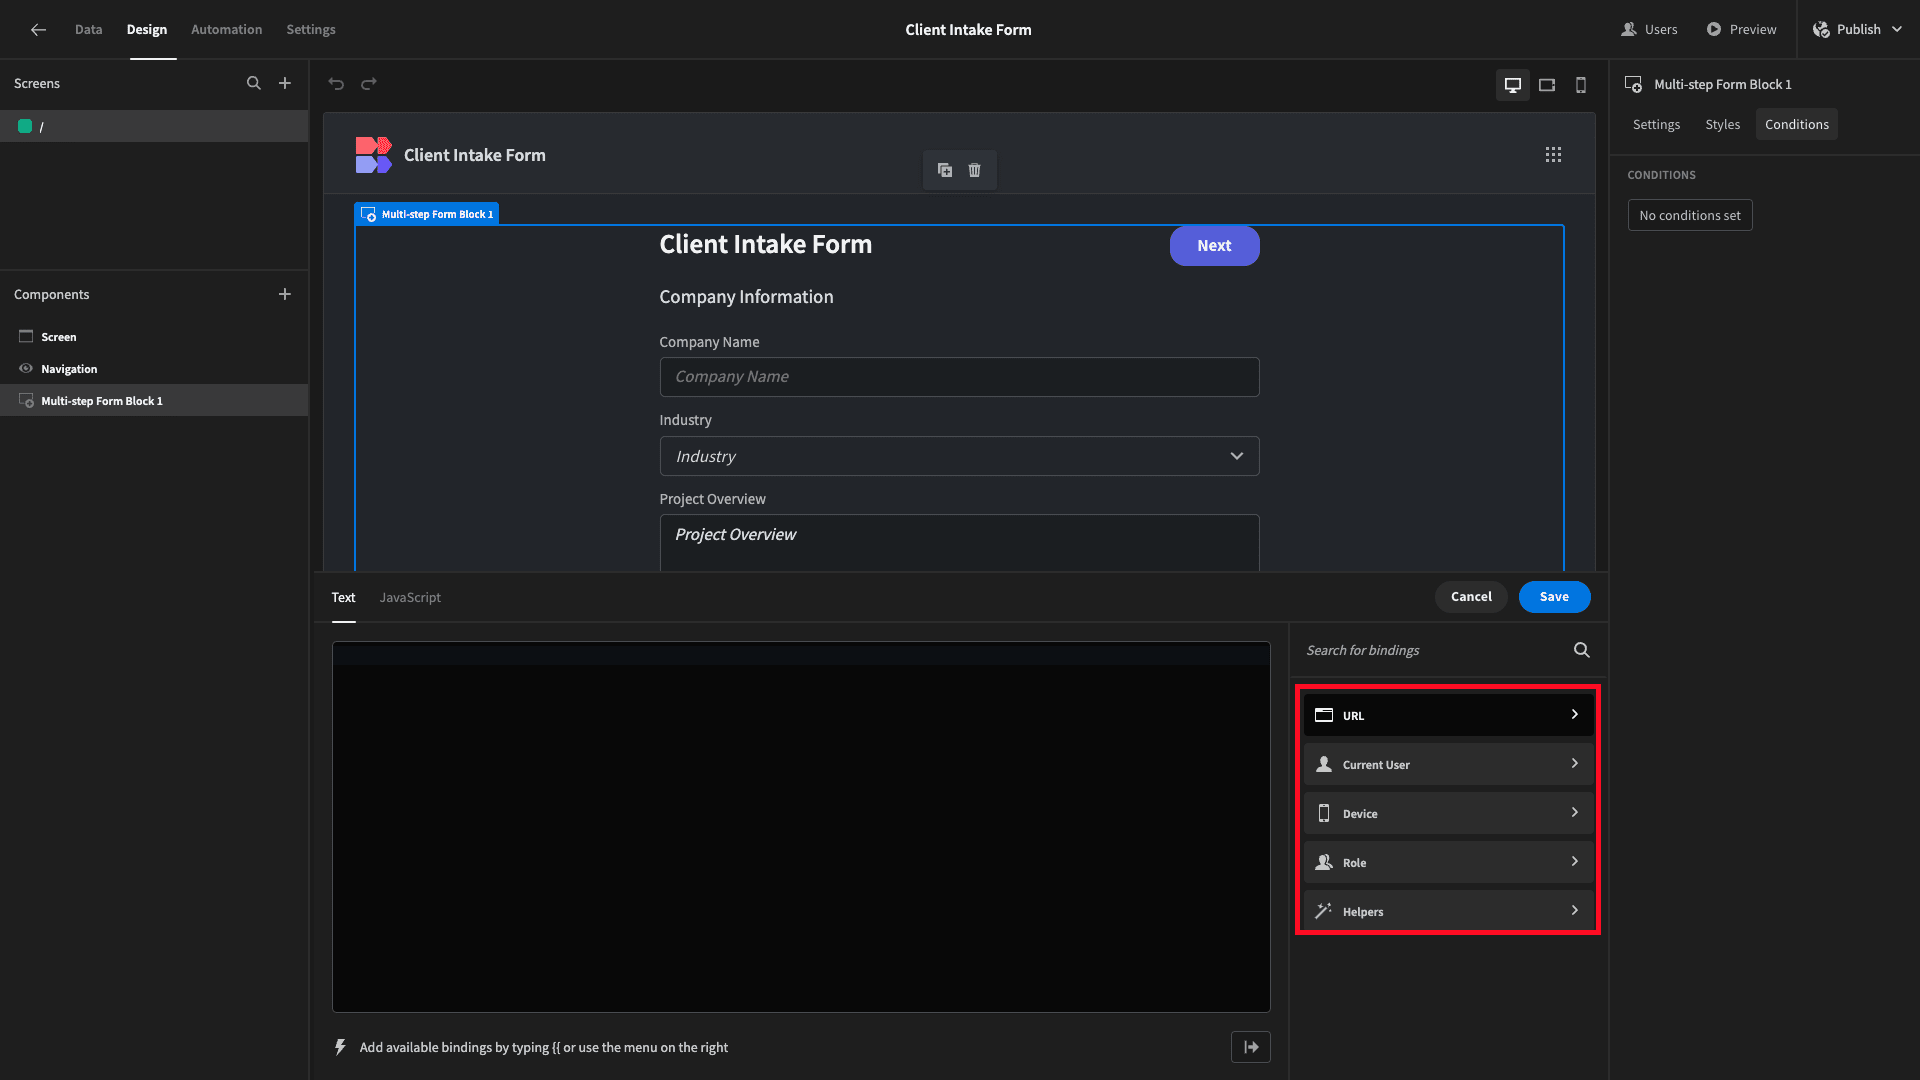
We can either use these as they are or within more complex custom expressions.
You might also like our guide to building dynamic forms
Outcomes
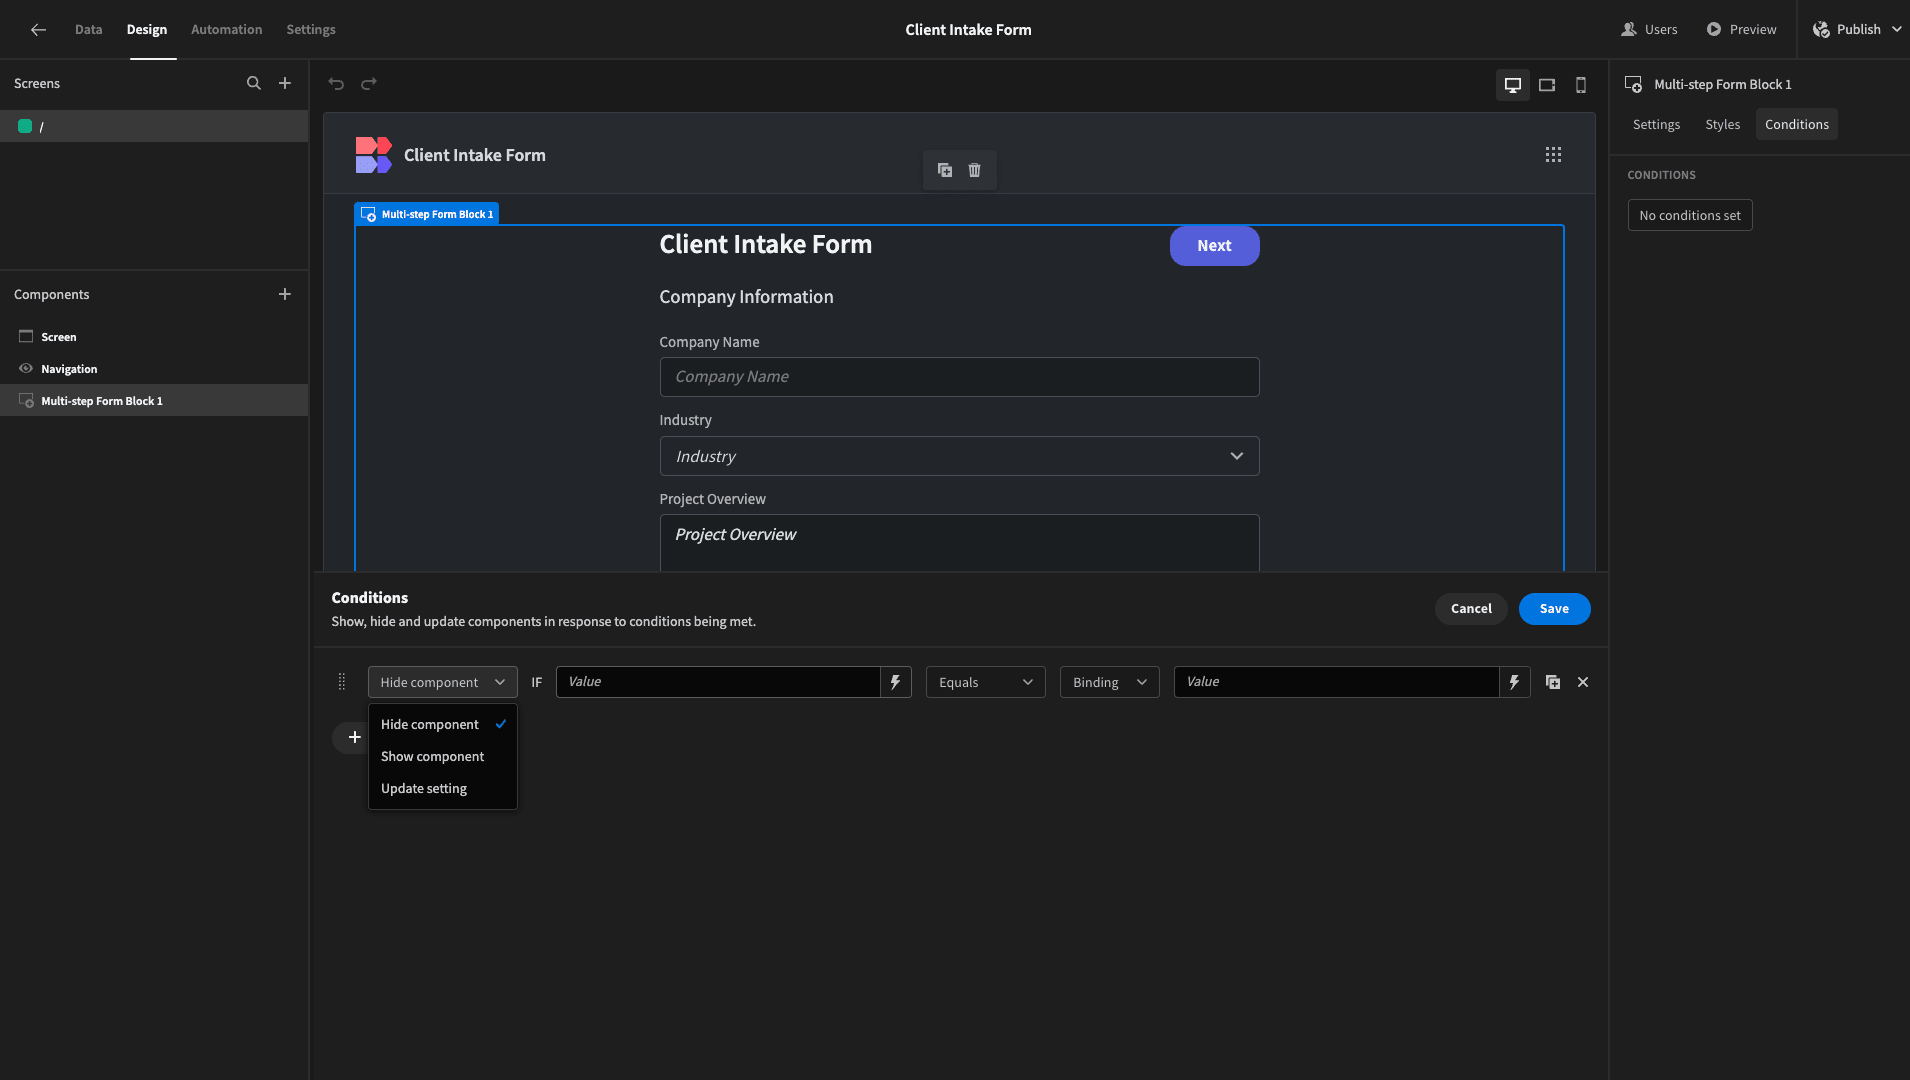
Outcomes are what we do when our condition evaluates to true. Within Budibase, we have three options here:
- Hiding the component,
- Displaying the component,
- Updating a component setting.
The first two are fairly self-explanatory.
We can use conditionality rules to update any setting that’s configurable for a particular type of component - including design and functionality.
For example, with individual form fields, we can update their default text or the space they occupy on the screen. For buttons, we can update the actions that are carried out when pressed - or simply update their color.
Within Budibase, we can select from these various options using simple dropdown selectors:
Building 5 types of conditional forms in Budibase
Now that we’ve seen the basics of how we can build conditional logic forms in Budibase let’s apply this to some real-world use cases.
Specifically, we’re going to focus on five of the most illustrative kinds of conditions we can create.
Here goes!
1. Rules based on other form fields
The type of conditionality you’re most likely familiar with already involves dynamically displaying certain form fields based on a user’s other answers.
For example, our form might contain fields that are only applicable in certain situations. If they aren’t applicable, we want to hide them for the sleekest possible UX.
Let’s check out an example of how we’d achieve this in the real world.
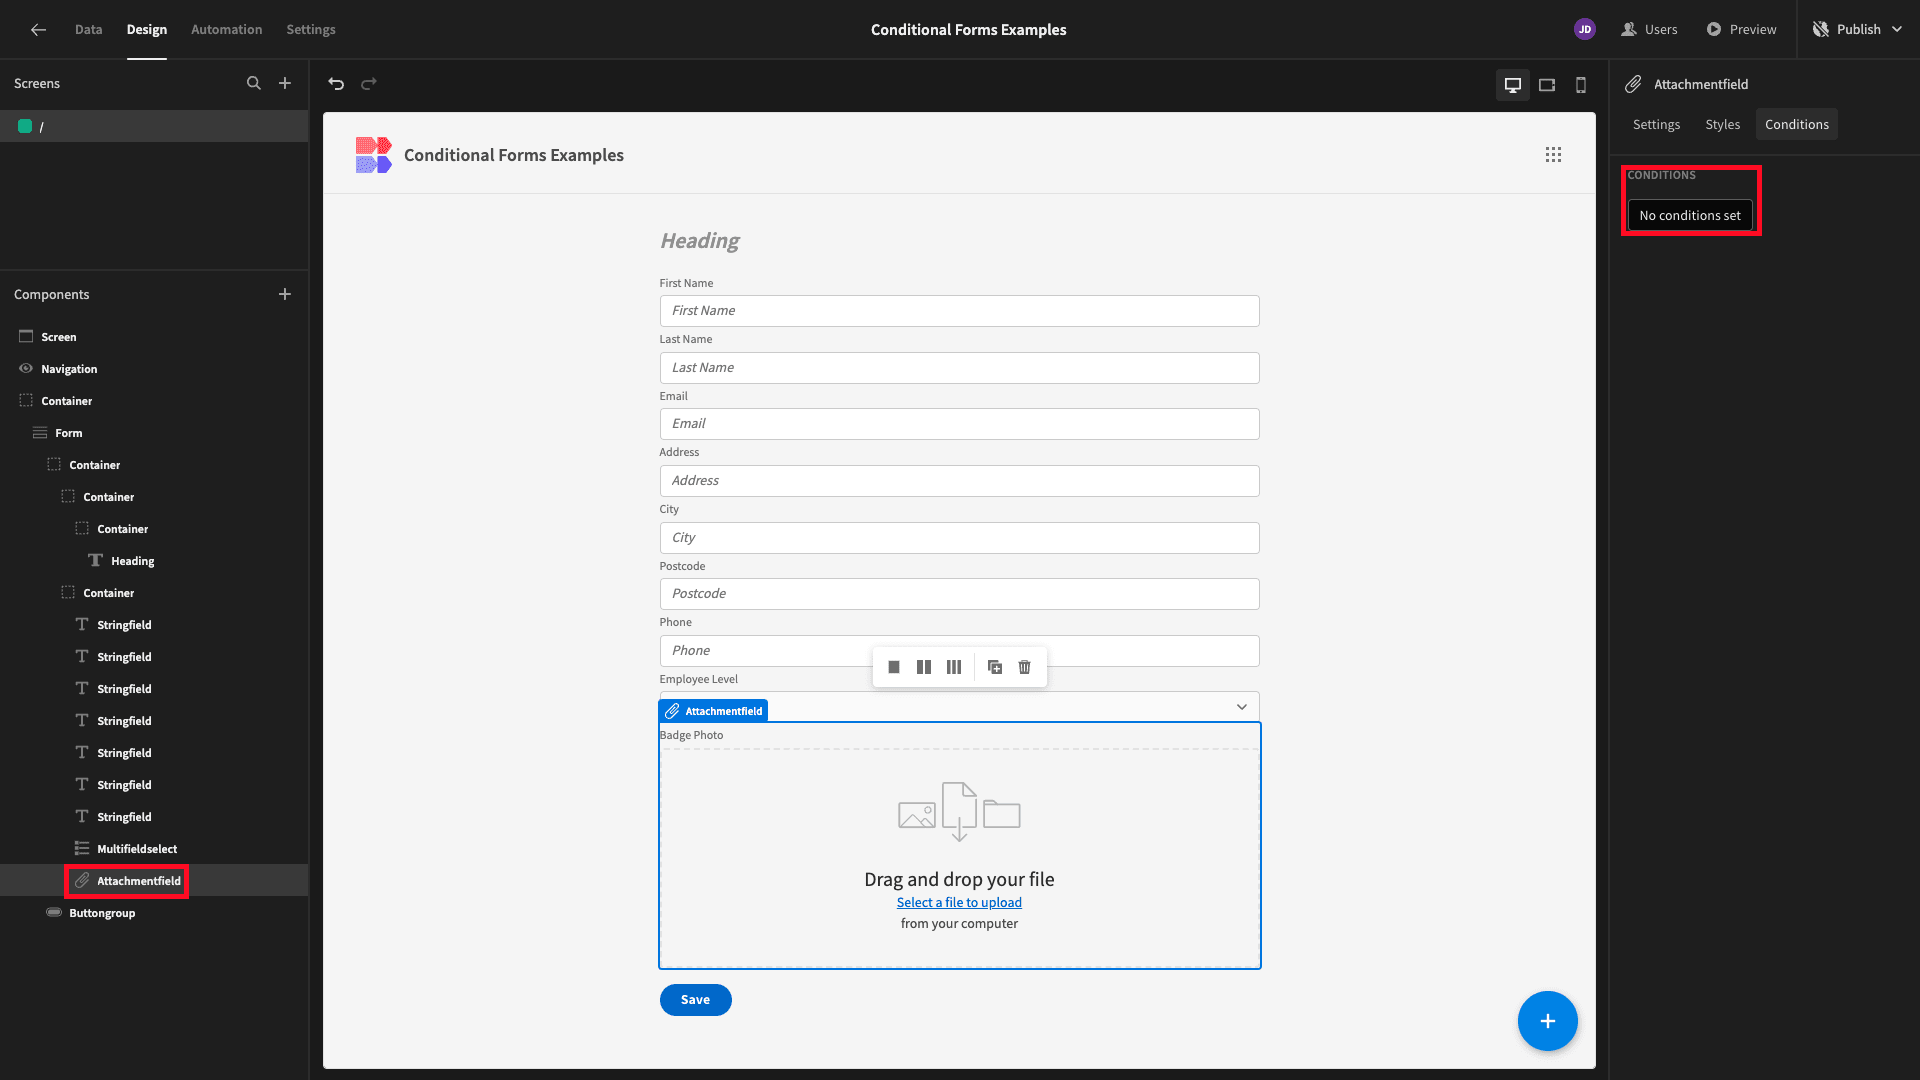
We’ve got a form for inputting a new employee’s information:
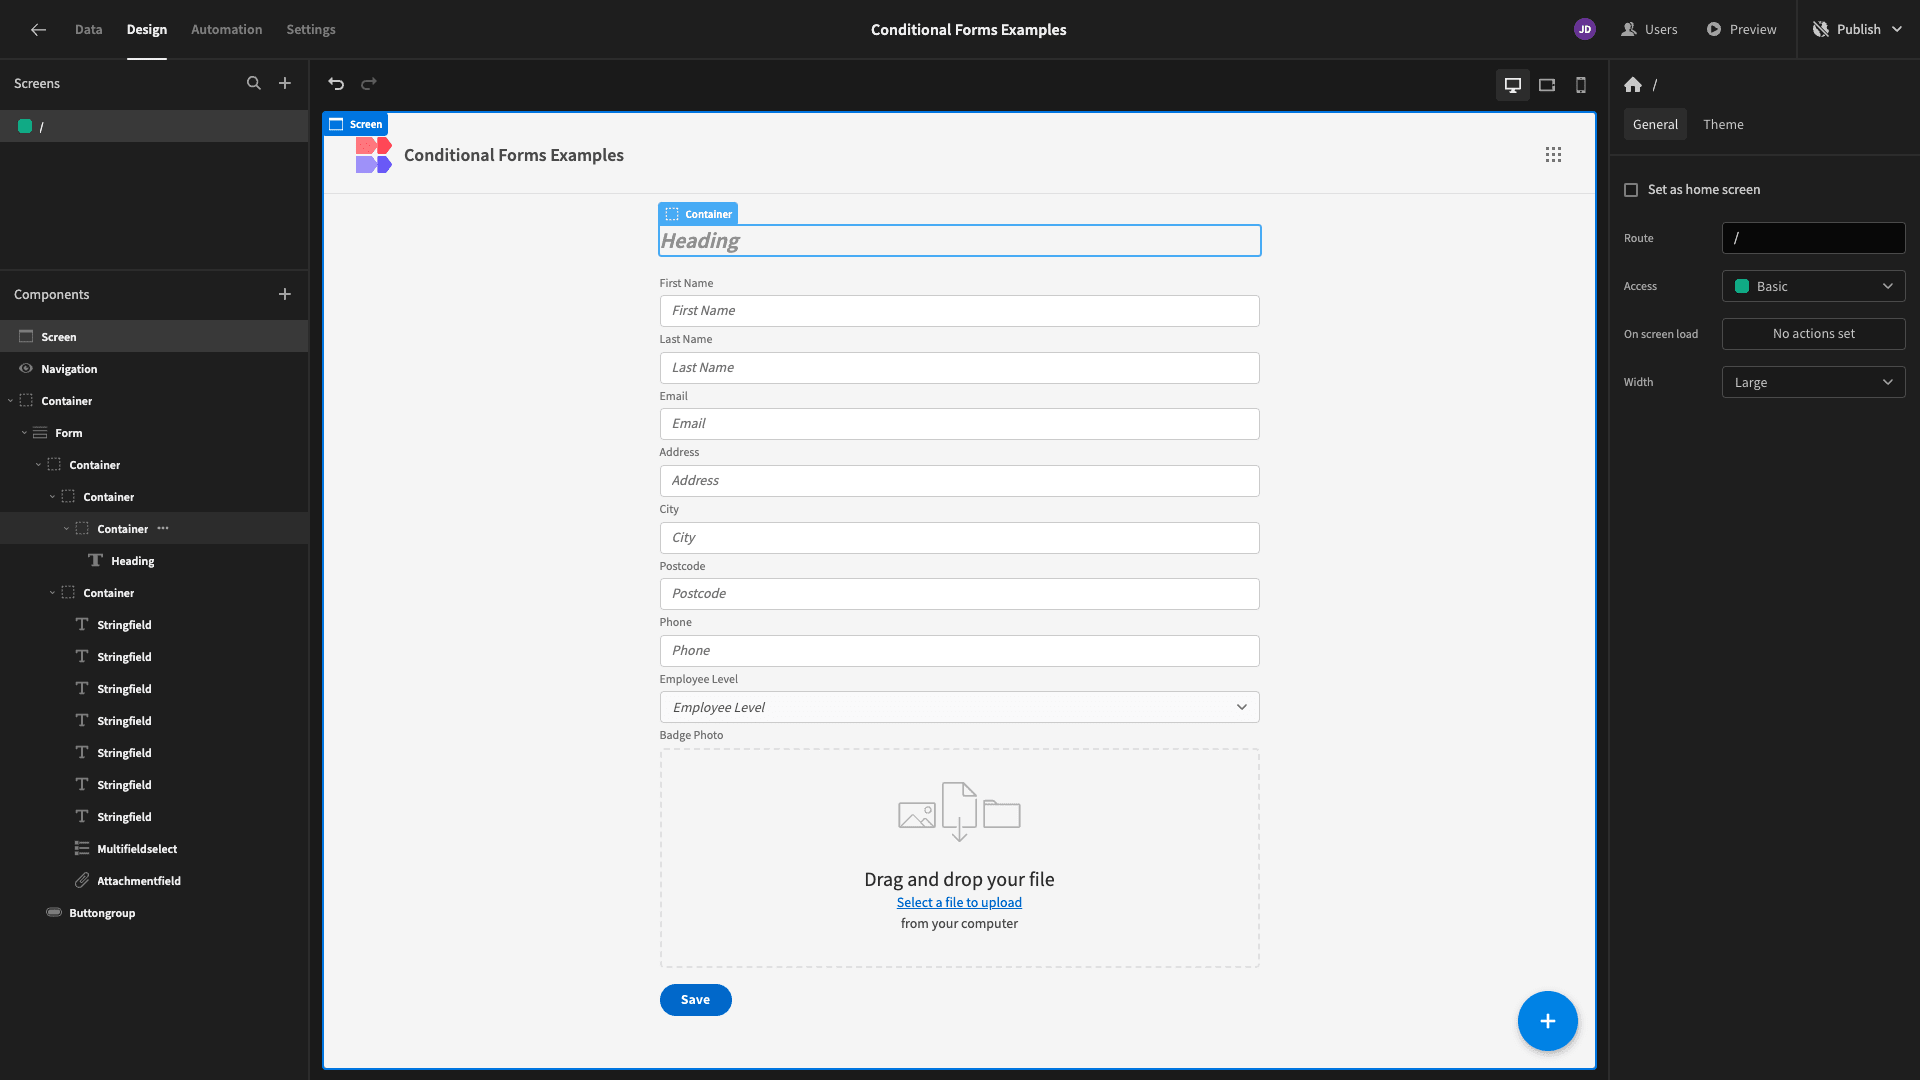
The last two fields are an options picker called Employee Level and a file upload field called Badge Photo. The options for Employee Level are Apprentice, Contractor, Junior, Manager, and Senior.
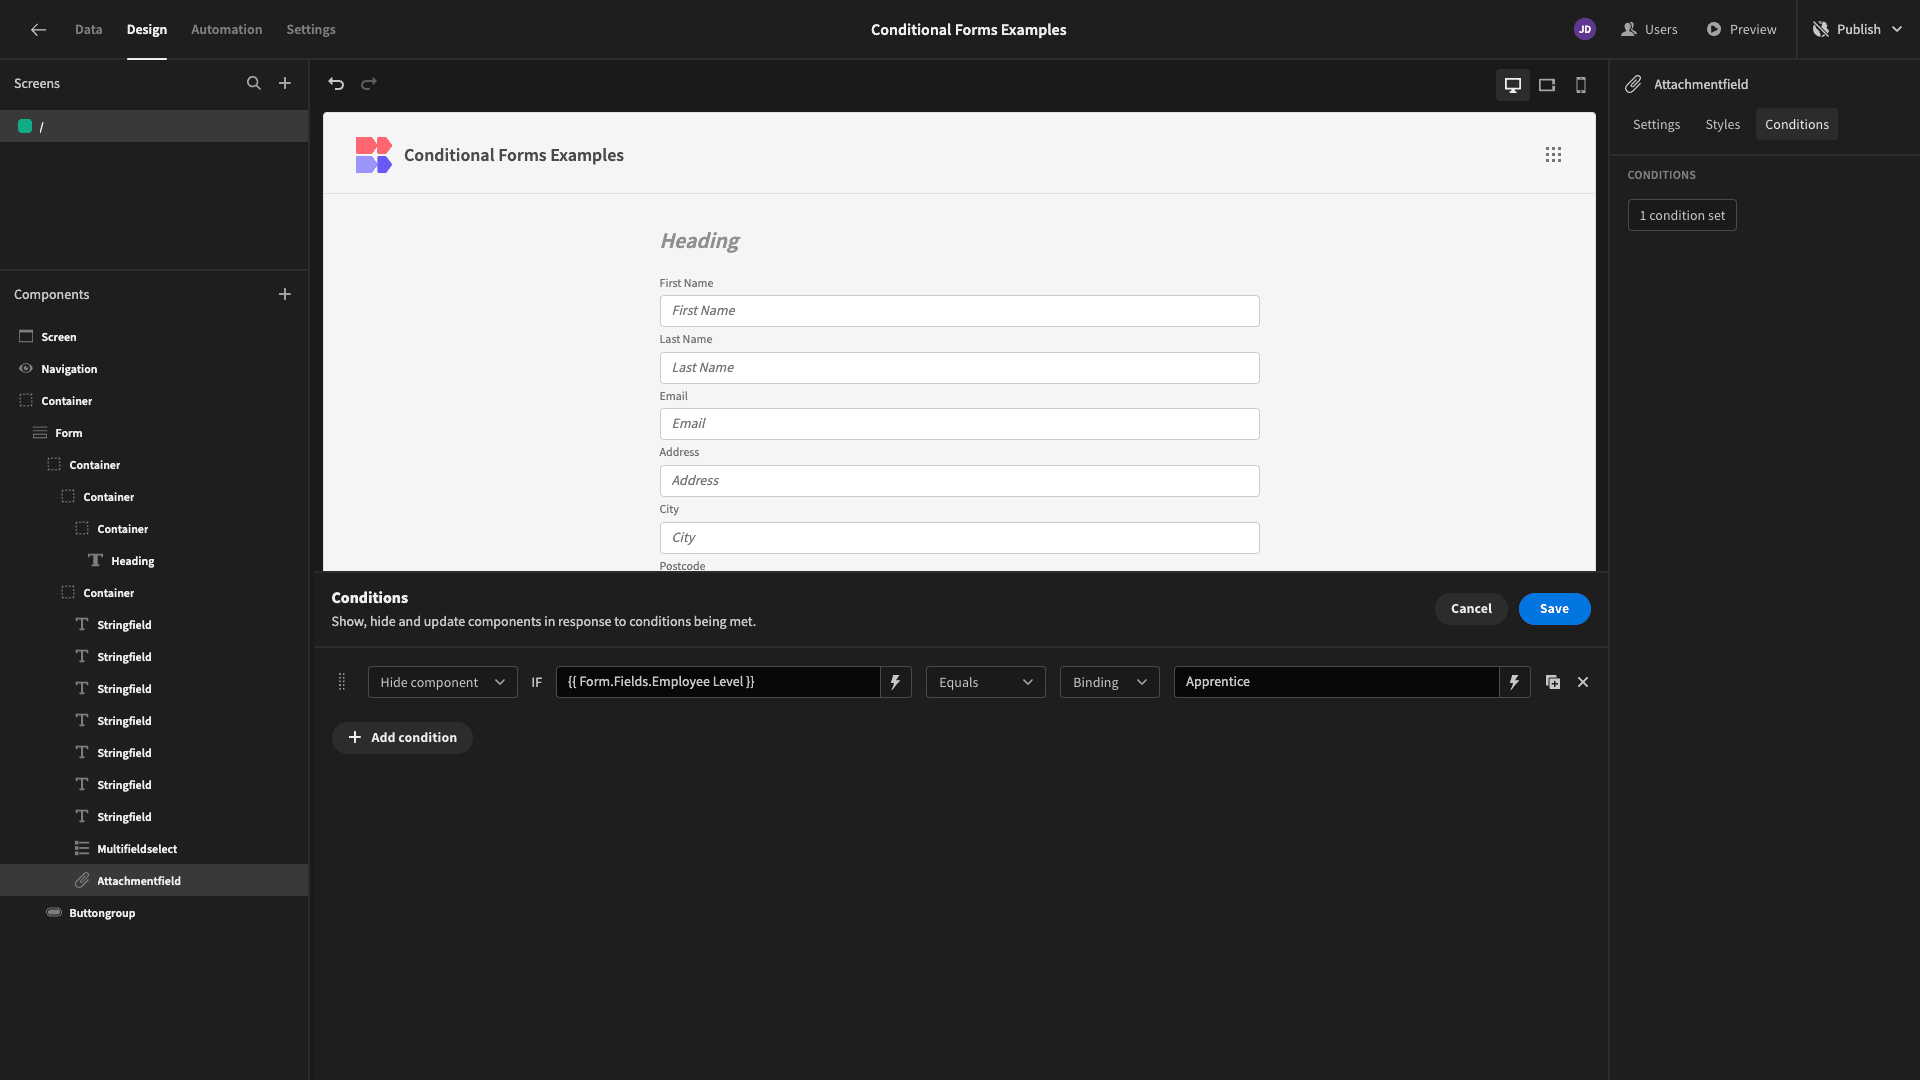
Let’s say our internal policy is that we don’t put photos on apprentice’s badges since they’re only temporary employees. So, we want to create some conditional logic to hide the Badge Photo field for apprentices.
We’ll start by selecting this field and opening the bindings drawer:
Here’s what this looks like.
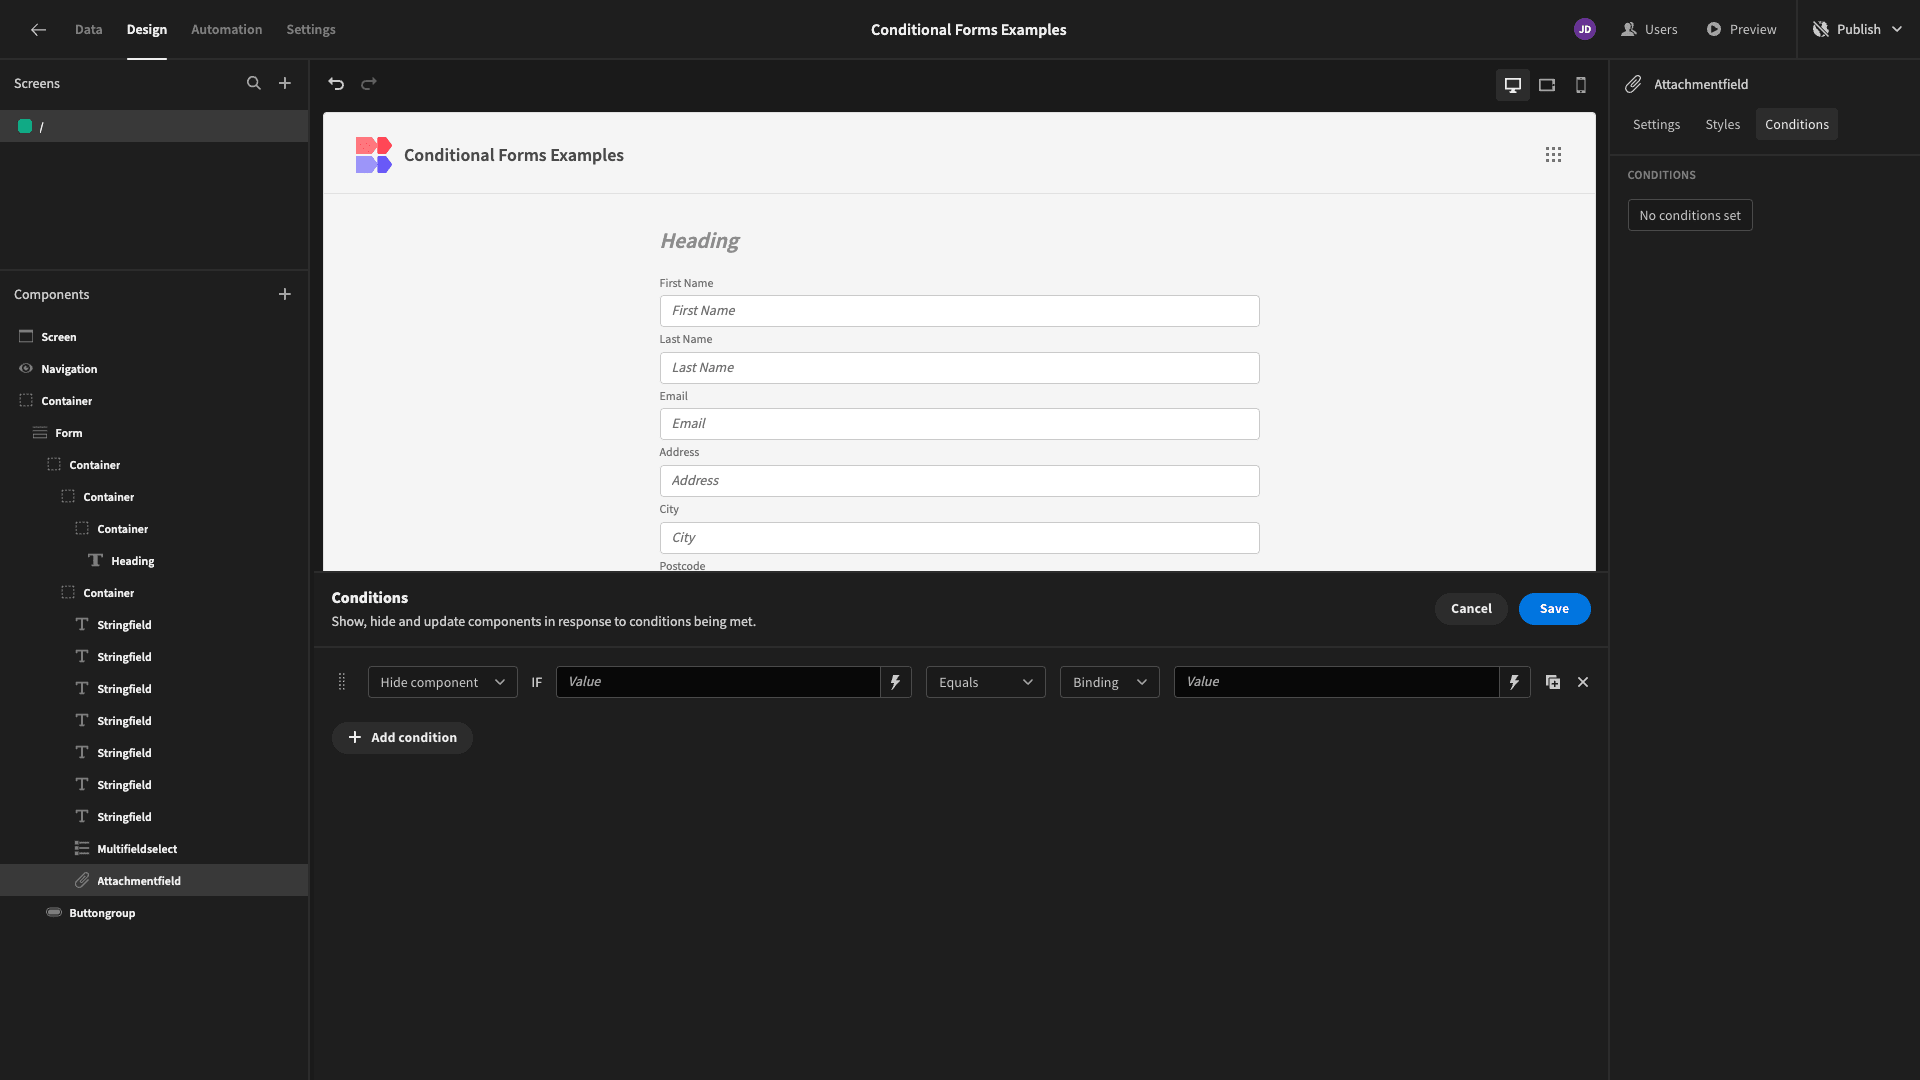
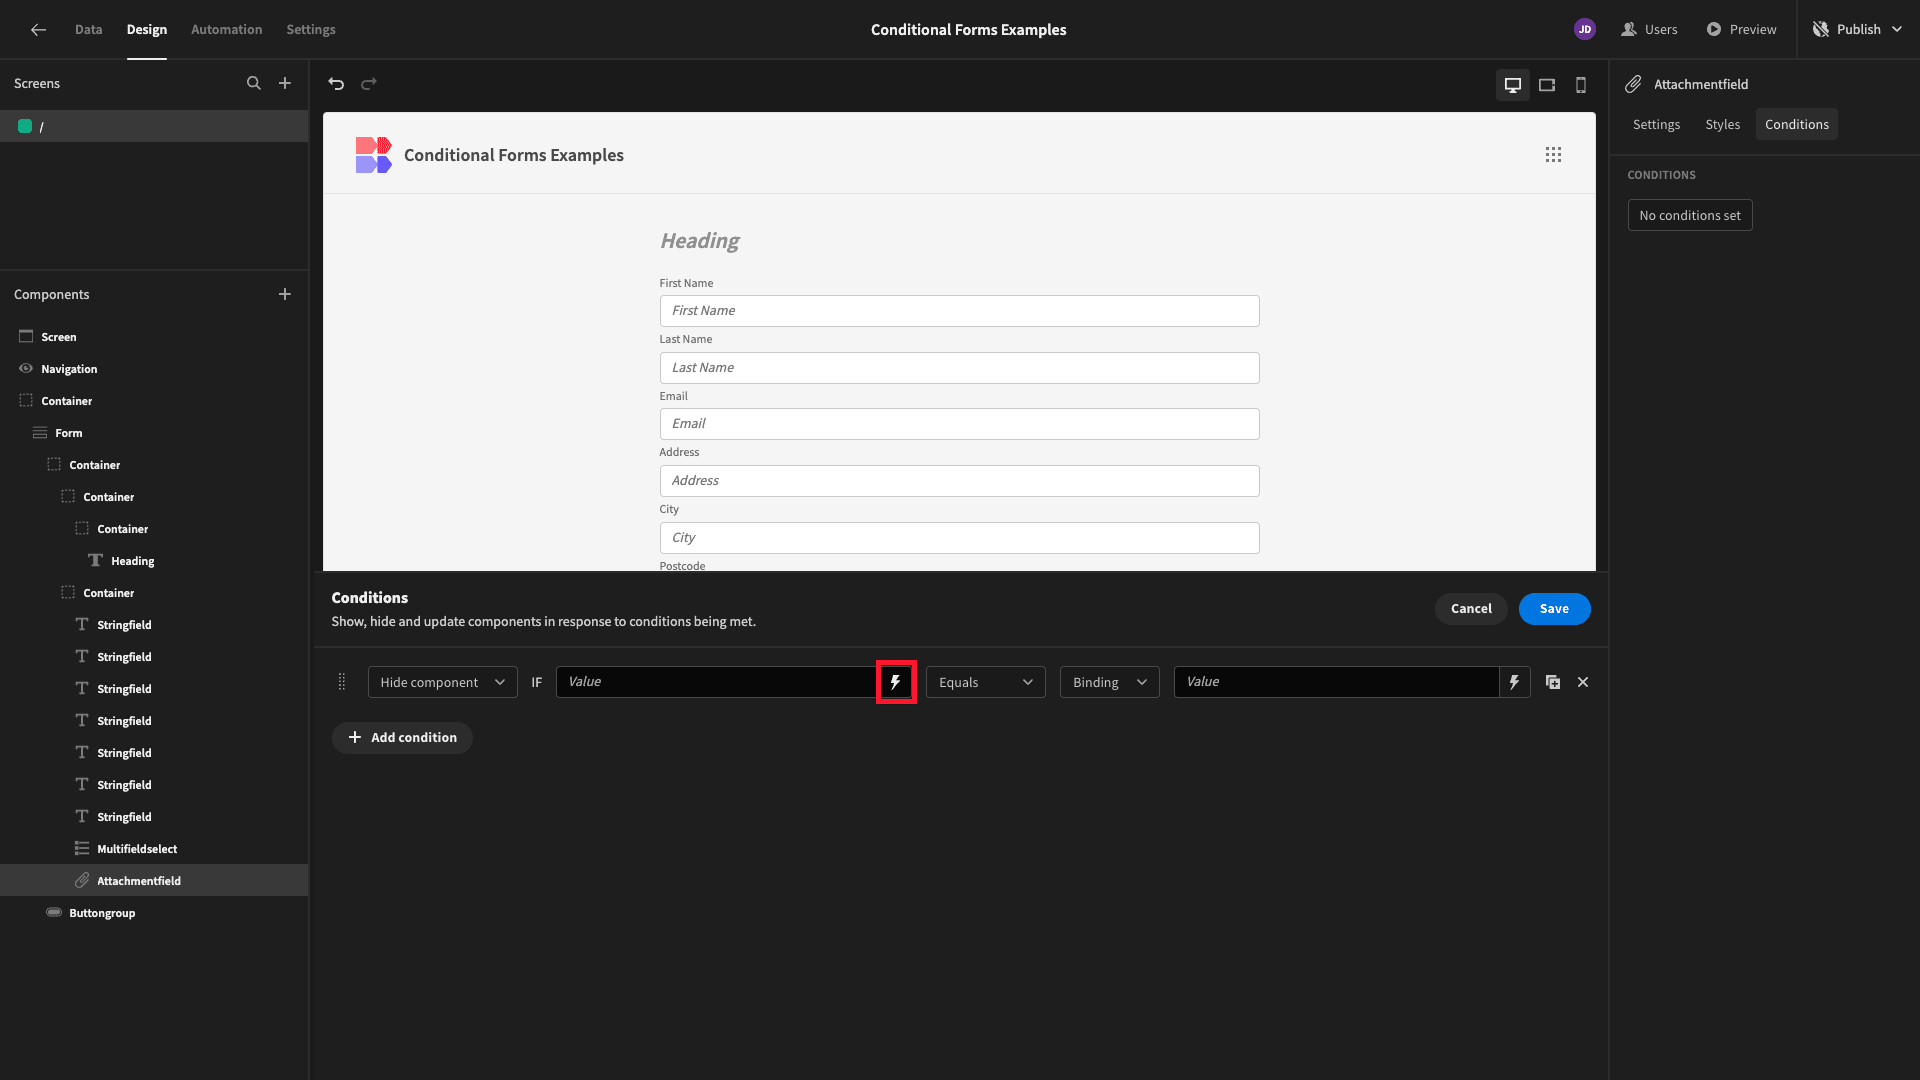
We’ll open the bindings drawer for our reference value:
We want to build our rule around a user’s previous answer - so we can find this under Form:
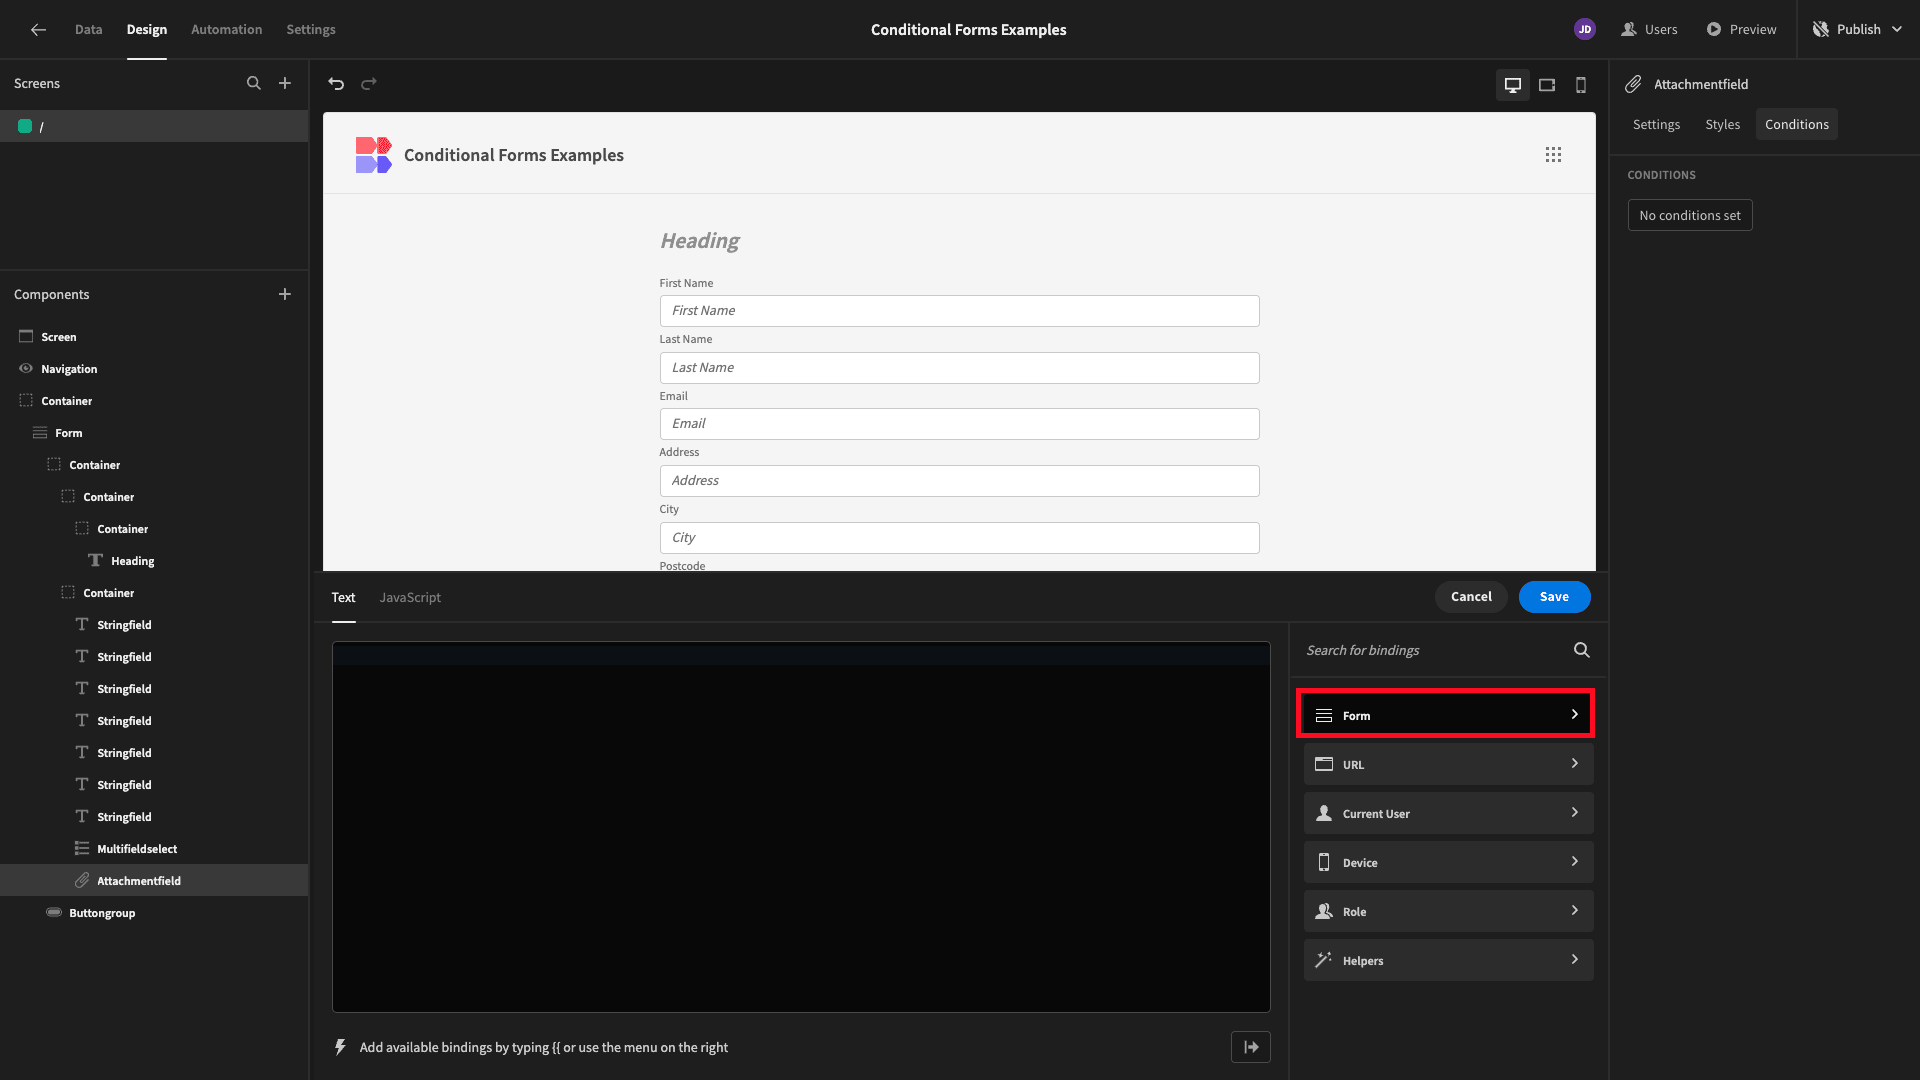
And we’ll select Employee Level.
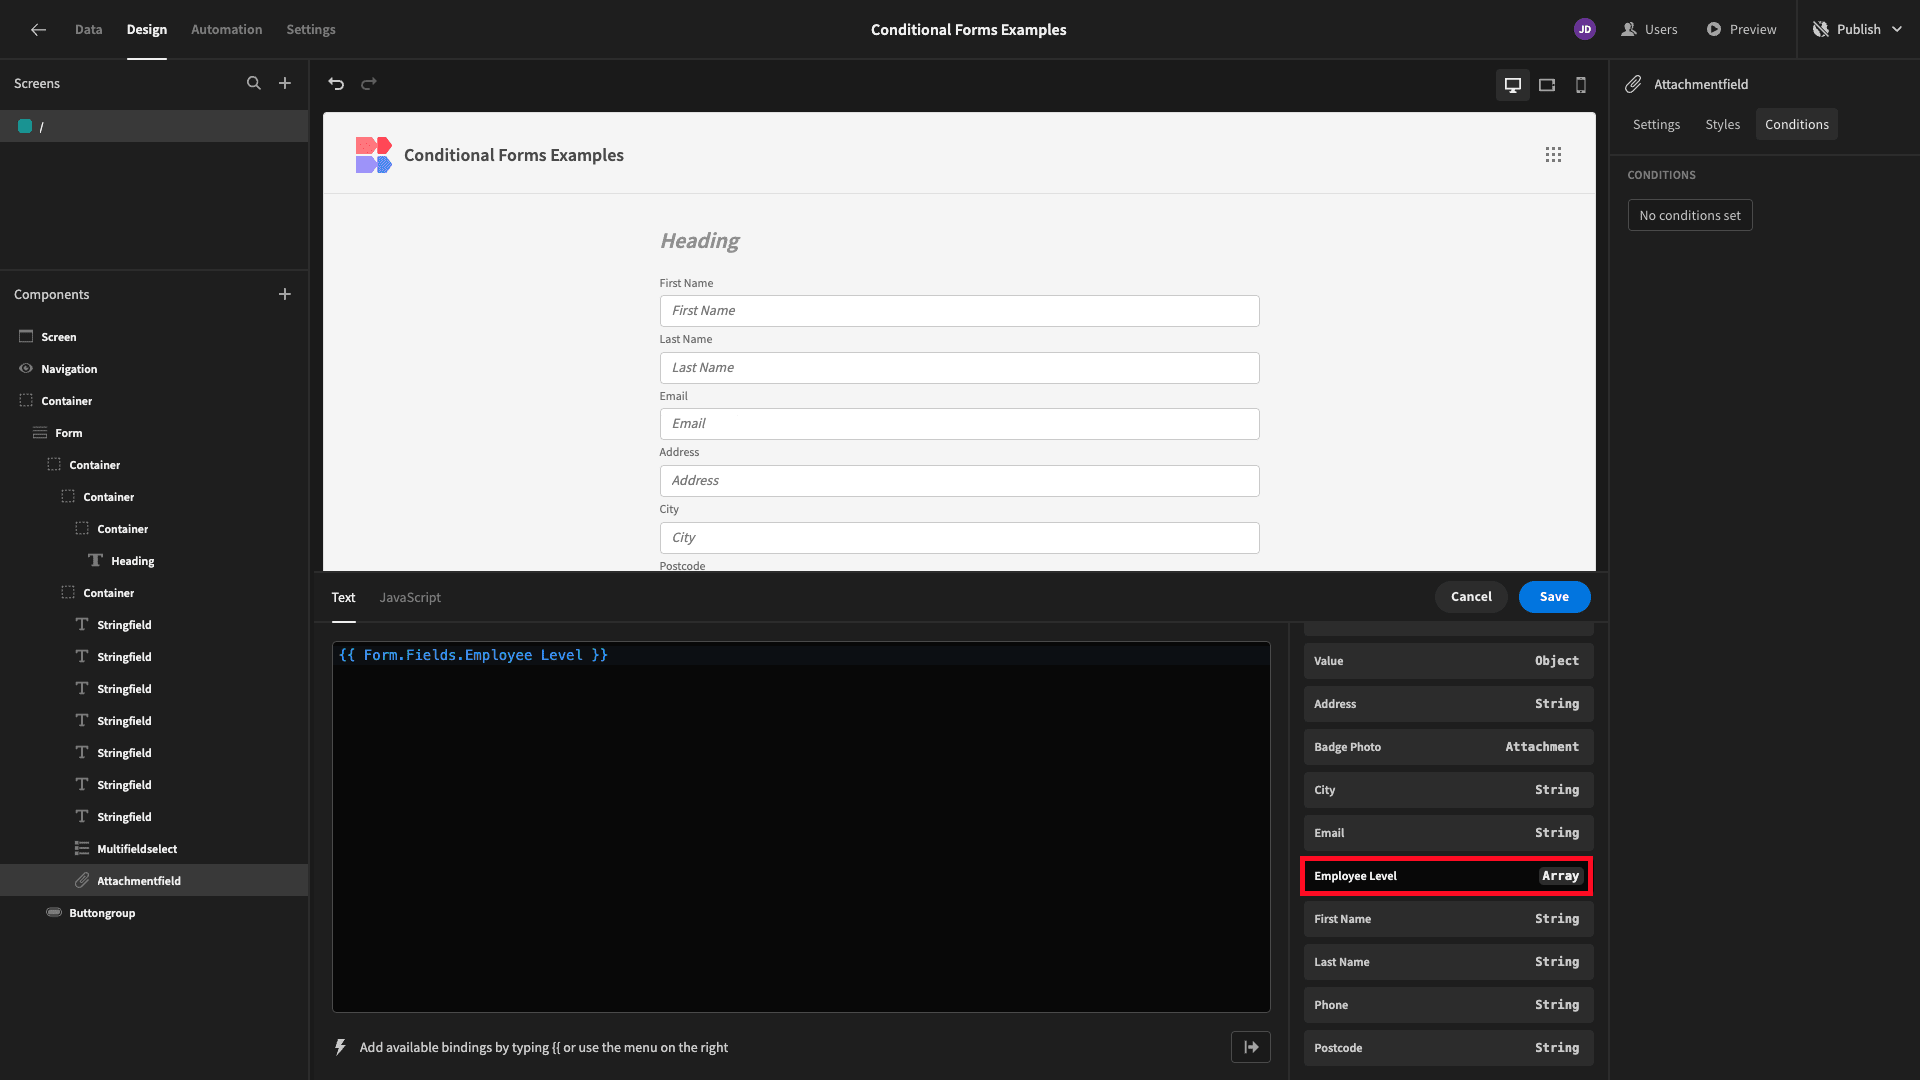
Lastly, for our comparison value, we’ll simply enter Apprentice as plain text.
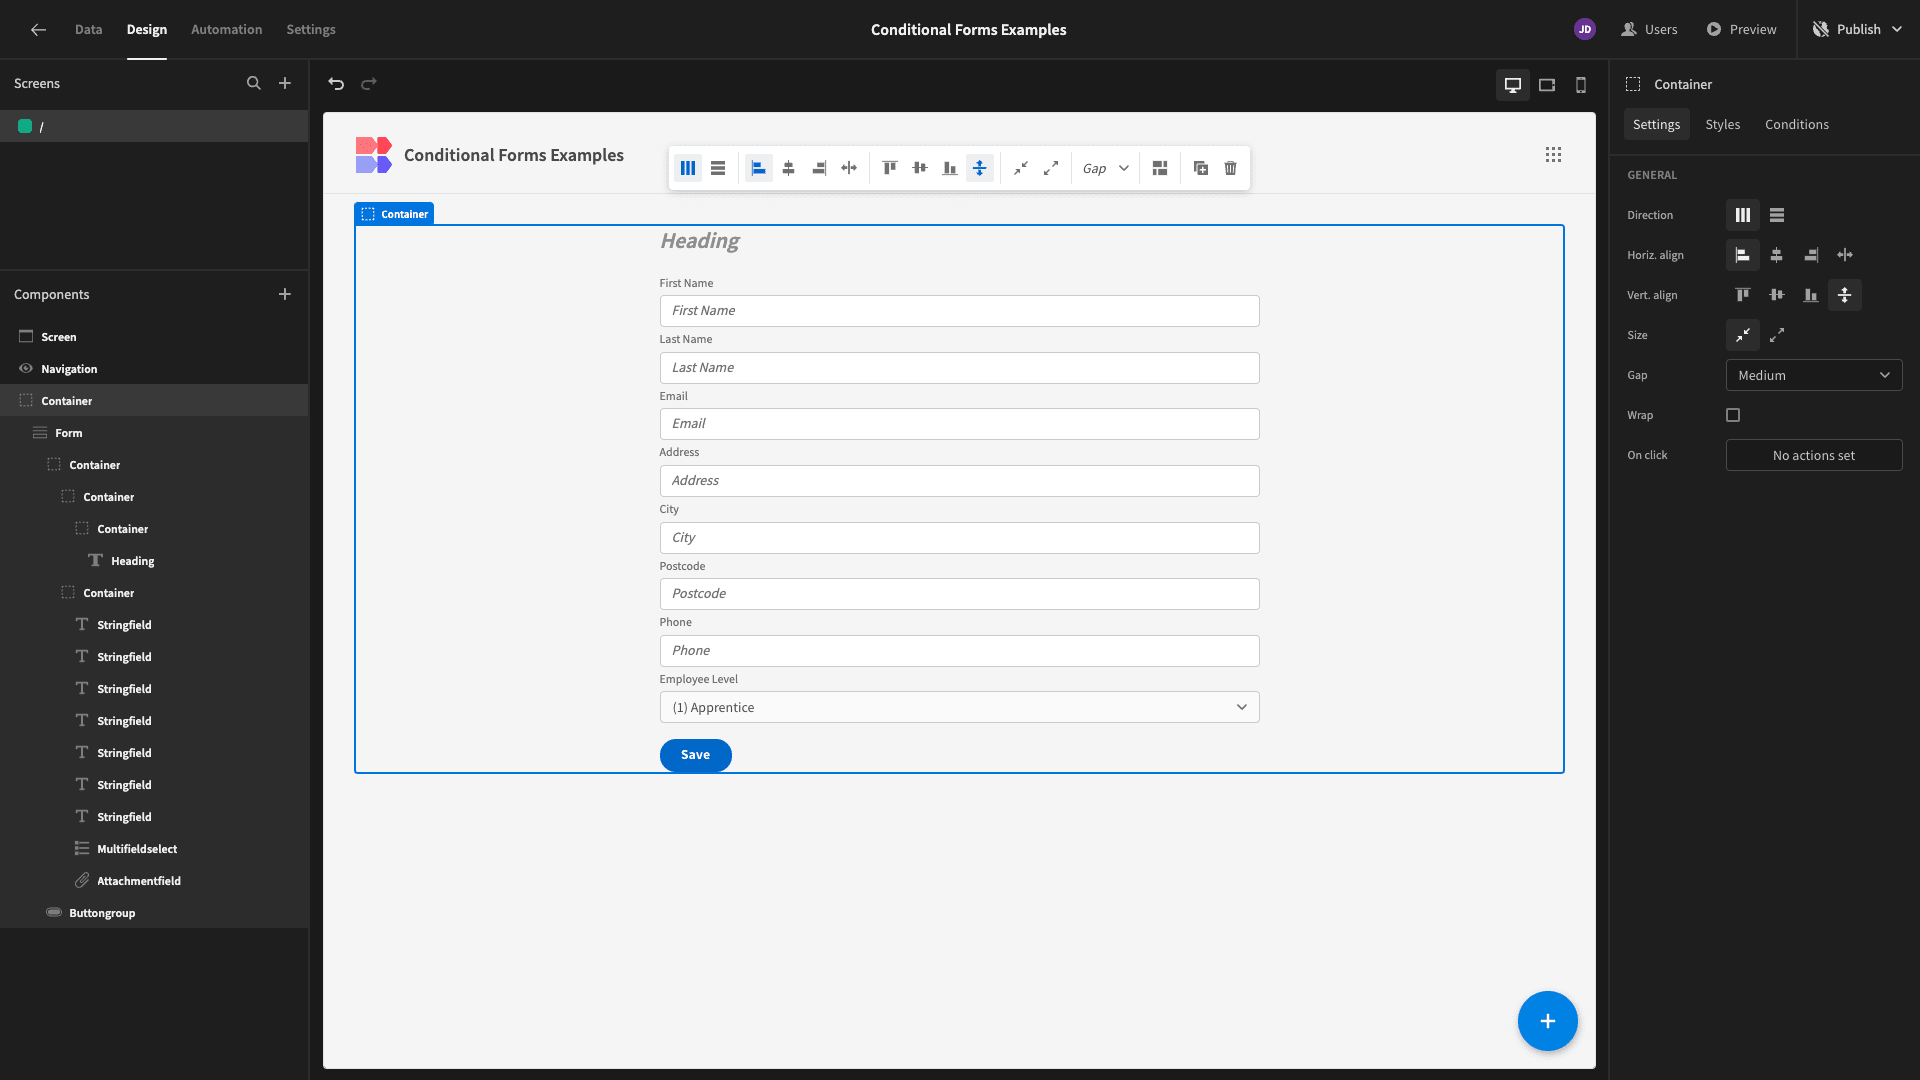
Just like that, we have a dynamic form where the Employee Level will disappear if our new colleague is an apprentice:
2. User attribute conditions
Let’s try something a bit more advanced. Besides branching logic, another key use for conditionality within forms is personalization.
Here’s the exact same form, except we’ve updated the headline text to “Welcome!”. Ultimately, we’d like to personalize this message a little bit, but we can obviously only do that if we know the user’s name.
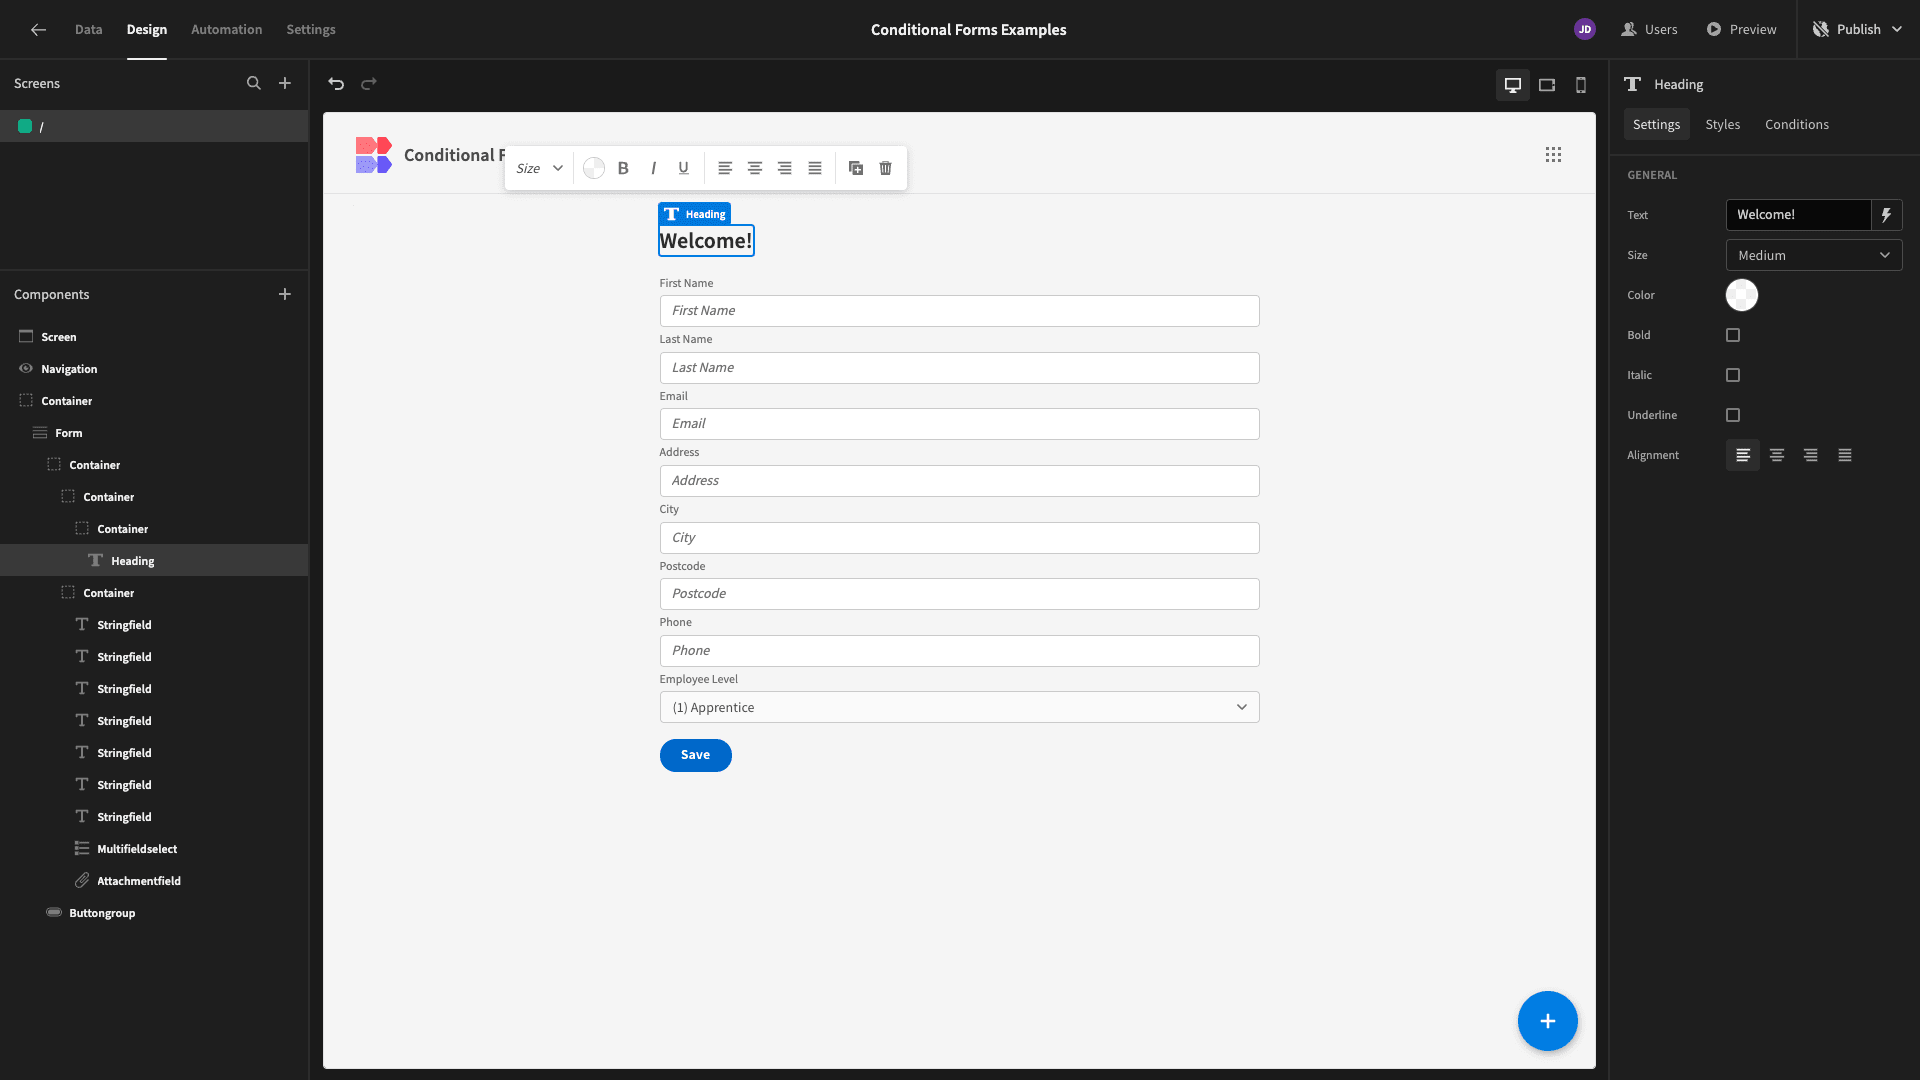
Otherwise, we’ll want to fall back on this generic default message.
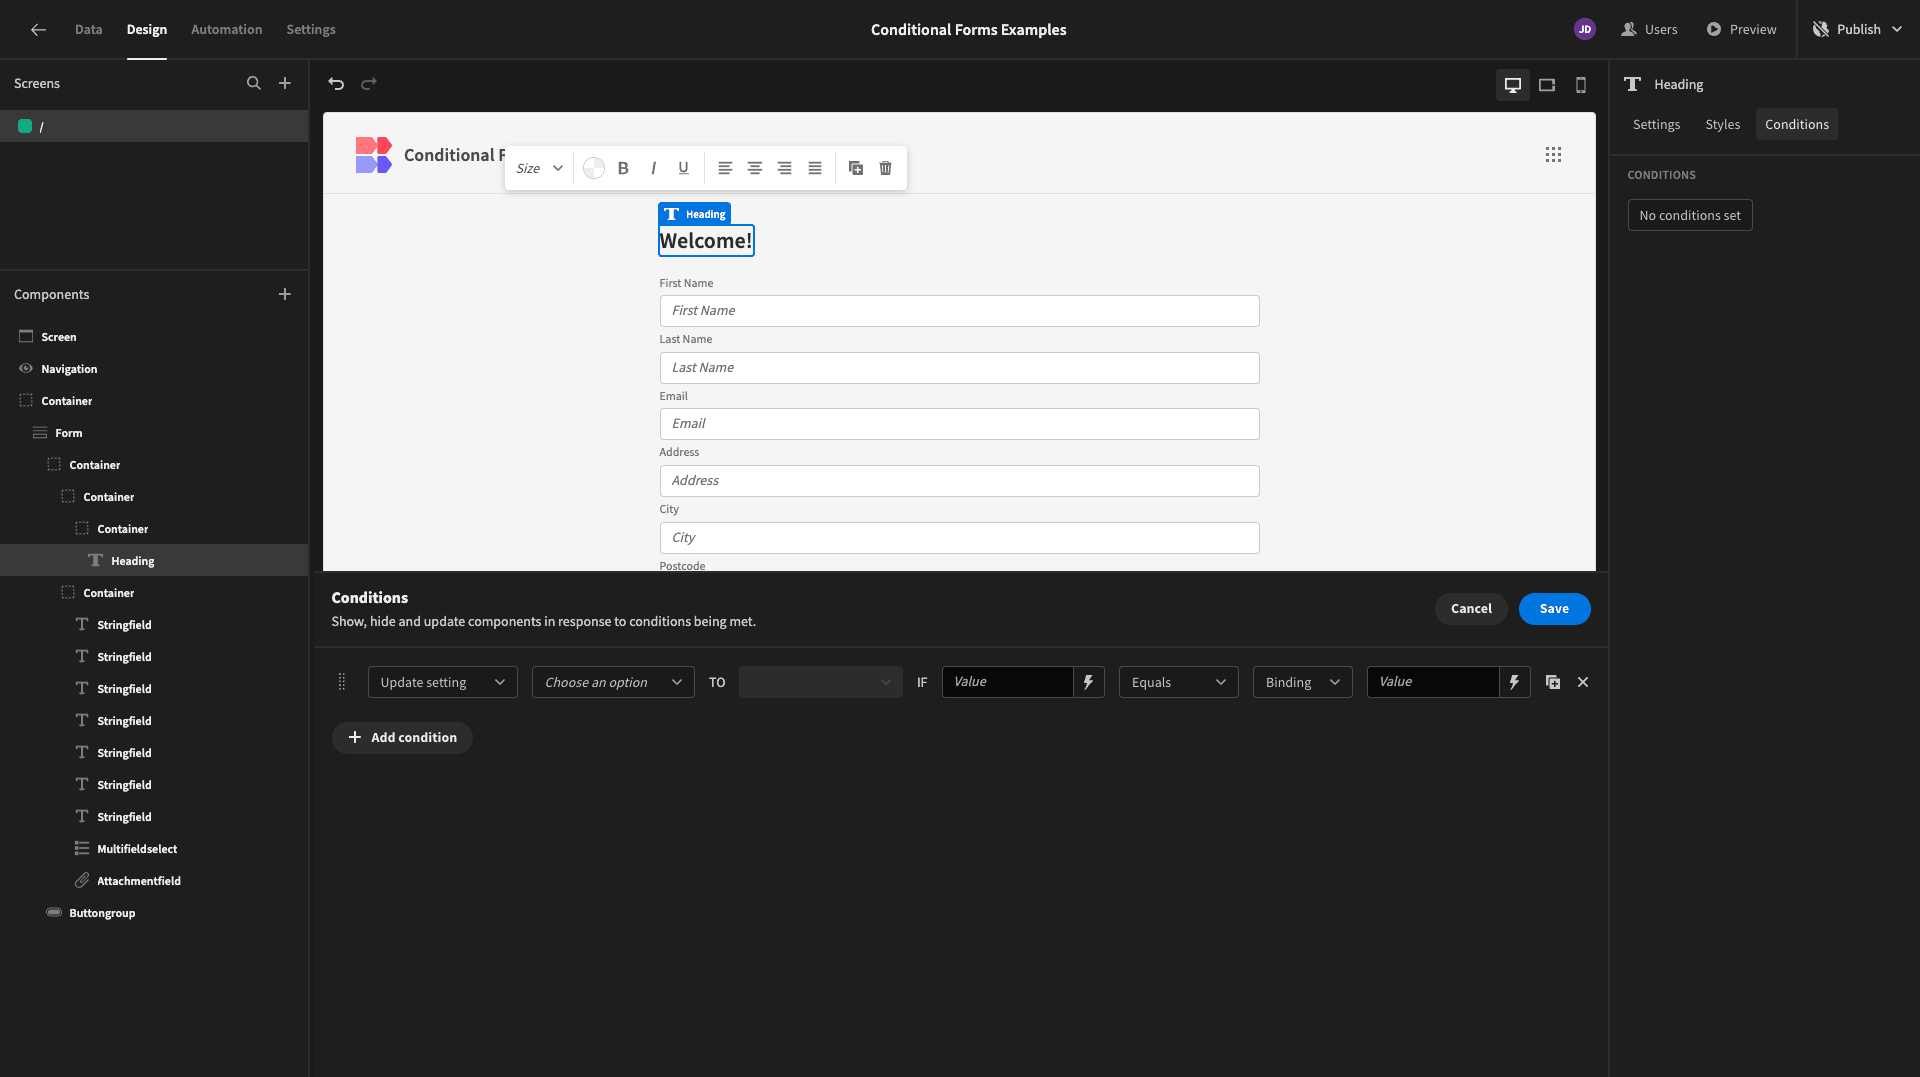
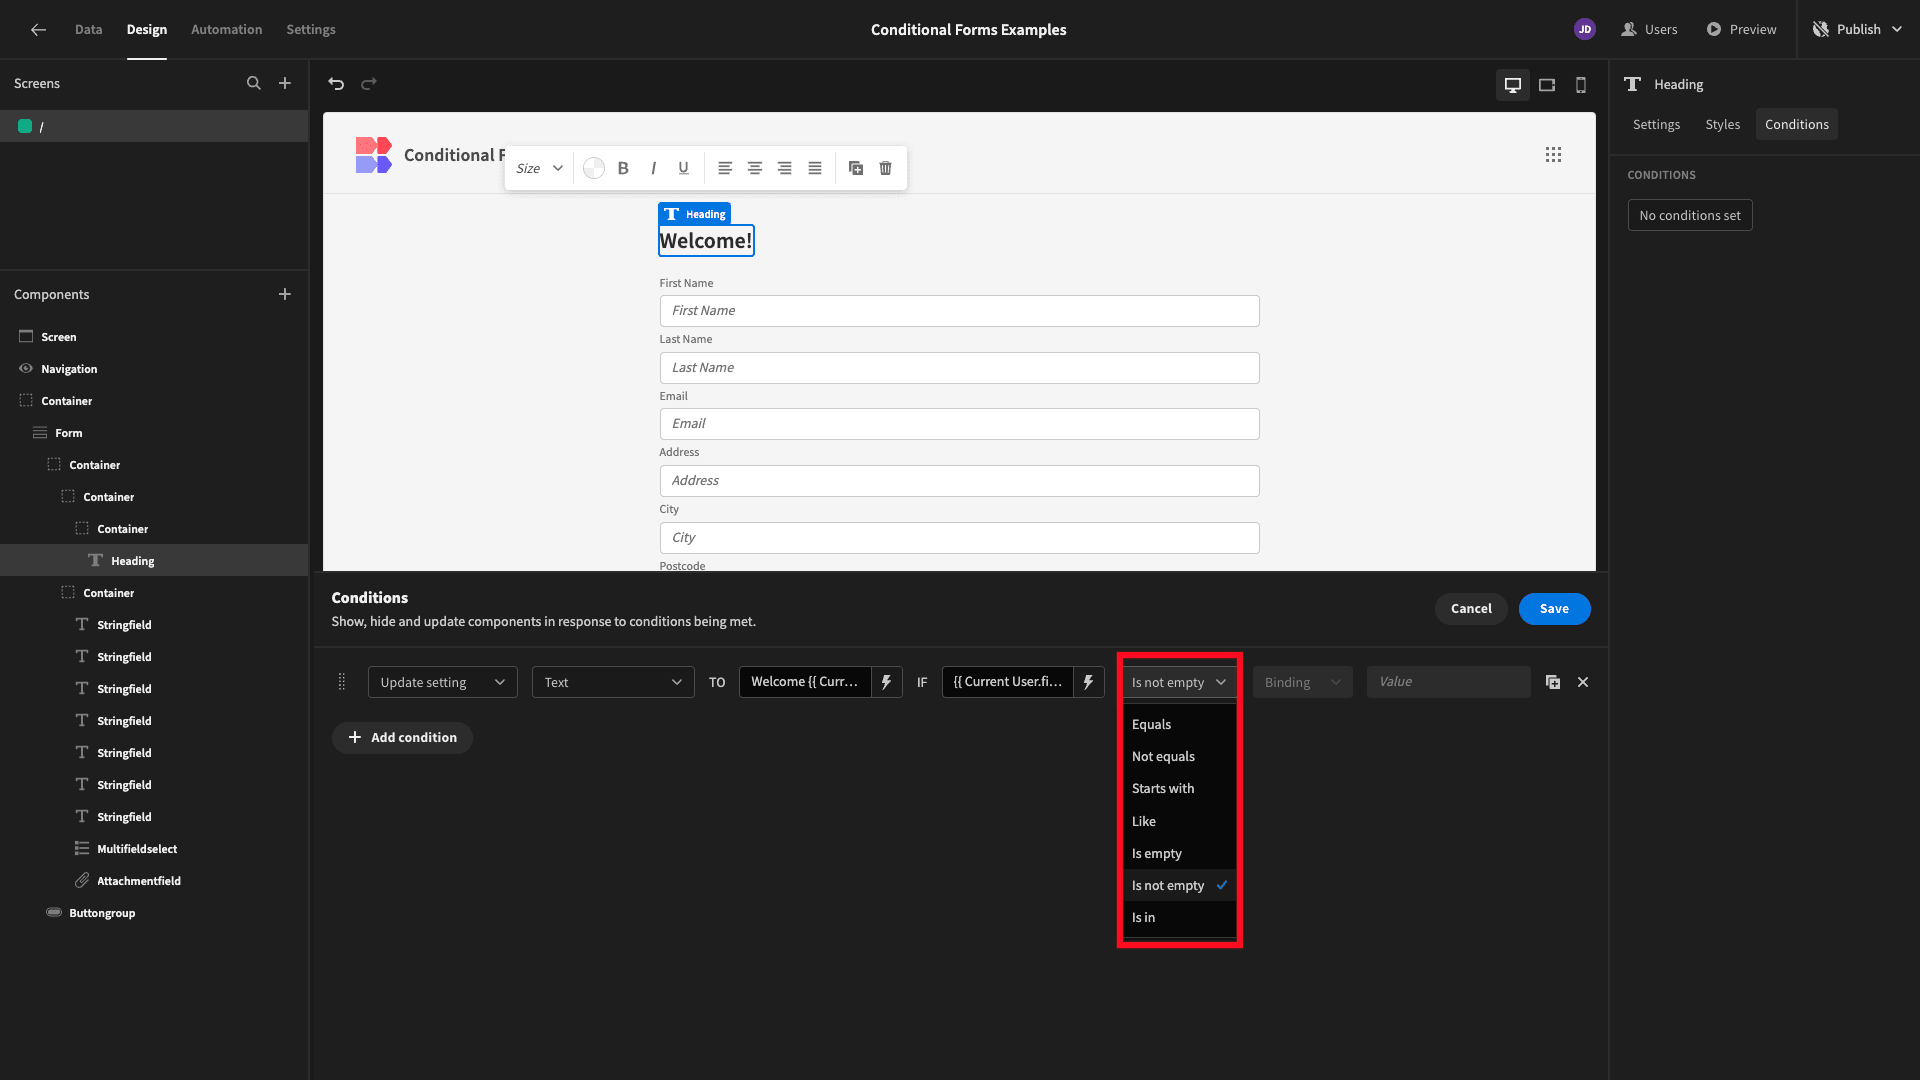
We’ve opened the conditionality editor for our Headline component, this time choosing the “Update Setting” option:
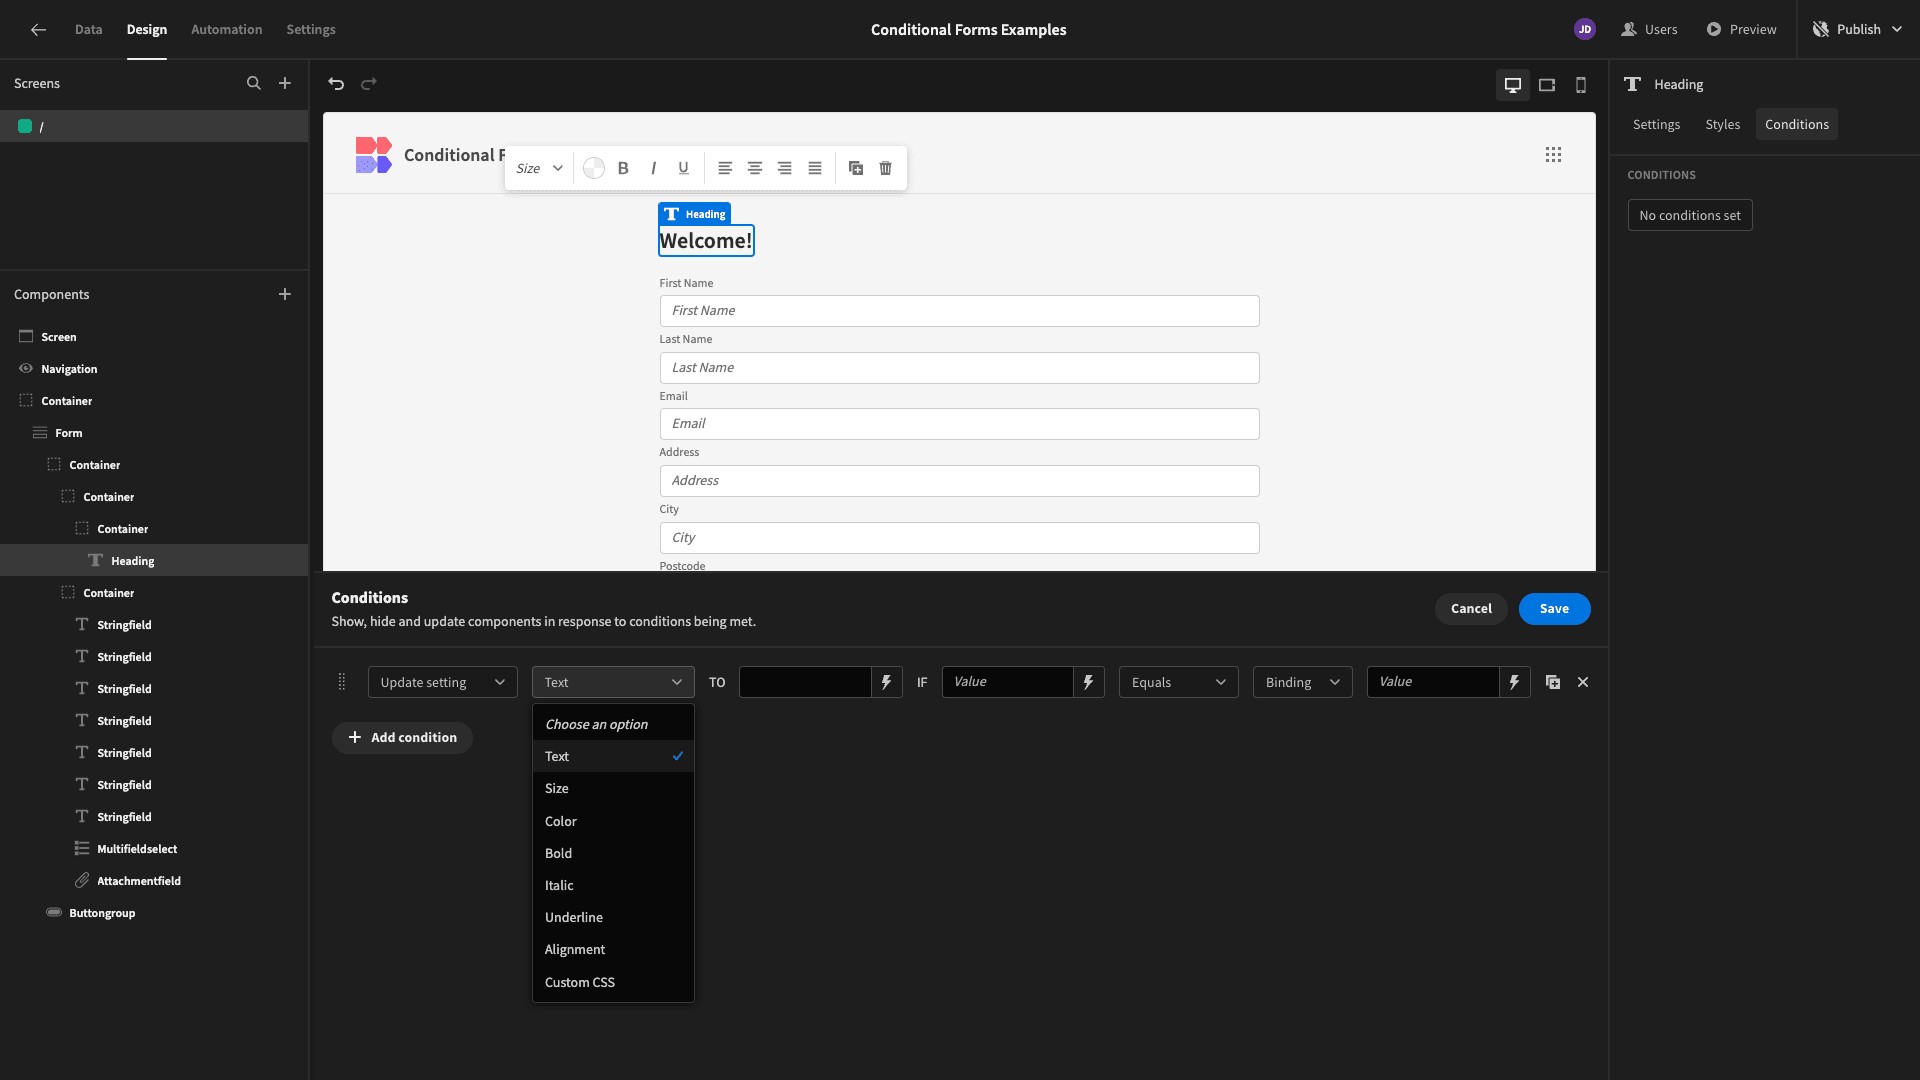
We can then choose which of this component’s settings our rule will alter. We’ve selected Text:
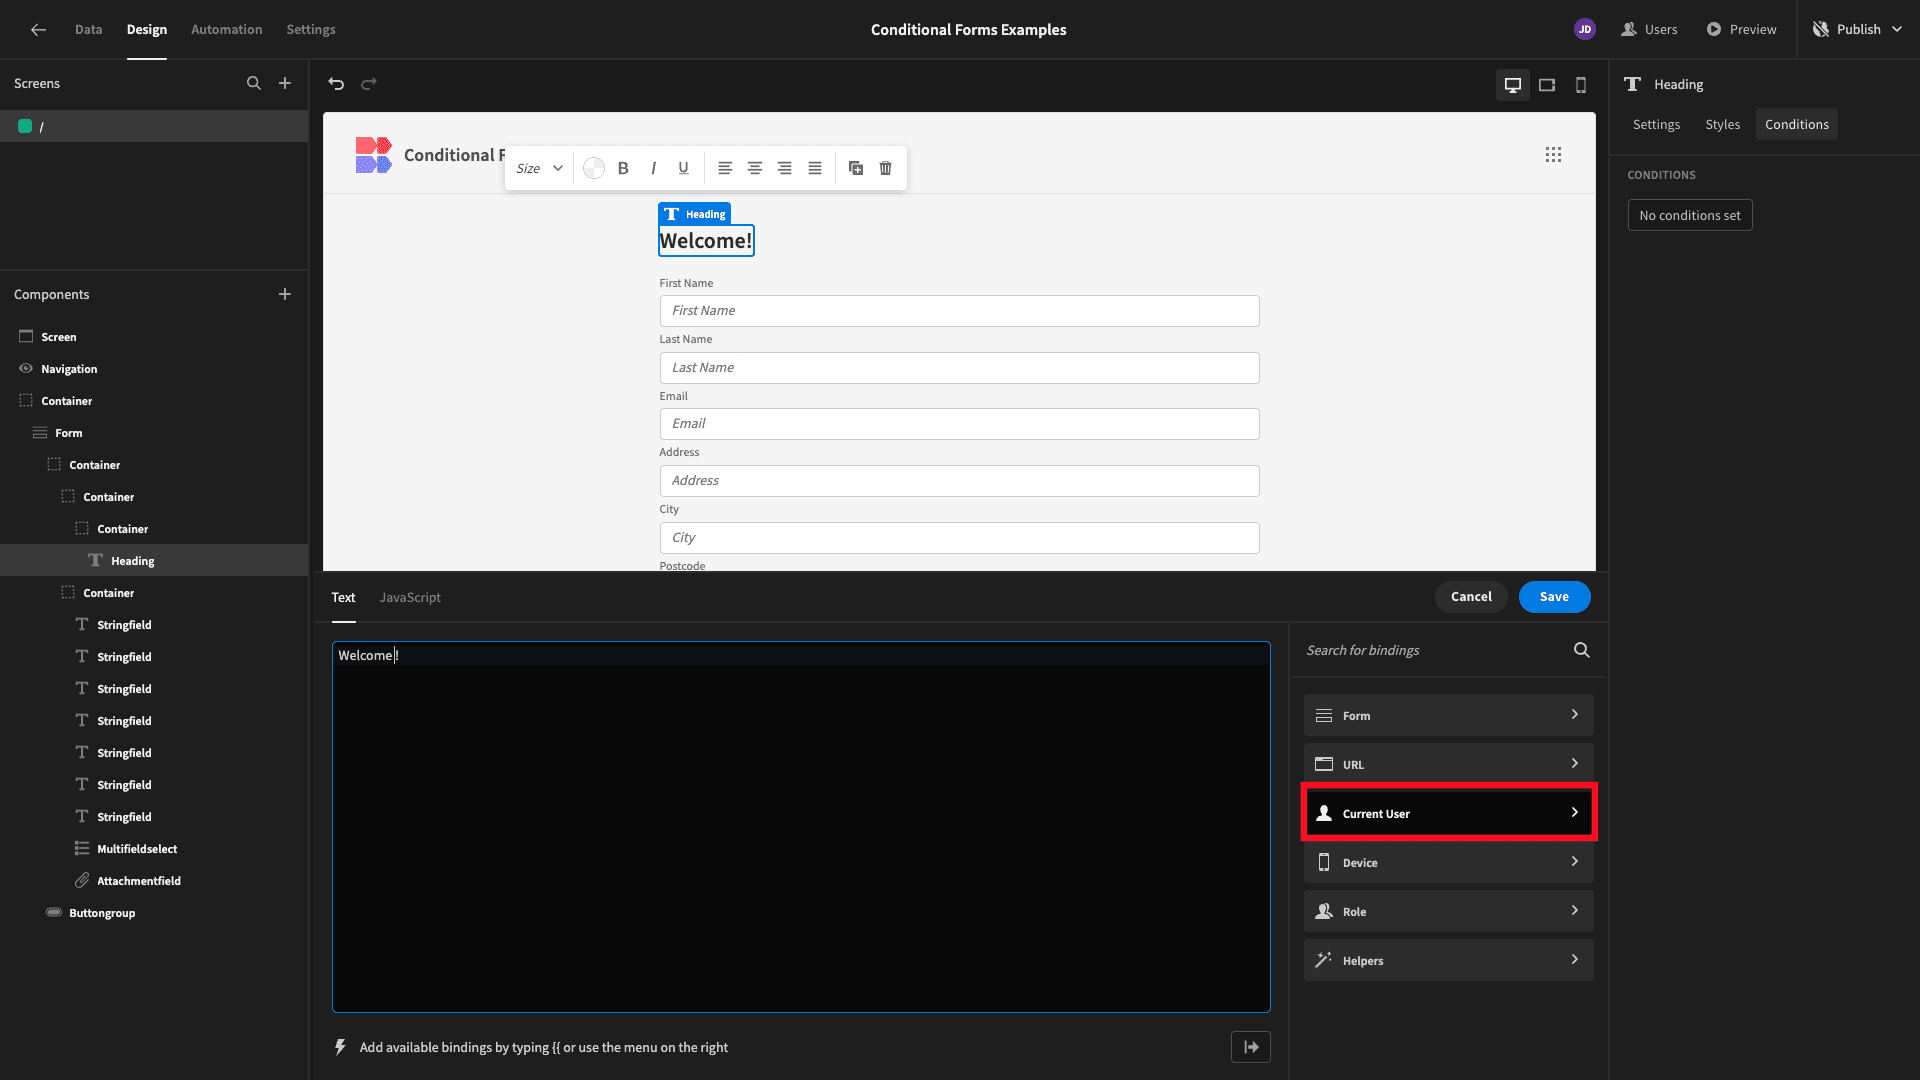
We want our form to say “Welcome” followed by the current user’s first name. So, we’ll open the Current Users options:
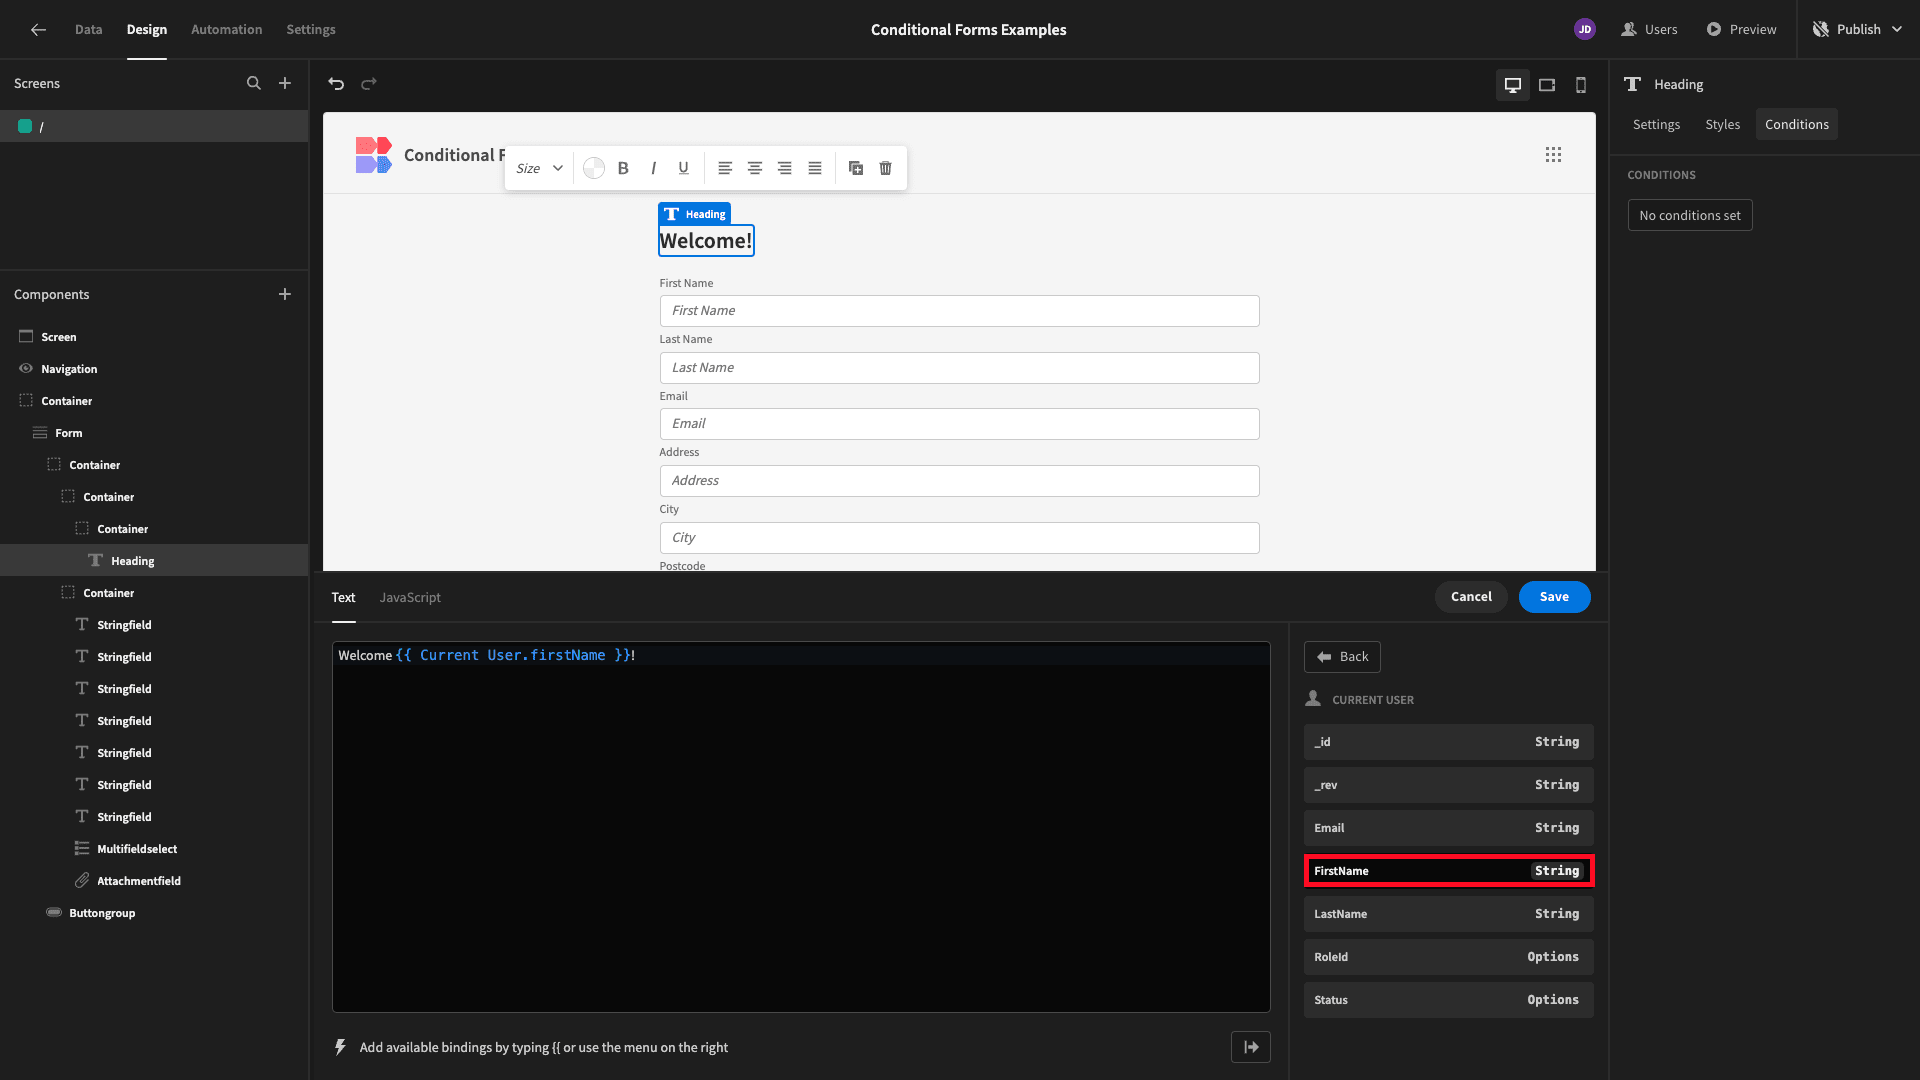
And we’re selecting firstName:
Now, we’ve set our action and our reference value. We still need to add our operator and our comparison value. We want to display this personalized text if we know the current user’s first name.
In other words, if this field is not null.
So we’ll select {{ Current User.firstName }} as our comparison value, and we’ll use Is Not Empty as our operator:
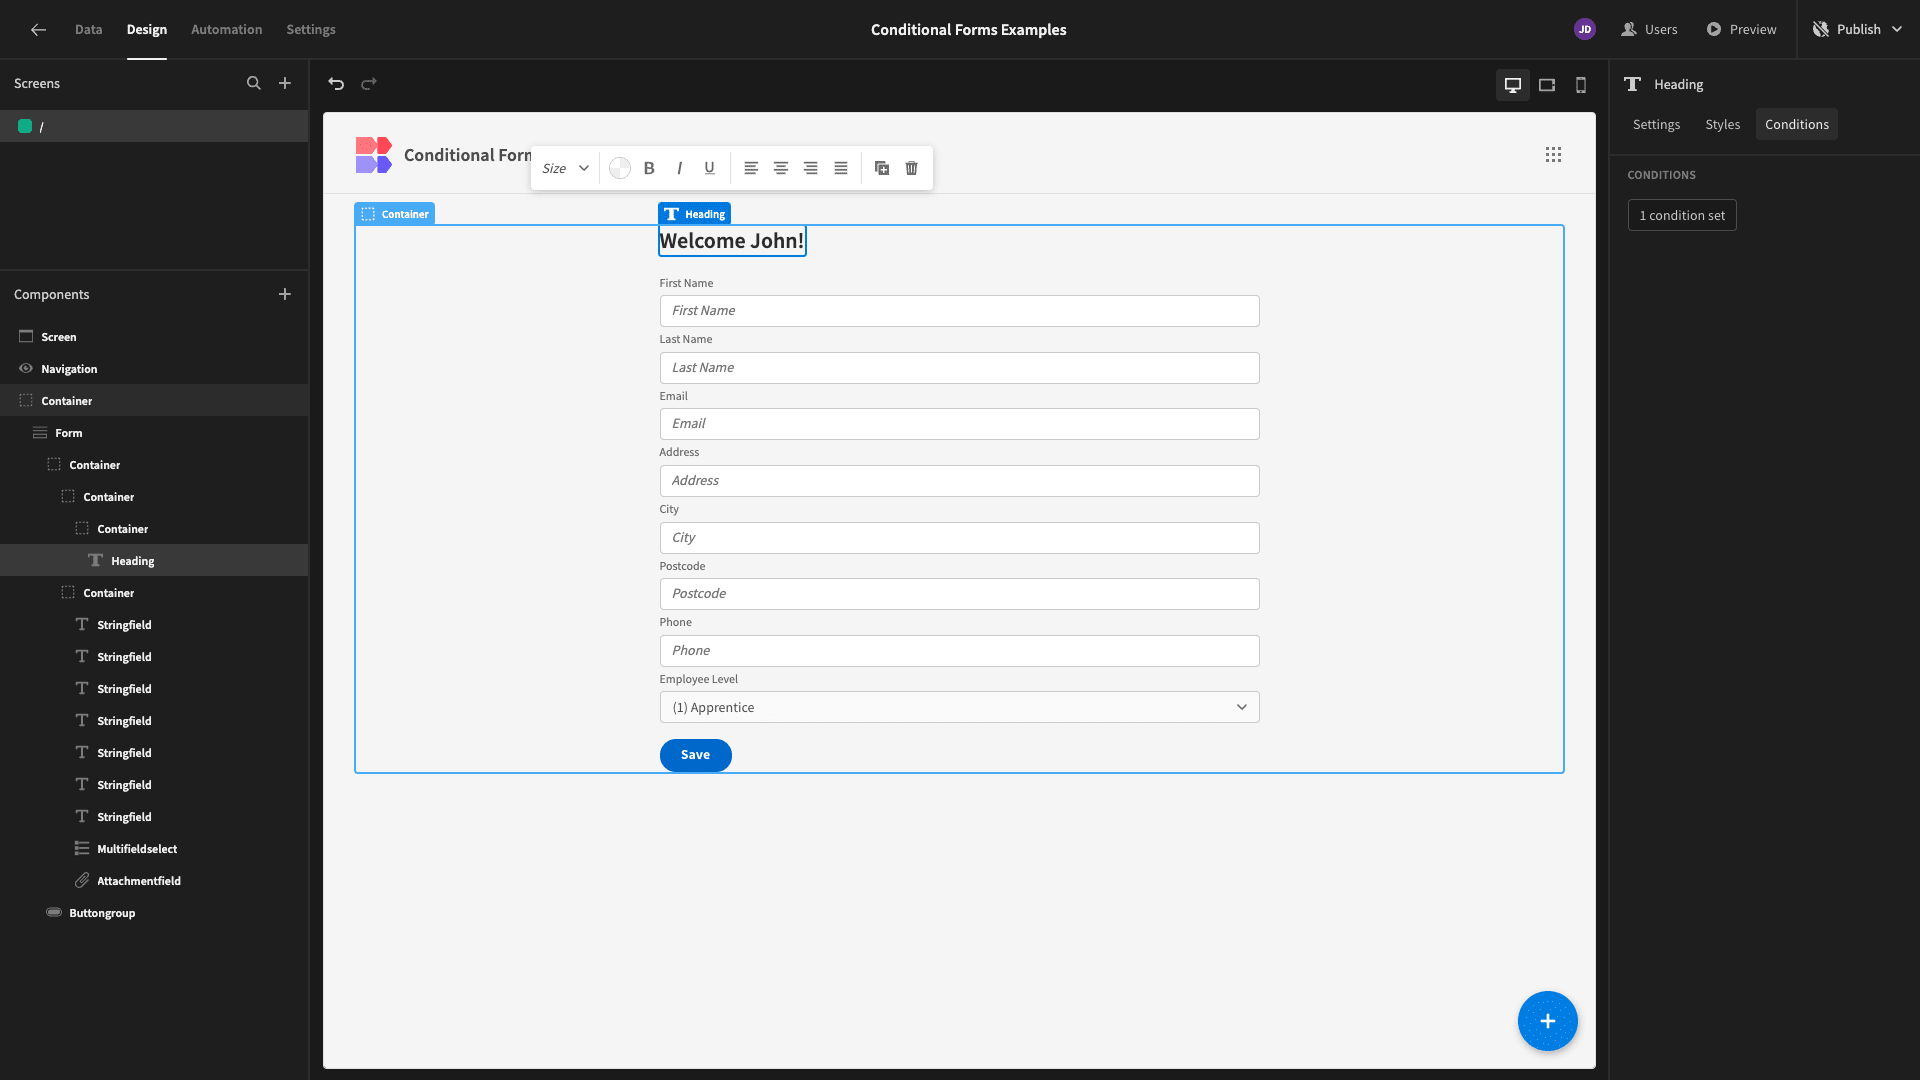
And here’s the result:
3. User role conditions
Another use case for conditional logic forms is governing which specific data attributes certain users are allowed to update. In other words, we might have some form fields that we want to reserve for higher access roles.
We’ve added two additional form fields called Start Date and End Date.
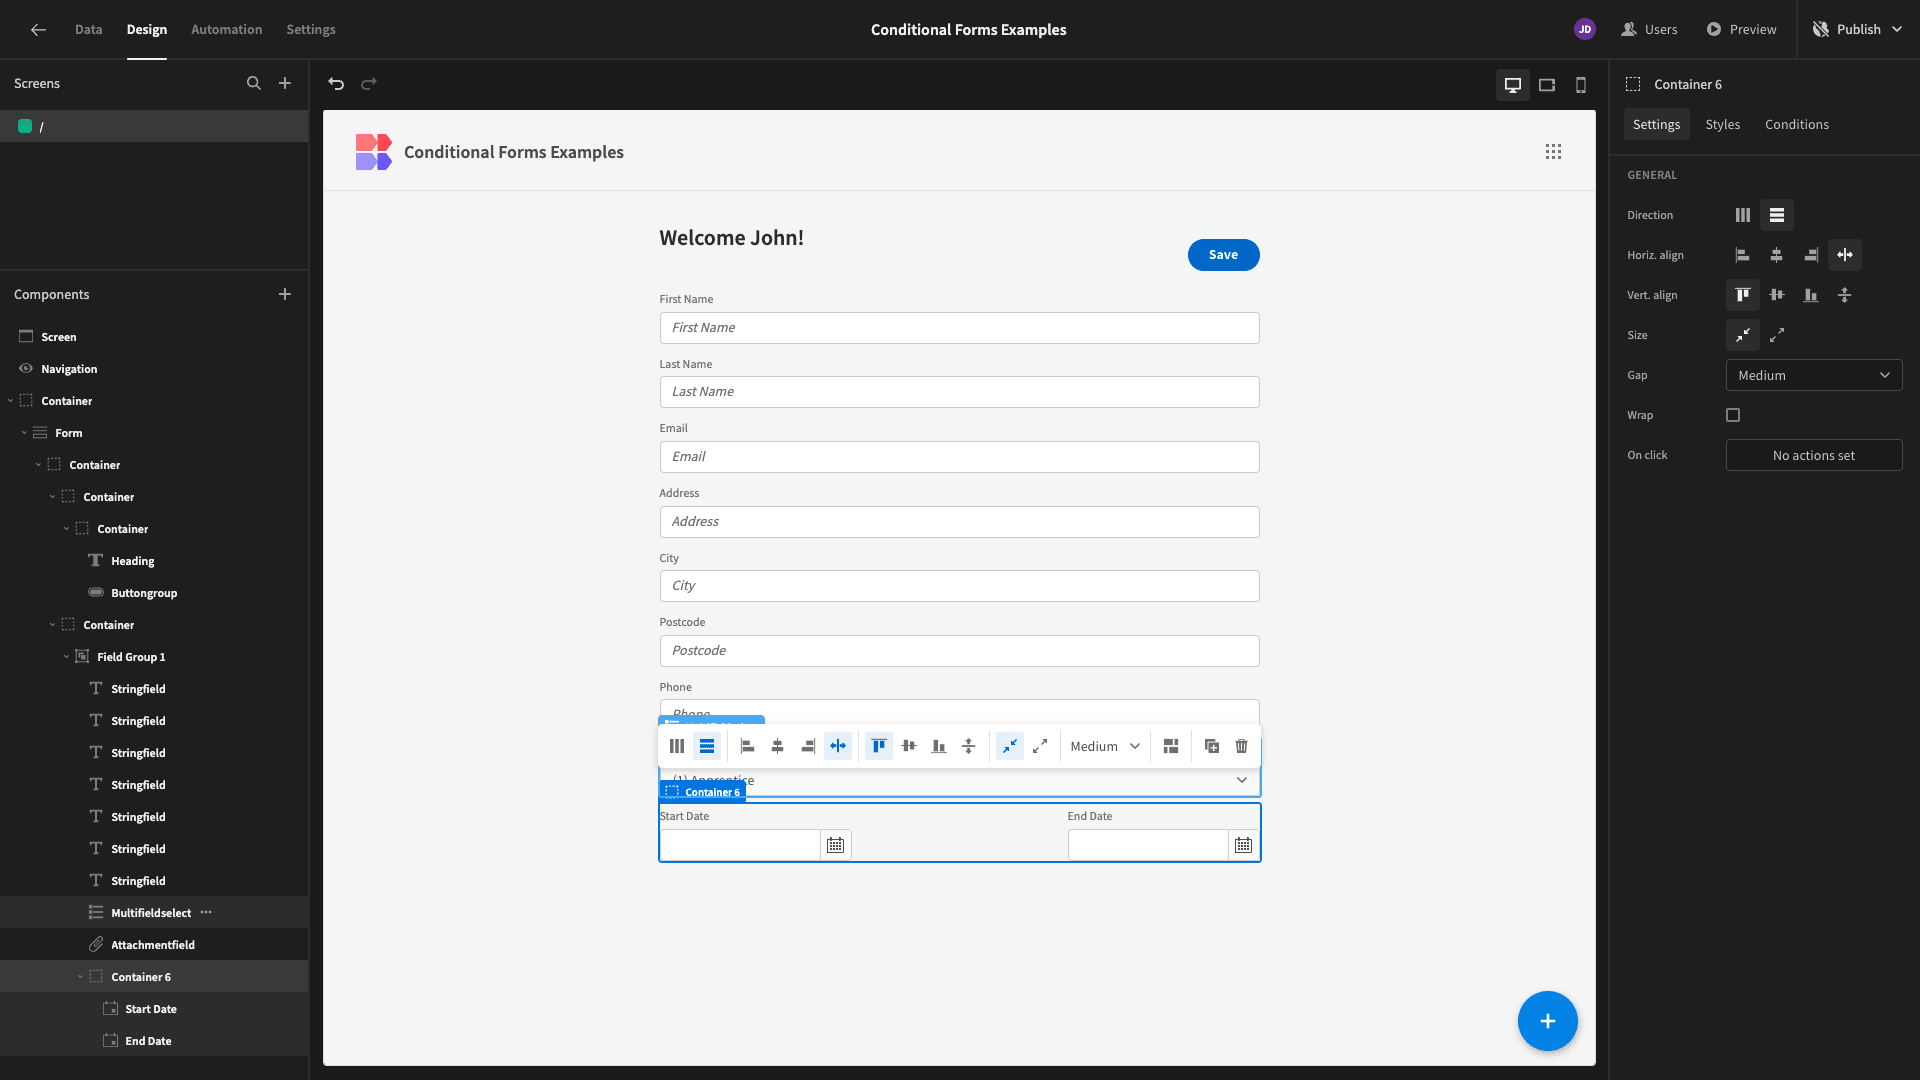
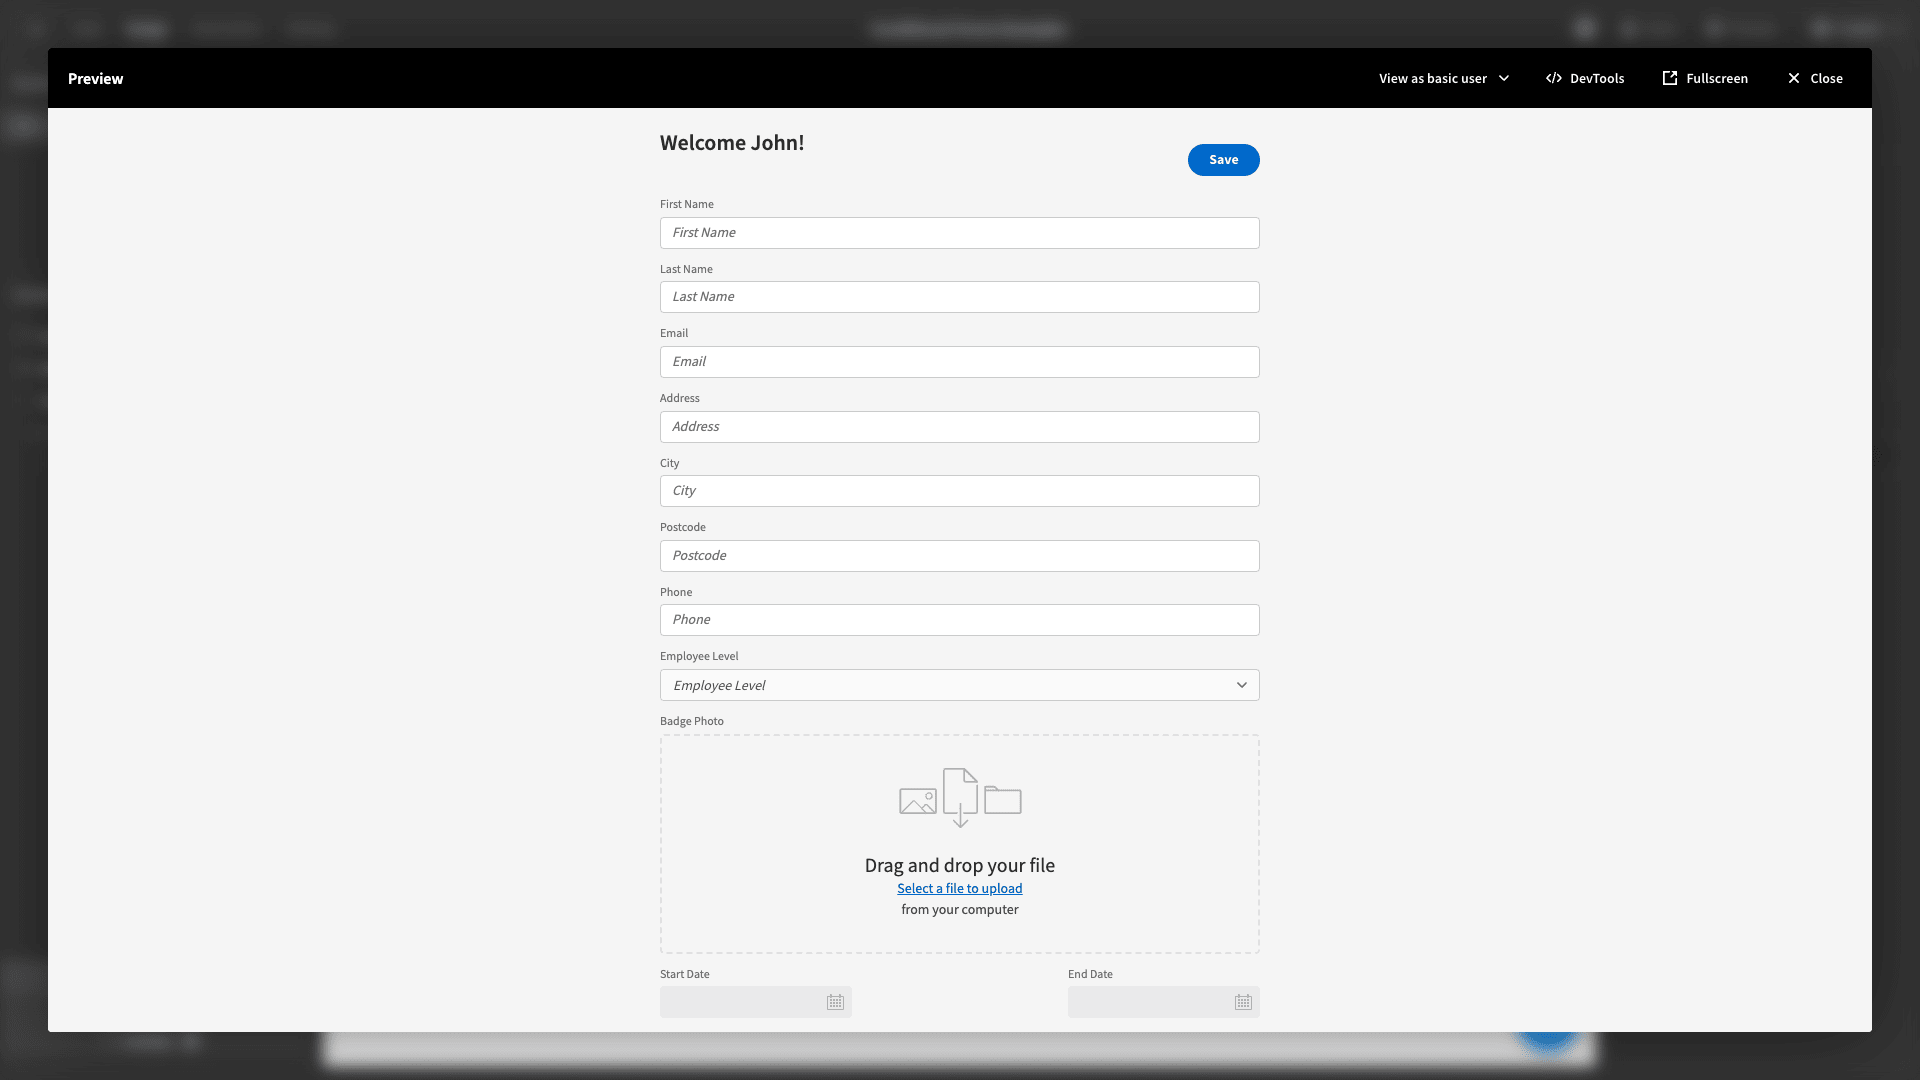
We always want to display these, but we only want them to be editable by users with an Admin role.
For each of our new fields, we’ll need to start by creating an Update Setting rule again. This time, the setting we’re choosing is called Disabled, and we’re updating it to be selected:
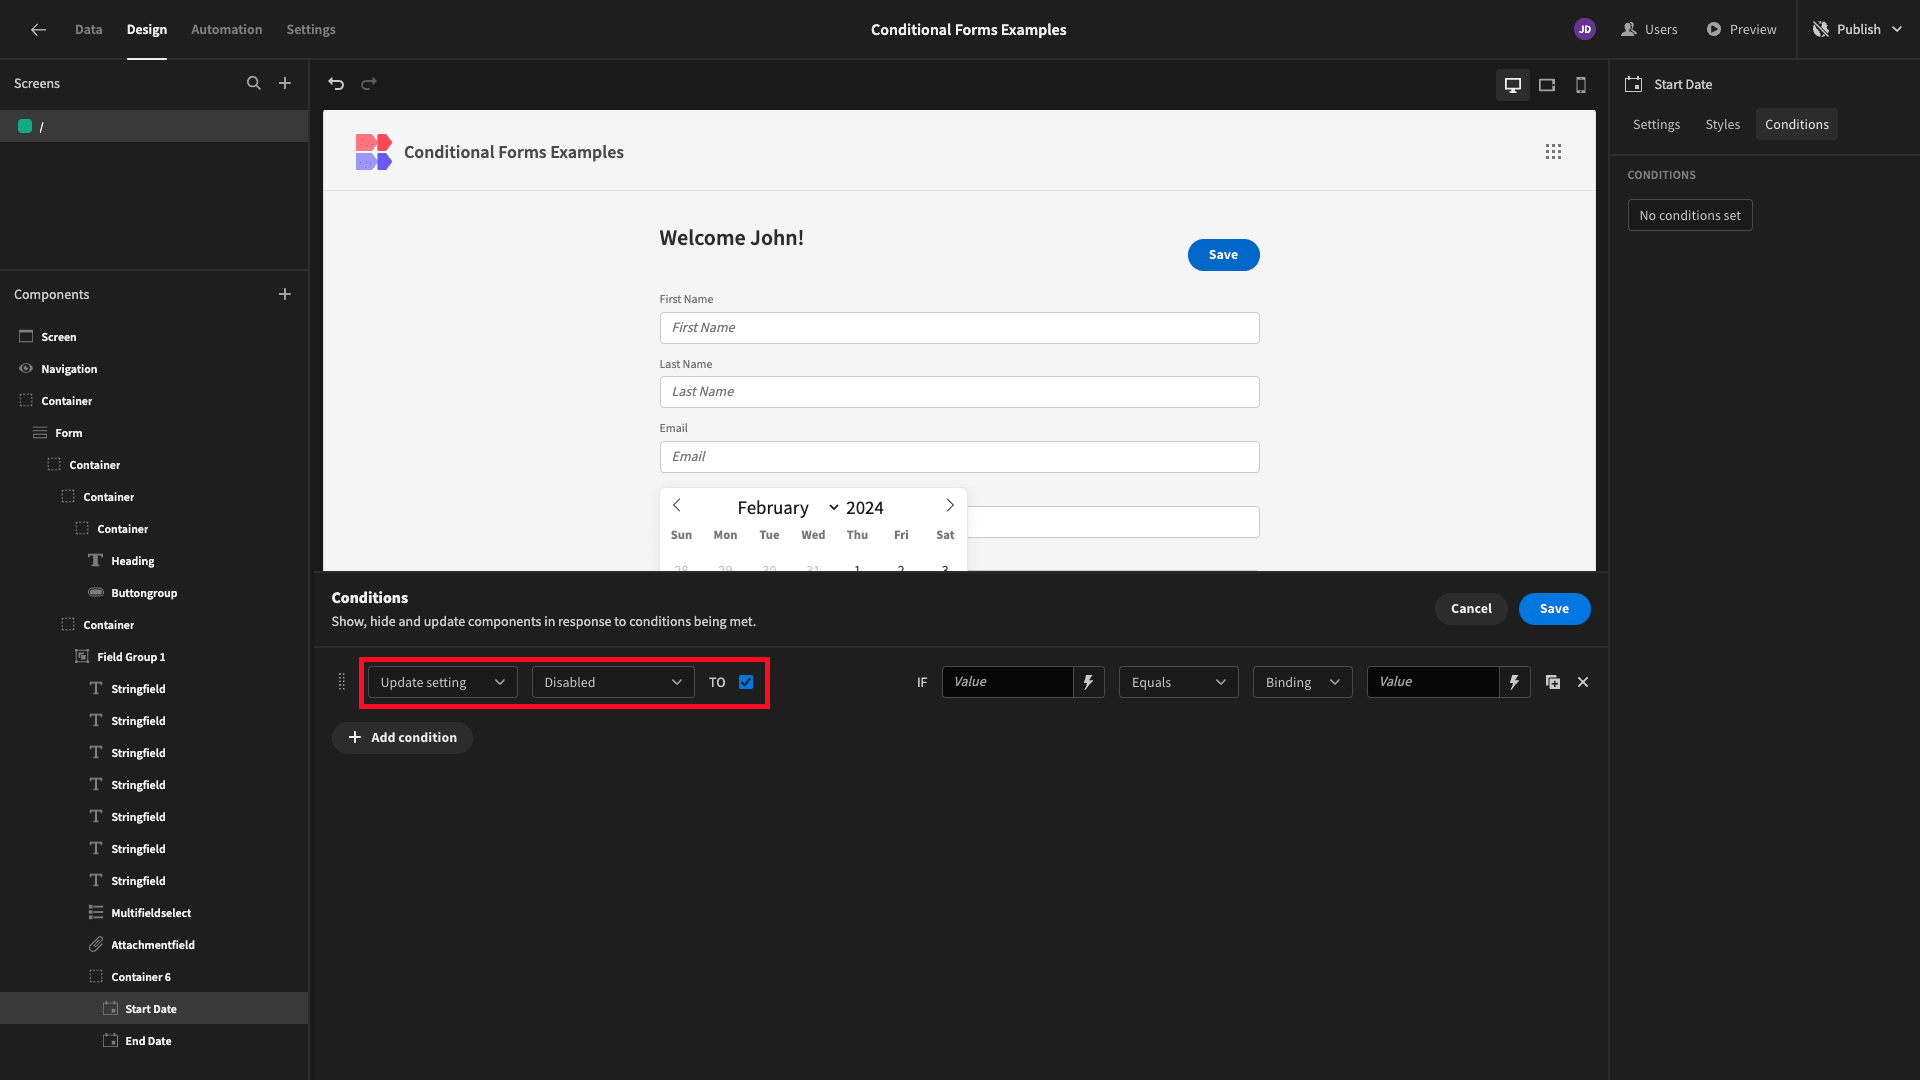
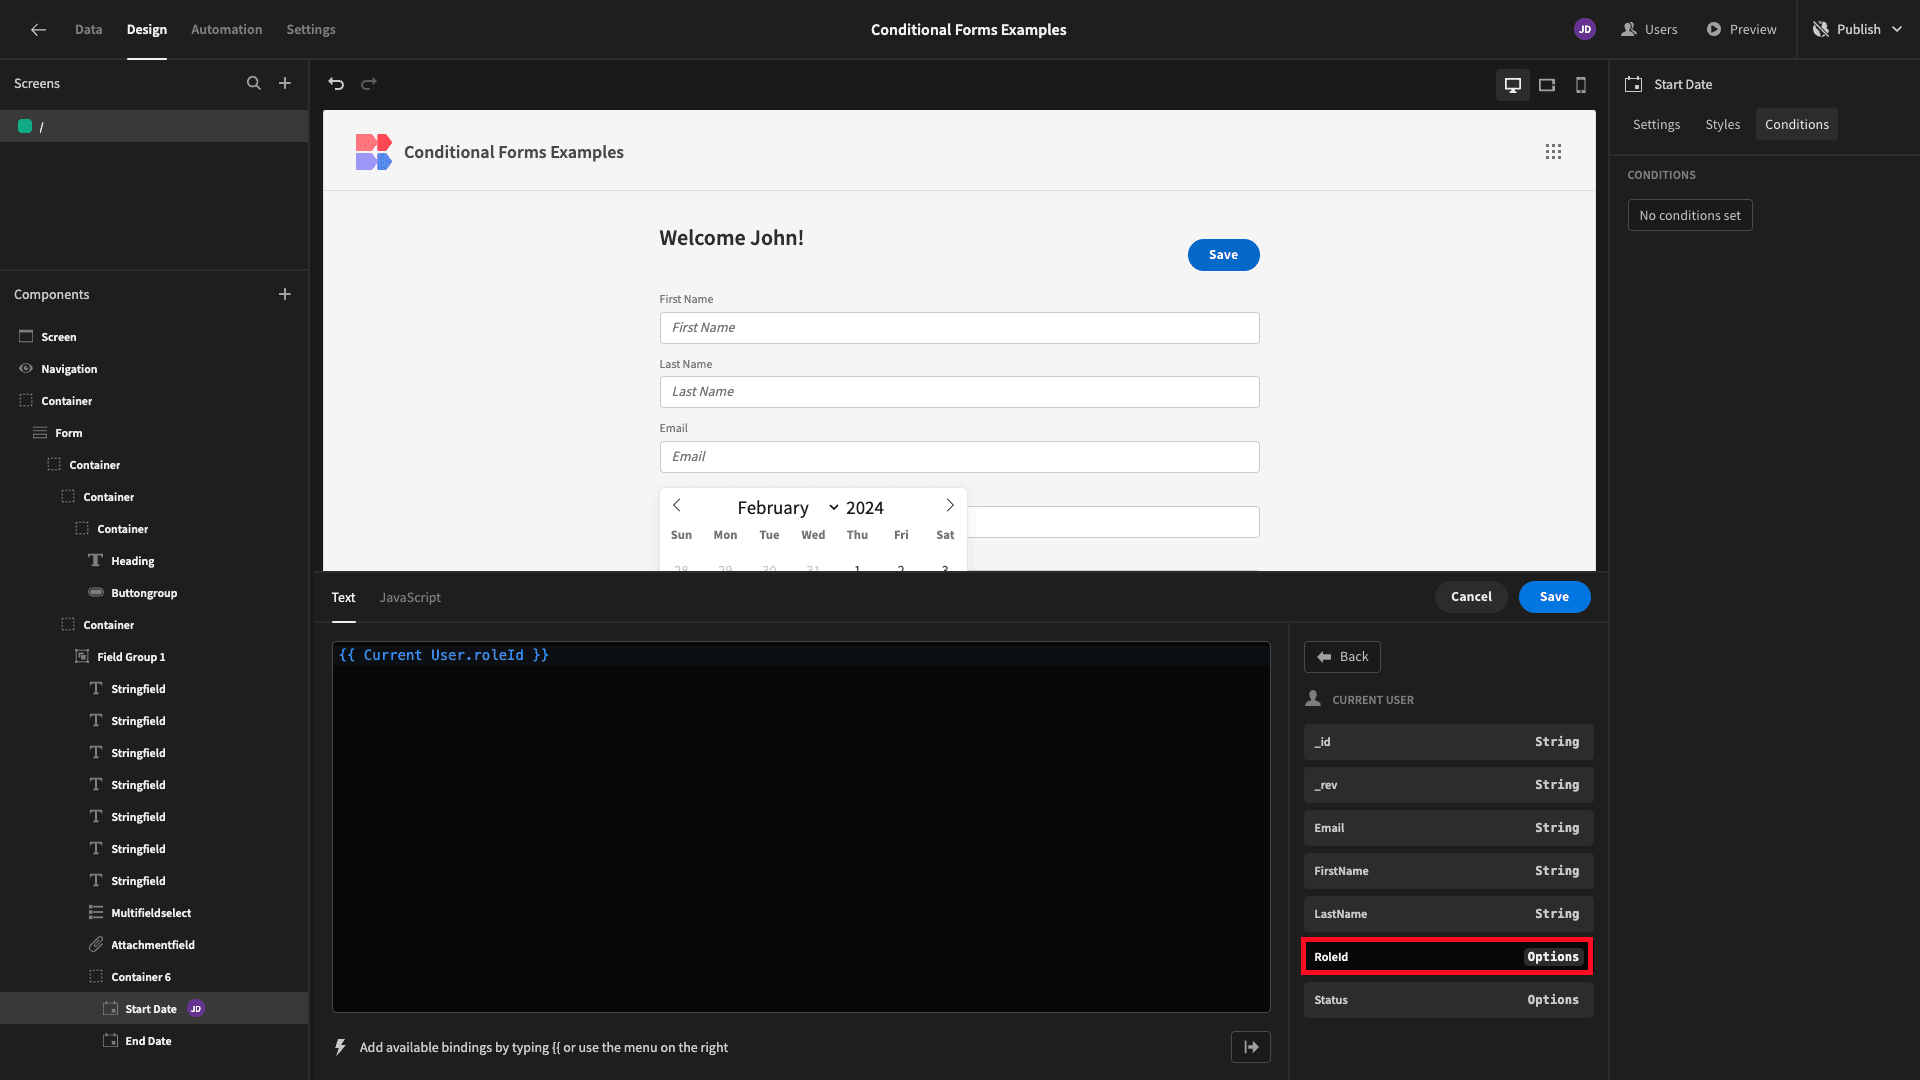
The reference value is another Current User field called roleId:
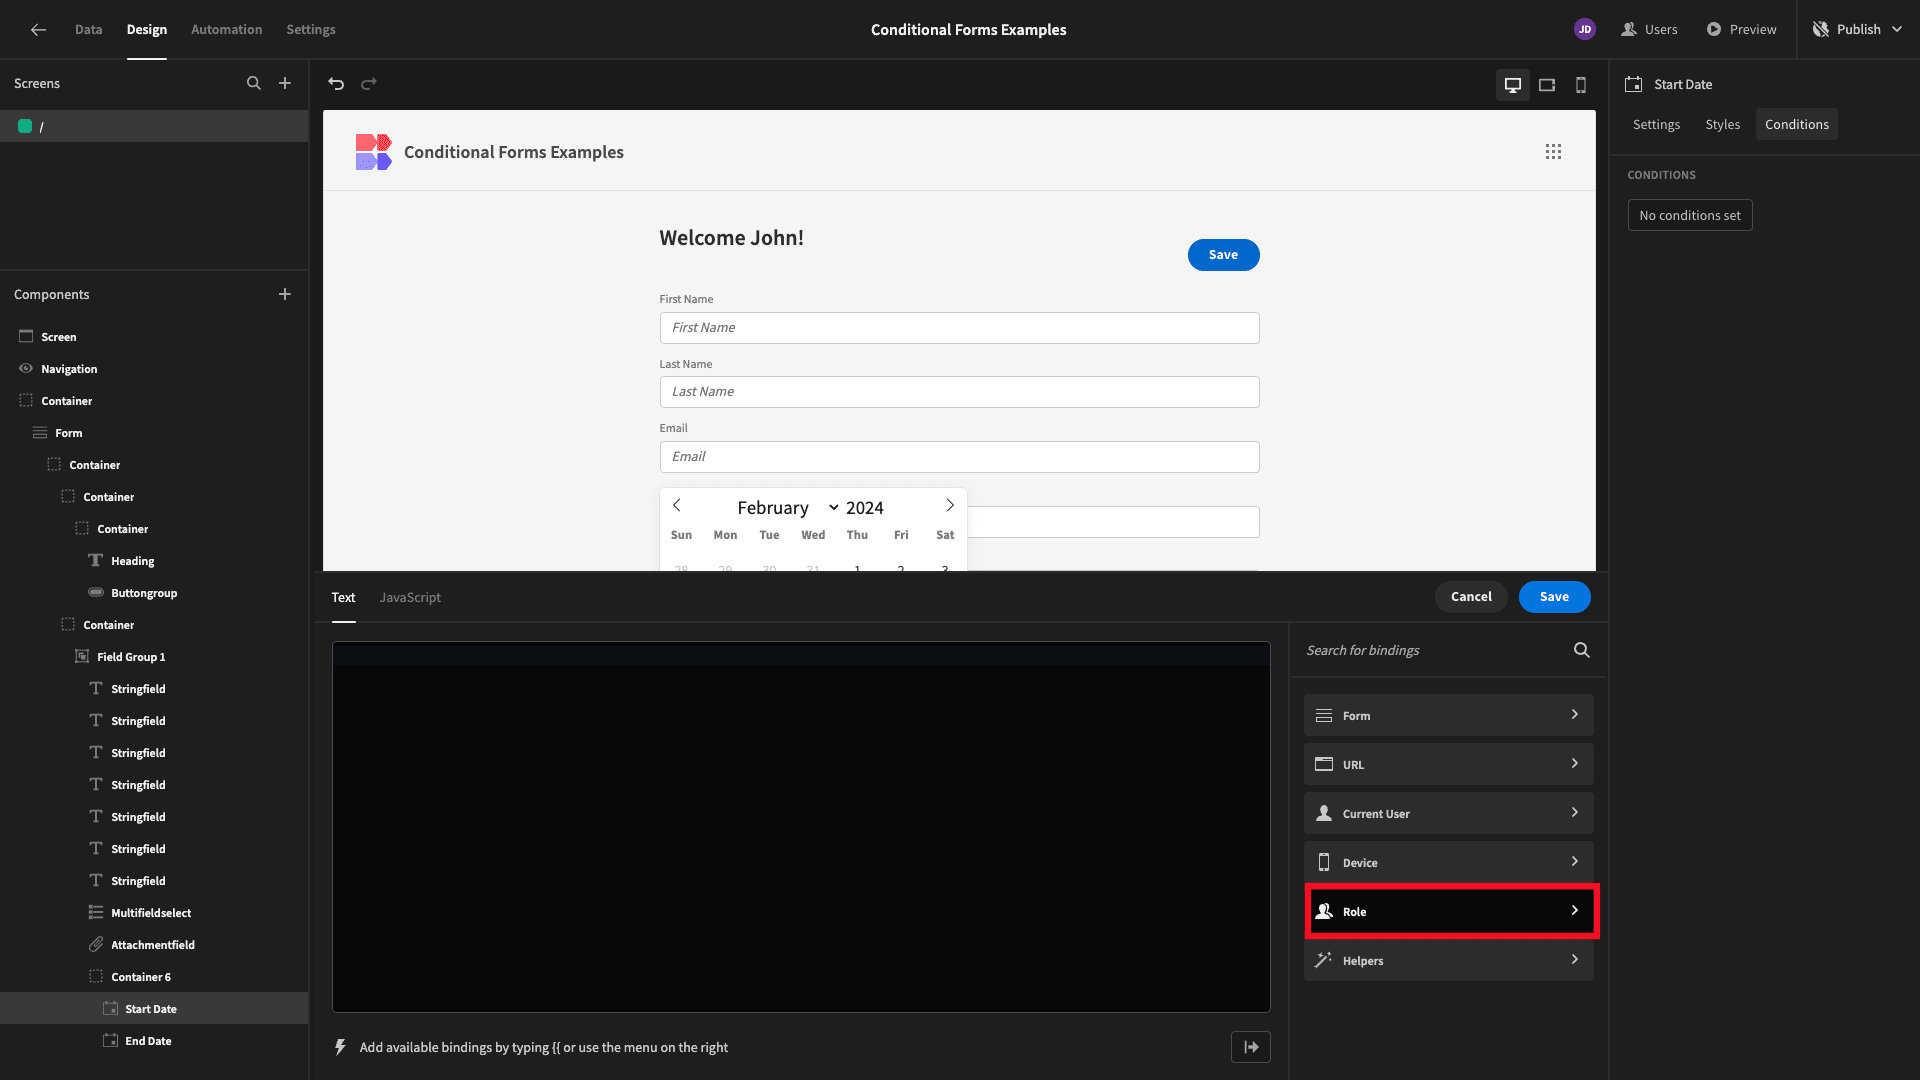
Budibase has four built-in access roles, each with a name and a corresponding ID. We can access the ID attribute for these under the Role heading in the bindings drawer for our comparison value:
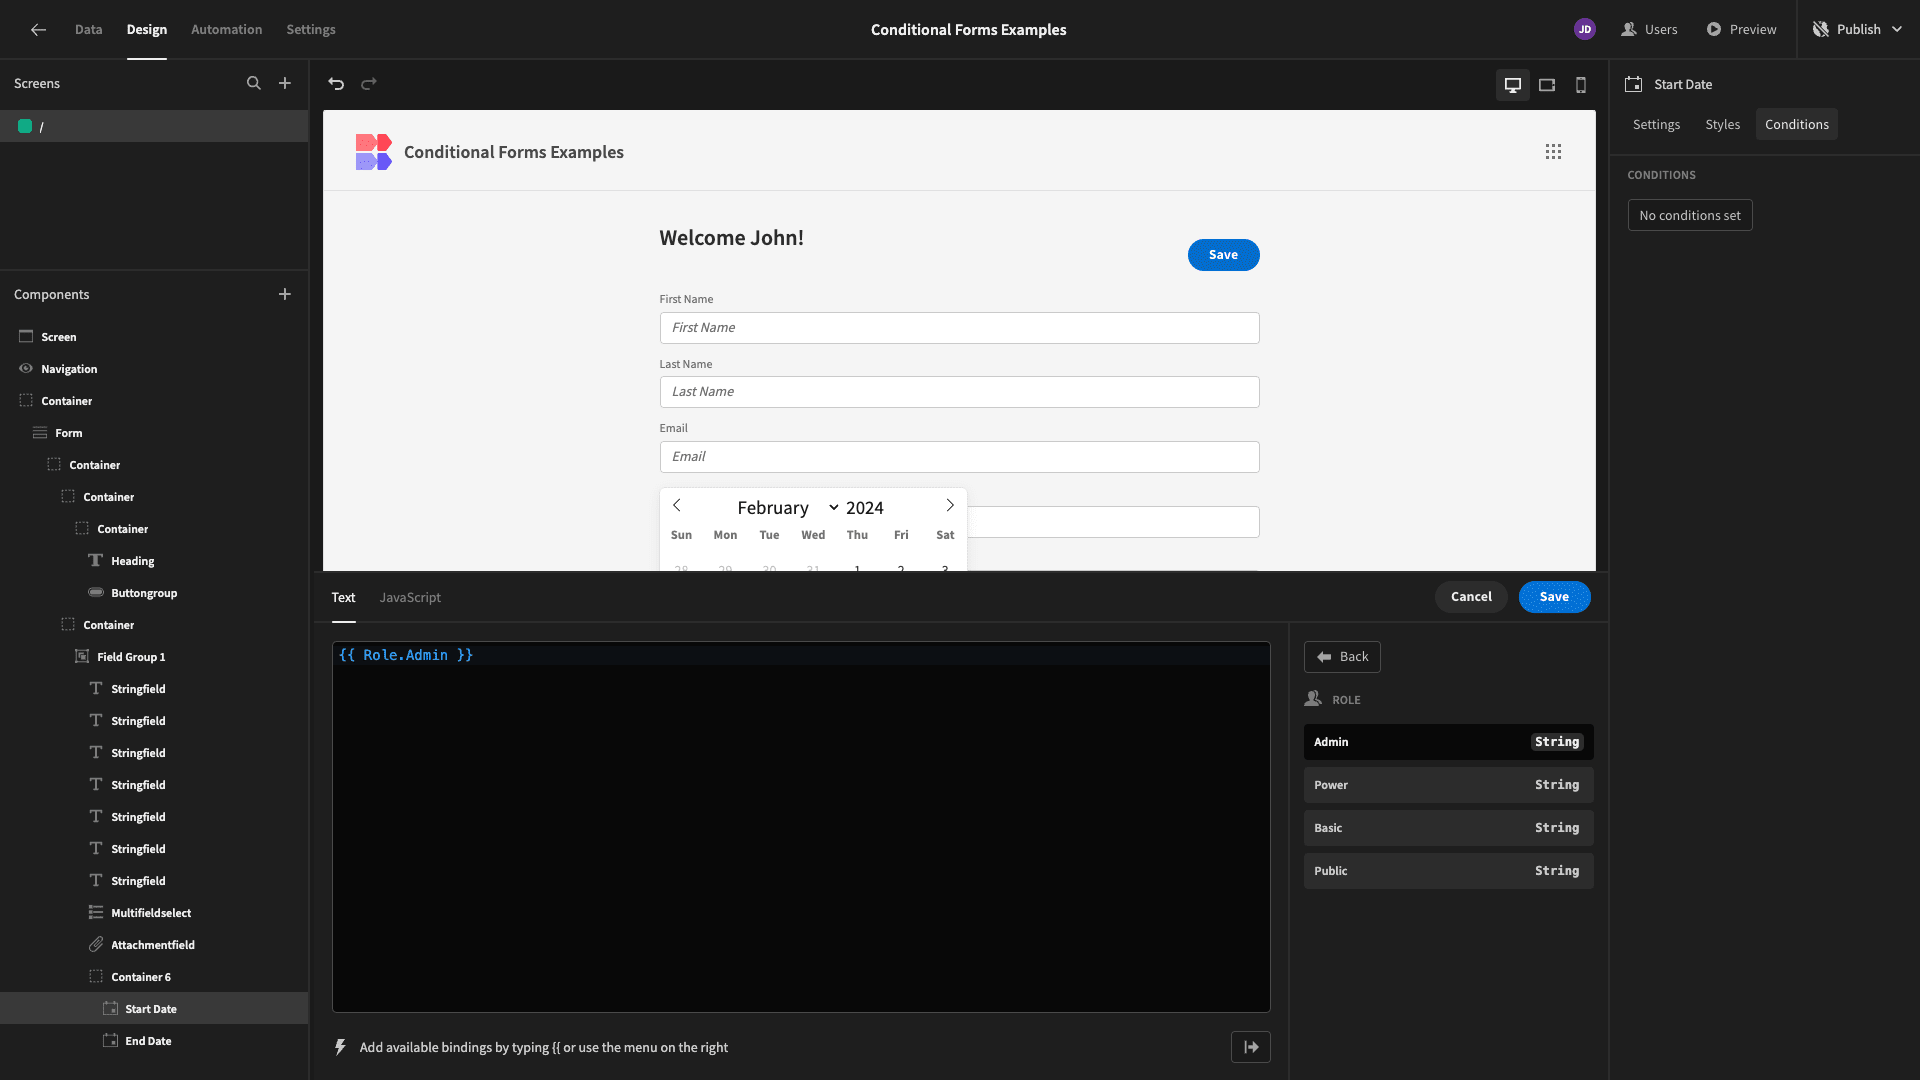
These fields should only be editable for users with an Admin role, so that’s what we’re choosing:
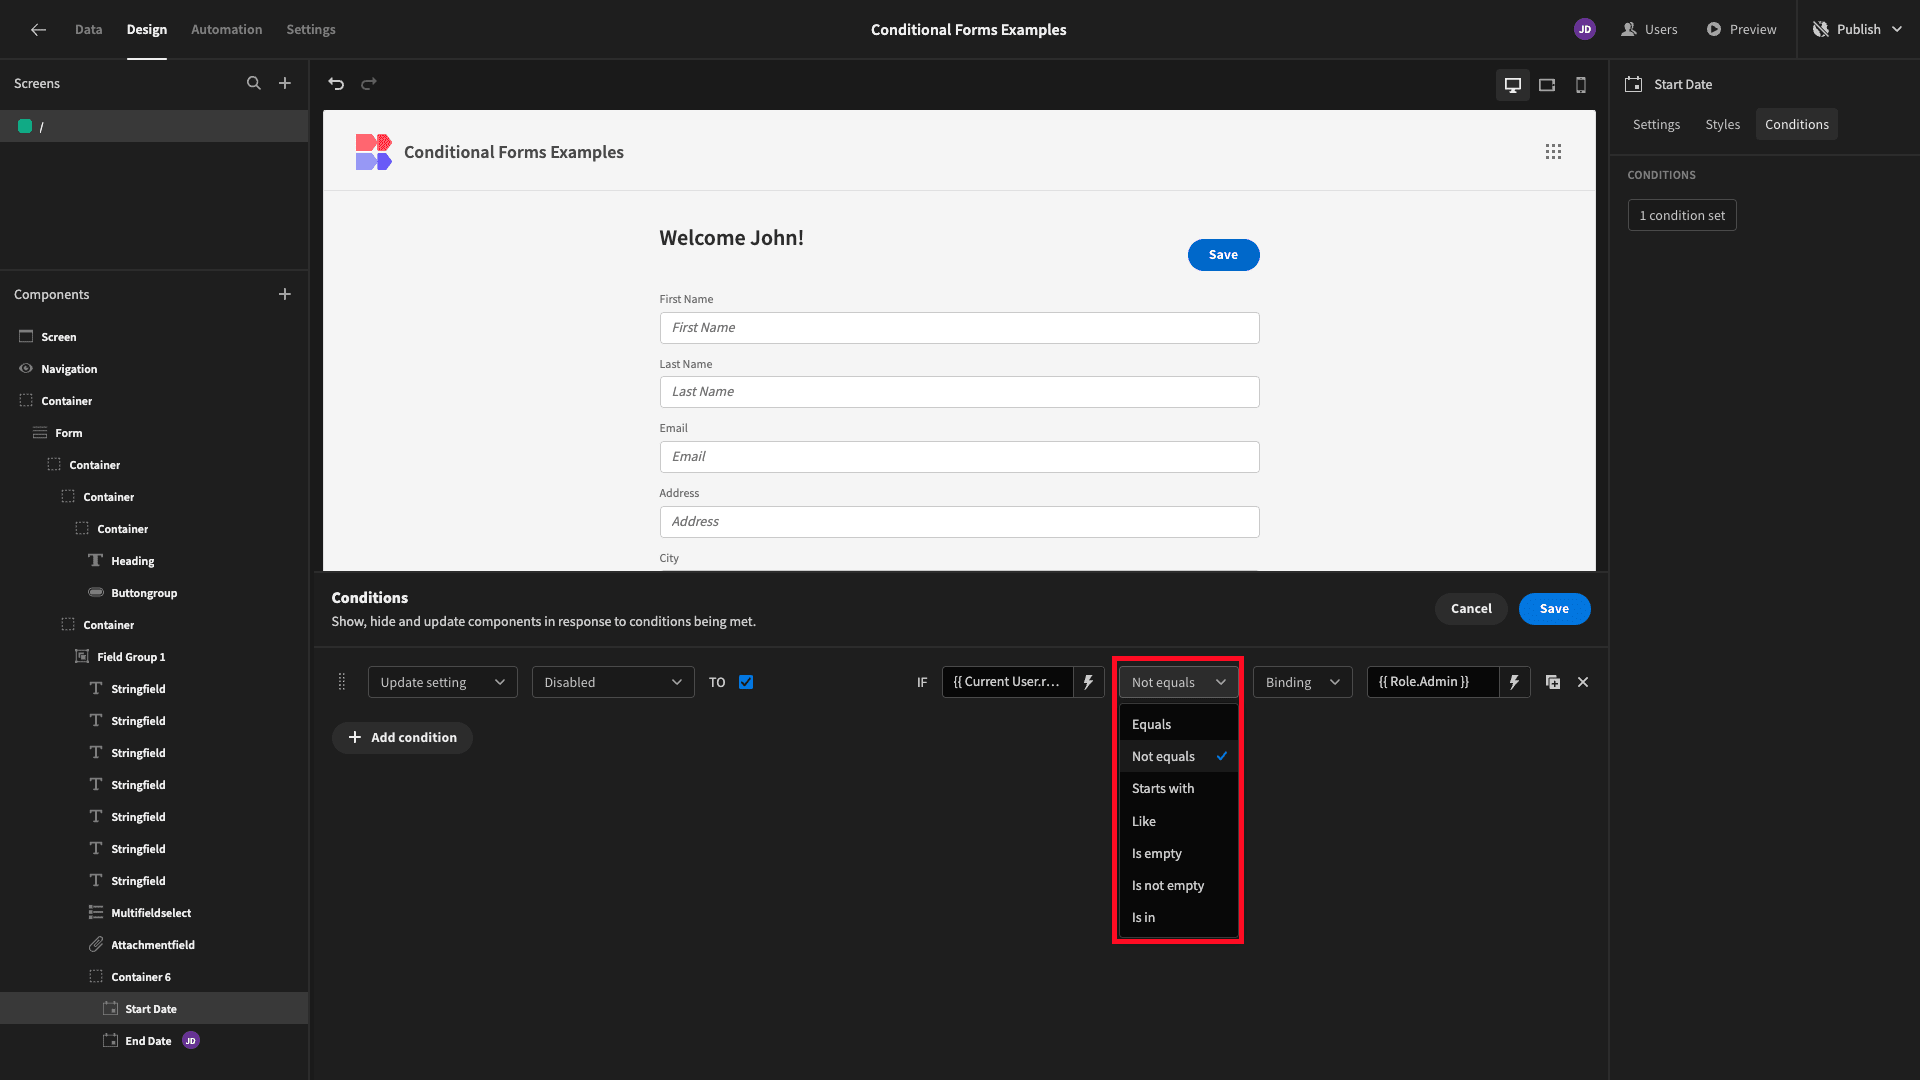
We’re also choosing Not Equals for our operator:
We have an Admin account on our Budibase tenant, so these fields still appear as editable for us in the builder:
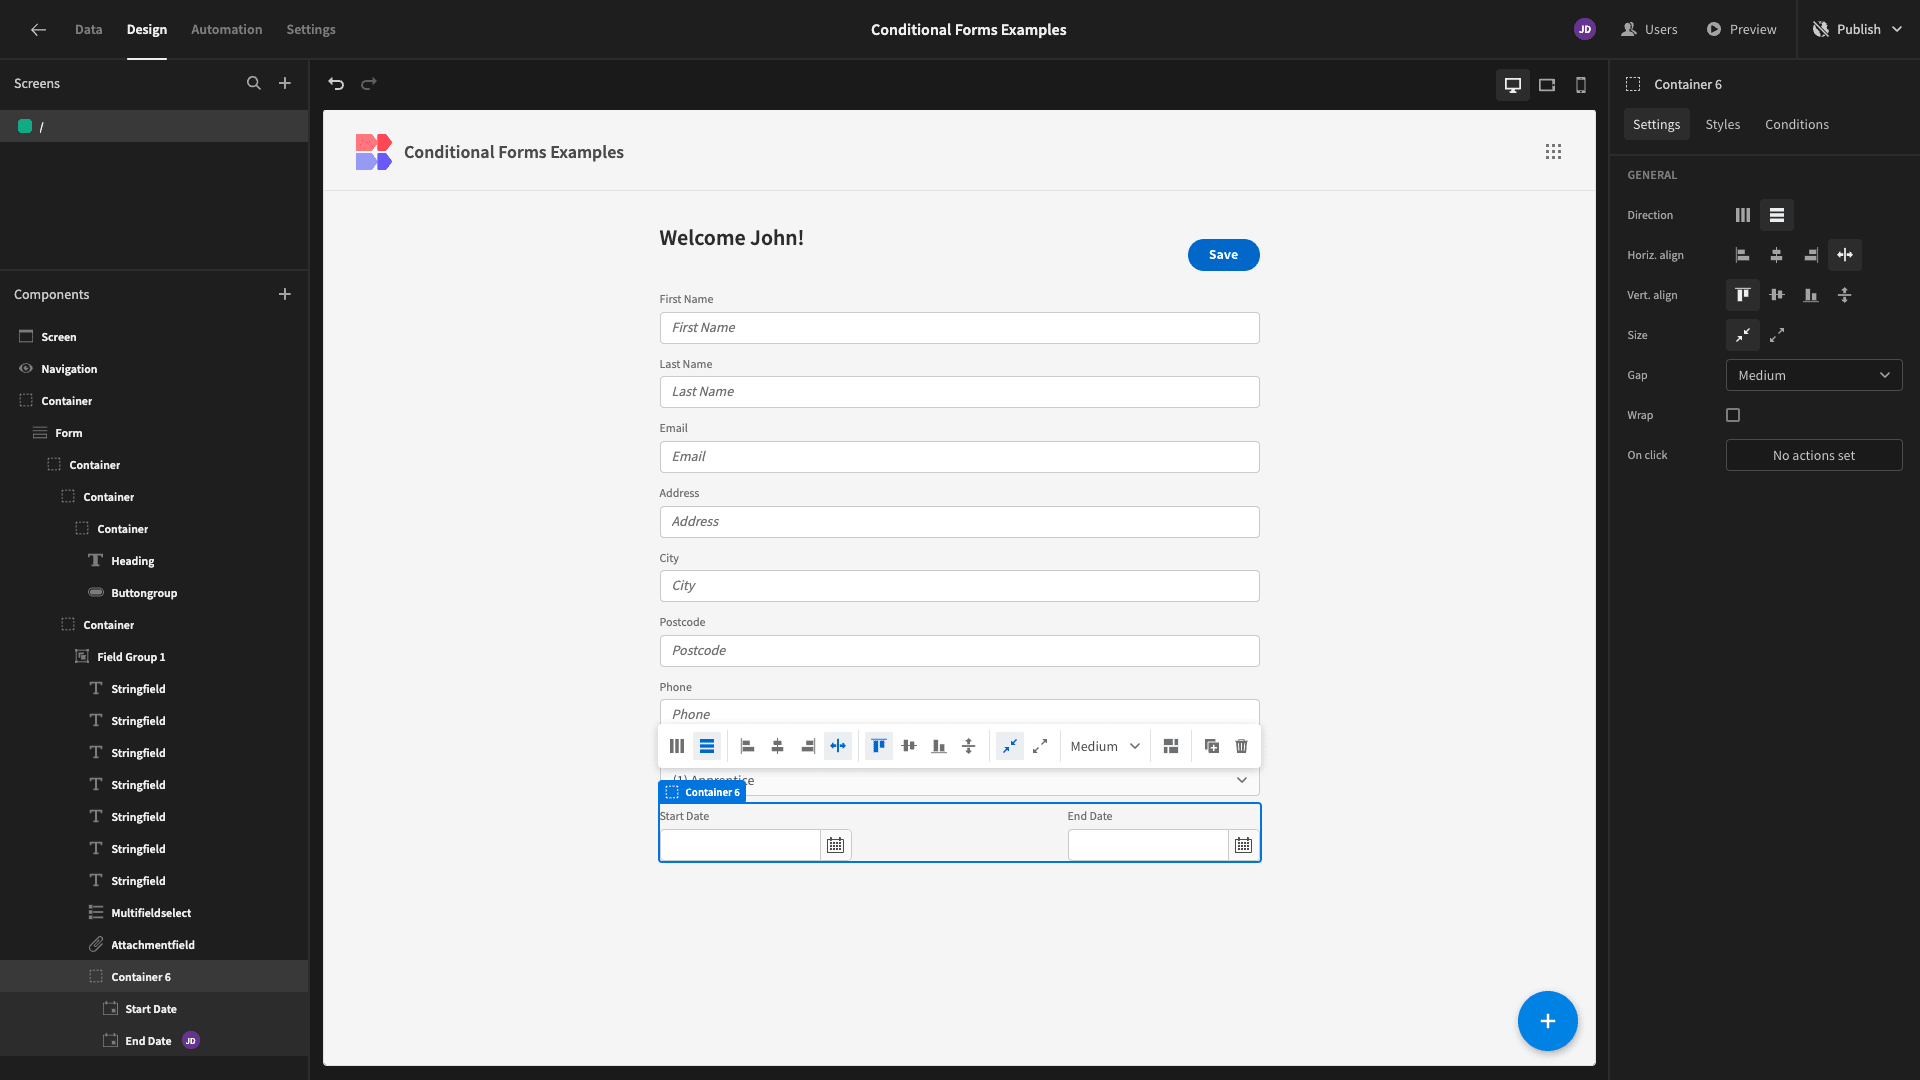
However, when we preview our app as a Basic user, they’ll be disabled:
4. Contextual conditions
We can also use contextual information to apply conditions to our form UI. We’ve made another modification to our form, this time wrapping the First Name and Last Name fields in a horizontal container so they appear on a single line:
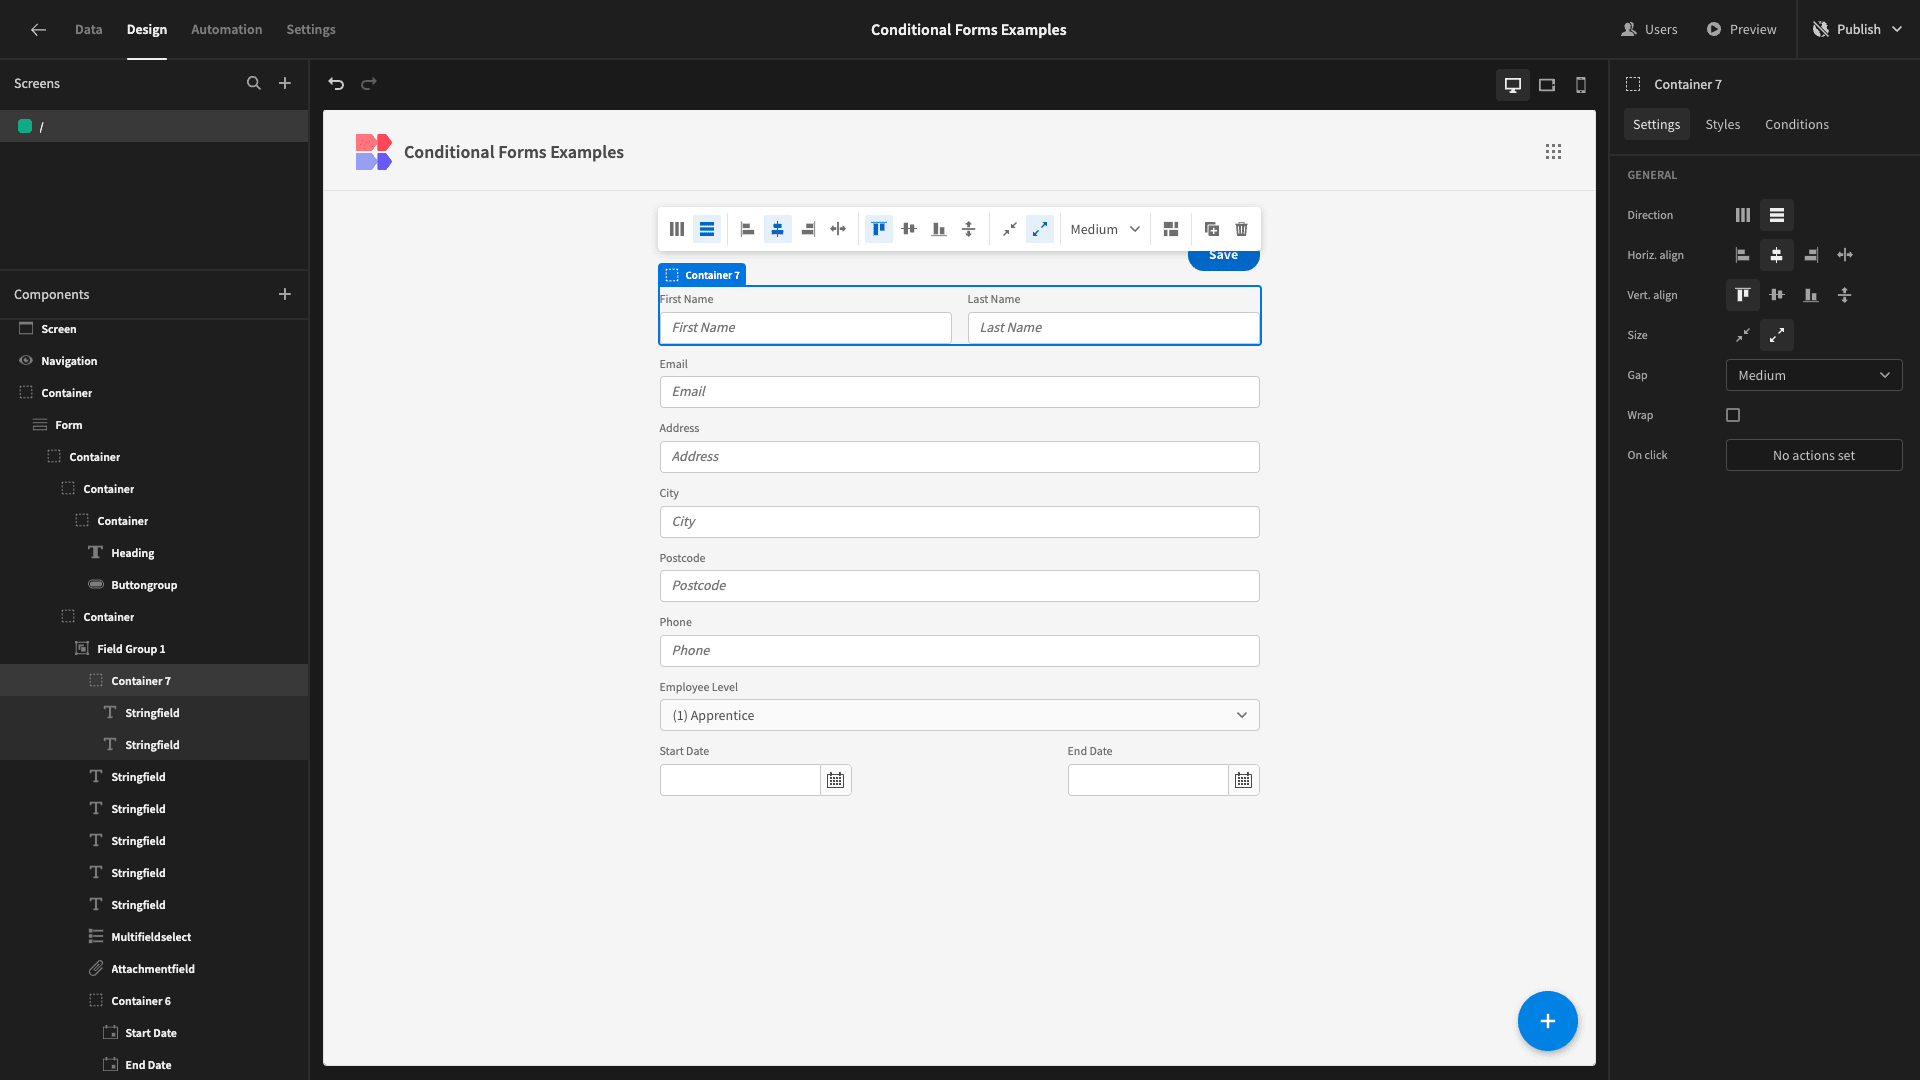
This is a better UX if we access our form on a desktop, but it doesn’t work as nicely on mobile:
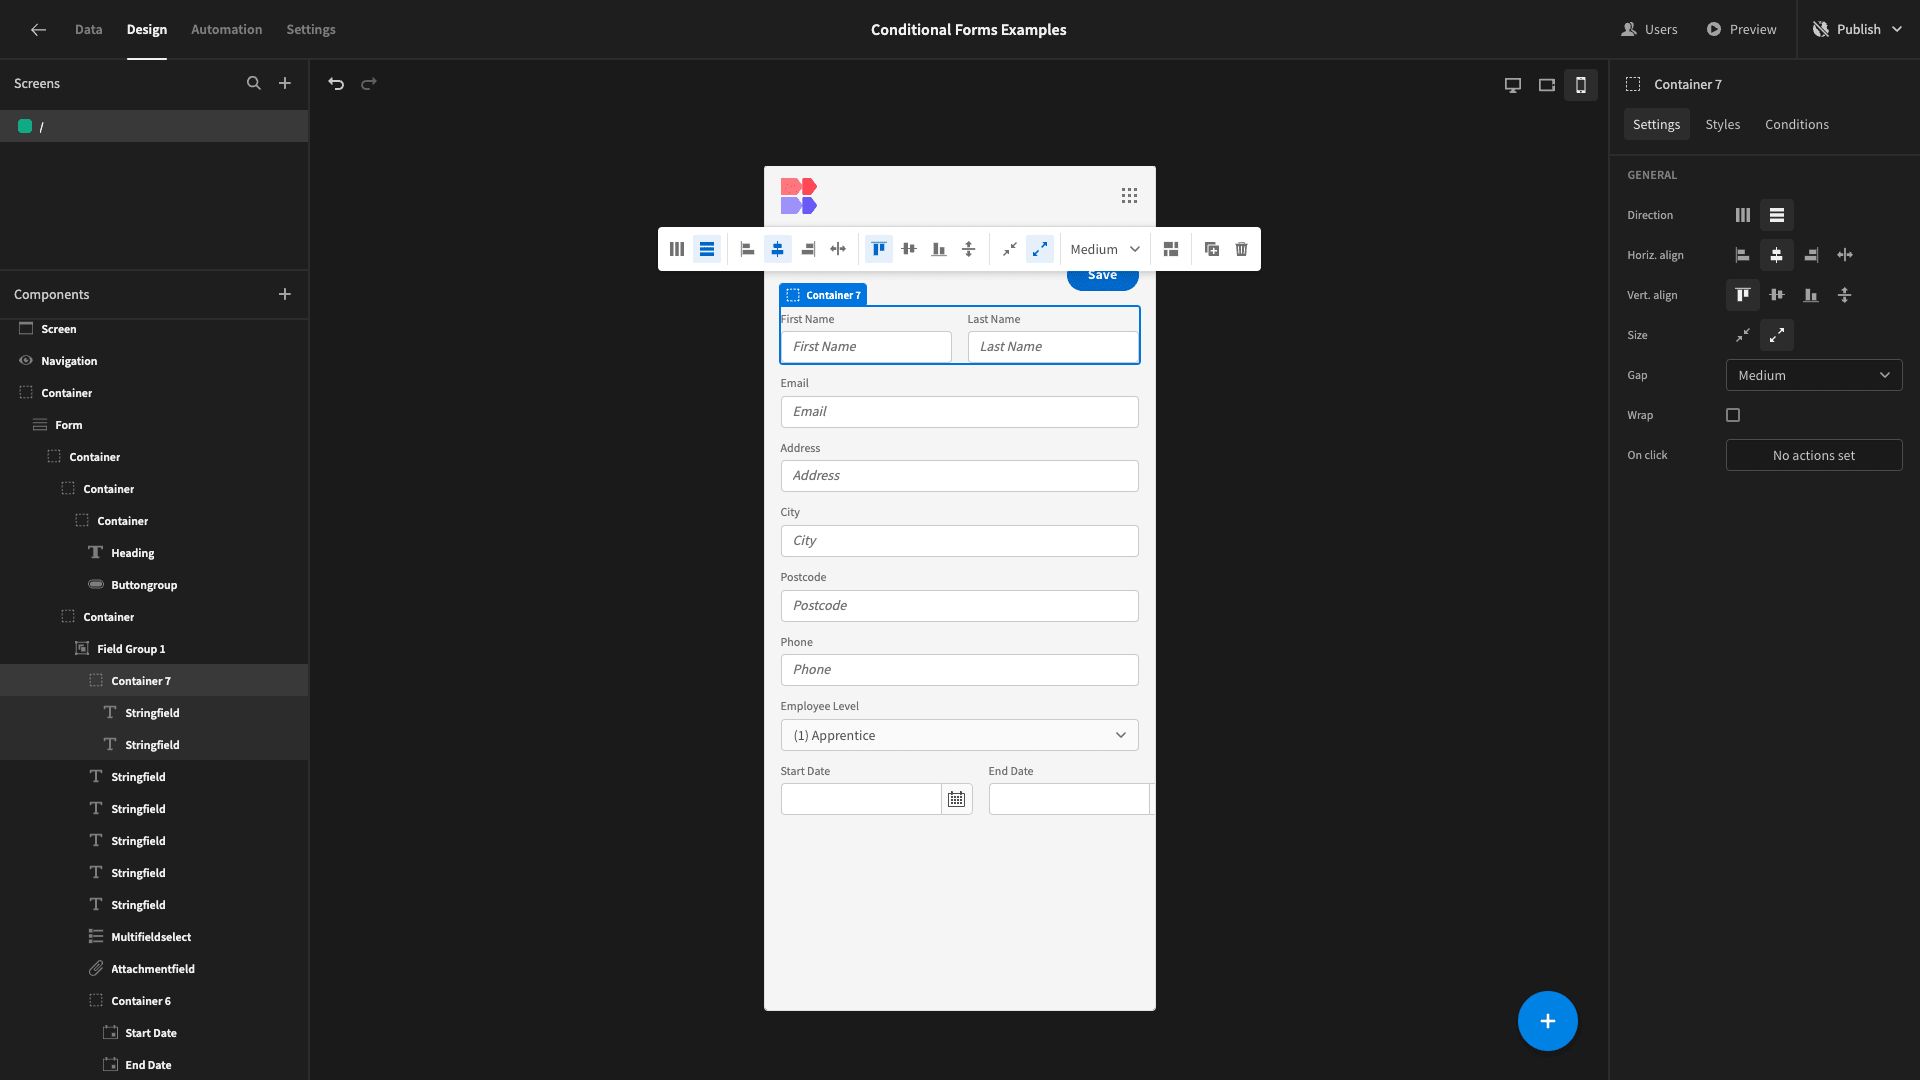
We’re going to create a condition for our new container that updates its Direction setting to Vertical:
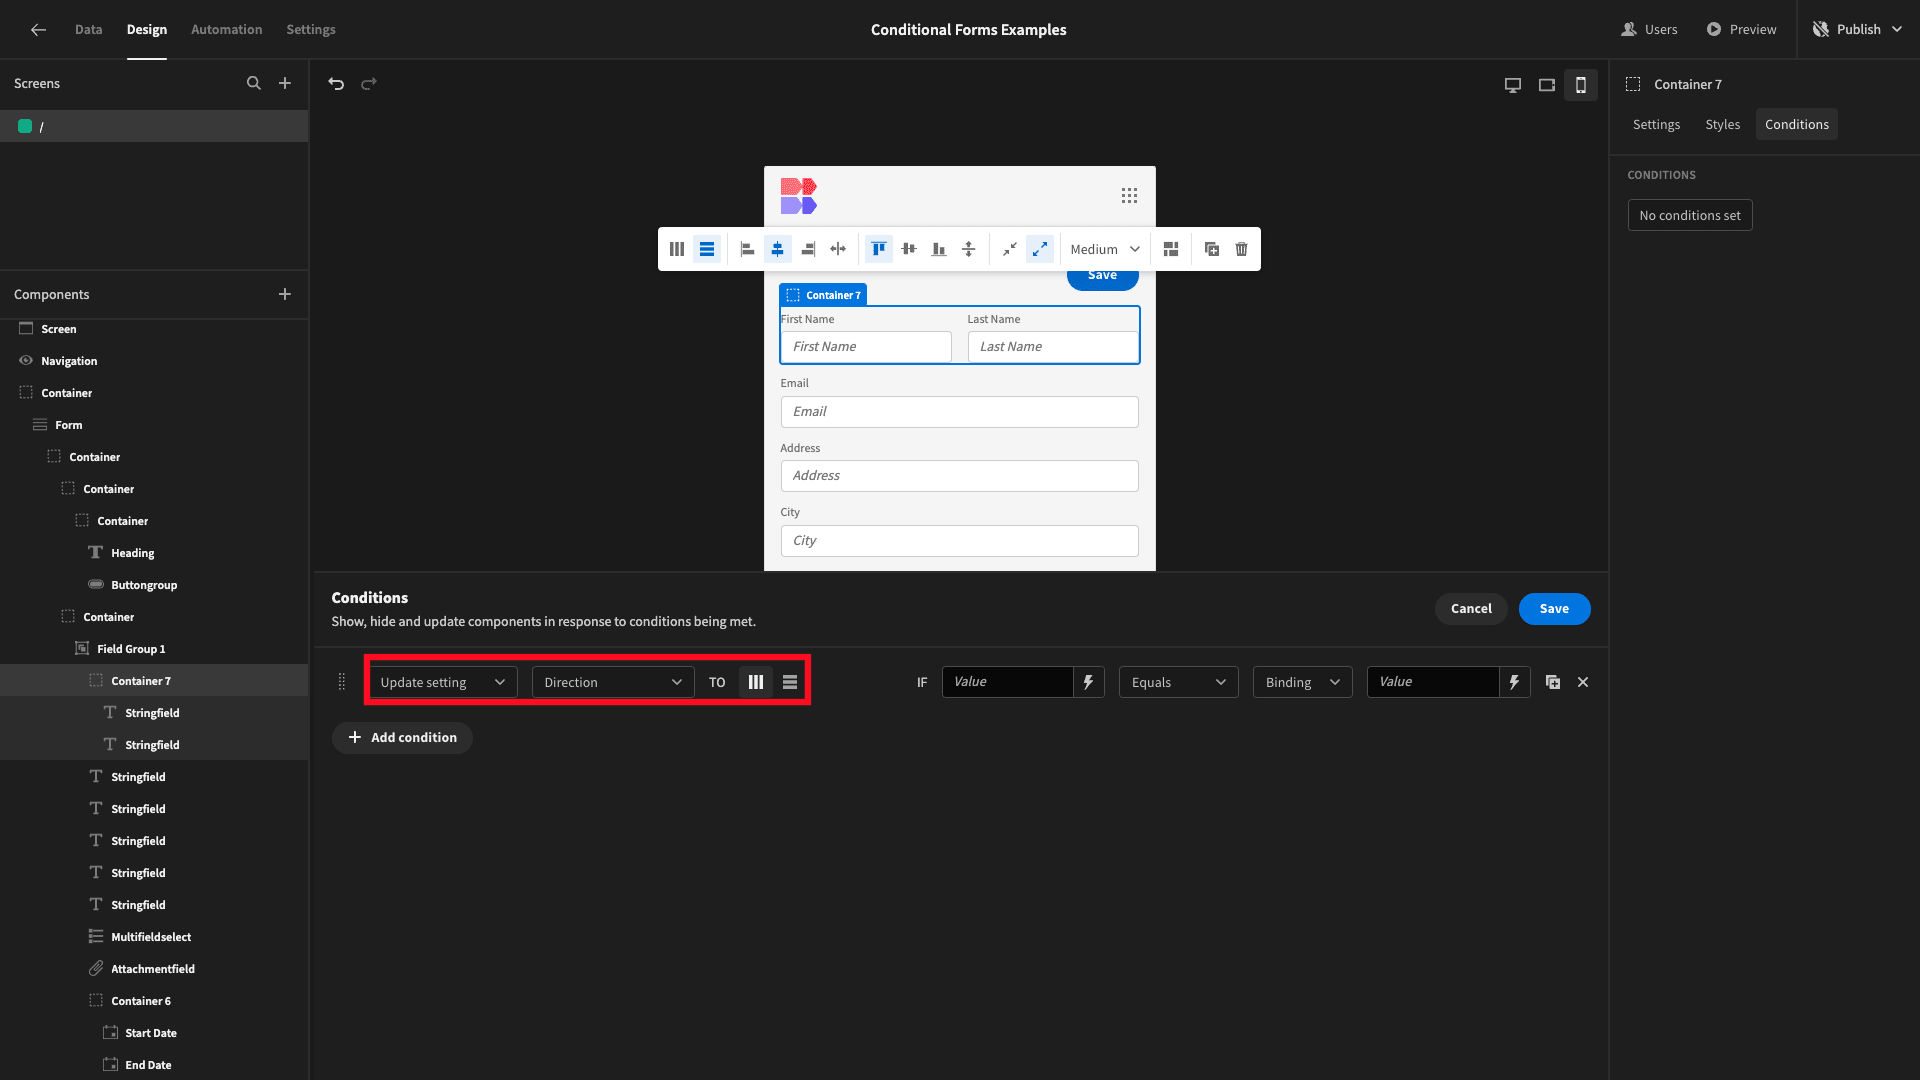
We want to apply this setting when the current user’s device is a mobile phone. We’ve got a category of helpers called Device:
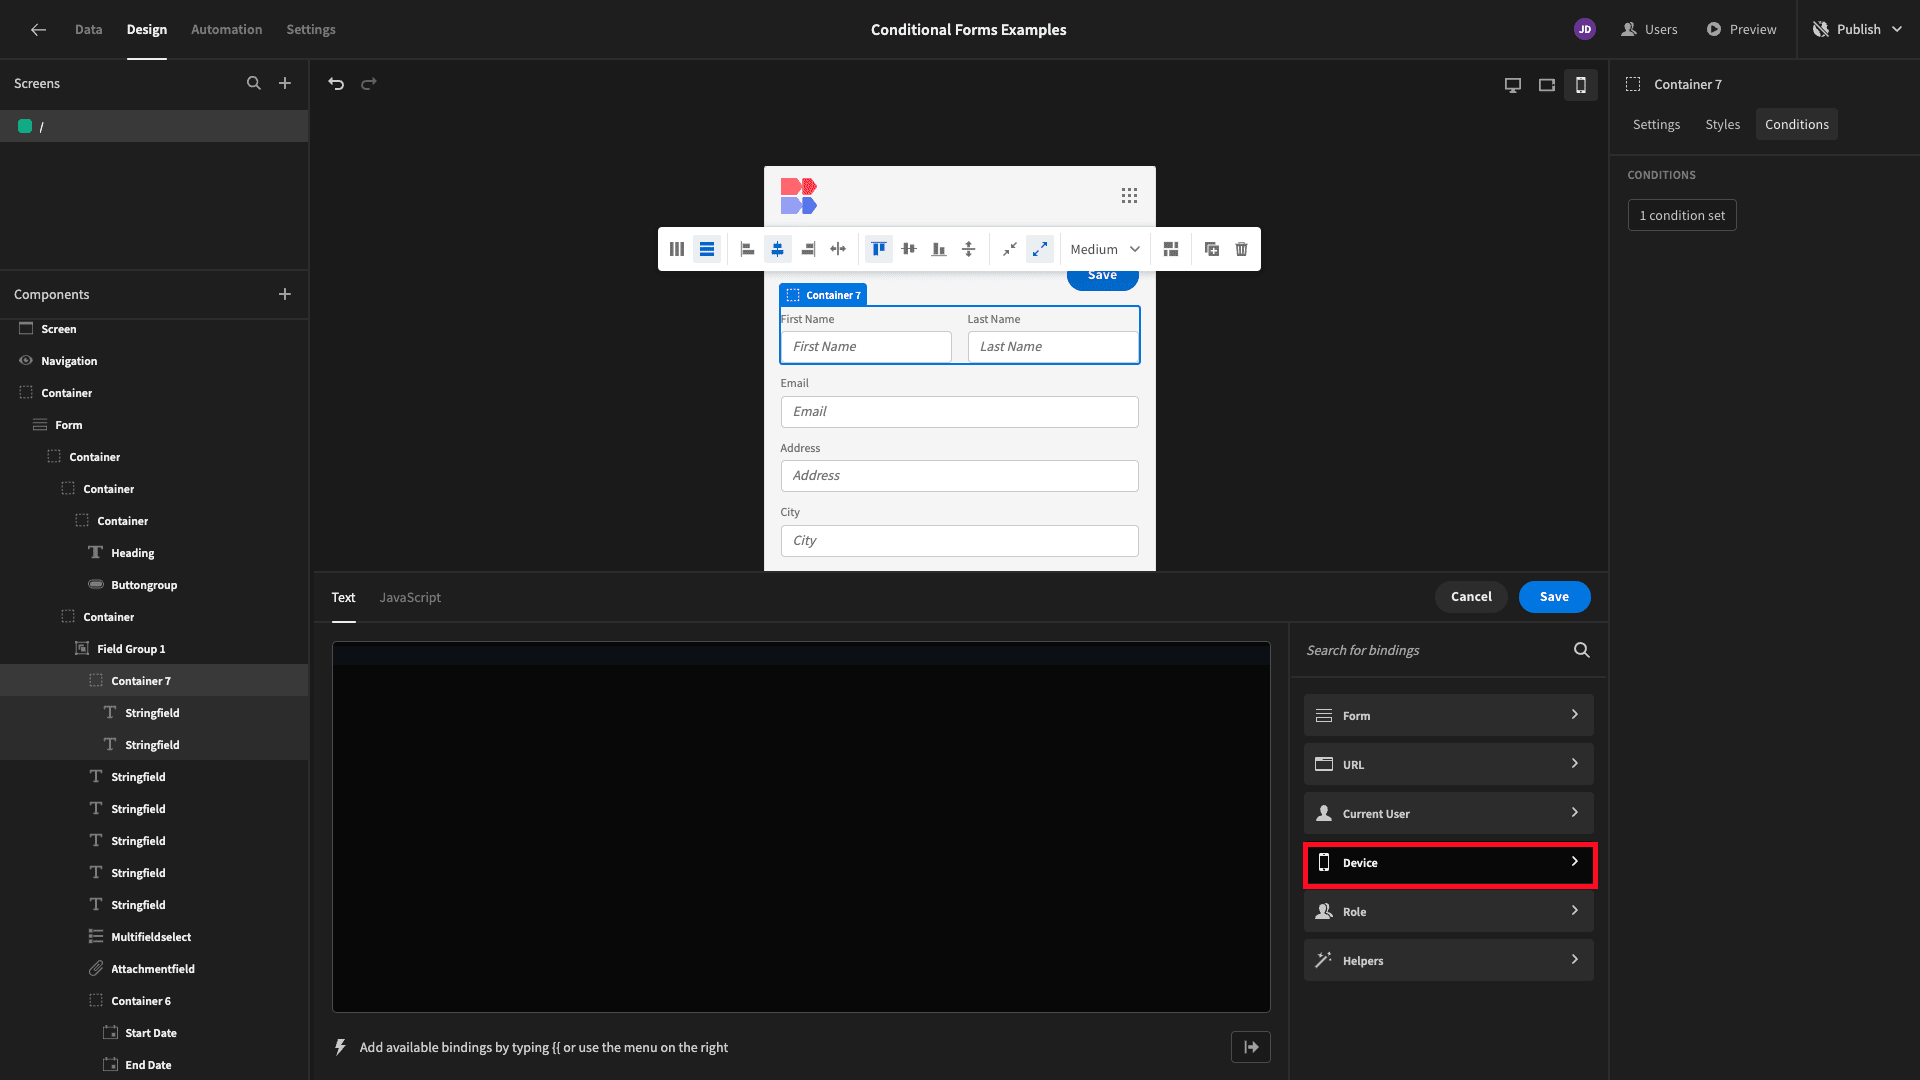
Inside this, we can choose Mobile:
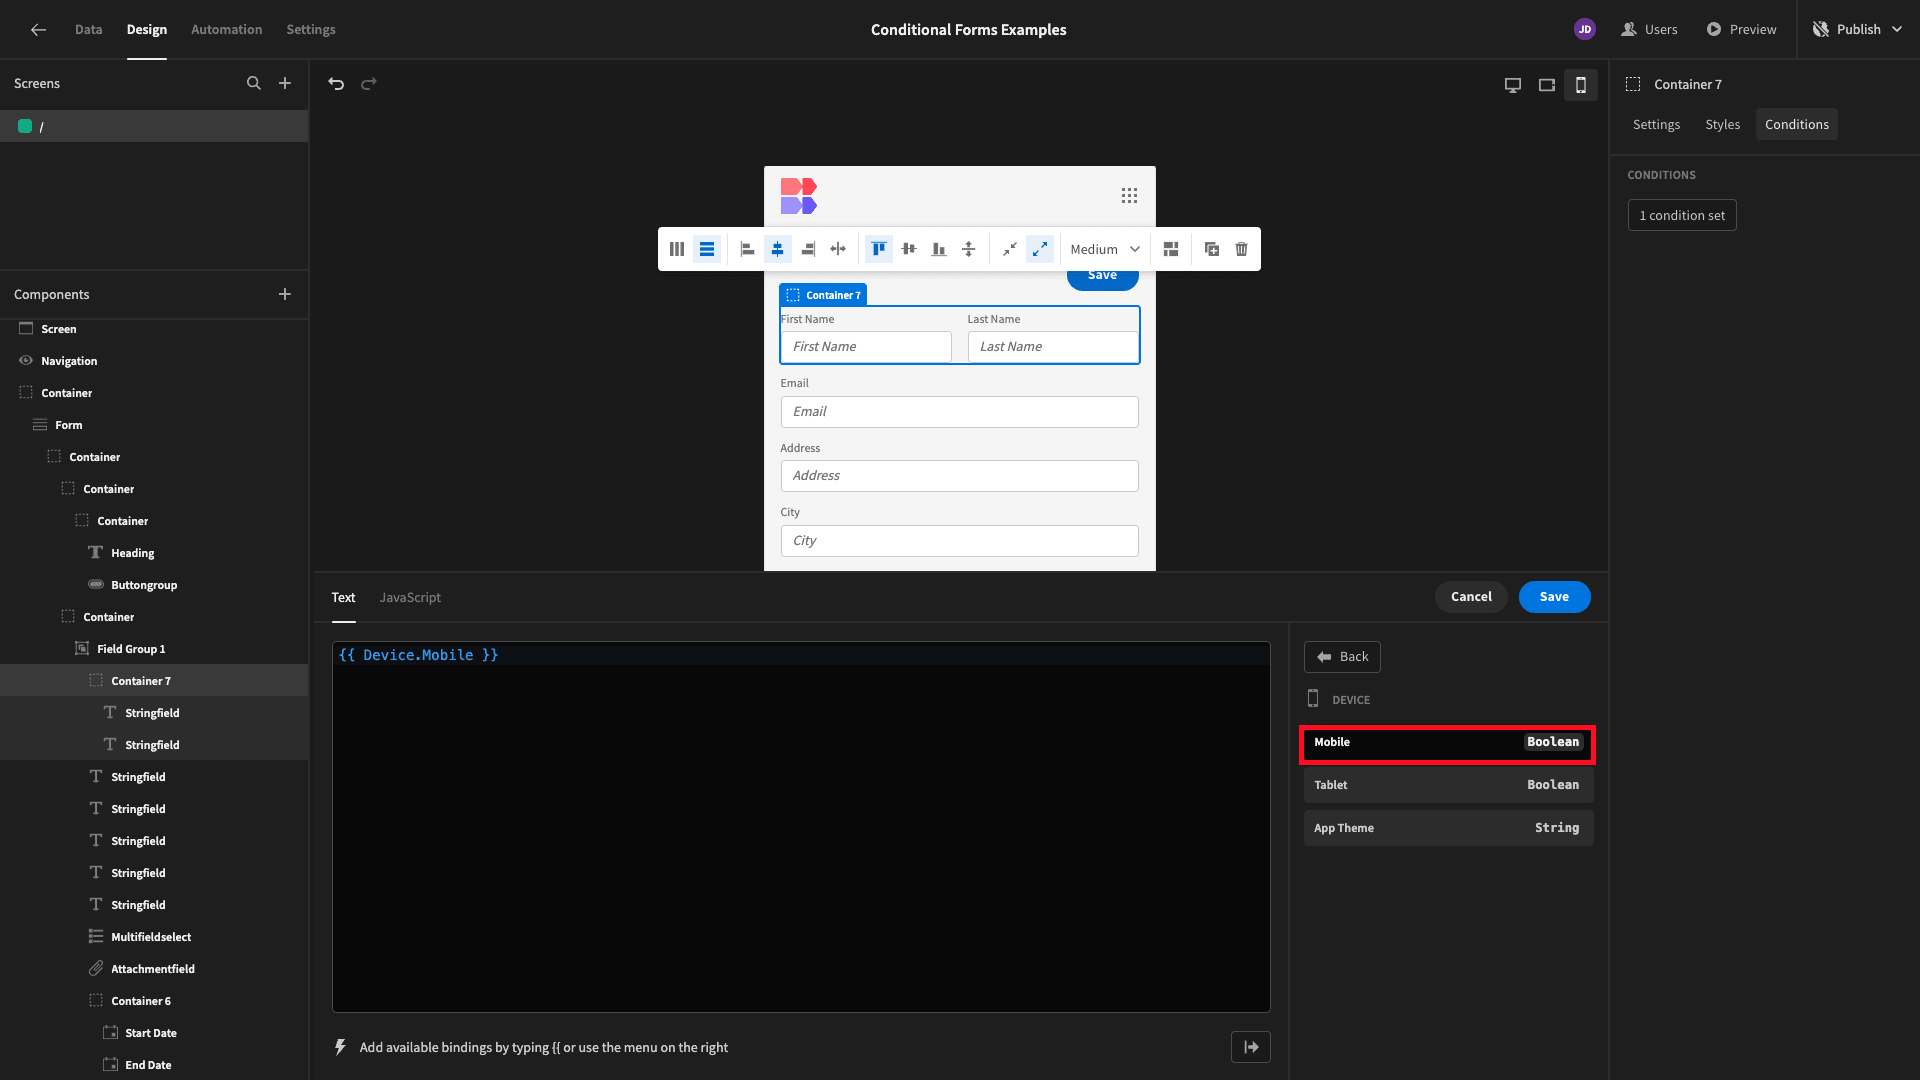
This is a contextual boolean variable that evaluates to true when a user accesses our form from a mobile device. So, instead of binding a comparison value, we’ll select Boolean:
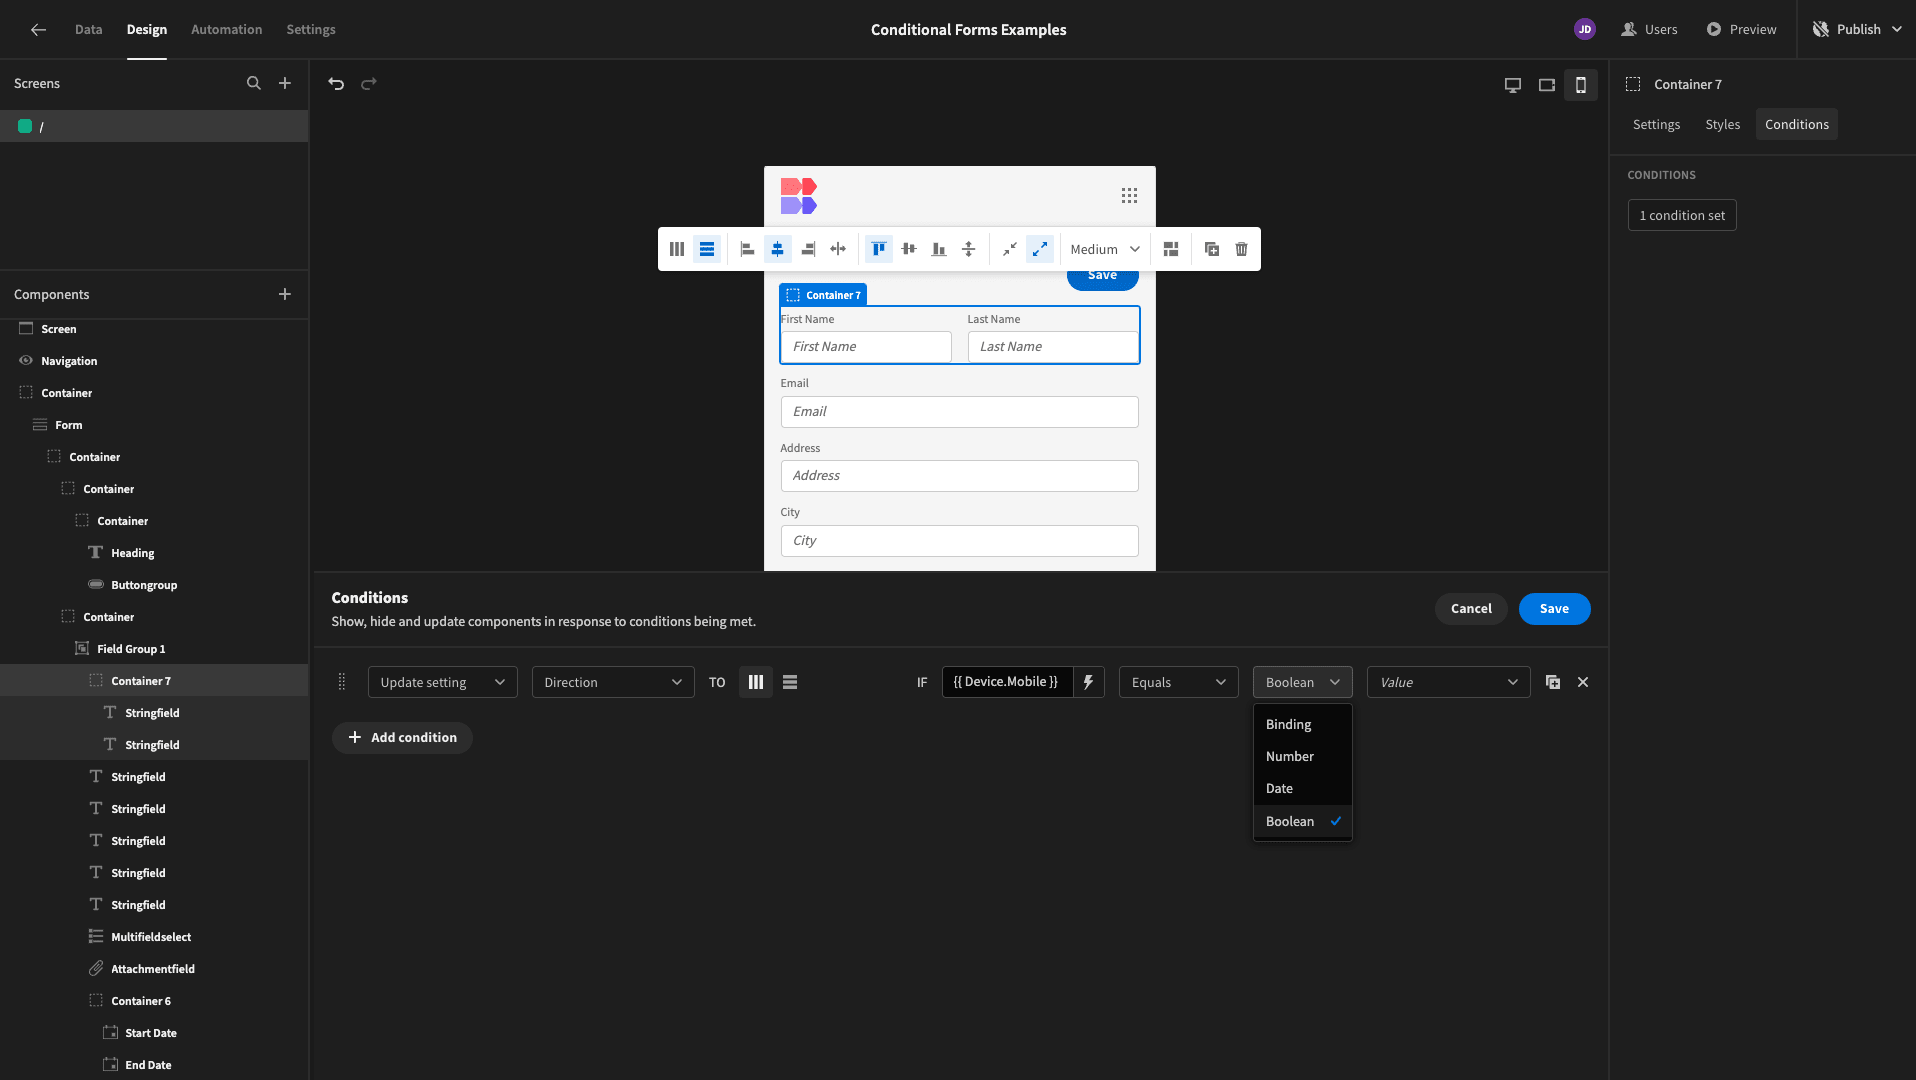
And lastly, we’ll set our comparison value to True:
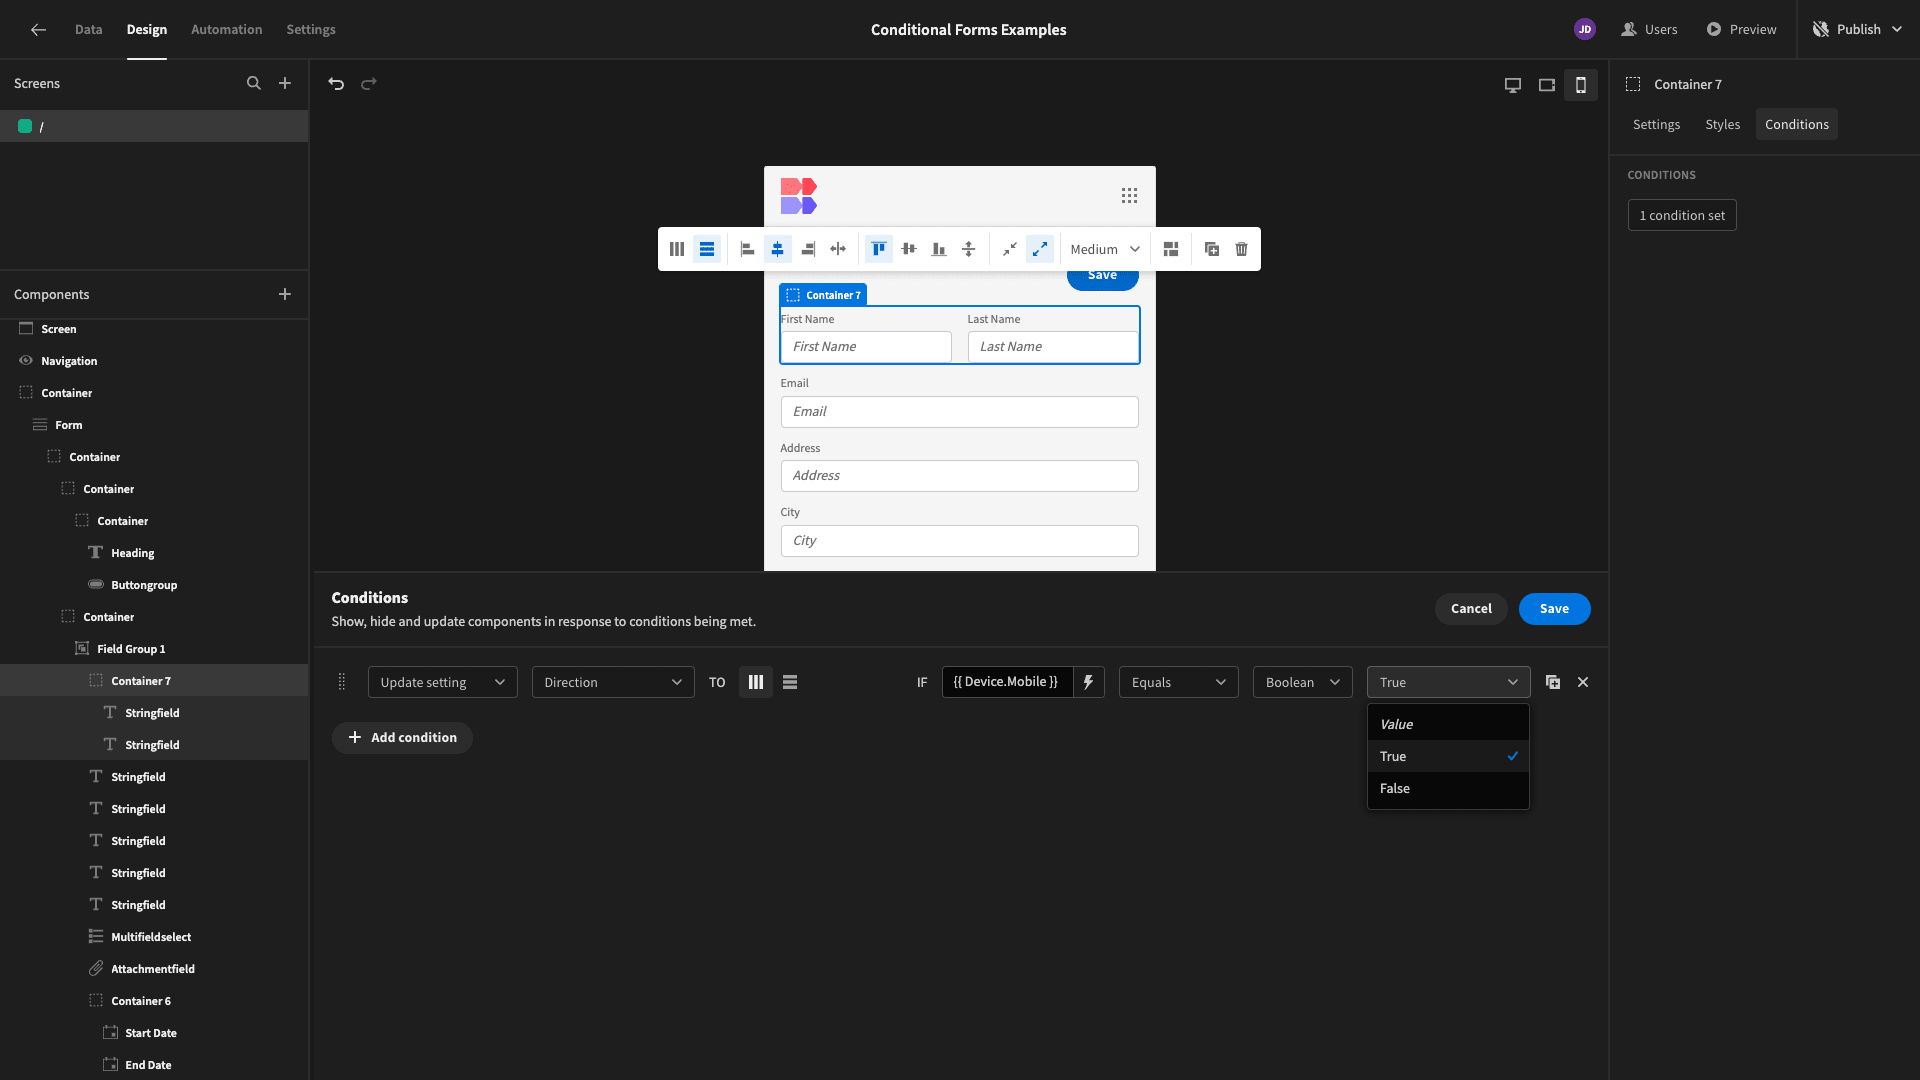
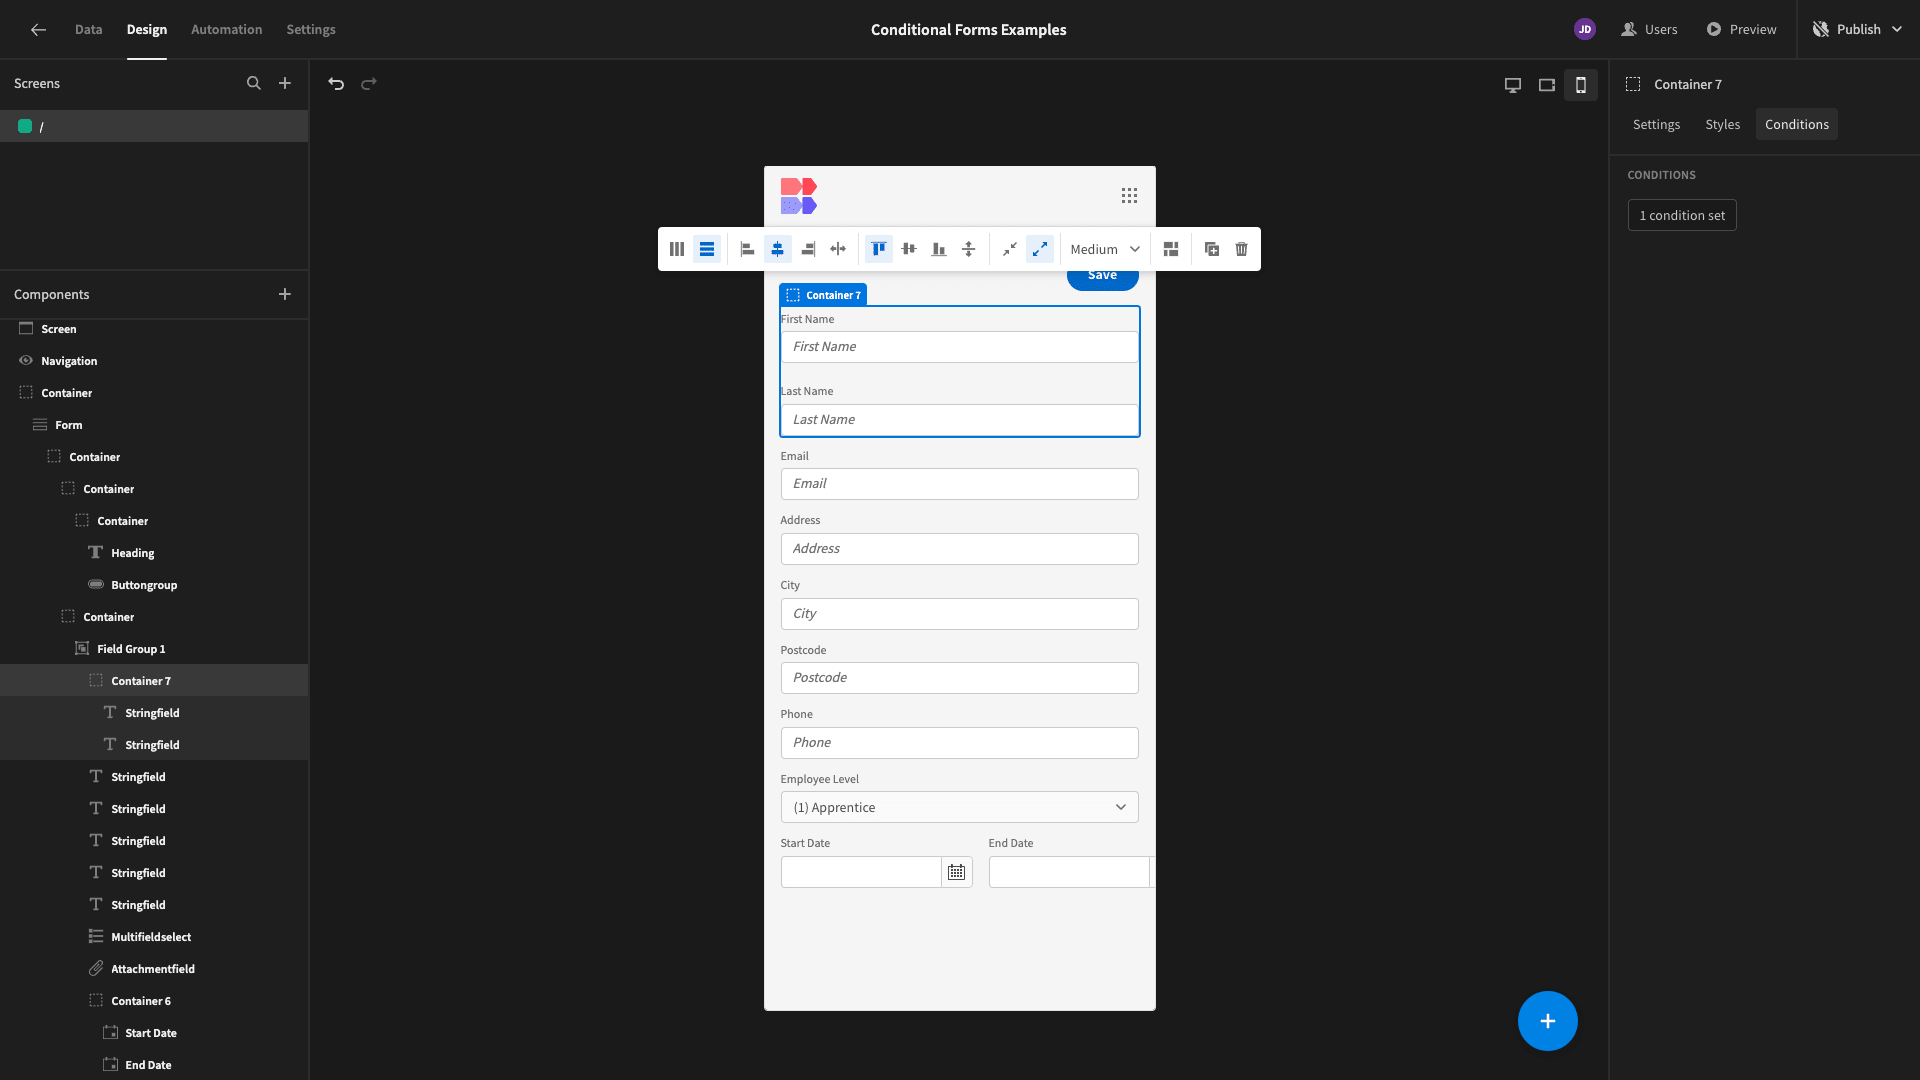
When we apply this rule, our name fields will be arranged vertically for mobile users:
5. Advanced conditionality rules
Budibase stands head and shoulders above traditional form builders for creating advanced, custom solutions. With a built-in automation builder, extensive external data support, custom front-end scripting, and more, there’s huge scope for building complex conditionality rules.
We can connect to just about any API or data source - and use query responses however we want.
This means that we can create conditional logic within our forms that would never be possible in traditional form builders that lack this level of connectivity and data support.
To demonstrate this, we’ve added an API request to our example app.
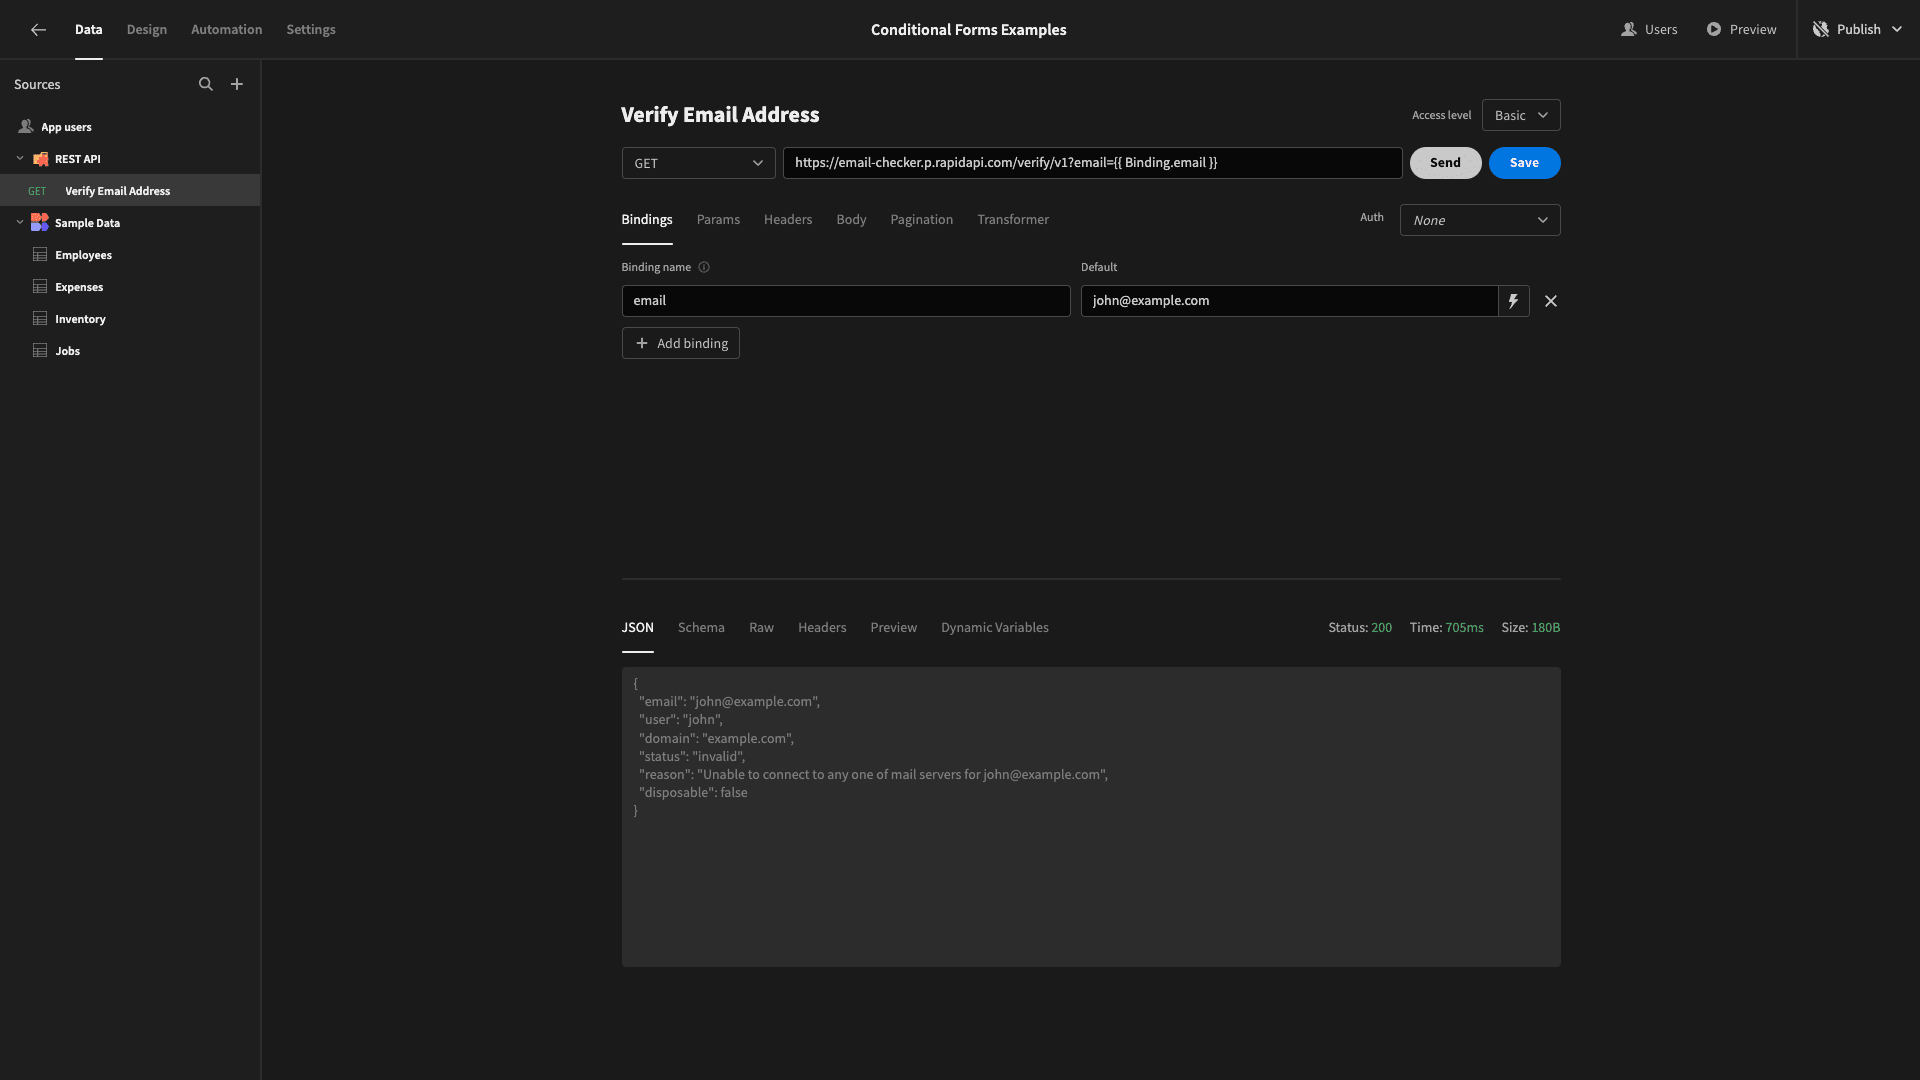
You can check out our REST API documentation to learn more about how this works.
Our API request accepts a bindable value to represent an email address and returns a JSON object with a series of key/value pairs relating to the validity of this. We only care about one of these, which is called status.
This can either return ‘valid’ or ‘invalid’.
We want to use this information to verify the email address that users submit to our form. We’ll then update its design to reflect this.
Back on the design tab, we can open the On-Change actions drawer for our email field:
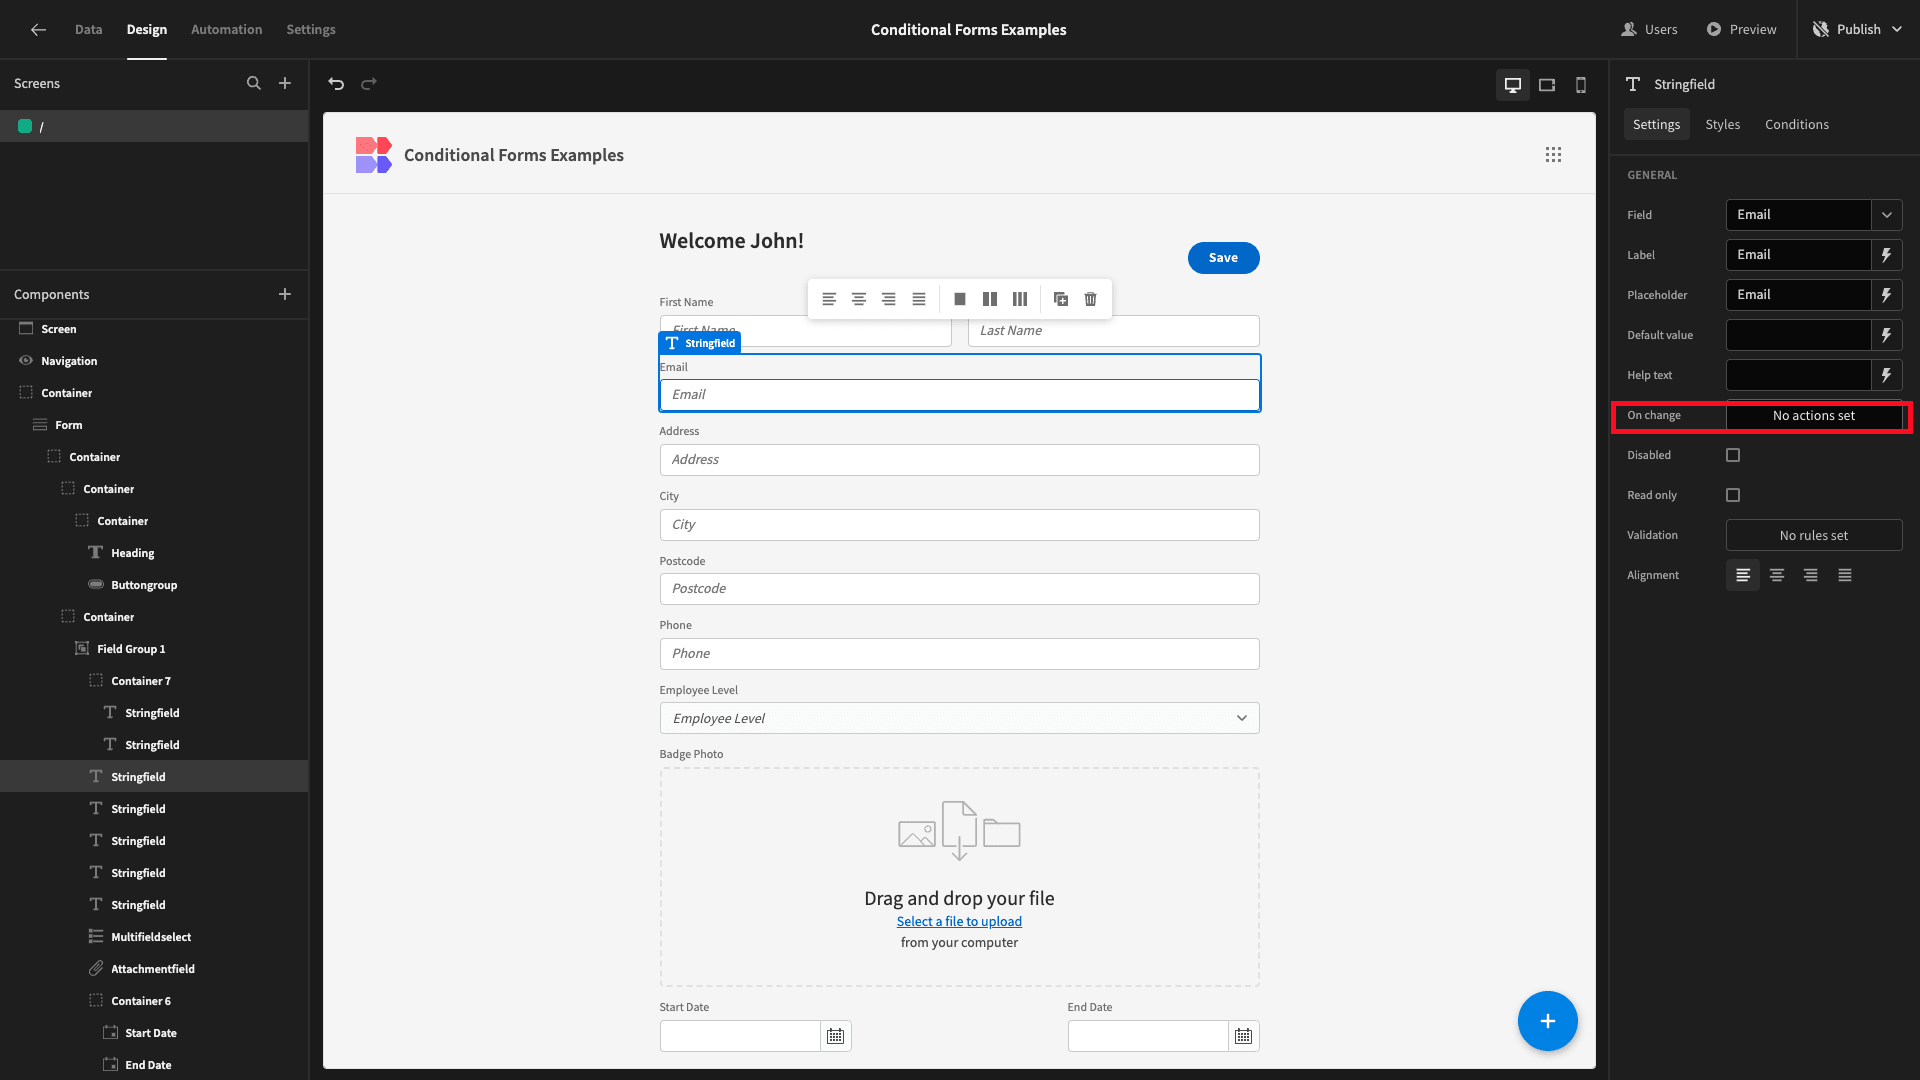
As the name suggests, this allows us to define actions that will be carried out each time the field is updated.
We’re adding an action called Execute Query and setting it to our REST request.
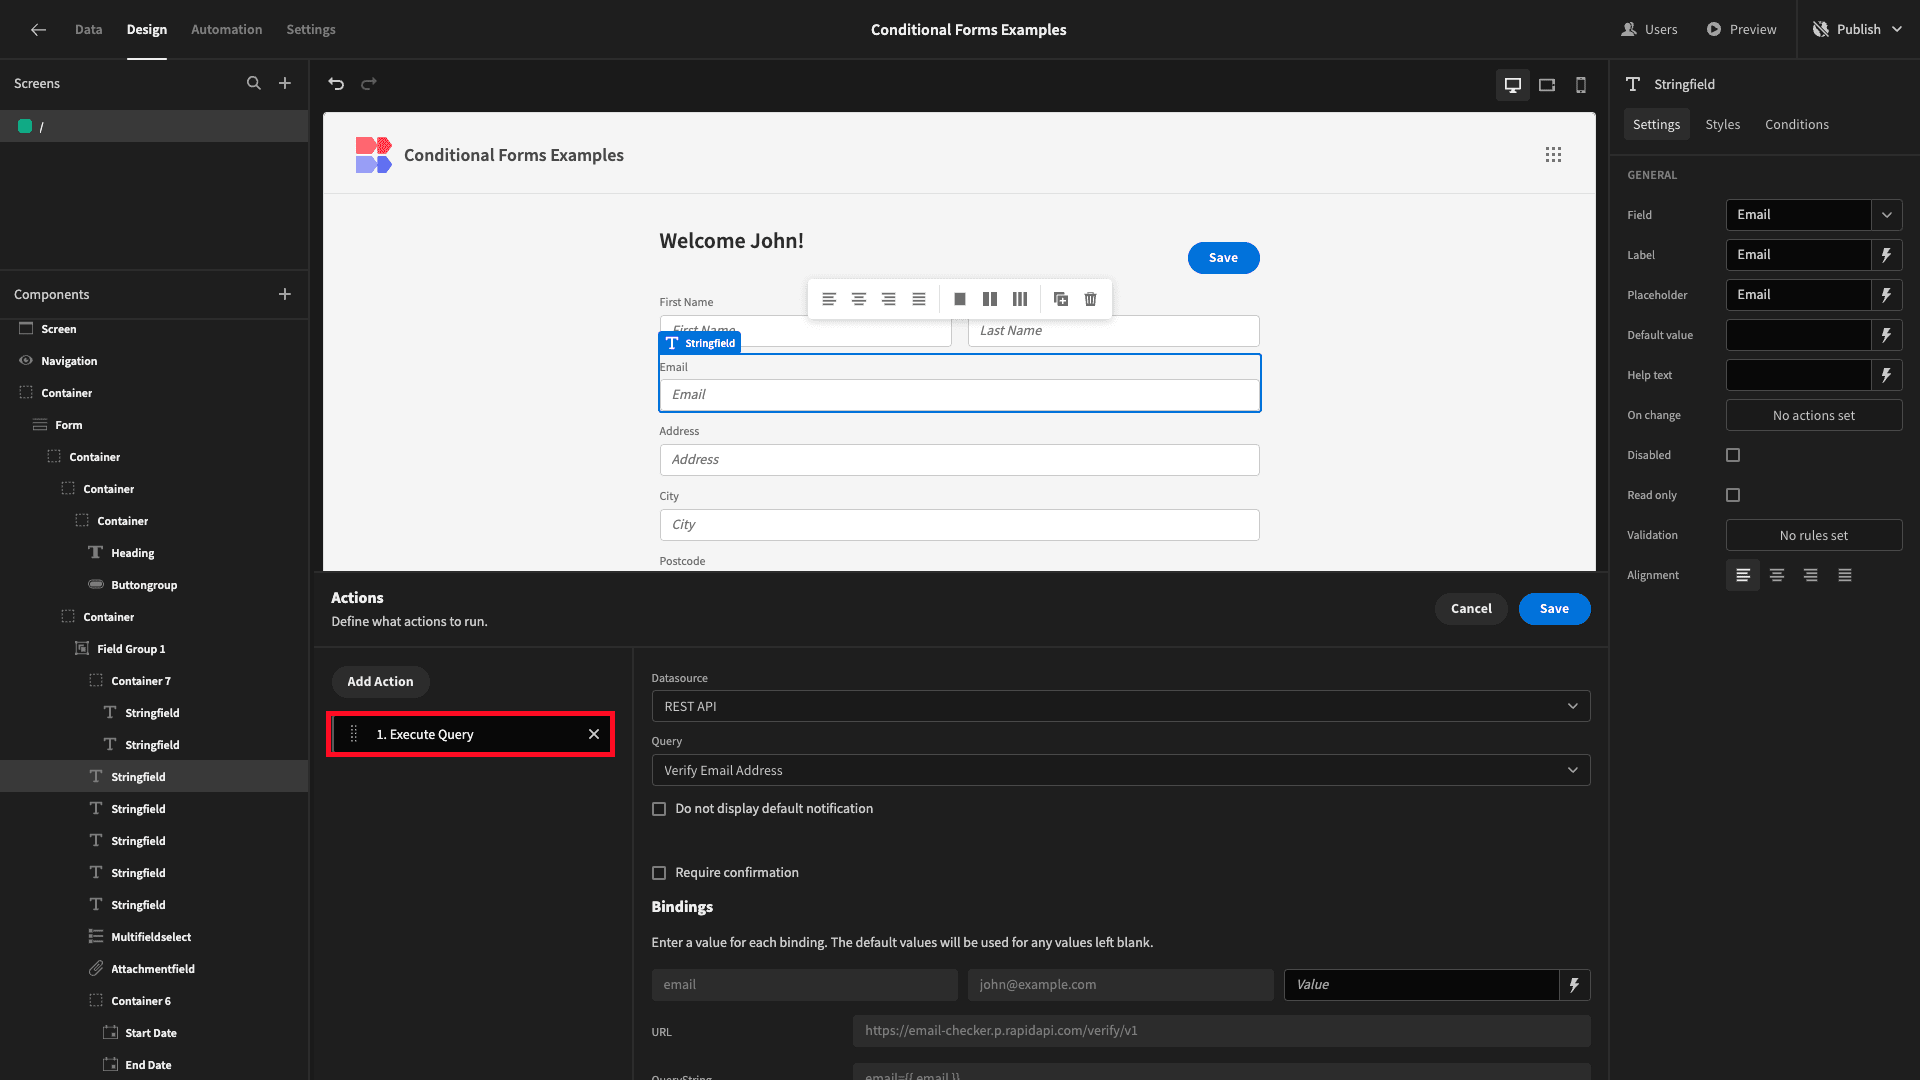
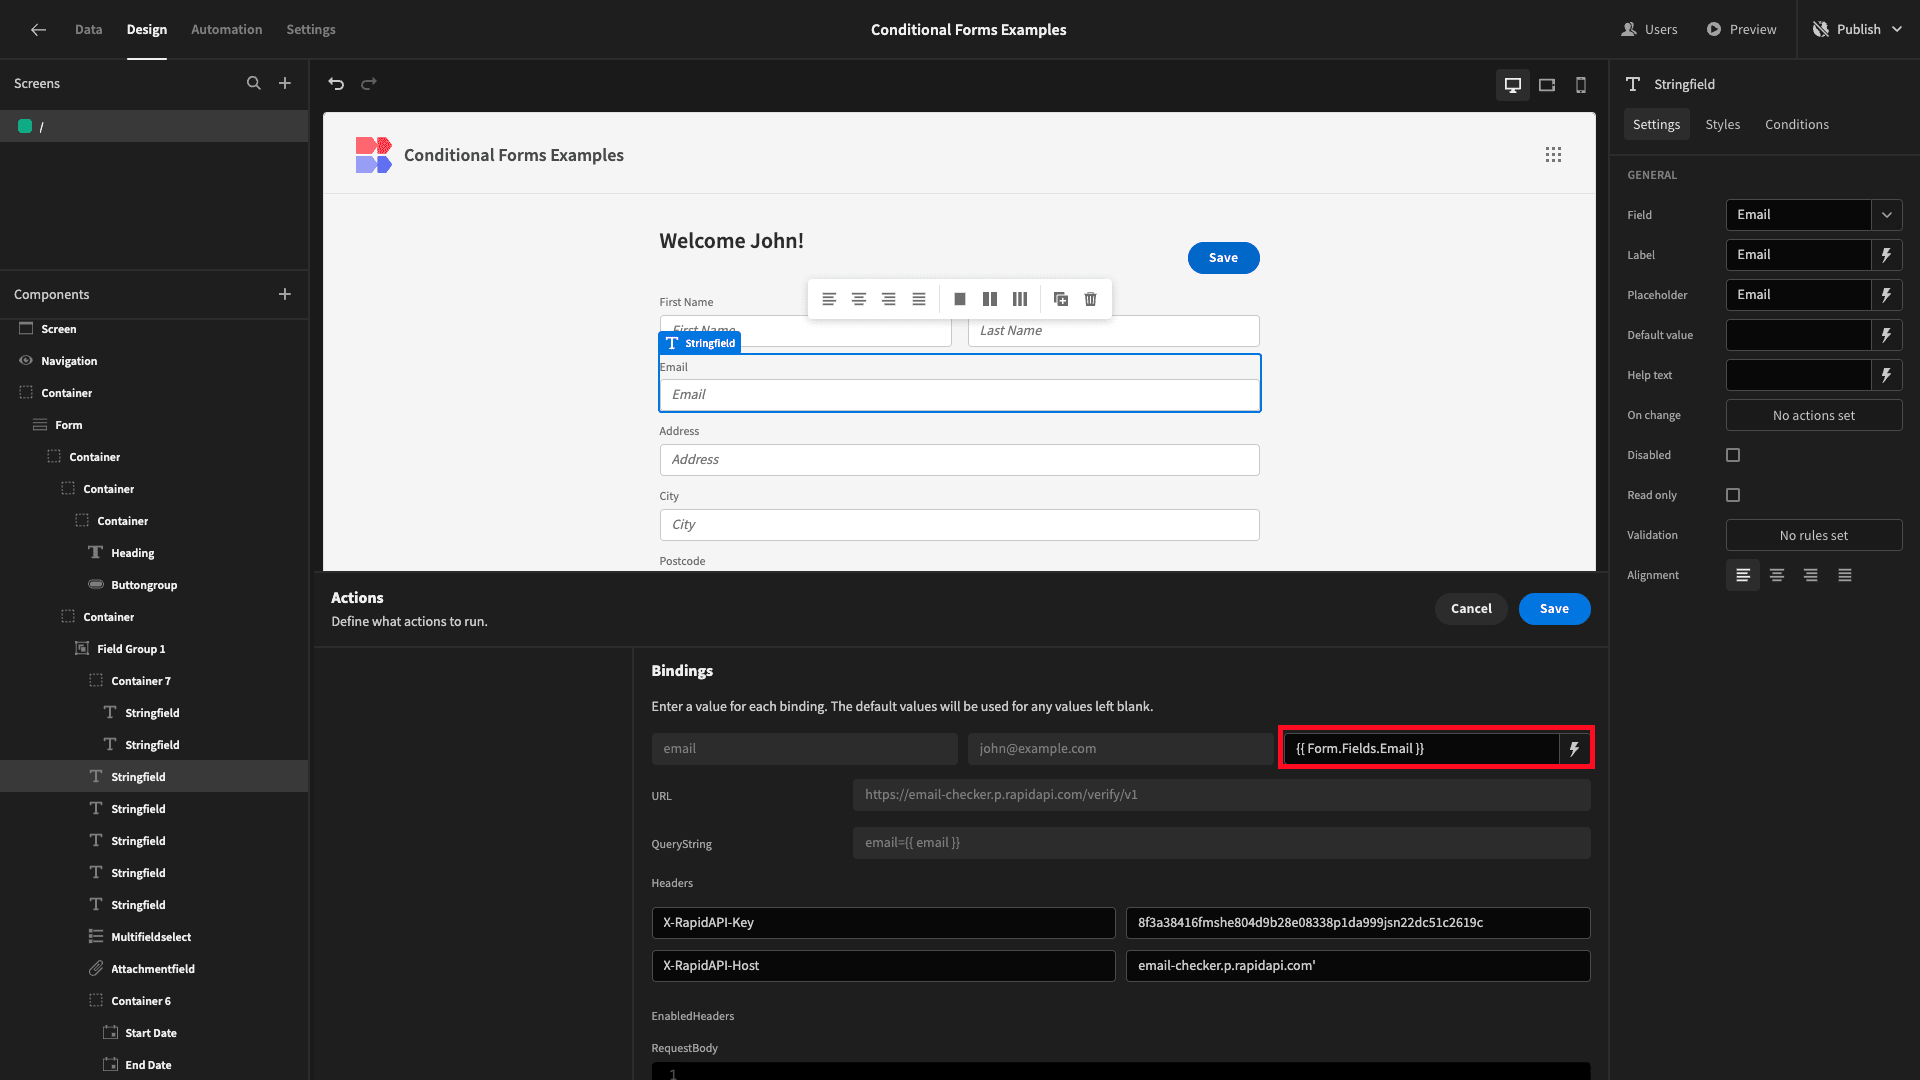
We’ll bind the email parameter for this request to the value that’s been submitted in the email field of our form:
Then, we’ll add an Update State action to save the status attribute from our query result.
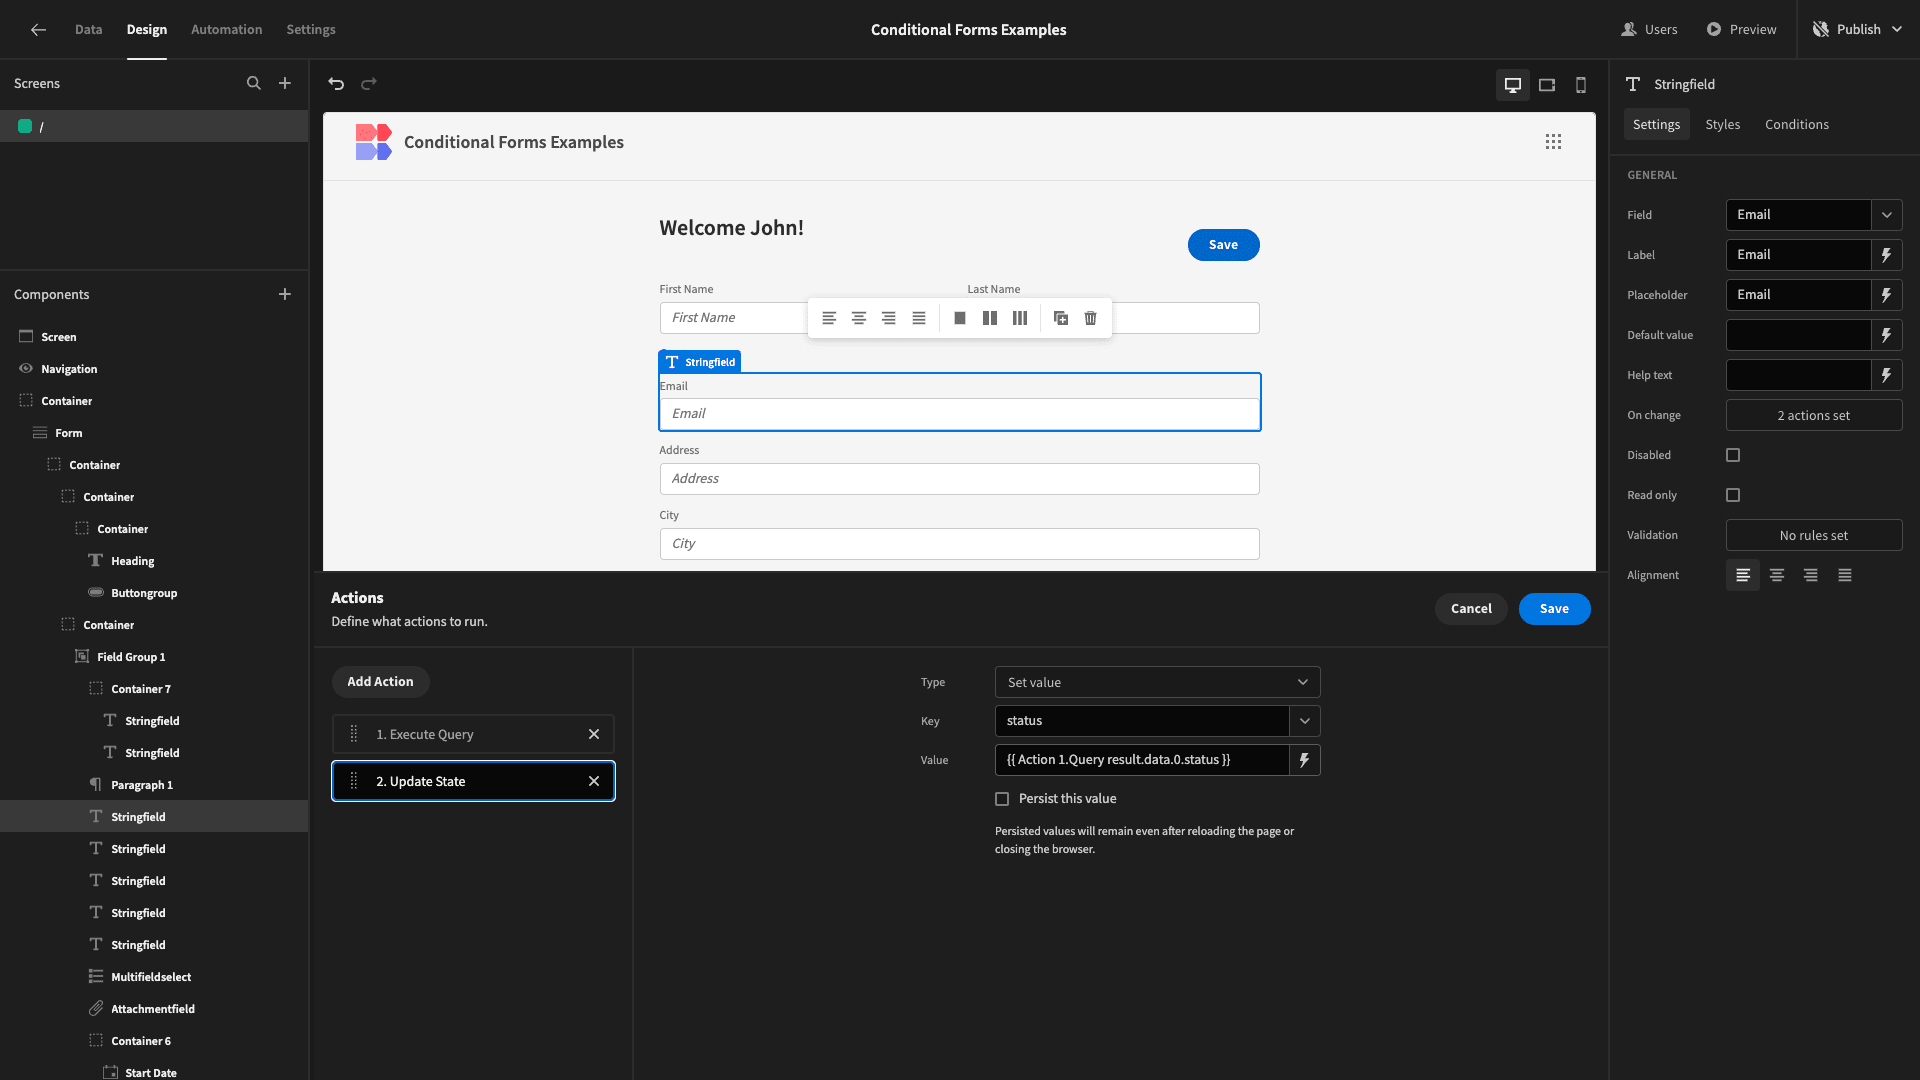
We’ve done this with the binding {{ Action 1.Query result.data.0.status }}. So, once an email address has been submitted, our state can either be “valid” or “invalid”.
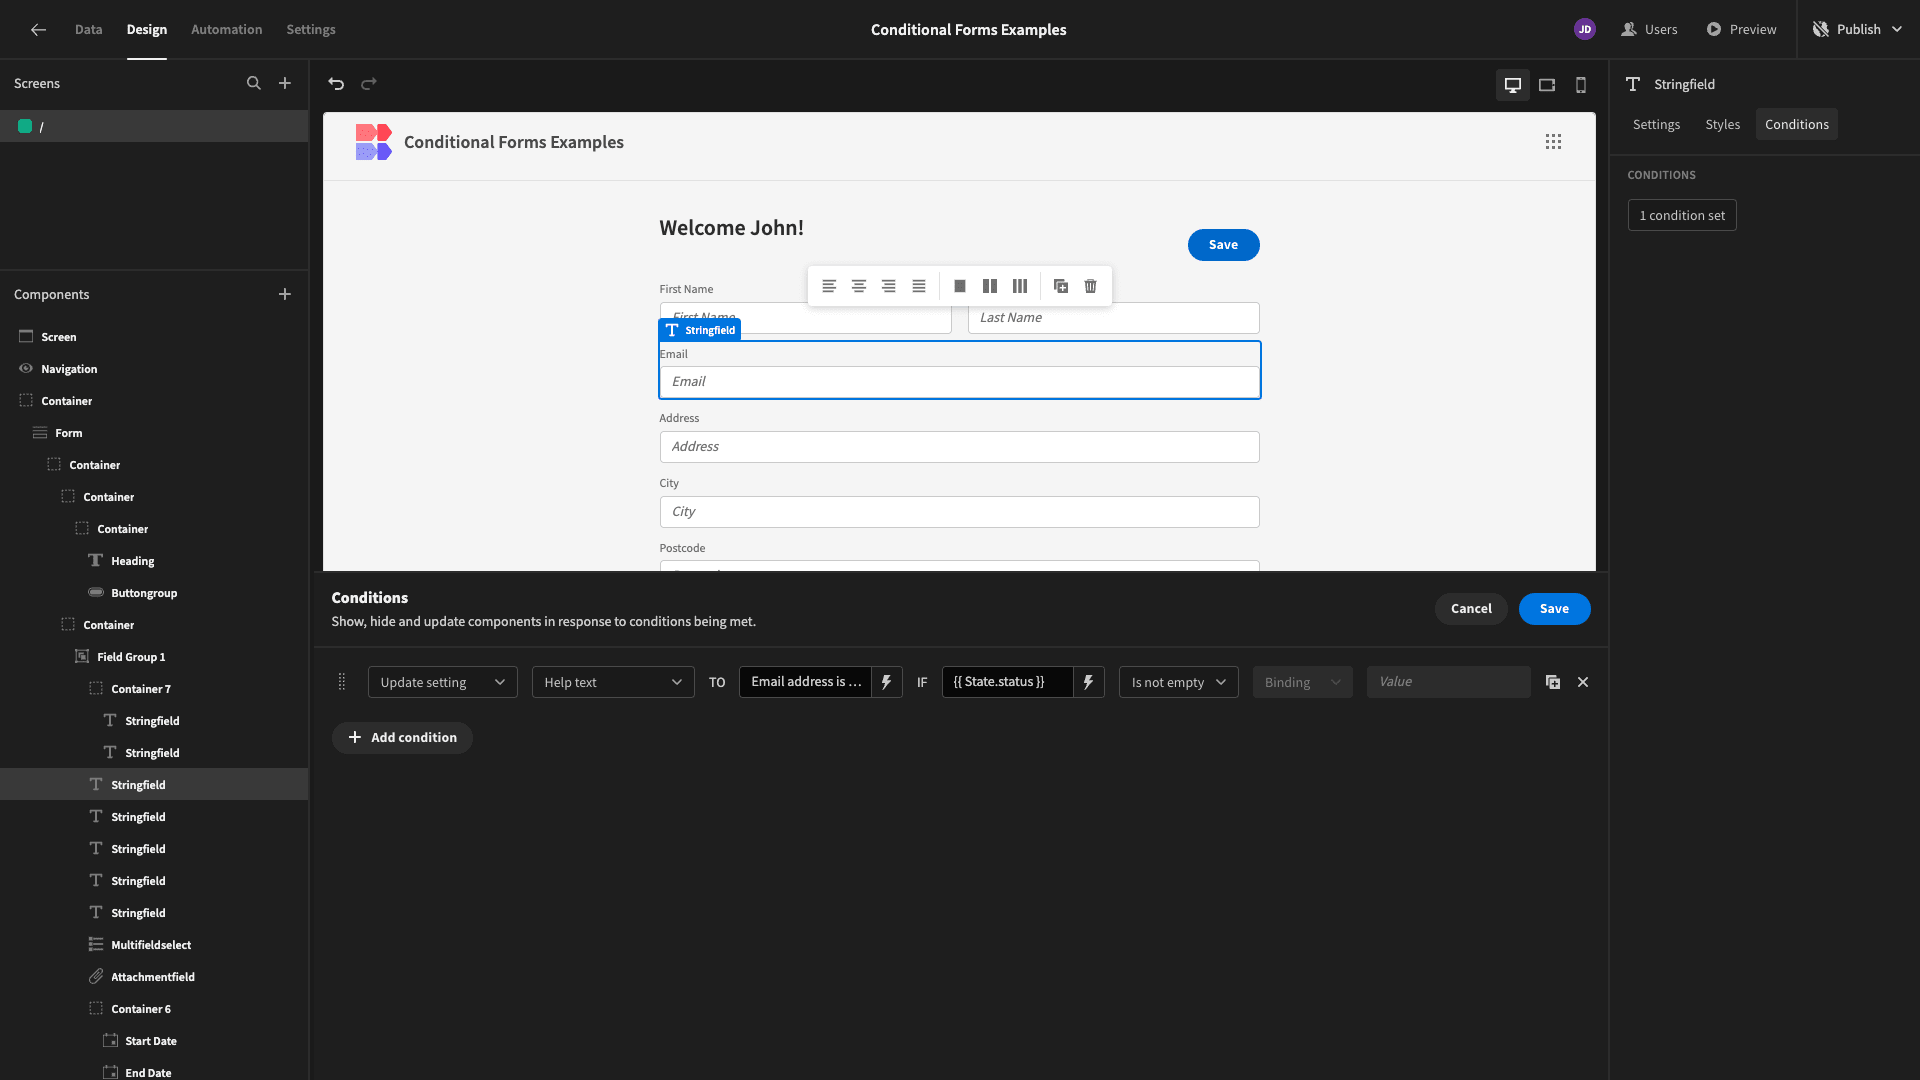
We’ll add an Update Setting condition to our email field, which updates the Help Text:
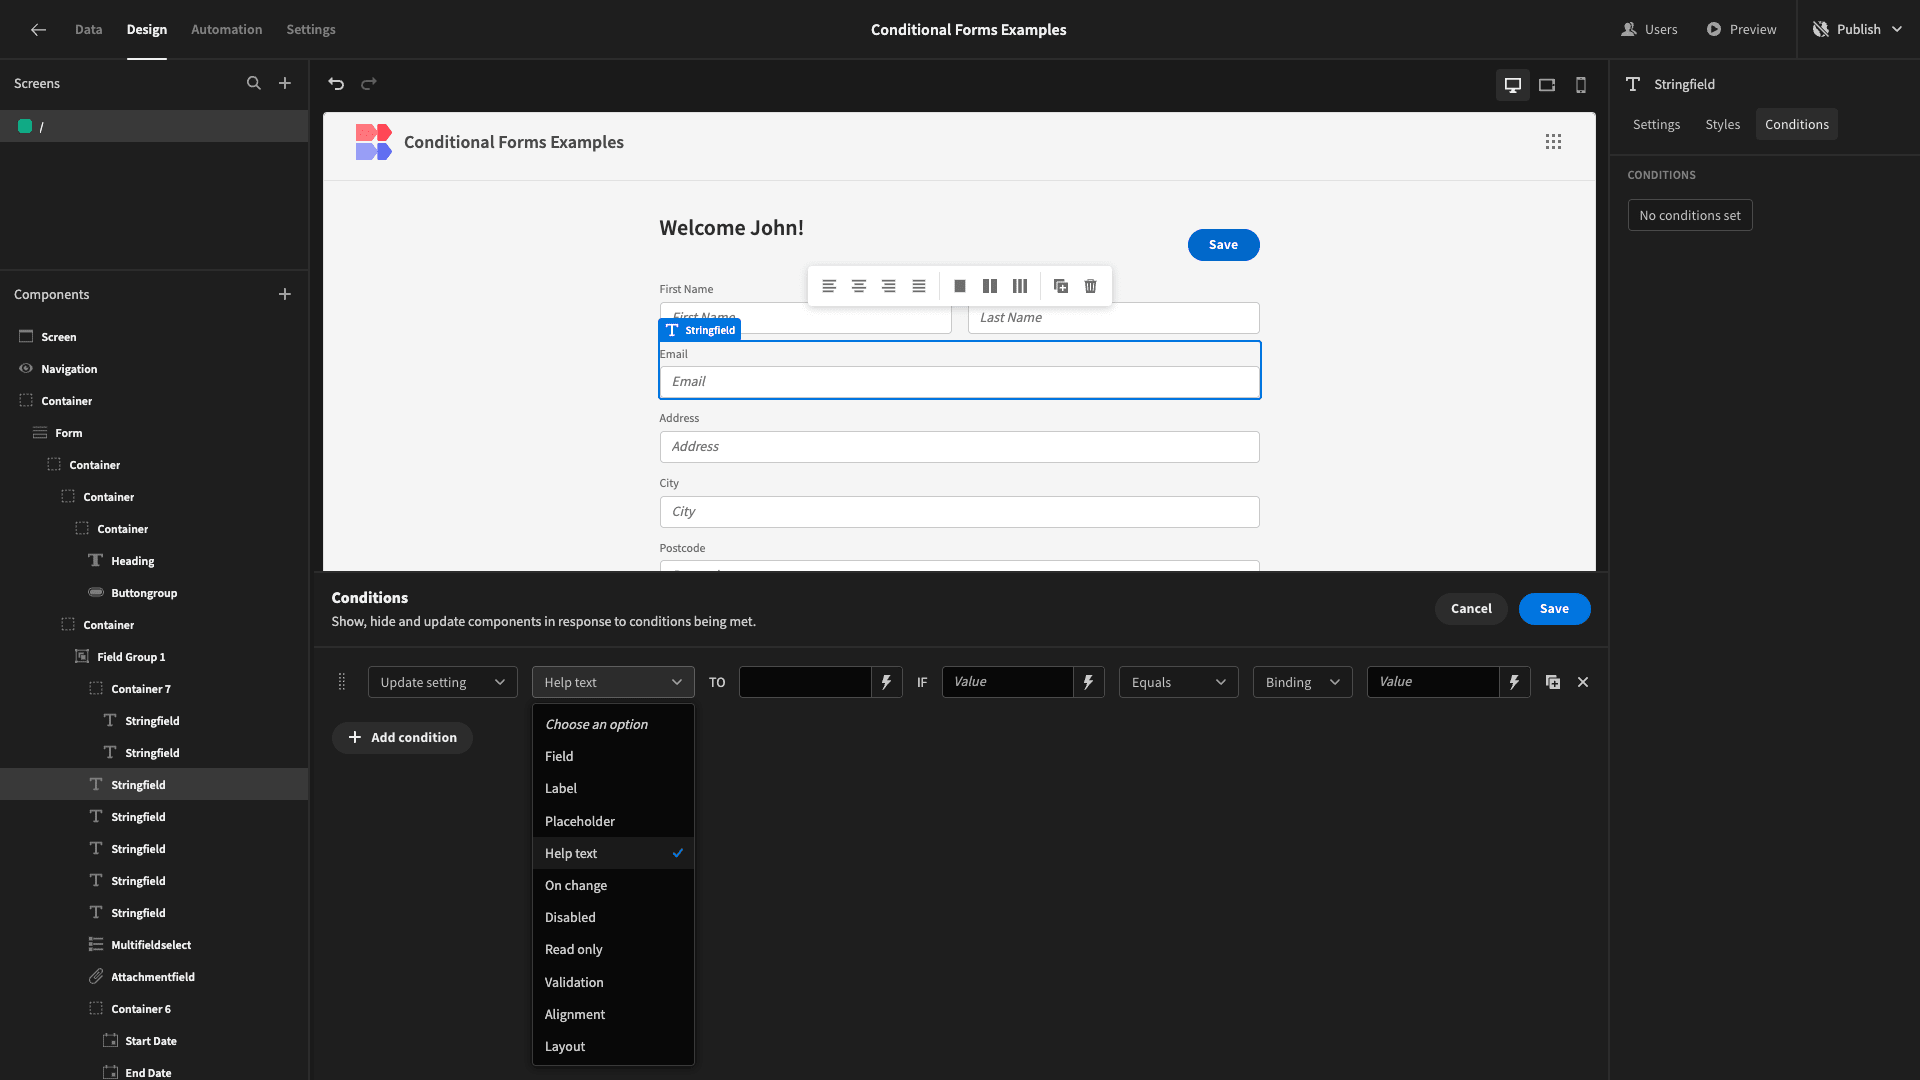
We’ll use the “status” attribute under State to set our new Help Text to:
1Email address is {{ State.status }}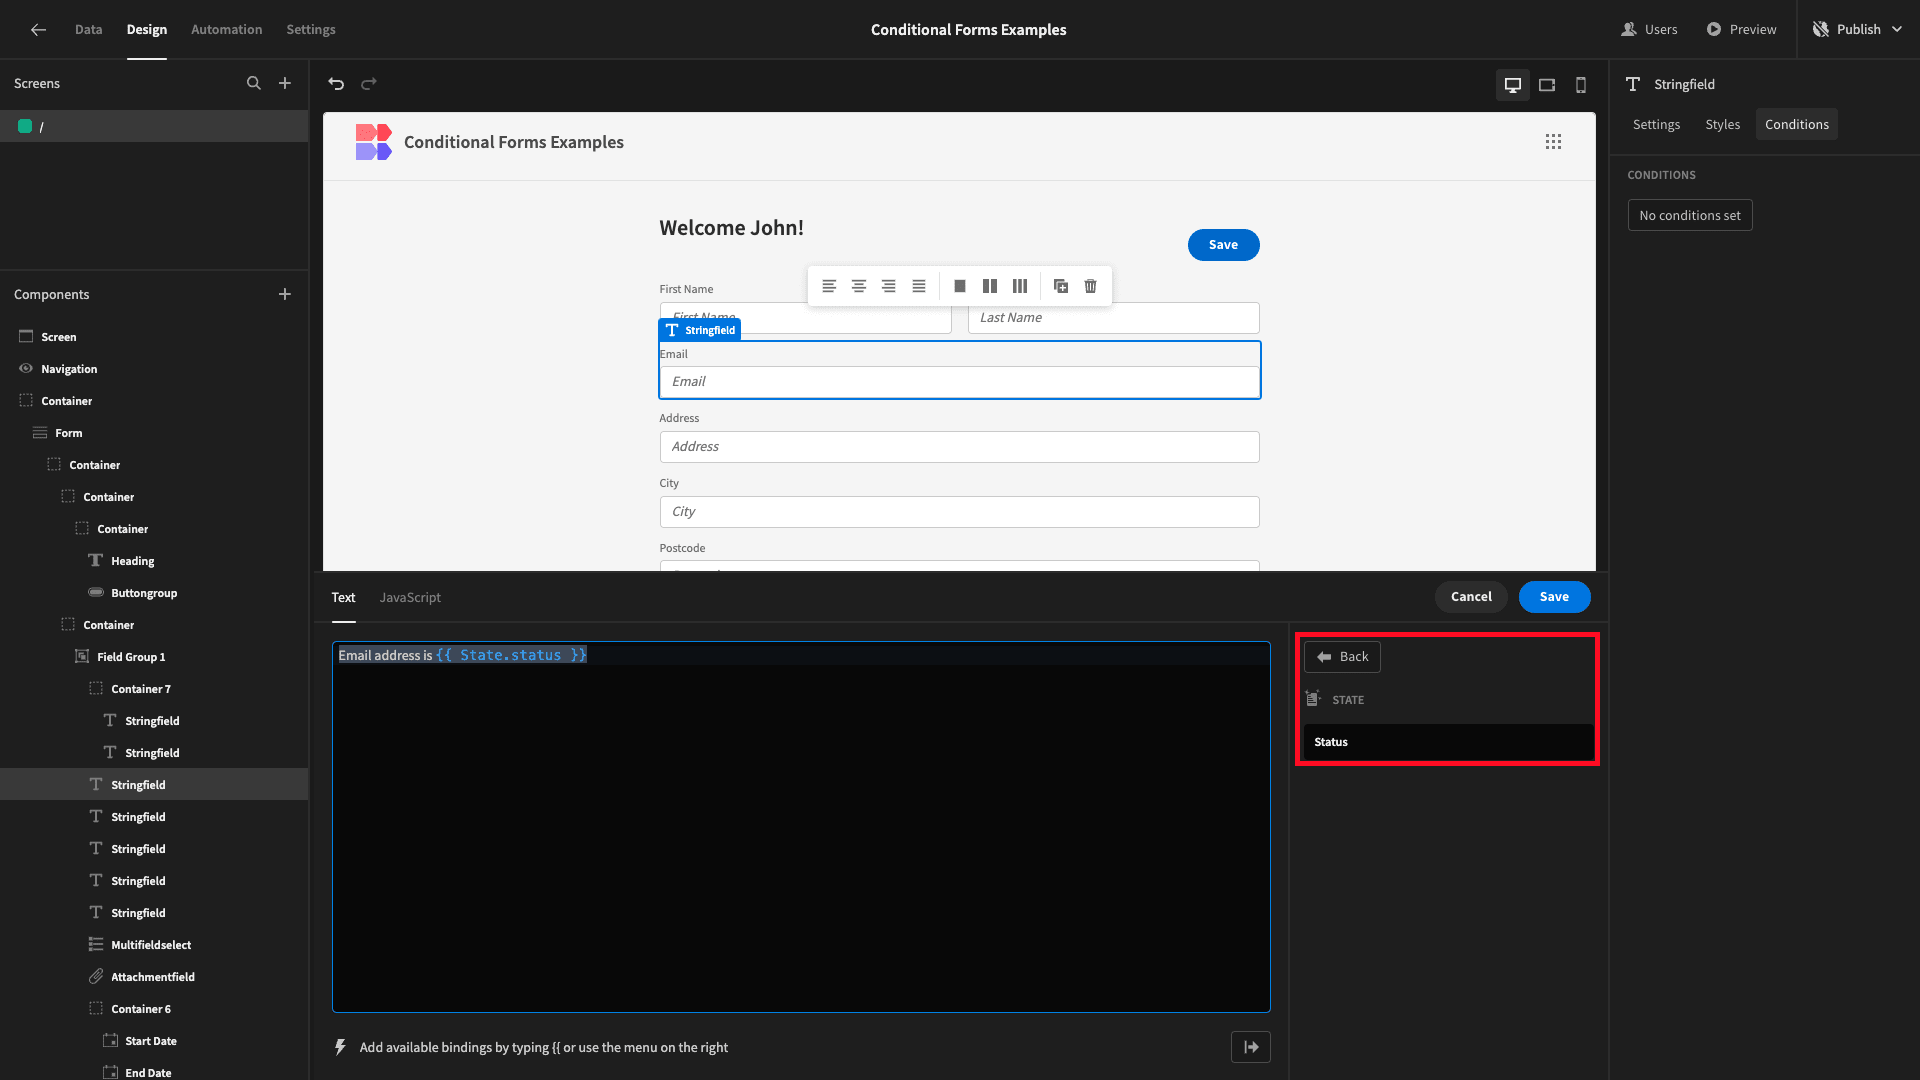
Our comparison value is {{ State.status }} and we’re using an Is Not Empty operator:
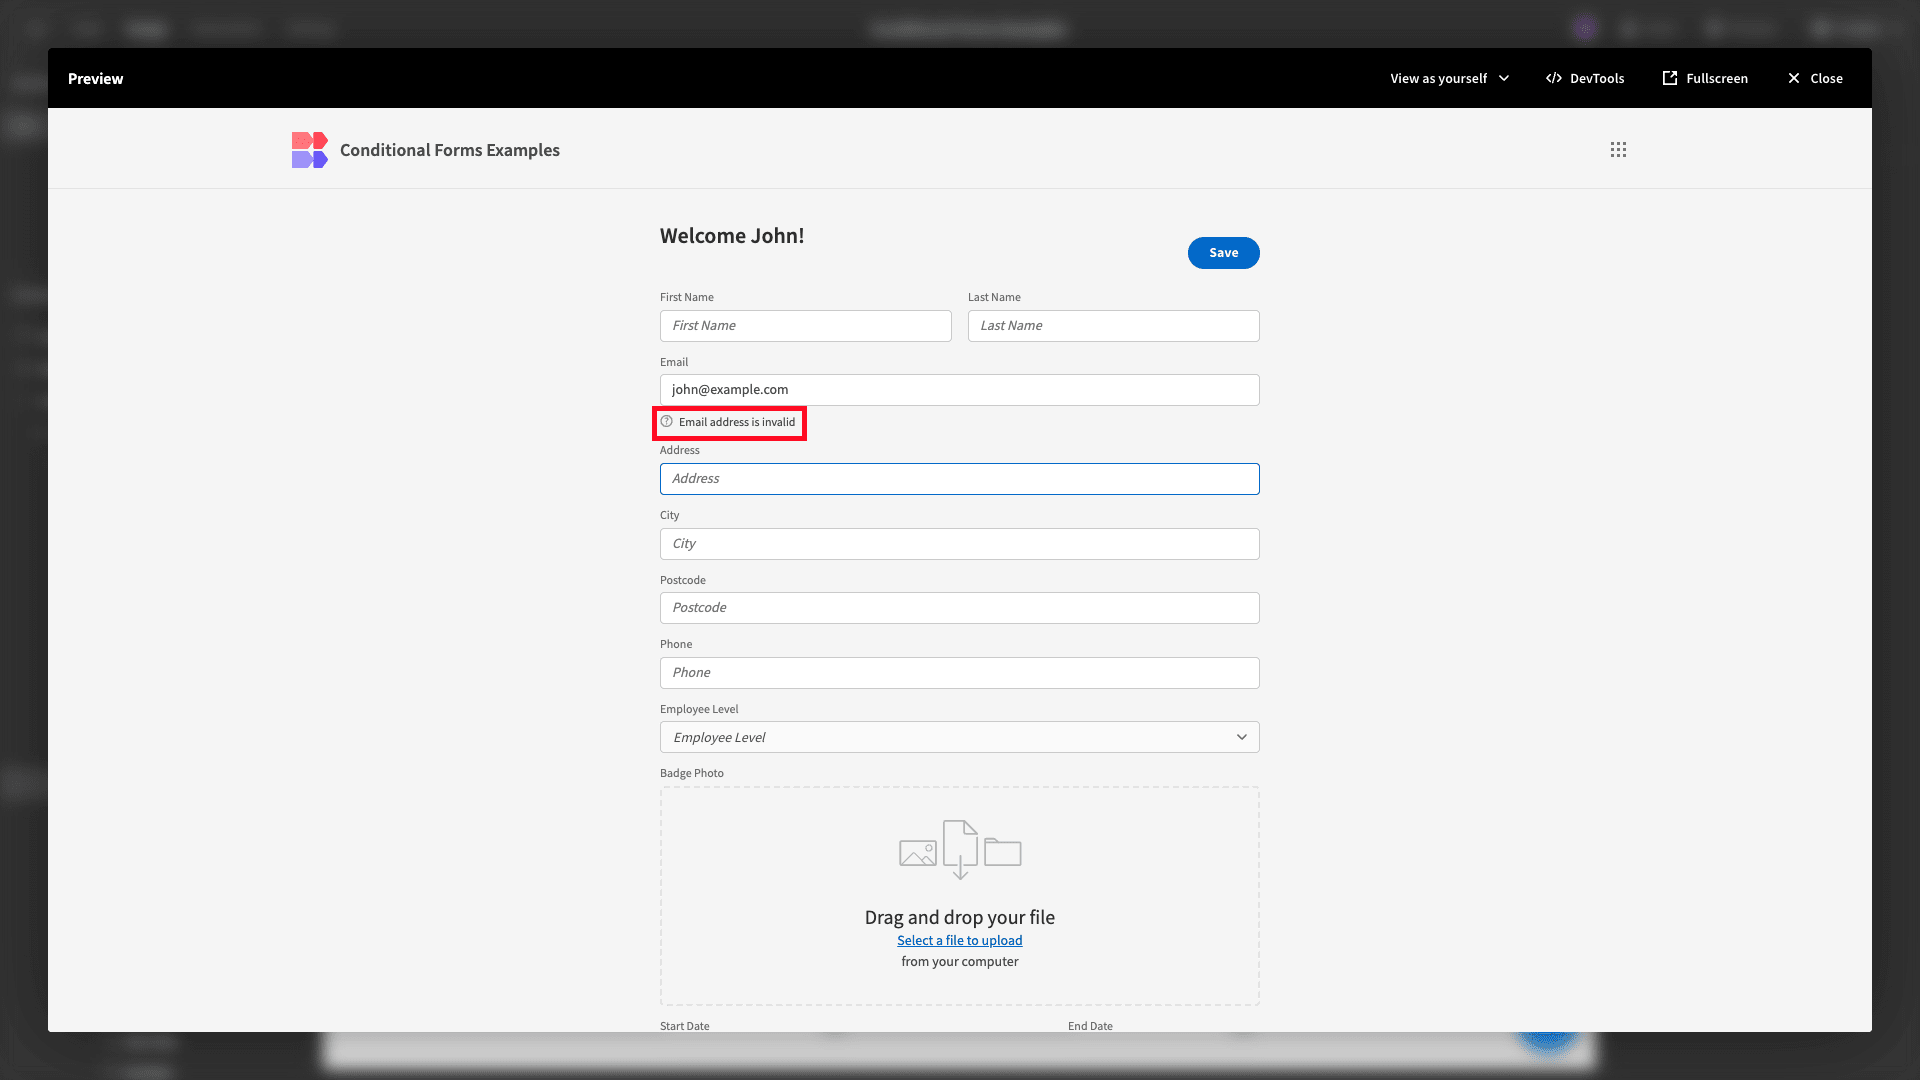
Now, if we enter an invalid email address, we’ll see a message that reads, “Email address is invalid”.
We’ll also see a corresponding message if we input a valid email address.
Build advanced forms with Budibase
Budibase is the open-source, low-code platform that empowers teams to turn data into action.
Today, we’ve aimed to show off how our platform can be used to build advanced forms on top of just about any data source. Of course, we can’t show every possible use case for conditional logic forms.
Rather, the idea is to demonstrate the unrivaled flexibility Budibase offers for building custom solutions at pace.
To learn more, check out our forms page .