How to Build and Embed a Form in 6 Steps
Embedding forms is probably the most common way to add interactivity to a webpage. For instance, we’ve all encountered embedded forms for submitting contact information, requesting a callback, or carrying out some kind of sign-up flow.
However, how we build web forms can have a huge impact on the value we ultimately get from them.
See, most teams build these using one of the following methods:
- Manually building forms with HTML and JavaScript,
- Using traditional form builders like JotForm or TypeForm ,
- Using other SaaS tools or CMS platforms like Salesforce or HubSpot.
Each of these offers distinct pros and cons.
For instance, hard-coding a solution offers a huge degree of flexibility but requires a greater level of development skills and expertise. Traditional form builders offer a faster alternative but often lack advanced capabilities.
Native web forms from larger SaaS tools provide strong integration with their own platforms but lack easy connectivity for other tools and data.
Today, we’re checking out how Budibase empowers teams to build advanced, secure forms on top of any data source - with minimal custom code.
Specifically, we’re going to build and embed a multi-step, responsive form on top of an existing MySQL database without writing a single line of code.
But before we get to that…
What is an embedded form?
An embedded form is an externally hosted UI that we can use to create or update data records from within a HTML document - like a web page or application screen.
This achieves several things.
The core goal here is to add functionality to our site or UI independently of how this itself is built. So, we can therefore unify experiences by including the same form in multiple locations.
We’ll also typically achieve higher levels of maintainability, as well as avoiding performance issues related to hosting forms directly on our site.
Even better, the vast majority of forms are embedded using iframe tags in HTML. This means that they’re essentially platform agnostic. That is, we can use iframes within any tool or UI that supports standard HTML.
You might also like our guide on how to make a web app .
Why do we need embedded forms?
Before we move on to embedding Budibase forms, let’s take a minute to think more deeply about some of the key use cases here.
We can approach this from two angles.
One is at the level of the kind of solution we’re building. We’ve already touched on the most common use case here - embedding data collection forms of your website. For instance, for lead generation or signup flows.
Besides this, another common use case is legacy modernization. So, we might have an existing solution that we want to add a form to.
Embeds are an easy, inexpensive way to achieve this.
The other thing we need to consider is the types of data we’re most likely to handle using embedded forms.
Typically, we’re either sending API requests or querying an external database. Key examples of this include customer-facing tasks, like updating a contacts list, requesting information, scheduling a meeting, or signing up for an event.
For the most part, traditional form builders will allow us to save data to their internal databases or send it via native integrations. However, they lack the flexibility to query external databases directly or populate custom API requests.
So…
How do form embeds work in Budibase?
Any Budibase application can be embedded in any document that supports standard HTML. When we publish our app, we can generate a working iframe to embed it externally. This will behave just as it does when we load it in an ordinary browser window.
Budibase offers dedicated connectors for an enormous variety of external data sources - including RDBMSs, NoSQL tools, REST APIs, Google Sheets, Airtable, and more.
When we connect to third-party data, Budibase behaves as a proxy. This means that the data source is queried directly by our low-code platform, but the data itself is not stored.
Our built-in RBAC system means that we can easily build embeddable forms for either public or authenticated users. Since we can assign minimum access roles to individual screens, this means that we’re able to embed individual form UIs from within a larger application.
How to build and embed a form in 6 steps
To show off how this to embed forms in Budibase, we’re building a custom contact form on top of an existing MySQL database.
Specifically, we’re going to build a multi-step UI that guides users through the process of submitting the required information - for maximum completions. We’ll include fields for their basic personal data, contact details, and a longer form text field for submitting a query.
Here’s what this will look like when we’re finished.
If you haven’t already, sign up for a free Budibase account to start building advanced forms the fast, easy way.
1. Setting up our data schema
The first thing we need to do is create a new Budibase application. We have a couple of options here, including using a prebuilt template or importing an existing app dump. However, today, we’re starting from scratch.
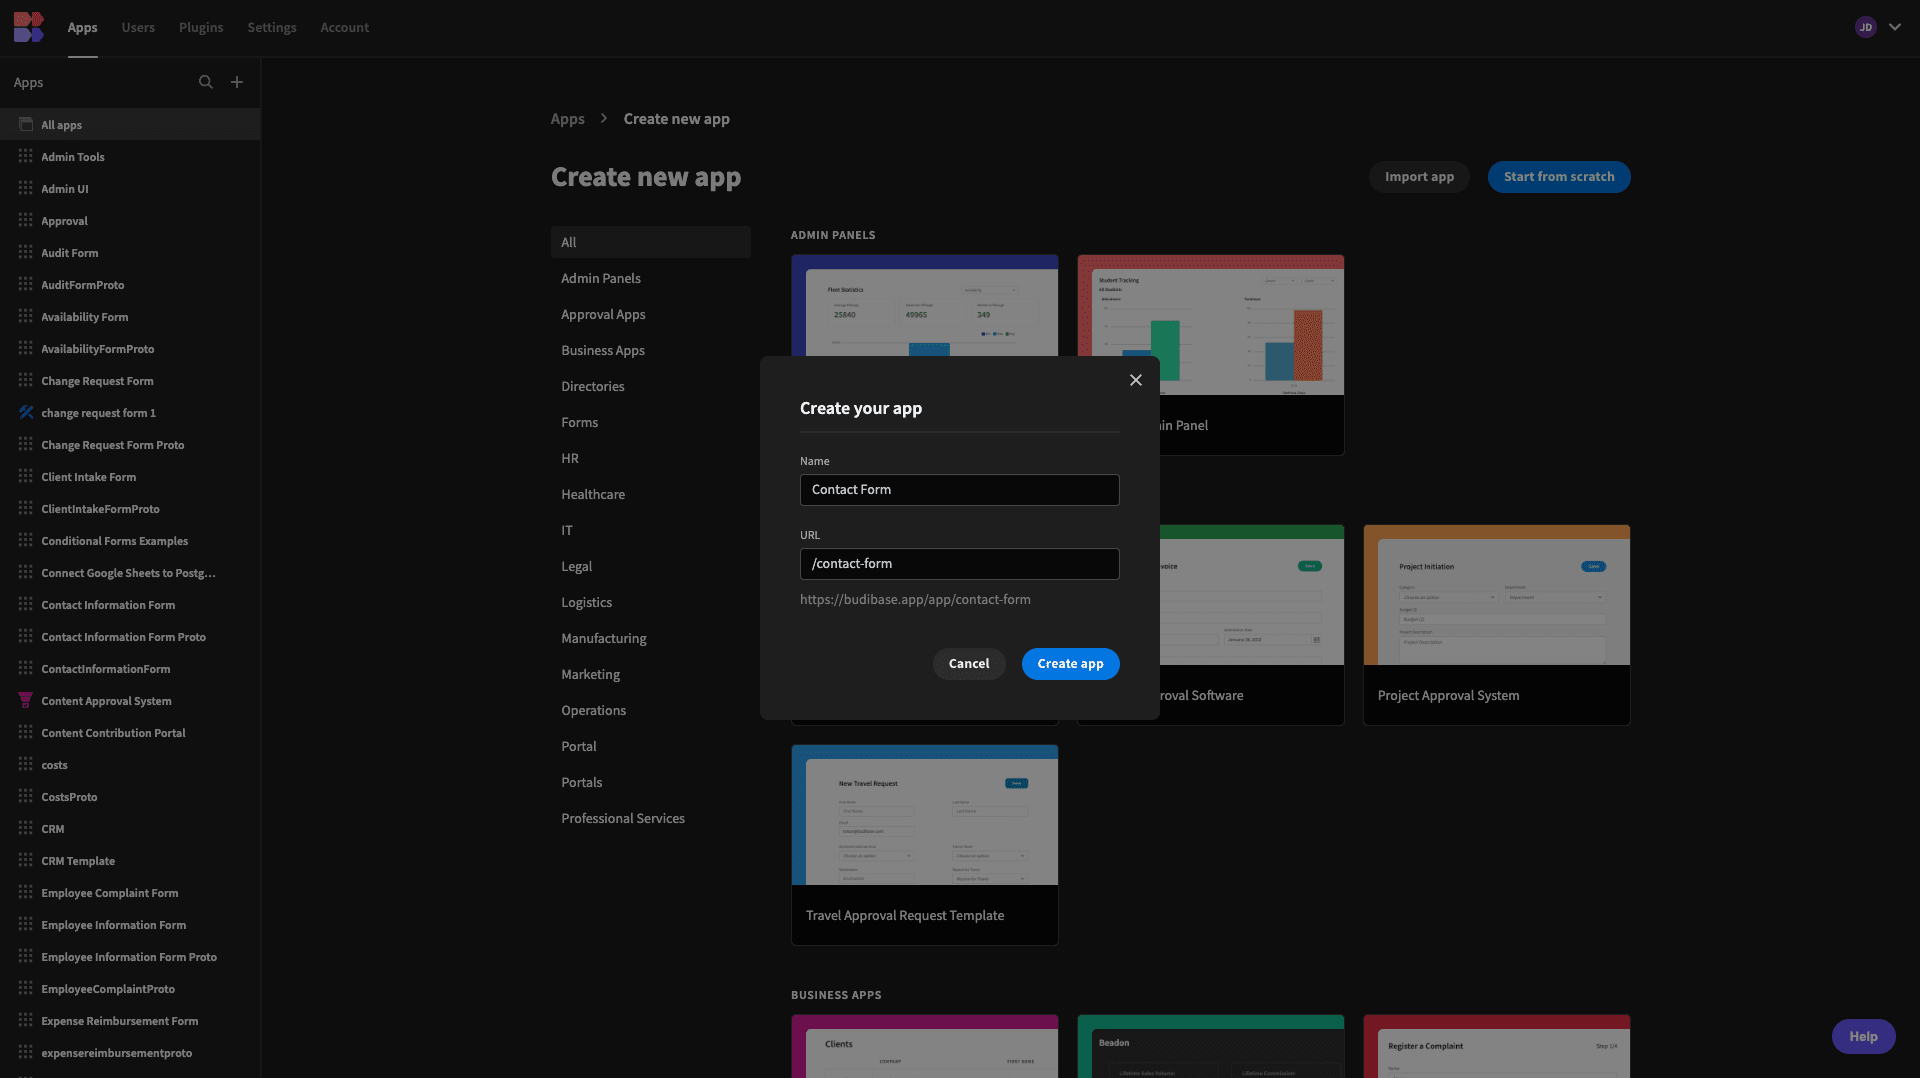
When we choose this option, we’re prompted to choose a name and URL slug for our app. We’ll call ours Contact Form.
Then, we’re prompted to choose a data source. Budibase offers dedicated connectors for SQL Server, MySQL, Postgres, Airtable, S3, Google Sheets, Mongo, Couch, REST API, and more - alongside our internal low-code database.
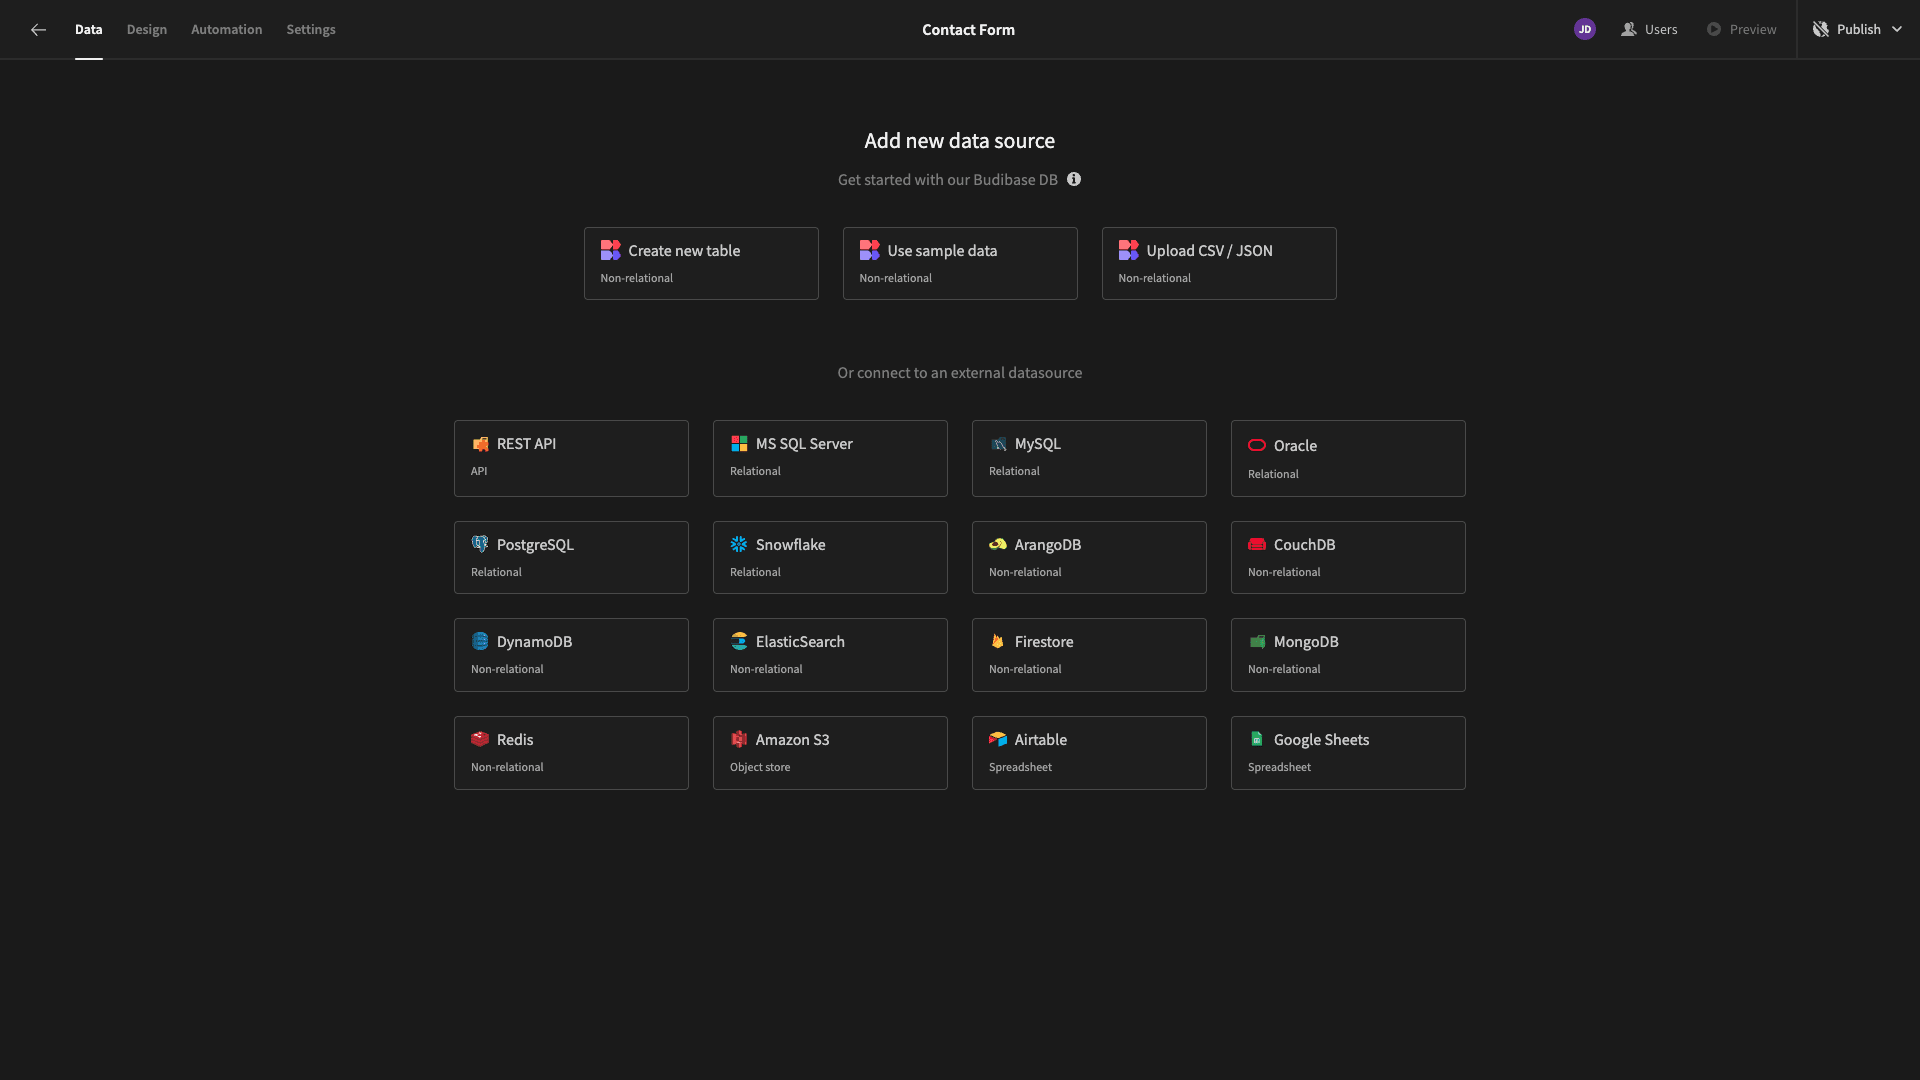
This provides us with unrivaled flexibility to build forms on top of existing data assets.
Today, we’re choosing MySQL. We’re then prompted to input our configuration details.
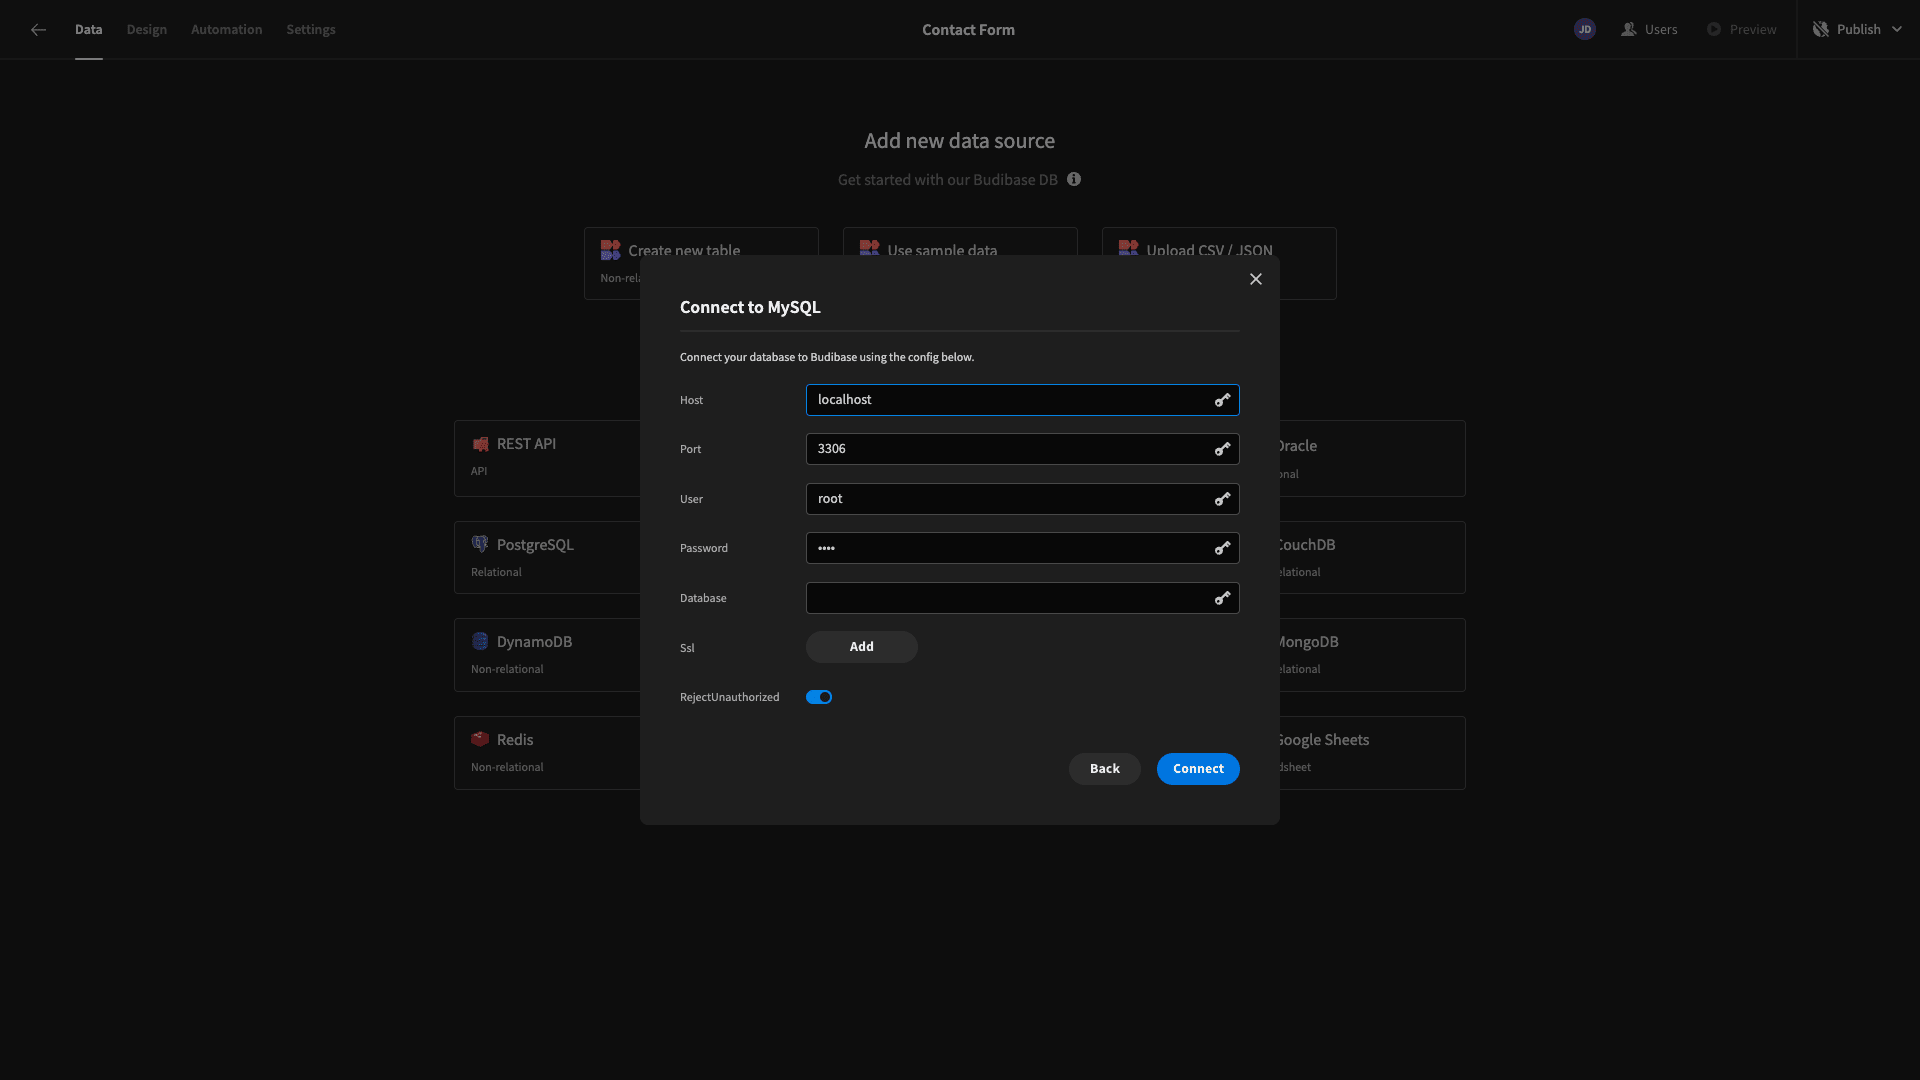
We have our database credentials stored as secure environment variables within our Budibase tenant, so we can use these without having to enter them manually.
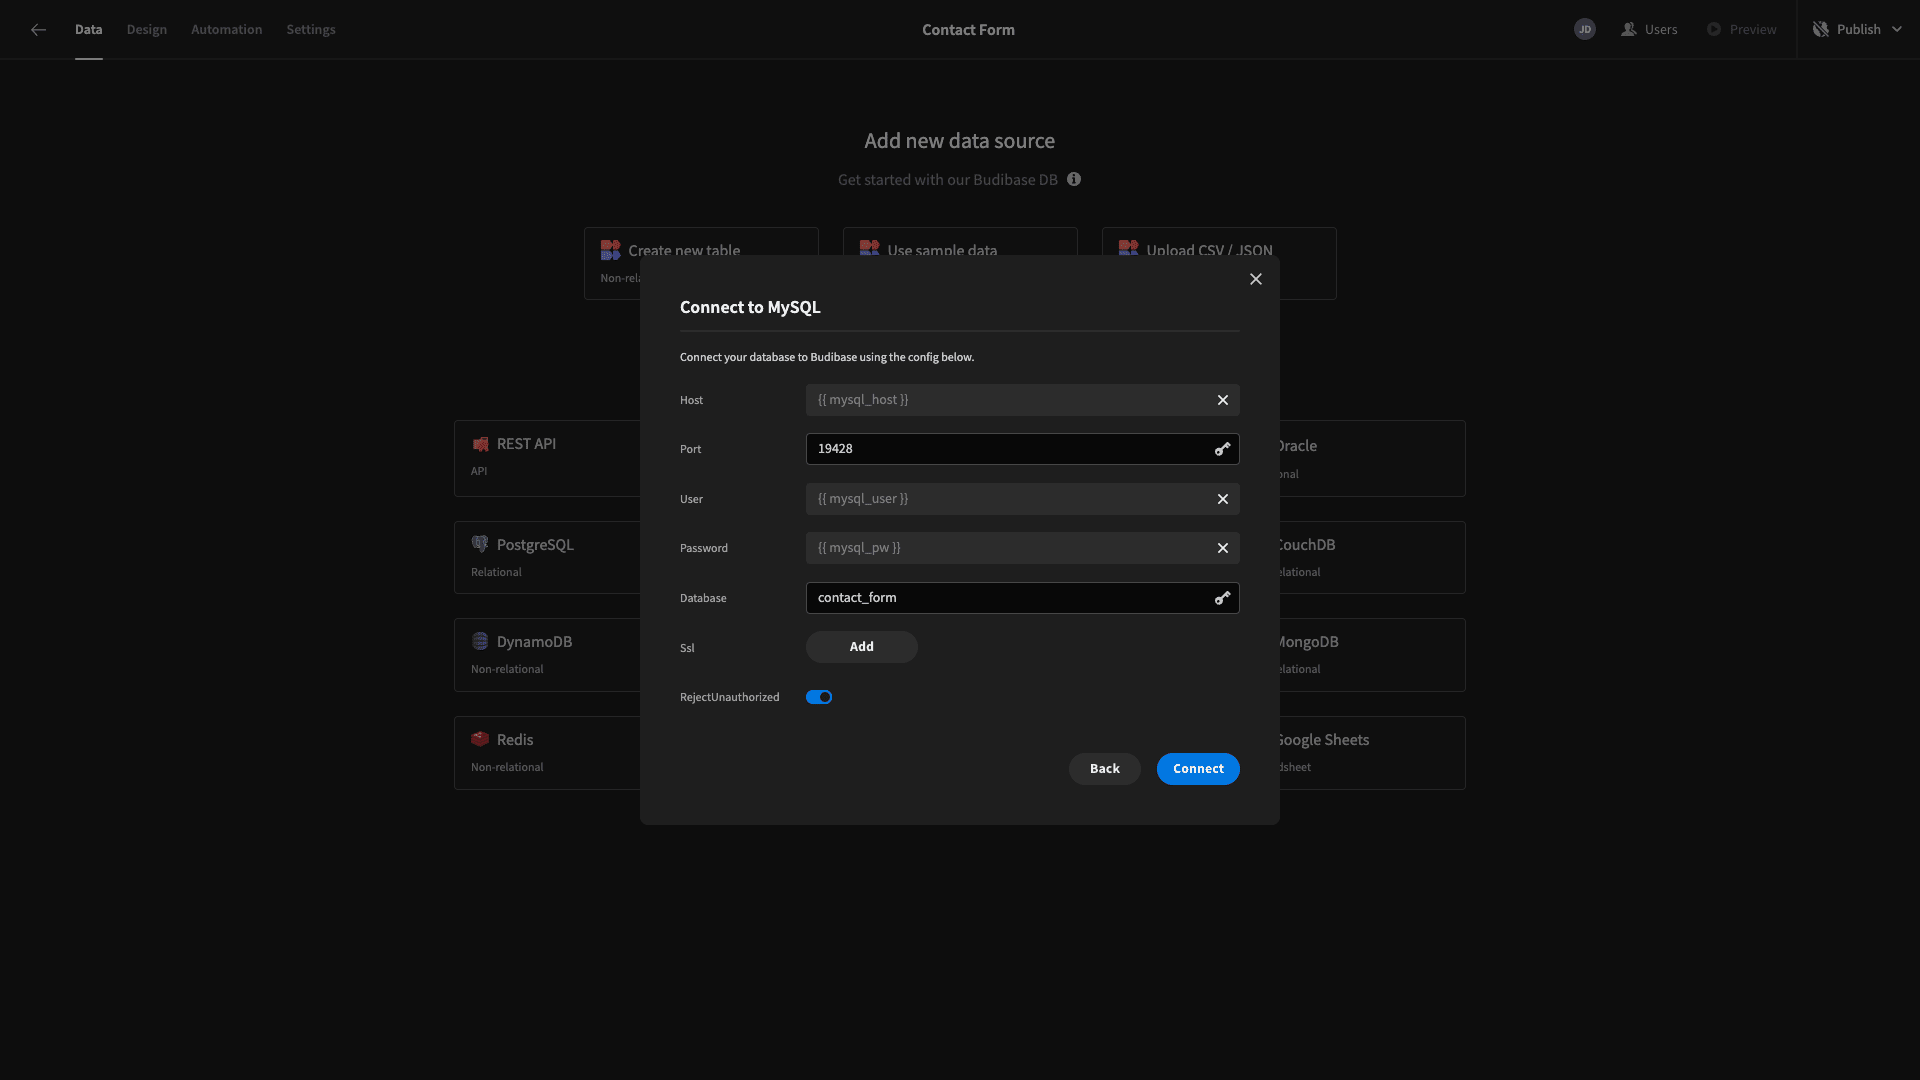
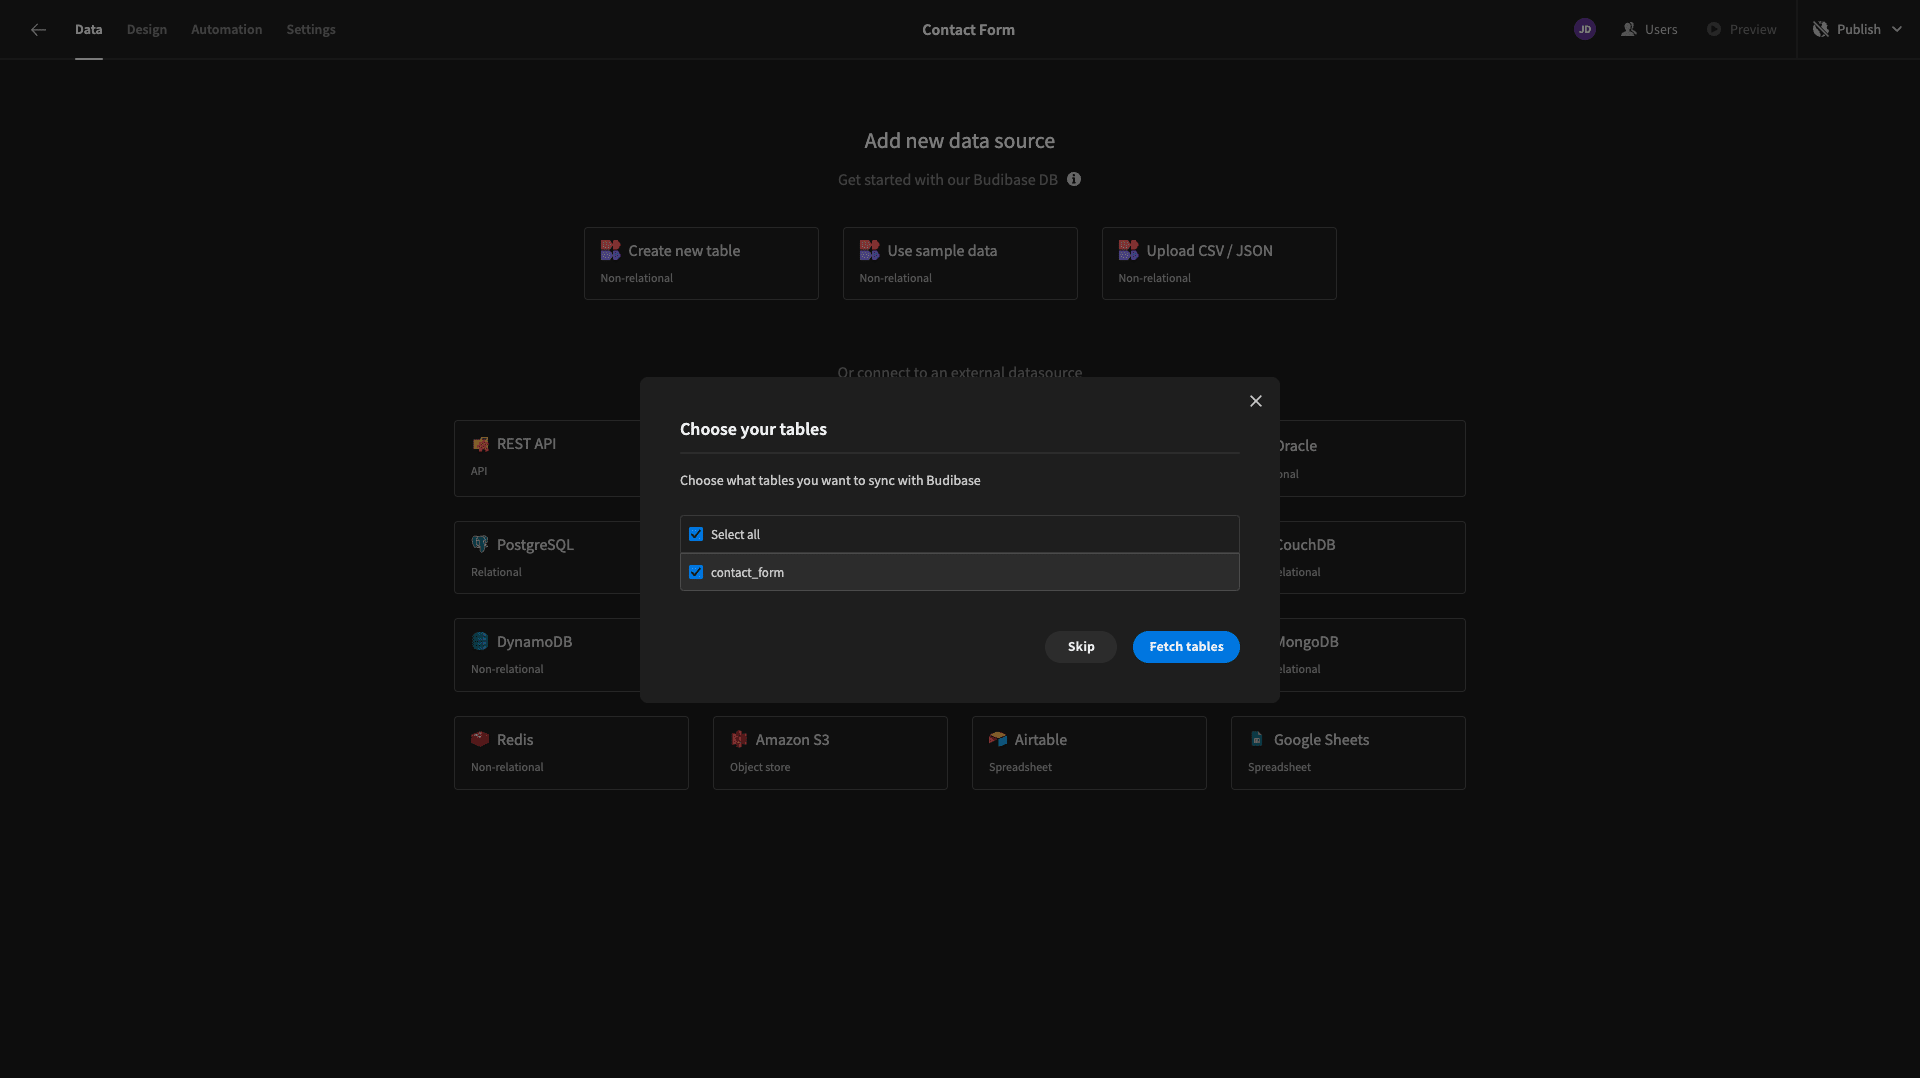
Then, we can choose which of our database tables we’d like to fetch - making them queryable within Budibase. Our database contains a single table called contact_form.
If you’d like to build along with the rest of this tutorial, you can use the following query to recreate our table in your own MySQL database.
 1CREATE TABLE contact_form (
 2
 3  id INT AUTO_INCREMENT PRIMARY KEY,
 4
 5  first_name VARCHAR(50) NOT NULL,
 6
 7  last_name VARCHAR(50) NOT NULL,
 8
 9  email VARCHAR(100) NOT NULL,
10
11  phone_number VARCHAR(20),
12
13  message TEXT NOT NULL,
14
15  submission_date TIMESTAMP DEFAULT CURRENT_TIMESTAMP
16
17);
Here’s what our form table looks like in Budibase’s Data section.
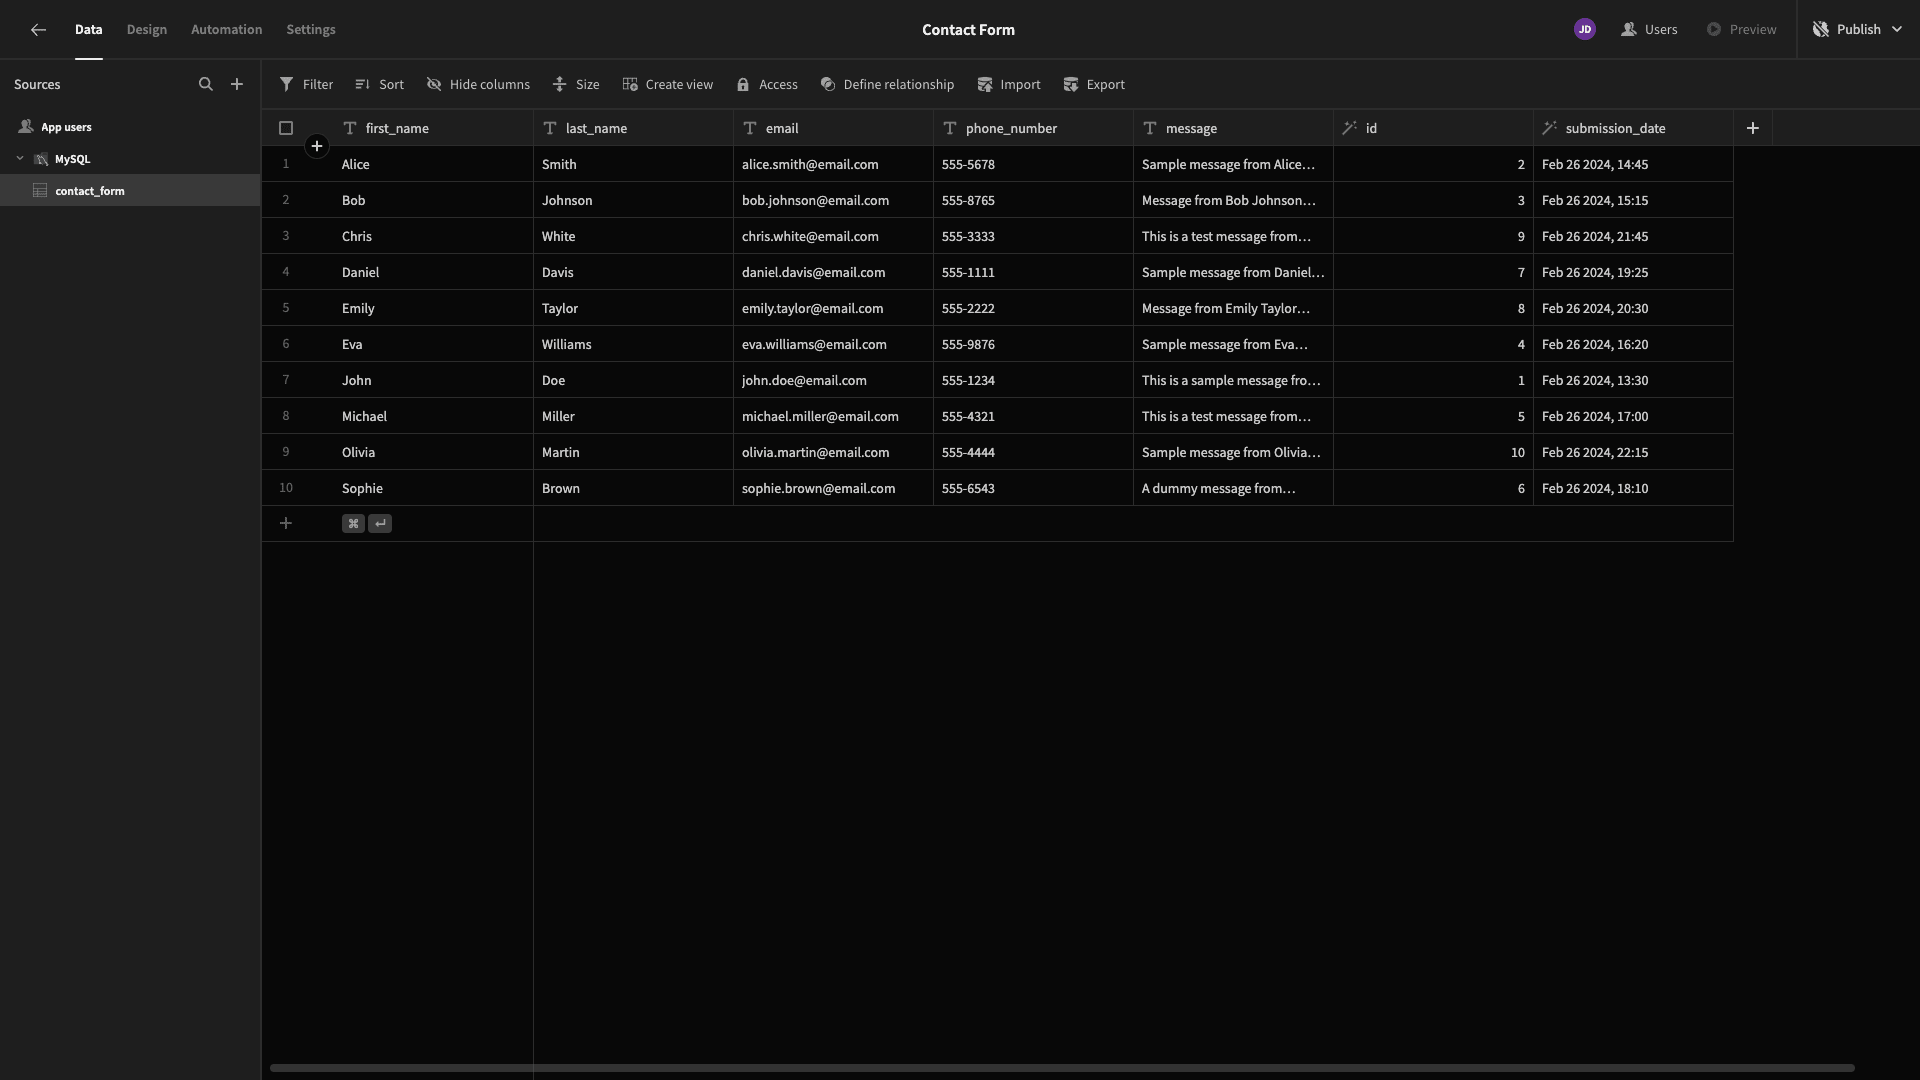
So, we have columns for the user’s first and last name, their email and phone number, a message, a unique ID, and a timestamp for when the request was submitted.
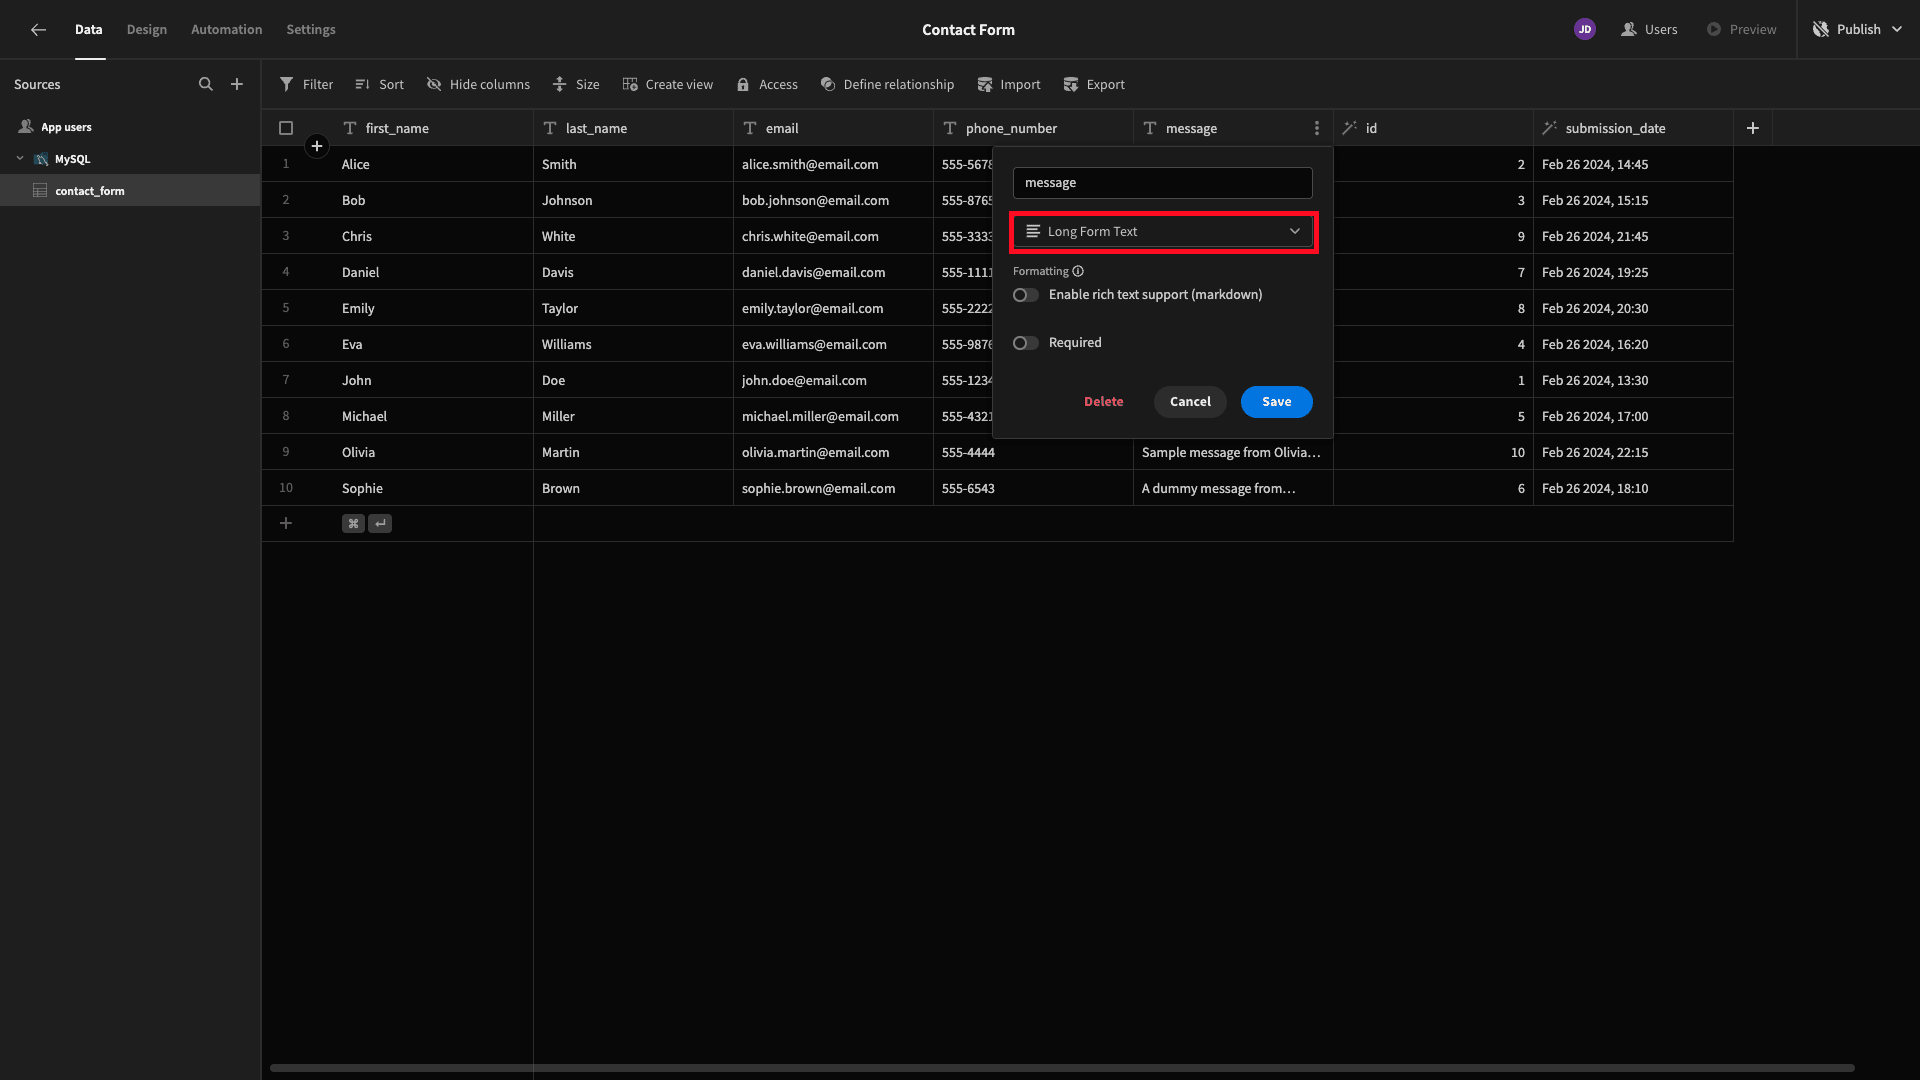
We’re going to make one alteration to our data model before we move on to building our form. Our message attribute will be used to input a longer query, but in our database, this has the TEXT type, which doesn’t distinguish between long and short inputs.
Budibase has two distinct data types for strings - Text and Long-Form Text.
We’re going to update the type of our message attribute so that a long-form text field is provided for users when we autogenerate our form. We can do this under the settings for the message column in our database grid.
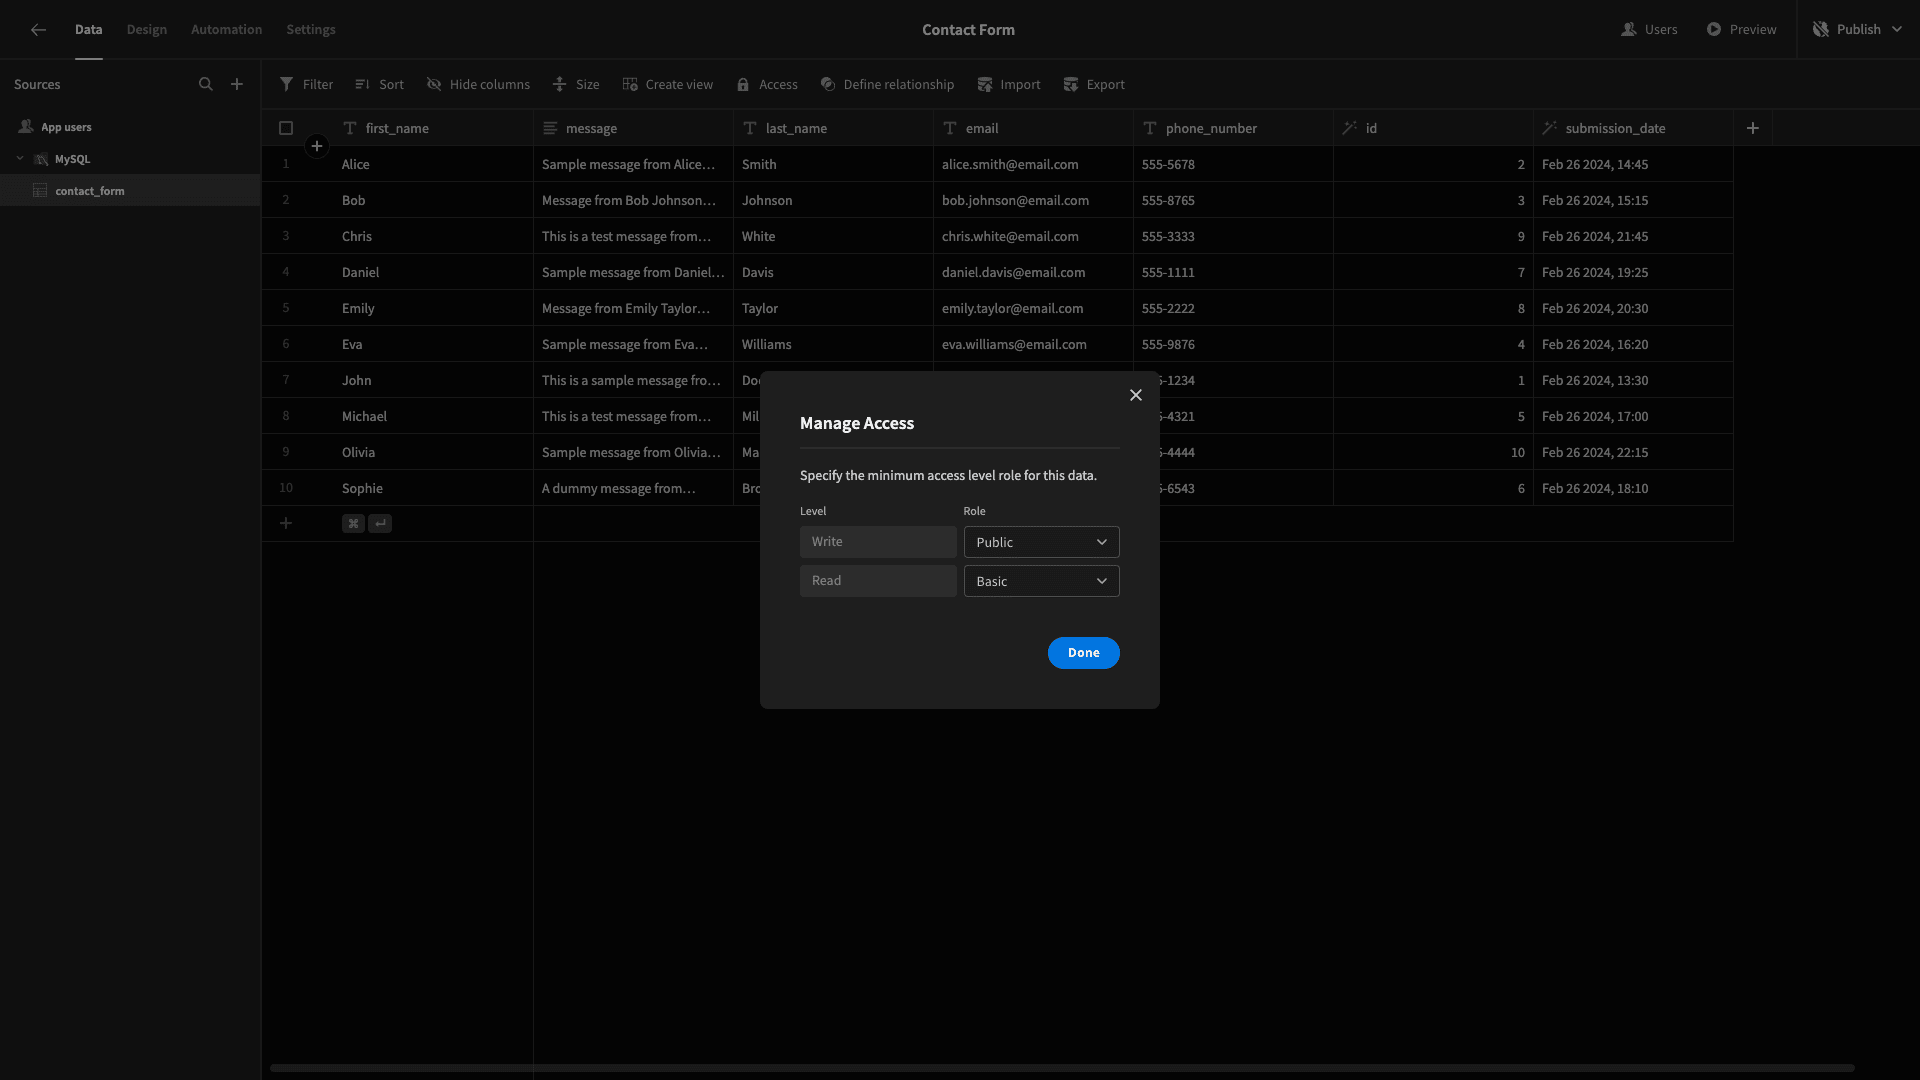
Lastly, we’re going to need unauthenticated users to be able to create rows in our database using our embedded form, so under Access, we’re setting the minimum permission for Write actions to Public under Access.
2. Auto-generating a form
Now, we can start creating our embeddable form. Start by heading over to the Design tab. We’ll be given a couple of options here for creating our first screen - including starting with one of Budibase’s prebuilt layouts.
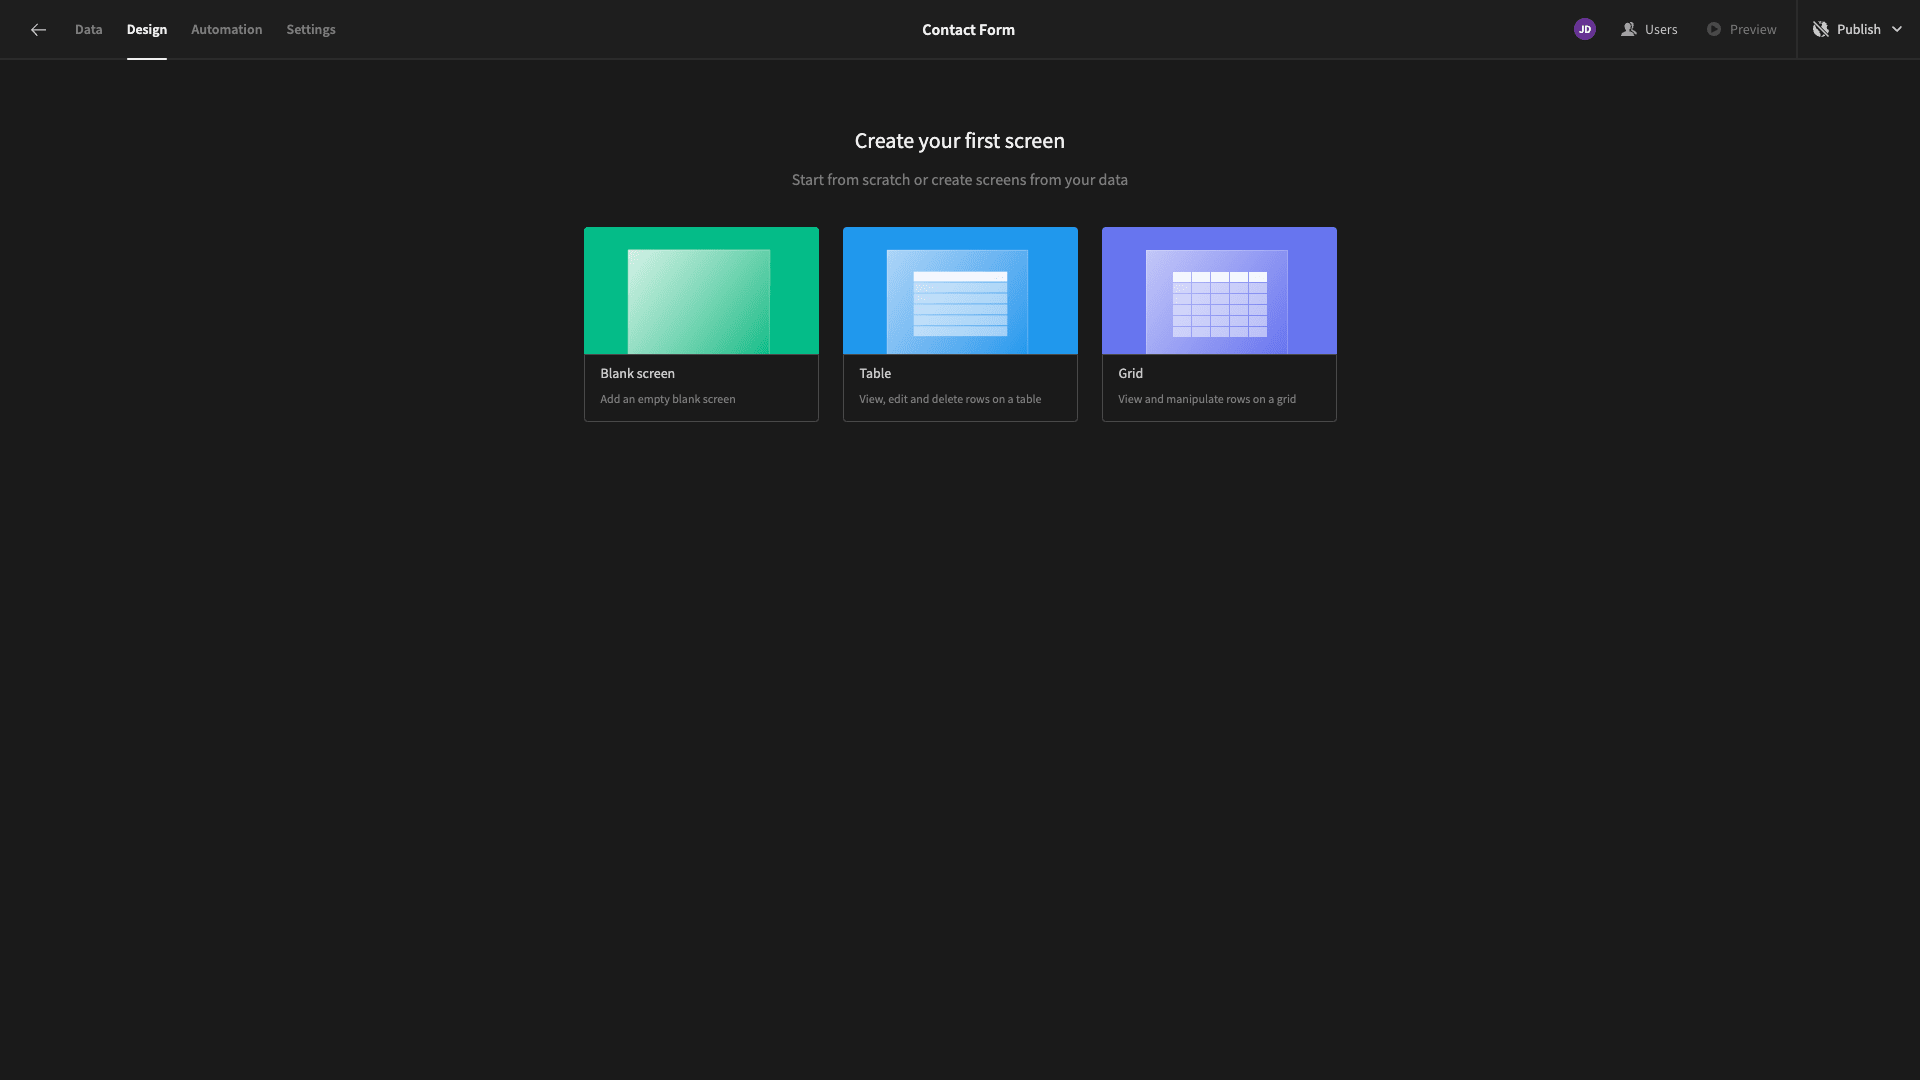
Today, we’re opting for a blank screen. We’ll need to give this a URL extension.
We’re calling ours /contact-form.
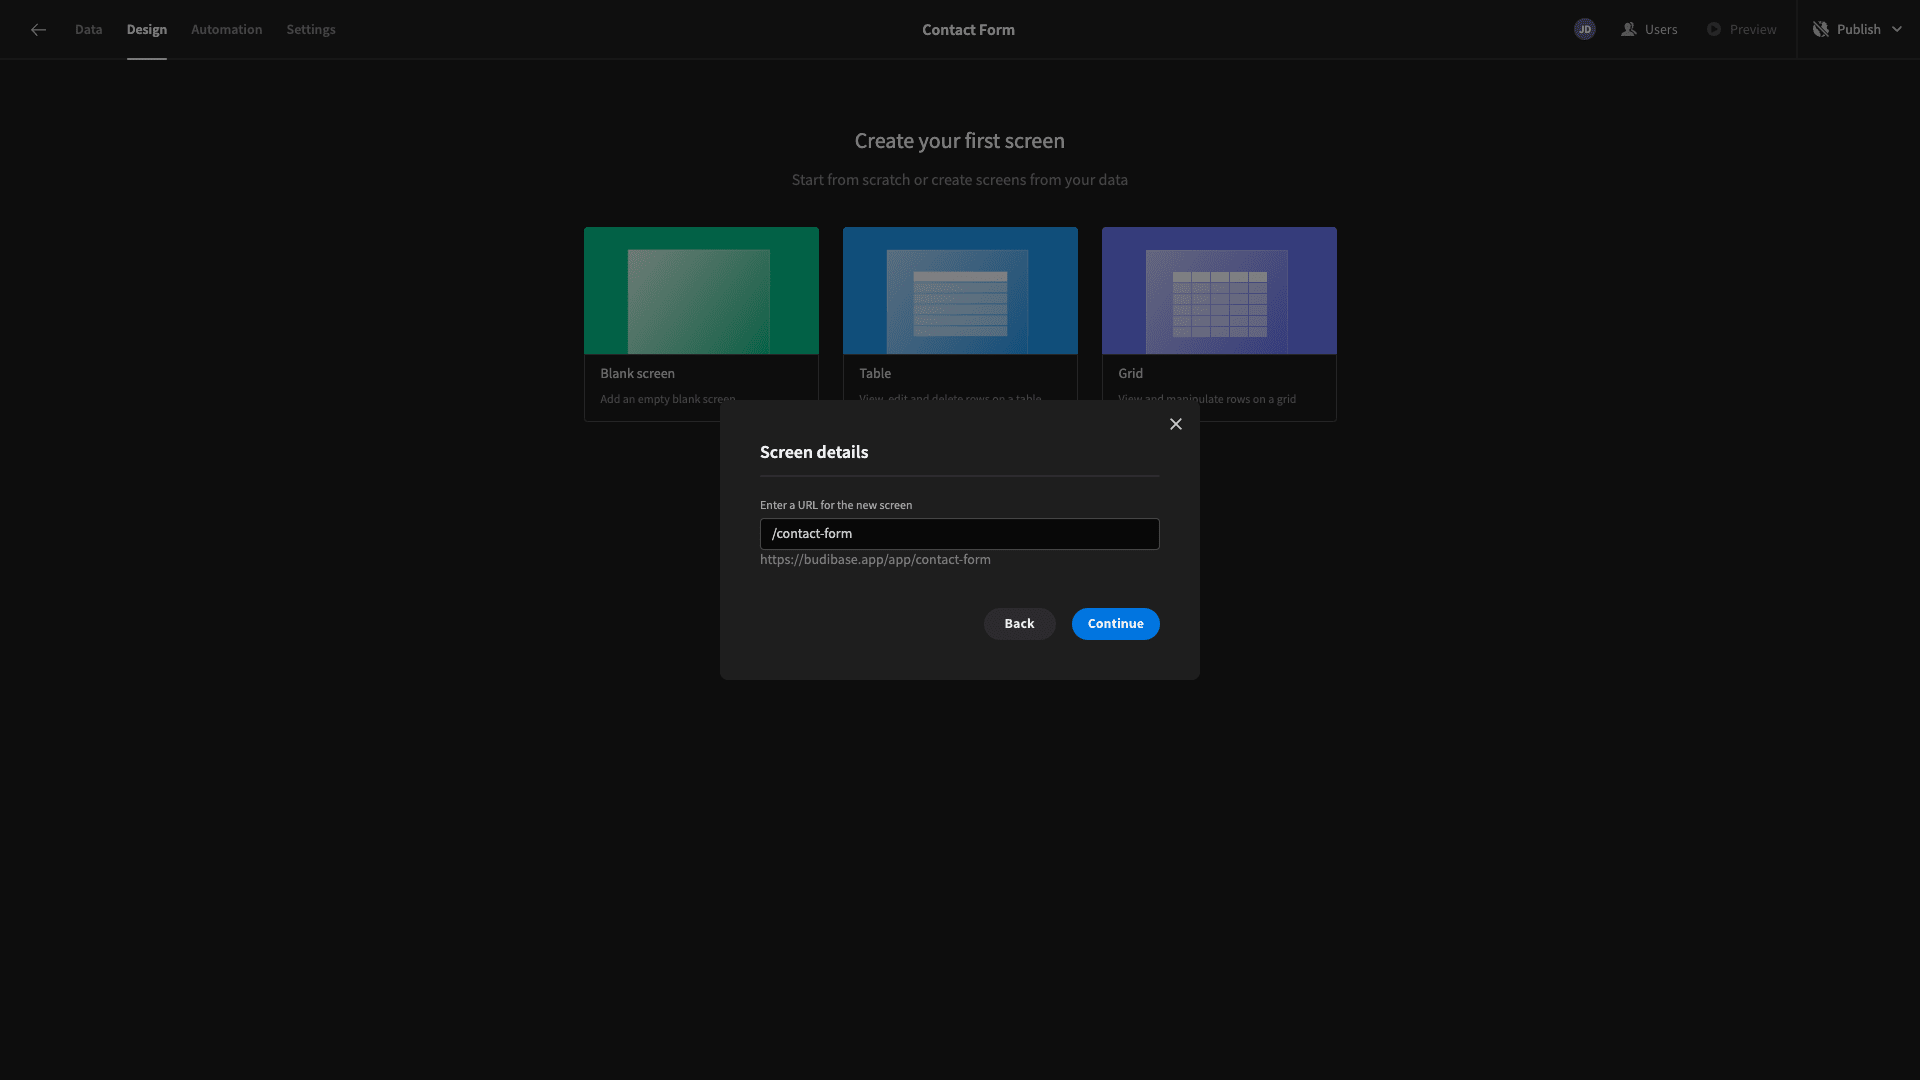
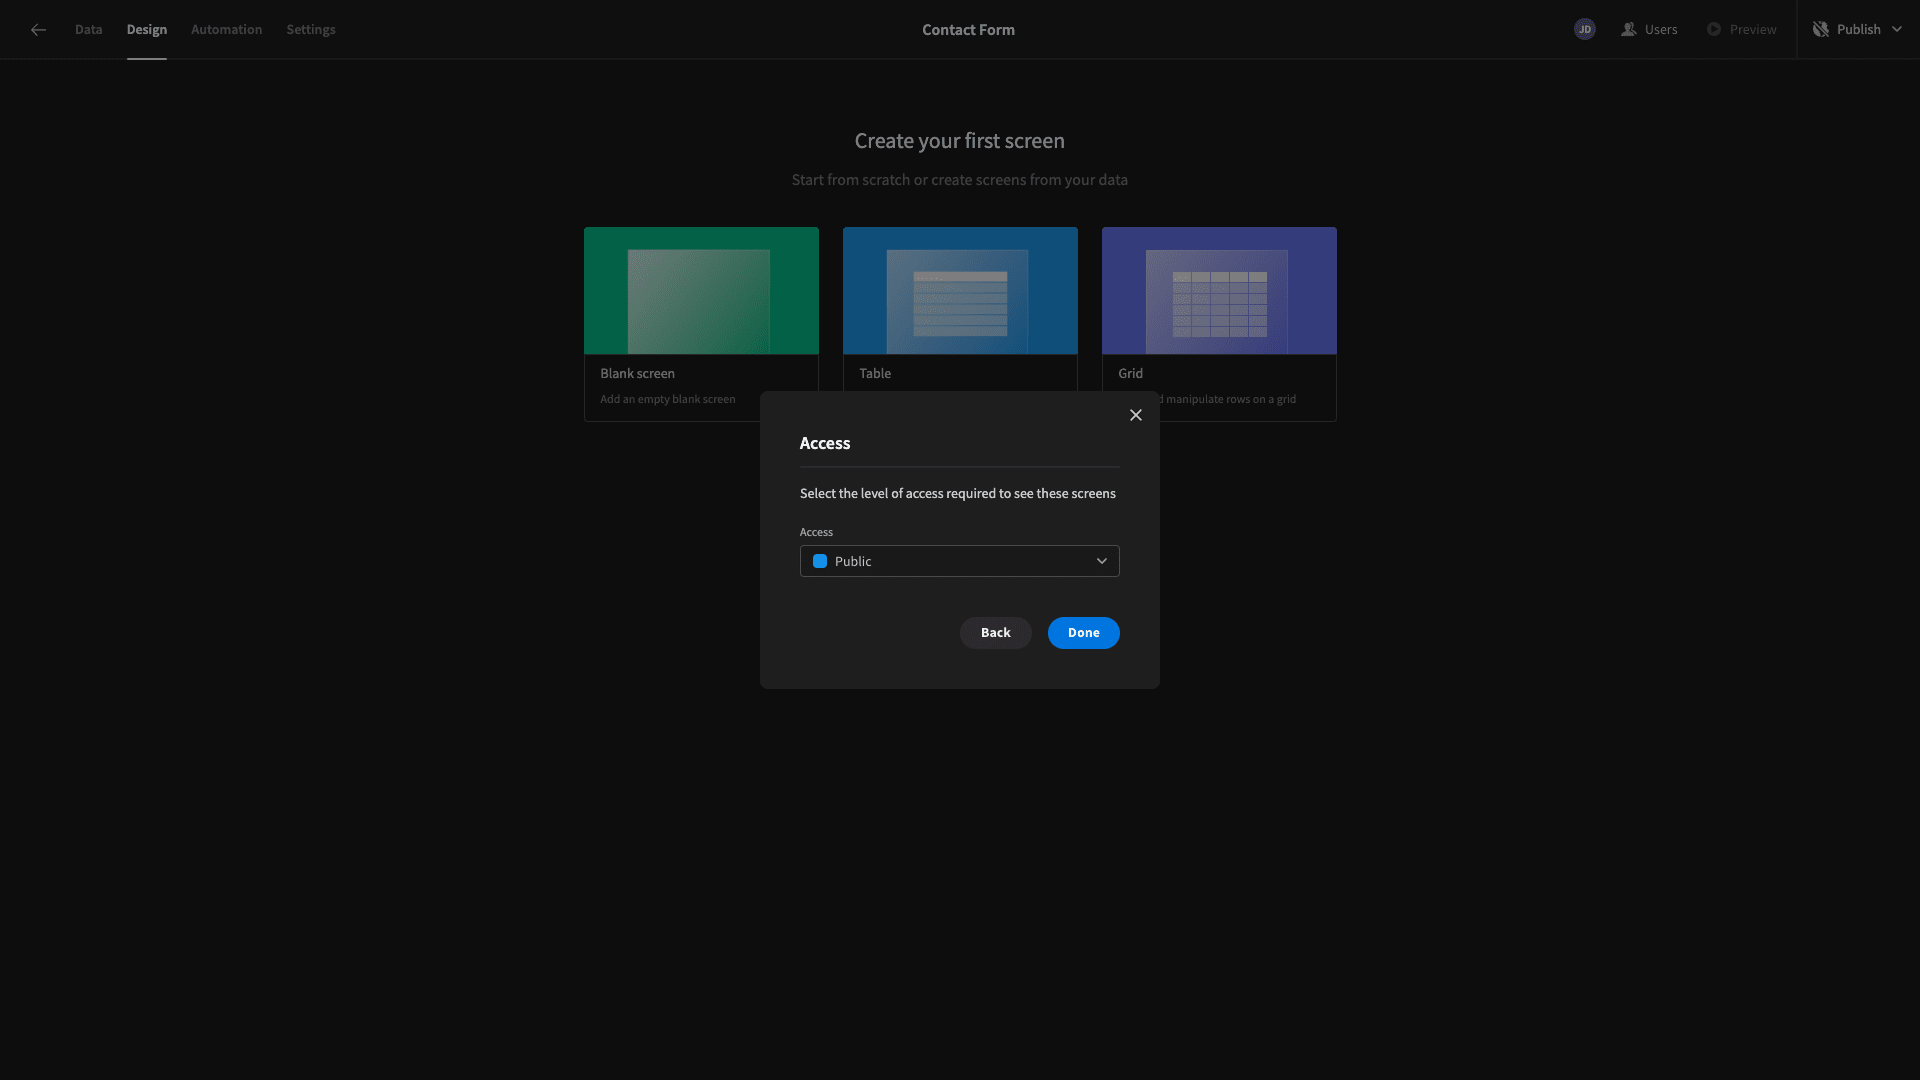
Then, we’re asked to choose a minimum role that will be required to access this screen. Budibase’s built-in RBAC system features four hierarchical roles. Basic, Power, and Admin are all for authenticated users.
We want our form to be fillable by unauthenticated users when it’s embedded, so we’re setting the role to Public.
Here’s how our blank screen will look.
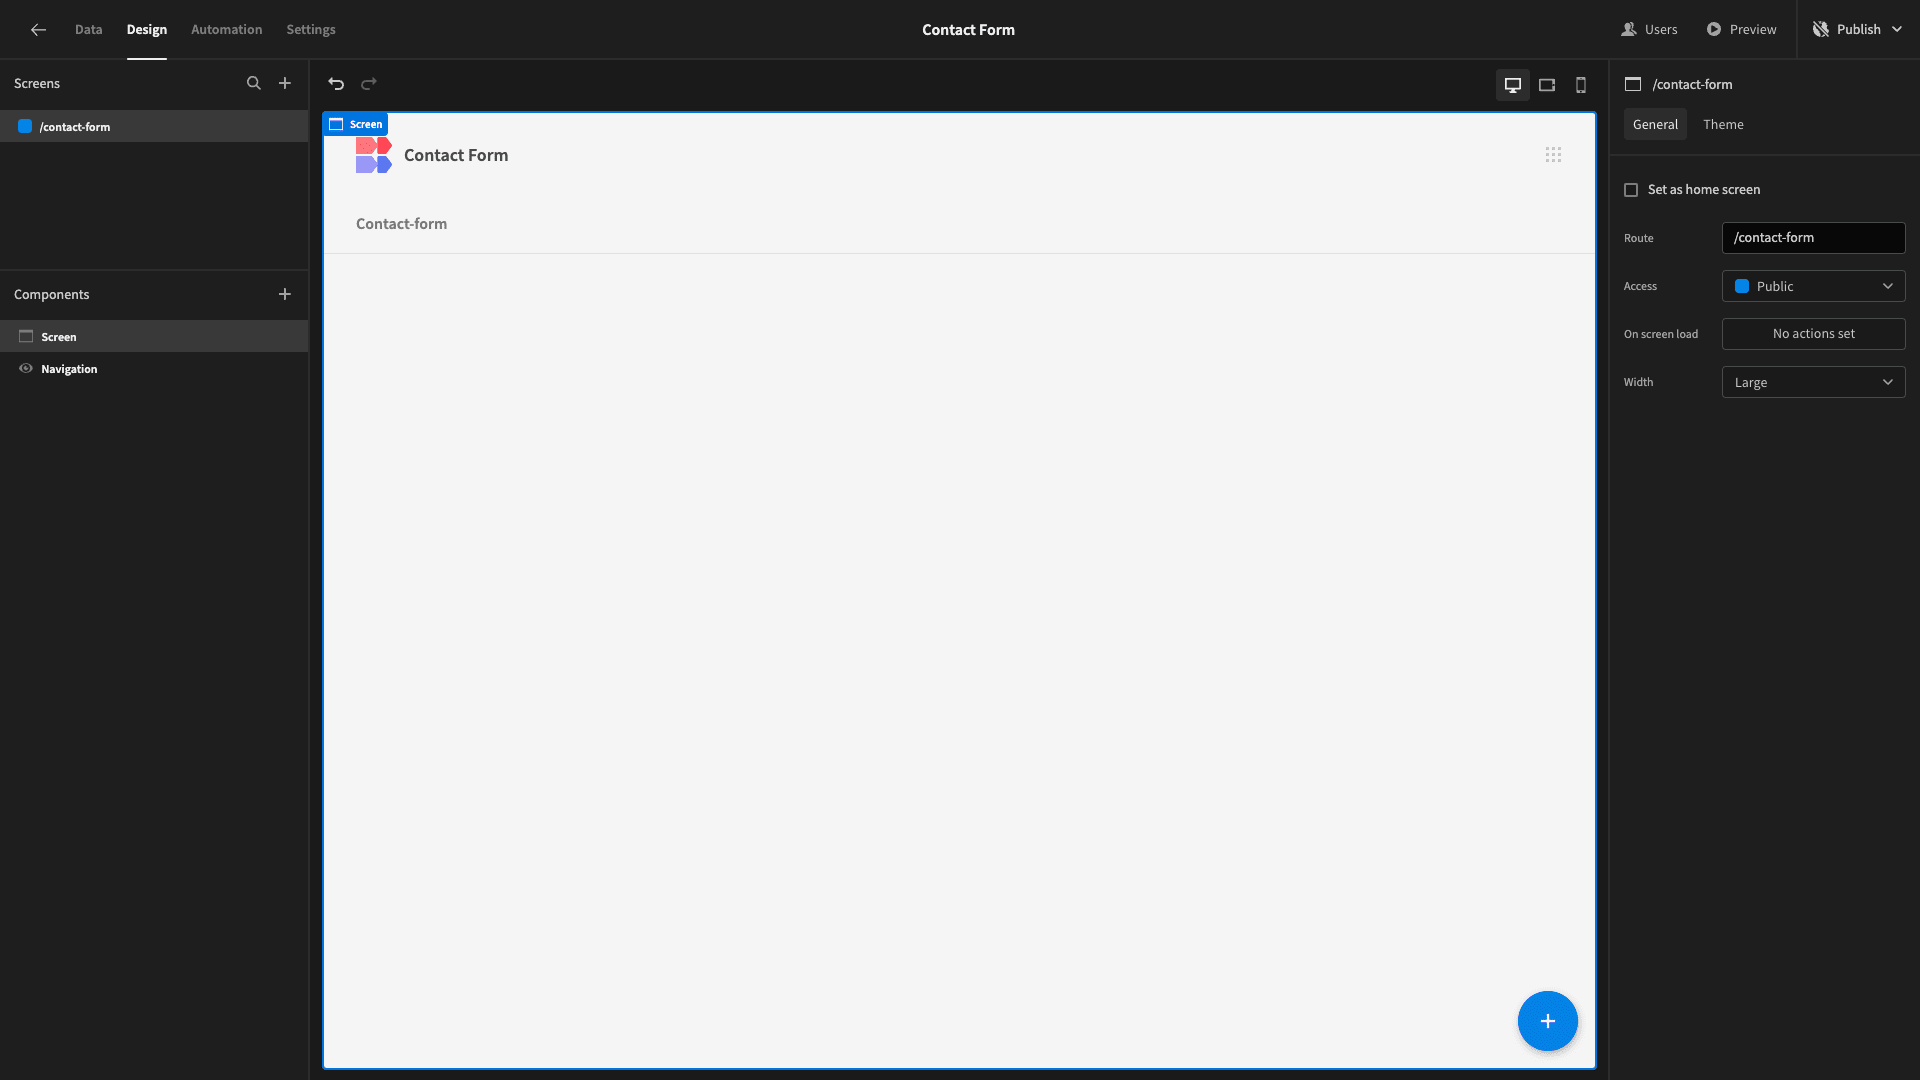
We’re going to add a single component to this called a Multi-Step Form Block. This will generate a working form based on the schema of the data table that we set it to.
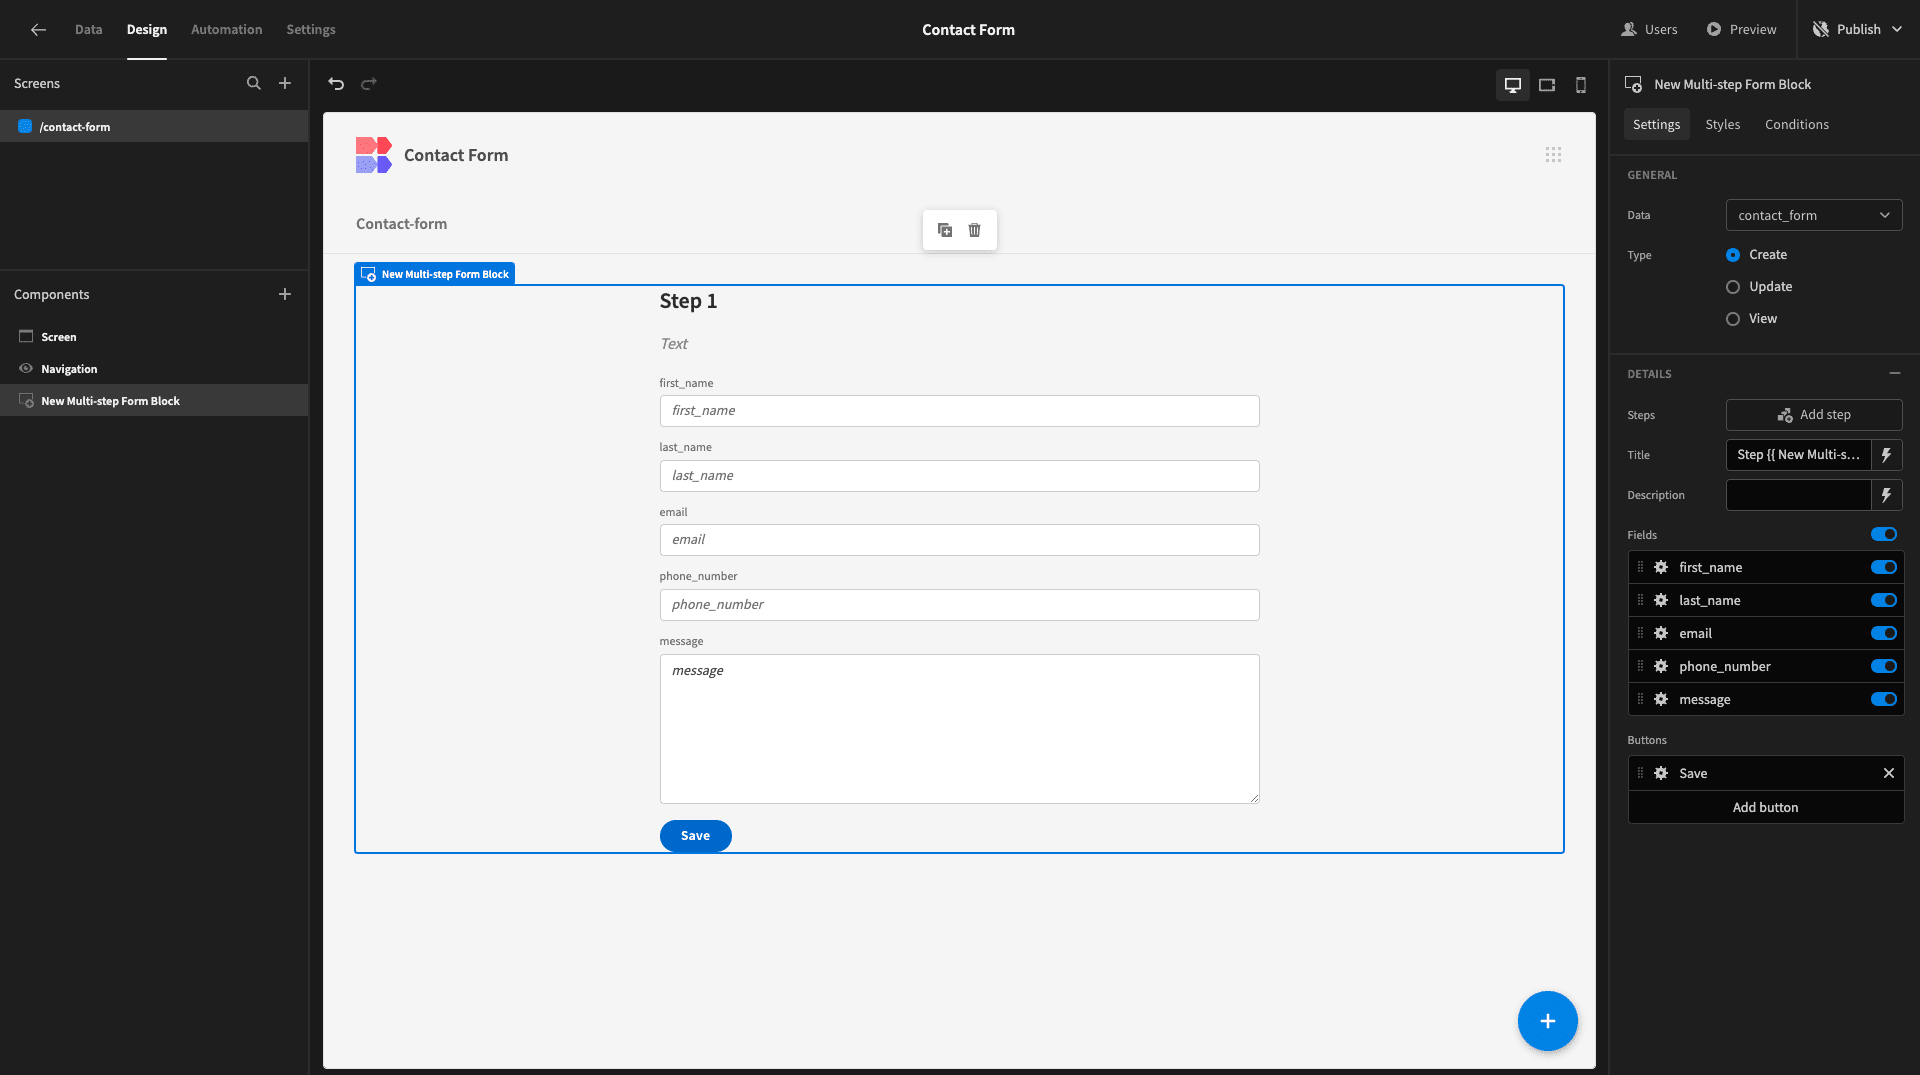
This is already a fully functional form.
Our first task is arranging our fields into separate steps. As you can see, they’re all displayed on a single form step by default.
We’re going to display our form across three steps.
These will comprise:
- The first_name and last_name attributes.
- The email and phone_number attributes.
- The message attribute.
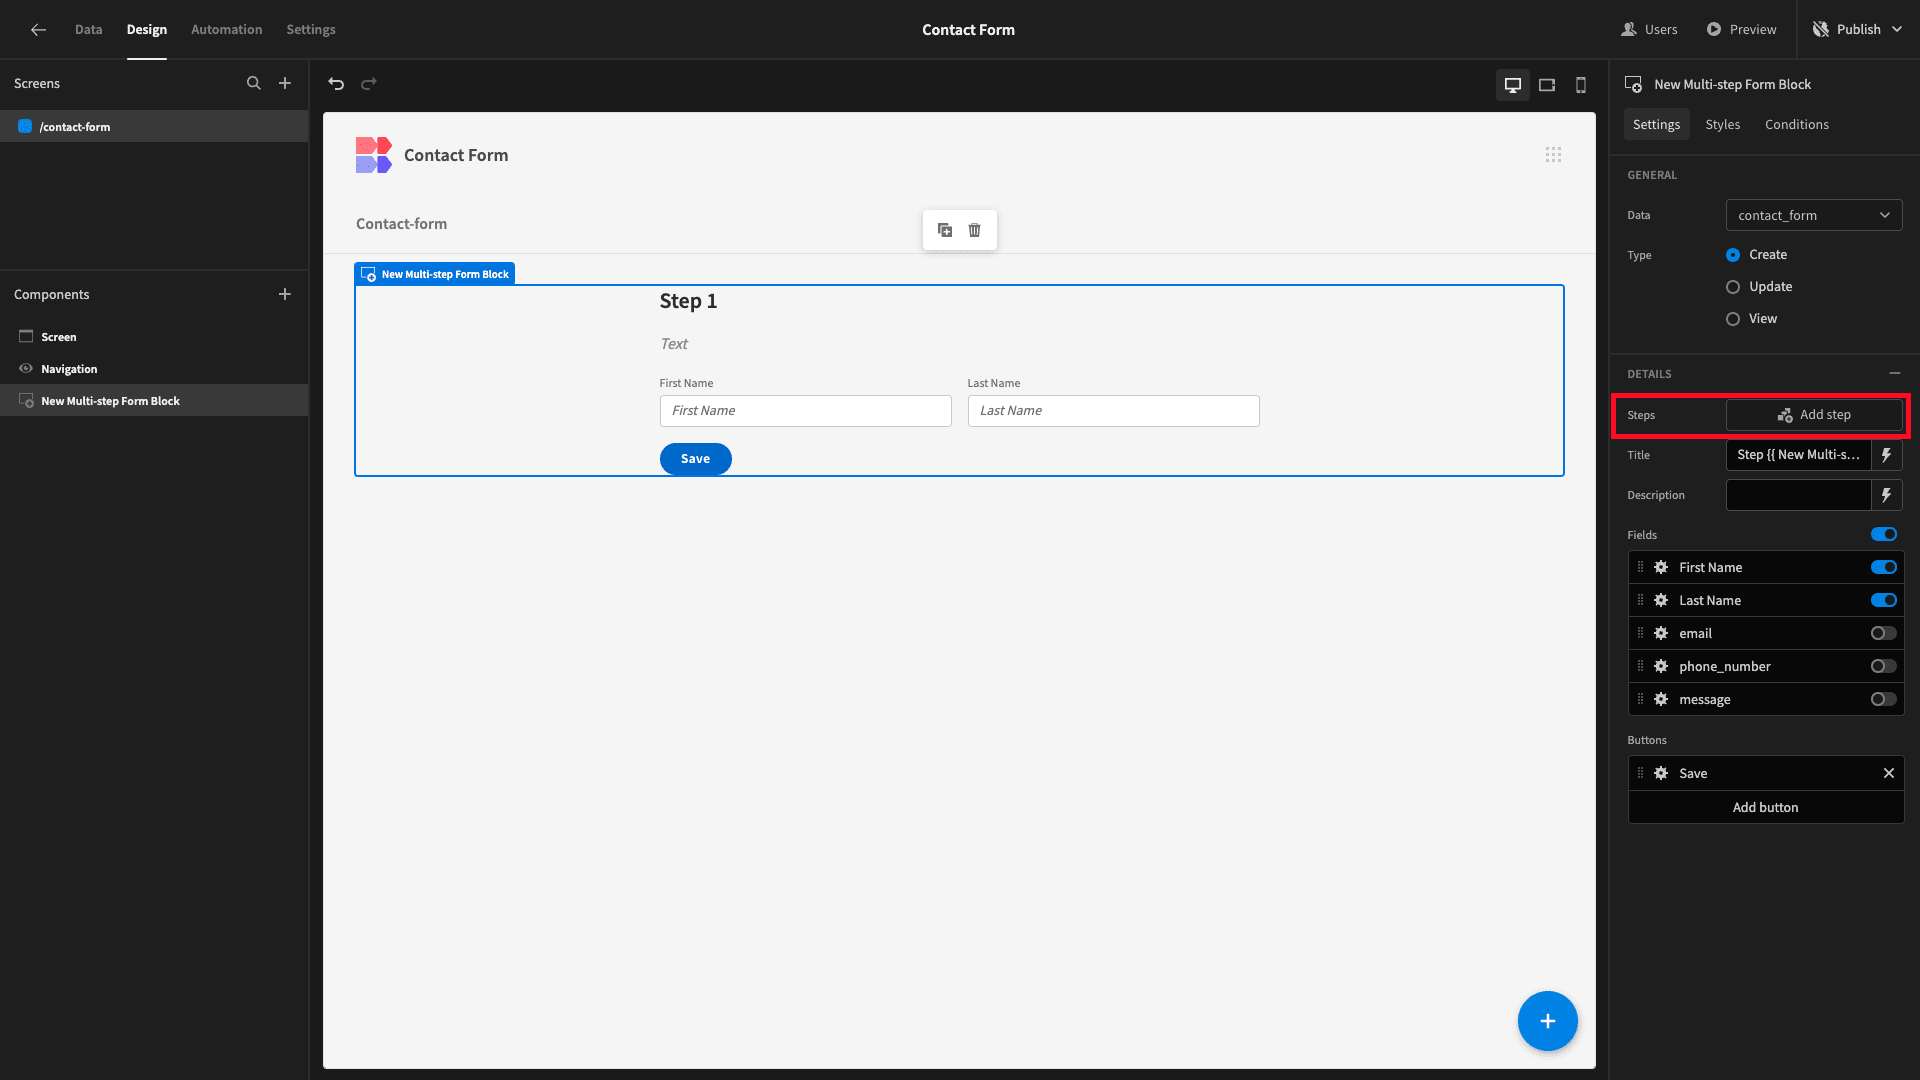
We’ll start by deselecting everything except first_name and last_name on our existing step.
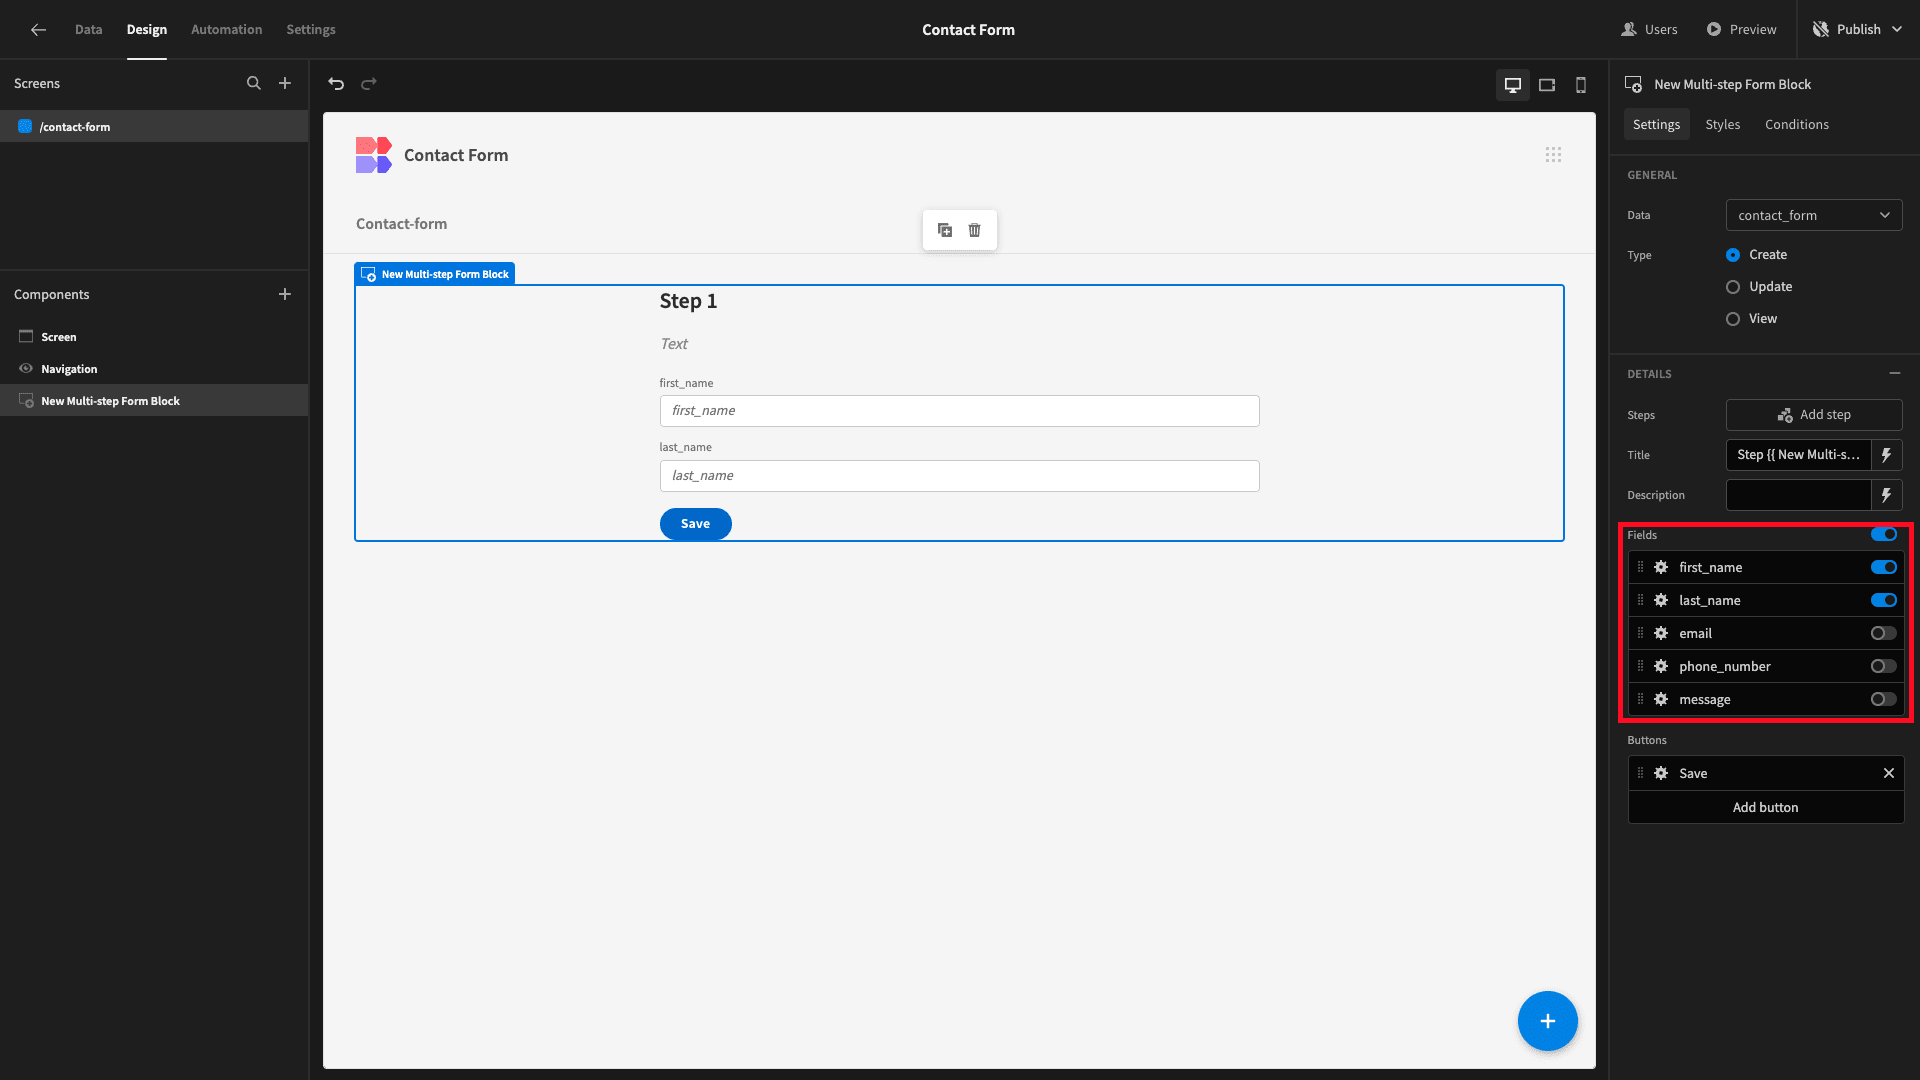
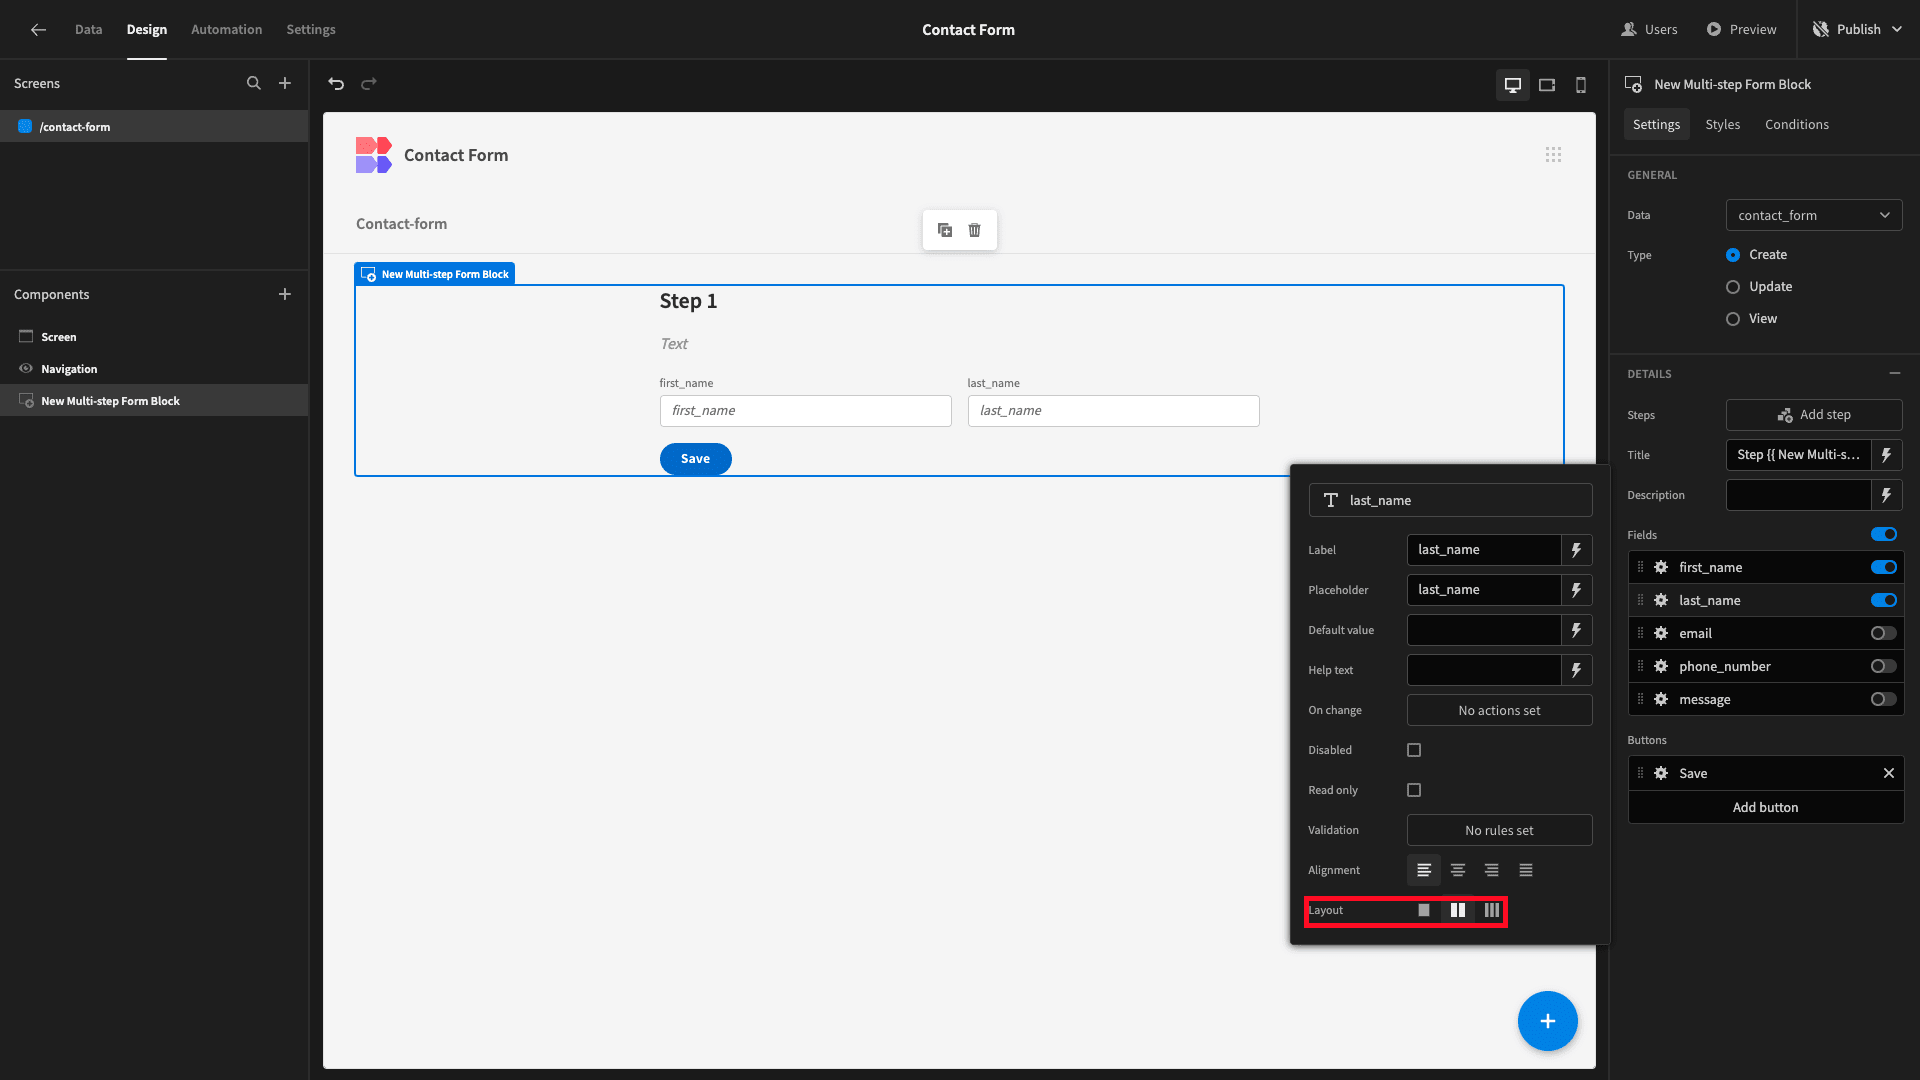
These need as much horizontal space as they’re currently occupying, so we’re going to use the Layout setting for each to arrange them into columns.
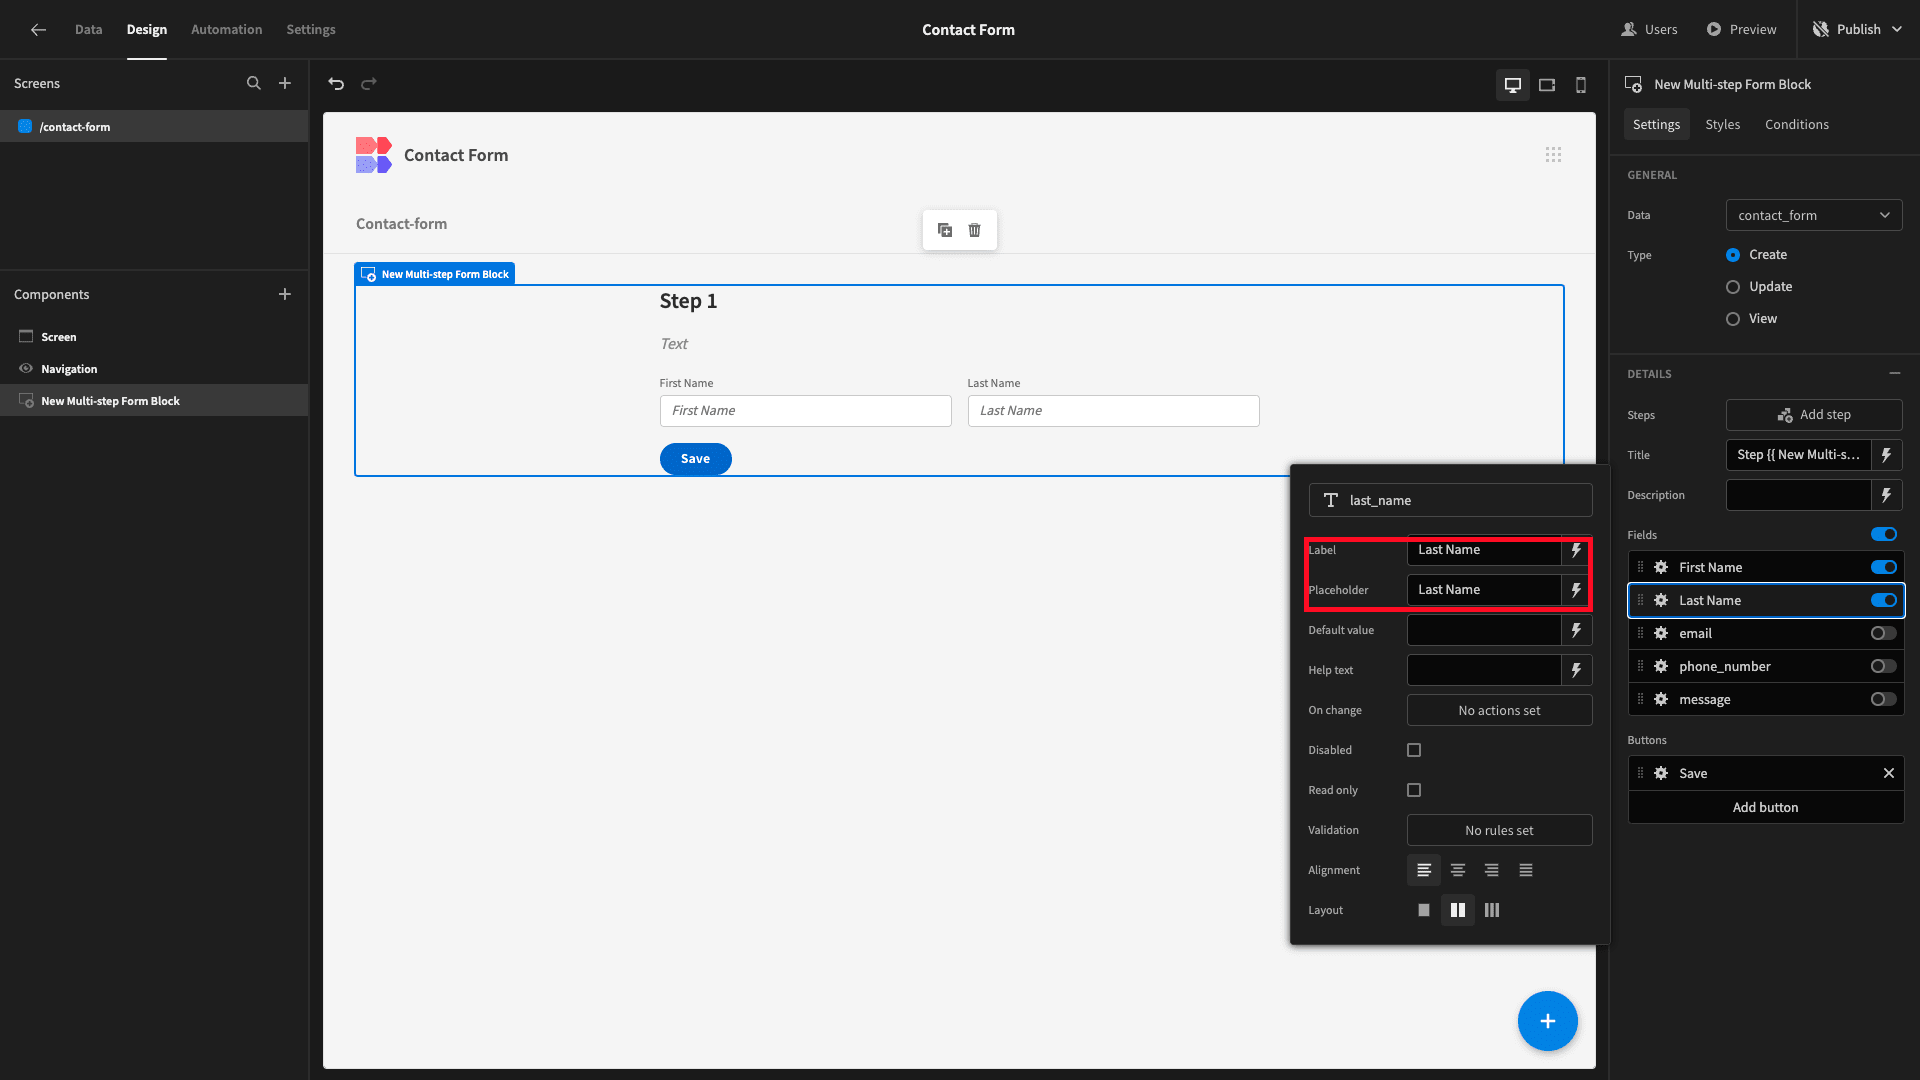
While we’re here, we’ll also update the Label and Placeholder fields with more human-readable text - rather than simply displaying the names of our attributes as they’re stored in our database.
Next, we’ll hit Add Step.
This time, we’re selecting email and phone_number.
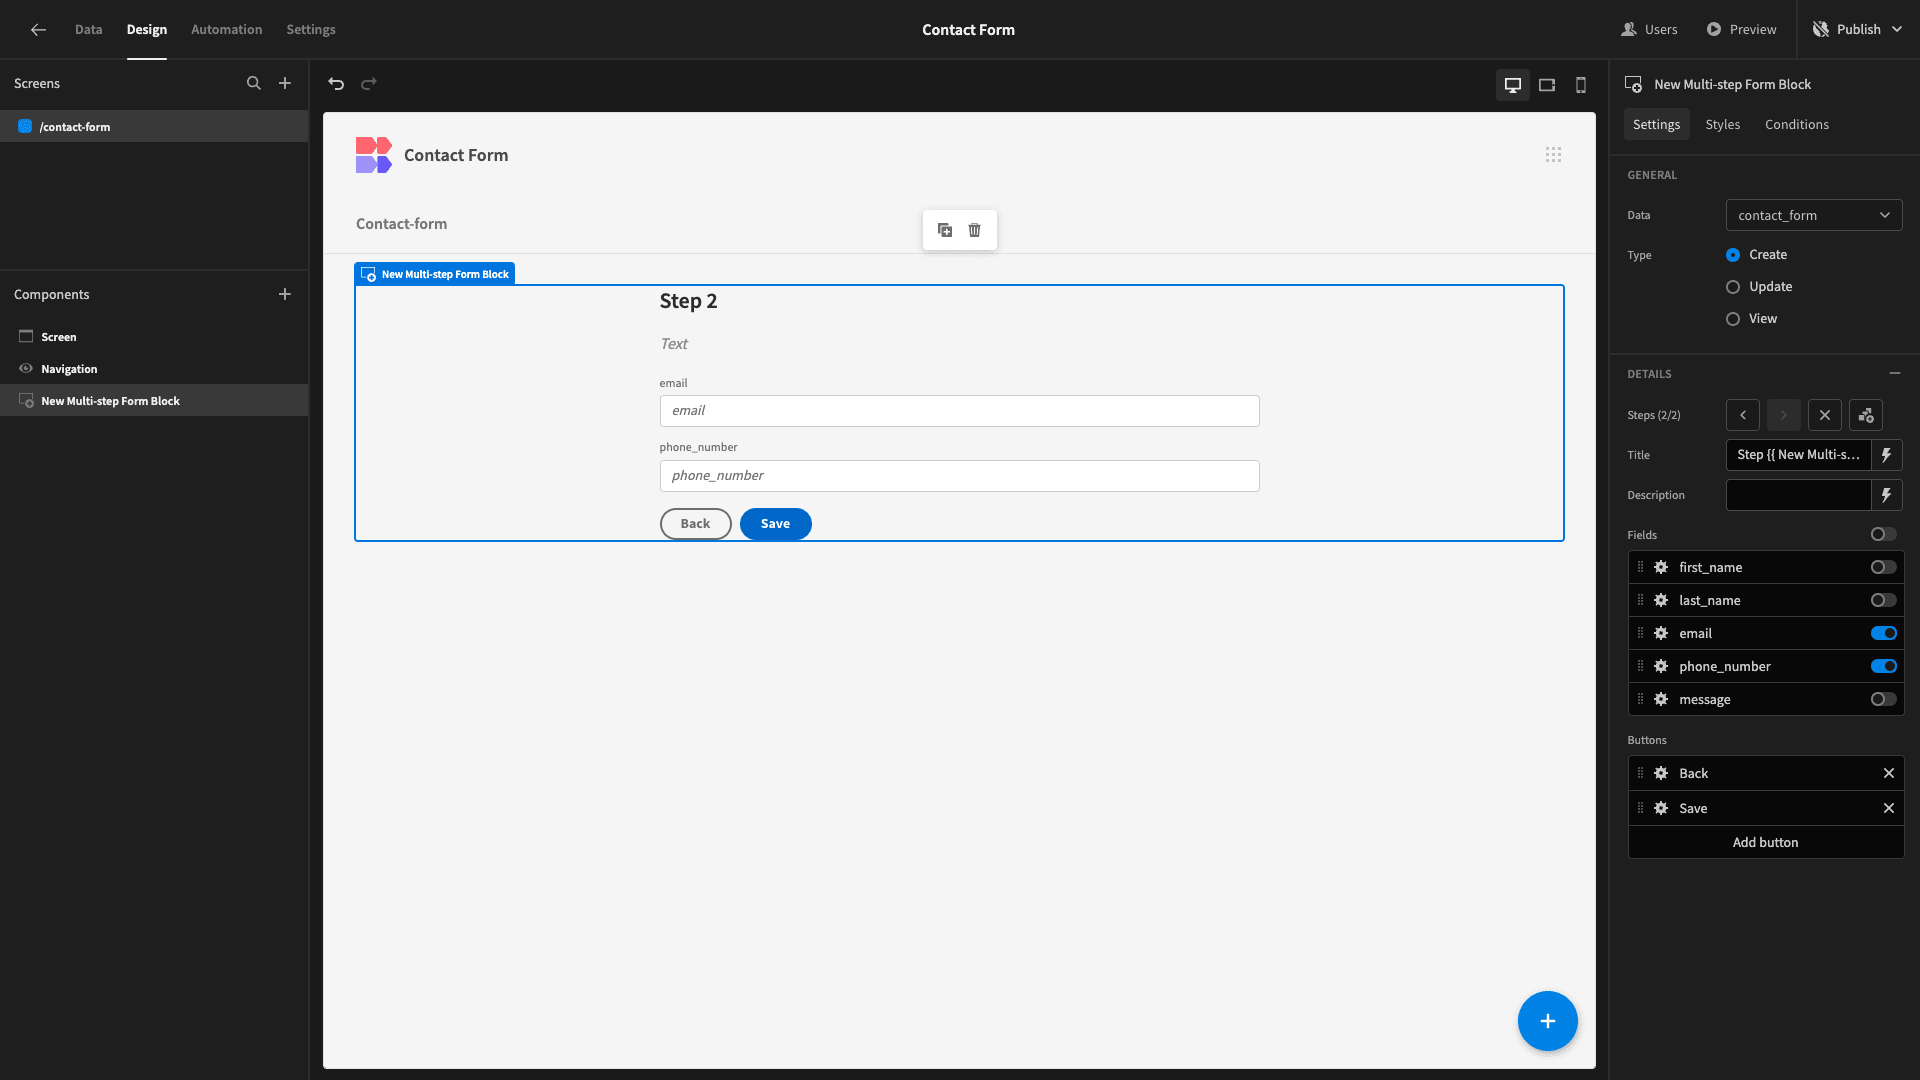
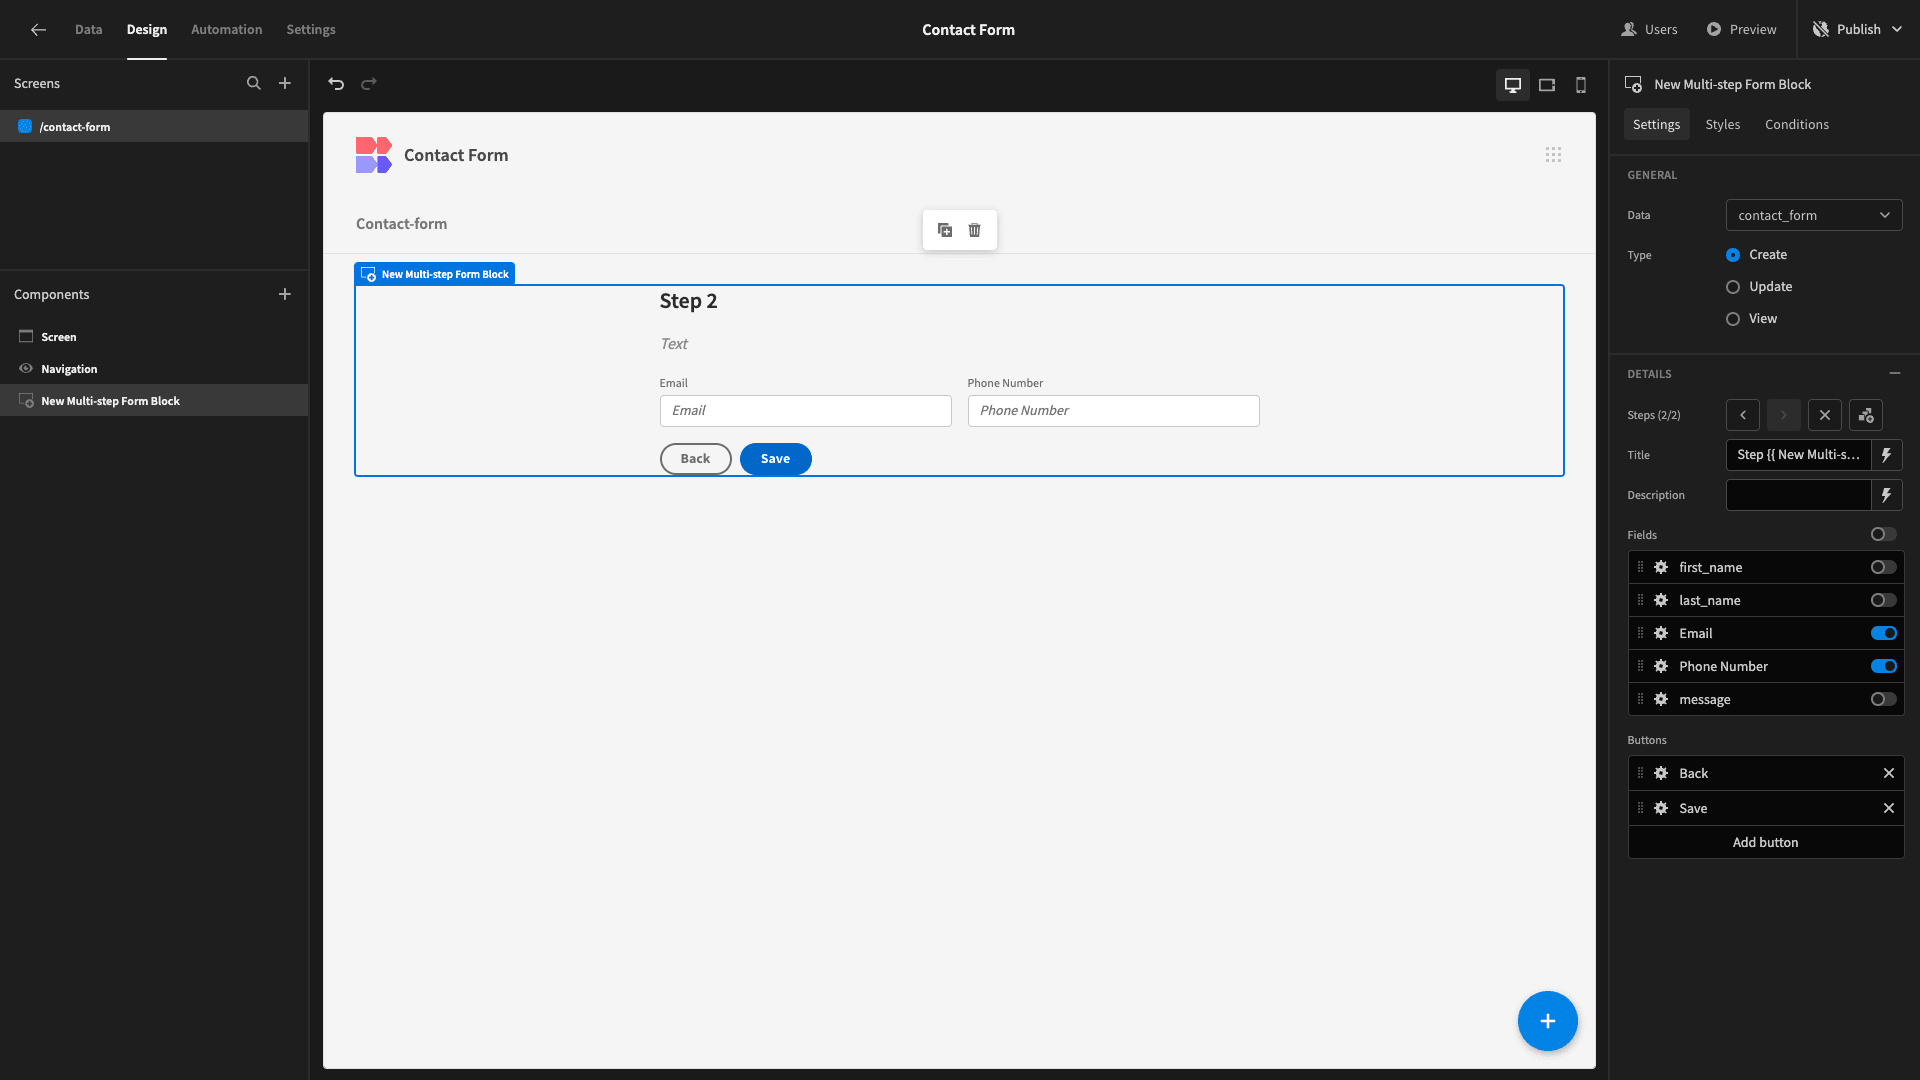
And we’ll repeat the process of updating our display texts and arranging our fields into columns.
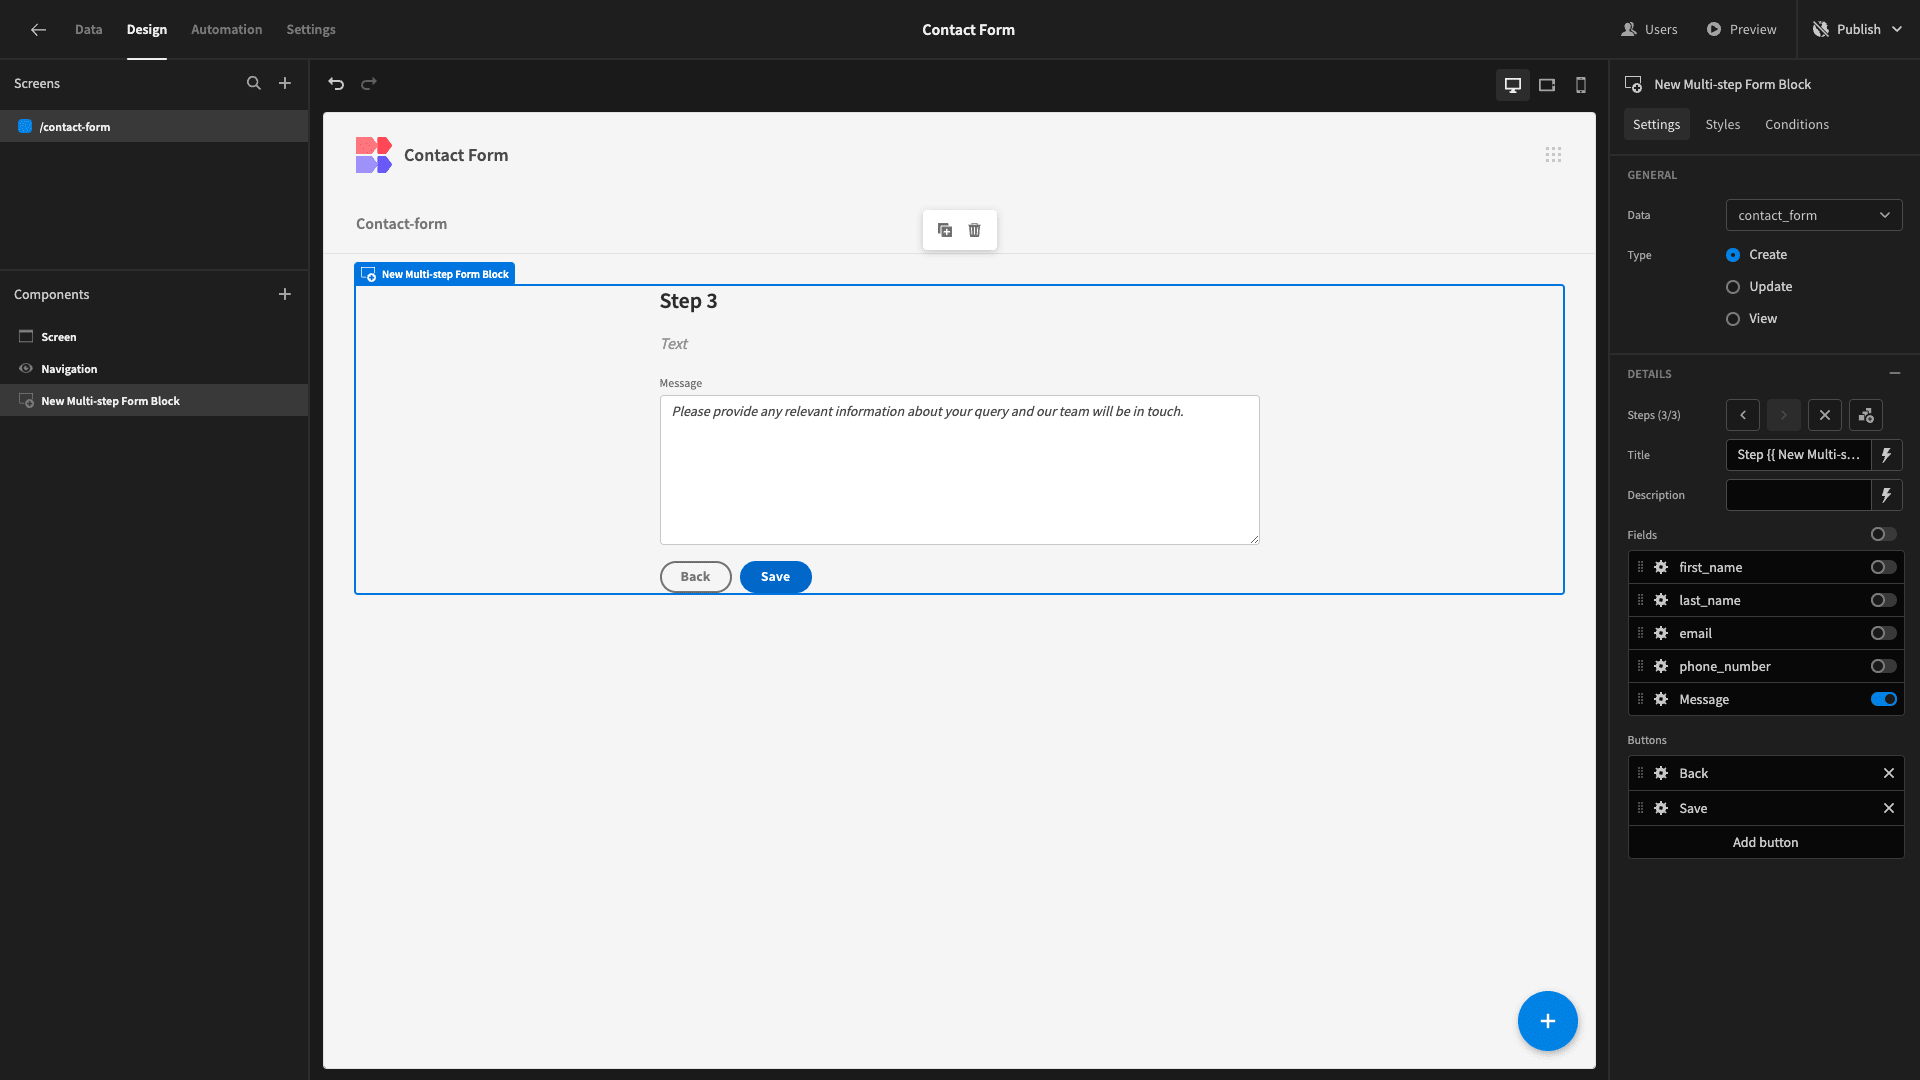
Lastly, we’ll add our third step - which will only contain the message attribute. This time, we’ll capitalize the Label and add a more descriptive Placeholder text.
That’s the basic structure of our form completed. However, before we move on, we want to make a couple of extra tweaks to this.
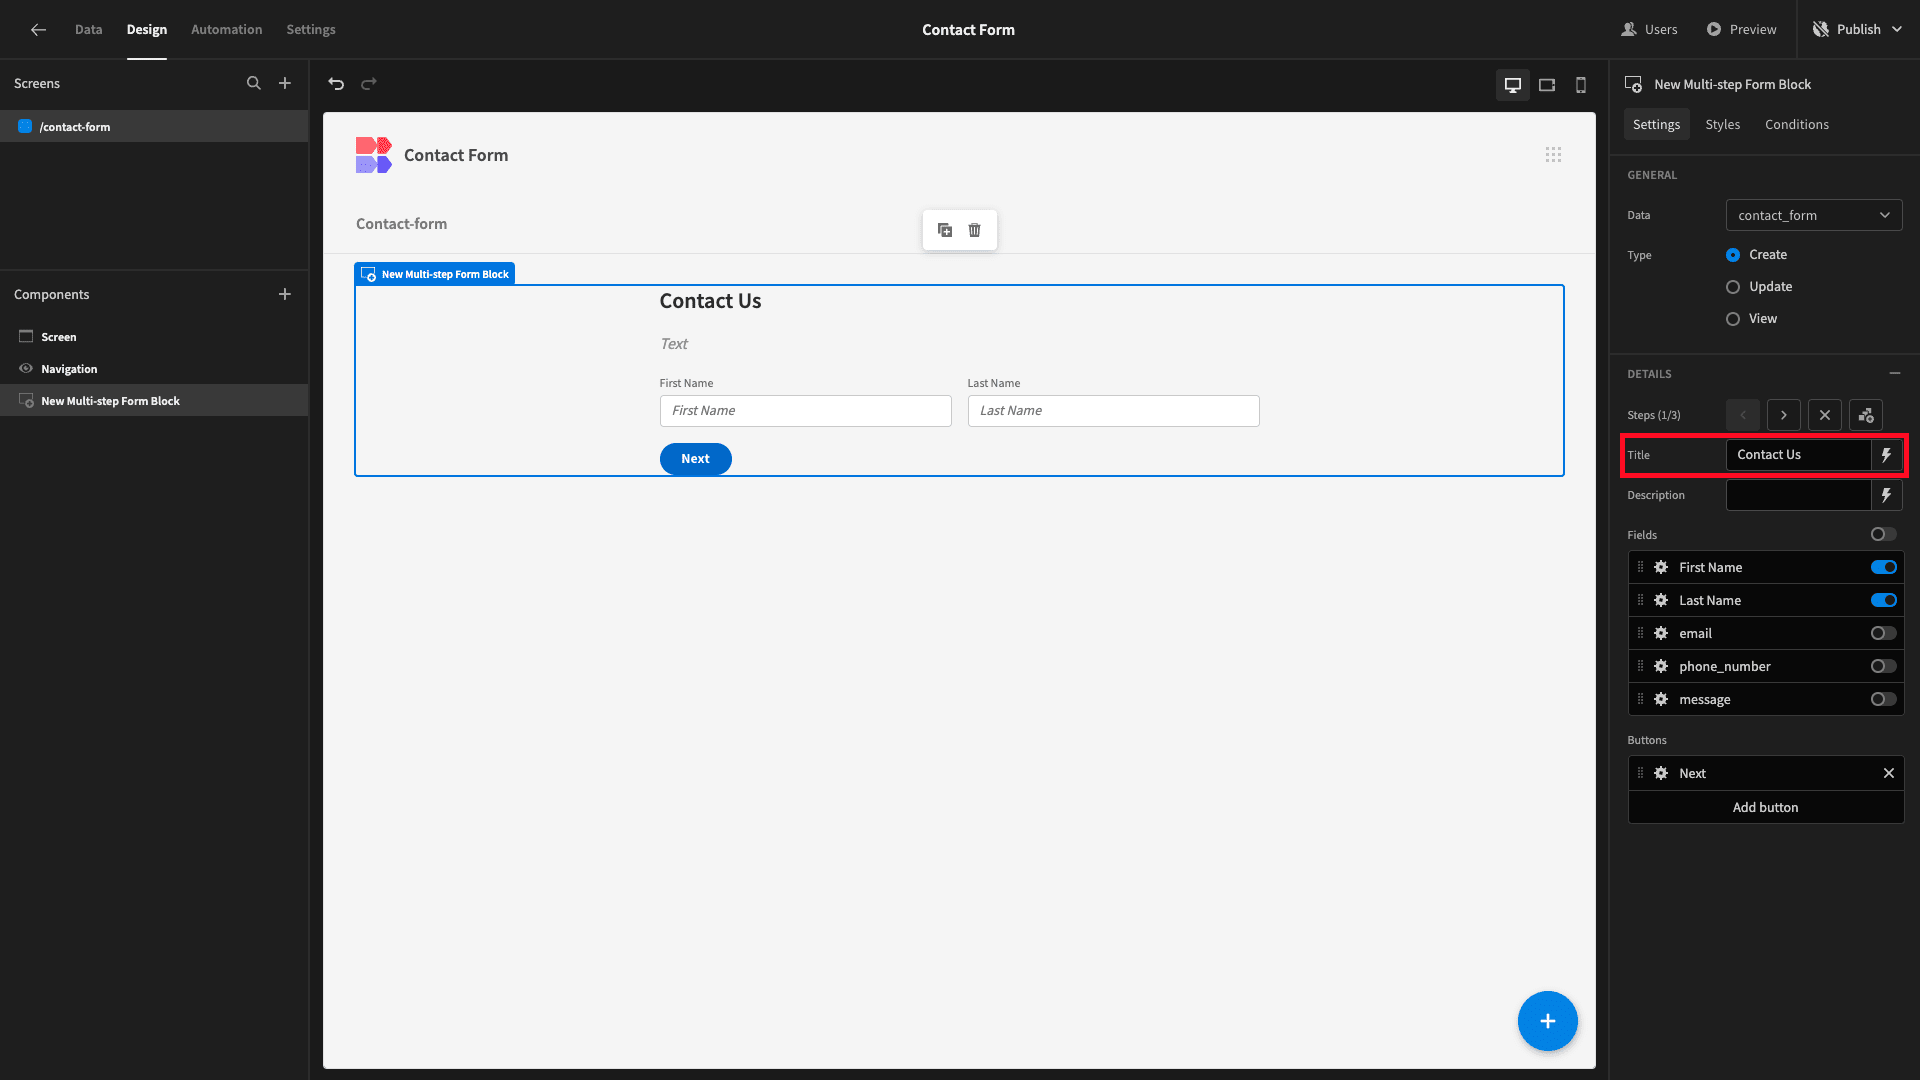
First, we want to replace the Title attribute on each of our form fields with something a little bit more user-friendly.
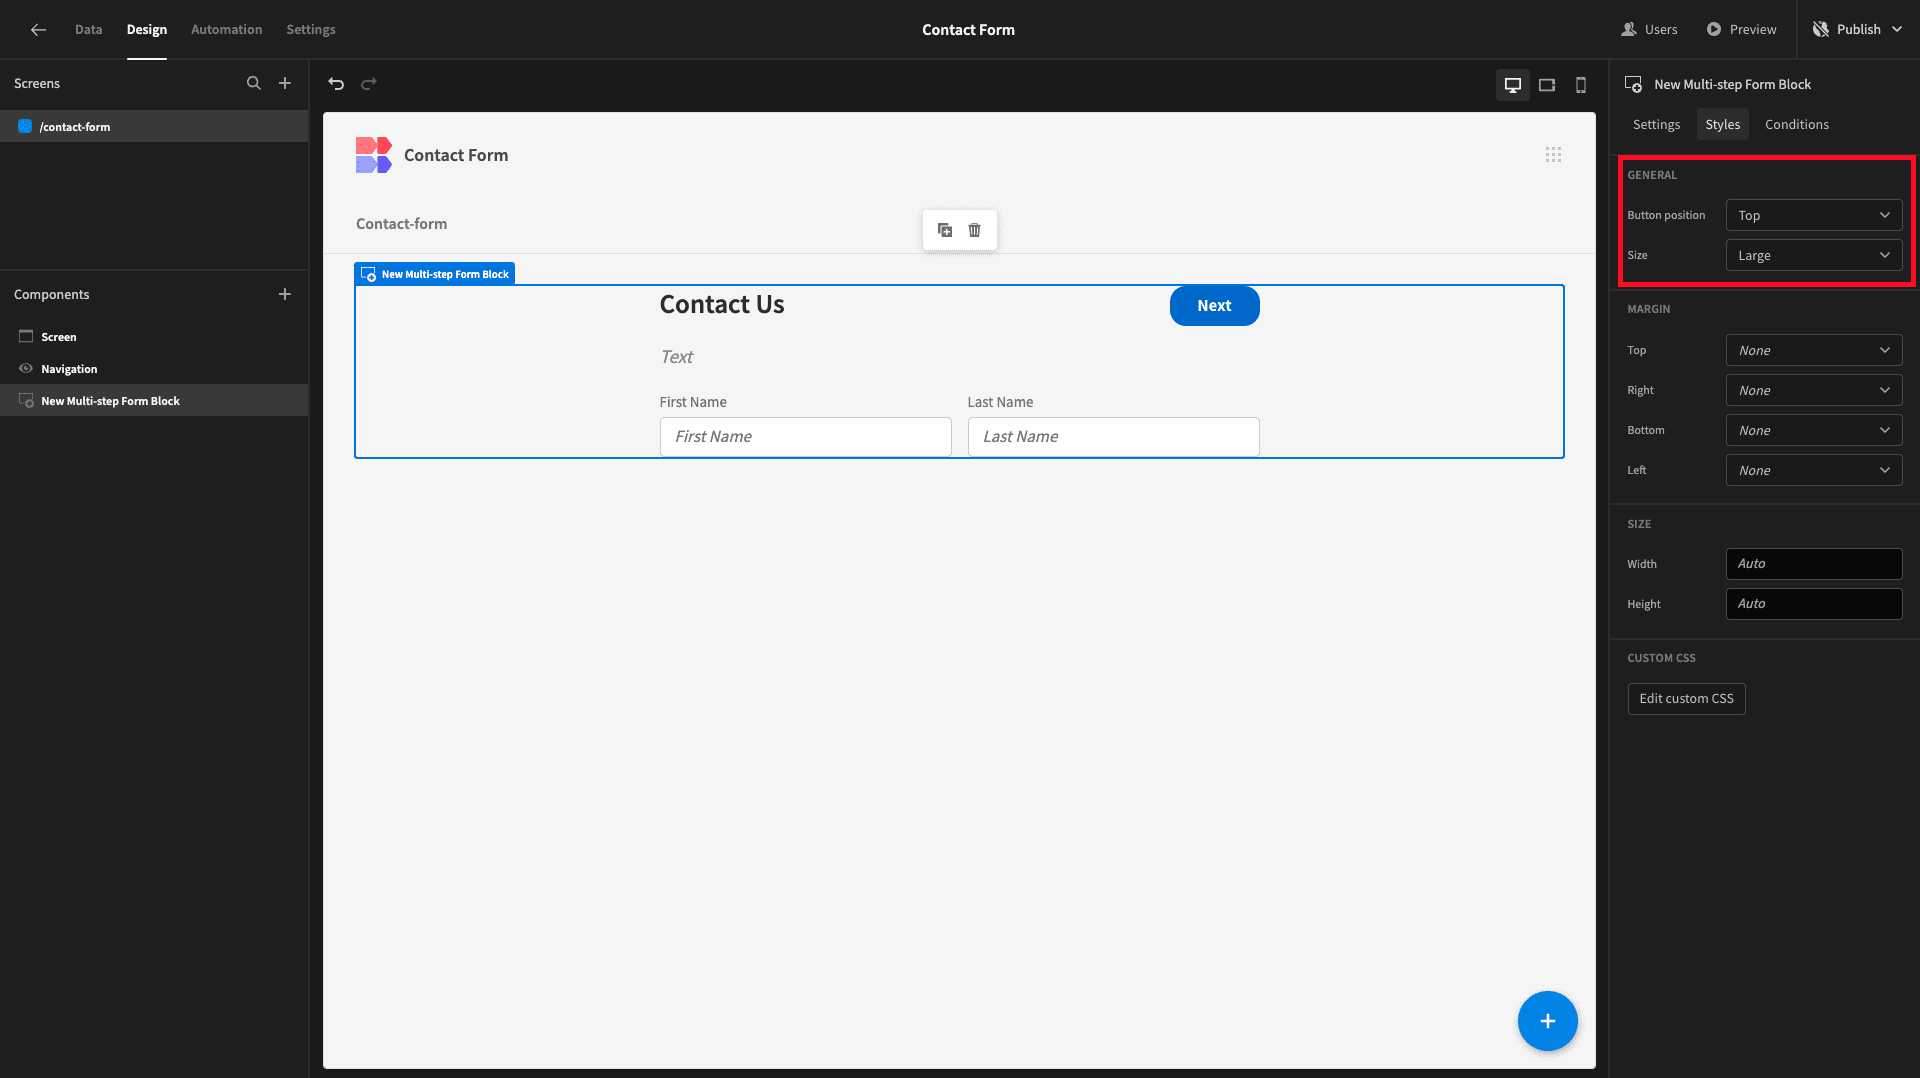
Then, under Styles, we’ll set the Size option to Large and the Button Position to Top.
3. Adding a confirmation message
Next, we want to create a confirmation message that will be displayed when a user completes our form, advising them of the next steps. We’ll do this using a little bit of front-end conditional logic.
We’ll start by creating the message. Beneath our Multi-Step Form Block, we’re adding a Headline component, with its horizontal alignment set to the center.
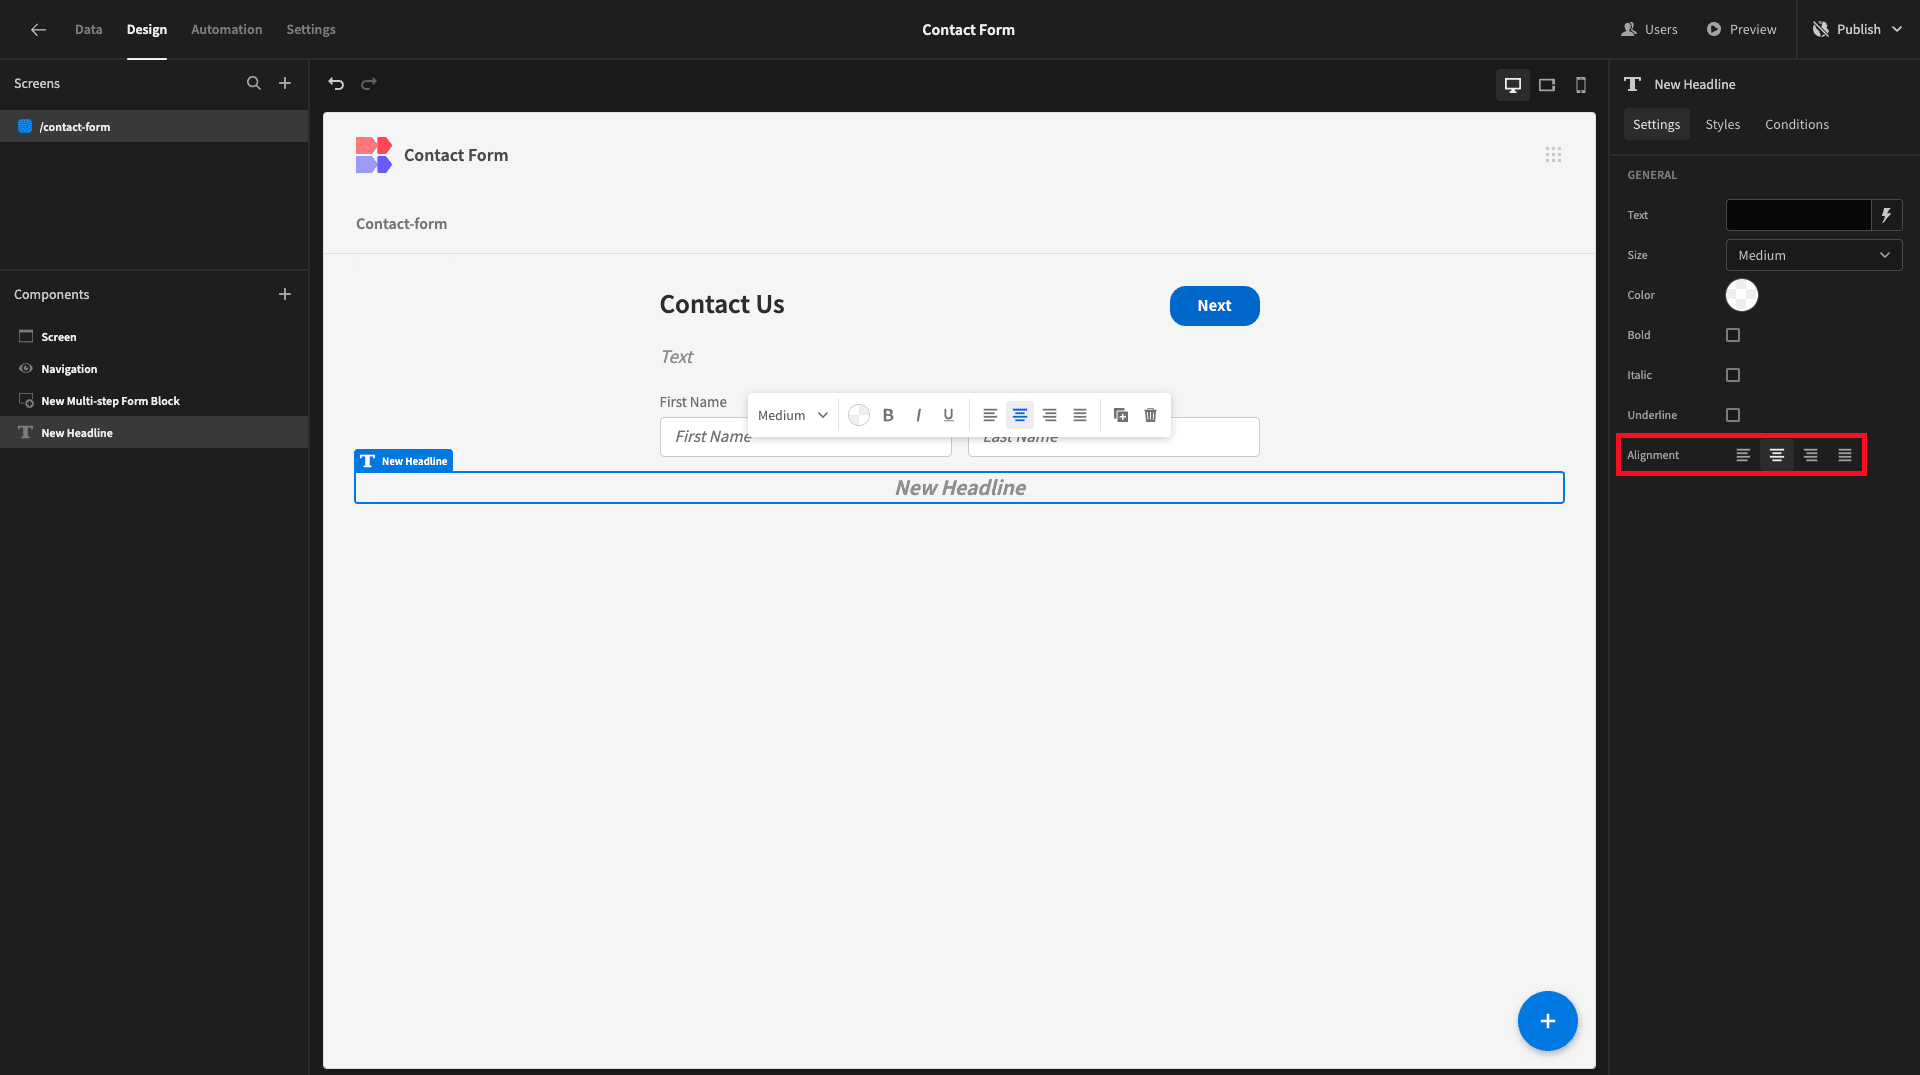
We’ll place our message in its Text field.
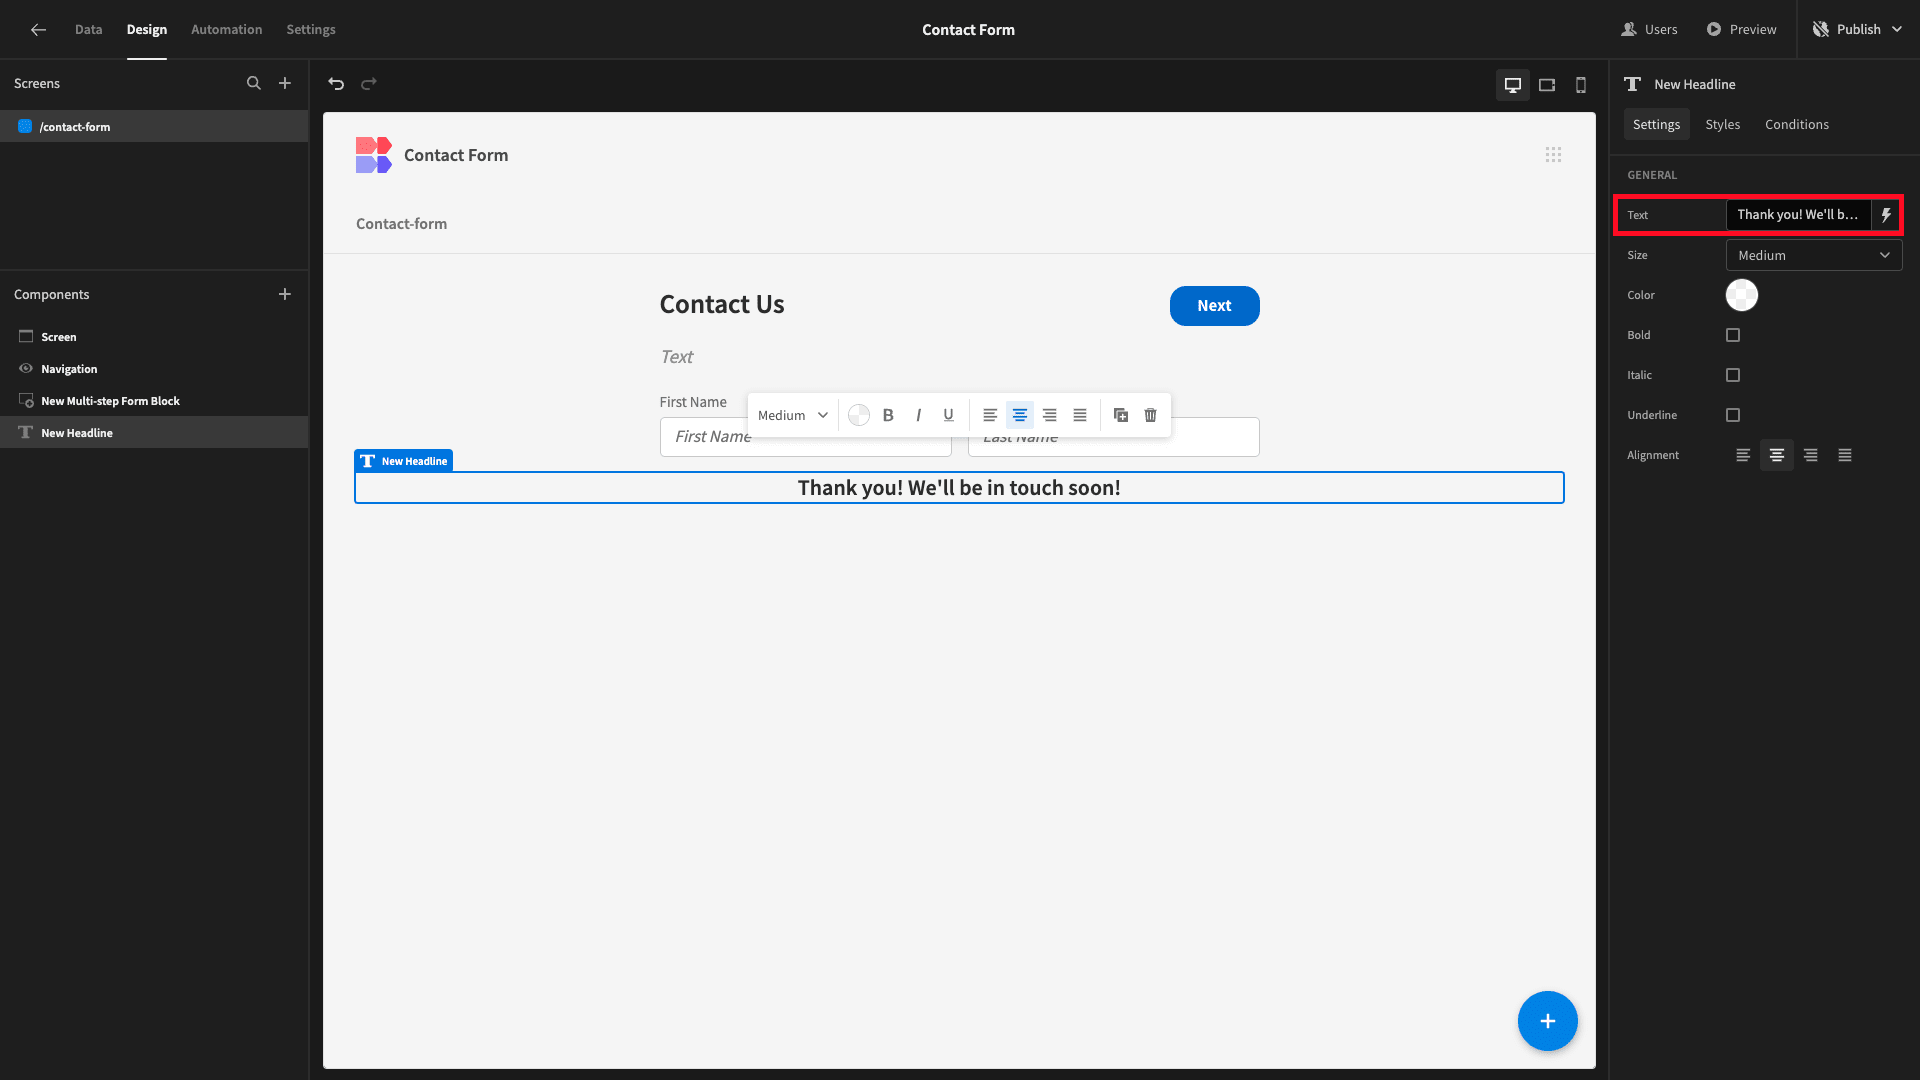
When a user hits Save, we want our form to be hidden and our Headline component to be displayed.
To achieve this, we’re going to do two things:
- Create a state variable whenever a user hits save.
- Add conditionality rules to show/hide our Headline and form.
We’ll start by opening the Actions drawer for our save button.
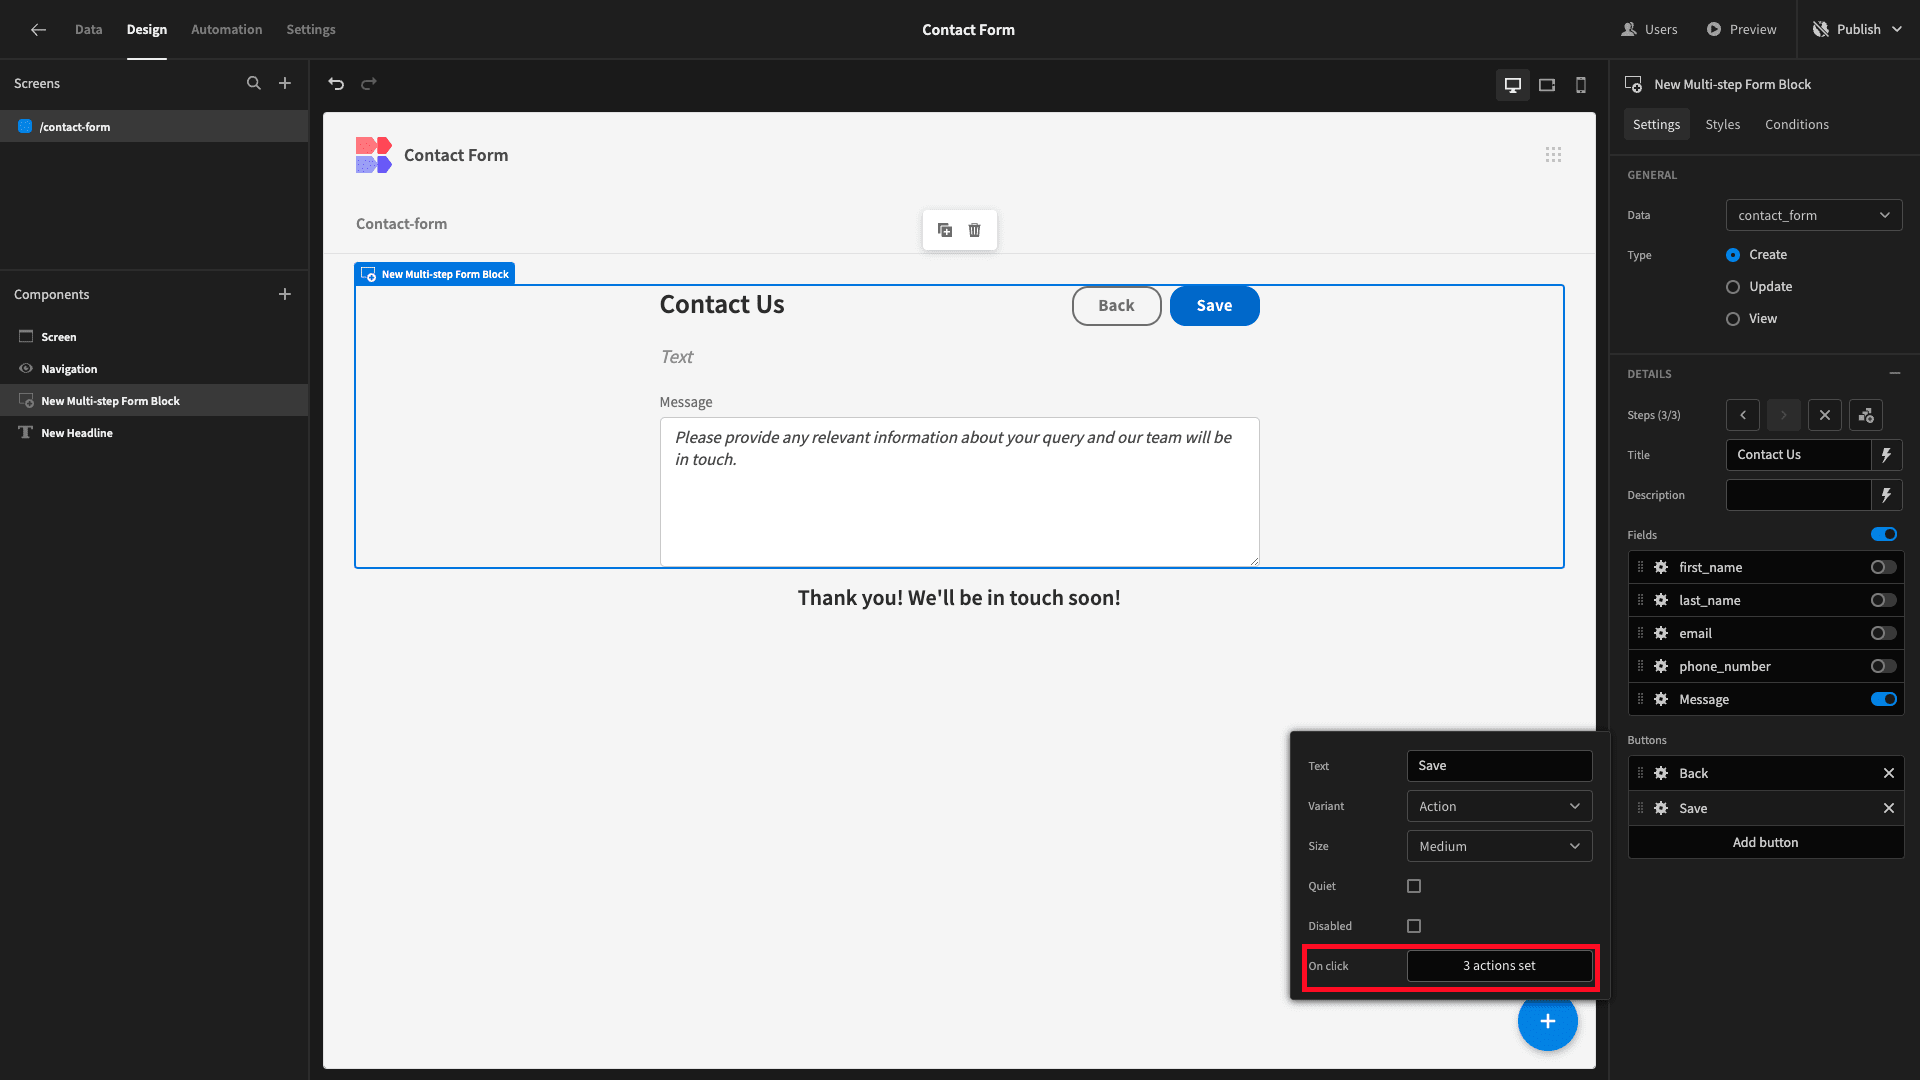
We’re going to add an action called Update State. This stores a key/value pair whenever our button is pressed.
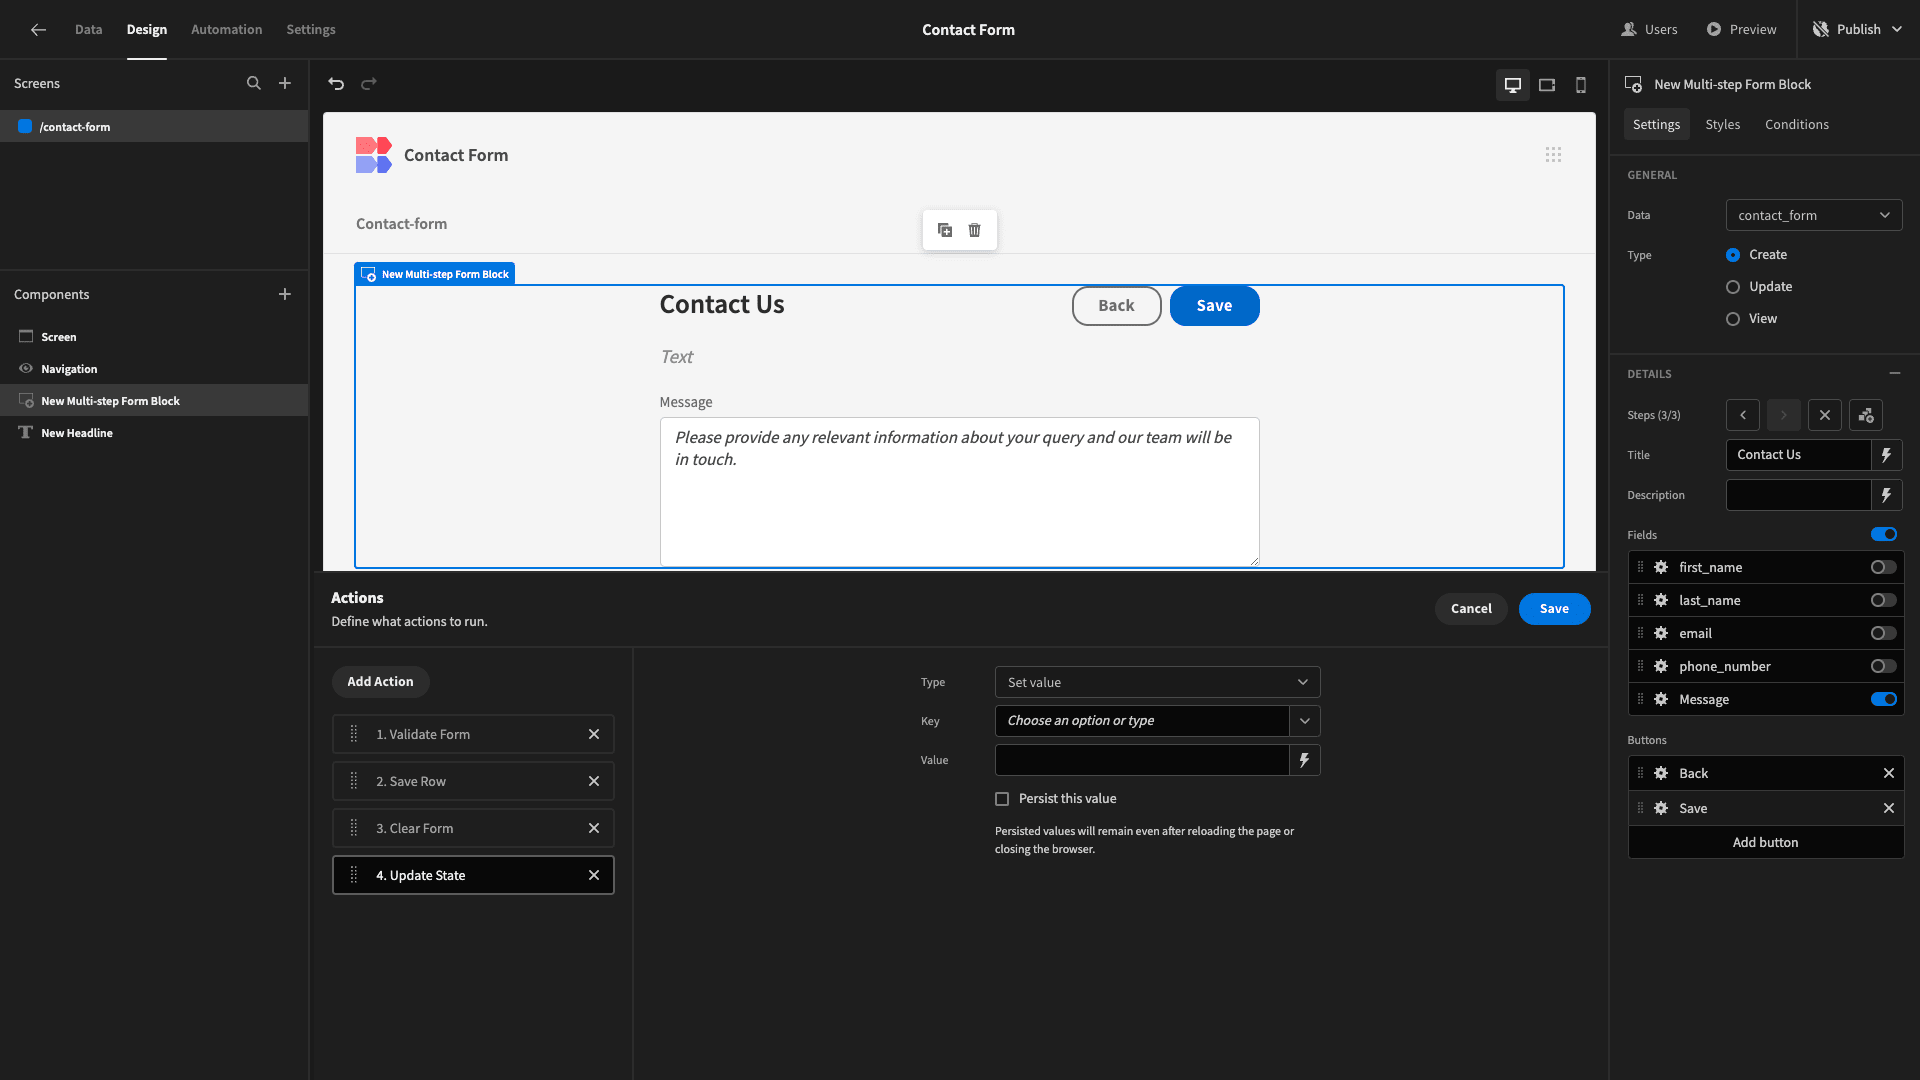
We’ll set our Key to ‘complete’ and our Value to ‘true’.
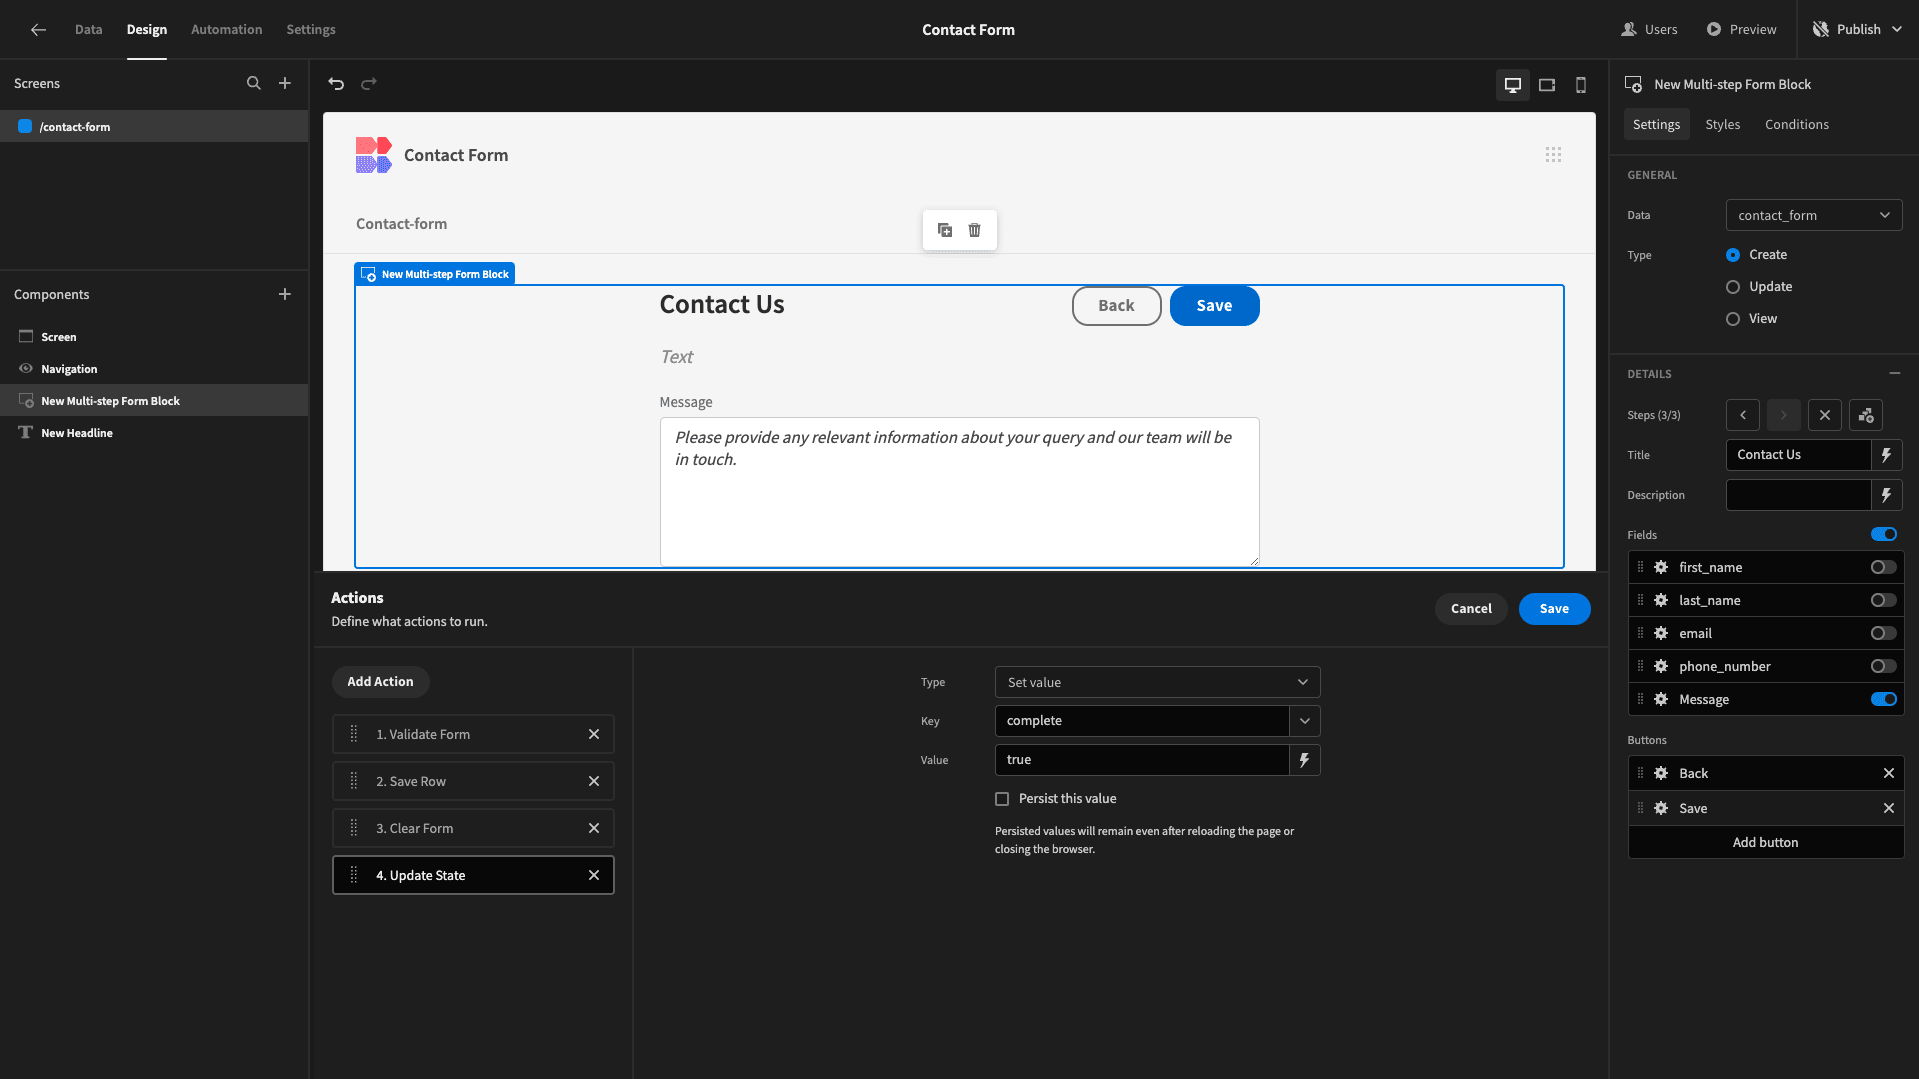
Now, we can create our conditionality rules. First, open the Conditions drawer for the Multi-Step Form Block.
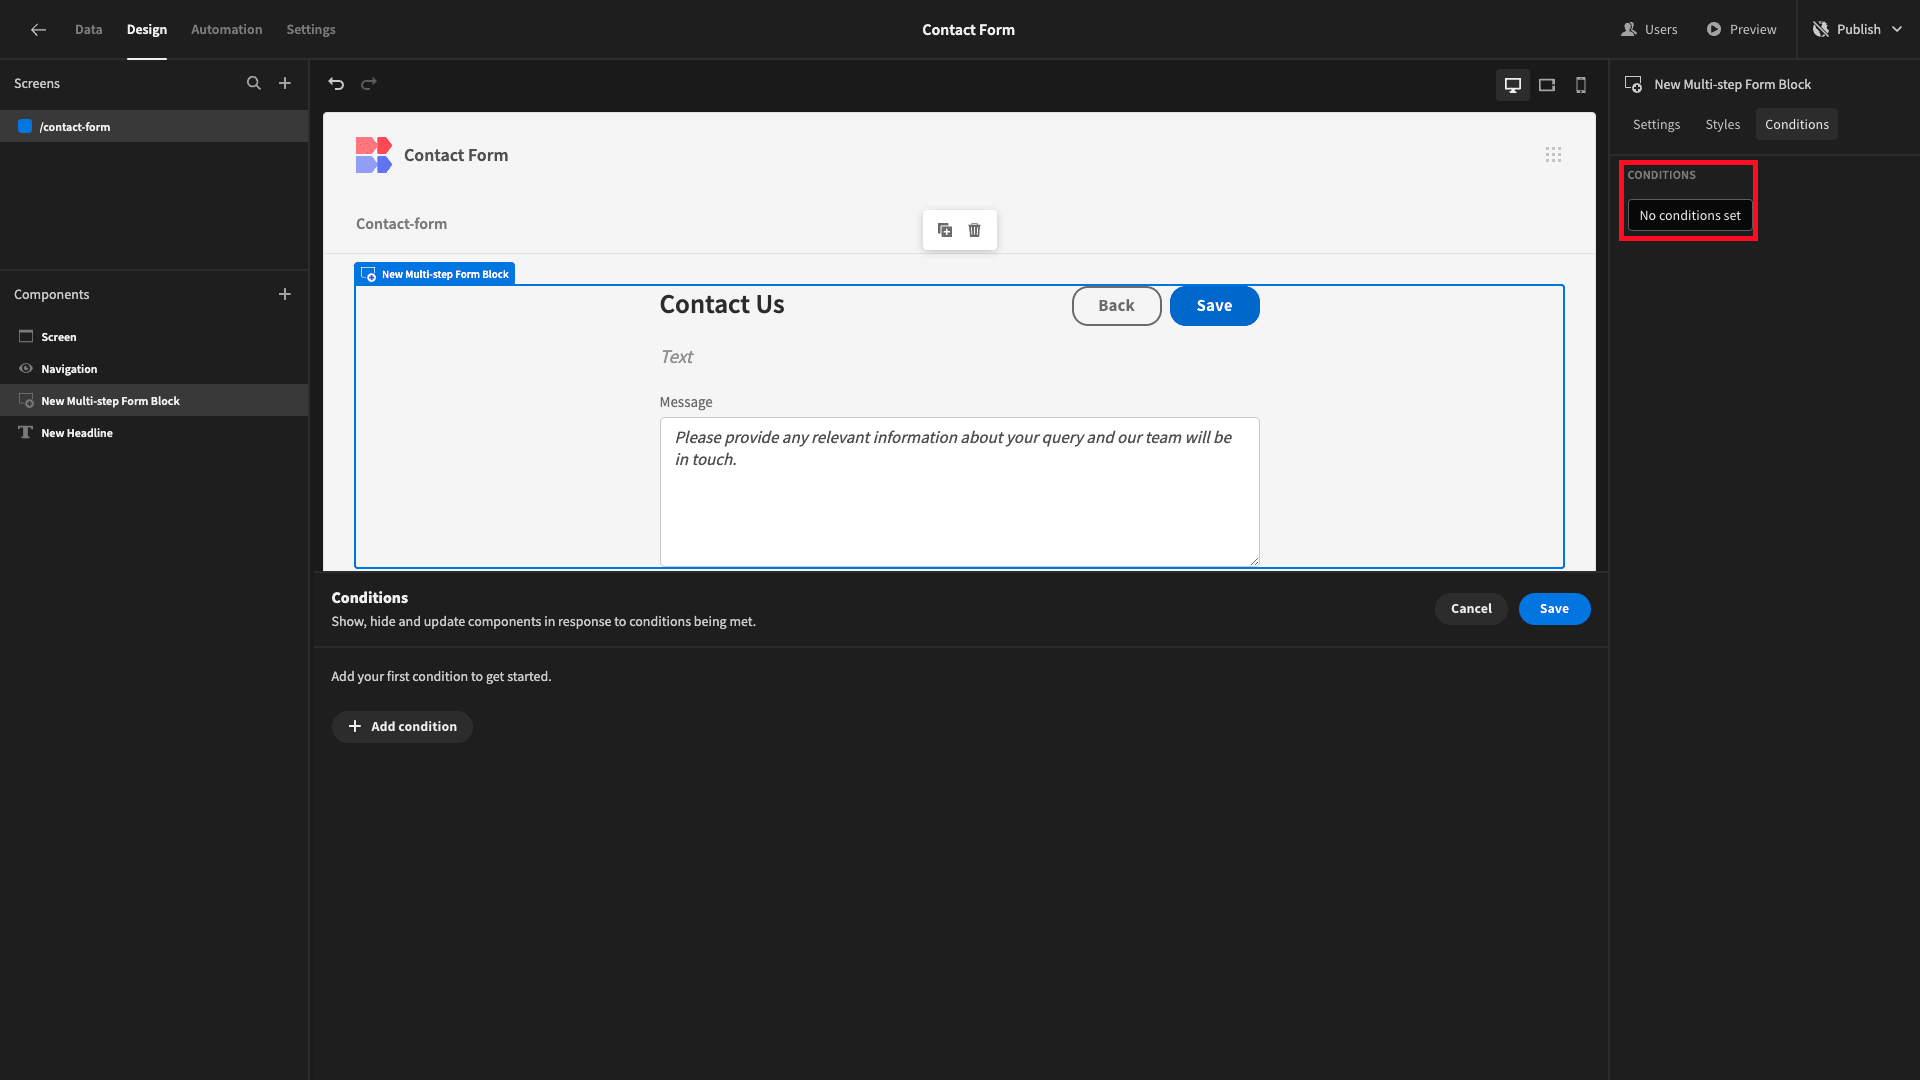
We’ll create a Hide Component rule.
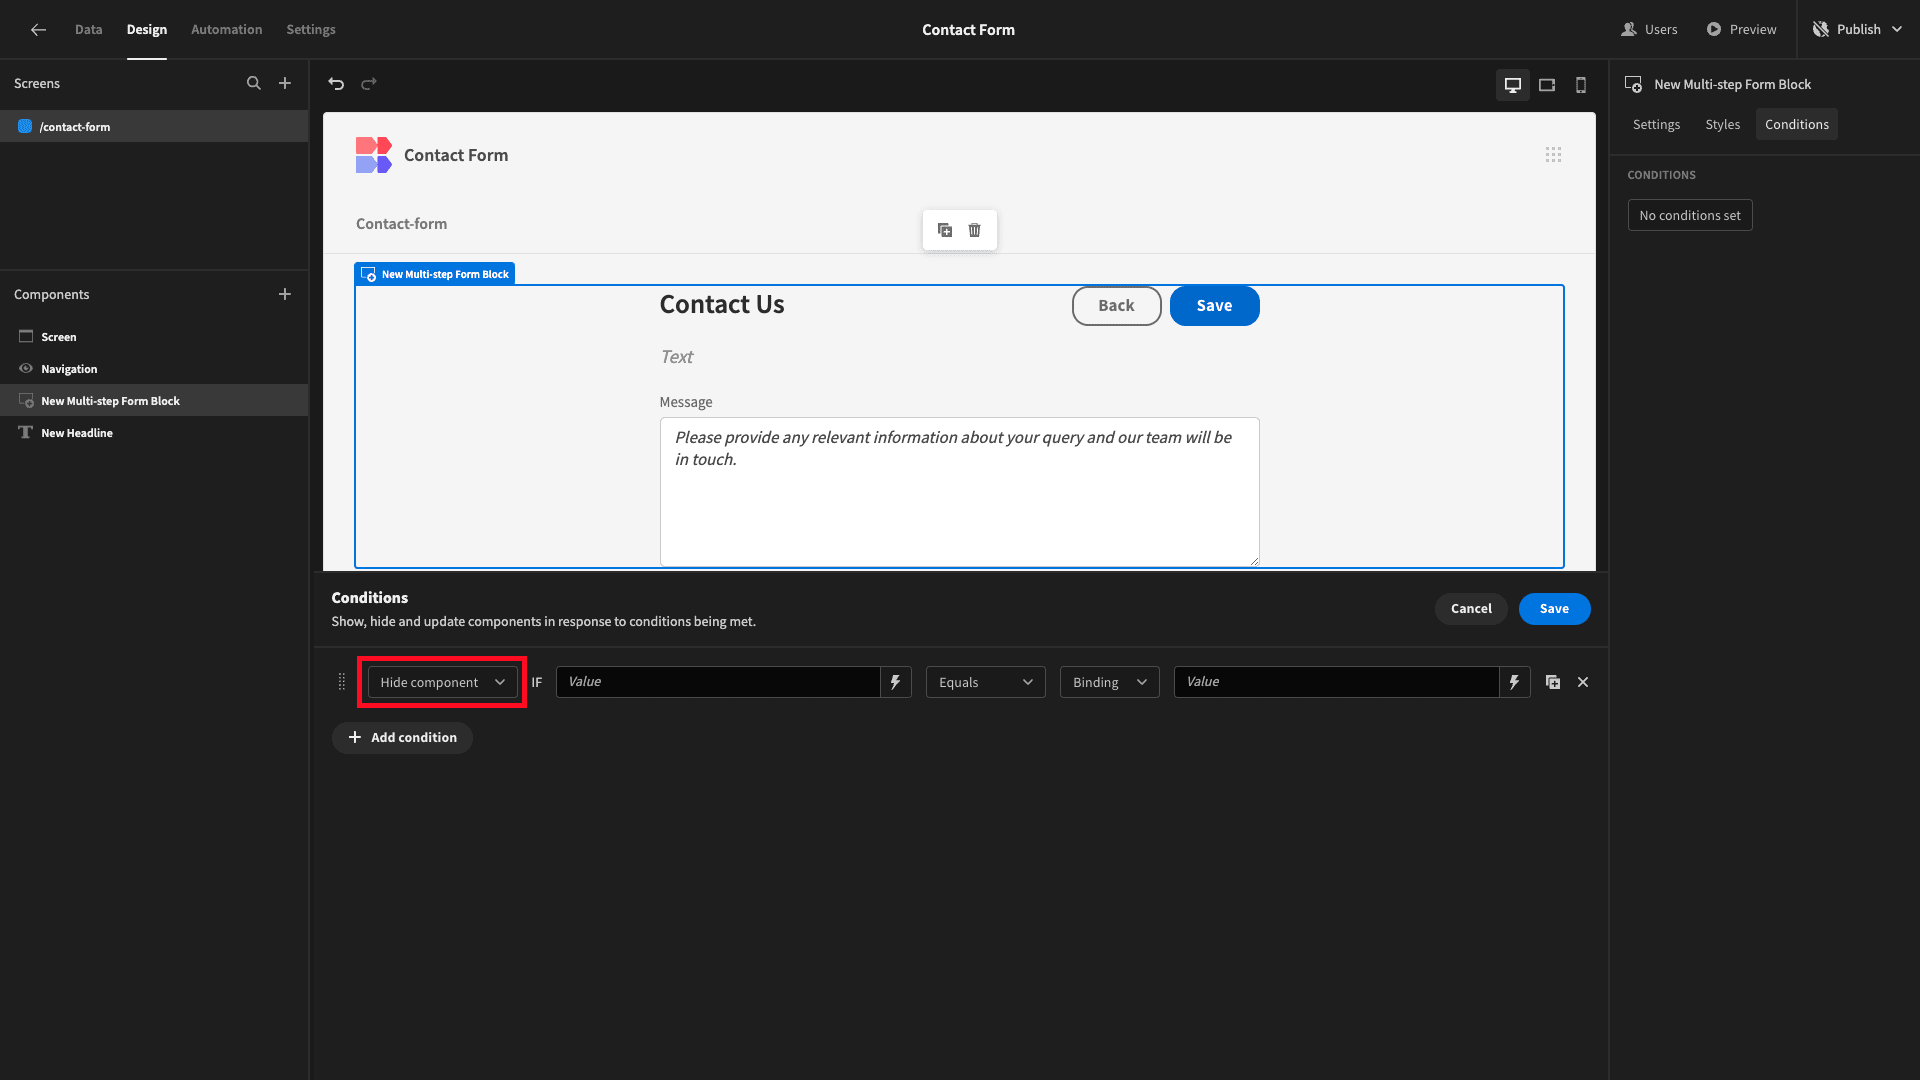
Then, we’ll hit the lightning bolt icon to open the bindings drawer for our reference value.
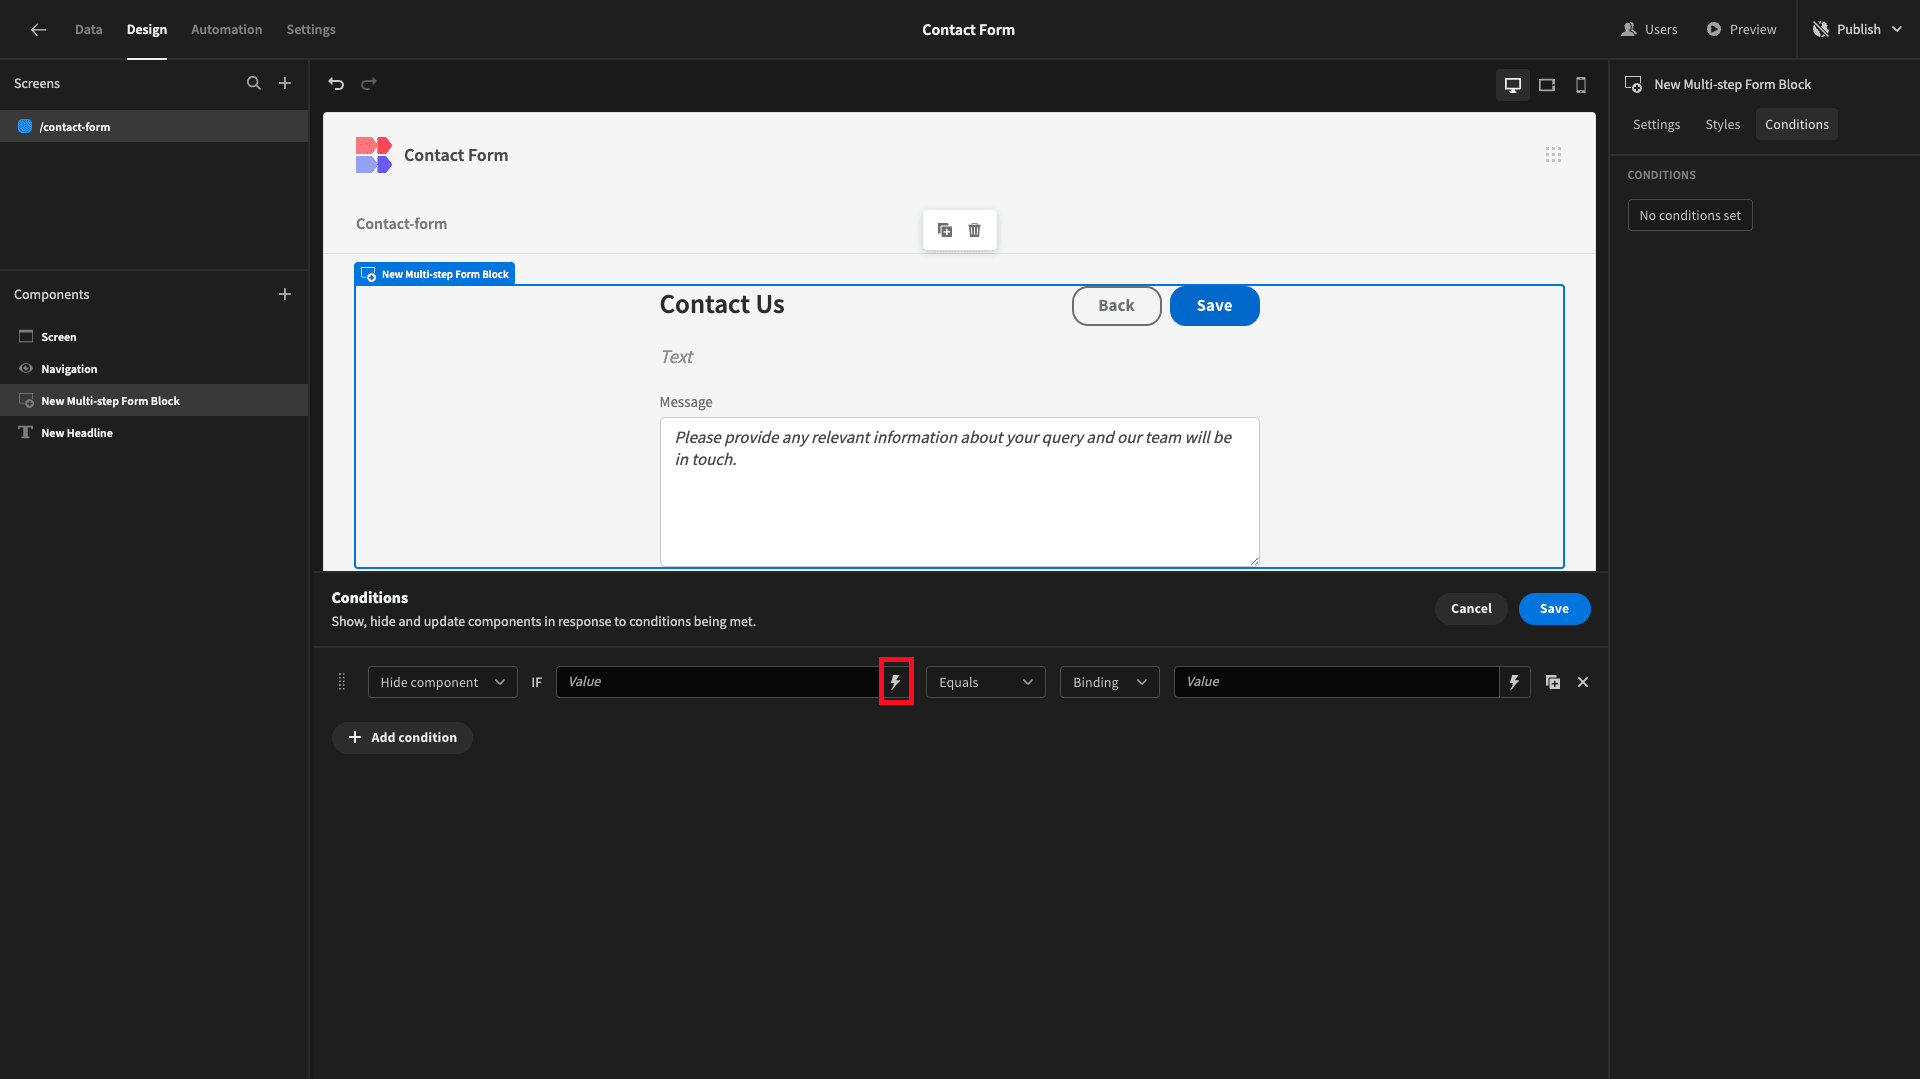
Here, we can see the categories of all of the data that our form is exposed to. These can be used as bindable values.
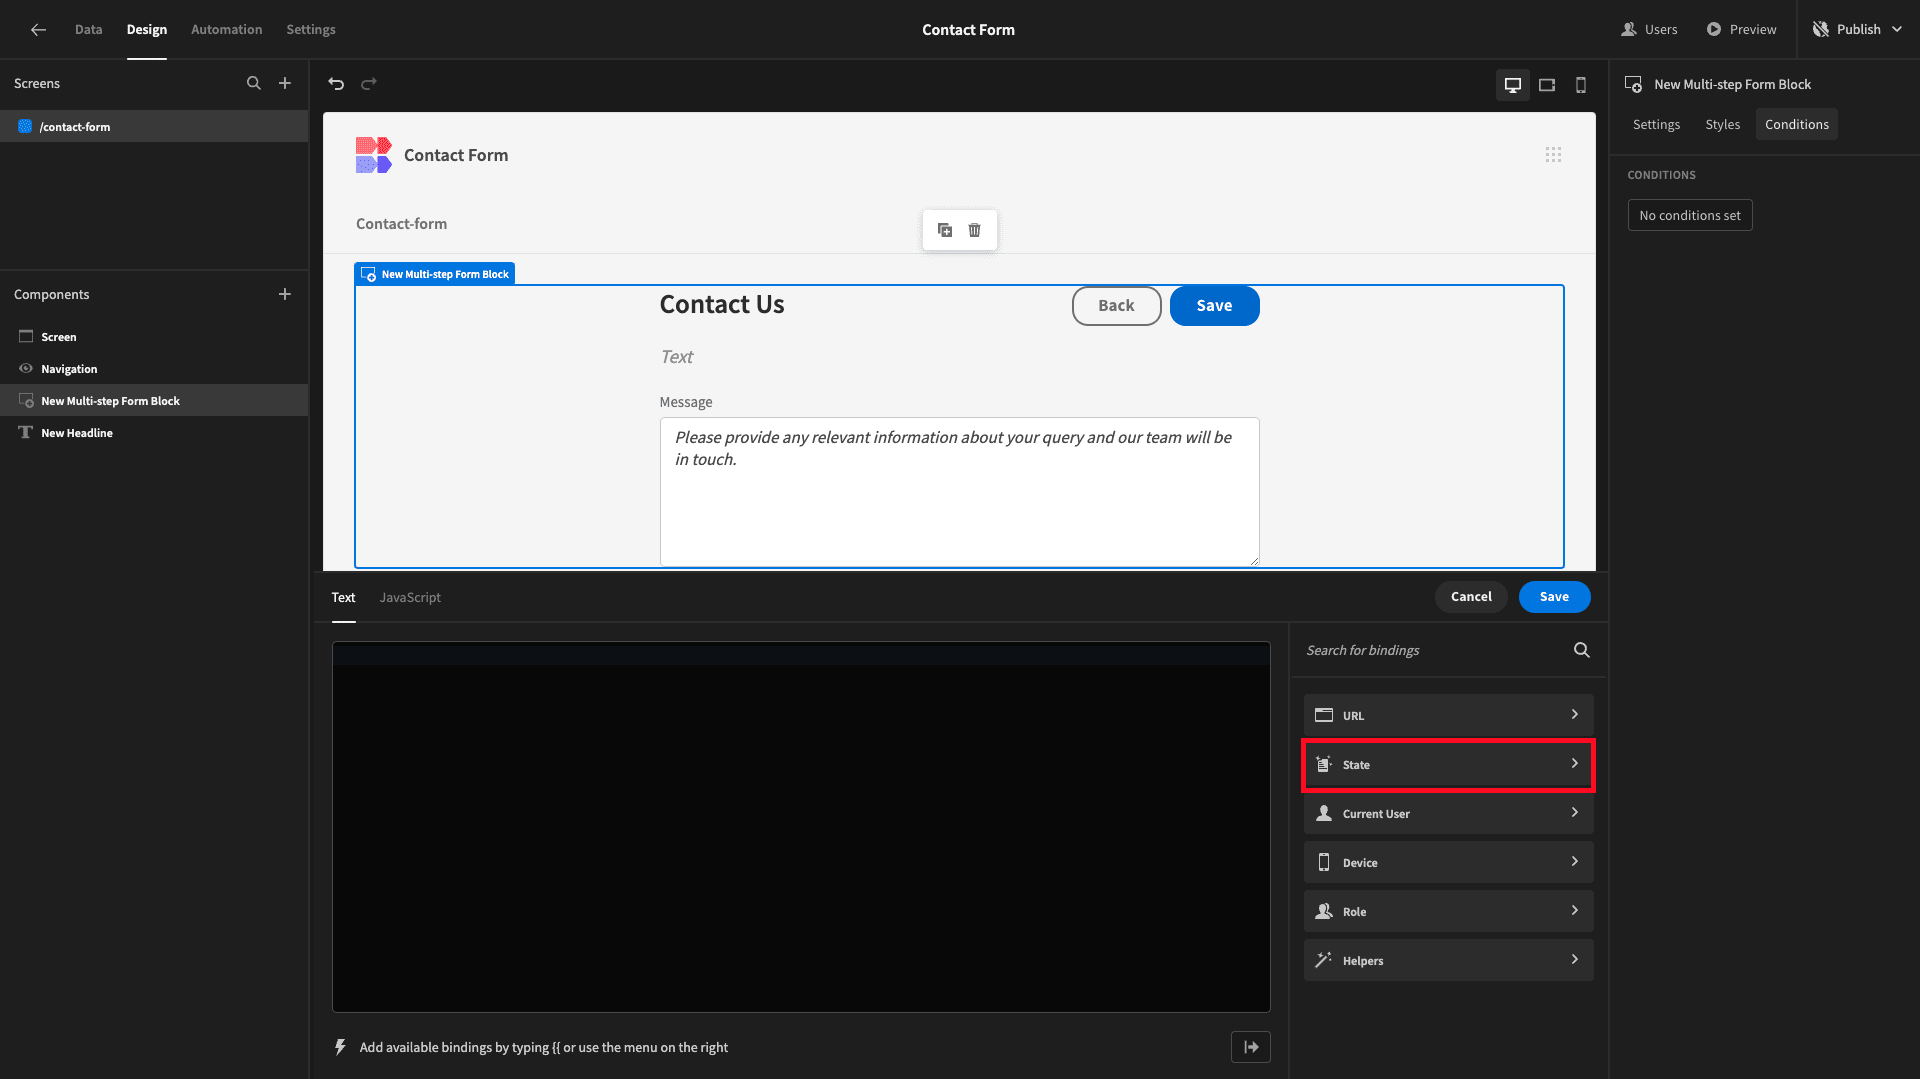
We’re selecting State.
And Complete.
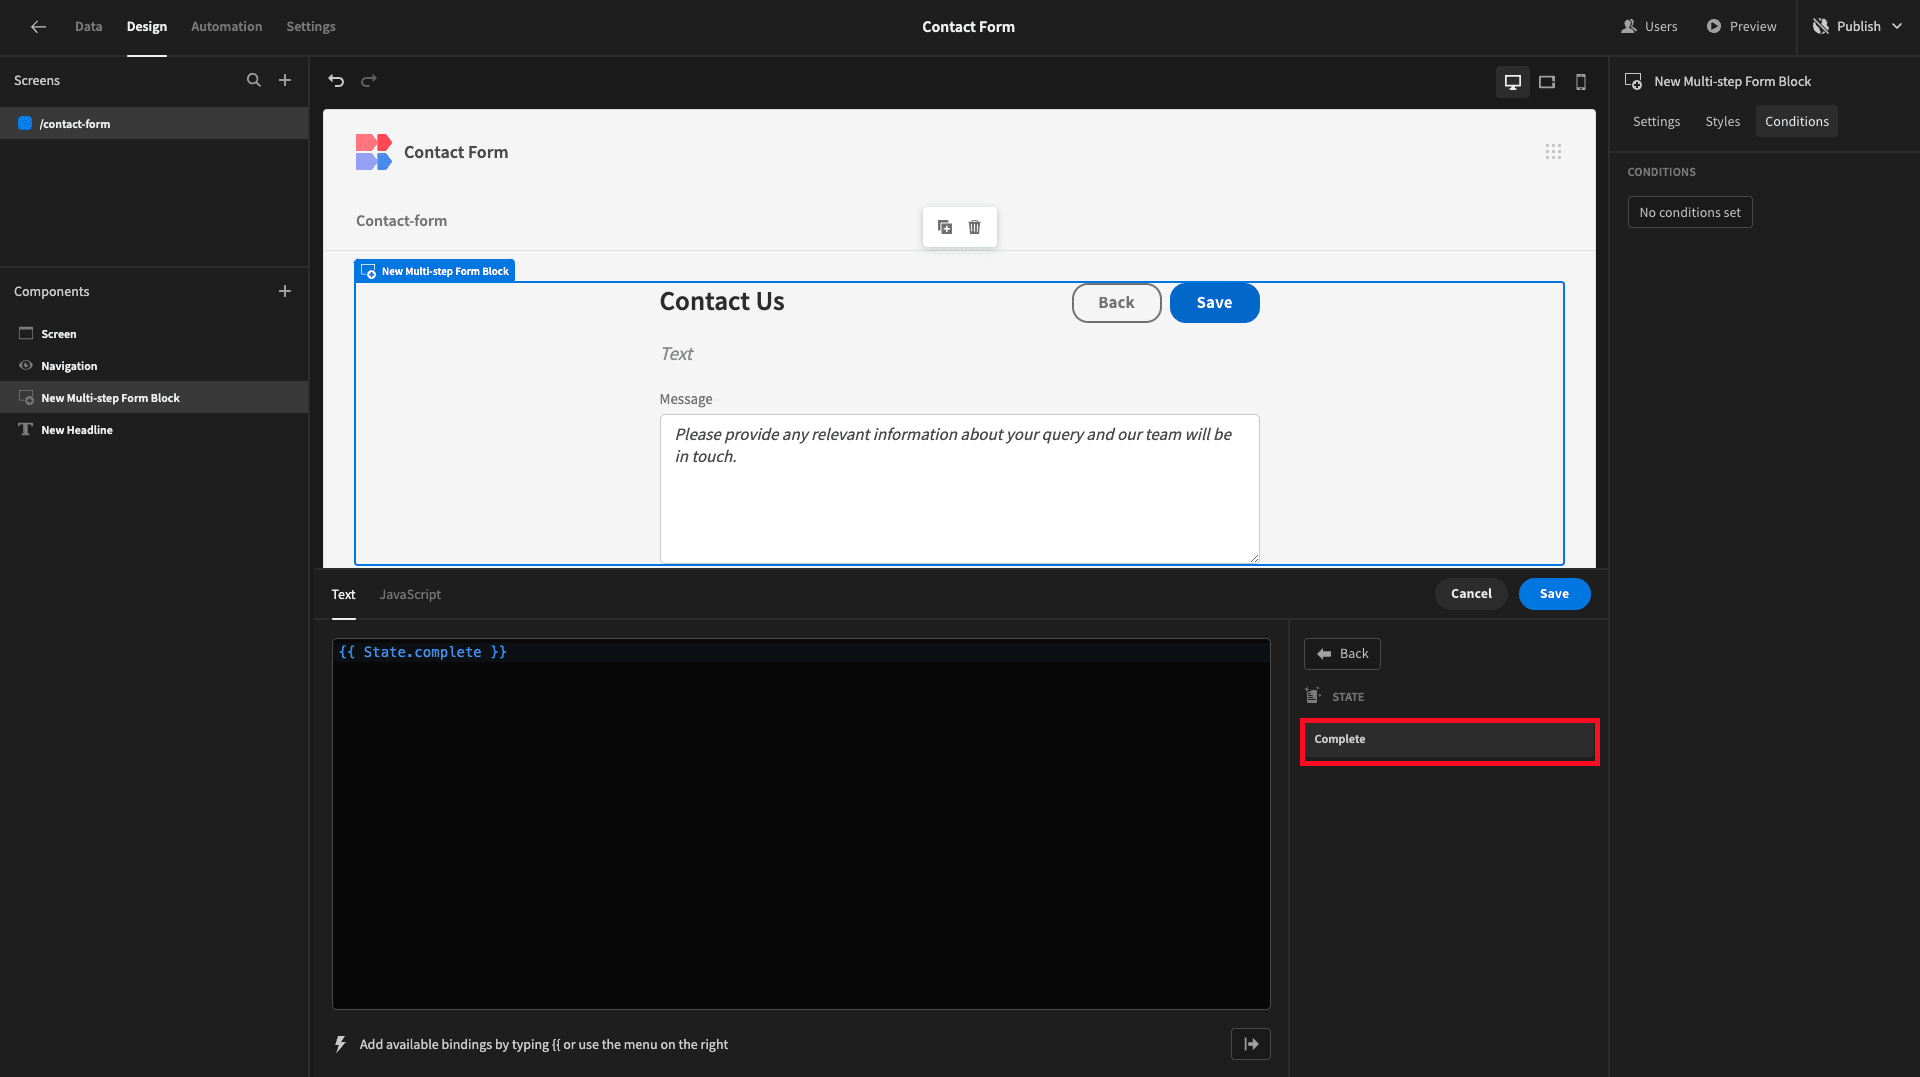
We’ll input the string ‘true’ as our comparison value.
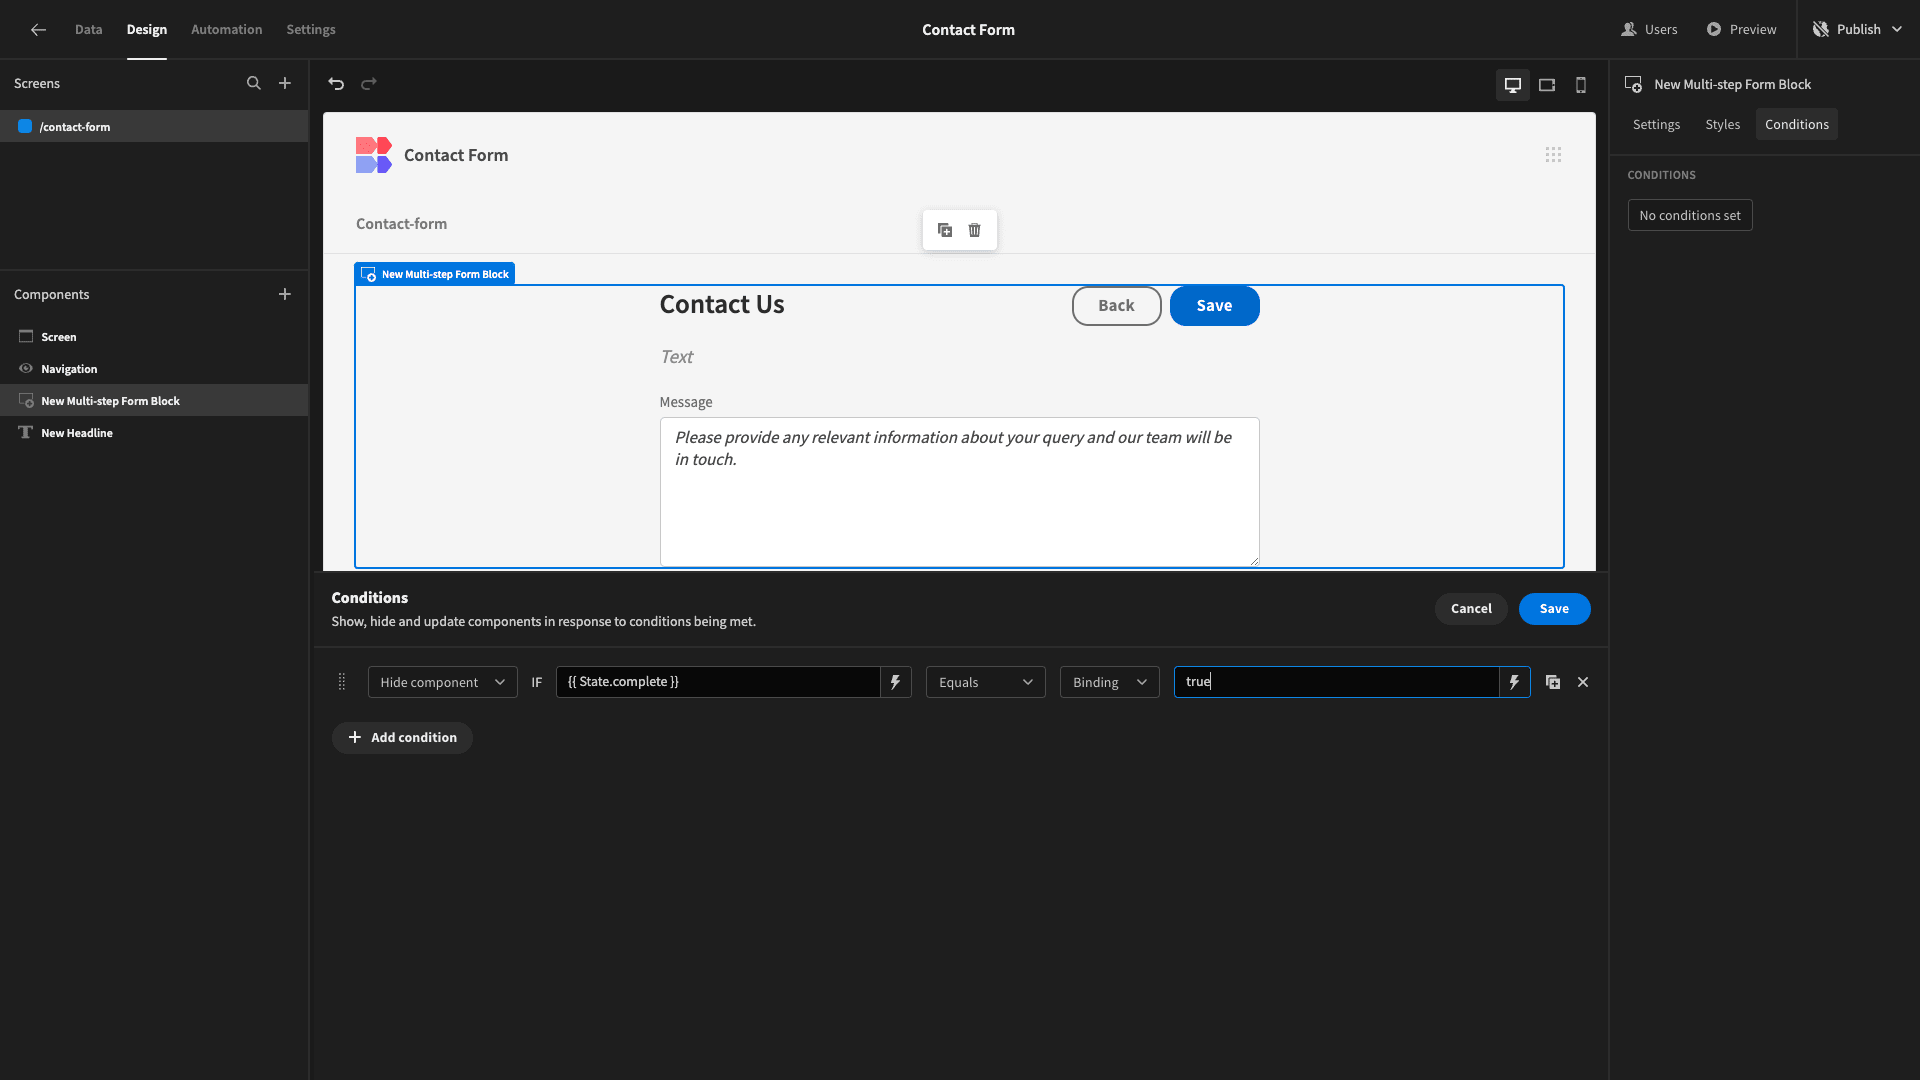
And hit Save. Now, our form will be hidden when complete equals true.
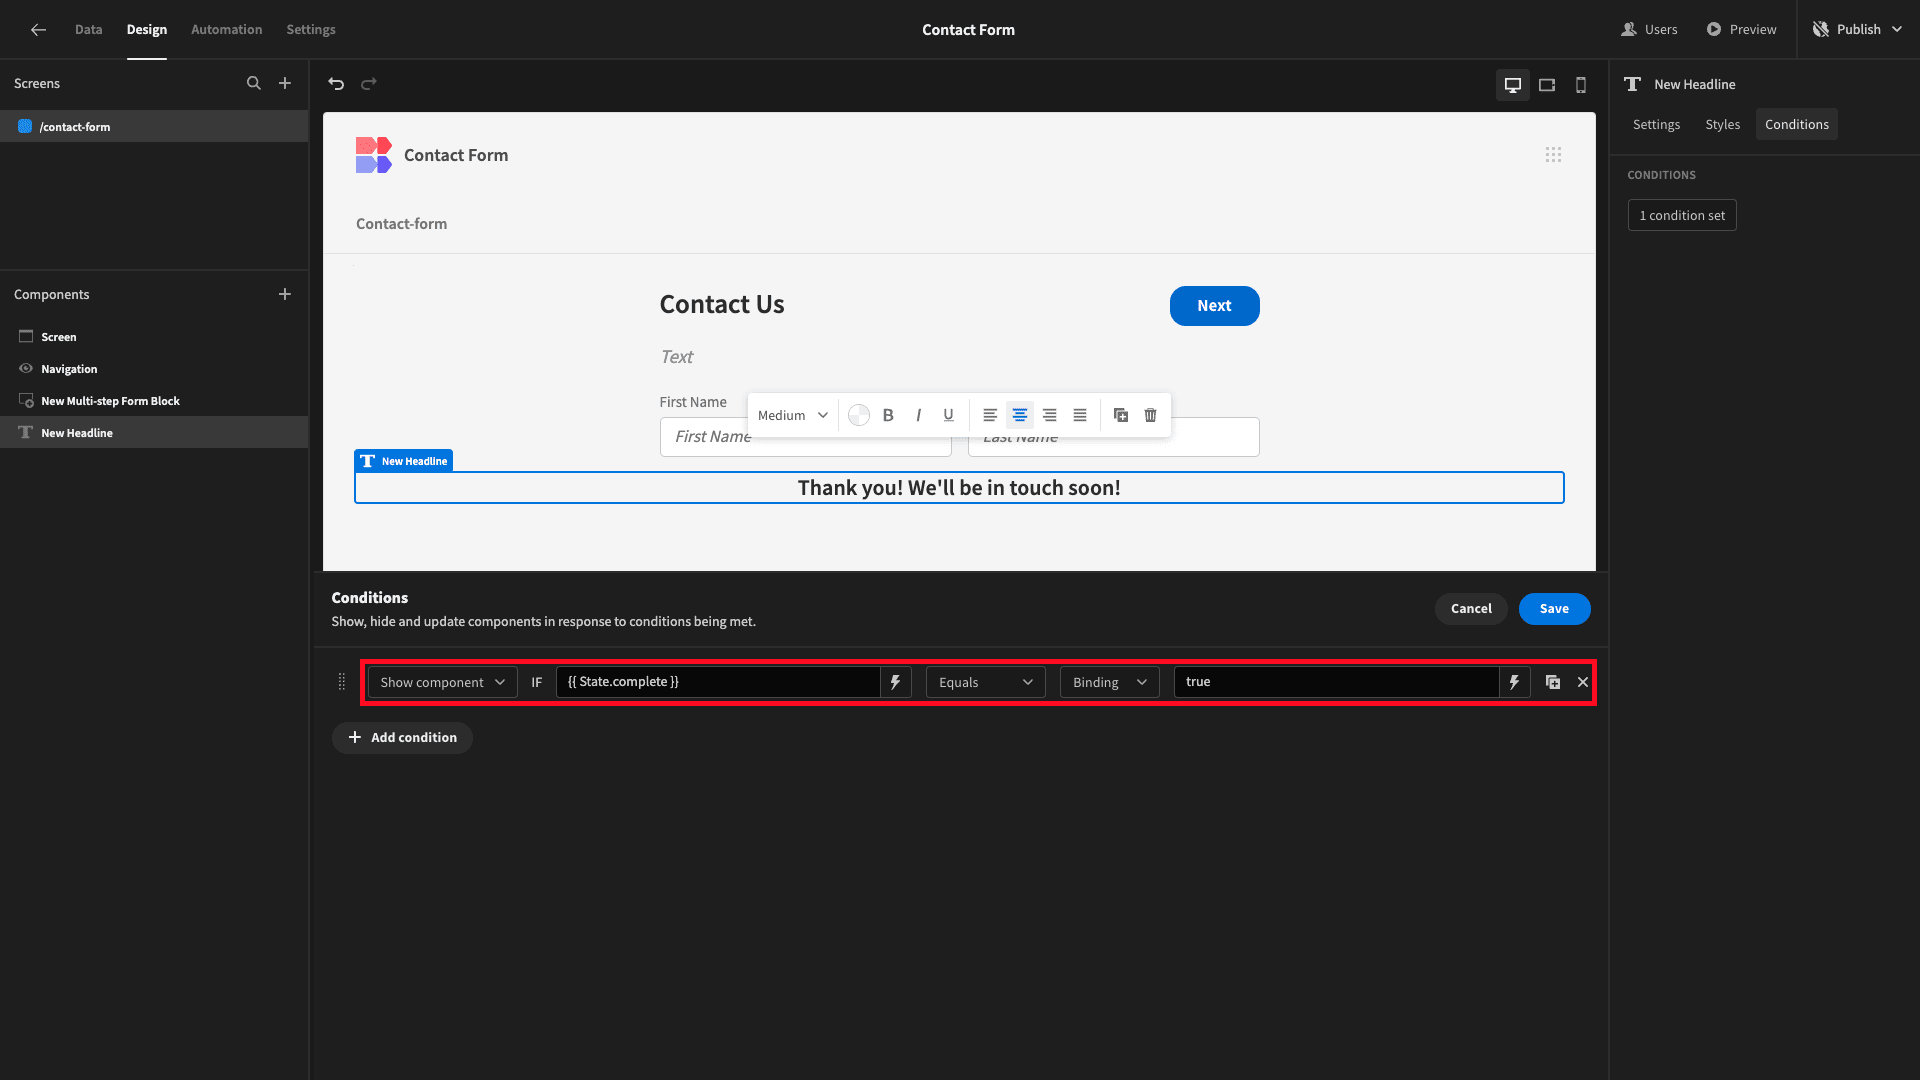
We’ll repeat this process to add a similar rule to our Headline component, this time only showing it if {{ State.complete }} equals true.
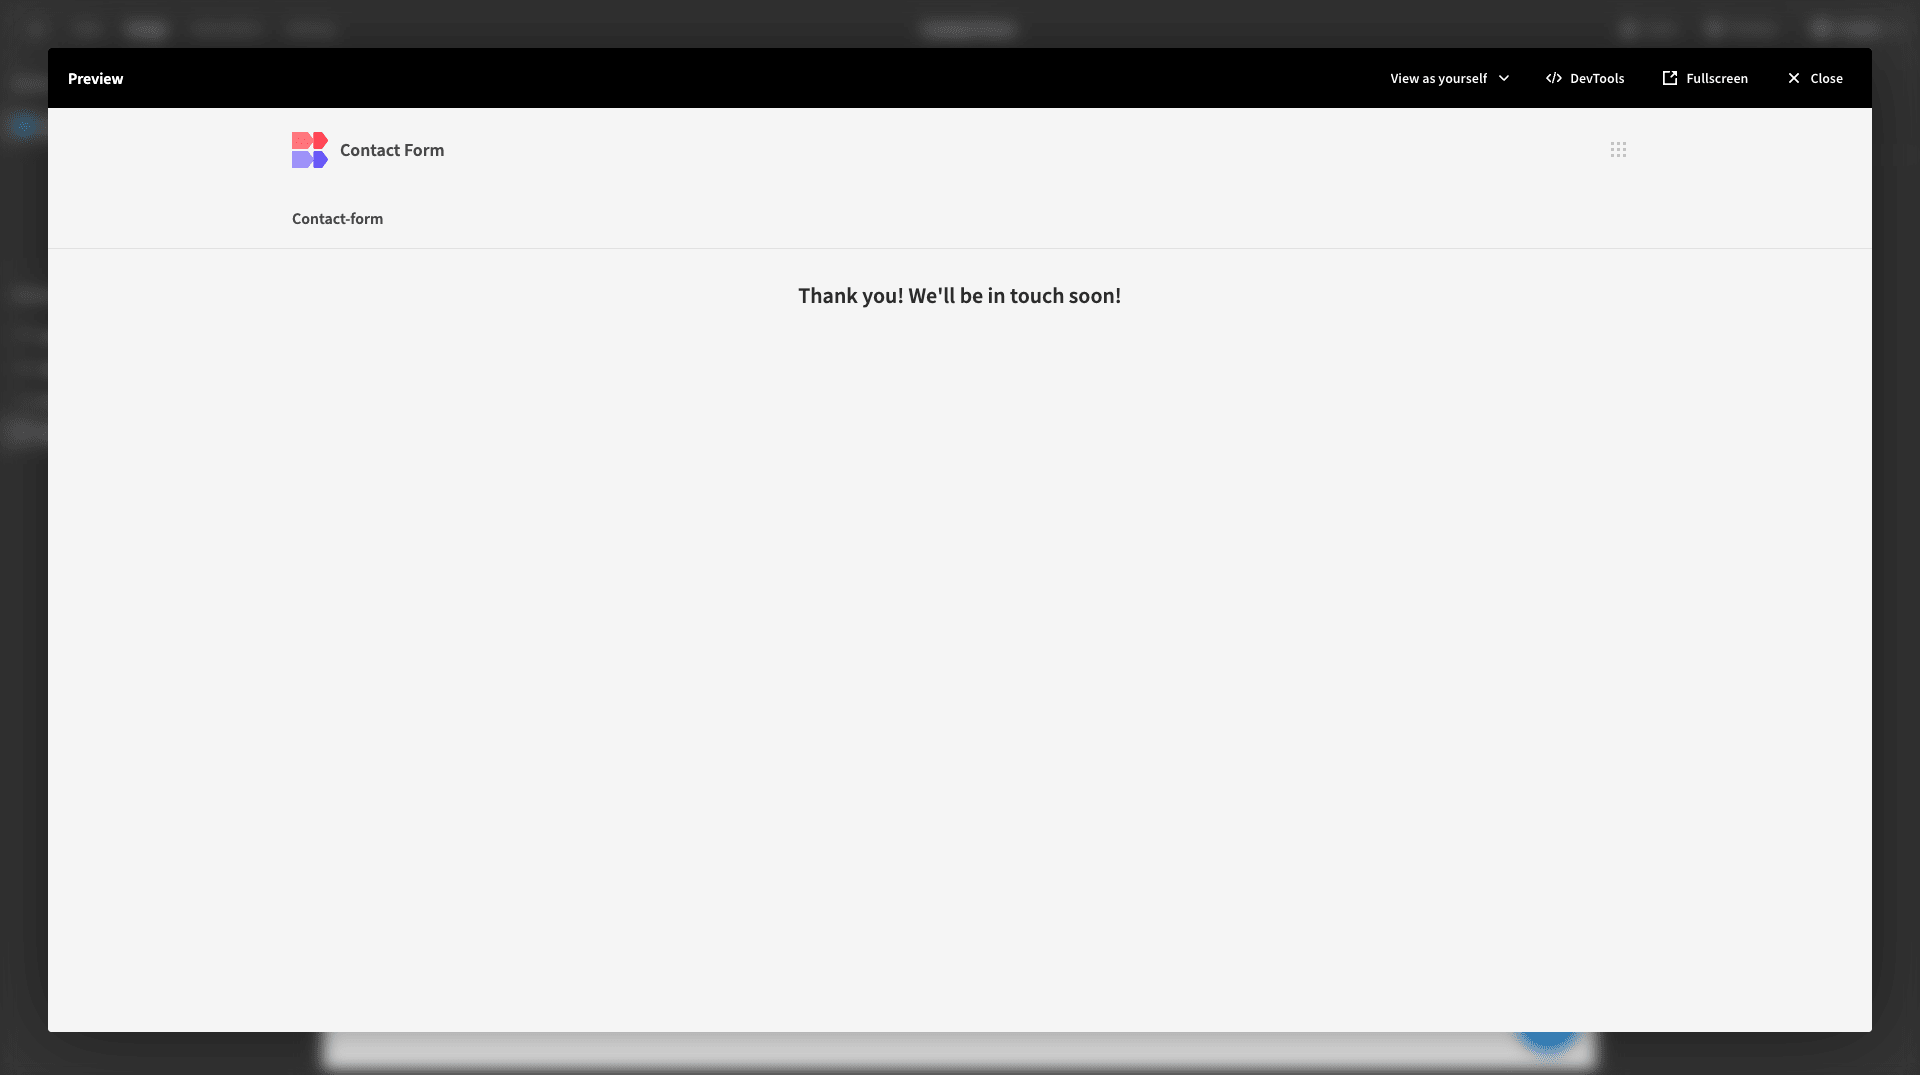
We can test this by previewing our app and adding a row of data.
4. Tweaking our design for embedding
Currently, our form is perfectly functional as a standalone web app - but there are a few design changes we should make to optimize it for embedding.
First of all, we’re going to want our UI to appear in the center of our iframe.
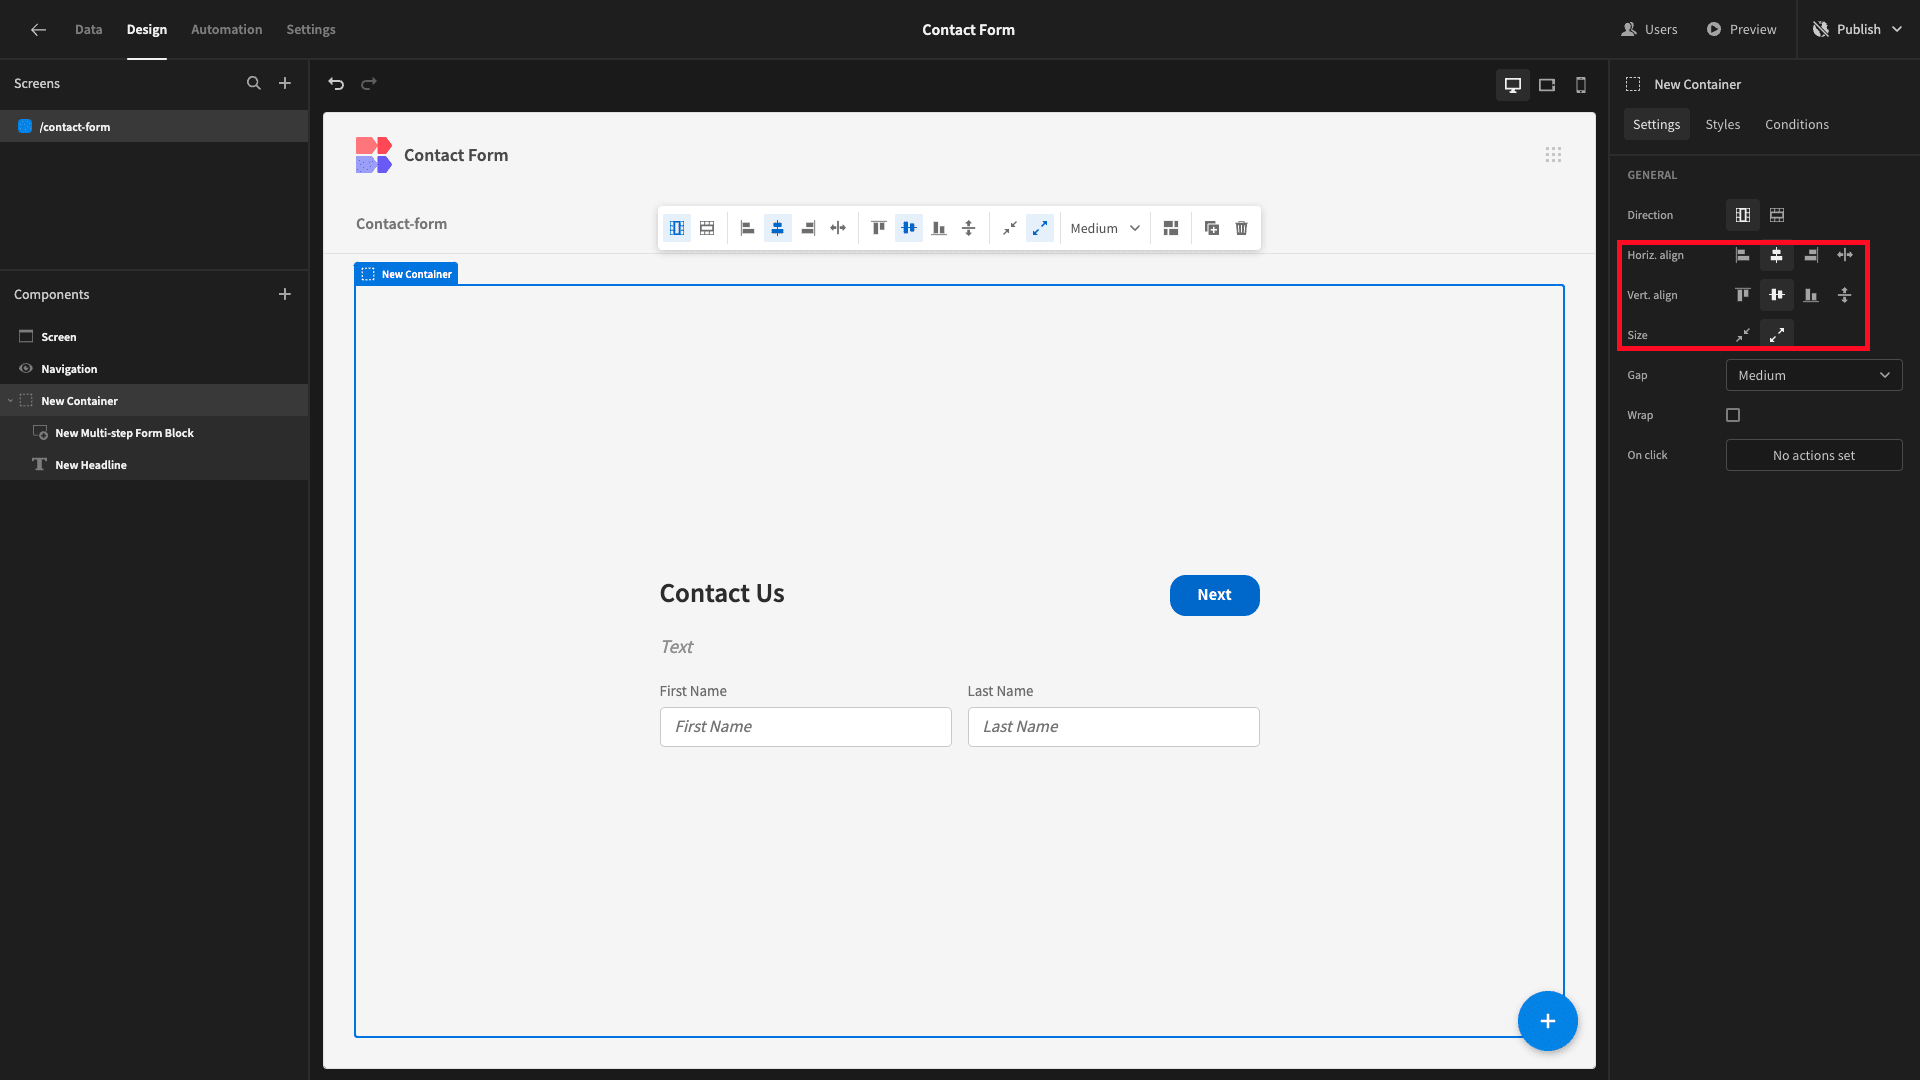
To achieve this, we’ll nest our existing components inside a Container.
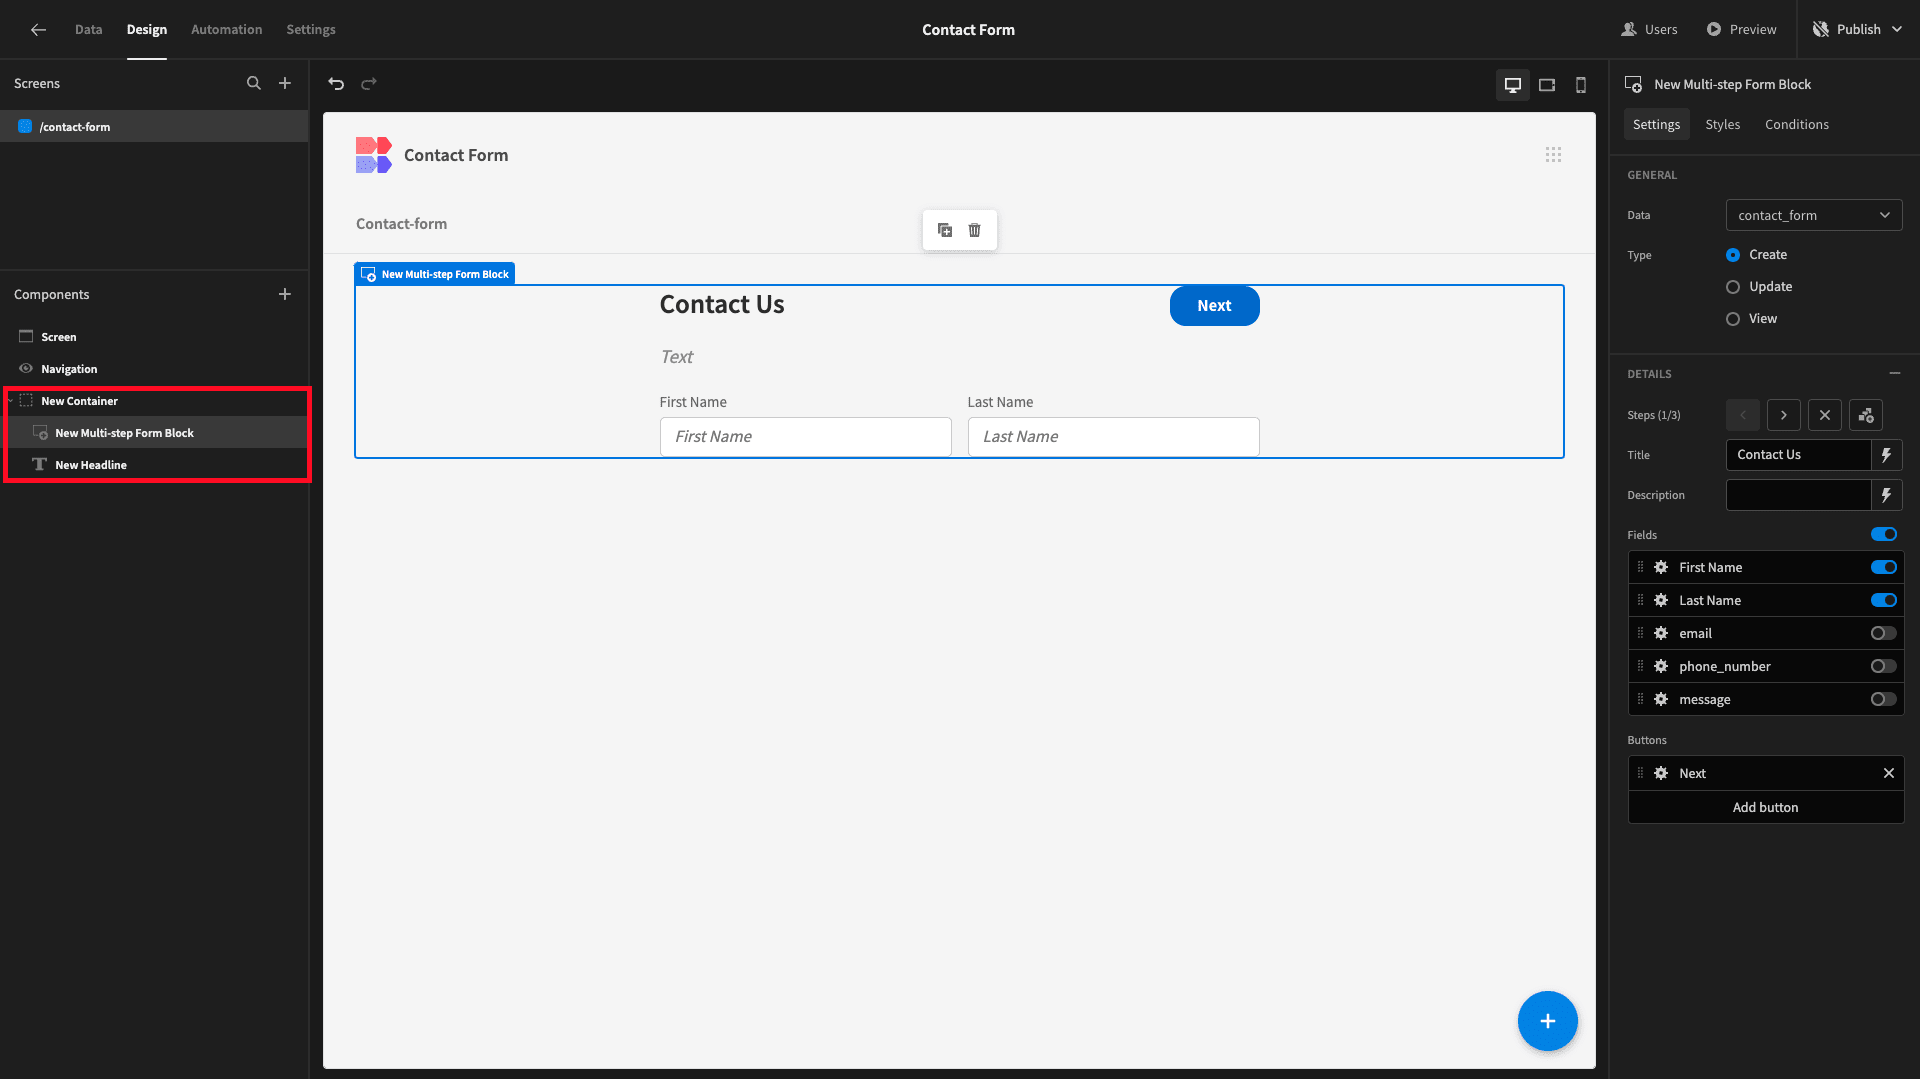
We’ll set the Size option within our container to Grow - as well as center, aligning it both horizontally and vertically.
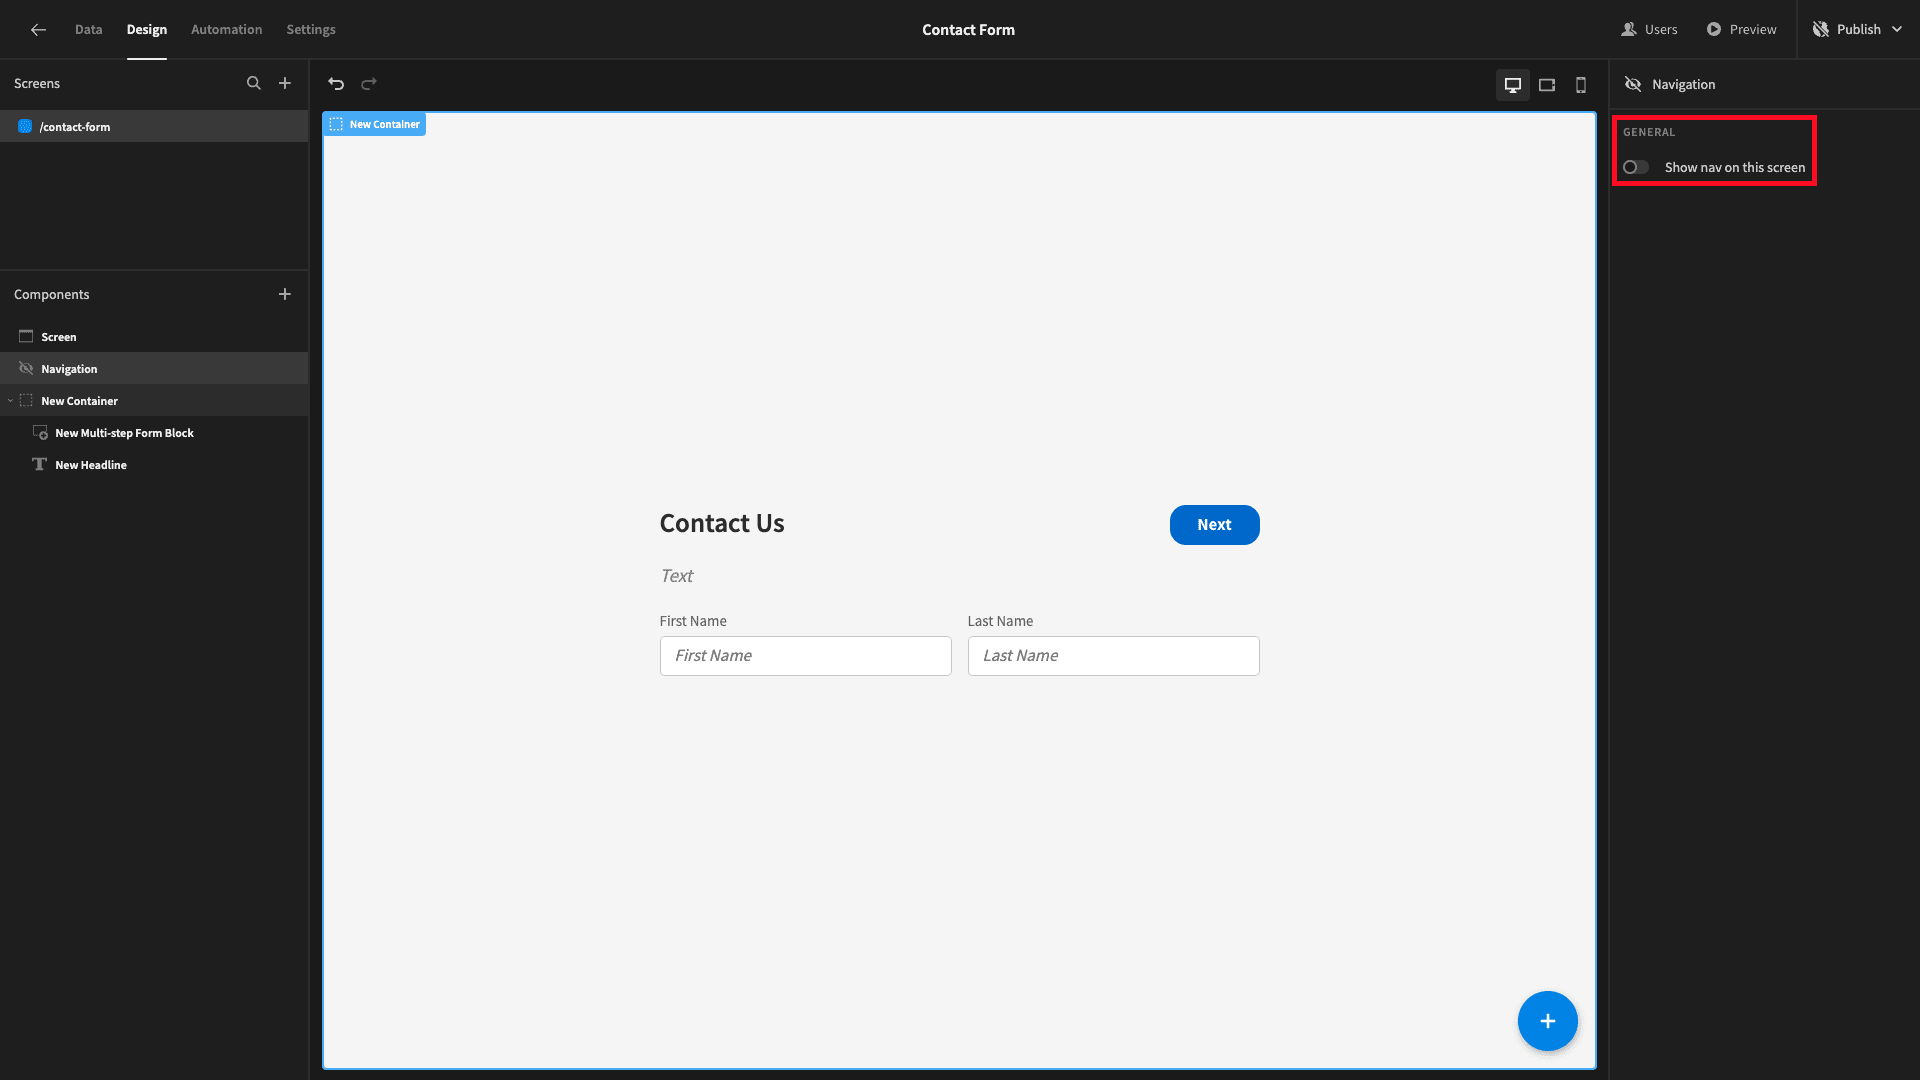
We also don’t need our nav bar, as this really only clutters our UI. Under Navigation, we’ll deselect the option to show this on this screen.
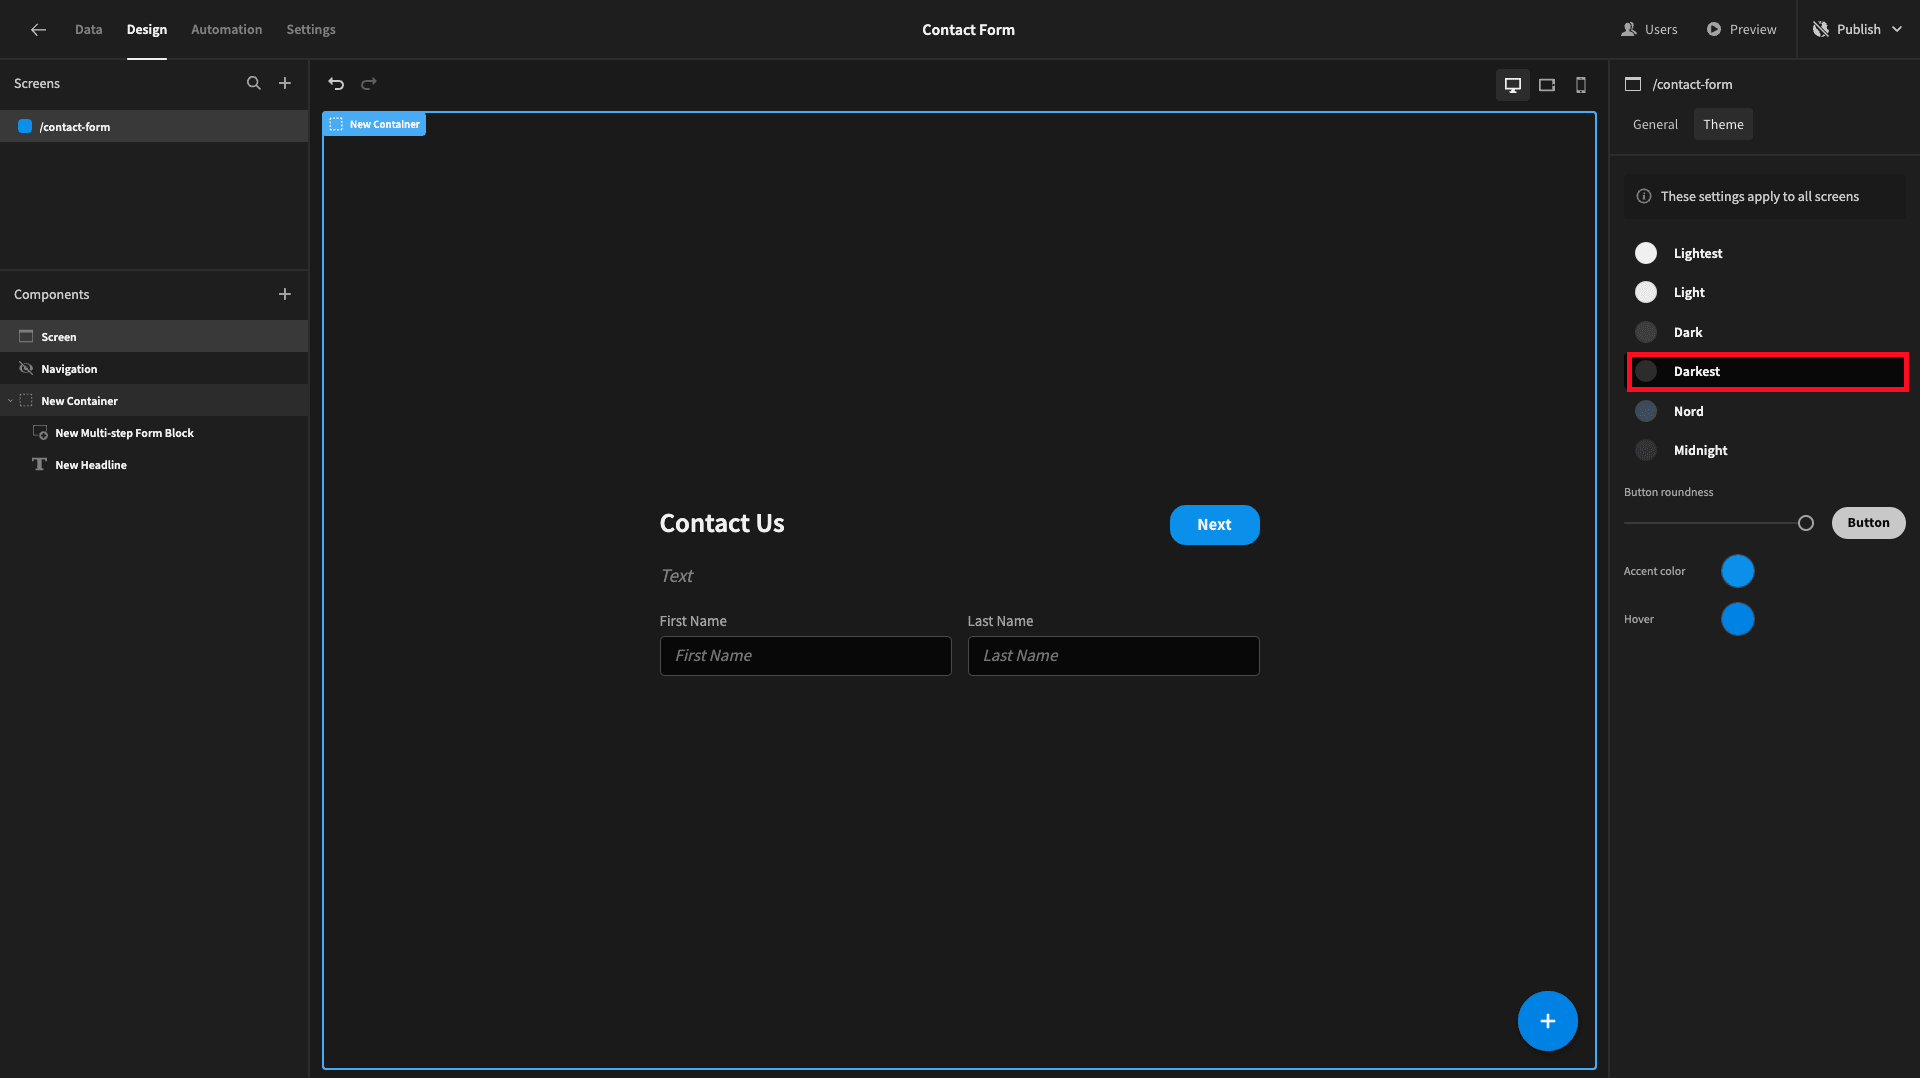
Lastly, most websites are white. We want our form to stand out, so we’re going to select a theme that contrasts with a bright background.
Under Screen, we’ll set our Theme to Darkest.
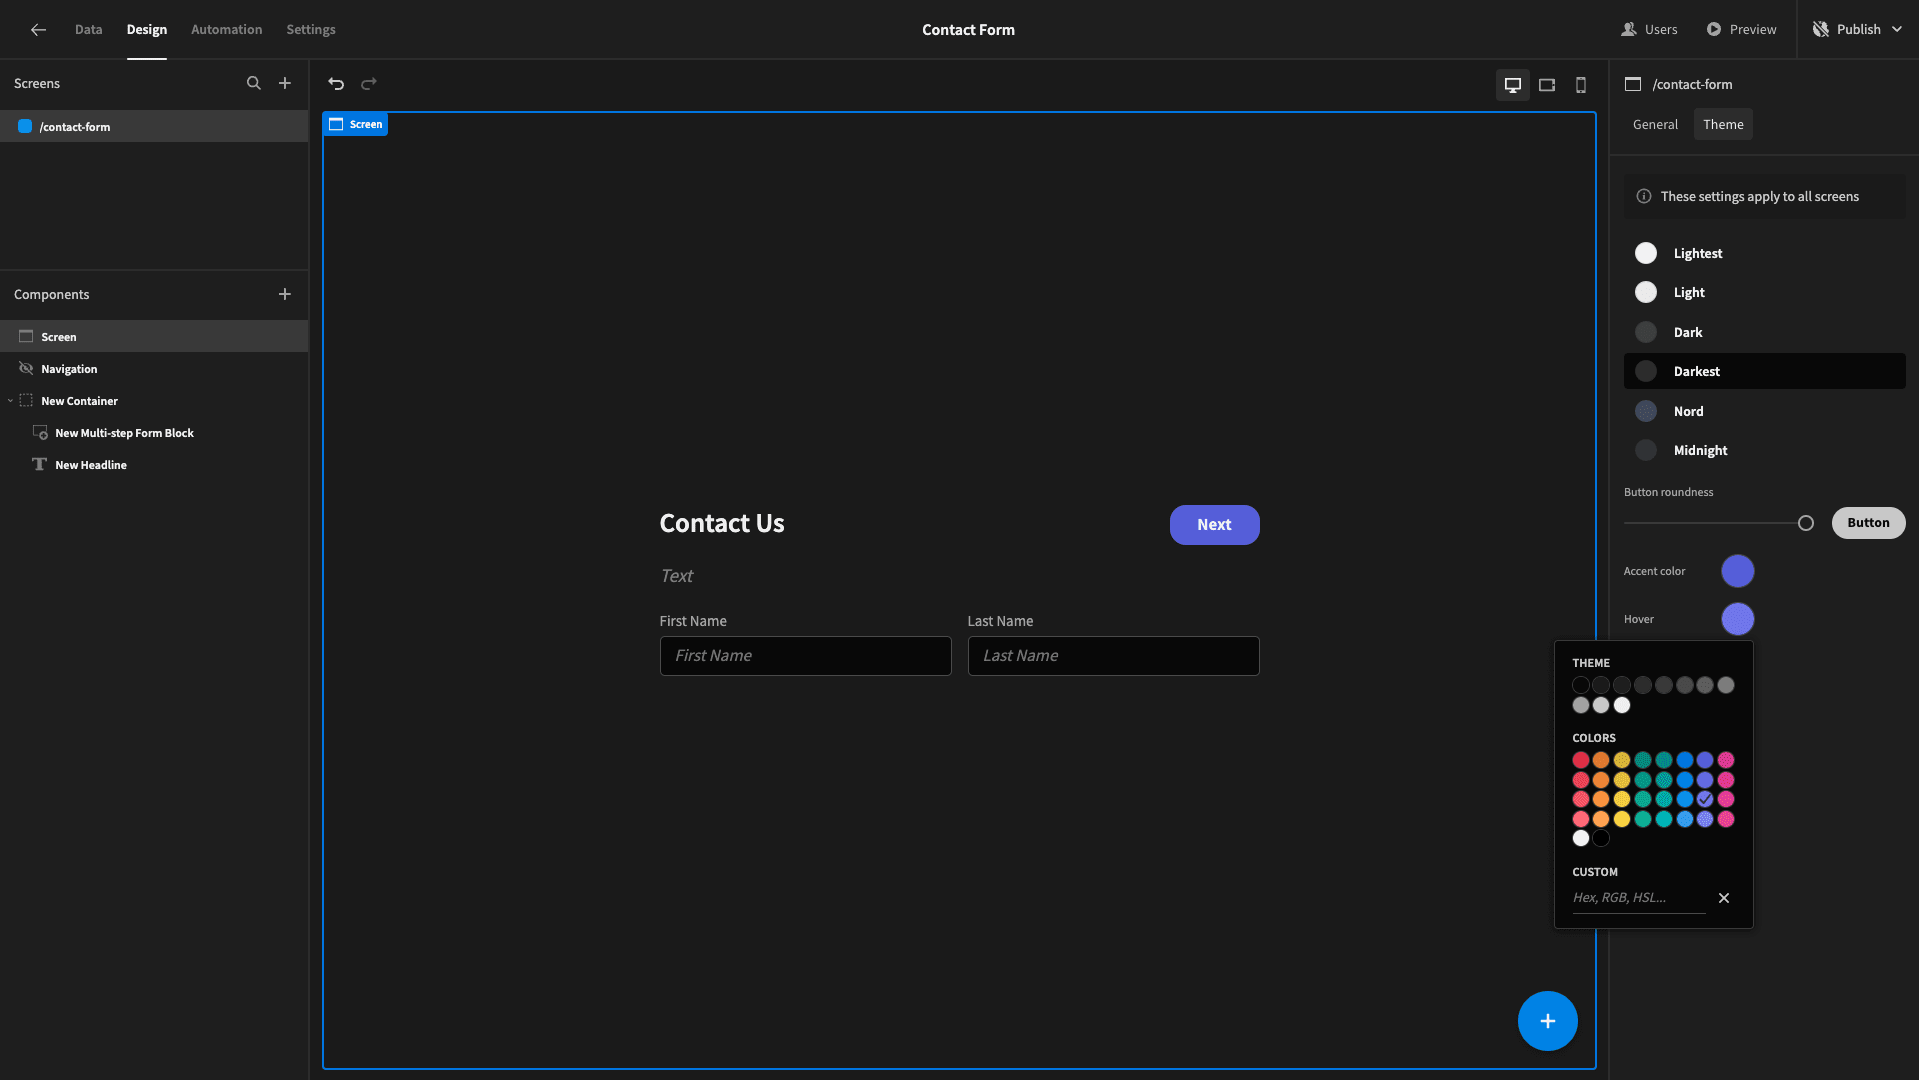
We’ll also update our button colors to something a little more distinctive.
5. Publishing our form and generating an IFrame
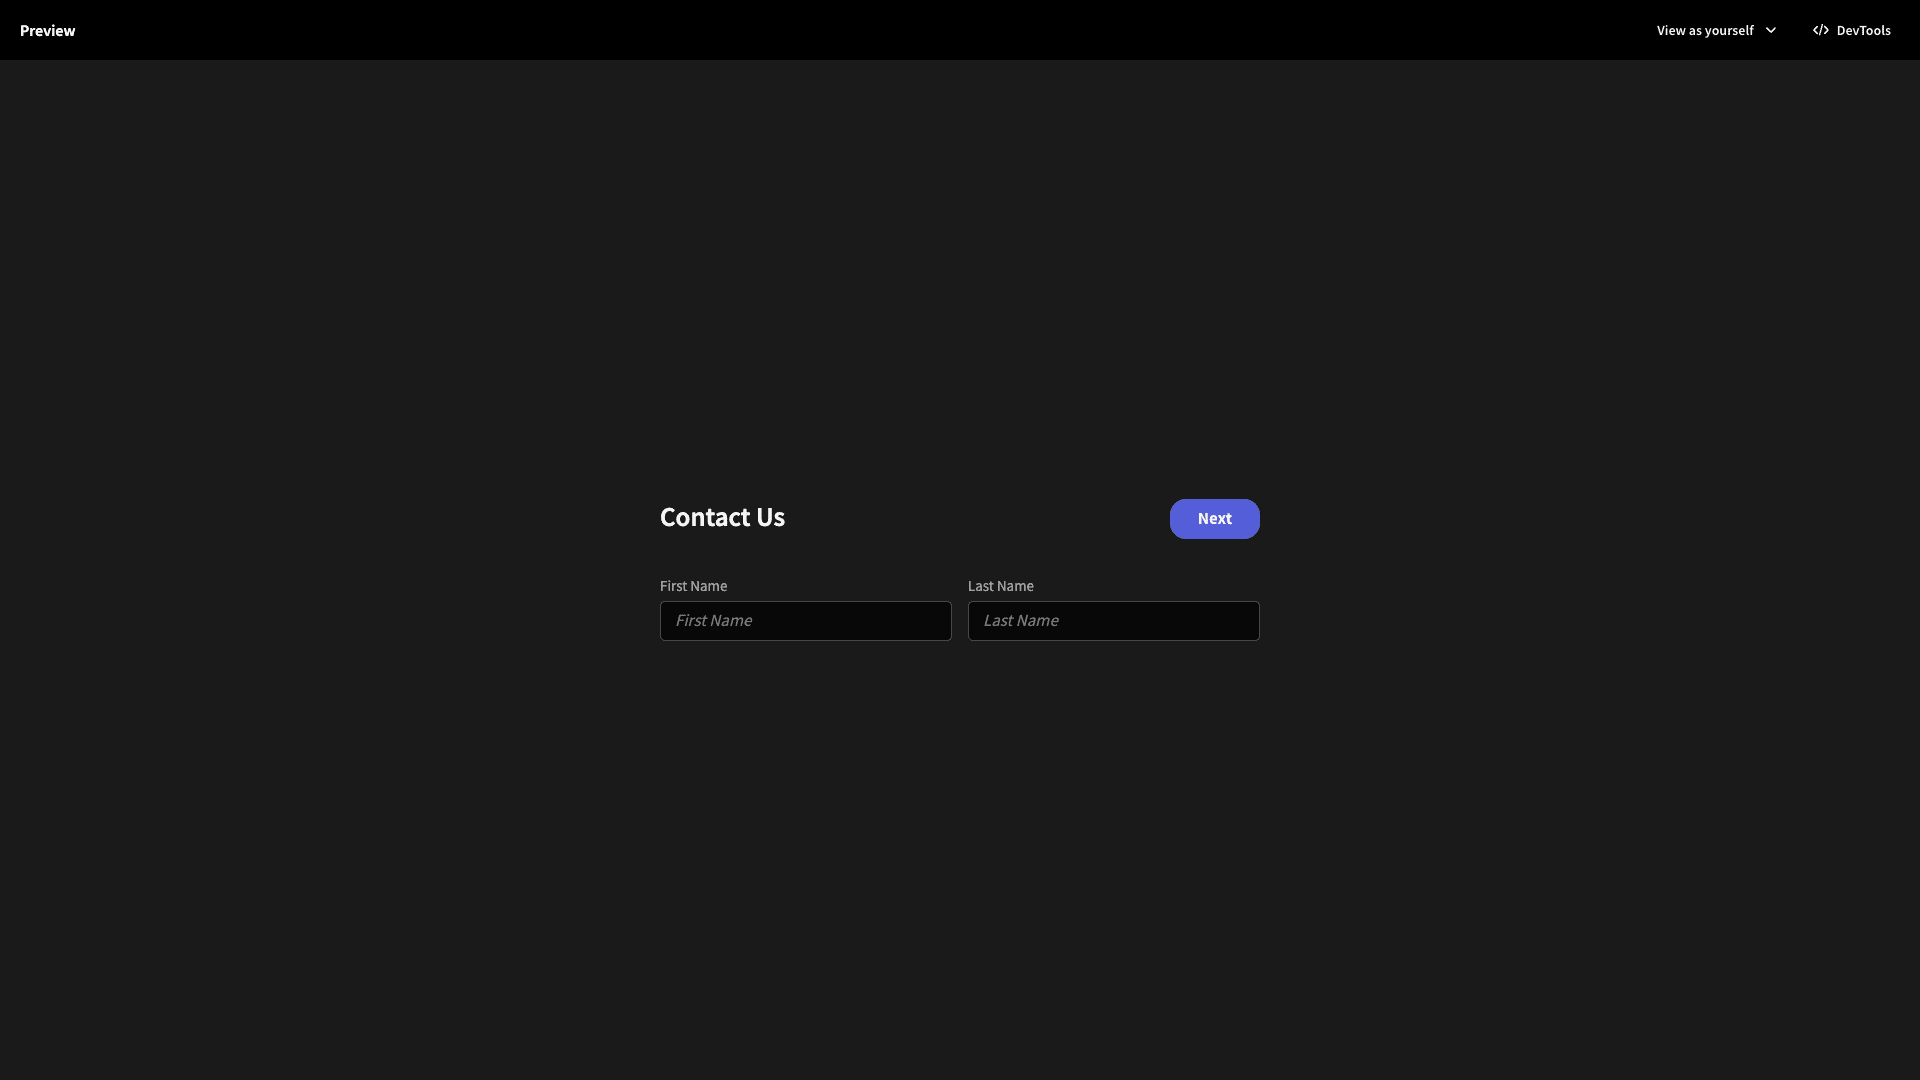
Here’s what our form looks like when we open it on its own screen.
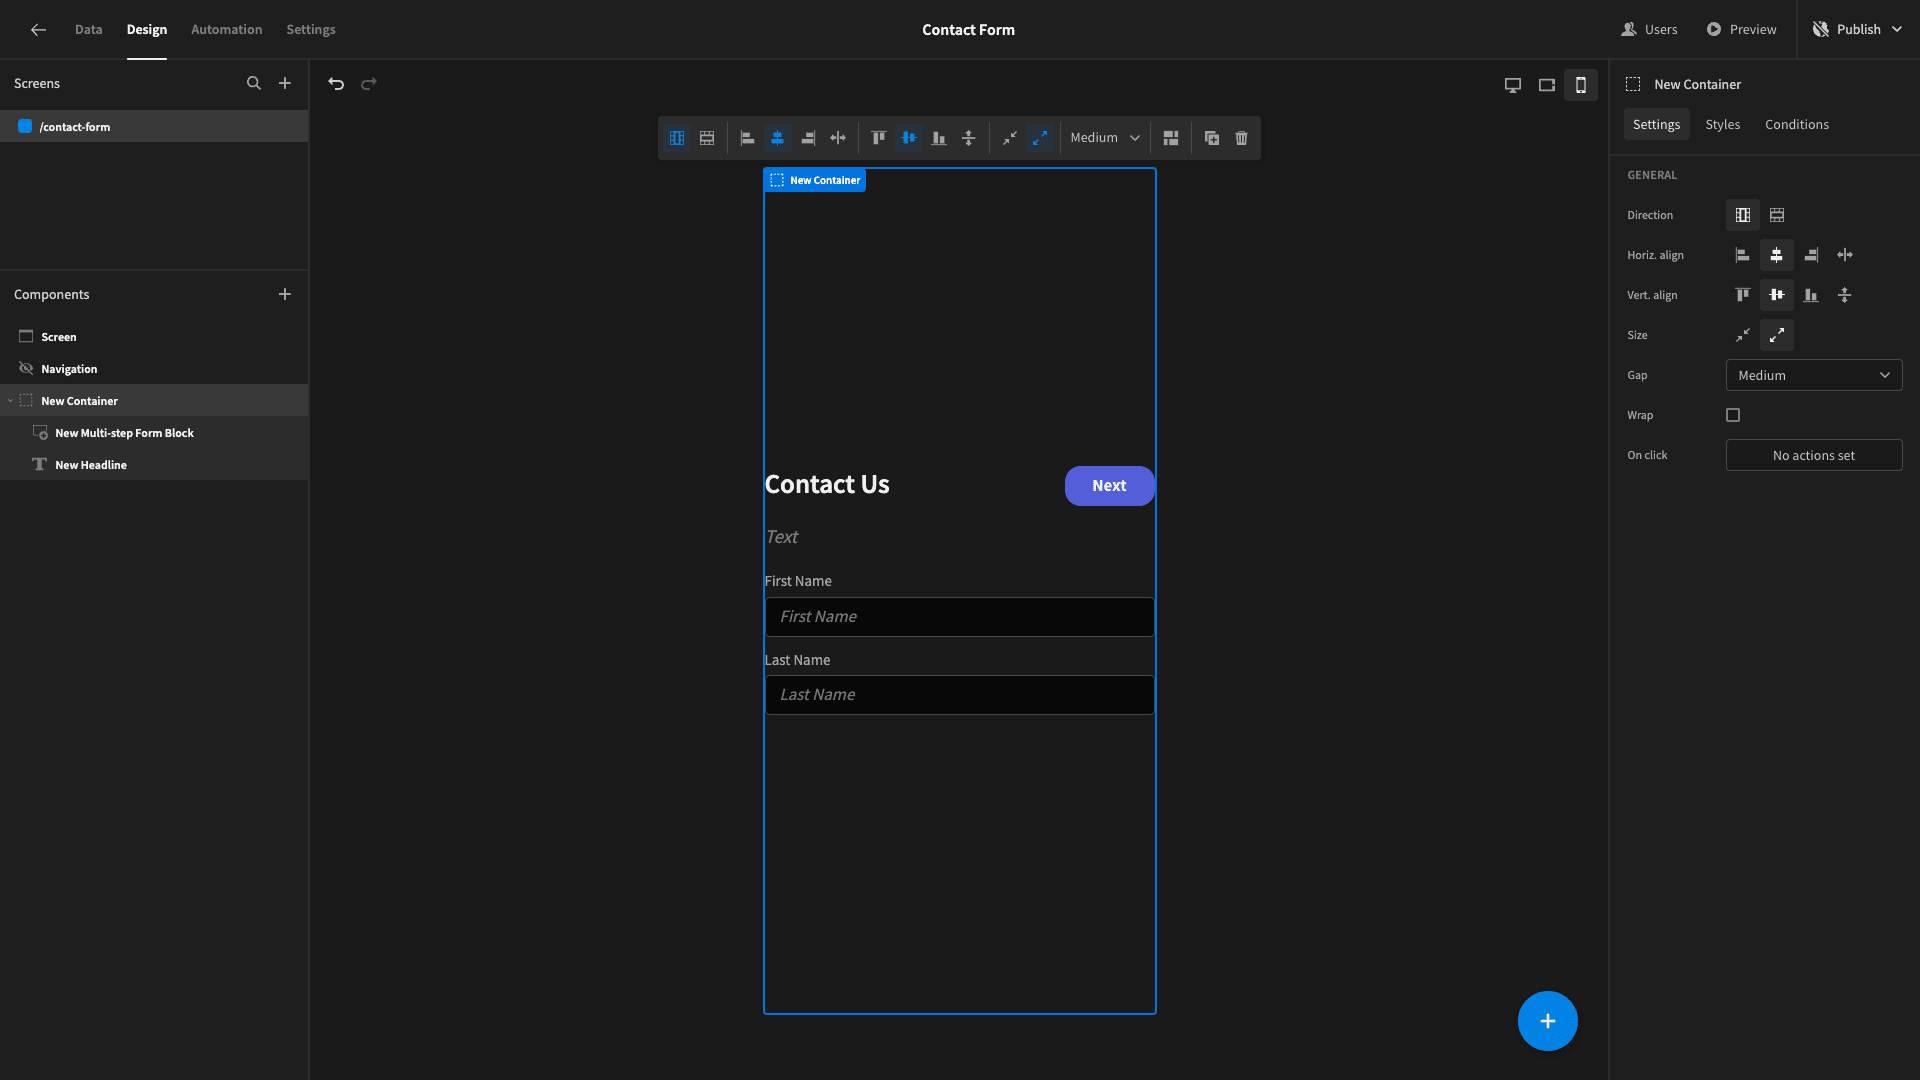
However, if we preview it on a mobile device, it will occupy the full width of the screen.
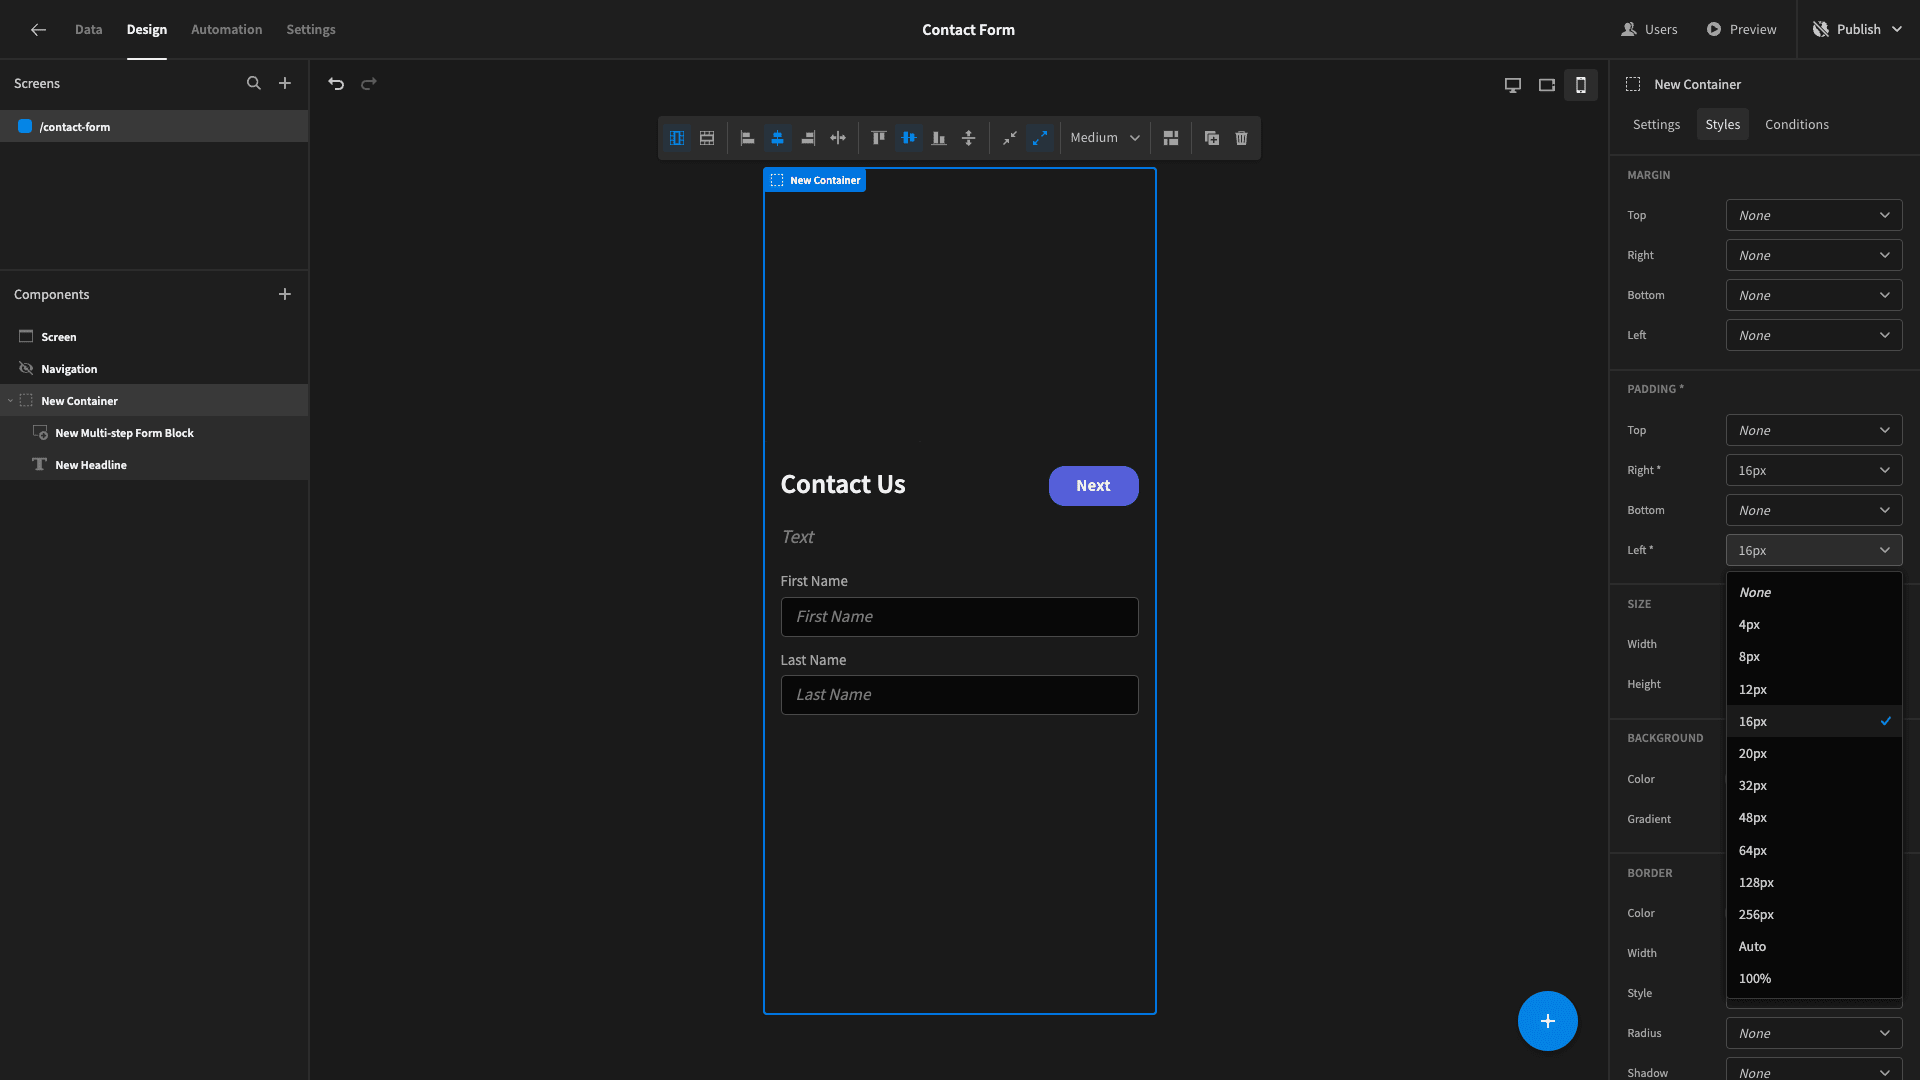
To improve this, we’ll add some margin to the left and right of our container.
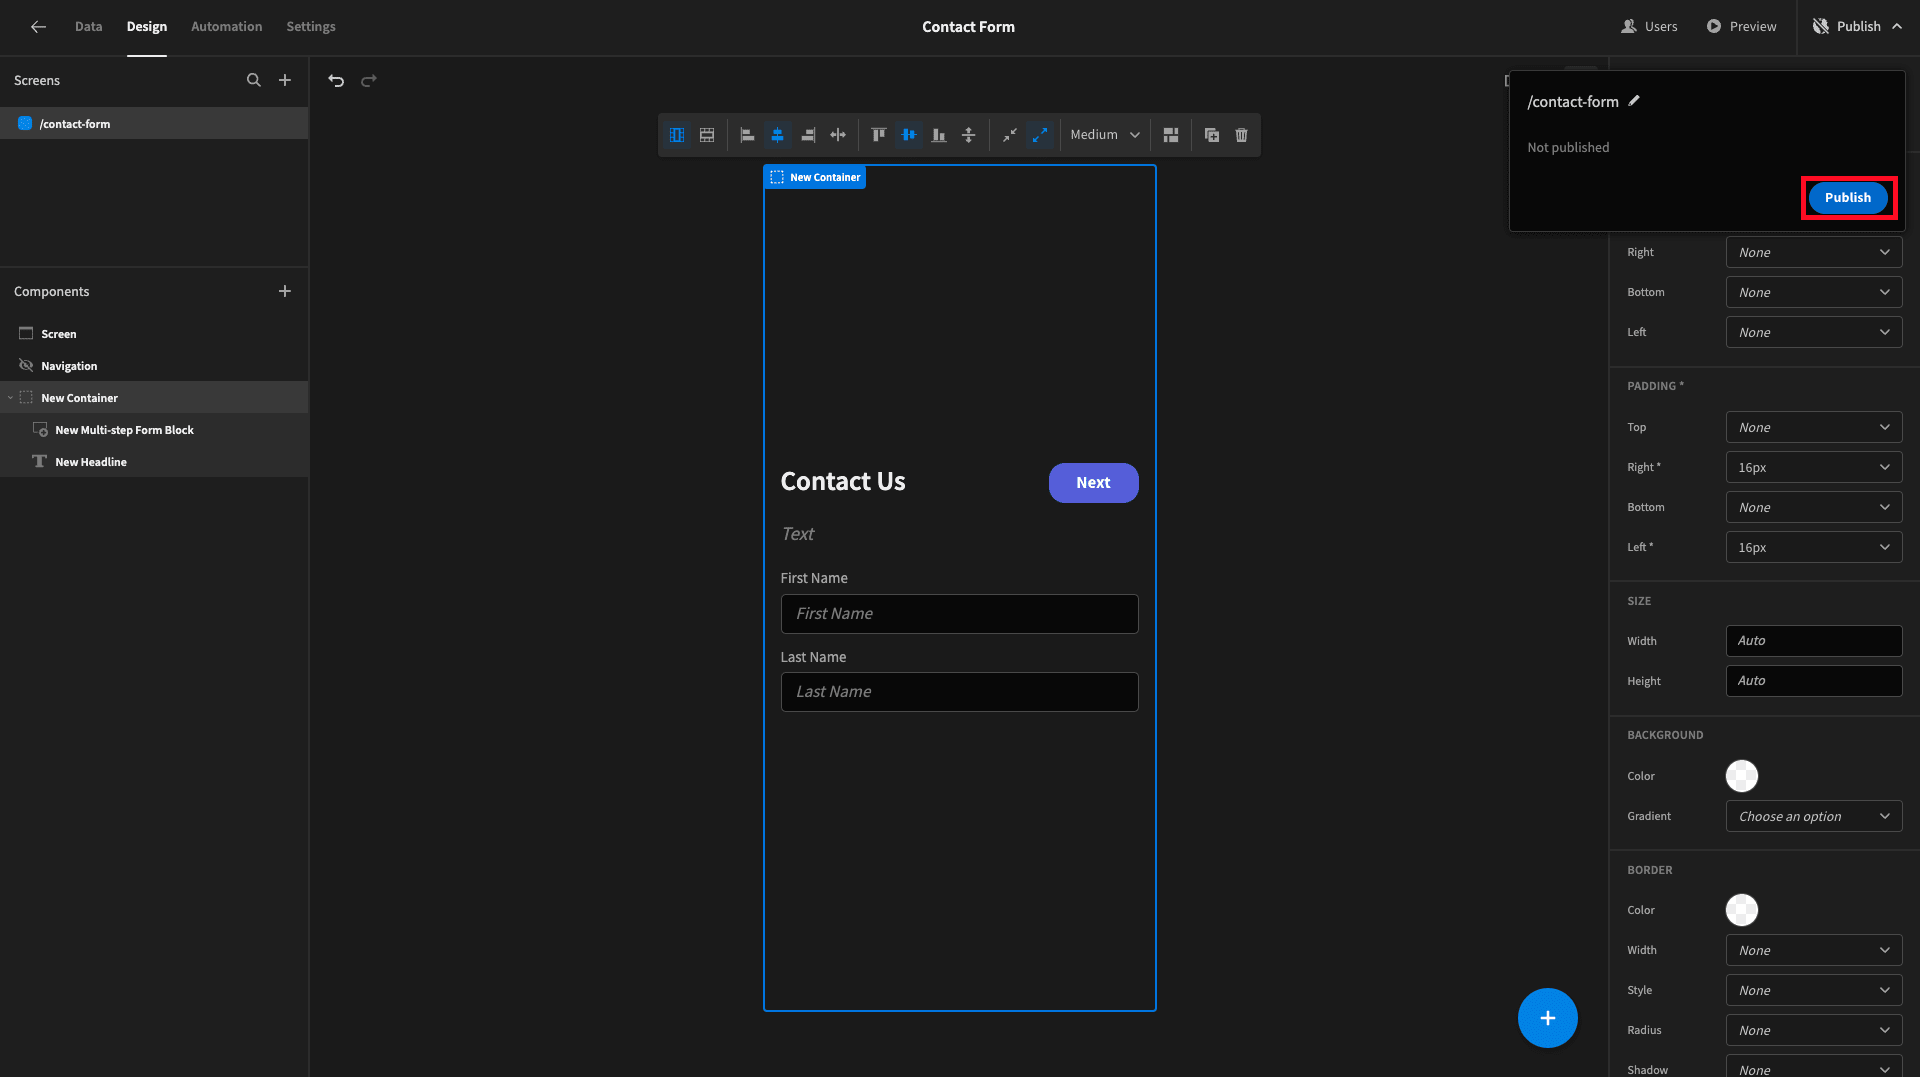
When we’re happy, we can hit Publish to push our app live for users.
Once it’s published, we have the option of opening our live app or embedding it.
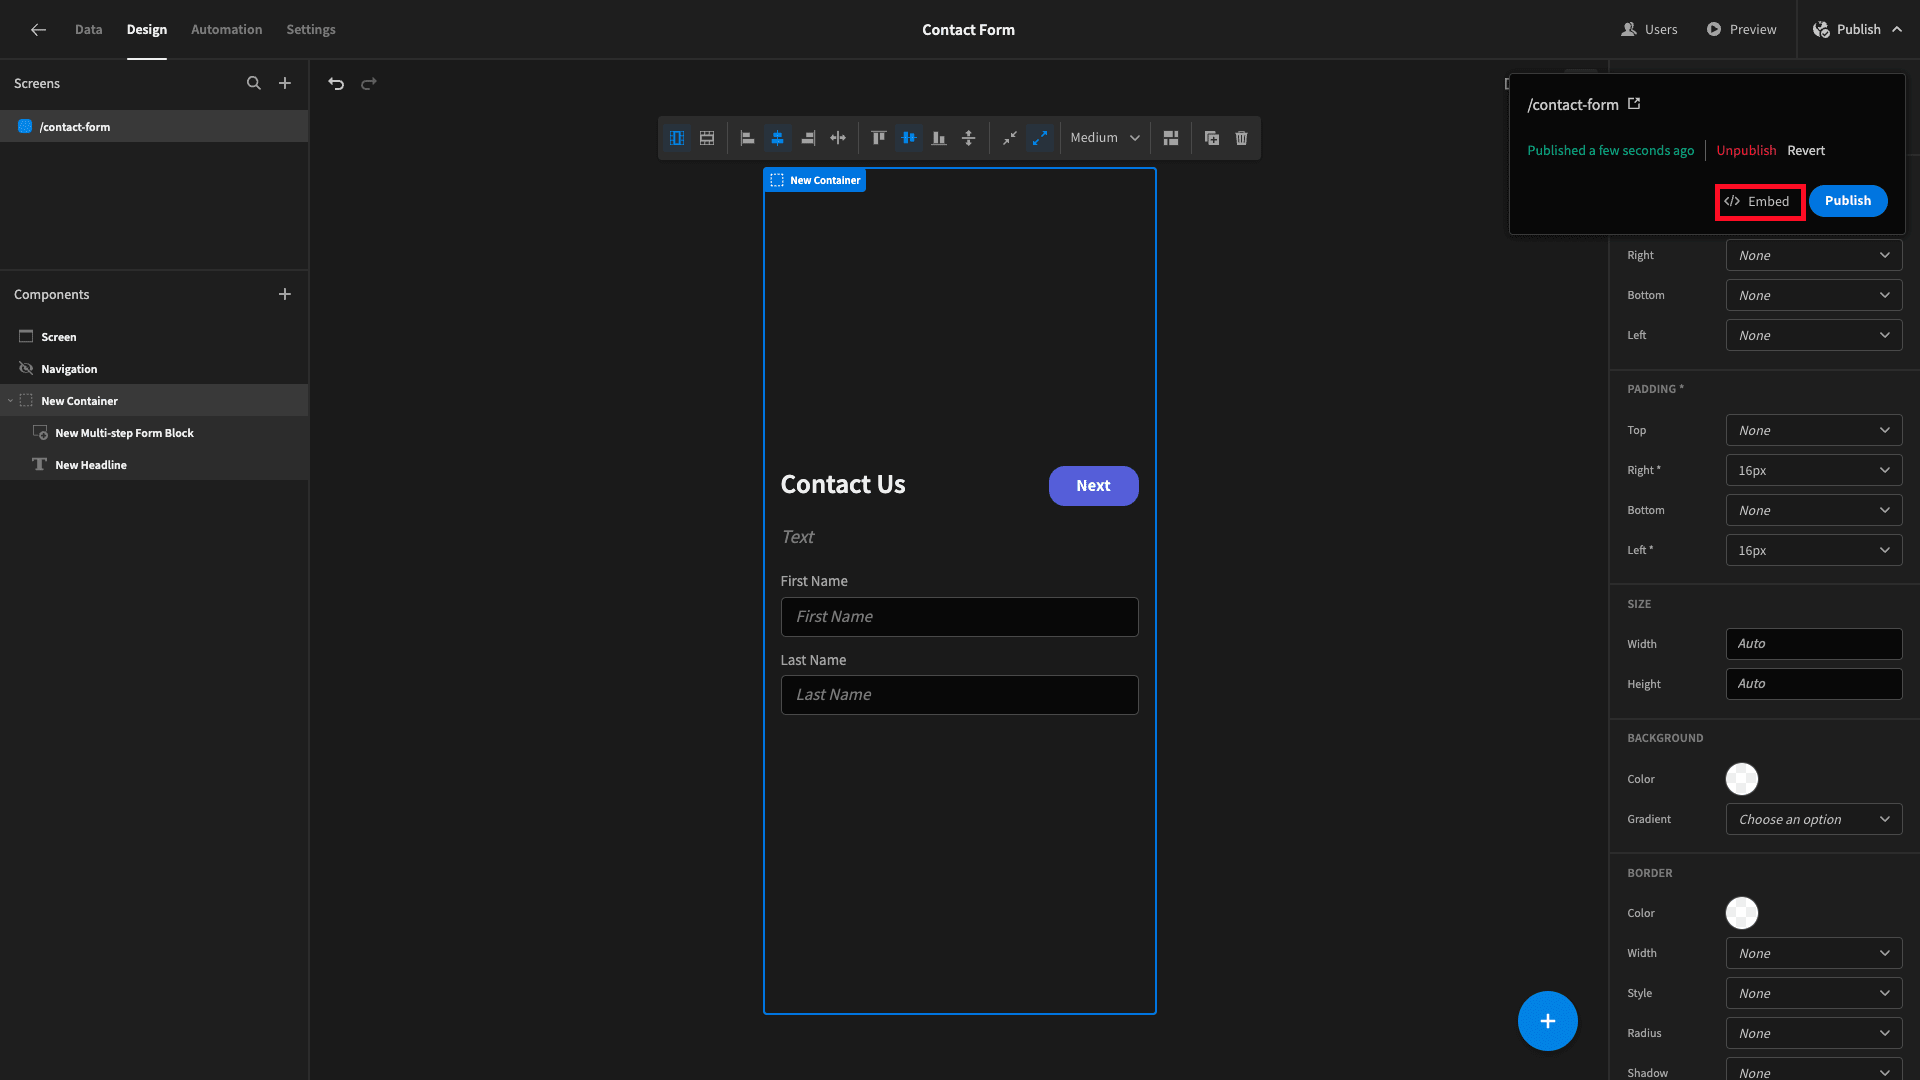
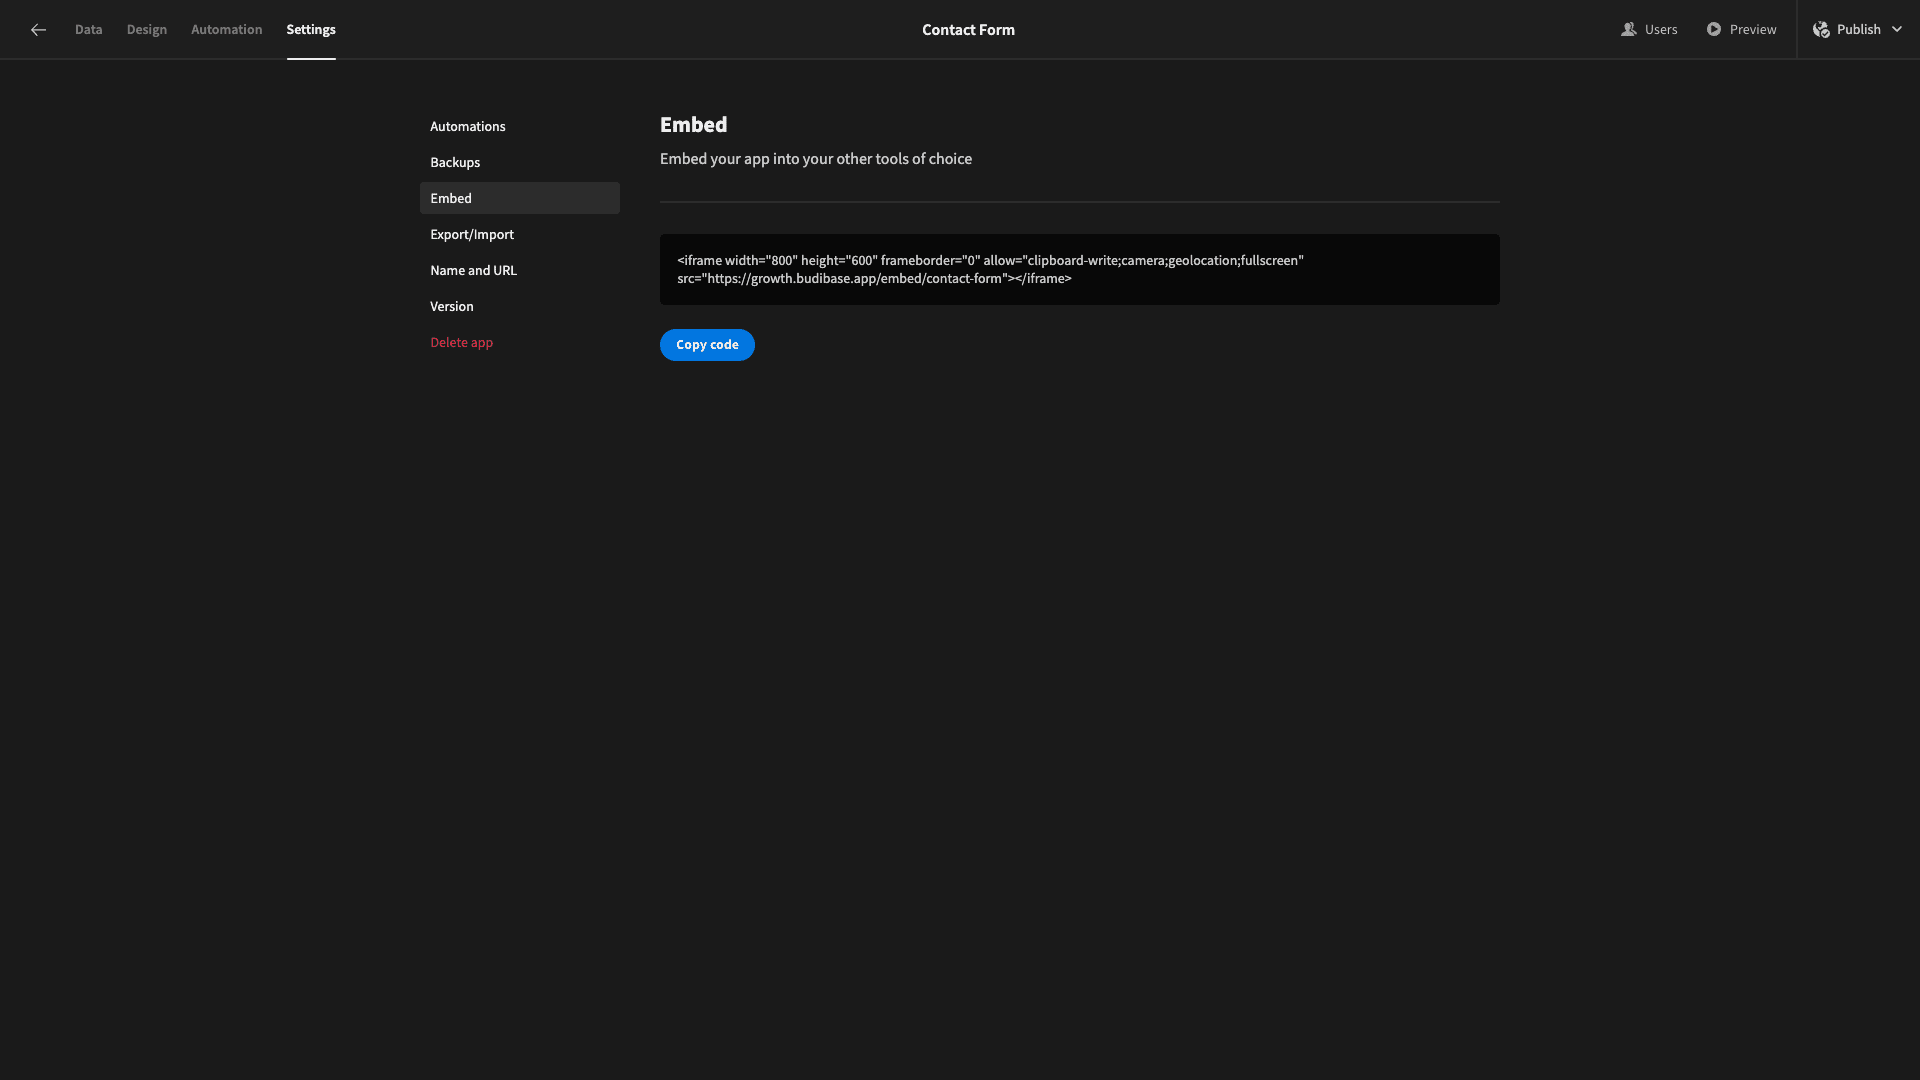
When we hit Embed, we’re brought to the following screen, where we can copy an embeddable iframe.
6. Adding our IFrame to a HTML document
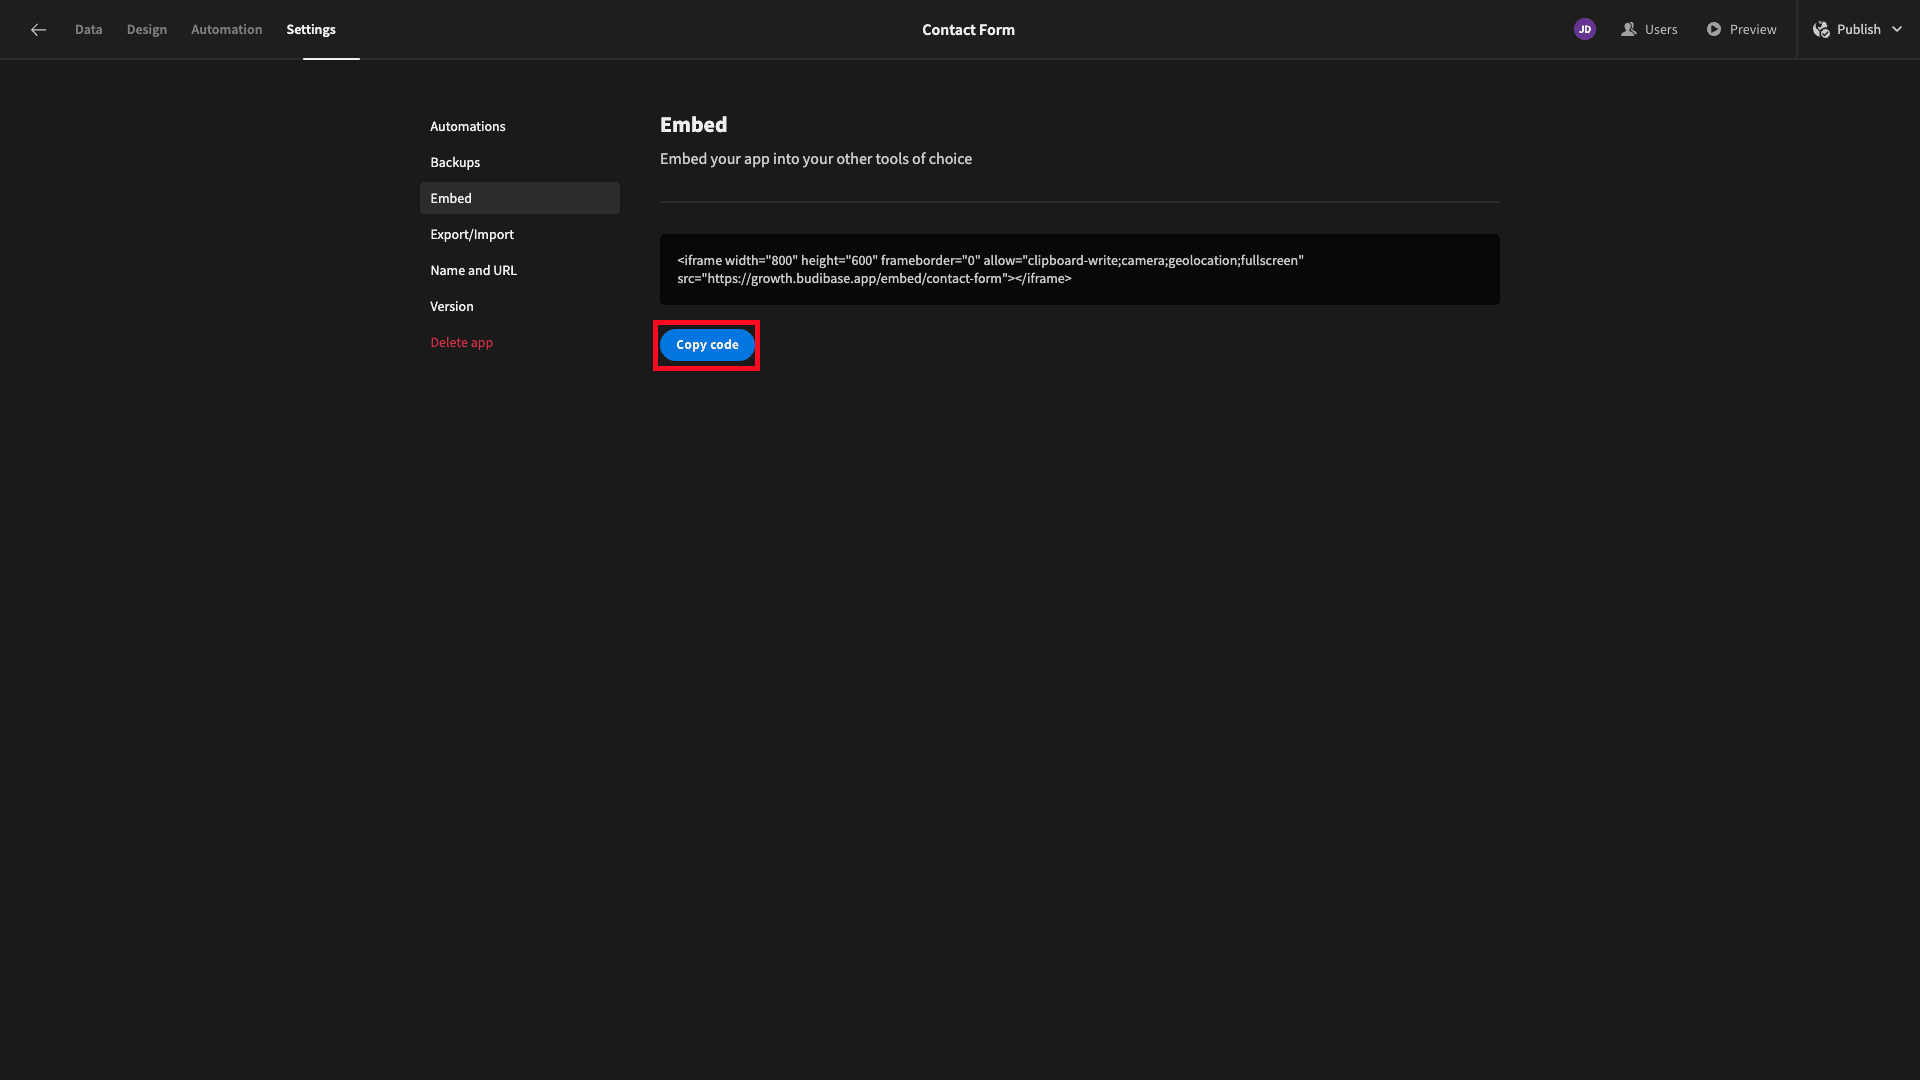
We need a HTML document to test out our form embed. This can be any webpage. When we’re ready, we’ll hit Copy Code.
And we can paste the iframe that Budibase provides into our webpage’s source using the IDE or text editor of our choice.
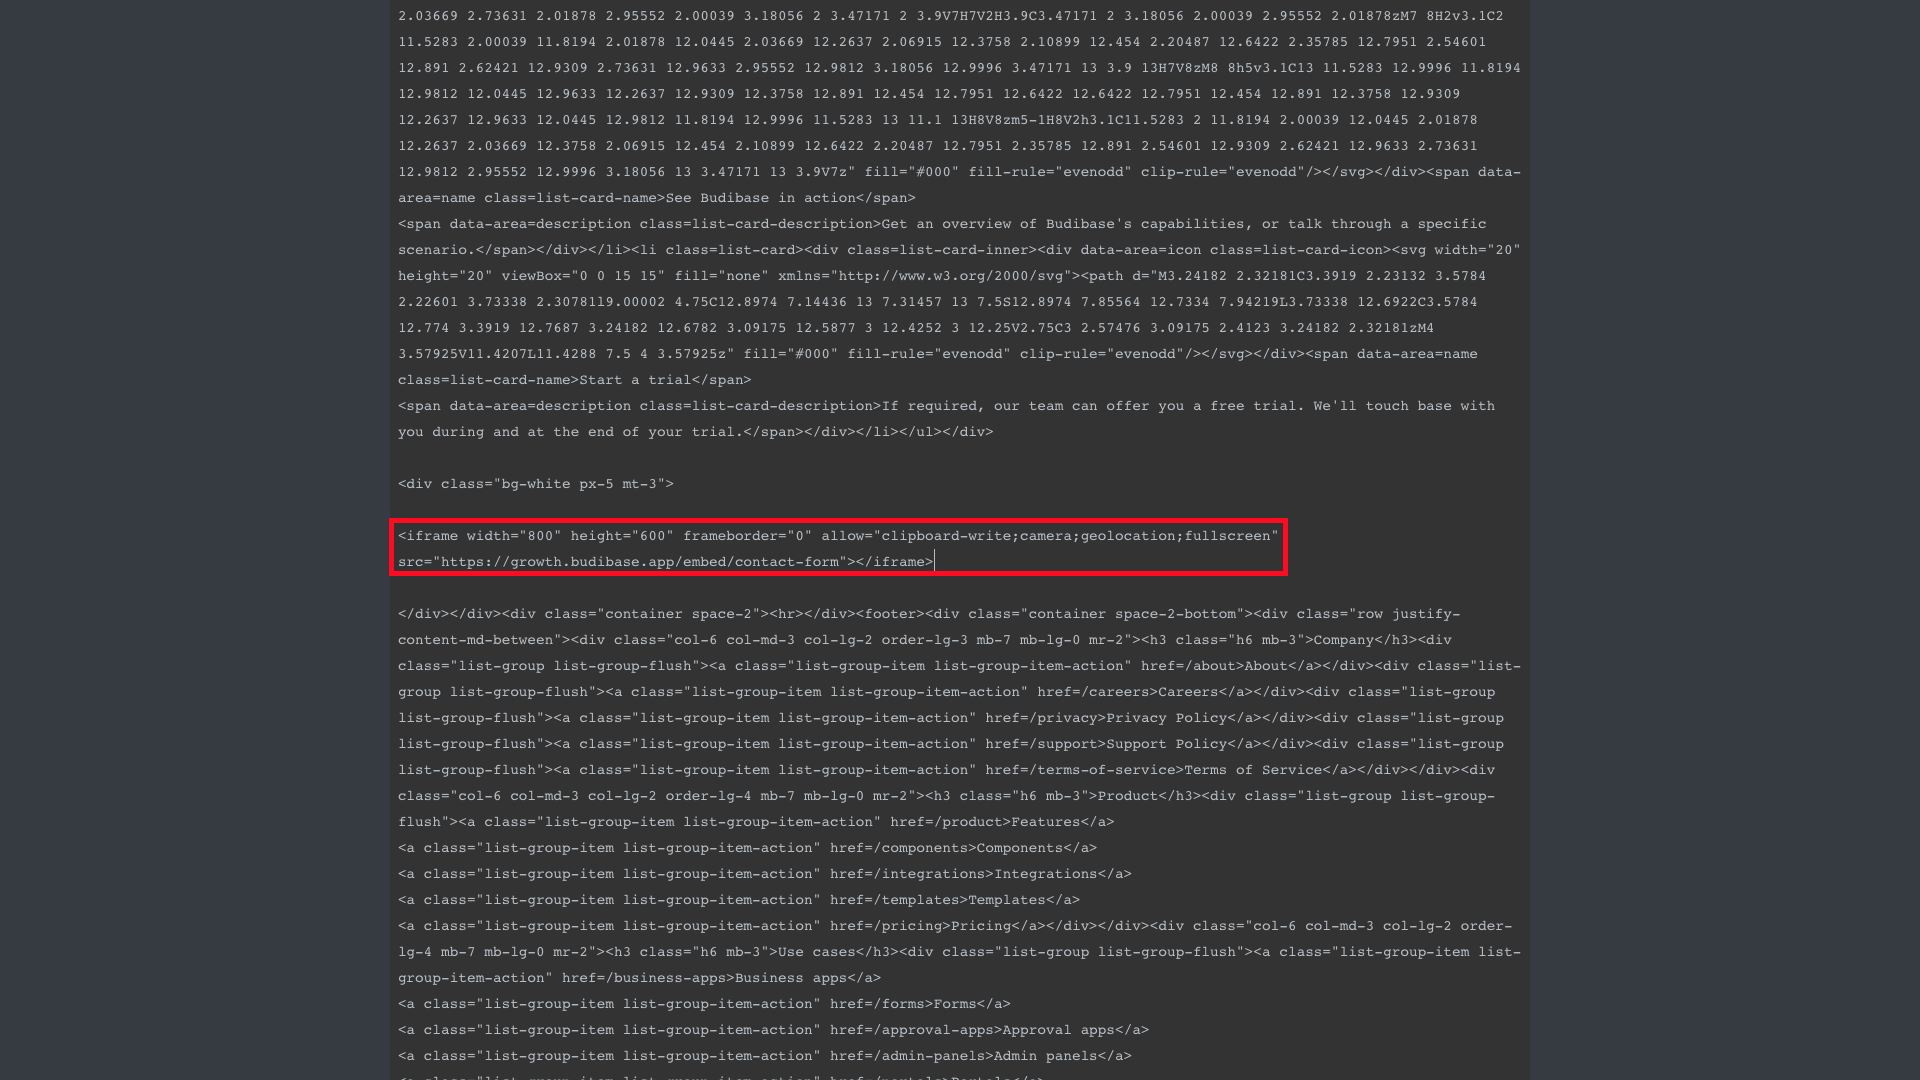
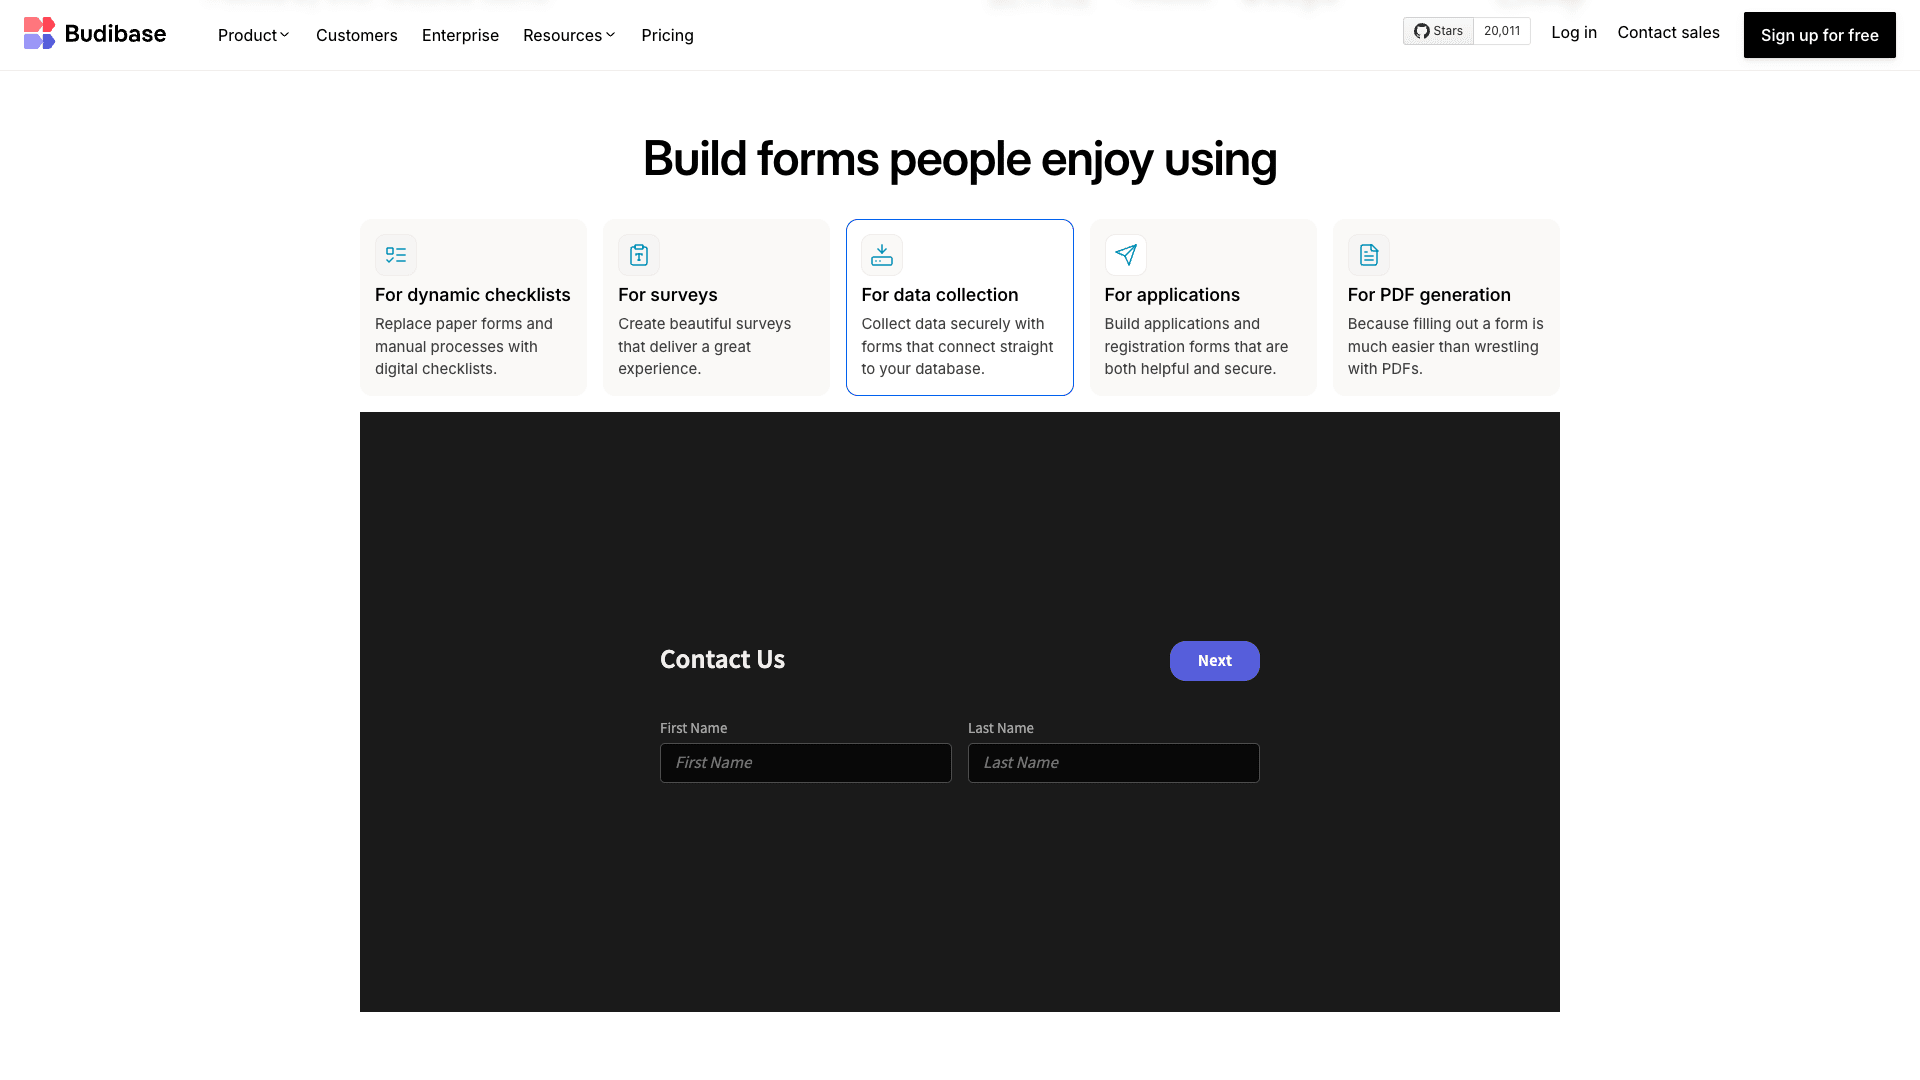
Here’s an example of how this could look on the Budibase site.
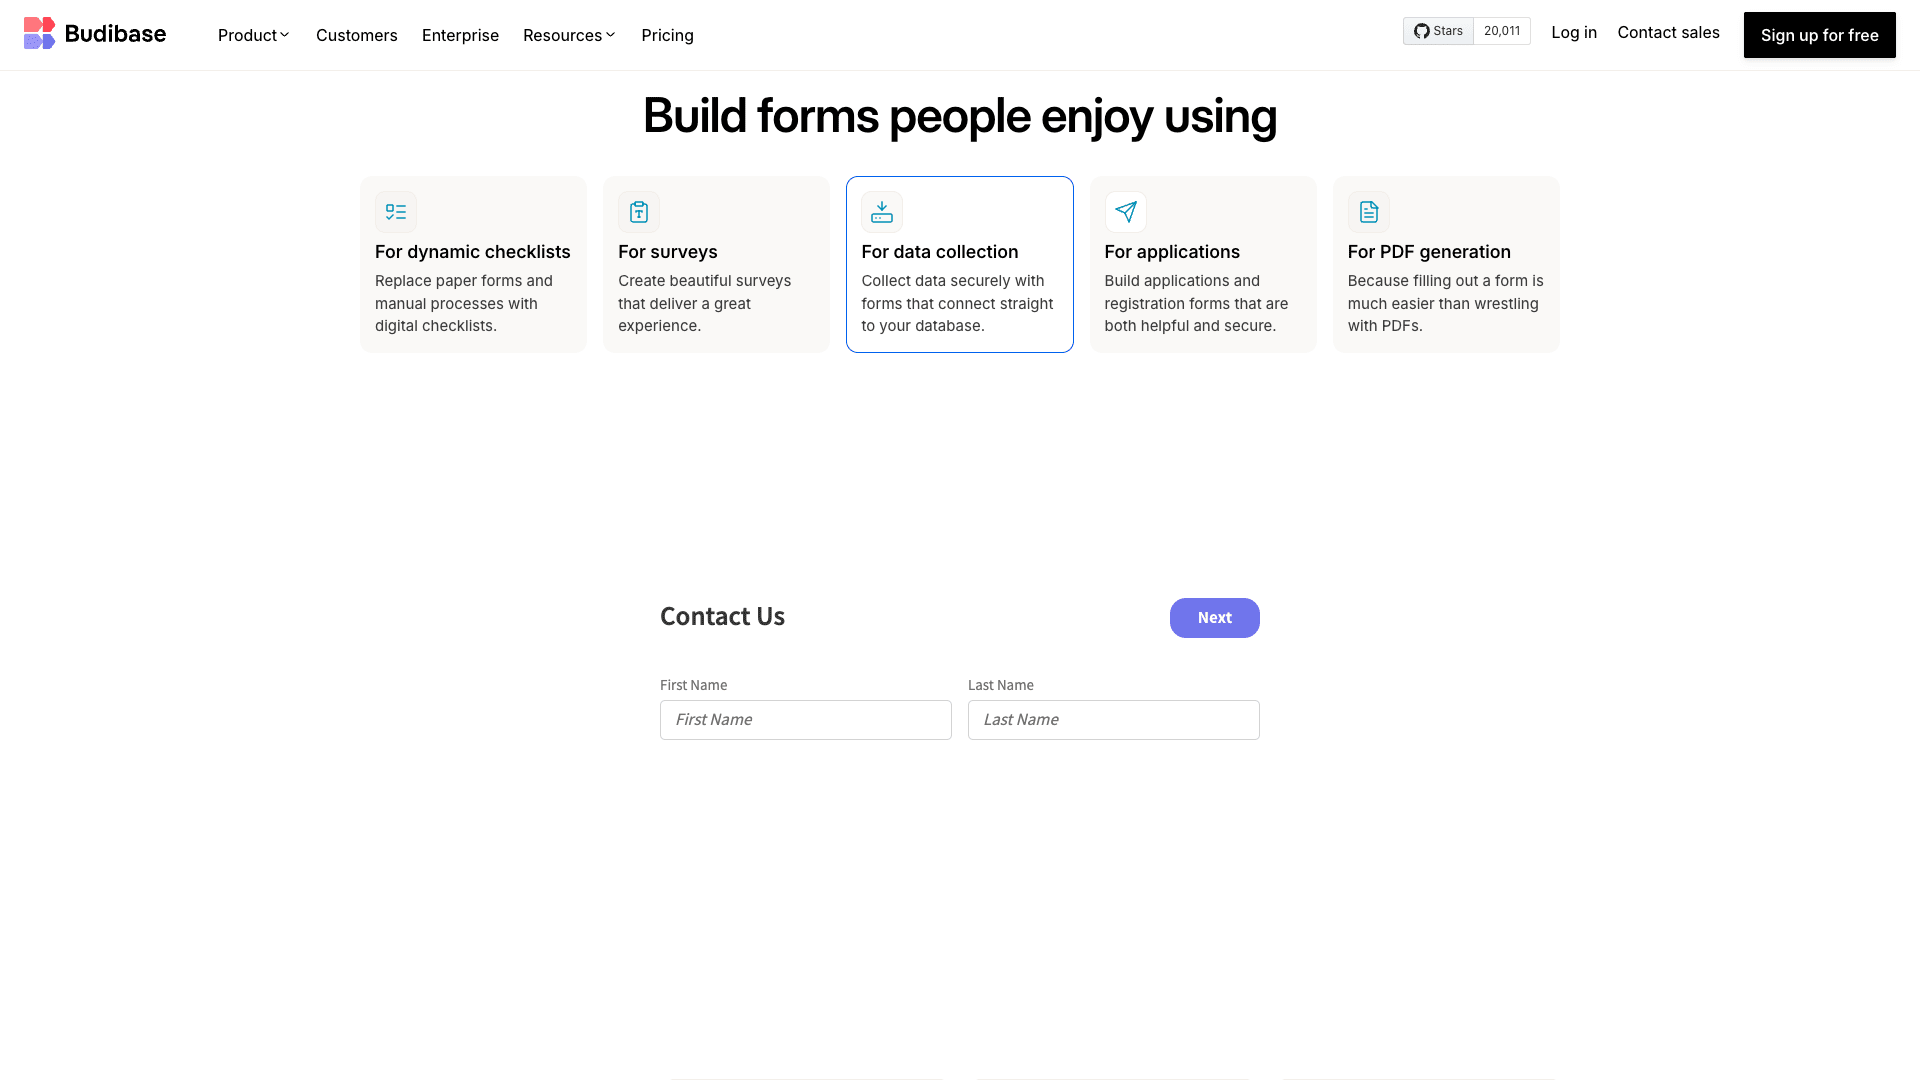
Or, we could set the theme to Lightest, so it blends in with the background if we prefer.
Budibase is the fast, easy way to build advanced forms on top of all kinds of existing data.
To learn more, check out our digital forms page.