
Budibase is designed to build powerful apps that streamline internal processes and workflows. One workflow that we see come up time and time again is internal ticketing systems, with some very consistent requirements, regardless of what the tickets are tracking.
Today, we're taking these systems to the next level with a new set of features specifically built for users developing these ticketing systems. Whether you work in IT managing support requests, are a developer handling bug fixes, or anything in between, we think you’ll love them.
These updates include:
- Conditional formatting: This makes it easy to scan data in a table and identify critical information at a glance.
- Multi-cell operations: We made some changes to the Data section of Budibase to make it feel more like a spreadsheet, with multi-cell copying, pasting, and more.
- Automation on data change: You can now trigger automation when a cell's value changes to something specific, such as sending an email if a cell’s value changes to “Complete.”
In this blog, we’ll dive deeper into how these features can help you and your team build a superior ticketing system. Let’s take a closer look!
Conditional formatting for Tables:
With conditional formatting, you can now scan your database for important information at a glance. To make your formatting dynamic, you can set rules that change the format of cells based on their value. For our example, this means highlighting our row in red when the Priority column contains the value “High.”
You can find conditional formatting options under the column settings:
It’s worth noting that the order of your conditions matters, as Budibase processes these conditions from top to bottom. This is more relevant for numbers than text, but here is a basic example.
Here, we’ve got a column that calculates the number of hours since a ticket was created. Say we wanted tickets above 24 hours to be highlighted yellow, and orange if it goes above 48. Budibase will always execute in order from the first criteria to the last, so we need to have the <24 criteria before the <48 criteria, otherwise the condition will be overwritten, as seen below.
Multi-cell operations
By using multi-cell operations, you can easily manage your dataset using shortcuts you already know and love. You can now copy, paste, and duplicate multiple cells at once, making managing your dataset a breeze. This can be done by either right-clicking a cell, or using keyboard shortcuts.
For example, imagine that while setting up our “hours since ticket created” field, we accidentally set it as a text field instead of a number field, meaning we can’t run numerical calculations. Now, instead of having to rewrite every entry, we can simply create a new column and copy/paste our data across—easy!
Triggering Automations on Data Change
Time to add some flare to this app. Now, we want to set up Budibase to trigger an Automation once our priority gets set to “High,” sending an email to our IT team (I’m actually just sending it to myself, but let’s pretend for now 🤫).
To do this, we can use the new automation on data change functionality. There are a few steps required to get this set up. First things first, you’ll need to make sure that you have the right authentication to send emails via Budibase. I won’t go into that in this blog, but please check out our documentation to do this if you haven’t done so already.
Next, we’ll hop over to Automations in-app. The first thing we need to set is our trigger. For this example, we want to set our automation to trigger once data is changed—specifically, when our “Priority” field is updated to “High.” This is done through the trigger's filter.
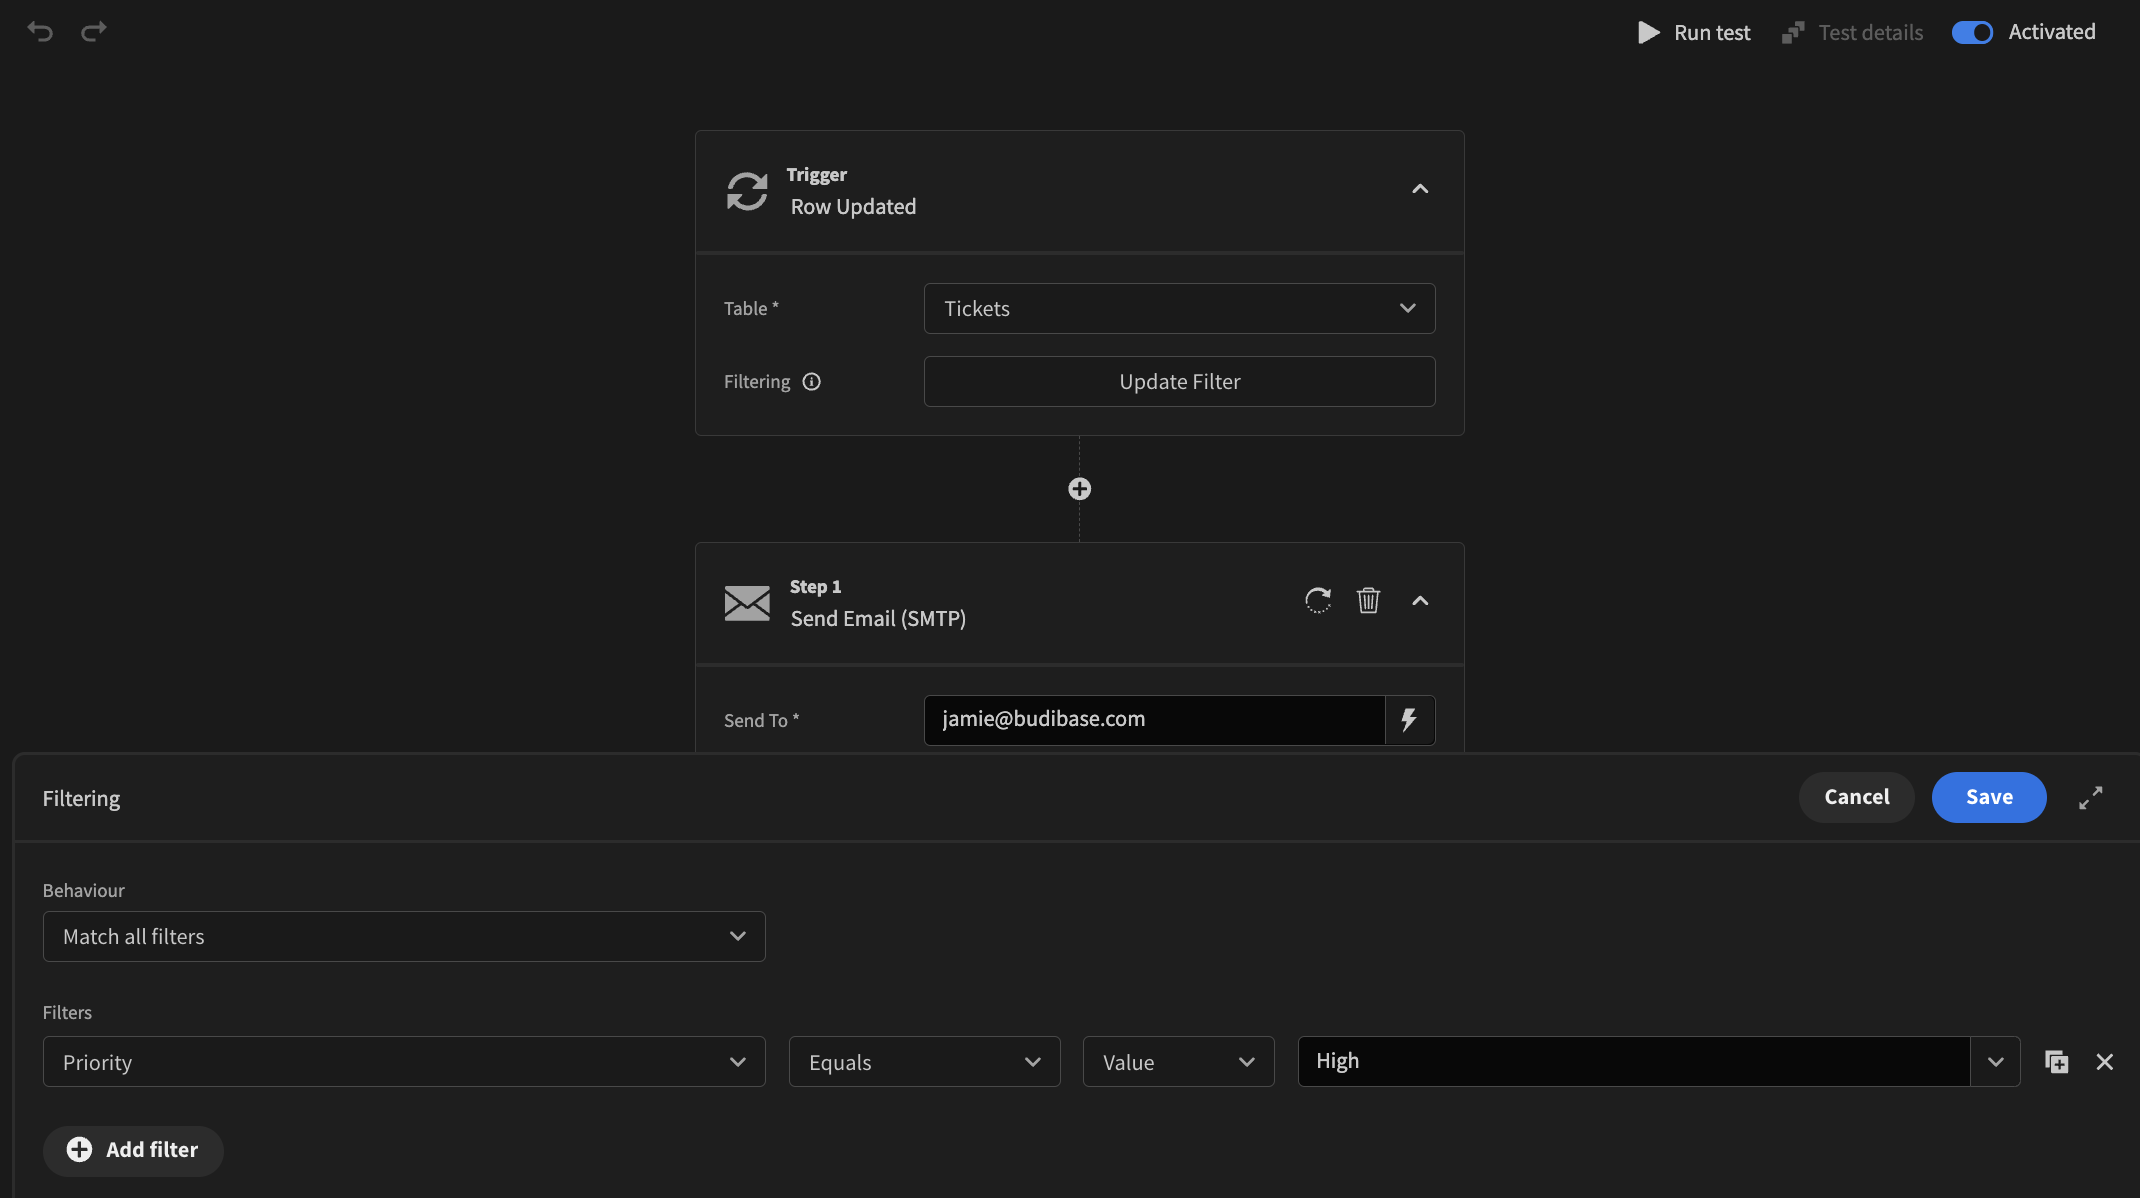
Finally, we’ll set up the email content. We can select a title and set up the contents of the email using HTML, pulling in some dynamic information from the ticket, such as the title and description. This is an extremely basic email template, and if used in practice, we recommend expanding it with more relevant information.
On the front end, there isn’t much that we have to do. However, for a better user experience, we recommend adding a confirmation screen on any automation that triggers behaviors such as sending emails. This can be done through the “Save” button in our editable form.
And that's a wrap! You now have a beautiful ticketing system, color-coded, to help you take action as quickly as possible.
While this blog highlighted one particular use case, the potential applications and workflows enabled by these releases are vast. We hope you enjoy the new functionality and find it valuable for enhancing your internal workflows.