How to Build a Trouble Ticketing System
Trouble ticketing systems are some of the most common internal tools around. In fact, they’re at the center of how we deliver exceptional user experiences to customers and colleagues alike.
The more efficiently we can gather, categorize, and respond to information about issues, the faster we can provide resolutions to users.
Today, we’re exploring how Budibase can supercharge your ticketing efforts. Specifically, we’re going to build a fully custom trouble ticketing system on top of an existing database - without writing a single line of code.
We’ll also provide all of the queries you need to build our DB schema so you can follow along with our tutorial.
By the end, you’ll have a flexible, ready-to-use solution that you can deploy anywhere you like.
But first, let’s start with the basics.
What is a trouble ticketing system?
Trouble ticketing software is used to provide customers or internal users with a centralized, easy way to submit requests for support.
Our service desk colleagues can then view, manage, and action these requests, as required.
This achieves a few key things. First of all, we can ensure that relevant data is stored securely and in a consistent format.
In turn, this helps to ensure that our users furnish our support agents with the information they need to adequately respond to tickets.
On the one hand, this allows us to provide better, faster resolutions for individual issues. On the other, we can also improve decision-making down the line, including around resource allocation, process changes, and agent availability.
Why would we build a custom ticketing tool?
Of course, there are several platforms on the market offering off-the-shelf ticketing solutions. So, why would we opt for a custom solution instead of using one of these?
The short answer is control.
This applies at a few distinct levels. First of all, when we build our own trouble ticketing system, we have much more scope to map this to our unique internal processes and tool stack.
COTS tools will generally offer us some scope for customization, but we’re more likely to encounter limitations here.
Similarly, with a custom build, we have much greater control over the data we use for our ticketing solution, as well as how we host, deploy, and maintain the finished tool.
On top of this, many enterprise features, like SSO, self-hosting, or custom branding are prohibitively expensive, so large-scale usages for off-the-shelf tools can often have a much higher real-world lifetime cost.
Take a look at our guide to ServiceNow alternatives to learn more.
So…
What are we building?
We’re building a simple trouble ticketing system on top of an existing PostgreSQL database.
Our tool is going to be based around two main screens. First, we’ll have a table-based UI where service users can submit trouble tickets and view the status of their previous submissions.
Our other screen will offer service desk colleagues a similar experience, but it will allow them to view all submissions, not just the ones they’ve created.
Our trouble ticketing system will also offer support for commenting on tickets, which we’ll present as a chat UI under individual submissions.
Here’s what the finished product looks like.
Let’s jump in.
How to build a trouble ticketing system in 5 steps
If you haven’t already, sign up for a free Budibase account to start building unlimited apps with our open-source, low-code platform.
The first thing we need to do is create a new application. We can do this using a pre-built template or by importing an existing app dump. Today, though, we’re going to start from scratch.
When we choose this option, we’re prompted to give our new app a name, which will also be used as our URL extension.
We’re going to call ours Trouble Ticketing System.
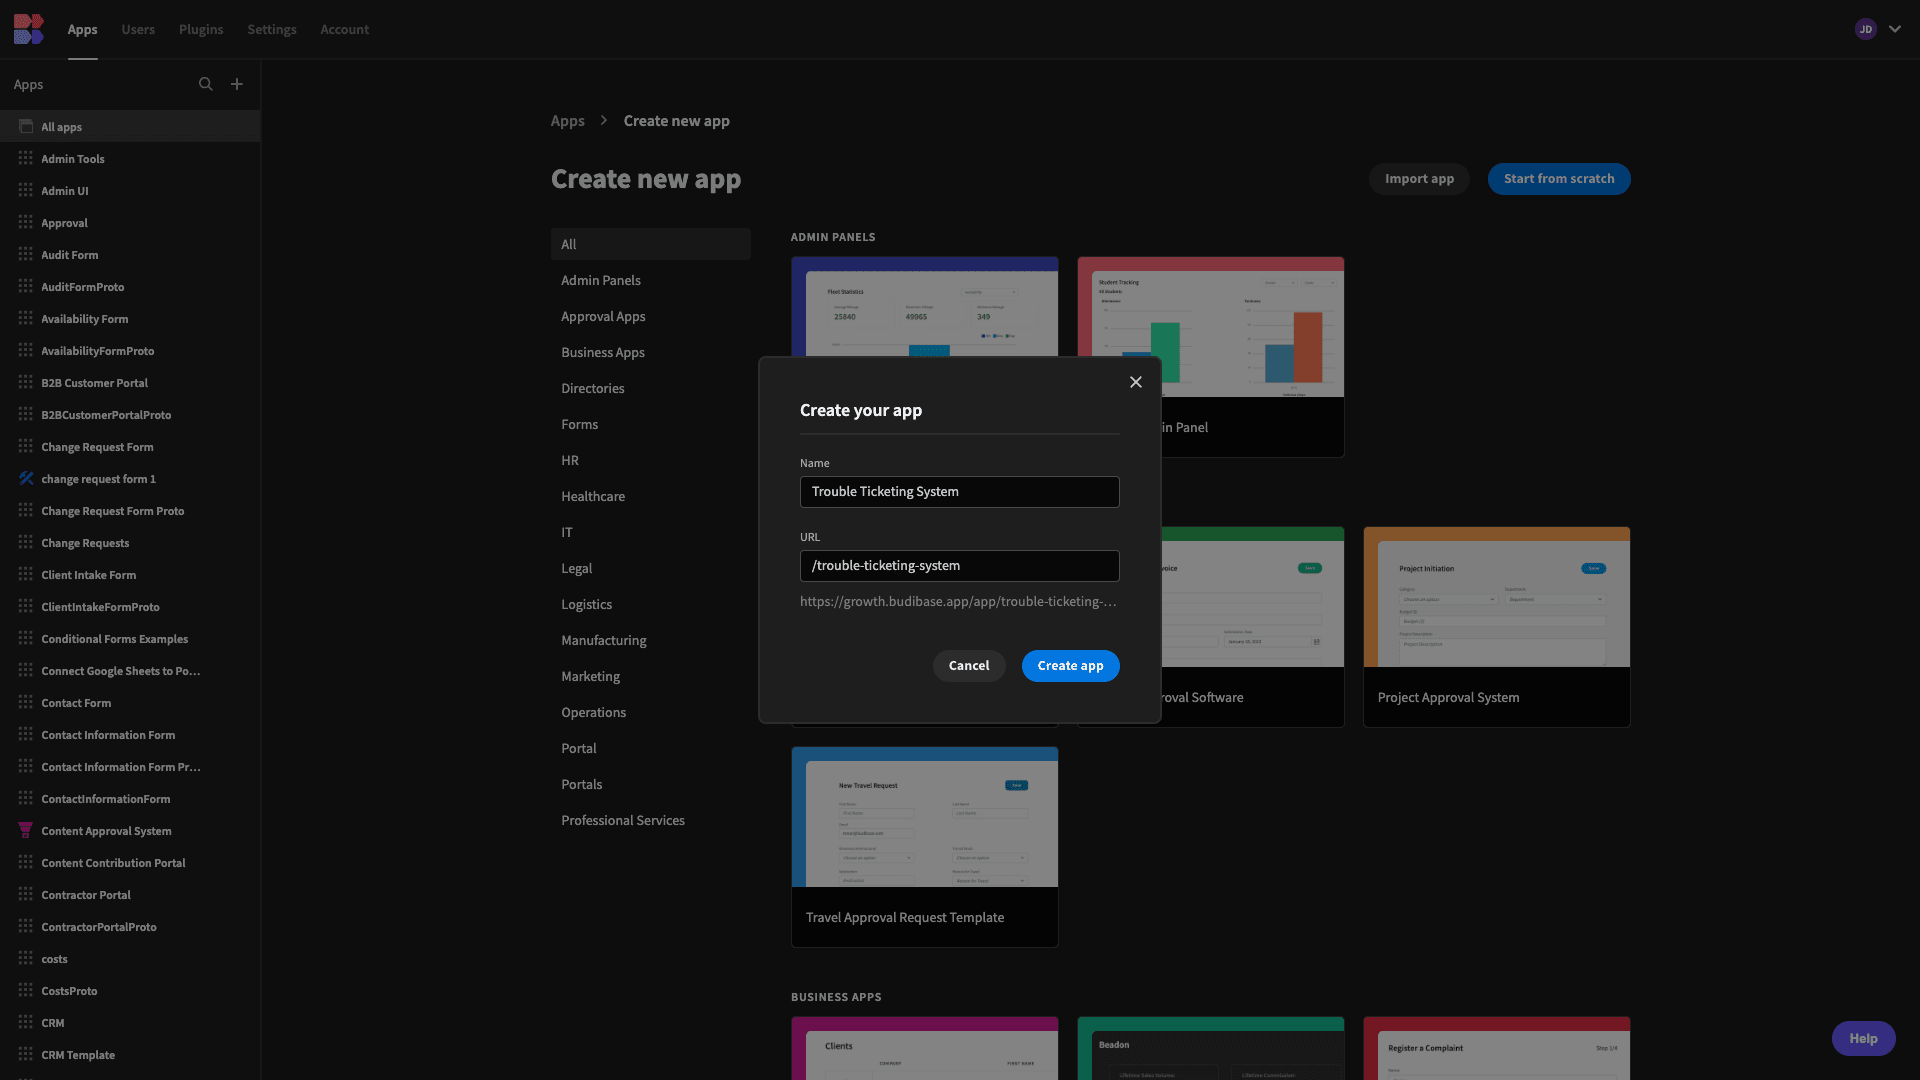
1. Connect to our database
Before we can start building our UIs, we need to set up our data layer. Budibase offers a built-in database, as well as dedicated connectors for a huge range of RDBMSs, NoSQL tools, APIs, spreadsheet tools and more.
When we connect to an external database, Budibase acts as a proxy, returning data to use in our apps without ever storing it.
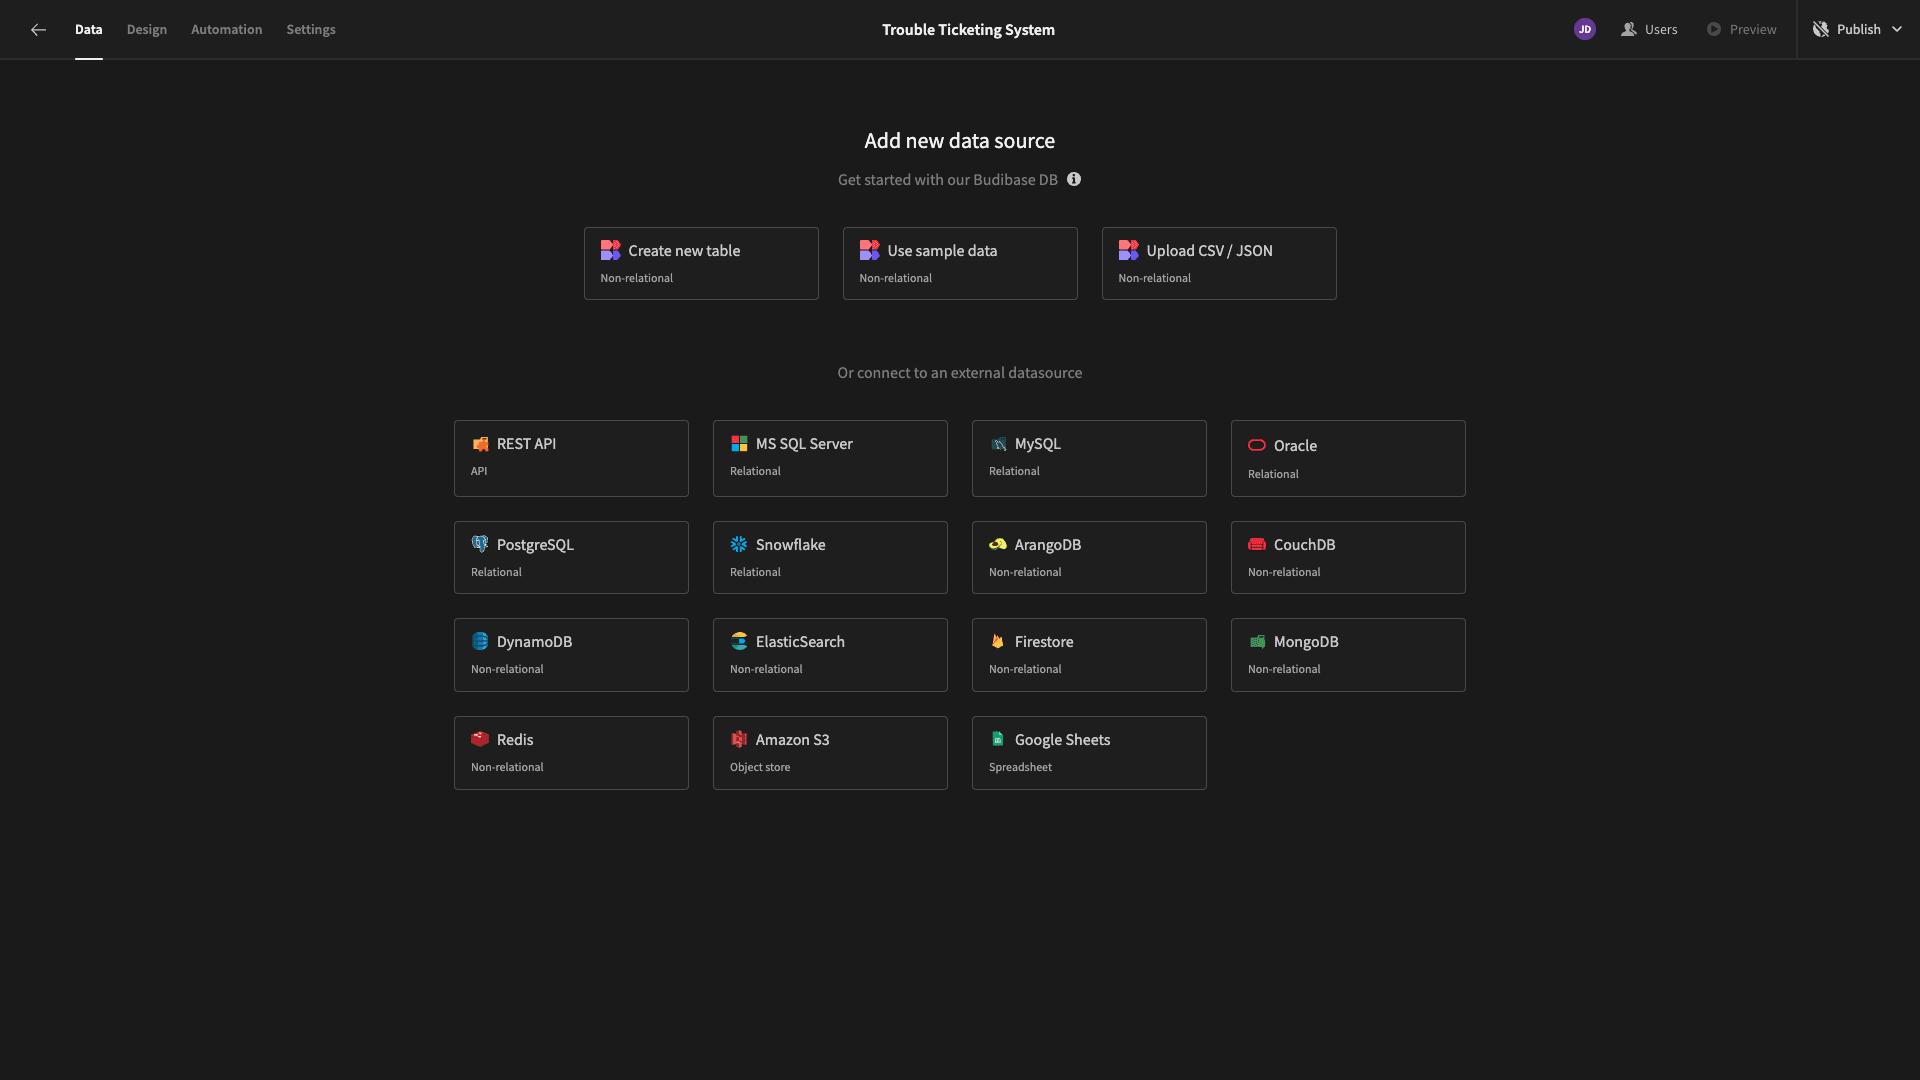
As we said earlier, today, we’re using a preexisting Postgres database. When we choose this option, we’ll be prompted to input our config details.
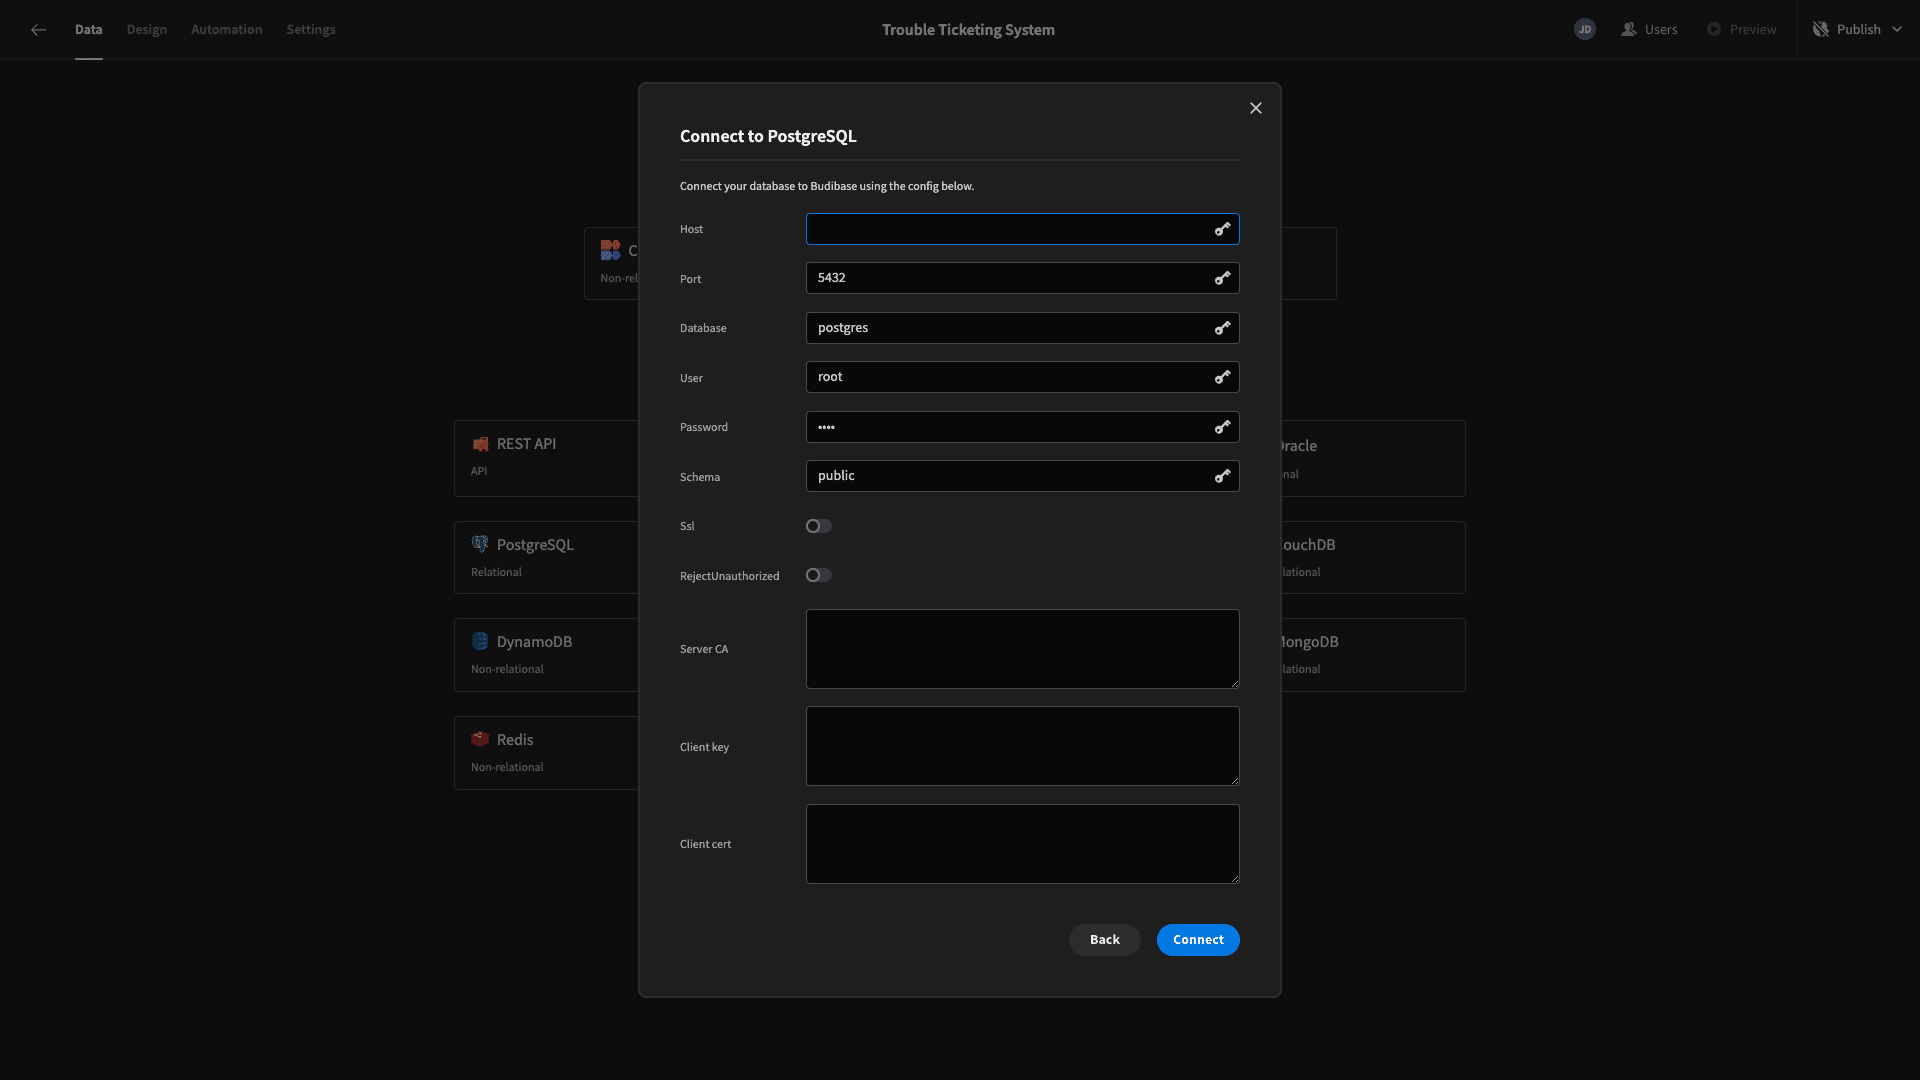
You can use whatever Postgres database you want. We’ll give you the queries to create our tables in a second.
When we’ve entered our connection details, we’ll then be asked which tables we’d like to fetch, making them queryable within Budibase. Our database has two tables called tickets and comments. We’re fetching both.
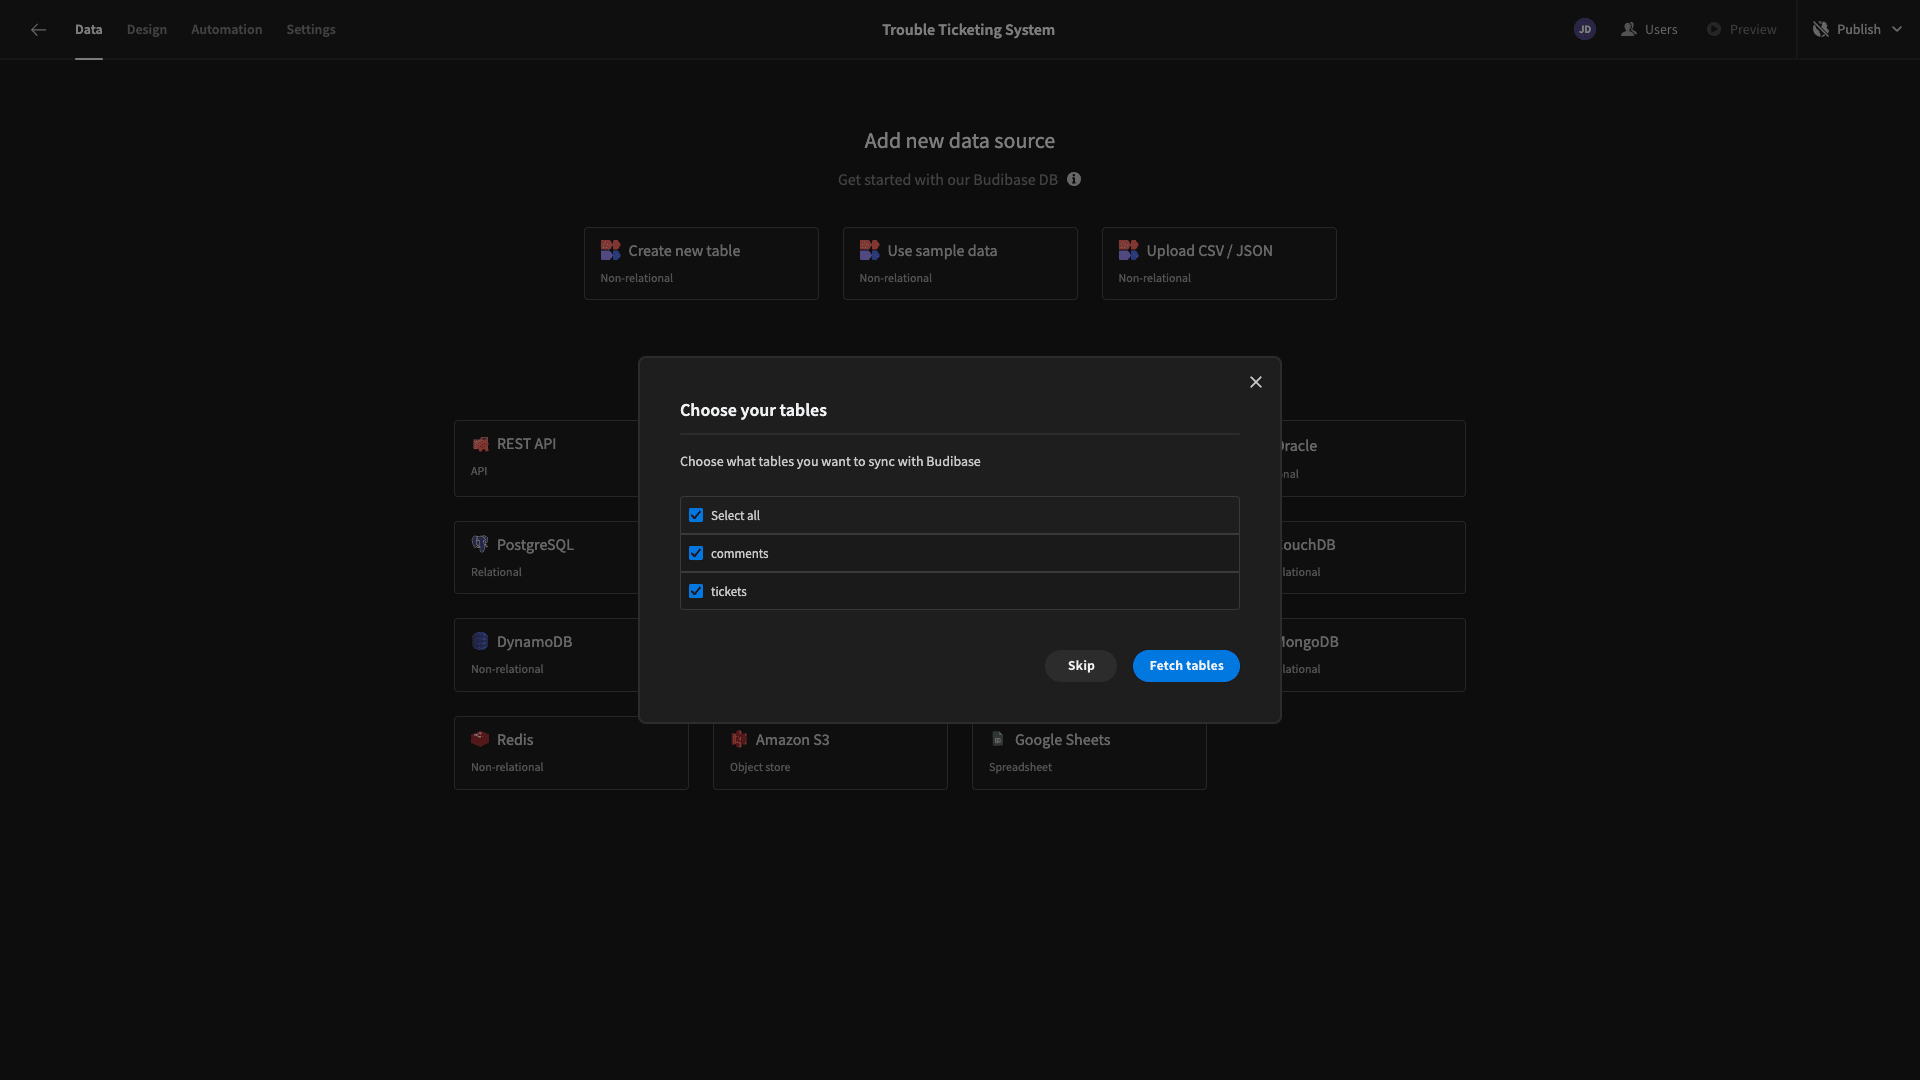
We can now edit each of their values and schemas within Budibase’s Data section.
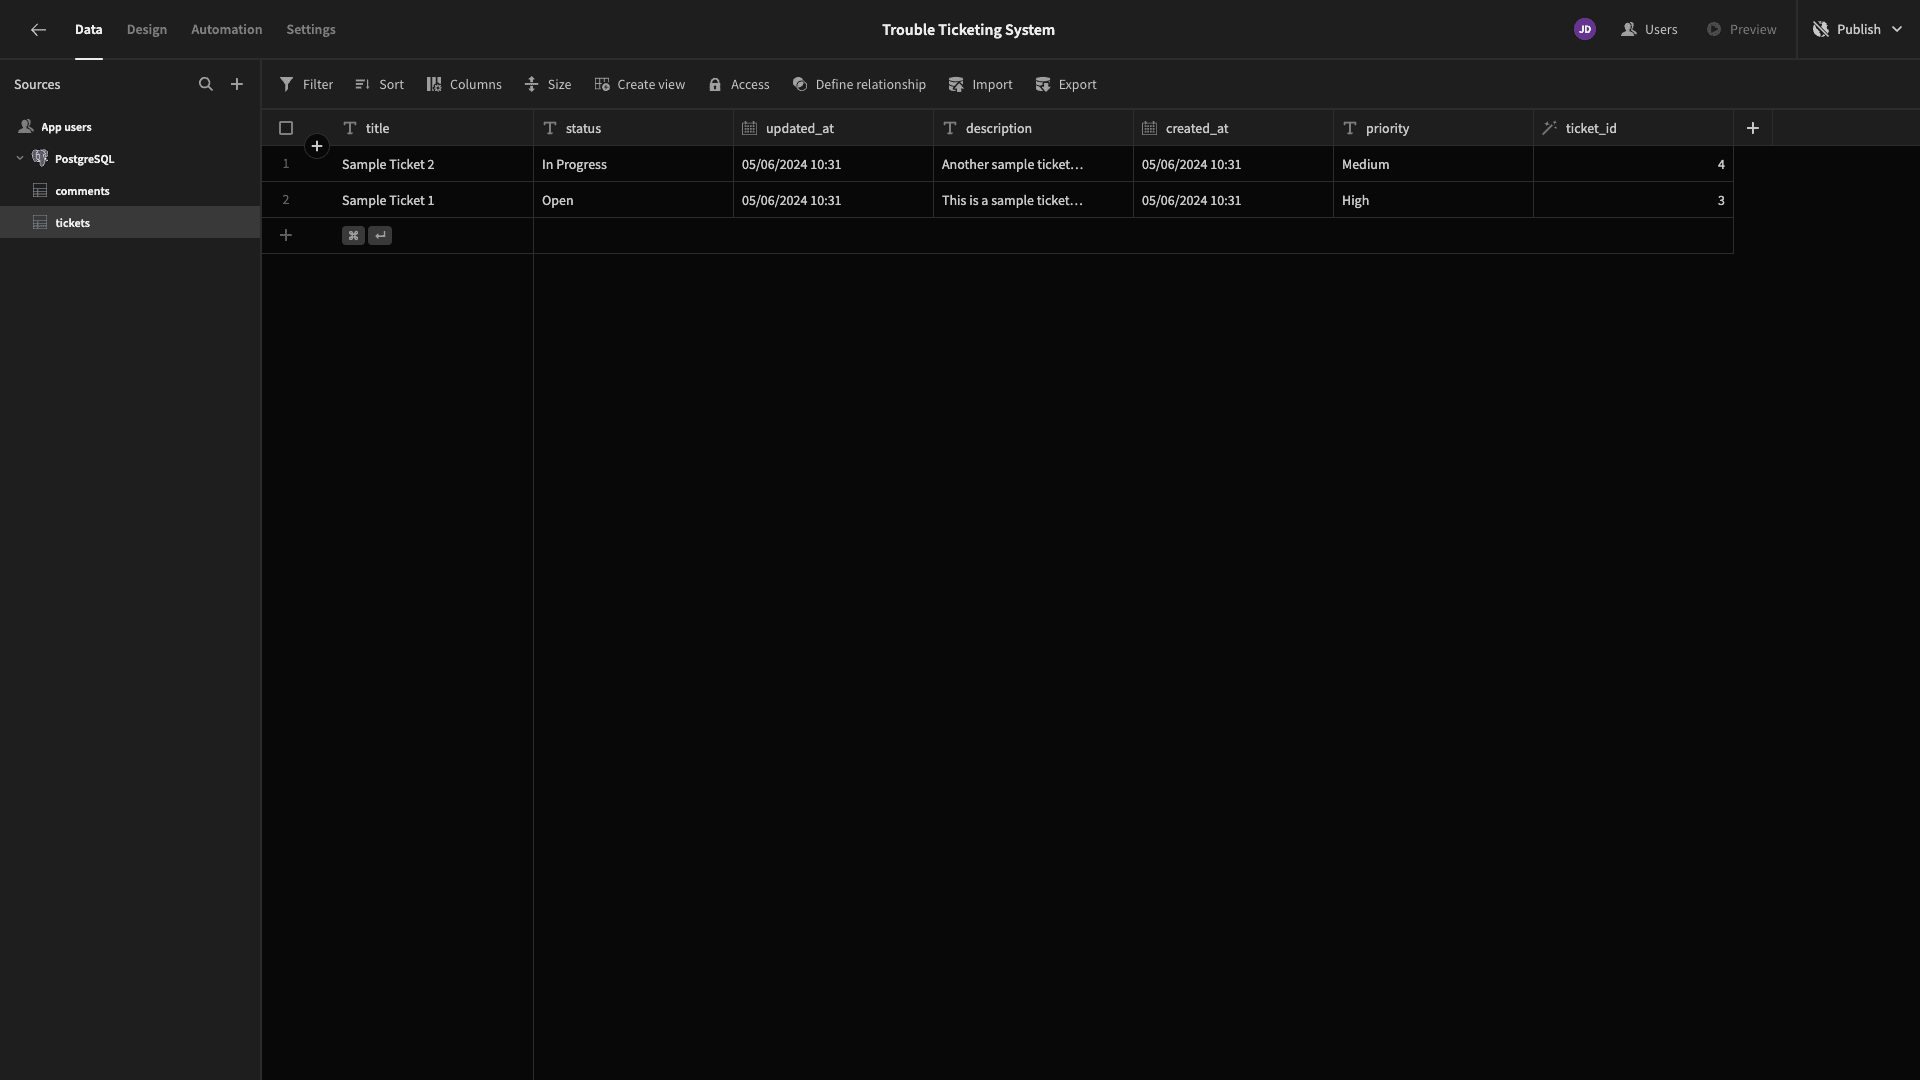
The tickets table stores values called title, status, created_at, description, updated_at, priority, and ticket_id. The comments table has columns called comment, created_at, comment_id, and ticket_id.
You can create these in your own database using the following query.
 1-- Creating the tickets table
 2
 3CREATE TABLE tickets (
 4
 5  ticket_id SERIAL PRIMARY KEY,
 6
 7  title VARCHAR(255) NOT NULL,
 8
 9  description TEXT NOT NULL,
10
11  status VARCHAR(50) NOT NULL,
12
13  priority VARCHAR(50) NOT NULL,
14
15  created_at TIMESTAMP NOT NULL,
16
17  updated_at TIMESTAMP NOT NULL
18
19);
20
21-- Creating the comments table
22
23CREATE TABLE comments (
24
25  comment_id SERIAL PRIMARY KEY,
26
27  ticket_id INT NOT NULL,
28
29  comment TEXT NOT NULL,
30
31  created_at TIMESTAMP NOT NULL,
32
33  FOREIGN KEY (ticket_id) REFERENCES tickets(ticket_id)
34
35);
36
37-- Inserting sample data into tickets table
38
39INSERT INTO tickets (title, description, status, priority, created_at, updated_at)
40
41VALUES
42
43('Sample Ticket 1', 'This is a sample ticket description.', 'Open', 'High', '2024-06-01 10:00:00', '2024-06-01 10:05:00'),
44
45('Sample Ticket 2', 'Another sample ticket description.', 'In Progress', 'Medium', '2024-06-02 11:00:00', '2024-06-02 11:15:00');
46
47-- Inserting sample data into comments table
48
49INSERT INTO comments (ticket_id, comment, created_at)
50
51VALUES
52
53(1, 'This is a comment on ticket 1.', '2024-06-01 10:10:00'),
54
55(2, 'This is a comment on ticket 2.', '2024-06-02 11:20:00'),
56
57(3, 'This is a reply on ticket 1.', '2024-06-01 11:20:00');
Before we go any further, though, we’re going to make a few tweaks to each table.
First of all, we want the ability to link rows in each table to a particular user. Budibase offers dedicated columns for linking data to our internal users table.
We have the option of adding a single user or a multi-user column, depending on our needs.
We’ll start by adding a single user column to the tickets table and calling this created_by.
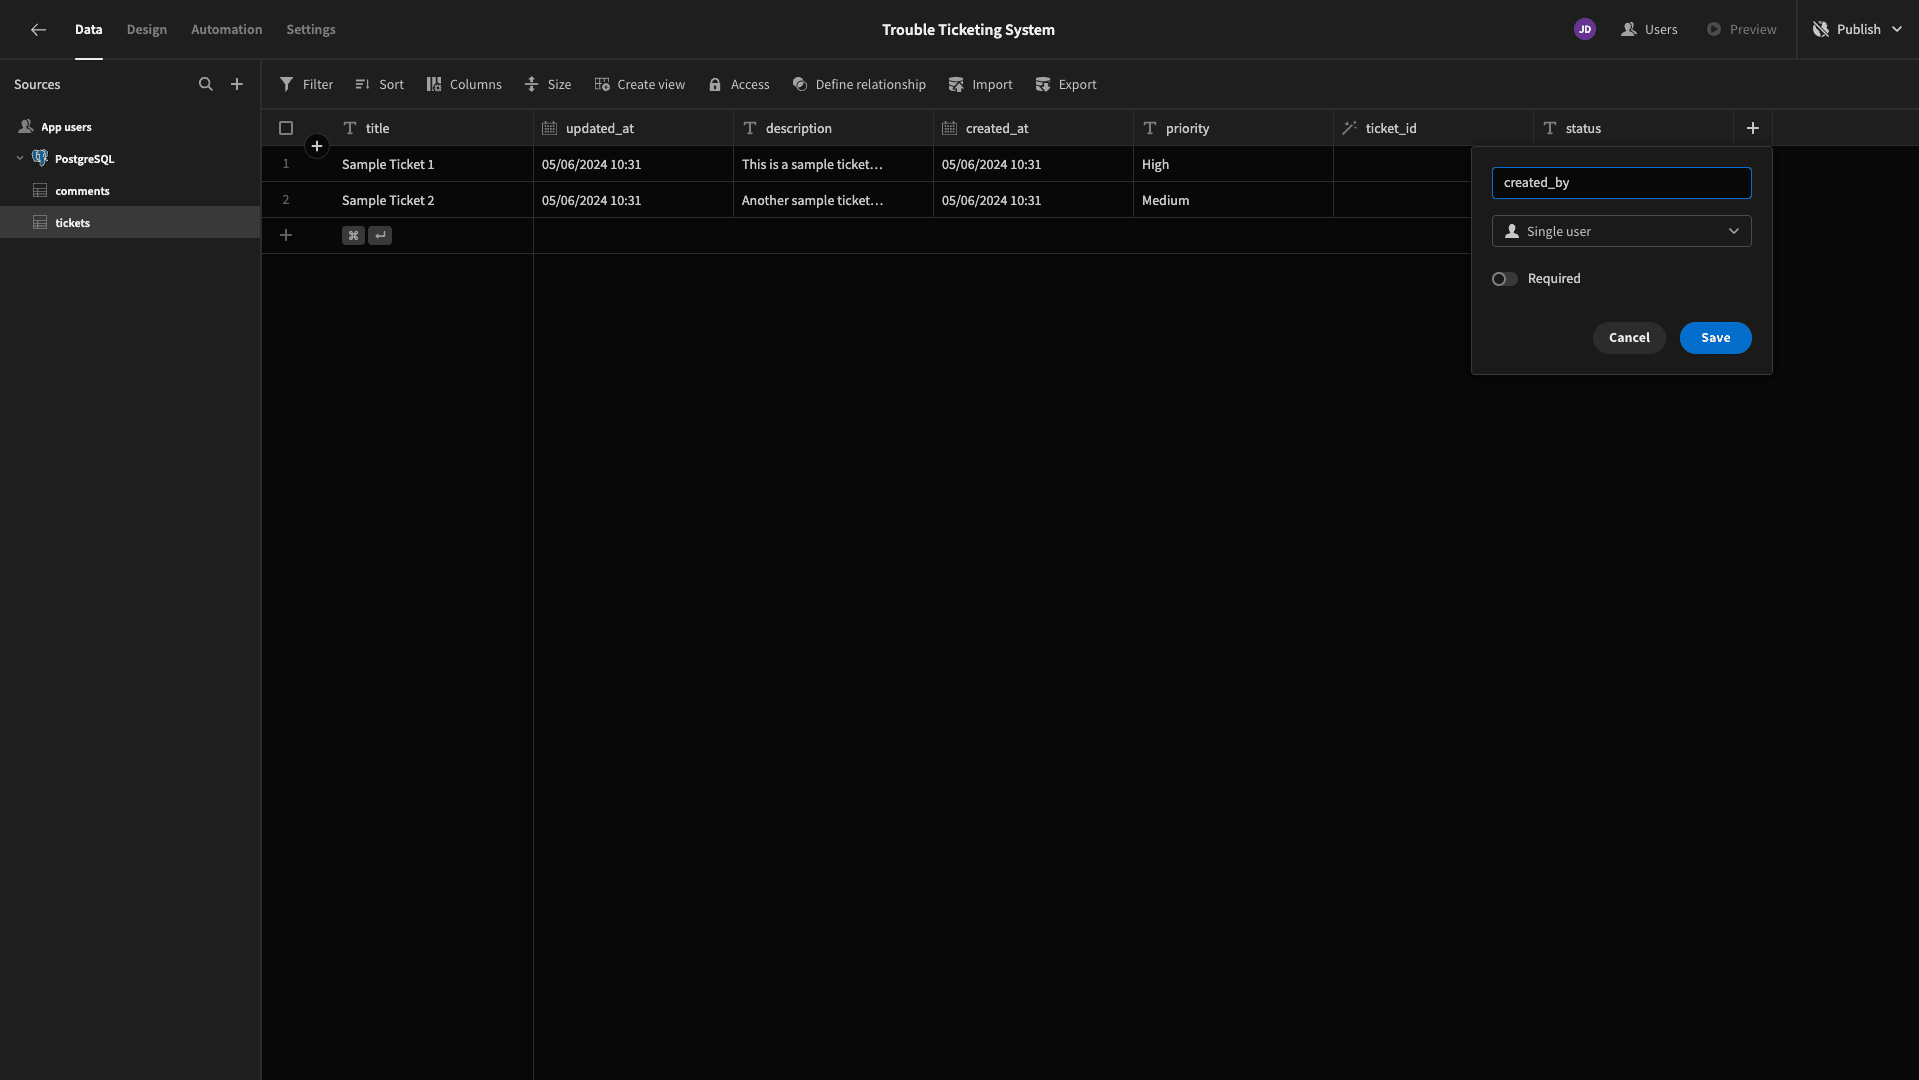
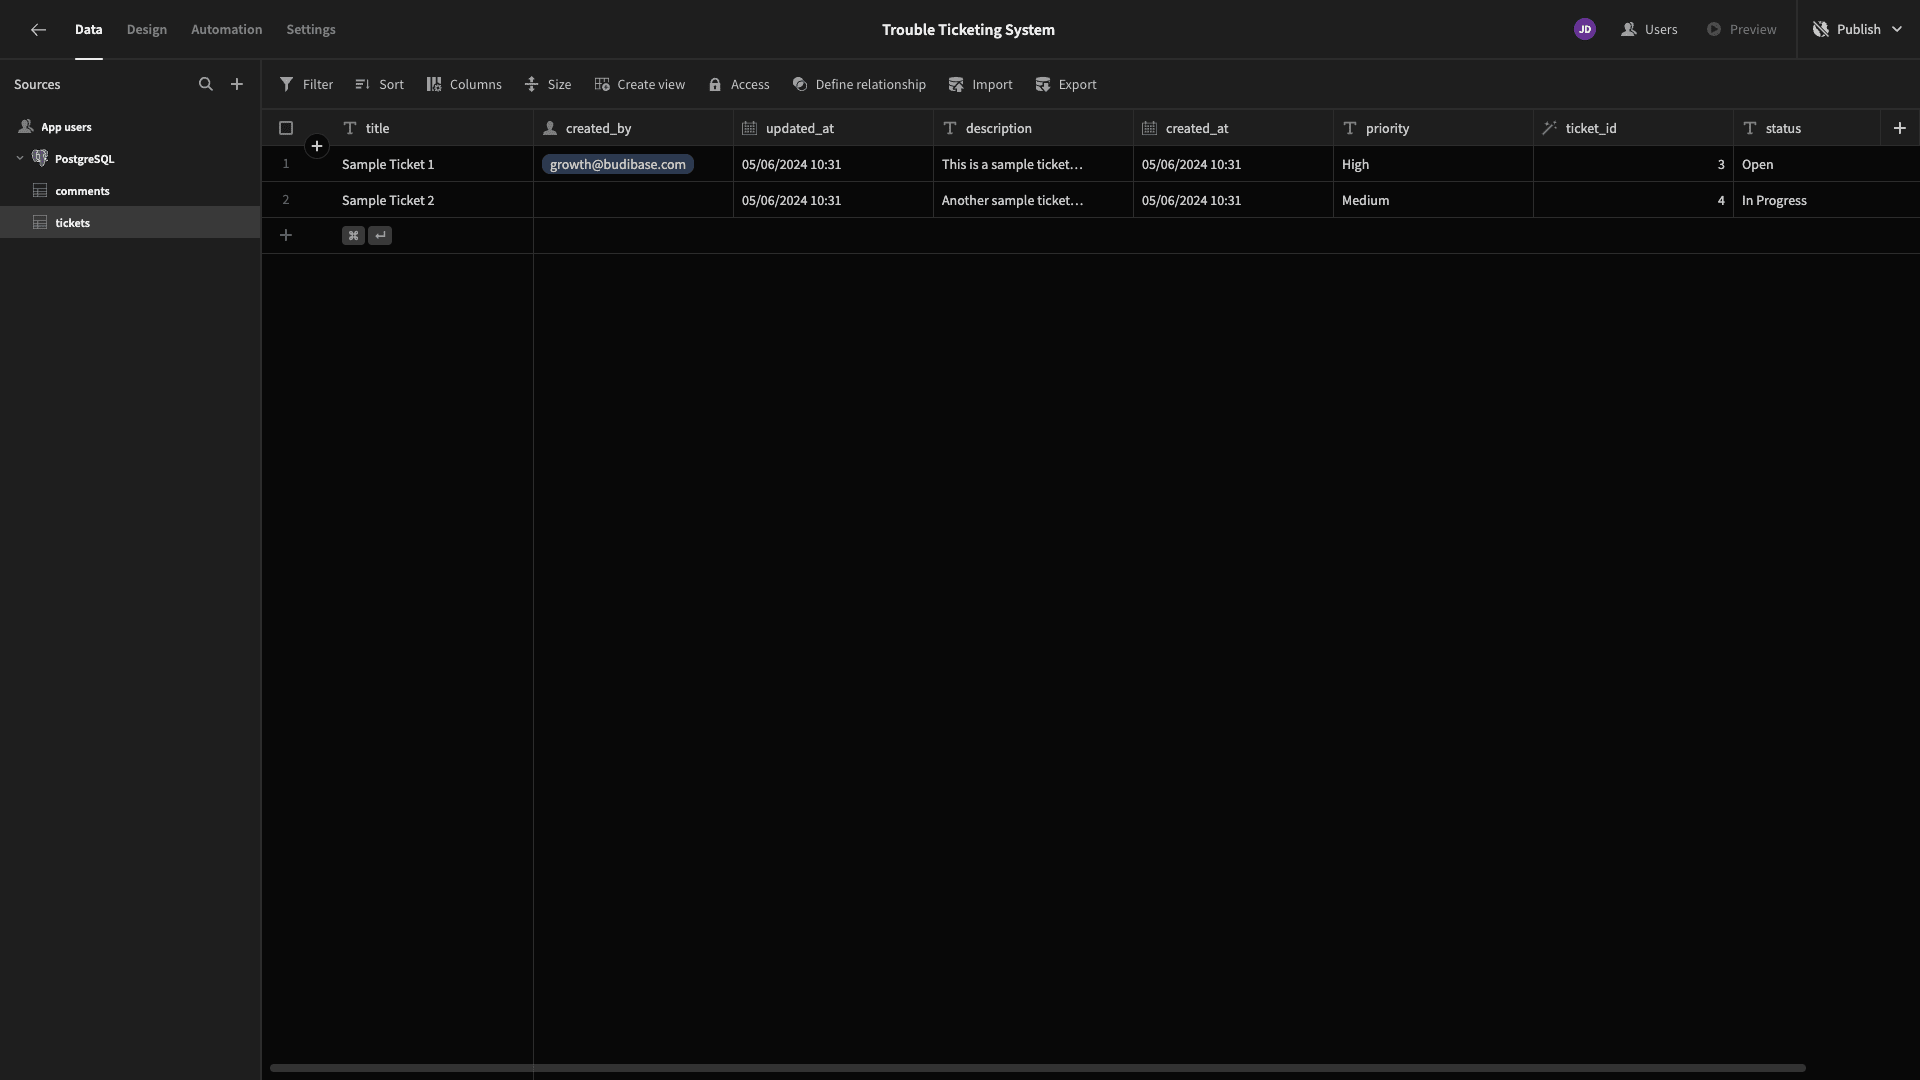
We’ll also add ourselves to one of the rows for testing purposes.
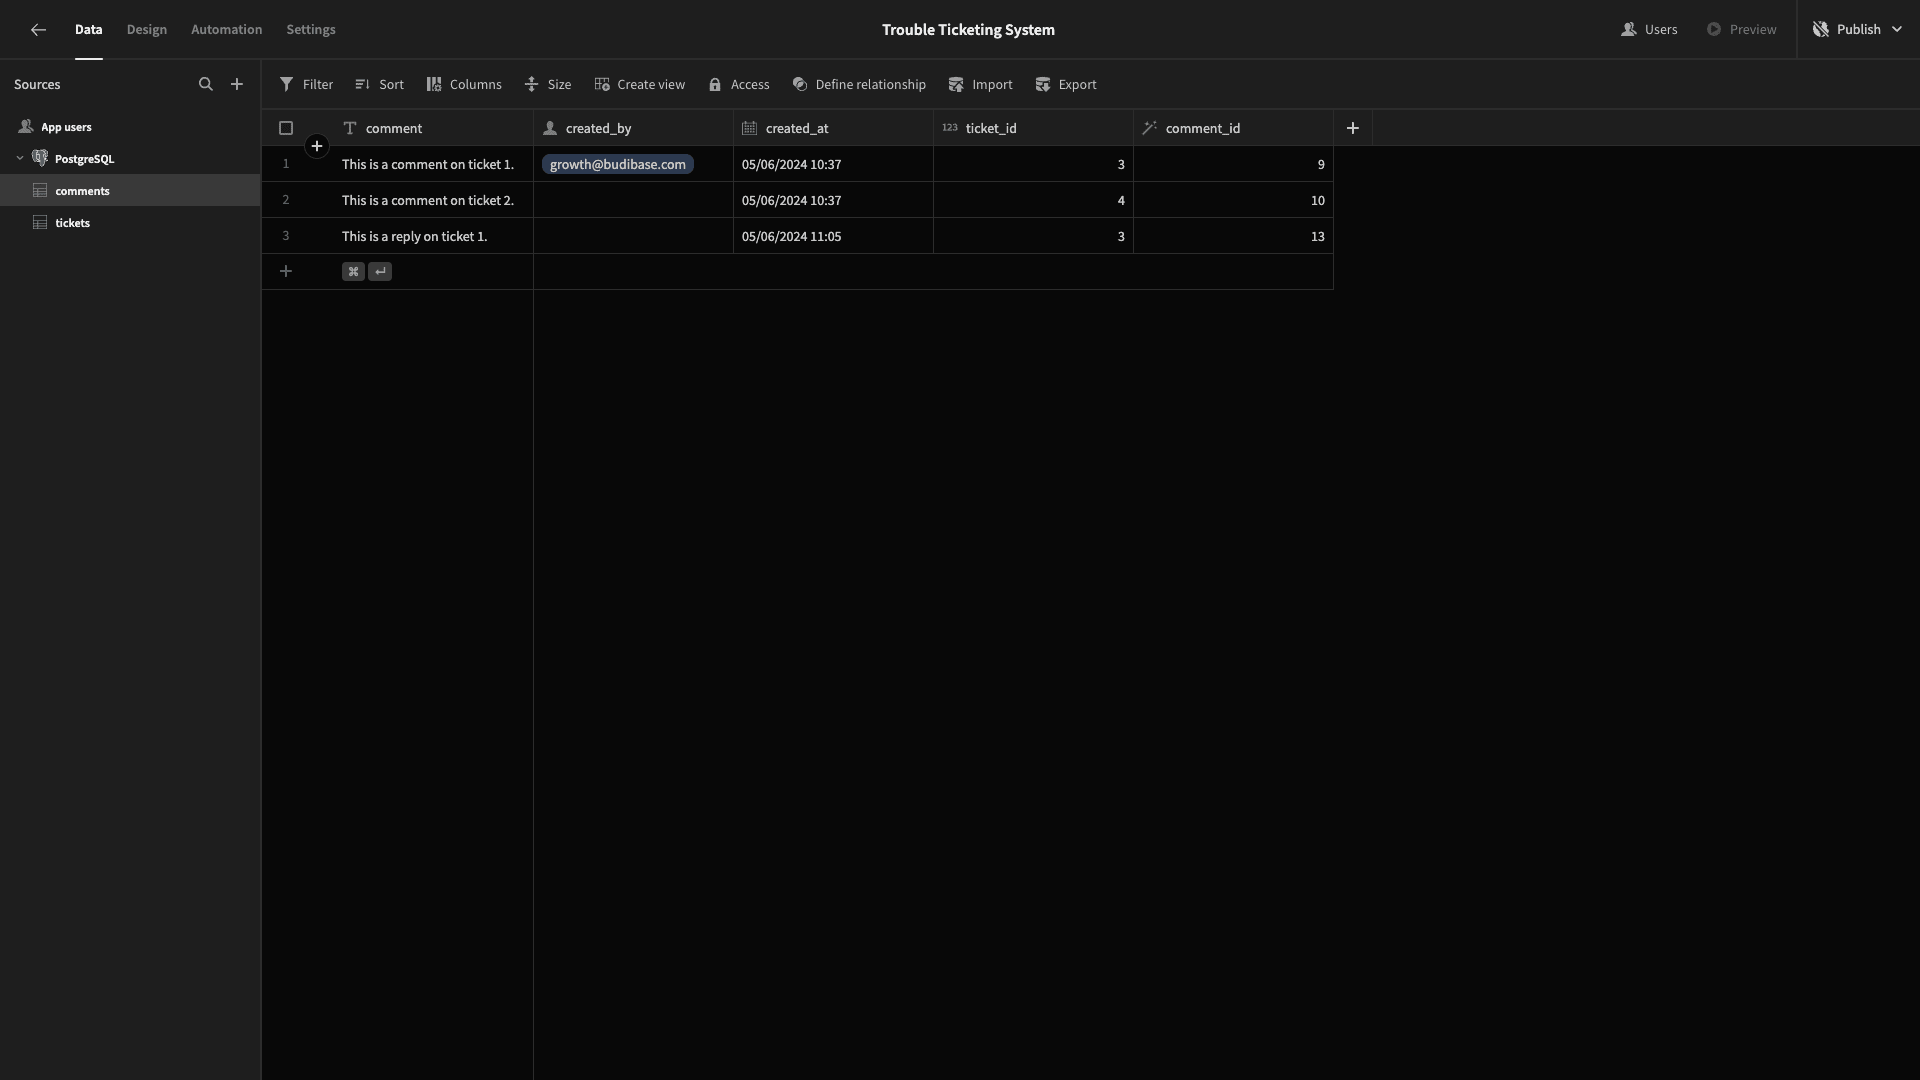
We’ll then repeat this process to add a created_by column to the comments table.
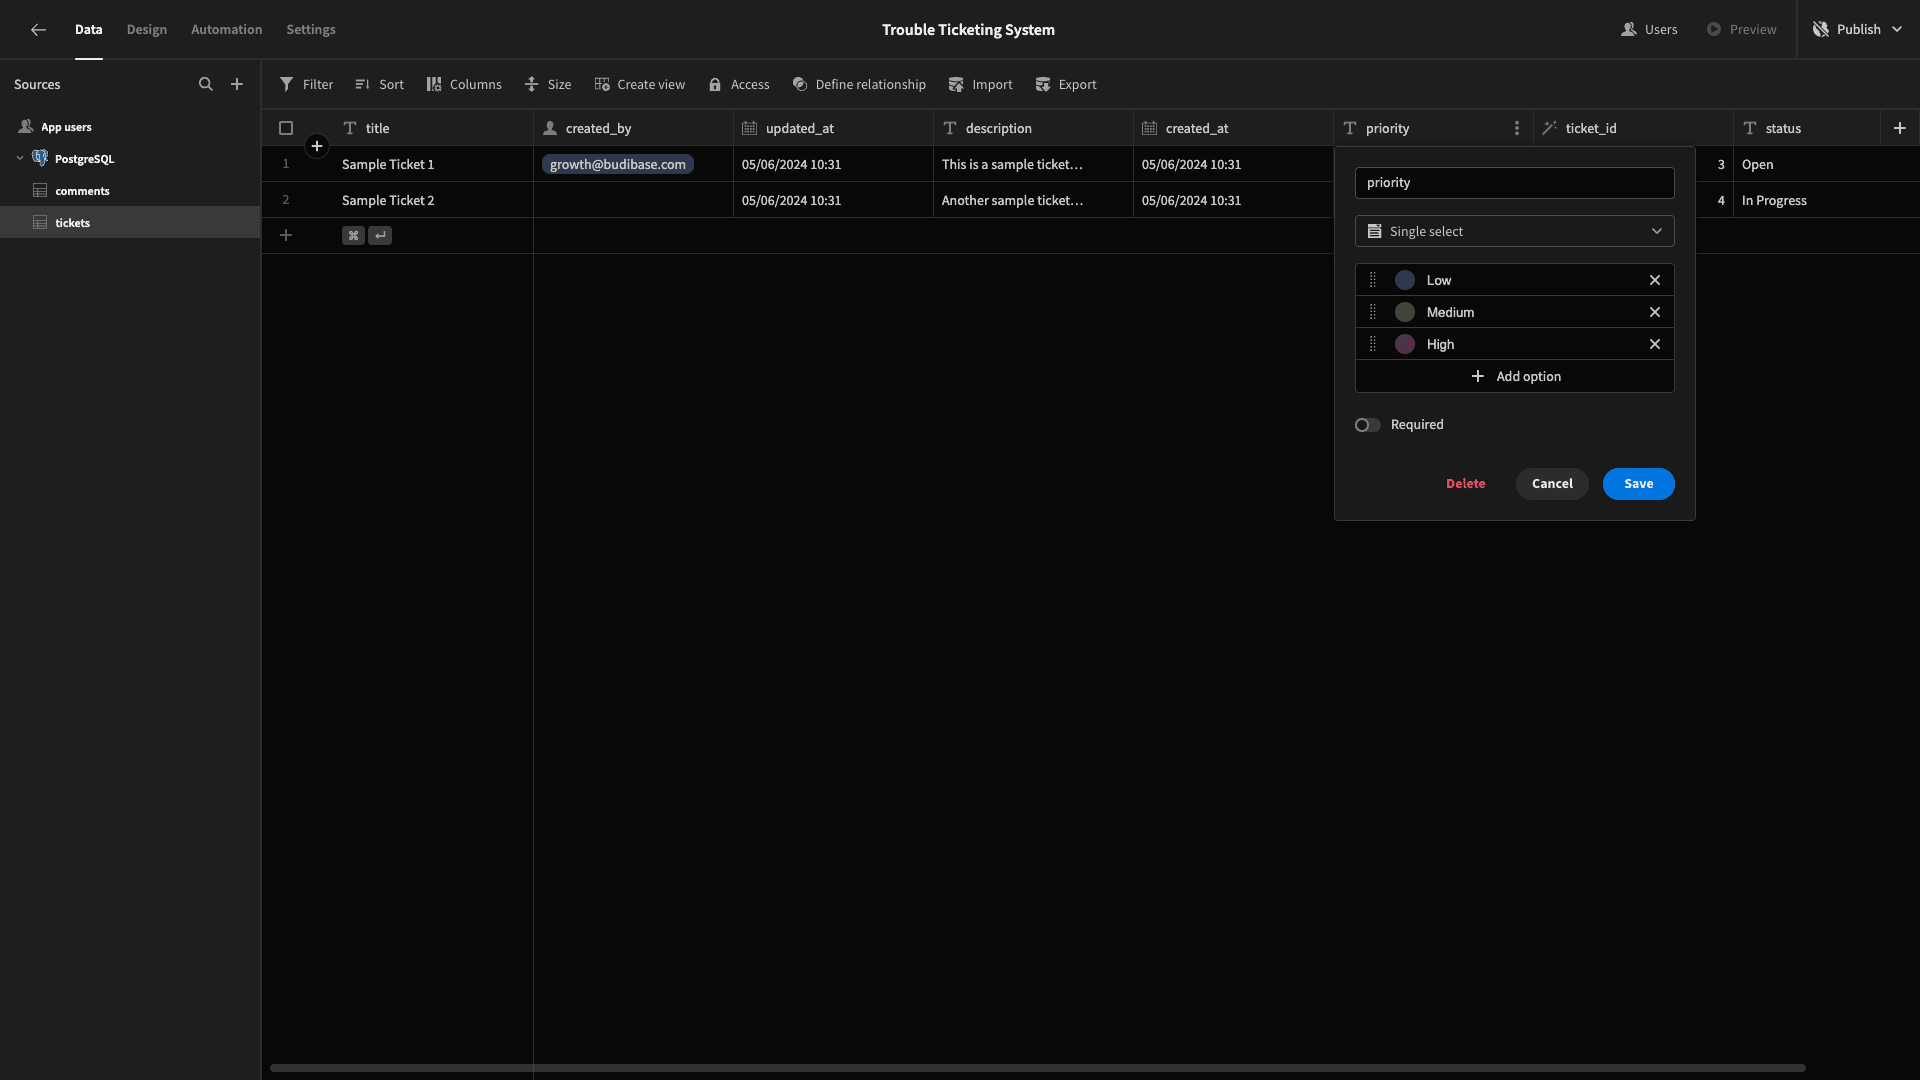
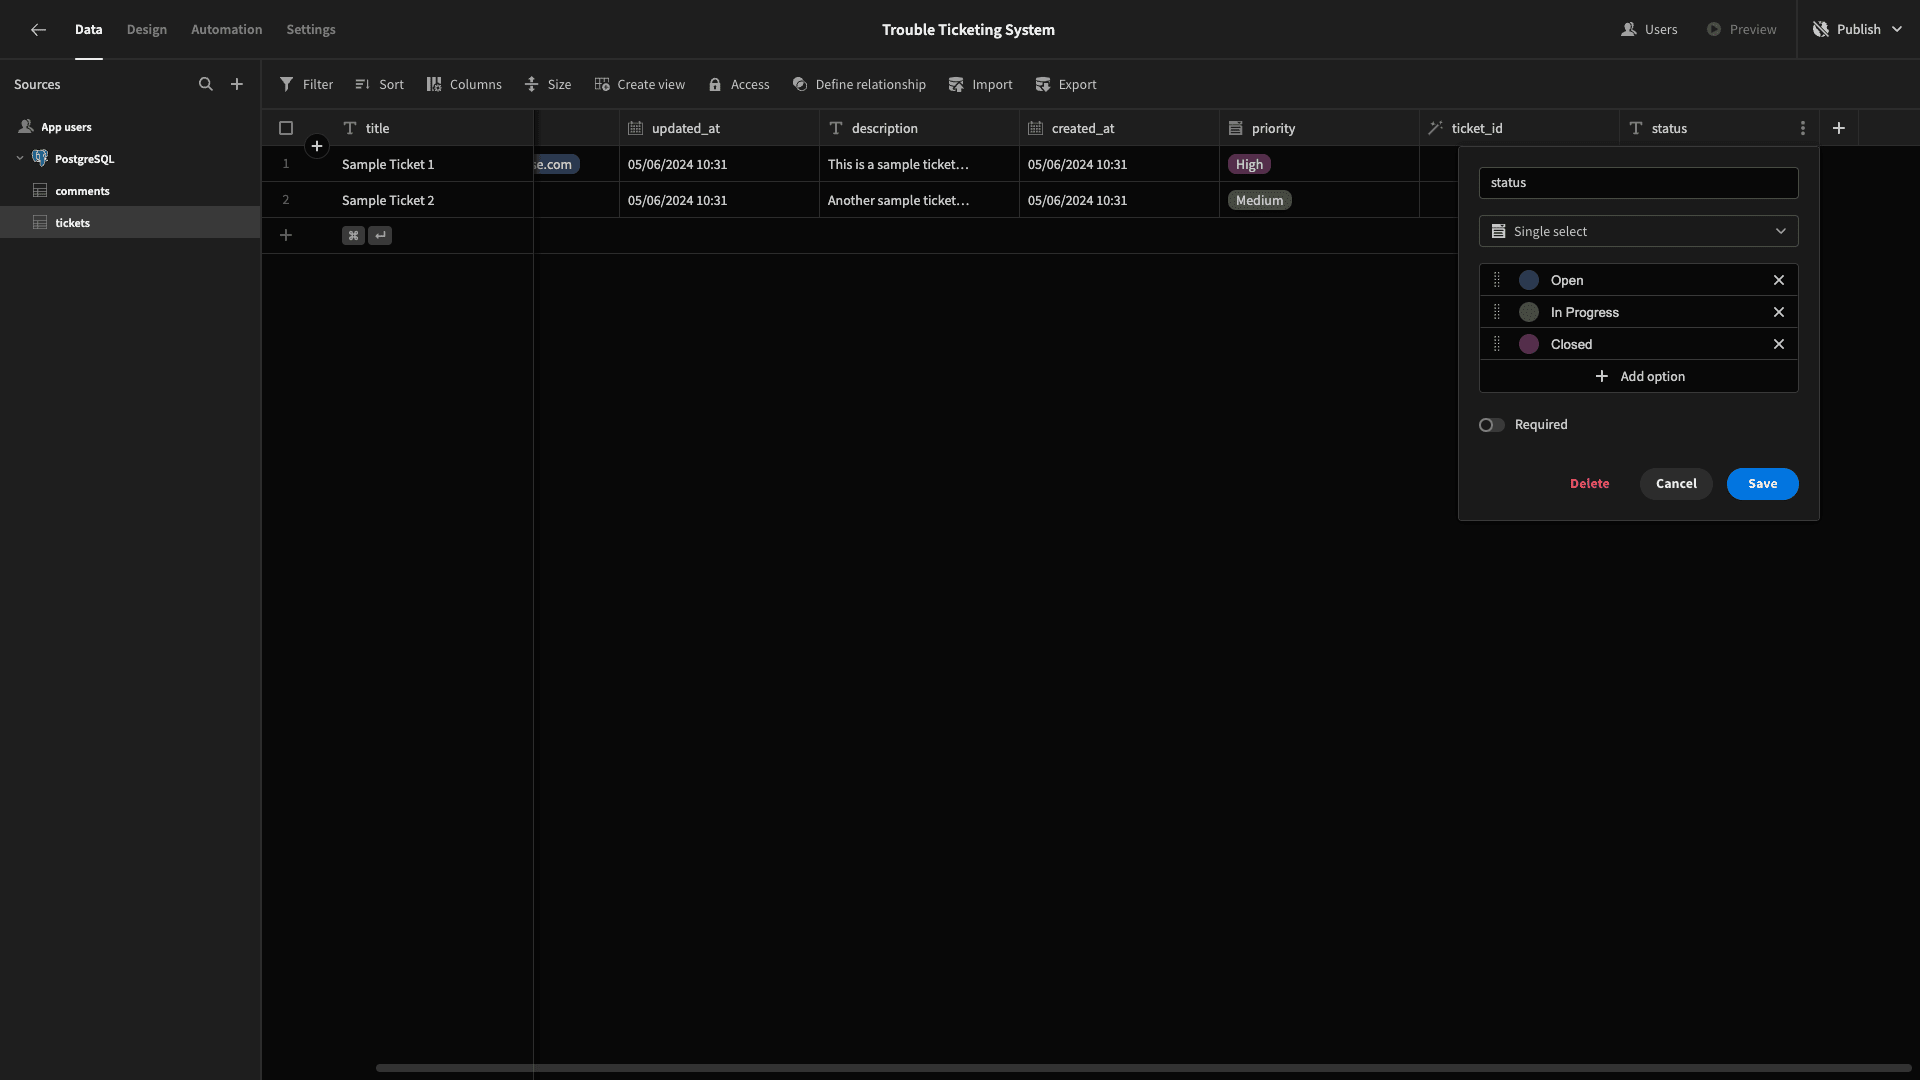
Lastly, there are a couple of attributes in our tickets table that are stored as VARCHARs, but we’d like to offer users a fixed set of options in our UIs. These are the status and priority columns.
We can hit Edit Column to update the Type setting for each of these from Text to Single Select. We can also set the available options here.
For priority, these will be Low, Medium, and High.
For the status attribute, our options will be Open, In Progress, and Closed.
And that’s our data model ready to go!
2. Building our home screen
Now, it’s time to start building the UIs for our trouble ticketing system. Head to the Design tab, and you’ll be prompted with several options for creating your first screen, including starting from scratch or using a pre-built layout.
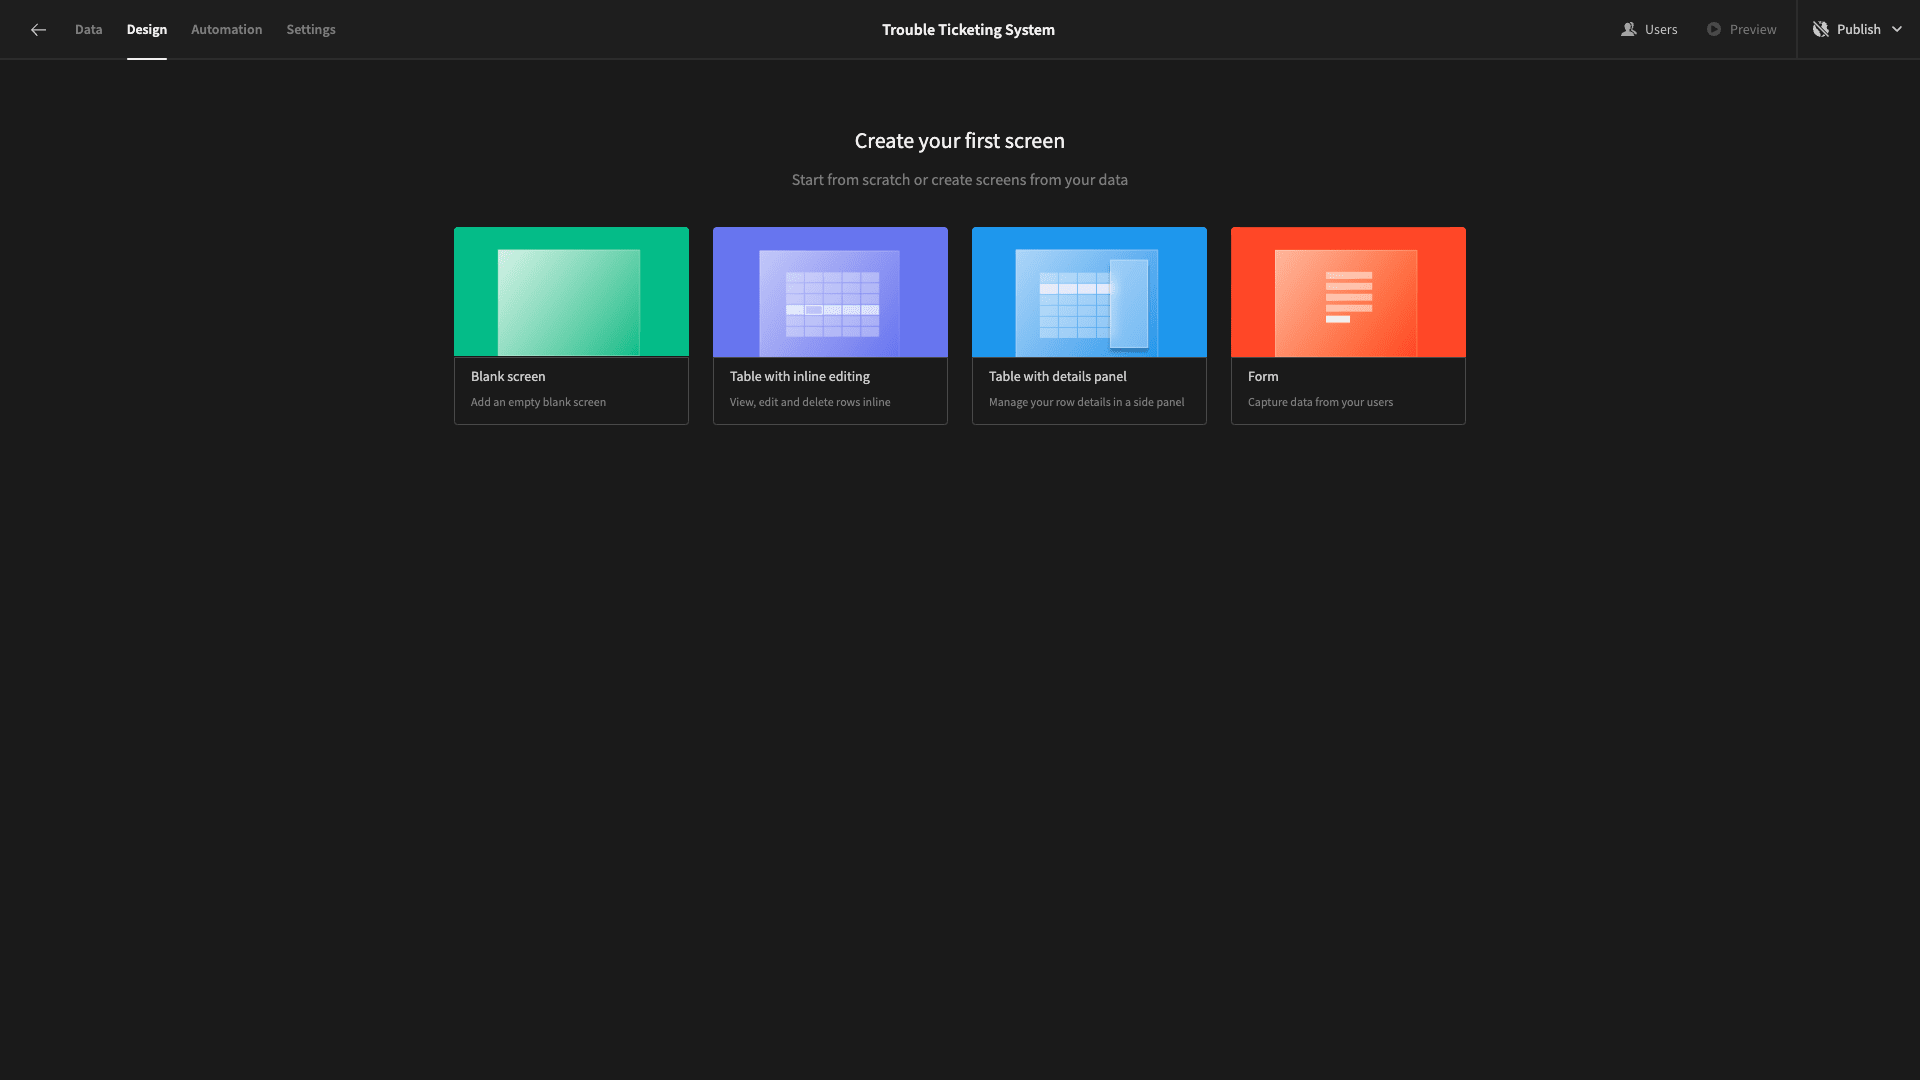
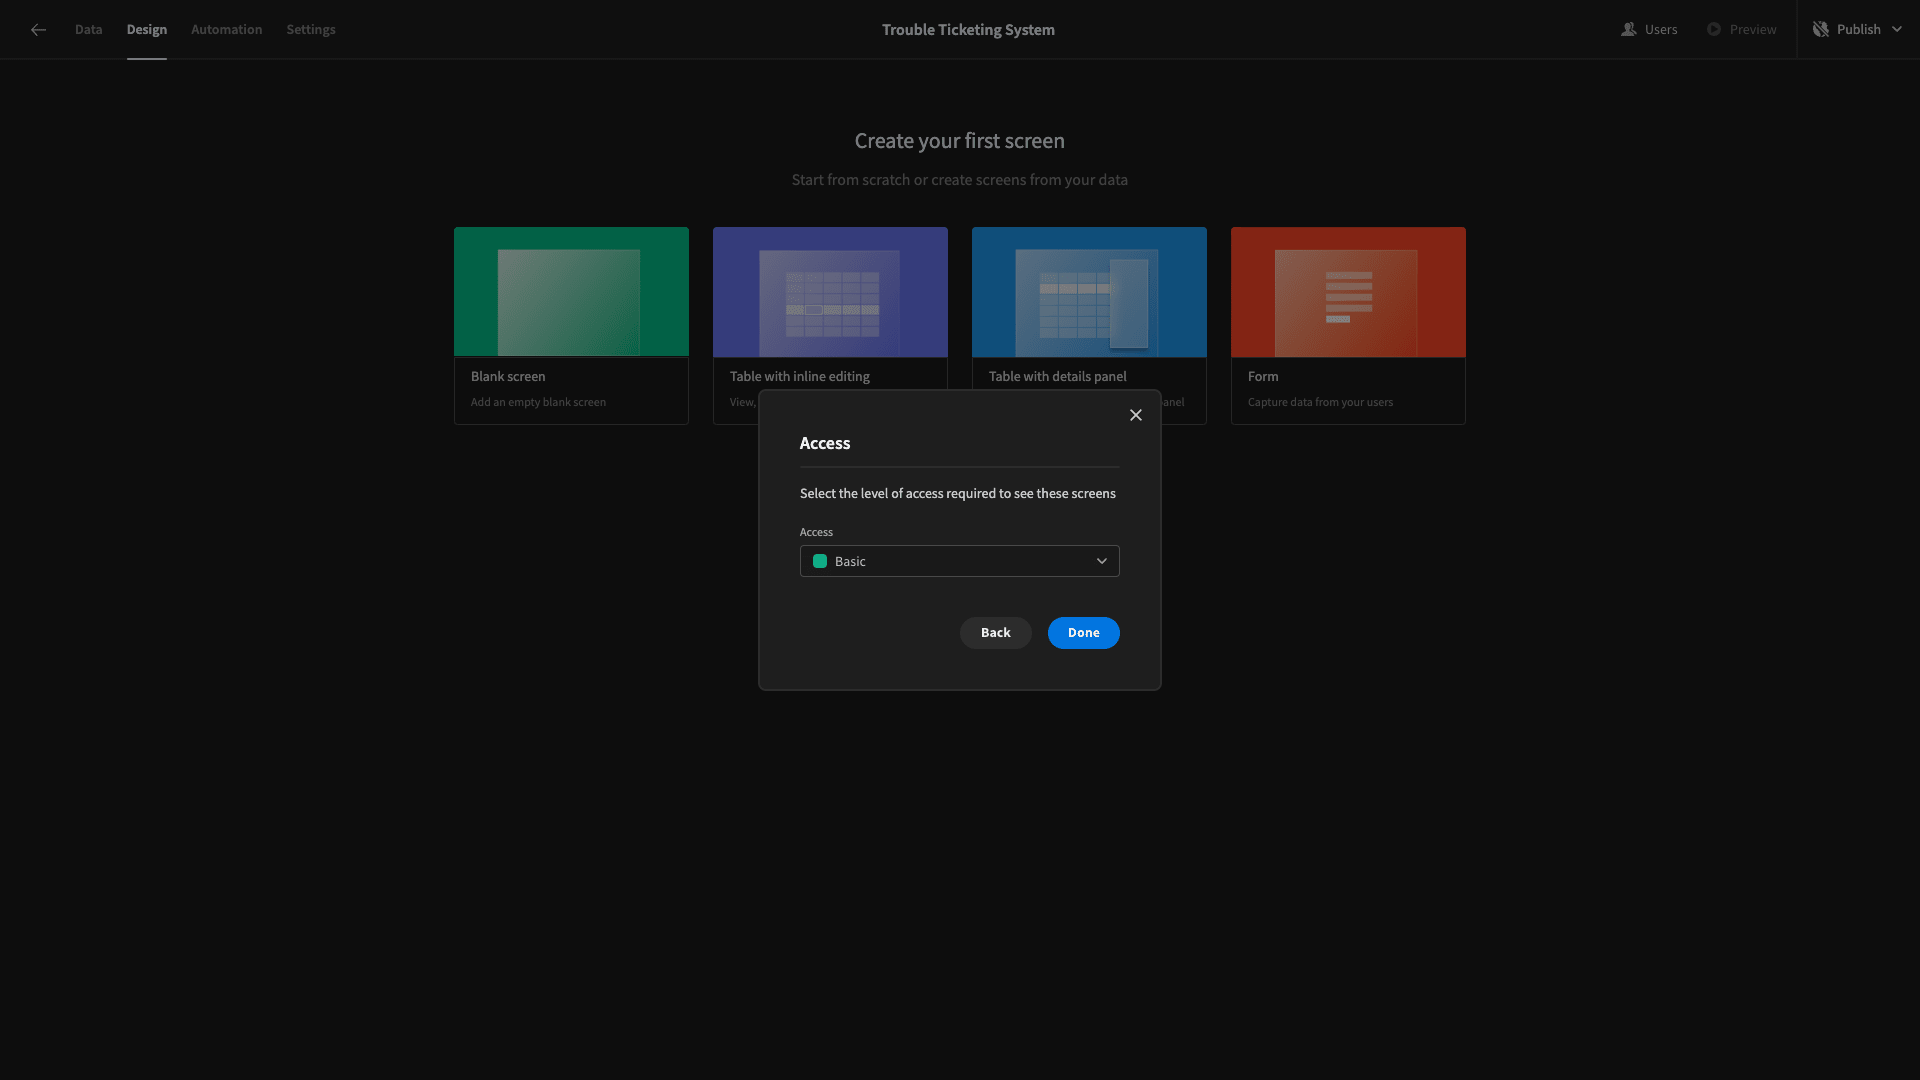
We’re going to choose the option for a table screen with details panels. This will output a working CRUD screen based on whichever internal or SQL database we point it at. We’re choosing the tickets table.
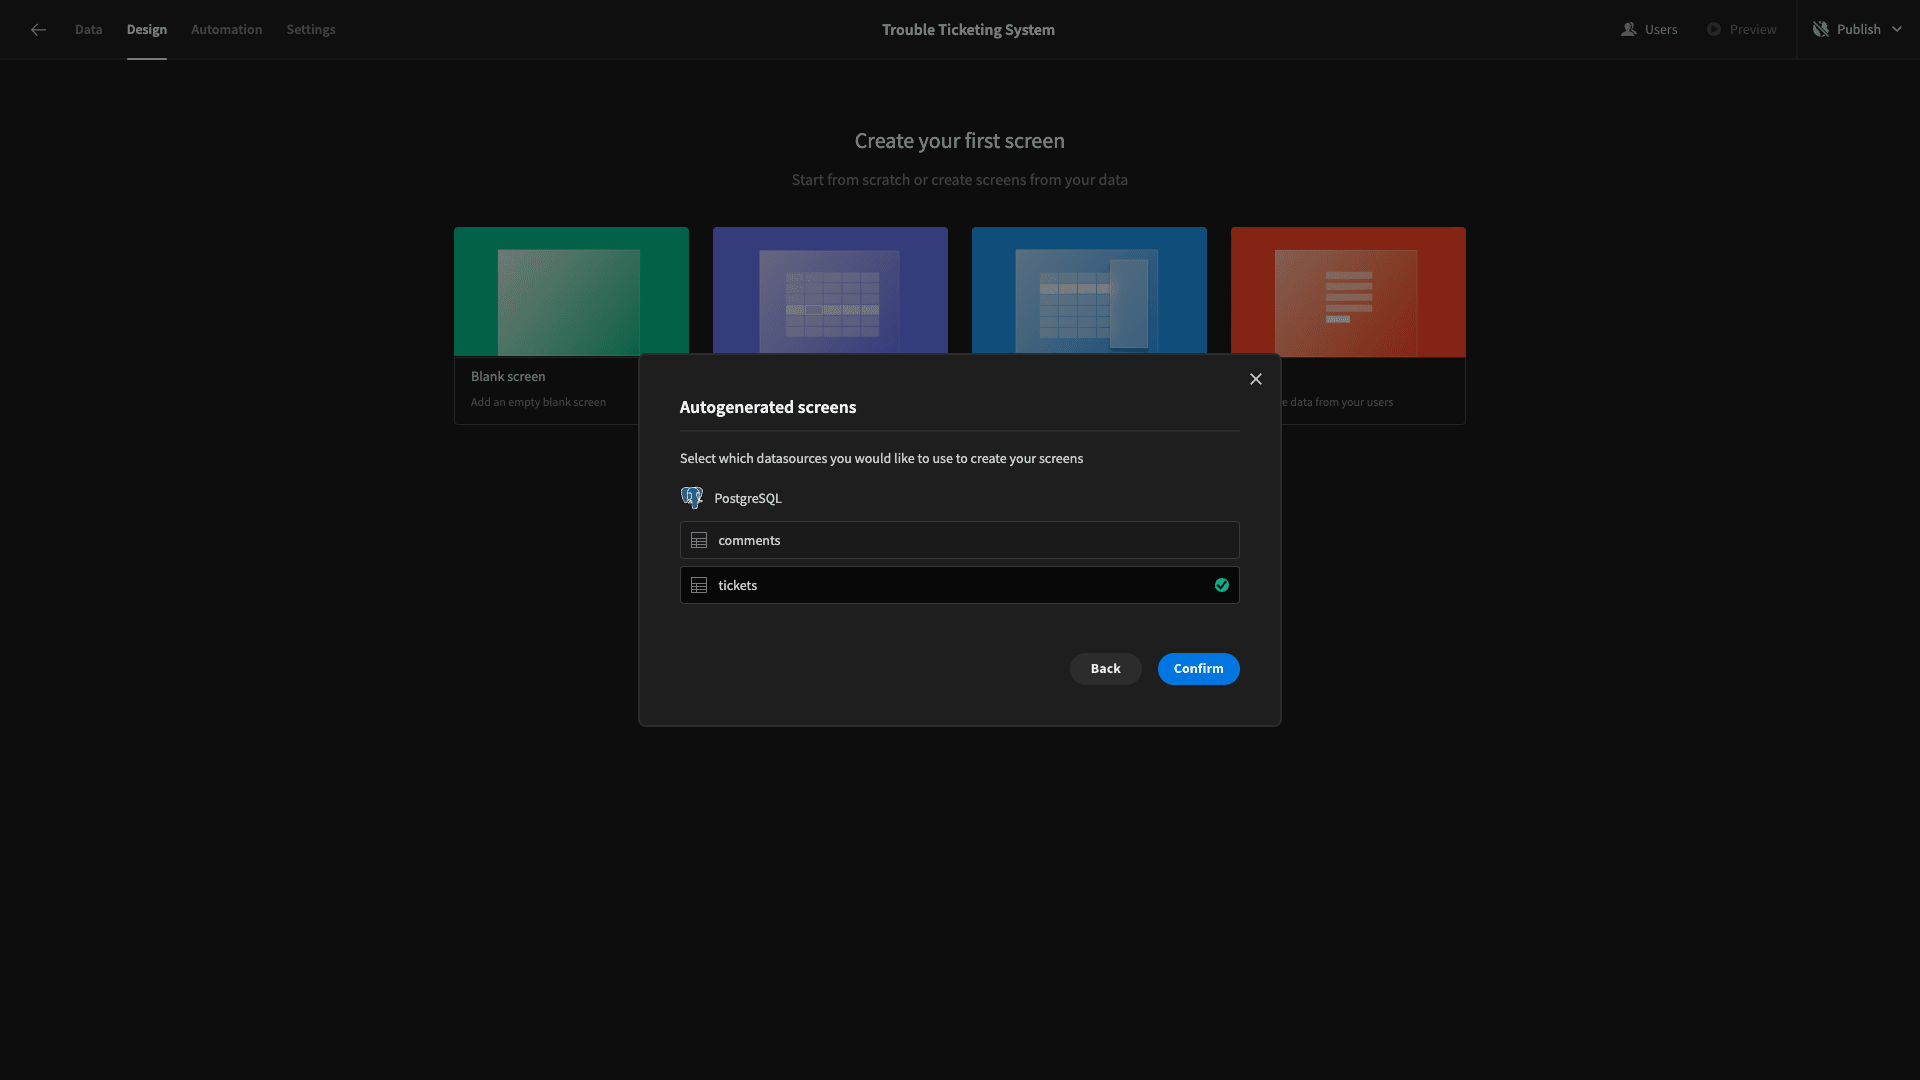
We’re then asked to choose the minimum role that’s required to access this screen. We’ll leave this set to the default option, Basic.
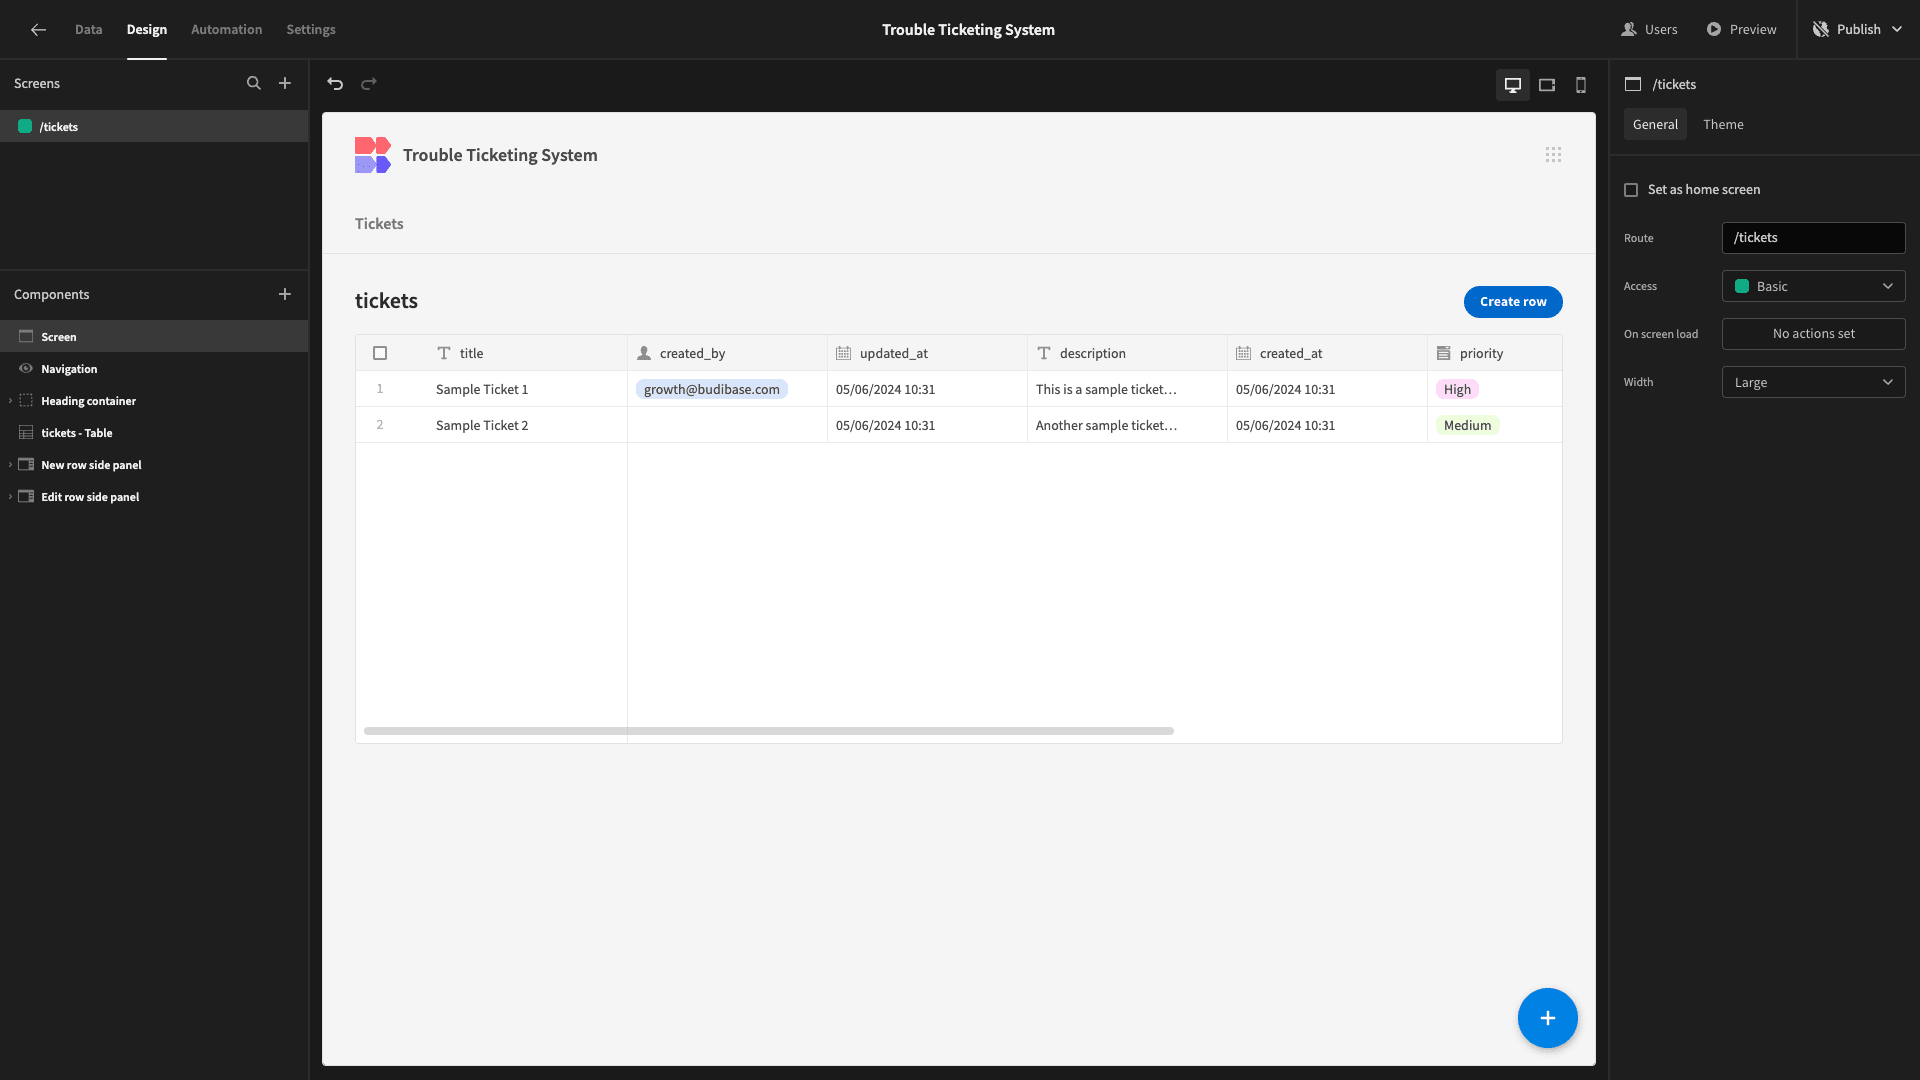
Here’s what this will look like.
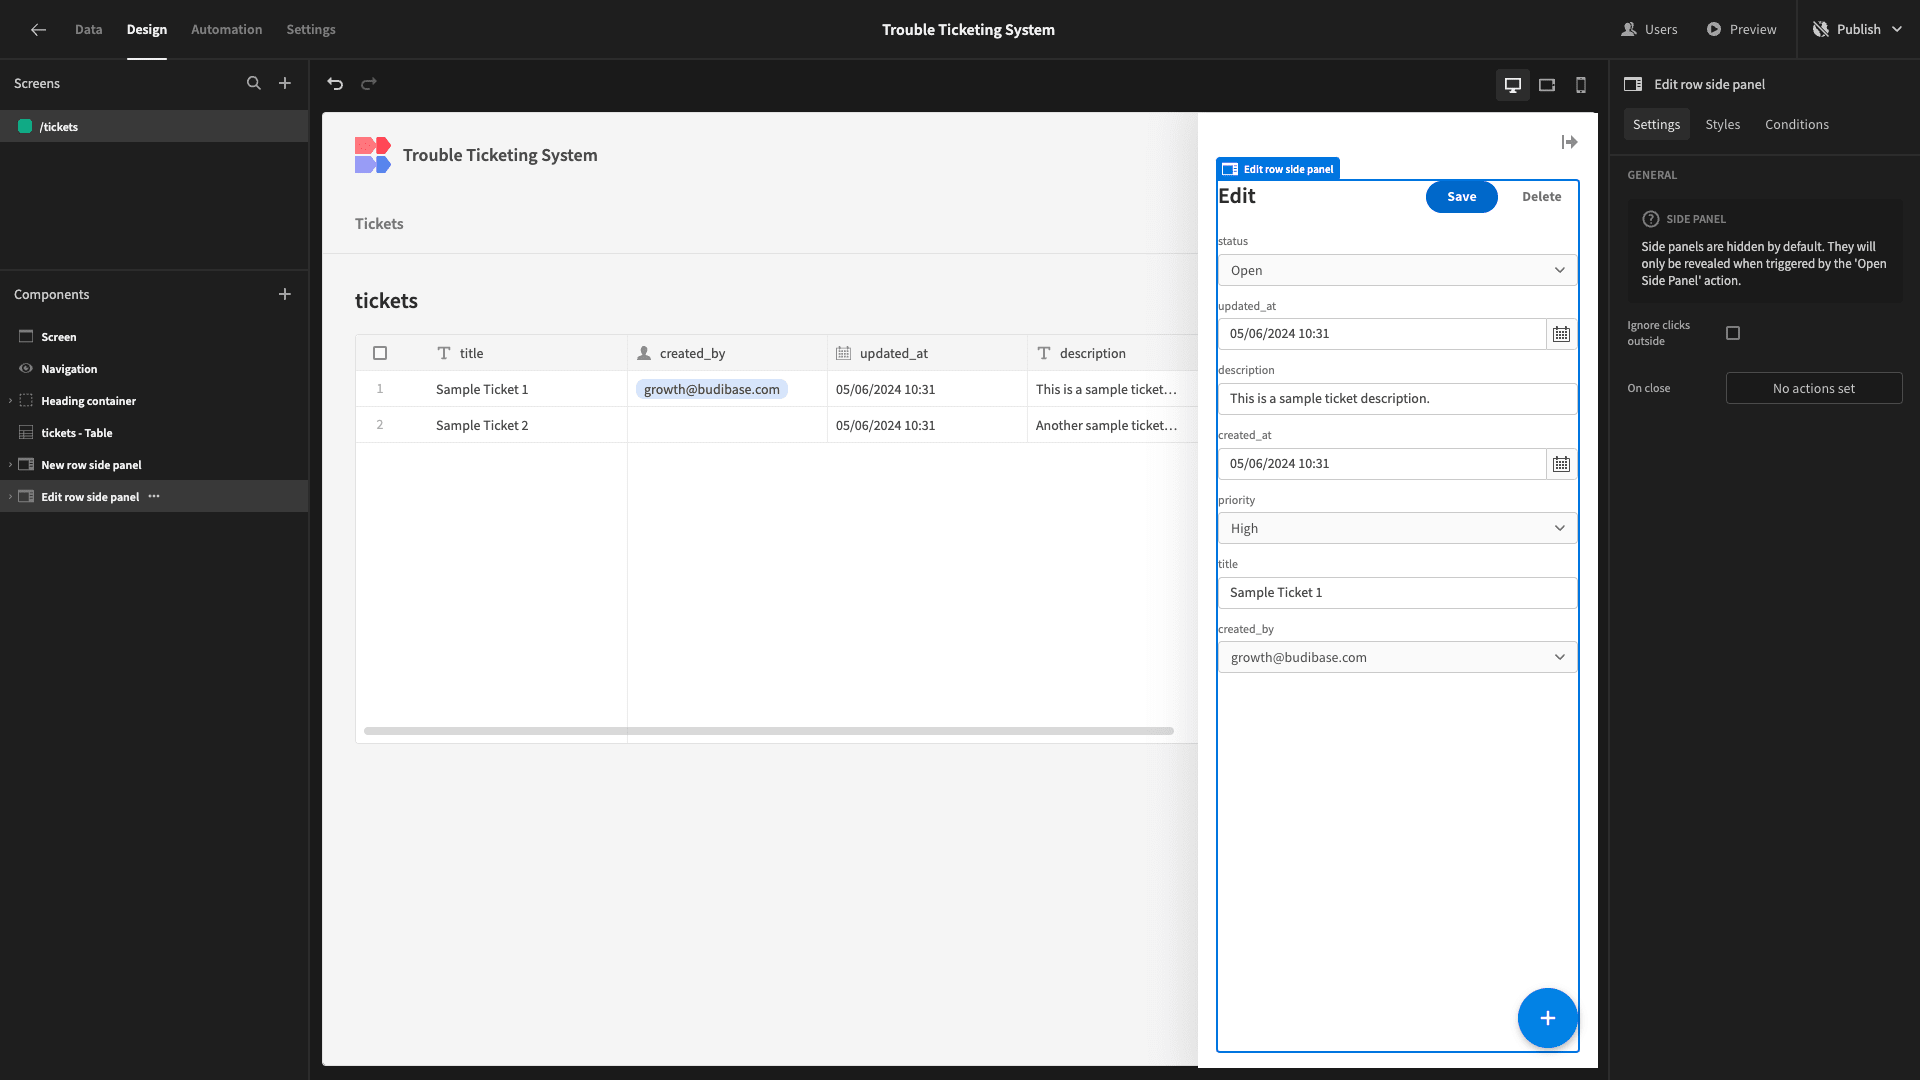
We can create, update, or delete rows using side panel forms.
When we’re finished, users will only be able to view their previous submissions and submit new tickets.
First, though, we want to tidy up the design a little bit.
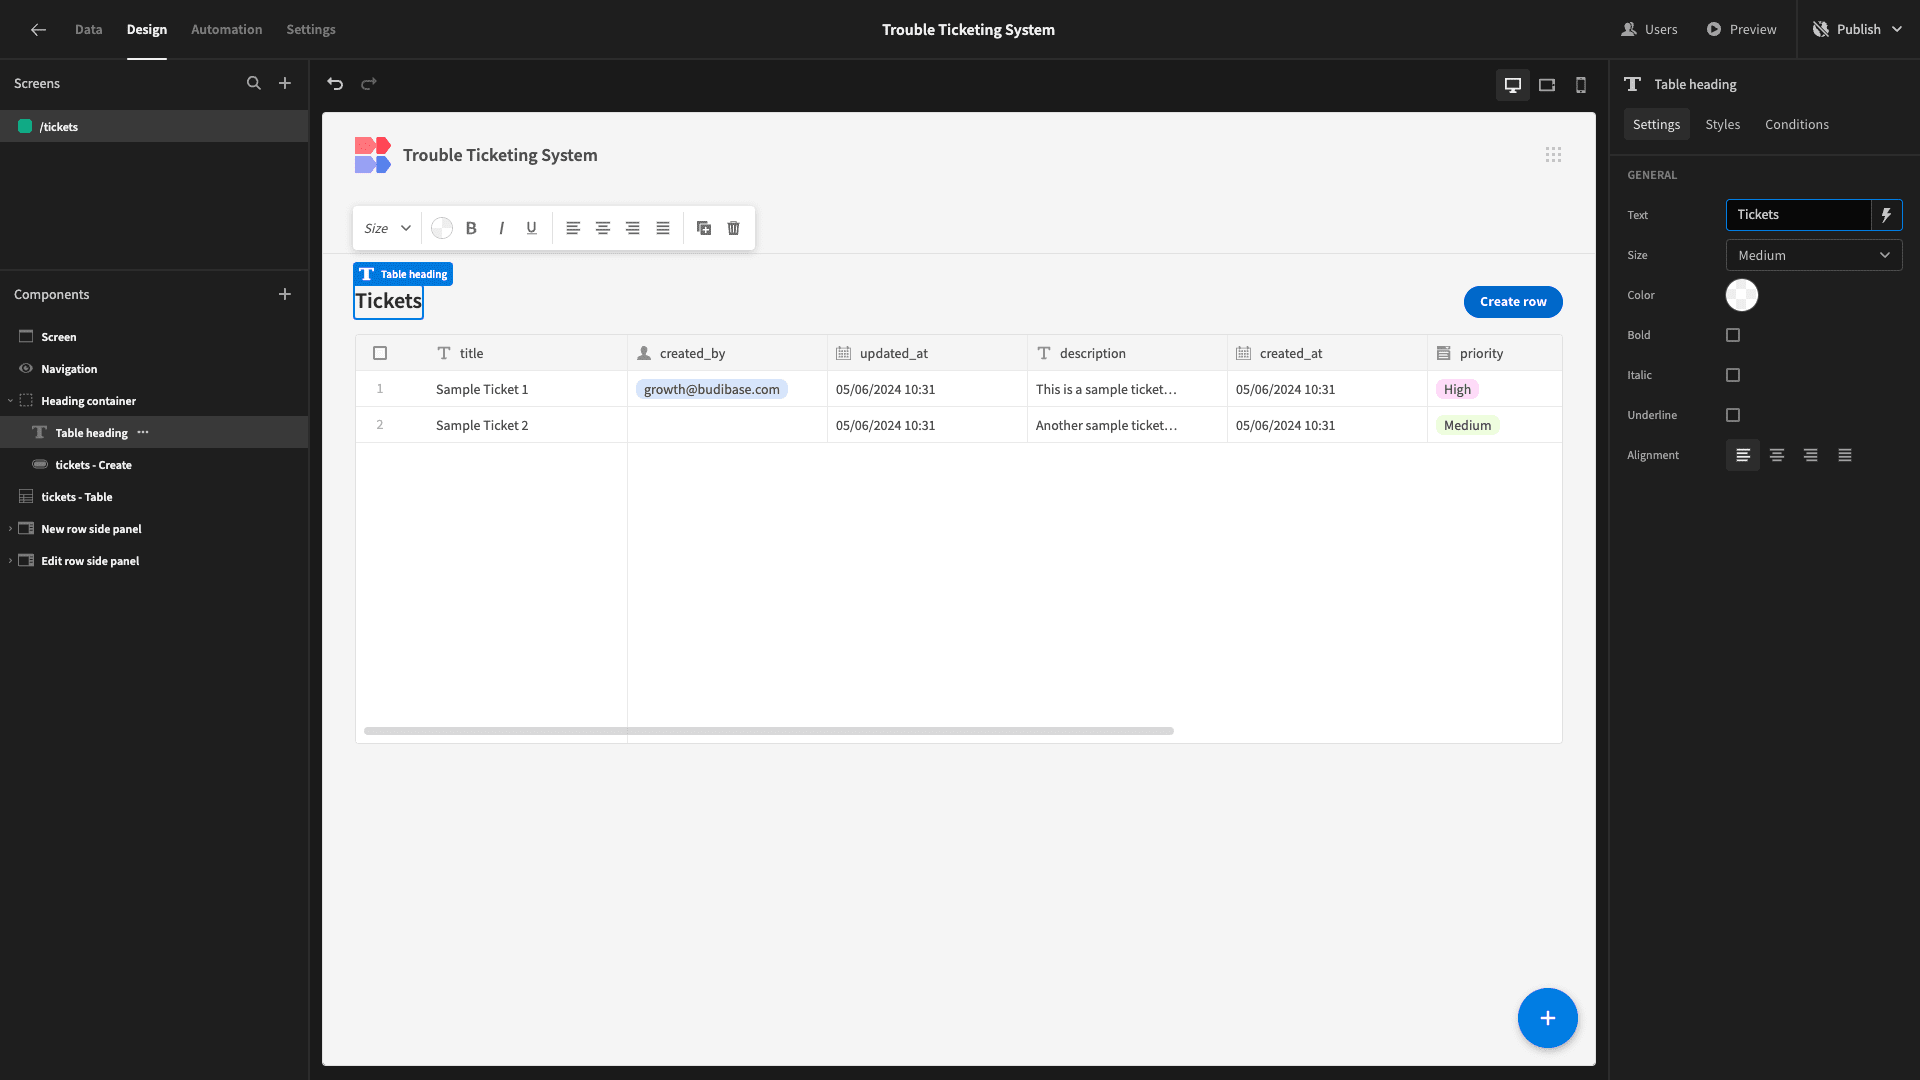
We’ll start by updating the Text setting of our heading to capitalize it.
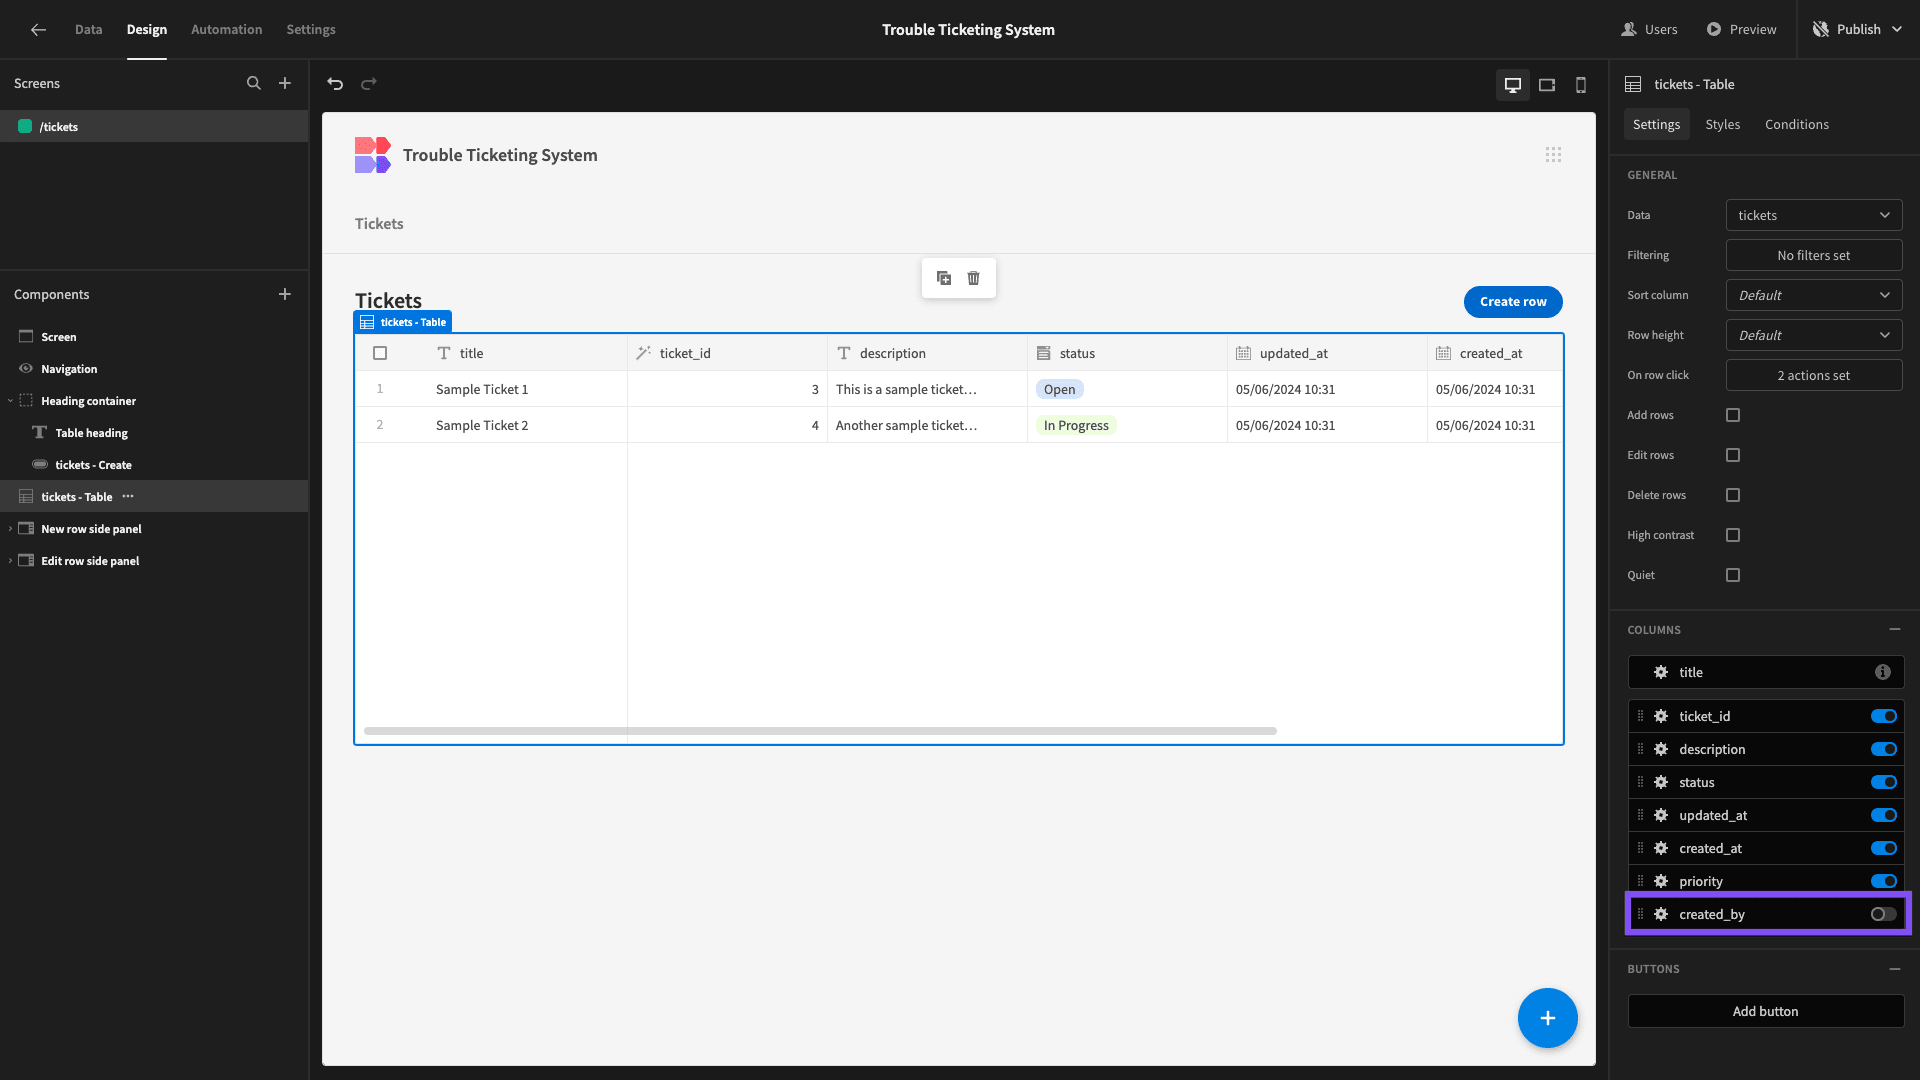
Next, we want to improve the appearance of our table itself. We can start by decluttering it slightly.
Using the sliders on the right-hand side, we’ll deselect the created_by attribute since this will be redundant when we filter our table later.
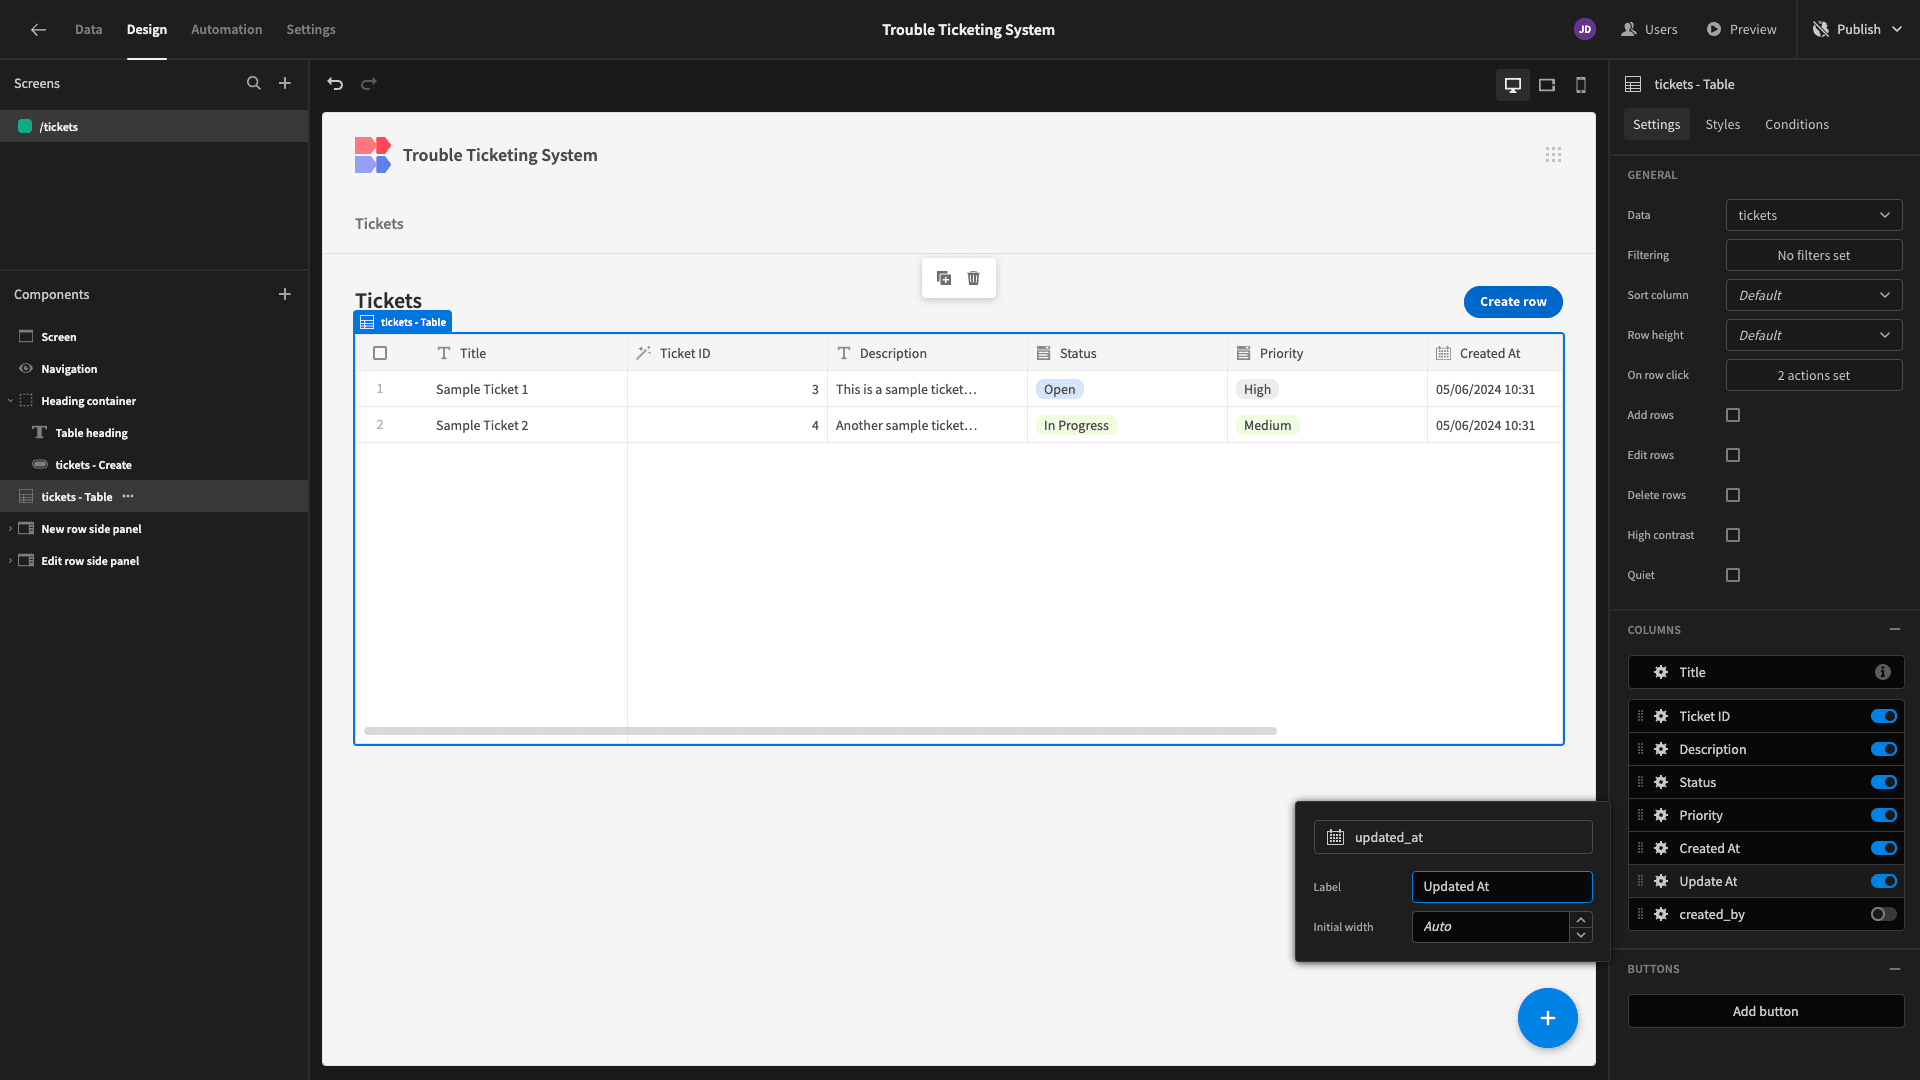
We can also update the label text for each of our columns, again adding capitalization.
Next, we’re going to make a few changes to our form for creating a new row. Here’s how this looks at the minute.
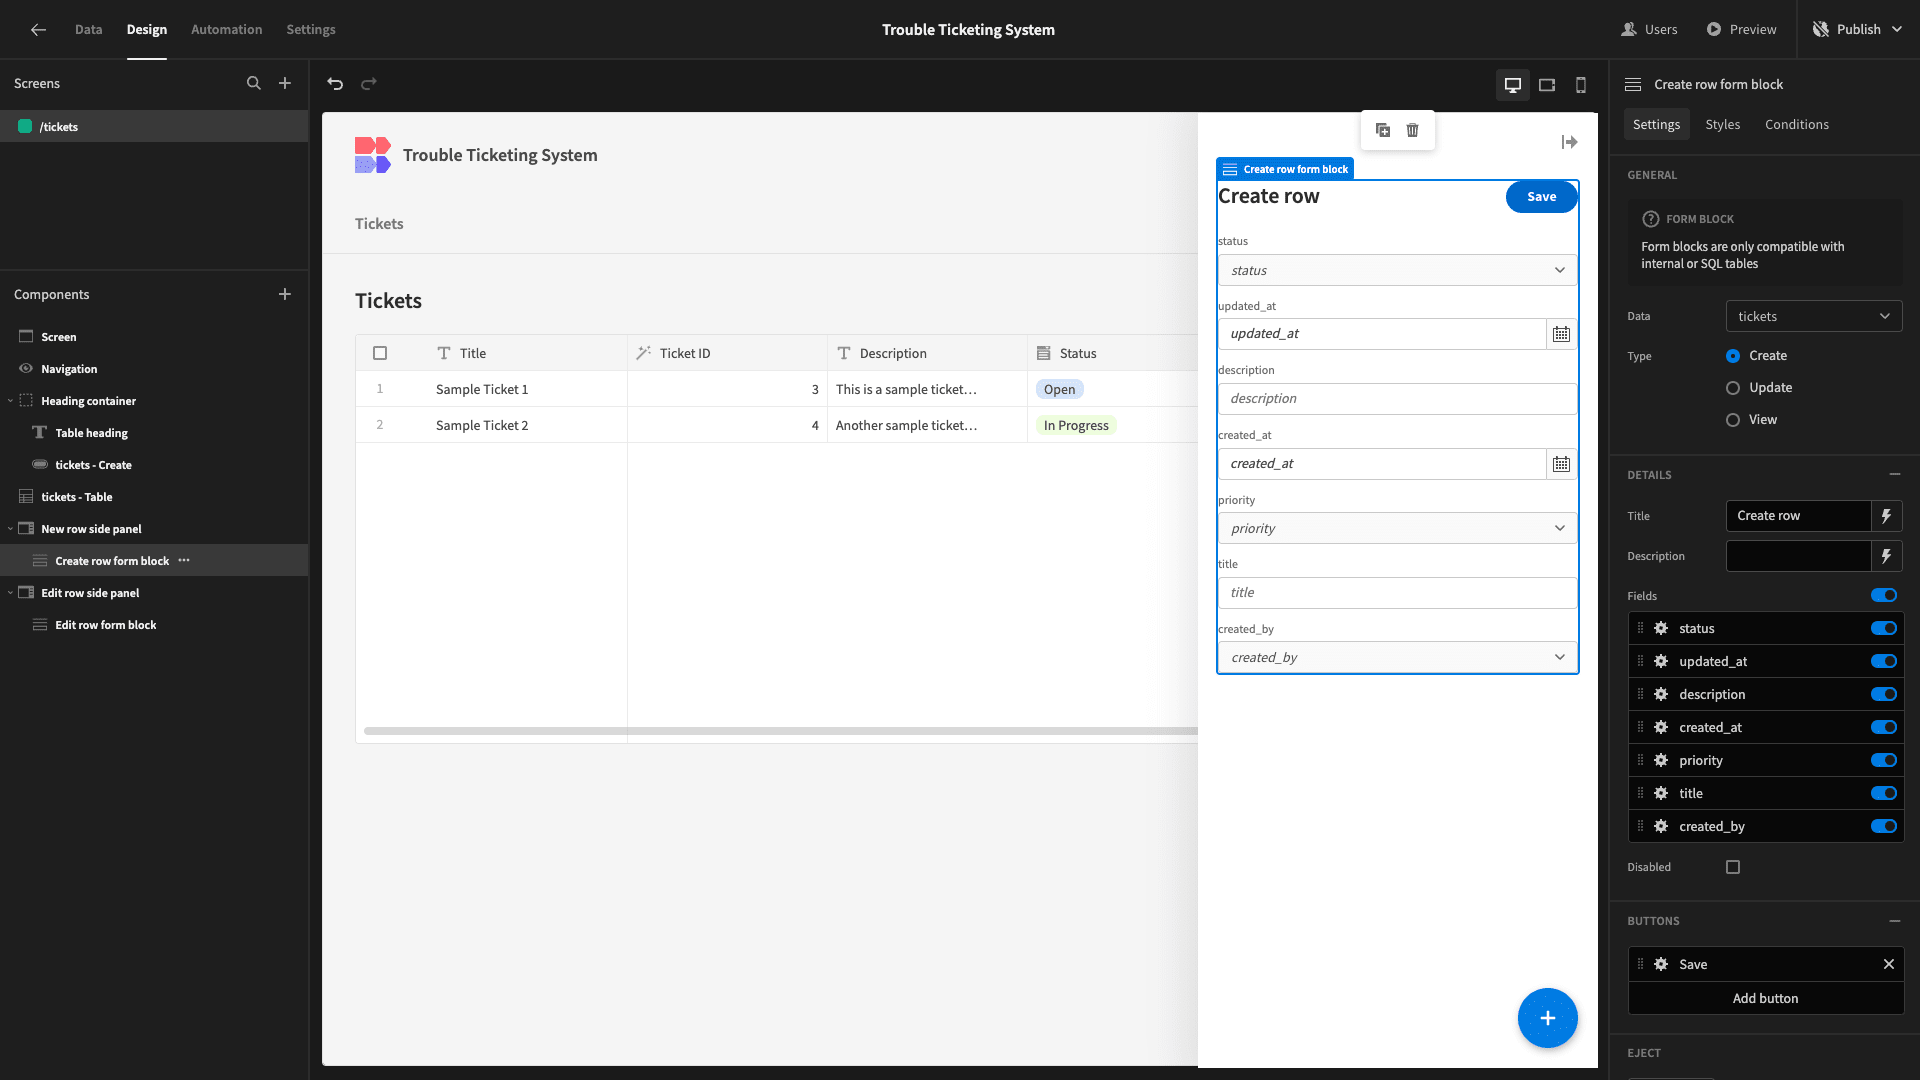
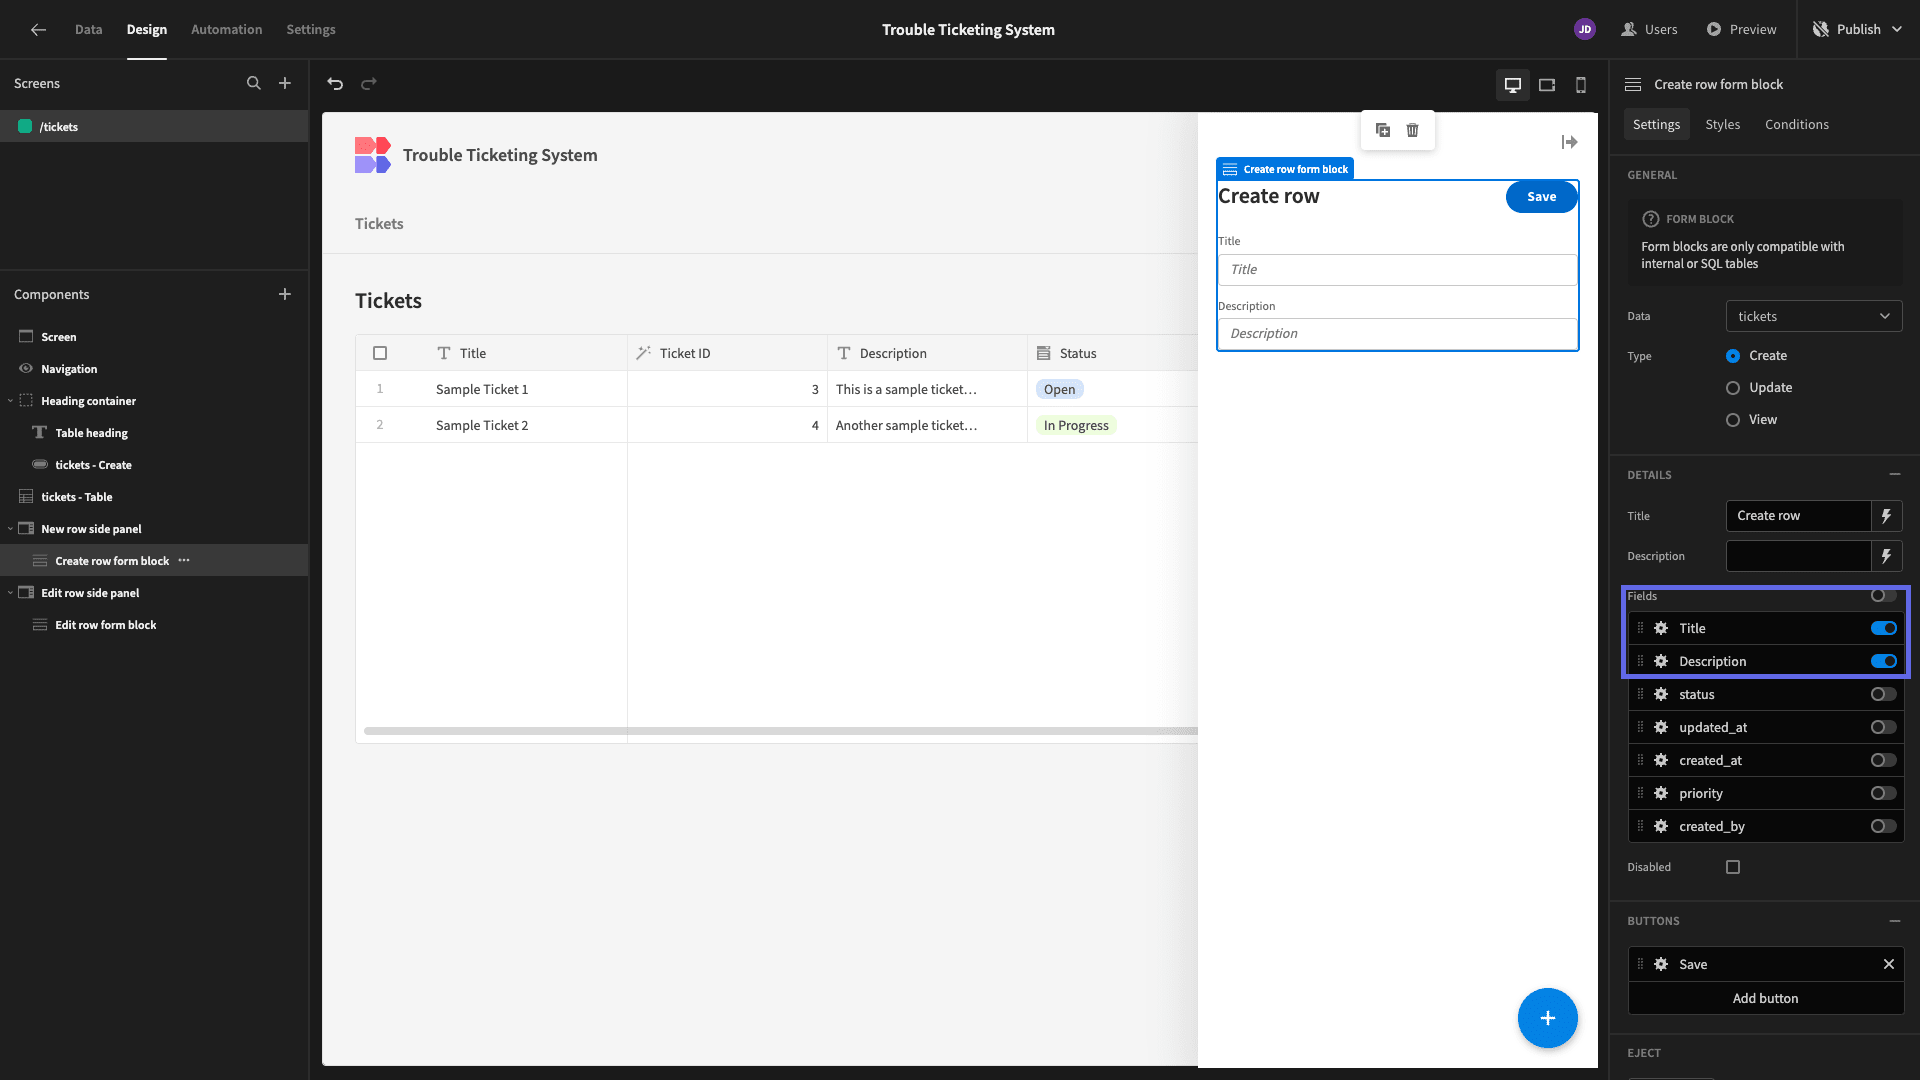
Currently, this shows fields for all of the columns in our database schema. However, we want to automatically populate most of the values. So, we’re going to deselect everything except for the title and description fields.
We’ll also tidy up the display texts for these as before.
However, we probably want to give our users more space to add a description to their trouble tickets. The easiest way to do this is to head back to the Data section and update the Type of this column from Text to Long-Form Text.

While we’re here, we’ll do the same thing for the comment field on the comments table.
Here’s how our form will look now.
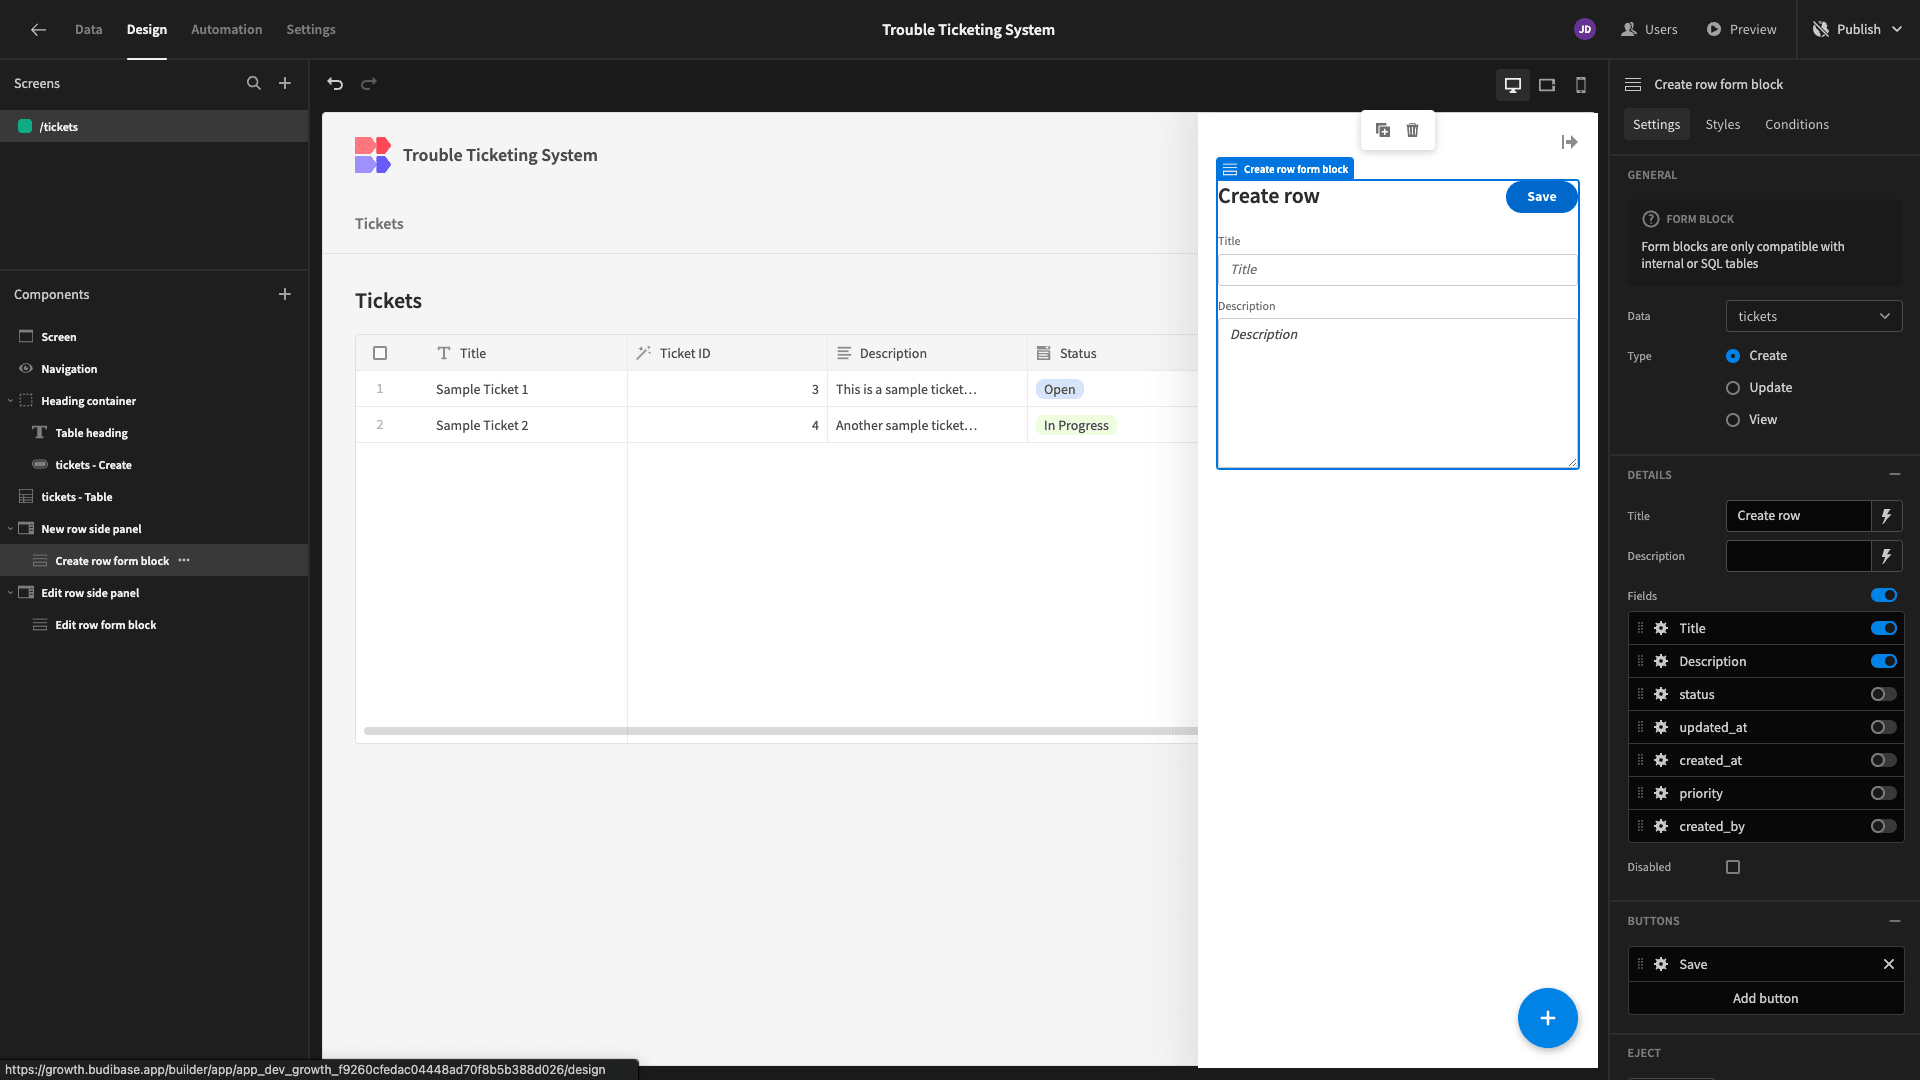
Next, we want to configure our form so that the remaining fields are populated automatically when a user hits save.
We’ll start by opening the on-click actions drawer for our button. Here, we’ll find an action called Save Row.
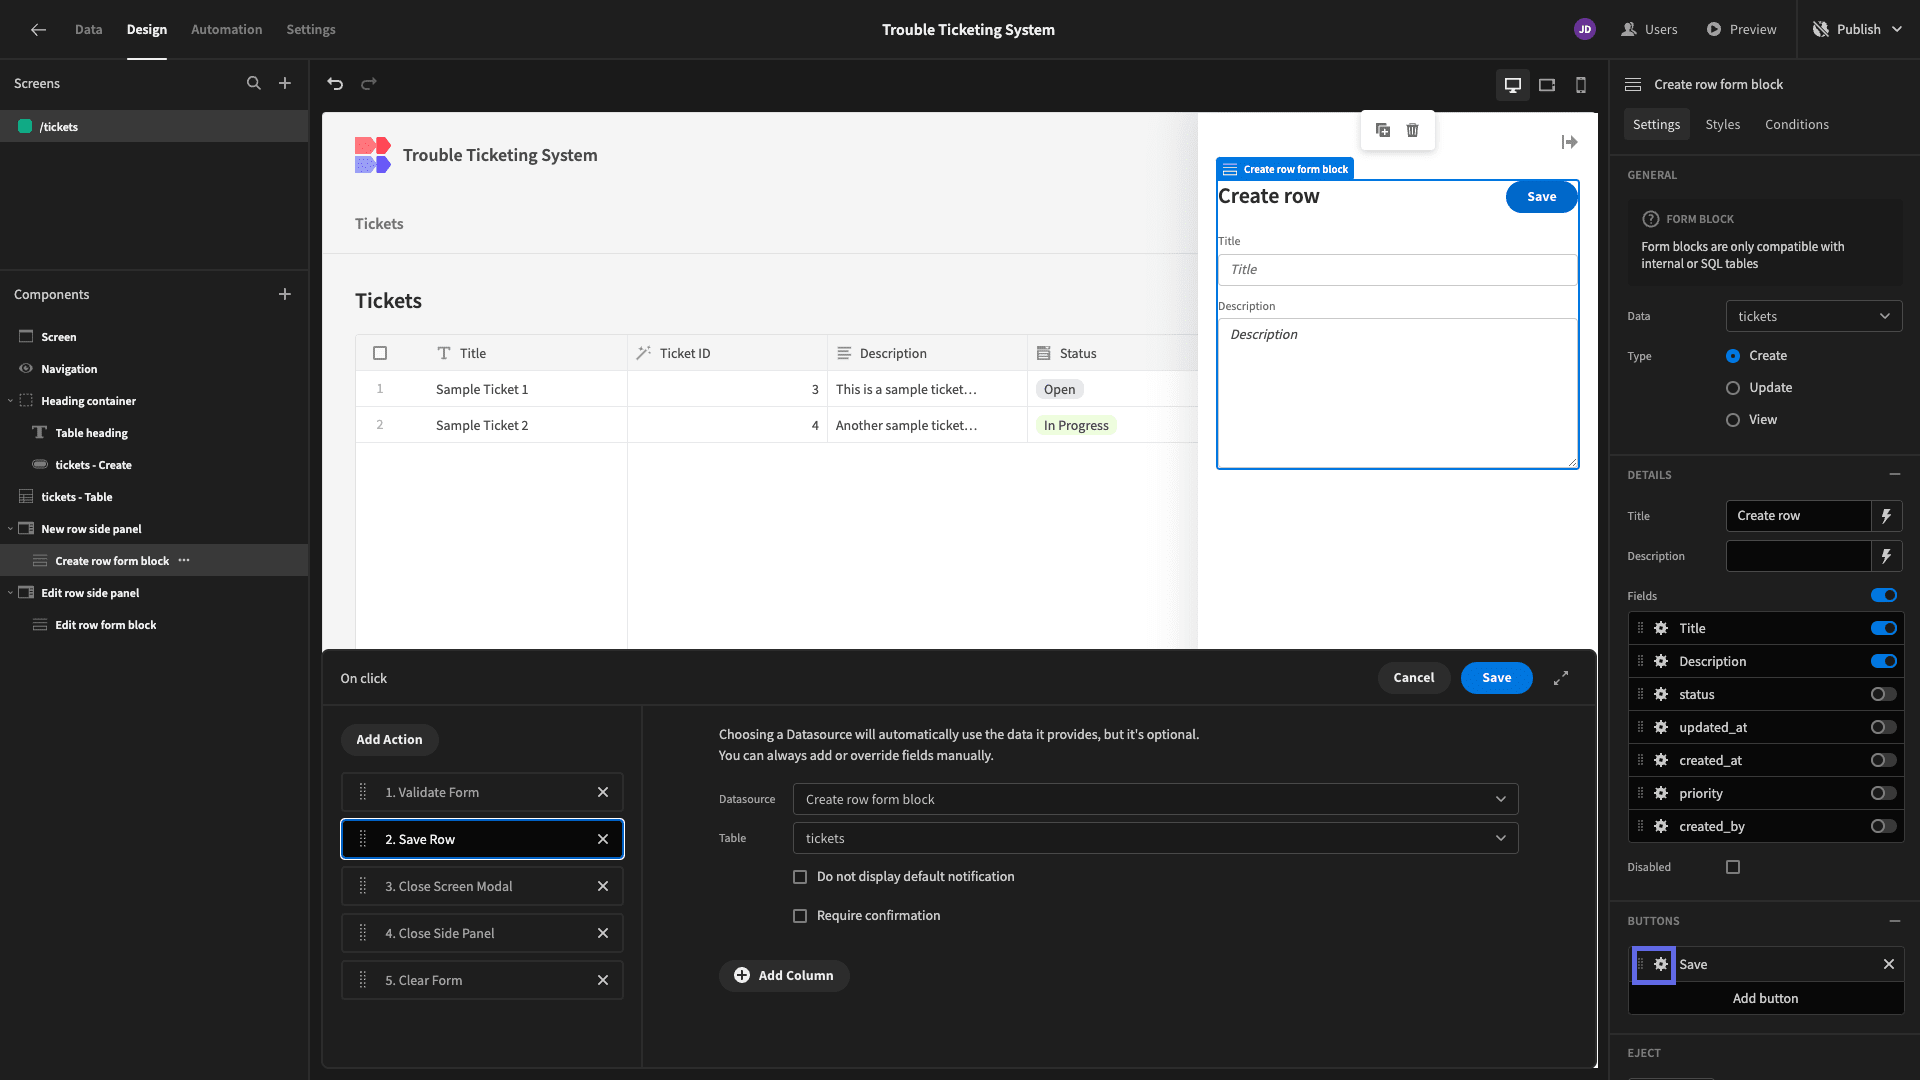
We’ll use the Add Column button to add the rows we want to assign values to. Our two dates - created_at and updated_at are timestamps in our database and the ticket_id simply increments, so these are already taken care of.
So, the three columns we need to add are status, priority, and created_by. We’ve set status and priority to Open and Medium, respectively, by simply inputting these as strings.
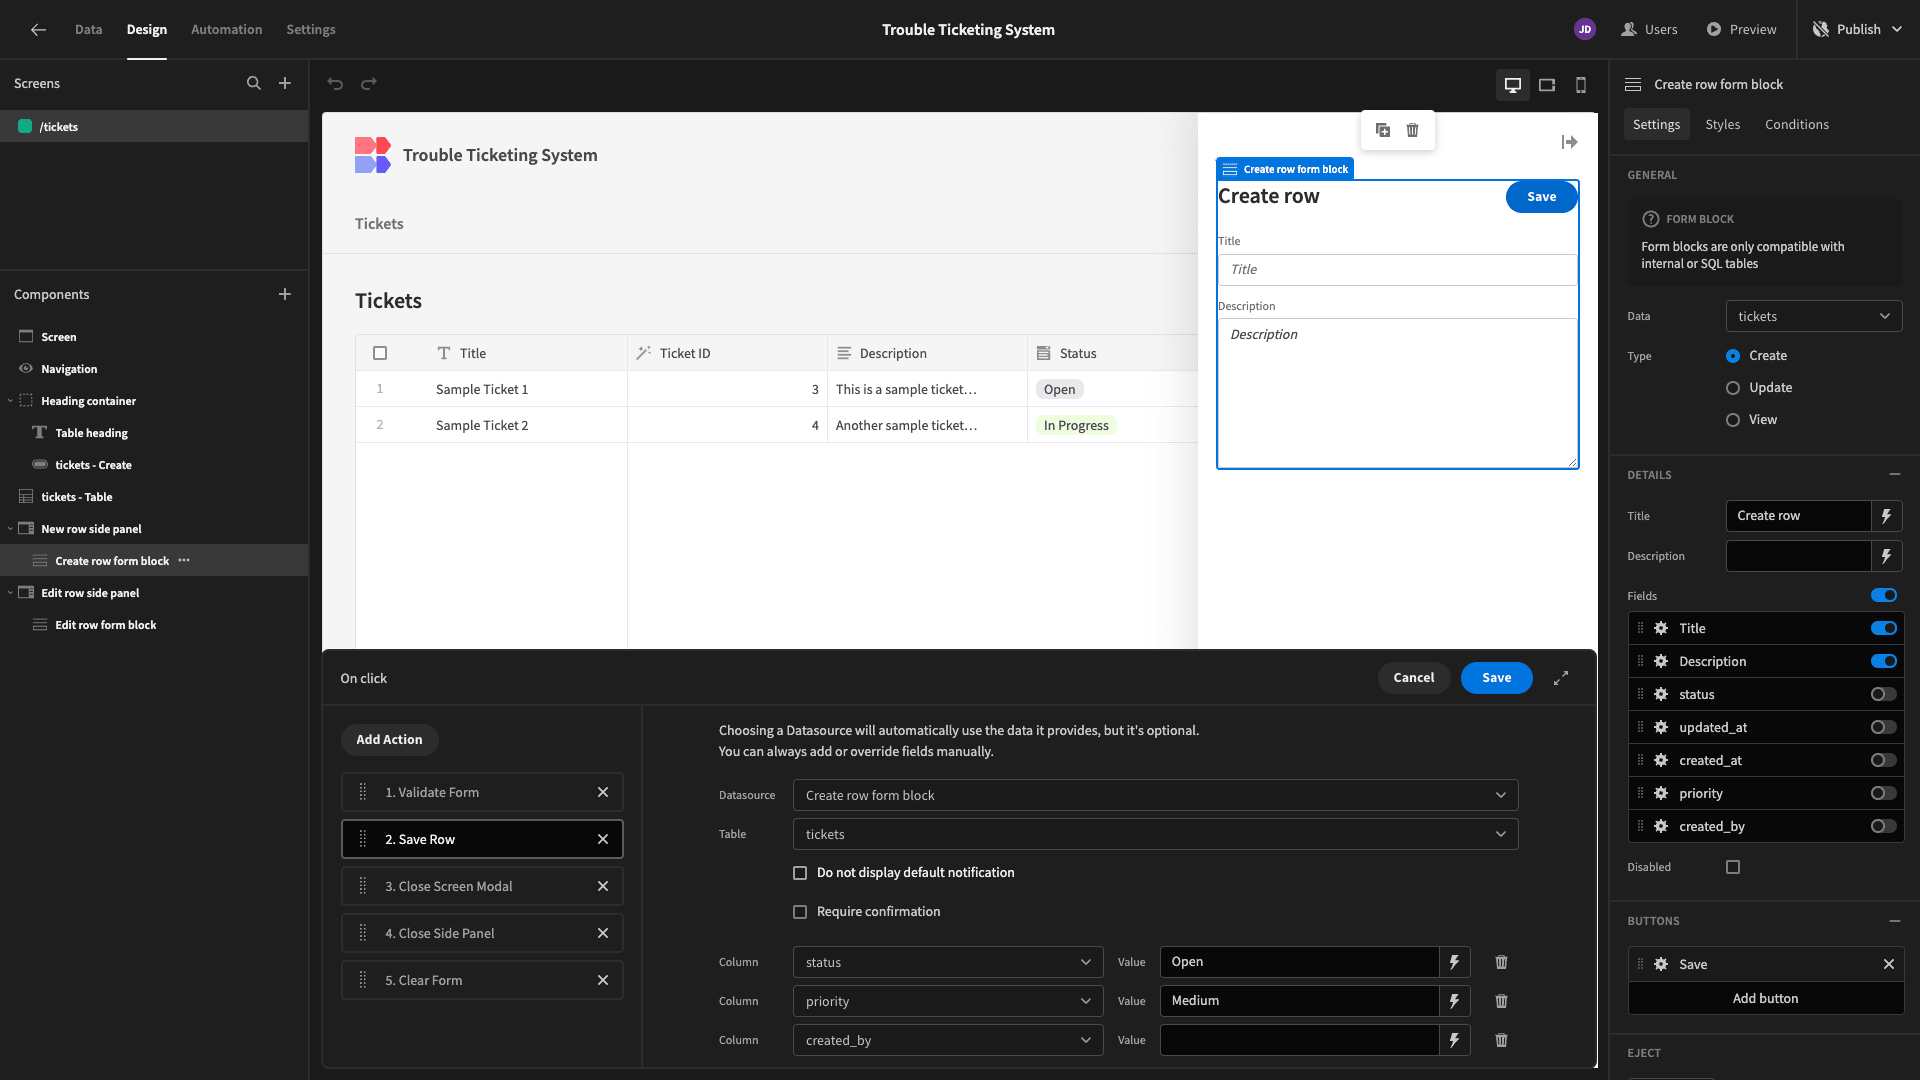
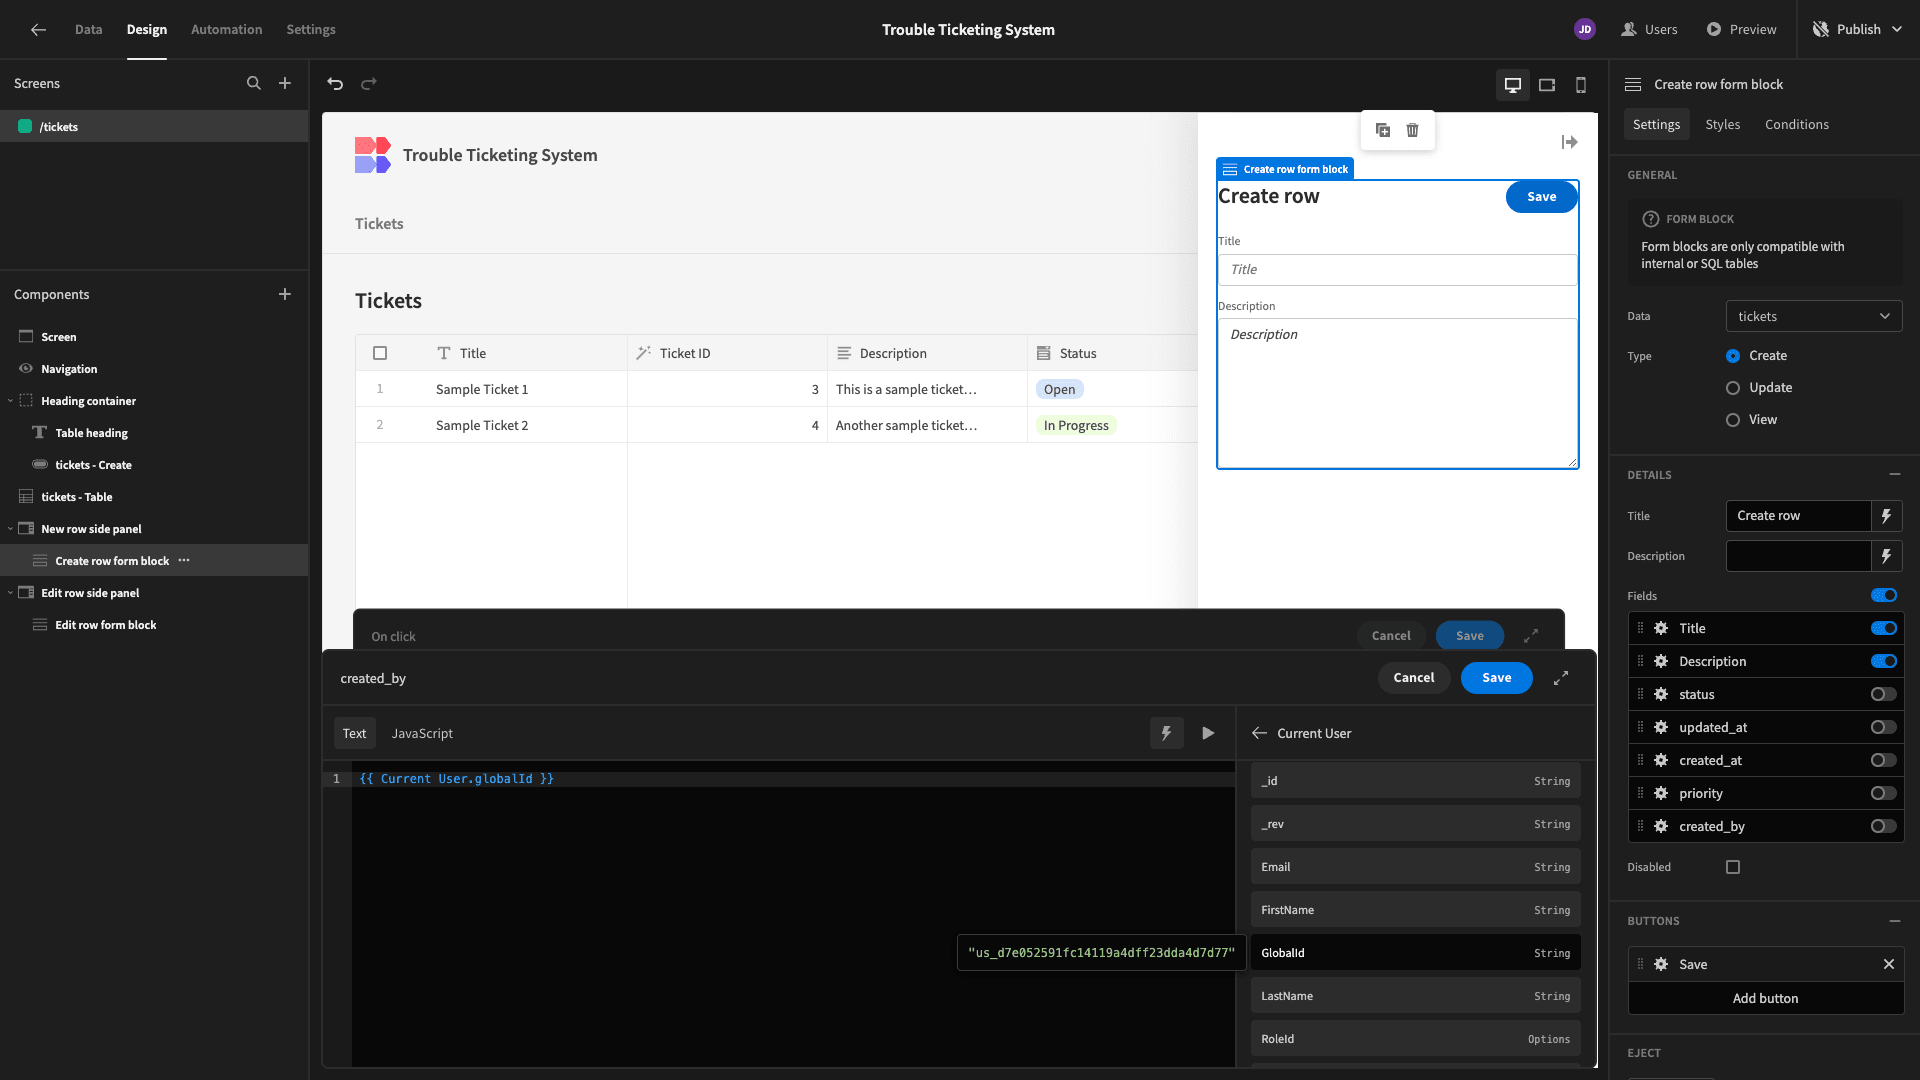
For created_by, we’ll first click into the Current User bindings.

And then, we’ll select their globalId to associate the ticket with the row for the user who hit the save button.
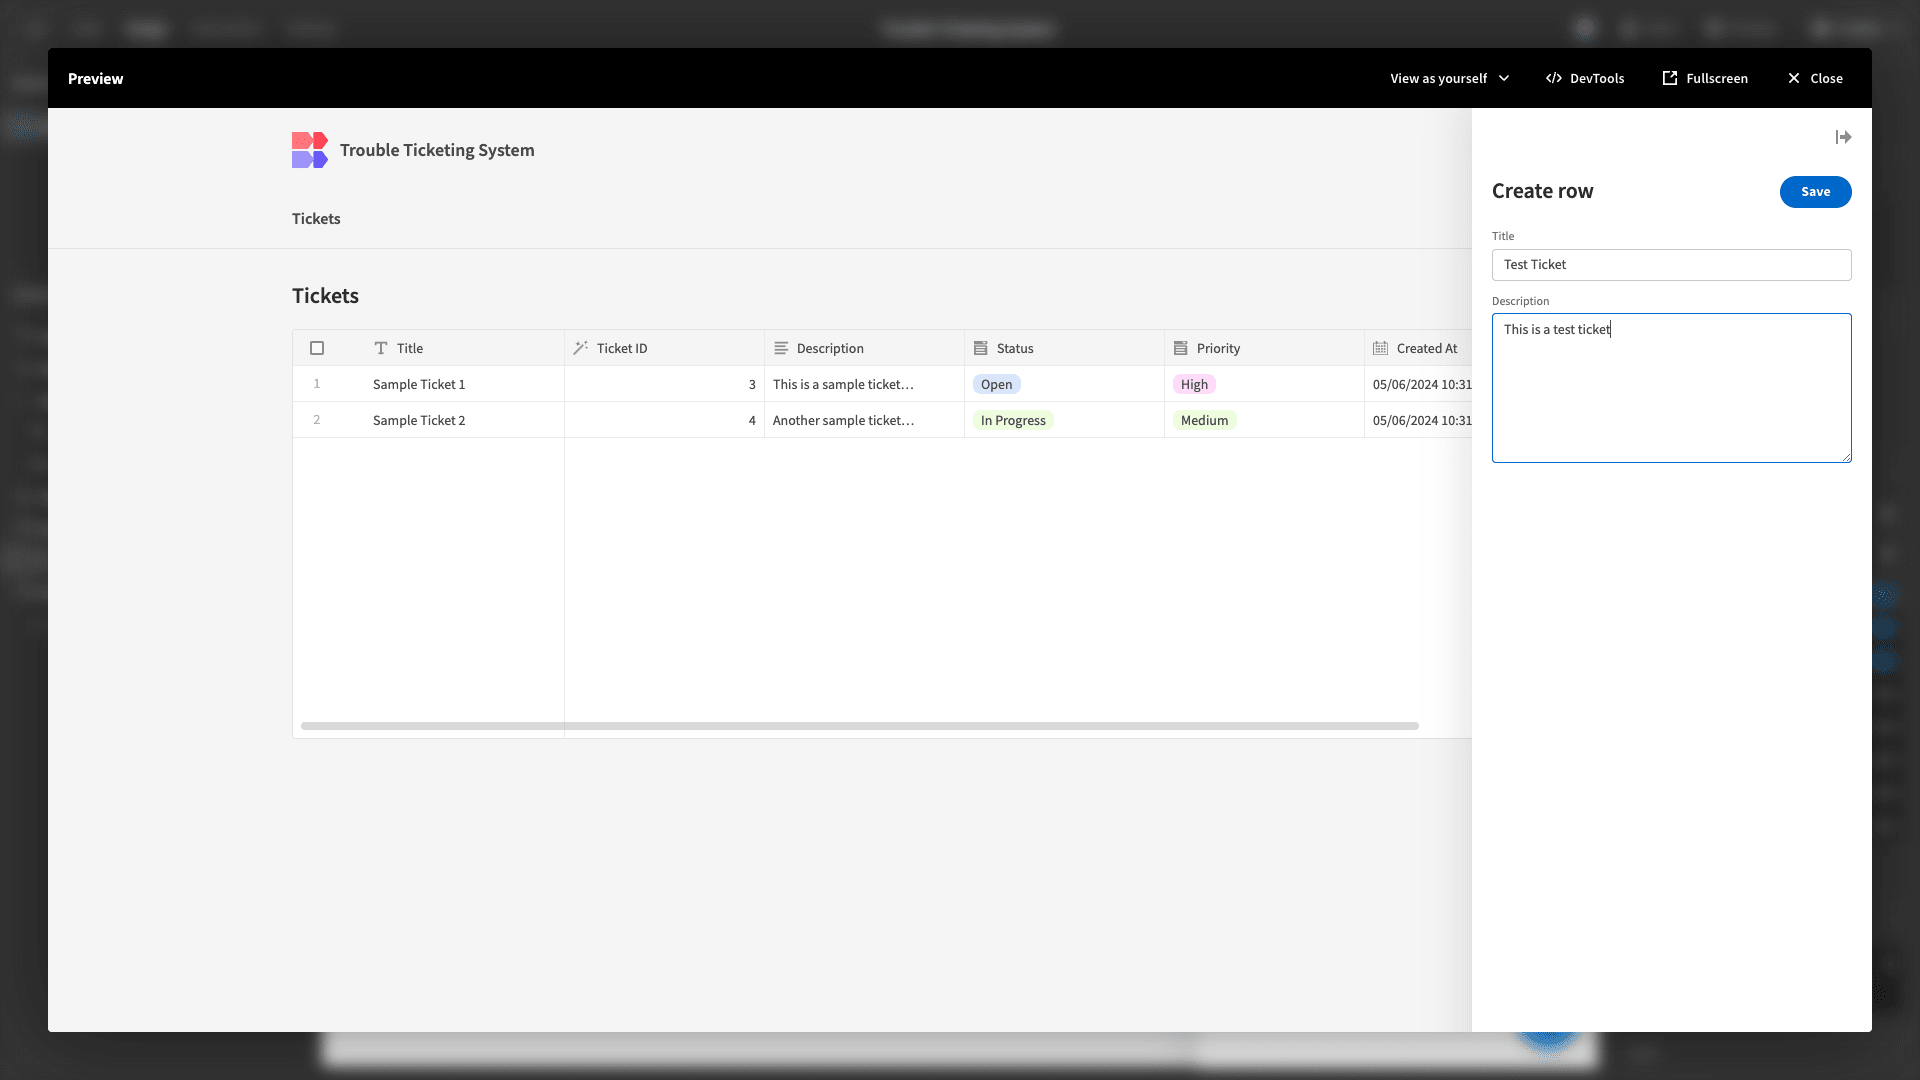
Then, we’ll preview our app to confirm that everything works as expected.
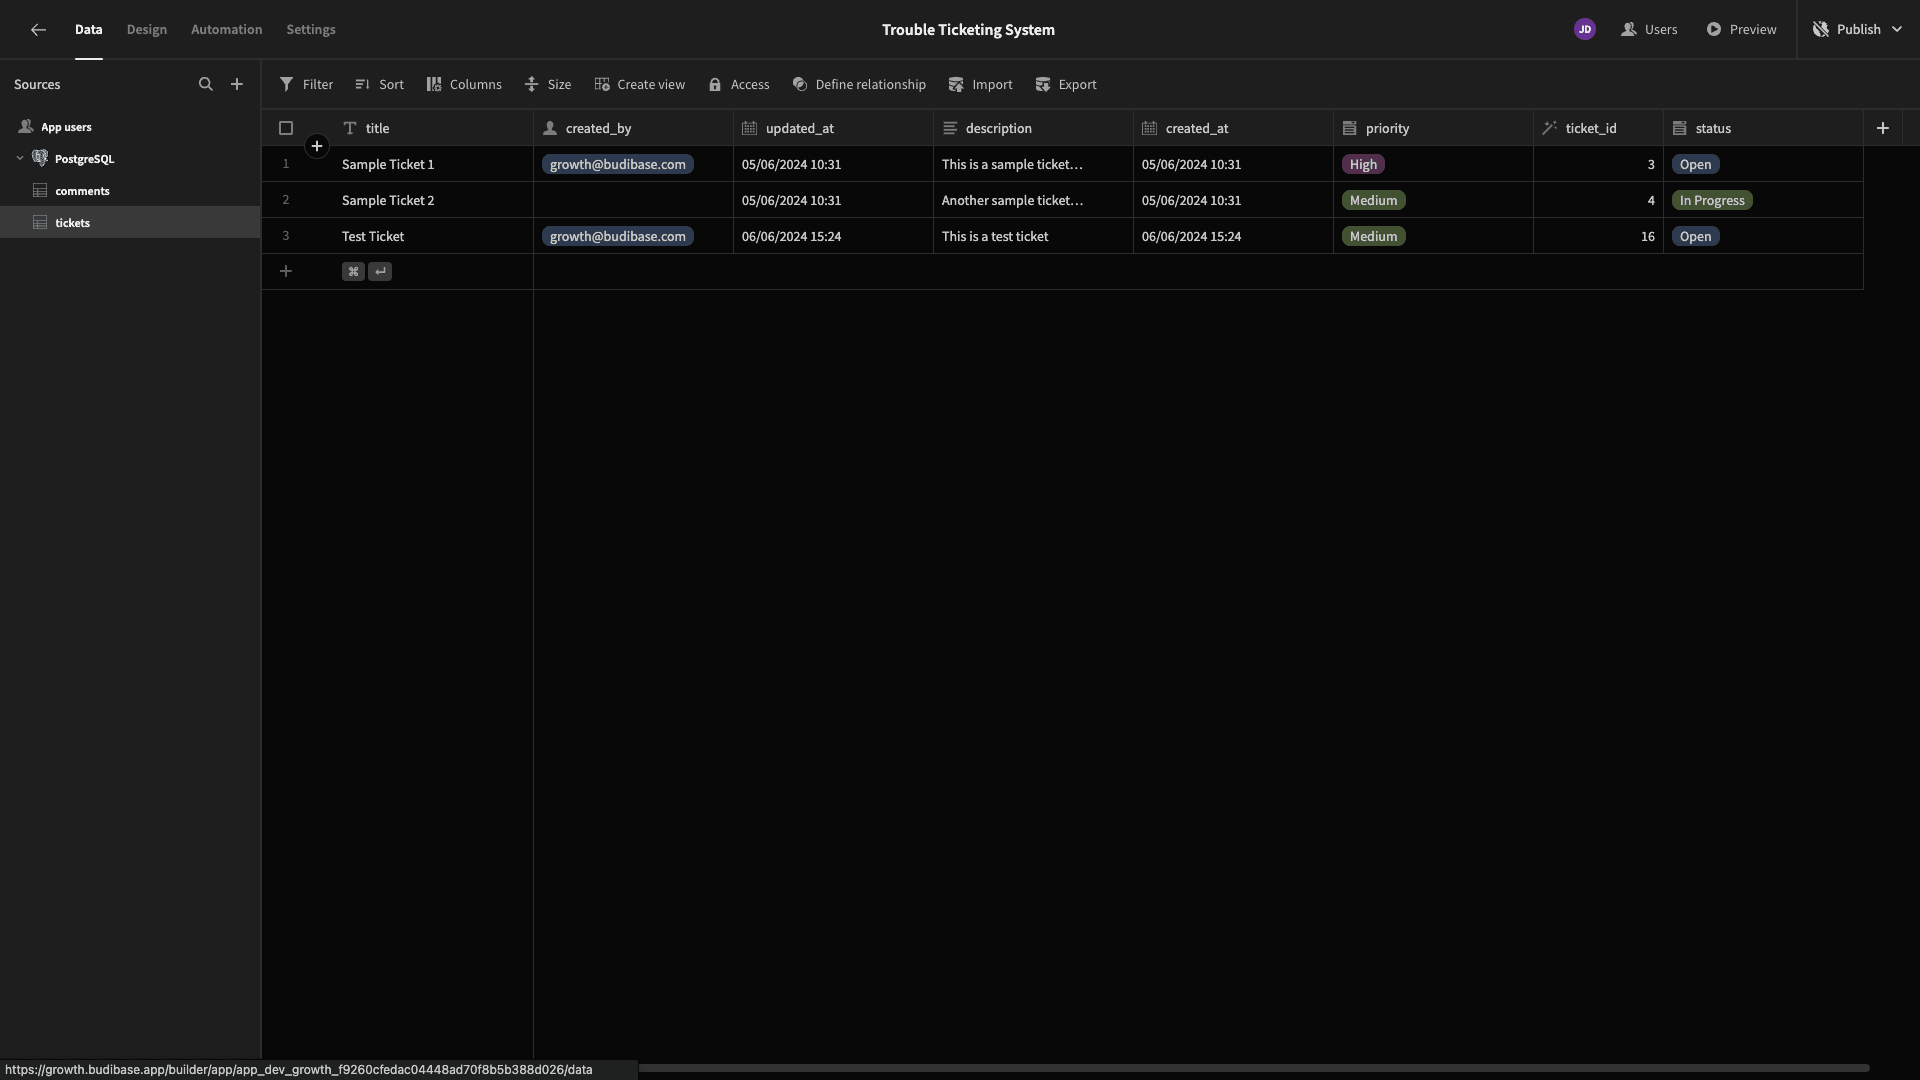
We can see that this has worked under the Data tab.
The last thing we’ll do on this screen is set up a filtering expression so that users can only see the tickets that they themselves have created.
We’ll open the Filtering Drawer on our Table component and add an expression based on the created_by attribute.
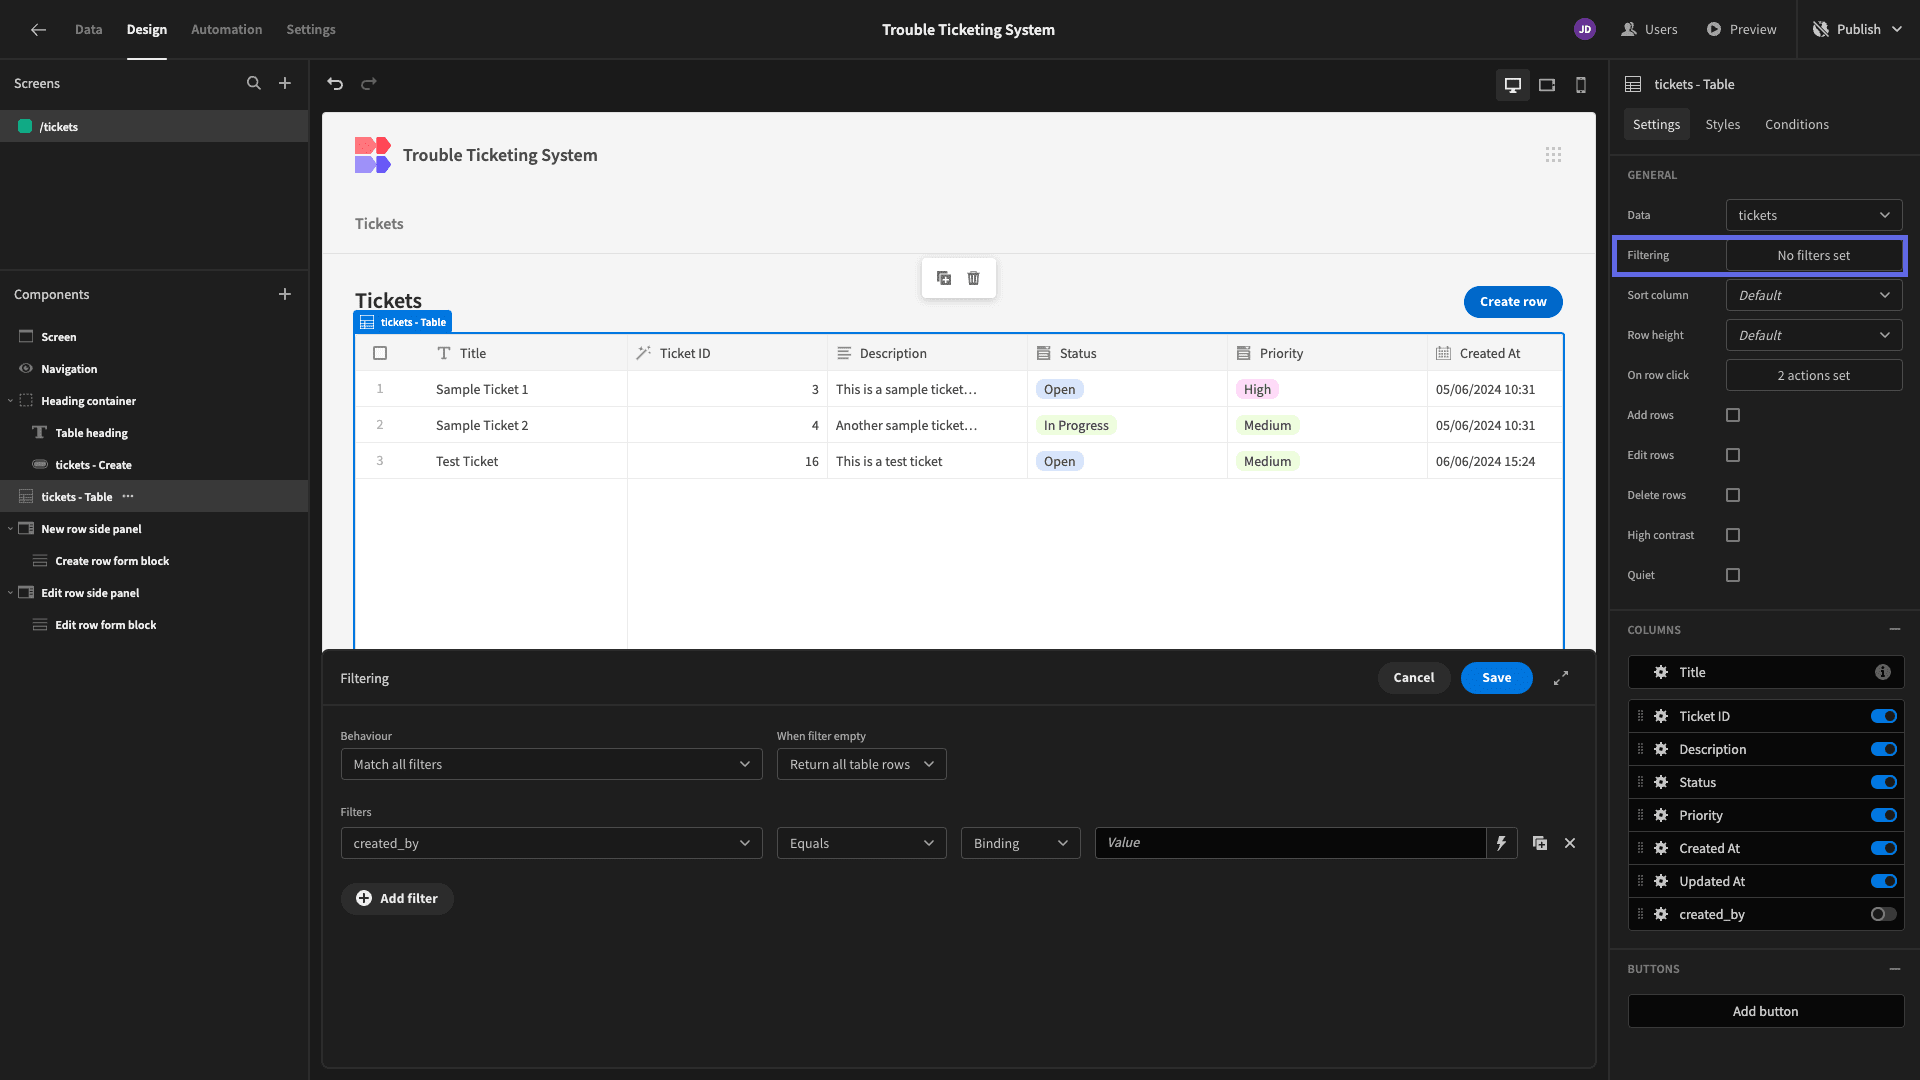
We’ll then set this as equal to the current user’s globalId, just like we did a second ago.
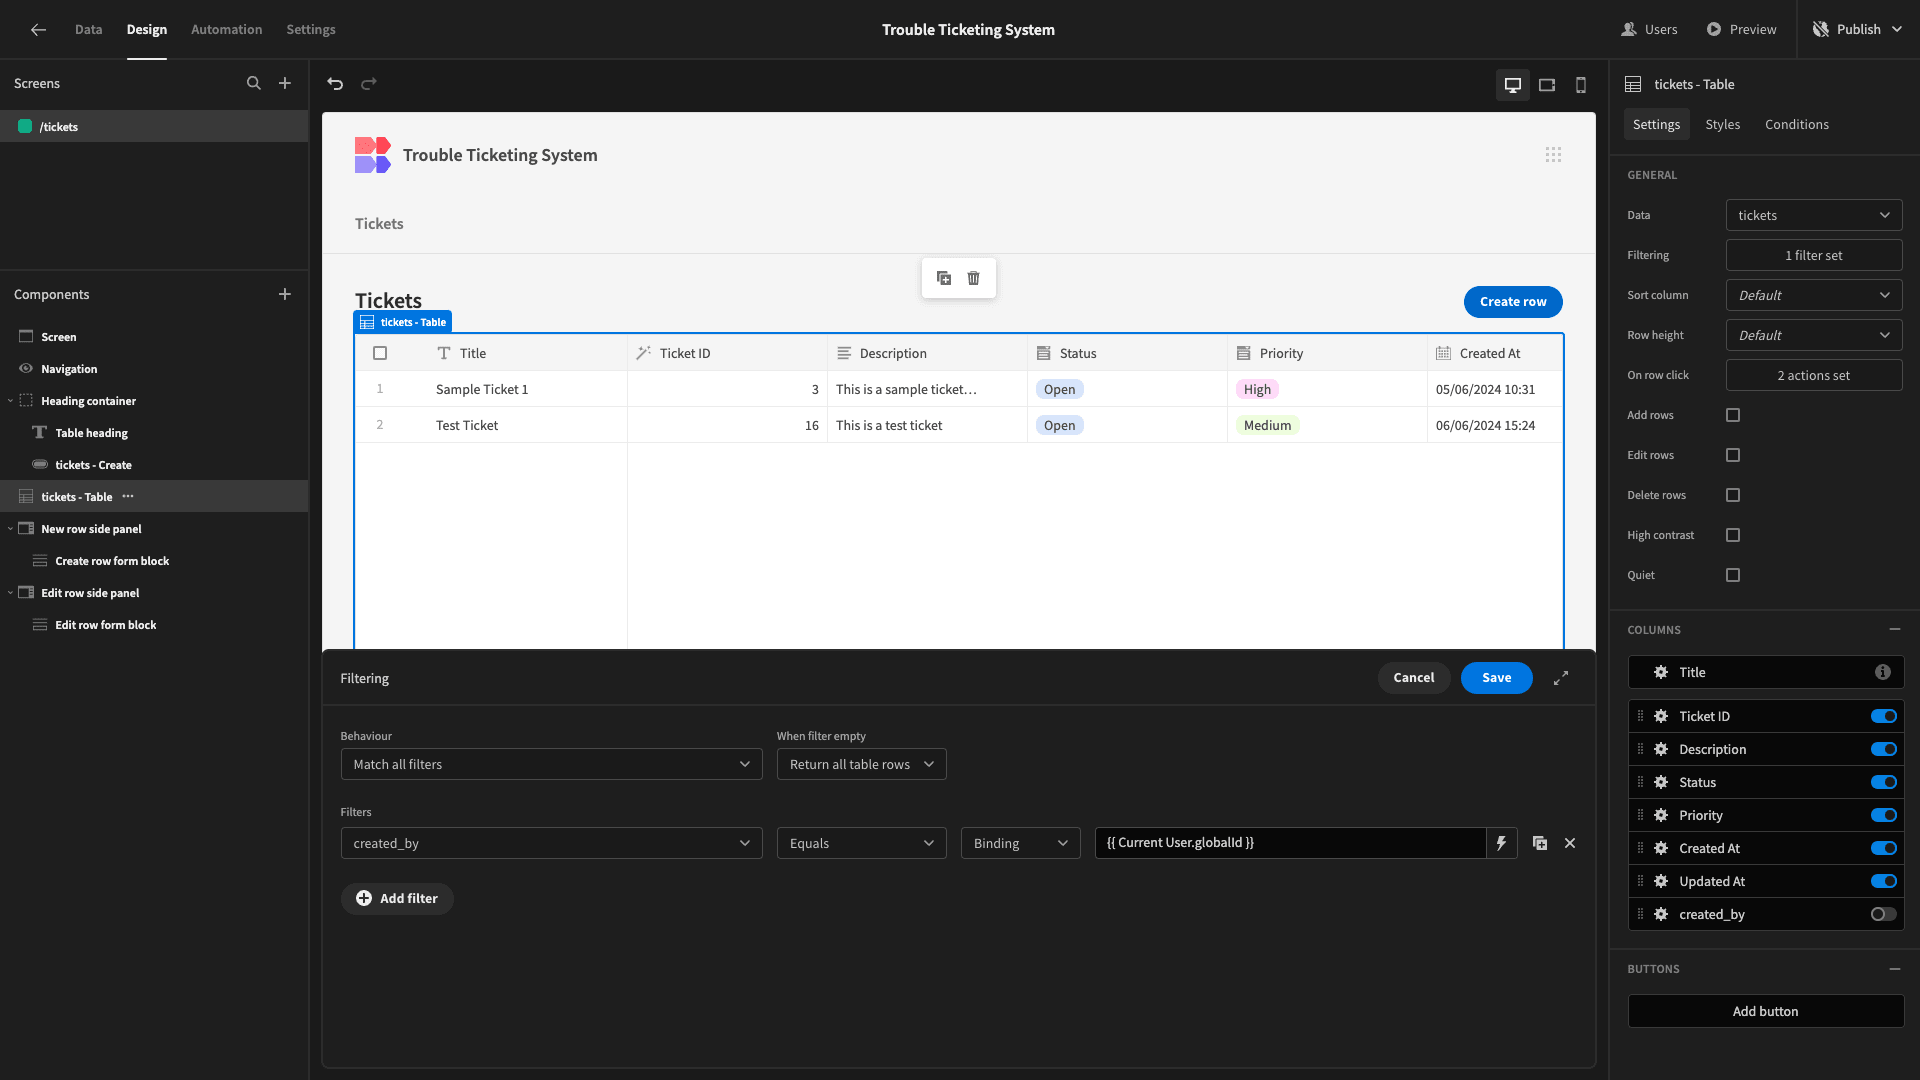
Now, we can only see the two rows that are associated with our user account.
3. Adding a custom view form
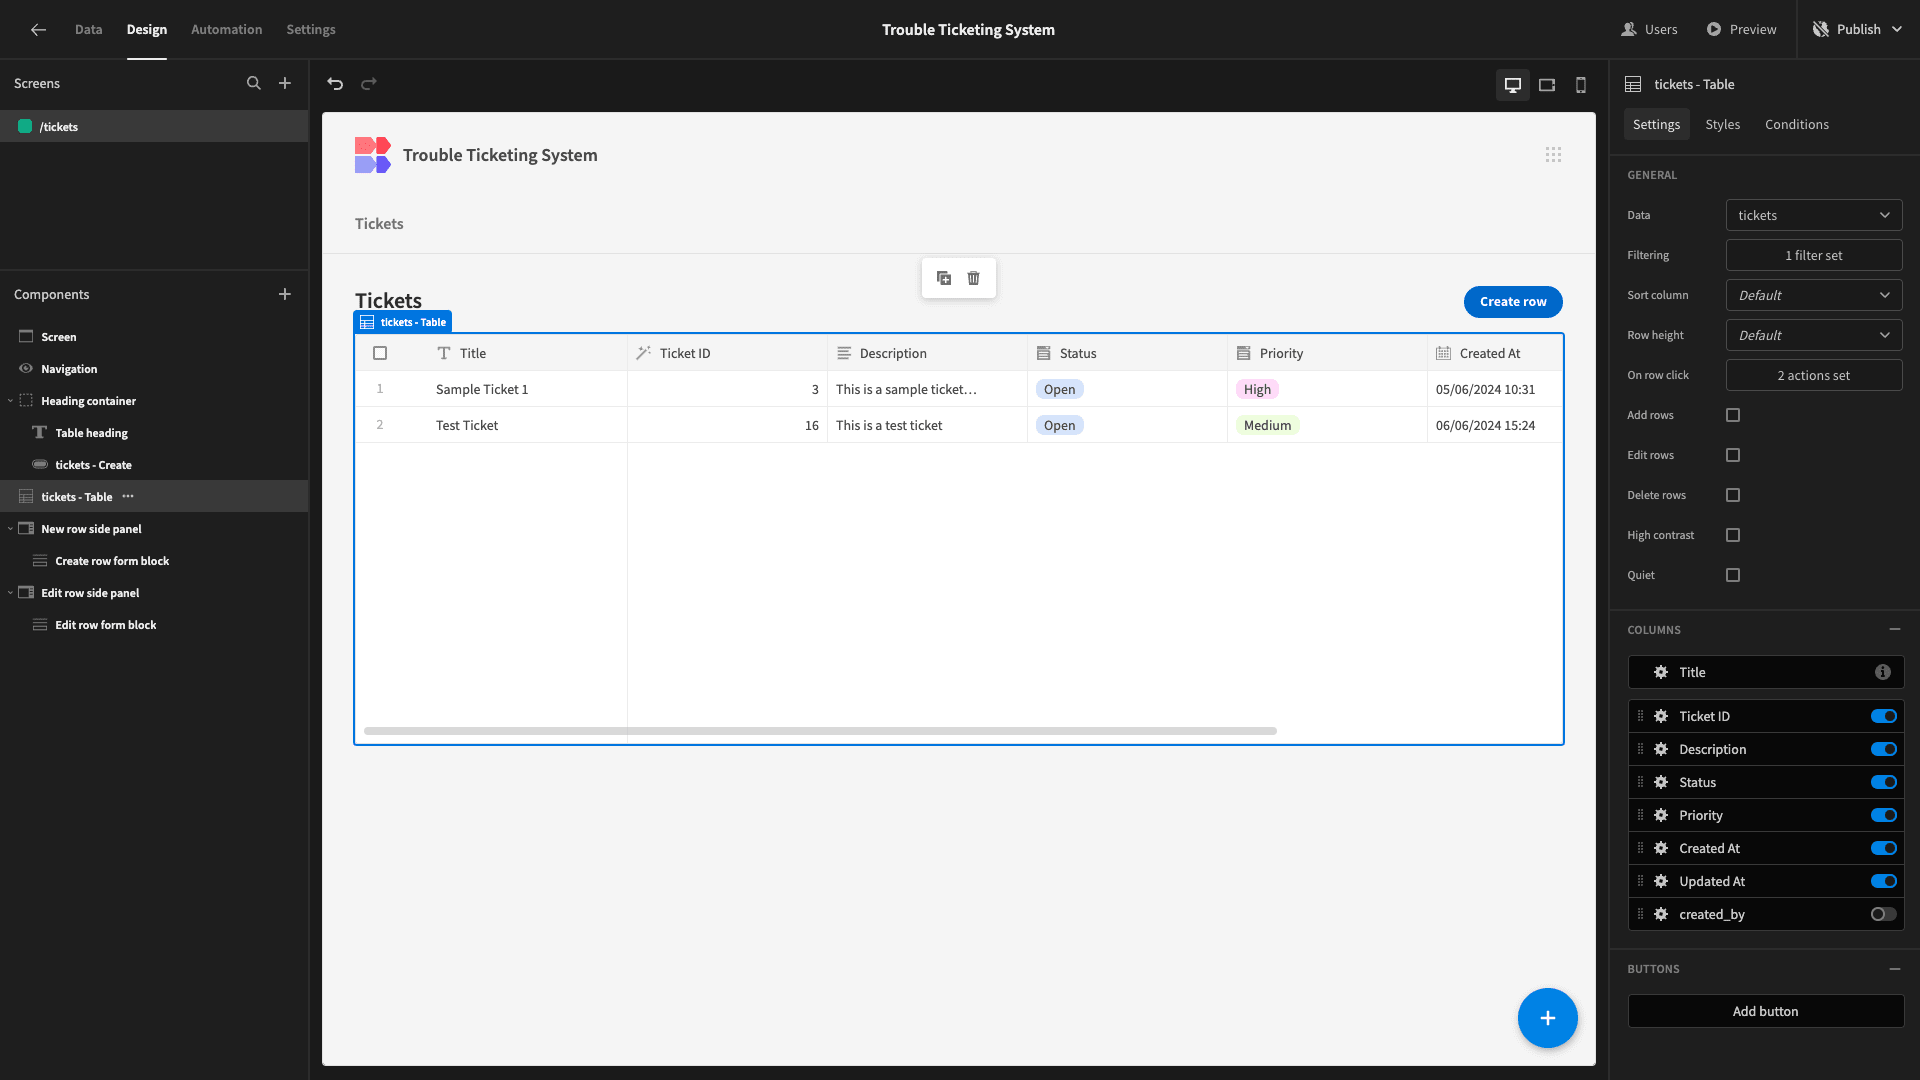
Next, we’re going to build a custom form for viewing existing ticket submissions. Currently, this can be done using a side panel form, but eventually, we’re going to display comments below our ticket information.
So, we’re going to use a modal screen to give ourselves a bit more space. The first thing we’ll do is delete the existing side panel component to avoid confusion.
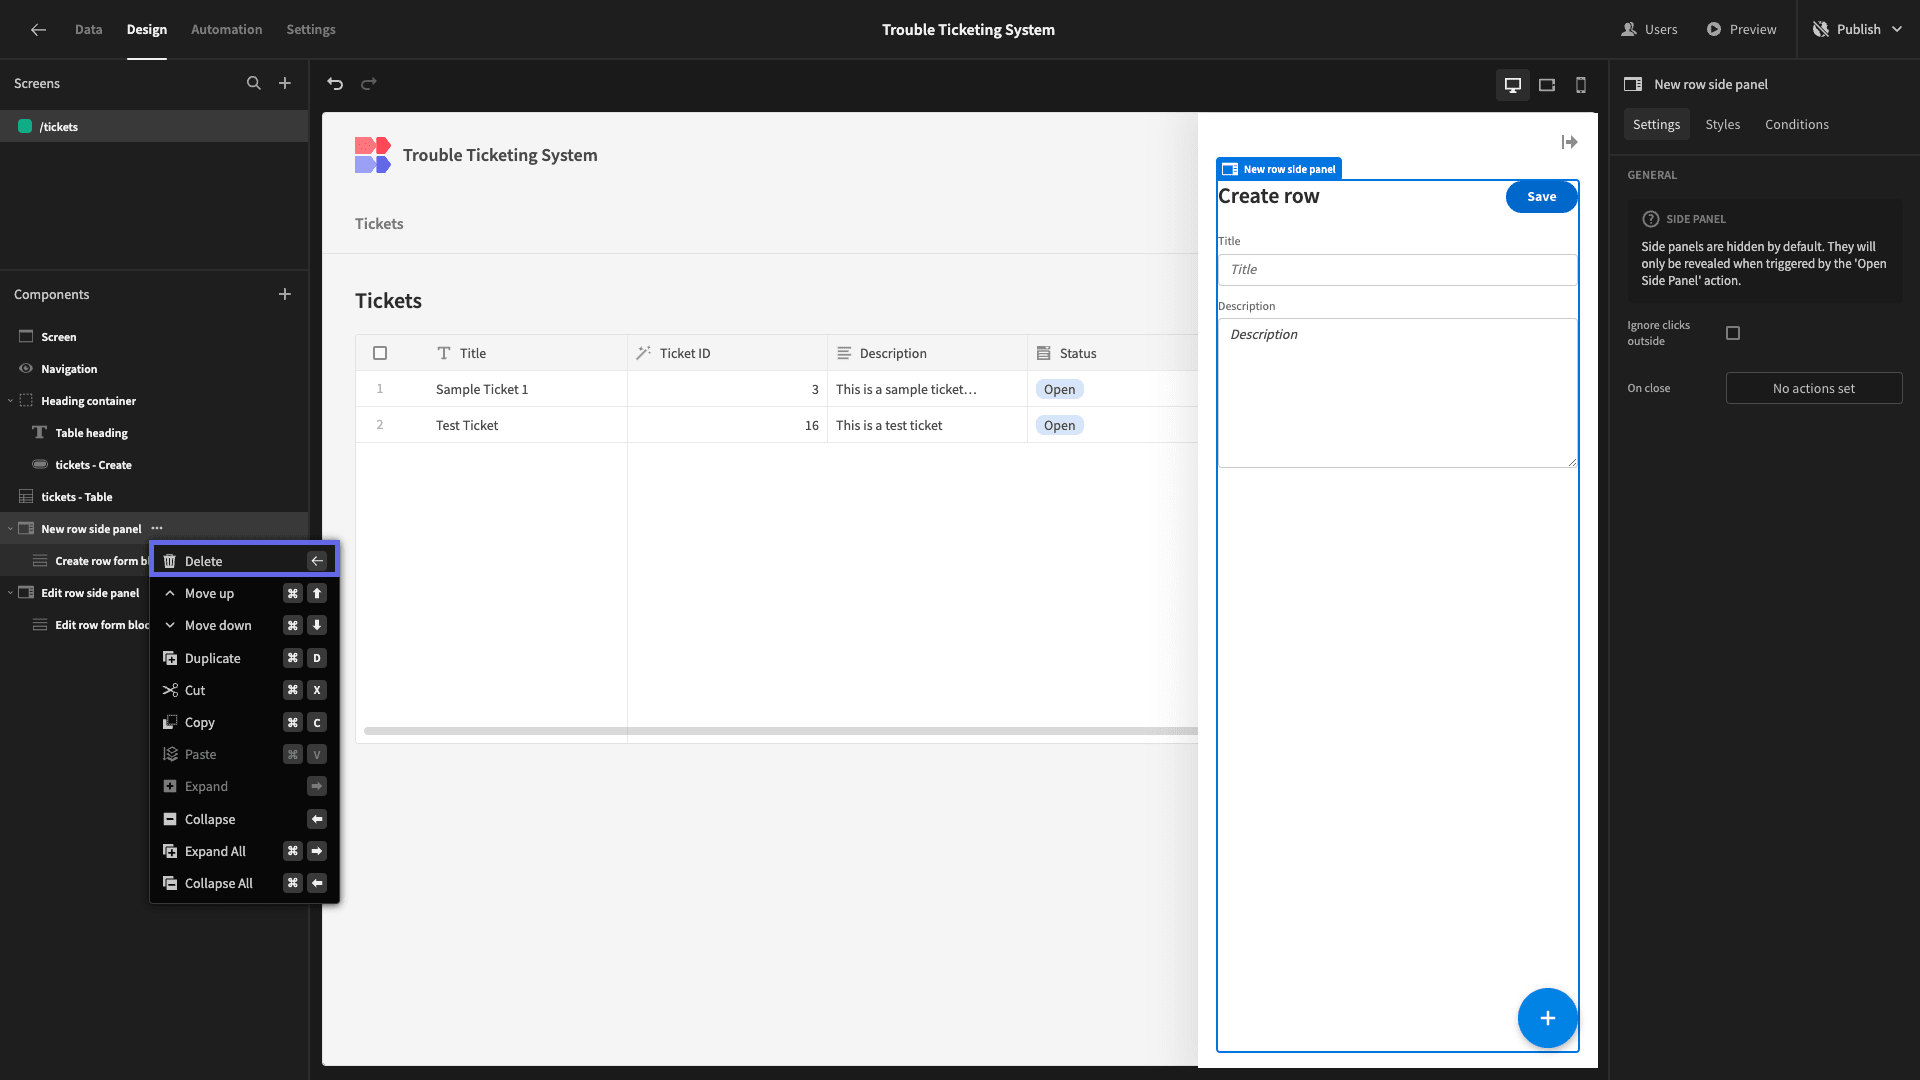
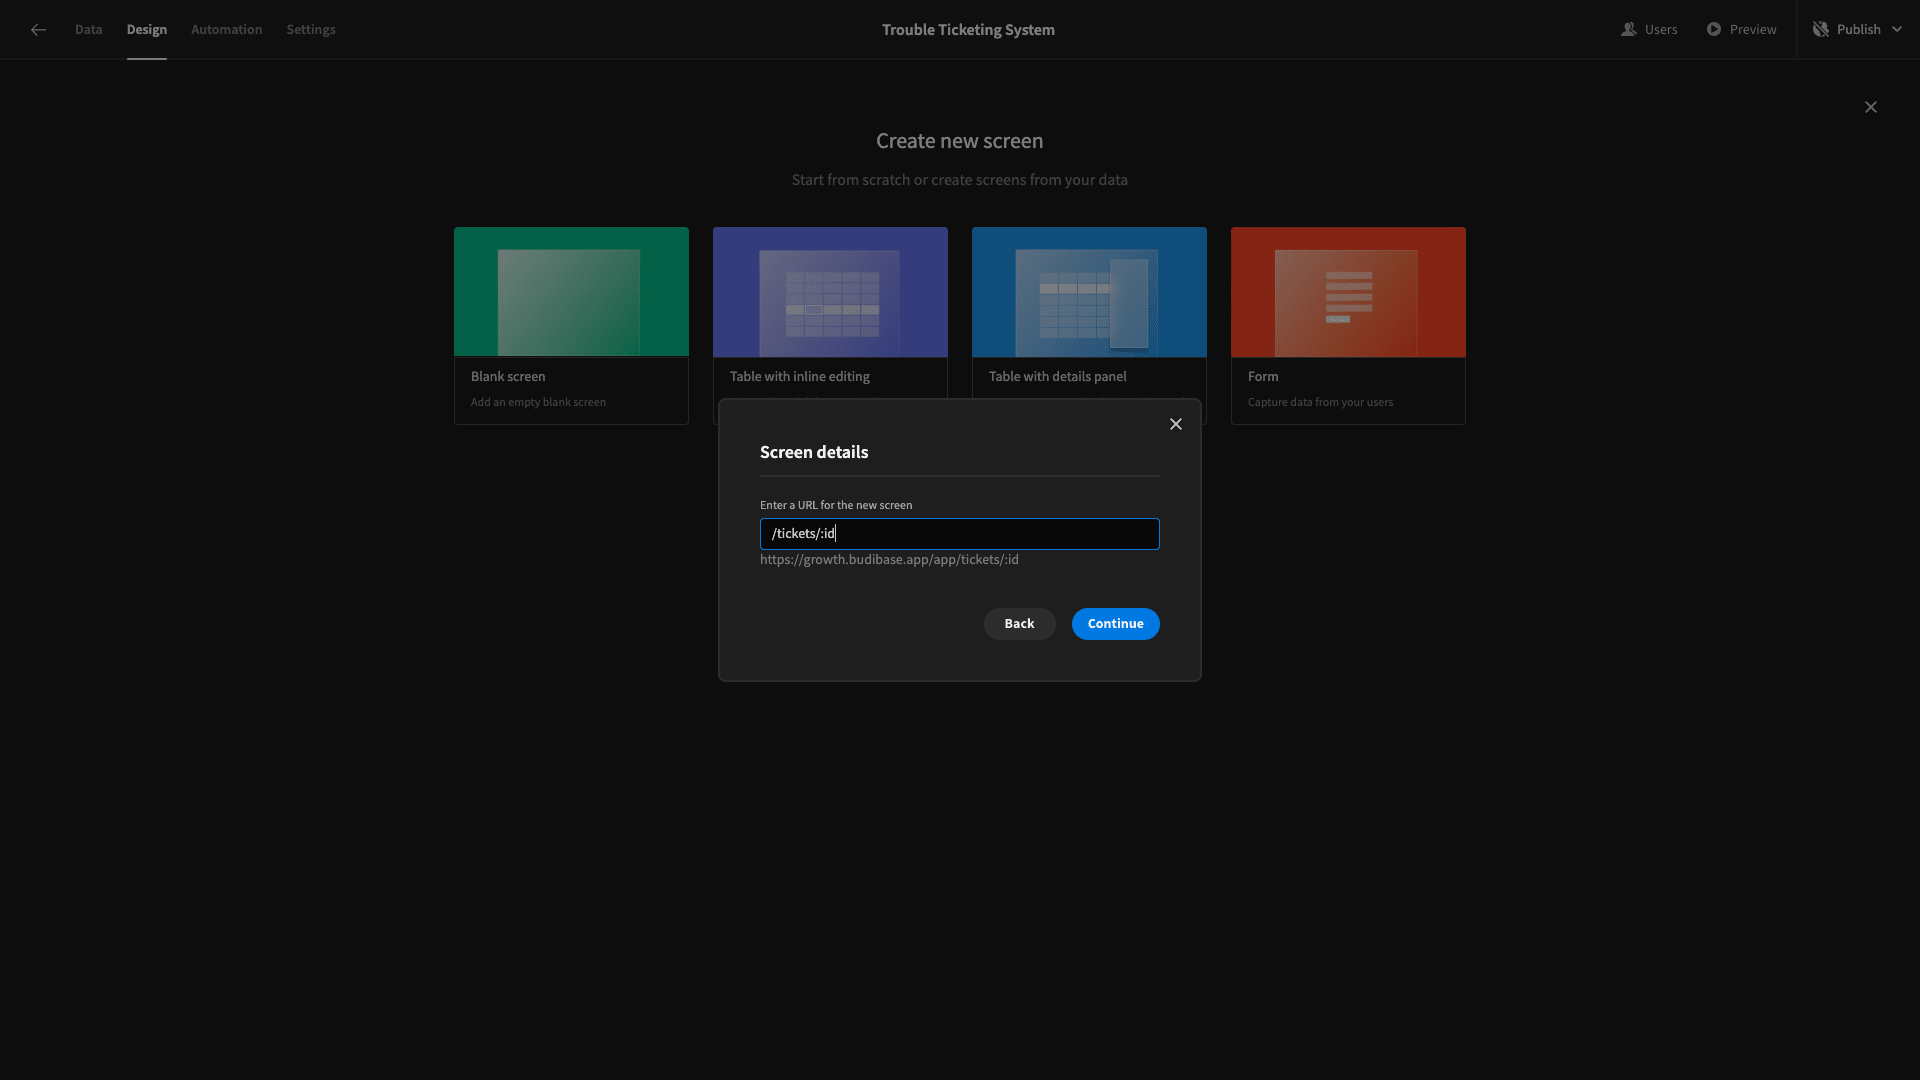
Then, we’ll create a new screen. This time we’ll choose the option to add a blank screen. We’re prompted to give this a URL extension. We’re using /tickets/:id - allowing us to add a variable called id to our URL. We can then populate this dynamically later.
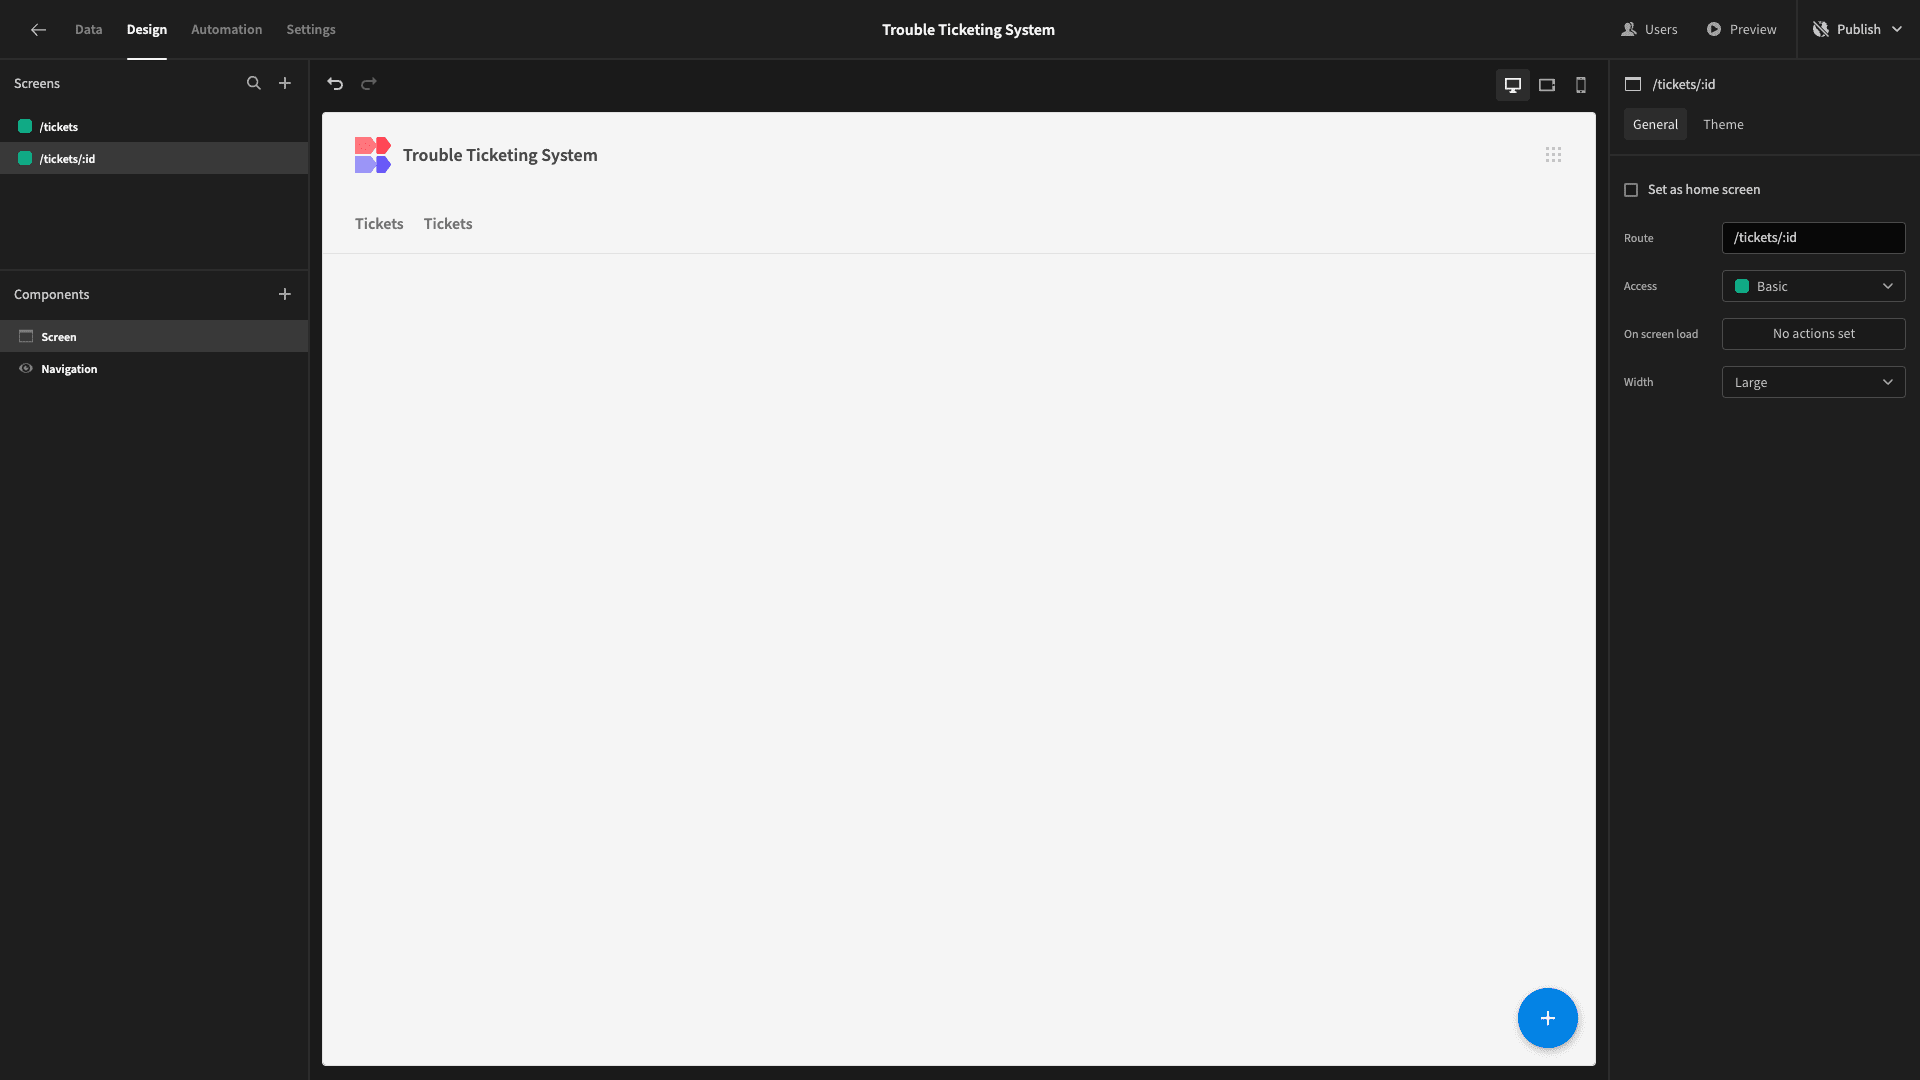
Again, we can set an access role for this screen, but we’re leaving this set to Basic. Here’s our blank screen.
The first component we’ll add is called a Form Block. This will output a working form based on whichever data table we point it at. Ours will be set to the tickets table. We also need to set its Type to View.

Now, we need to associate our form with a specific row in our database table. There’s a setting called Row ID. We want to set this to the :id variable in our URL, using the binding {{ URL.id }}.
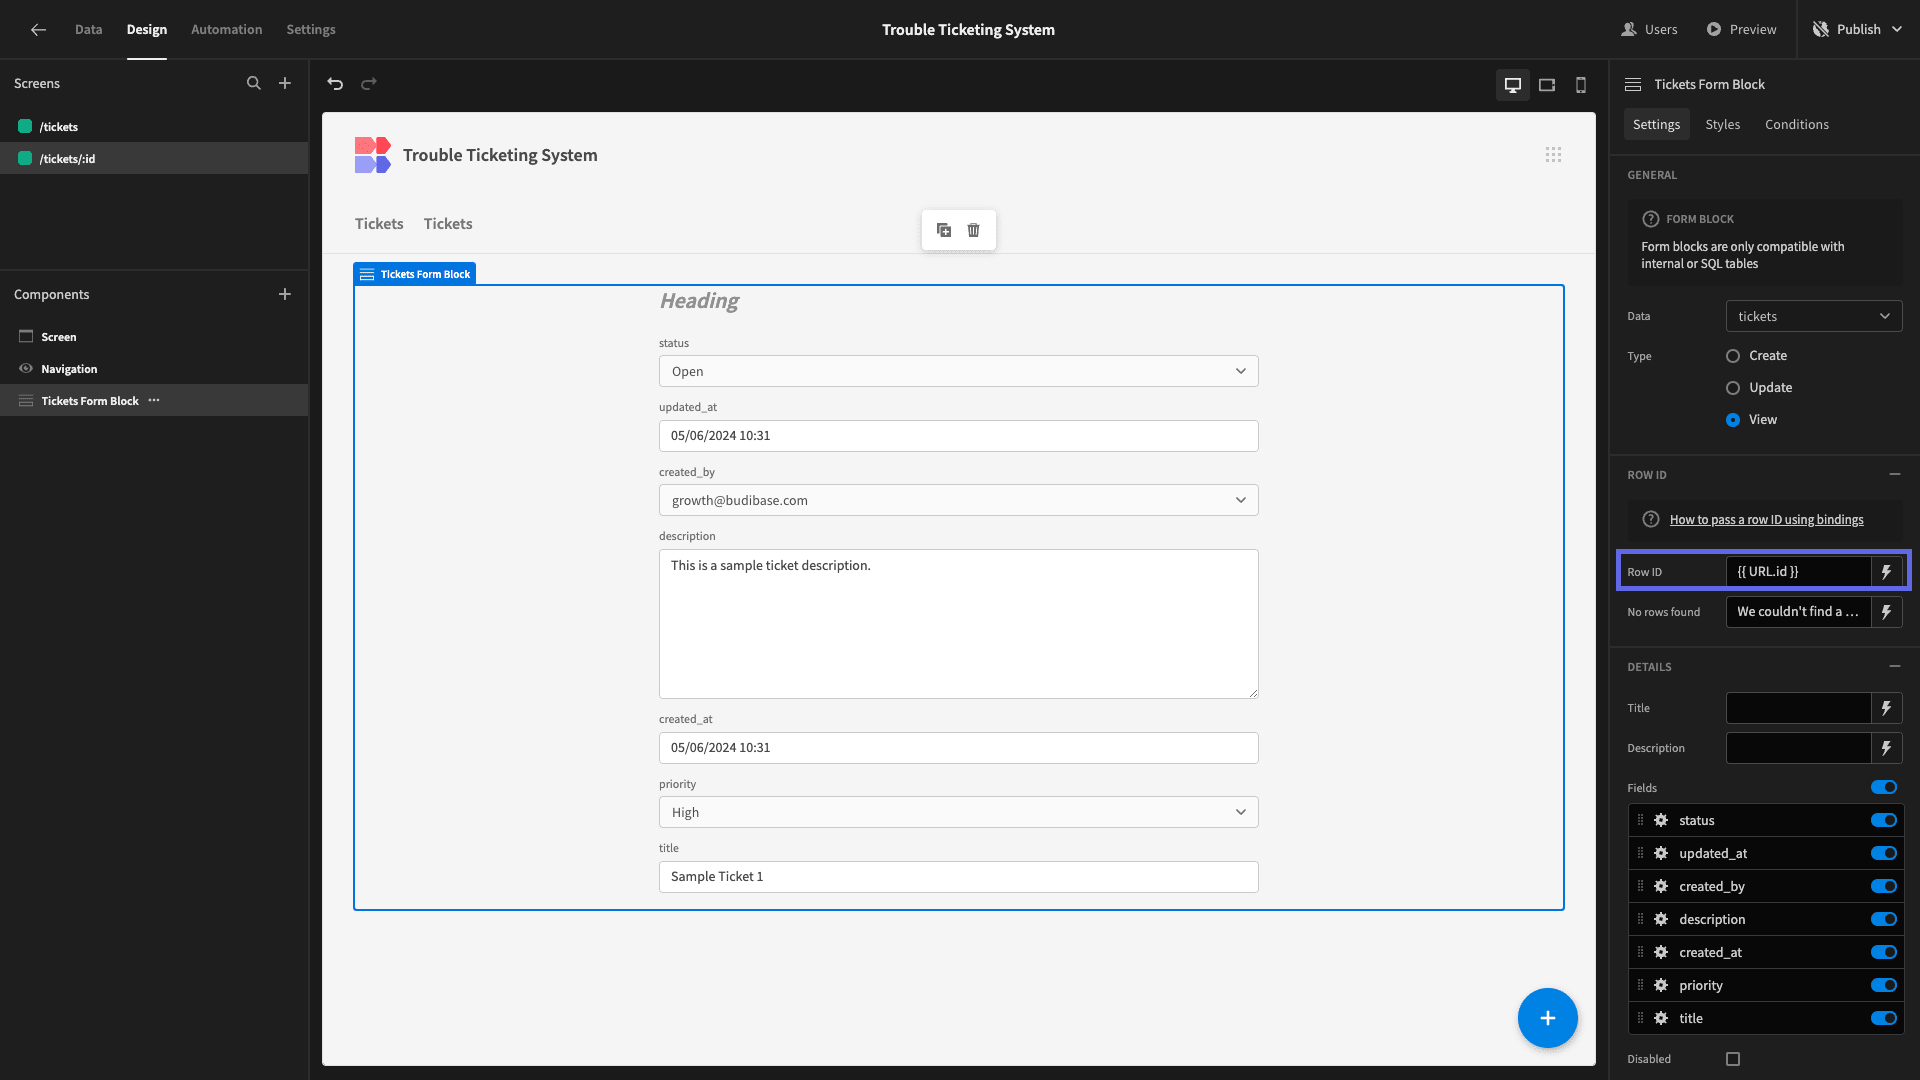
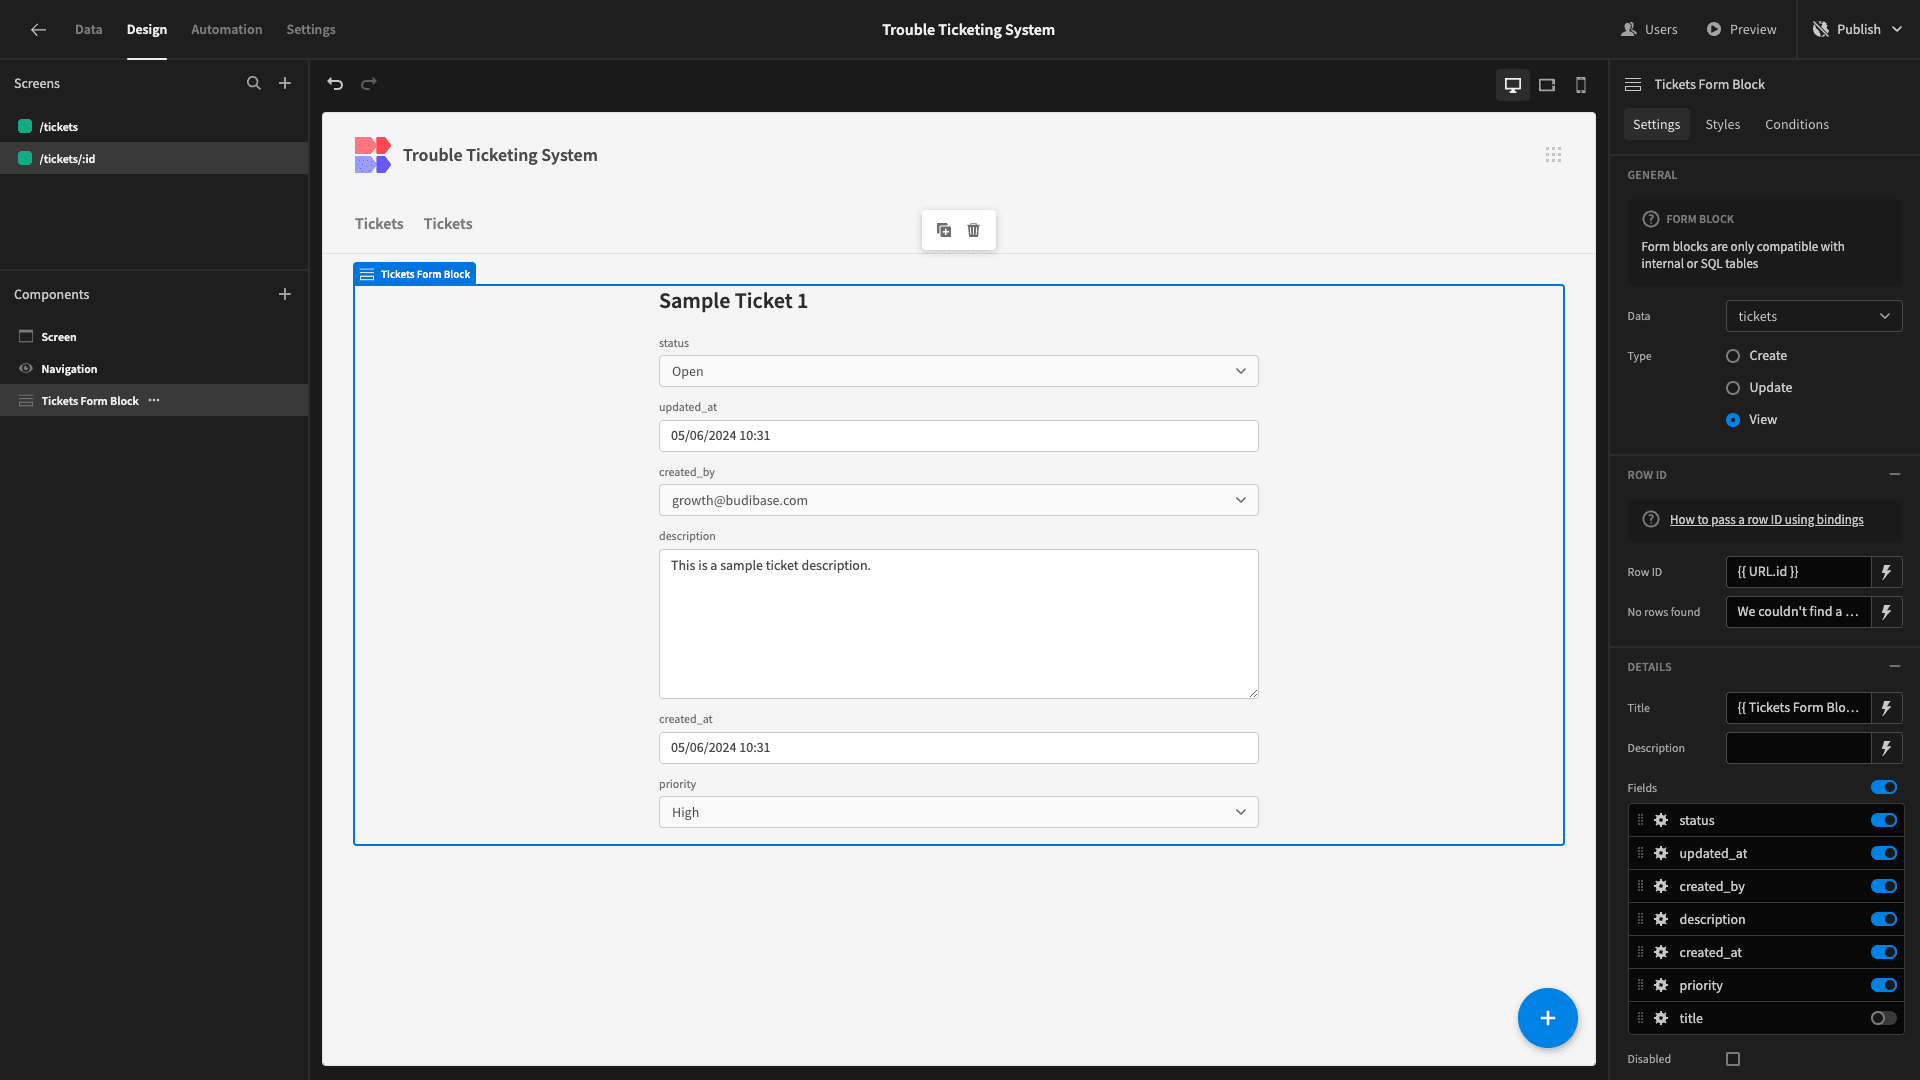
Then, we’ll deselect our title field and display this in the Form Block’s Title attribute instead, just like we did earlier. We’ll also deselect created_by.
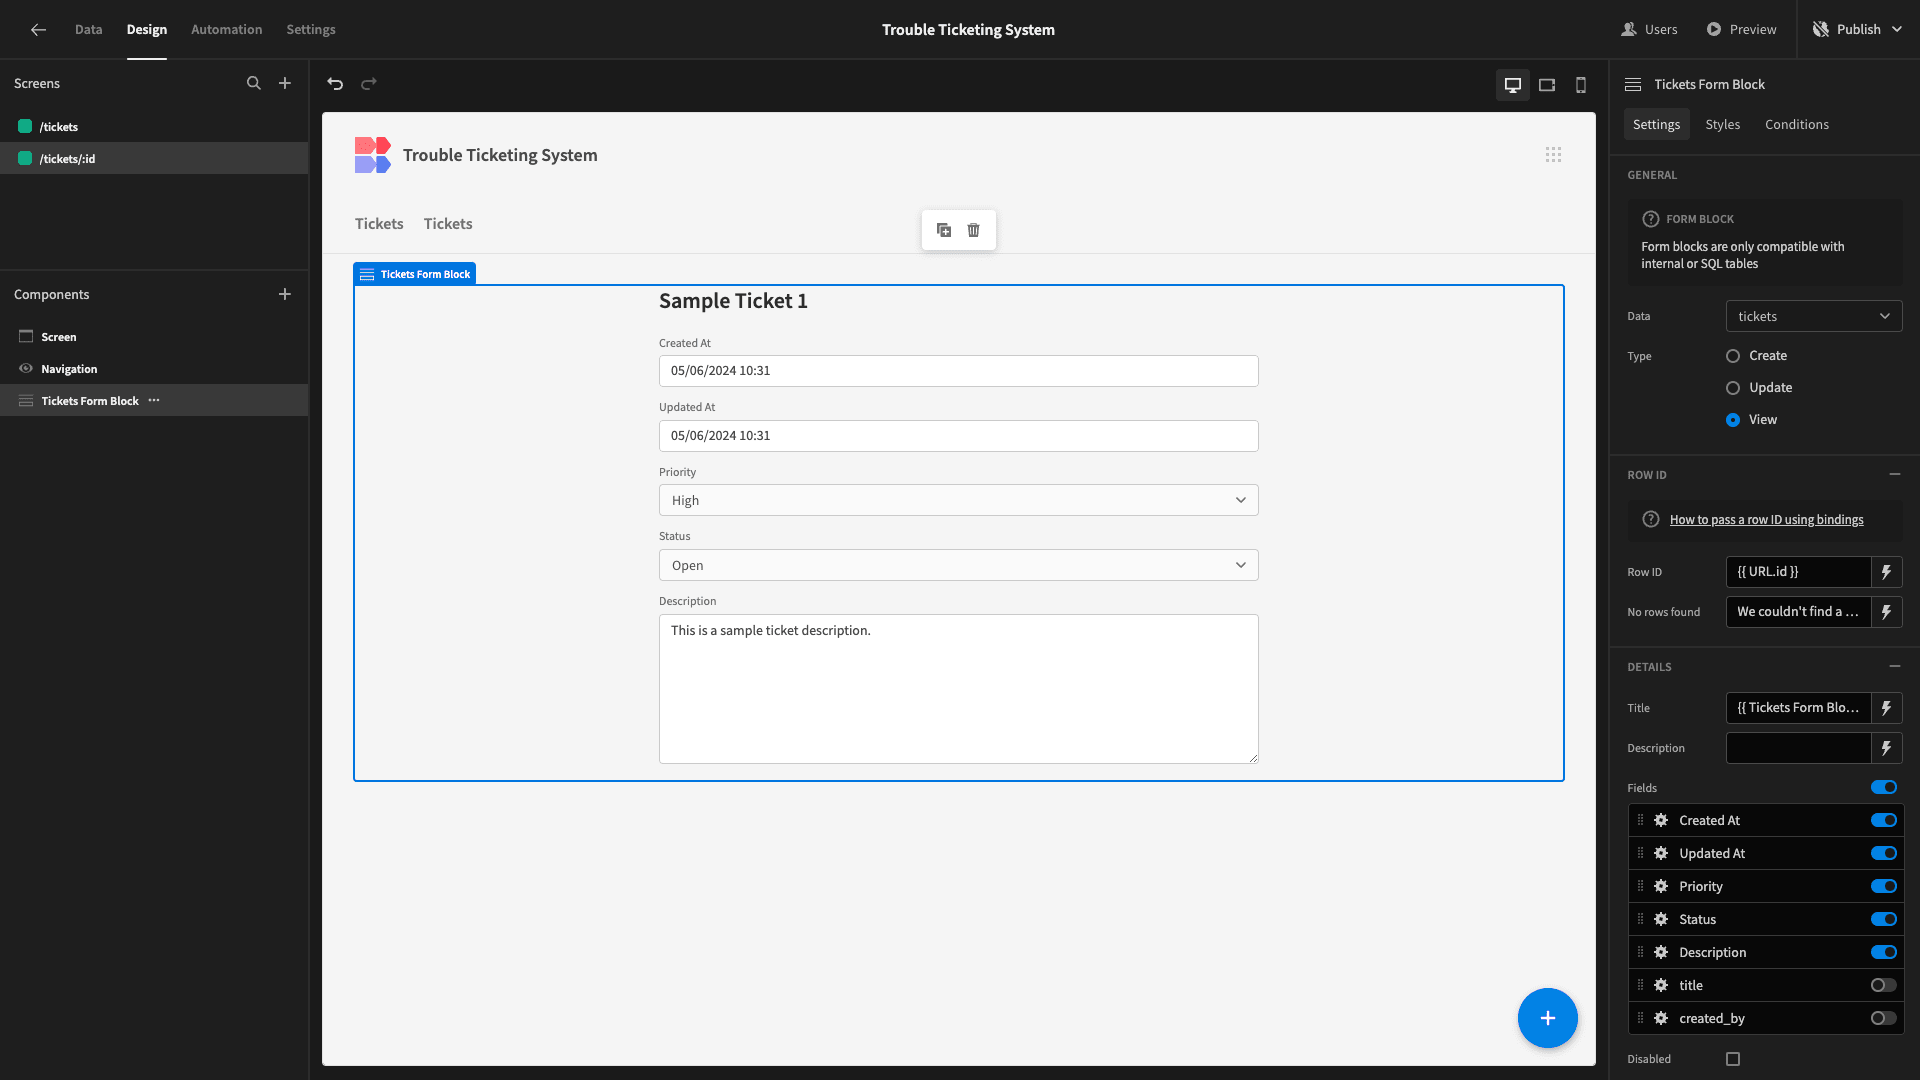
Lastly, all we need to do is rearrange our remaining fields into a more logical order and capitalize their labels.
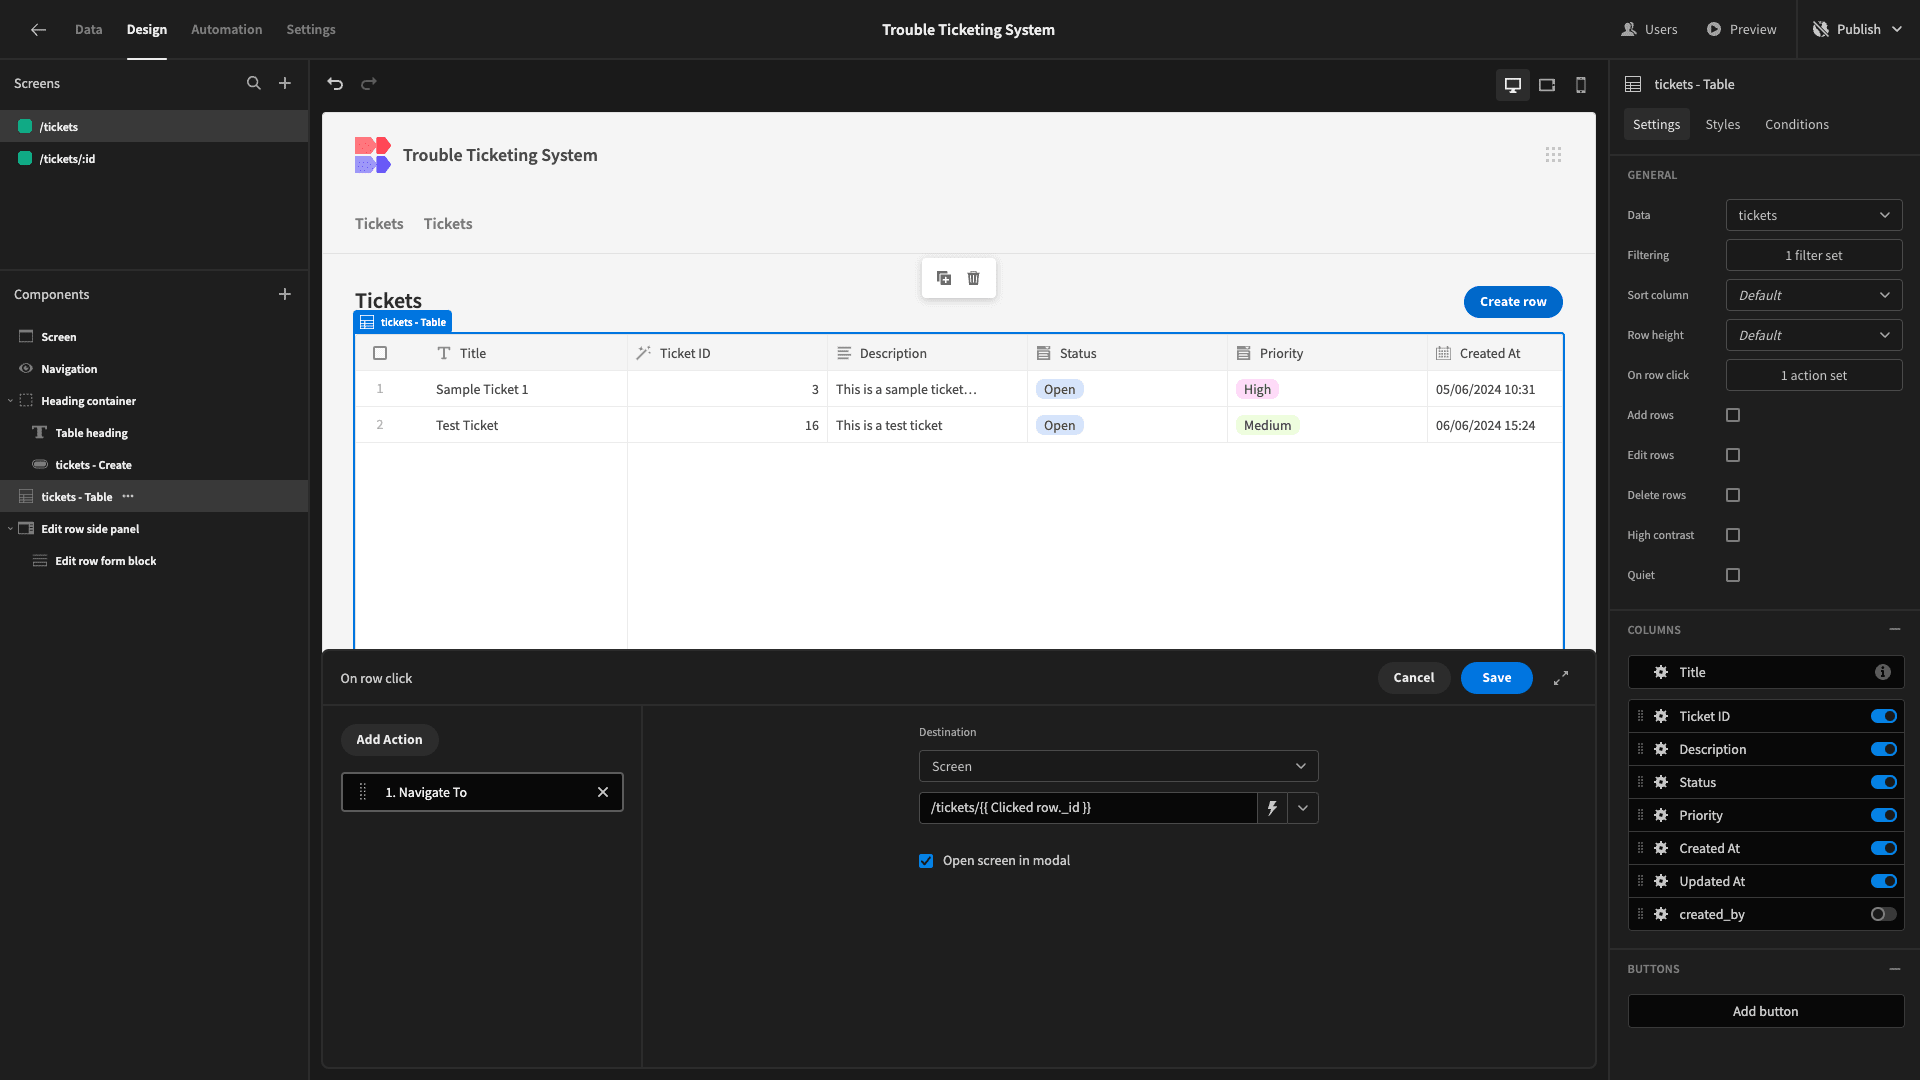
Head back to our other screen and open the row click actions drawer for our table. Here, there are two existing actions that we’ll delete using the X icon.
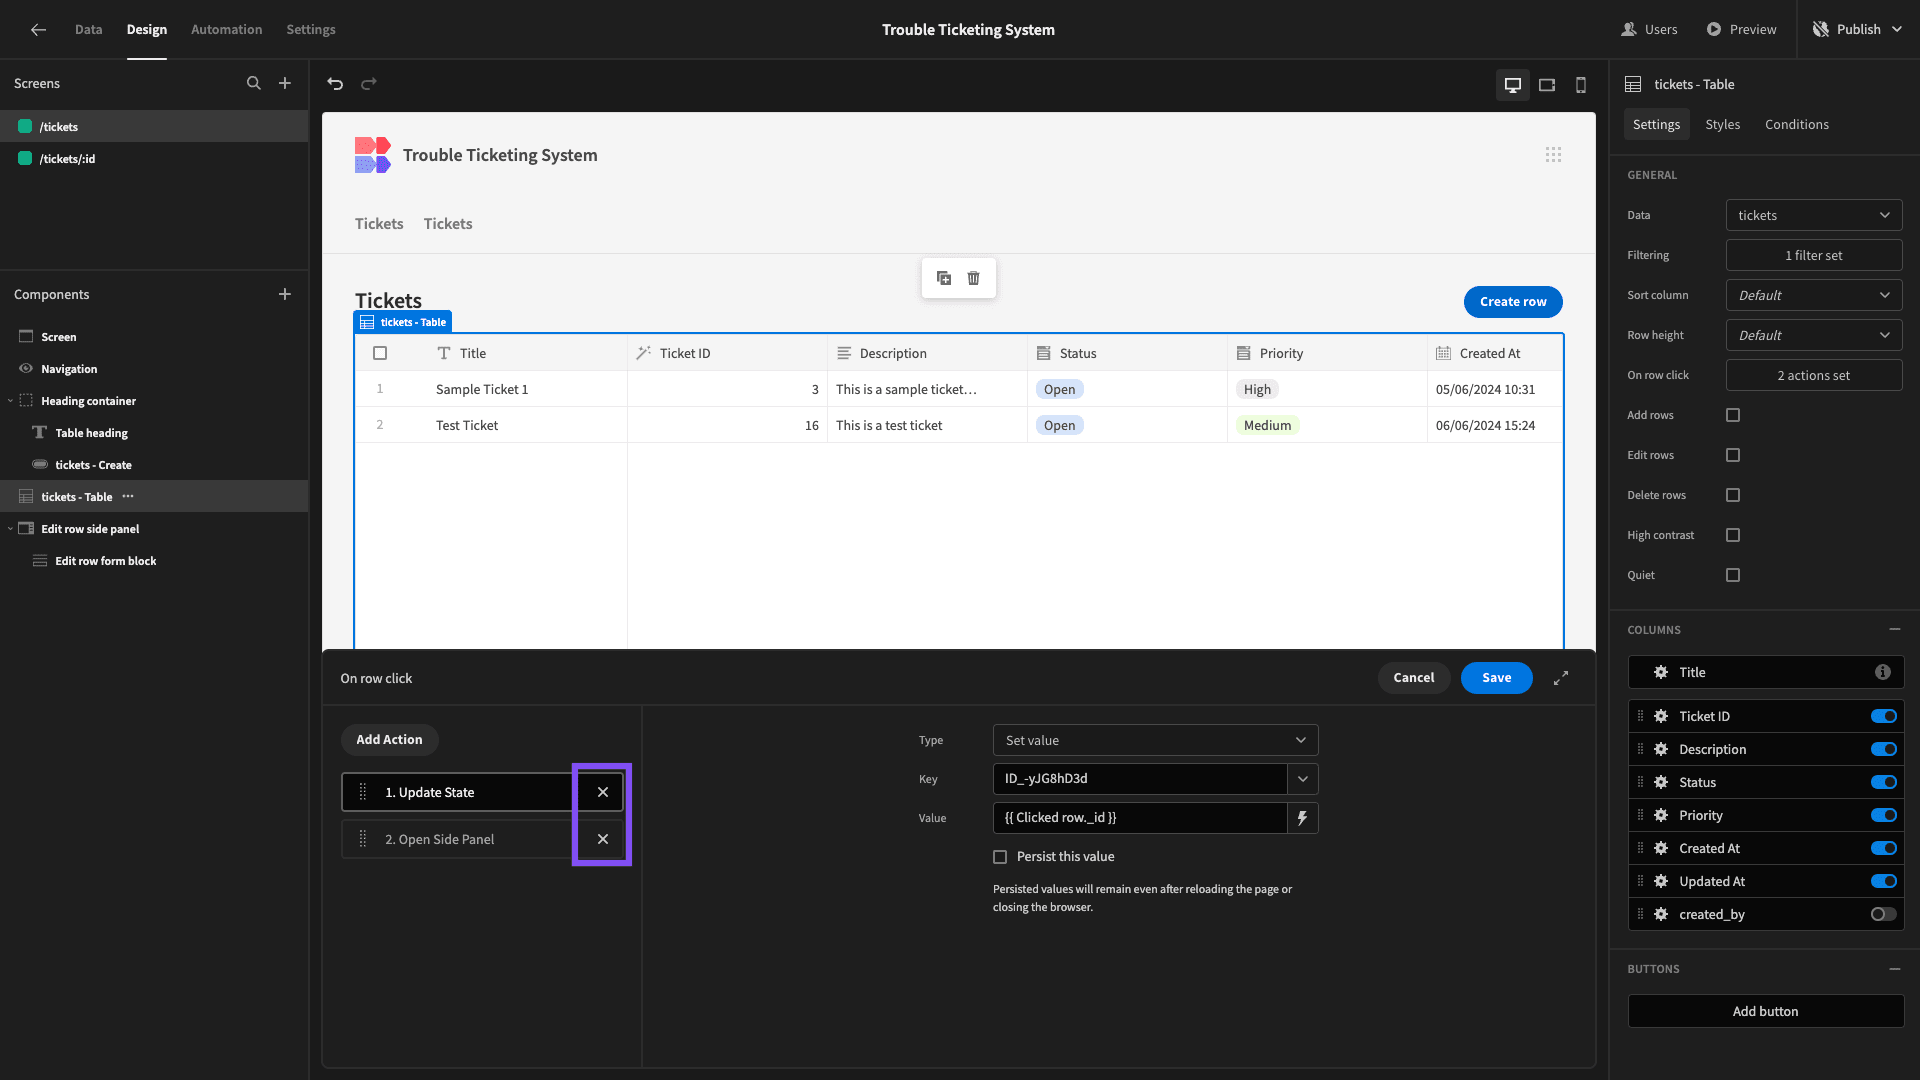
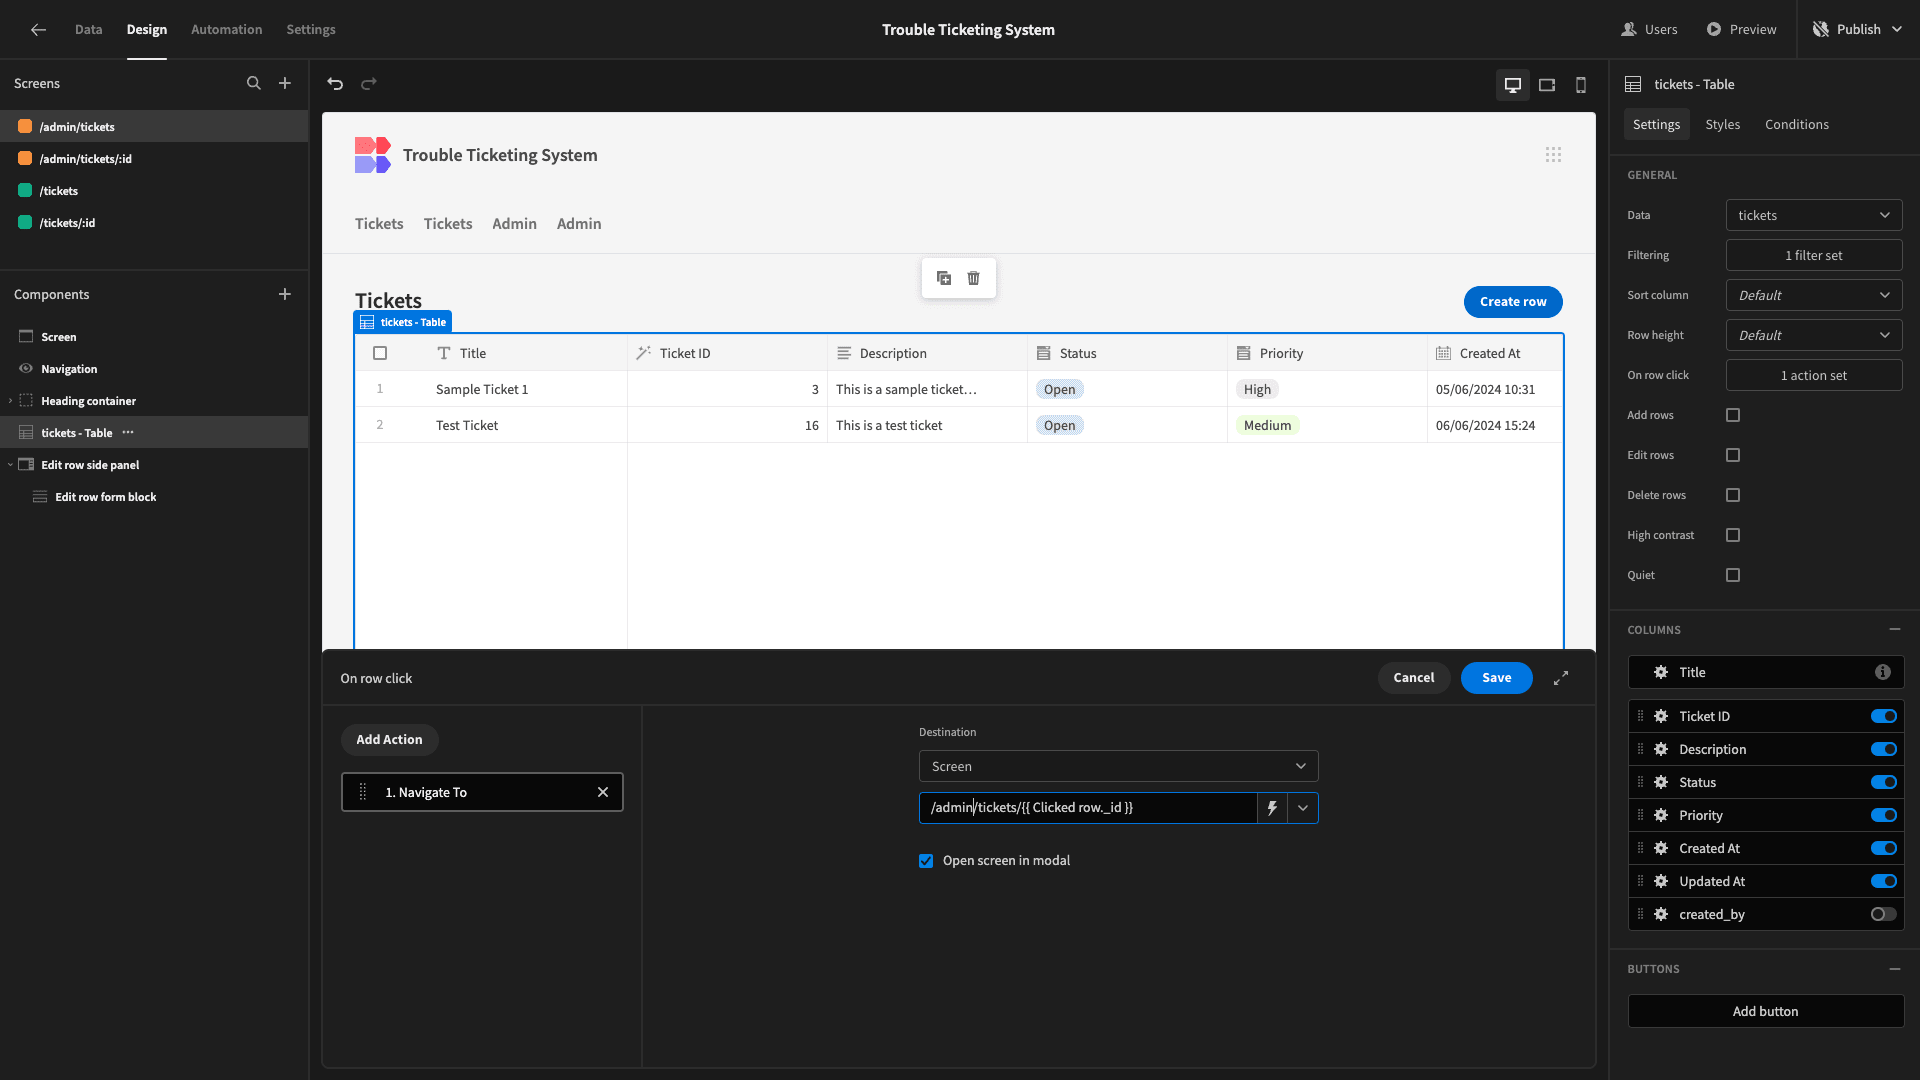
We’ll then replace these with a Navigate To action, setting the destination to /tickets/{{ Clicked row._id }} to populate the :id attribute in our URL with the _id of the row a user clicks on. We’re also selecting the option to open our screen in a modal.
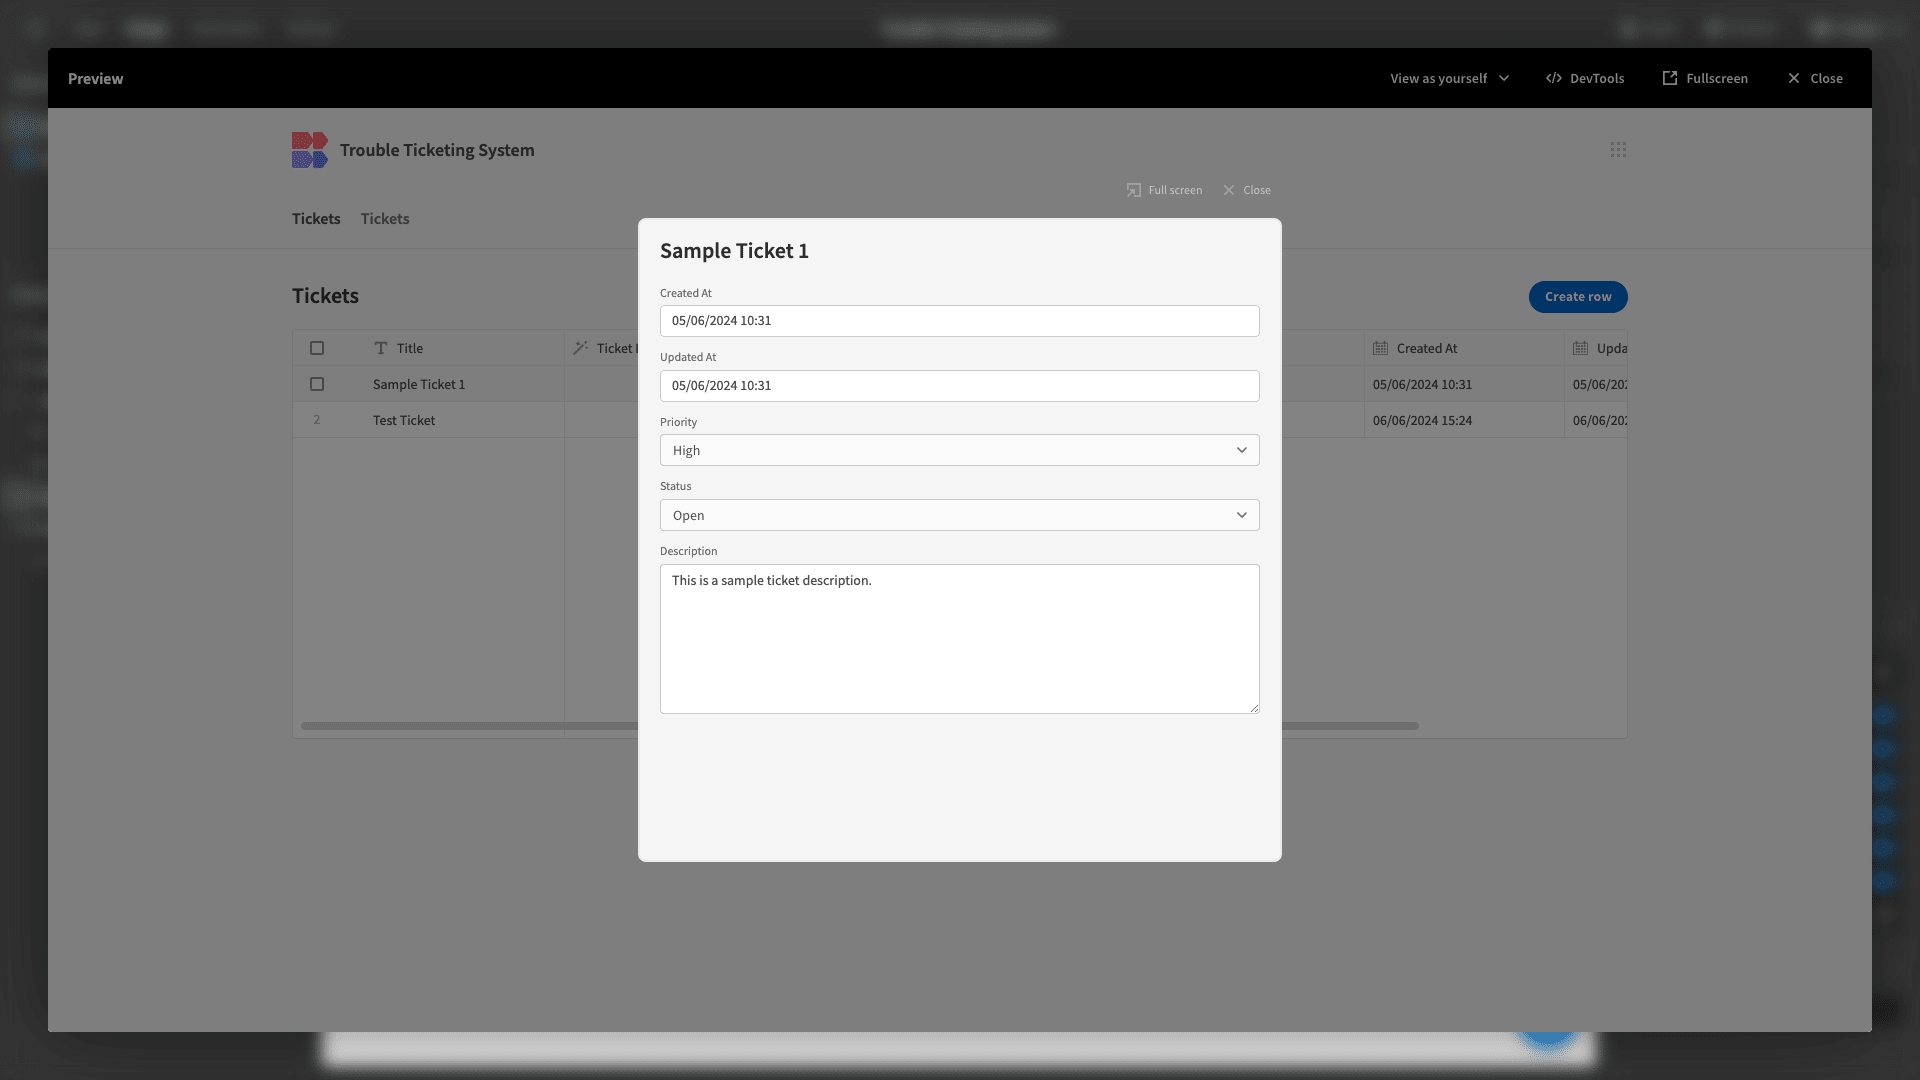
Here’s how our form will look when a user clicks on a table row.
4. Handling messages
The next thing we want to do is build a UI for viewing and adding comments on our tickets. We’re going to base this around a messaging interface, with comments from the current user appearing differently to those created by others.
We’ll start by adding a component called a Repeater Block. This accepts a data source, and iterates over it, displaying whichever components we nest within for each entry.
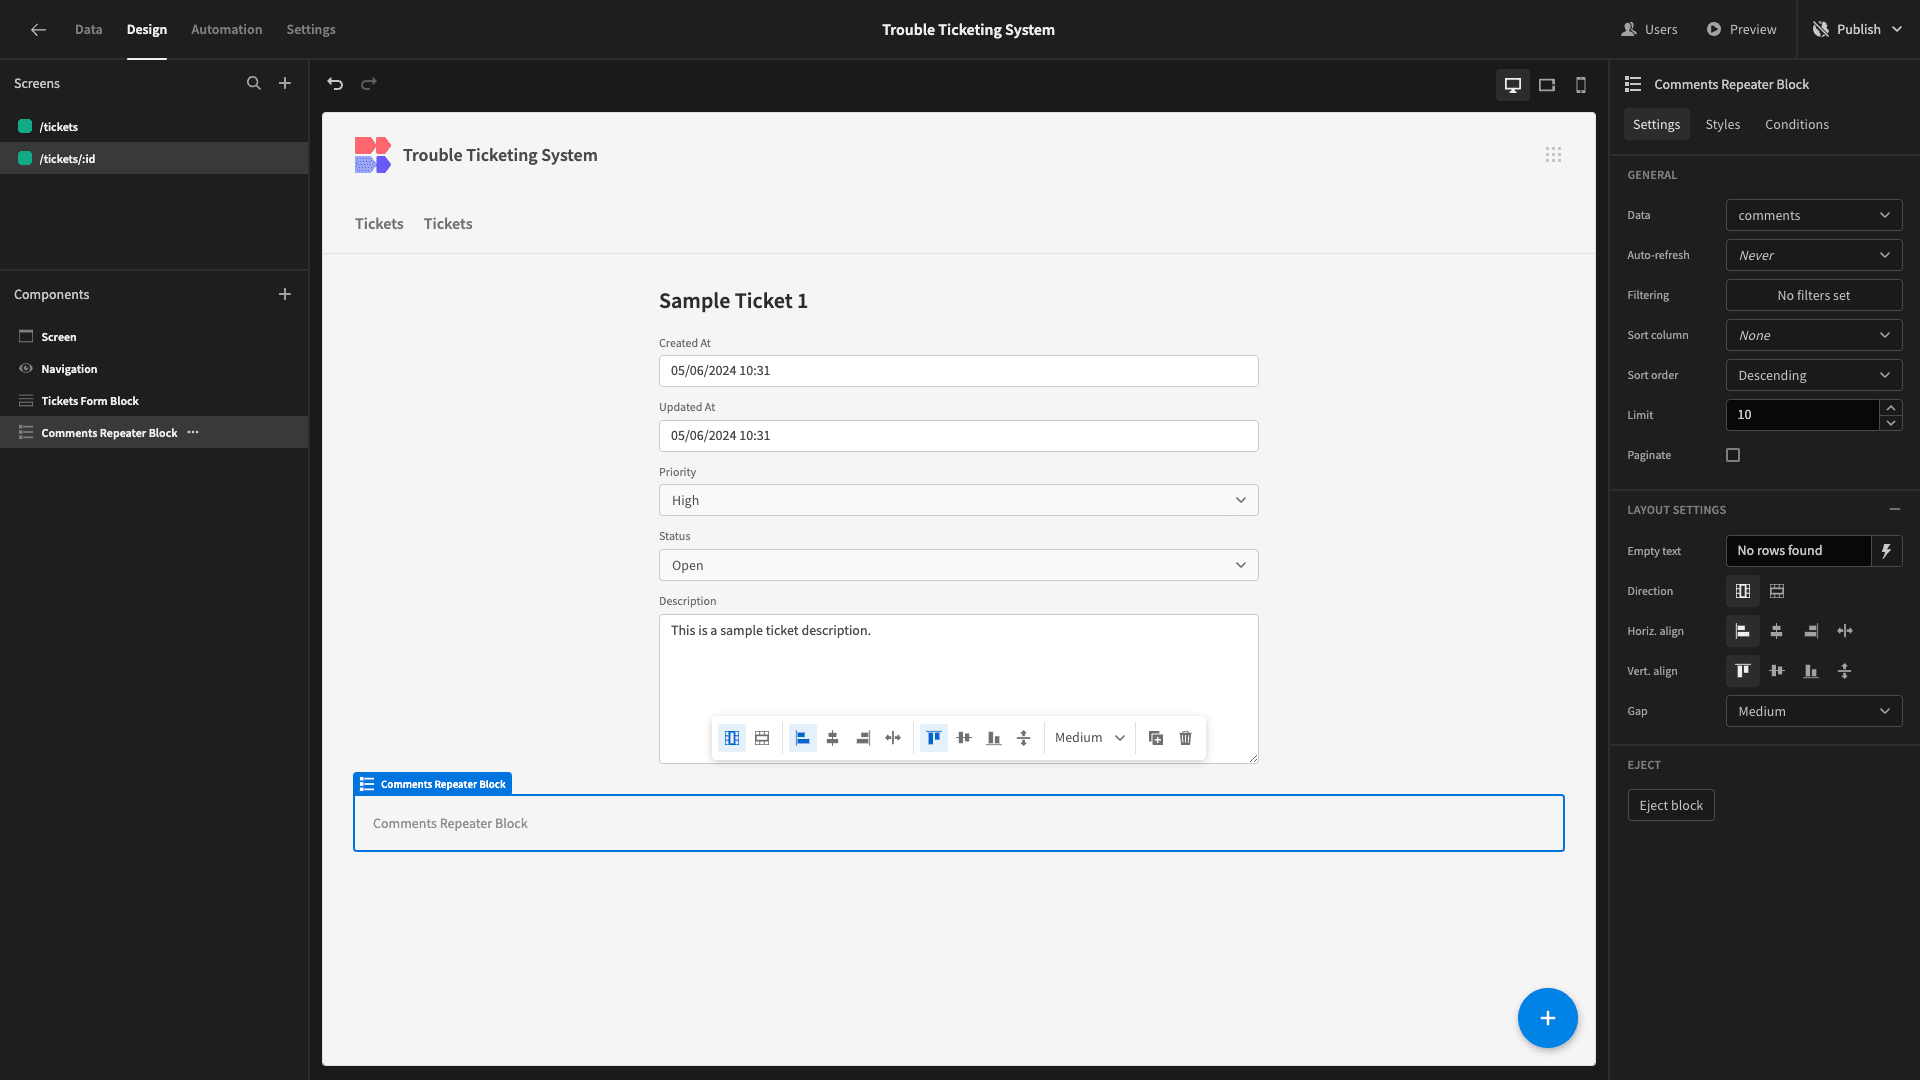
Inside this, we’ll nest a Container with its horizontal alignment set to the left. We’ll call this Alignment Container.
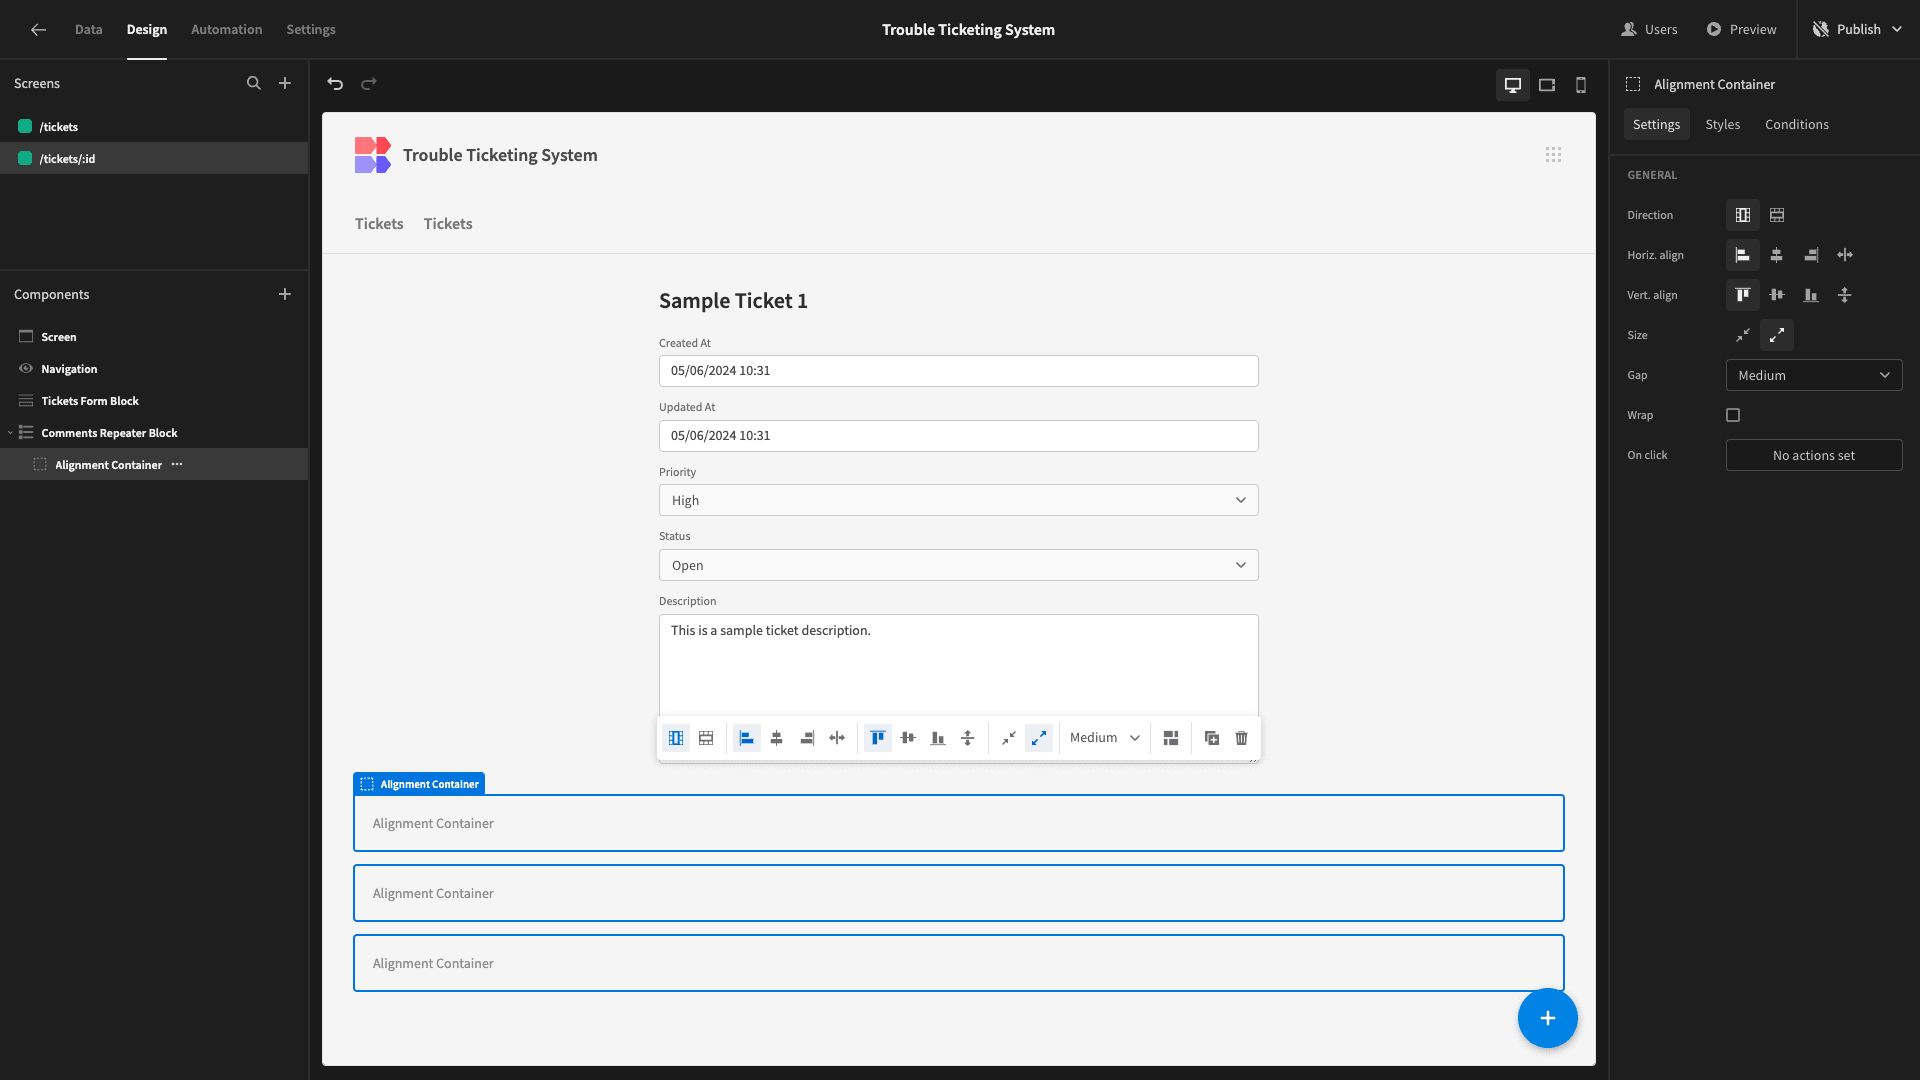
Inside this, we’ll nest a second container called Comment Container. We’ll give this a blue background and a small radius.
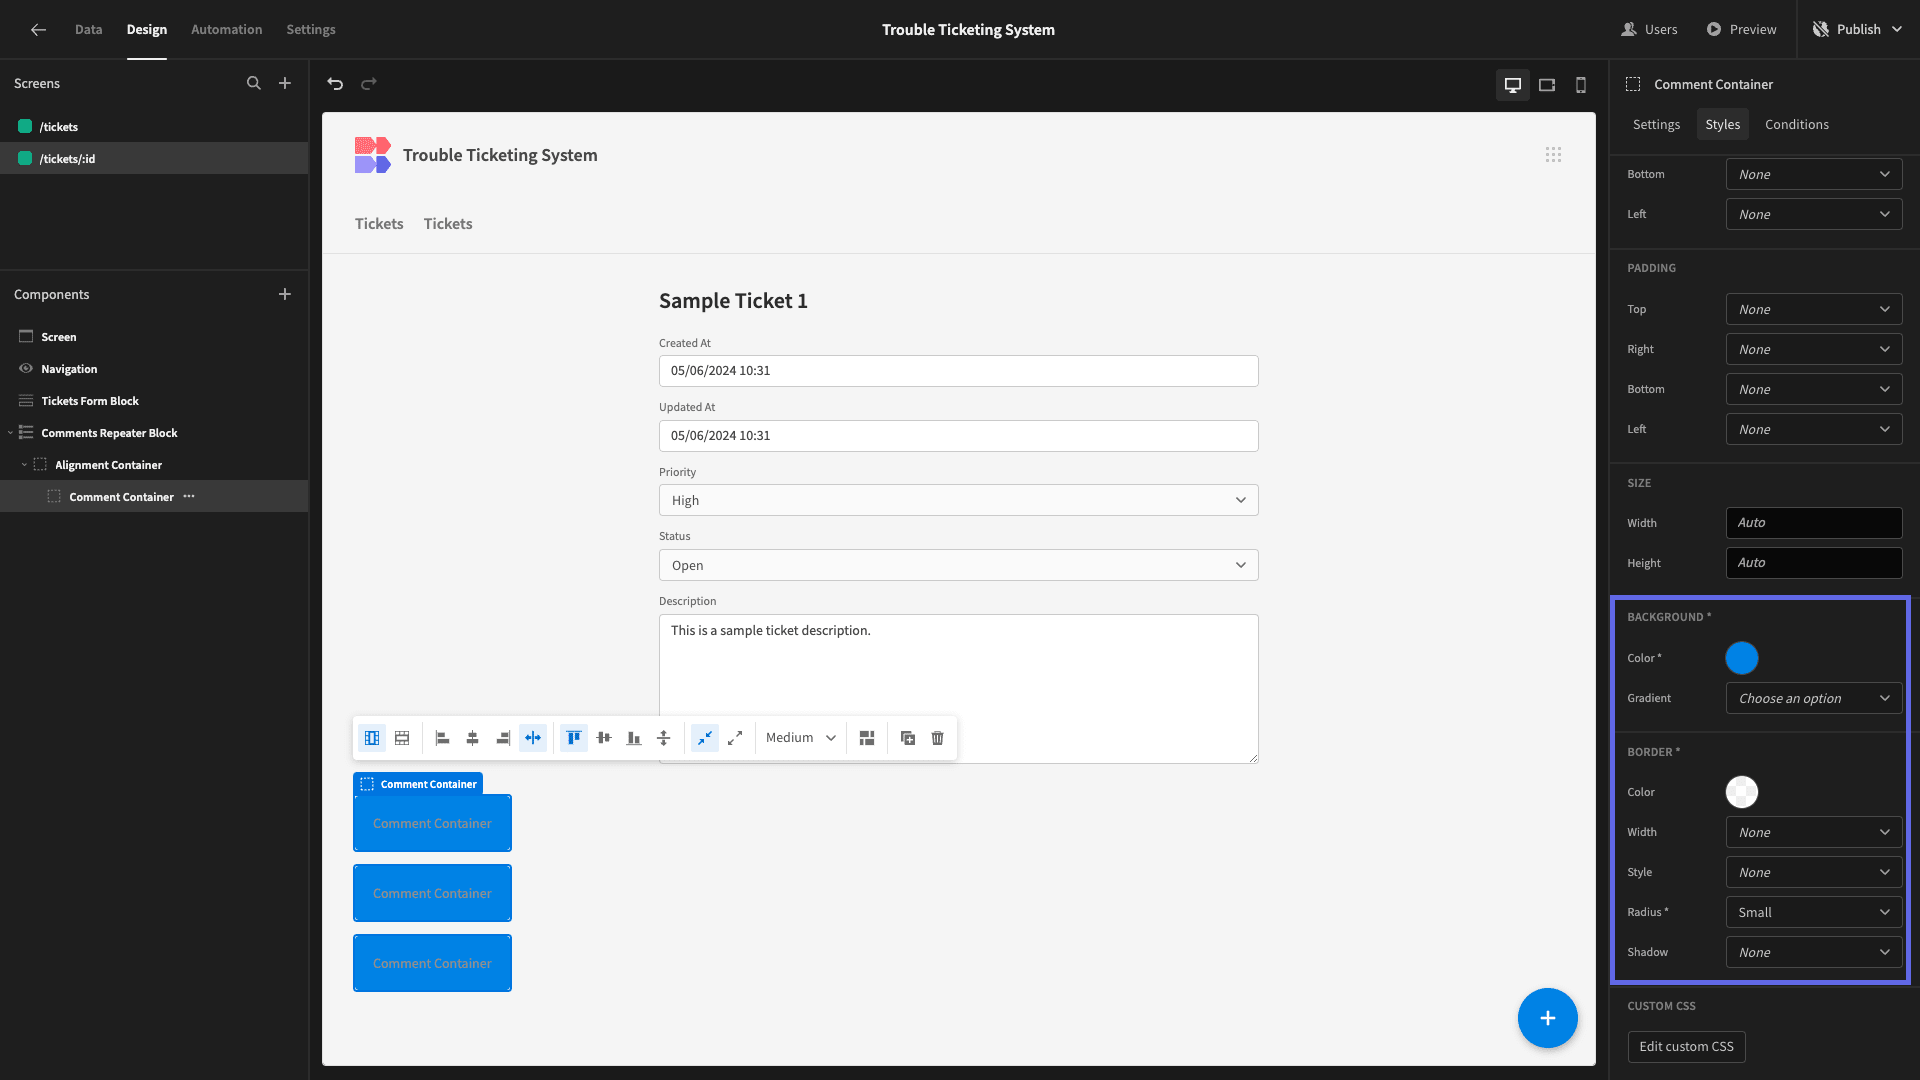
We’ll add a Paragraph component inside this and set its color to off-white, as well as adding a little bit of padding.
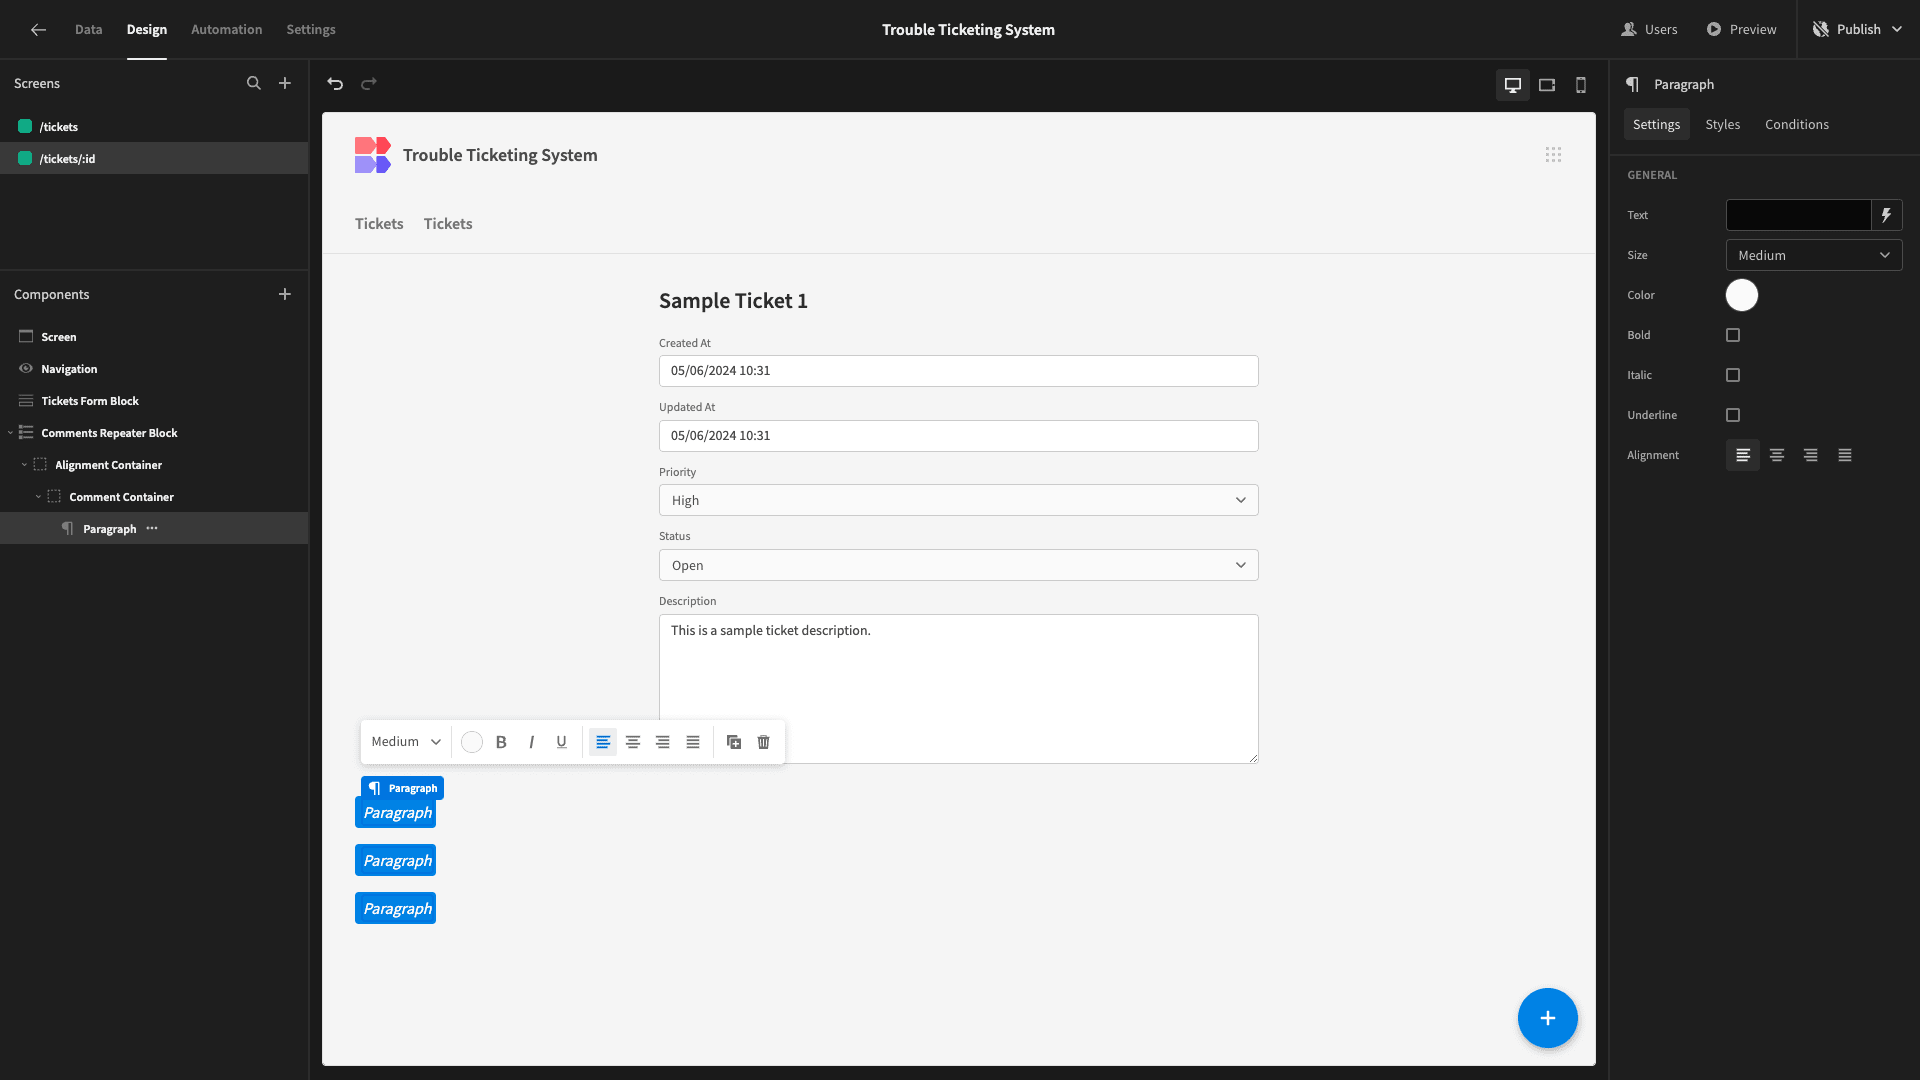
We want this to display the name of the user who submitted the comment and the created_at date, followed by the comment itself on a new line. So, we’re binding our Text setting to:
1{{ Comments Repeater Block.comments.created_by.firstName }} - {{ date Comments Repeater Block.comments.created_at "DD/MM hh:mm" }}
2
3{{ Comments Repeater Block.comments.comment }}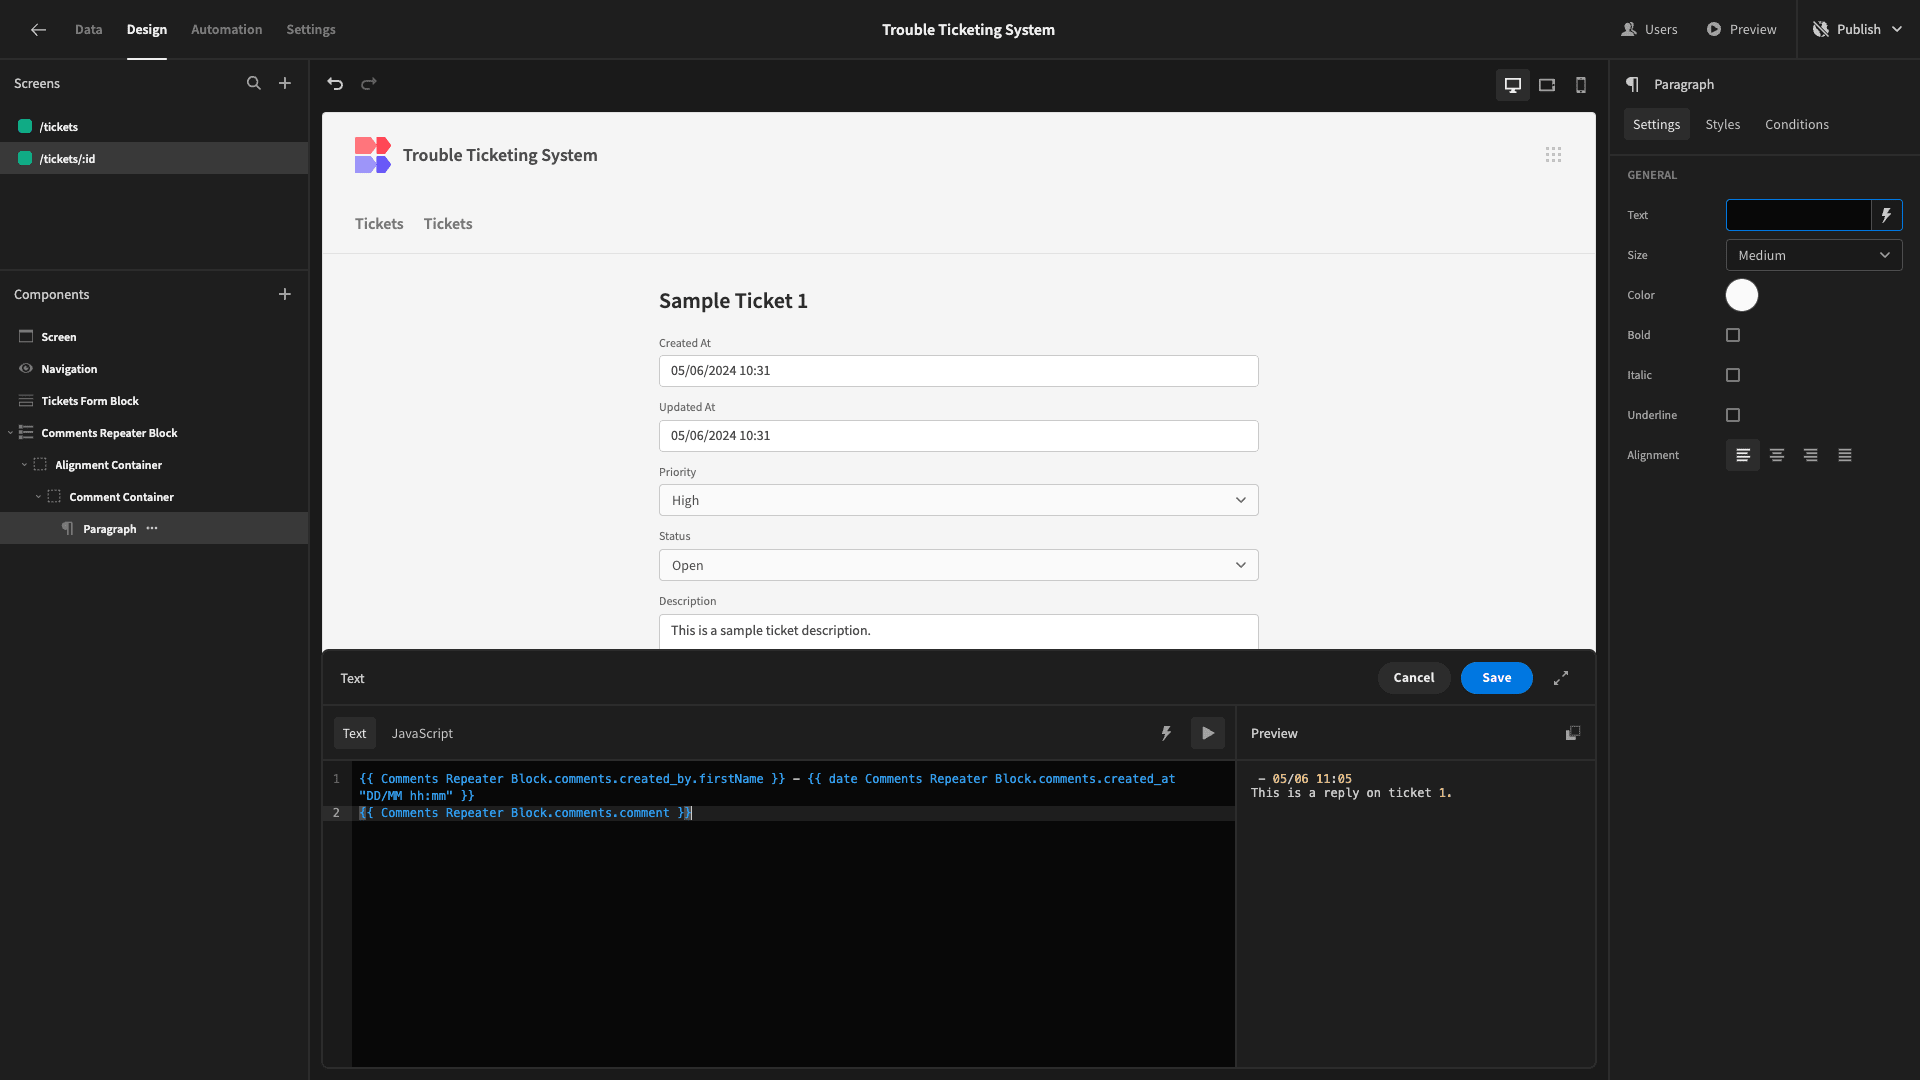
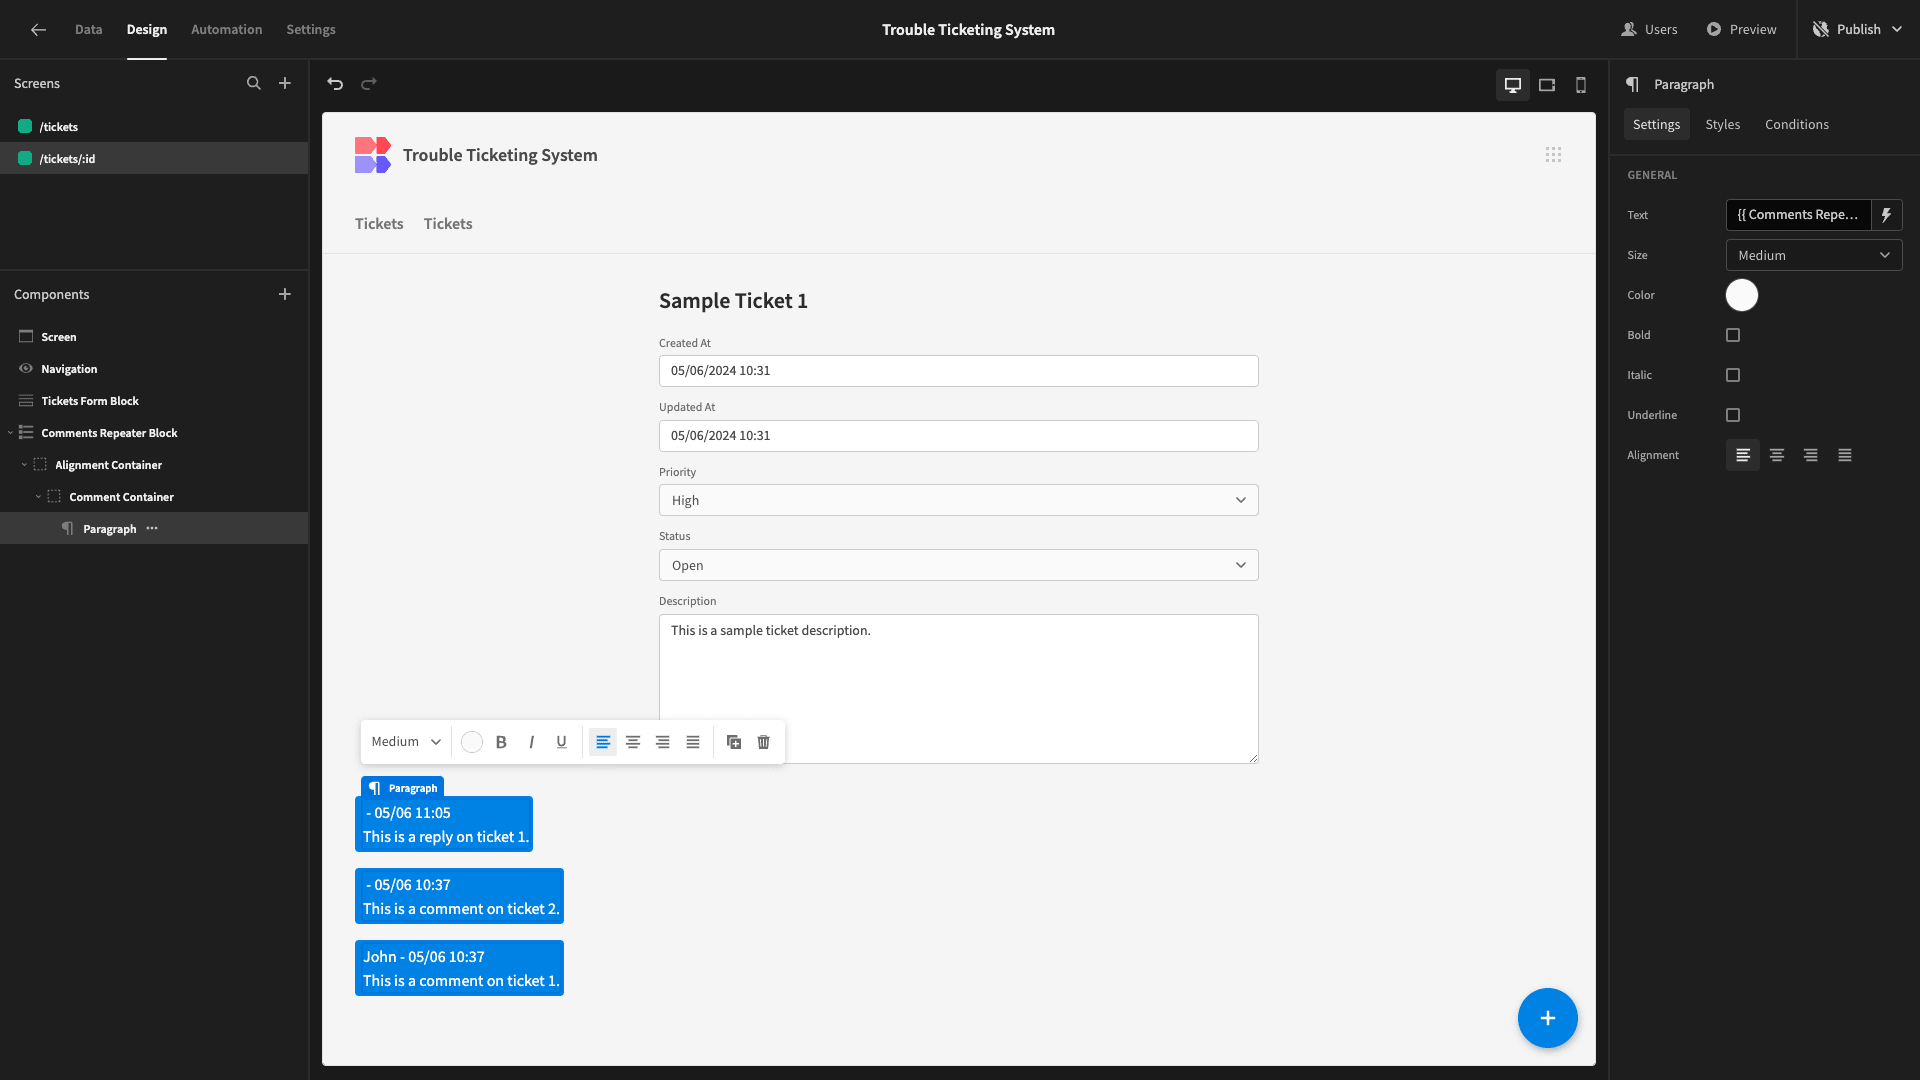
Here’s how this will look. Note that some of our comments don’t have a user associated with them so the name is blank, but this is okay for testing purposes as we can see that it works on the others.
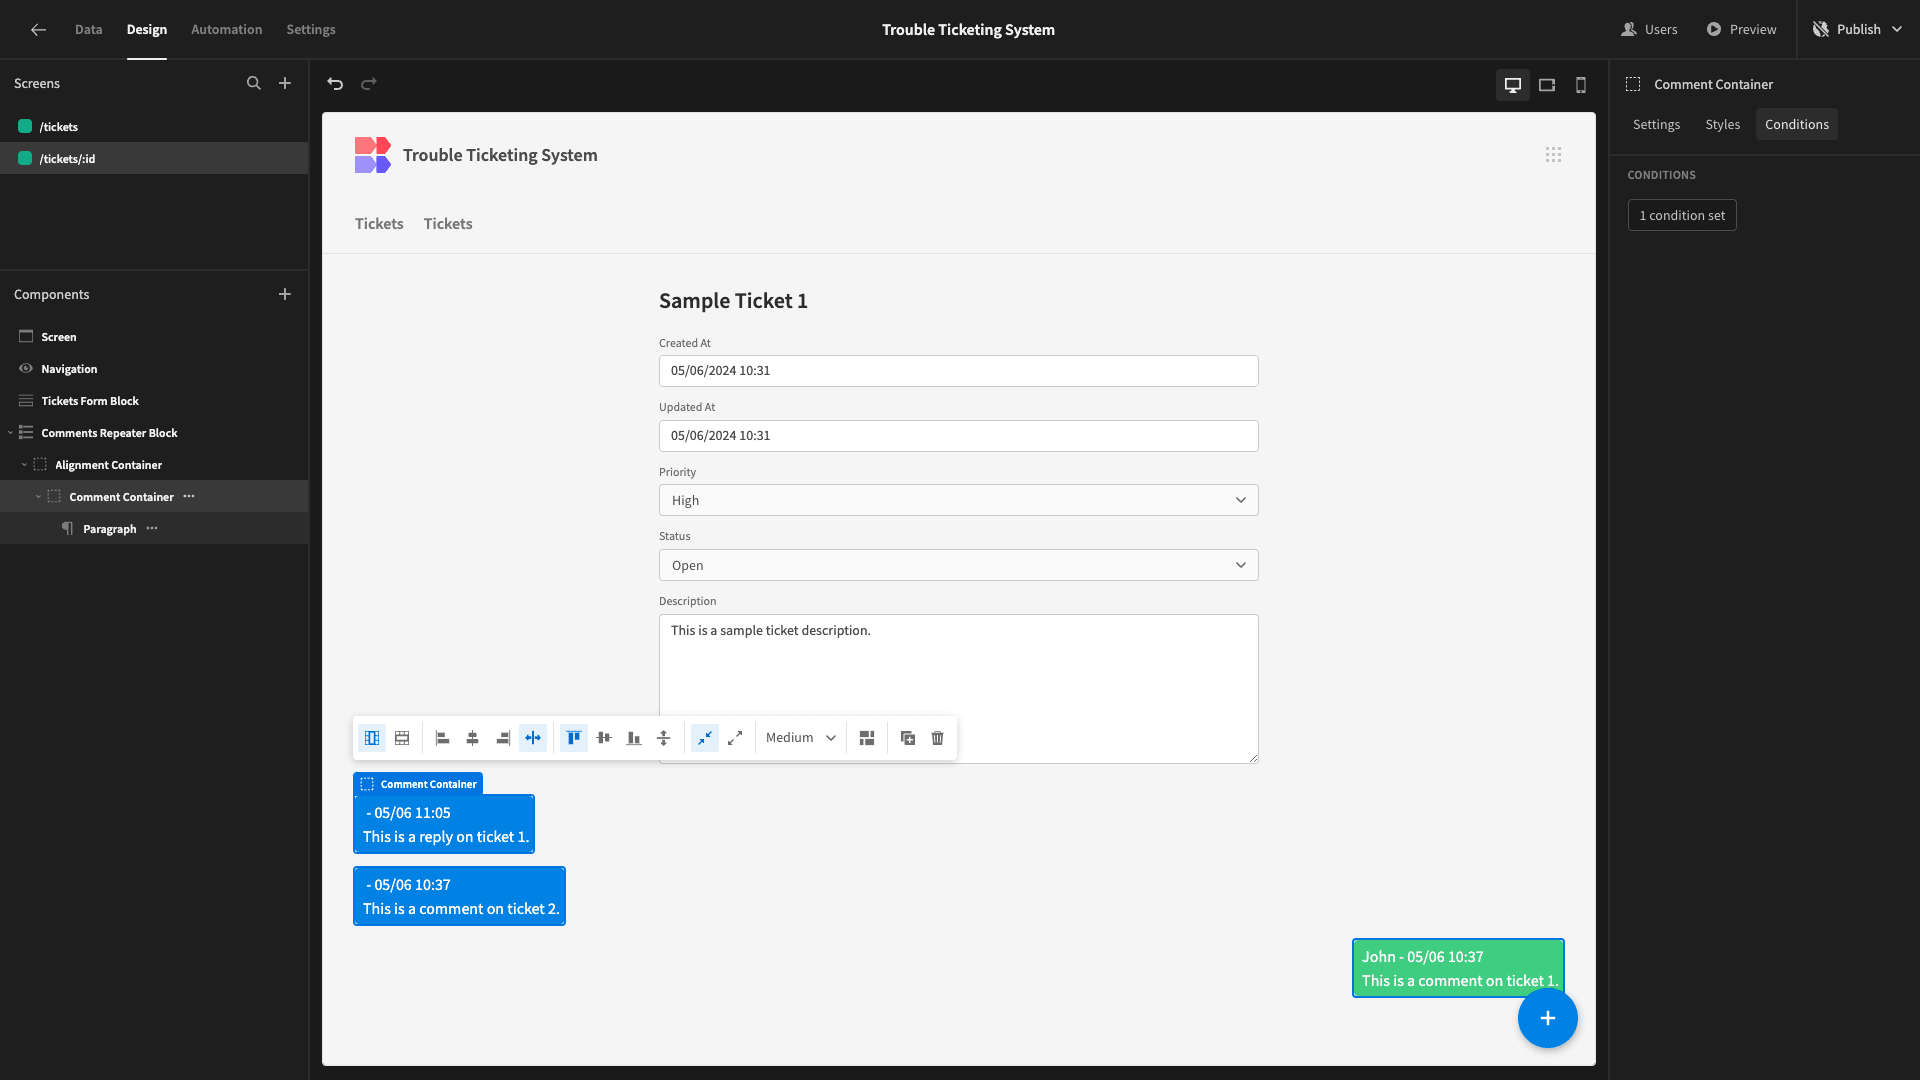
Next, we want to right-align any comments submitted by the current user and place them in green containers. We’ll achieve this with Budibase’s custom conditionality rules. We can use this to display, hide, or update the native settings of any component.
We’ll start by adding an Update Setting rule on our Alignment Container, changing its horizontal alignment to the right.
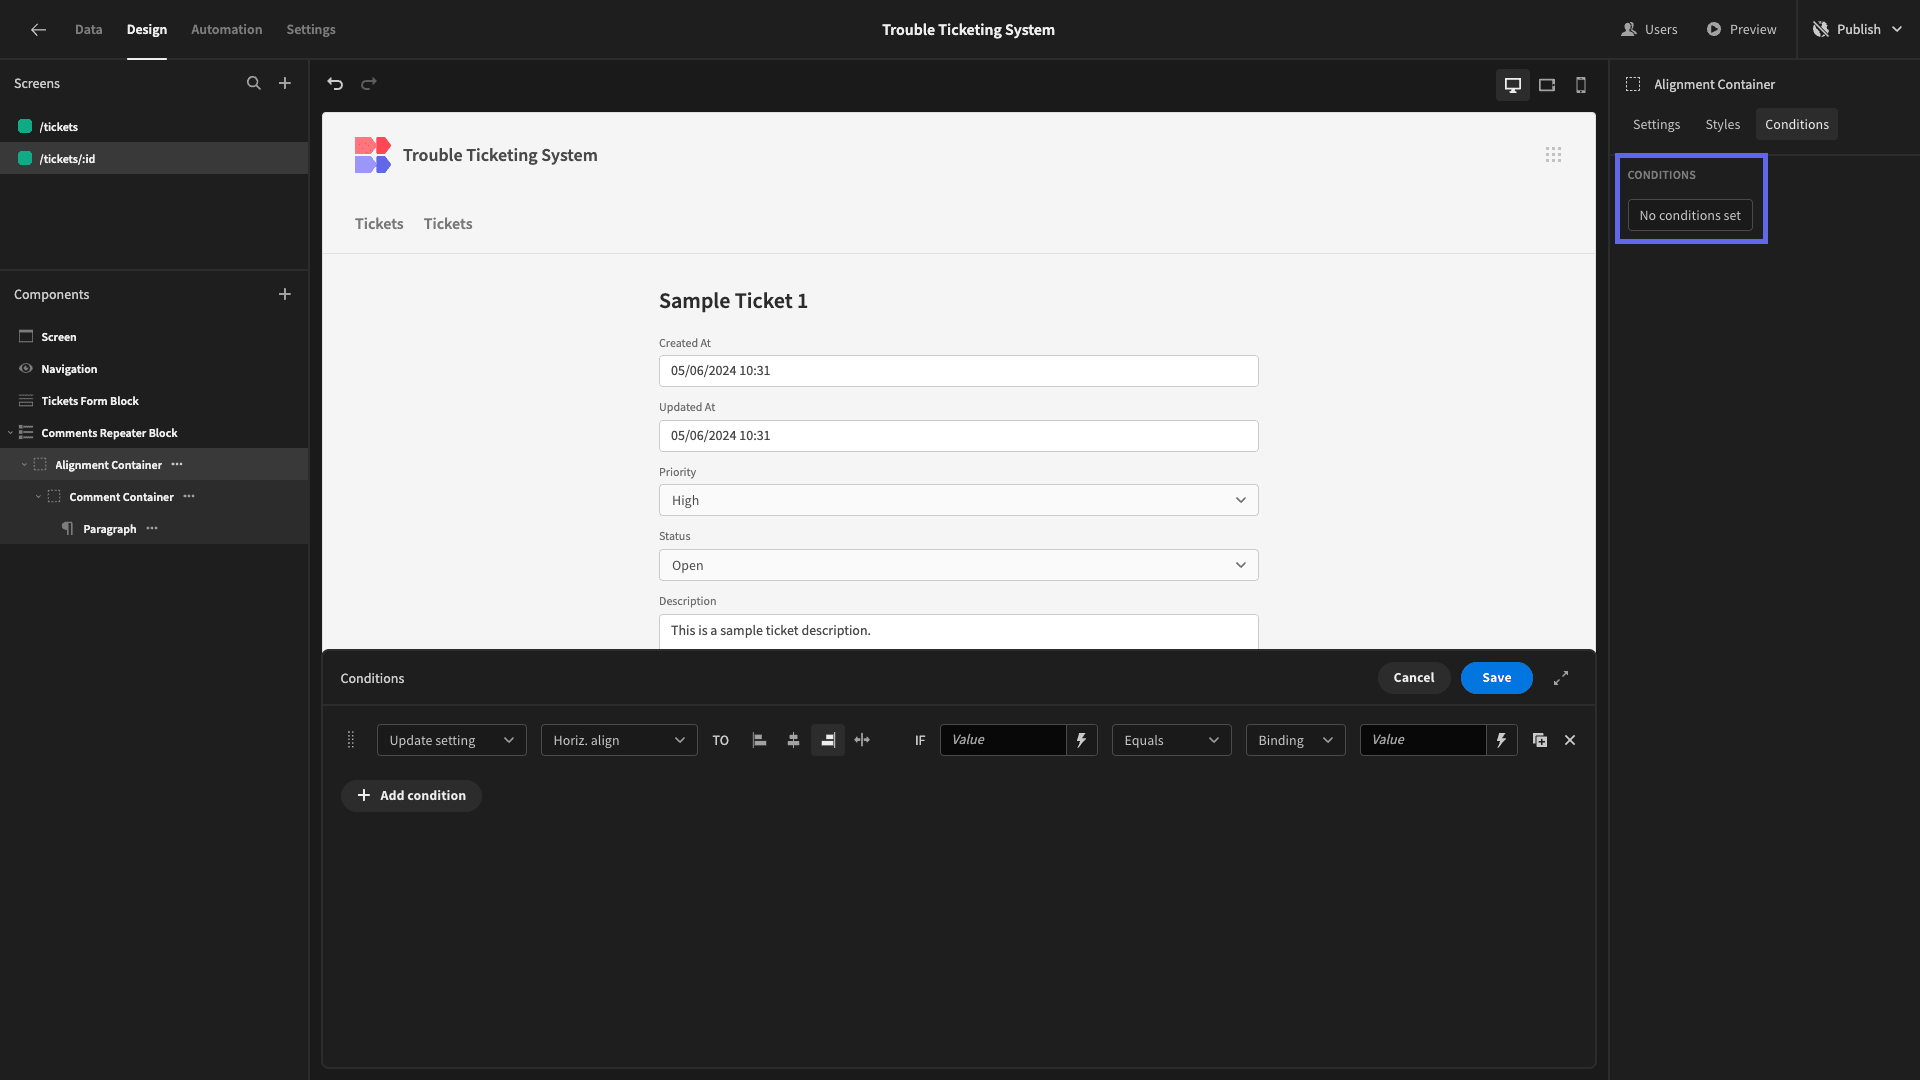
We’ll do this if {{ Comments Repeater Block.comments.created_by._id }} equals {{ Current User.globalId }}.

Here’s how this should look.

Then, we’ll add a similar rule to our Comment Container, this time changing the Custom CSS setting to:
1background-color: #52CC7A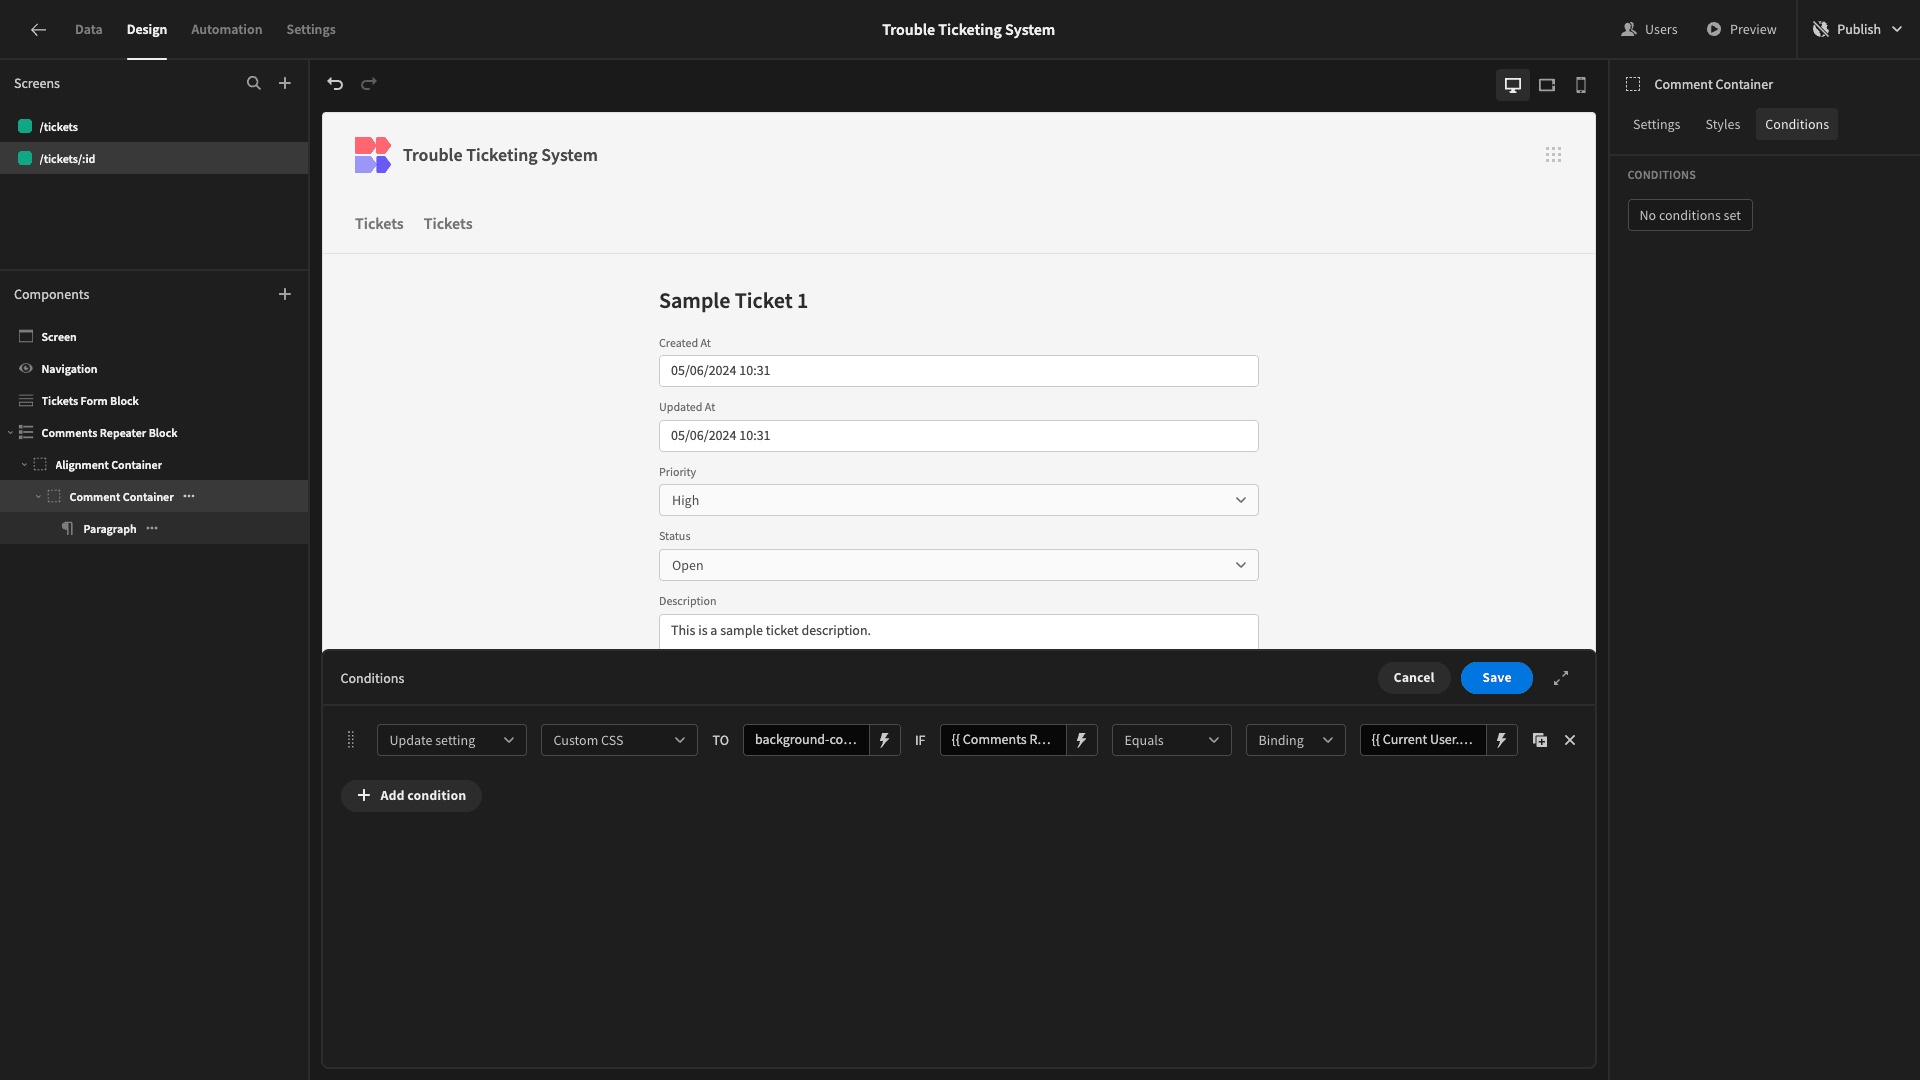
This gives us a nice pale green when our condition is met.
We need to make a few adjustments to our Repeater Block so that the right comments are shown in the right order.
We’ll start by adding a filer so that the ticket_id attribute matches the corresponding value from our Form Block.
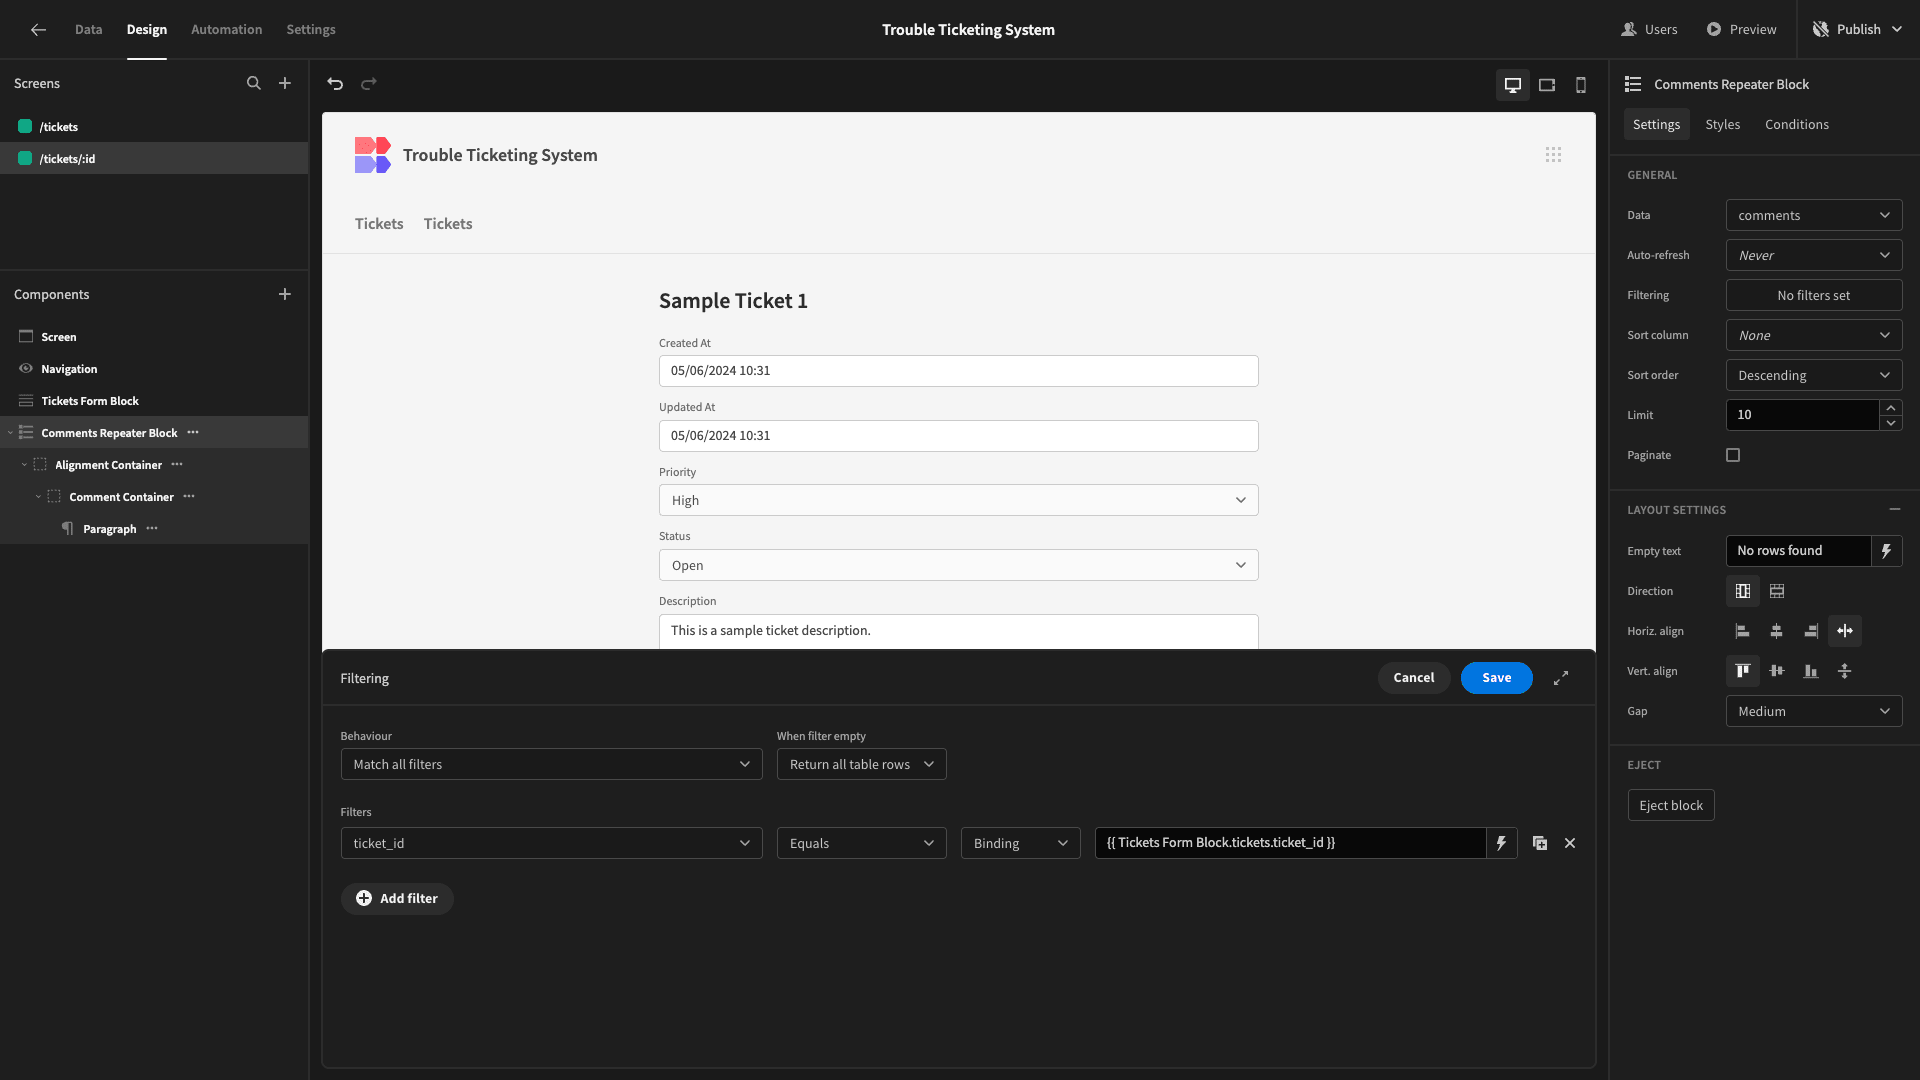
We’ll also give it an auto-refresh period of 30 seconds and sort our entries by the created_at variable in ascending order.
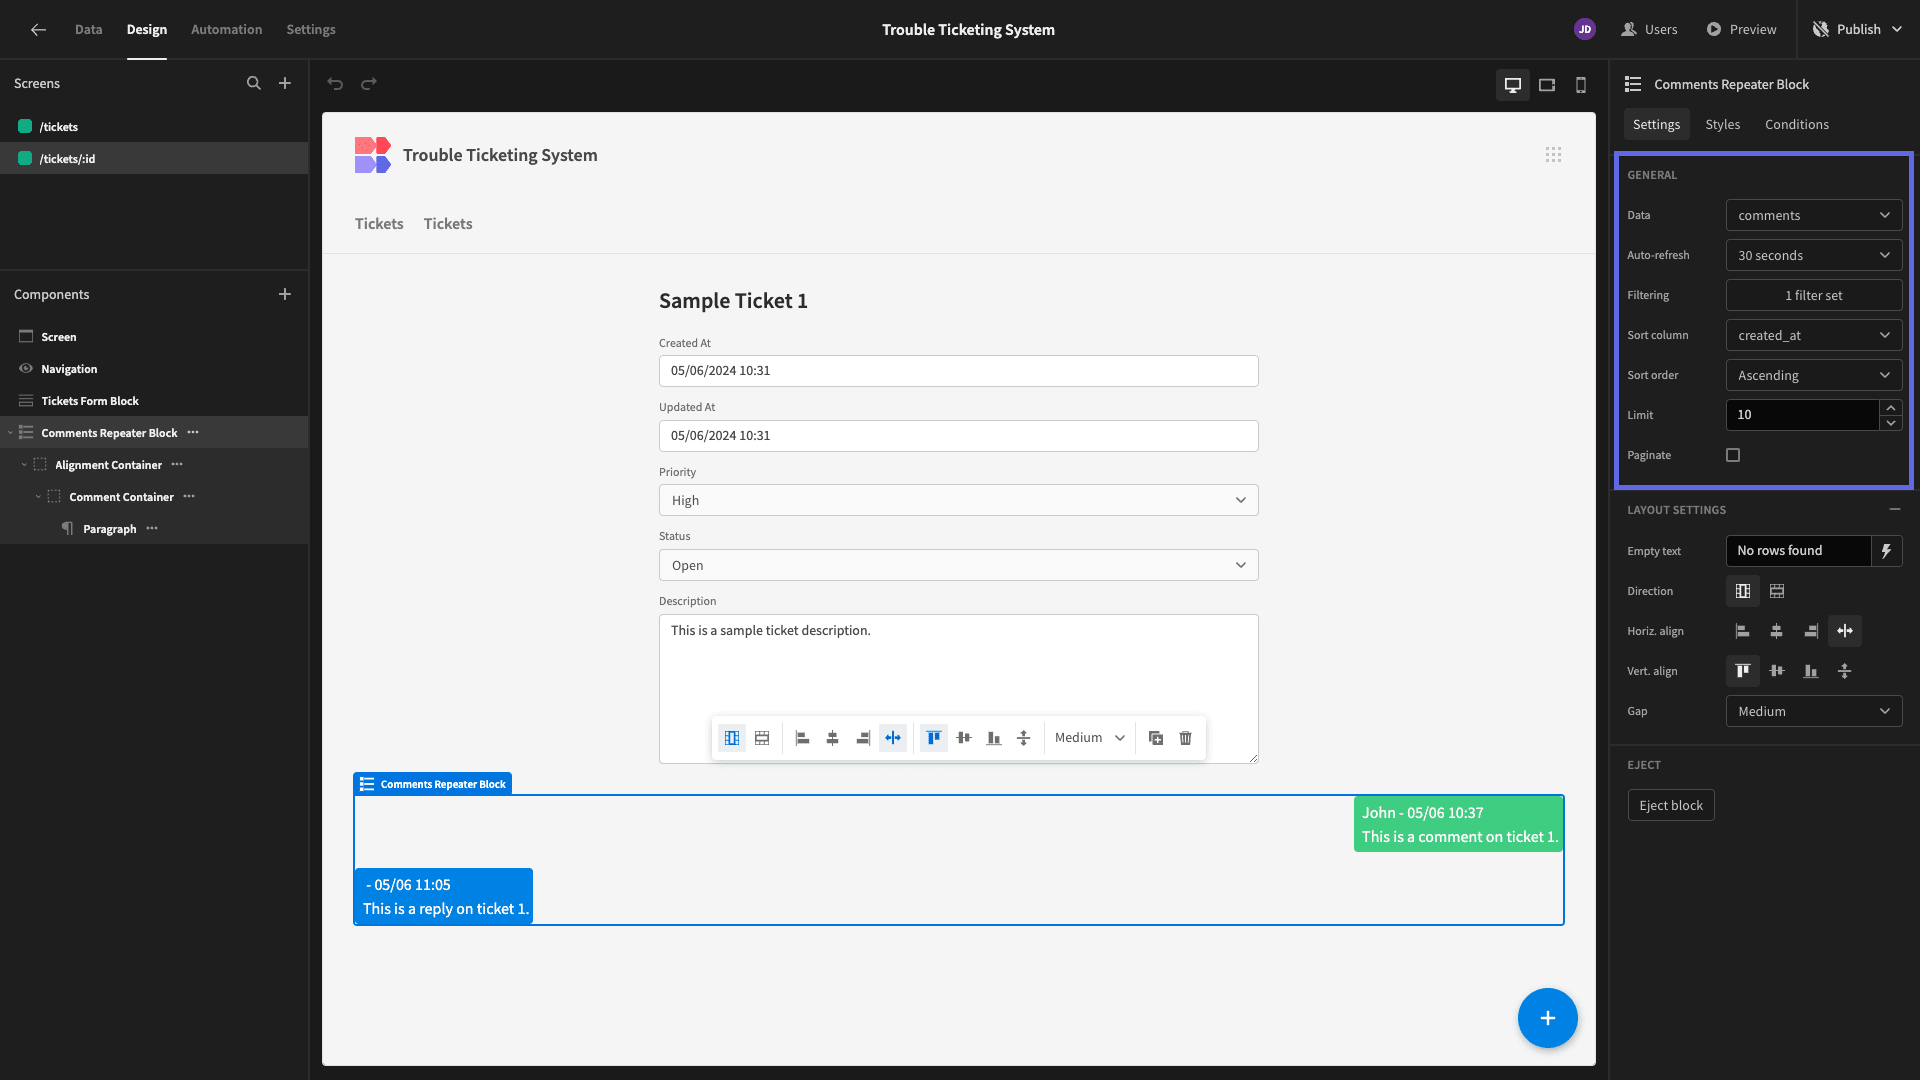
Here’s how this looks in our modal.
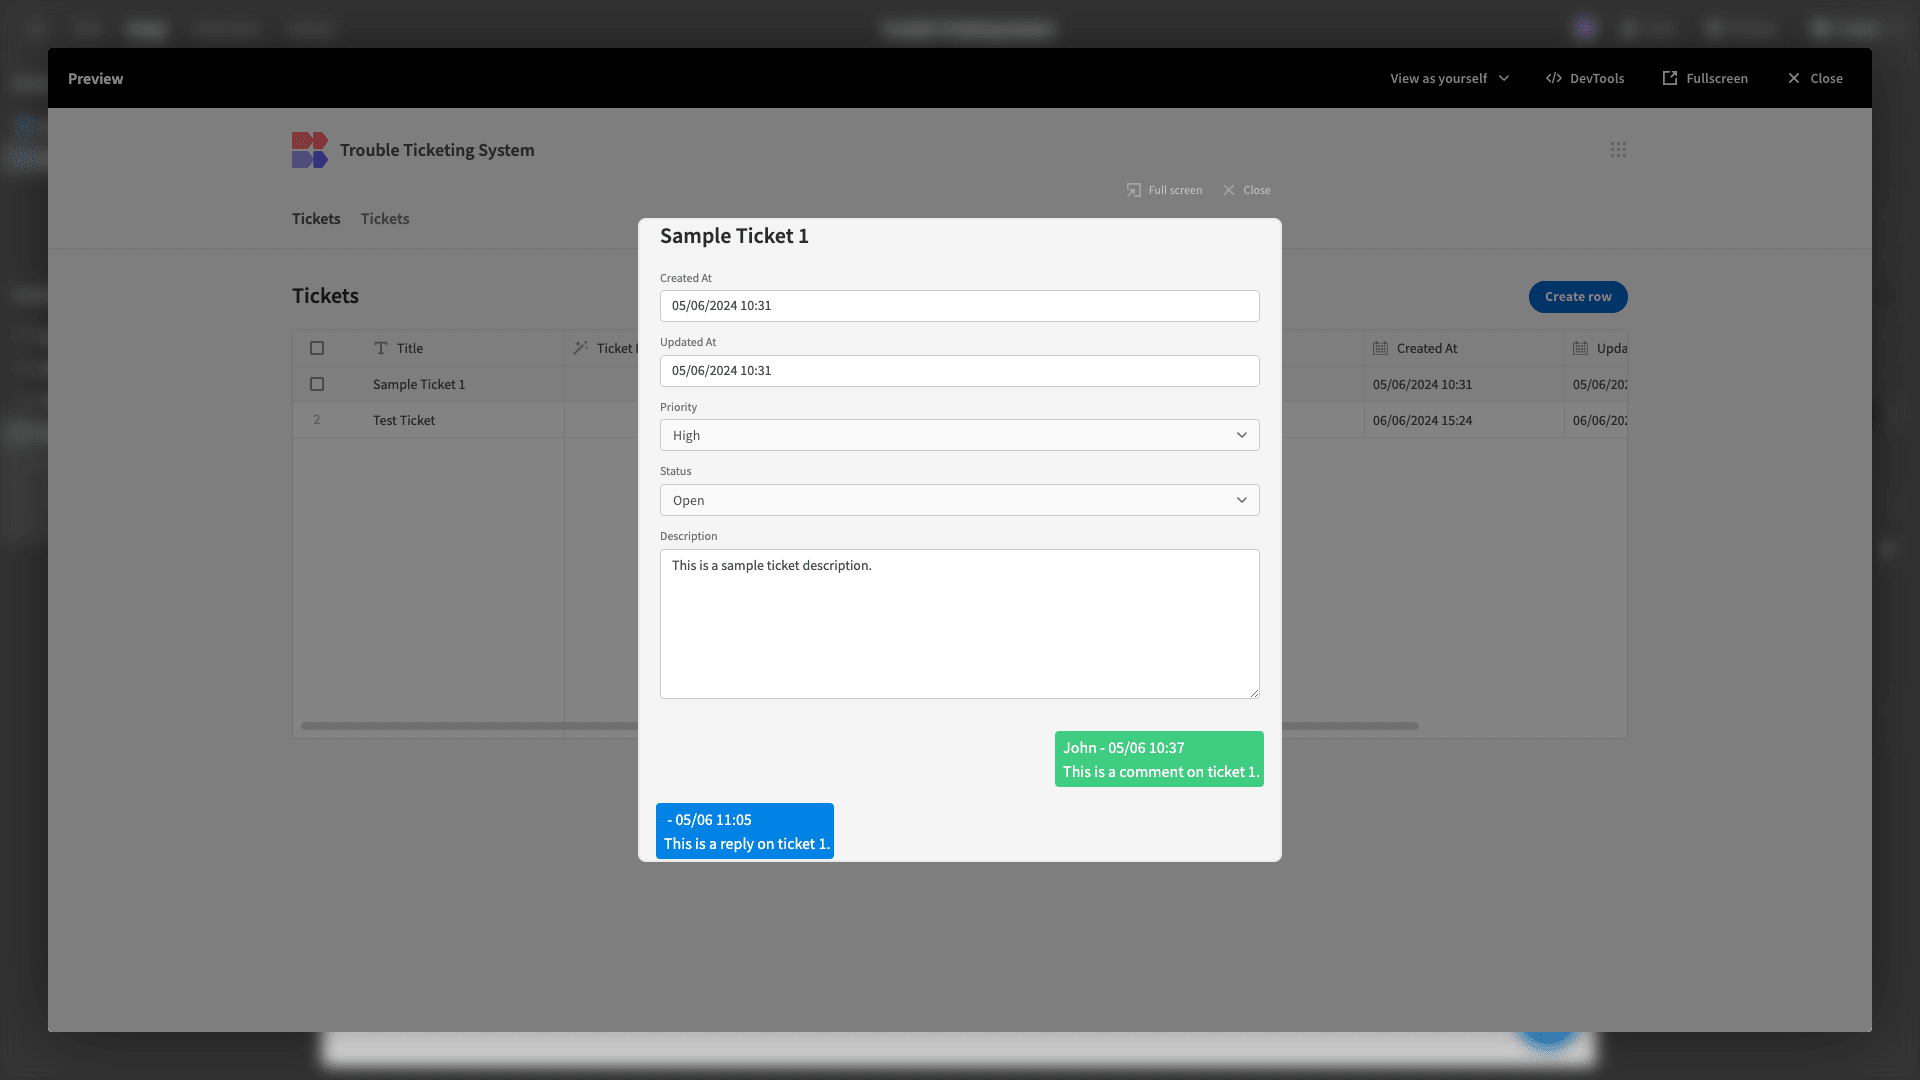
Beneath this, we want to add a form where users can submit new comments.
We’ll add a second Form Block, this time setting the data to comments, the type to create, and deselecting all of the fields except for comment.
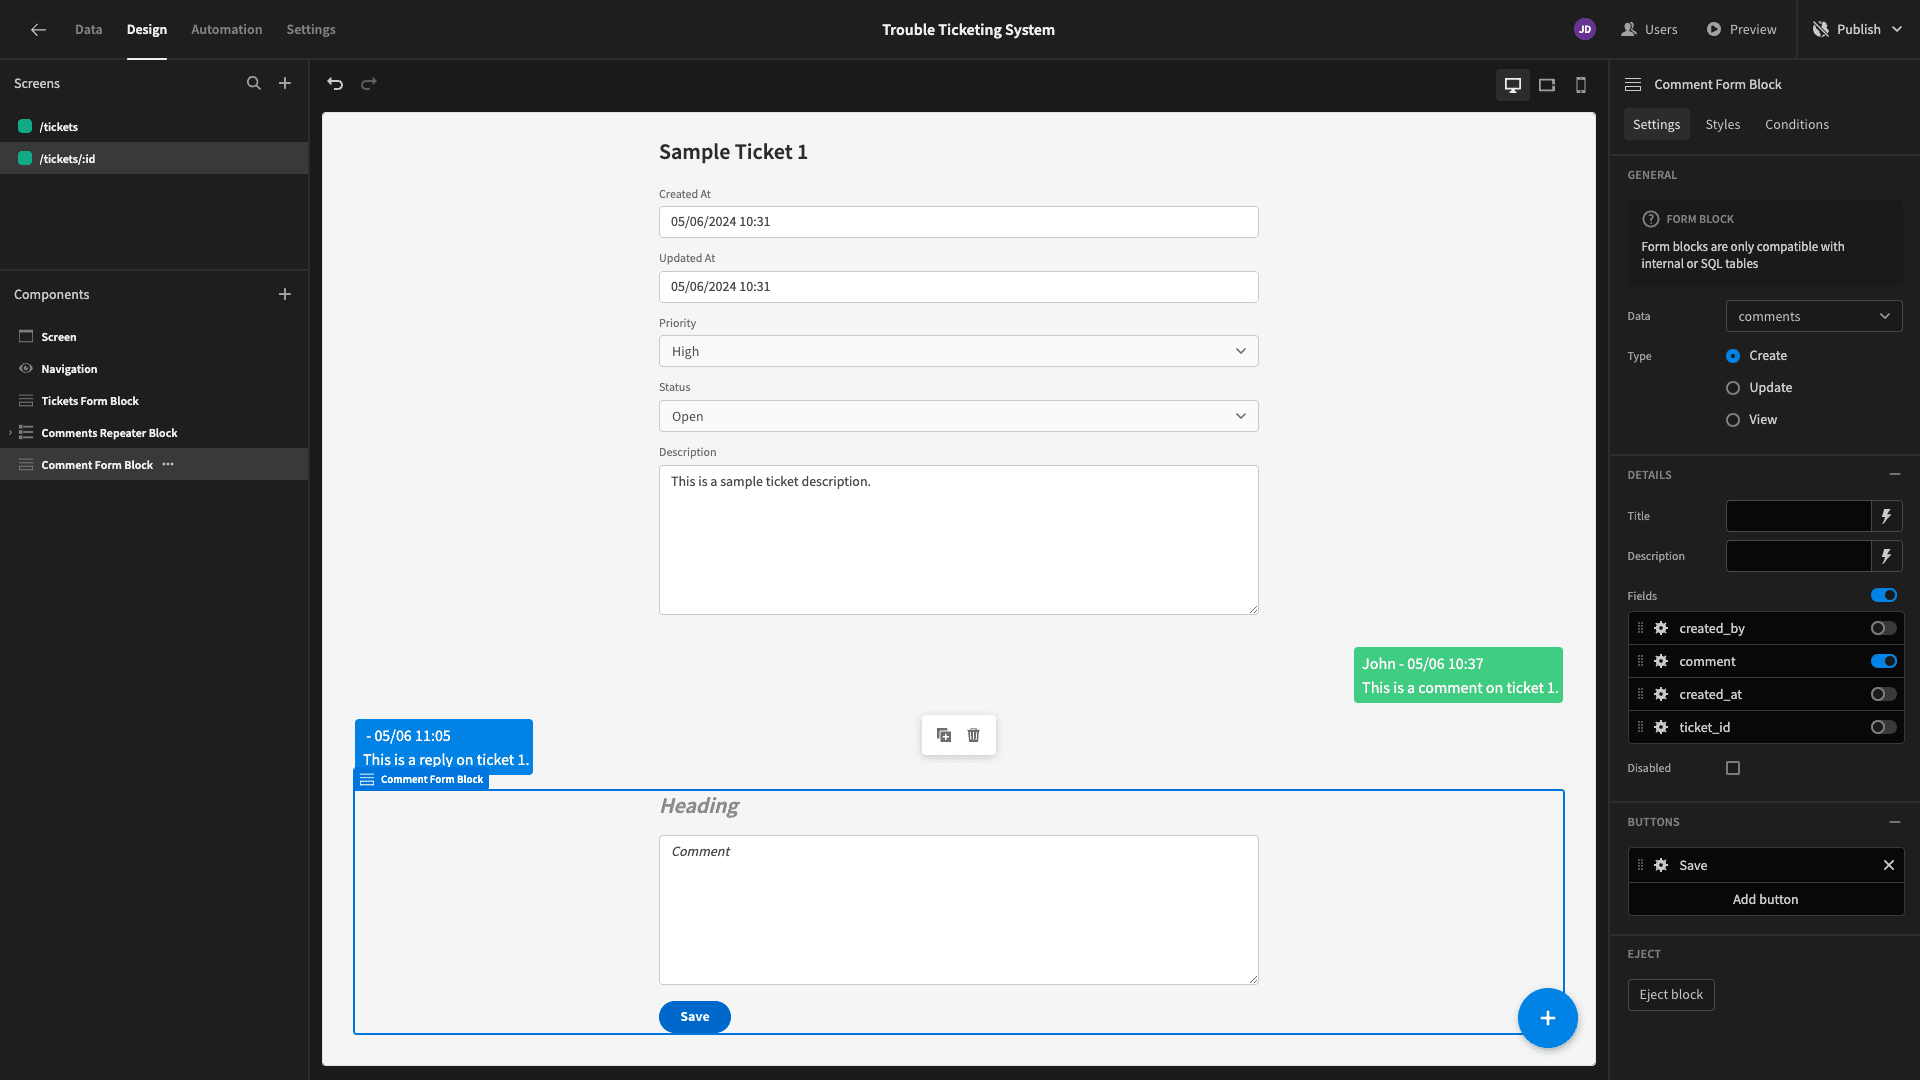
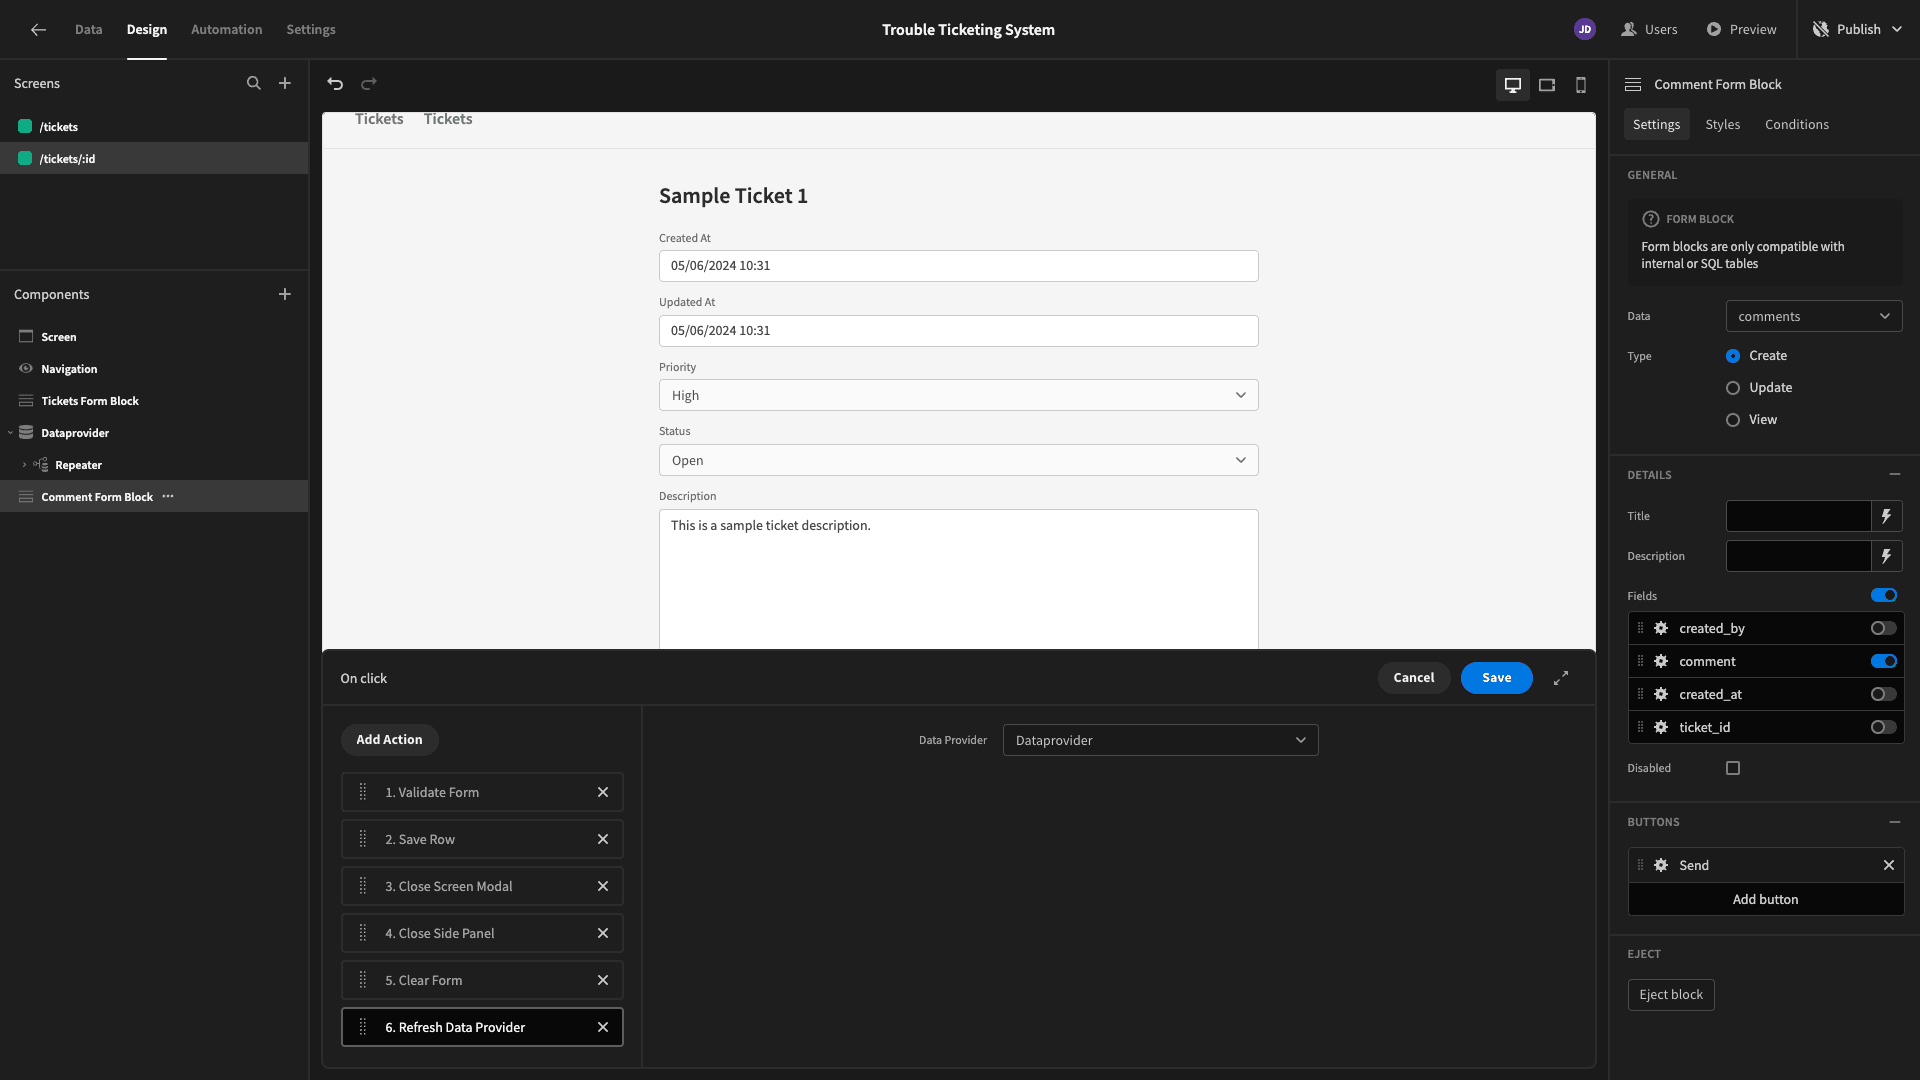
We’ll set the button position to the top and change its display text to Send. We’ll also need to add columns to the Save Row action so that it saves values to our created_by value as {{ Current User.globalId }} and ticket_id as {{ Tickets Form Block.tickets.ticket_id }}.
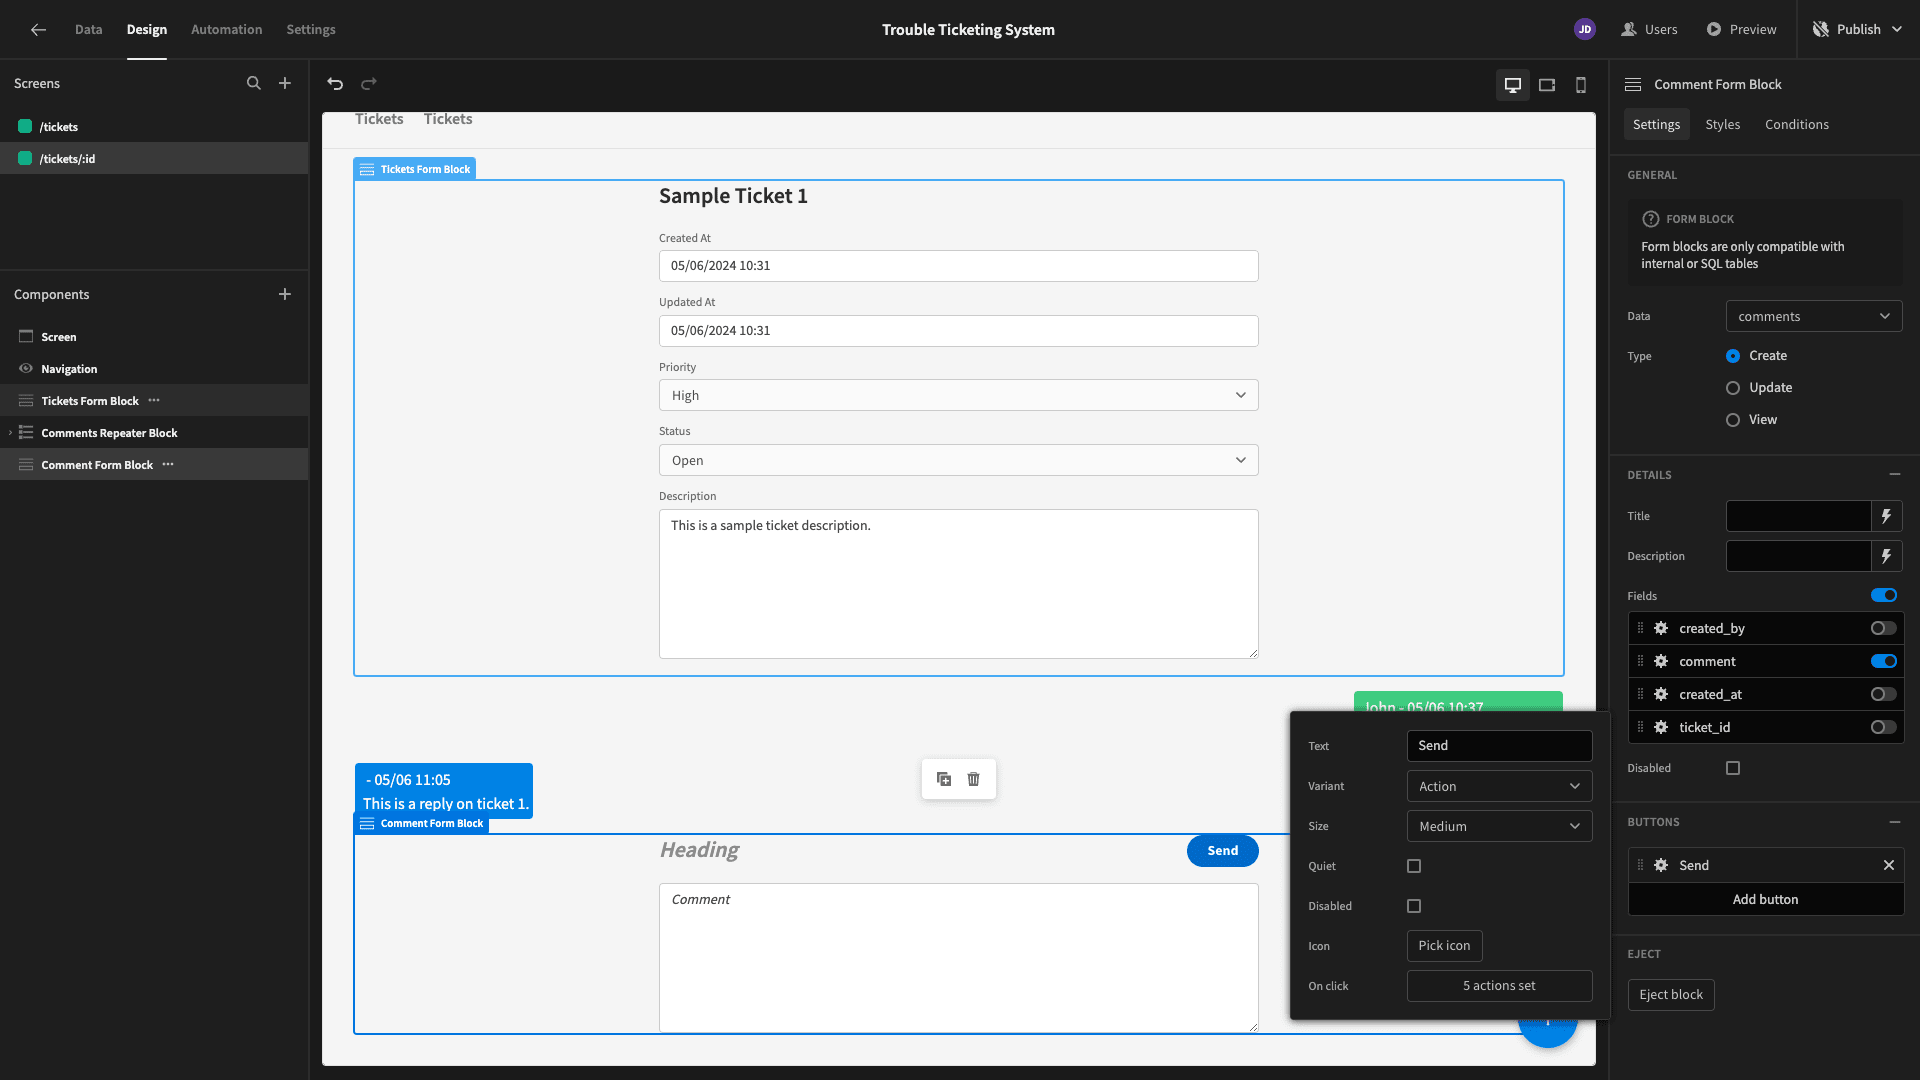
We’re going to change the color of all of our buttons a little later, so we’ll leave this as blue for now.
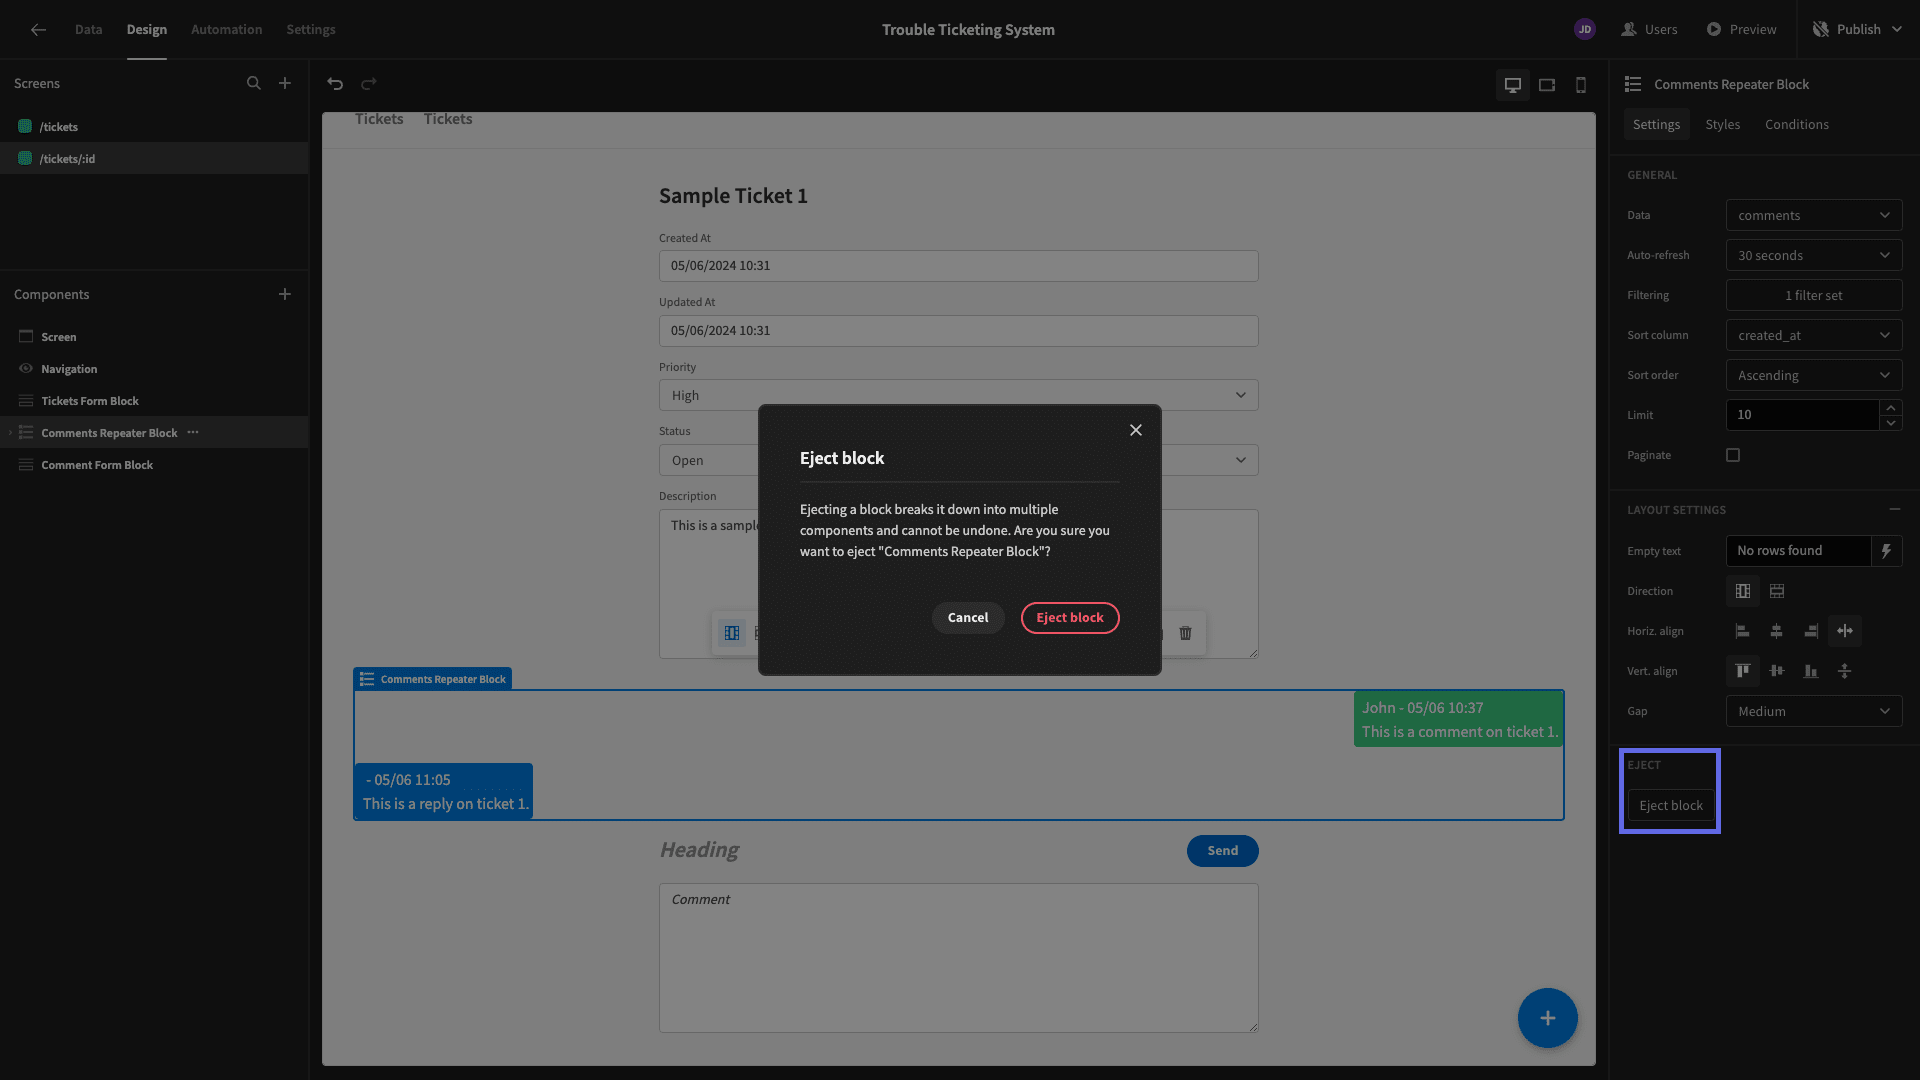
We’re also going to add an extra action to our button so that our chat UI updates each time a user hits send. To do this, we’ll need to hit Eject on our Repeater Block, exposing its underlying components.
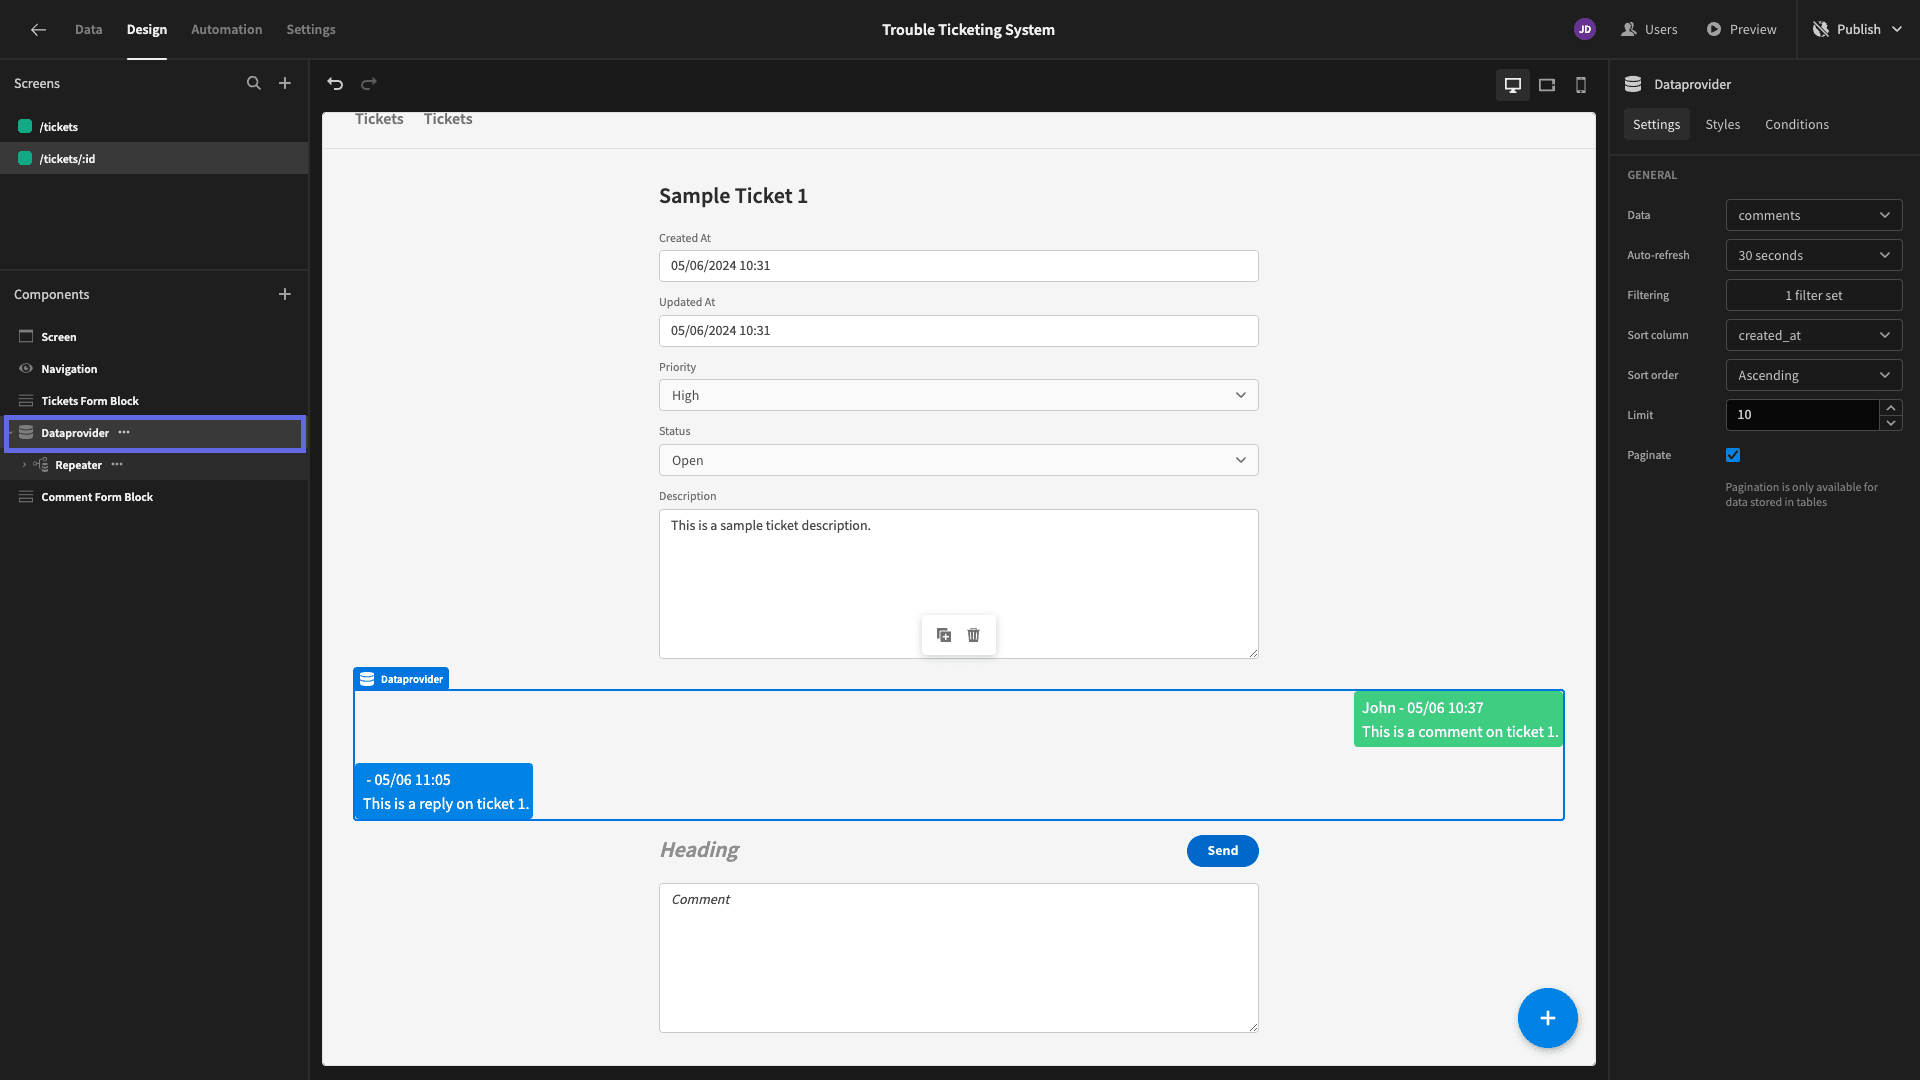
Now, we can see that there is a component in here called a Data Provider. This exposes all other components on the screen to whichever data source it’s connect to via Budibase’s global bindings.
Back on our Send button, we’re going to add a new action called Refresh Data Provider, and point this at our Data Provider.
Now, when a user sends a comment, it will appear at the bottom of the chat UI.
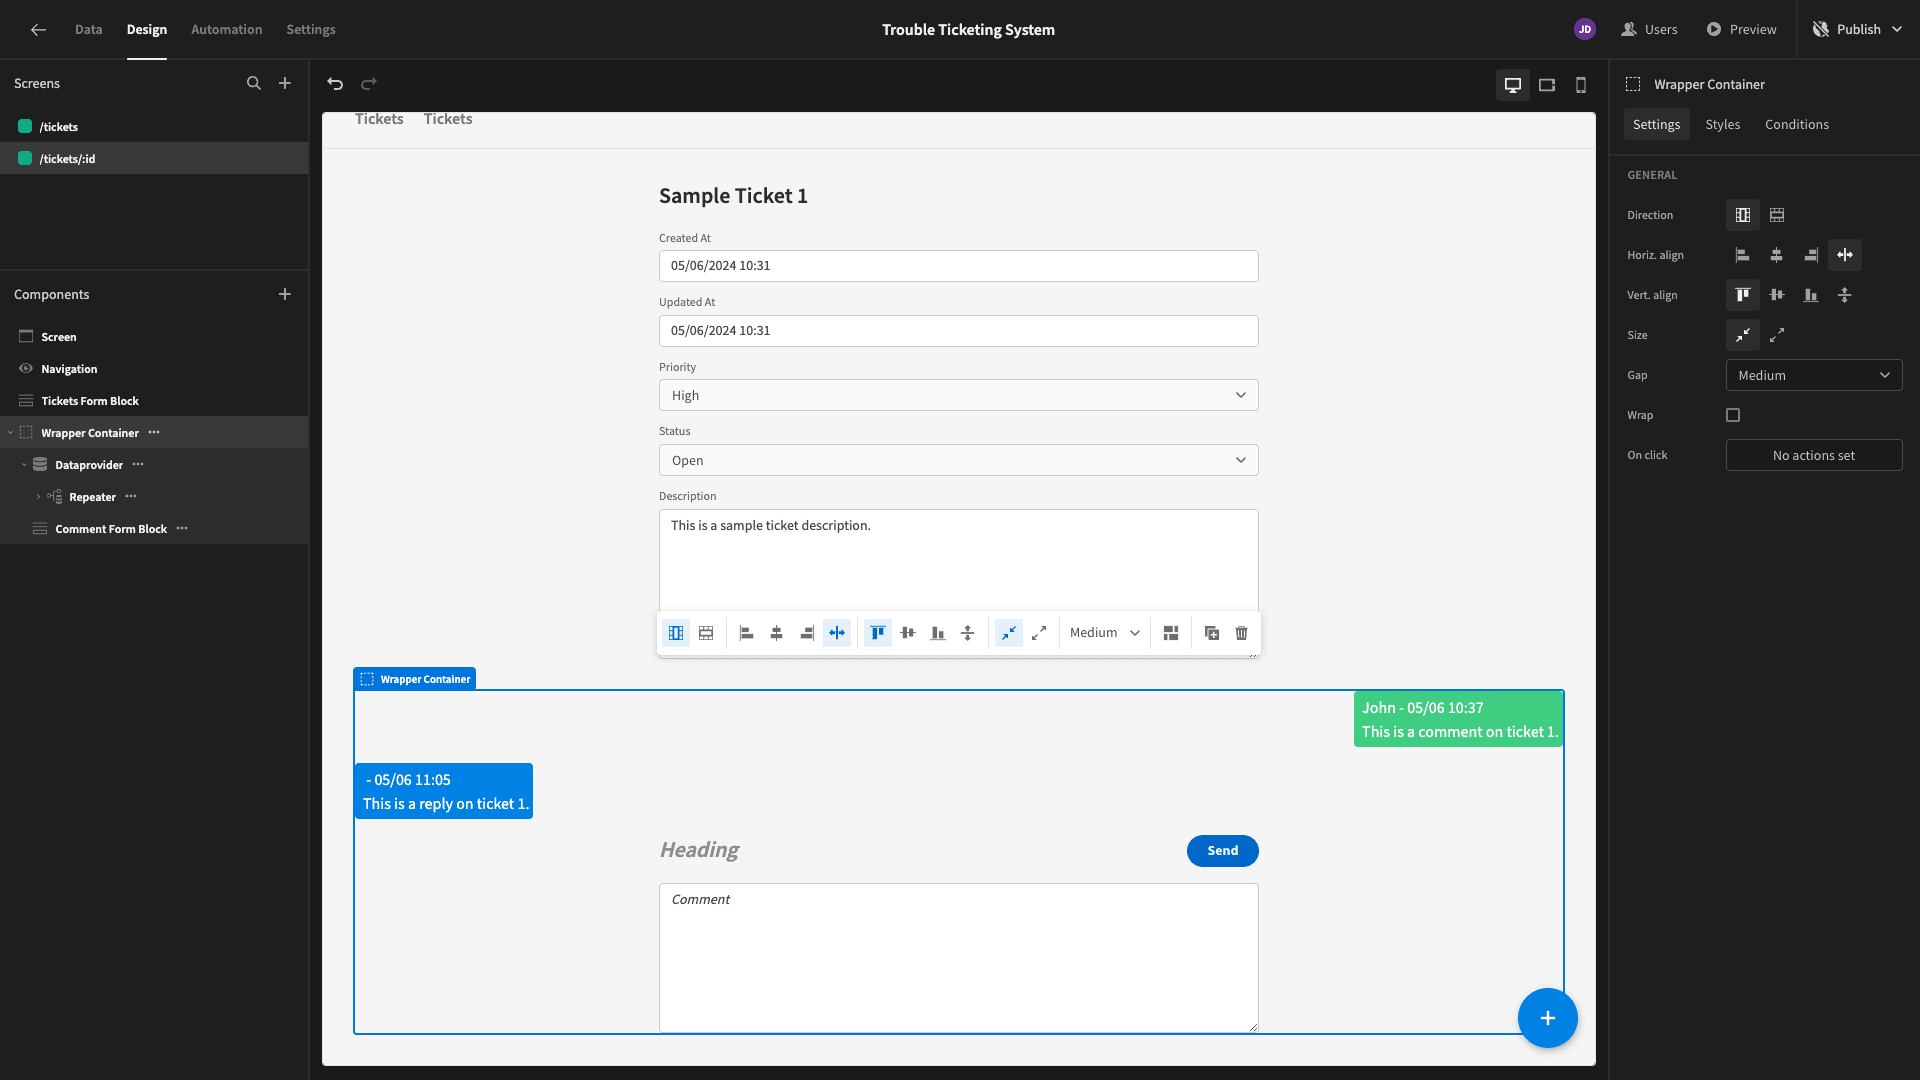
Lastly, we want to conditionally display our comments section. To make this easier, we’ll start by wrapping our Data Provider and Comments Form Block inside a container.
Above this, we’ll add a Button component, setting its Text to Comments and enabling the Quiet option.
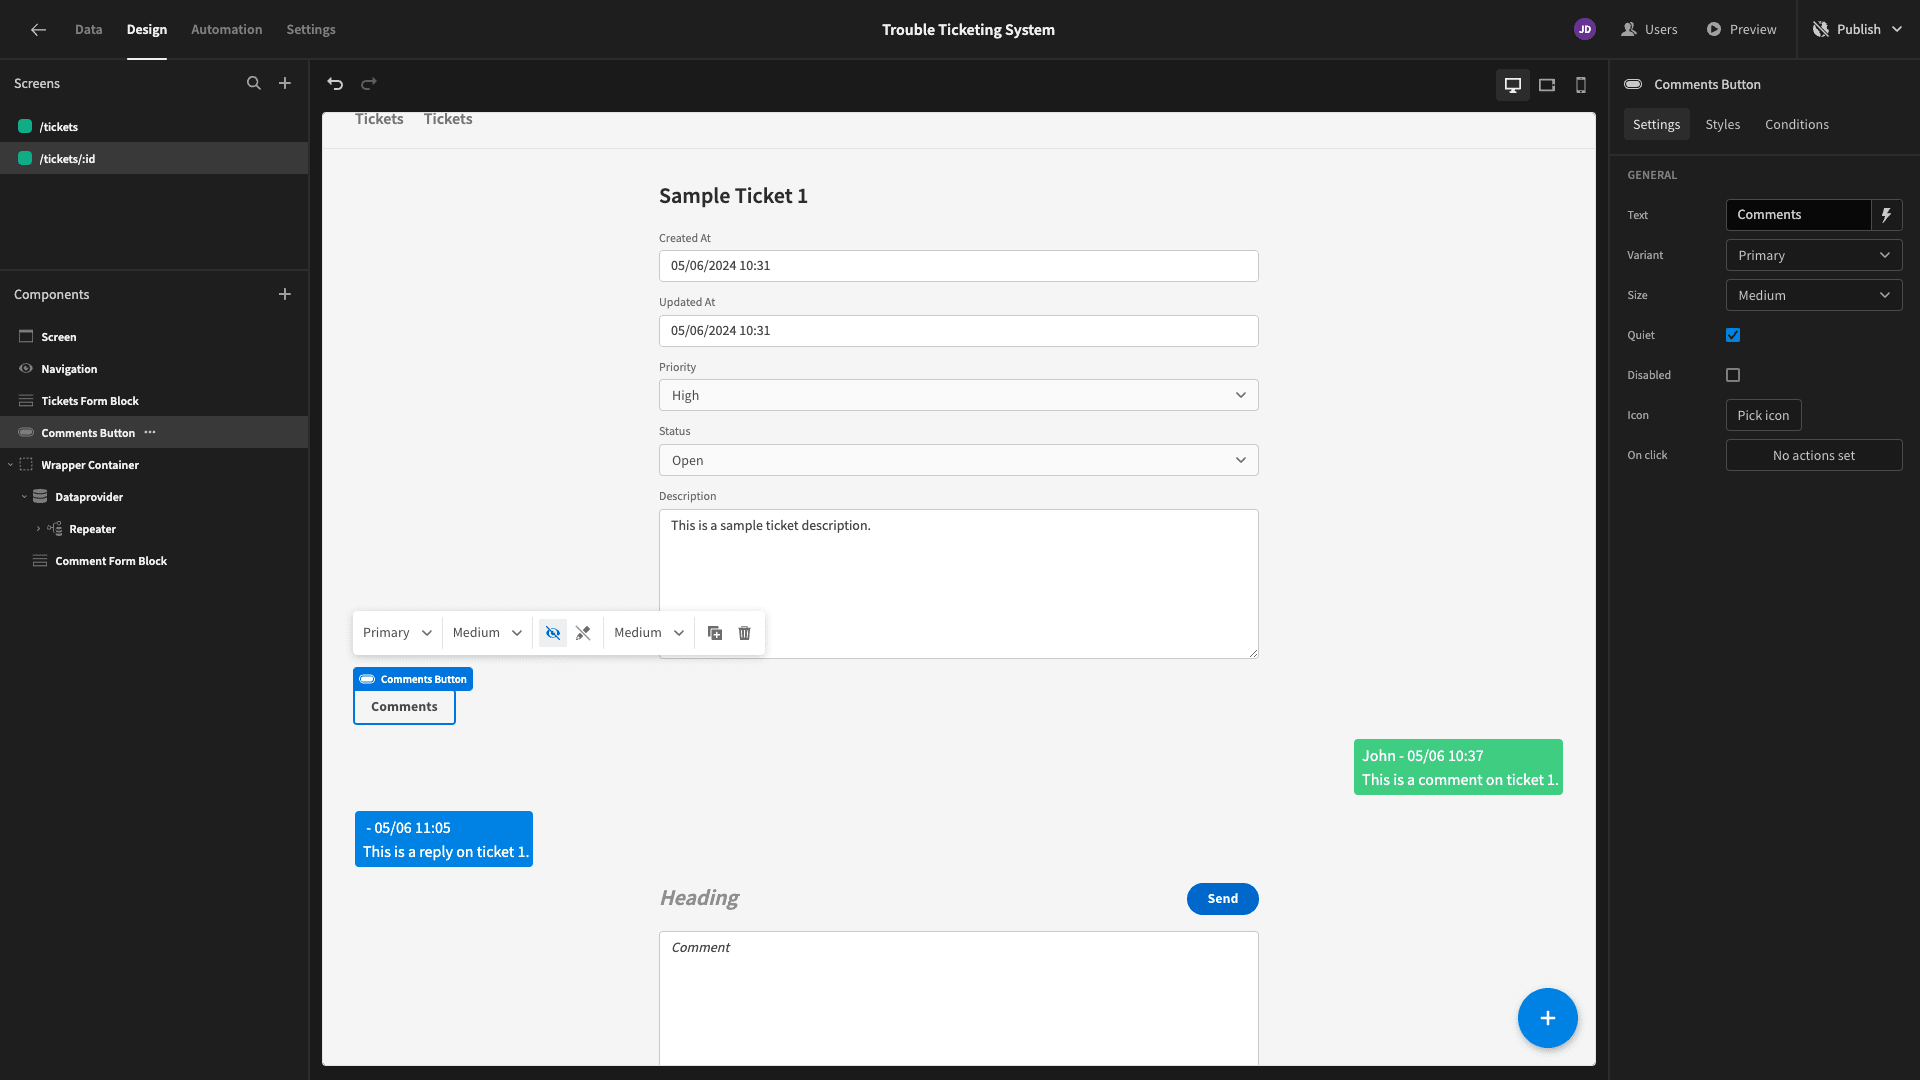
We’ll give this button an action called Update State. This defines and stores a key/value pair. Our key is comments, and our value is true.
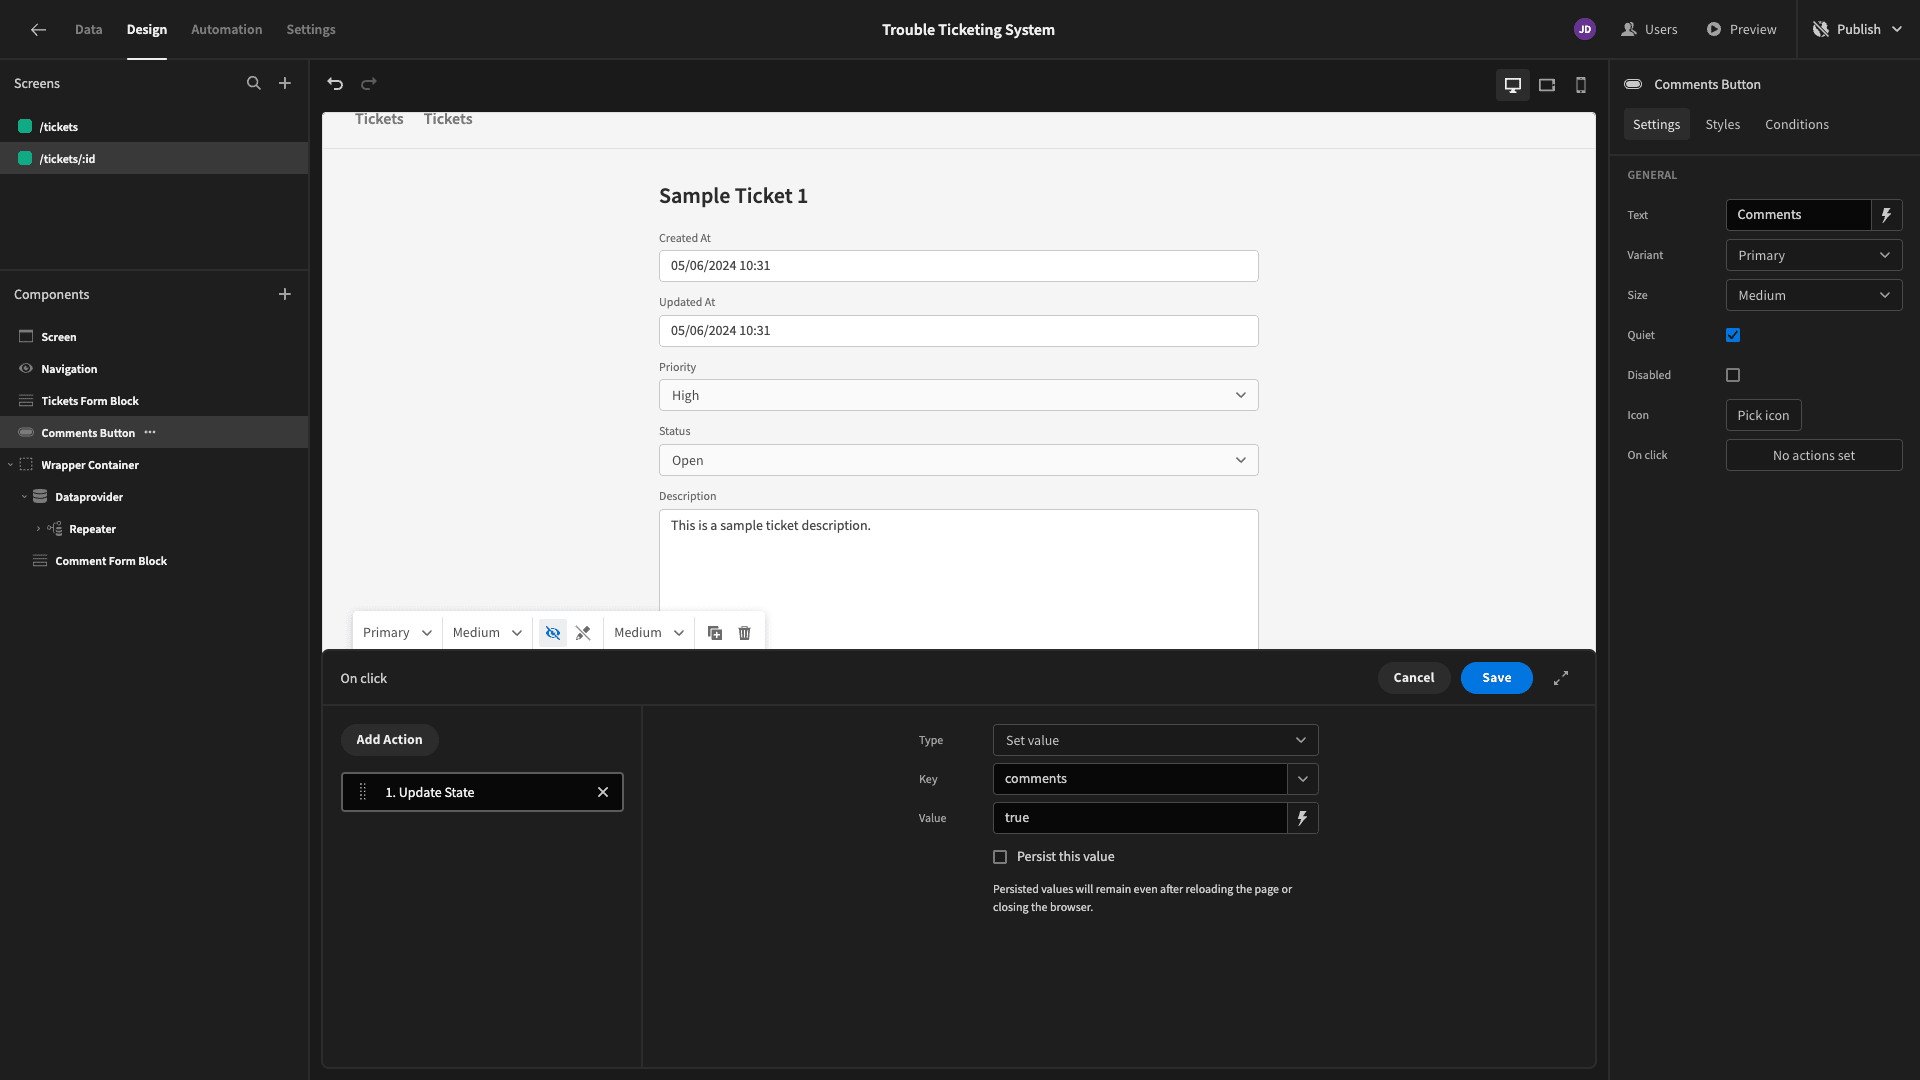
Then, back on our Wrapper Container, we’re going to add a conditionality rule so that it’s only shown if comments equals true.
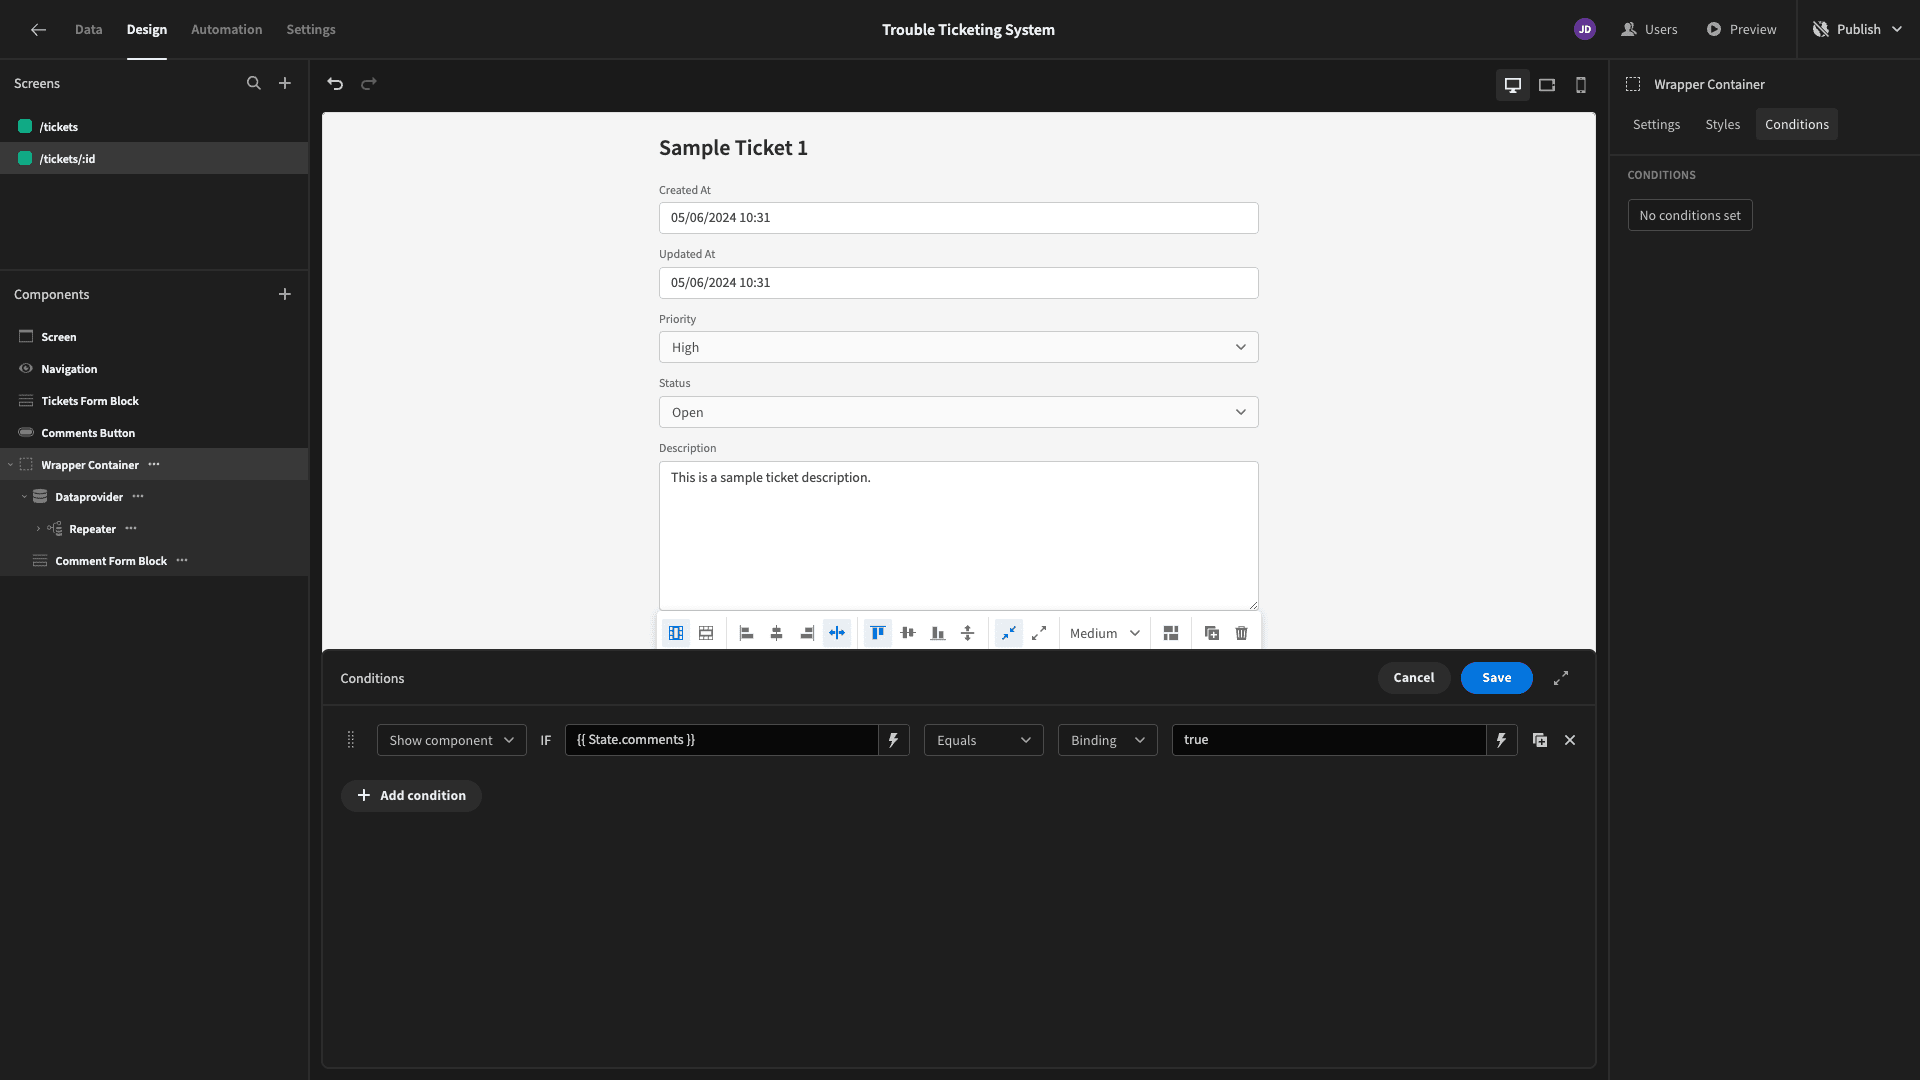
Now, our comments UI is hidden unless someone hits the Comments button.
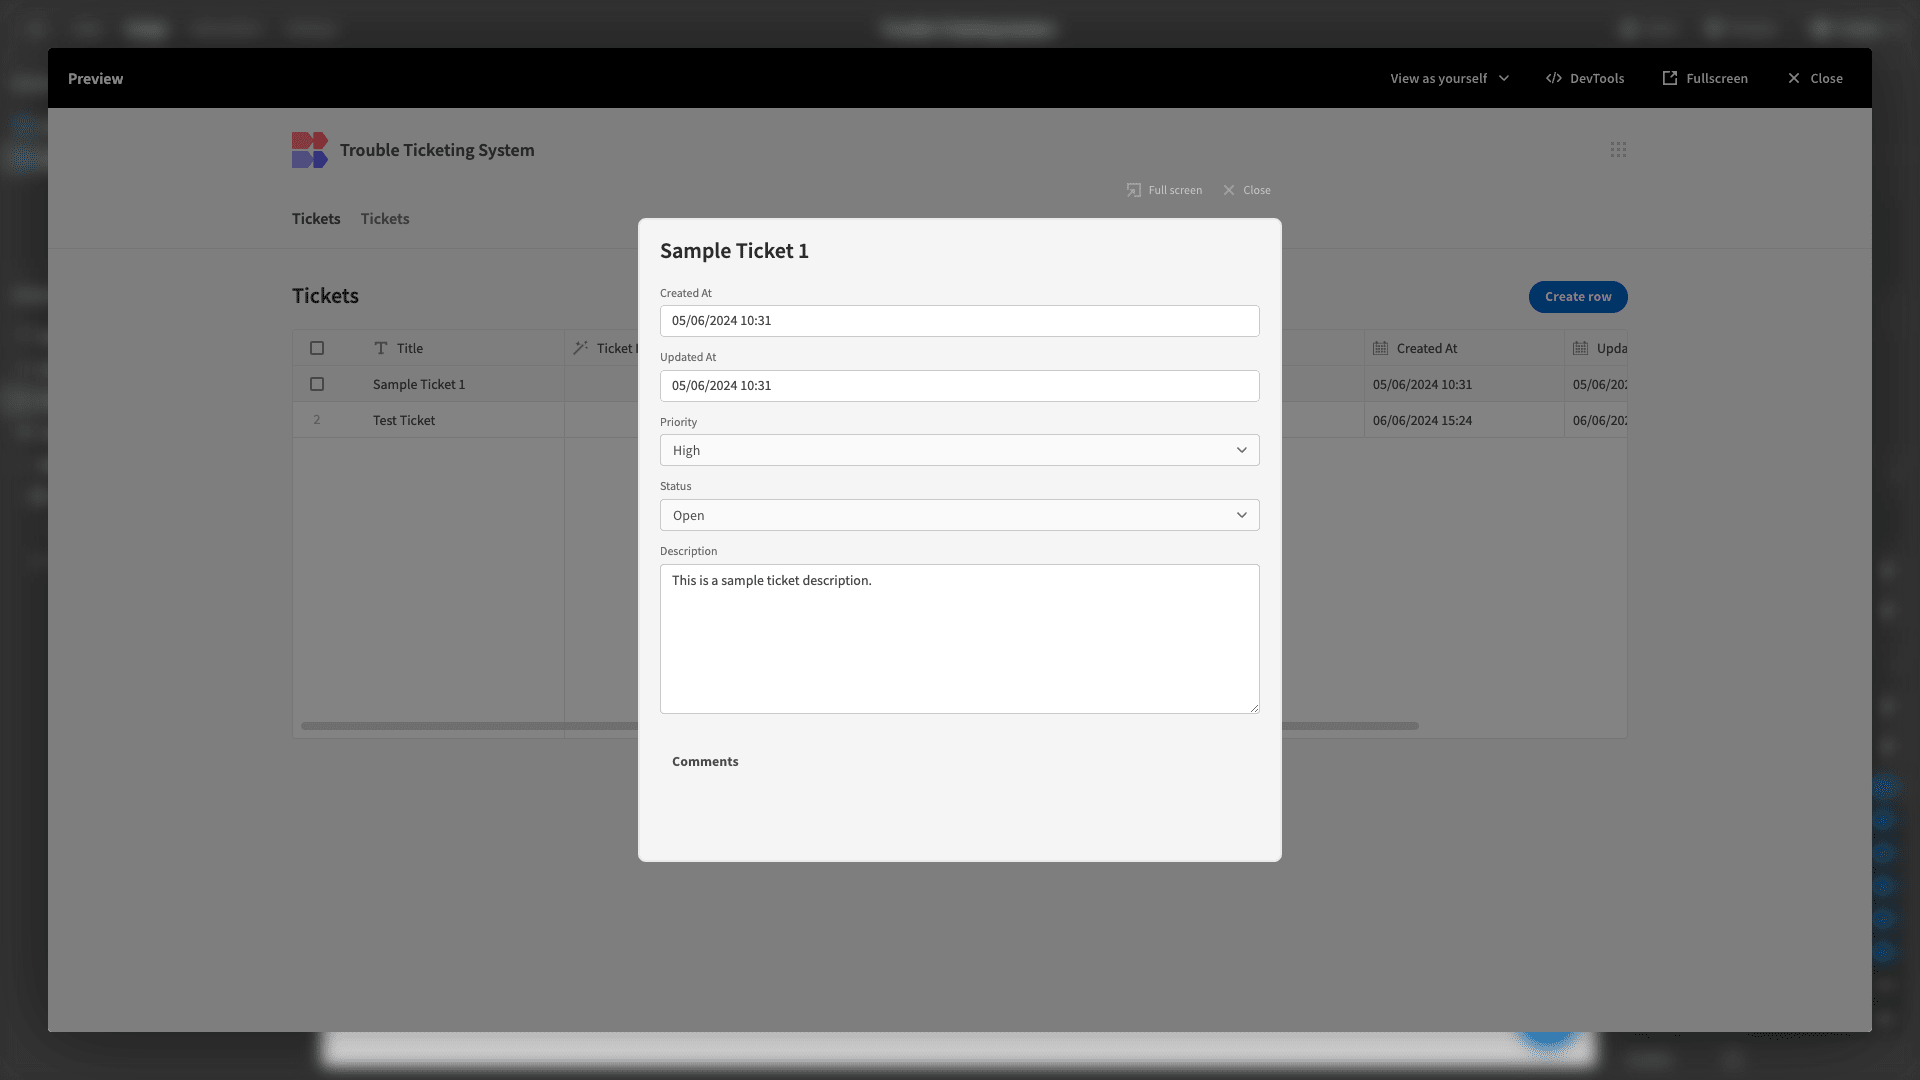
And here’s how it looks with the comments displayed.

5. Adding admin screens
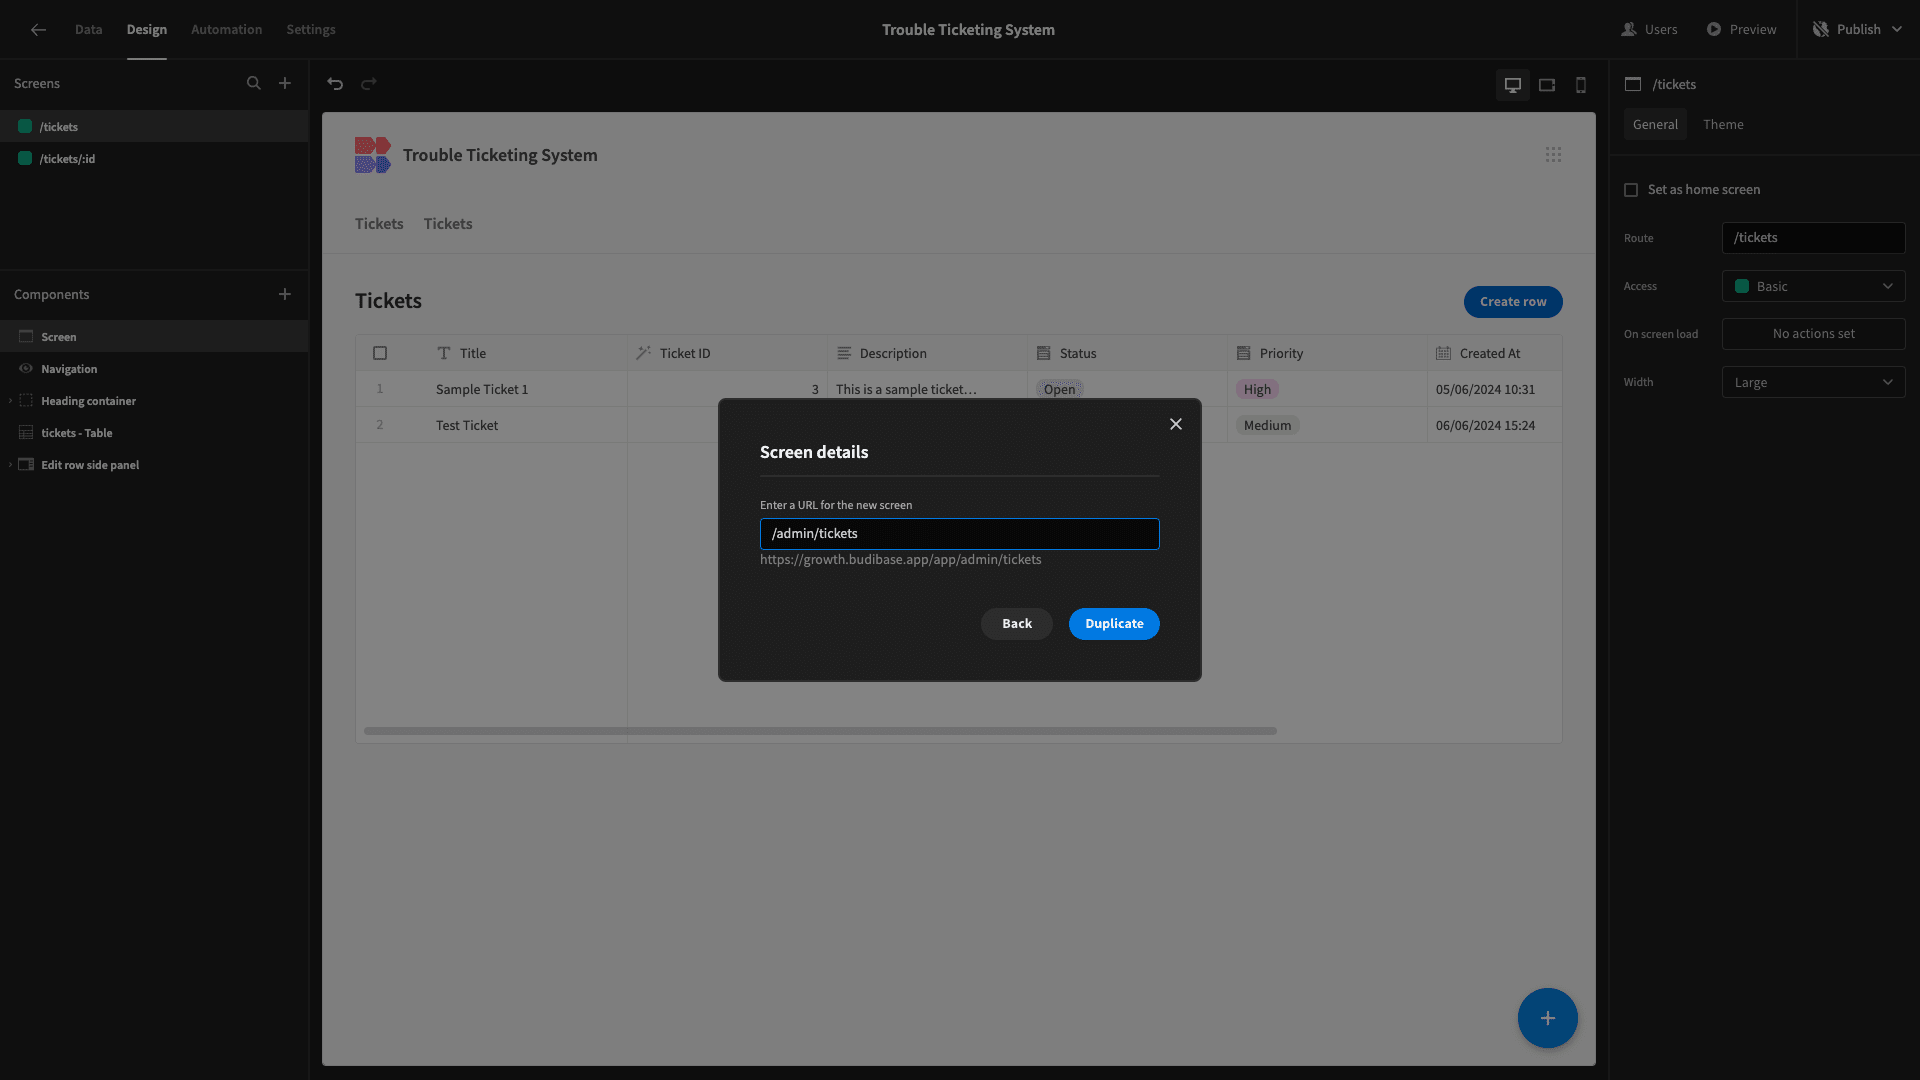
Next, we’re going to add the equivalent screens for our service desk users. We’ll start by duplicating our existing screens, placing /admin/ in front of their current URLs.
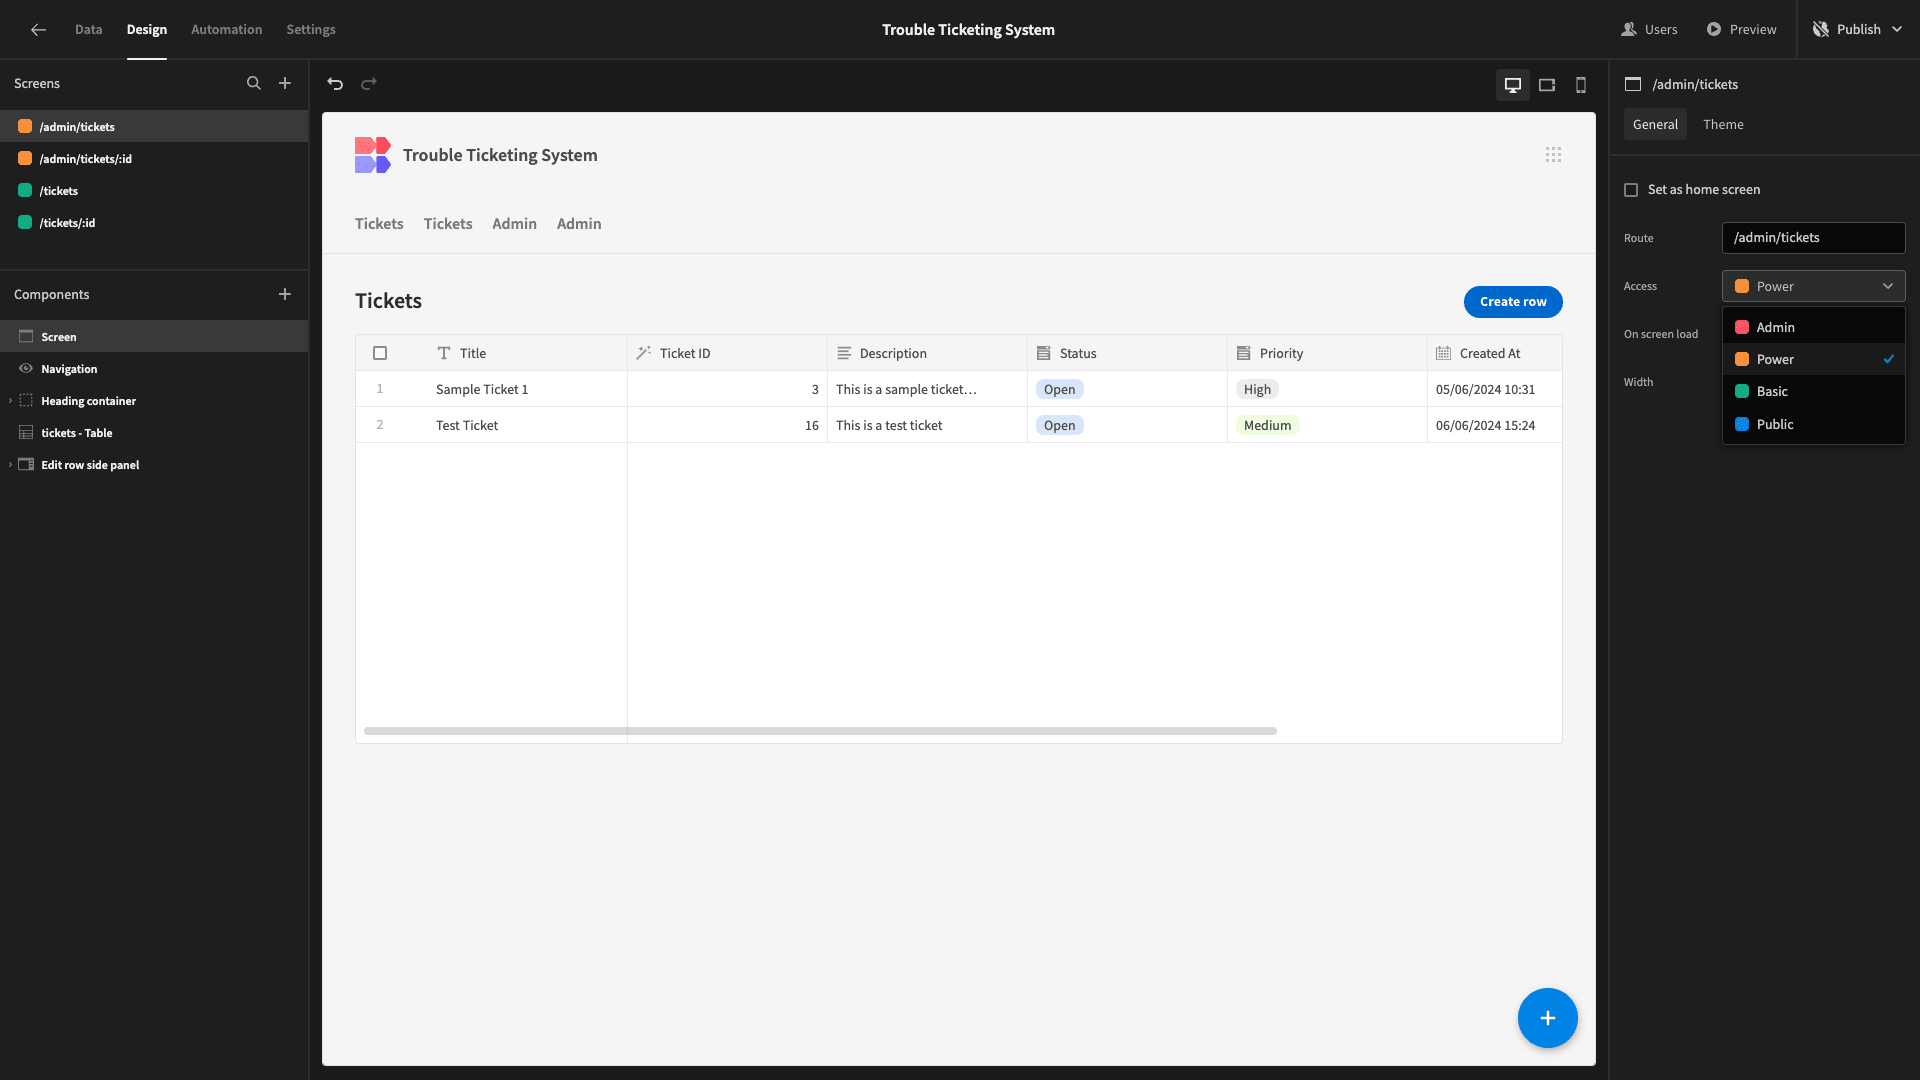
We’ll then update the access role for these new screens from Basic to Power.
We’ll need to make a few tweaks. Remember, we want our service desk employees to have the power to view any trouble ticket and edit certain attributes on them.
First, though, we’ll need to update our row-click action to navigate to the admin version of our edit screen.
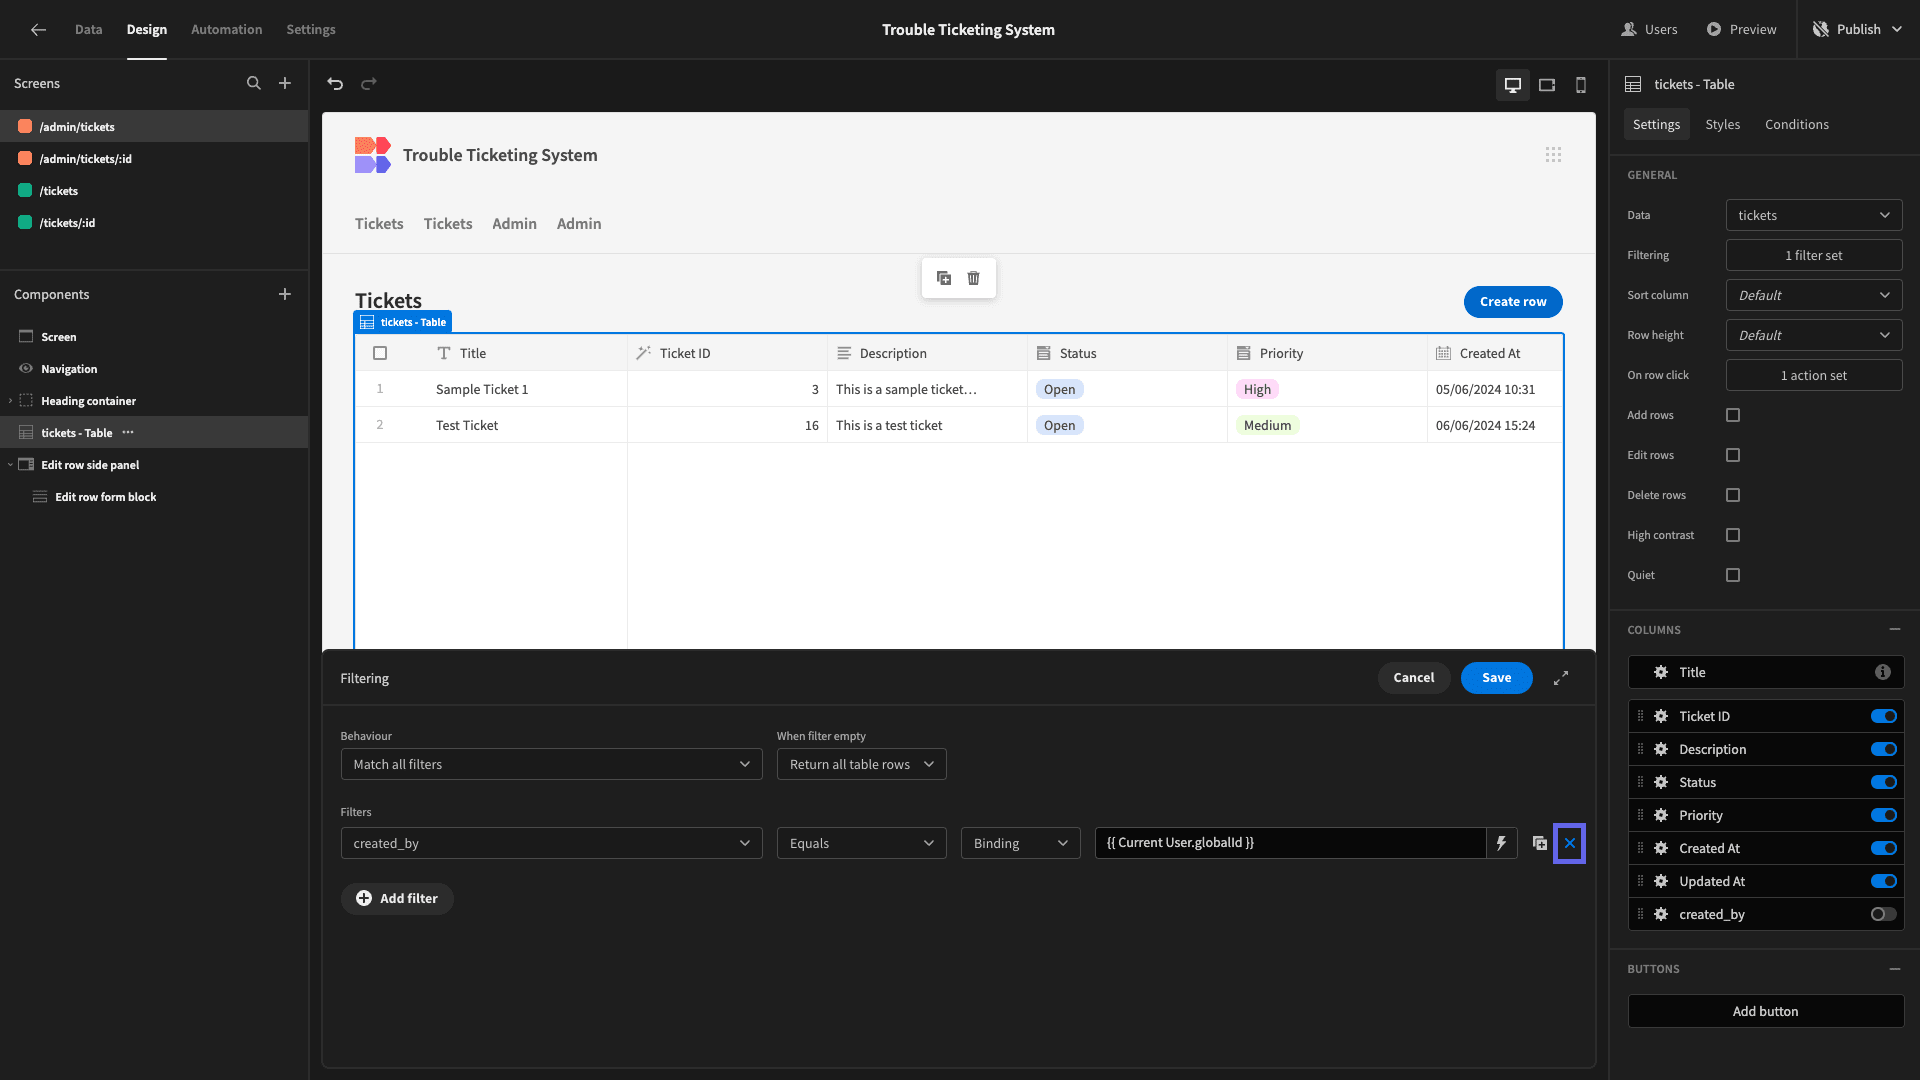
Then, we’ll remove the filter on our table so that we can see all records in our tickets table.
Lastly, we’ll include all columns in this version of our table, reenabling the created_by attribute.
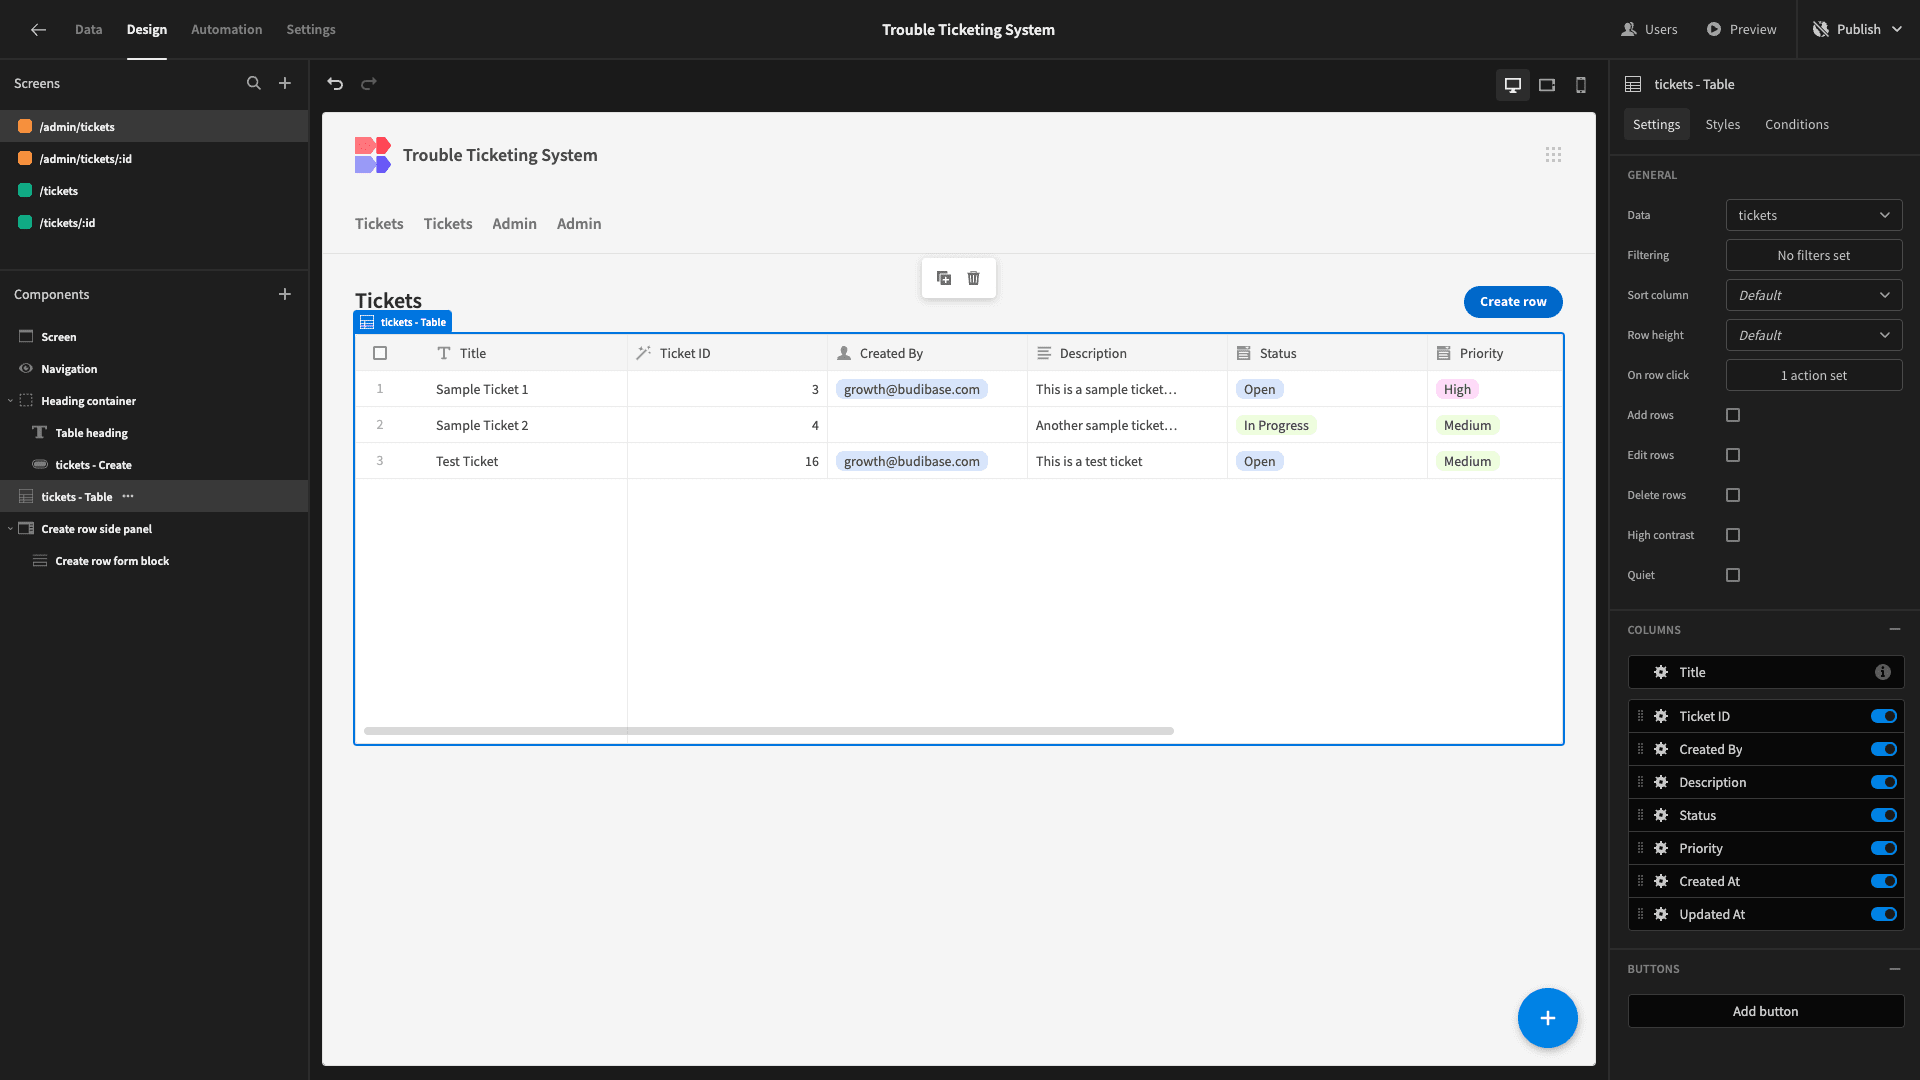
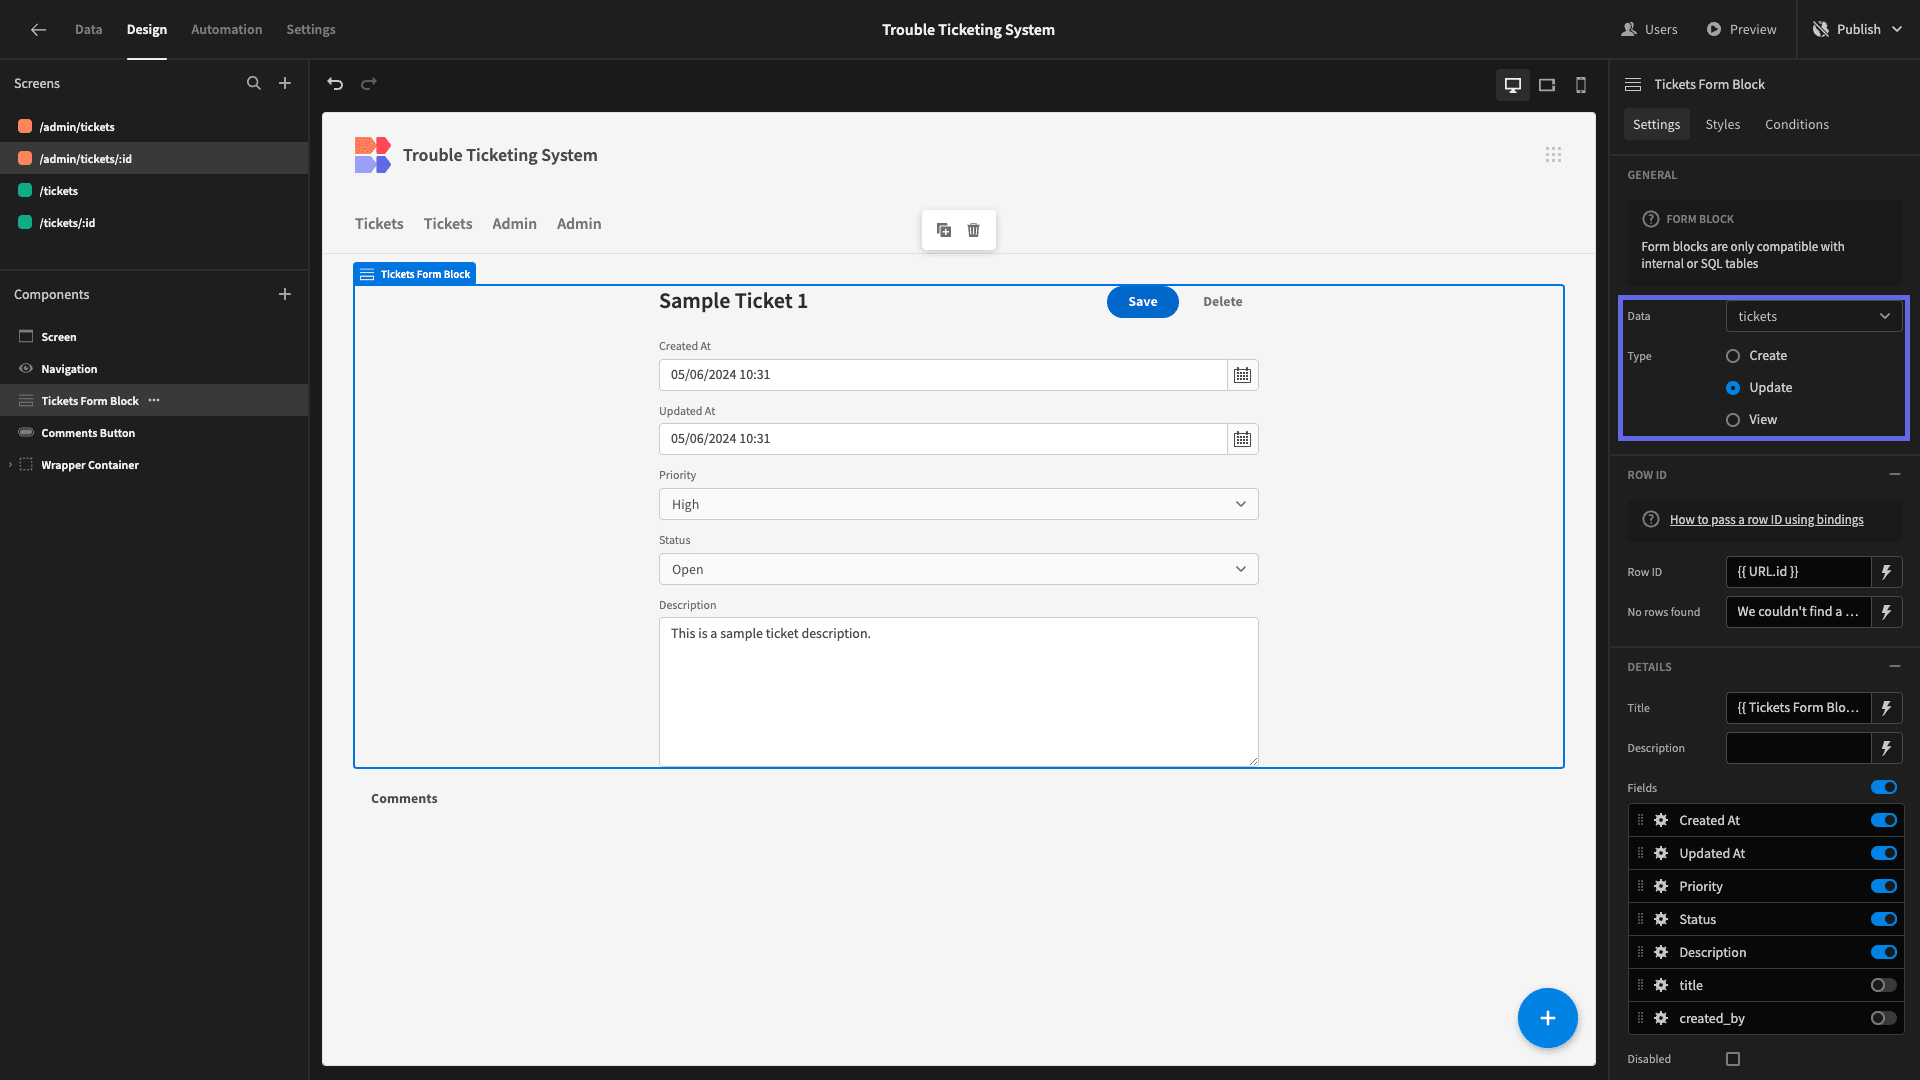
Next, we’ll head to our other screen and make a few changes to our form.
Specifically, we’ll update our Form Type from View to Update so that service agents can edit our ticket information.
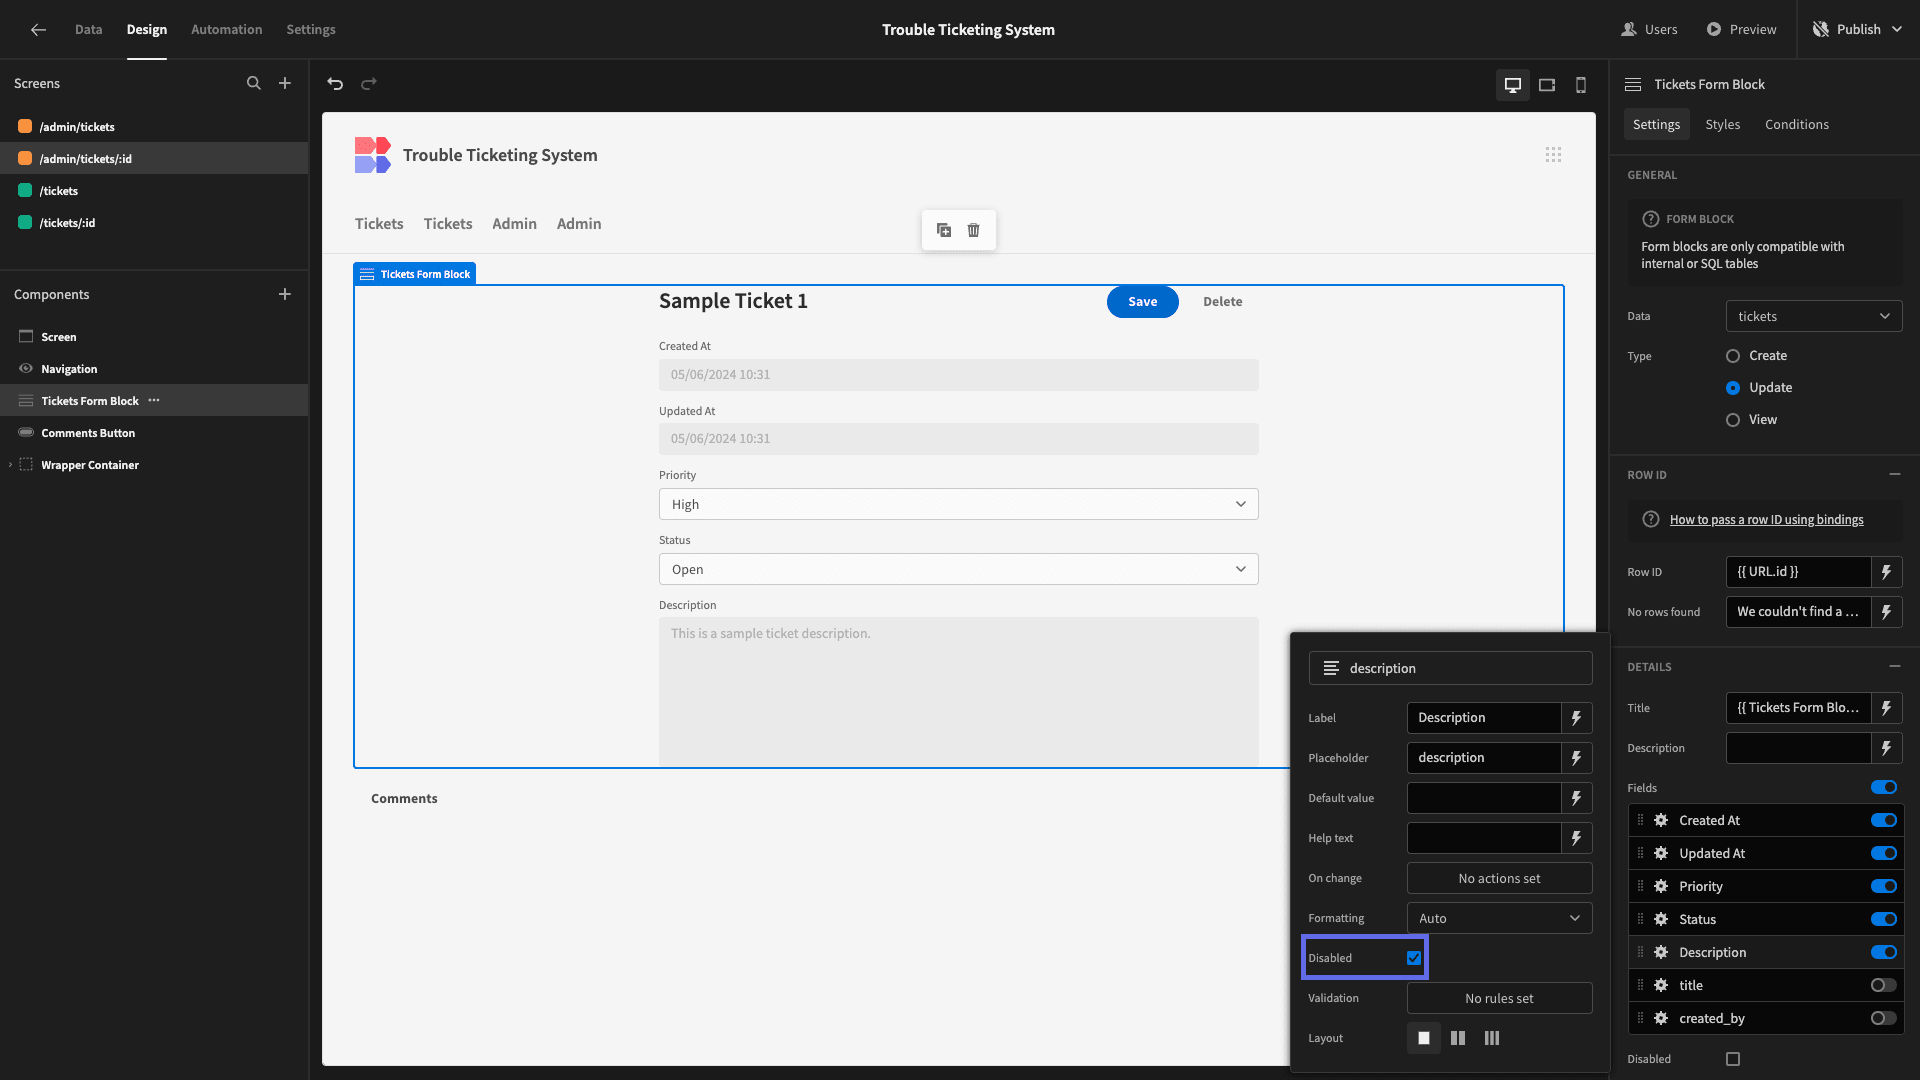
But, we only want to let them update the status and priority attributes, so we’ll select the Disabled option on all of our other fields.
6. Design tweaks and publishing
In terms of functionality, our trouble ticketing system is ready to go. Before we push it live for our users though, we’re going to make a few final design changes.
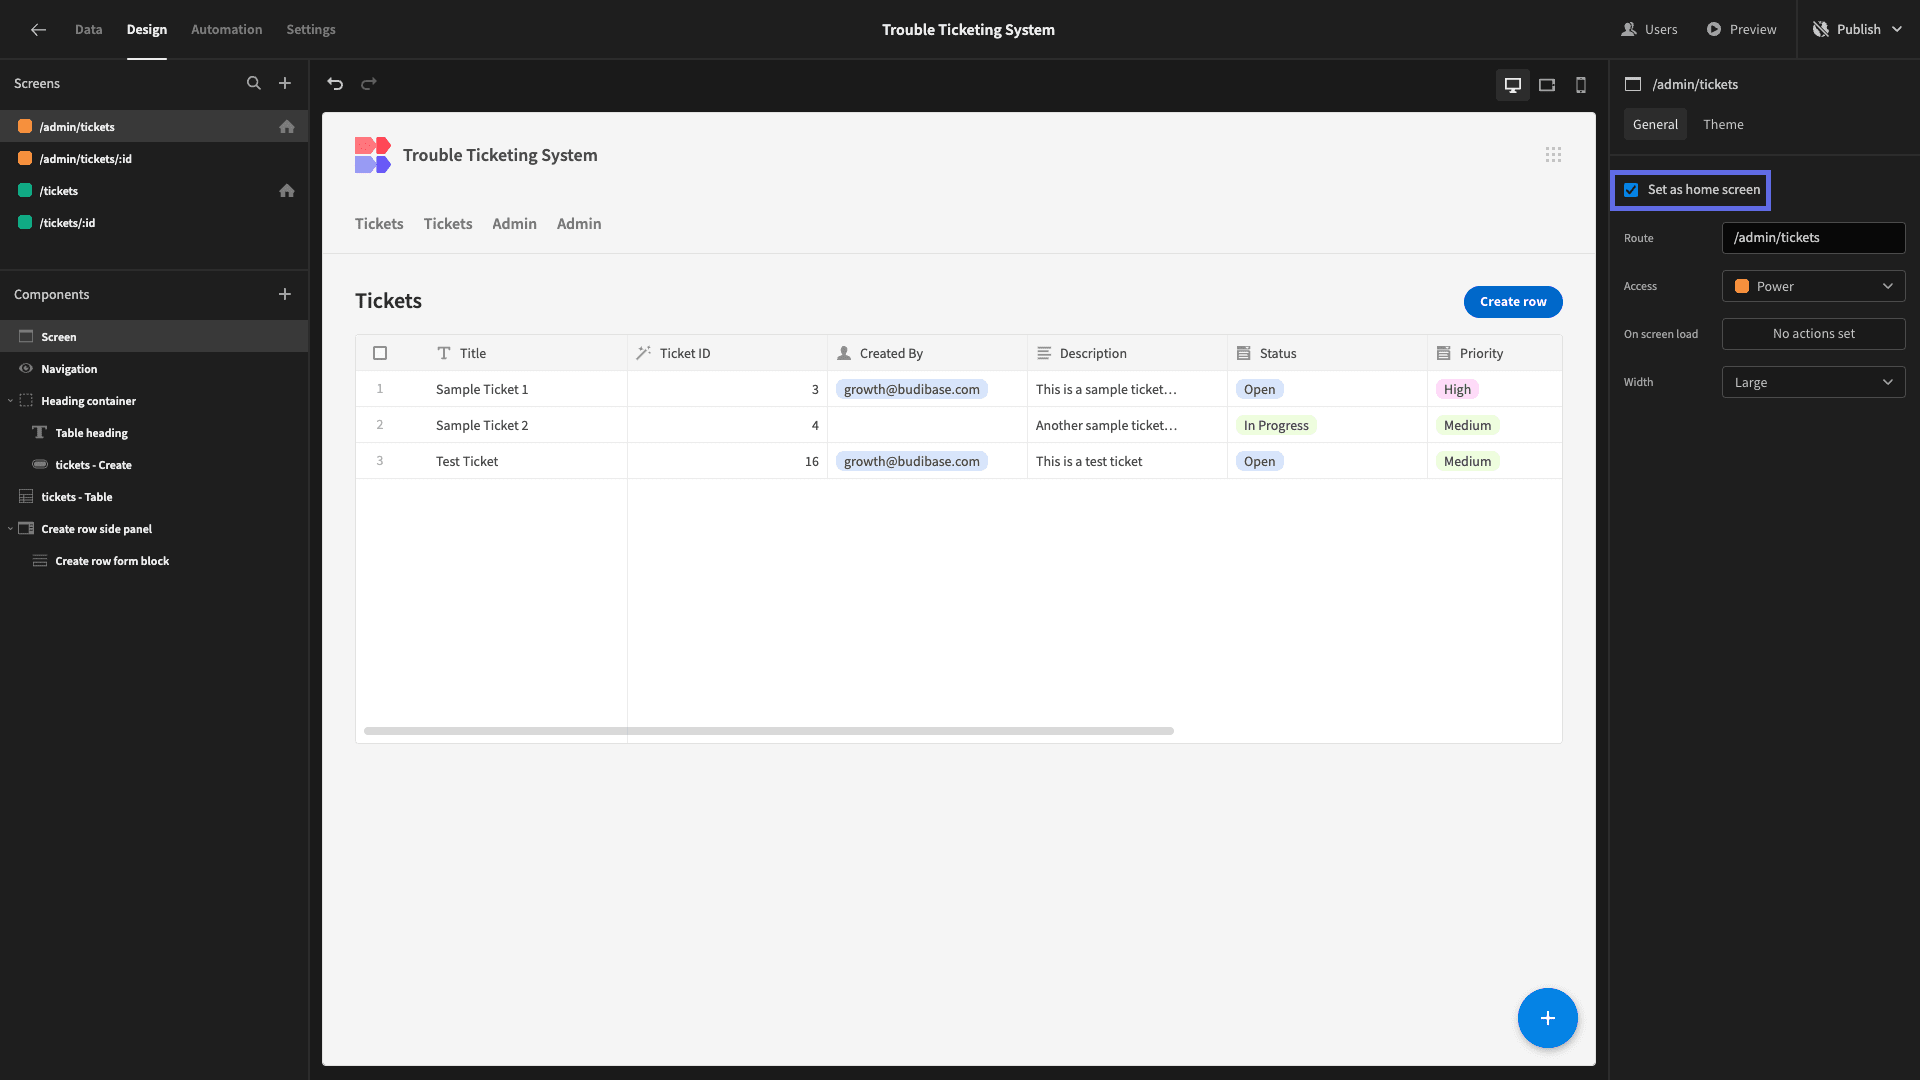
Our users only really need to access a single screen in our app, so we’re going to start by selecting the Set as Home Screen option on each of our table UIs. This means they’ll be used as the home screen for their respective roles.
We also don’t need our nav bar. Under Navigation, we’ll use the X icons to remove all of the links in our menu.
Under Screen, we’ll head to Theme and choose Midnight.
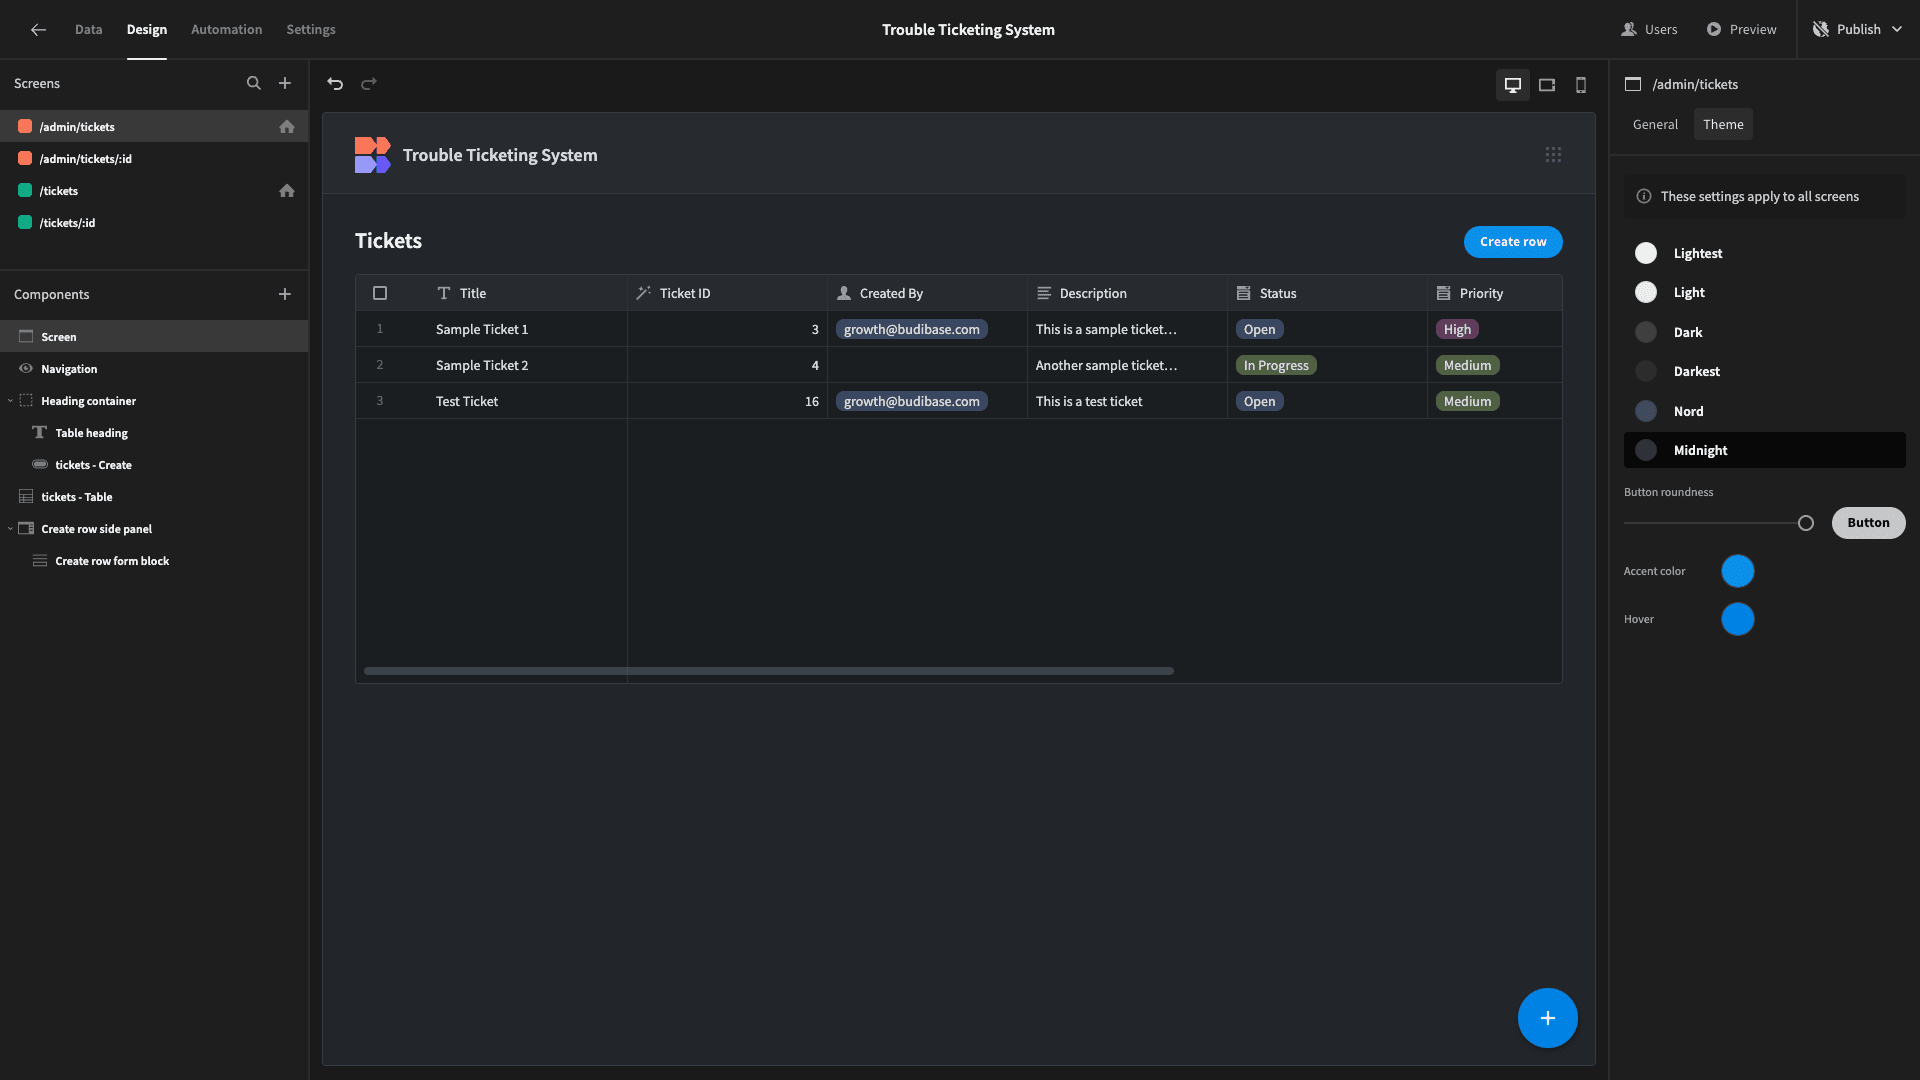
Here, we can also update our button colors to the same green as we used earlier for our comment boxes.
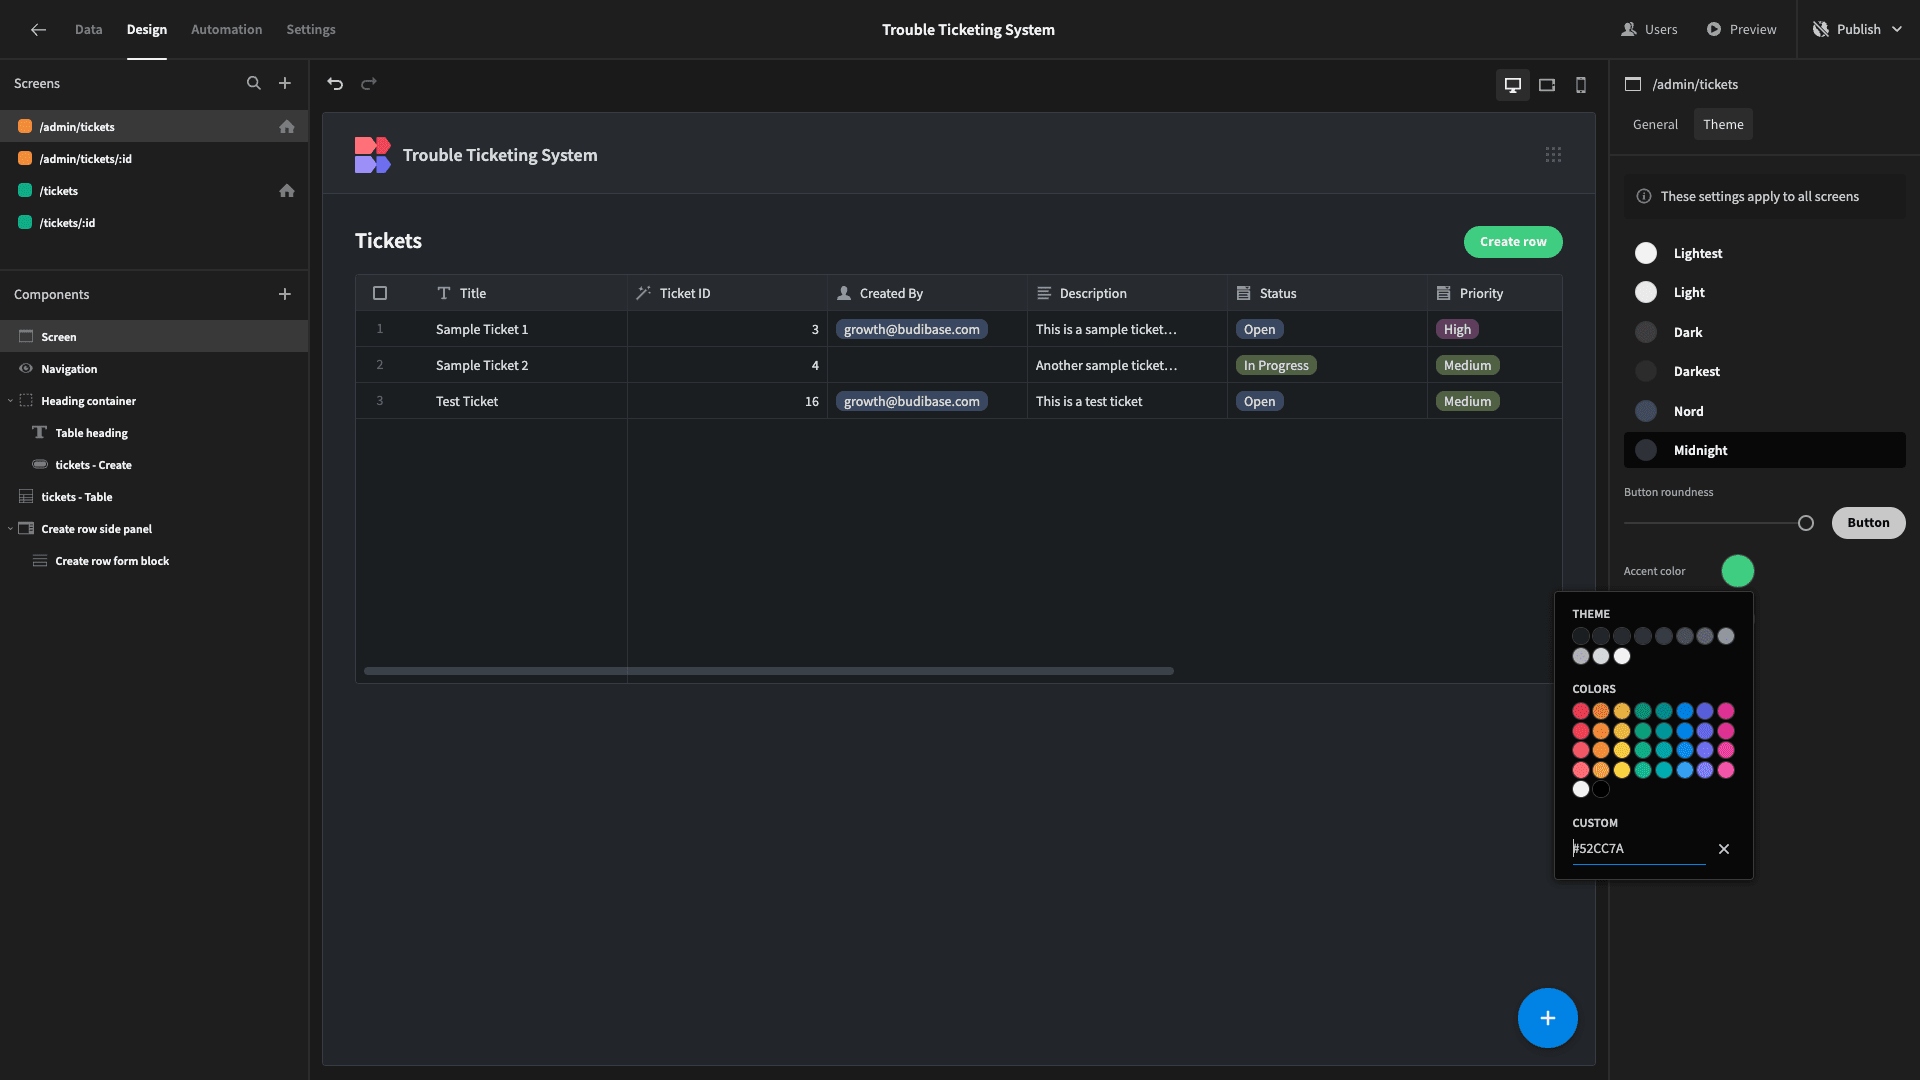
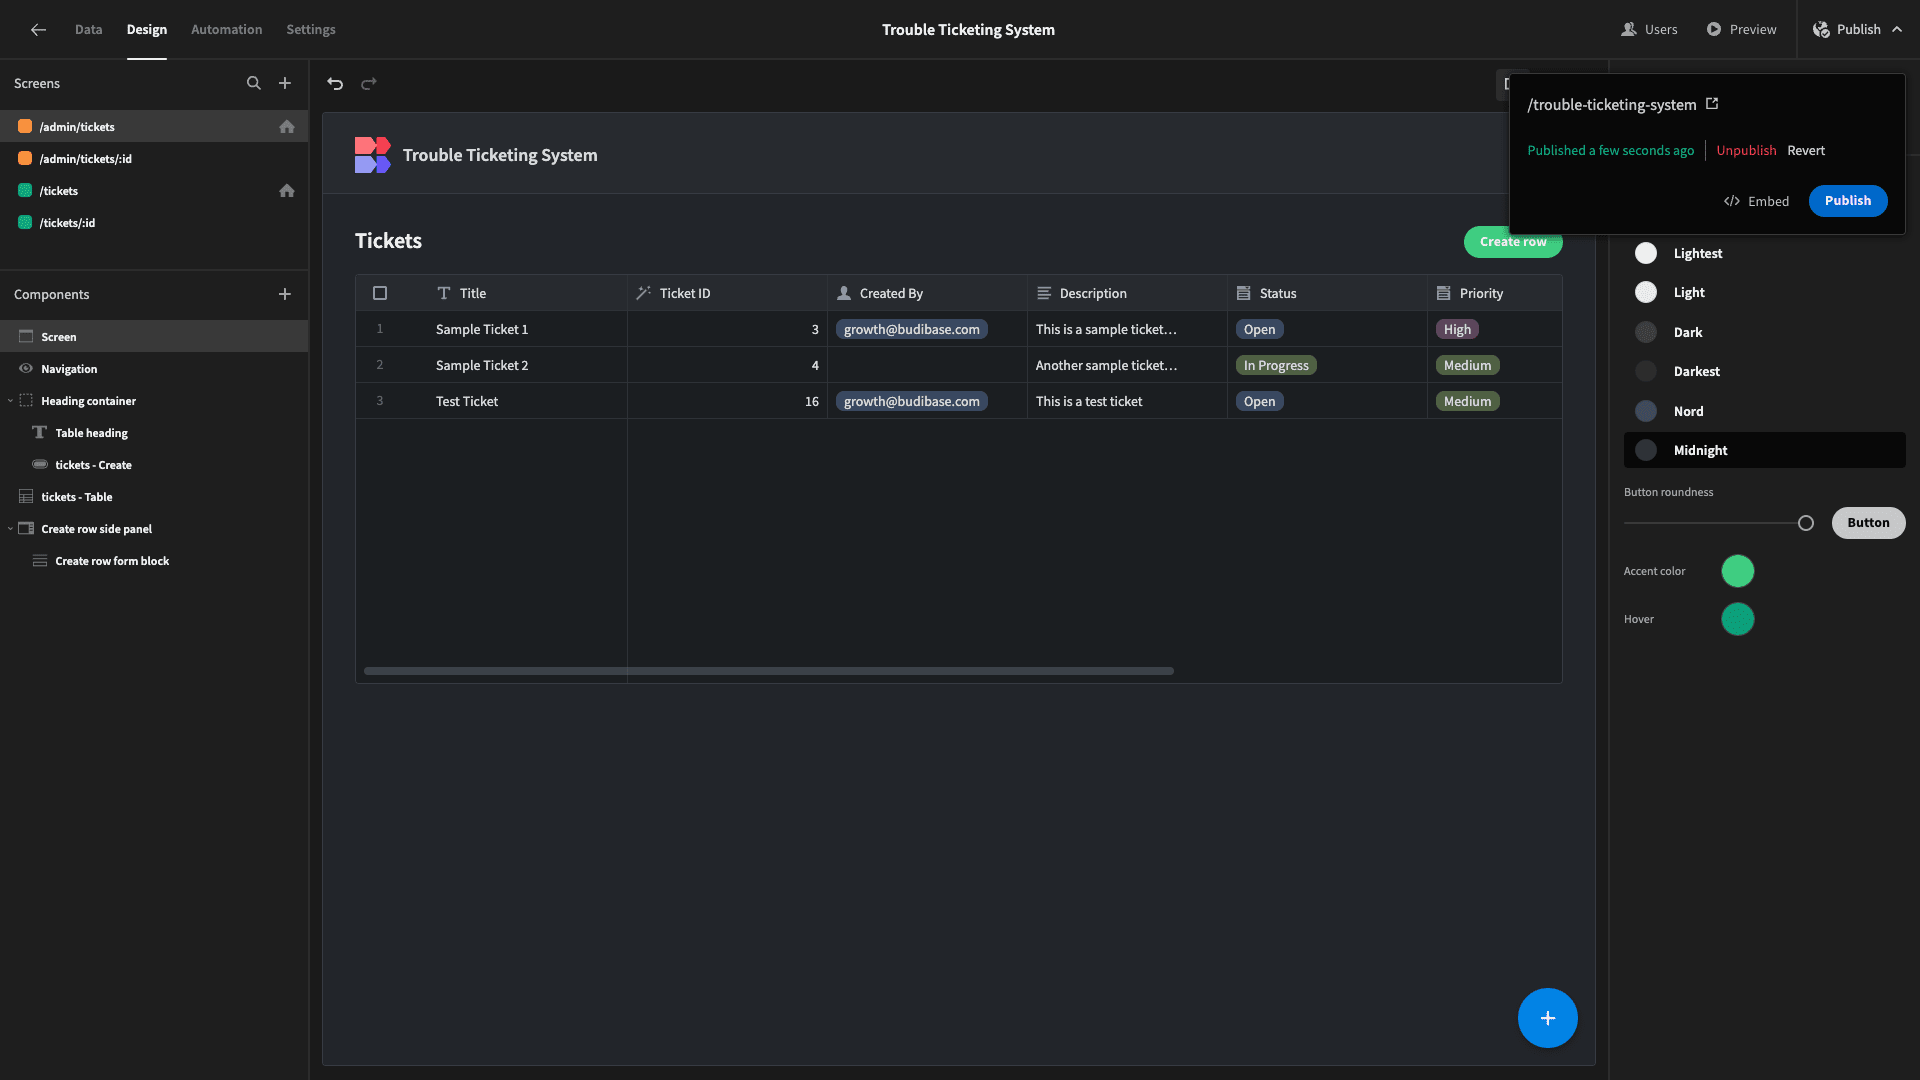
When we’re ready, we can hit Publish to push our app live.
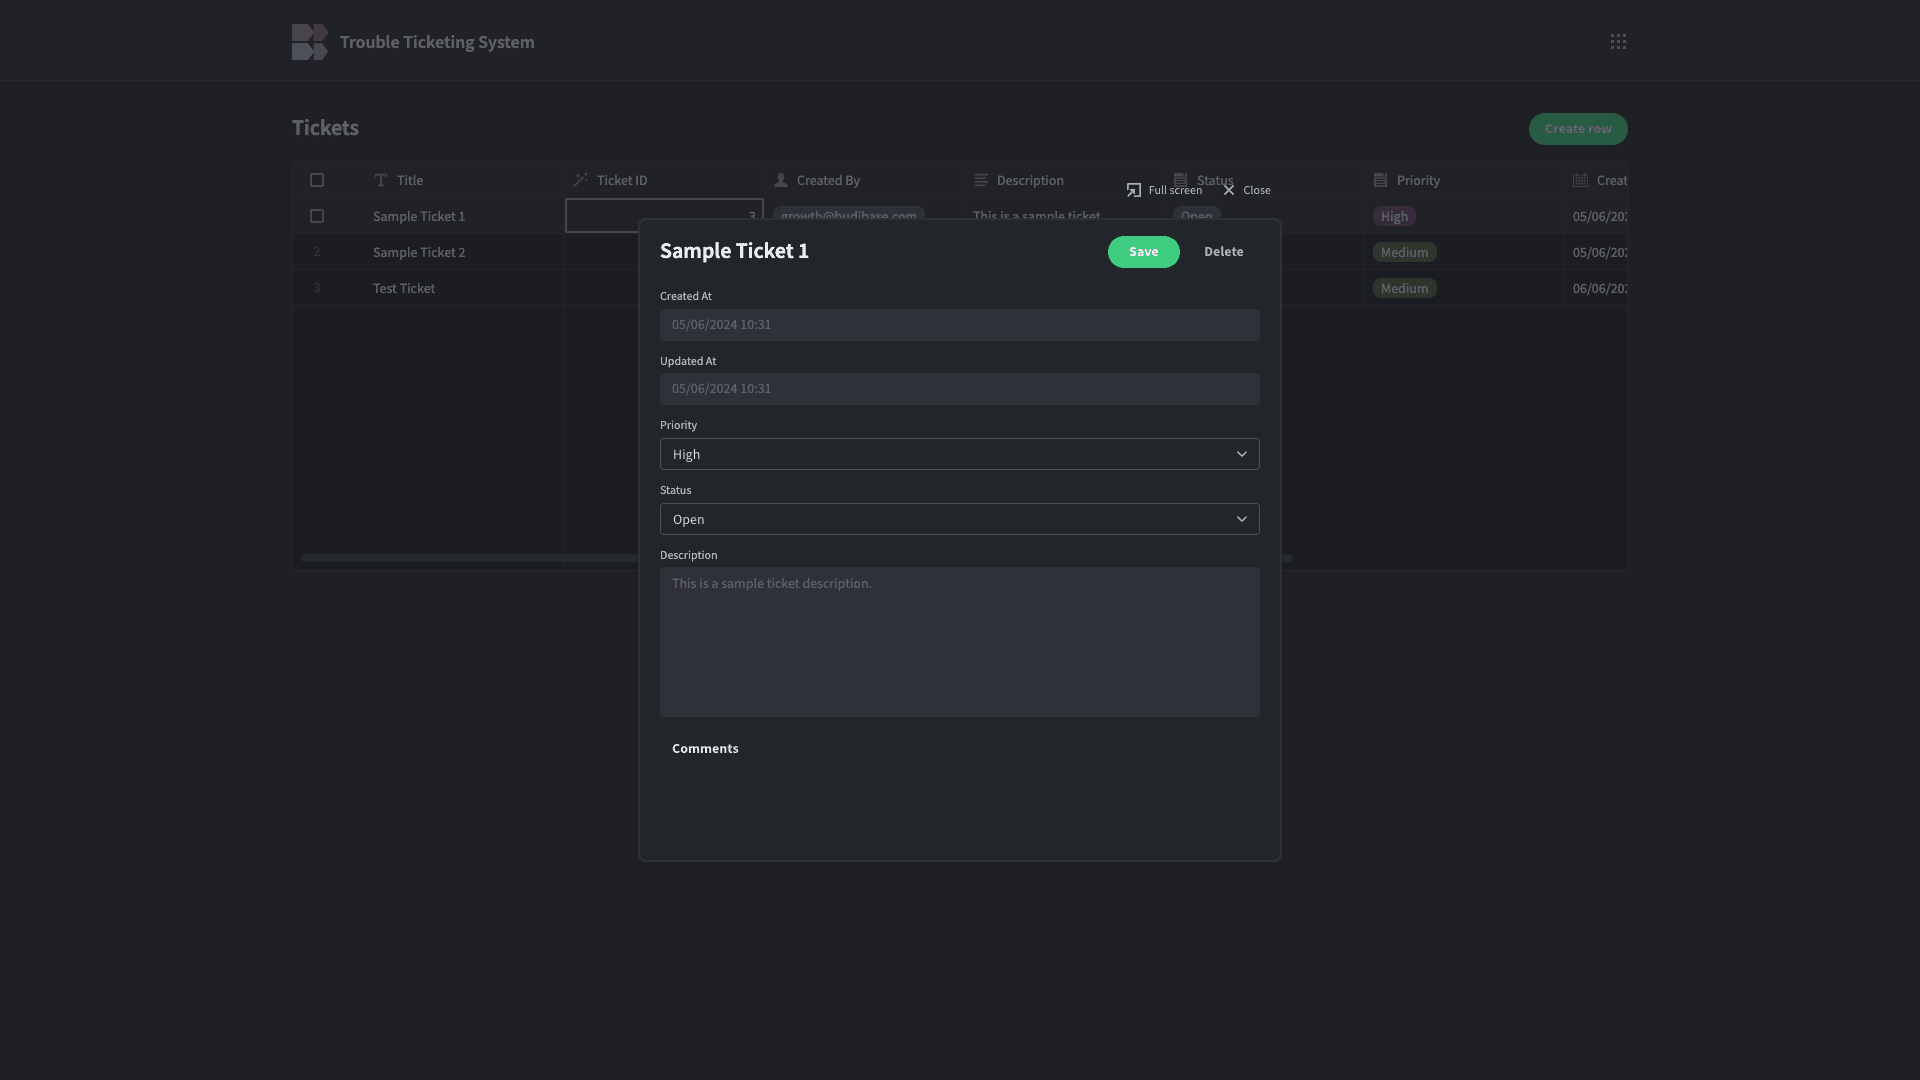
Here’s a reminder of what our finished trouble ticketing system looks like.
Turn data into action with Budibase
Budibase is the fast, easy way to build professional internal tools on top of any data source.
With extensive external data support, autogenerated UIs, powerful automations, optional self-hosting, free SSO, and more, there’s never been a better solution for busy IT teams that need to output solutions at pace.
Check out our features overview to learn more.