Build a Free Postgres GUI in 3 Steps
A Postgres GUI helps you make the most out of your database, whether you are a coder or not.
Databases are incredible tools for businesses. They allow you to store and process data at scale so that you can make better-informed decisions.
You have two options to load data from databases. You can use code via a command line or a programming language. So, you type in the commands in a terminal or send your code to a server, and you get the results.
Or you can use a Graphical User Interface (GUI) to visually interact with your database objects. With a GUI, you interact with your database using screens, buttons, and visual elements to see what is happening.
Thus, a GUI allows you to access your database, even if you aren’t a coder. If you are a coder, it is still a great option to run simple tasks. You can always run your queries manually if you need them either way.
It is quite tricky to pick the right tool for managing SQL queries, though. There are many factors to consider, including licensing price, features, online access, number of users, ease of use, and many more.
But there’s a simple solution.
You can build your own Postgres GUI using a free, open-source low-code platform like Budibase.
It’s much easier than it sounds, it requires no coding knowledge and you can do it in three steps.
- Connect to your Postgres Database.
- Auto-generate the GUI screens.
- Add your custom elements to your Postgres GUI.
Today, we’ll walk you through this process. You’ll learn how you can connect to your database, get data from it, and generate screens automatically. Then, you’ll learn how to customize the app to add your own functions.
All of that with no coding knowledge, using Budibase.
You might also like our guide to building a GitHub metrics dashboard .
Let’s get started!
Is there a GUI for Postgres?
Postgres is an open-source database system. It is a tool to store and process data.
Thus, it doesn’t have an official GUI.
However, there are many Postgres GUI options available. In addition, you can build your own GUI for database administration in just three steps.
We’ll see what you can build in the next section.
You might also like our guide to building a MySQL GUI .
What is the best client for PostgreSQL?
The best Postgres GUI depends on your requirements. There are pre-made tools with a wide range of features and prices, yet there’s no guarantee that you’ll find the perfect fit for your business.
At the end of the day, the best PostgreSQL client is the one that does everything you need. And very rarely will you find this in a premade tool.
Building an app with code can take a lot of time, and it can be very expensive. But you can use a low-code builder to do it for free.
You might also like our in-depth guide to ACID compliance .
Let’s see what we consider the best PostgreSQL client if you just want to get started.
The demo app is connected to a PostgreSQL database for a blog. You could alternatively connect to multiple databases - including SQL Server, MySQL, Oracle, and more.
There are two tables, one for posts and one for settings.
The first screen you see when you load up the web application is the posts table:
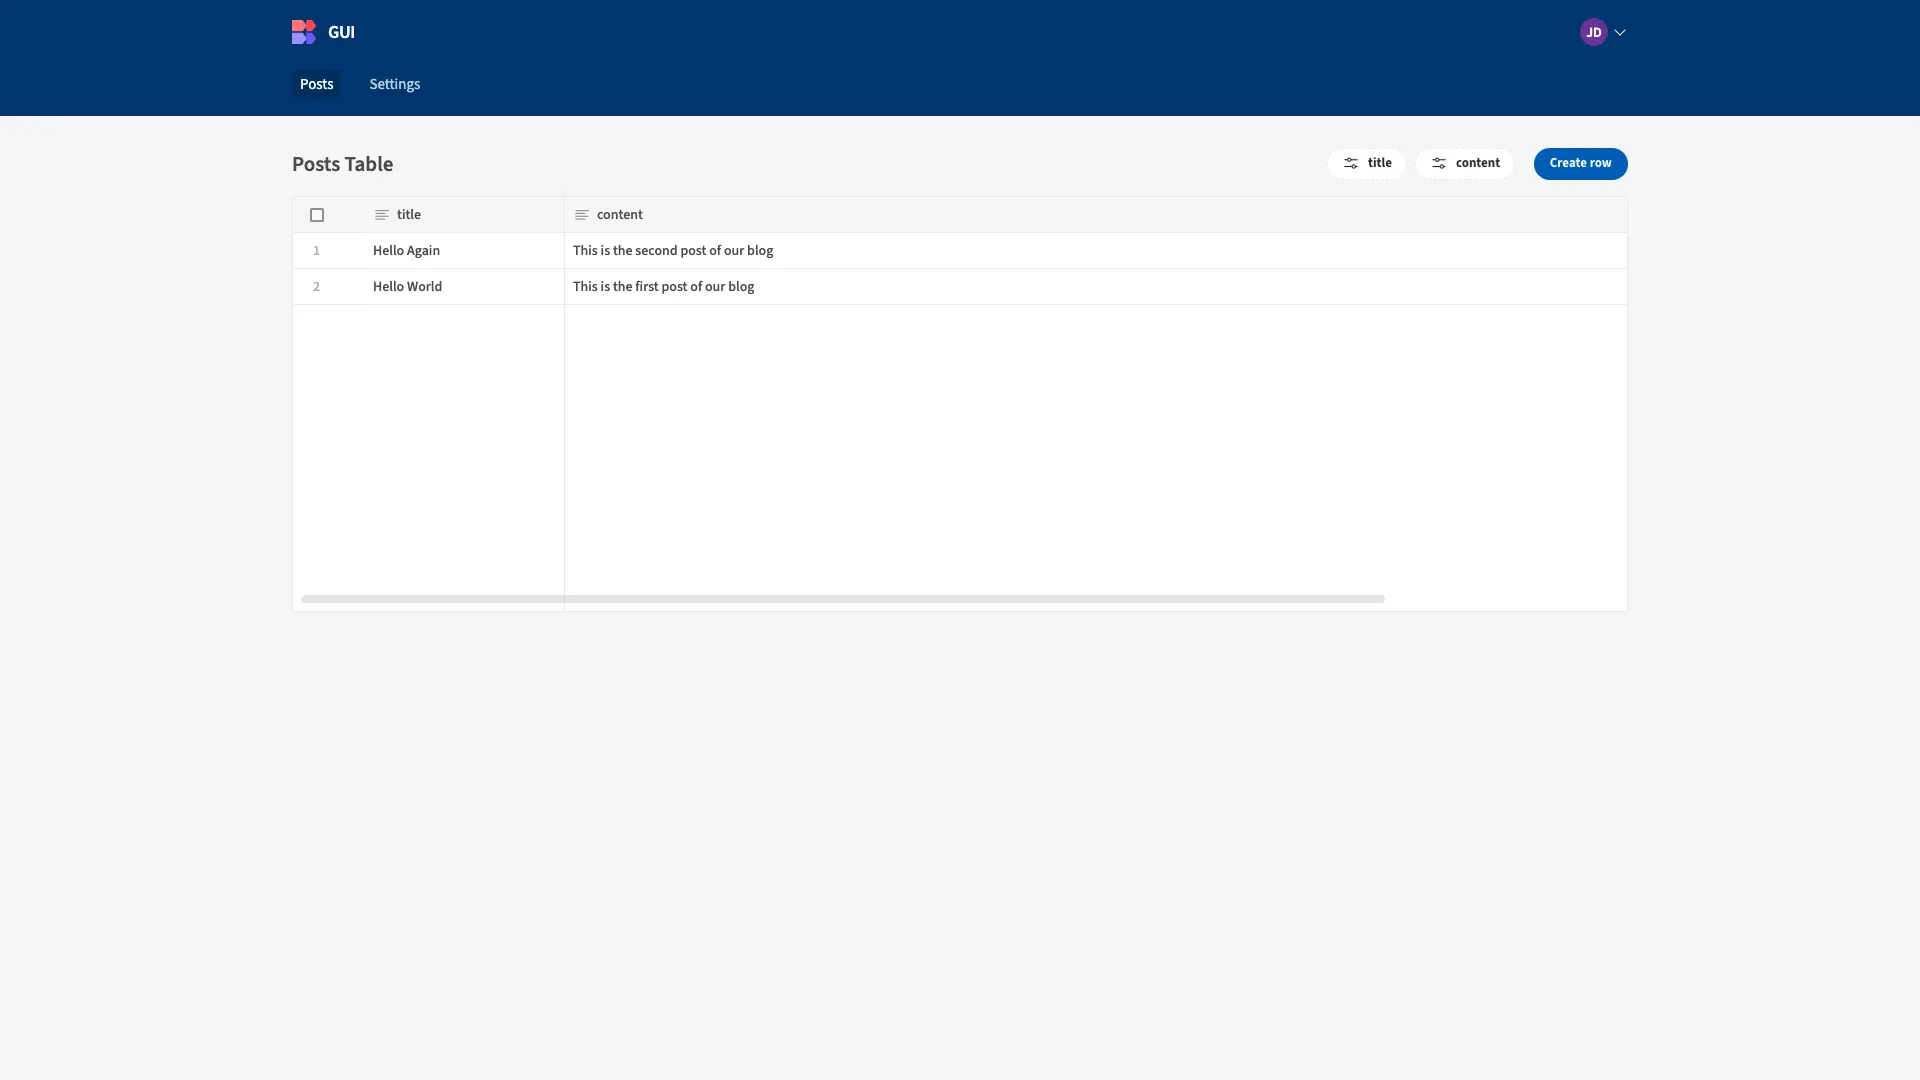
At the top, you can see the nav bar where we can select our other database table.
We’ve also added front-end filtering. We can select either of our table’s columns and apply whichever filtering rules we want, using the dropdown menu.
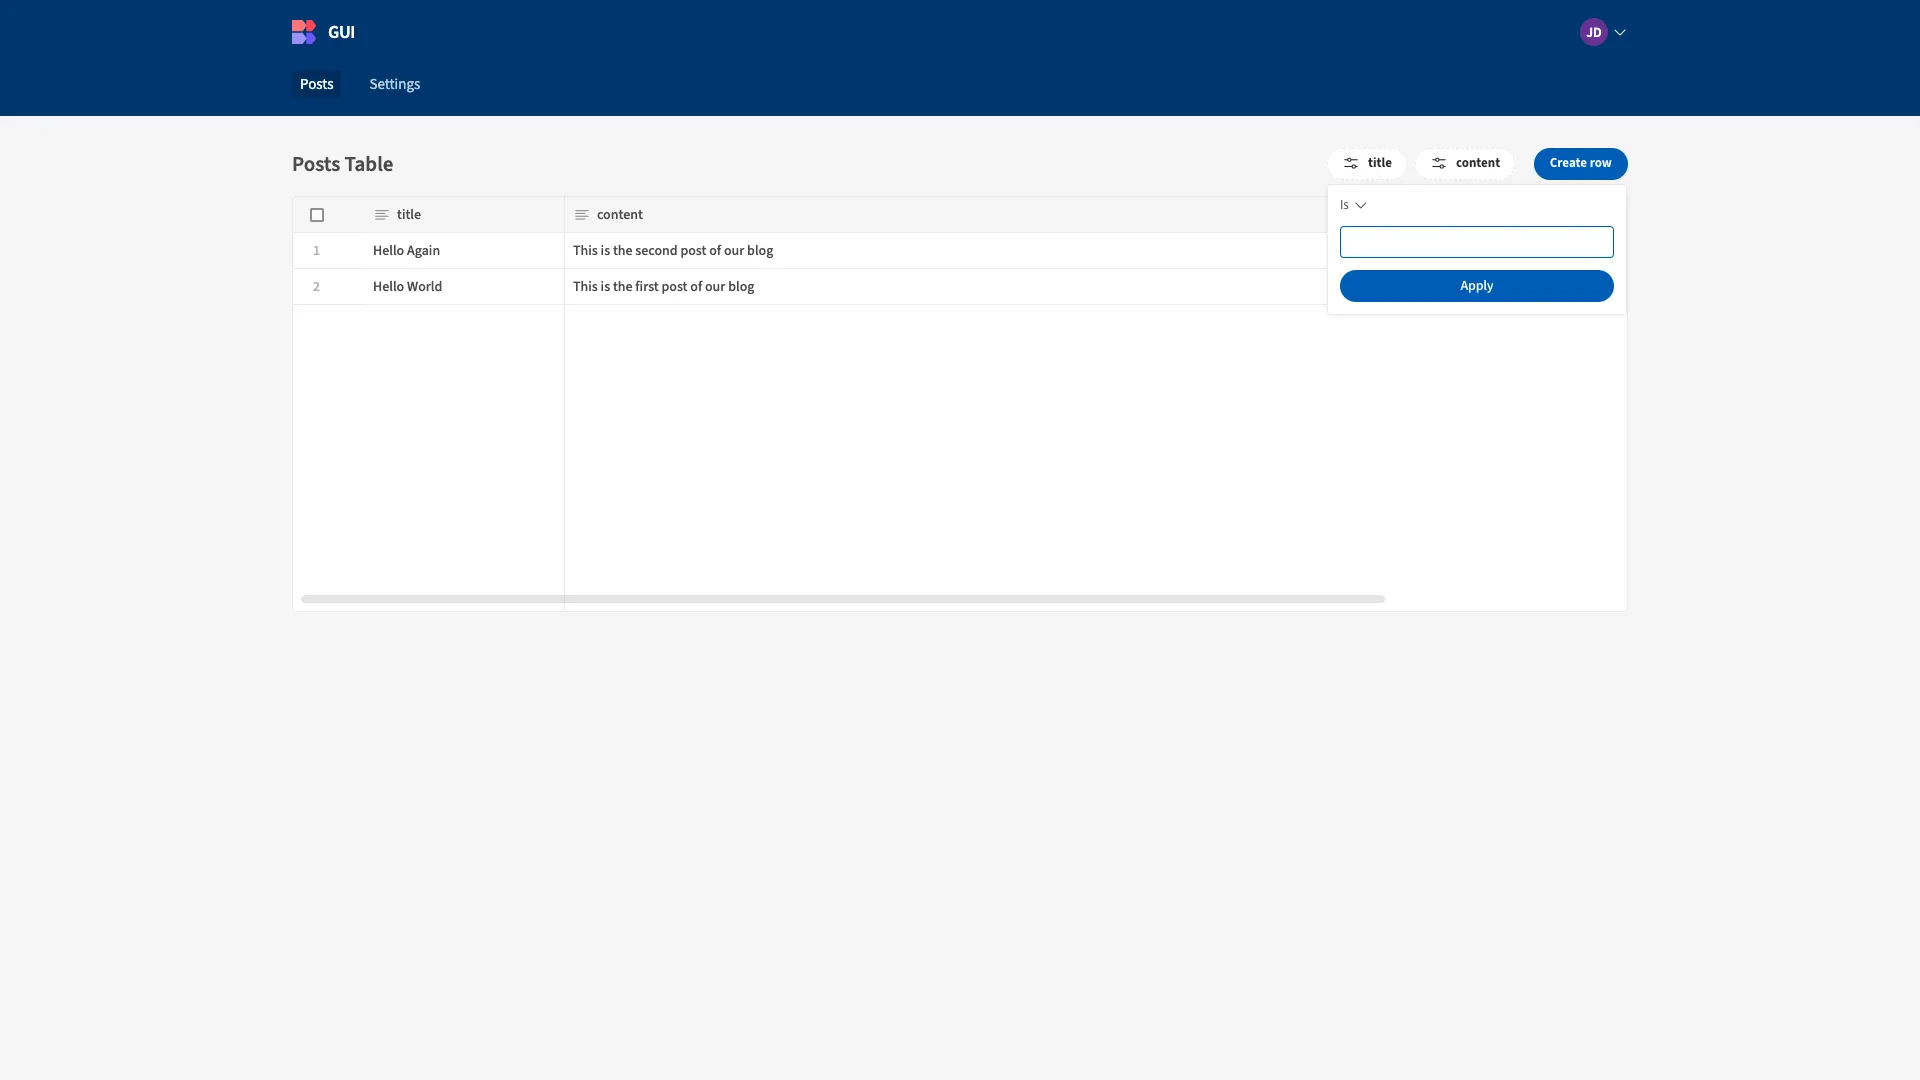
Next, you can see the table data. You can click on individual rows or the Create Row button to manage items. These open a modal screen with forms based on our table schema.
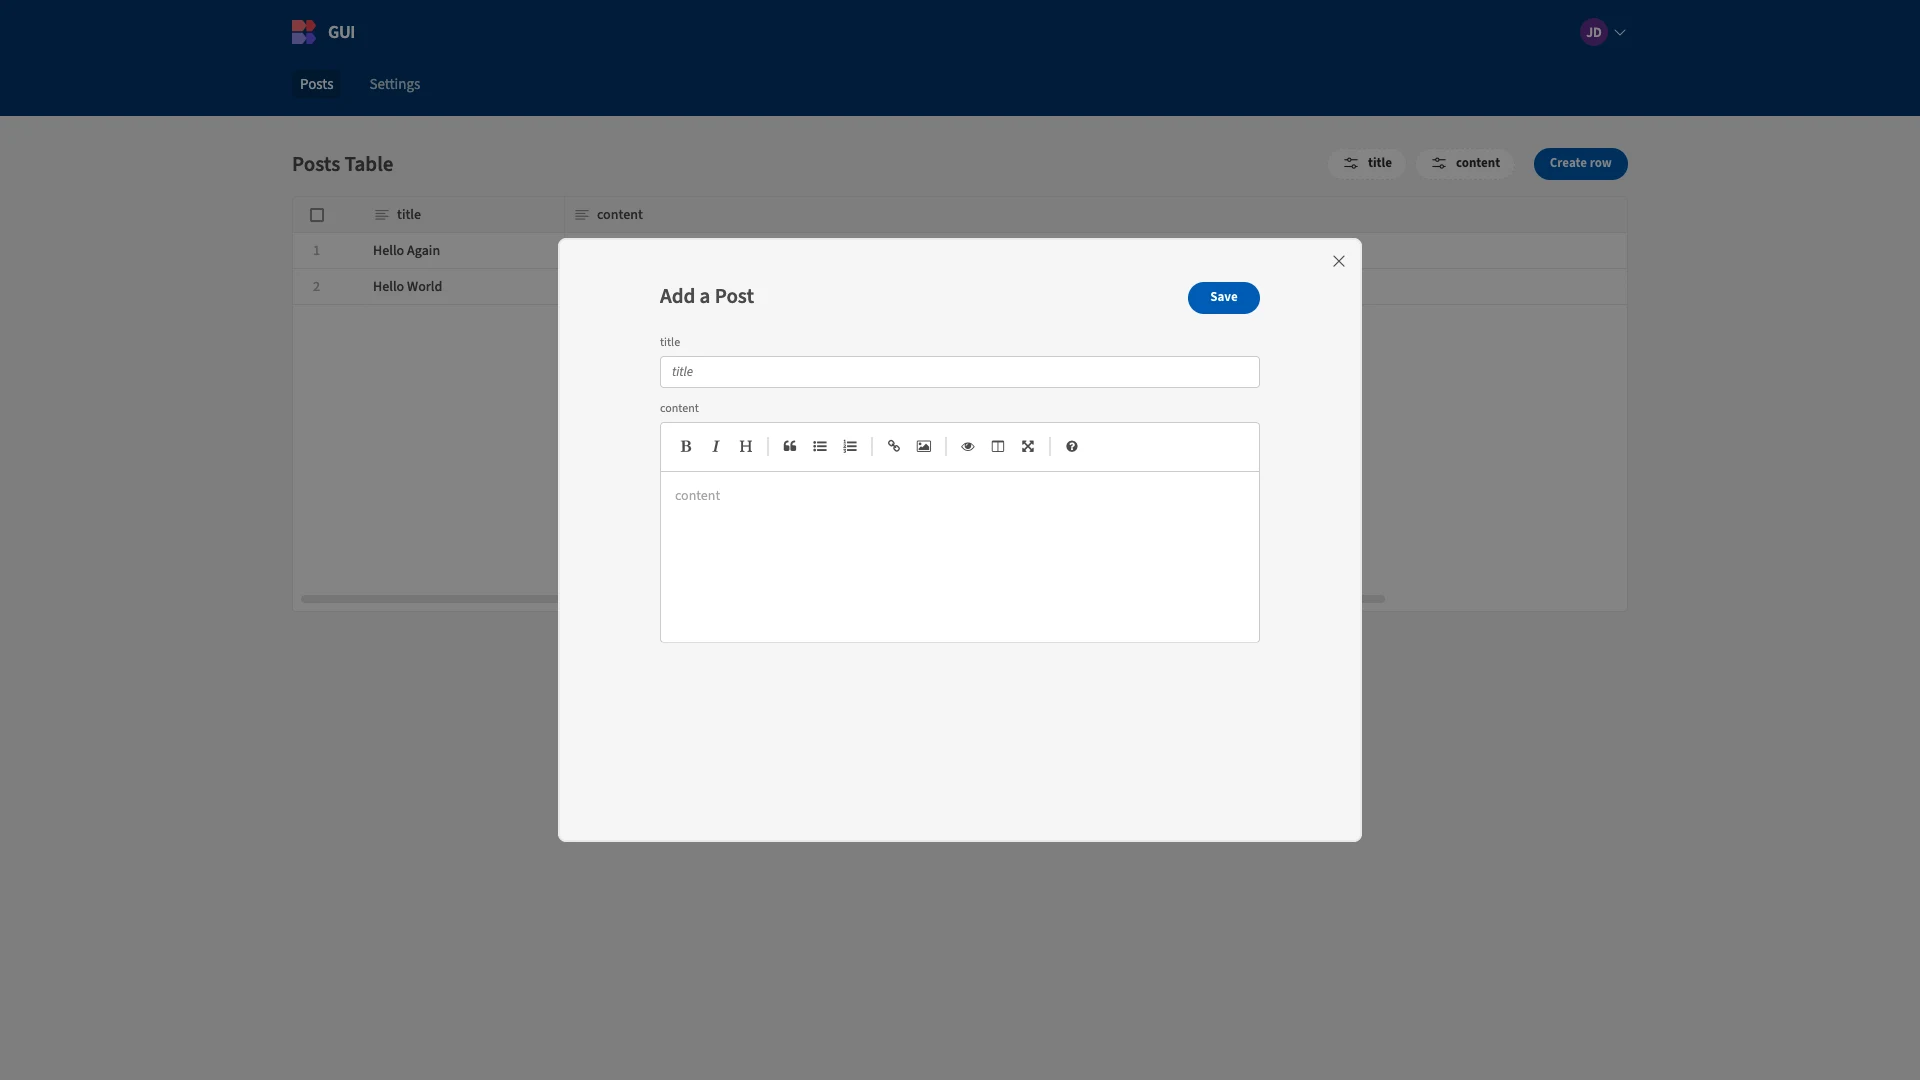
This is just a form with fields coming from the table. But you can spice it up in any way you want to. You can include reference data, API calls, data from other tables, and even actions to send emails alongside cross-team collaboration and connection to multiple data sources.
The settings screen is very similar, but it uses slightly different elements:
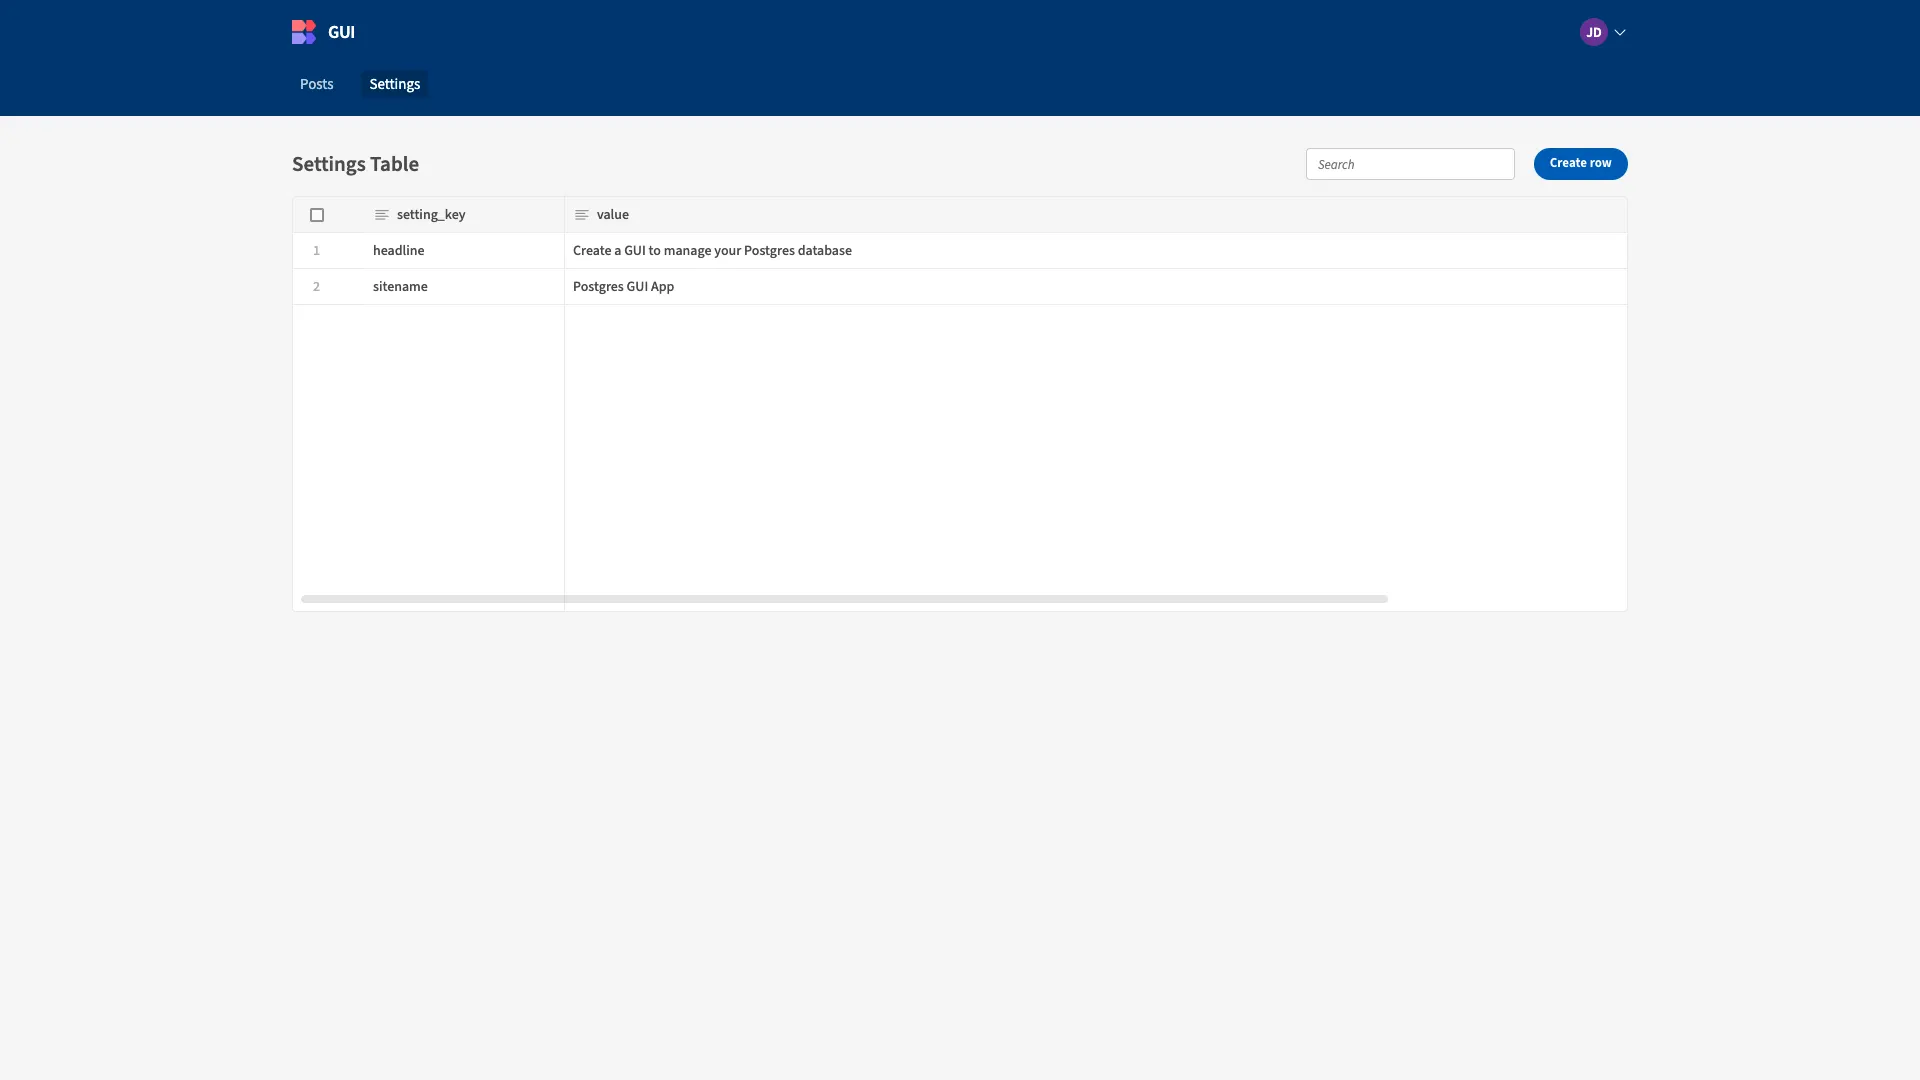
All elements are the same, but instead of the dynamic filter, there’s a static search bar, pointed at the setting_key column. This is another option to filter table data, and you can see the pros and cons of each item when you are creating them.
Let’s build your Postgres GUI now.
How to build a Postgres GUI in 3 steps
If you haven’t already, the first thing you’ll need to do is sign up for a free Budibase account.
We’ll then create a new Workspace, which we’ll call PostgreSQL GUI.
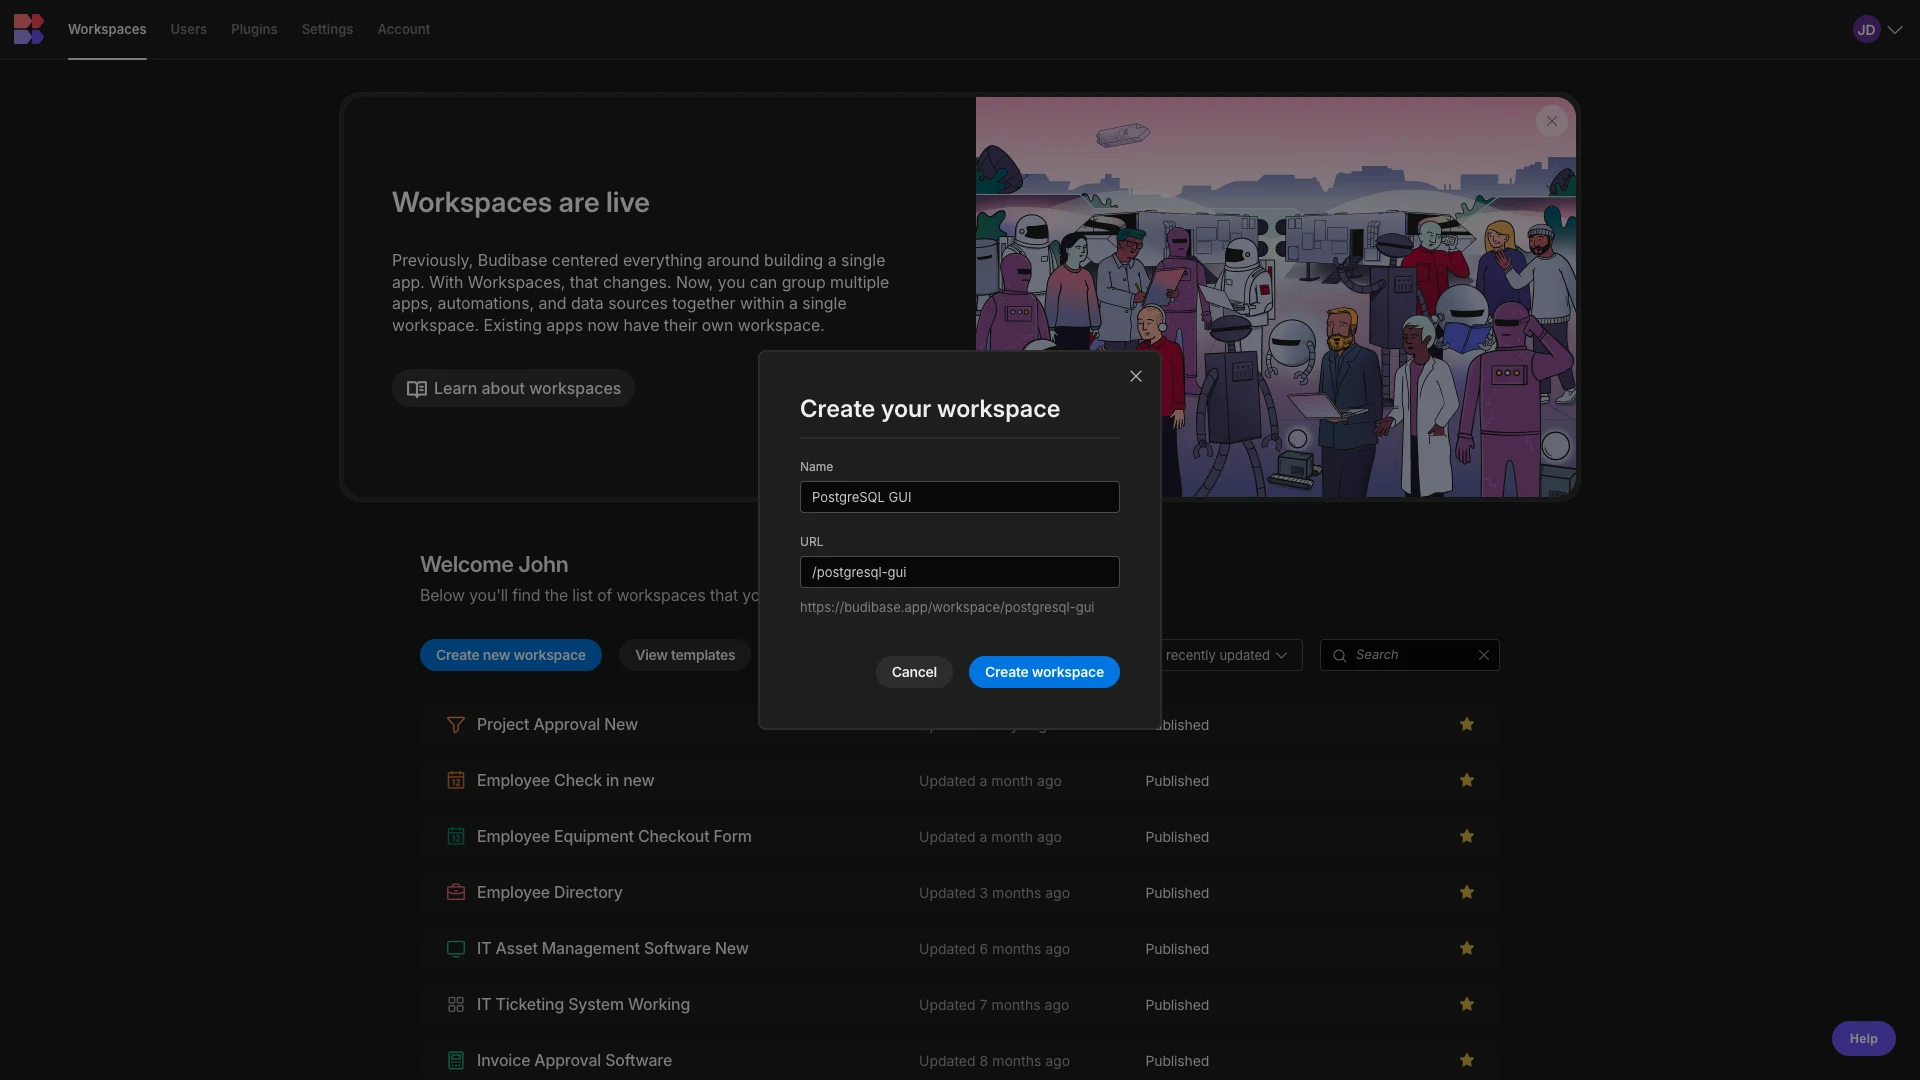
In Budibase, a Workspace is a collection of data sources, automations, and end-user apps that can all interact with one another.
We’ll next be prompted to connect our first data source. Budibase offers a built-in relational database, as well as native connectors for a huge range of RDBMSs, NoSQL tools, APIs, and more.
When we connect to an external database, Budibase acts as a proxy, querying your data without ever storing it.
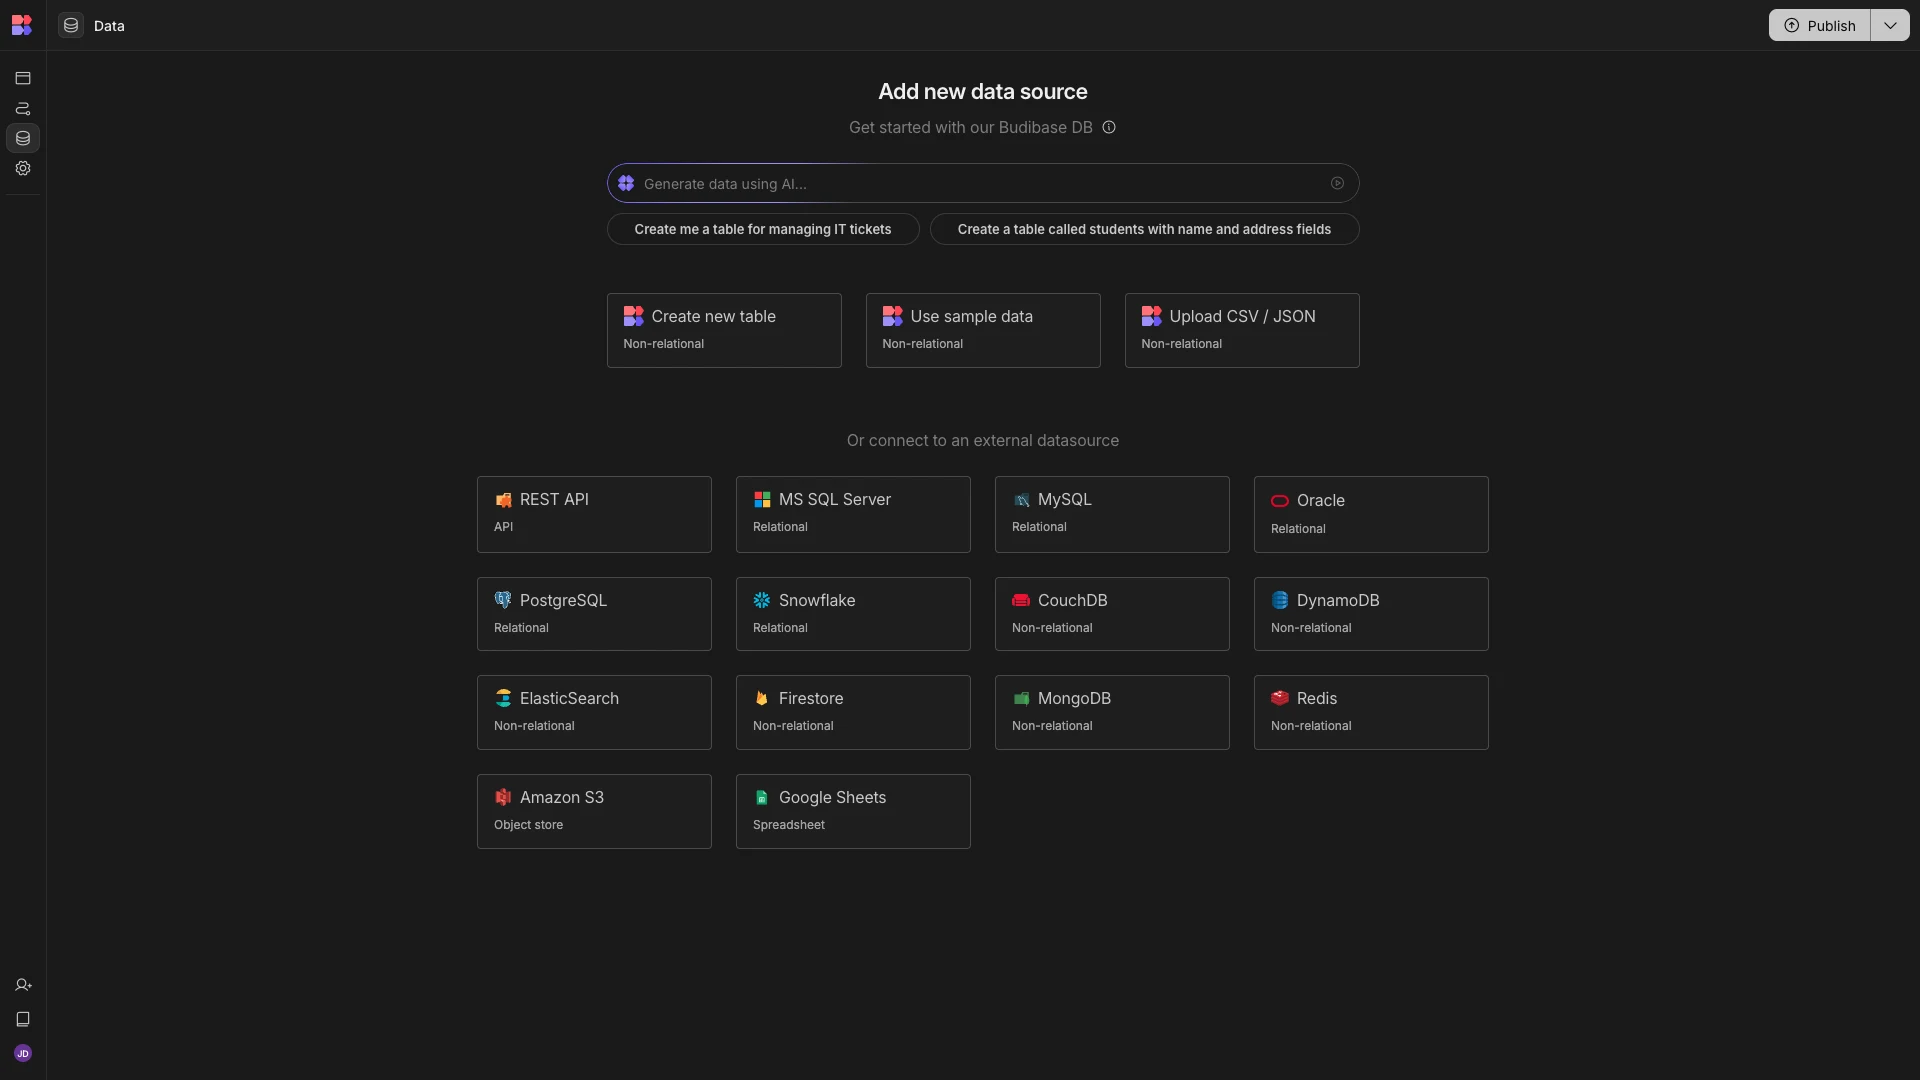
1. Connecting our database
As you can likely guess, we’re going to choose the option to connect to a PostgreSQL database.
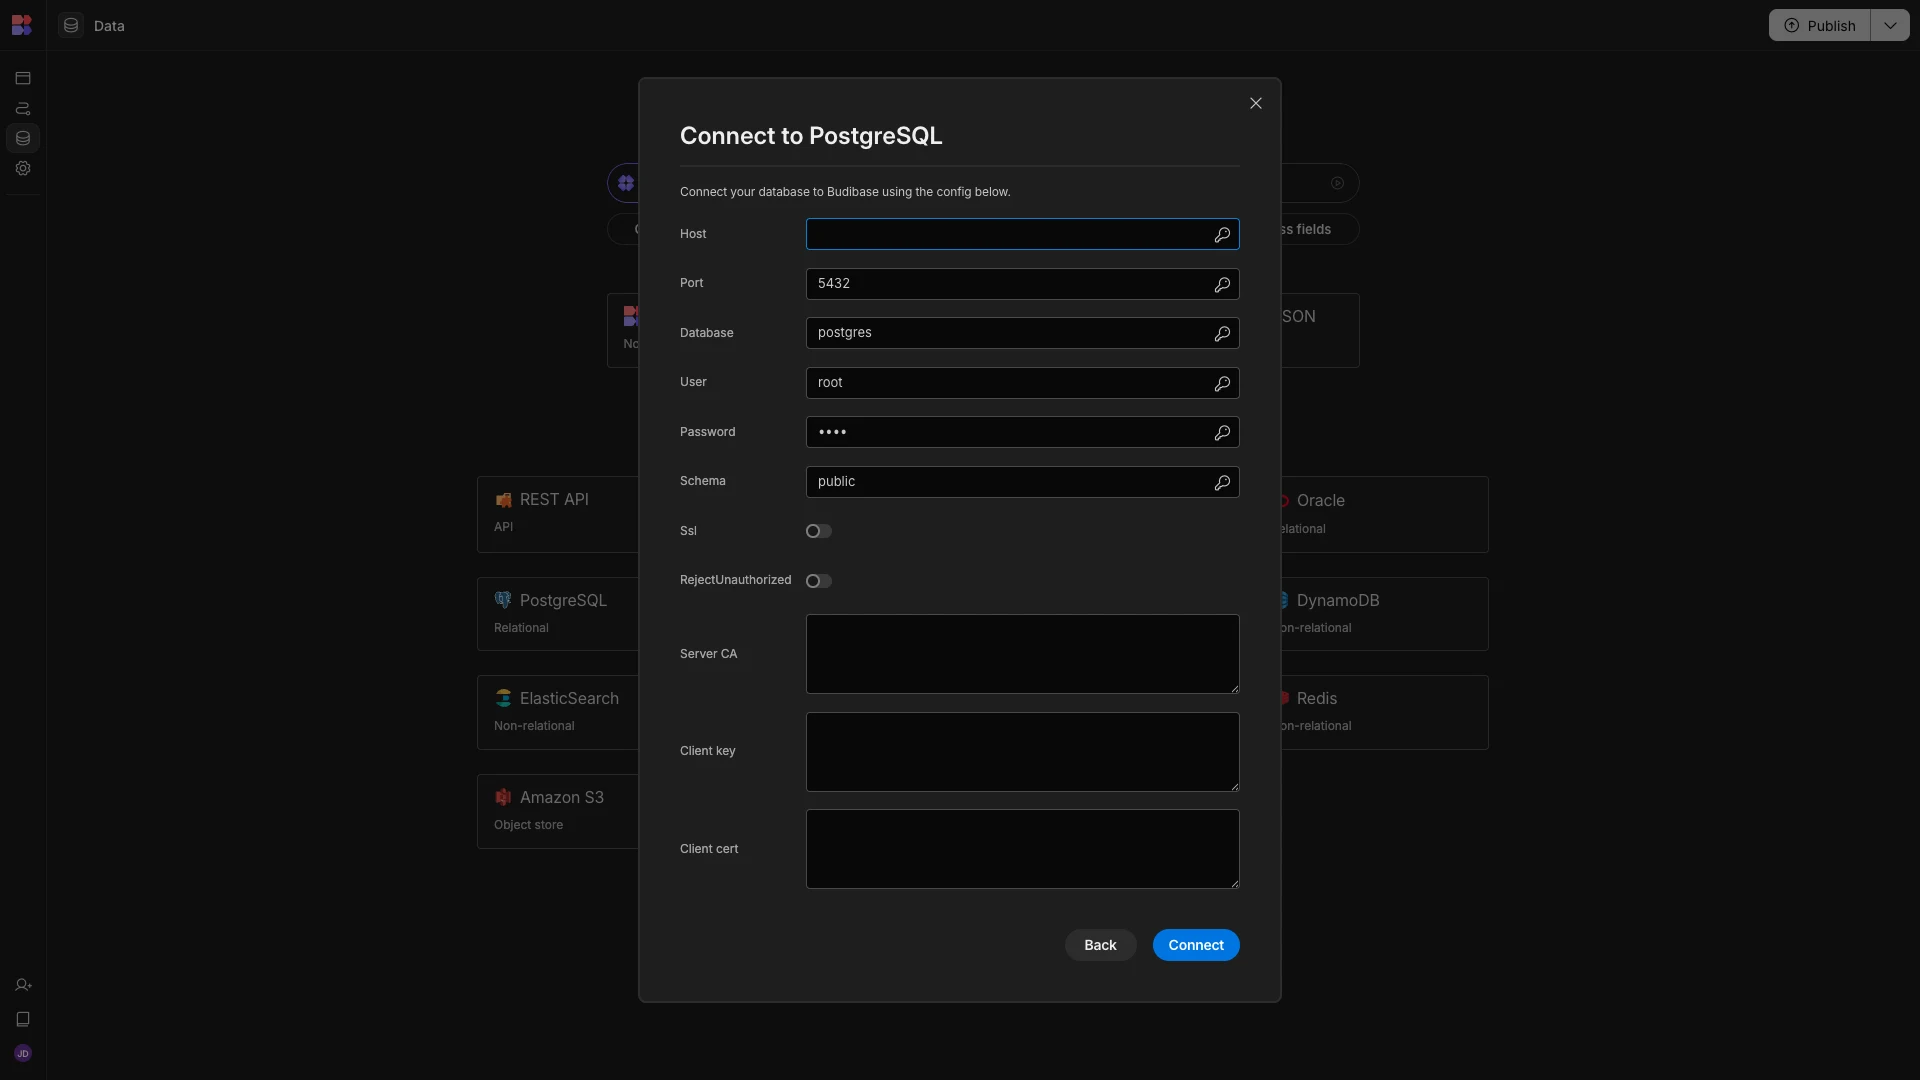
When we do this, we’re presented with the following dialog, where we can add our config details.
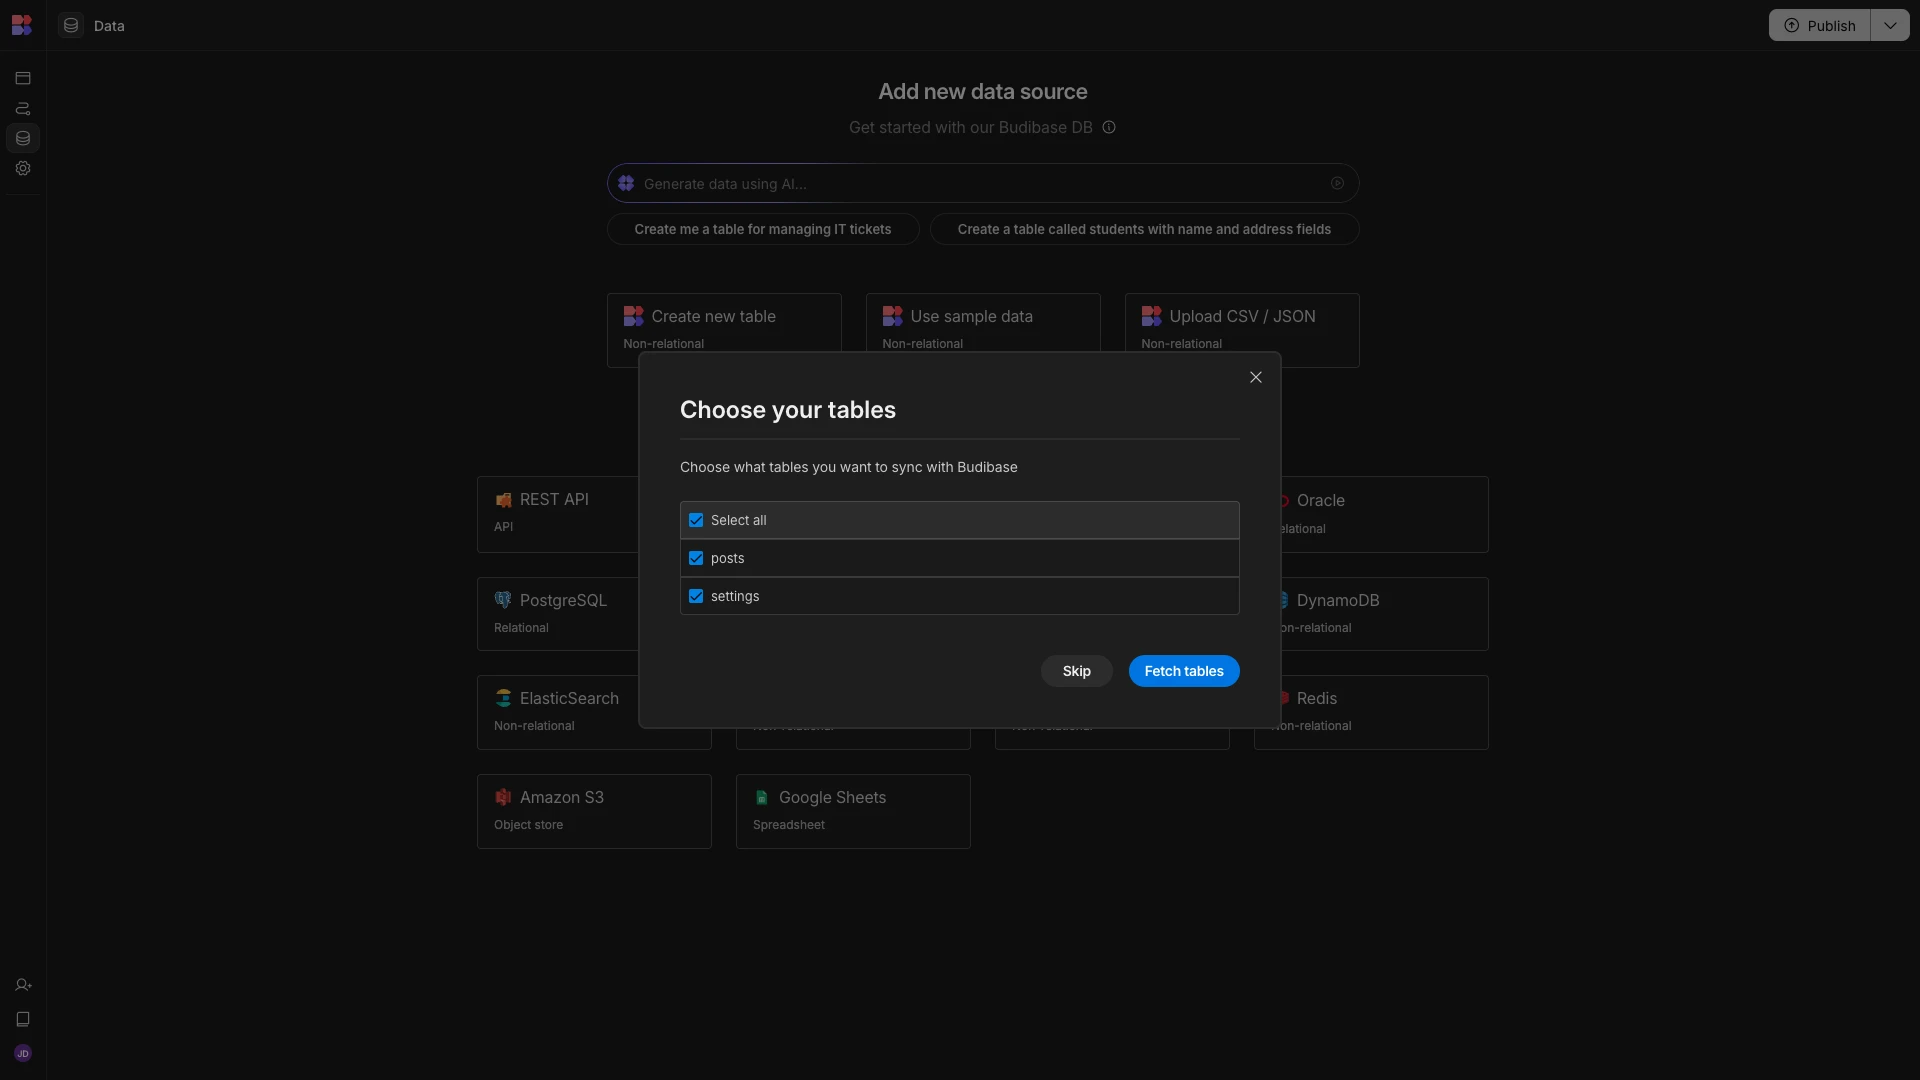
We’re then asked which of our database’s constituent tables we’d like to fetch. This will enable us to interact with whichever tables we choose in the Budibase builder, or end-user applications and automations.
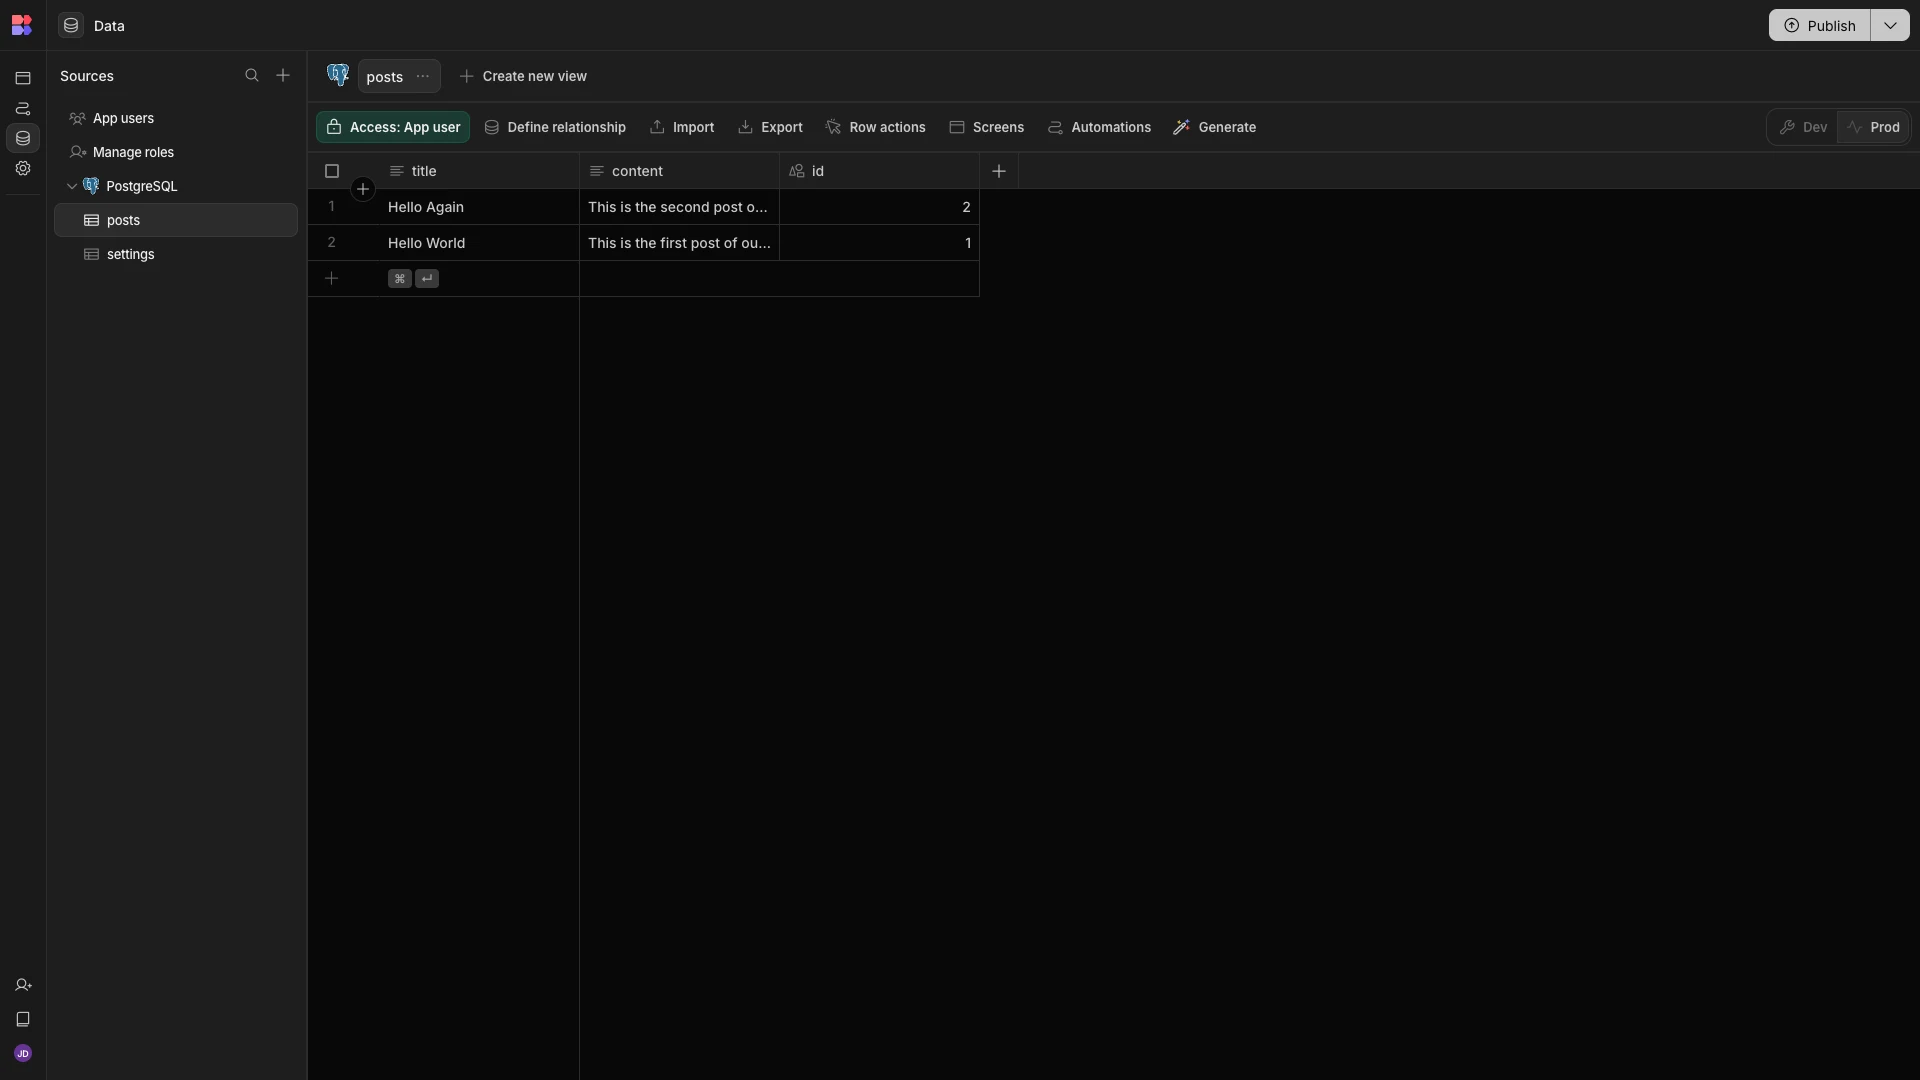
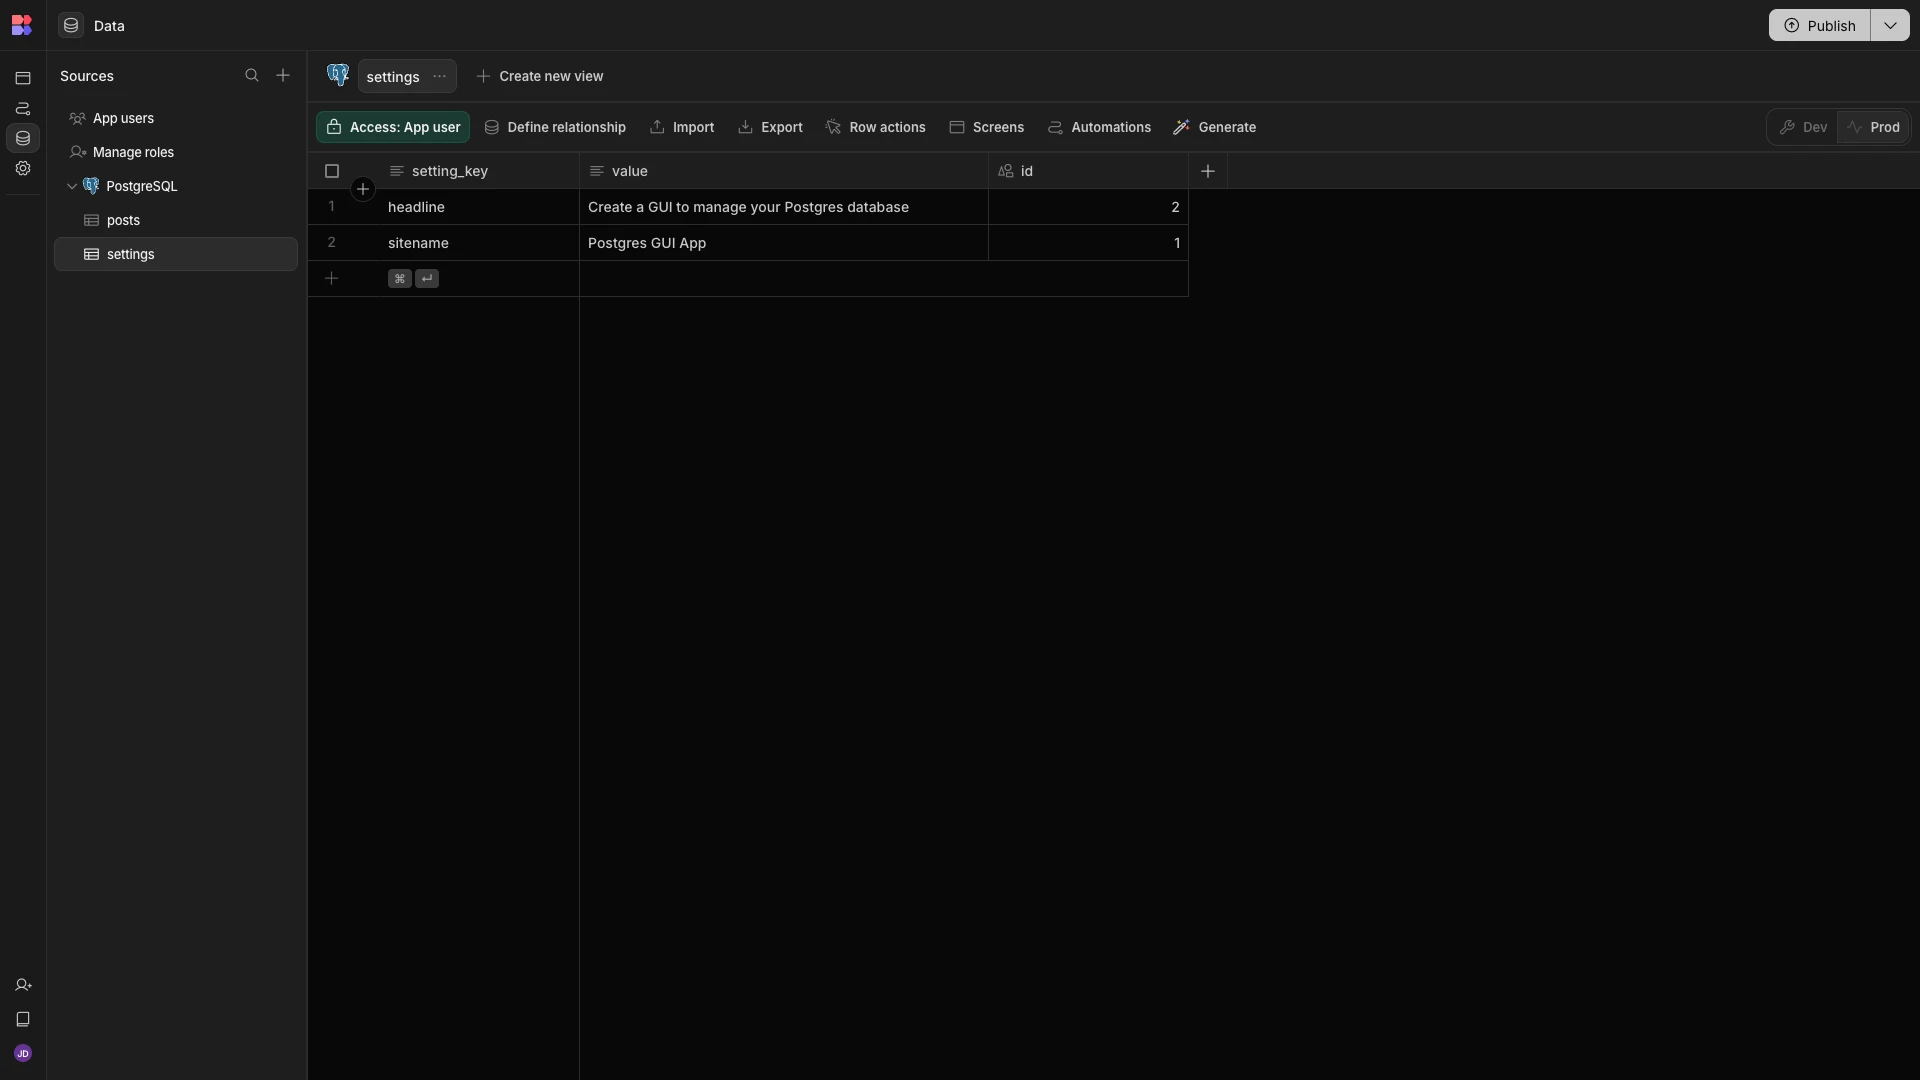
Once we’ve fetched our tables, we can interact with them using the spreadsheet-like interface in the Data section of our Workspace.
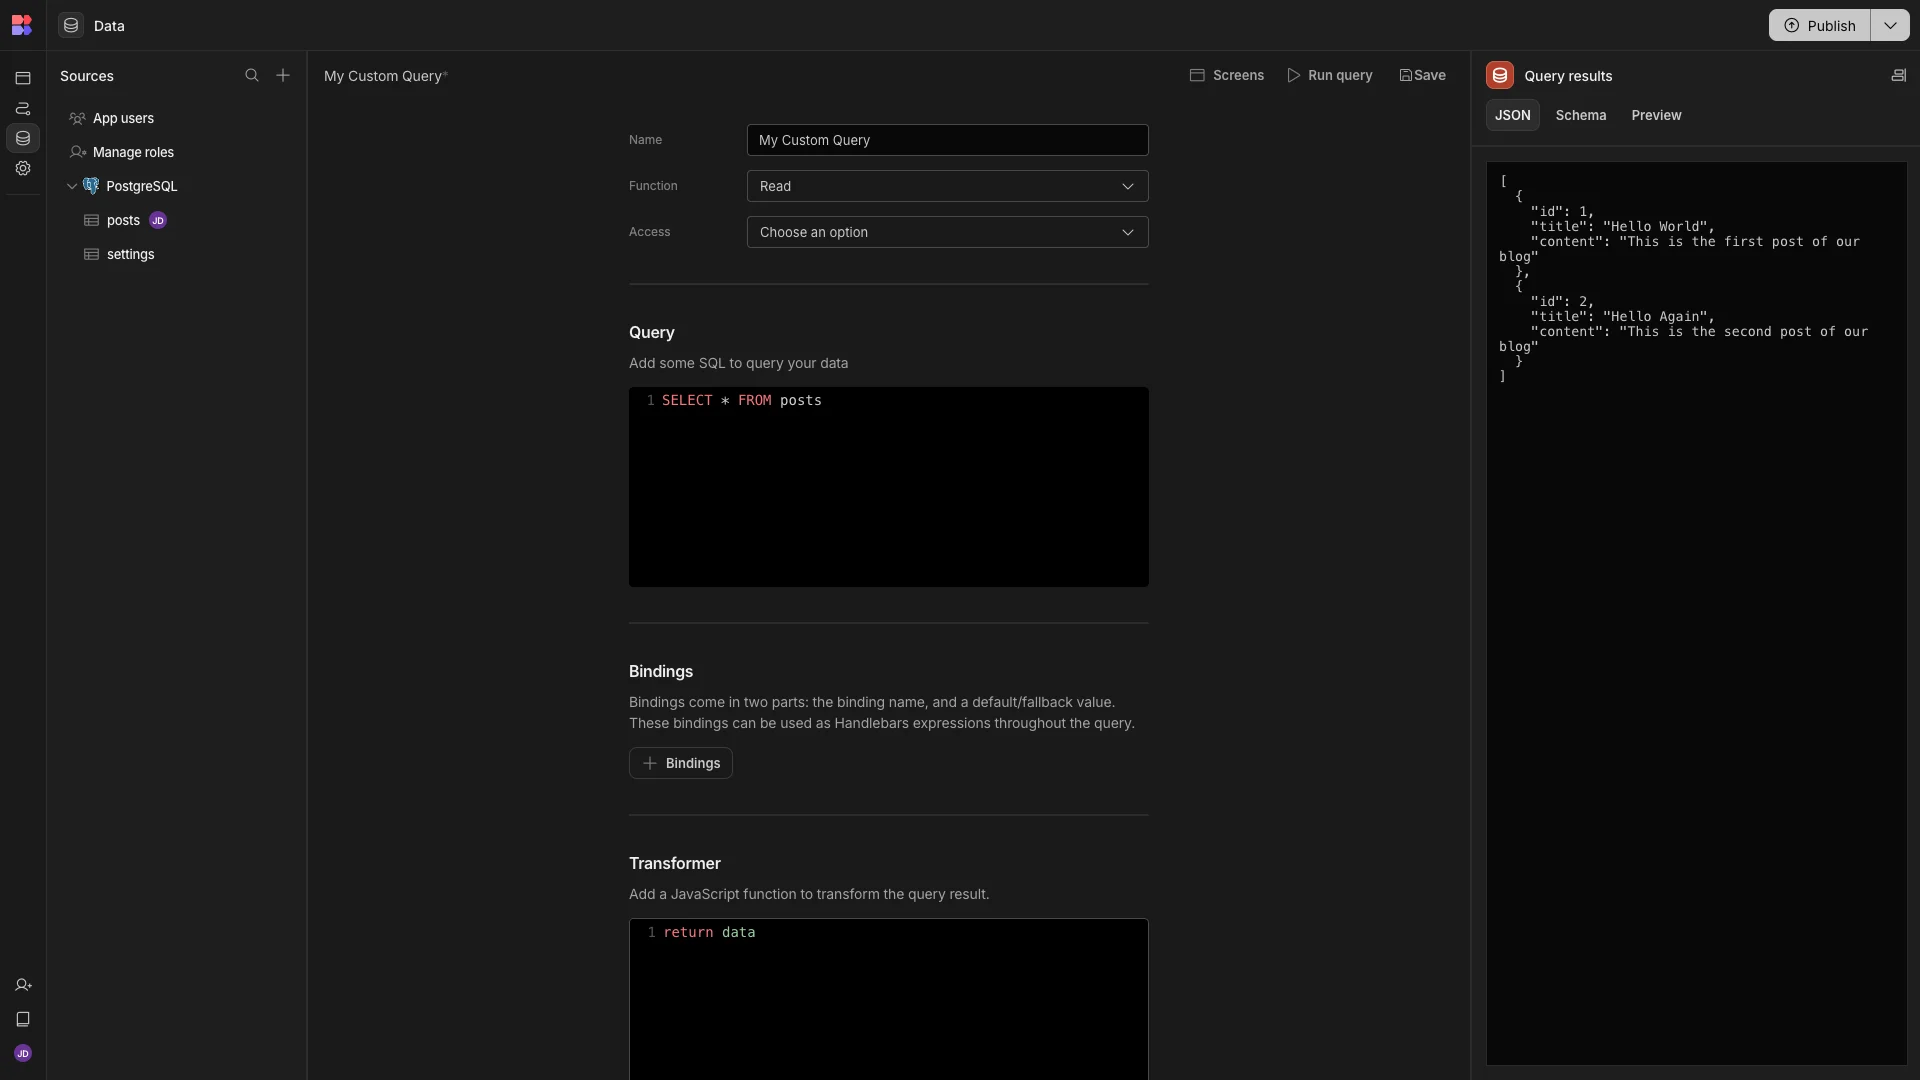
Budibase also gives us the ability to write, test, and save custom queries for connected databases. This means that App Admins can use the Budibase builder as a fully functional Postgres GUI, right out of the box.
However, our goal today is to build a GUI for end users to take defined actions. Specifically, we want to create UIs for performing CRUD operations on either of our two tables.
Before we can examine our existing data model, we must consider some of the other actions that we can take in Budibase’s Data section.
Our database consists of two tables, representing the back end of a blogging platform. The posts table contains two attributes called title and content, as well as an autogenerated id.
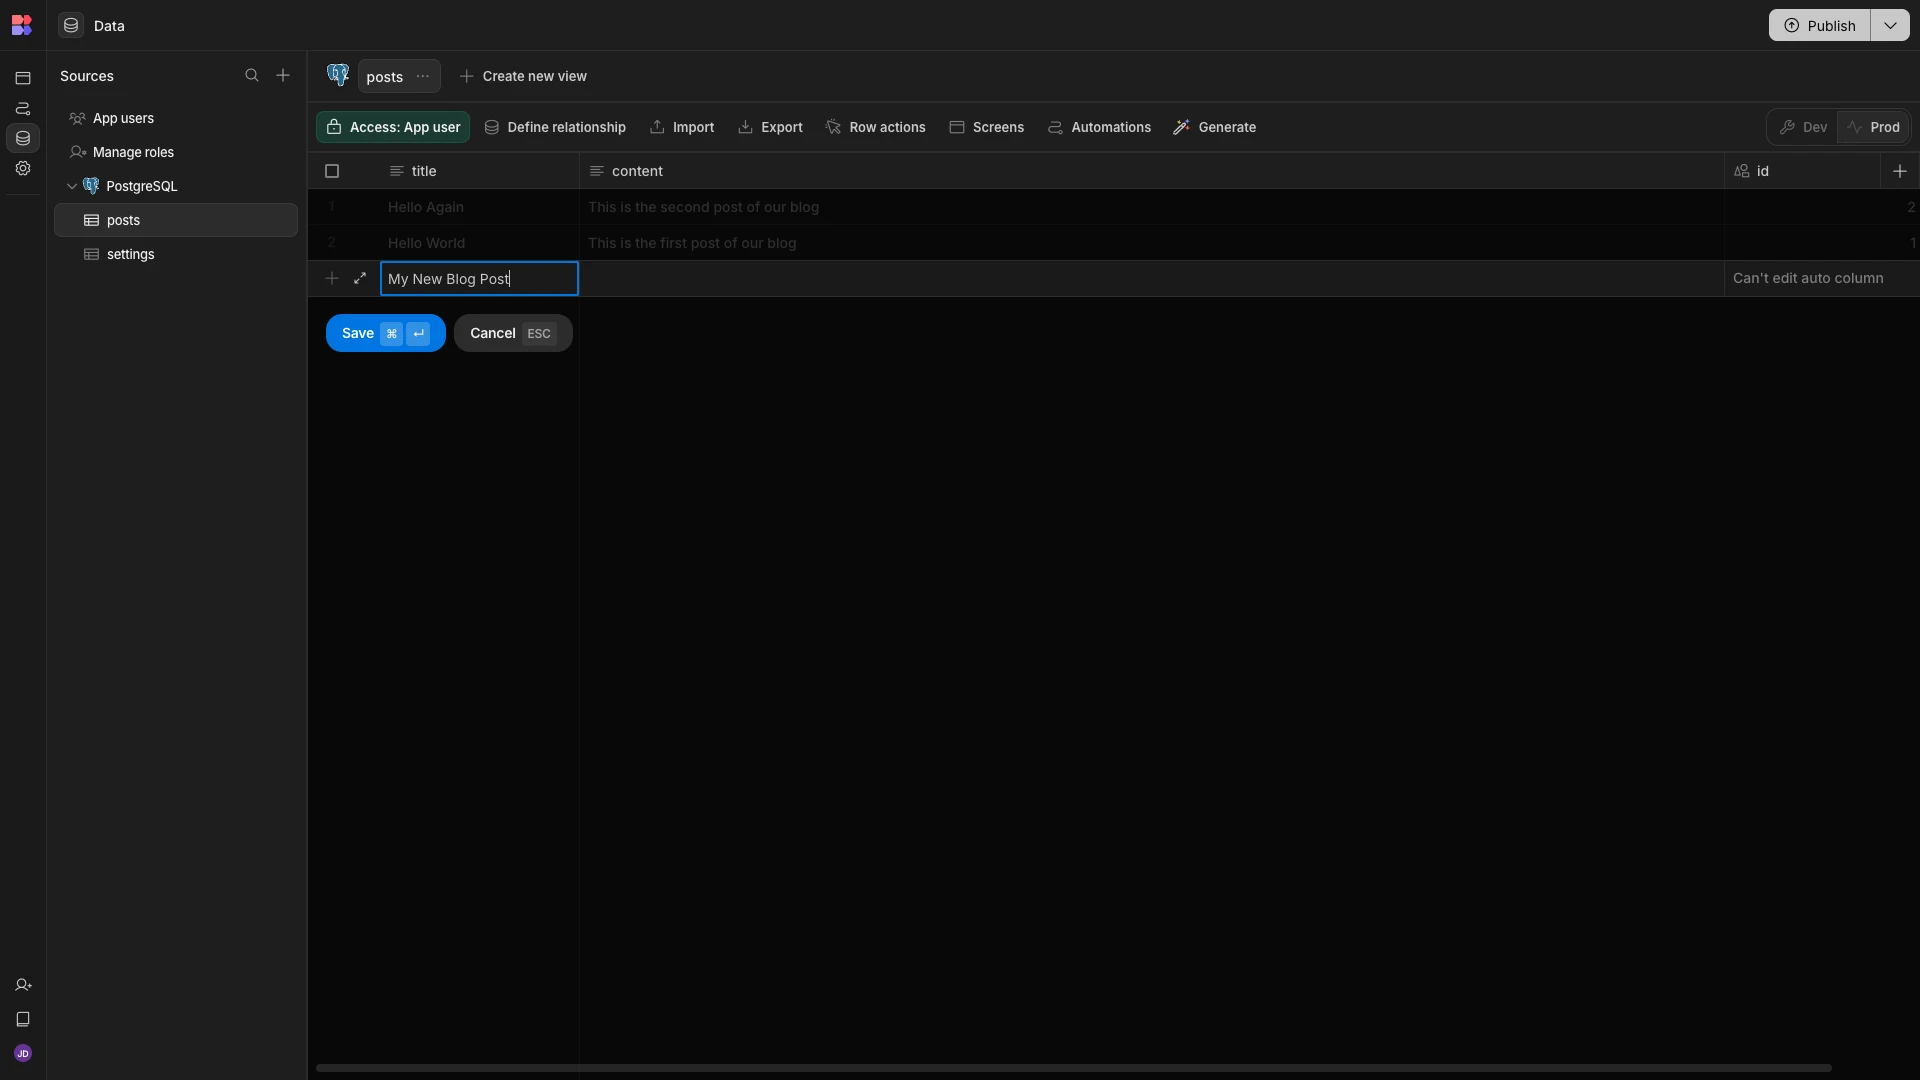
Within the Data section, App Admins can add new rows and columns, adjust access roles, or alter how Budibase will handle certain columns.
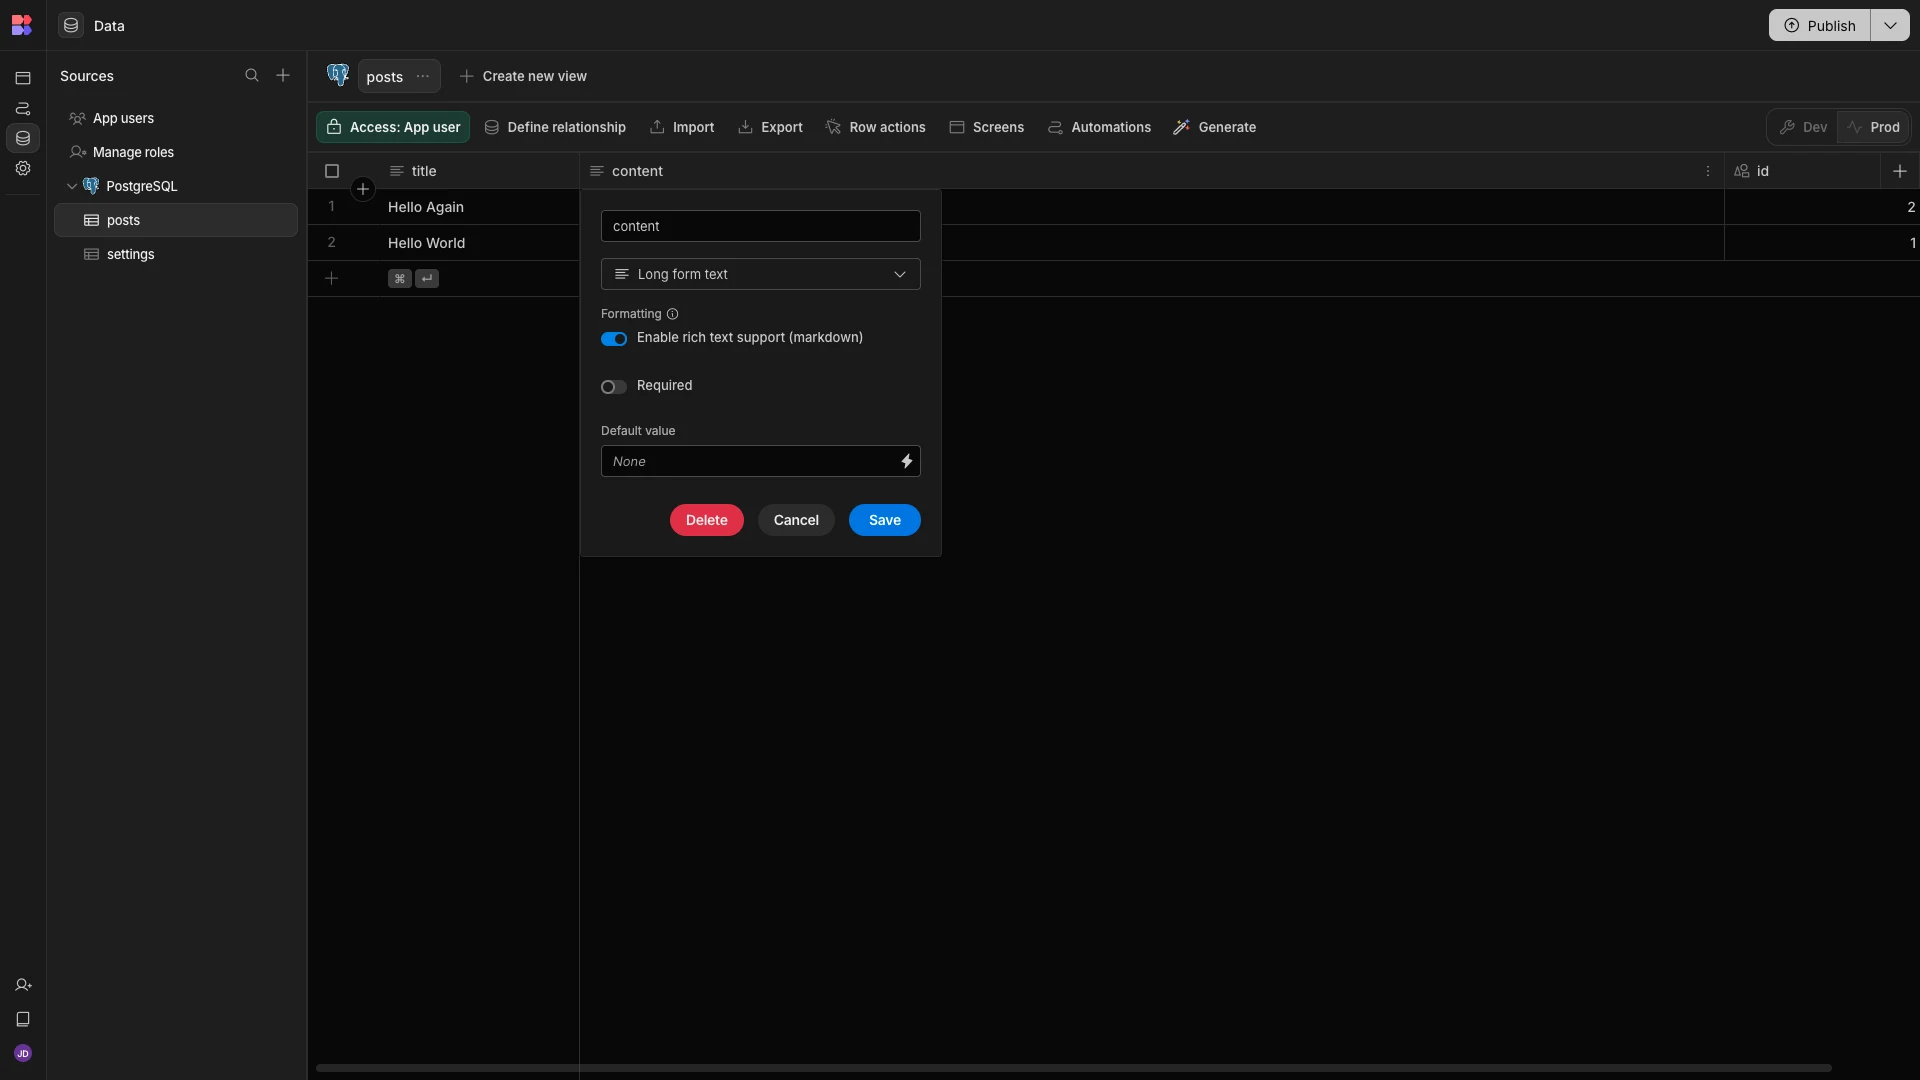
We’re going to make one small change here. Specifically, our two columns are stored as strings in Postgres, but this doesn’t account for the likely format or length of their respective values.
To alter how Budibase will handle this when we come to autogenerate CRUD forms, we’re going to change the Type of our Content column from Text to Long-Form Text, as well as enabling the enable rich text support option, so users can write Markdown in our Postgres GUI.
Our settings table represents the site settings we might include on our blog. This contains two text attributes called setting_key and value, alongside an autogenerated id. We’re going to leave this table as it is.
2. Autogenerating CRUD screens
Once we’re happy with our data model, we can begin creating the front-end of our Postgres GUI.
In Budibase, we can do this within the Apps section of our Workspace. Any Apps we create can be configured to access any data source within their parent Workspace.
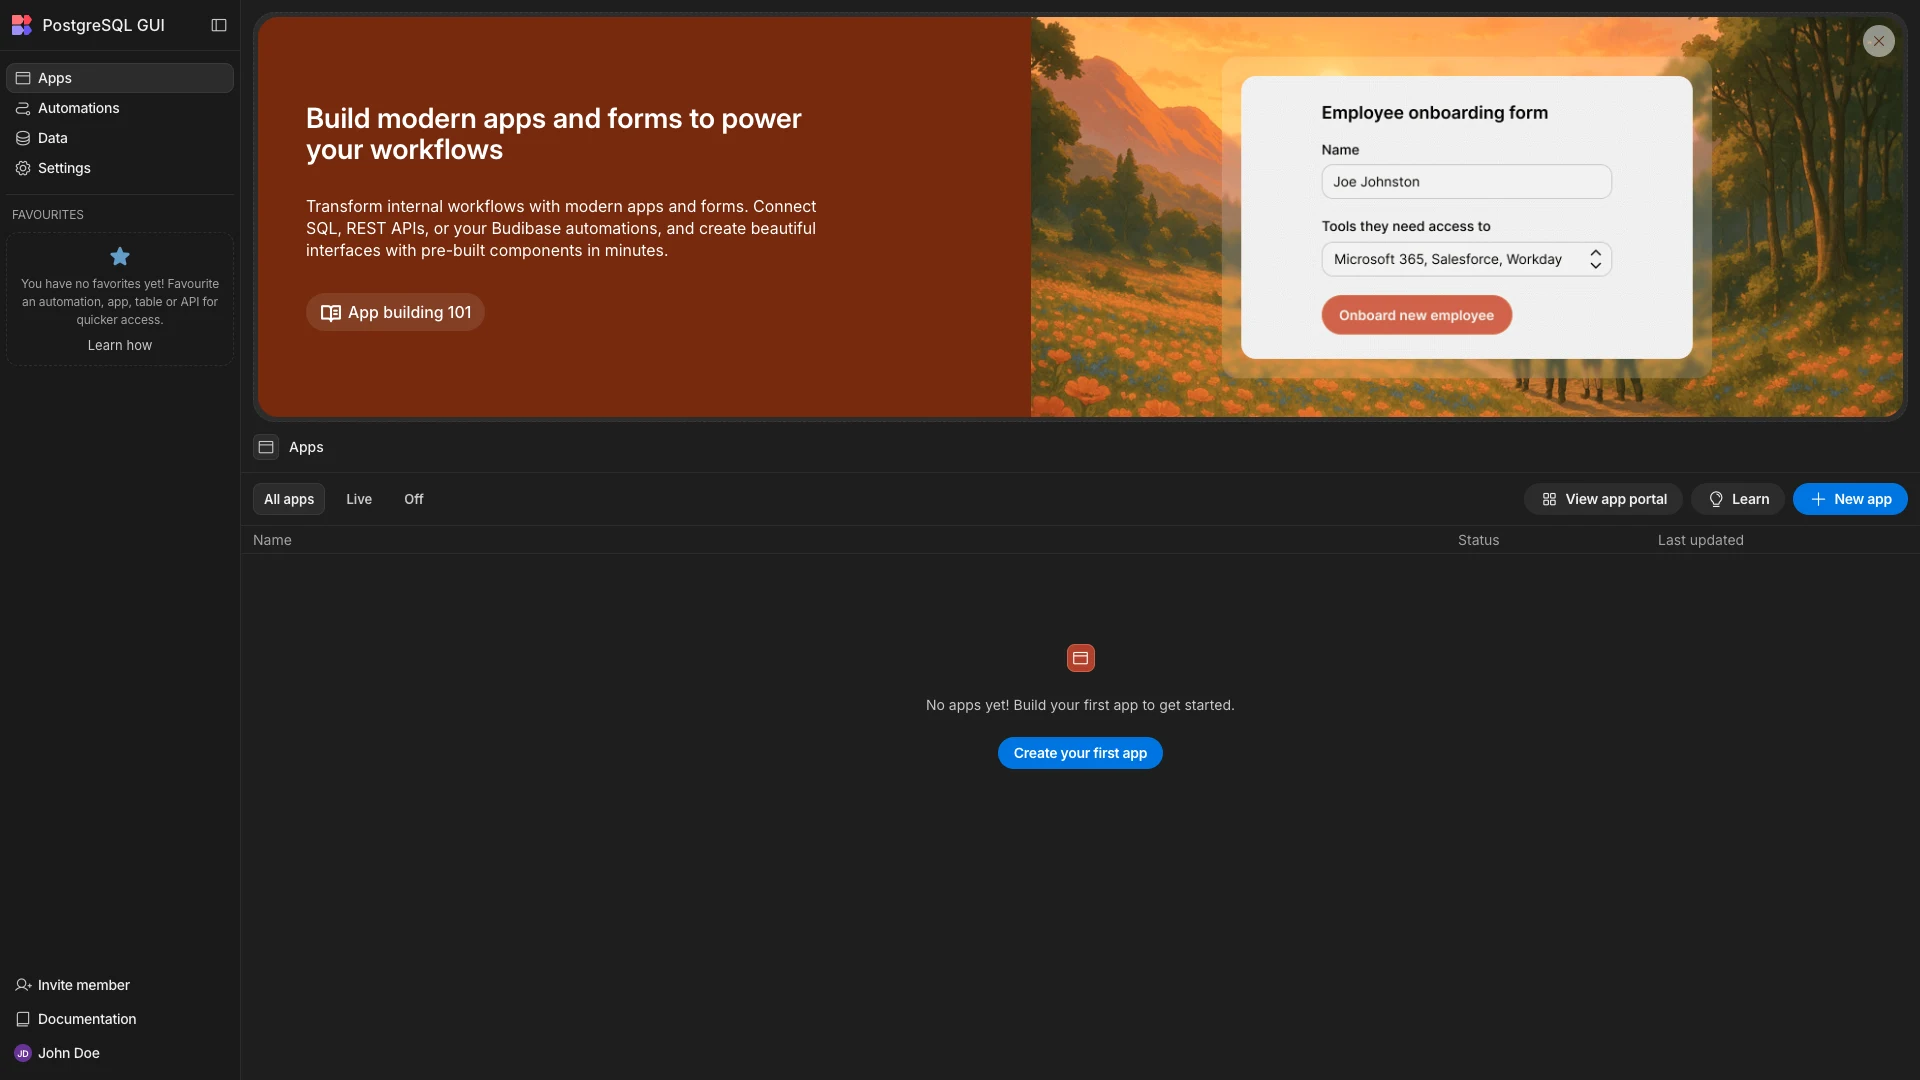
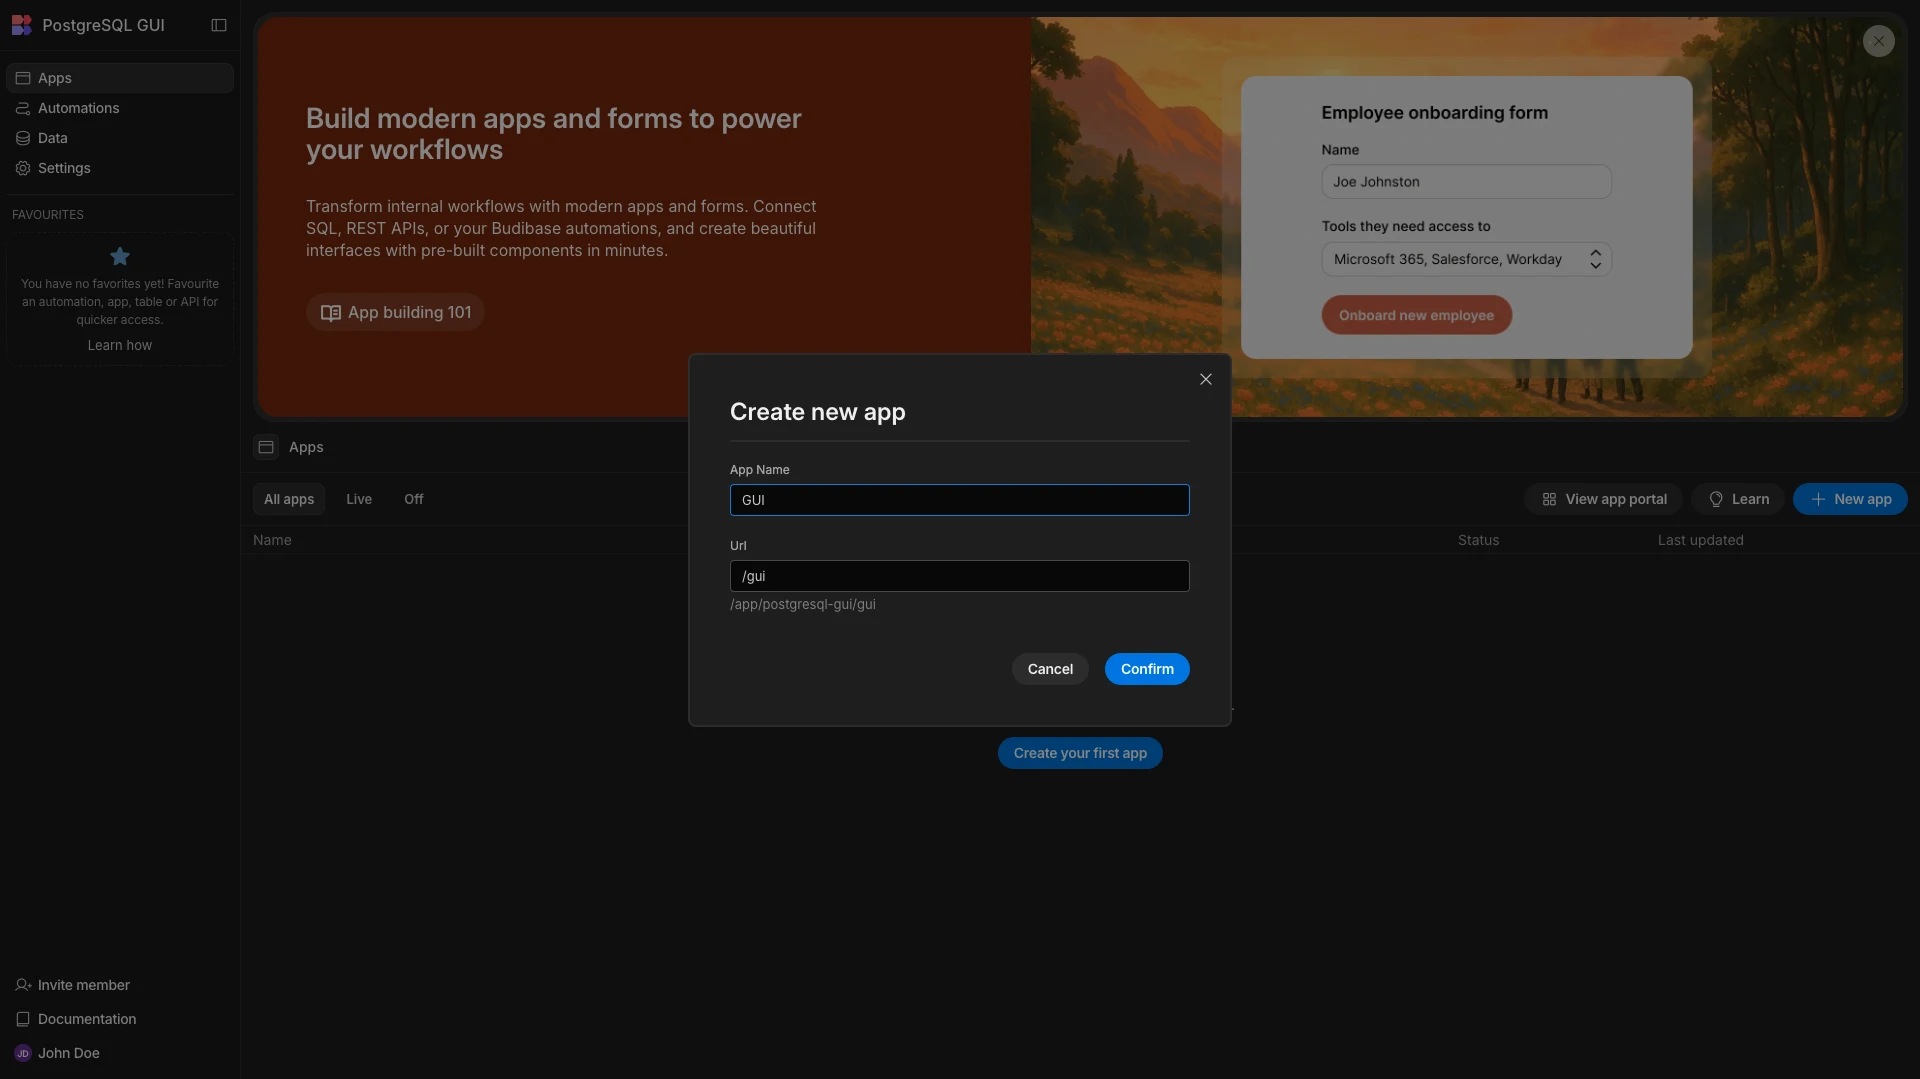
When we hit Create your first app, we’ll be prompted to give it a name and URL extension. We’ll simply call ours GUI.
This takes us to the Budibase builder, where a blank screen has been created.
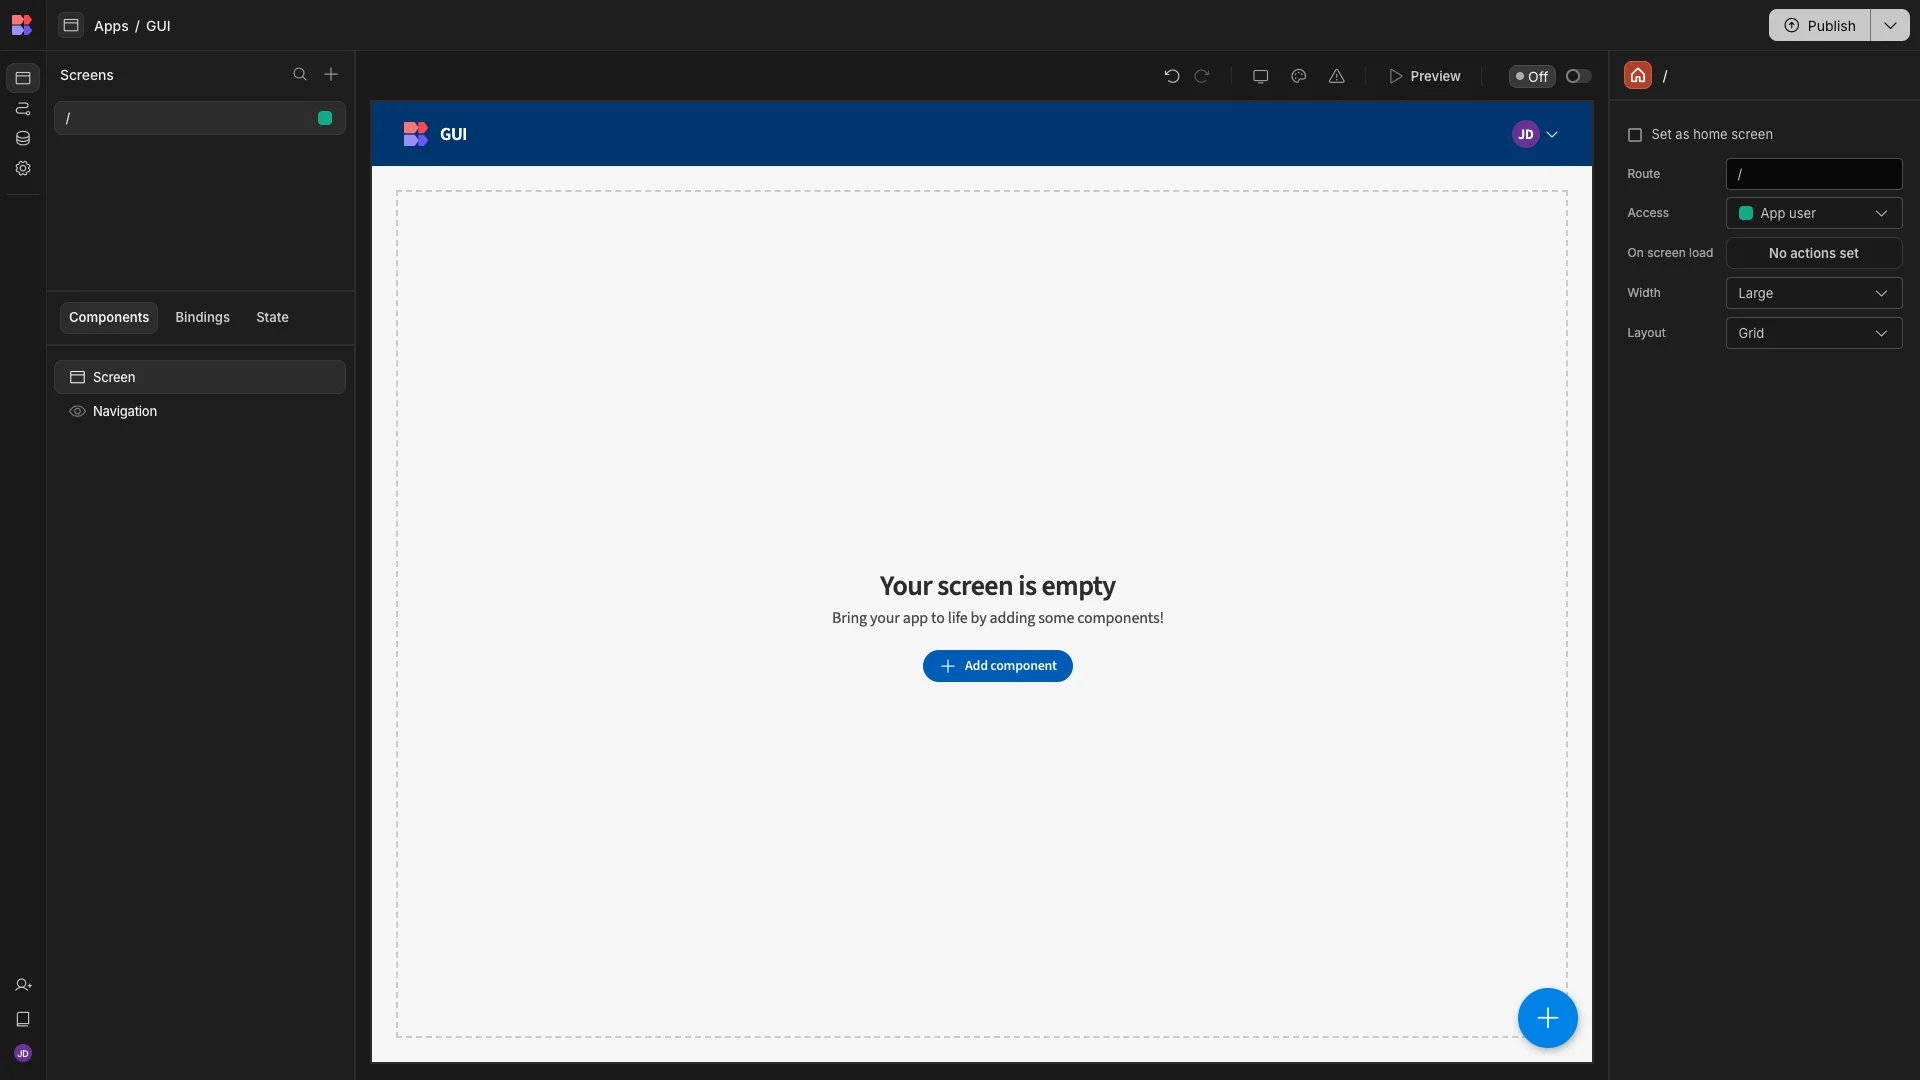
We’re going to be relying heavily on Budibase’s autogenerated UIs, so we can simply delete this screen.
Having done this, we’re presented with several options for creating our first screen, including starting from scratch or using one of Budibase’s autogenerated layouts.
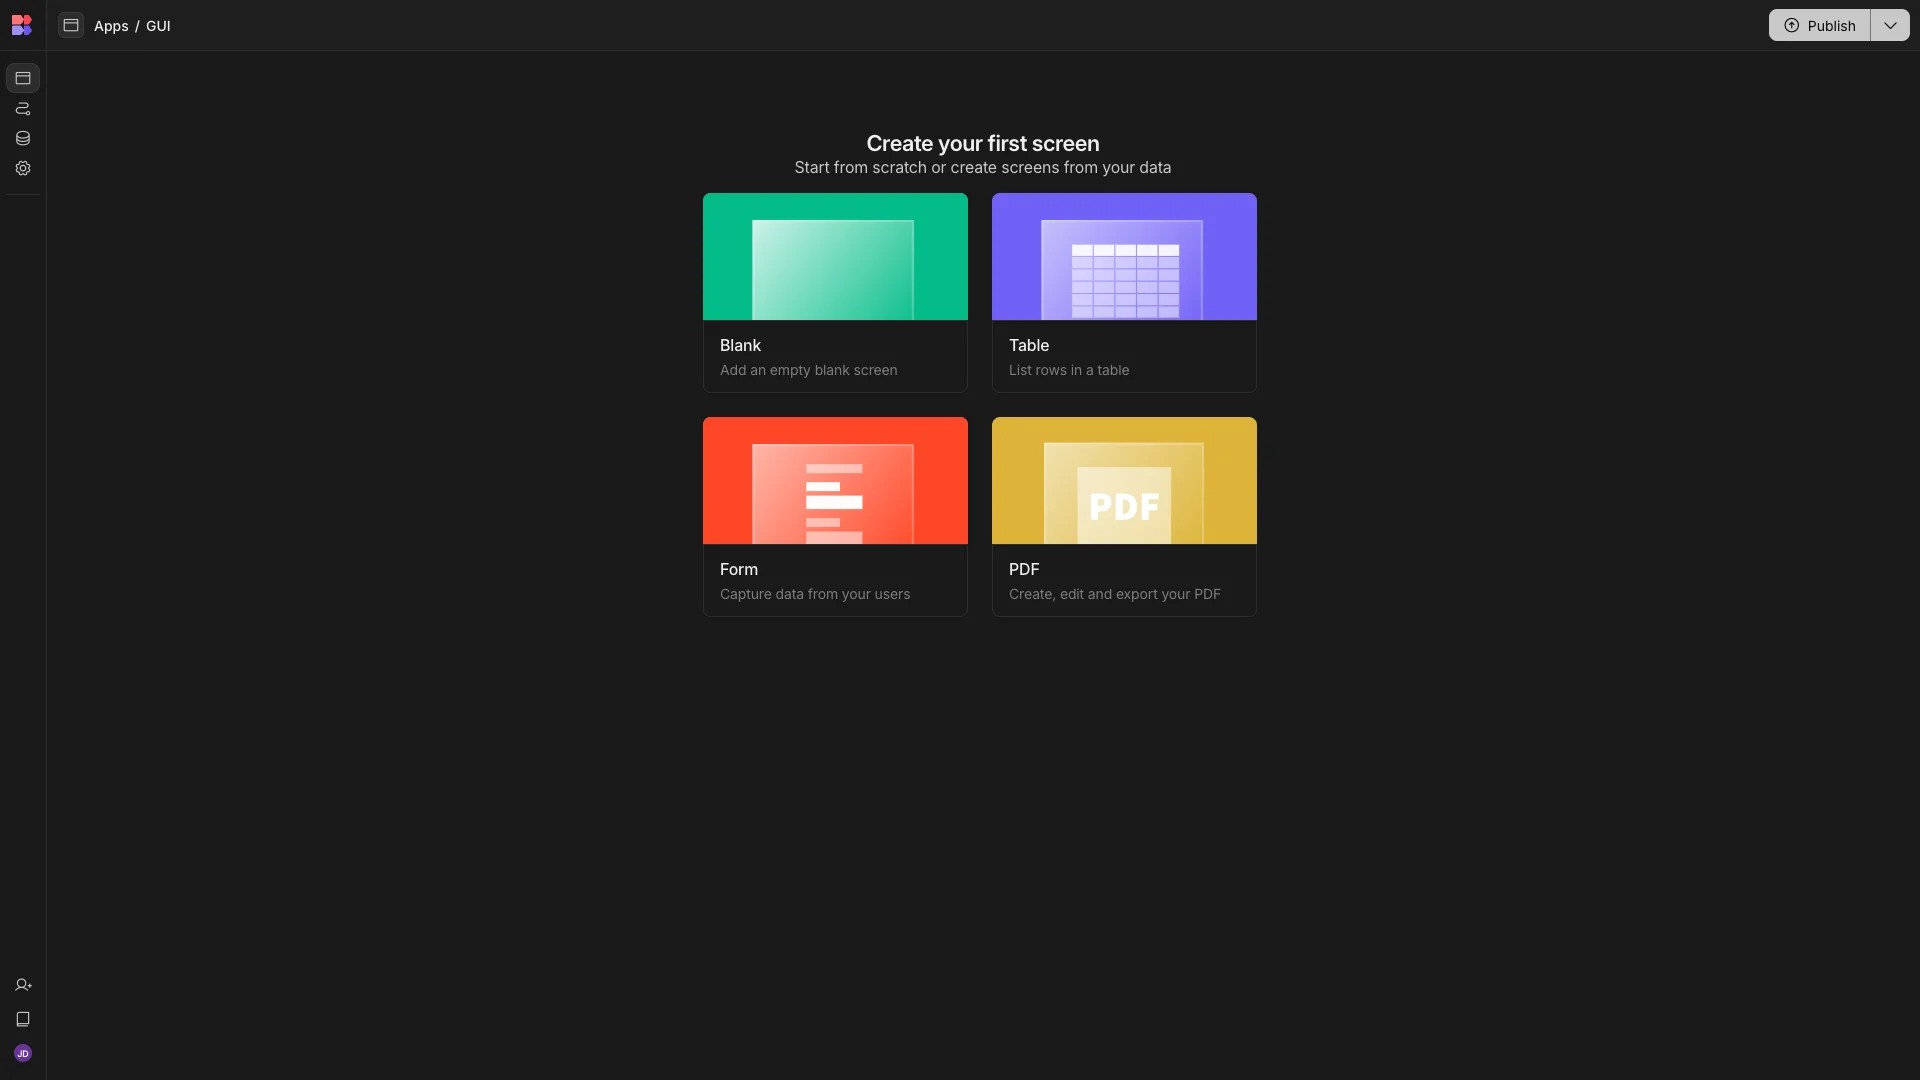
We’re going to select the Table option. This will generate a working CRUD UI, based on a supported data source. When we click on this, we’re asked to select the tables we’d like to base this on.
We’re selecting both of the tables in our Postgres database, which we’ll create a working CRUD UI for each.
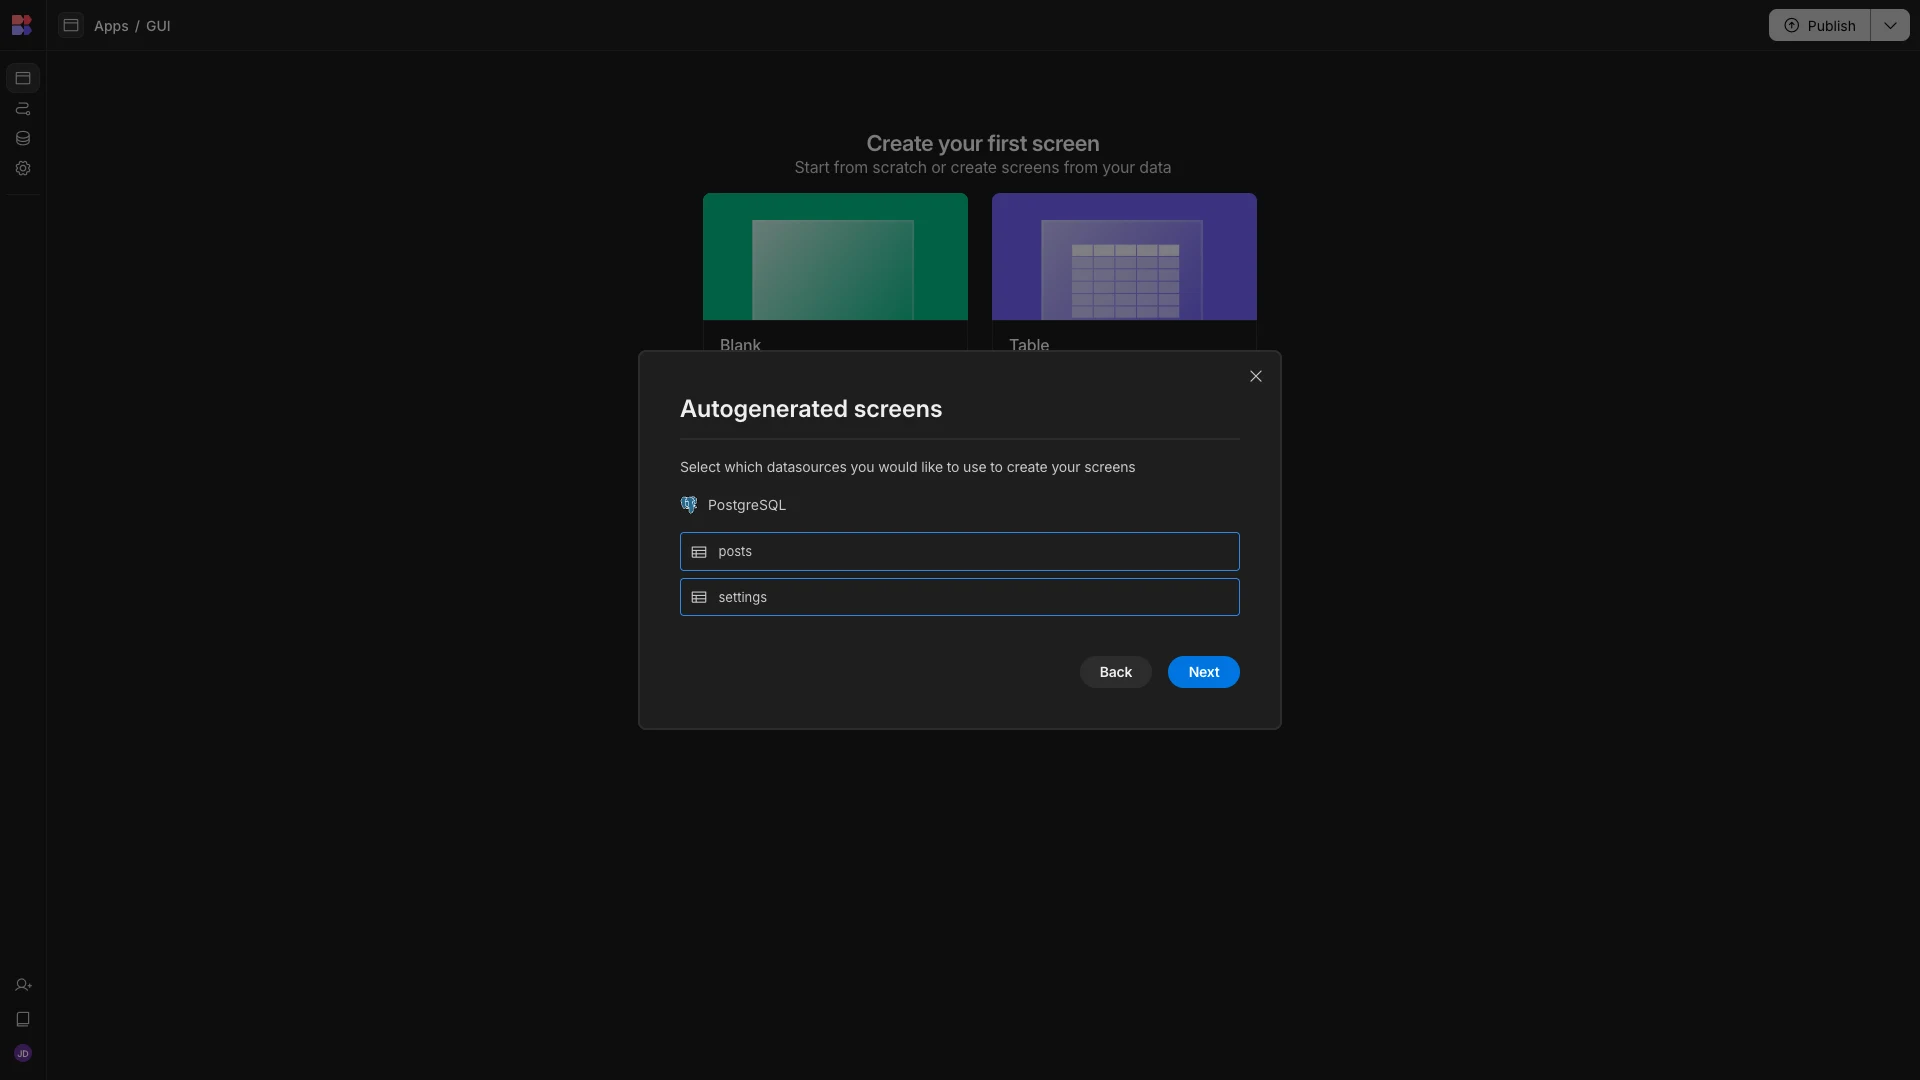
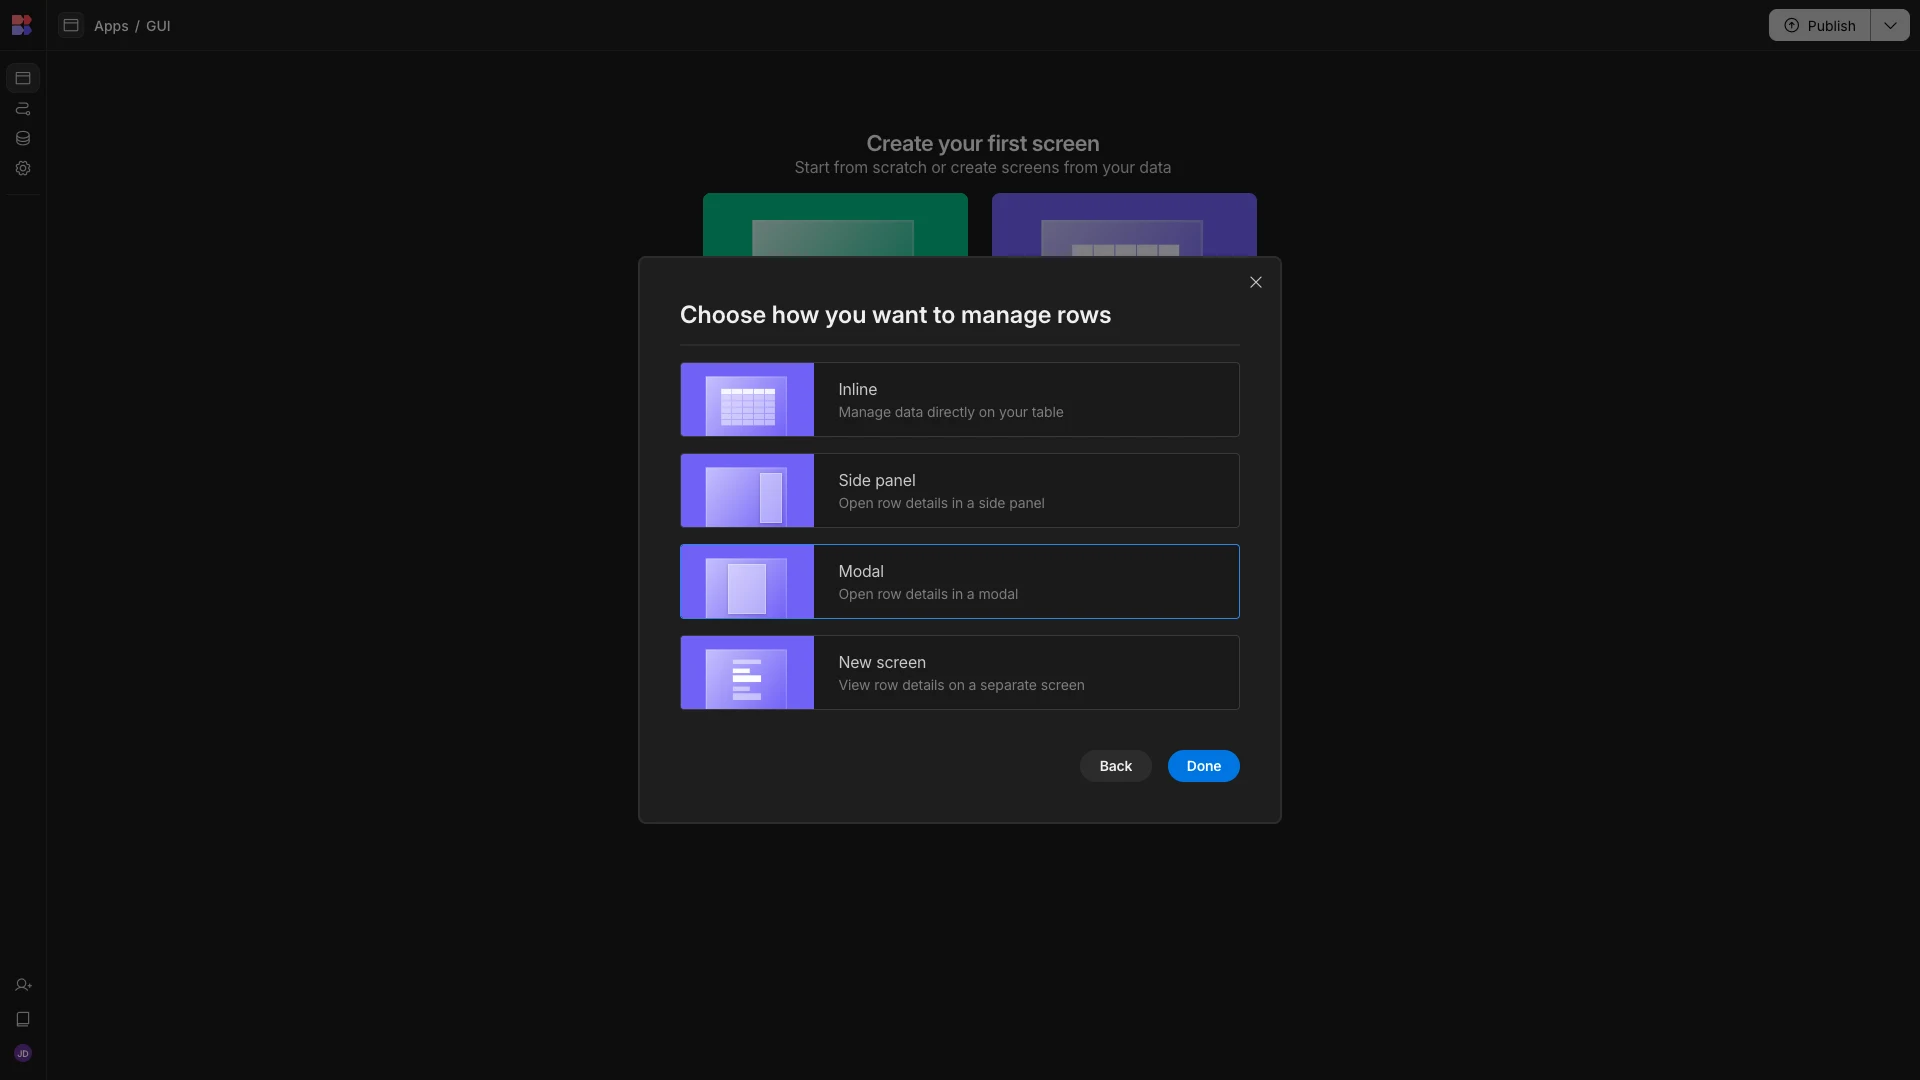
We can then choose which kind of components we’d like to display our CRUD forms within. We’re picking the option to present these as Modals.
Here’s how our posts screen looks within the Budibase builder.
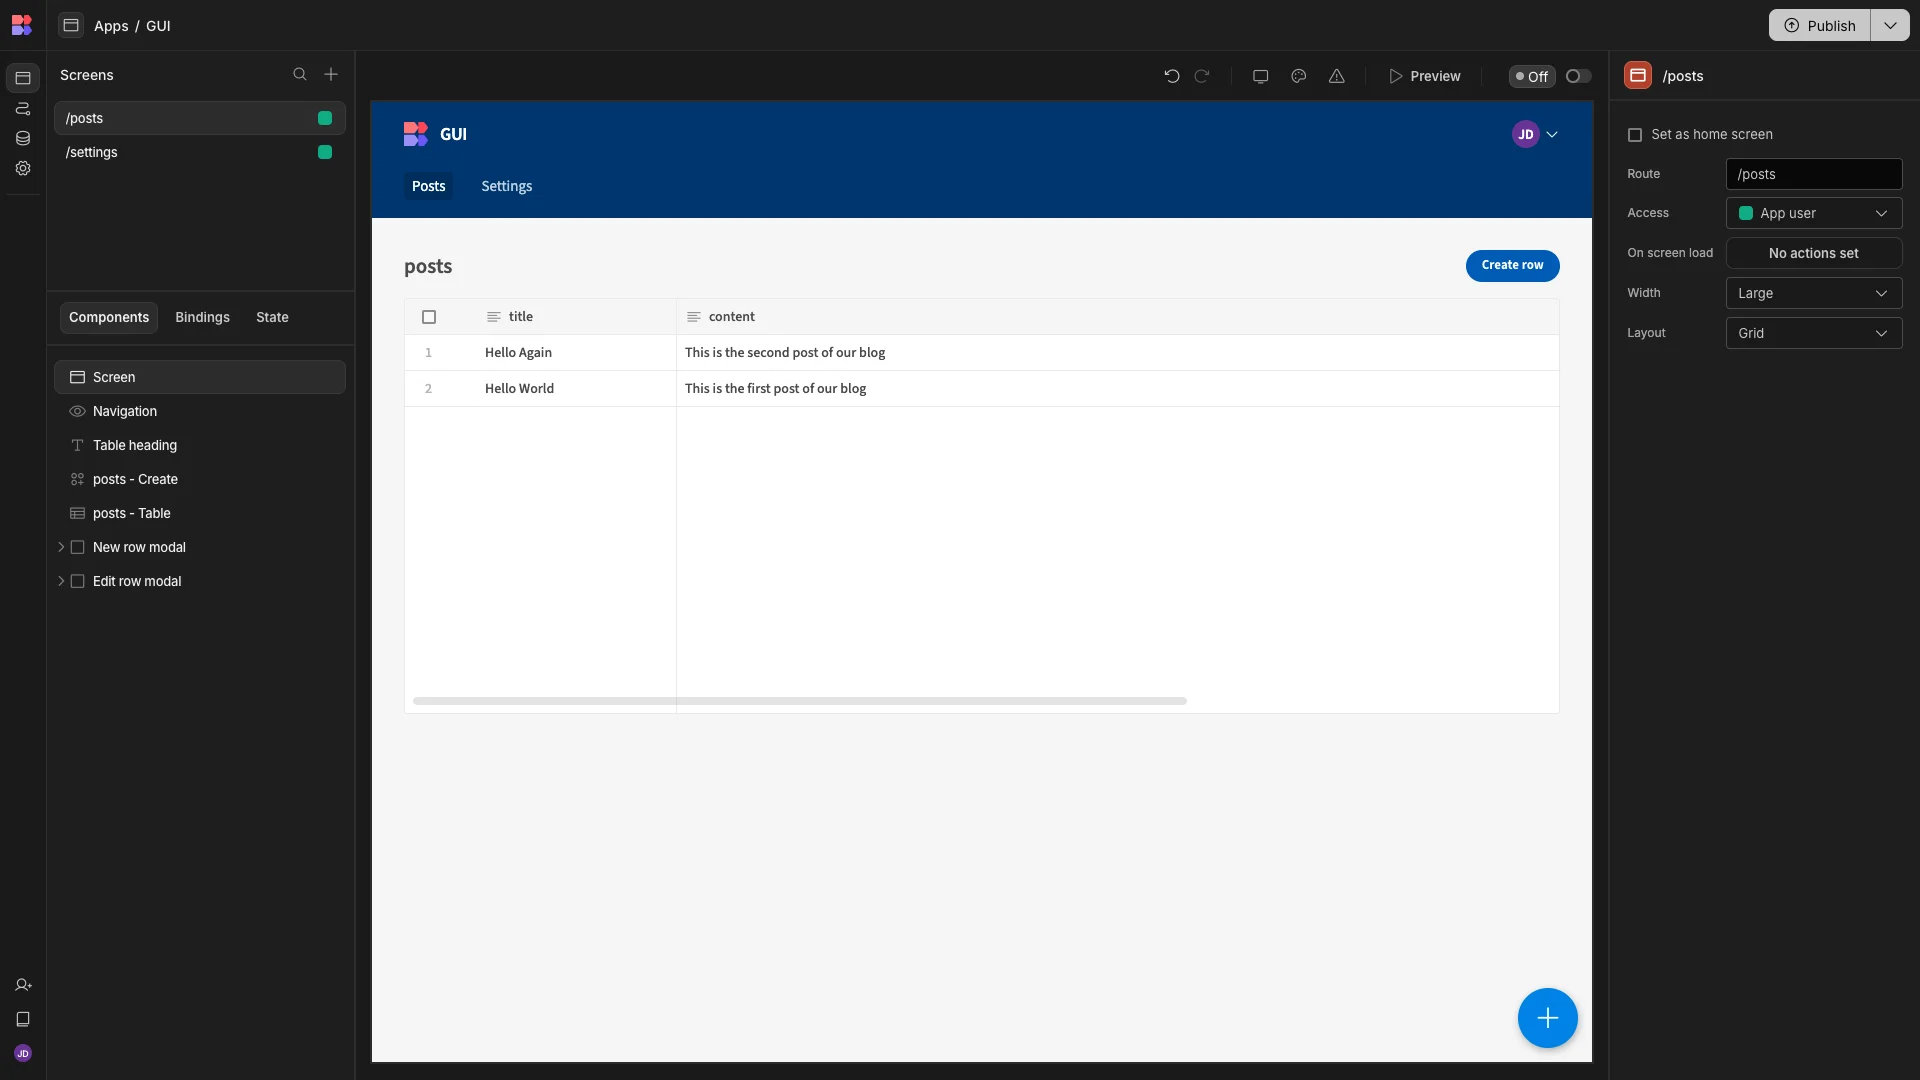
We can access CREATE or UPDATE forms using the Create Row button or by clicking on individual table rows, respectively.
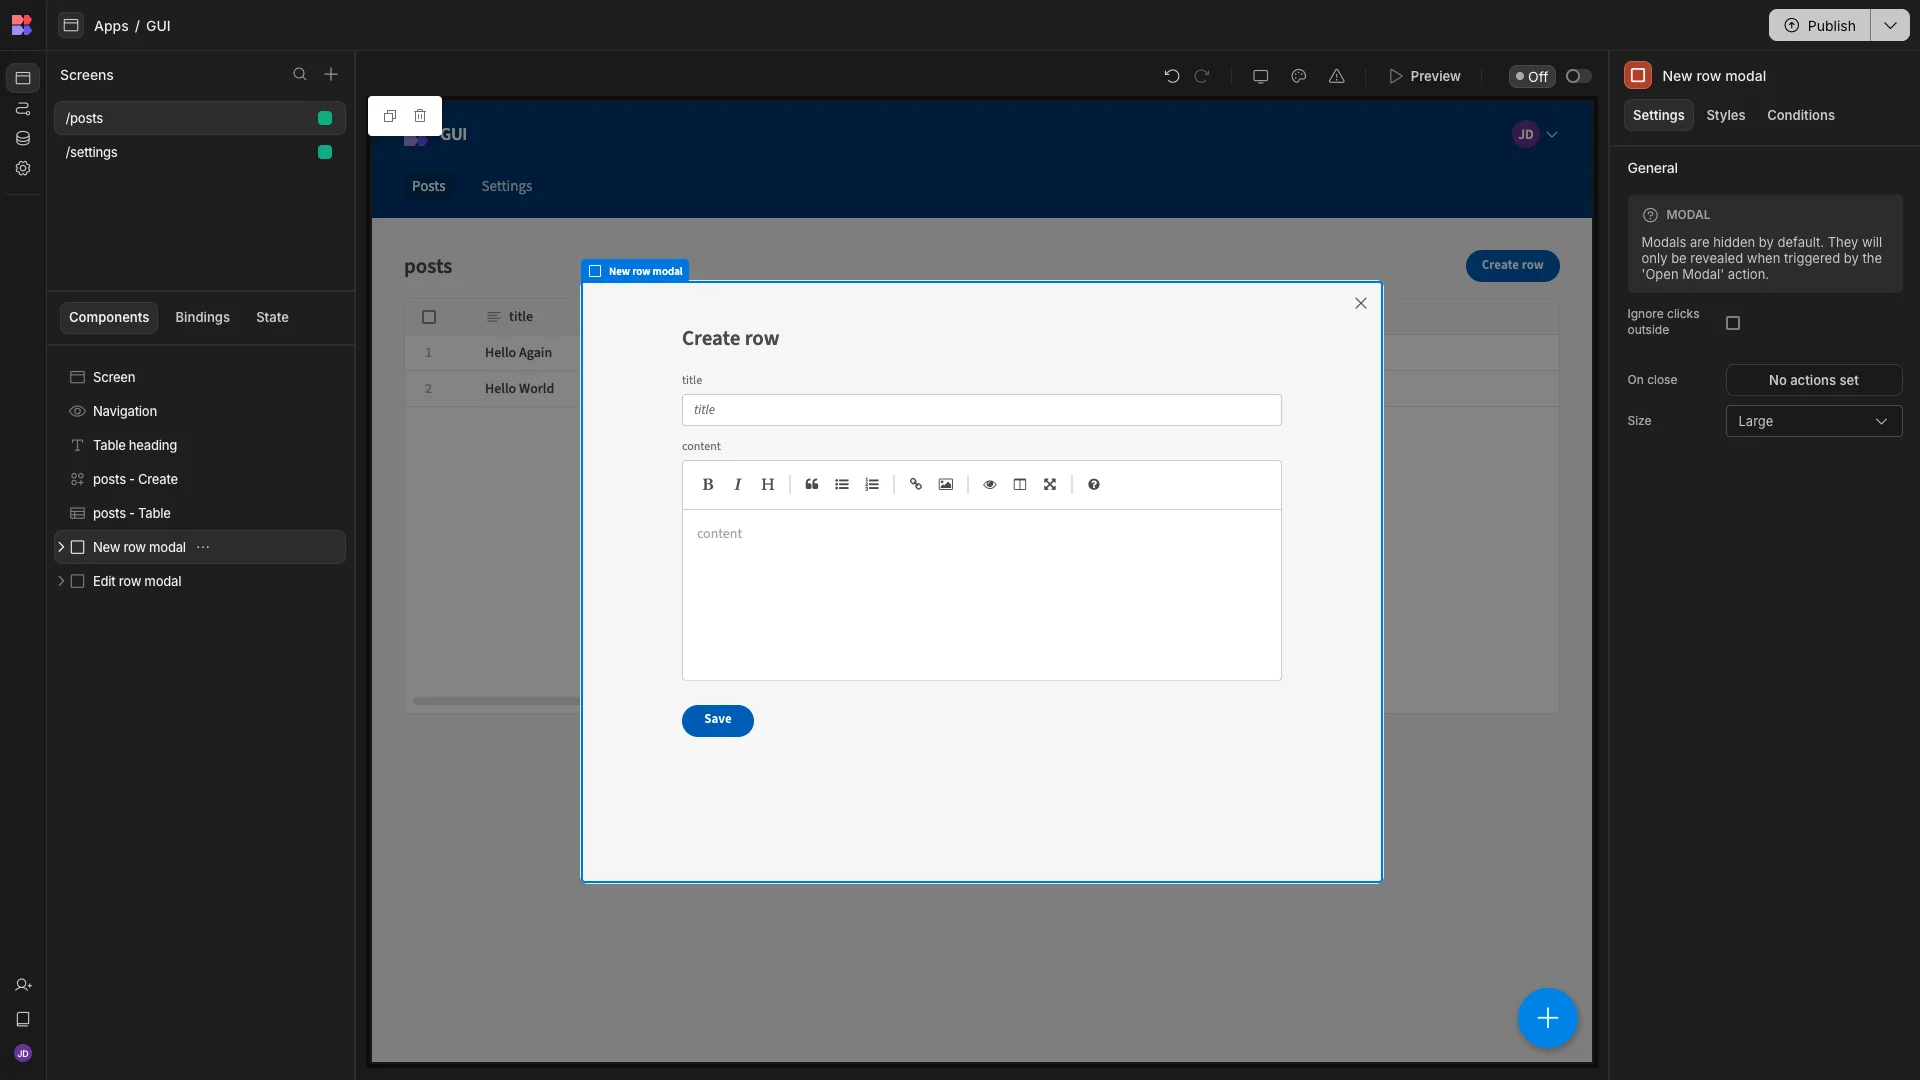
At this point, our Postgres GUI is already fully functional, in the sense that end-users can perform all CRUD operations on our two underlying database tables.
3. Modifying autogenerated UIs
Before we push our app live, though, we’re going to make a few UX improvements to each of our screens.
For simplicity’s sake, we’ll take each one in turn.
Posts
Firstly, we can make a few adjustments to our posts screen. We’ll start by updating the Text setting of our Headline component, to give this more reader-friendly display text.
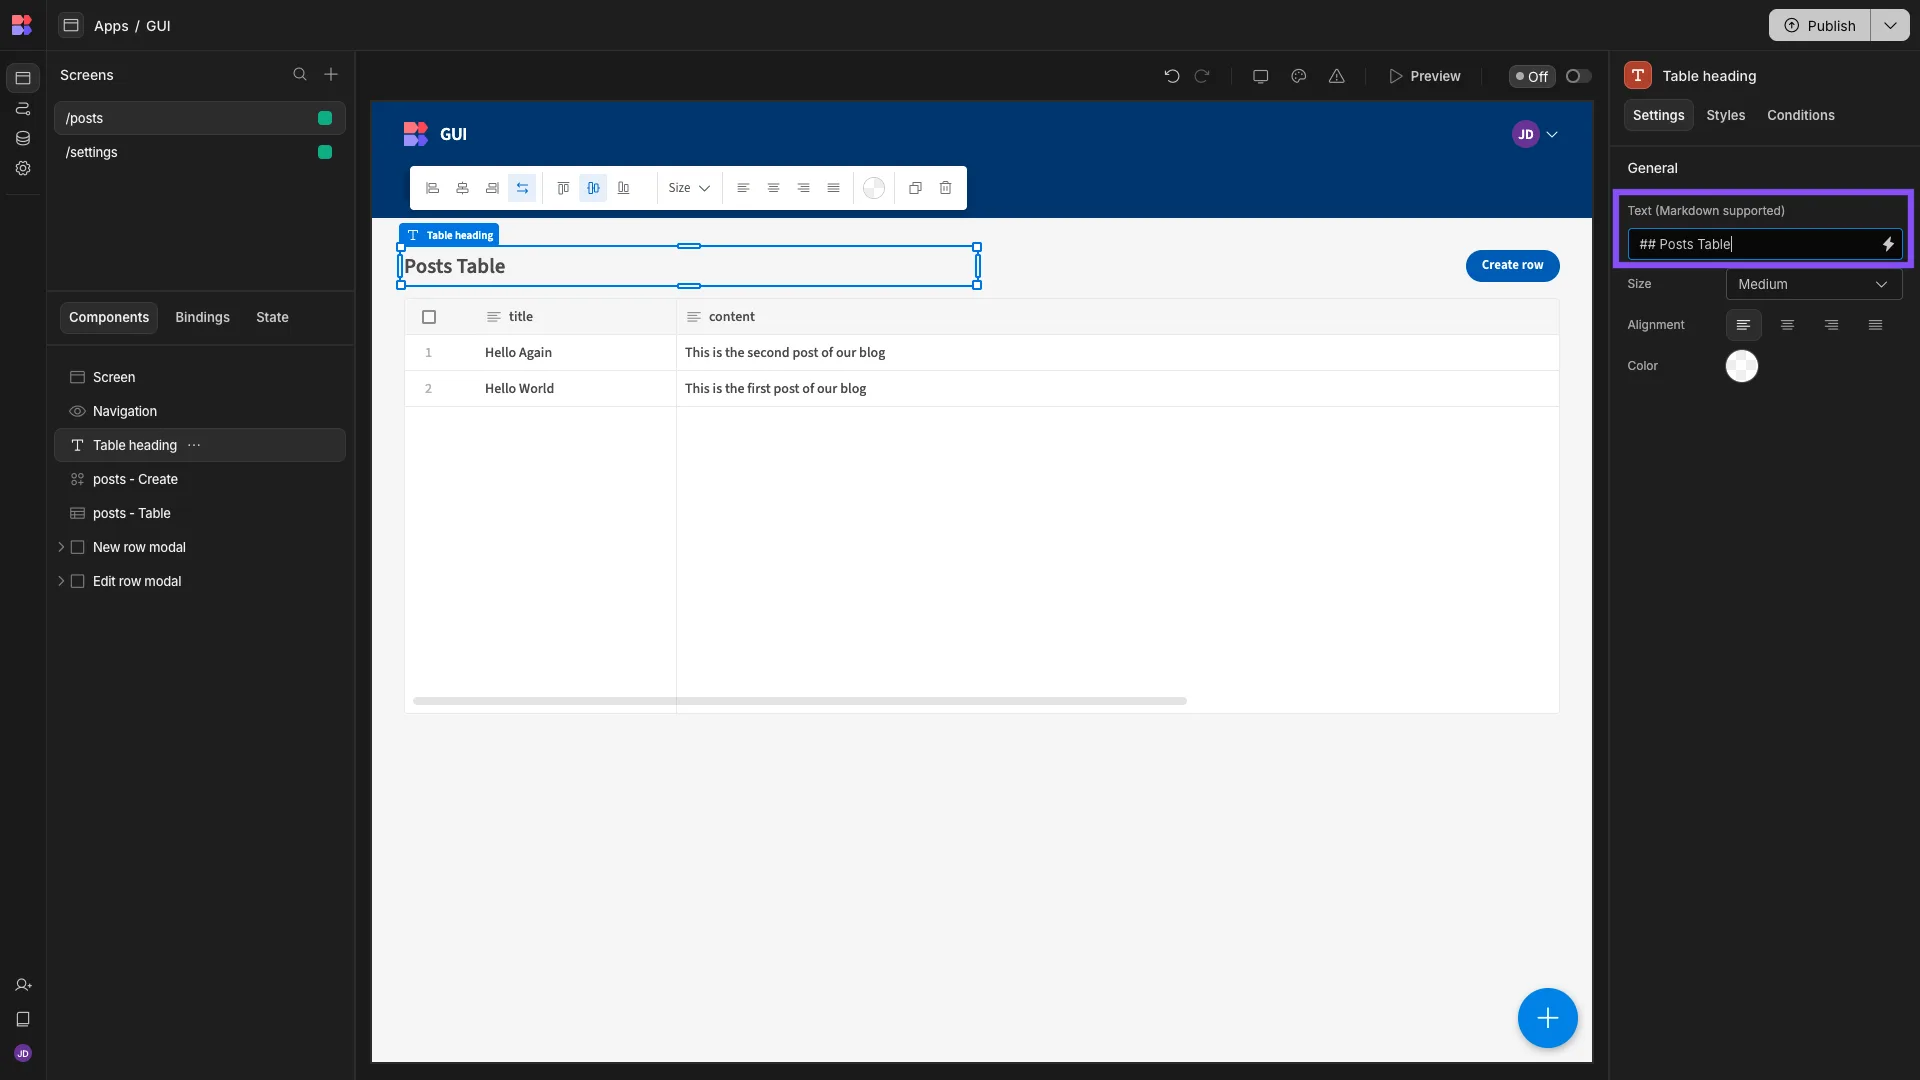
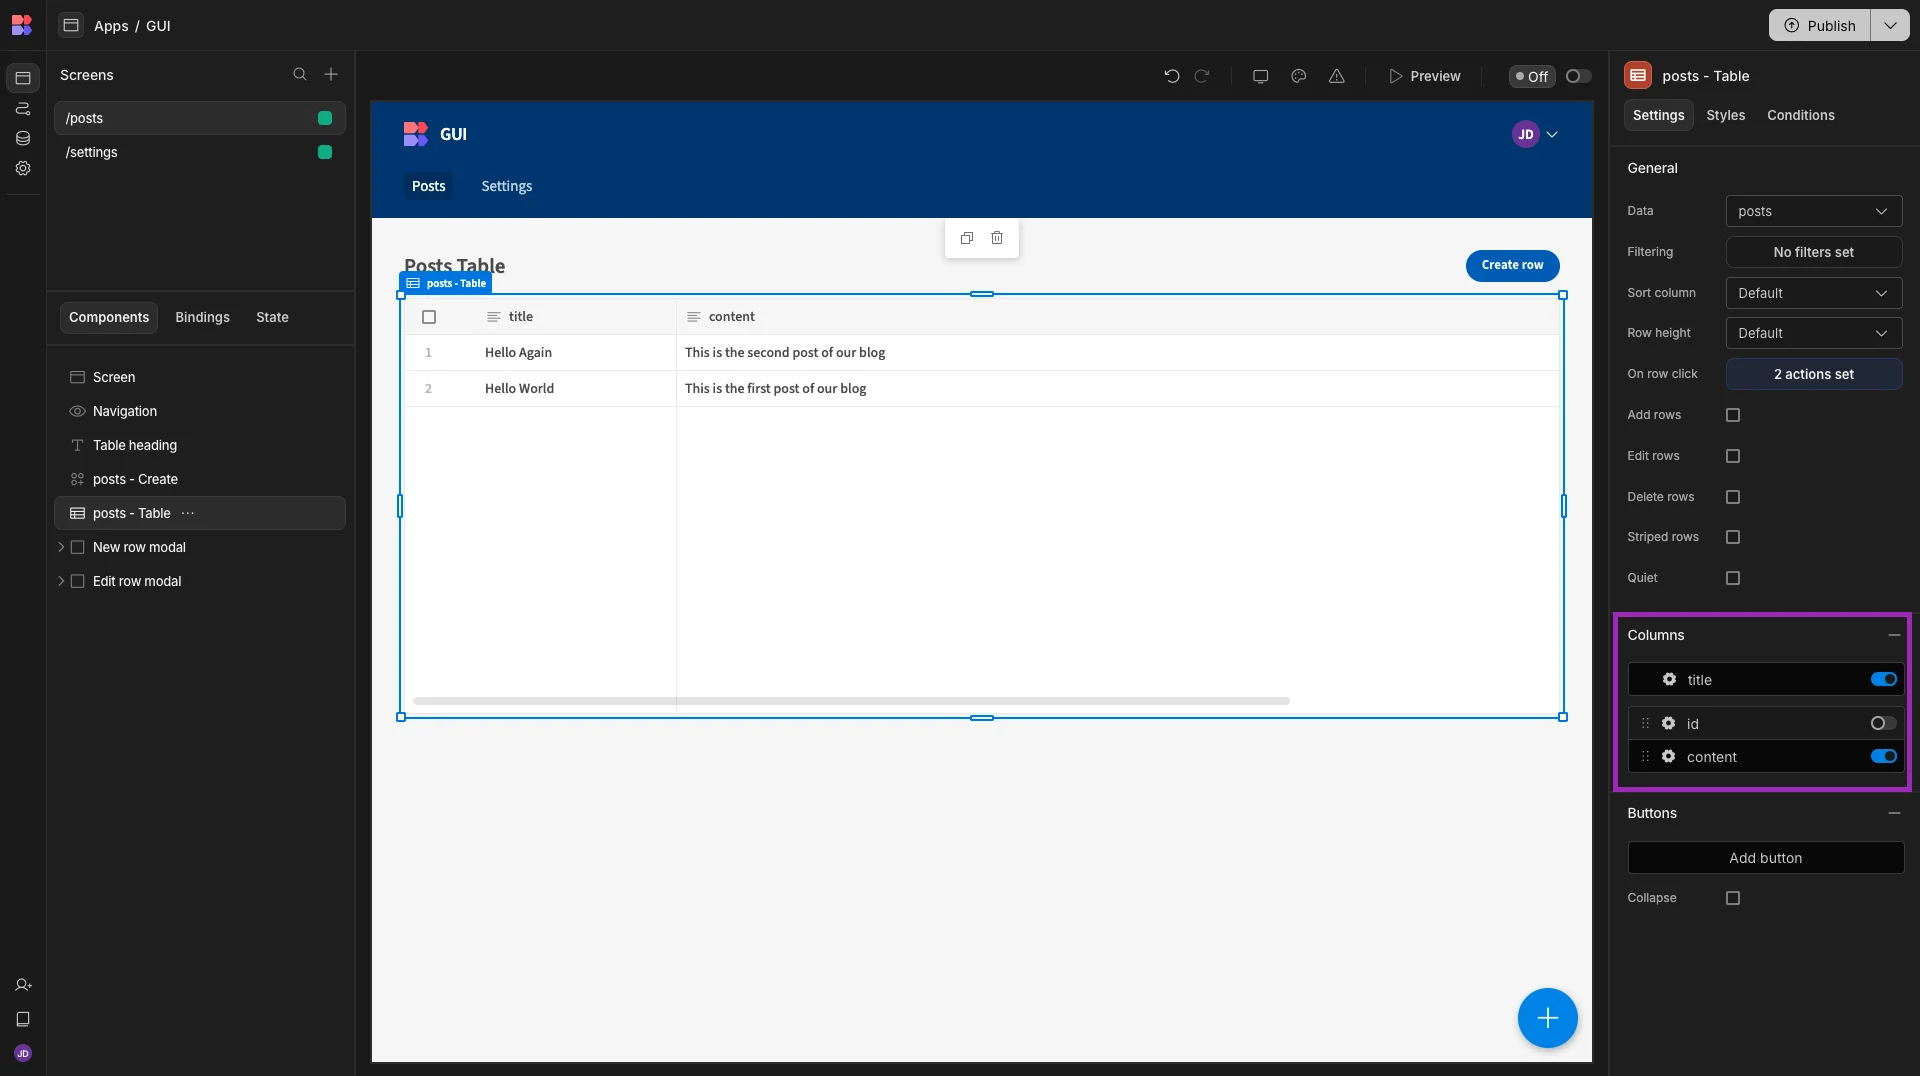
We’ll also deselect the id column on our table using the slider under Columns, so that it only displays Title and Content.
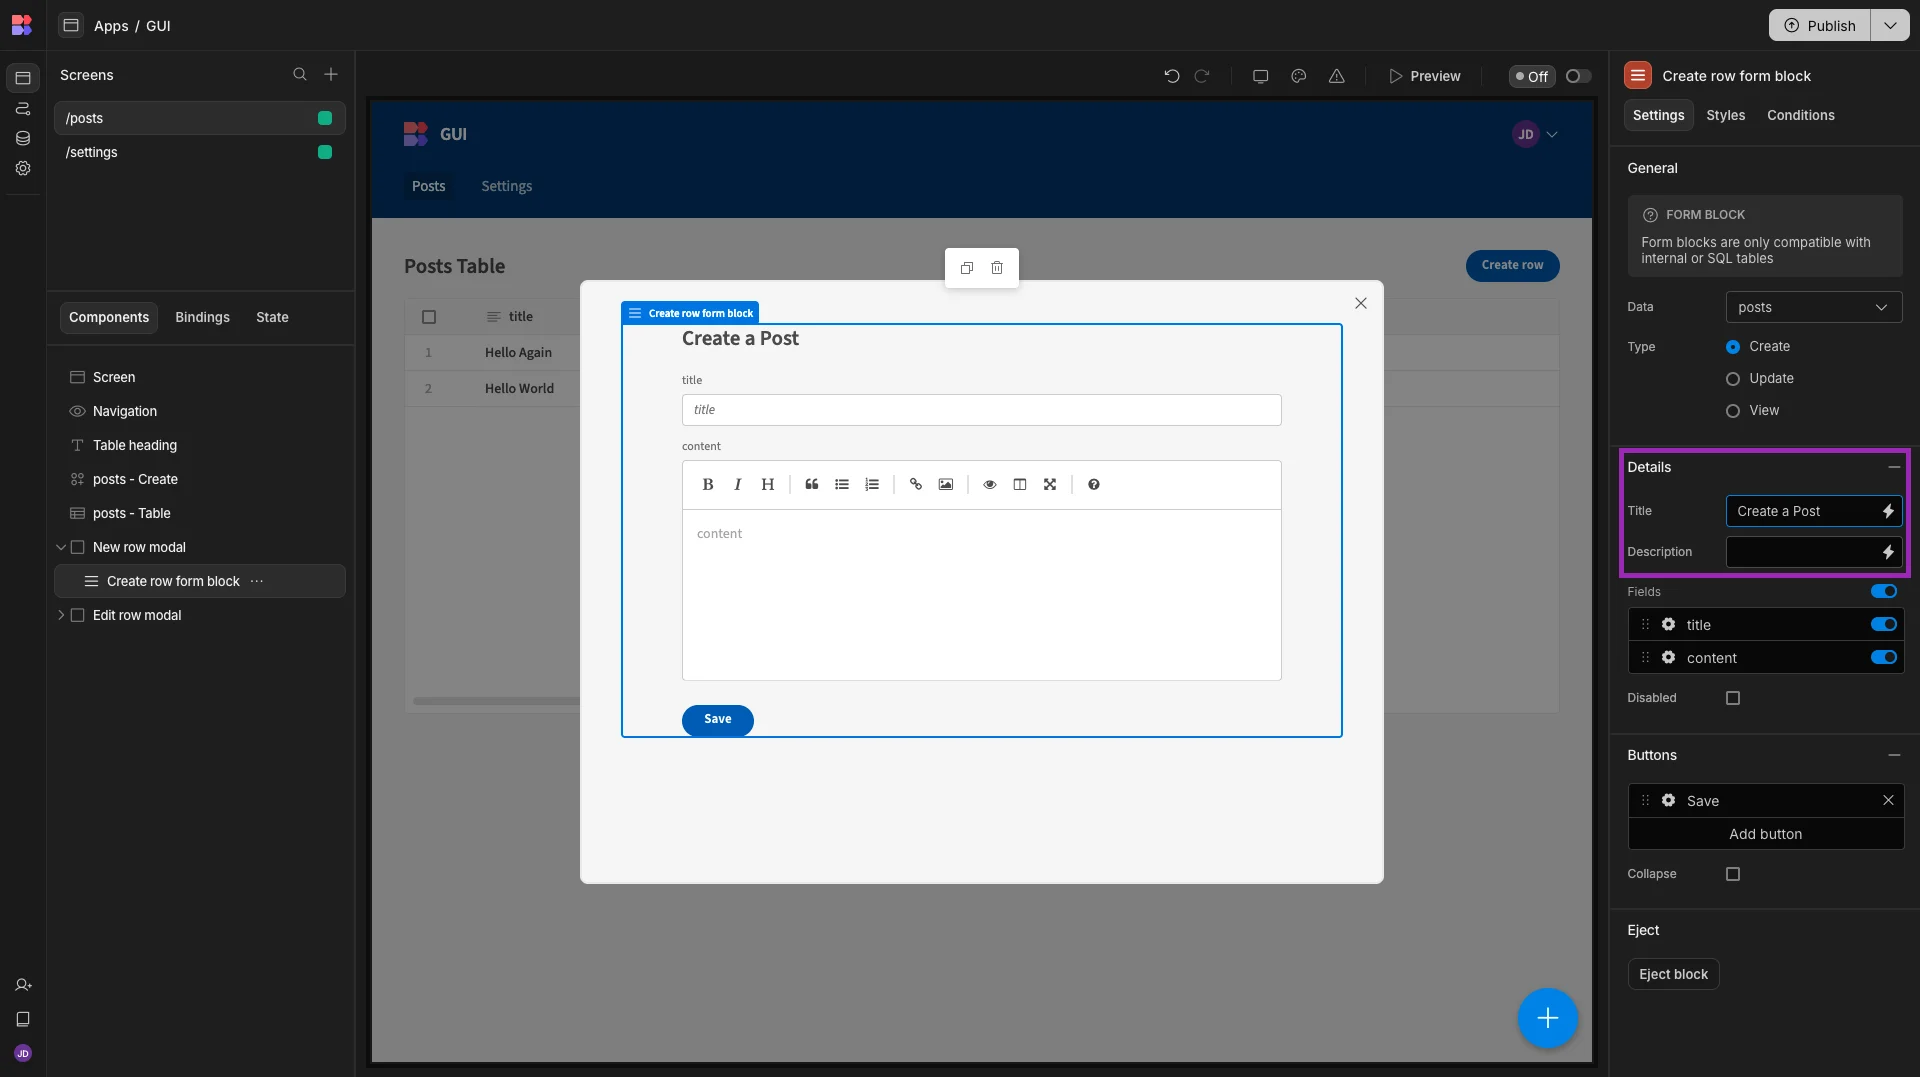
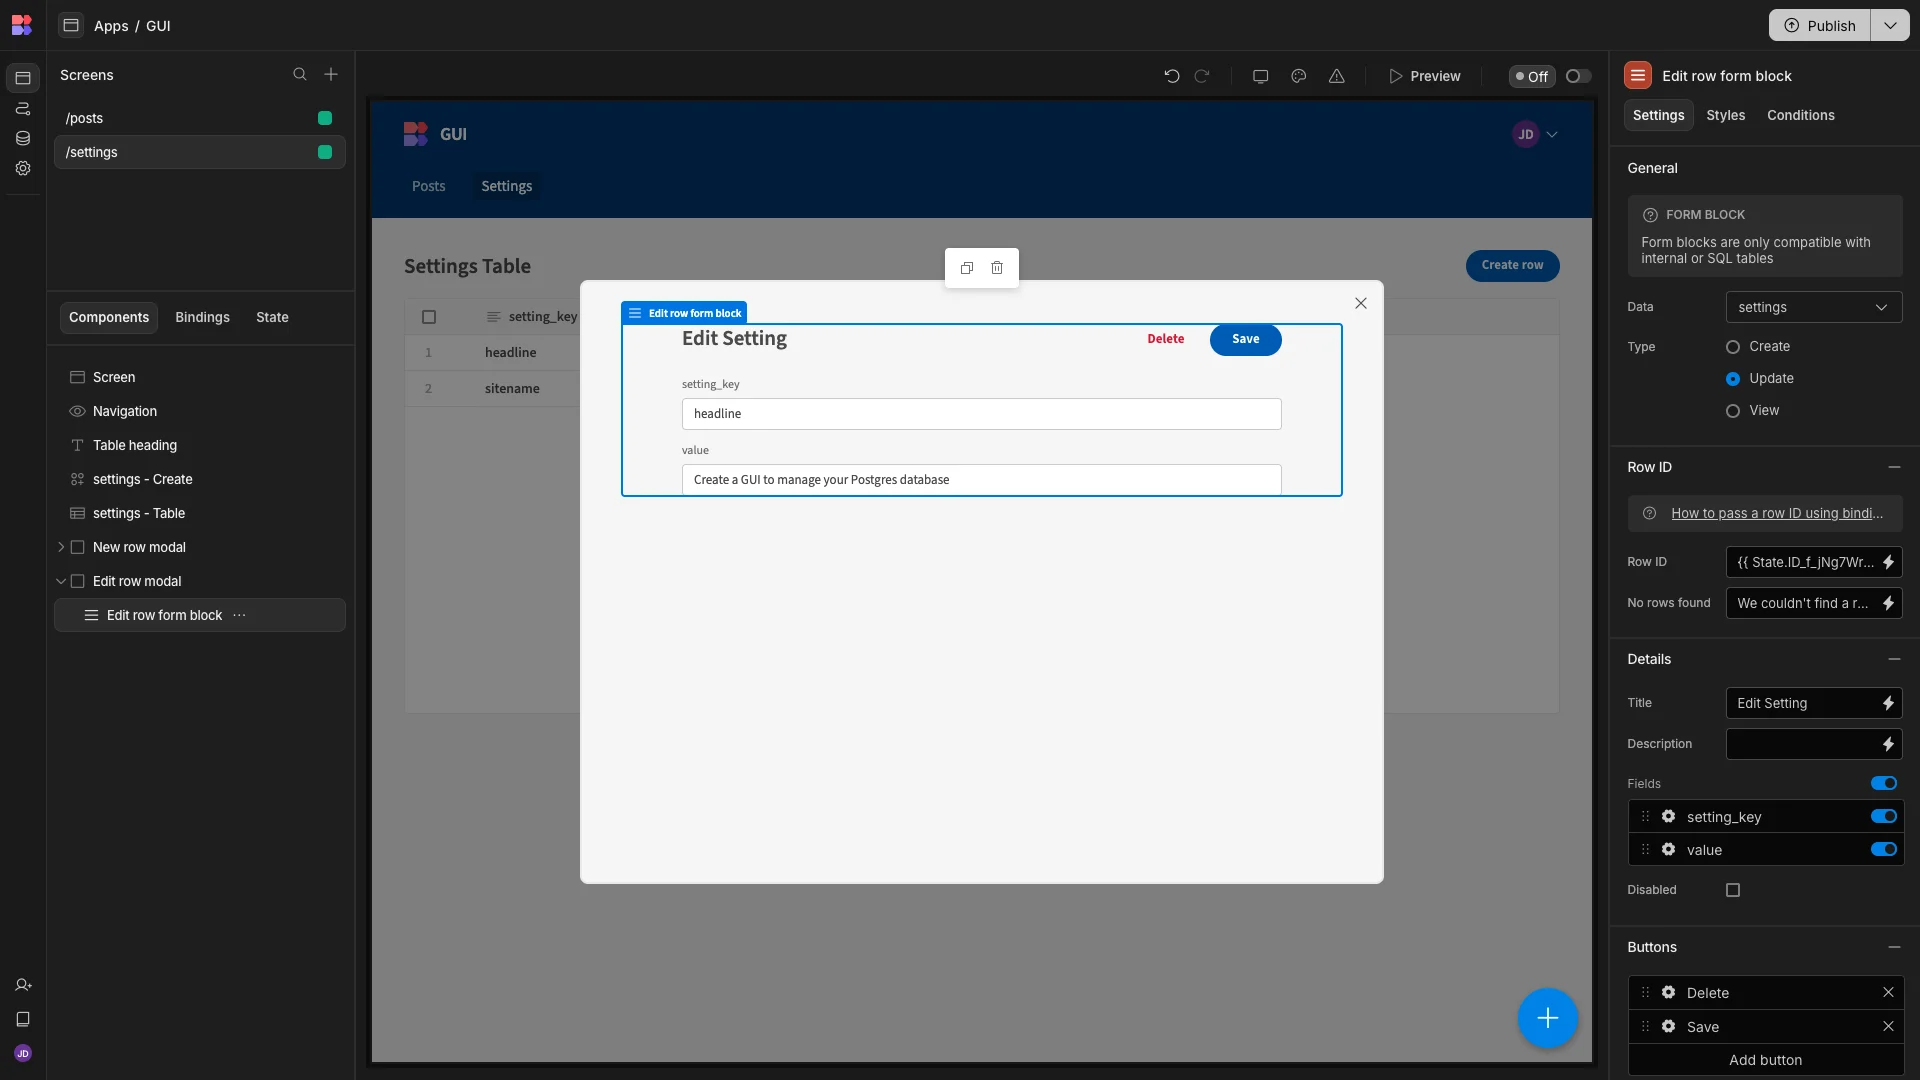
Within each of our Forms, we’ll use the Title setting to add more human-readable display text.
Under Styles, we’ll then set the Button Position to Top.
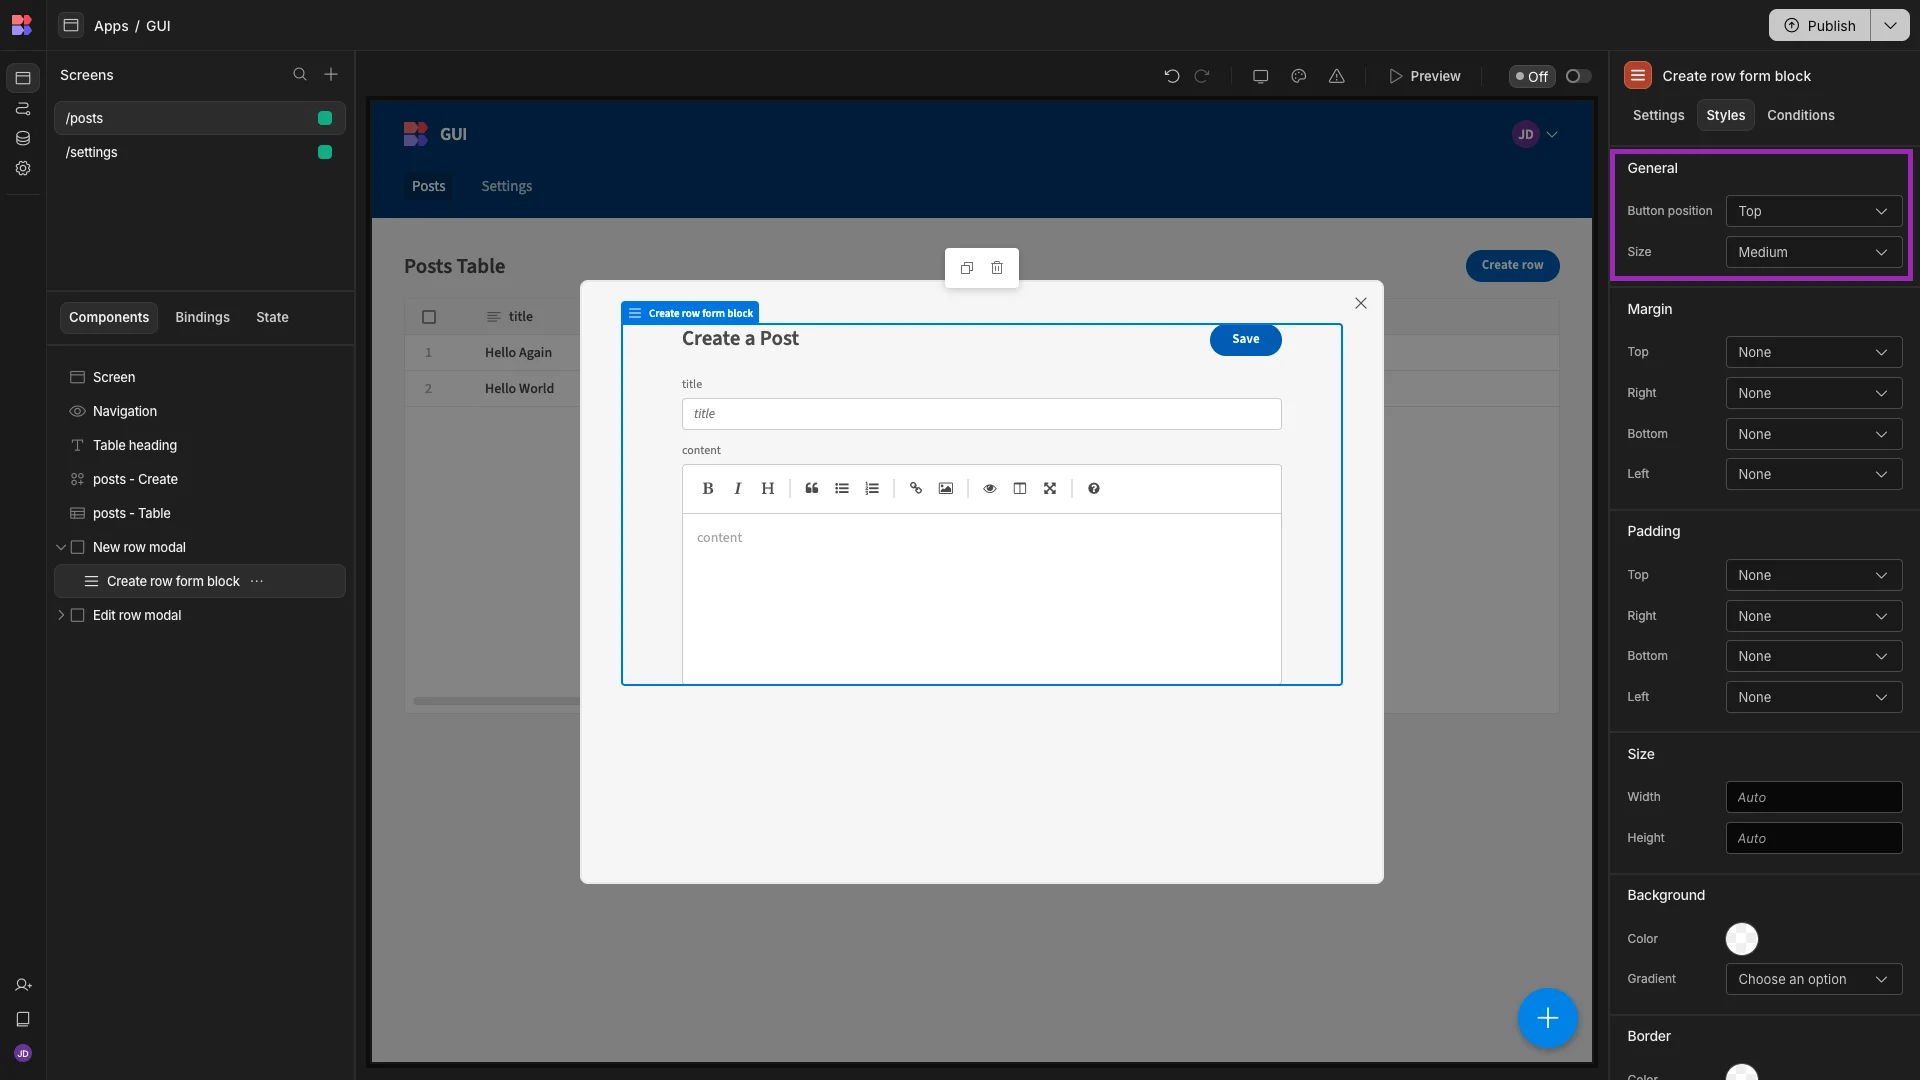
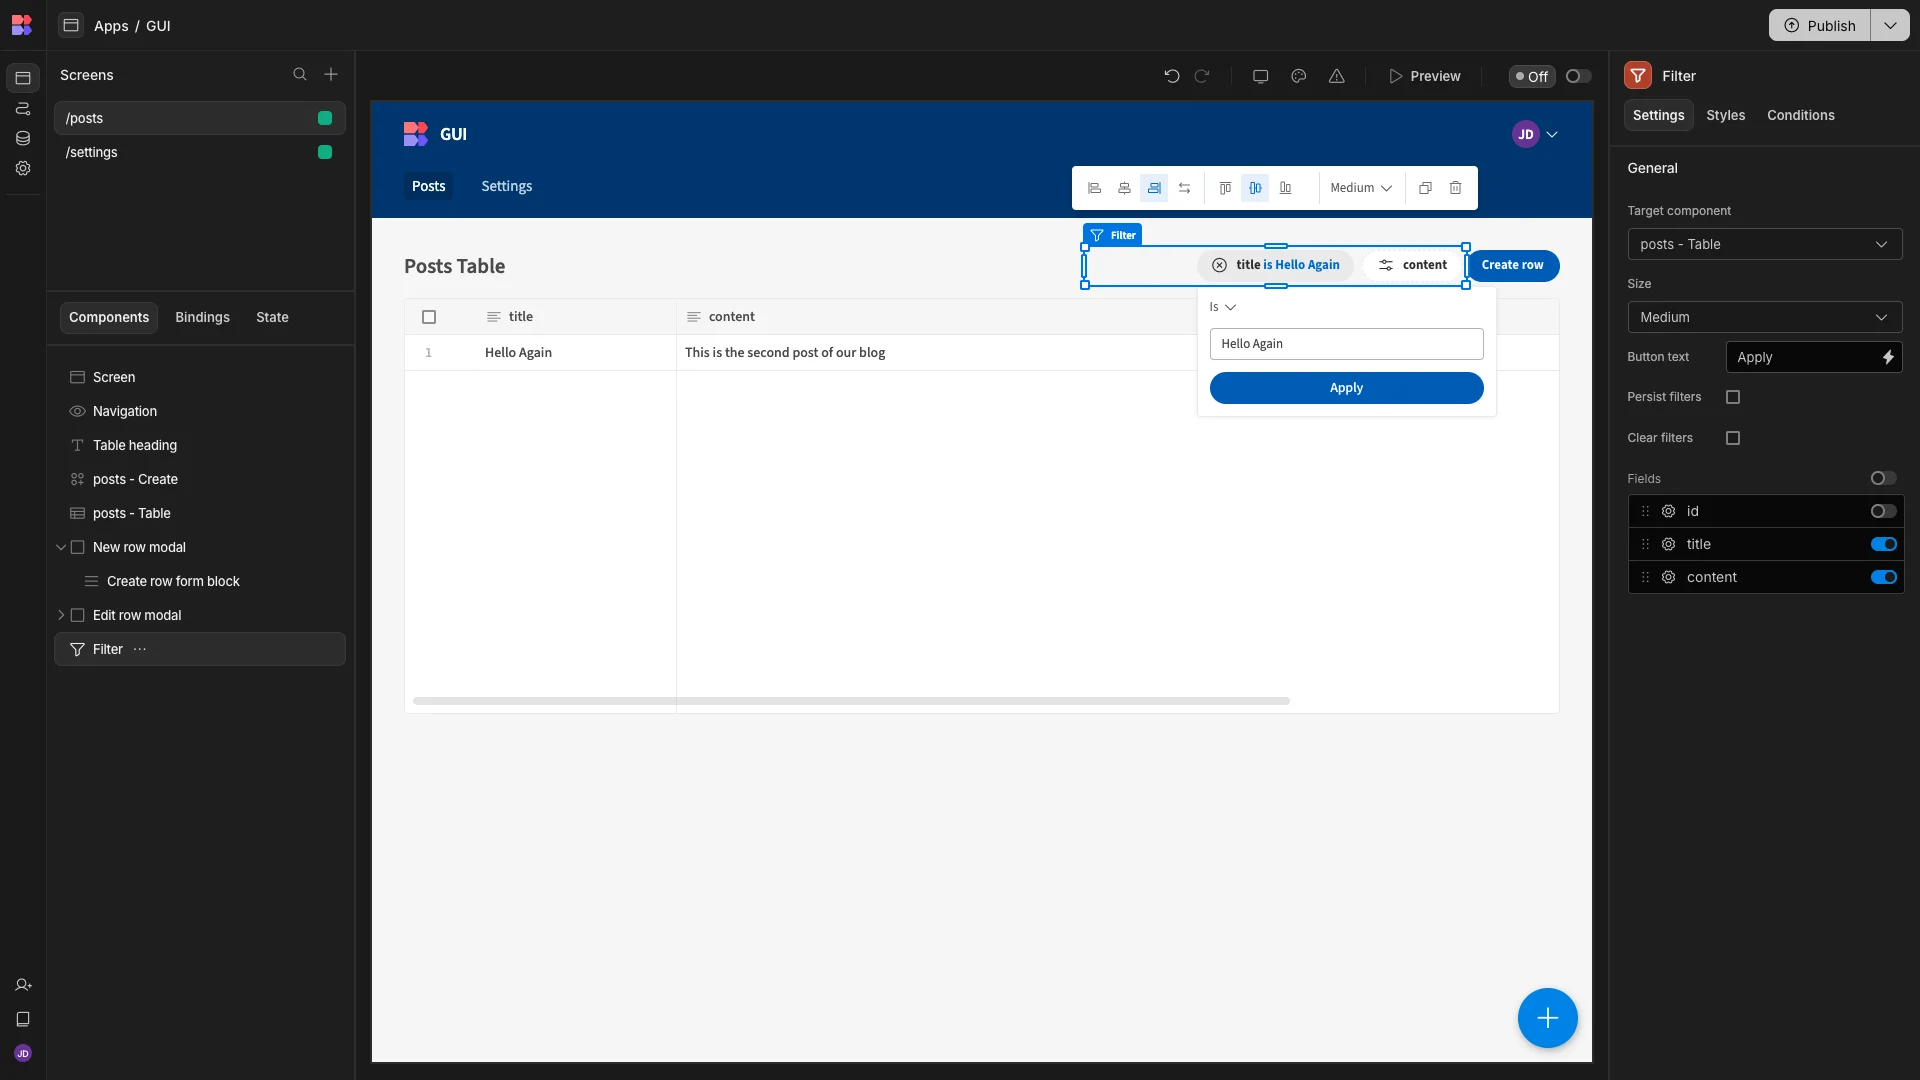
Next, a key feature of our Postgres GUI will be enabling users to perform front-end filtering. To do this, we’re going to add a Filter component.
Start by hitting the + to open our components menu. Here, we can search for Filter.
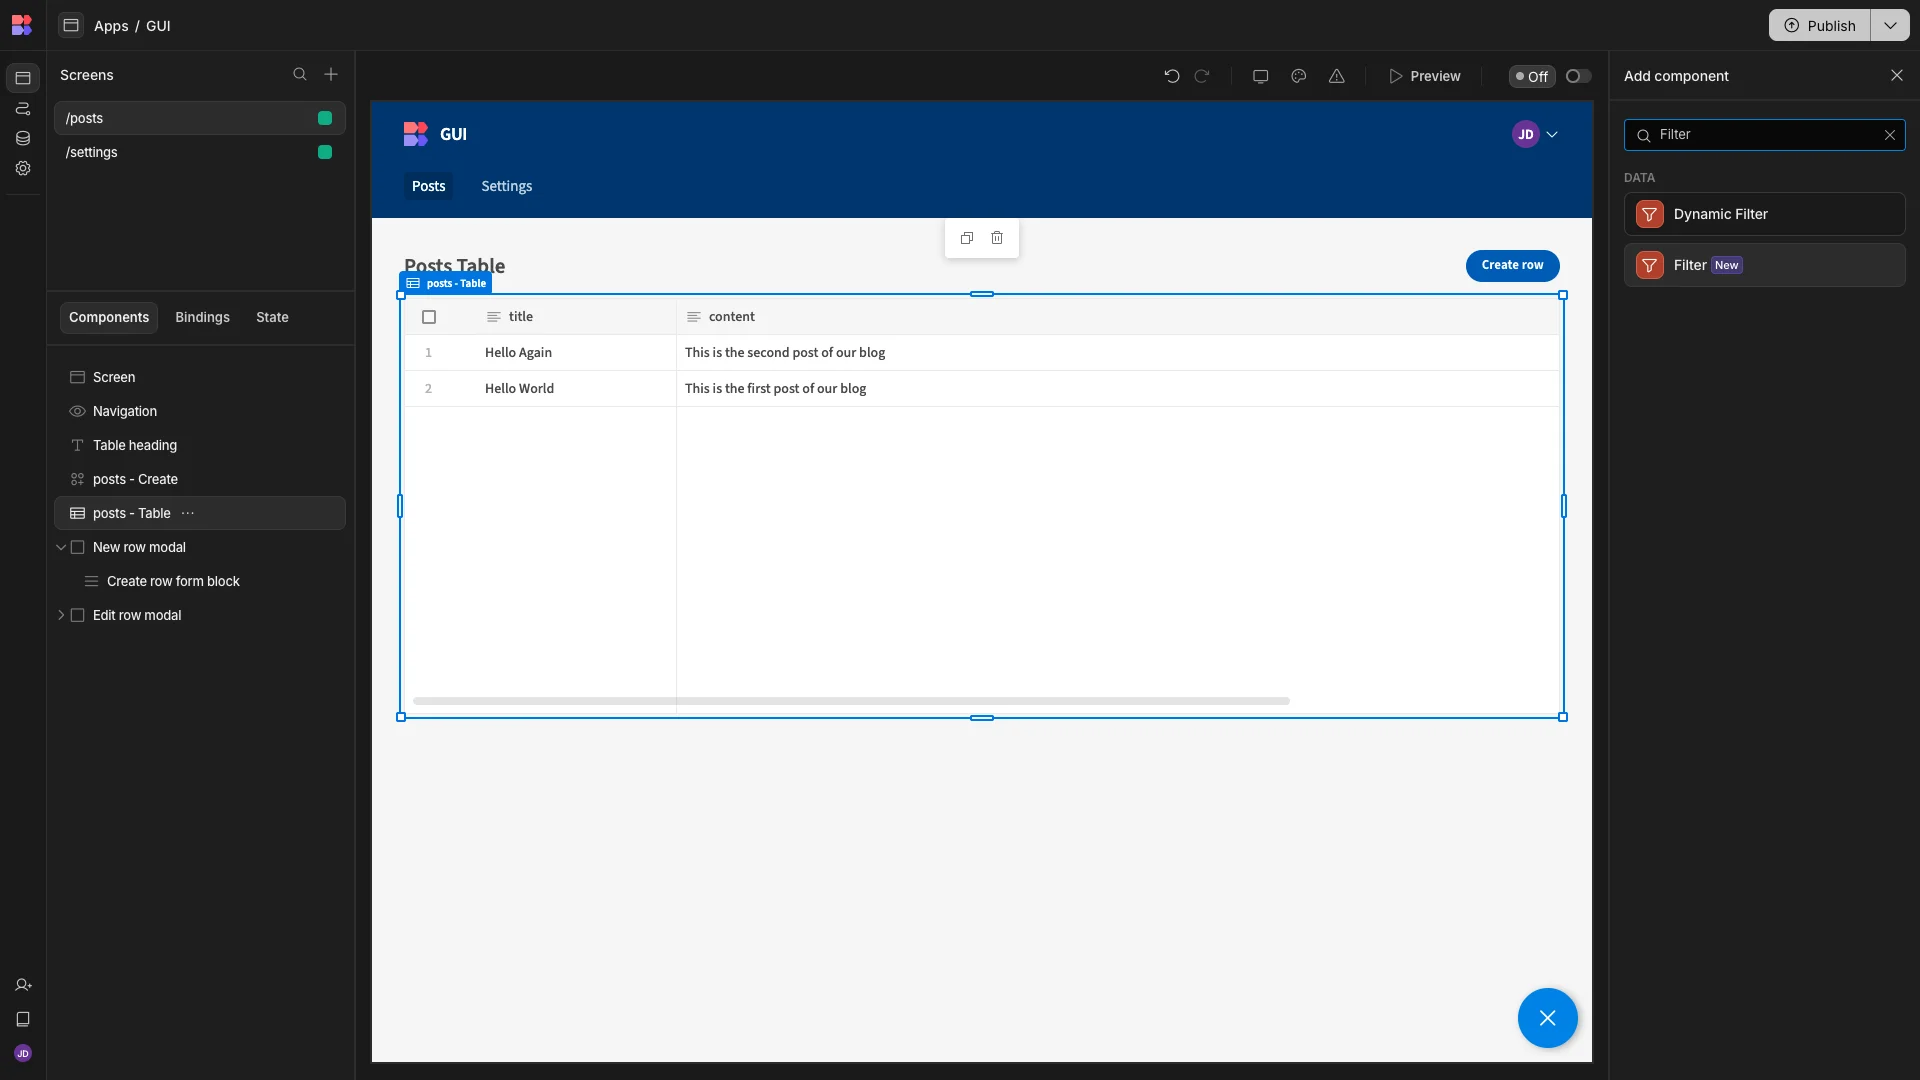
We’ll add this and drag it alongside our existing button component, above our table.
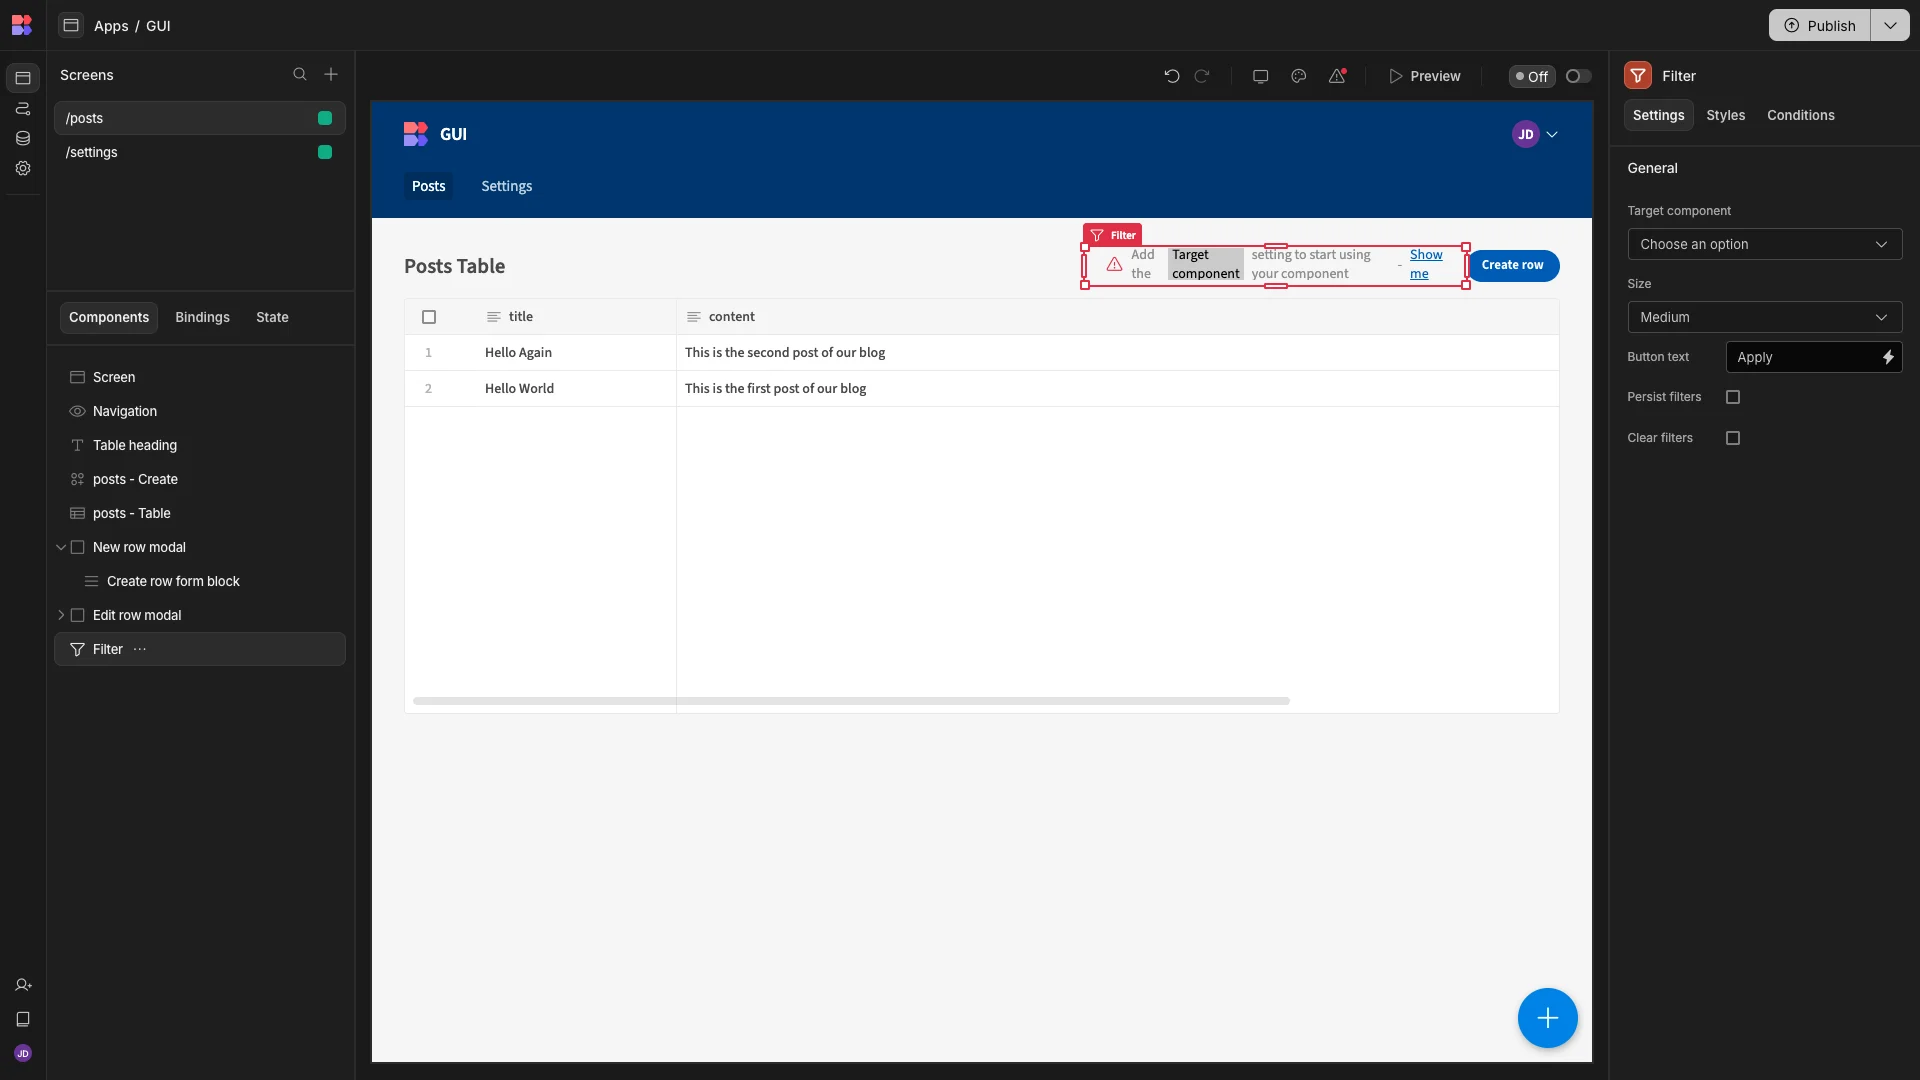
The Filter component can be pointed at any data-based element on our screen. We can then select the relevant columns from this which we’d like to enable users to filter on.
We’re pointing ours at the Posts Table, and selecting title and content as our fields.
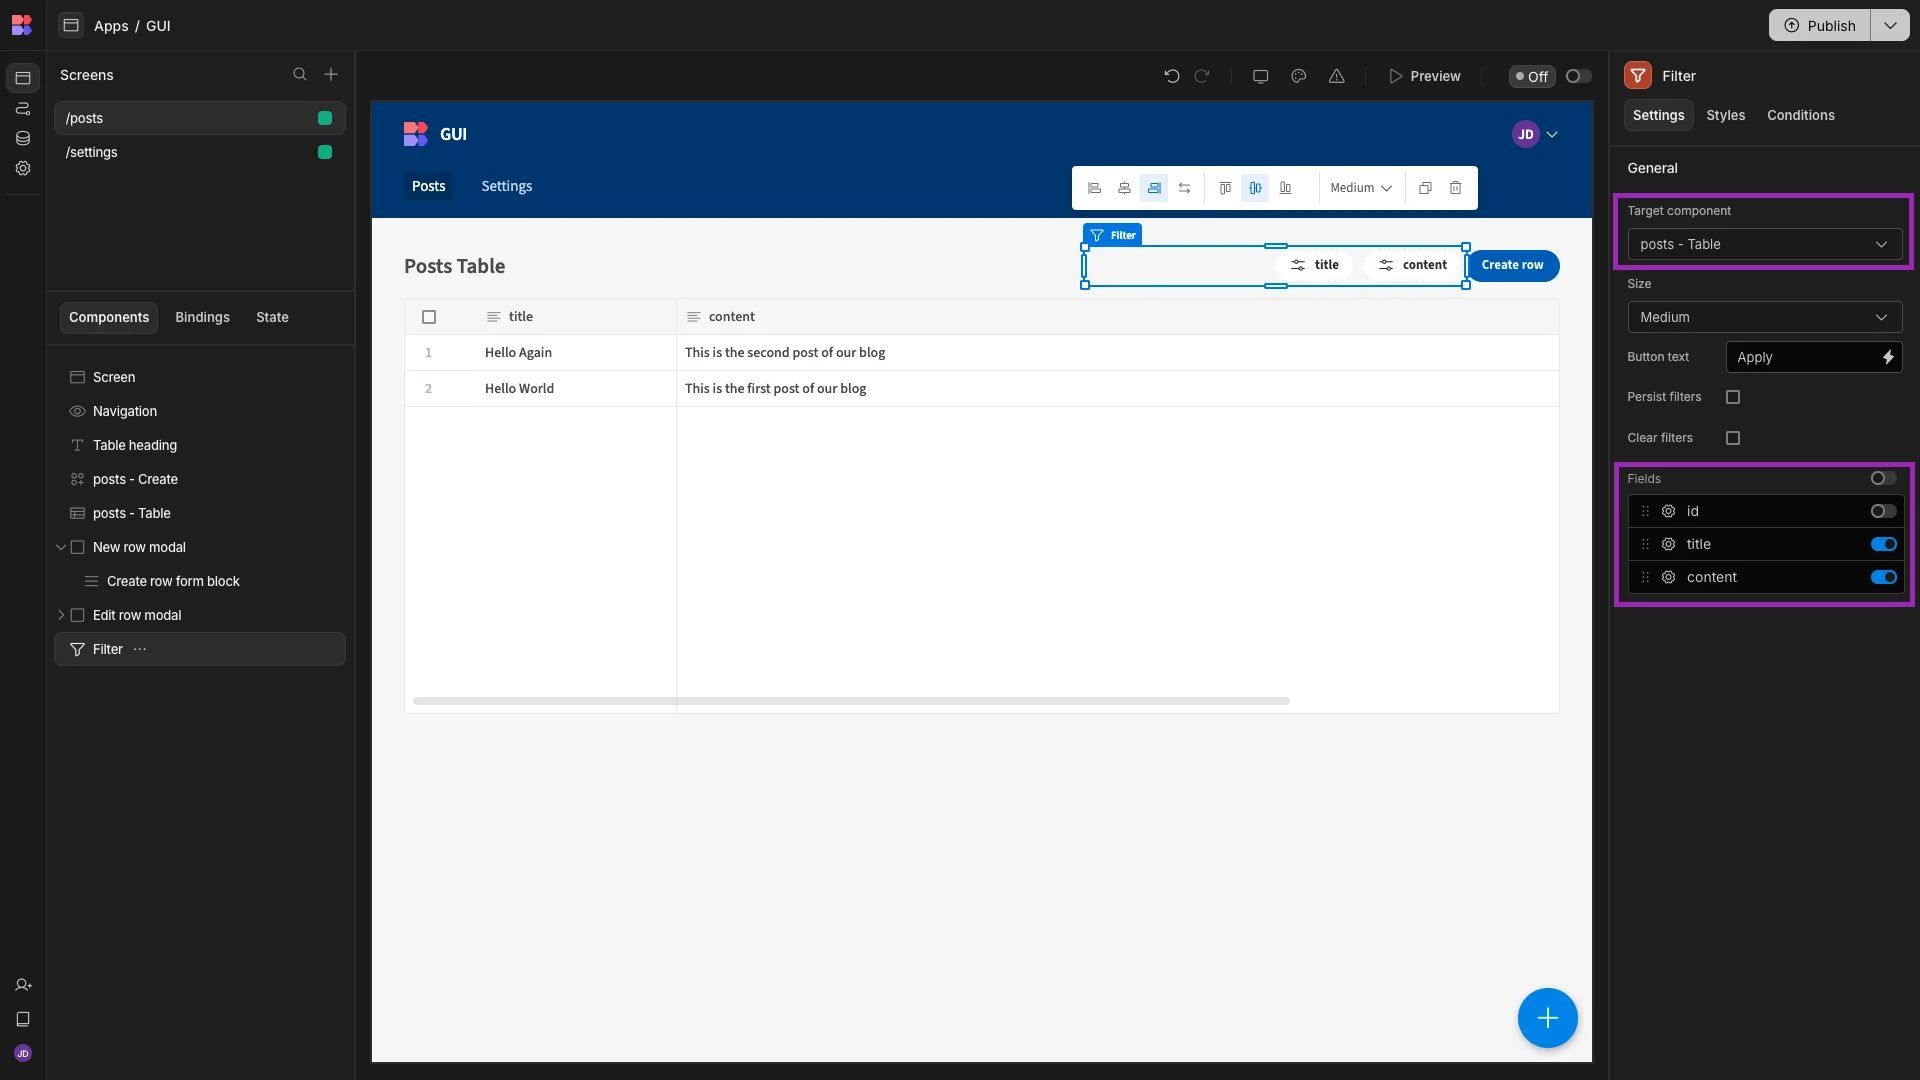
Now, users will be able to dynamically set filtering expressions from the front-end of our Postgres GUI.
Settings
Next, we can move on to making similar UX changes to our Settings screen. As we did a second ago, we’ll start by updating the Headline for our screen and deselecting the id column in our table.
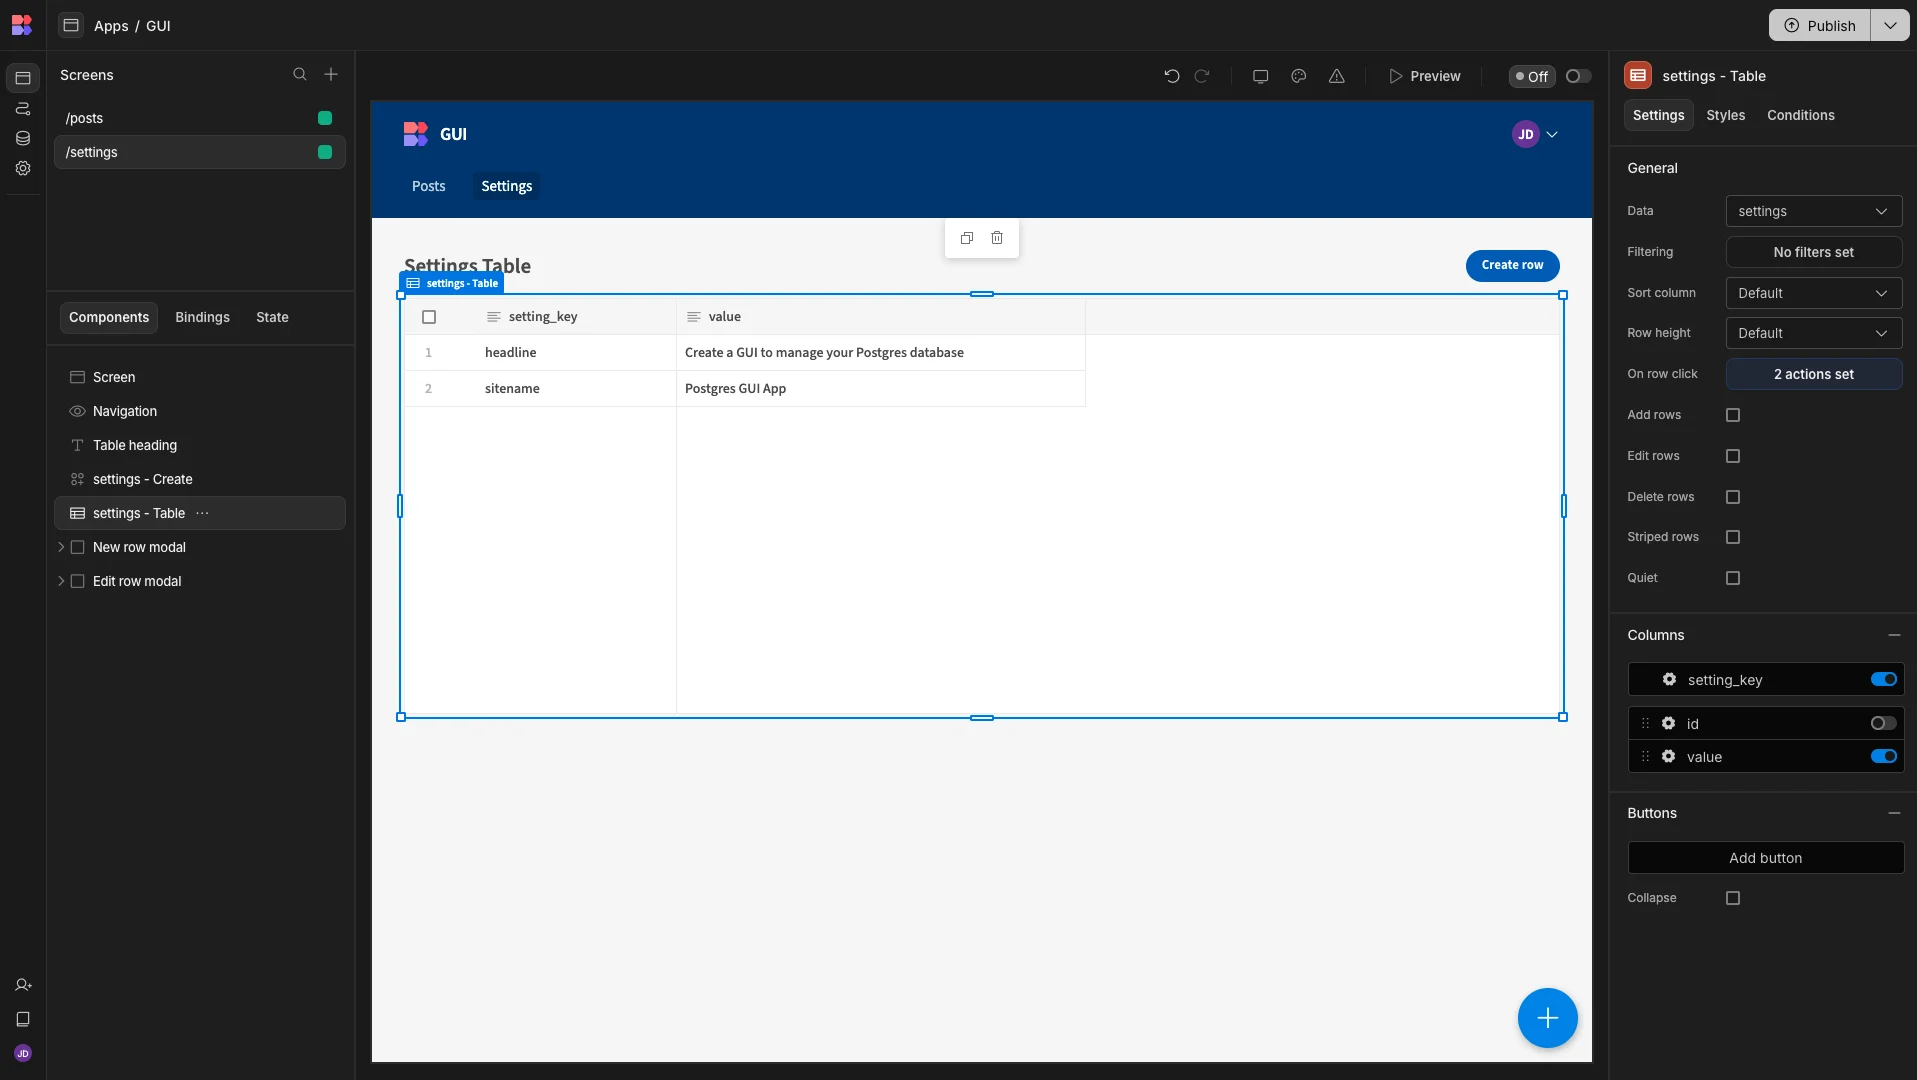
We’ll also repeat the same process of updating the display text and button positions on our forms.
This time, however, we want to take a different approach to front-end filtering.
Specifically, rather than offering users the ability to create complex filtering expressions on the fly, we’re going to create a static search bar.
Thanks to Budibase’s Global Context, where all elements on a screen are exposed to the data outputs of all other components, this is easy.
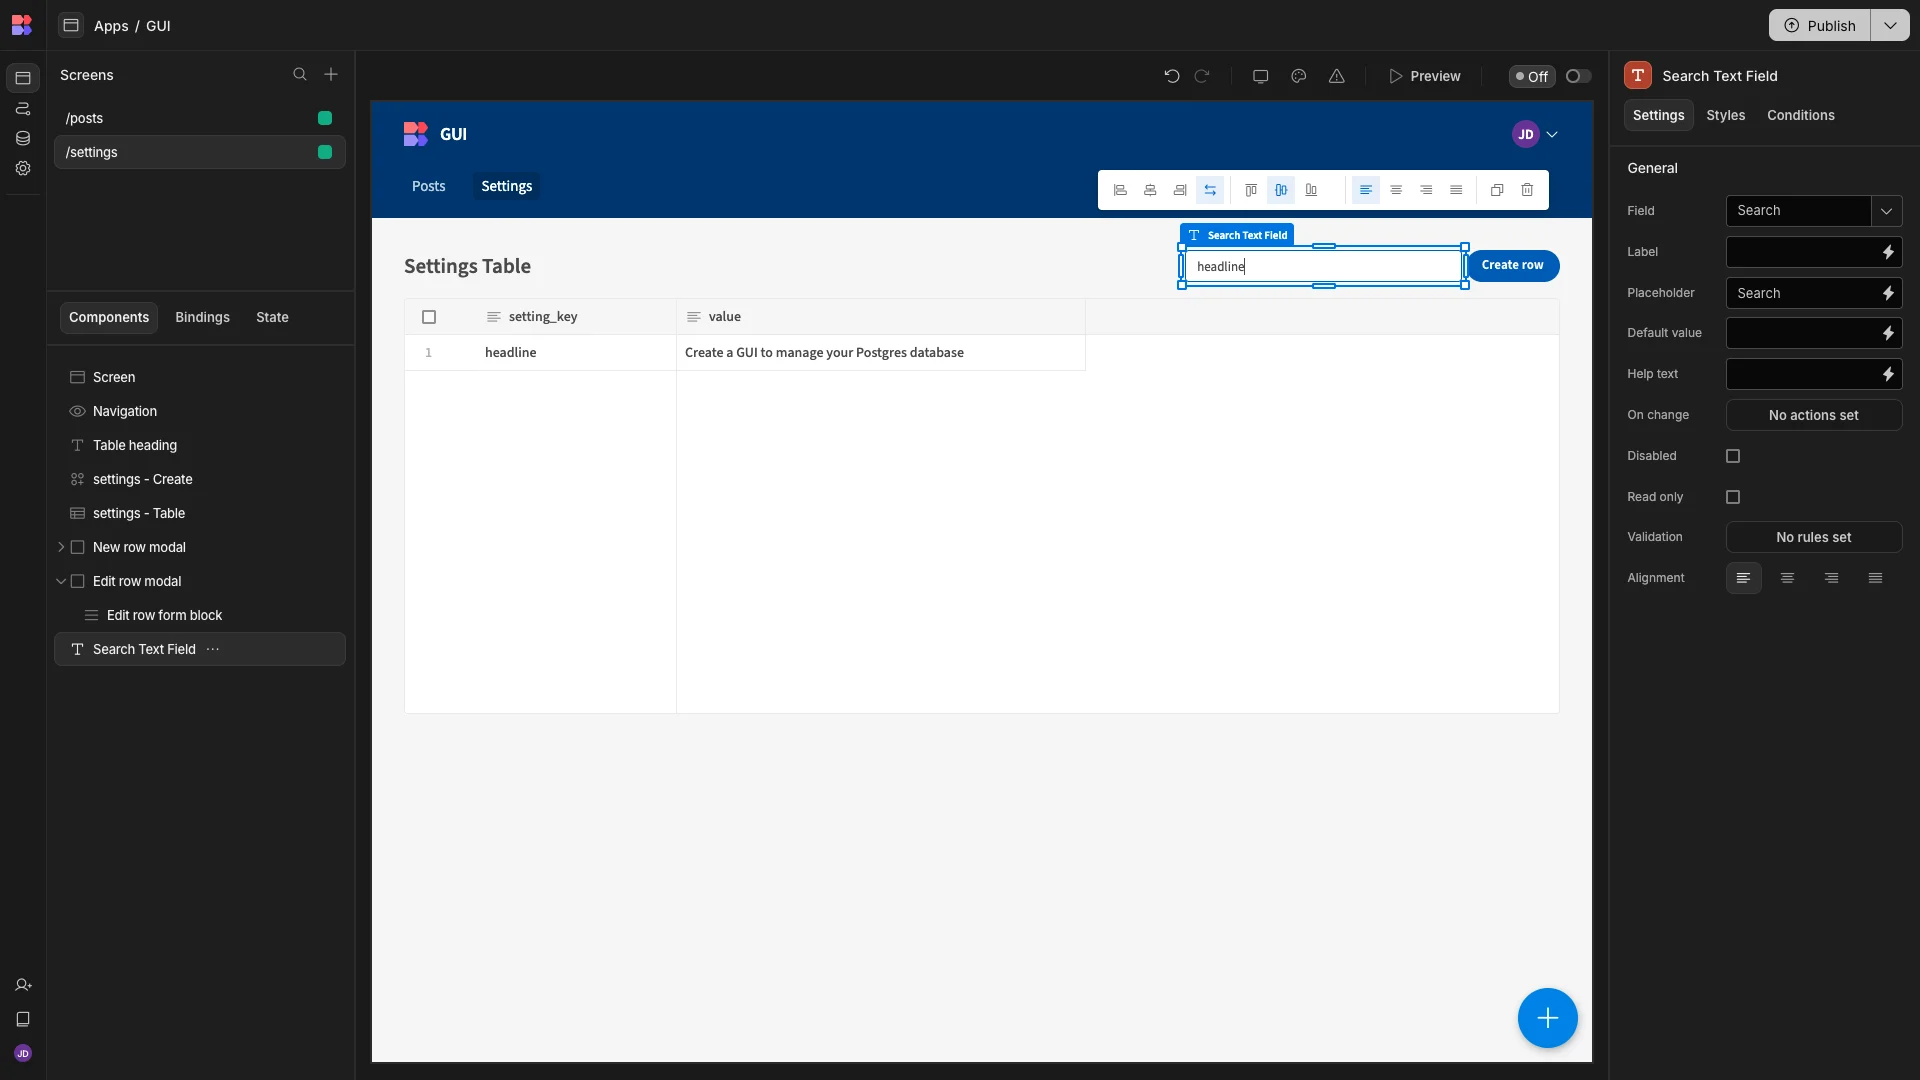
We’ll start by adding a Text Field component, alongside our existing Button.
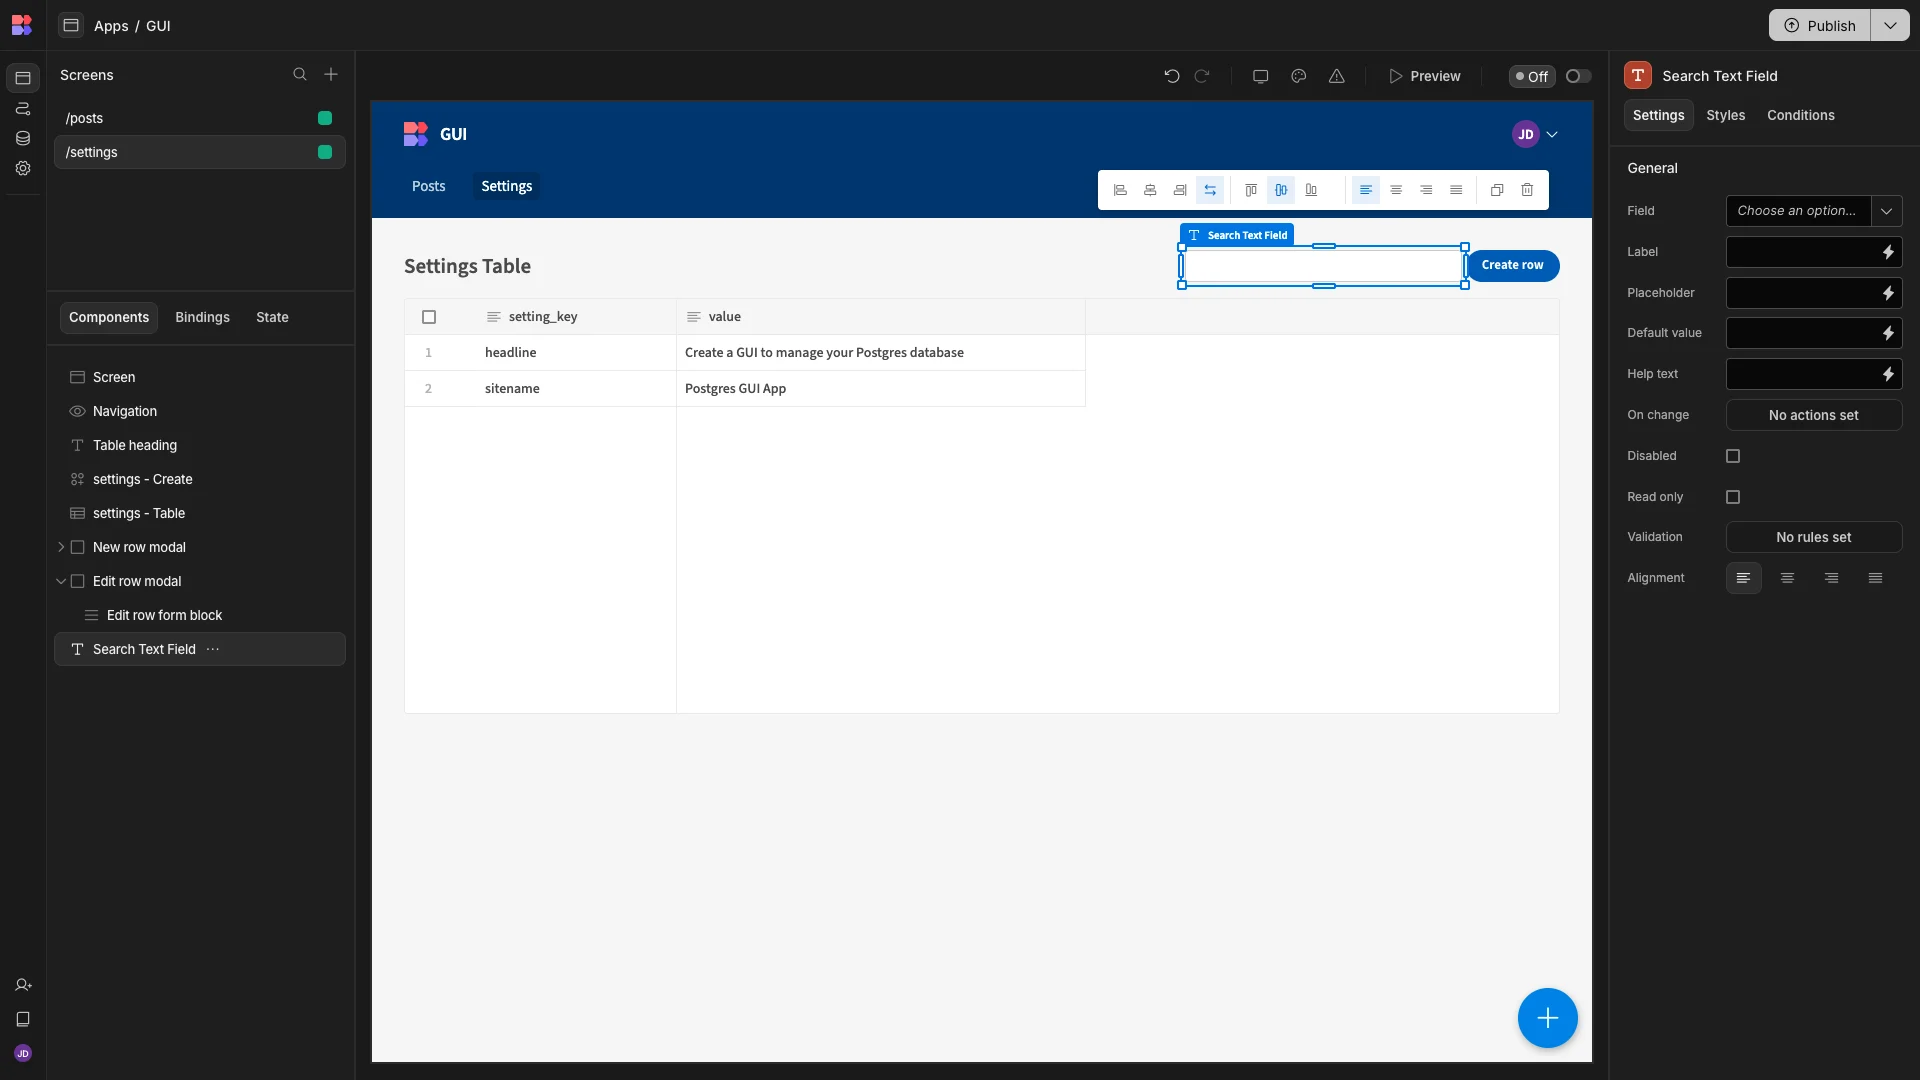
This accepts several settings, but the ones we’re interested in are Field, which is used as a reference in the builder, and Placeholder, which will be our display text when the textbox is blank.
We’ve set each of these to Search.
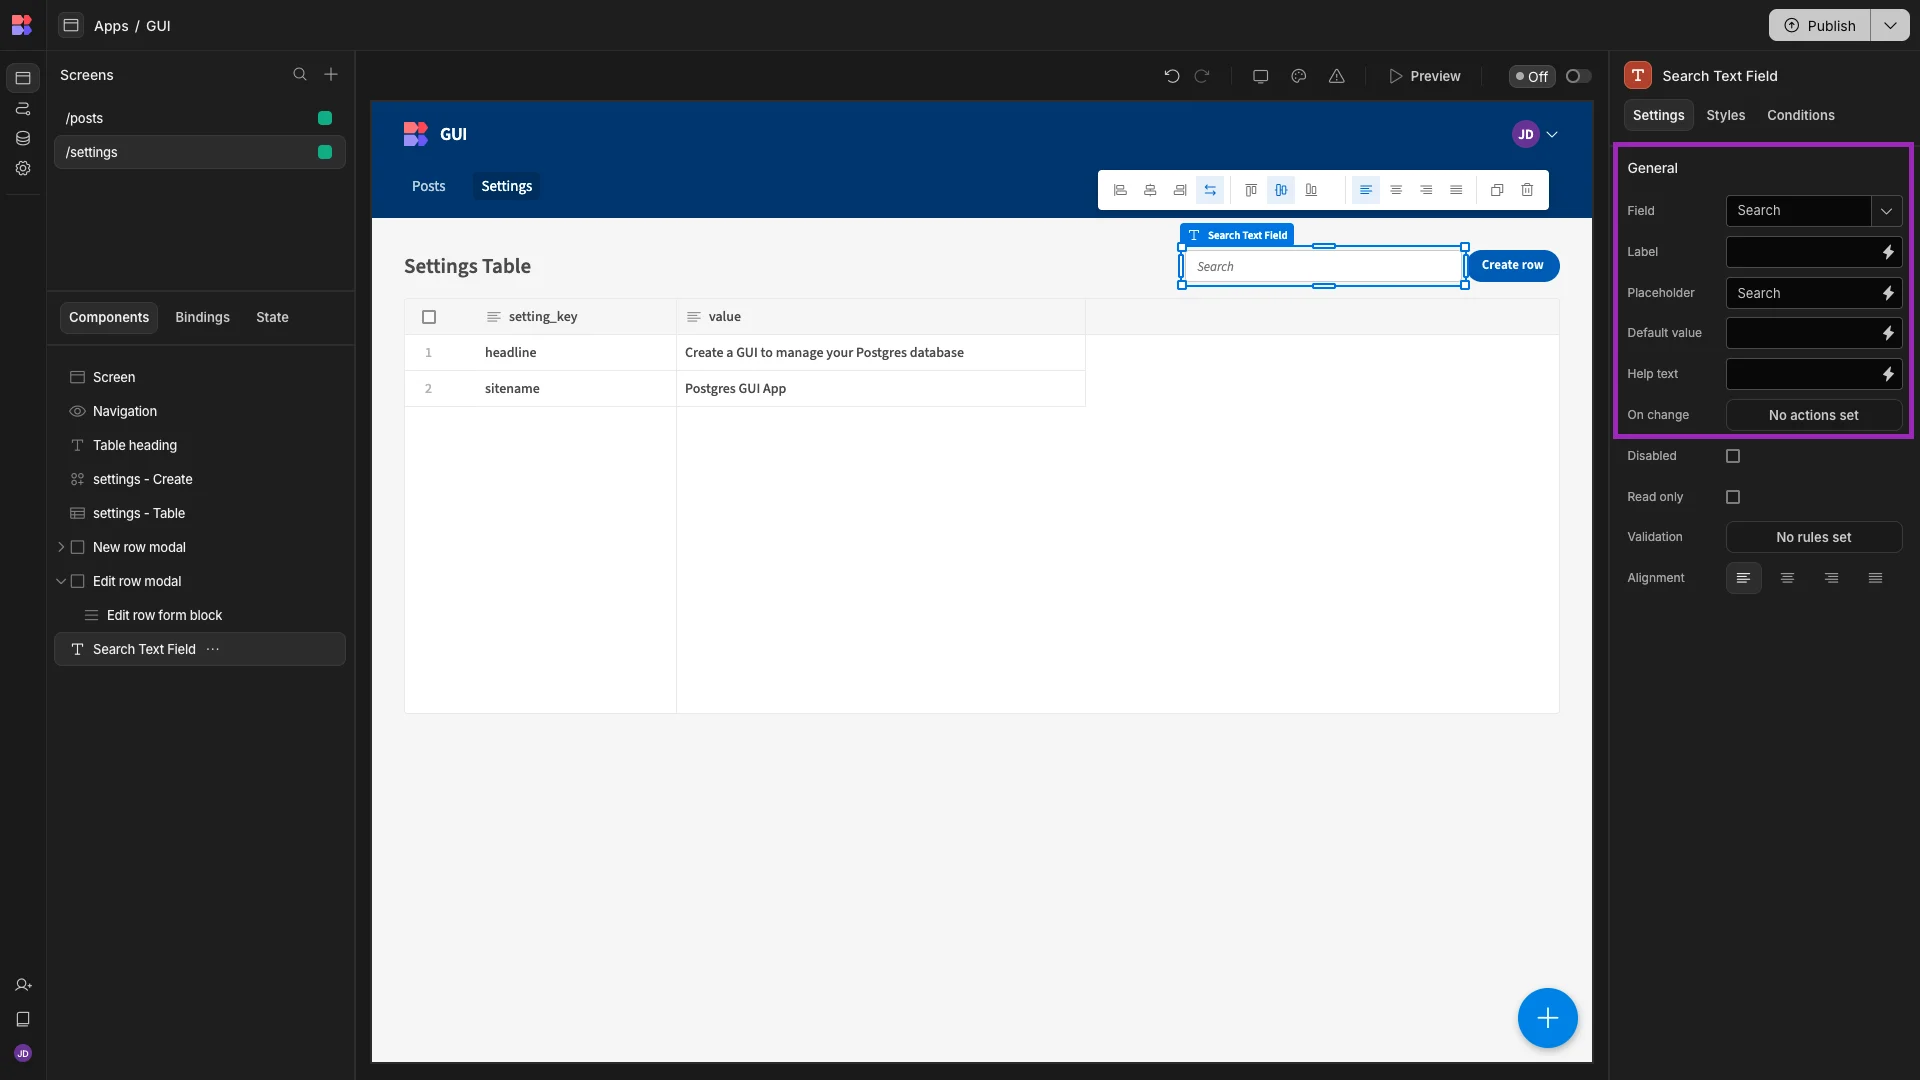
Unlike the Filter component, where we can simply select a target component, we’ll need to configure our Table to apply filters based on whichever value our user inputs in our text field.
To achieve this, we’ll select our Table and open the filtering menu.
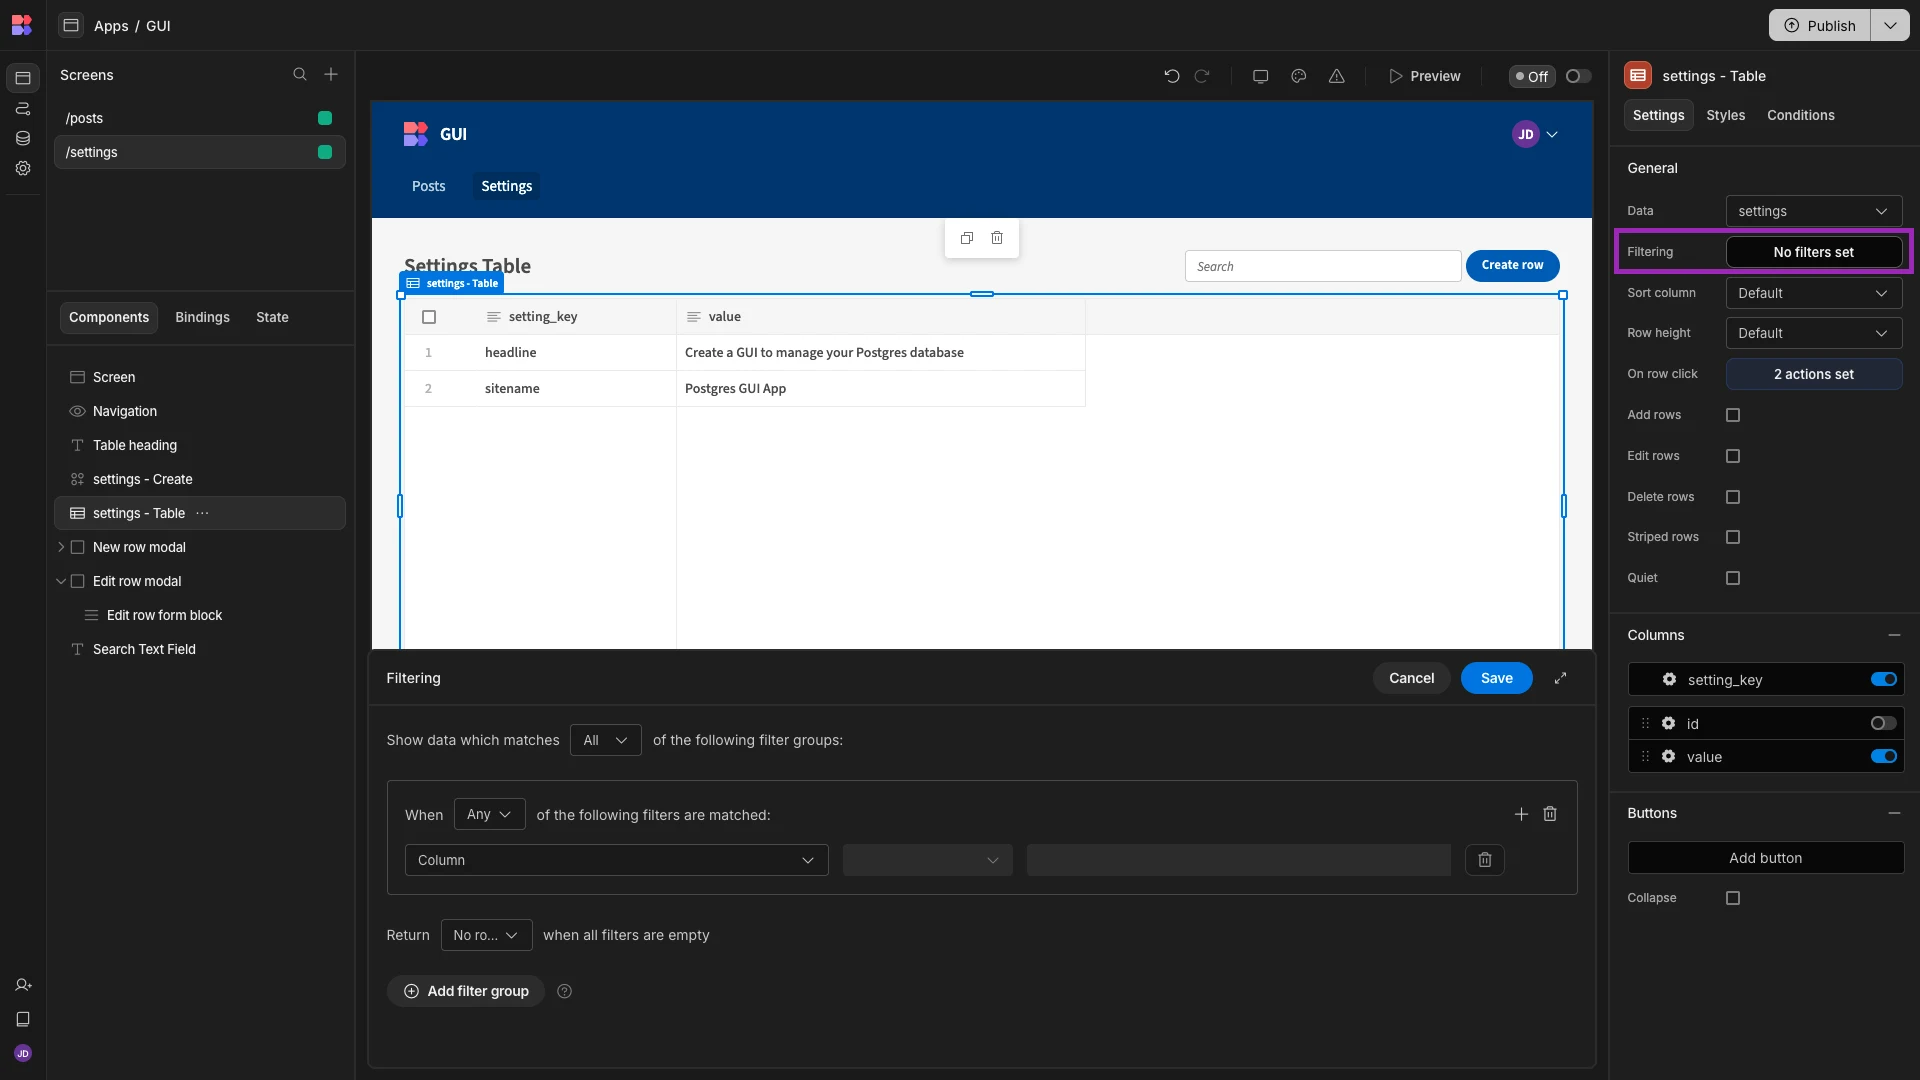
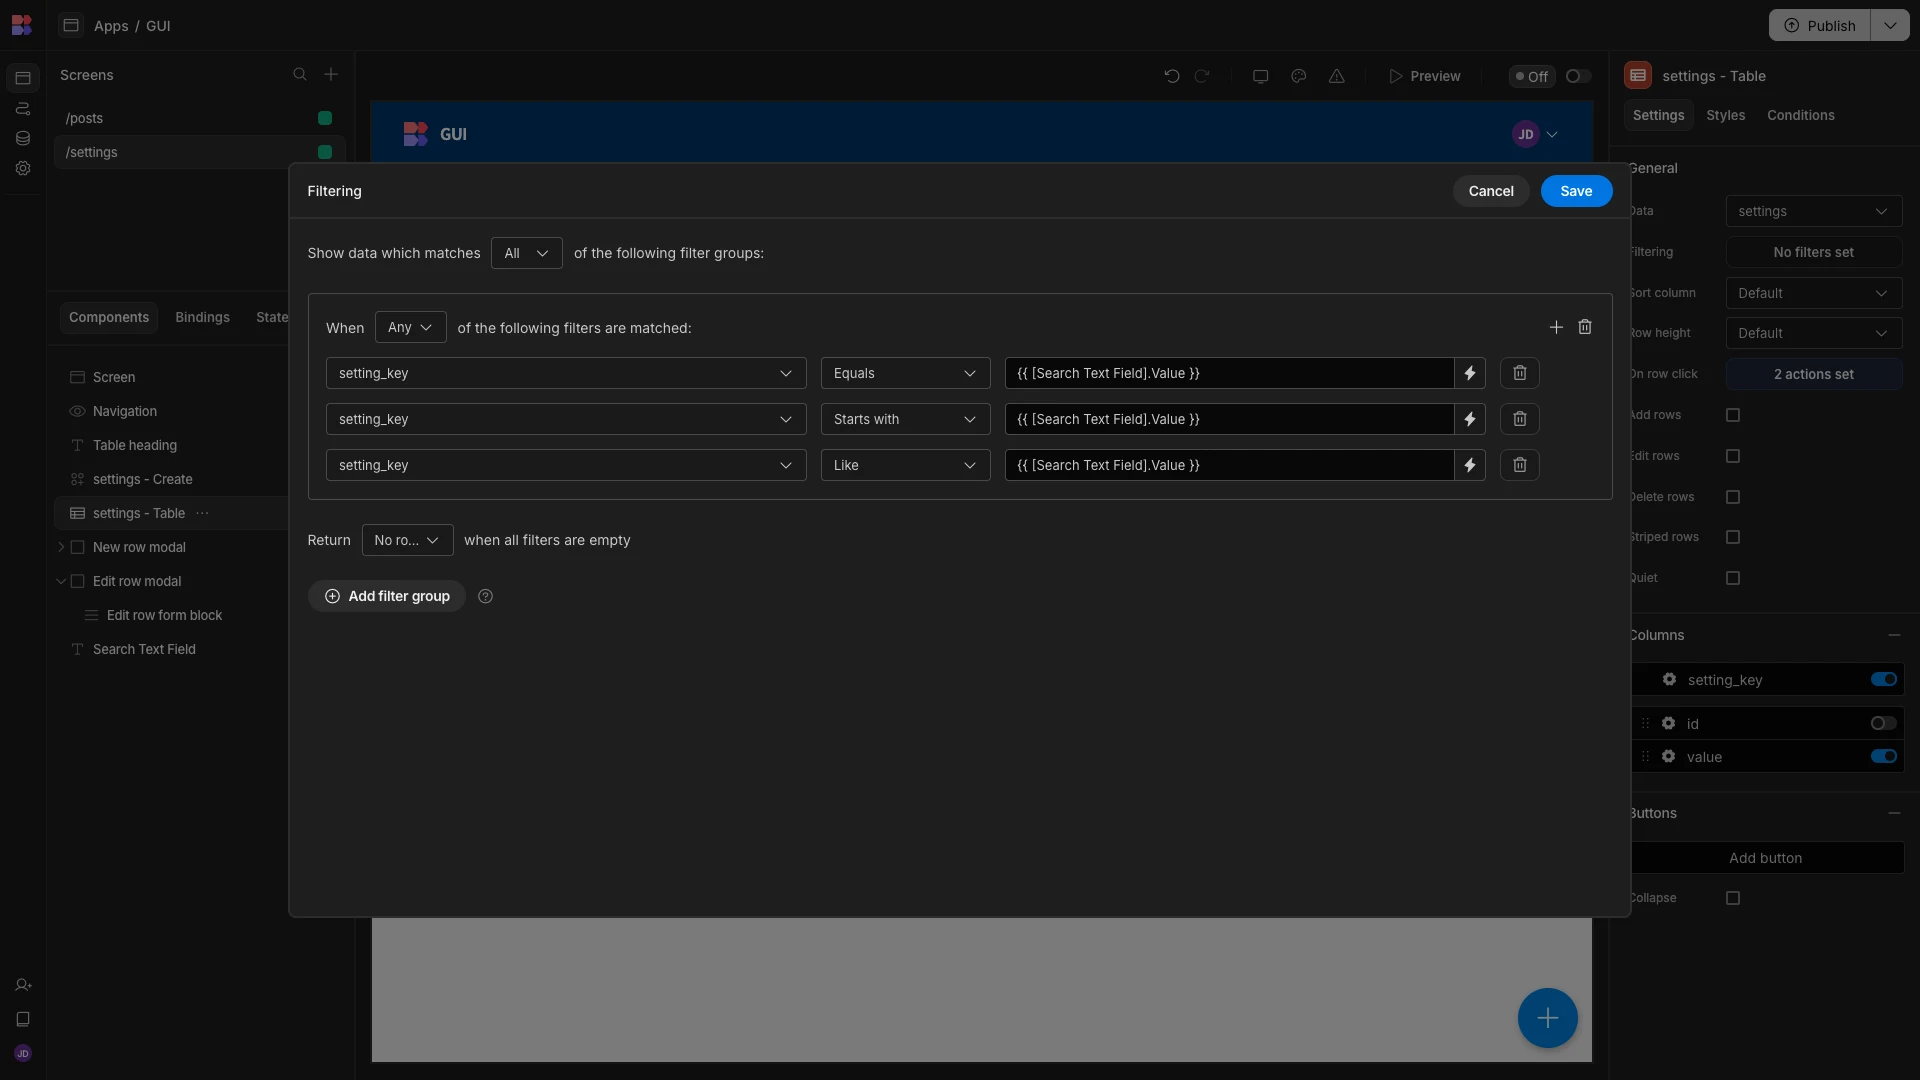
We want our users to be able to search for any row, based on its setting_key. To do this, we’re going to add a filter group with three expressions, to return rows where setting_key equals, starts with or is like our text input.
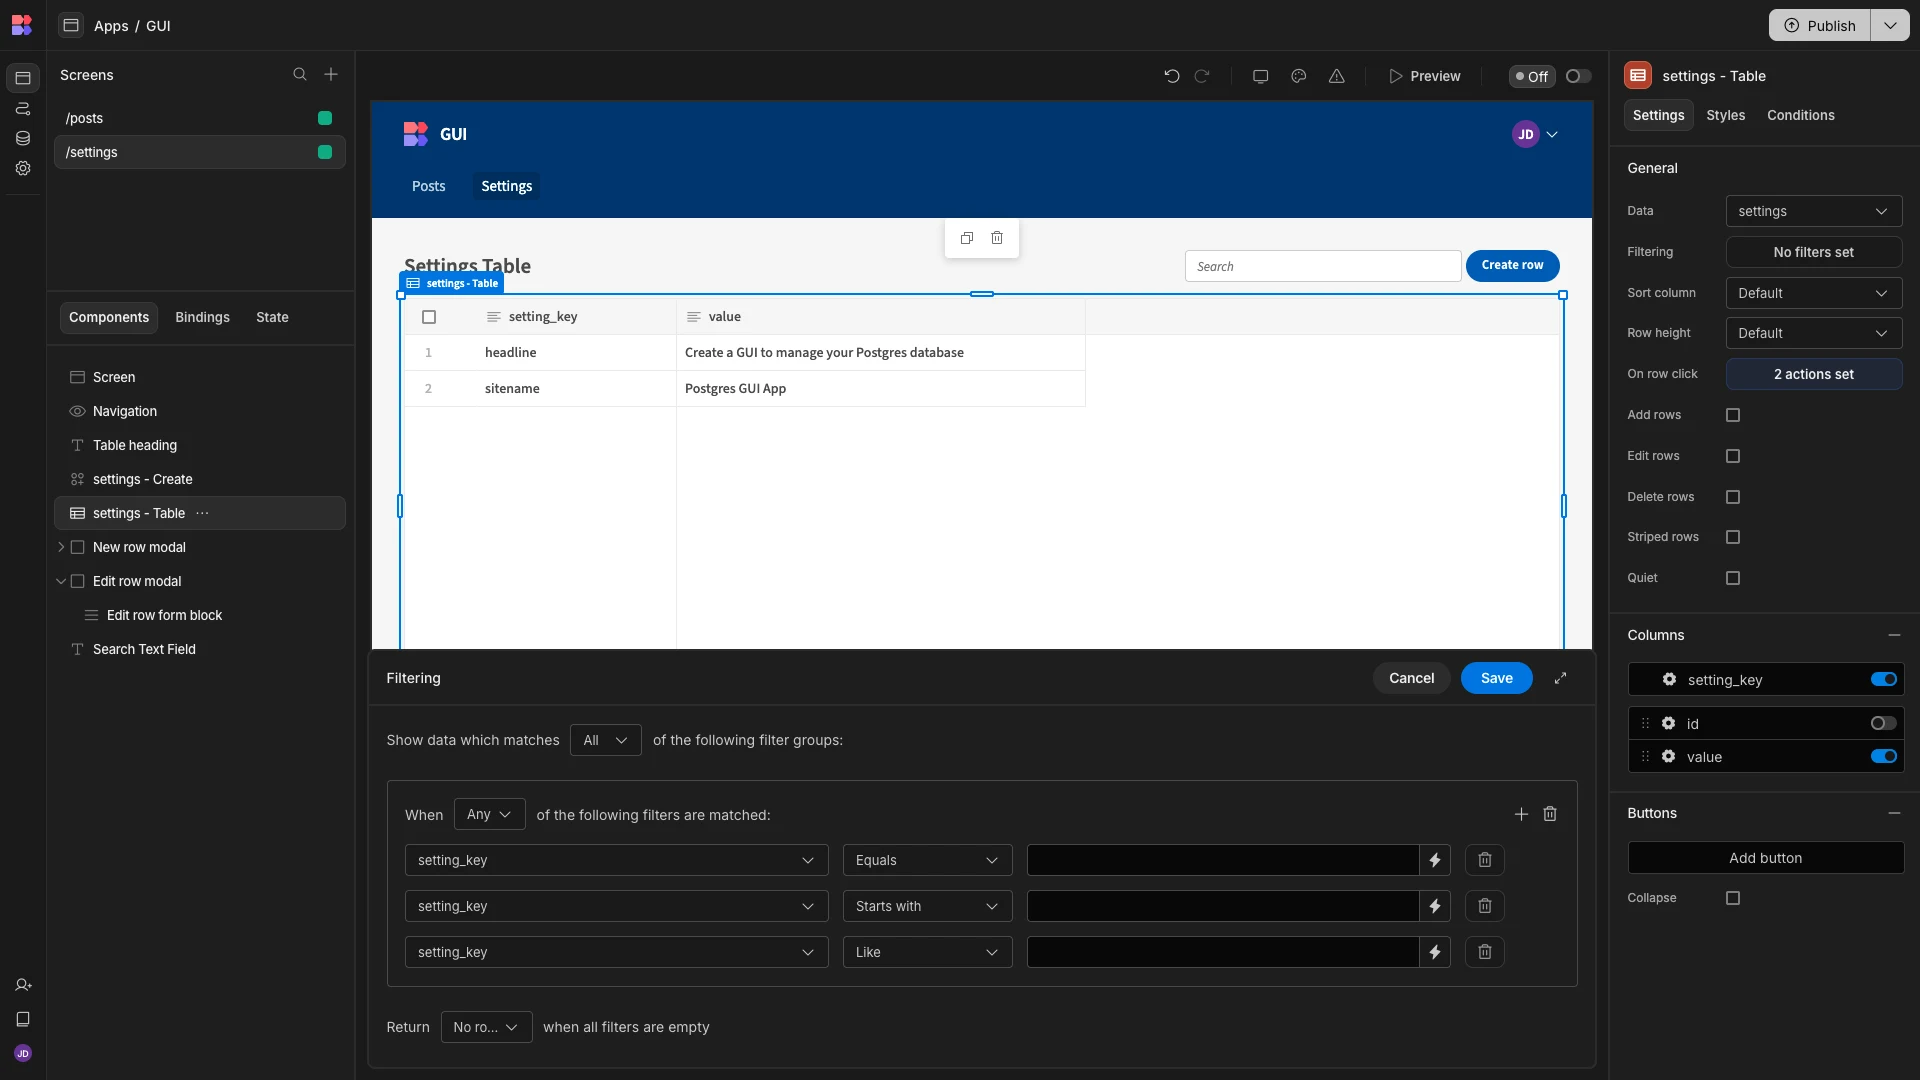
We can hit the lightning bolt icon alongside any of our comparison values to access Budibase’s bindings menu.
Here, we can see all of the data that our Table is exposed to, including the output of our Search text field.
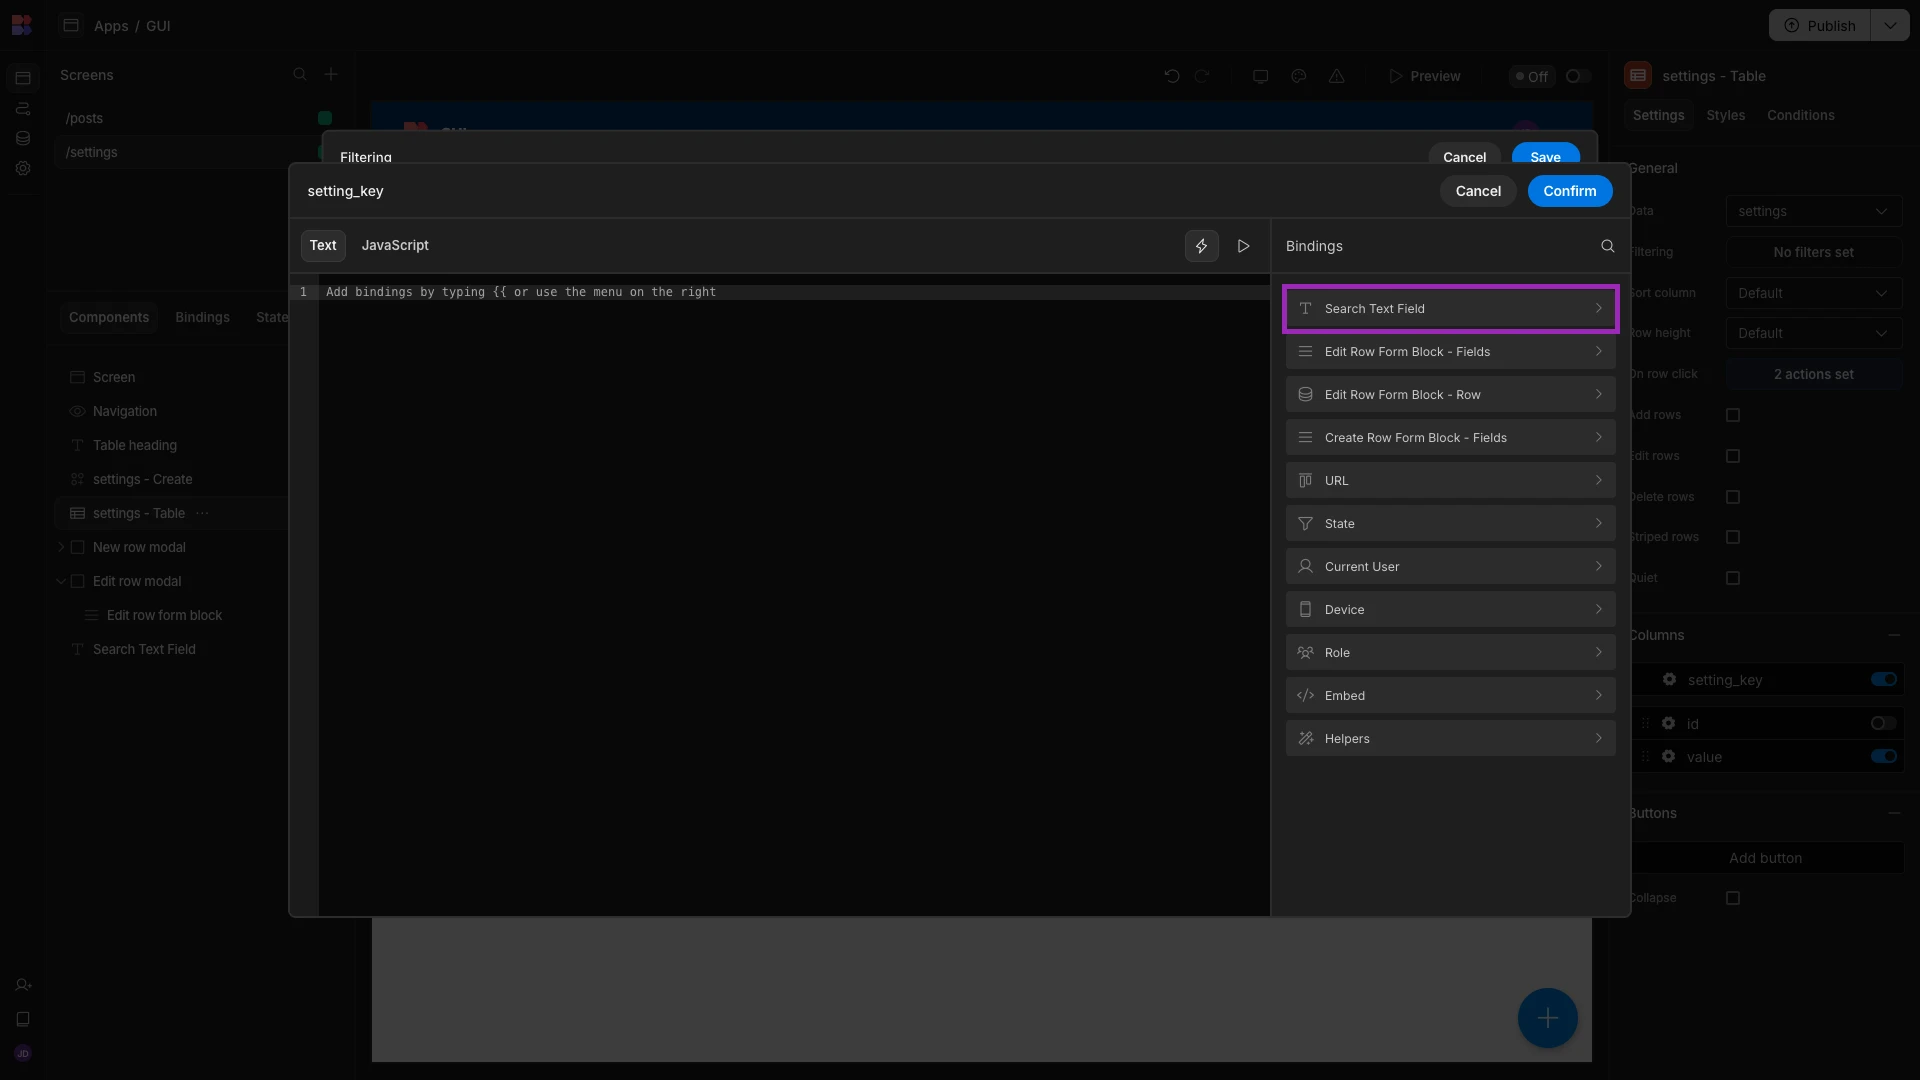
Within this, we can select the user input value as a binding.
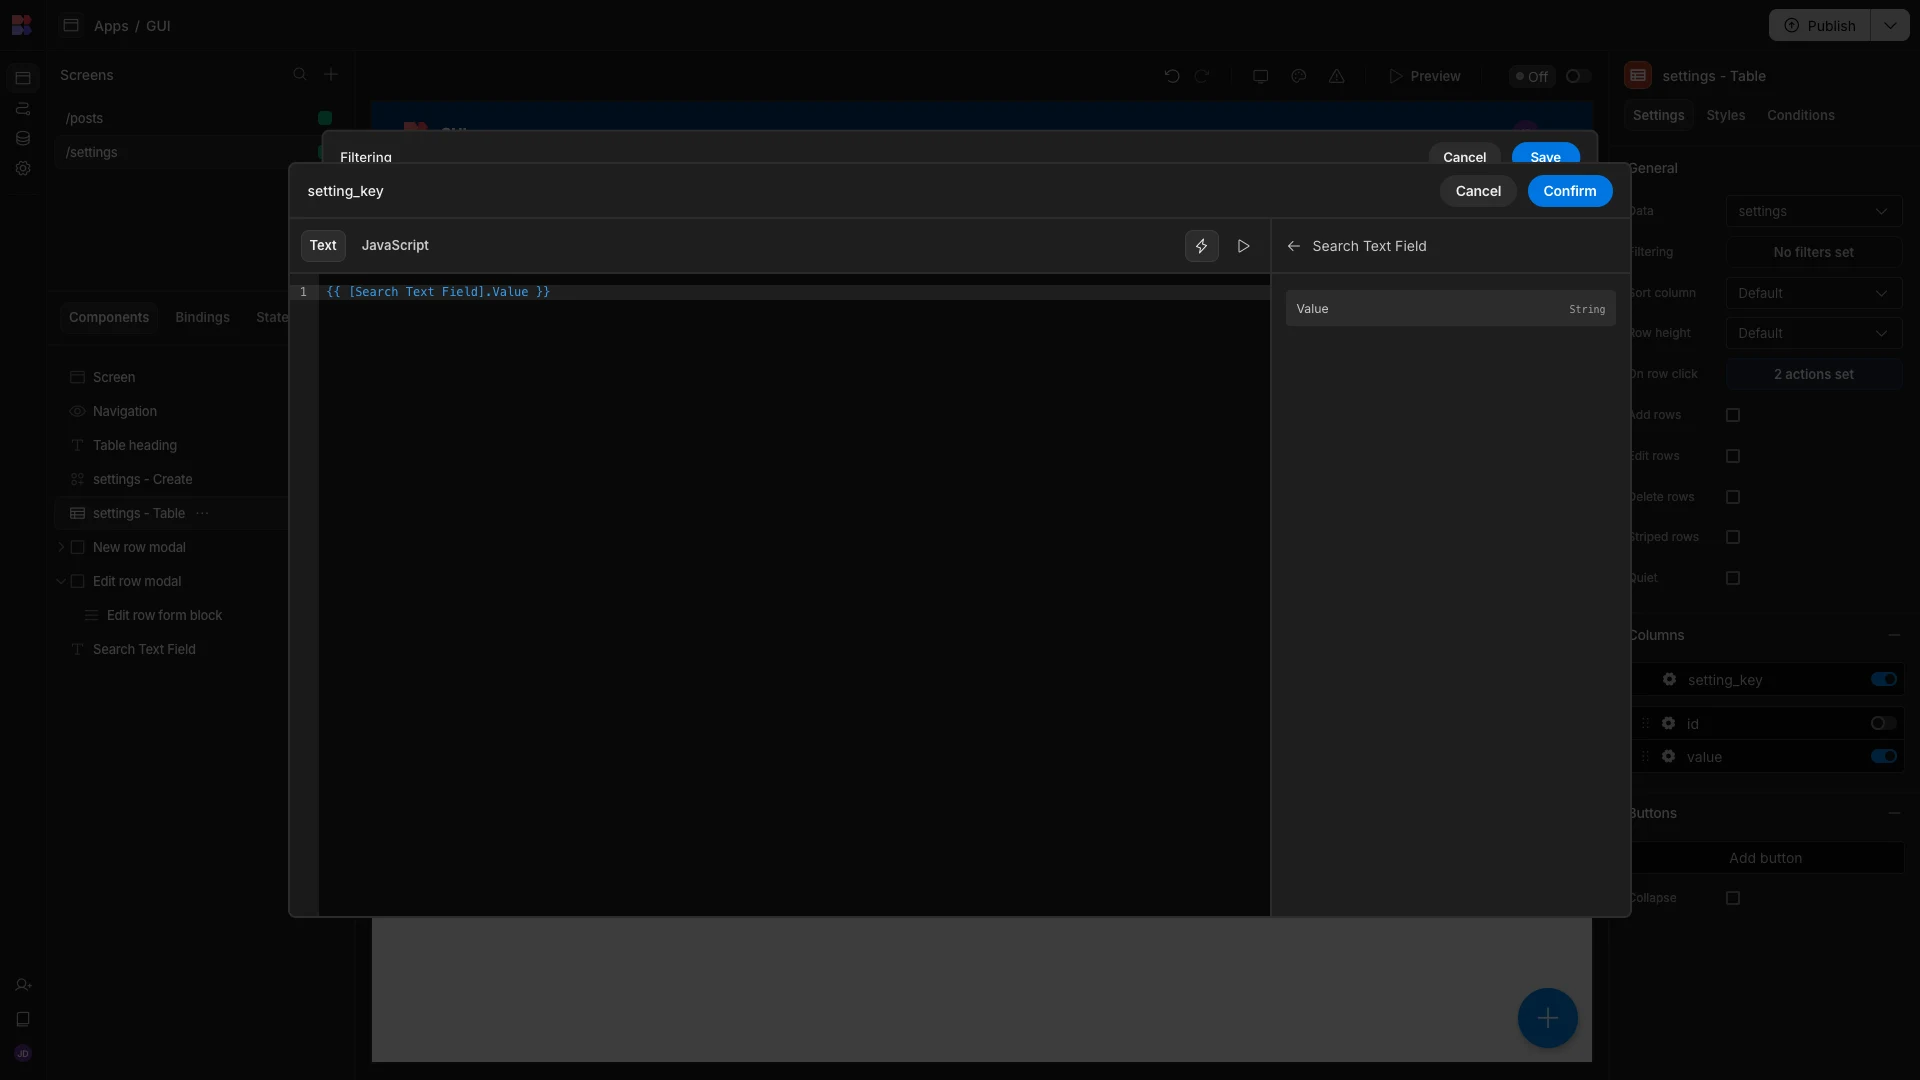
We’ll then repeat this process for all three of our filtering expressions.
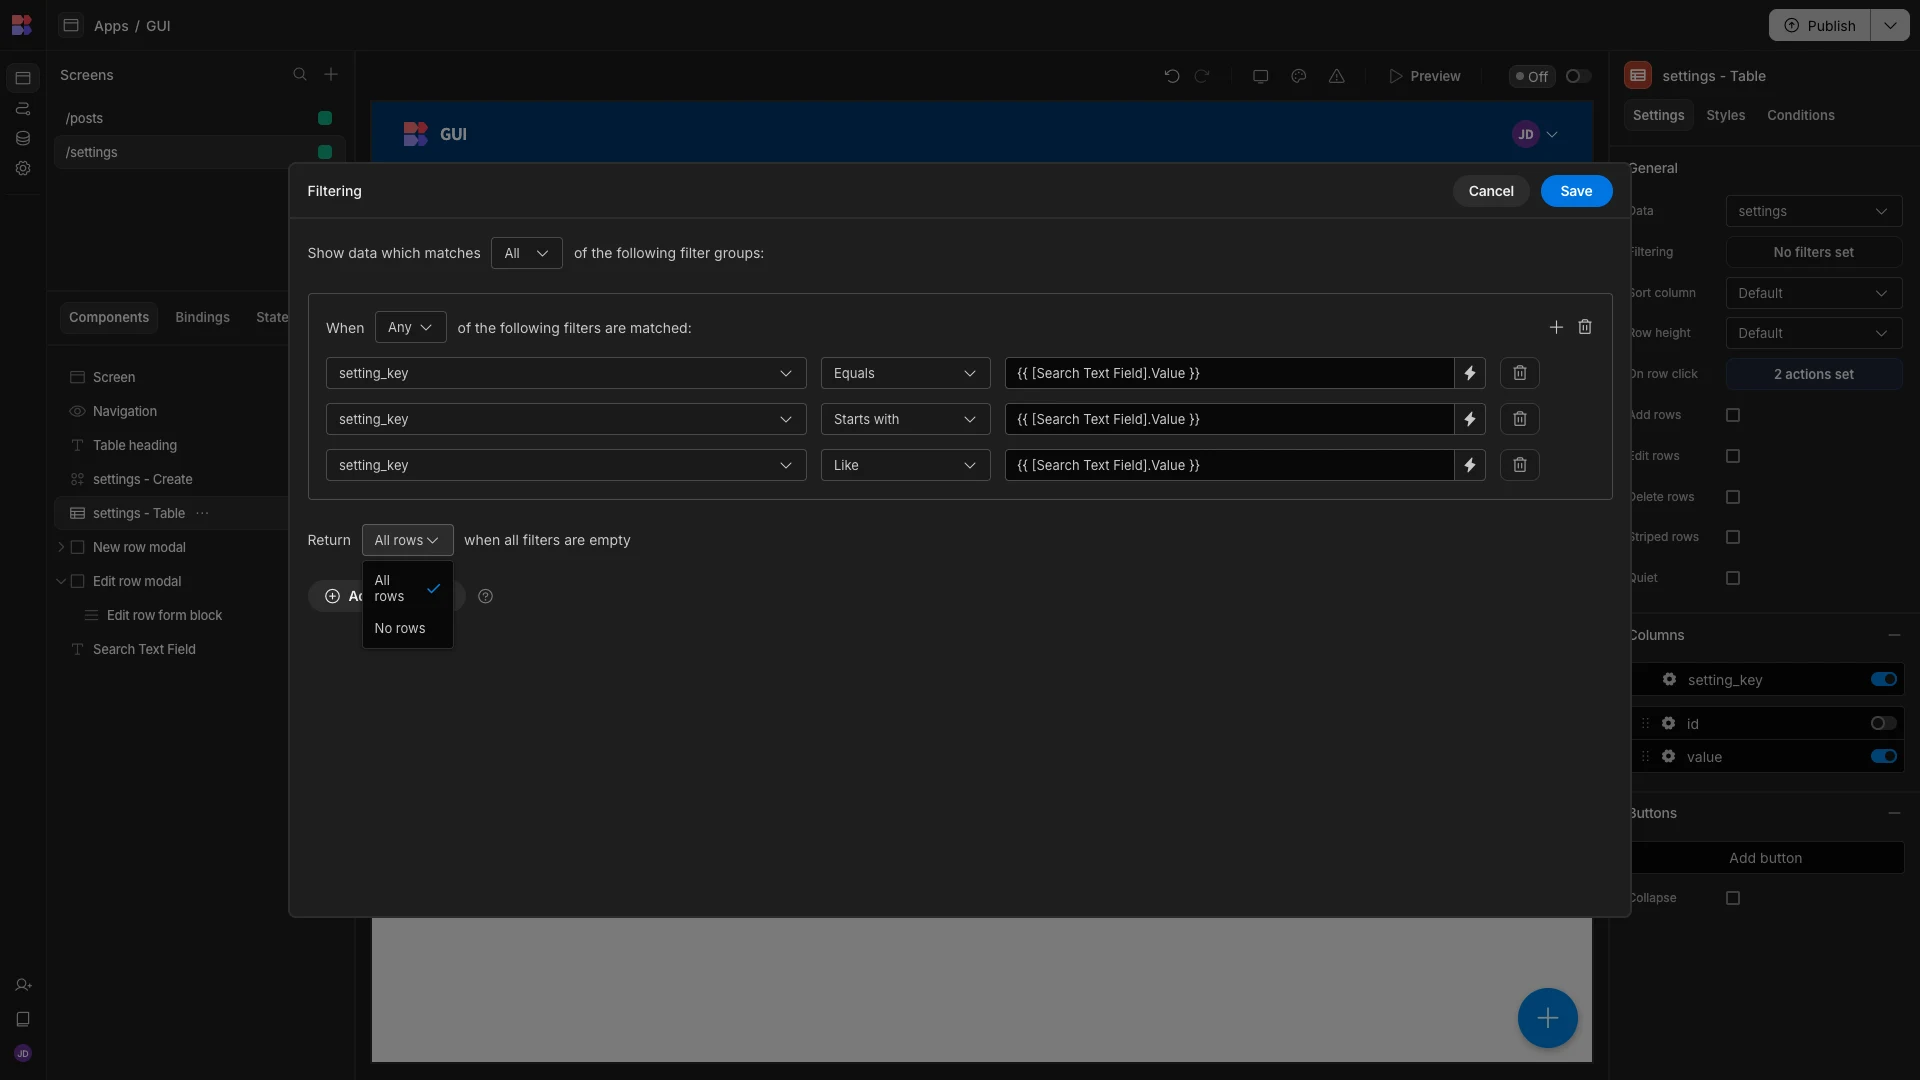
Lastly, we’ll use the dropdown at the bottom to set our filter so that all rows are returned if the text box is empty.
Now, our Postgres GUI has fully working search functionality, based on the setting_key column.
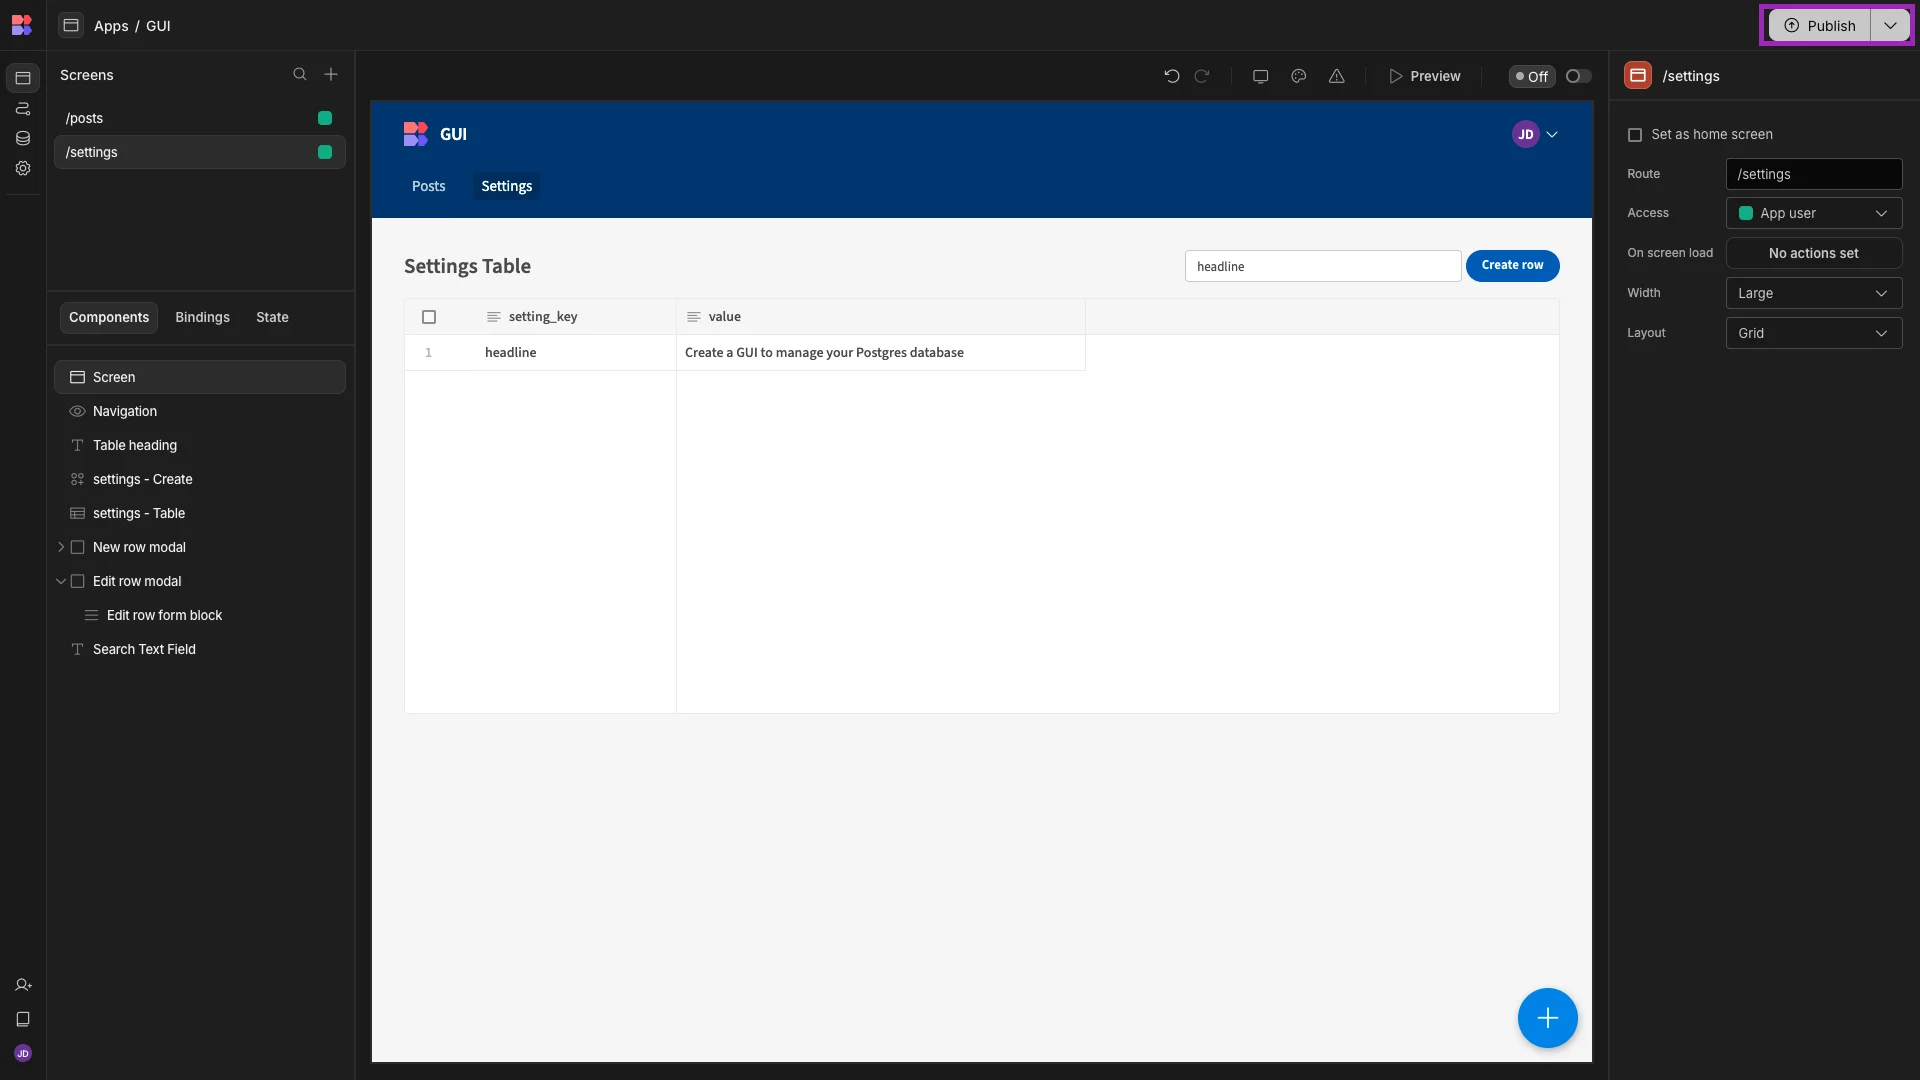
When we’re happy with our UX, we can use the Publish button to push our Postgres GUI live for end users within our Workspace.
Turn data into action with Budibase
Budibase is the open-source, low-code platform that empowers IT teams to turn data into action.
With extensive external data support, powerful AI-driven automations, autogenerated UIs, custom RBAC, optional self-hosting, free SSO, and more, there’s never been a better way to ship professional internal tools at pace.
Check out our features overview to learn more.