How to Build a Feature Request Management Tool in 5 Steps
Feature request management tools are some of the most common workflow apps for both internal and customer-facing use cases.
However, the specific information you need to gather and the process for approving requests will vary from one team to the next - or even between individual projects.
So, this is also one of the most requested internal tools.
Today, we’re checking out how to build a custom solution with Budibase. By the end, you’ll have a fully-functioning app that you can modify with your own data model or approval workflows.
First, though, let’s get a little bit more context.
What is a feature request management tool?
At its core, a feature request management tool is what’s known as an approval app. As the name suggests, this enables one set of users - typically the end-users of an existing solution - to ask the developers to add functionality that they need.
In an internal setting, these will generally be colleagues in non-IT departments. The goal is to gather the information our development team needs to make a decision about the requested feature in a consistent format.
A separate type of user then follows a defined process to either approve or reject incoming requests. This is usually a product owner or manager, although it could also be a senior developer, depending on the specific organization and project.
This achieves two things. Firstly, it empowers end-users to shape the tools that they use by giving feedback or suggestions to developers. Second, it creates a clear record of when features are requested and how our team responds to them.
What are we building?
We’re building a simple feature request management tool on top of an existing PostgreSQL database - although, with Budibase, we could use just about any database. This is made up of two tables - one for incoming requests and one for our planned features.
We’ve created a lightweight, adaptable workflow based on two distinct user roles. Here’s what each one can do:
Requestorscan create feature requests, edit their own submissions, and view other open requests. They can also view all existing planned features.Product Ownersinherit all permissions from Requestors. They can also accept or reject requests or update planned features.
Each set of users has their own set of screens for interacting with our data.
When a feature request is accepted, it’s automatically added to the planned features table. We’ll build this logic out using Budibase’s Automation section.
Here’s what our app will look like when we’re finished.
We’re using Budibase Cloud, although you could also self-host your feature request tool.
Along the way, we’ll also provide all of the queries you need to build a lookalike database so you can build along. We’re storing our Postgres database in the free version of NeonDB, so we don’t have to worry about hosting that either.
Check out our other tutorial on building a SQL GUI .
How to build a feature request management tool in 5 steps
If you haven’t already, sign up for a free Budibase account to start building as many internal tools as you need for free.
1. Setting up our data model
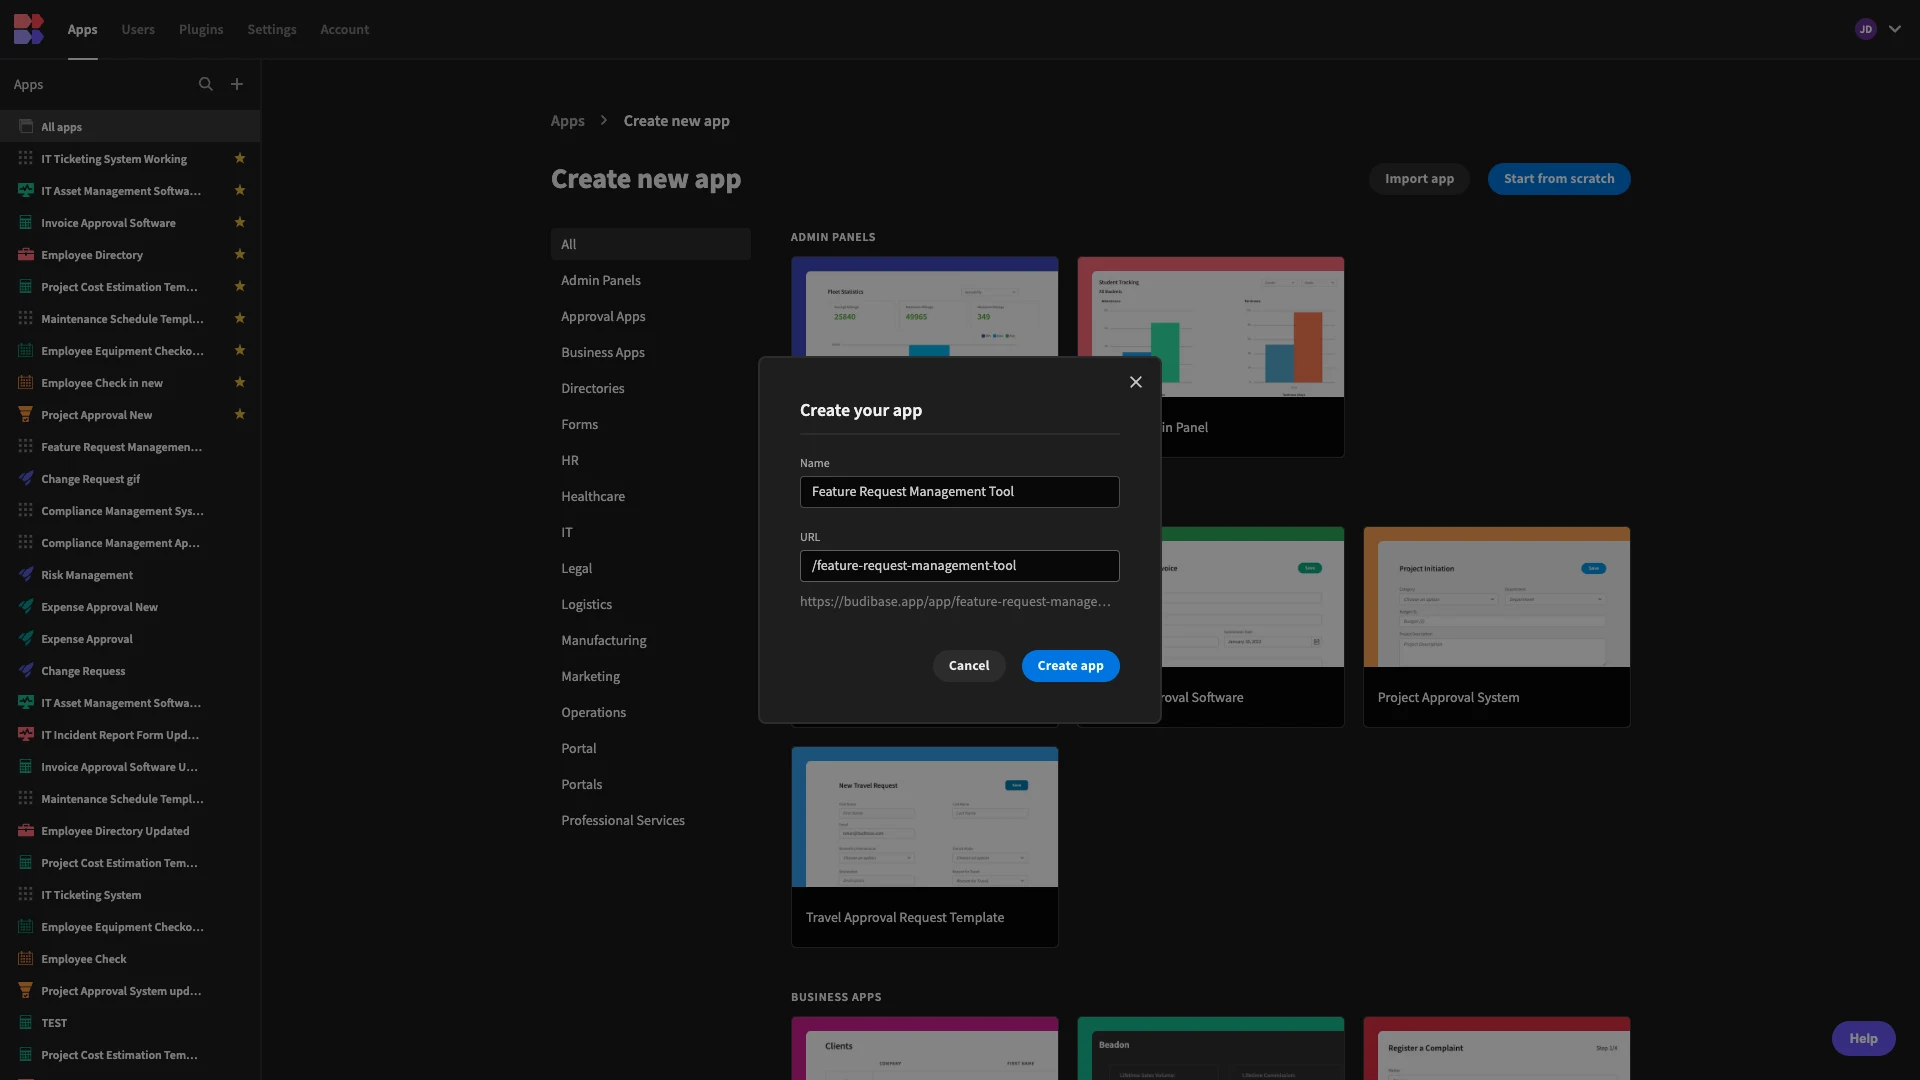
The first thing we need to do is create a new Budibase application. We have the option of starting with a template or importing an existing app dump, but today, we’re starting from scratch.
When we choose this option, we’ll be prompted to give our new app a name, which is also used to generate a URL slug. We’ll simply call ours Feature Request Management Tool.
Connecting to Postgres
Next, we need to select a data source for our app. Budibase offers dedicated connectors for all kinds of RDBMS, NoSQL tools, APIs, spreadsheet tools, and more - alongside our internal low-code database.
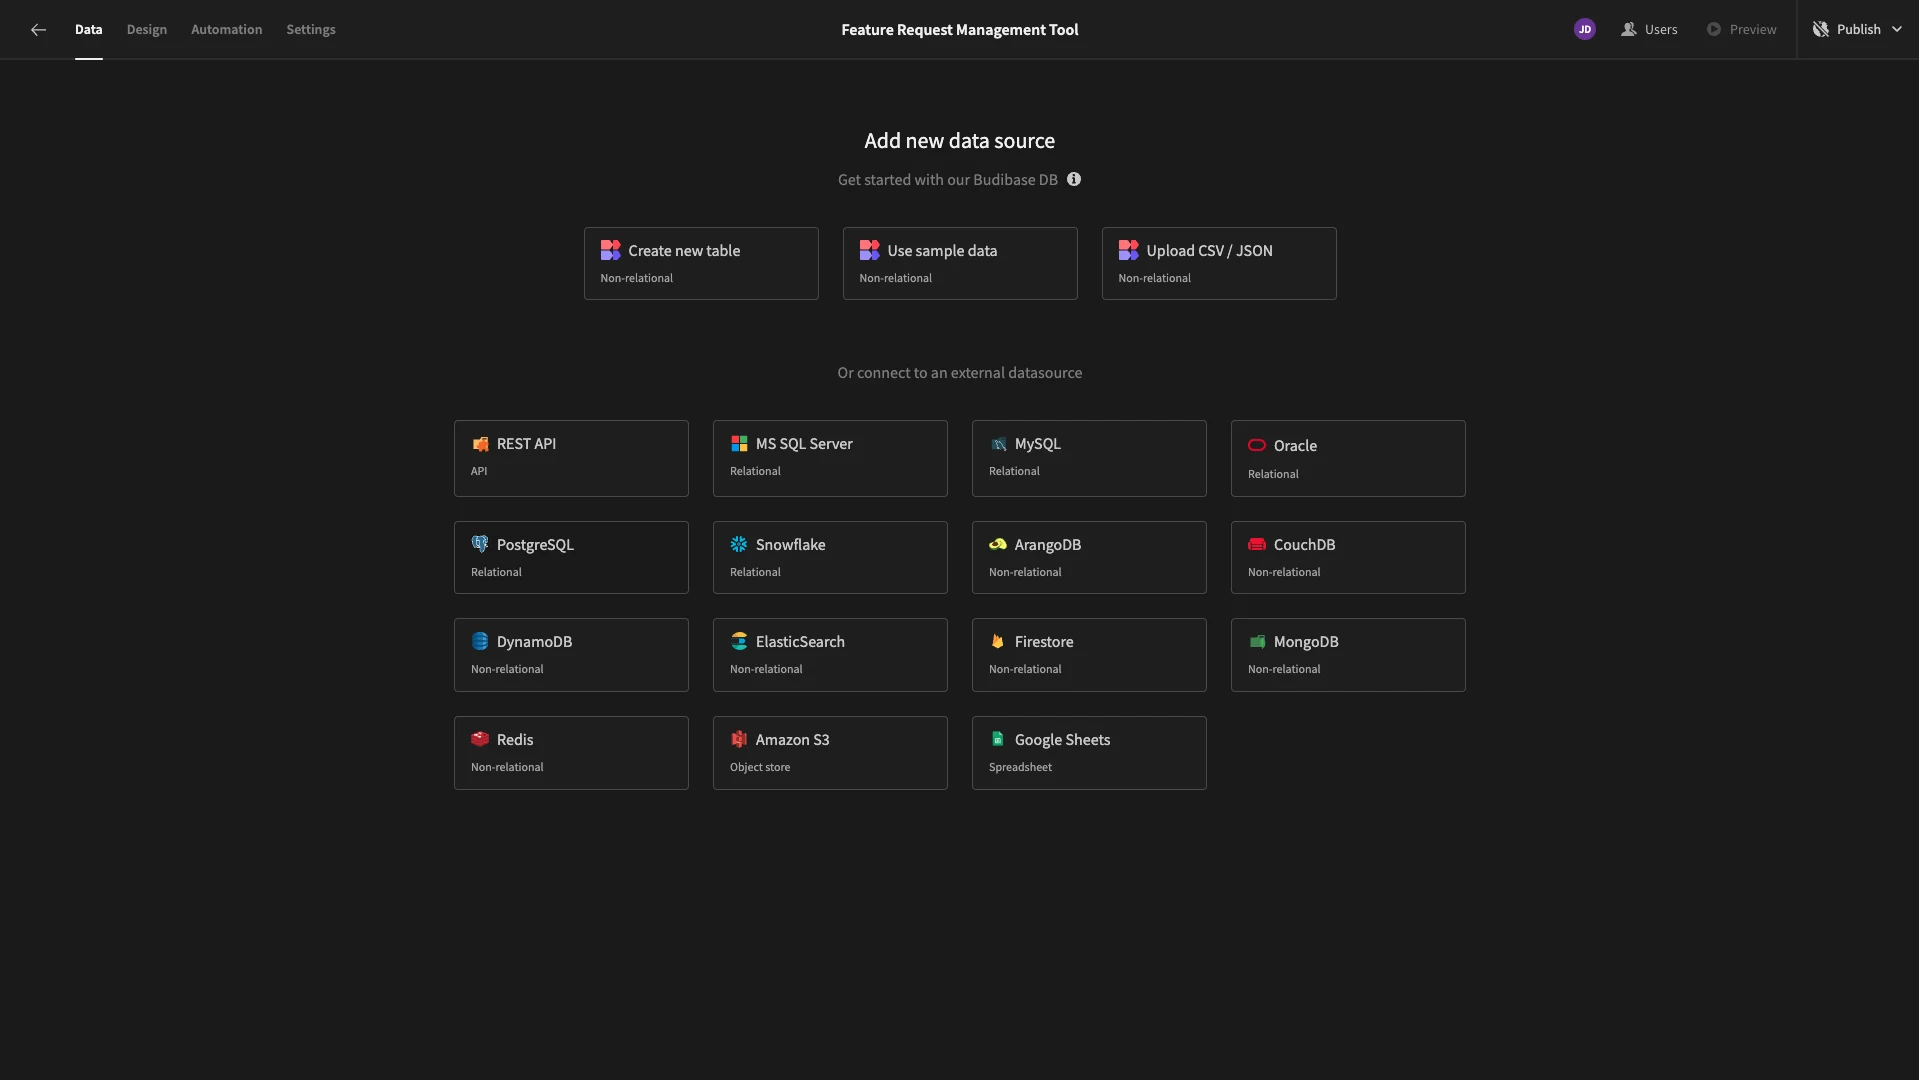
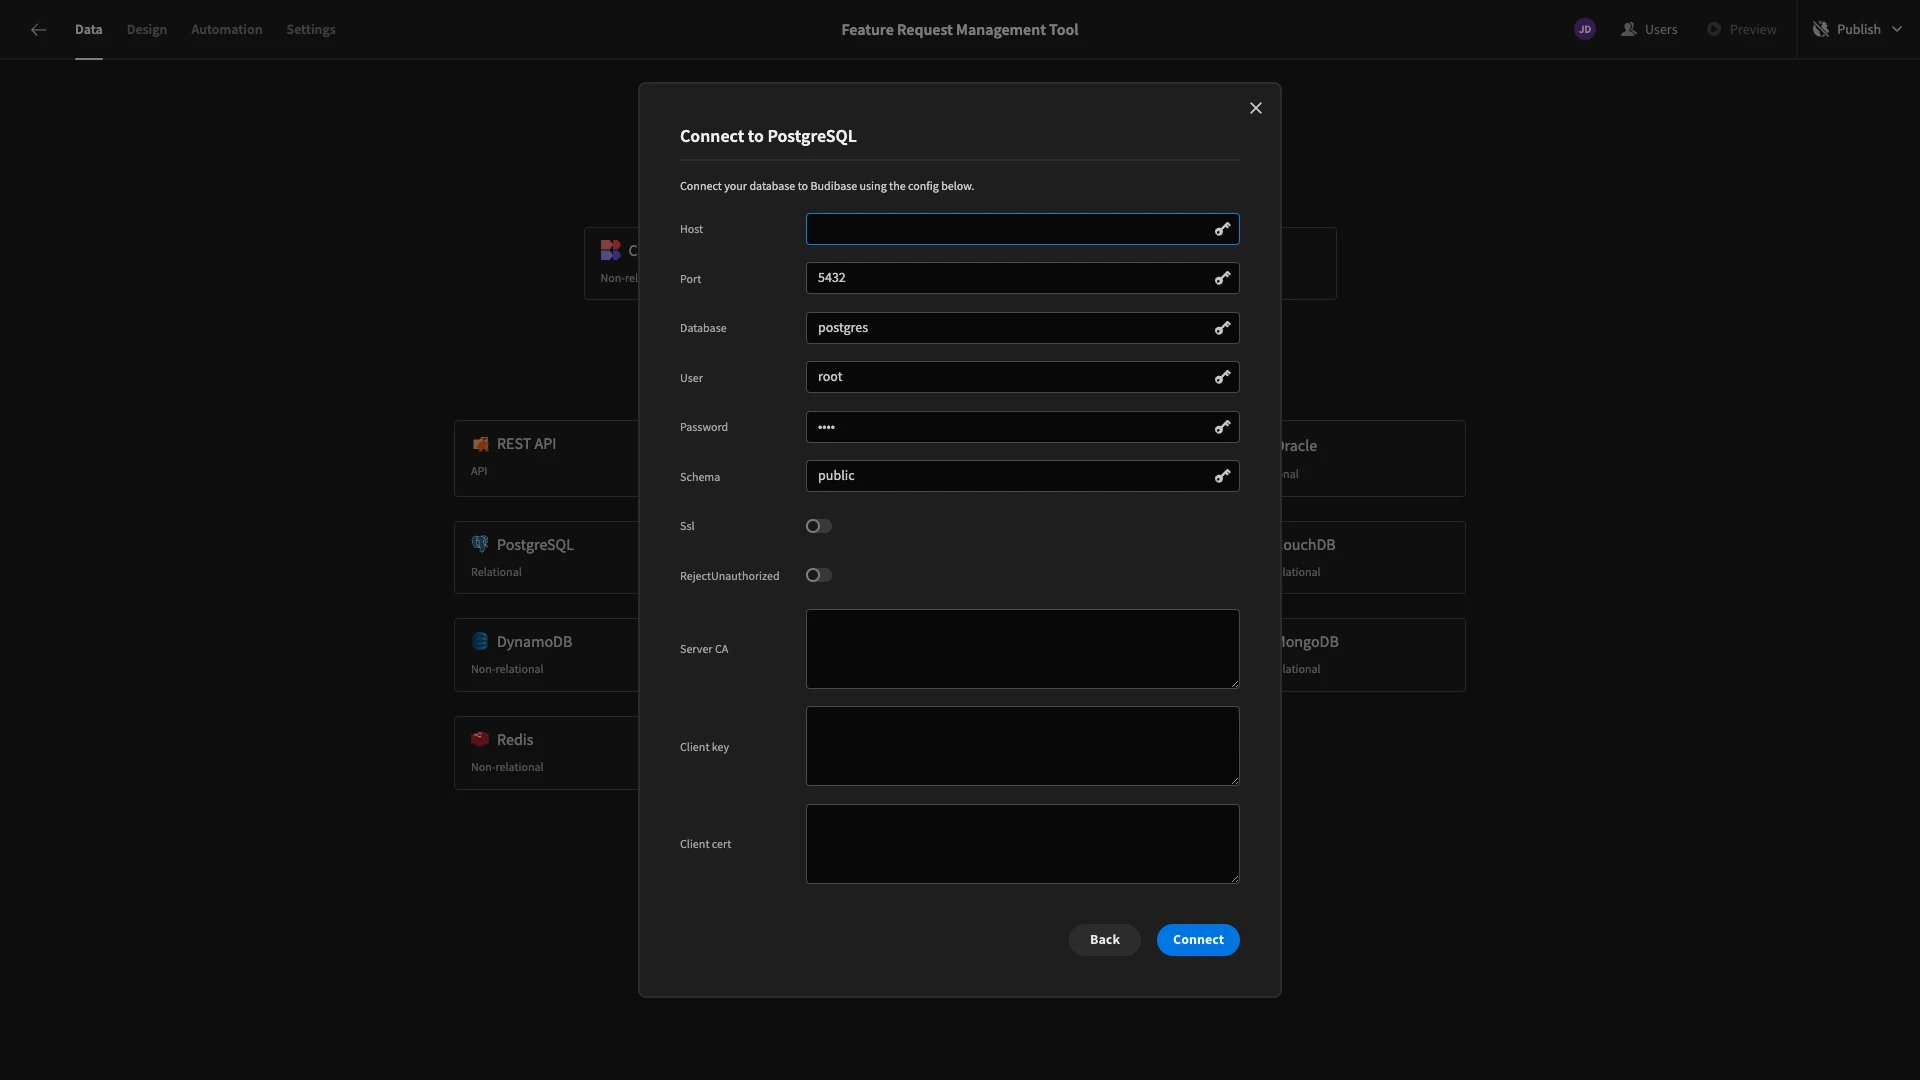
As we said earlier, we’re going to choose Postgres. When we select this option, we’ll be presented with a modal form where we can input our connection details.
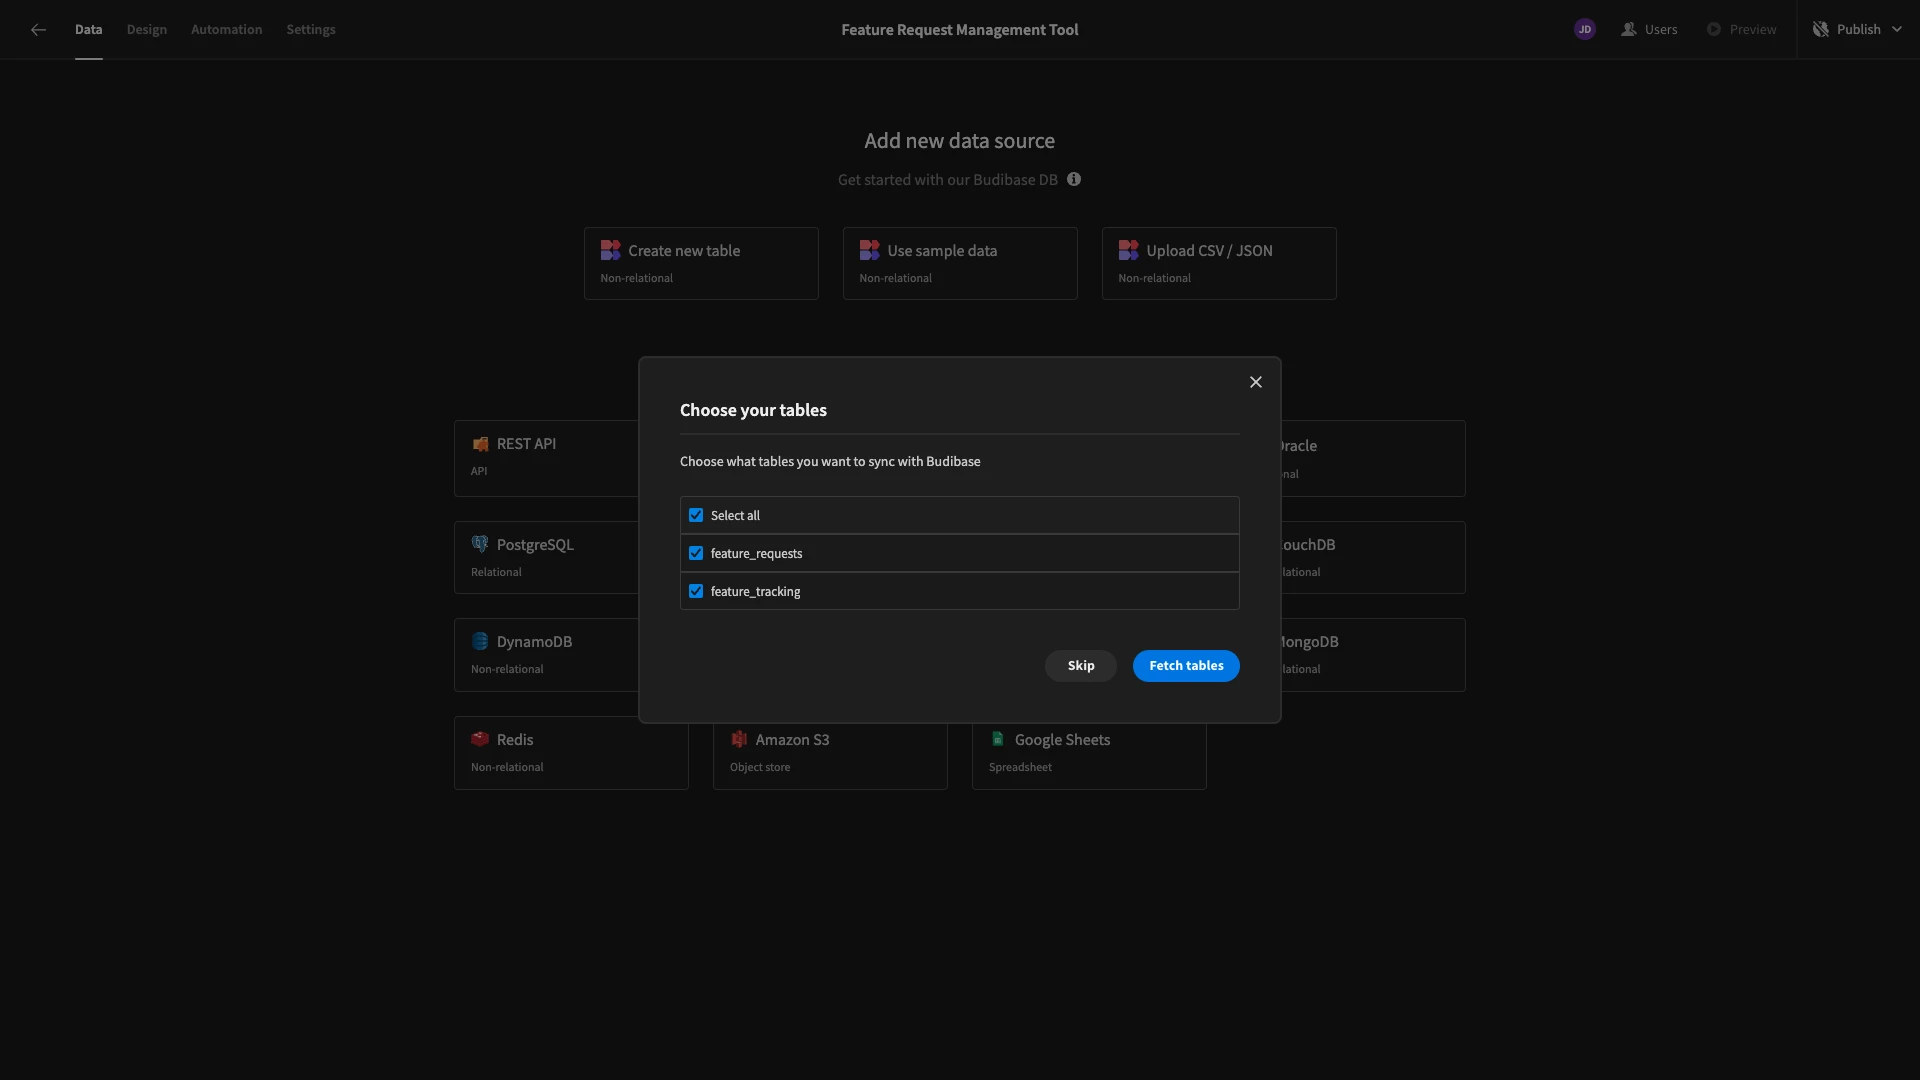
Once we’ve done this, we’re asked which of our database tables we’d like to Fetch, making them queryable within Budibase. Our database contains two tables called feature_requests and feature_tracking.
We’re selecting both.
If you want to create a lookalike database, you can use the following queries to create and populate these tables. First, feature_requests:
 1-- Table: feature_requests
 2
 3CREATE TABLE feature_requests (
 4
 5  id SERIAL PRIMARY KEY,
 6
 7  title TEXT NOT NULL,
 8
 9  description TEXT NOT NULL,
10
11  status TEXT,
12
13  created_at TIMESTAMP,
14
15  updated_at TIMESTAMP
16
17);
18
19-- Insert sample feature requests
20
21INSERT INTO feature_requests (title, description, status, created_at, updated_at)
22
23VALUES
24
25  ('Dark Mode UI', 'Users requested a dark theme for better accessibility.', 'New', NOW(), NOW()),
26
27  ('API Rate Limit Increase', 'Developers need higher rate limits for integrations.', 'Under Review', NOW(), NOW()),
28
29  ('Mobile App Enhancements', 'Improve mobile UI and performance.', 'Accepted', NOW(), NOW()),
30
31  ('Custom Webhooks', 'Allow users to create custom event-based webhooks.', 'Accepted', NOW(), NOW()),
32
33  ('AI-Powered Search', 'Enhance search with AI for better results.', 'completed', NOW(), NOW());
Then, feature_tracking:
 1-- Table: feature_tracking
 2
 3CREATE TABLE feature_tracking (
 4
 5  id SERIAL PRIMARY KEY,
 6
 7  feature_request_id INT NOT NULL REFERENCES feature_requests(id) ON DELETE CASCADE,
 8
 9  status TEXT,
10
11  priority TEXT,
12
13  estimated_completion DATE,
14
15  updated_at TIMESTAMP
16
17);
18
19-- Insert sample feature tracking data (for planned/in-progress requests)
20
21INSERT INTO feature_tracking (feature_request_id, status, priority, estimated_completion, updated_at)
22
23VALUES
24
25  (3, 'Planned', 'High', '2024-04-15', NOW()),
26
27  (4, 'In Progress', 'Critical', '2024-03-20', NOW()),
28
29  (5, 'Released', 'High', NULL, NOW());
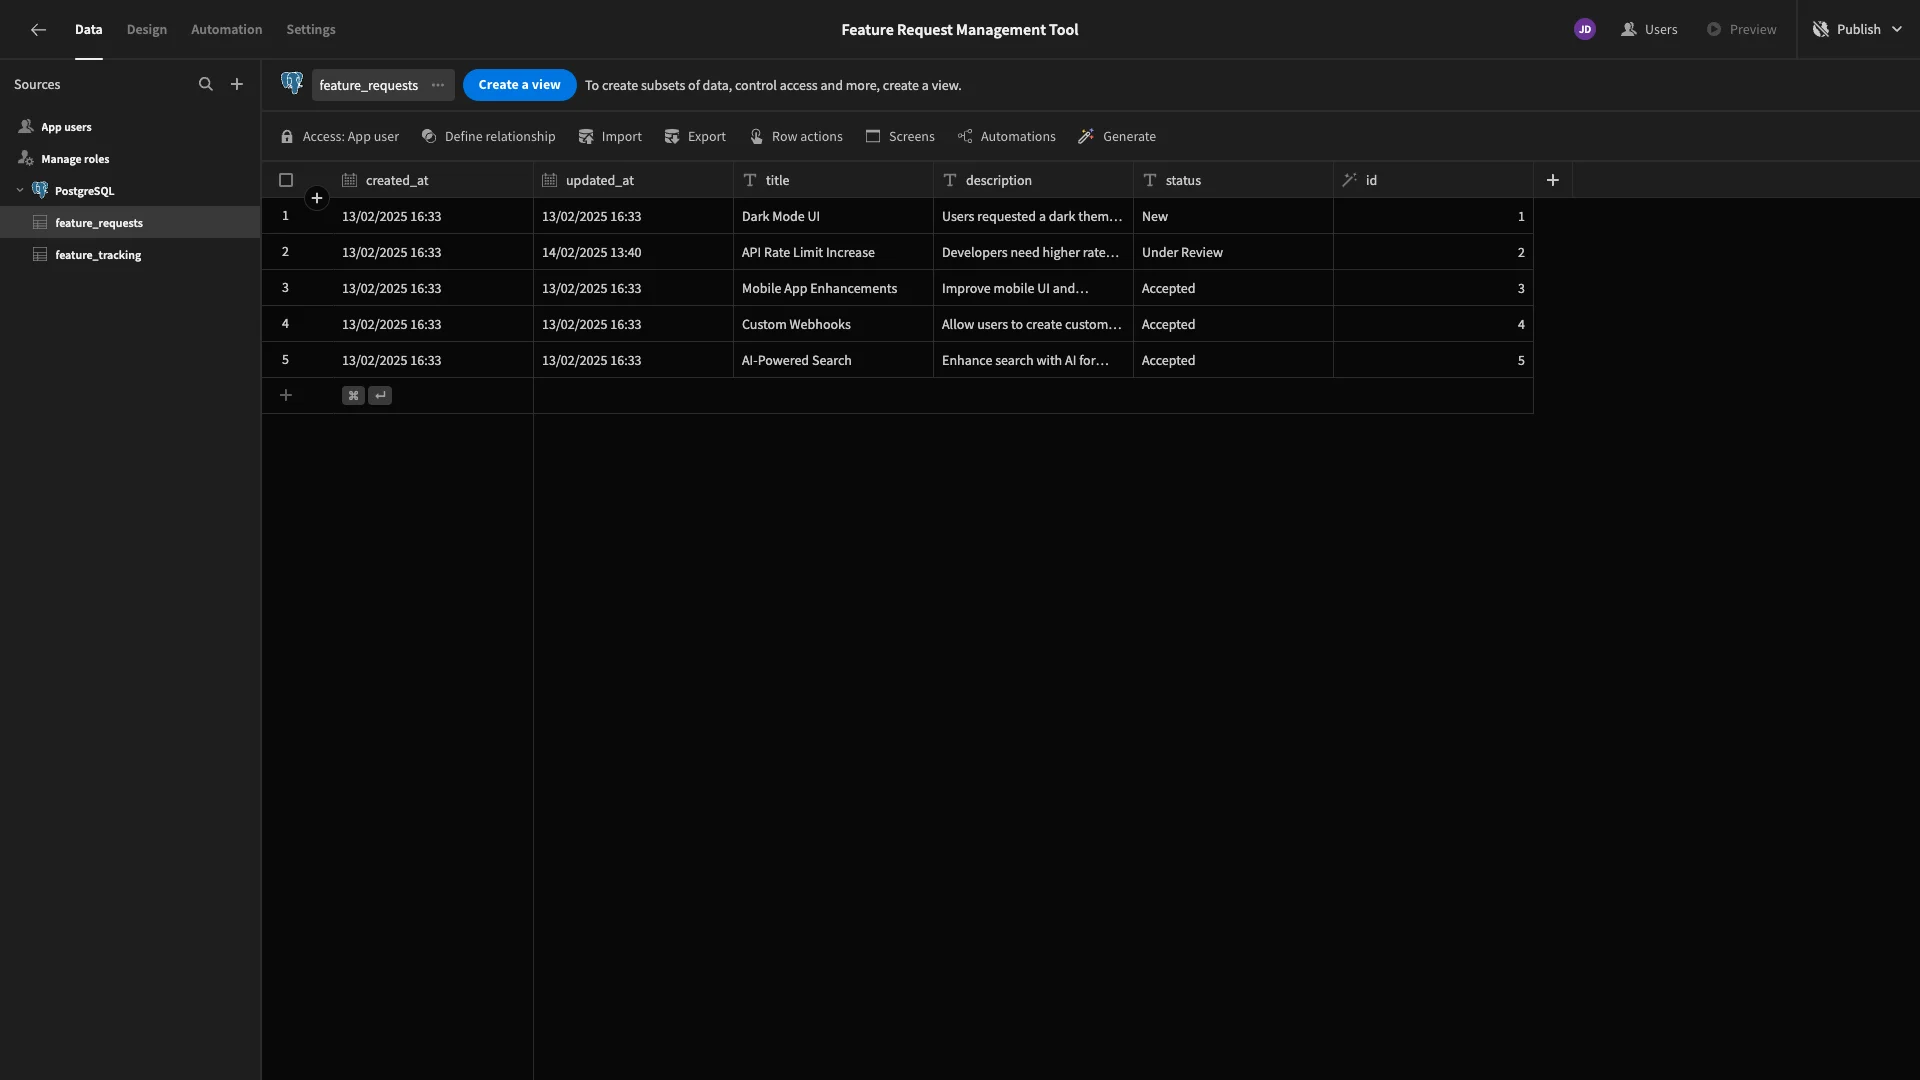
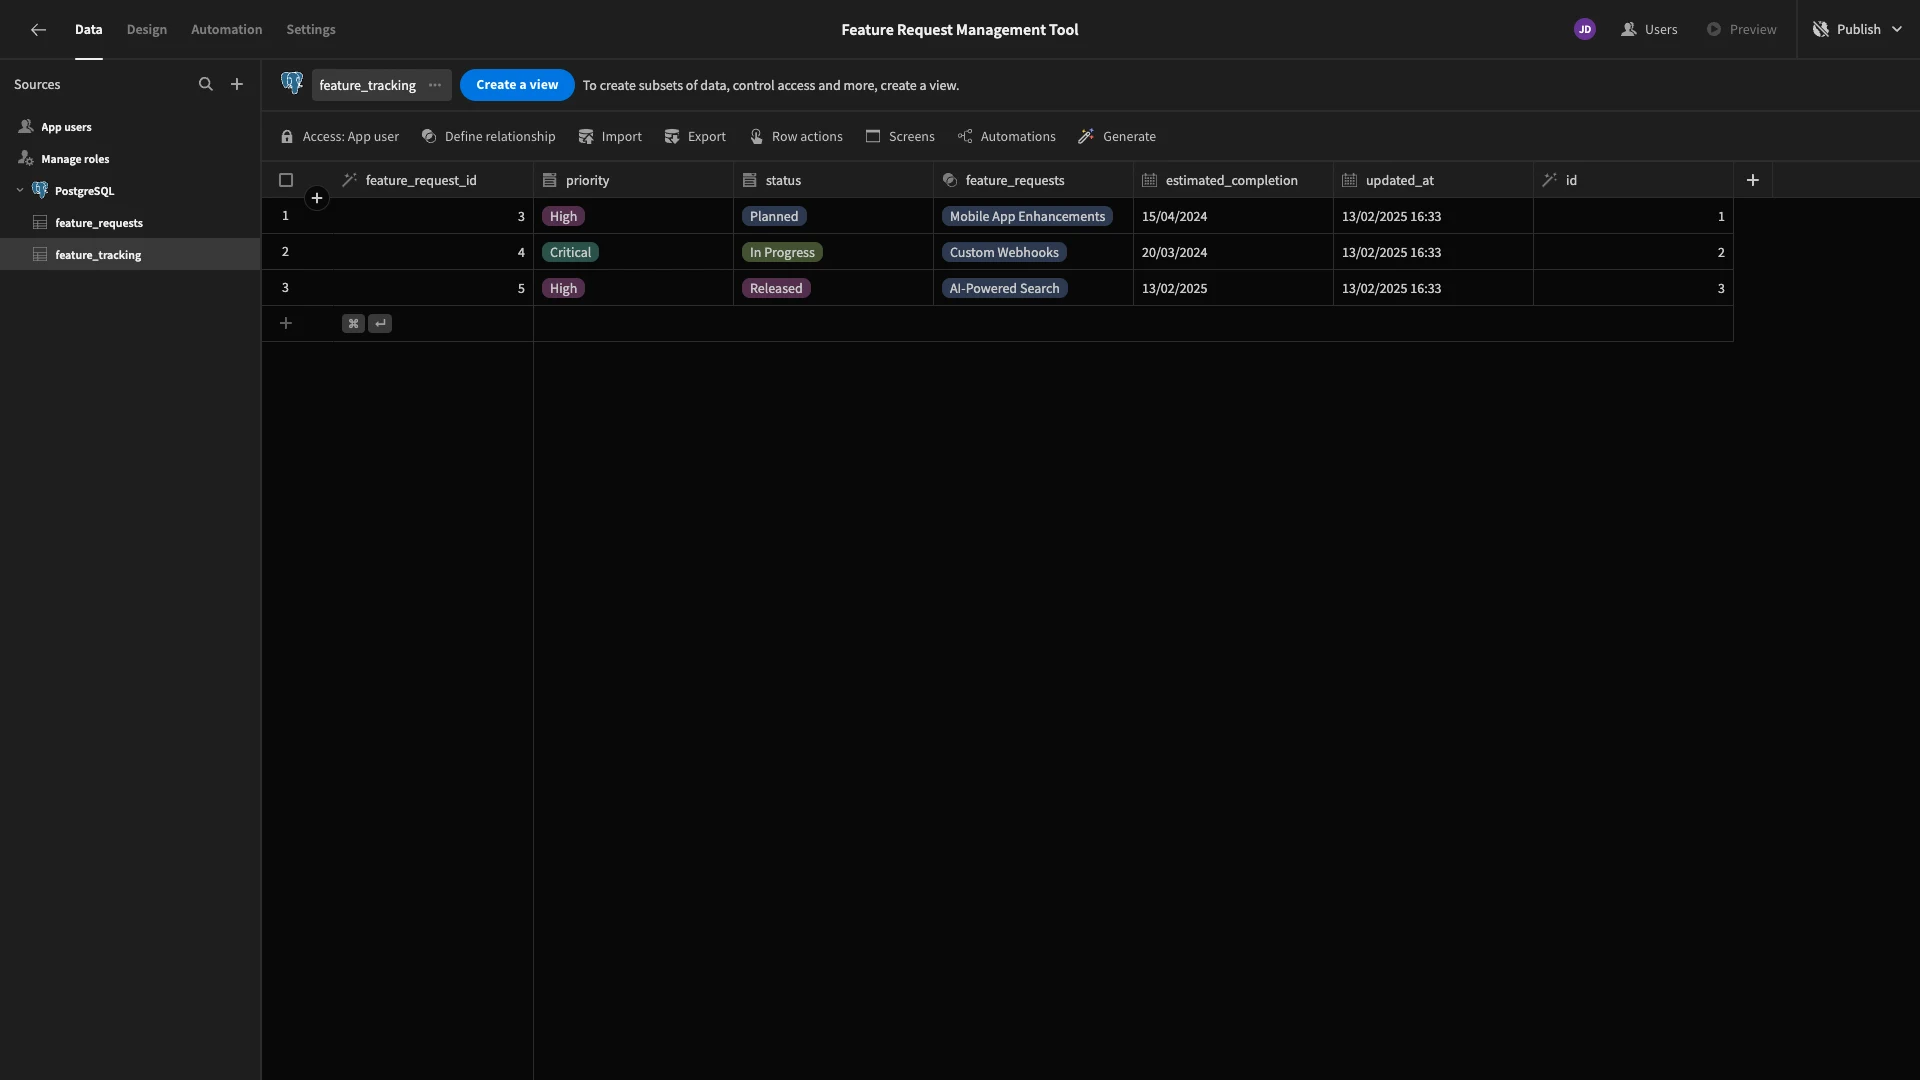
Here’s how our tables look once we’ve fetched them.
Tweaking our database
We could start using this as-is, but we’re going to make a few minor tweaks to how some of our columns are handled in Budibase to make our life a little easier when we generate UIs later.
Firstly, our Postgres database has several TEXT attributes, but Budibase has two different data types for handling text.
When we autogenerate our feature request form, we’re going to want to give users more space to enter a description, so we’re updating the Type of the description field in the feature_requests table from Text to Long Form Text.
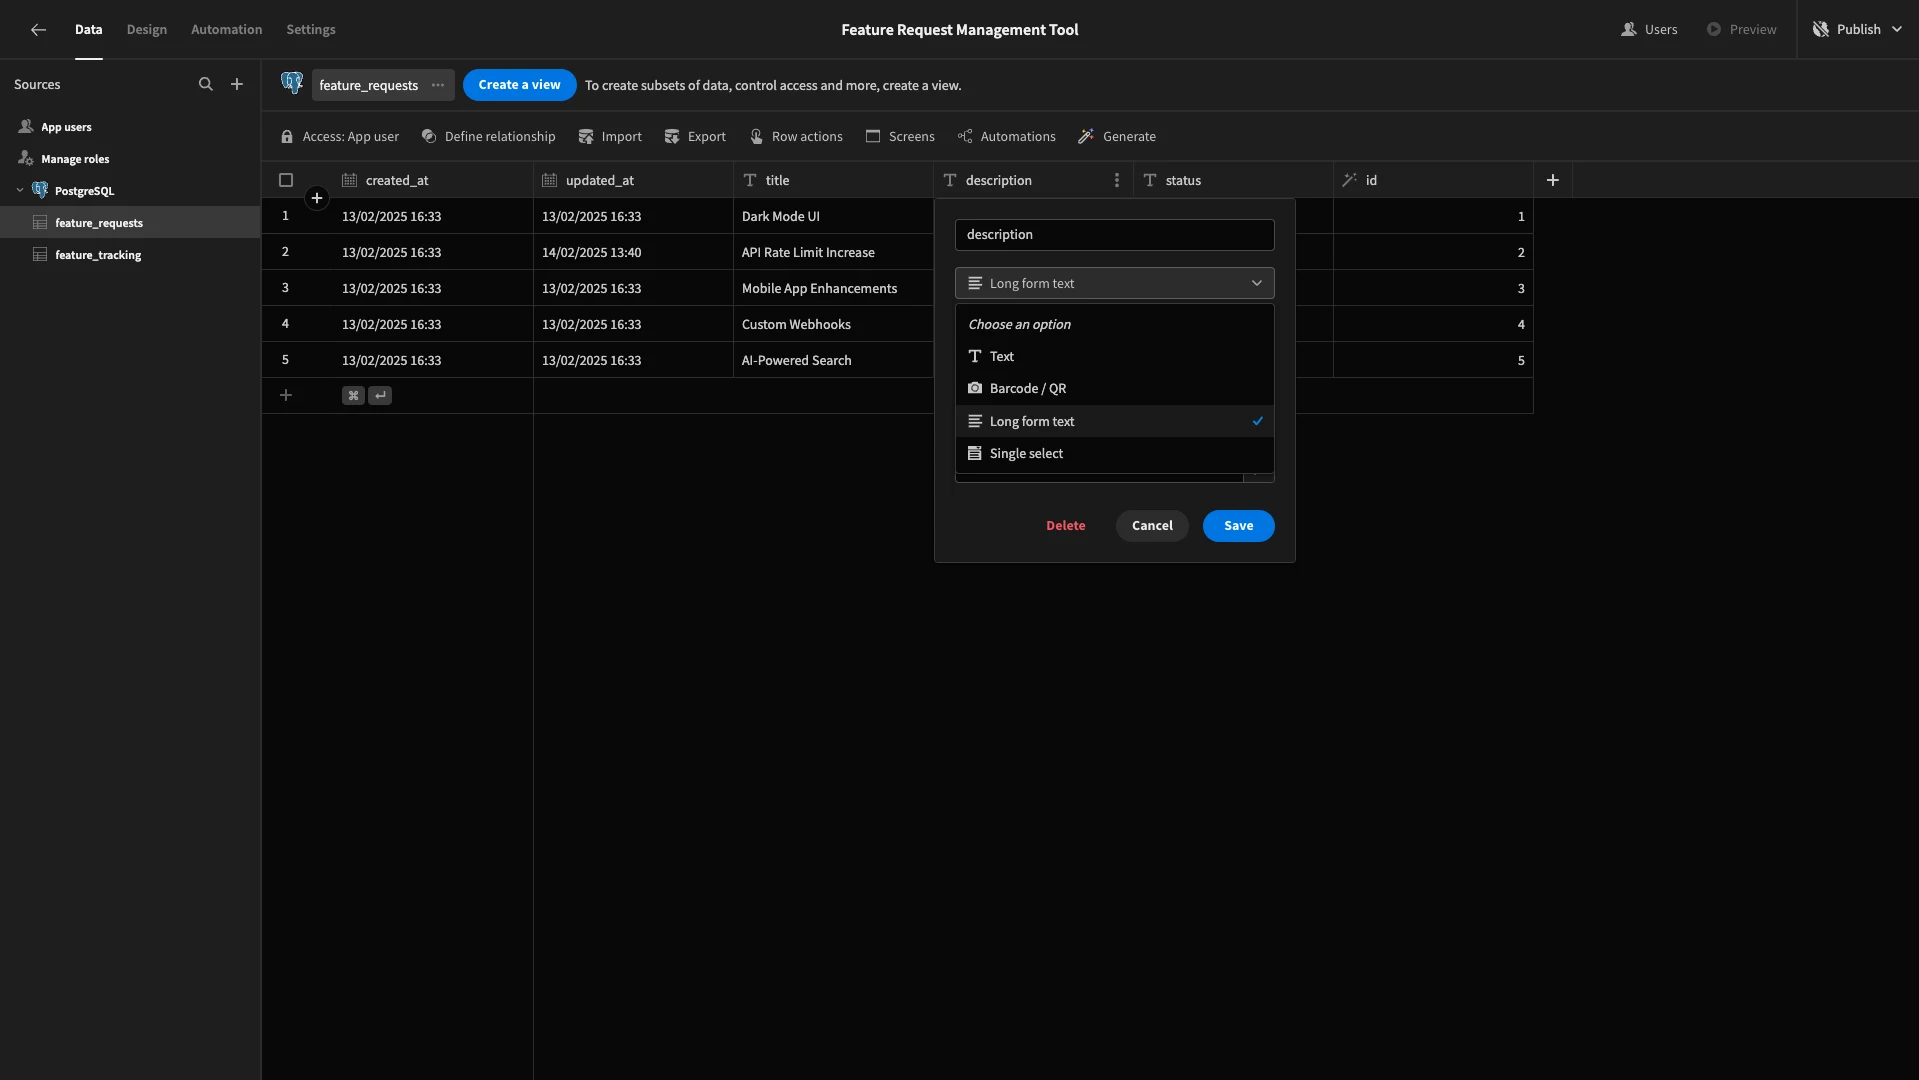
This won’t alter the underlying database - only how Budibase handles the description field.
There are also several TEXT fields in our database where we only want end users to choose from a defined set of options. These are status in the feature_requests table, and status and priority in the feature_tracking table.
First, we’ll update their type from Text to Single Select. When we do this, we can define our options. For the feature_requests status column, these will be New, Under Review, Accepted, and Rejected.
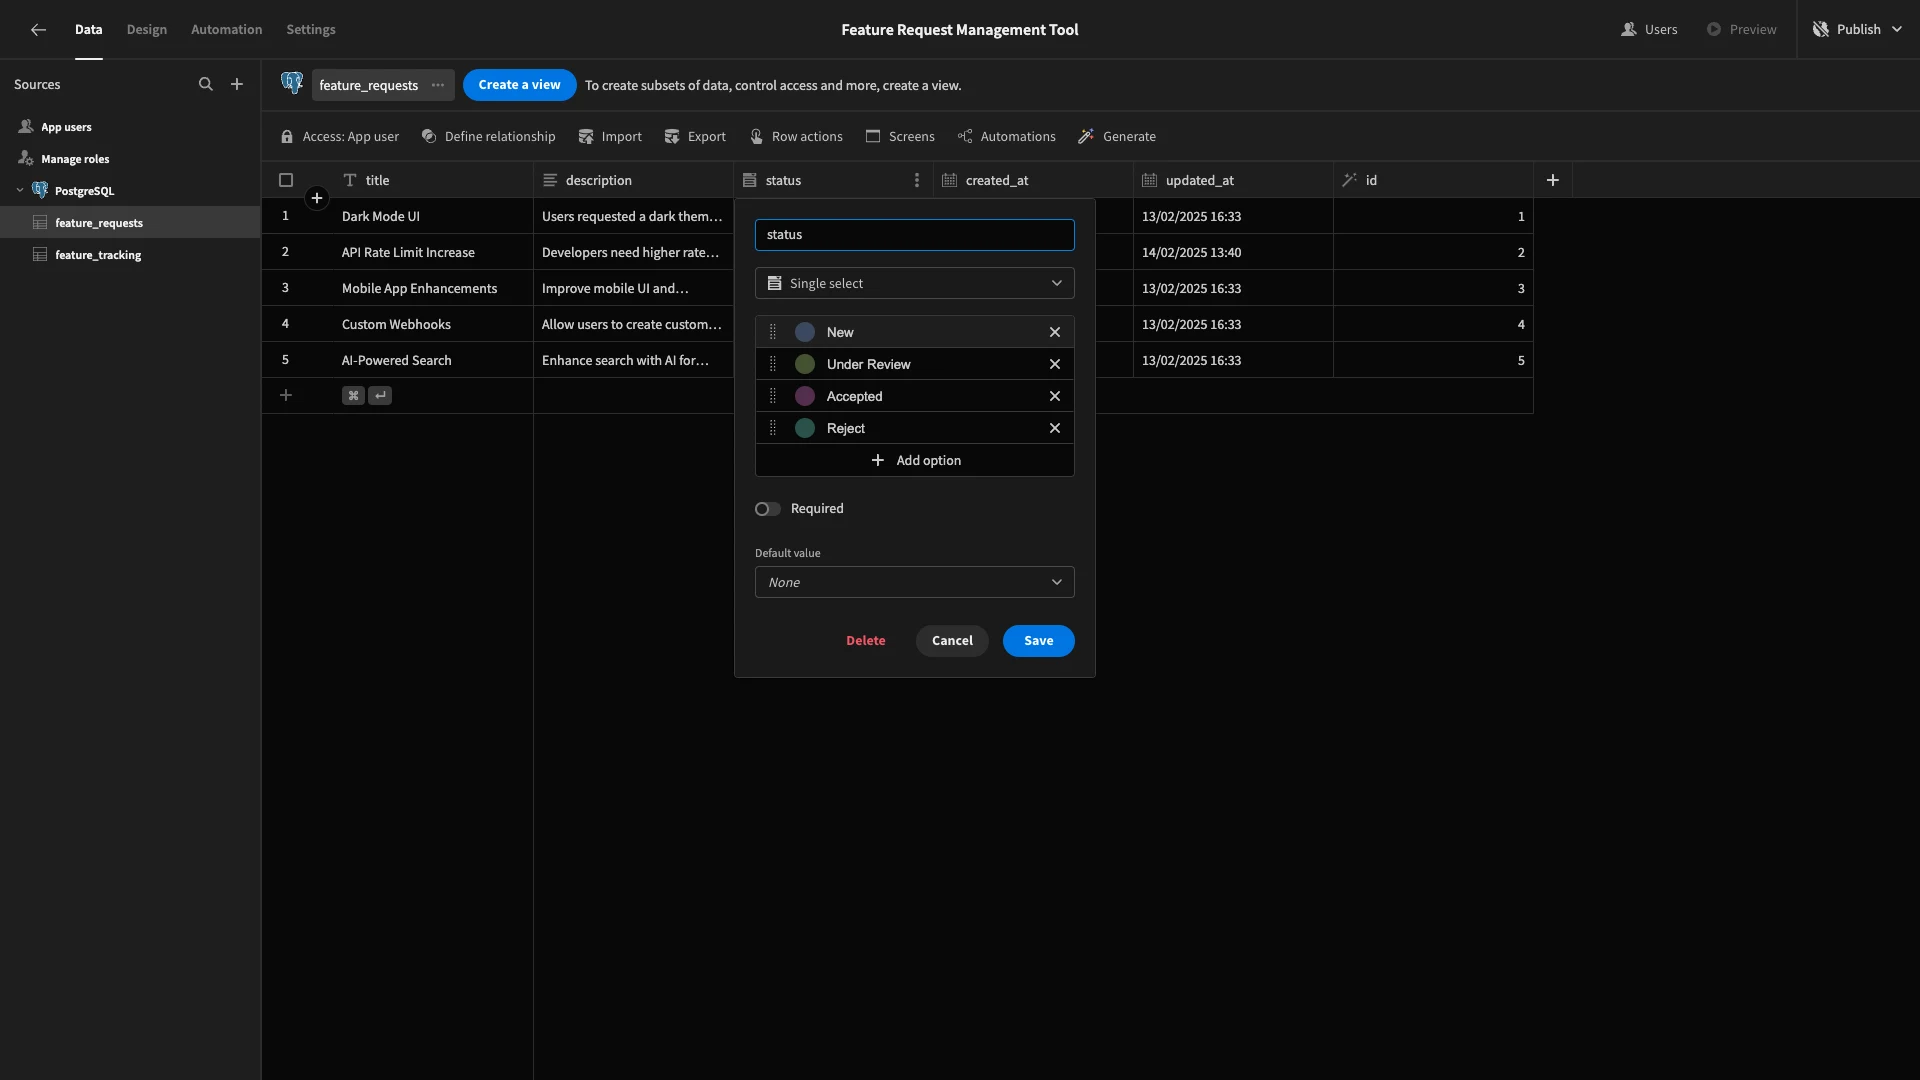
We’ll repeat this process for the two feature_tracking columns we mentioned a second ago. This time, for status, we’ll use Planned, In Progress, and Released. For priority, our options will be Low, Medium, High, and Critical.
Adding default values
Within our data model, there are certain columns that we won’t always need users to add values for manually. We’re going to handle these with Budibase’s default values. This allows us to set a value for columns automatically - although users can still overwrite it.
These come in two clusters. First, for the status attributes in each of our tables, new rows will always start with the same value to reflect the initial point of our feature request workflow.
On the feature_tracking table, we’ll set our default status to Planned.
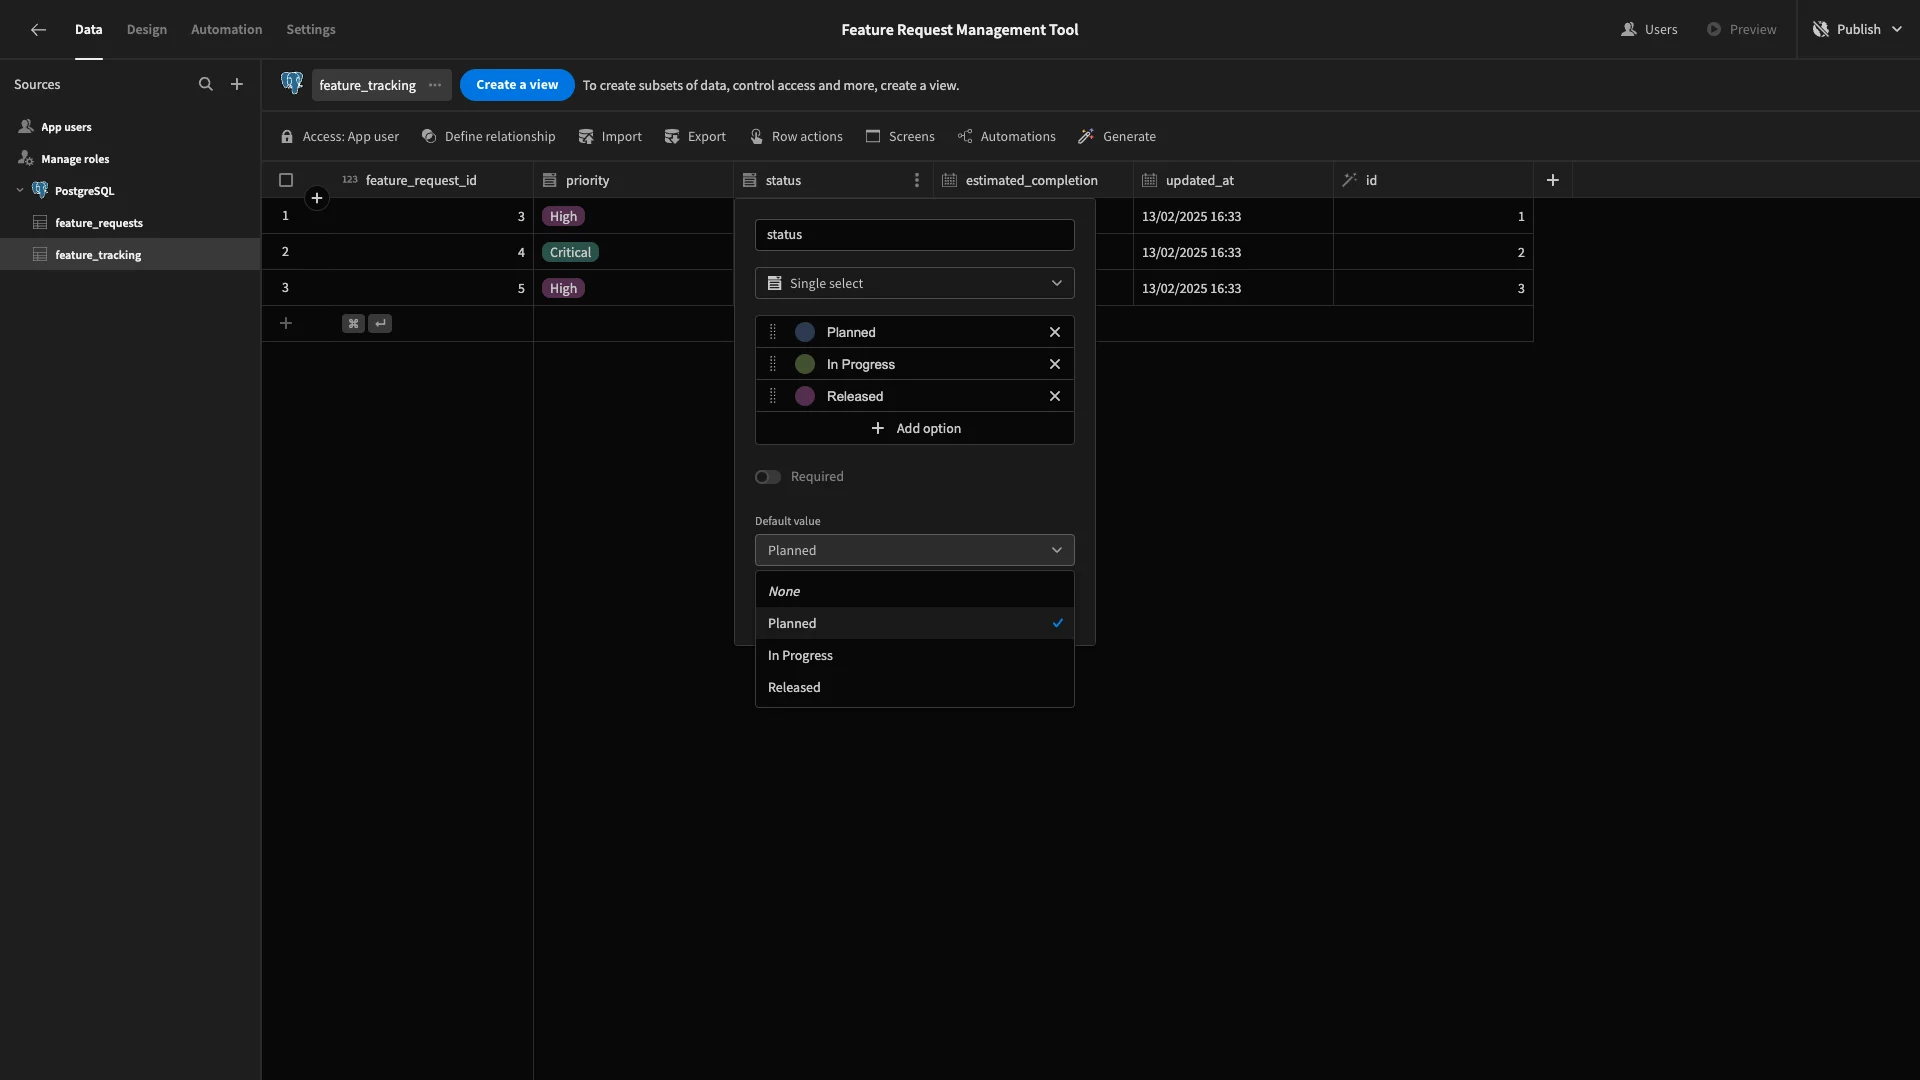
We’ll then follow the exact same process to default our feature_requests status to New.
The second group of values we’ll add a default value for are dates. These are the updated_at columns in each of our tables. We want these to automatically be set to the current date and time.
To do this, we’ll hit the lightning bolt icon to open the bindings menu and use {{ Date }} as a handlebars expression for our default value.
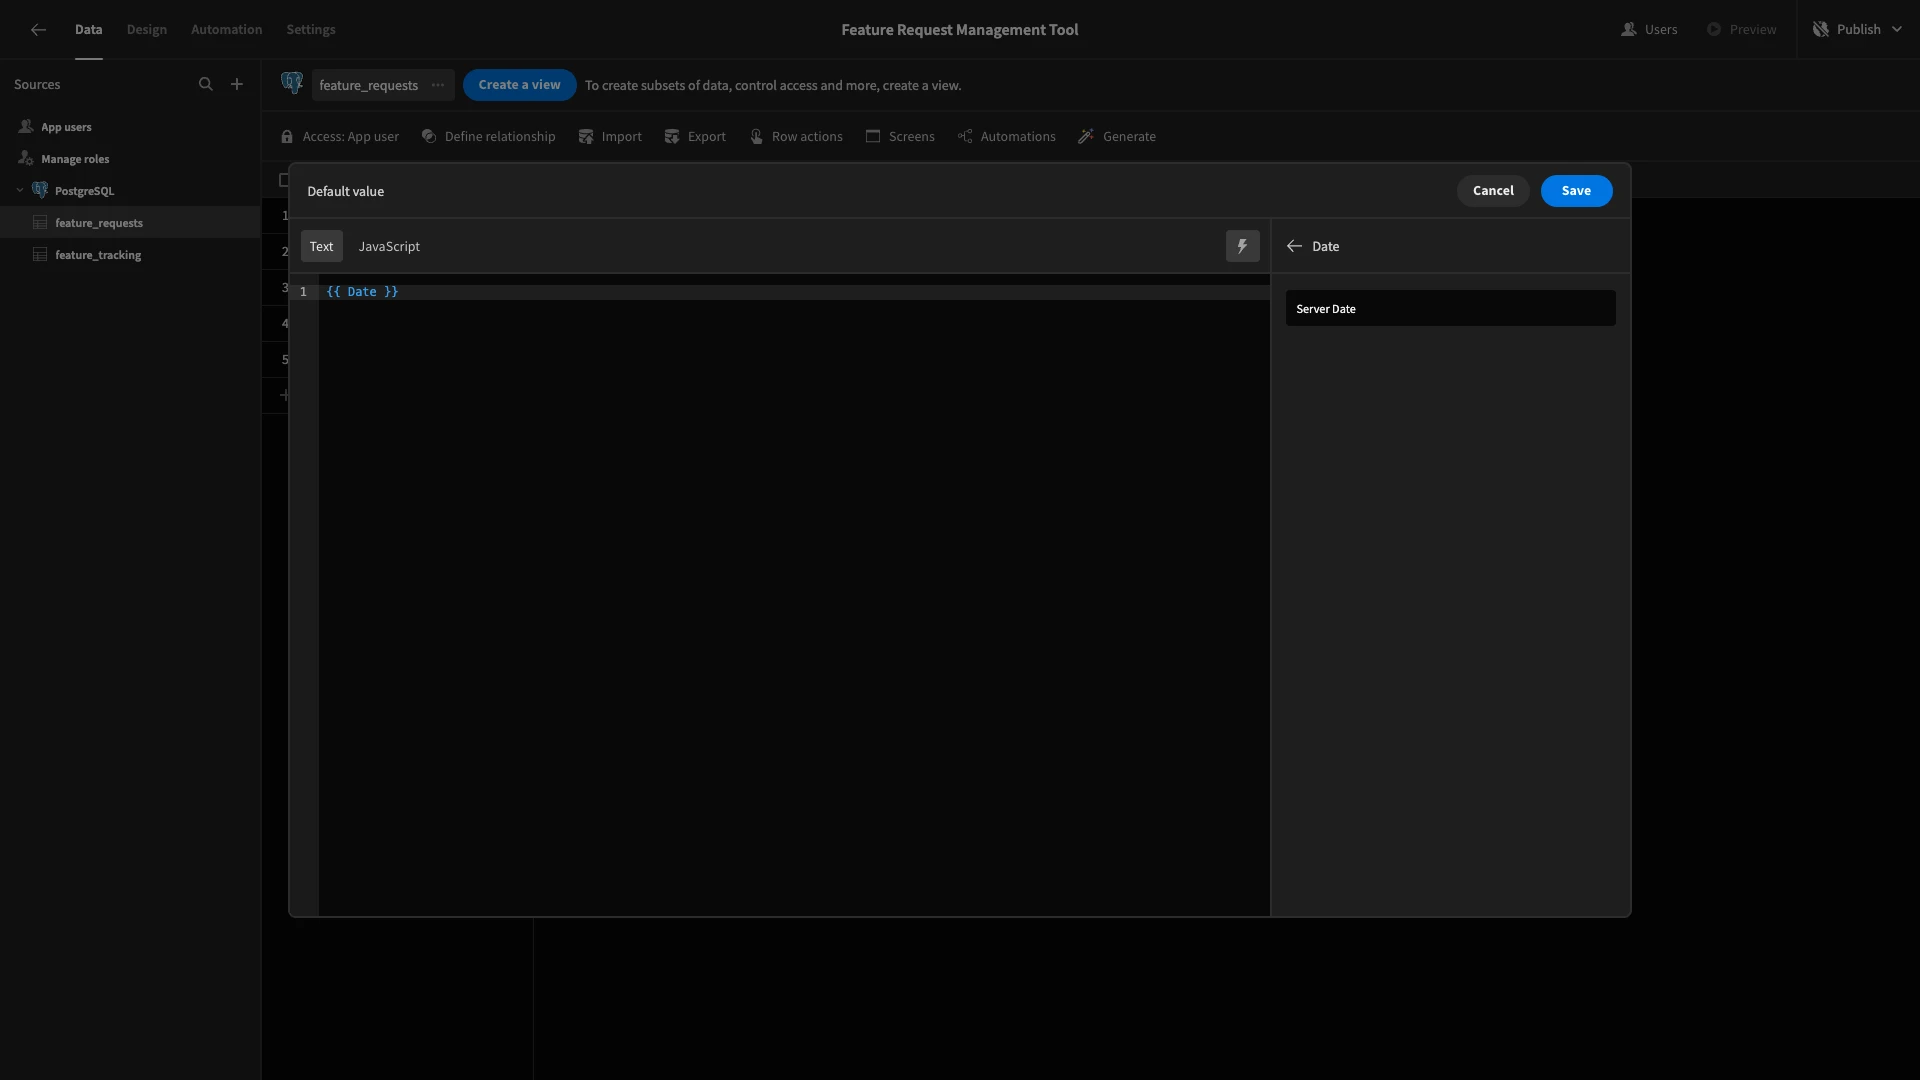
Remember to repeat this process for the updated_at attribute on both tables.
Setting up relationships
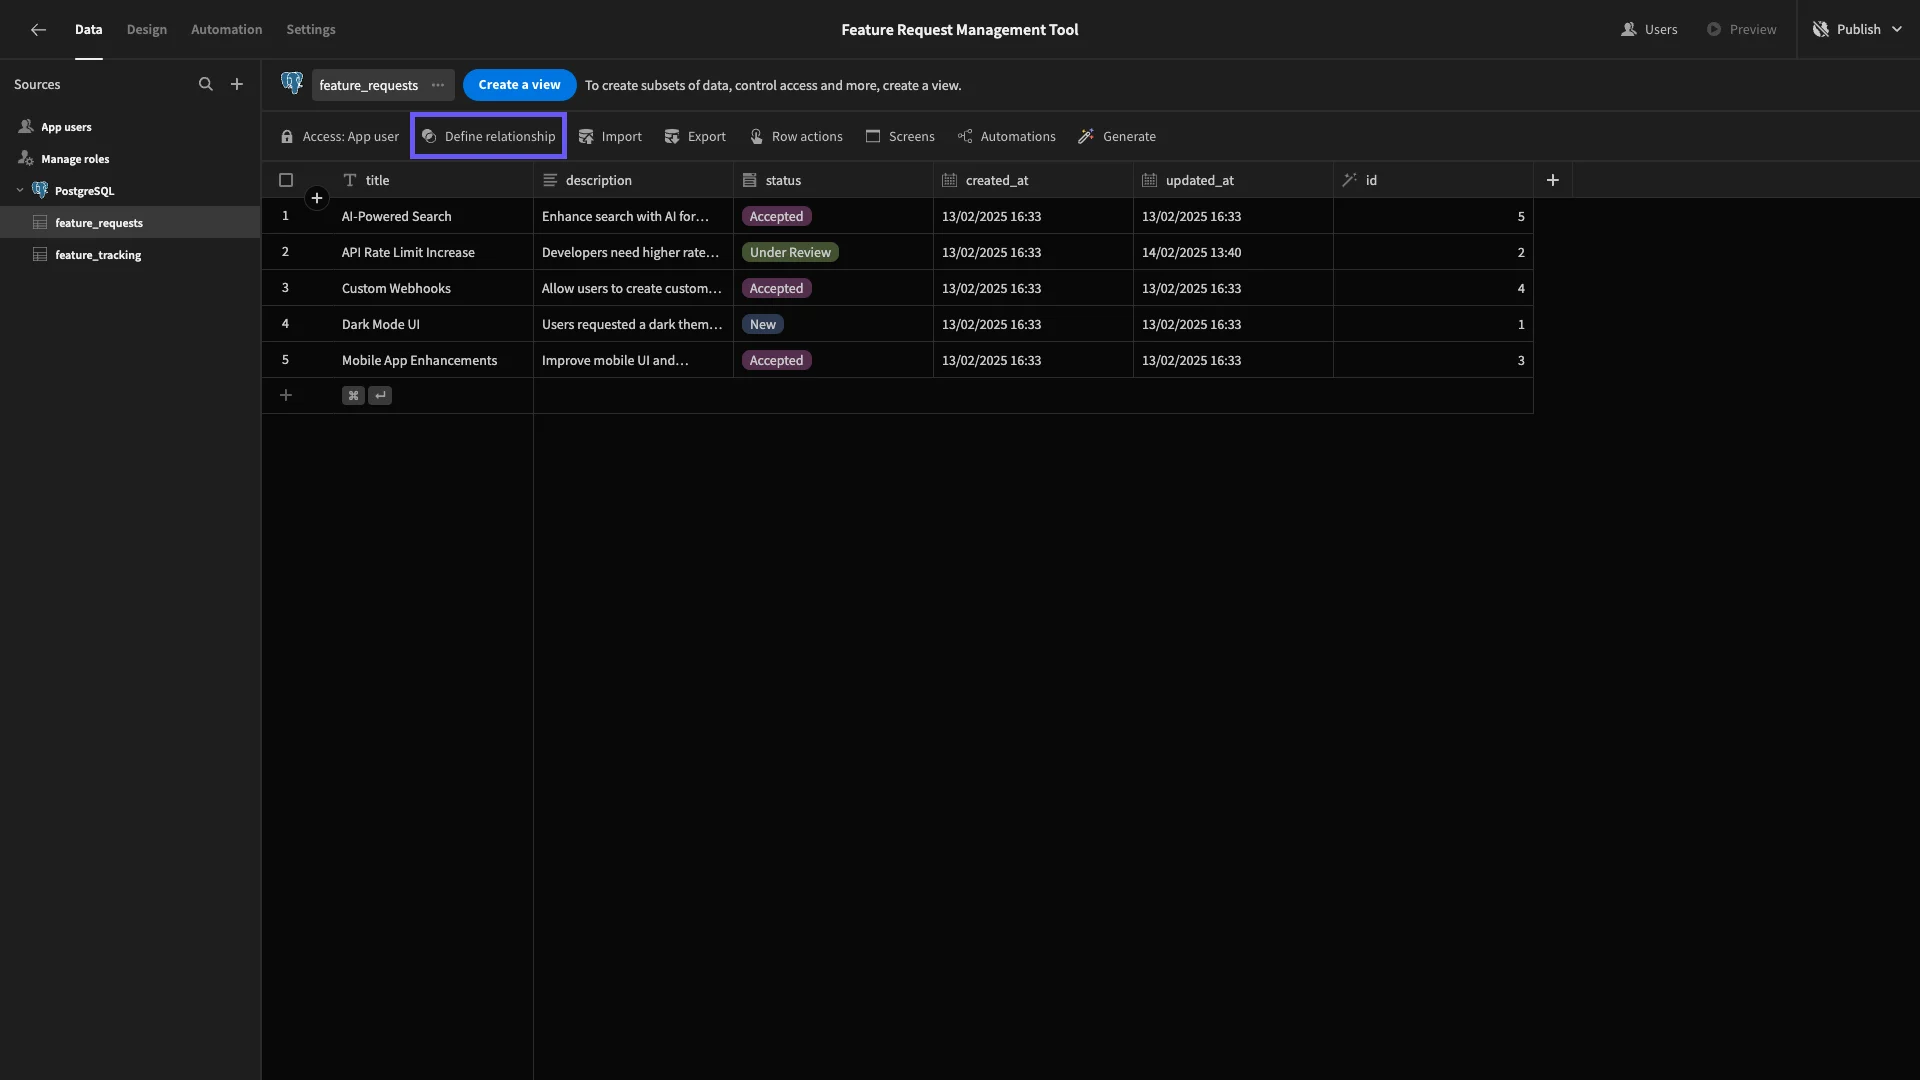
Our tables already have the primary and foreign key attributes we need to set up relationships. However, to utilize this, we need to configure a relationship between them in Budibase.
We’ll start by hitting Define Relationship.
This will open the following dialog.
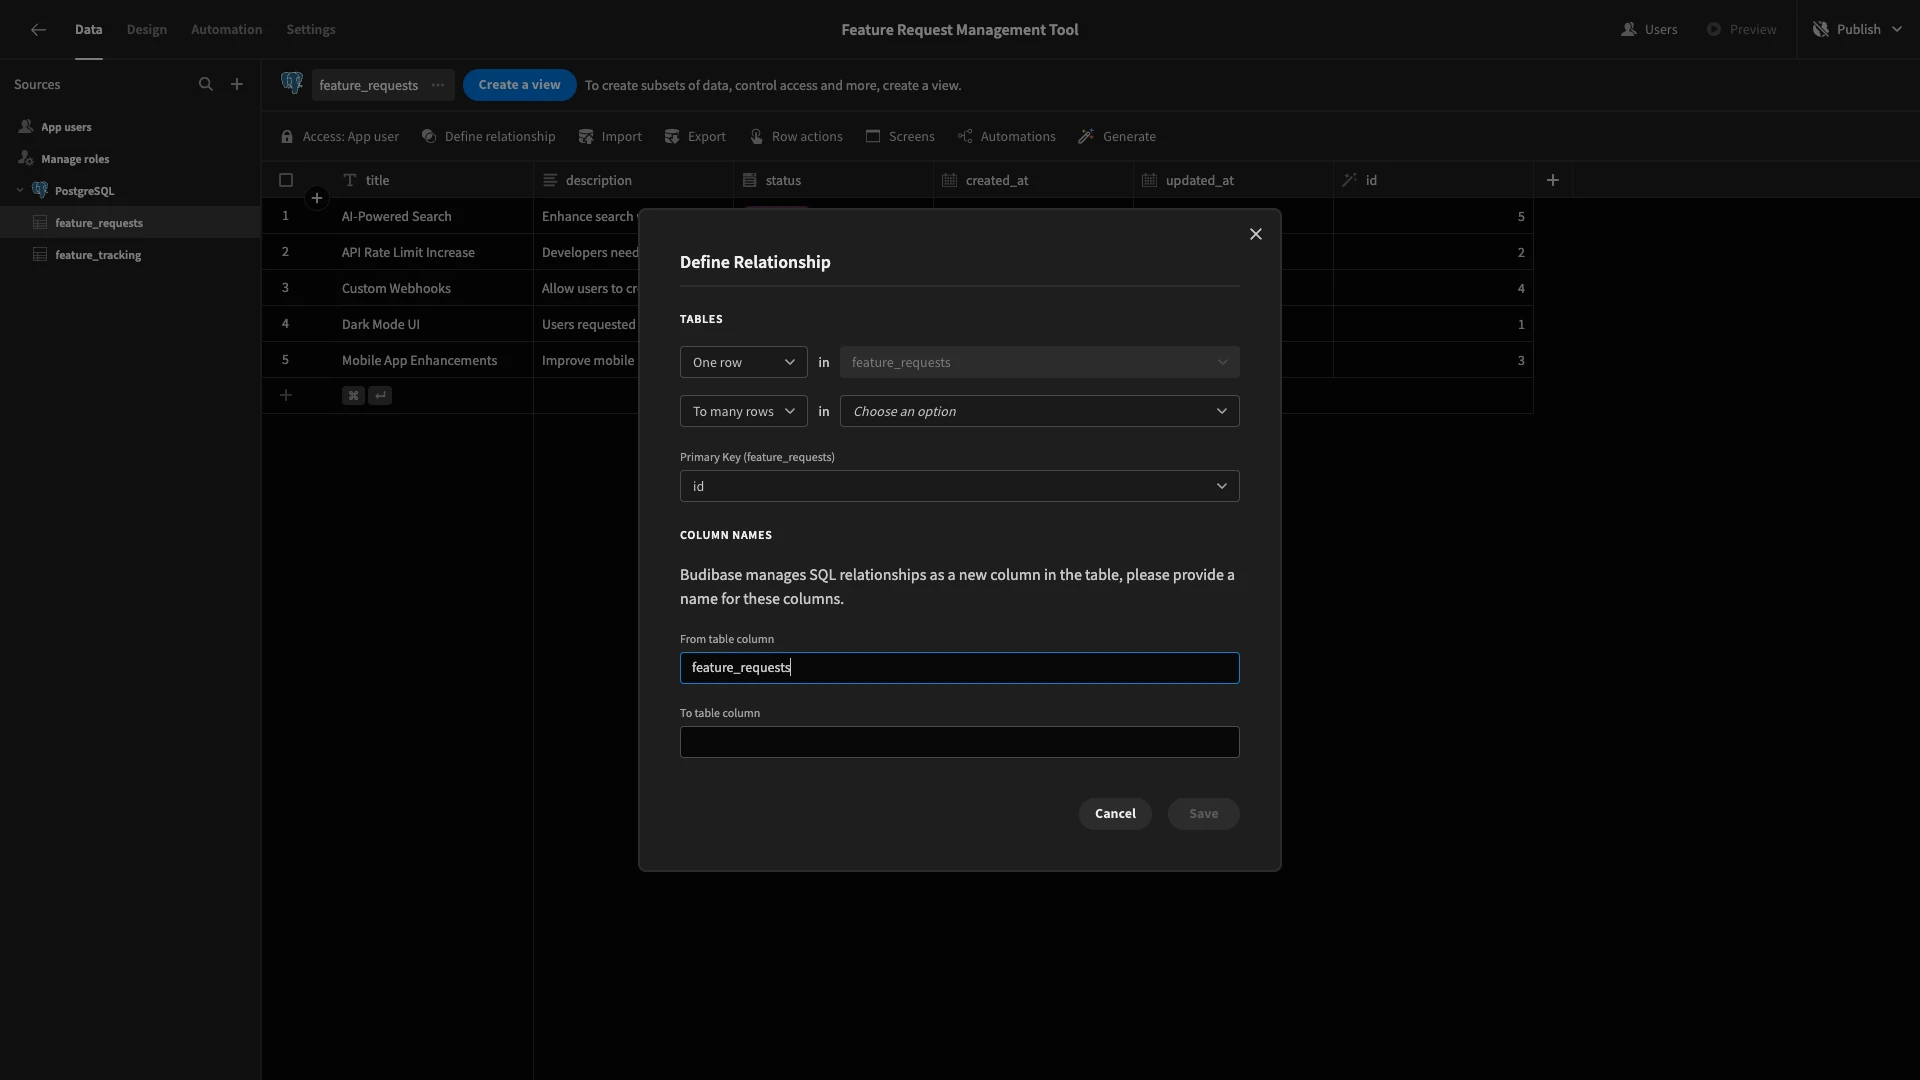
We’re going to set this so that many rows in feature_requests can be related to one row in feature_tracking. For our purposes today, we only really need a one-to-one relationship, but this approach will be more scalable if we want to bundle requests together in the future.
Our primary key is id, and our foreign key is feature_request_id.
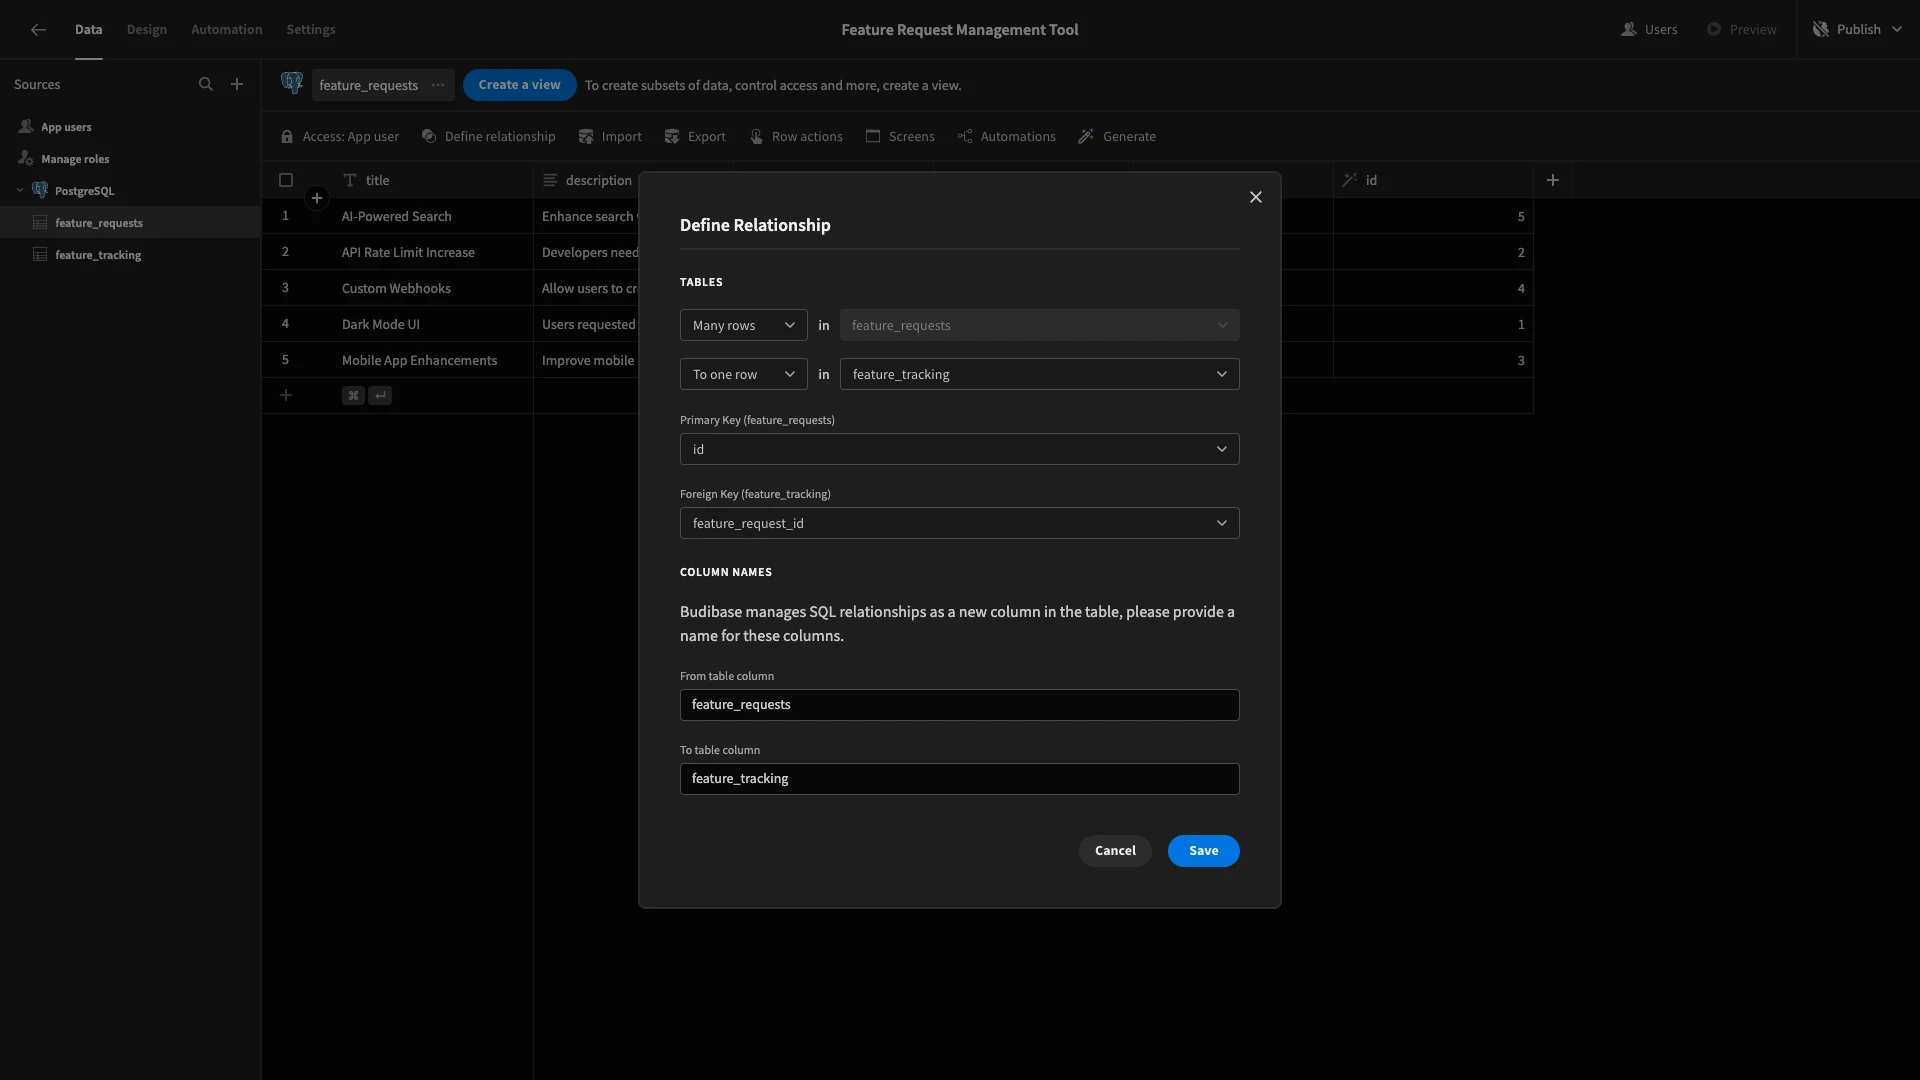
Now, in each table, we can see the corresponding row in the other.
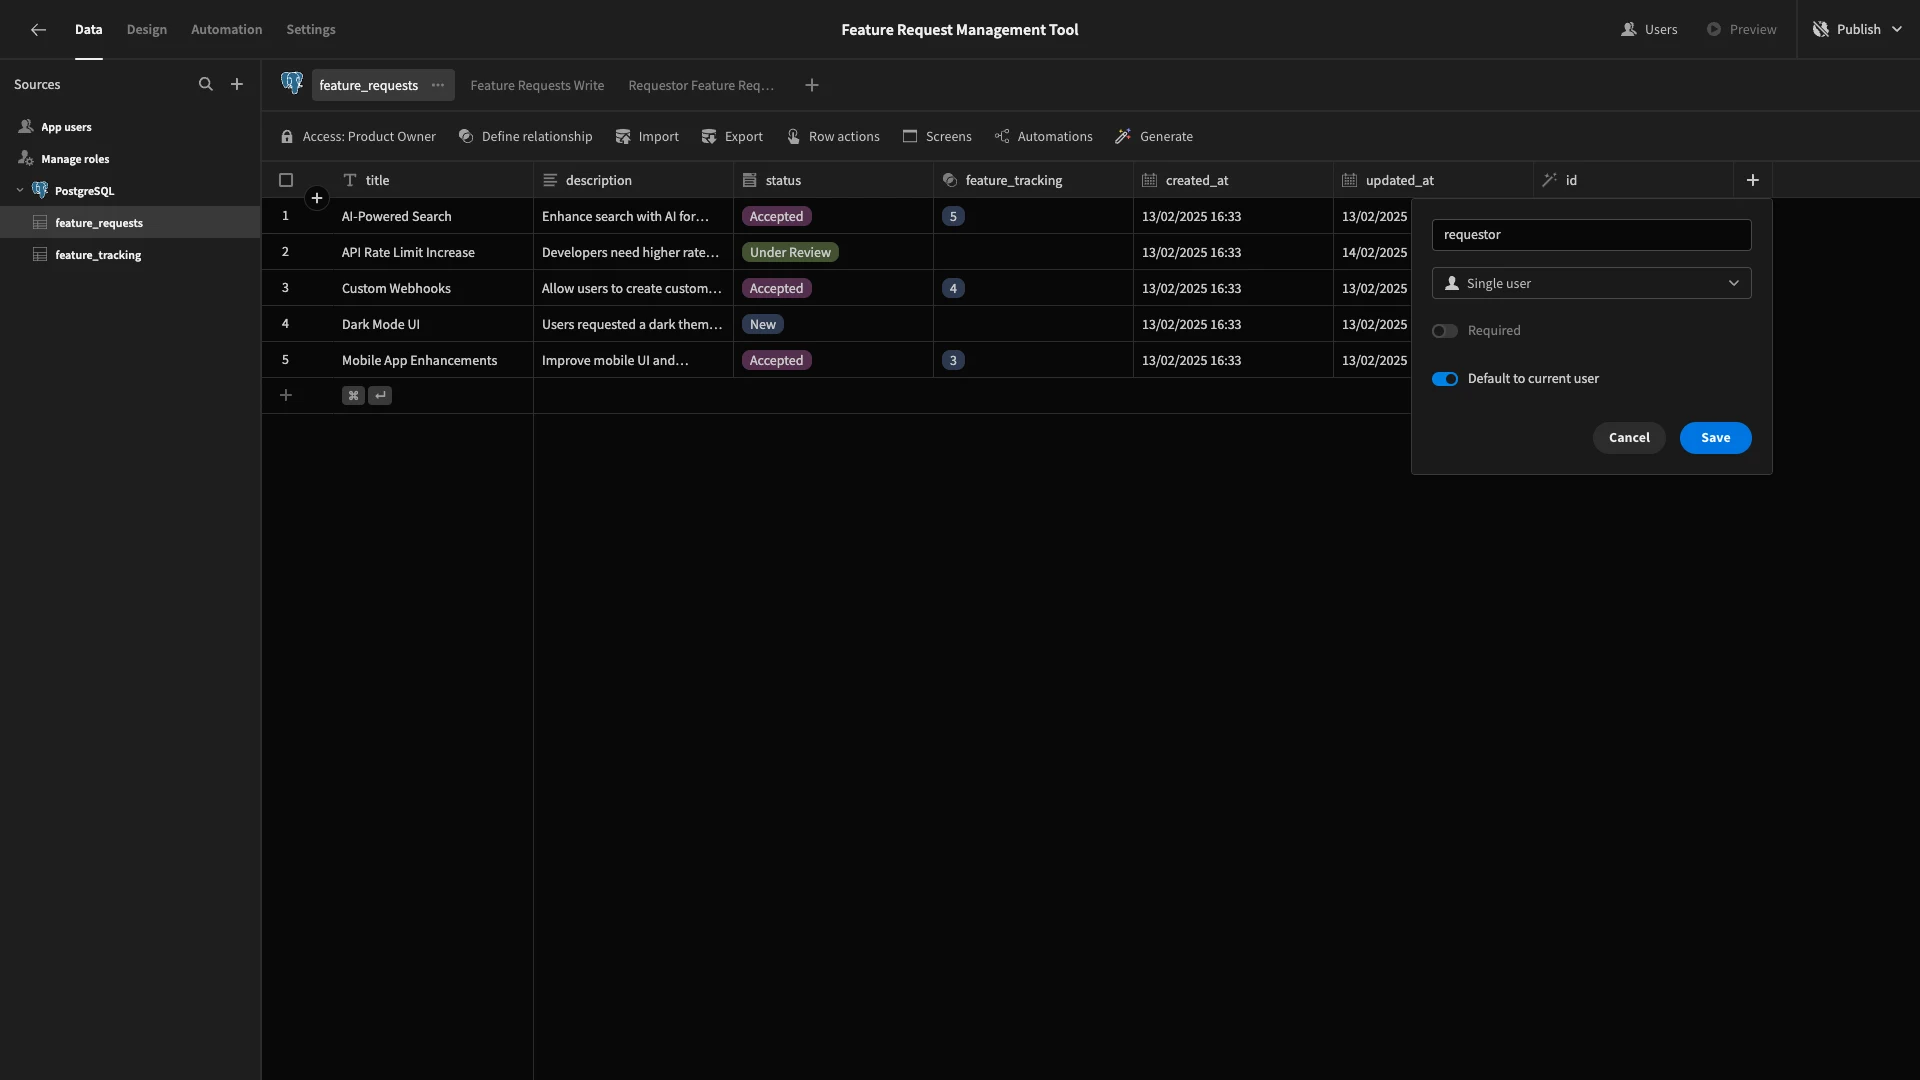
We also want to link each of our tables to Budibase’s internal Users table. However, this works a little bit differently than linking two tables in an external database.
To start, we’ll add a new column called requestor to our feature_requests table. For the data type, we’ll select Single User. We’re also selecting the option to default to current user.
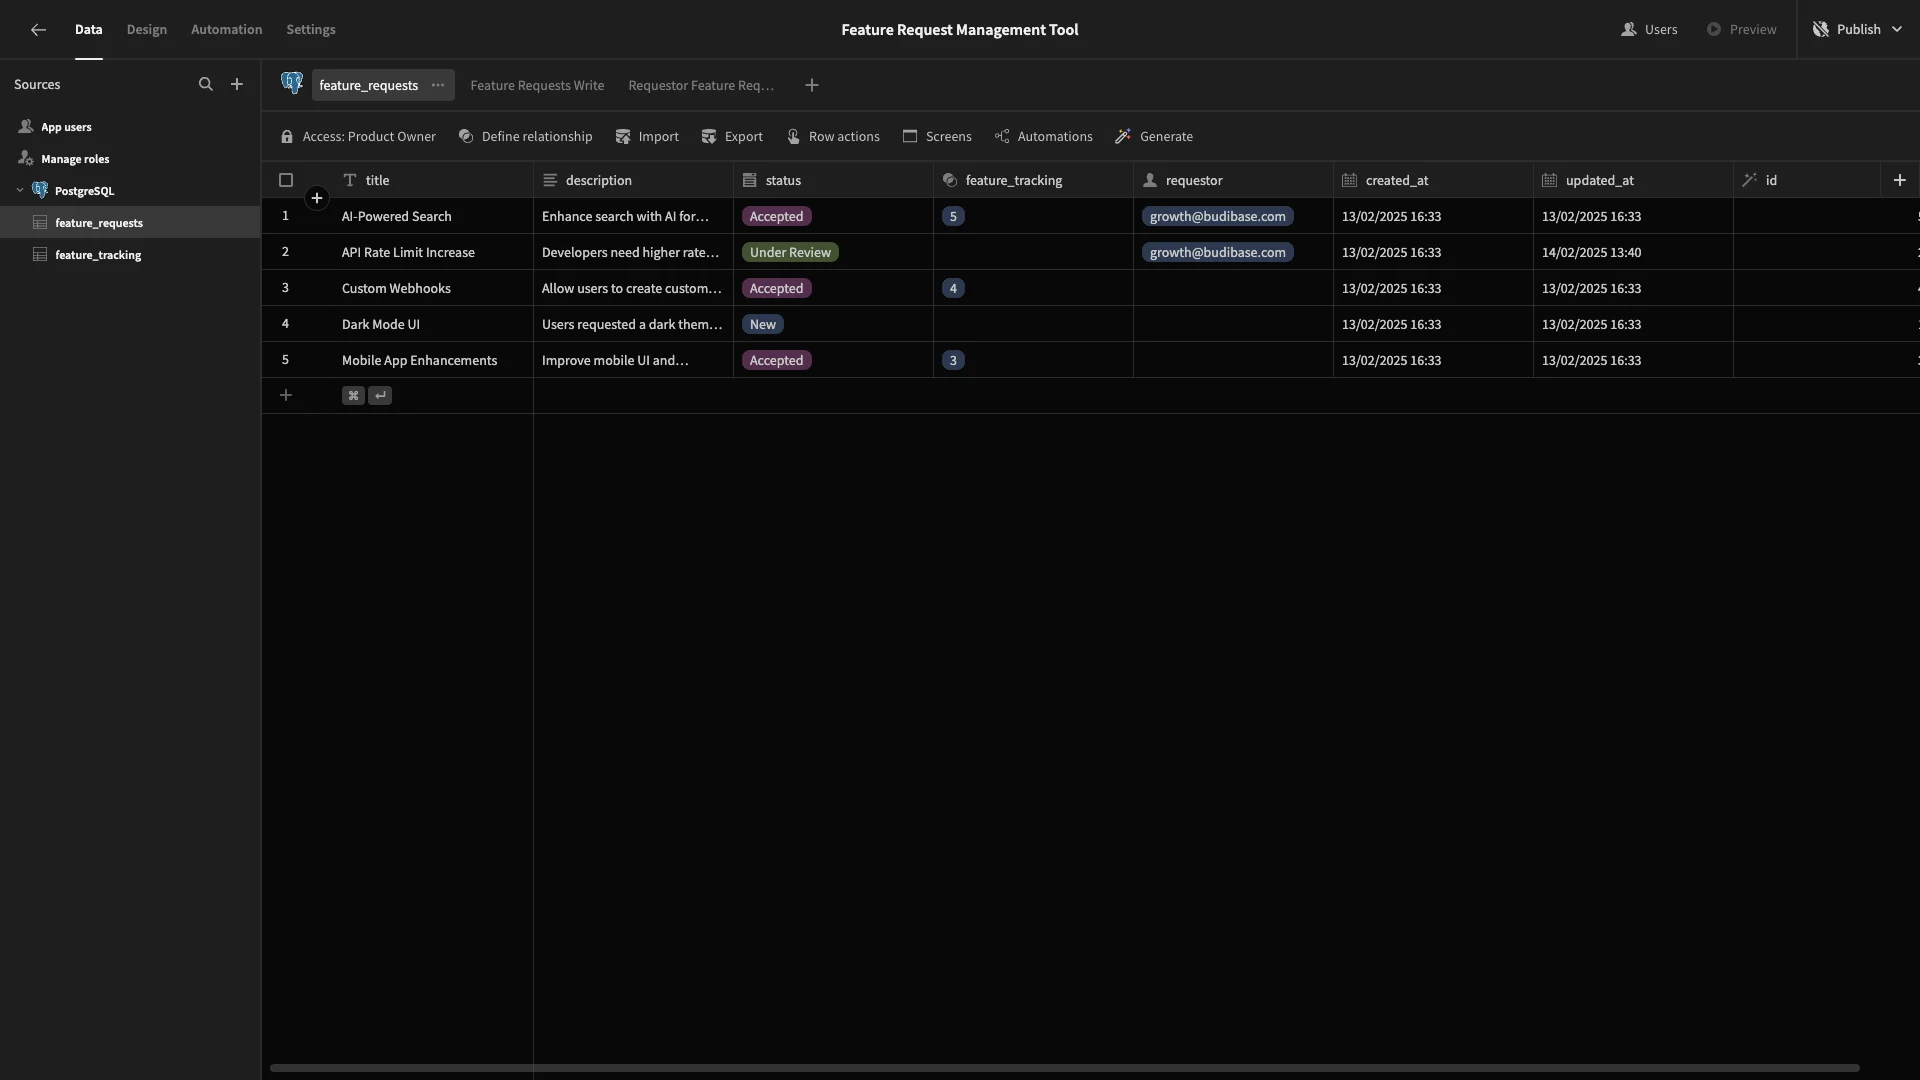
We’ll also assign ourselves to a couple of rows for testing purposes later.
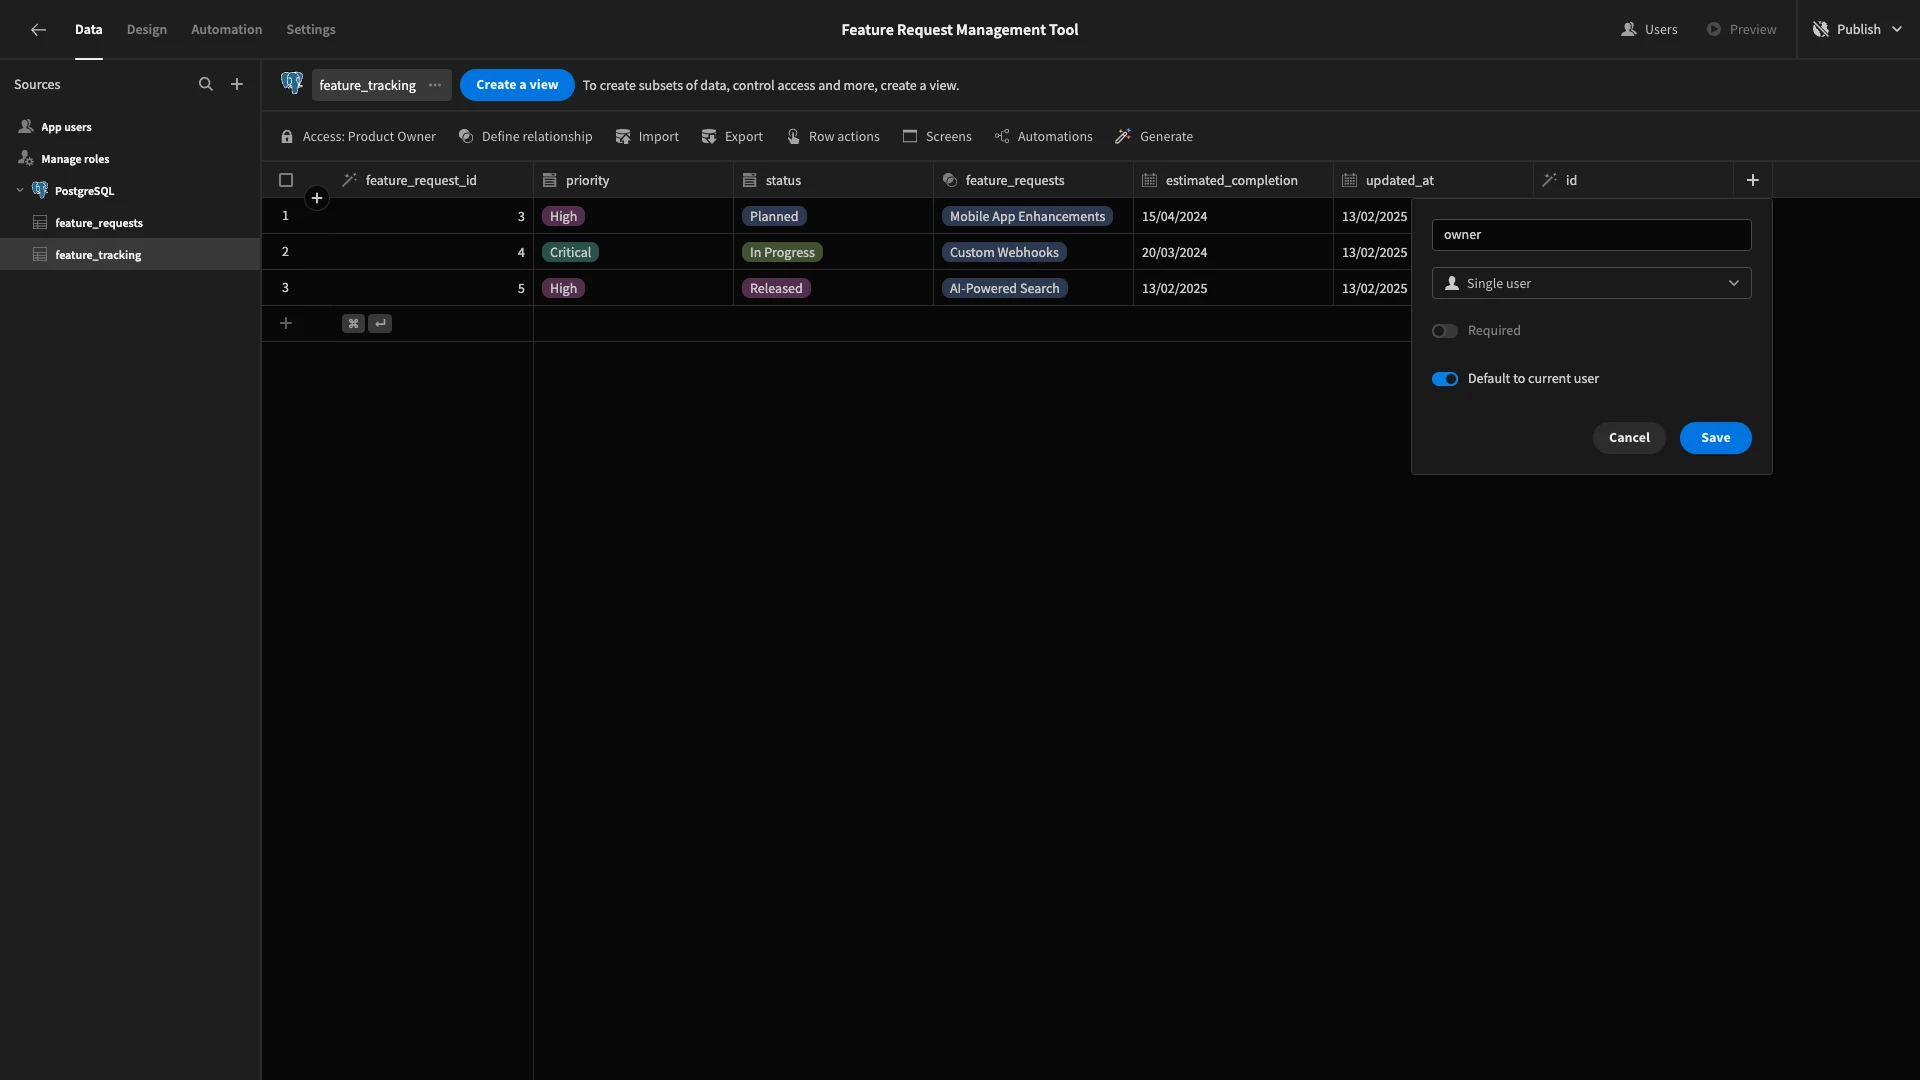
We can repeat this process by adding a Single User column to the feature_tracking. We’ll call this owner, remembering to default to the current user again.
Defining our user roles
That’s the core of our data model completed. But as we know, we have two separate groups of users who need to interact with this data differently. To reflect this fact, we need to start by setting up our user roles.
Staying within the Data section, head to Manage Roles.
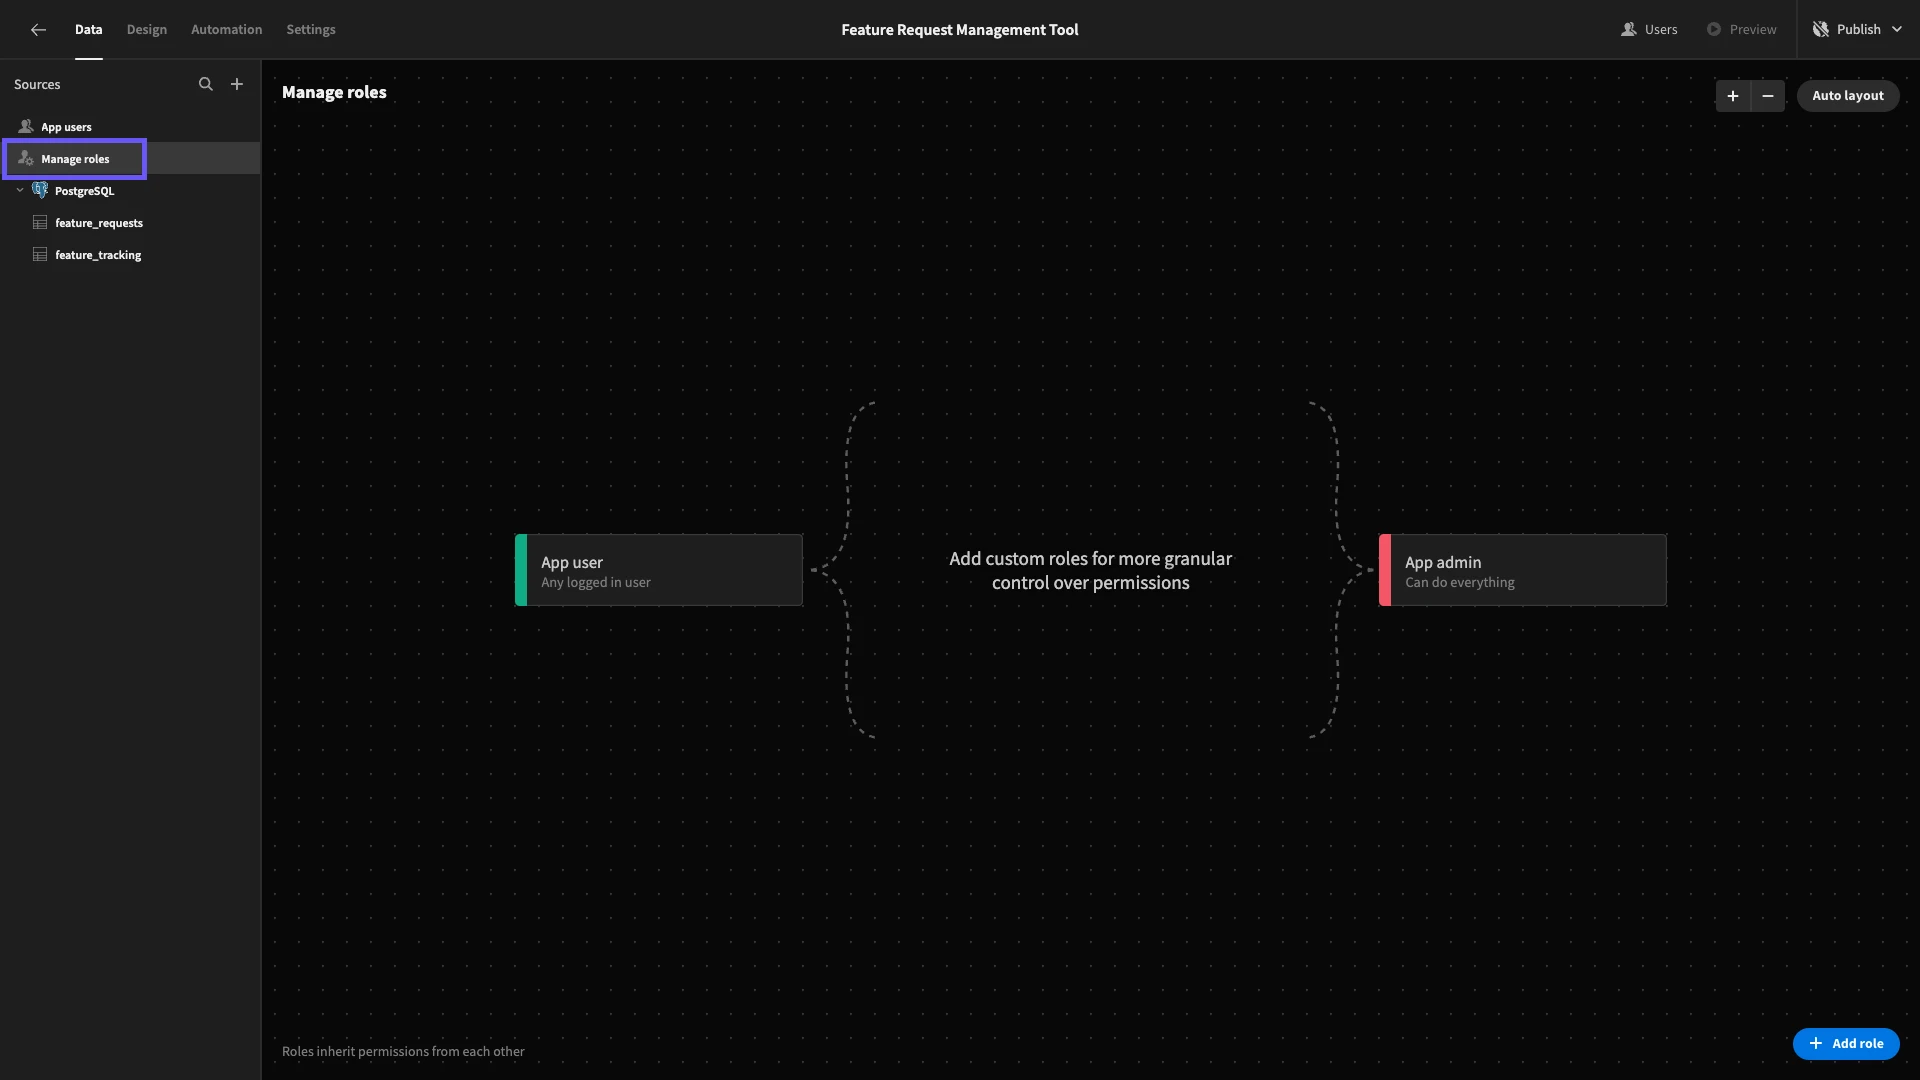
All Budibase apps ship with two default roles:
App User- which is any authenticated user.App Admin- which has full admin access across our app.
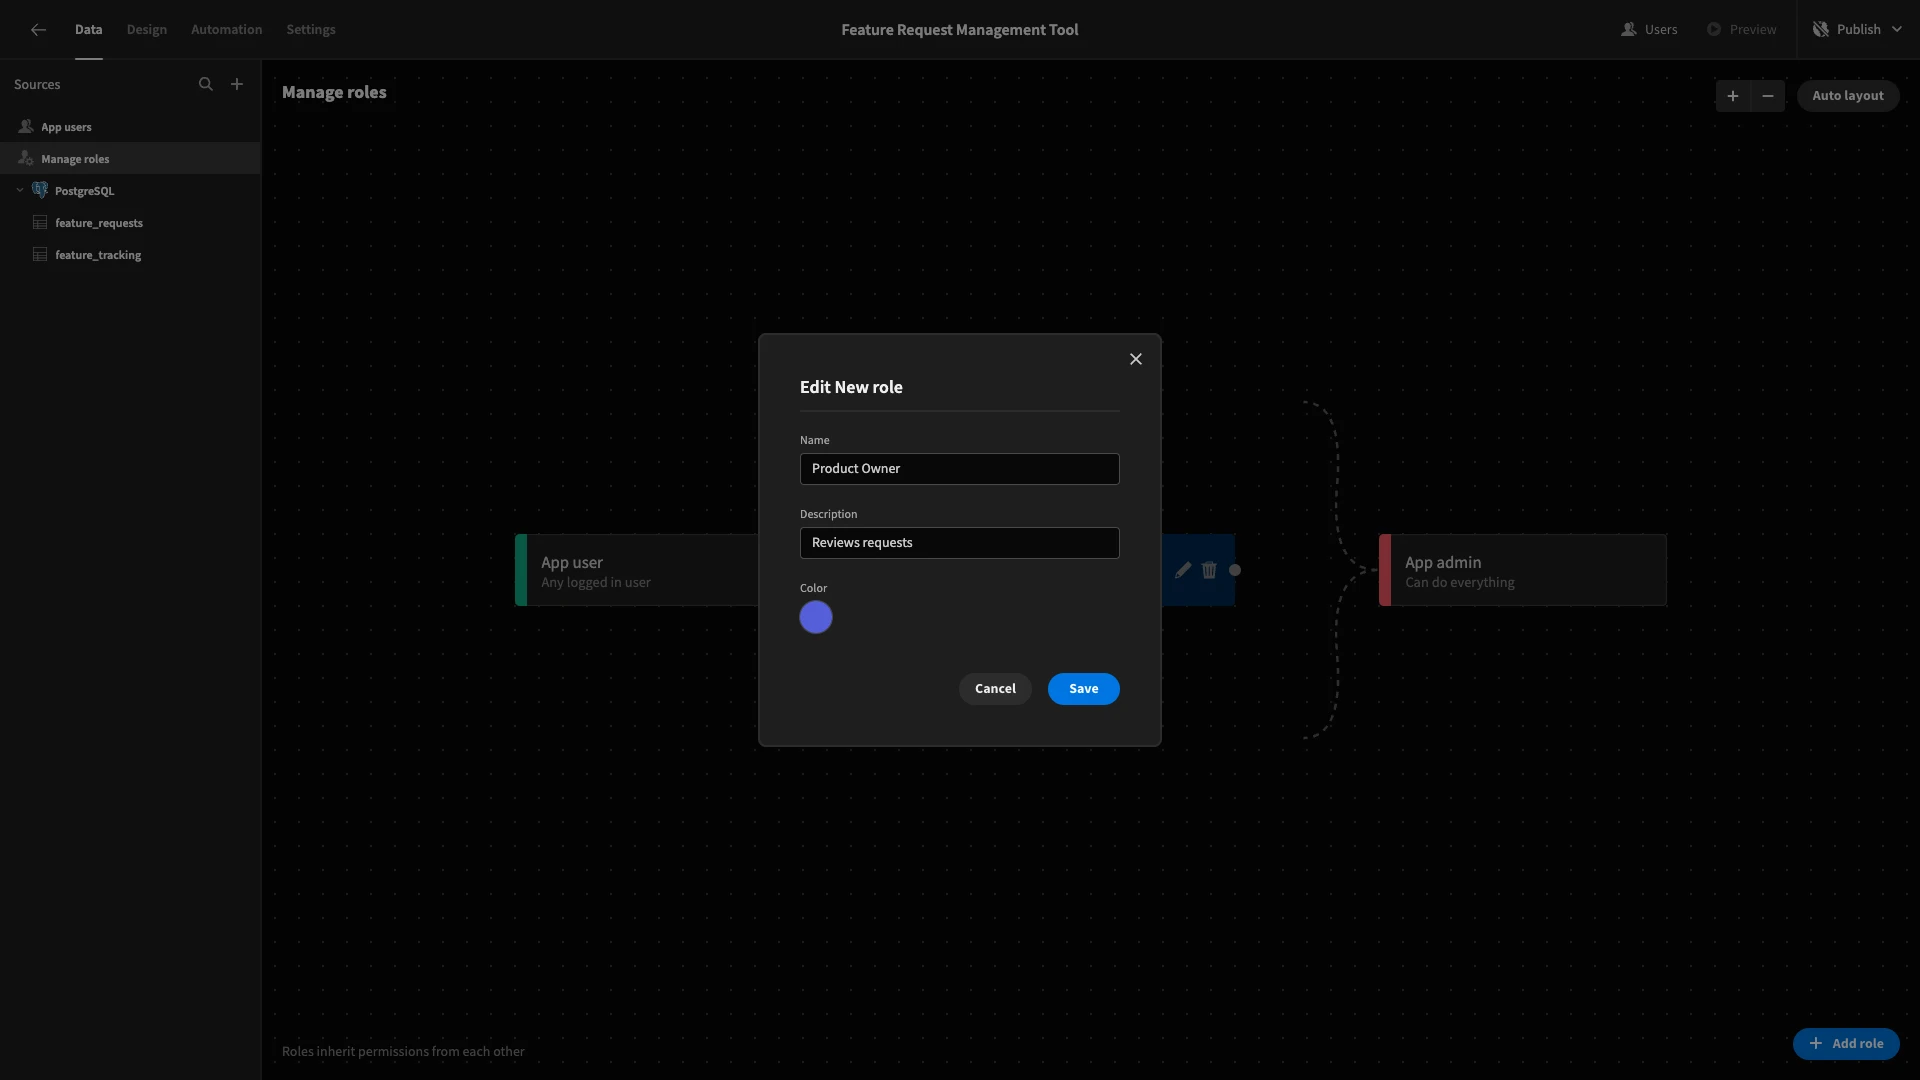
We’re going to add two custom roles. The first one will be called Product Owner.
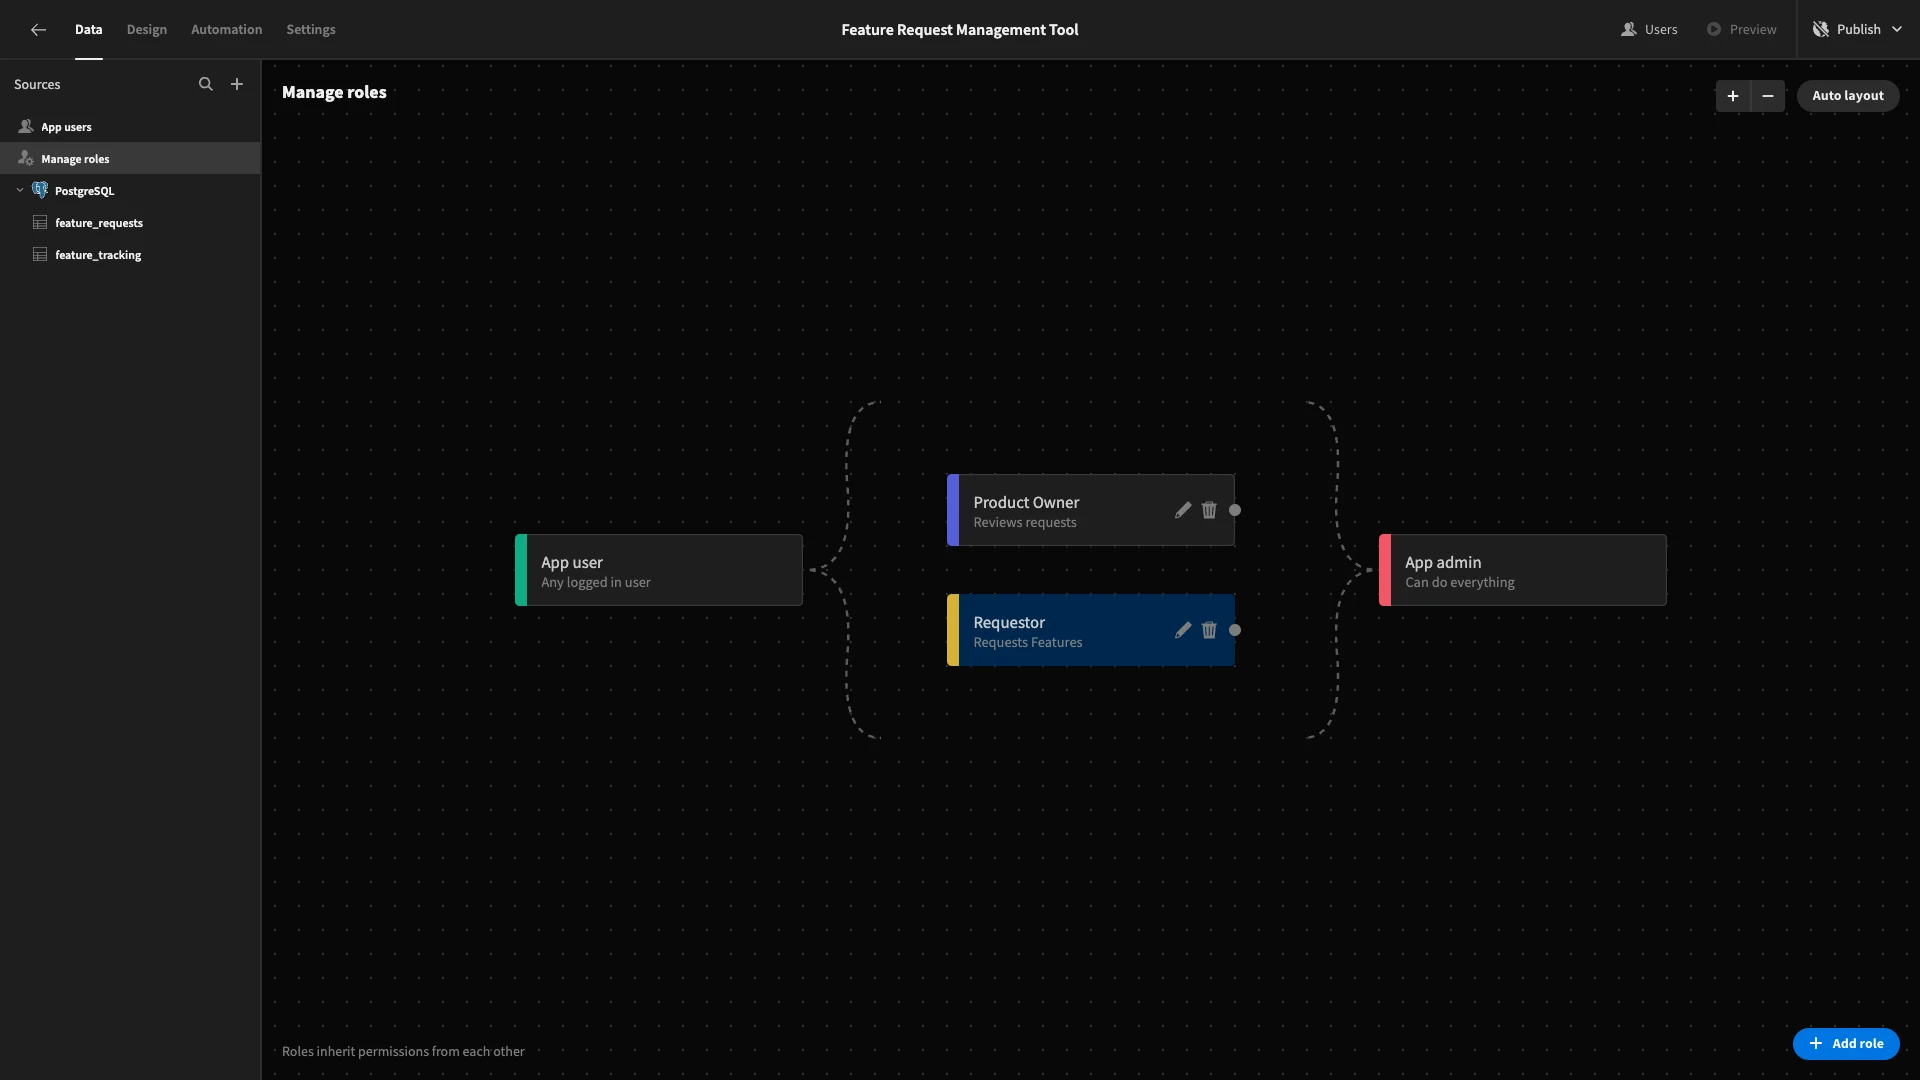
Our second role will be called Requestor.
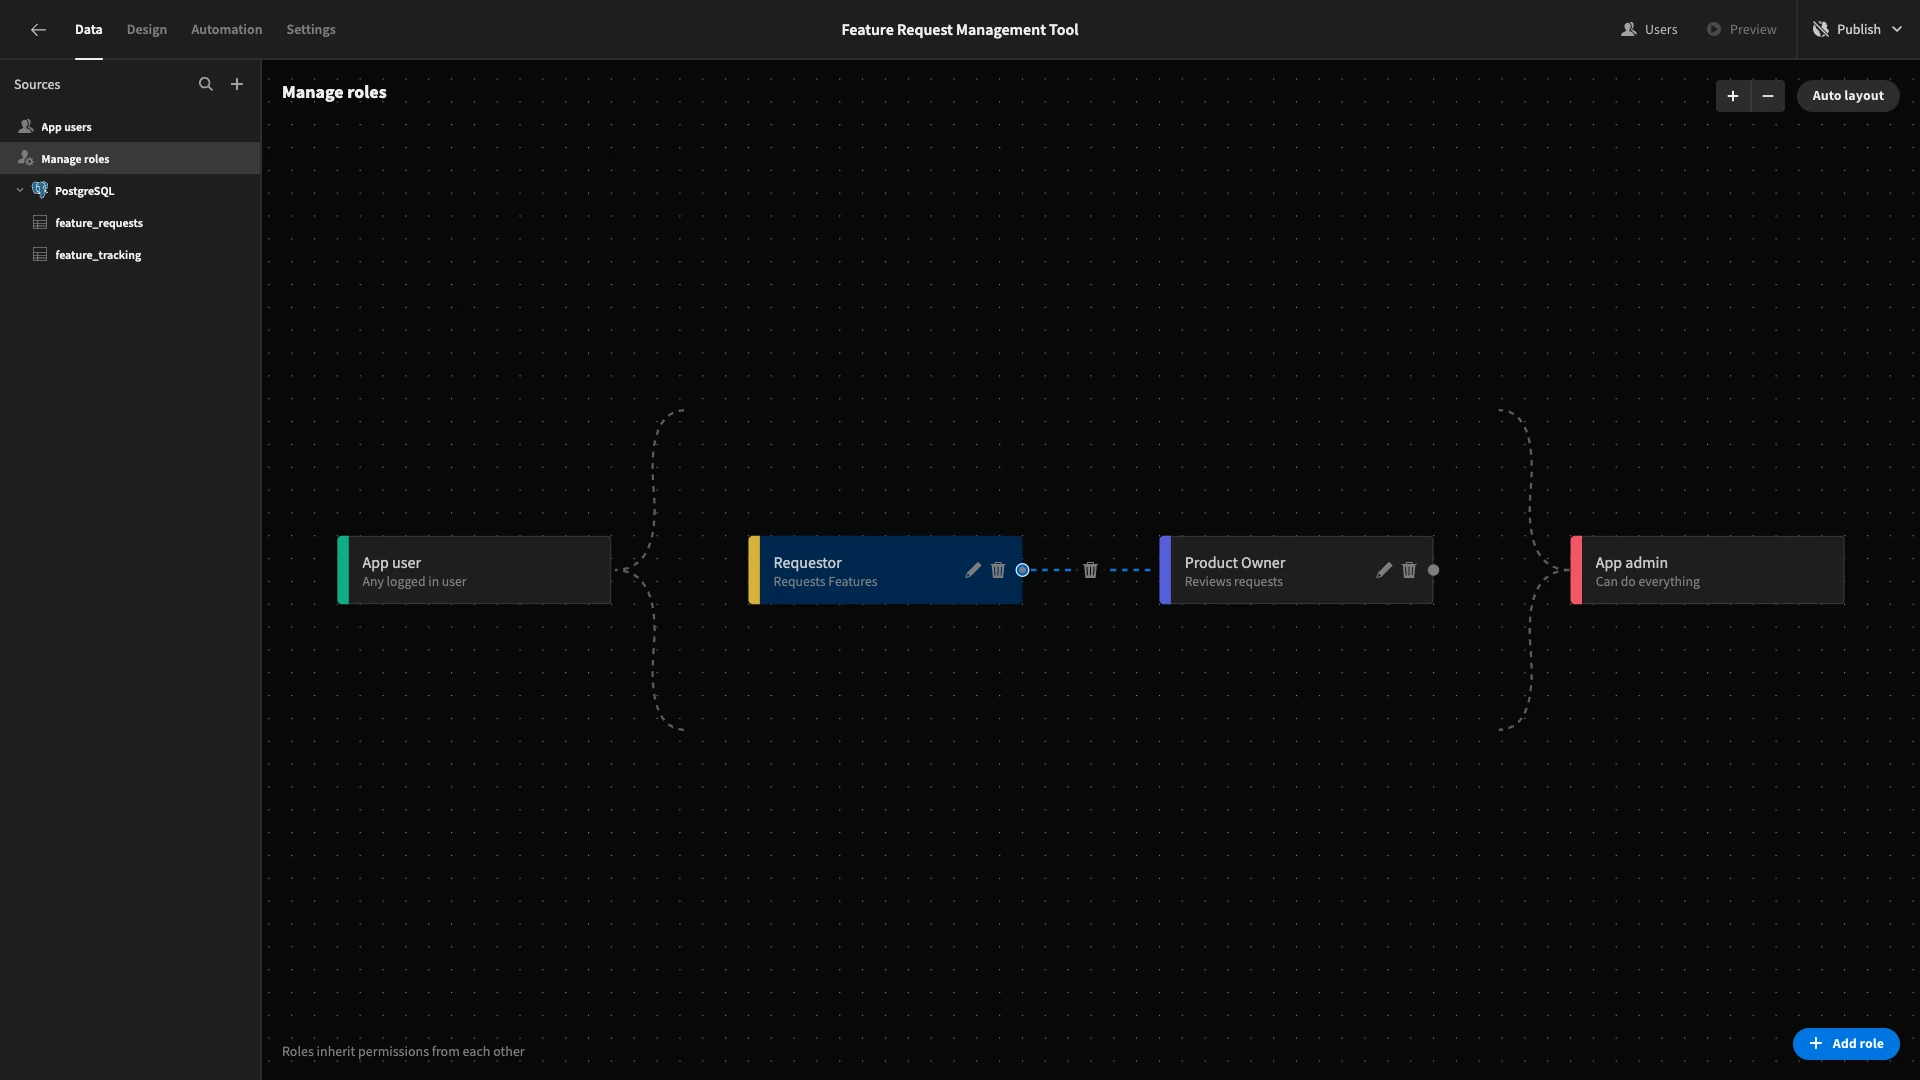
In our desired configuration, Product Owners will inherit all of the permissions we grant to Requestors, but they’ll also have their own additional permissions on top of this.
To achieve this, we’ll place Requestor to the left of Product Owner, and draw a line between them in our visual RBAC editor for inheritance.
Adding role-specific views
With our roles in place, we can begin granting permissions. In Budibase, database Views allow us to grant read and write permissions at the level of either rows or columns.
Before we create any views, we want to grant Product Owners full CRUD permissions across both of our tables, but we don’t want to give this level of access to Requestors. So, we’ll set the required access role for the underlying tables to Product Owner.
Again, make sure to repeat this process for both tables.
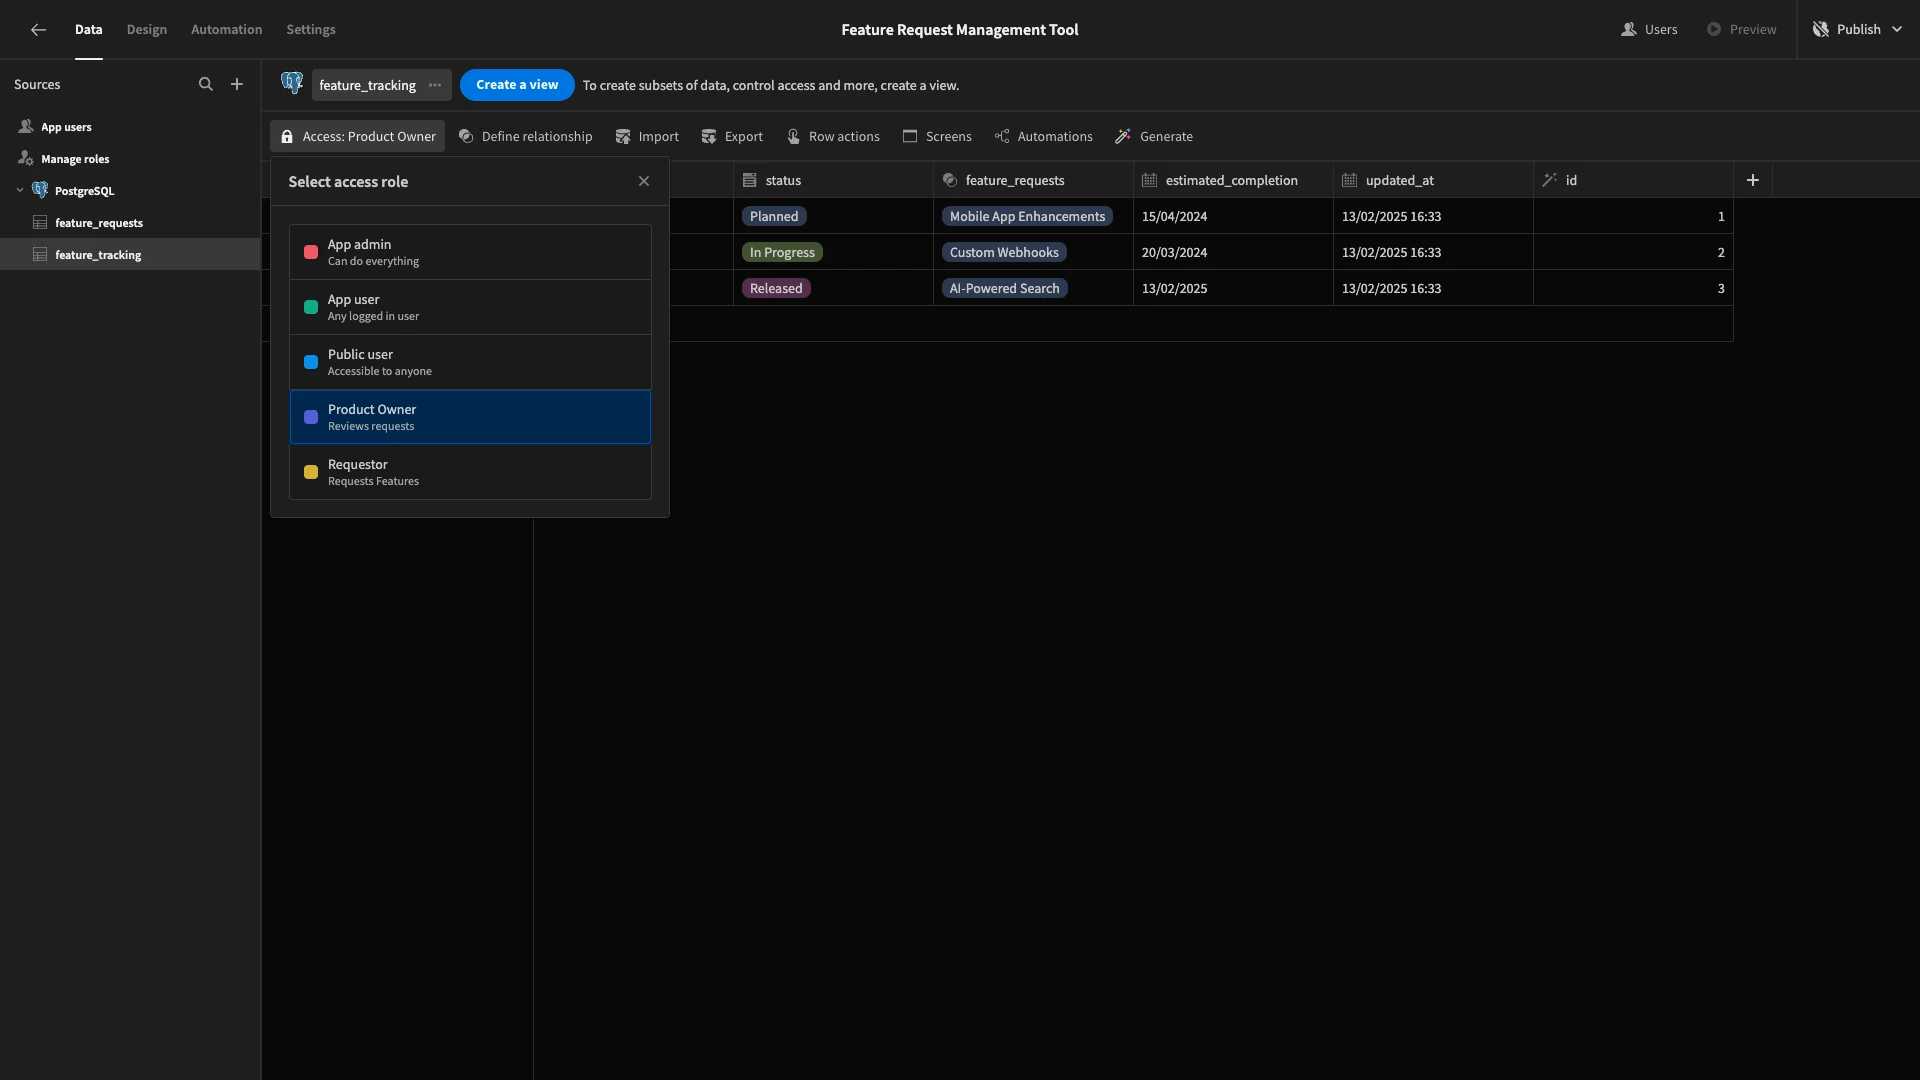
For our feature_requests table, we want to grant Requestors permissions to do the following:
- Create rows,
- Read all rows regardless of who created them,
- Edit certain attributes for rows that they have created.
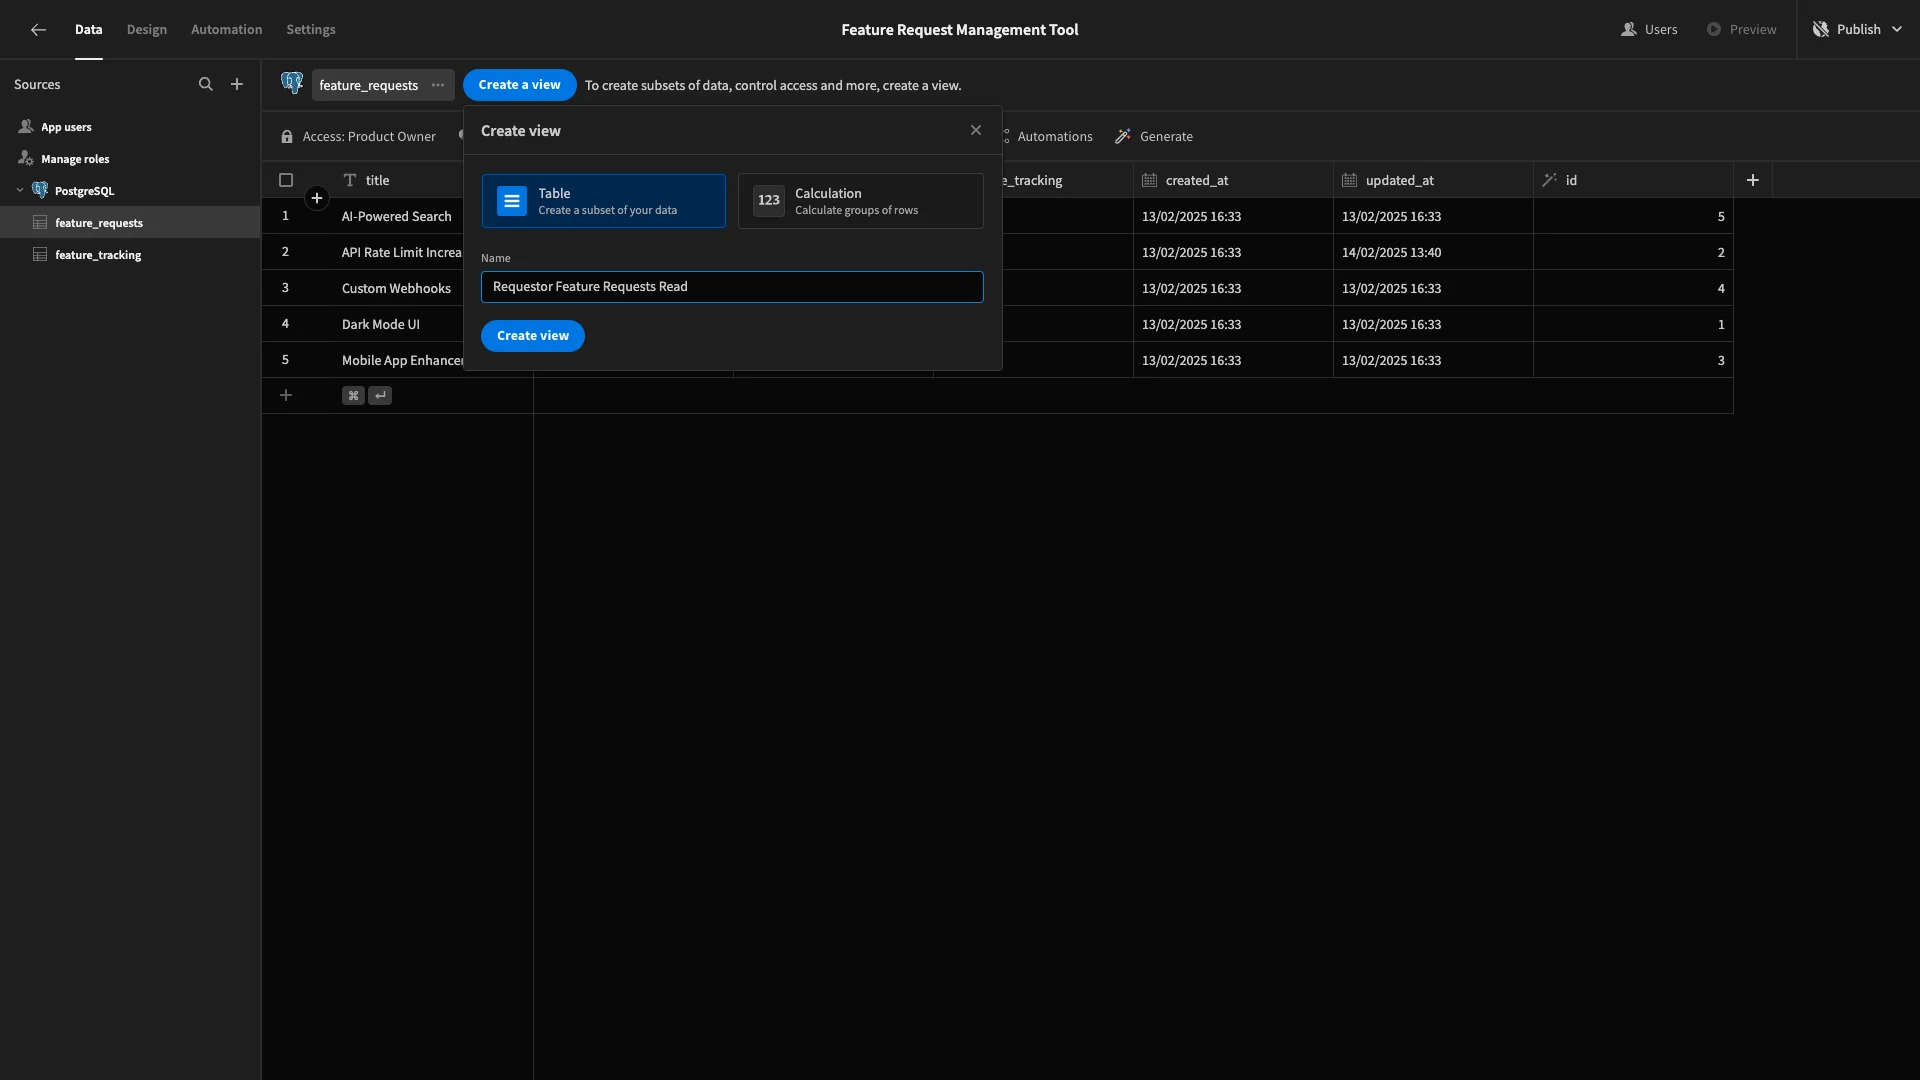
To do this, we’ll need to create two Views. Hit Create a View. We’ll call our first one Requestor Feature Requests Read.
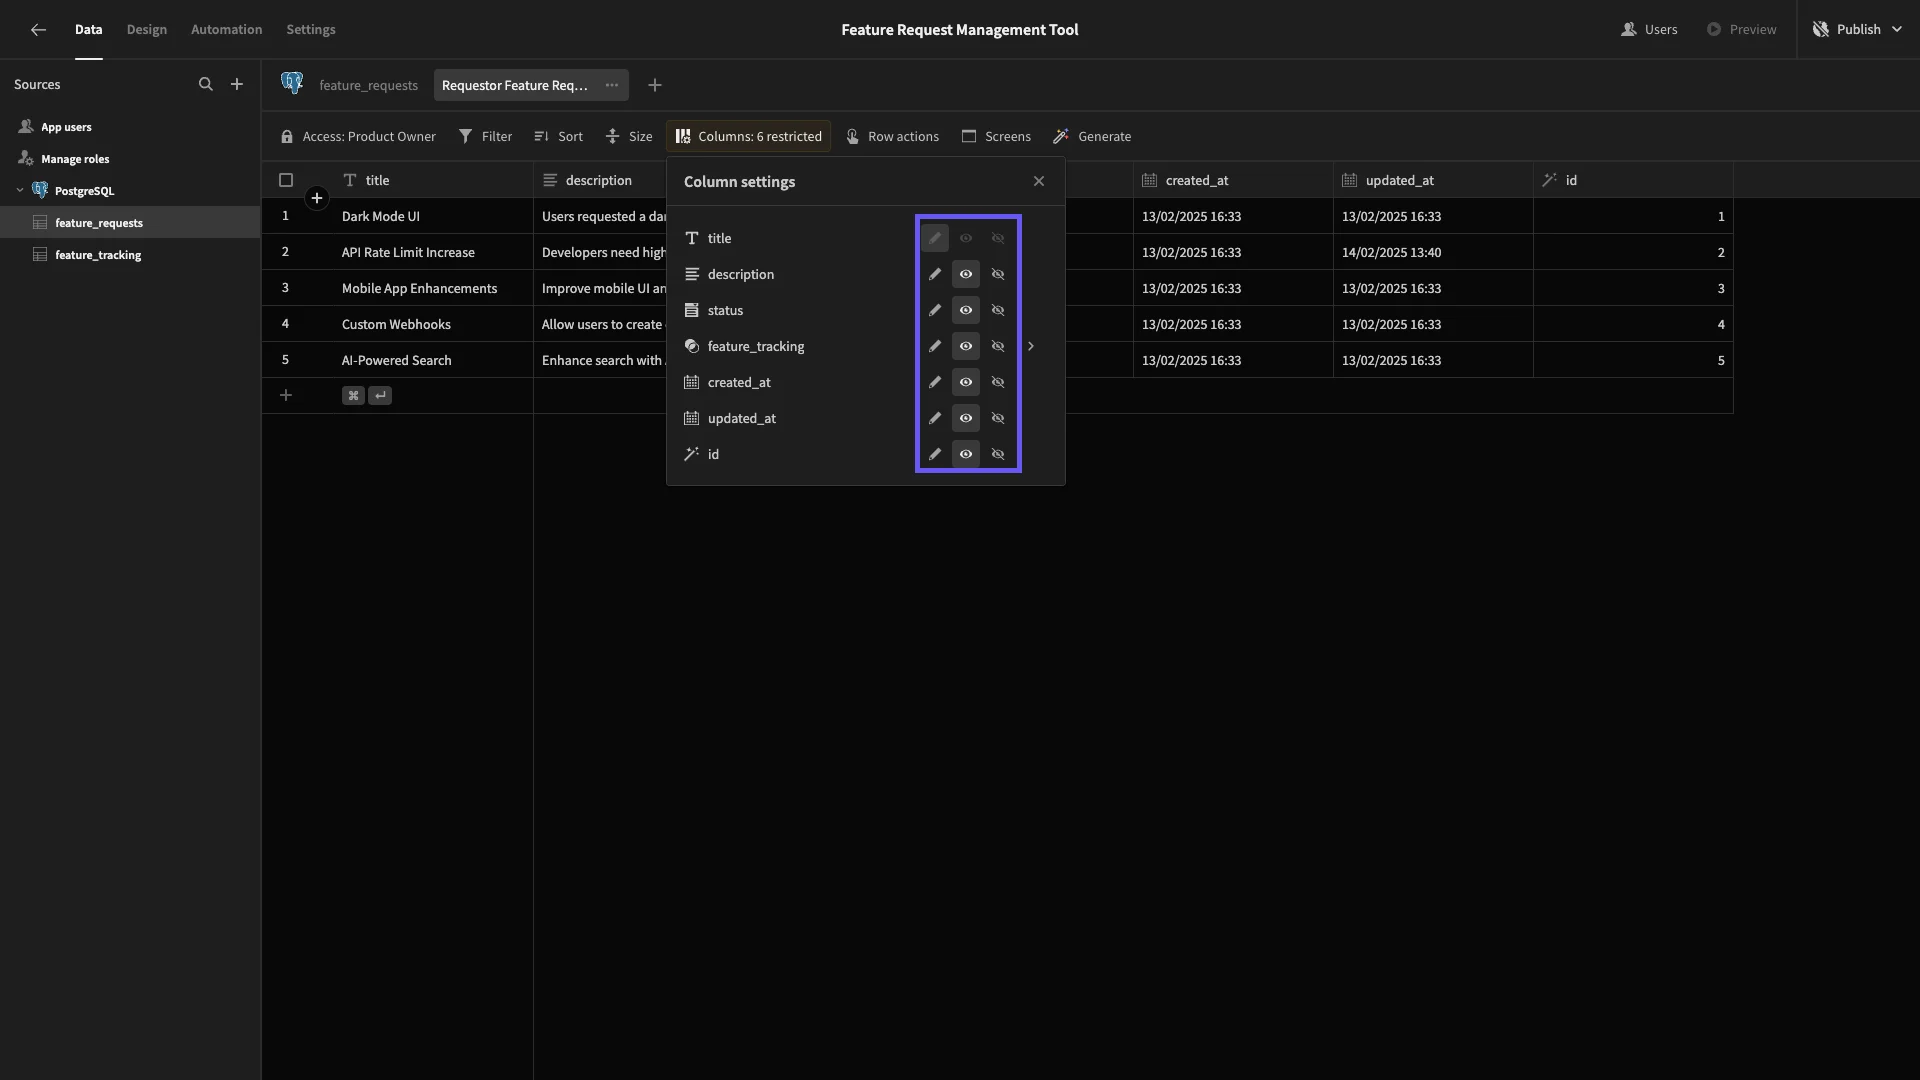
We can hit Columns to define which attributes this view enables users to read or write. We’ll simply set all columns to read-only.
Lastly, we’ll set our access role to Requestor.
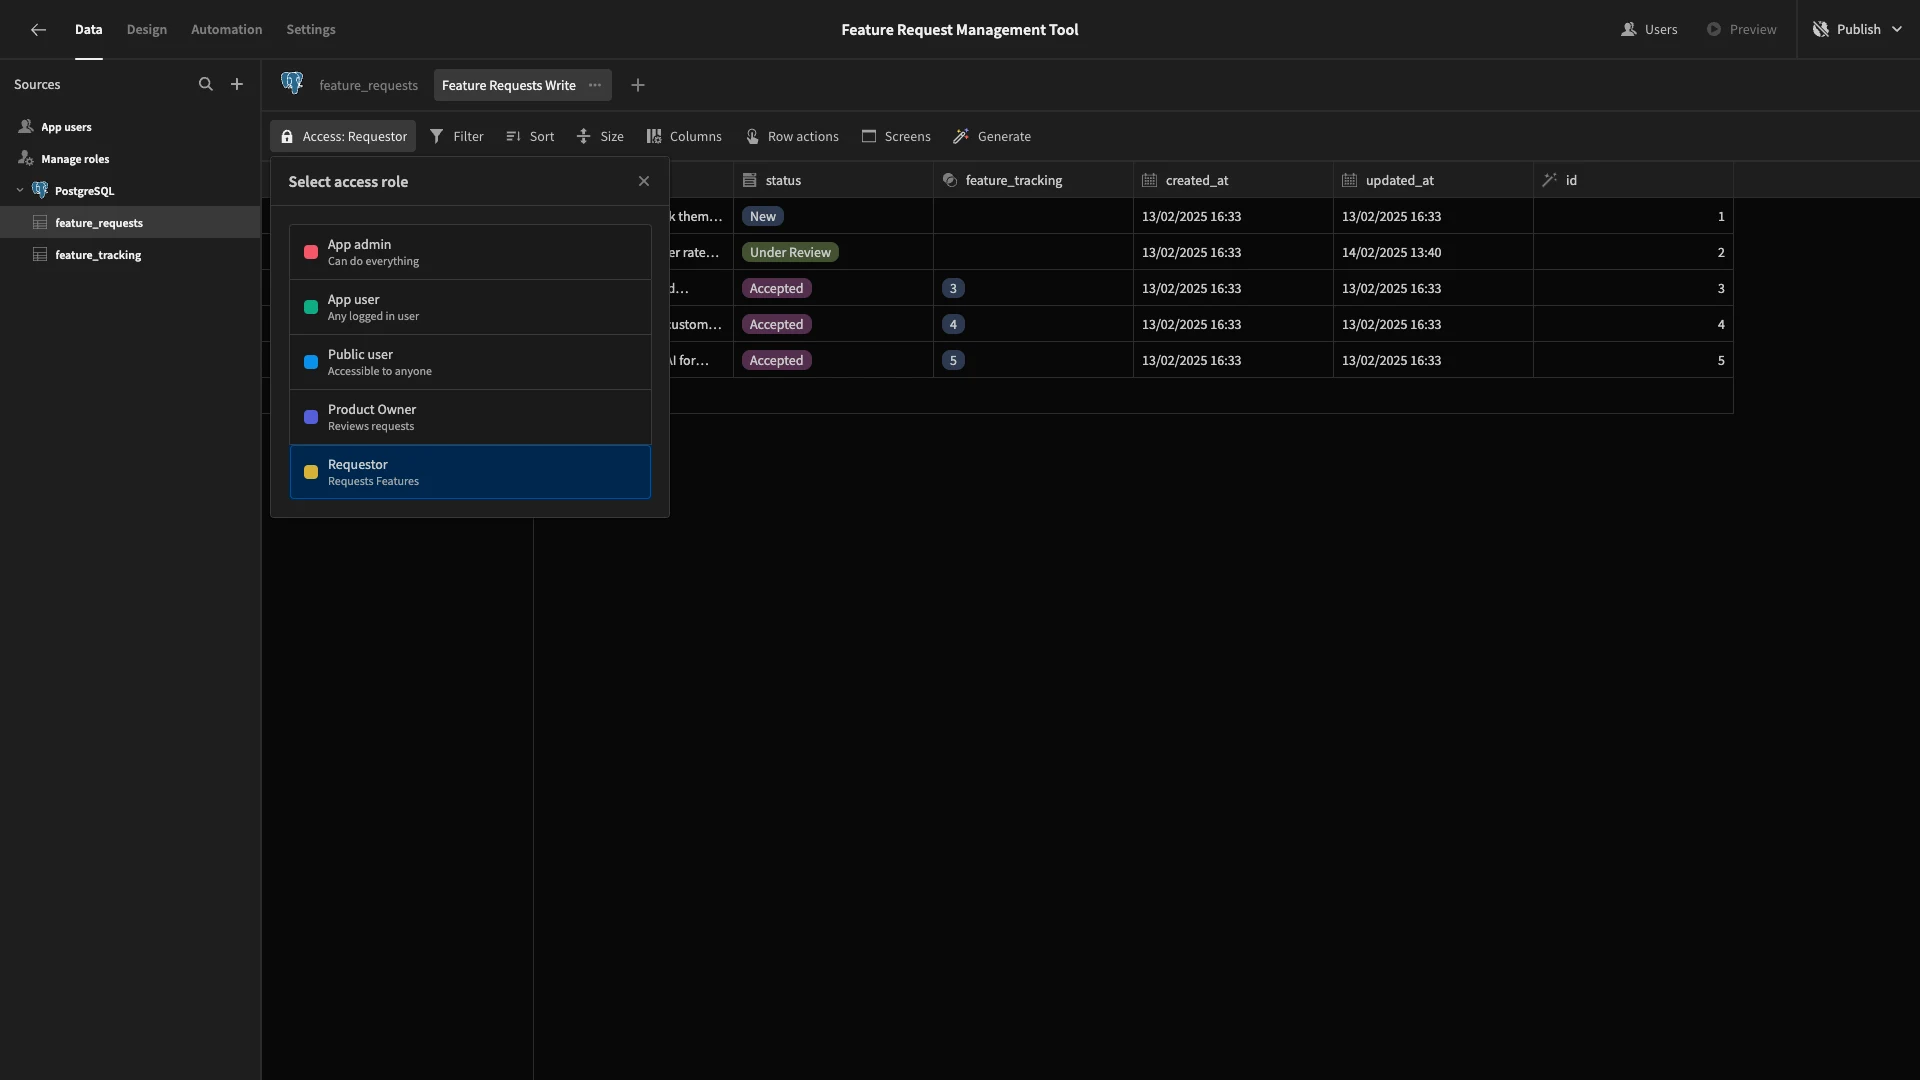
Now Requestors can read all feature_requests, regardless of who submitted them.
Next, we’ll add a second View and call it Requestor Feature Requests Write, again setting the access role to Requestor. This time, though, we’ll start by hitting Filter once this is created.
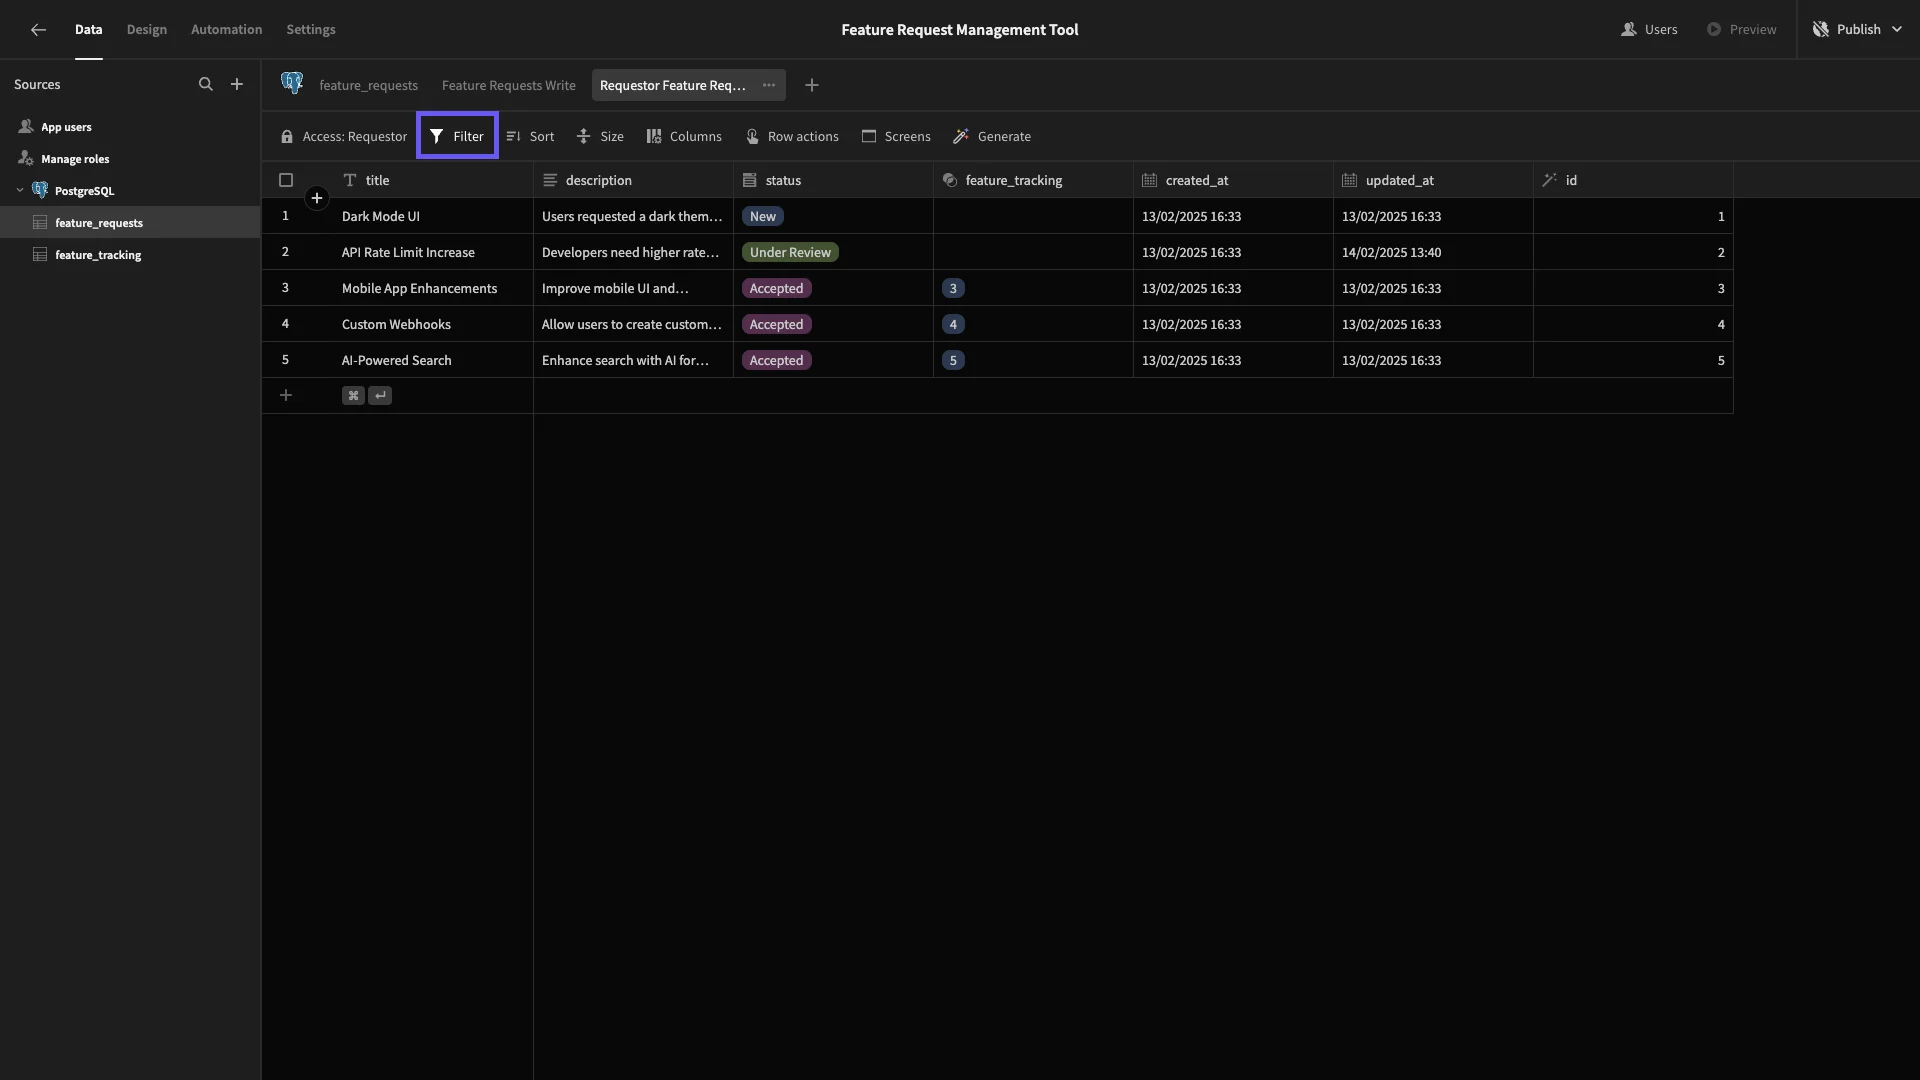
Here, we want to create a filtering rule based on the `requestor attribute. Then, we’ll use the lightning bolt to open the bindings menu for our value.
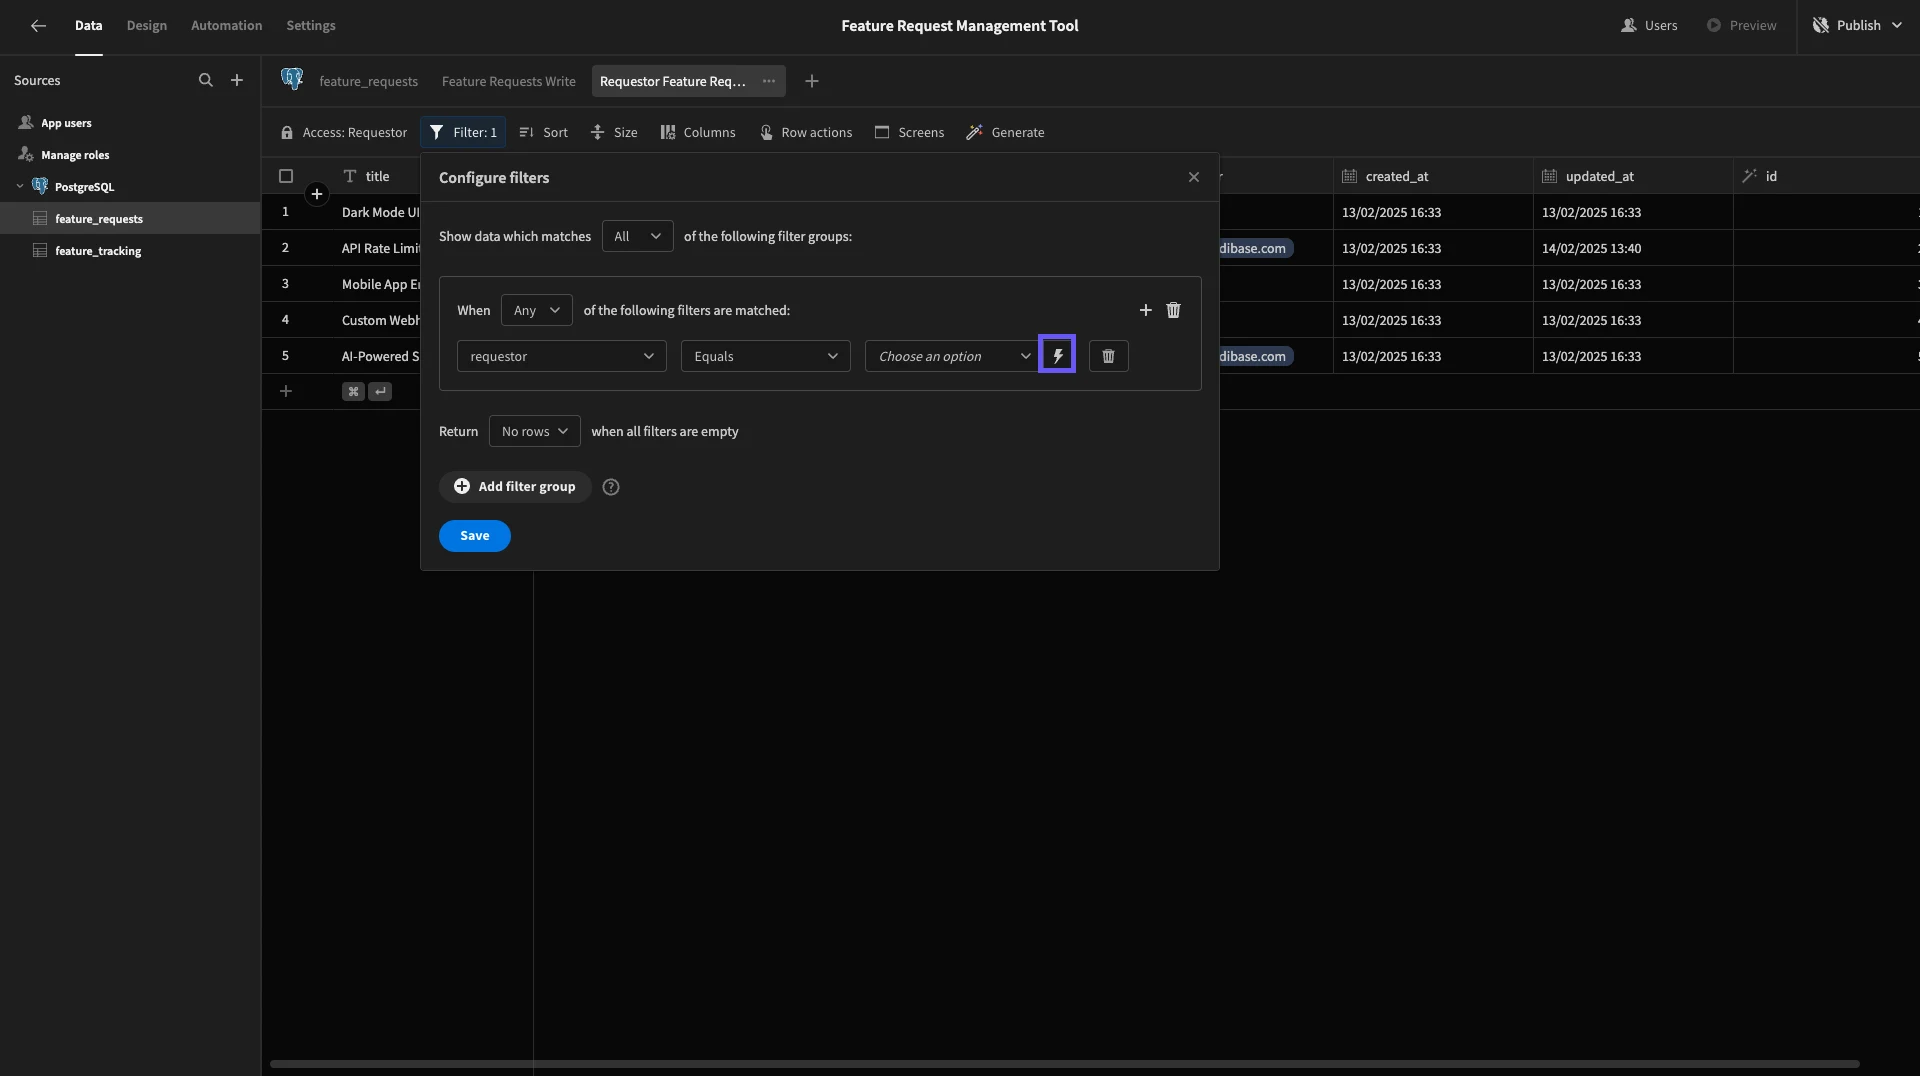
Under the Current User section, we’ll bind this to the _id attribute from the Users table.
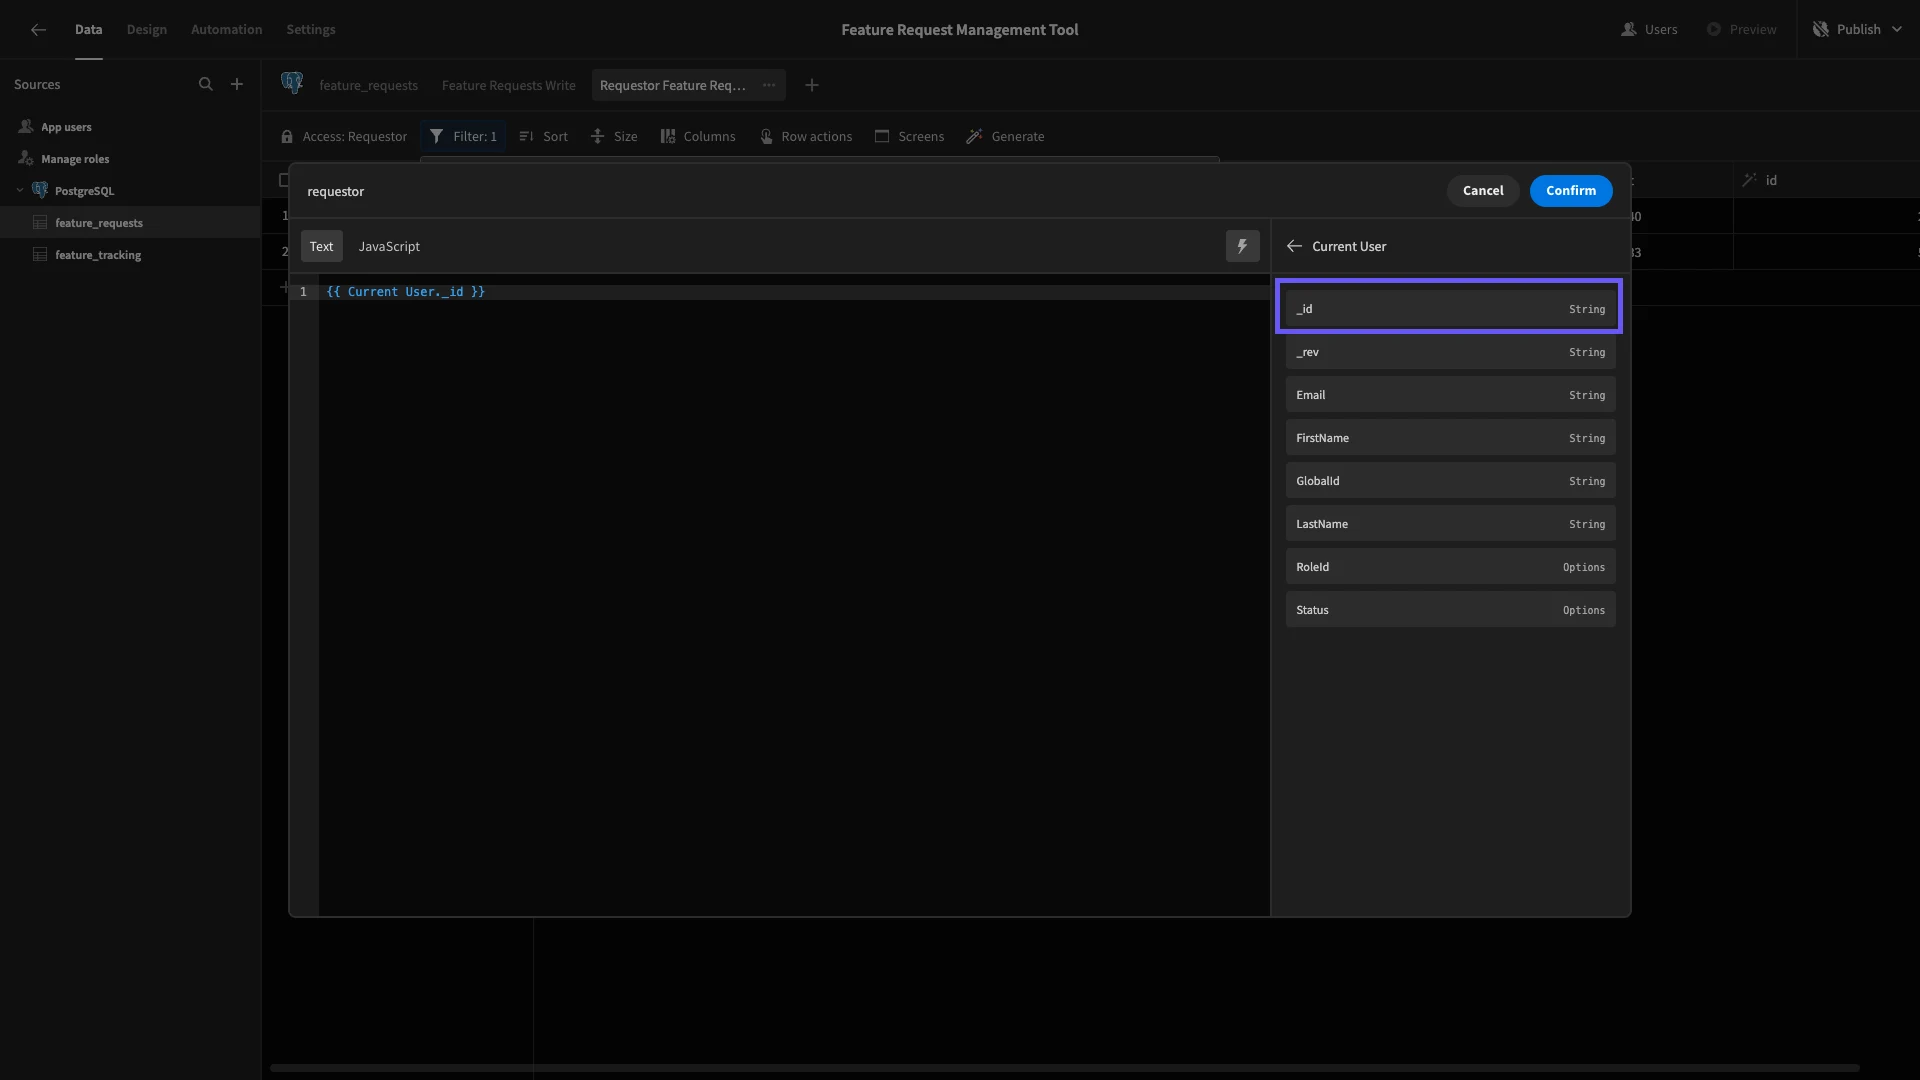
Now, we can only see the rows that we assigned ourselves to earlier.
Under Columns, we’ll then hide the requestor attribute, leaving everything else writable.
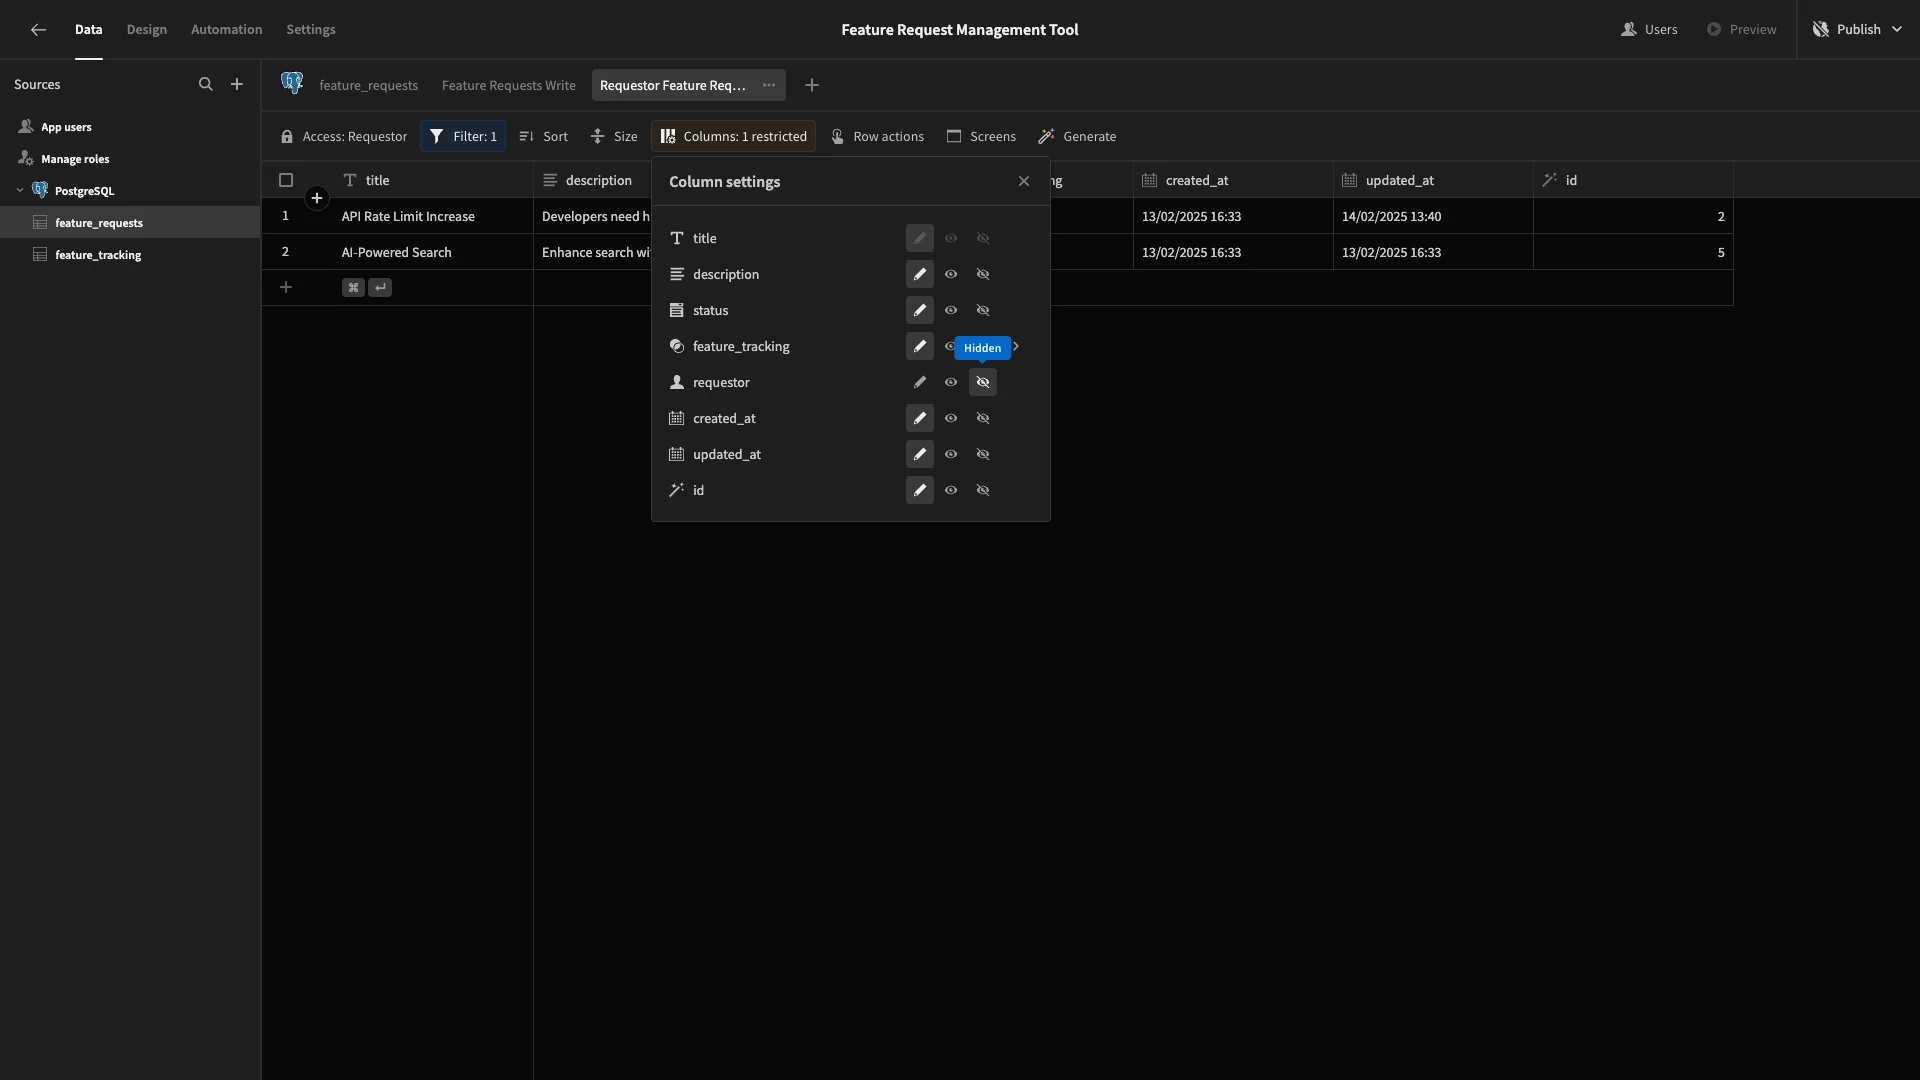
Now, Requestors can create rows or update ones they’ve submitted previously.
Next, we’ll head to feature_tracking and add a View called Requestor Feature Tracking, with its access role set to Requestor. We’ll then hide the idcolumn and set everything else toread-only`.
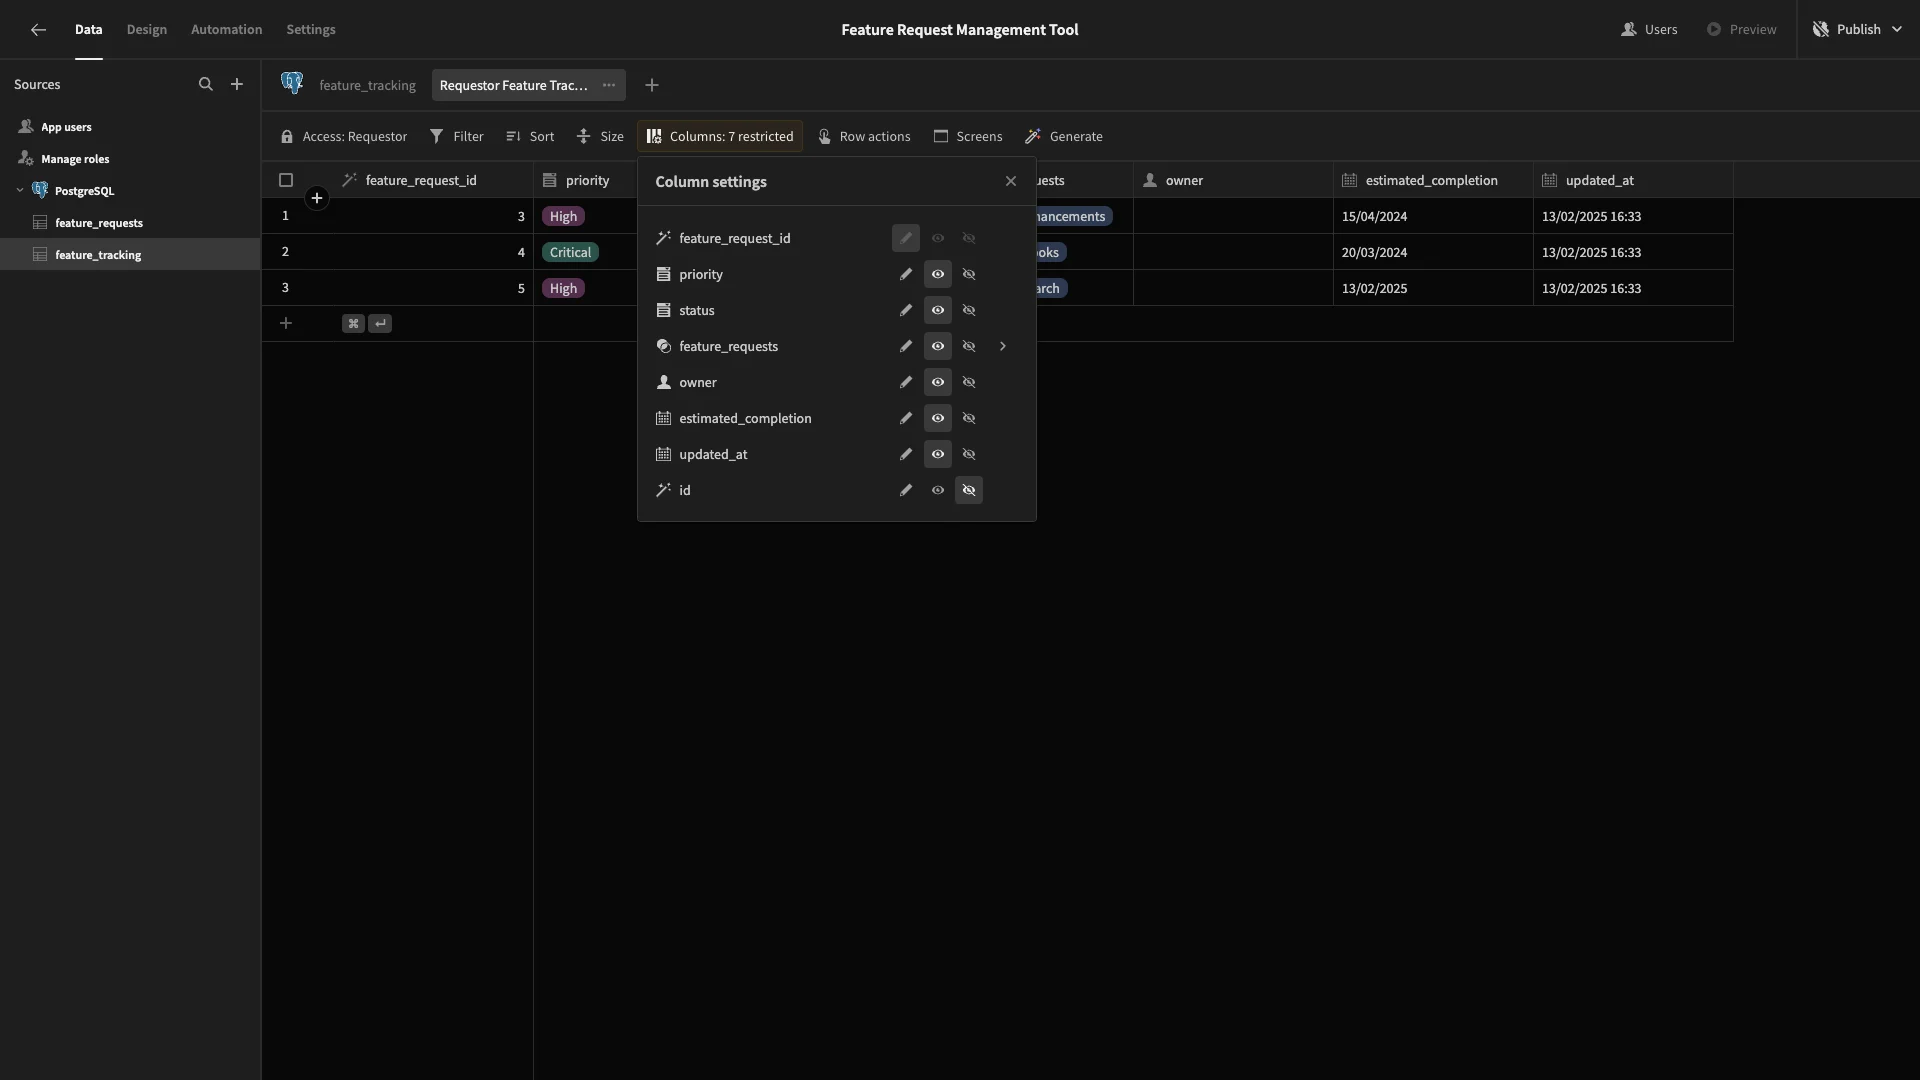
This time, however, we also want to add some columns from the corresponding feature_requests rows. Specifically, we’ll also enable Requestors to view the title and description from the original request.
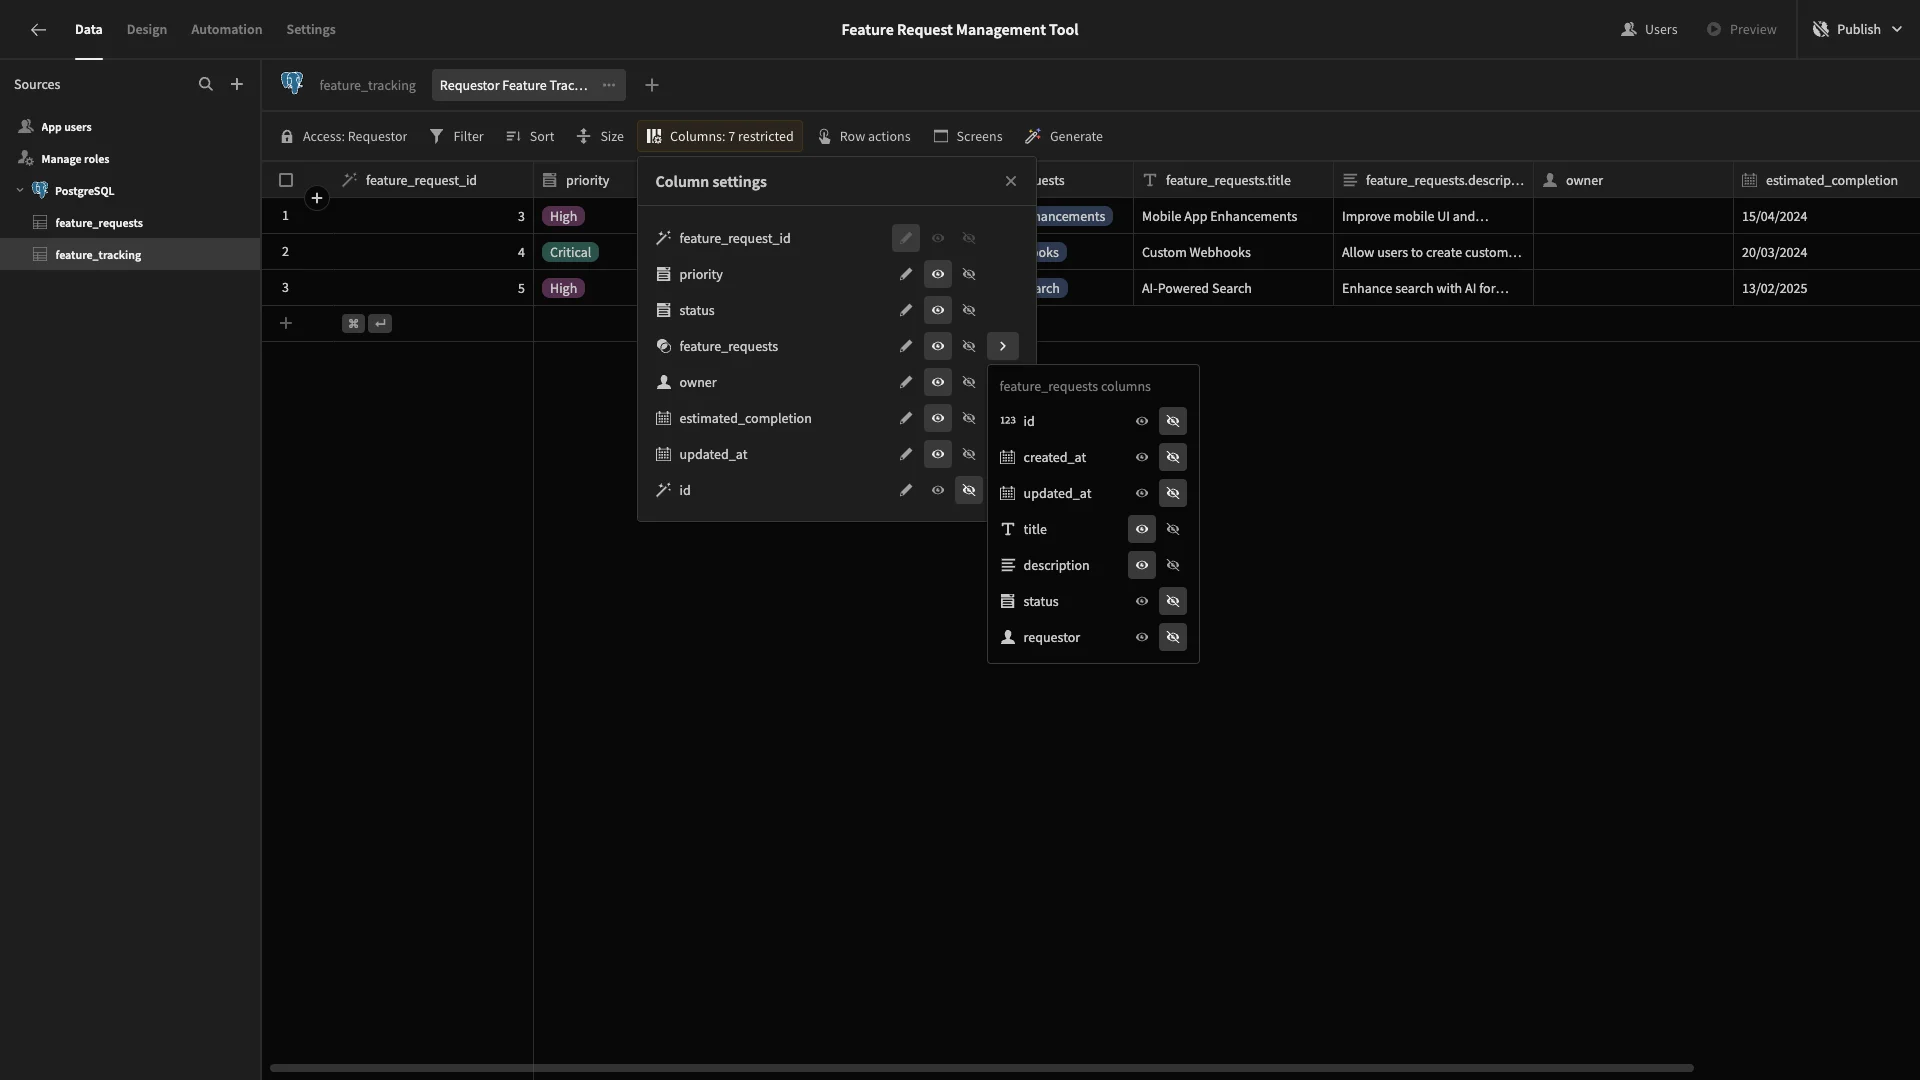
We’ll also want Product Owners to see these attributes when they look at feature_tracking data, so we’ll add one final view called Product Owner Feature Tracking.
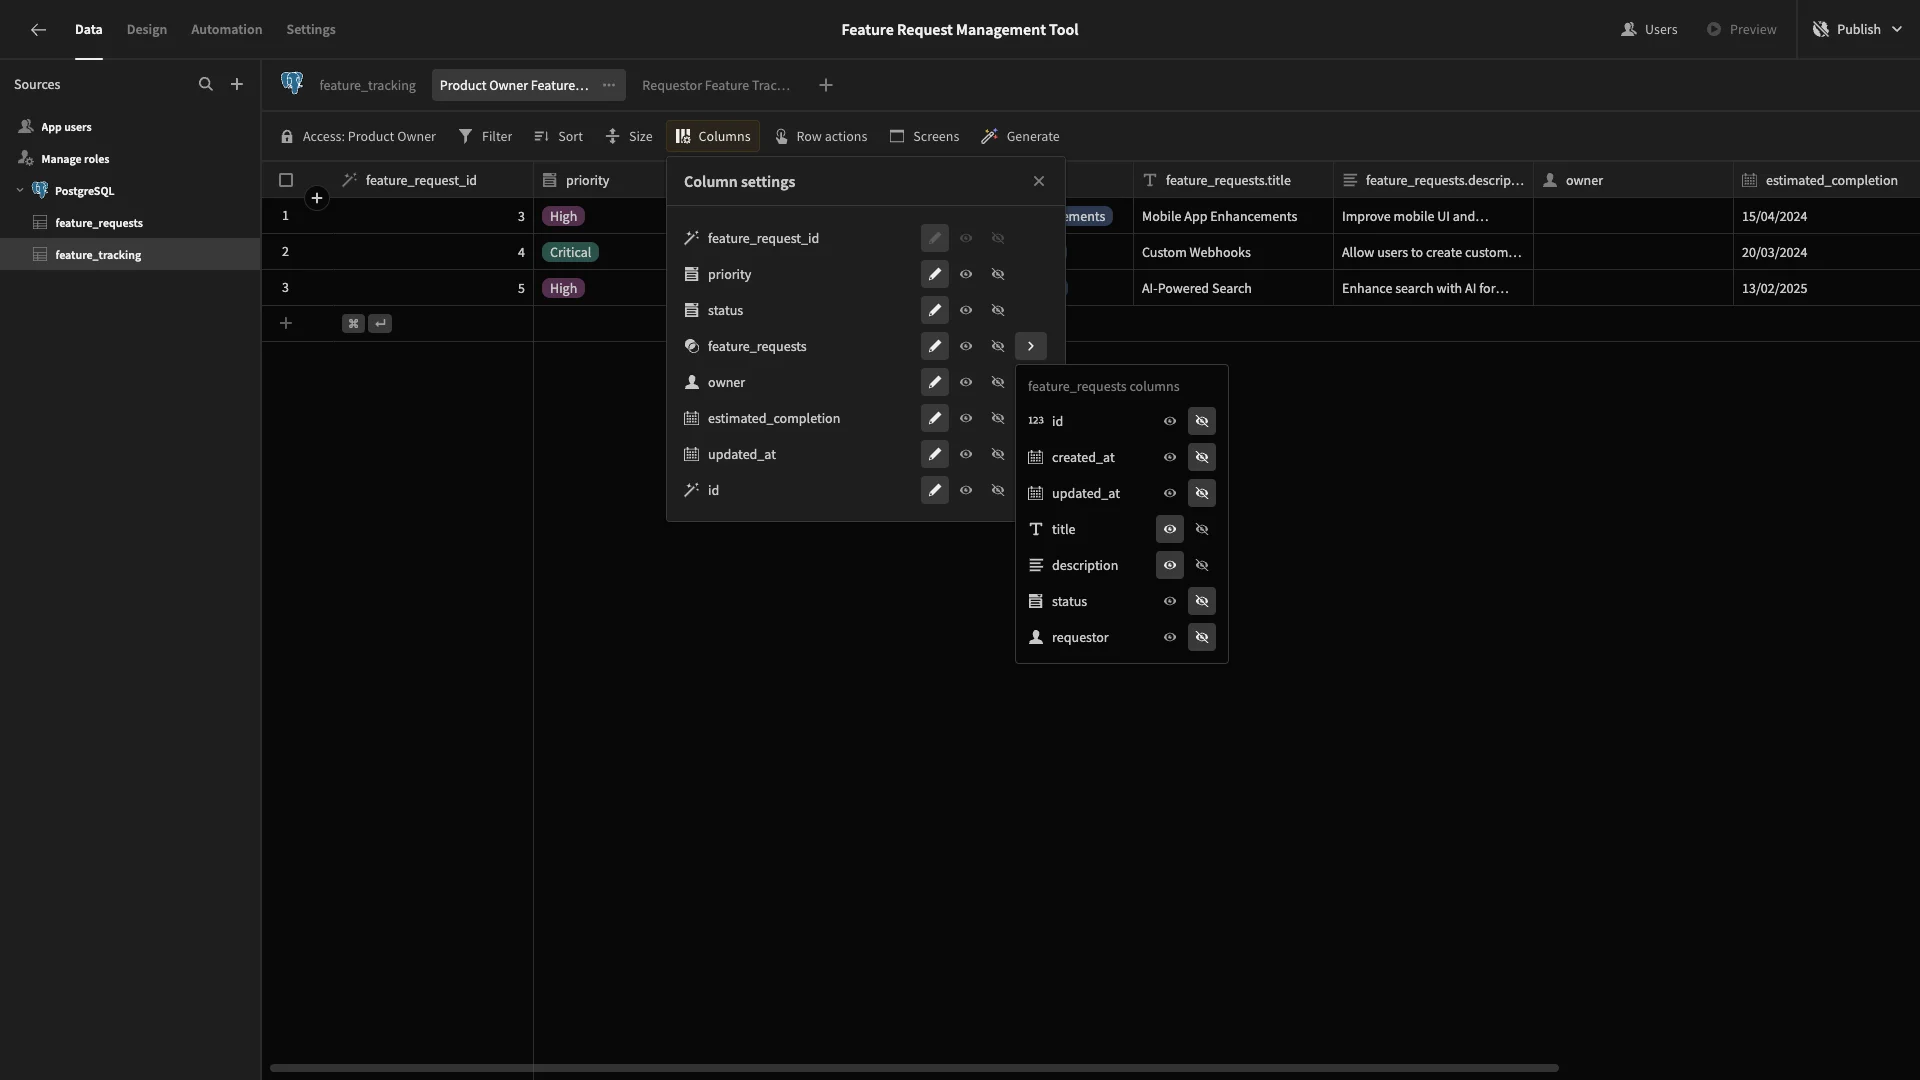
This time, we’ll leave everything writable but also add read permissions for those two extra columns.
2. Building a feature request form
With Budibase, once we’ve set up our data model, we can autogenerate customizable screens based on this. These will inherit the roles and permissions of whichever table or view they’re connected to.
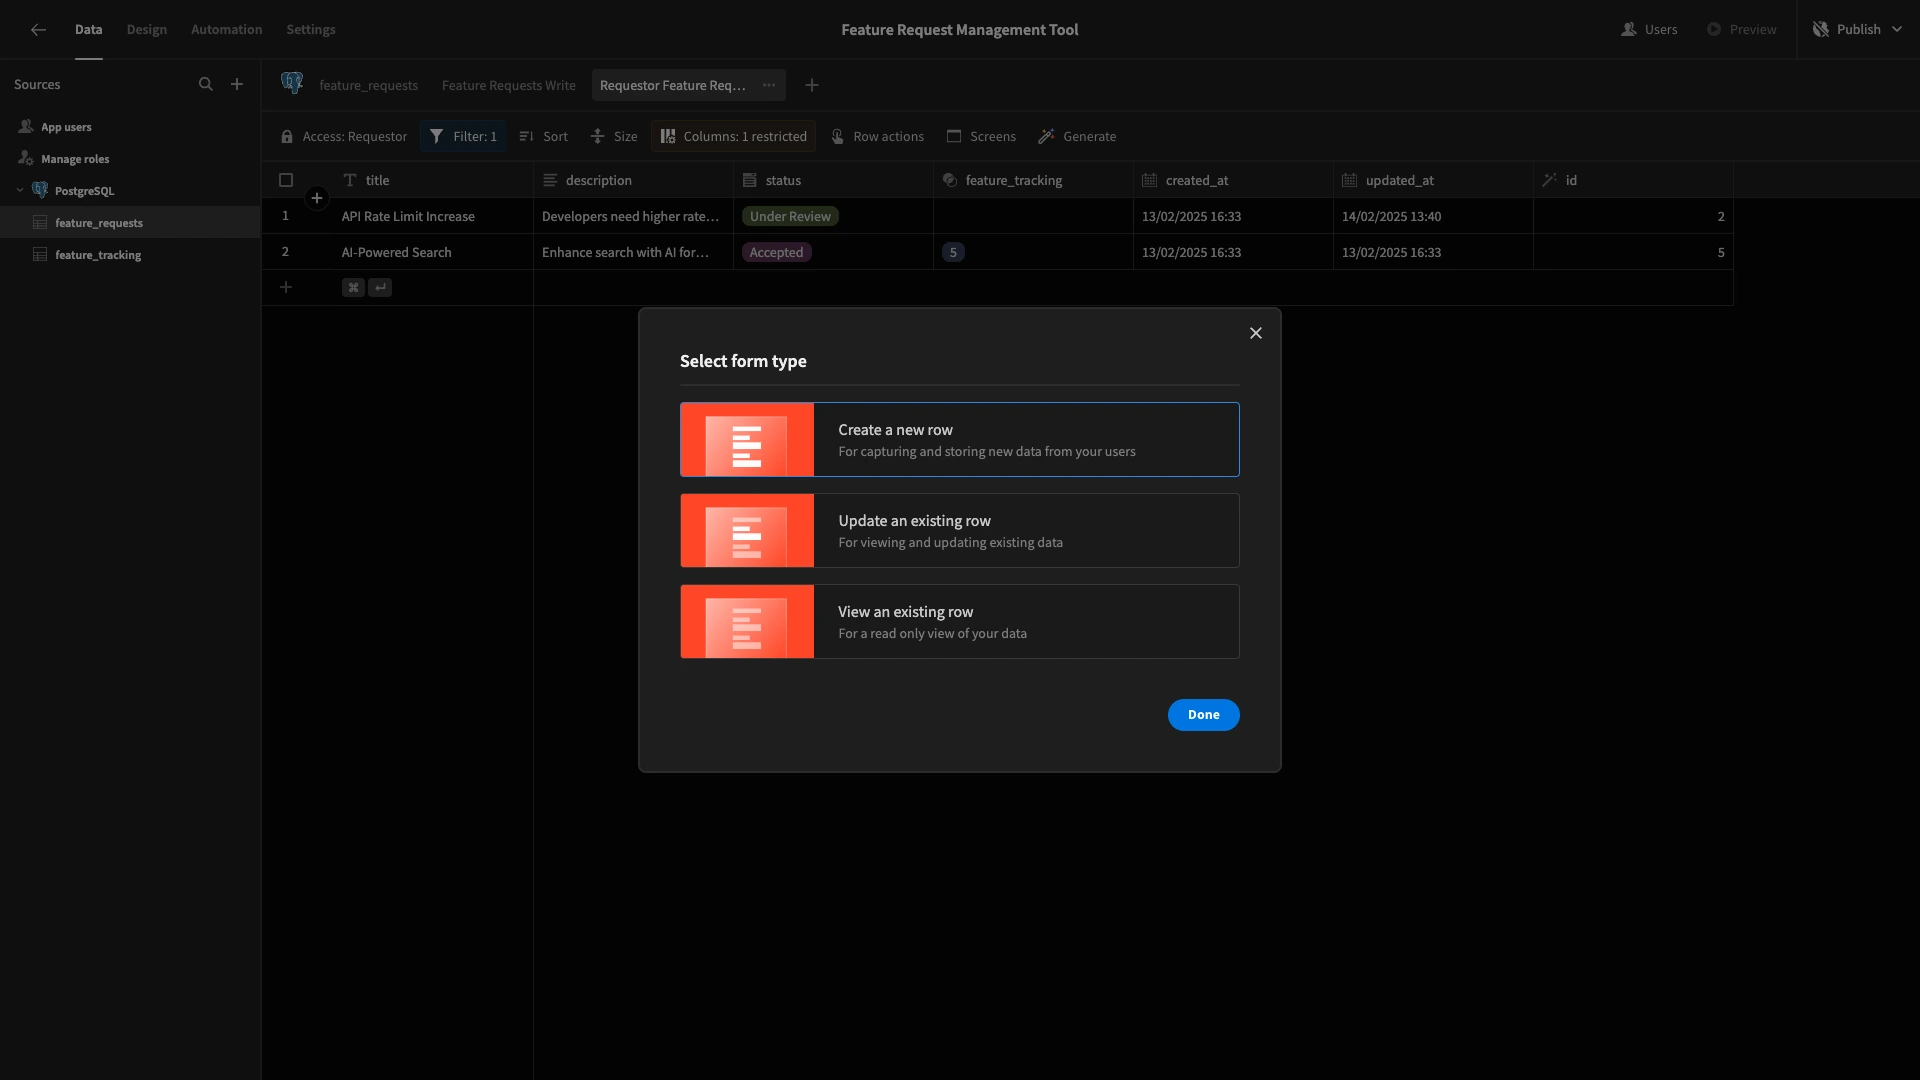
The first screen we want to build is a simple feature request form. Within the Requestor Feature Request Write View, we’ll hit Generate then Form.
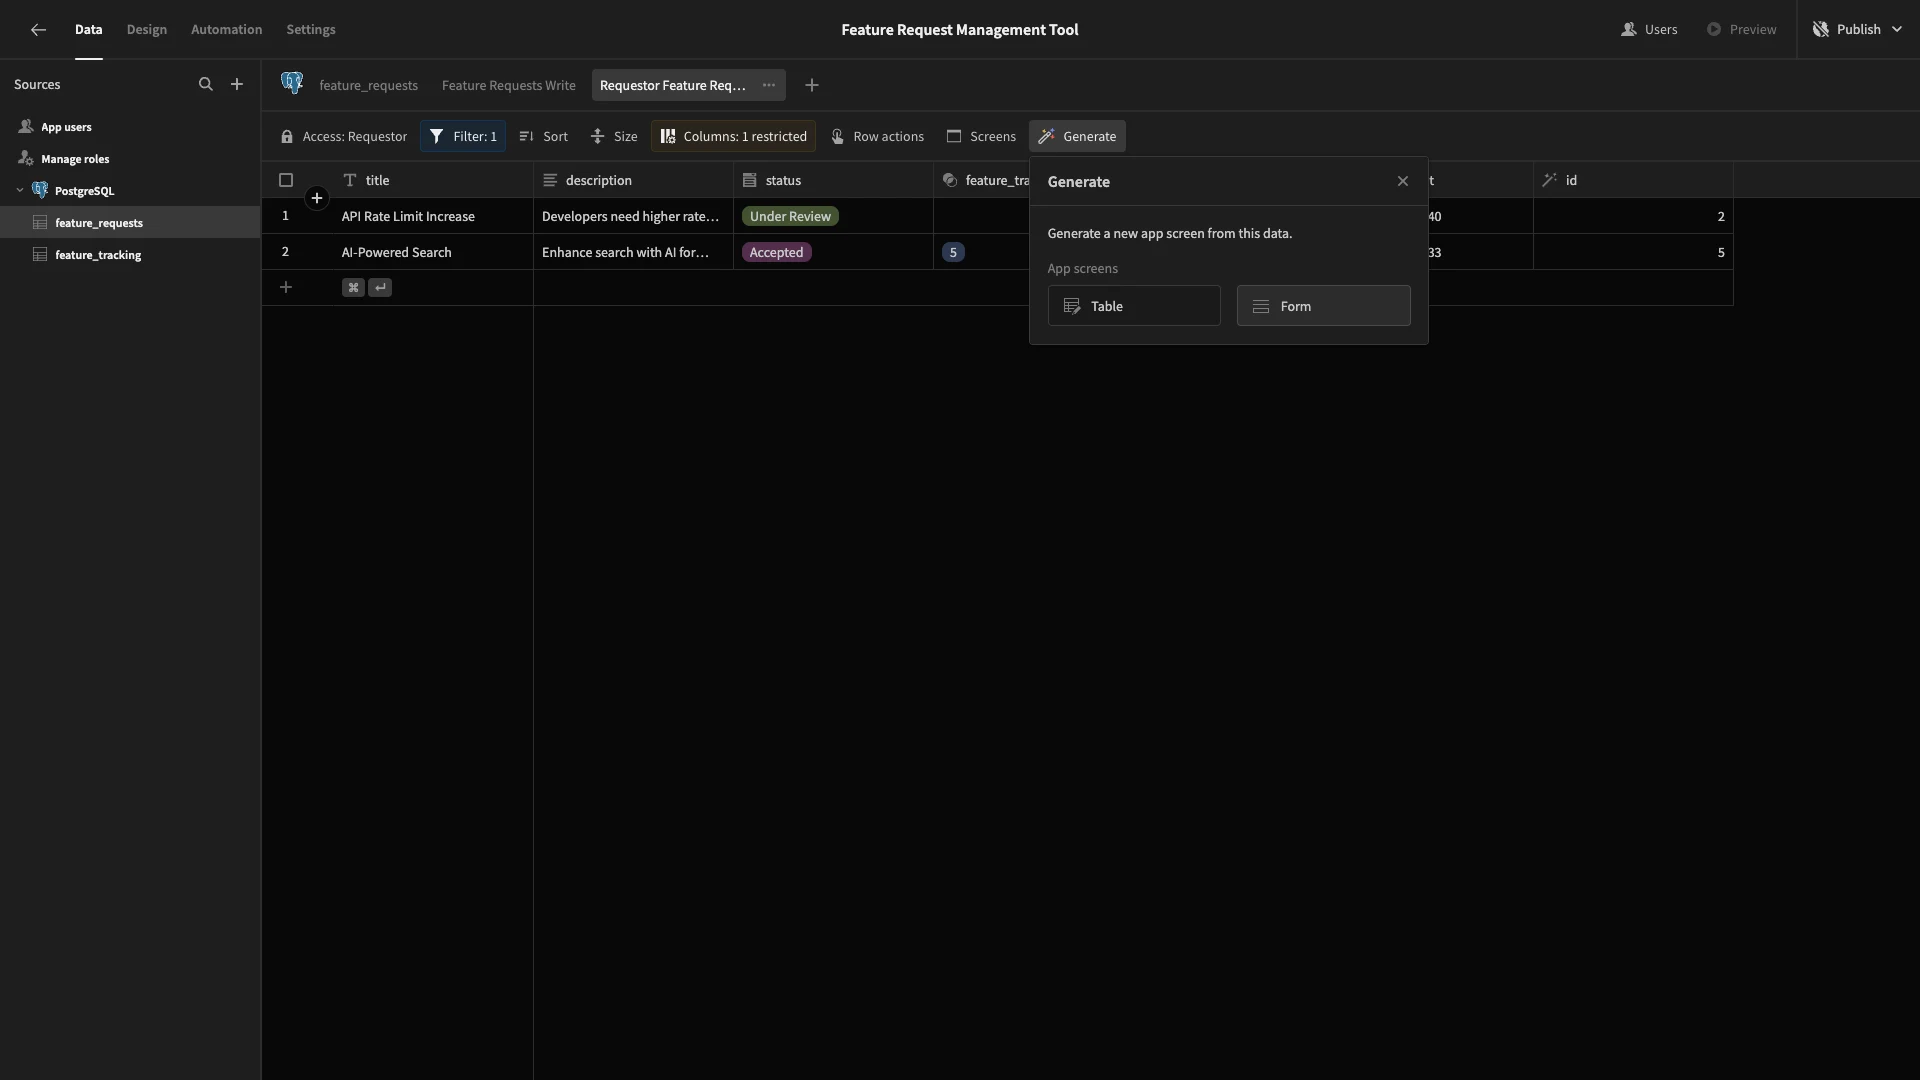
On the dialog that pops up, we’ll select the option for a Create form.
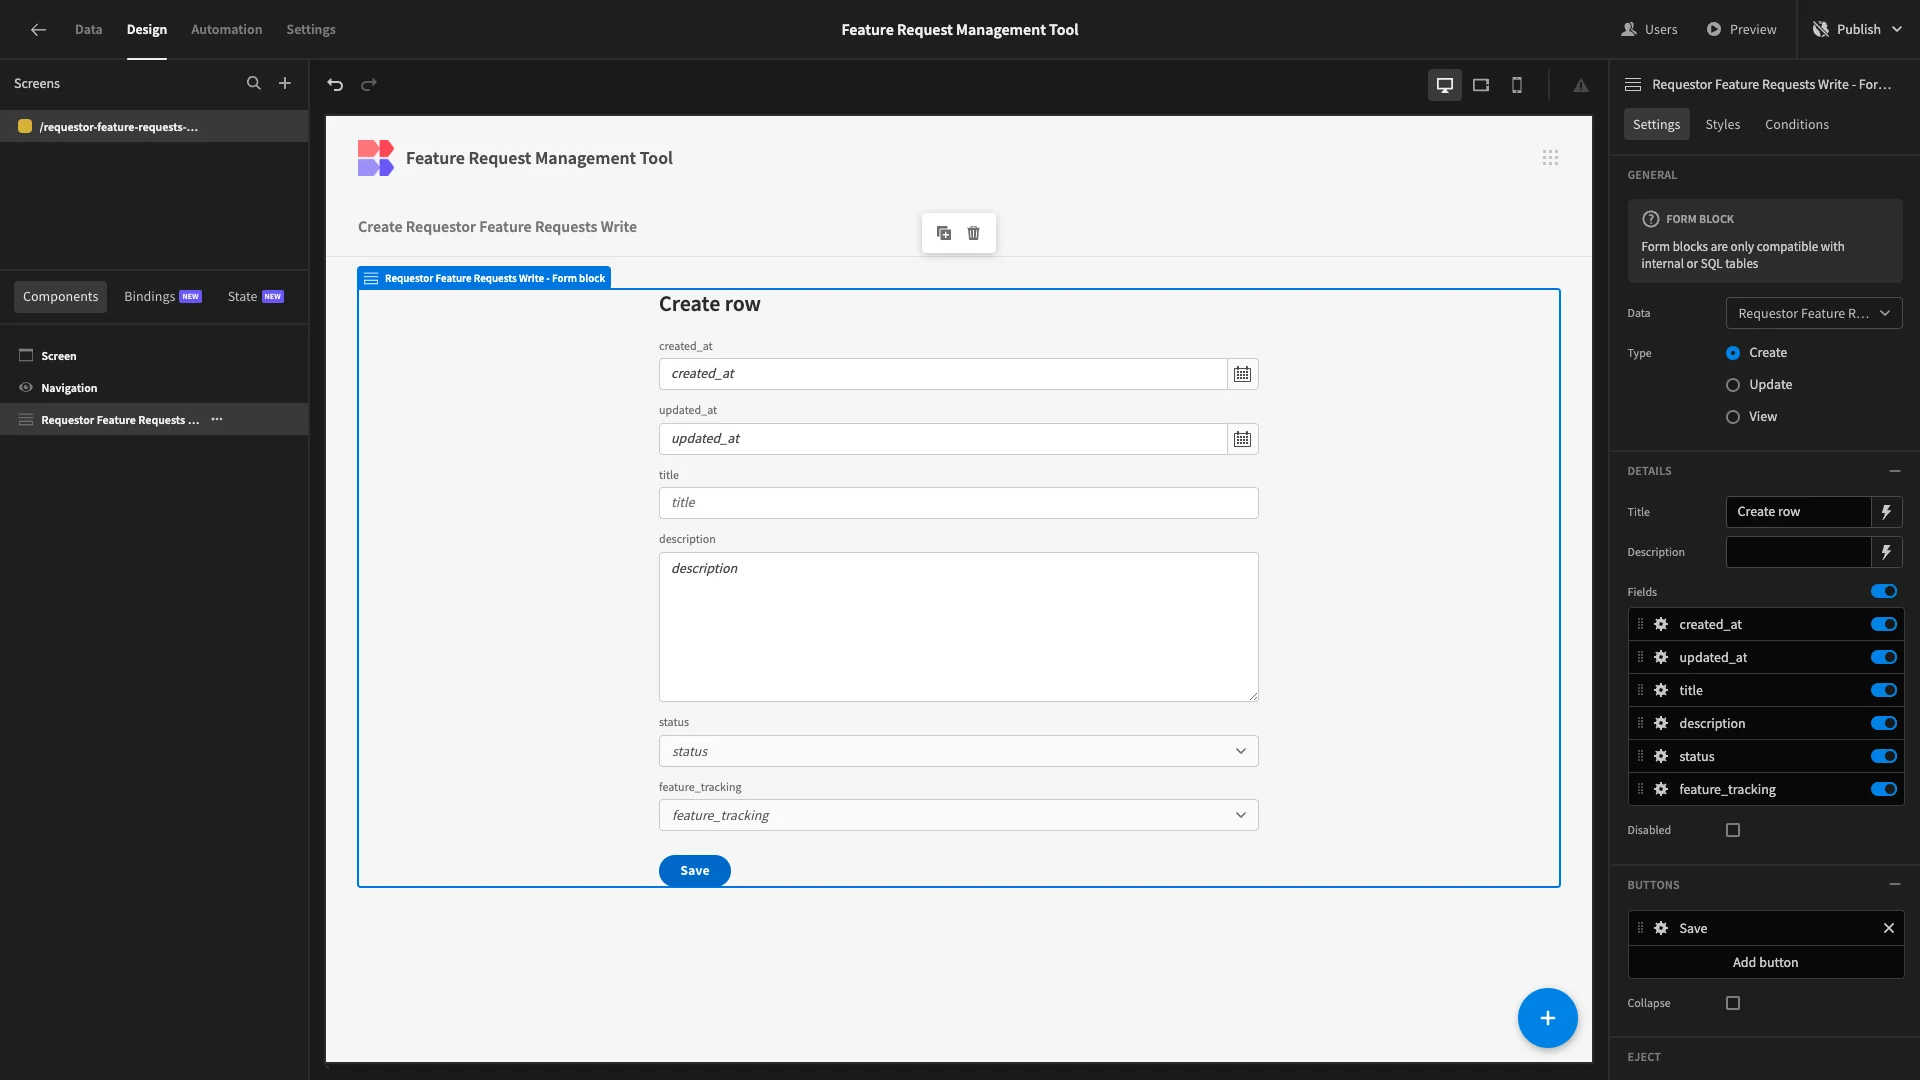
Here’s how this looks out of the box.
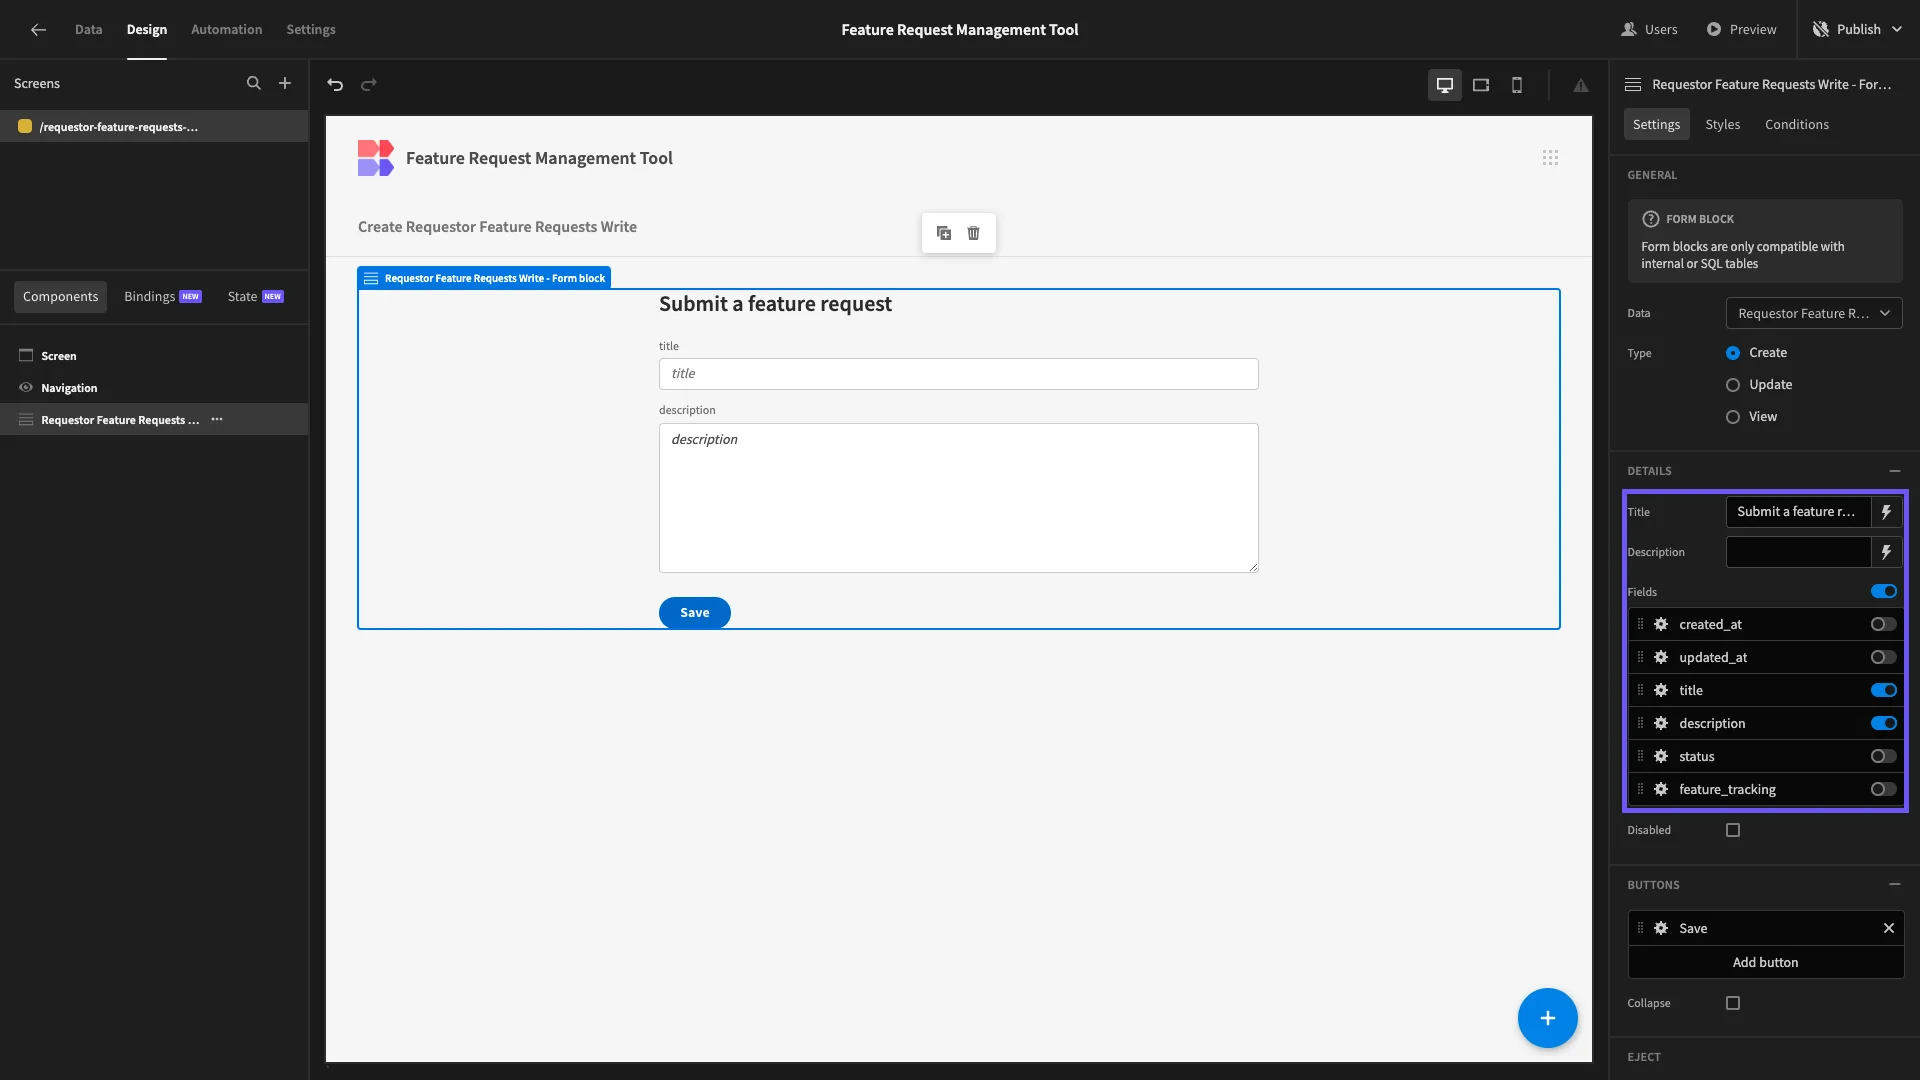
We’re going to hide all fields except title and description, as well as updating our form’s heading.
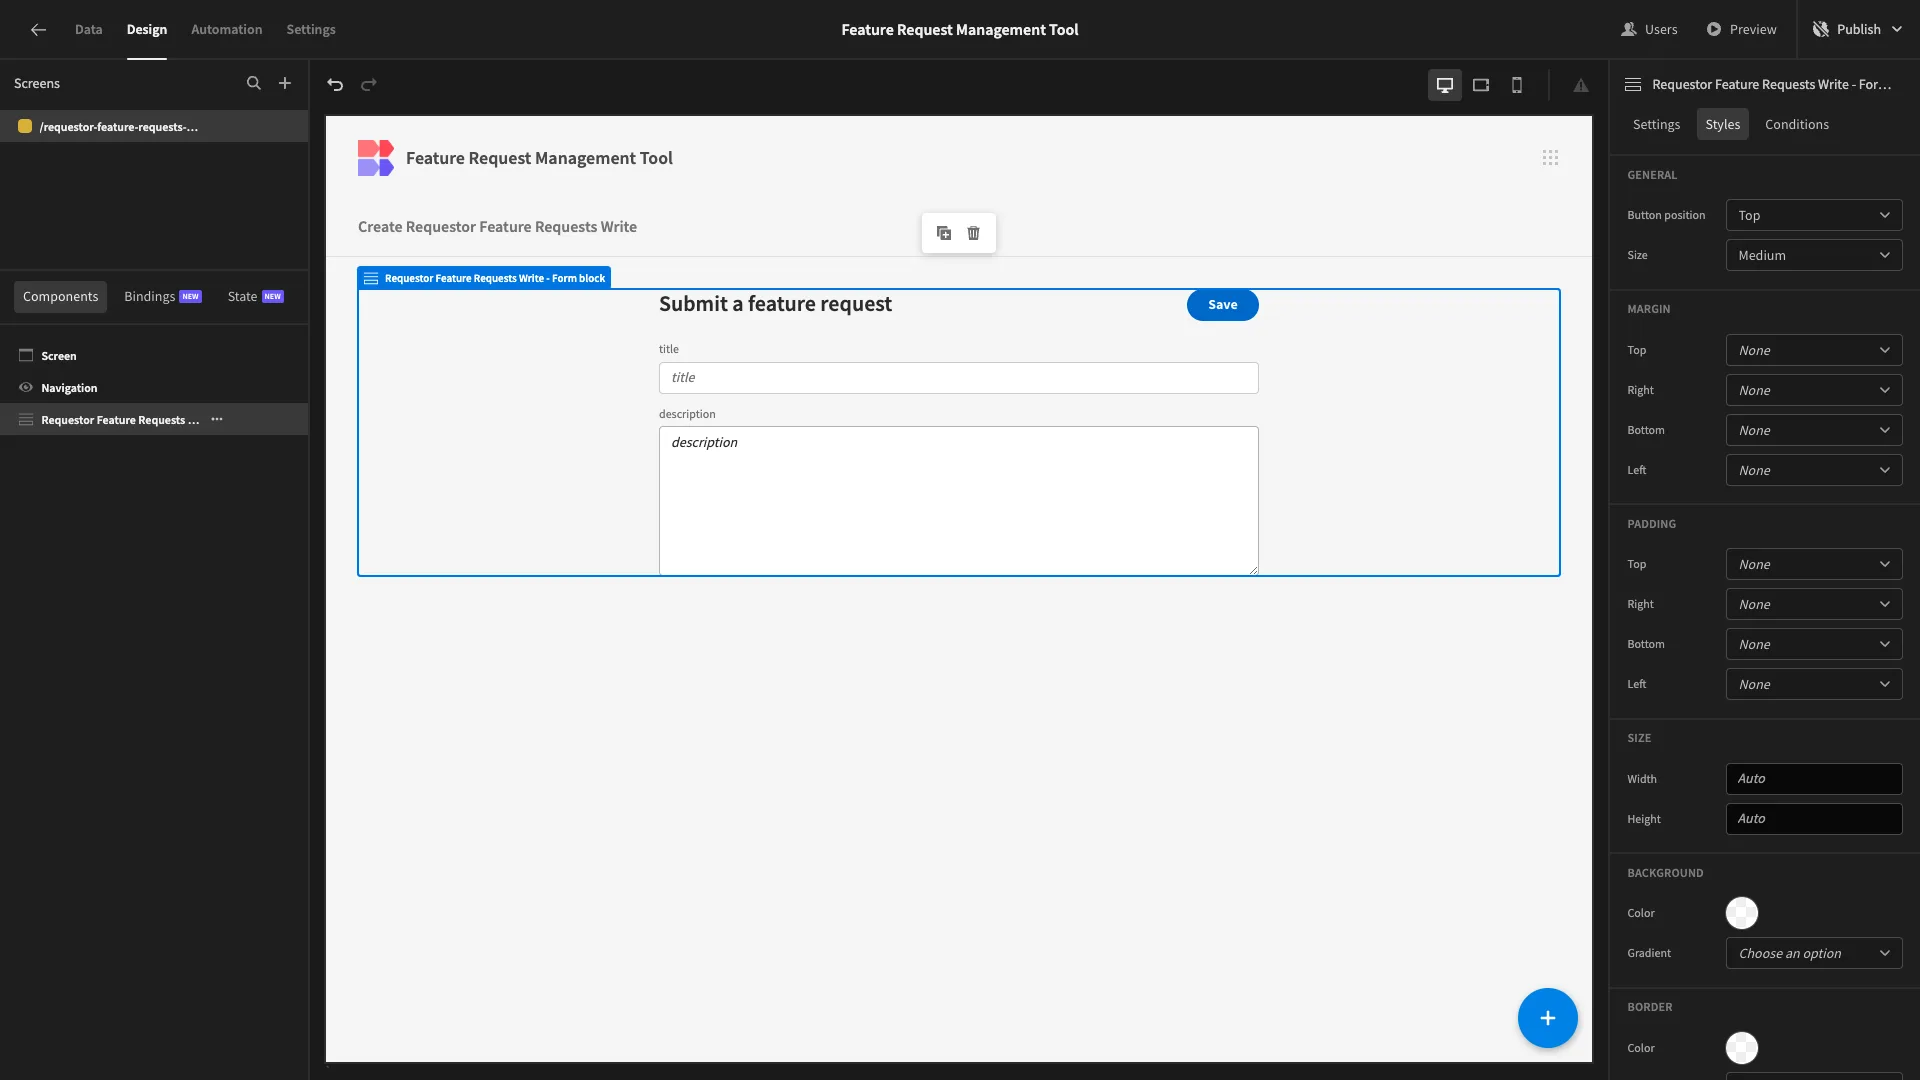
Then, under Styles, we’ll set the button position to top.
Earlier, we created default values for our updated_at attribute so that it will be populated automatically. The feature_requests table also contains an attribute called created_at.
We also want to set a value for this when a row is created, we can configure our Save button to do this.
We’ll start by opening the Actions drawer.
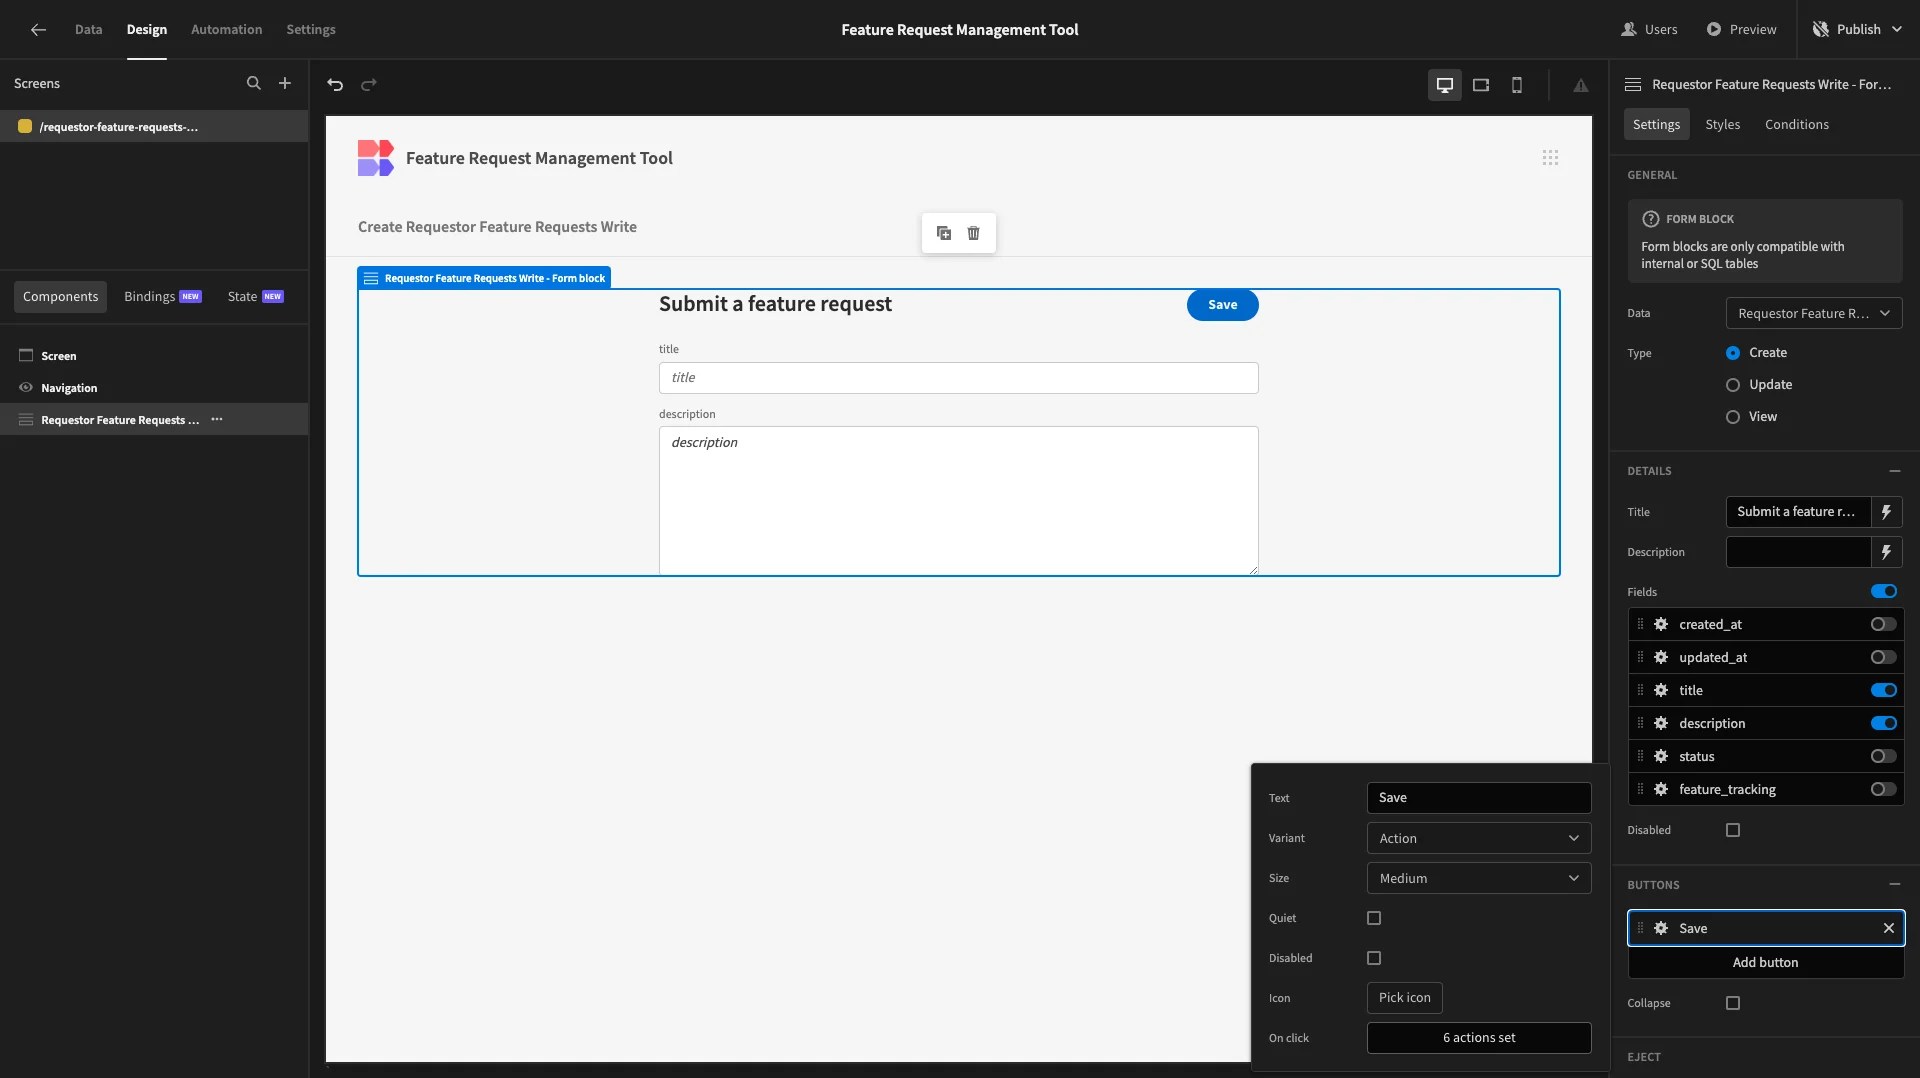
Under the existing Save Row action, we can manually set a value for our created_at attribute.
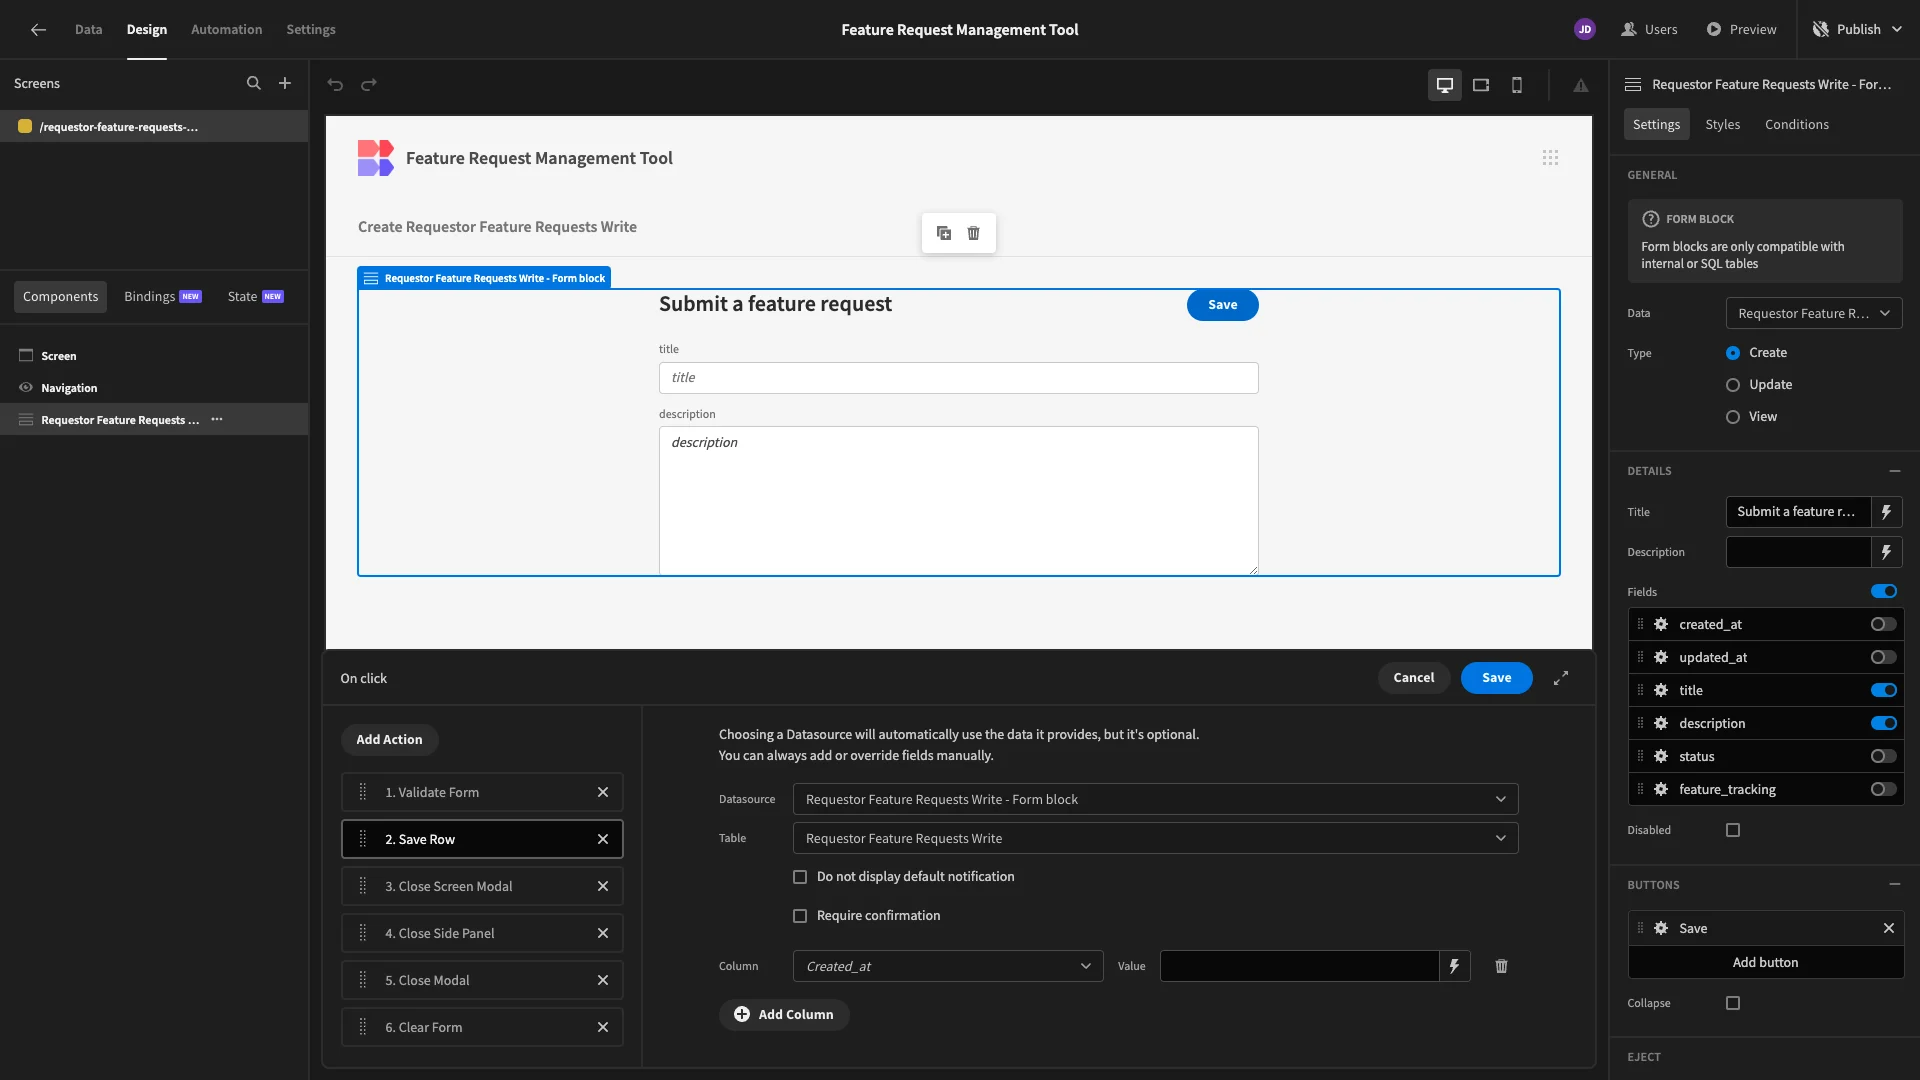
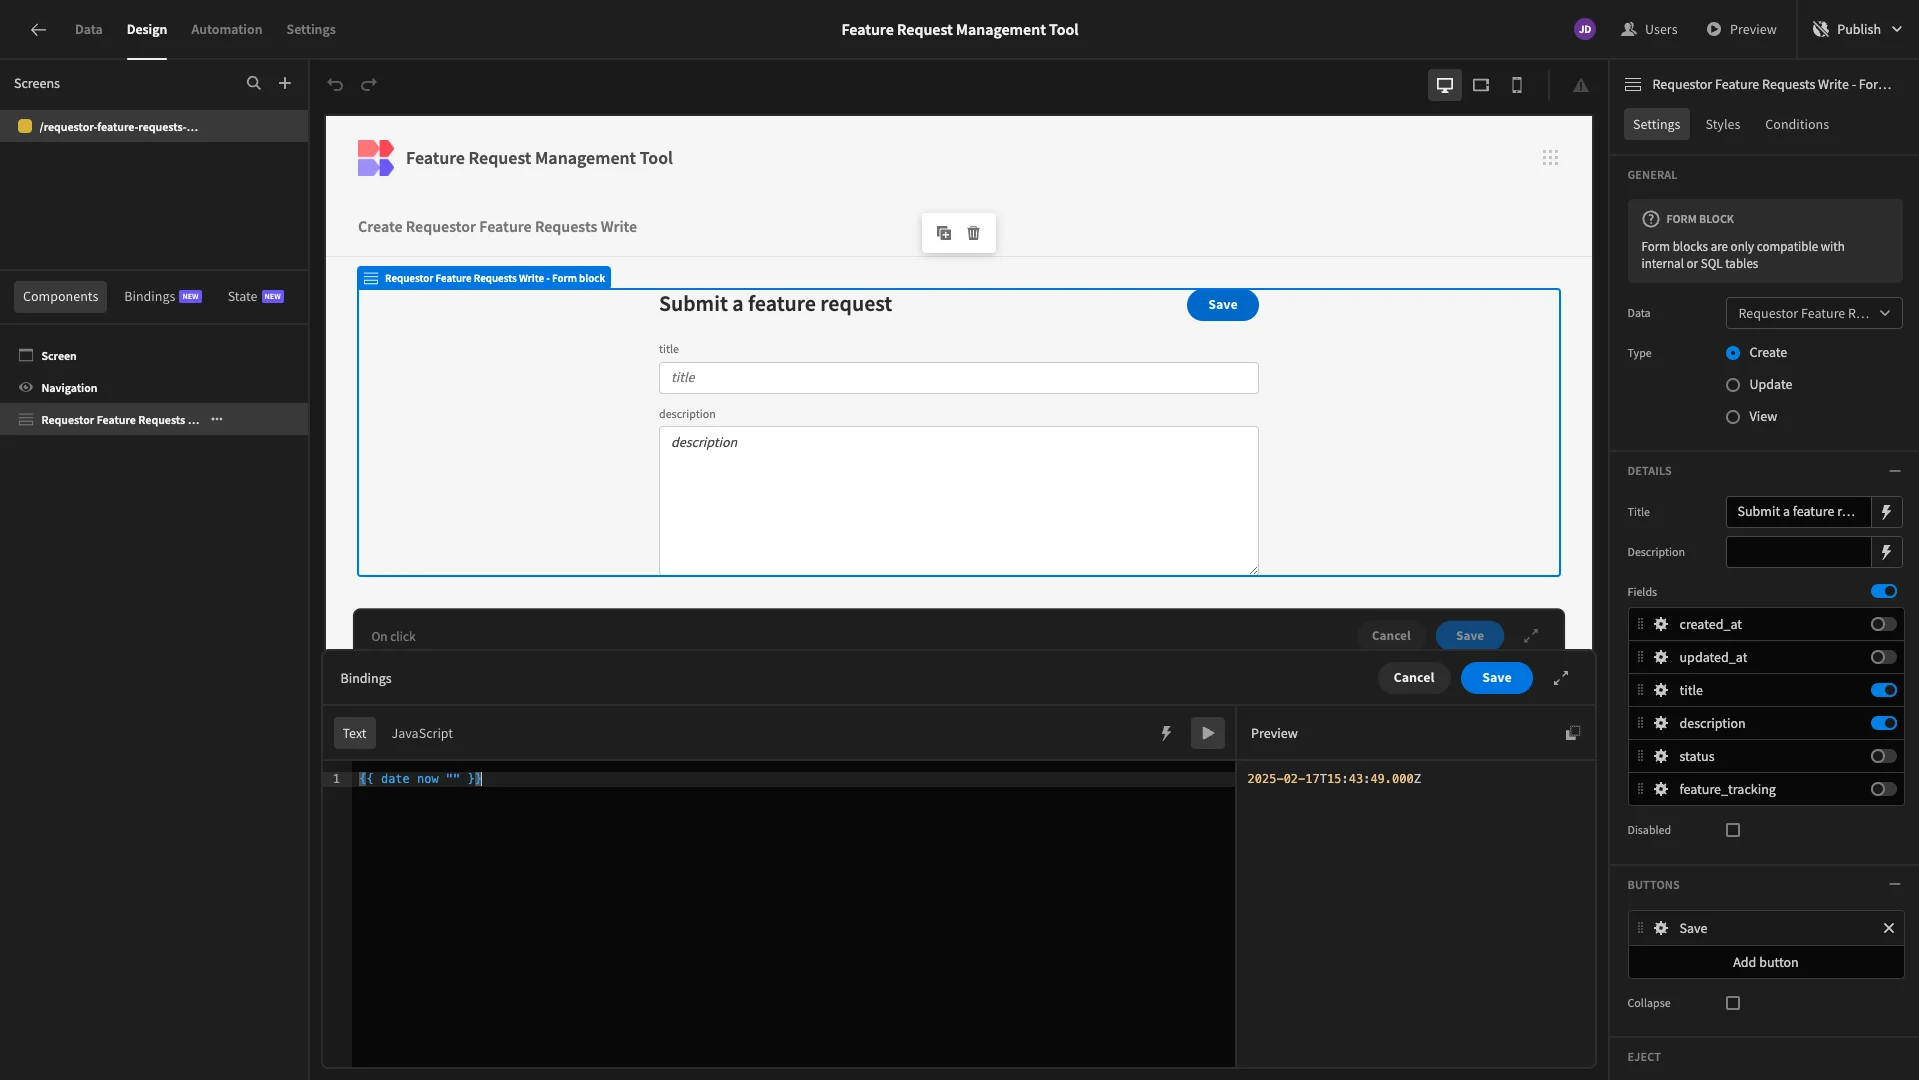
We’ll bind this to the handlebars expression {{ date now "" }}, returning the current date in the default format.
3. Feature tracking for requestors
Next, we want to build screens to enable Requestors to interact with existing feature requests and planned features.
Open requests
We’ll start by generating a Table UI from our Requestor Feature Requests Read View. This time, we’ll select the option for modal edit forms.
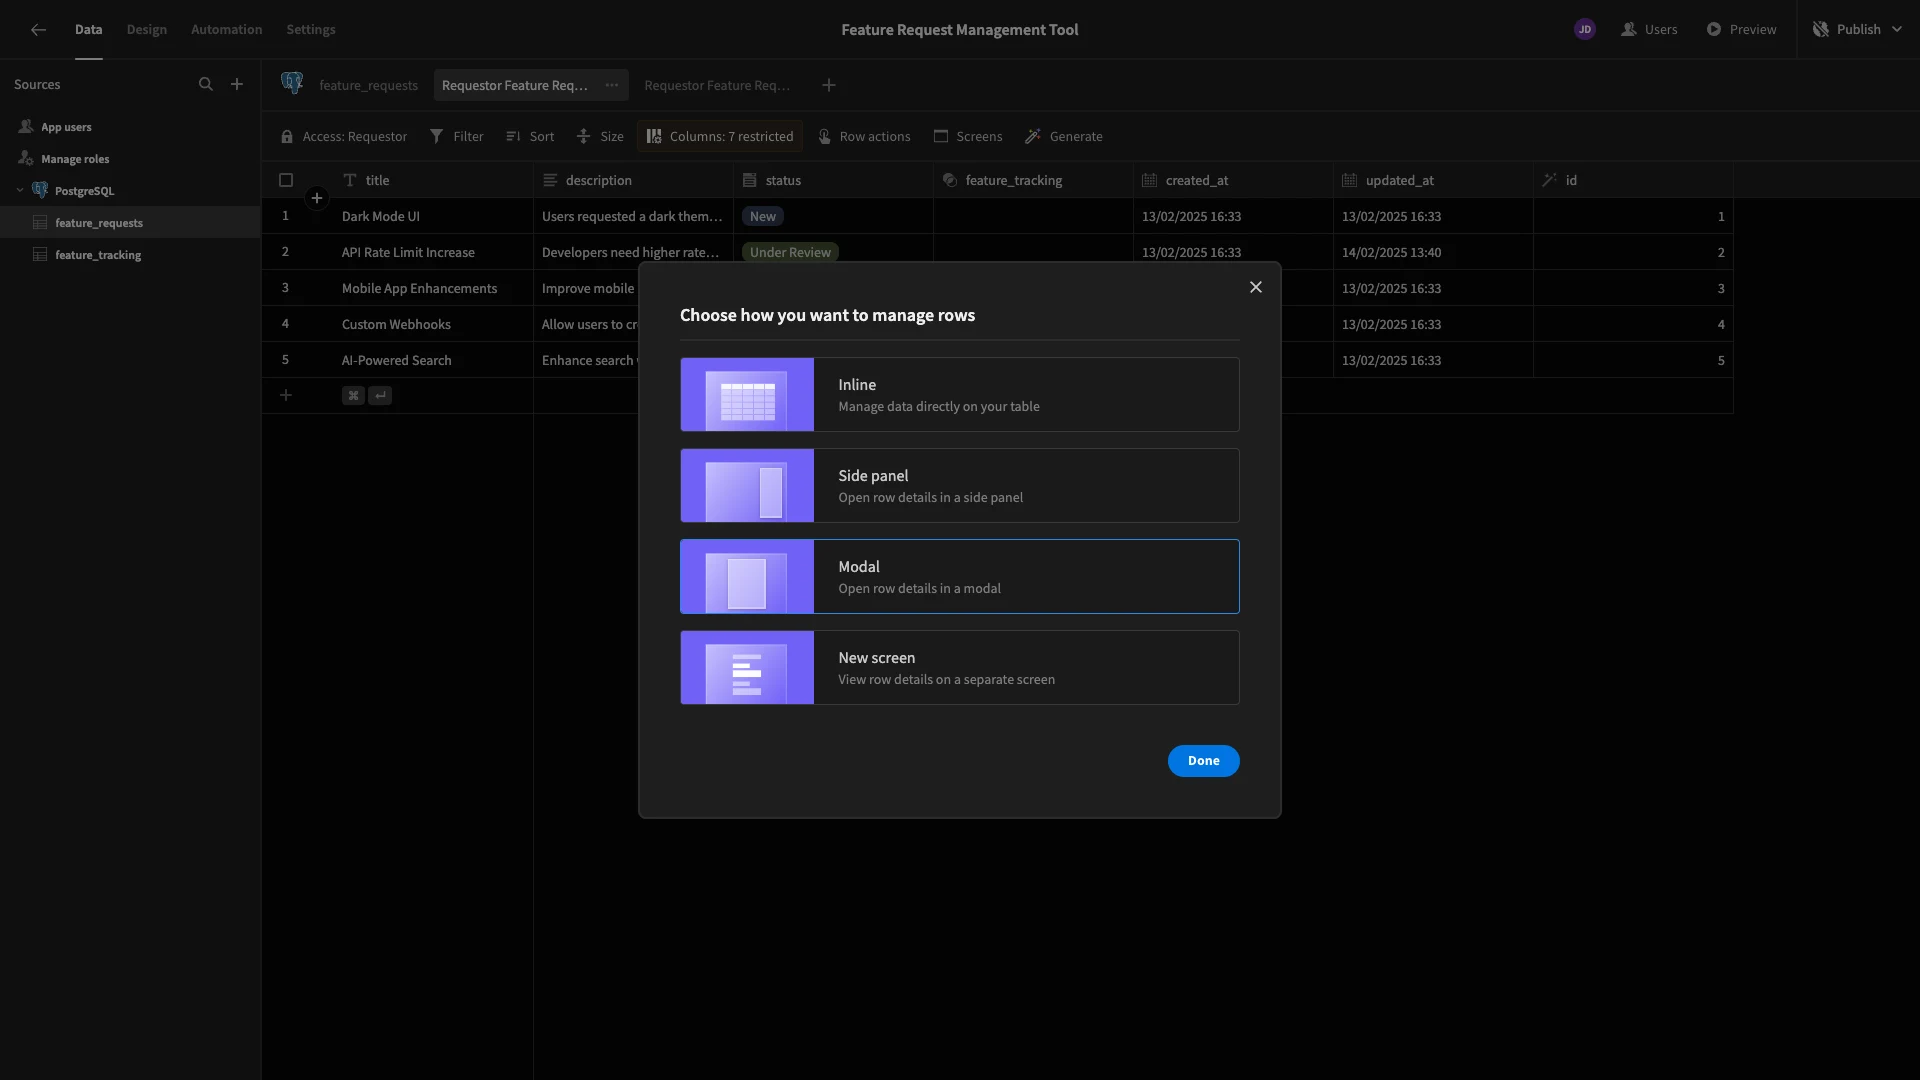
Here’s how this will look.
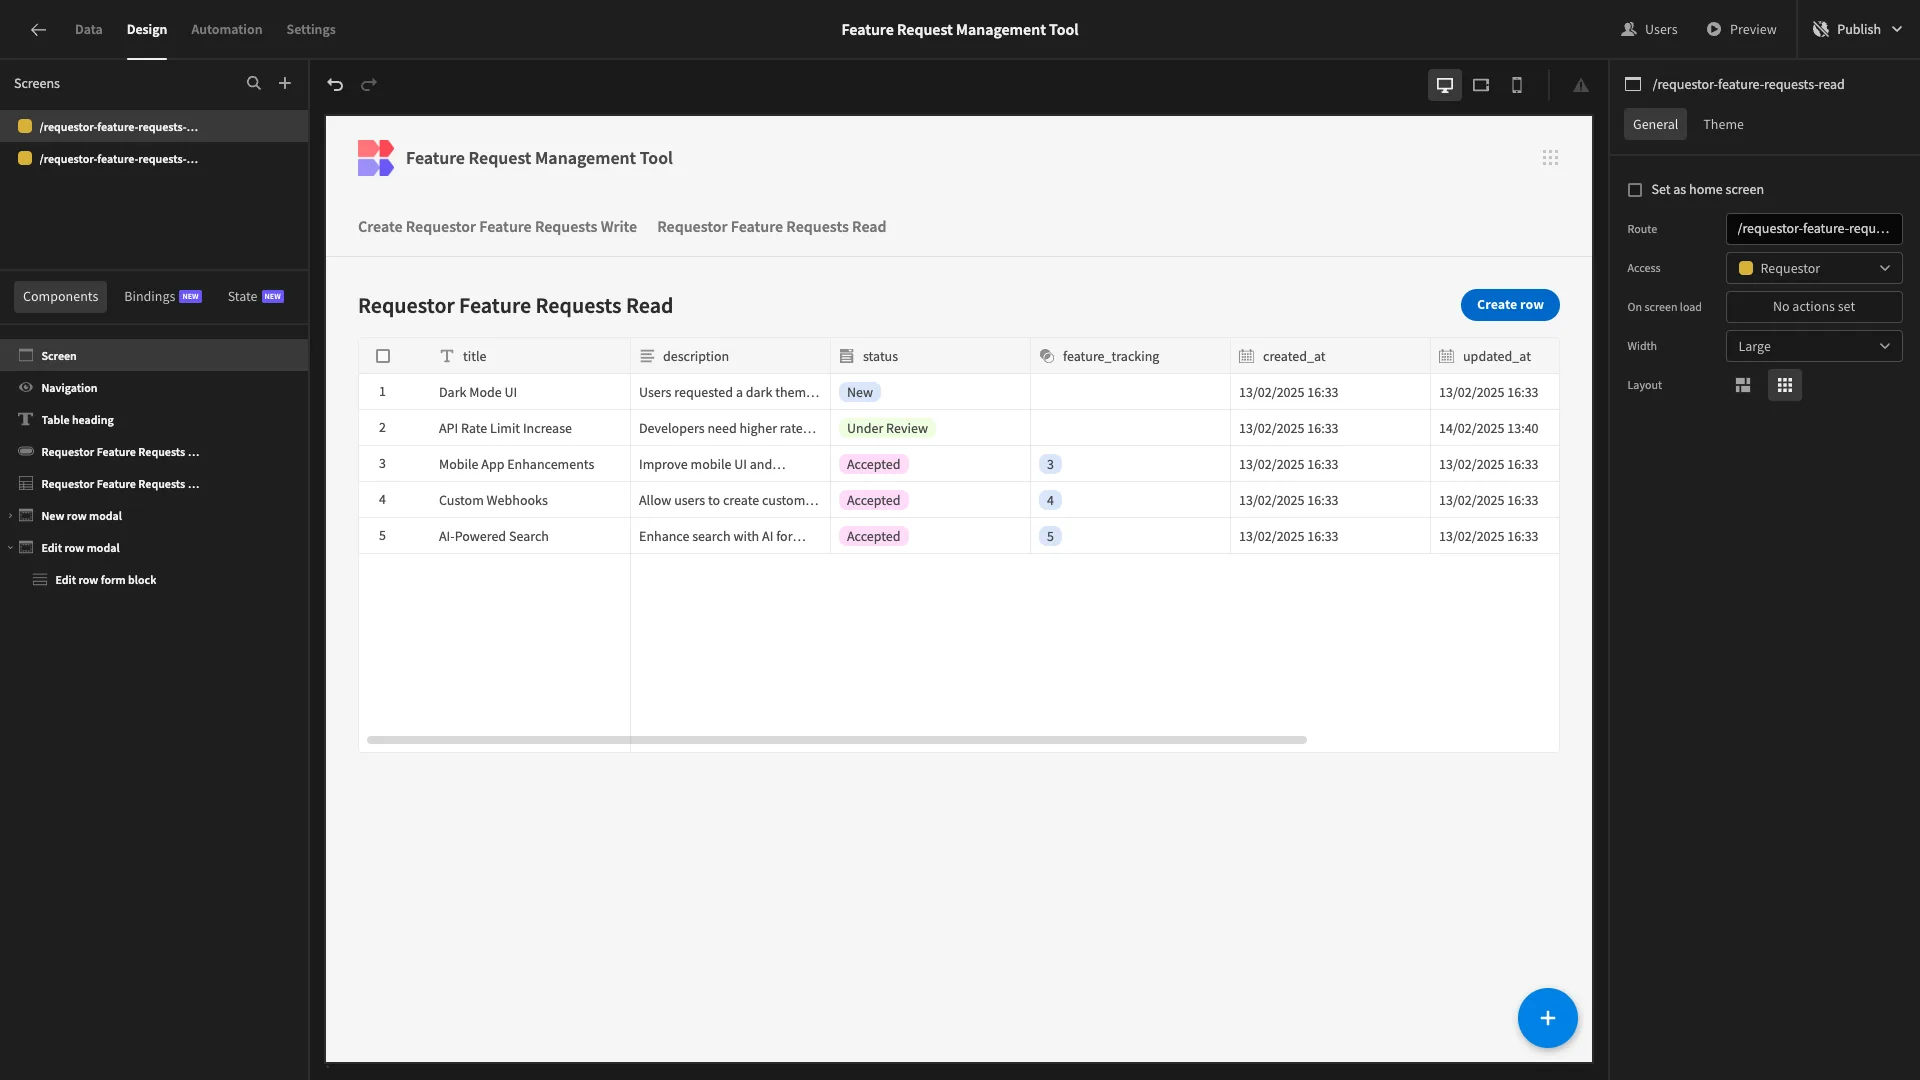
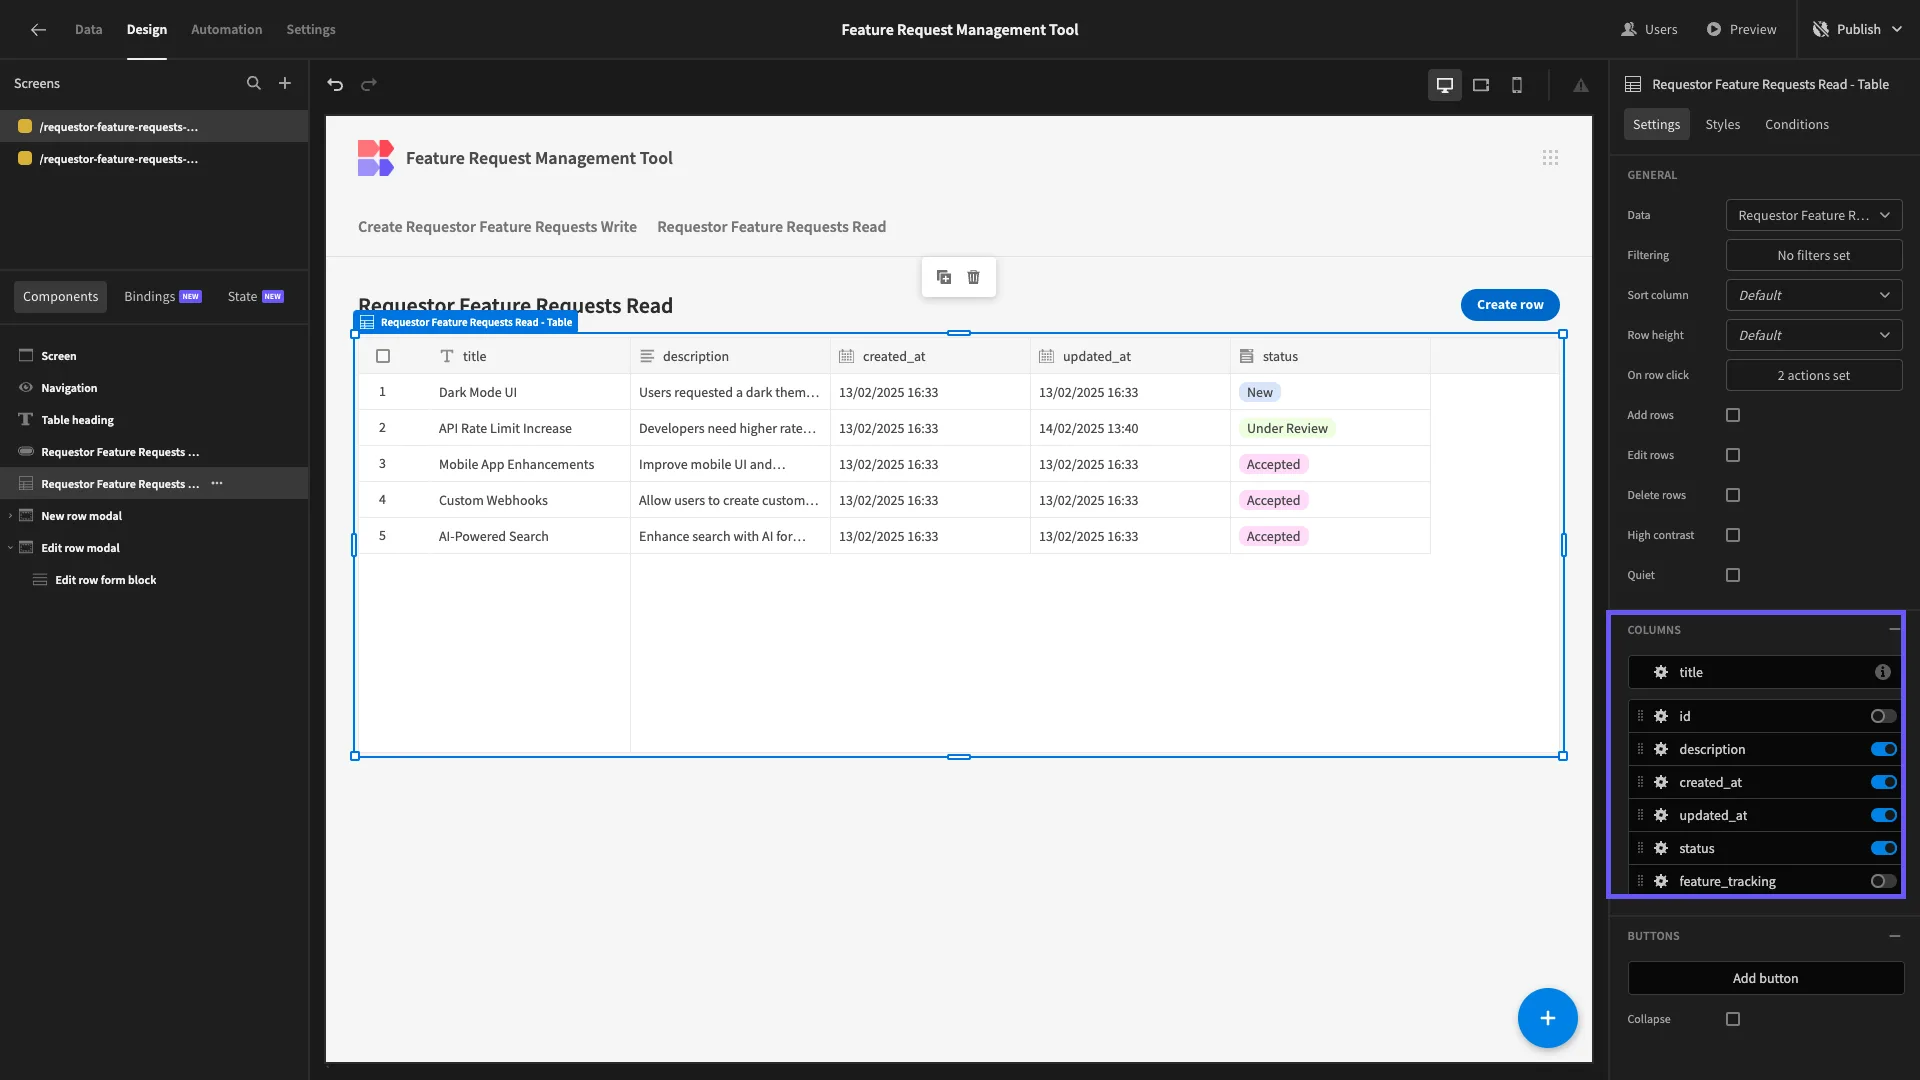
The first change we’ll make is to remove the id and feature_tracking columns from our table to clean it up.
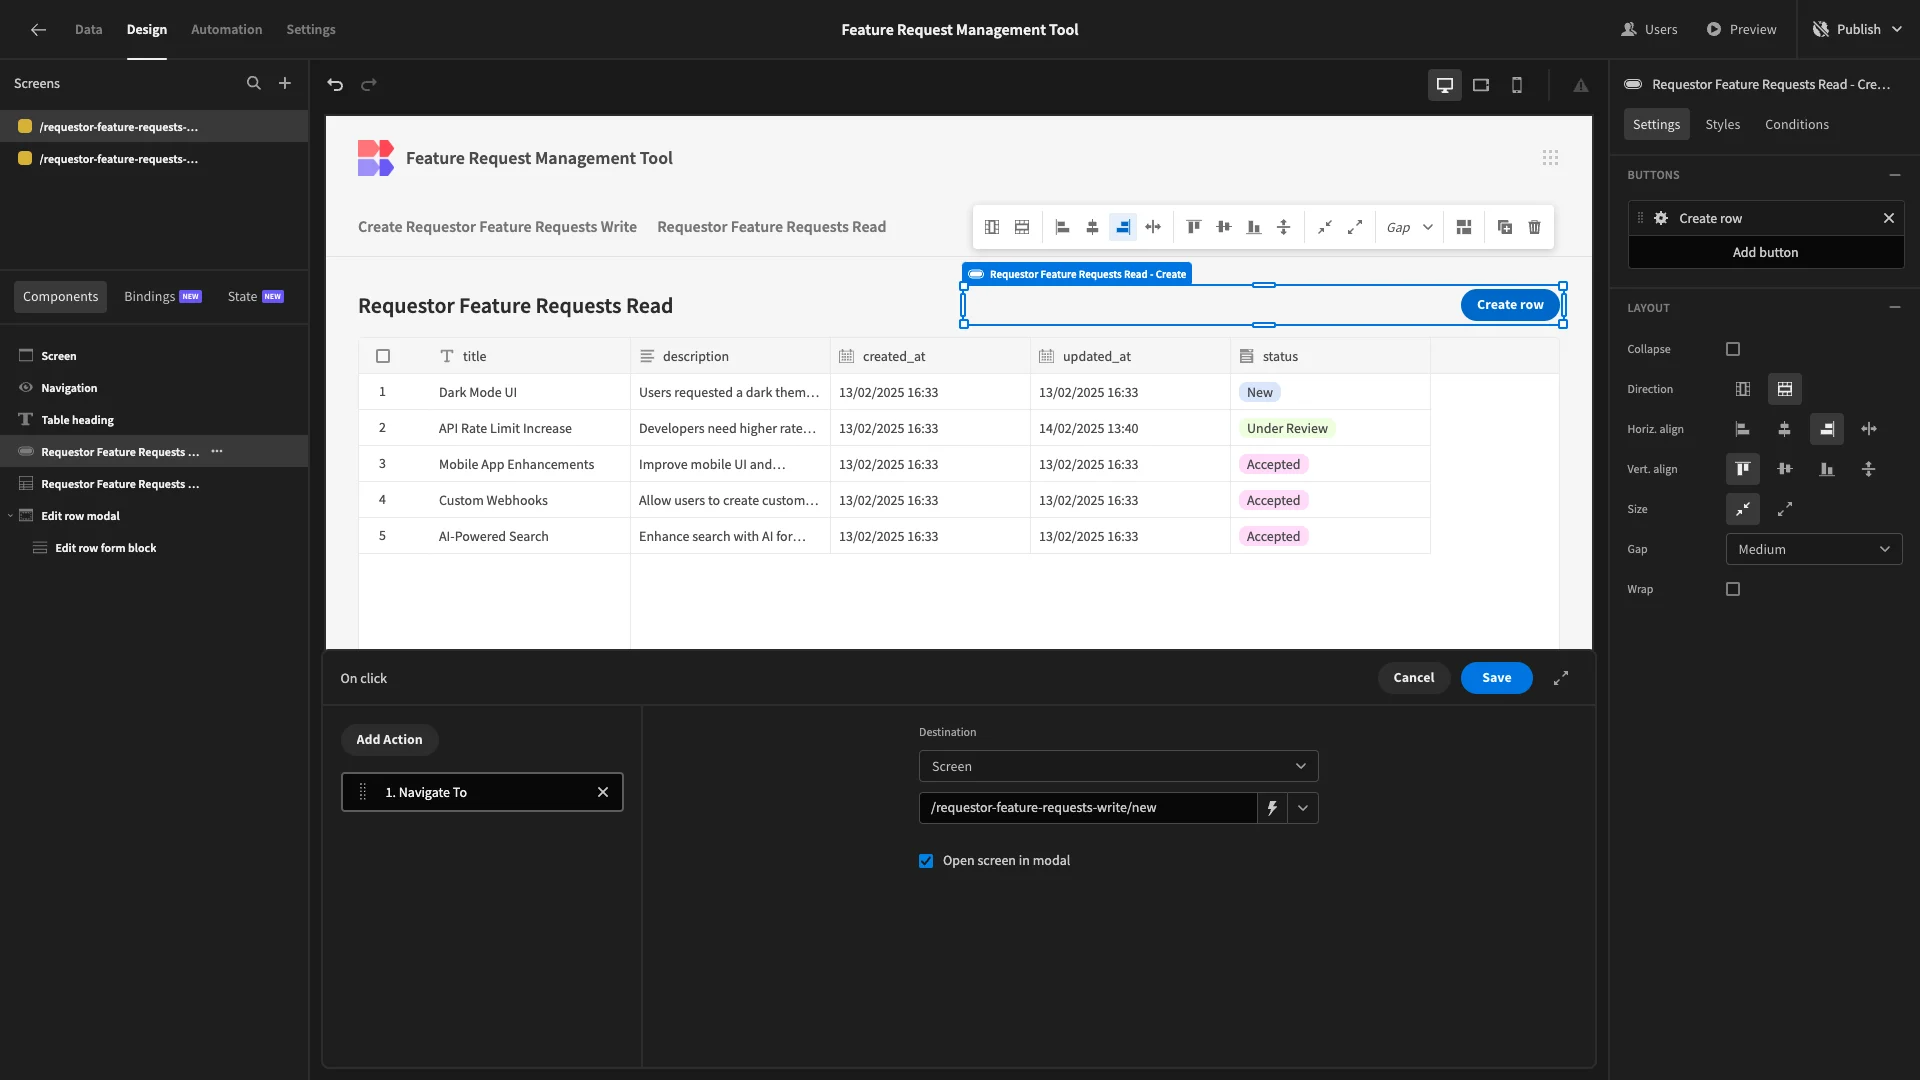
Next, instead of the default New Row form that comes with our table UI, we want to open our custom form from the last section in a modal screen. So, we can start by deleting this existing modal.
Under the Actions drawer for our button, we’ll replace the existing Open Modal action with a new Navigate To one. We’ll point this at our other screen and select the option to open it in a modal.
Here’s how this will look.
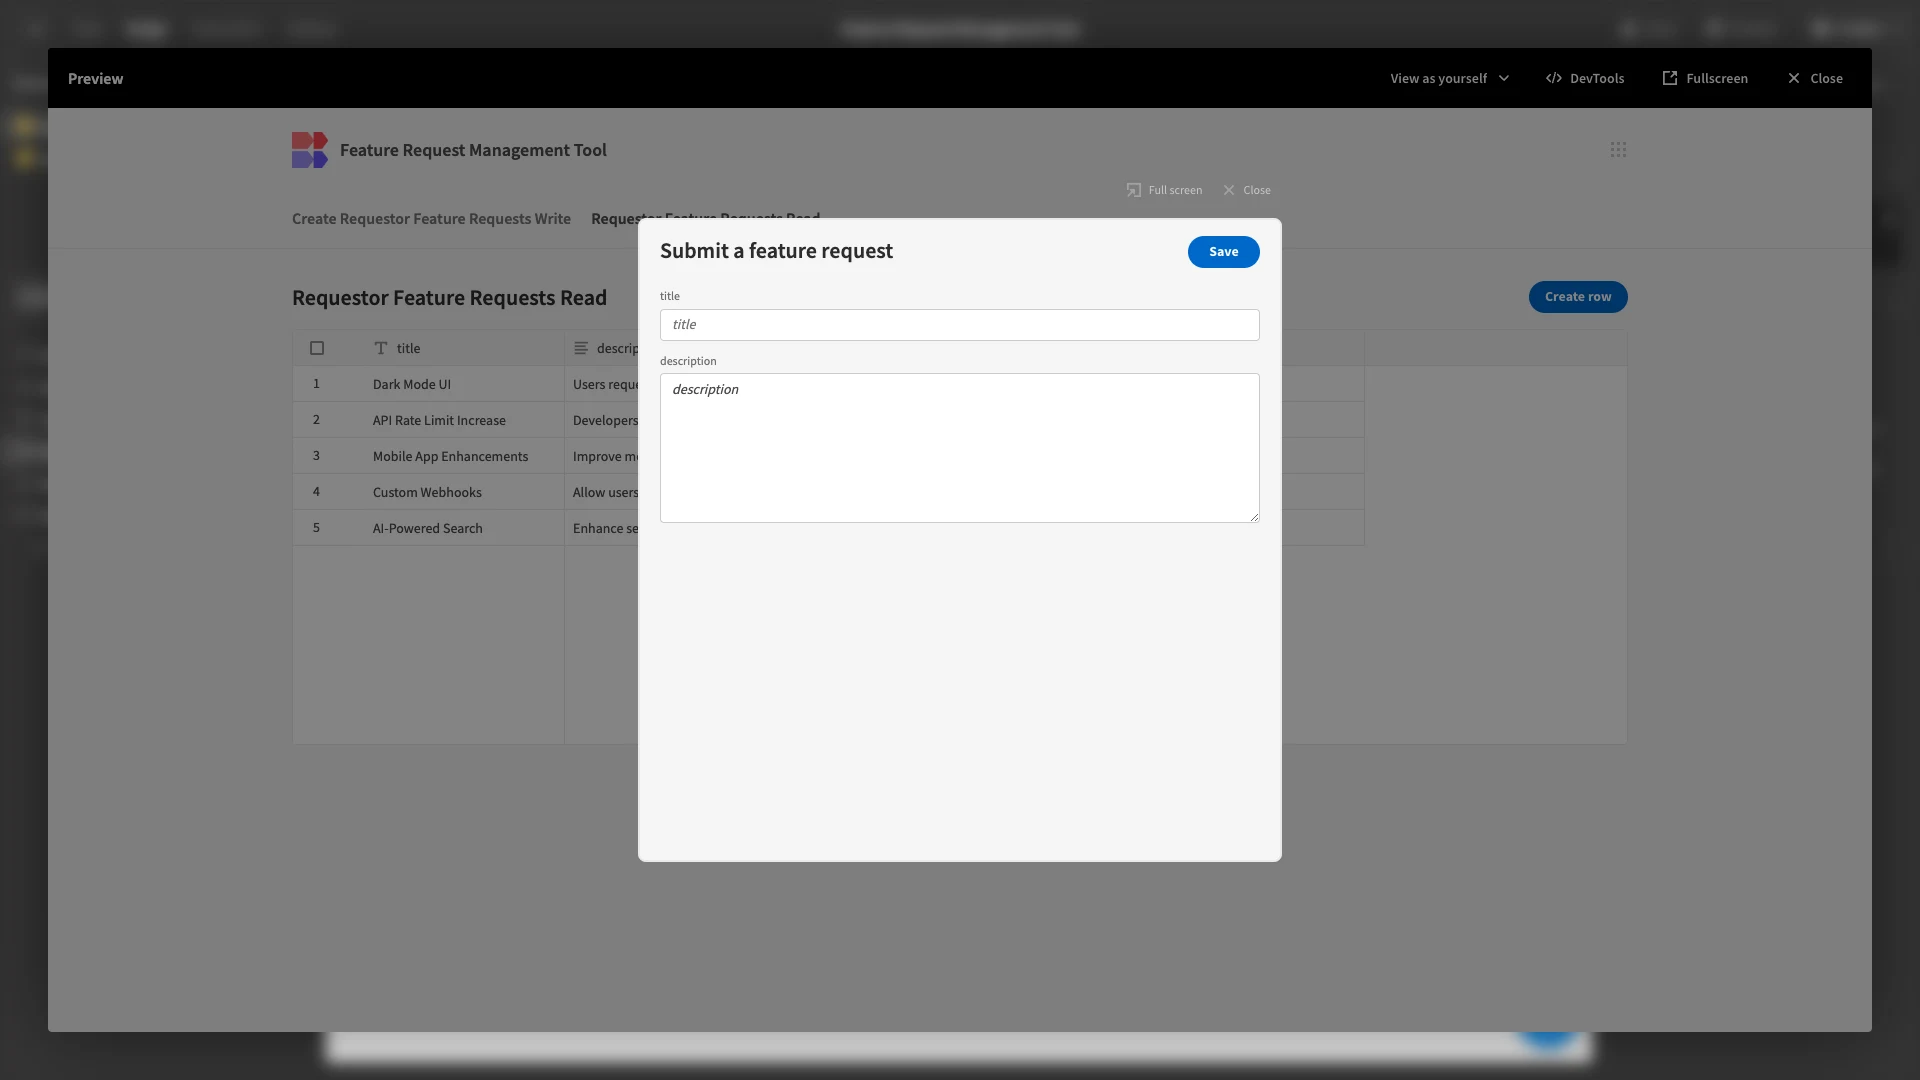
Lastly, we need to change our default edit row form.
This is a slightly more involved process, as we want to display different forms based on whether or not the clicked row was created by the current user.
Here’s how this looks, to begin with.
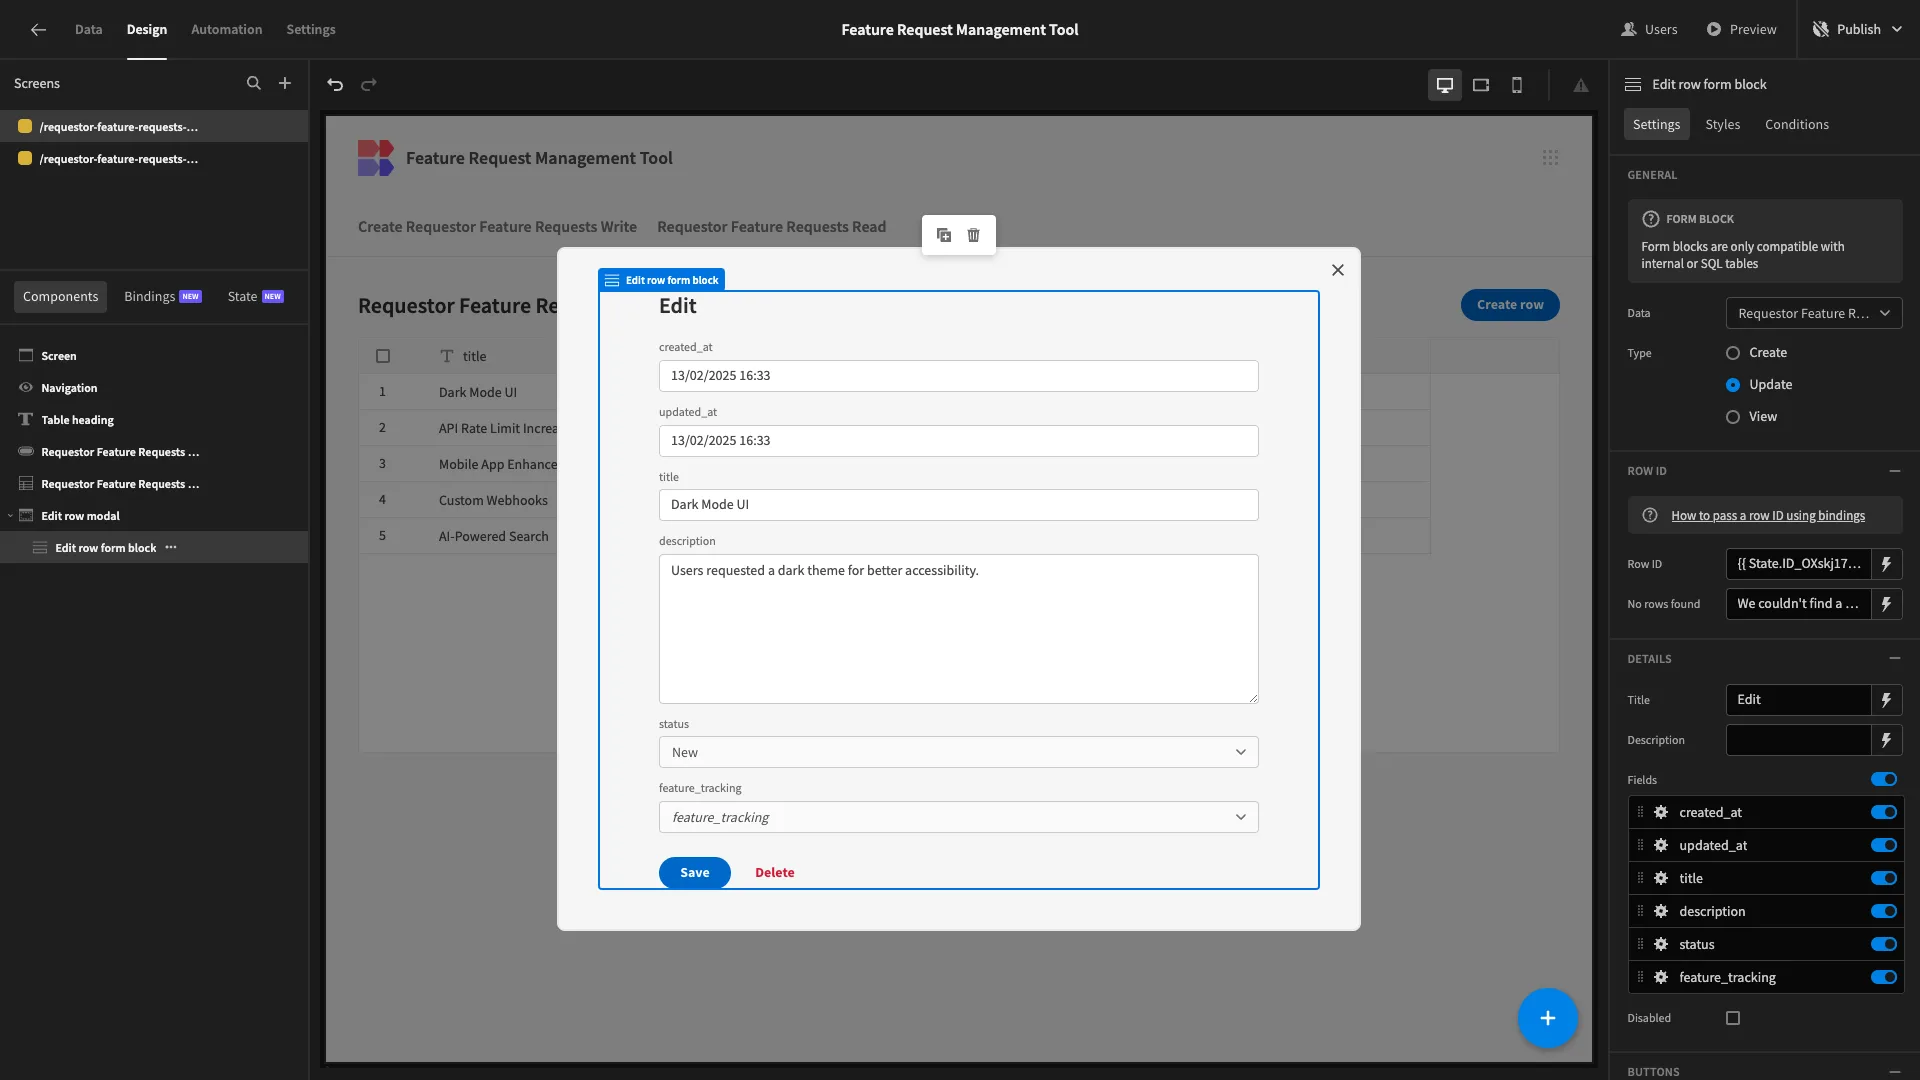
We’ll modify this to be used for editing rows the user has submitted themself.
We’ll start by disabling all fields except title and description.
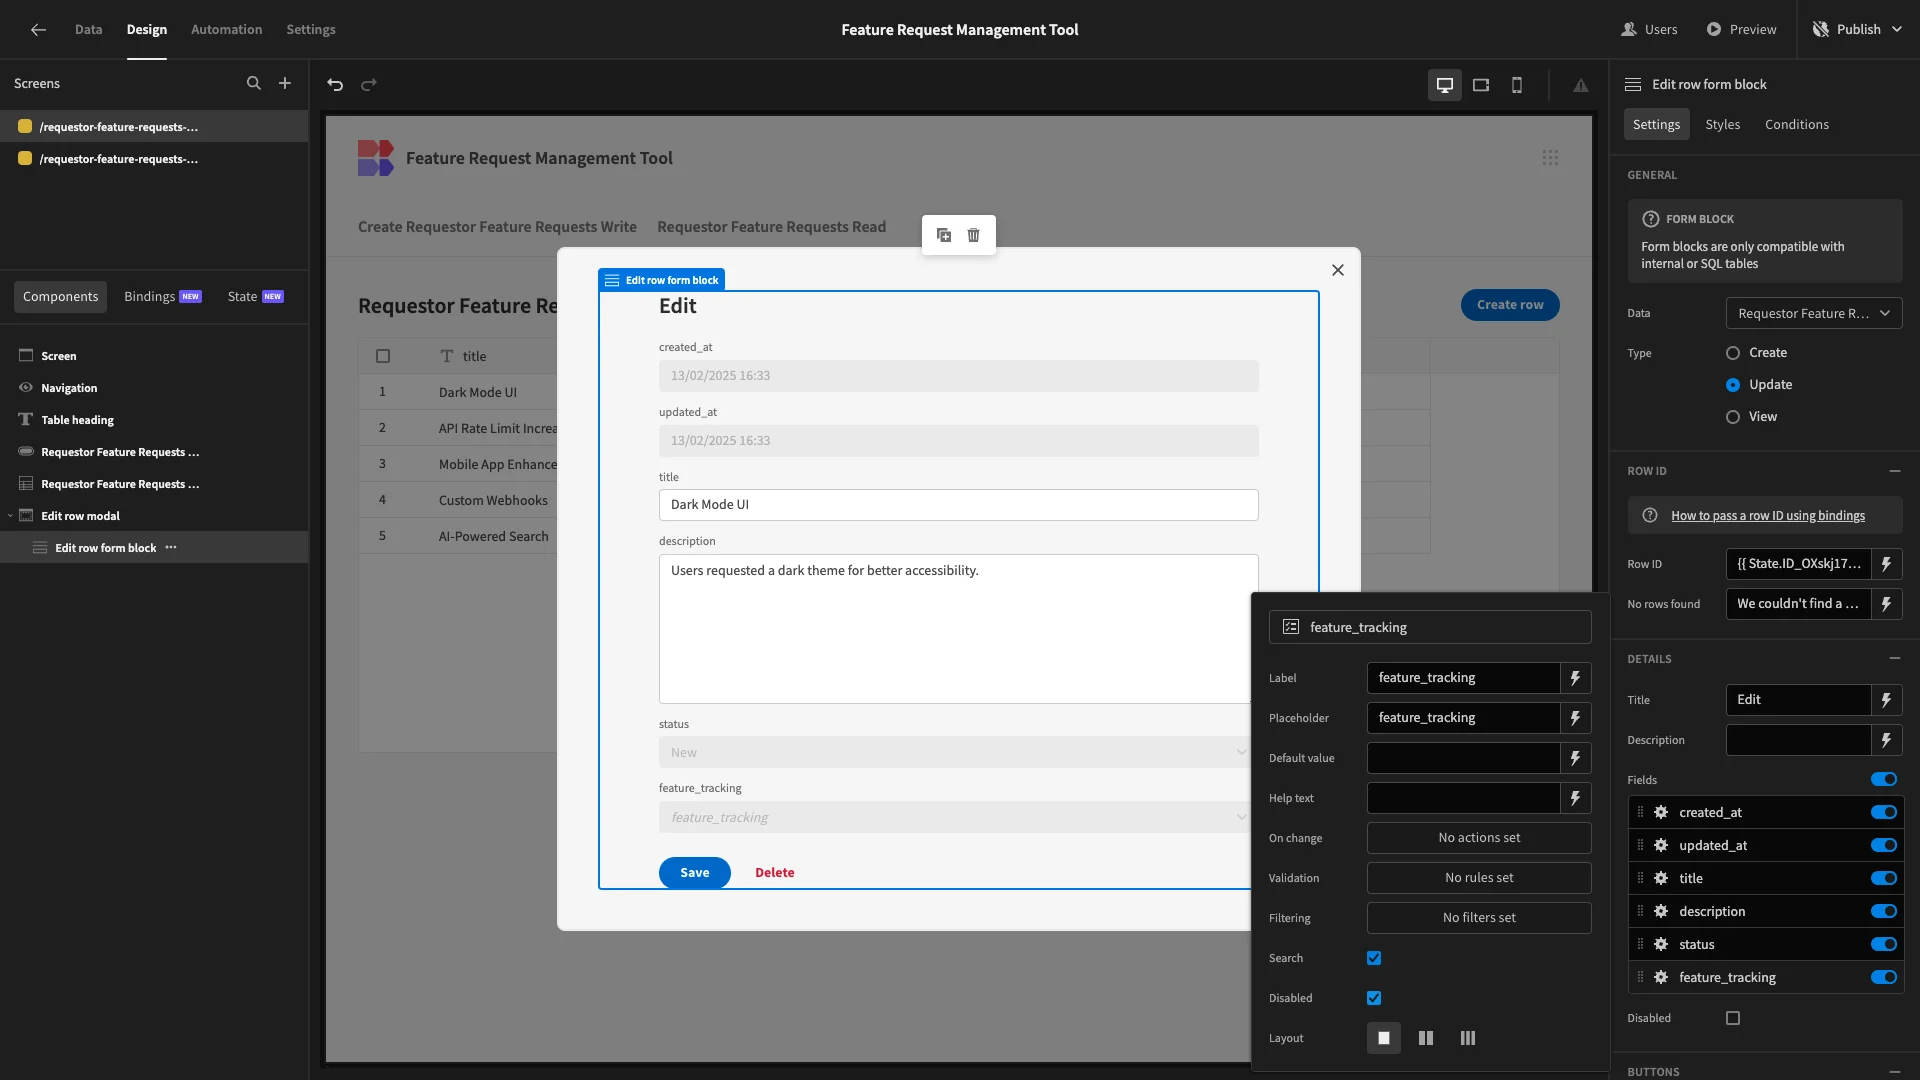
We’ll then place these fields at the top and arrange the disabled ones into columns.
Lastly, we’ll update our display text and move our buttons to the top, as before.
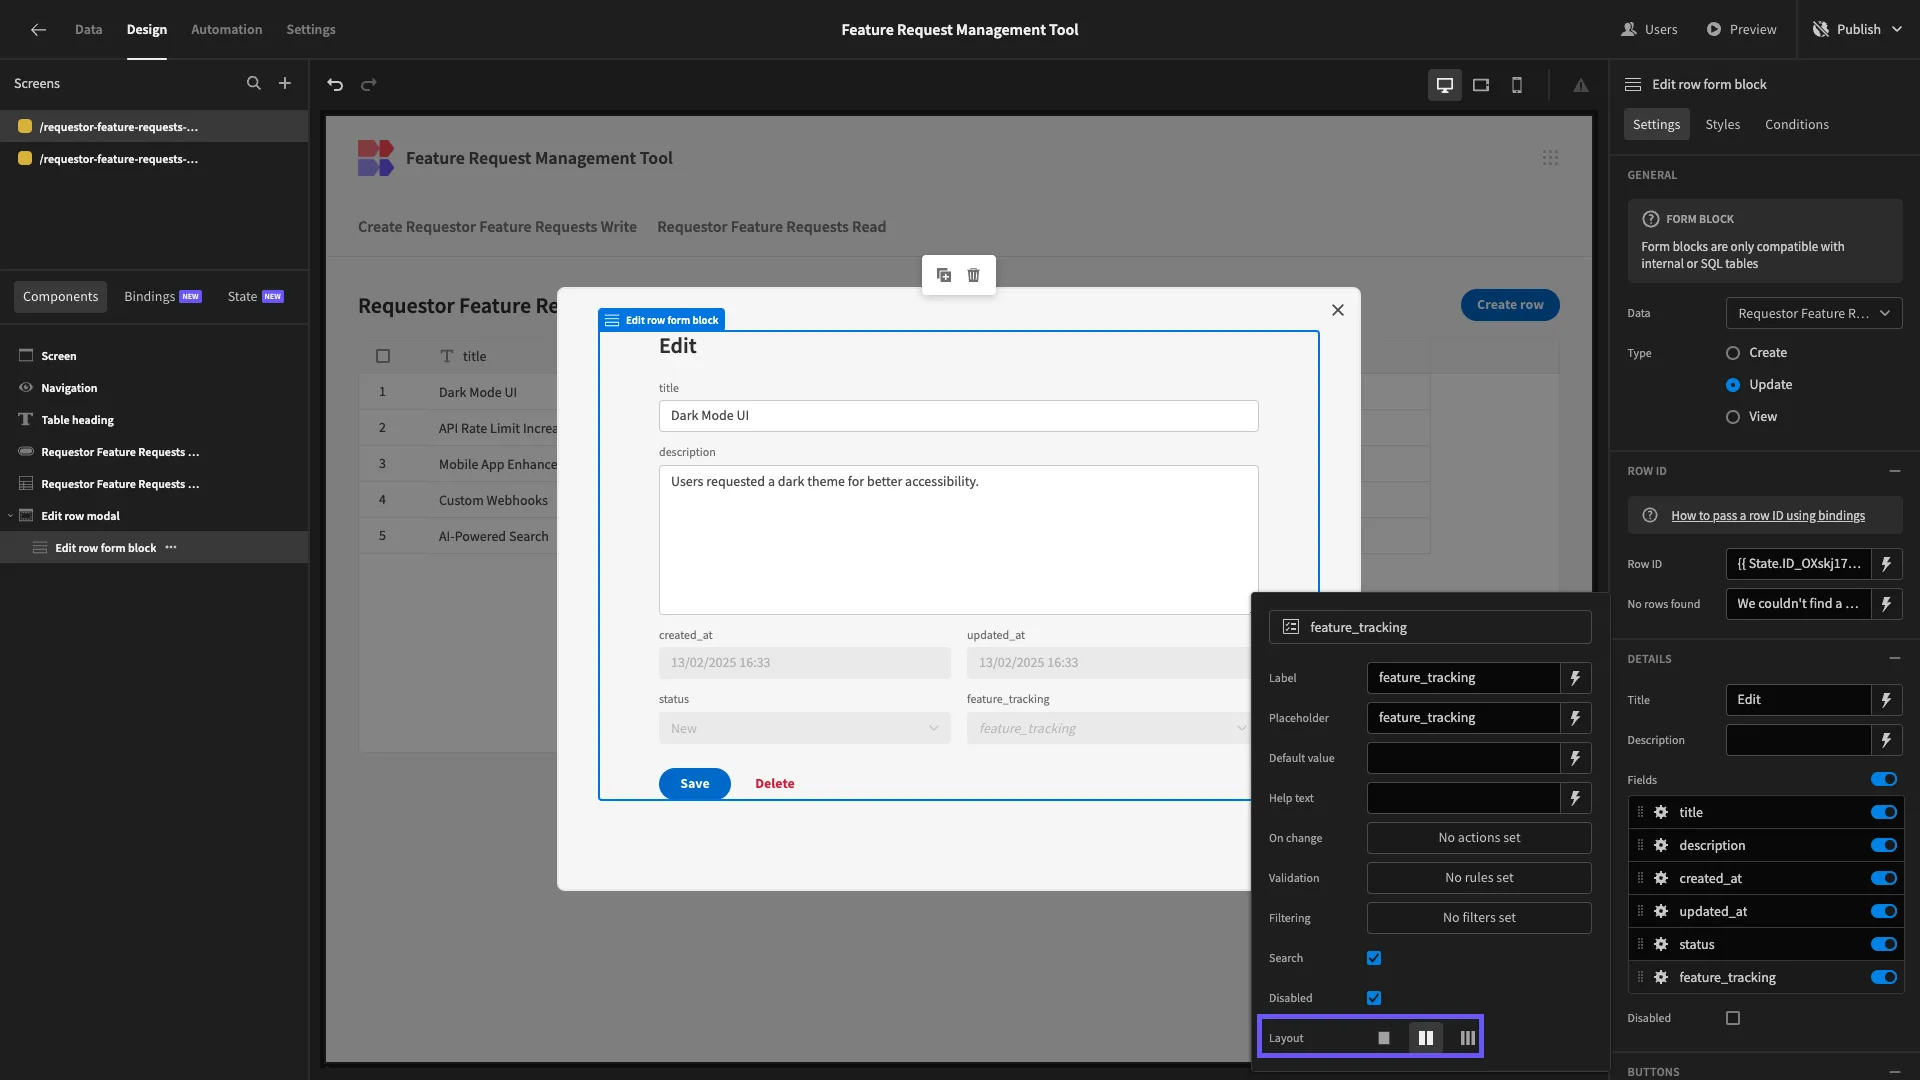
We only want this form to appear if a user clicks on a feature request that they submitted. Otherwise, we want to display a read-only version.
To achieve this, we’ll start by duplicating our existing form. We’ll also rename this duplicated version to keep things clear.
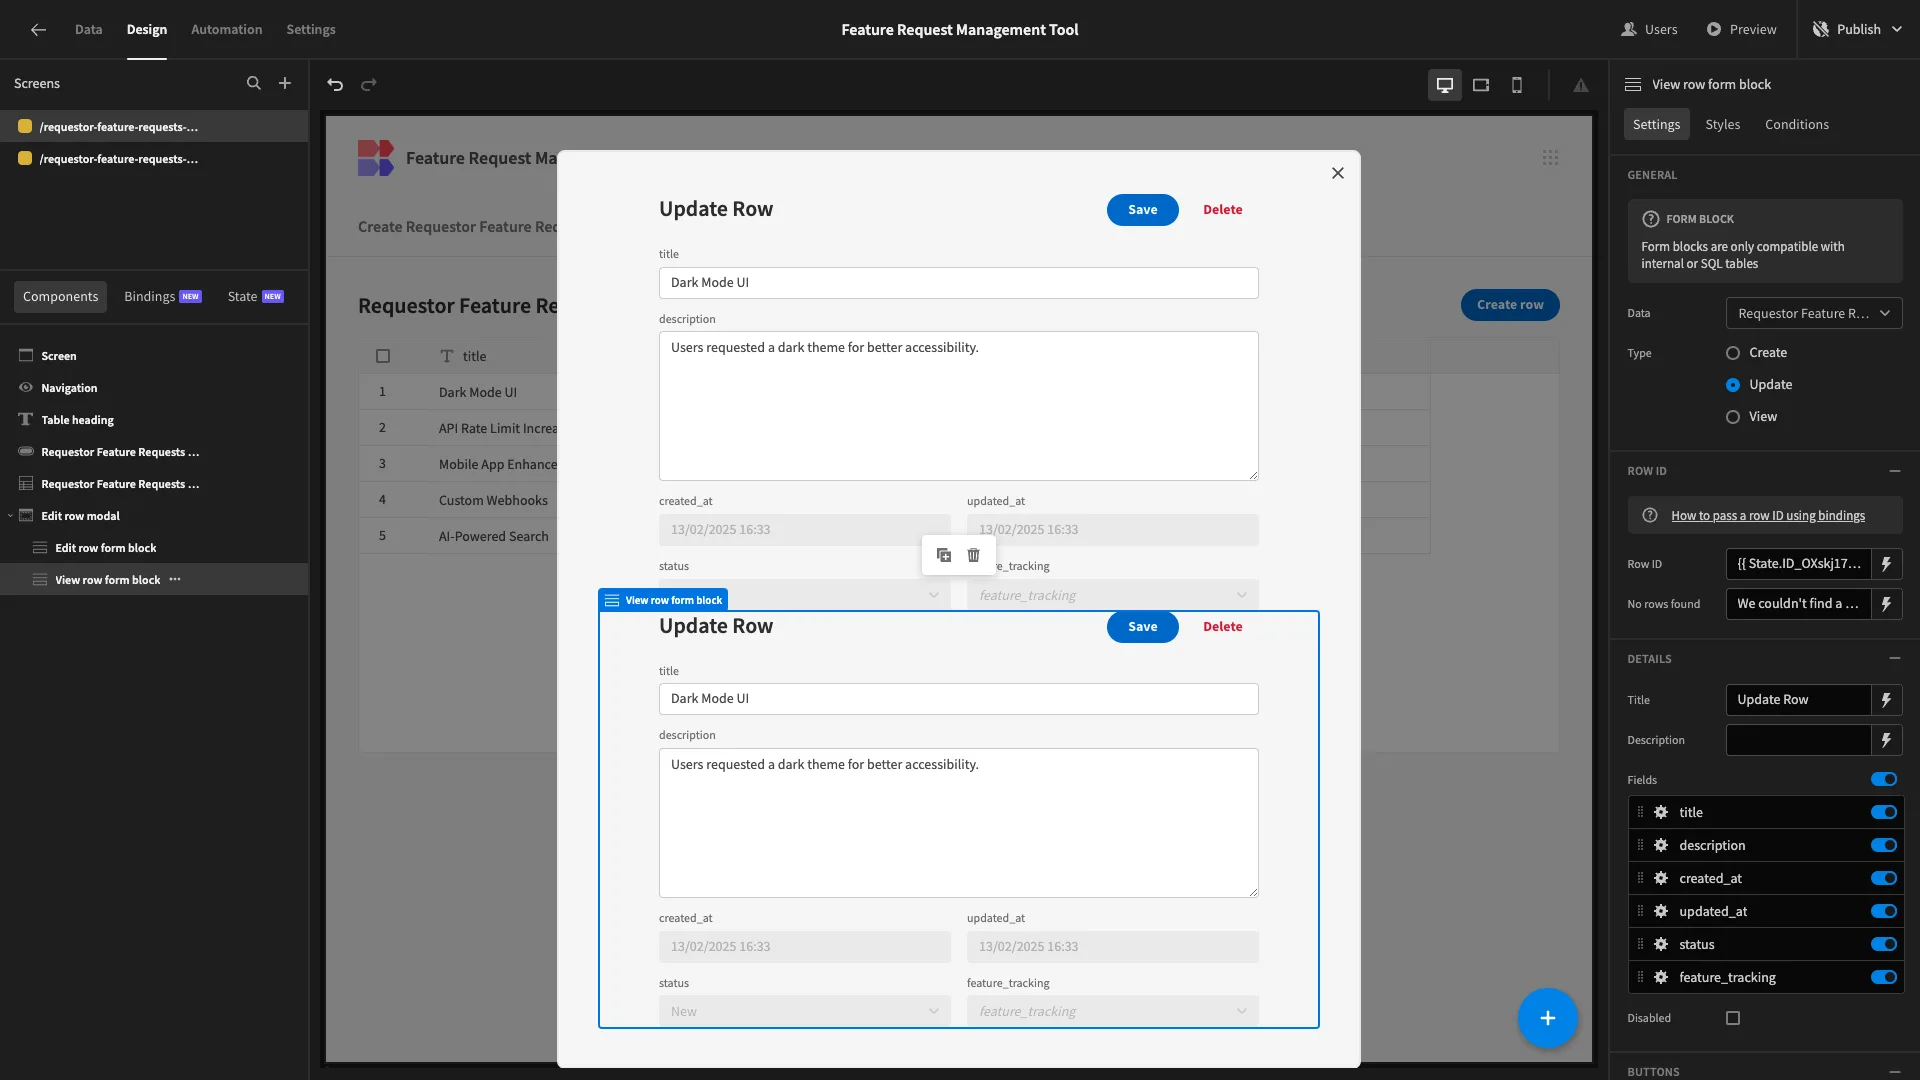
Then, we’ll set the type to View, disable our remaining fields, and update our display text.
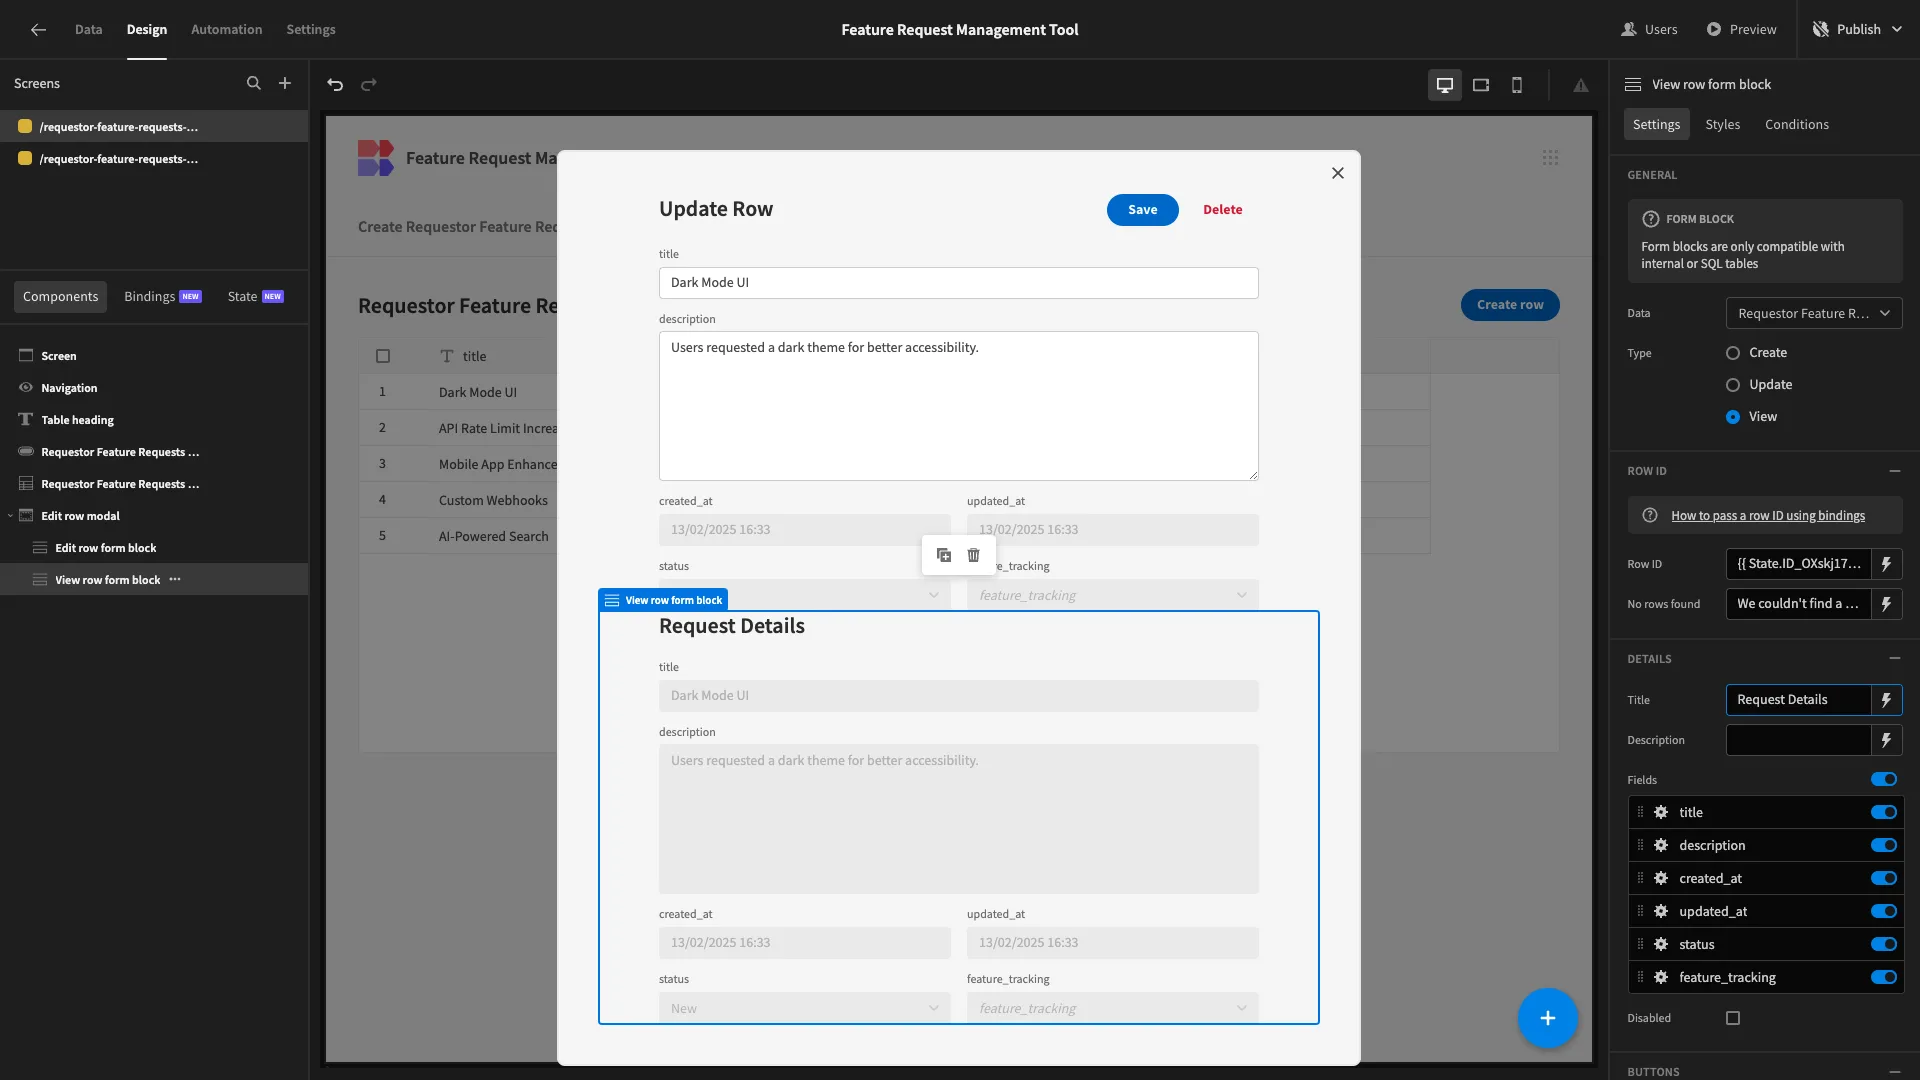
The last thing we want to do is set up the logic for which version of our form to display. Again, this will be based on the requestor attribute from the row a user clicks on to open the modal.
Back on our table, we’ll open the On Row Click actions drawer. Here, there are two existing actions called Update State and Open Modal.
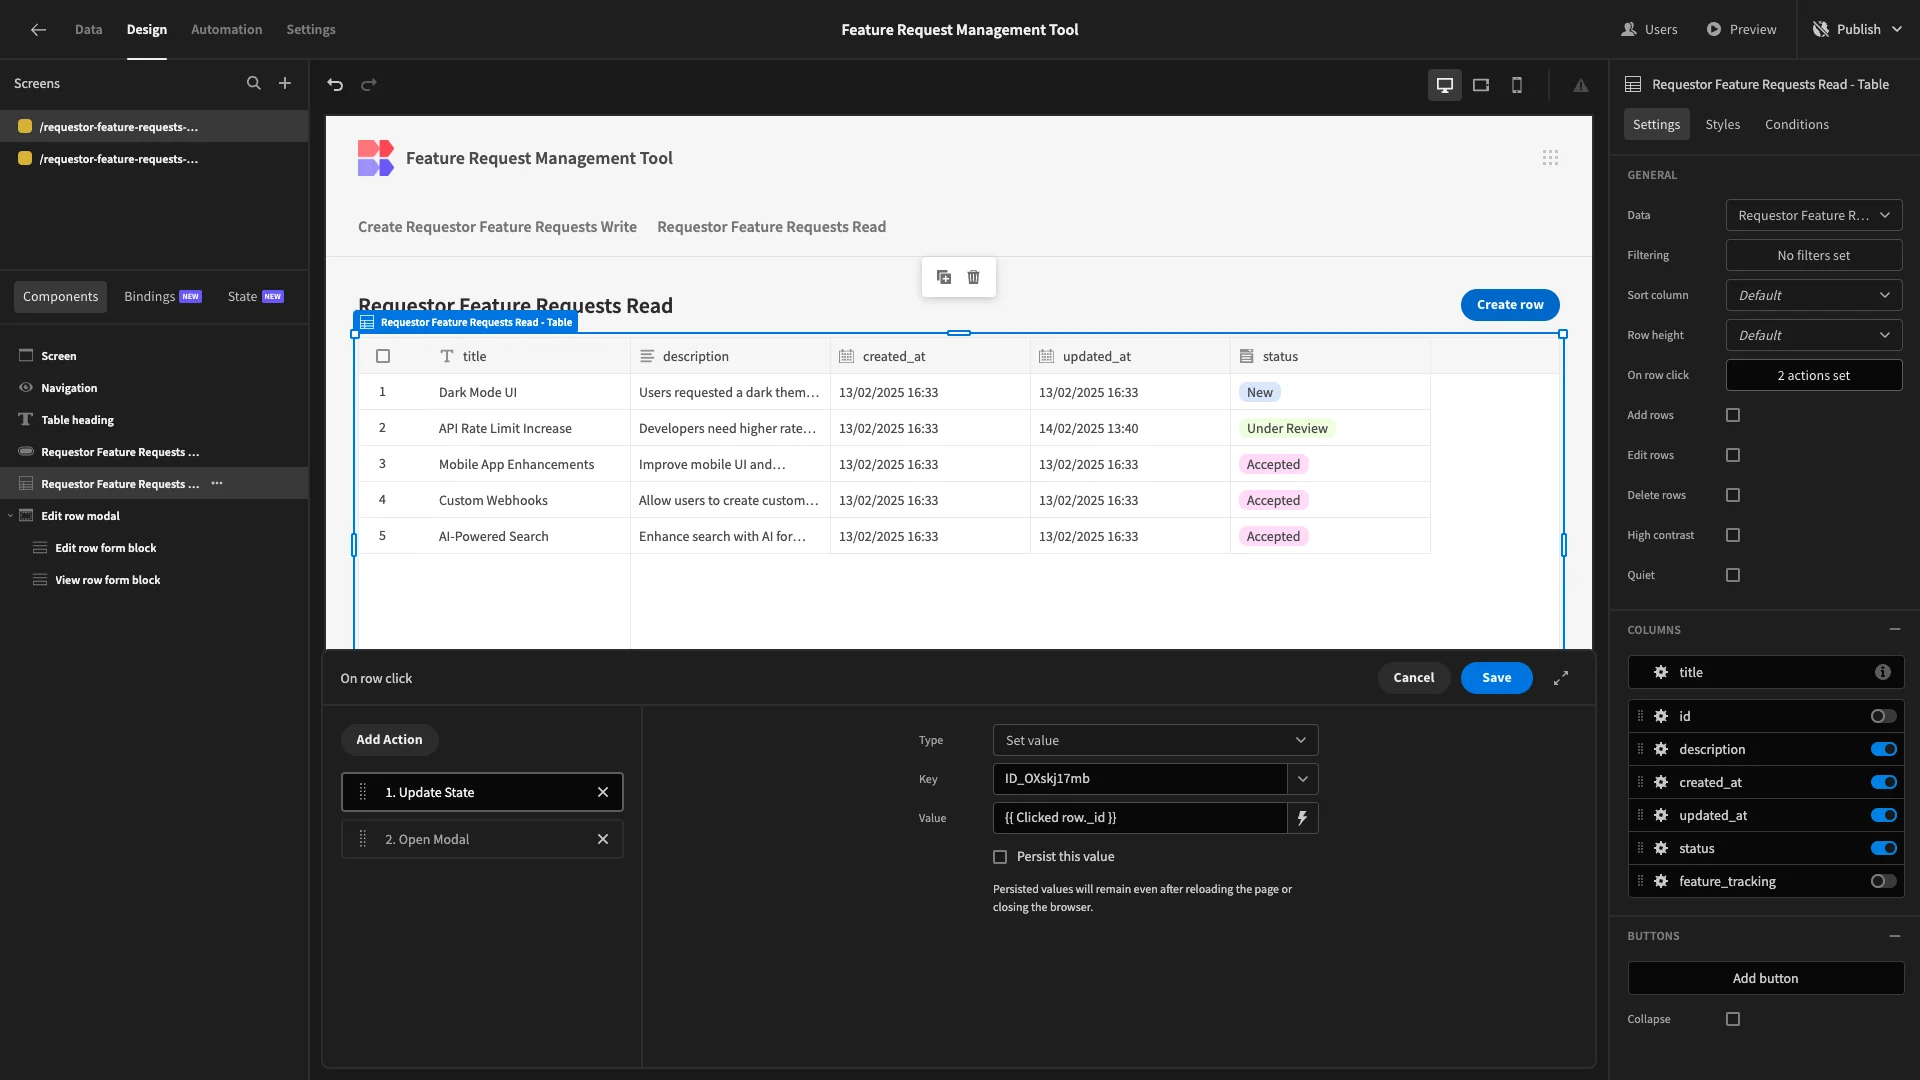
We need to add a second Update State action between these. This accepts a key/value pair, which we can then use as a binding elsewhere in the Budibase builder.
We’ll set our key to clickedRowRequestor.
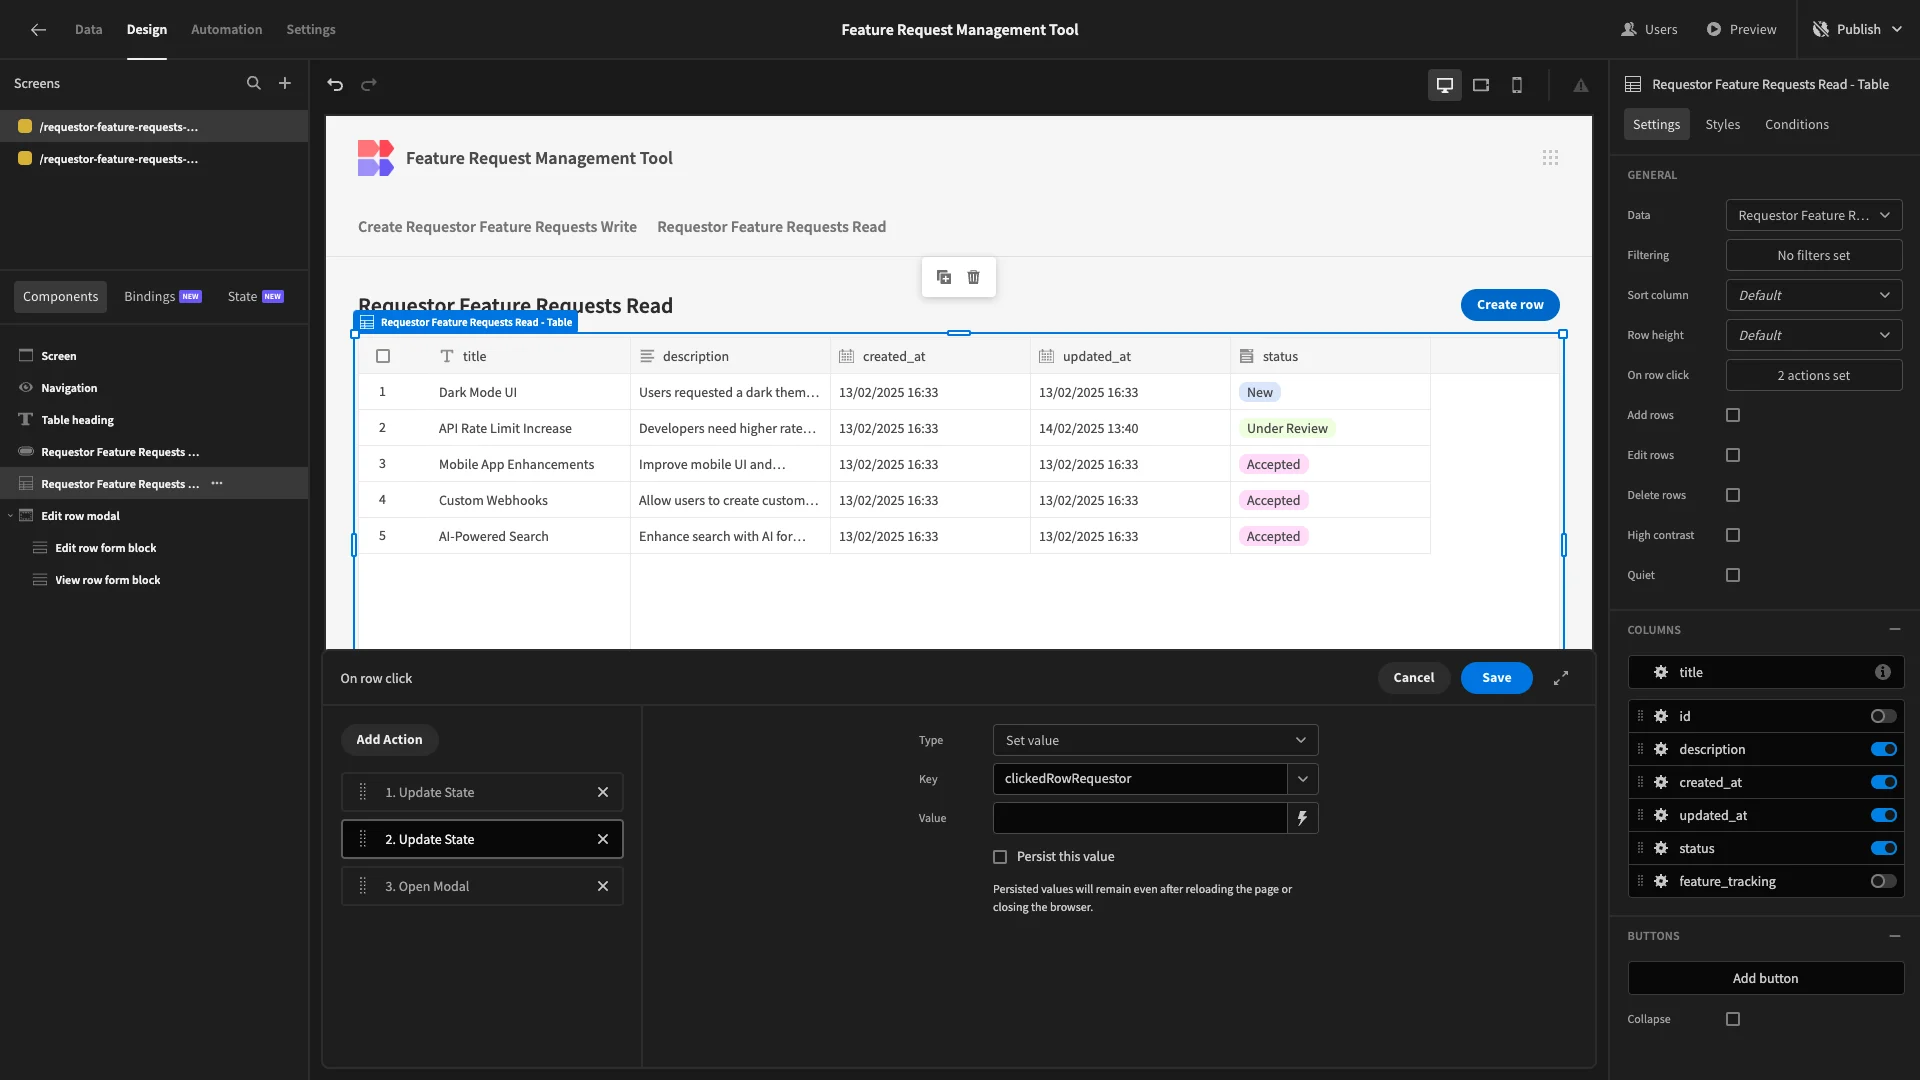
Then, we’ll open the bindings drawer and select requestor._id output from our clicked row.
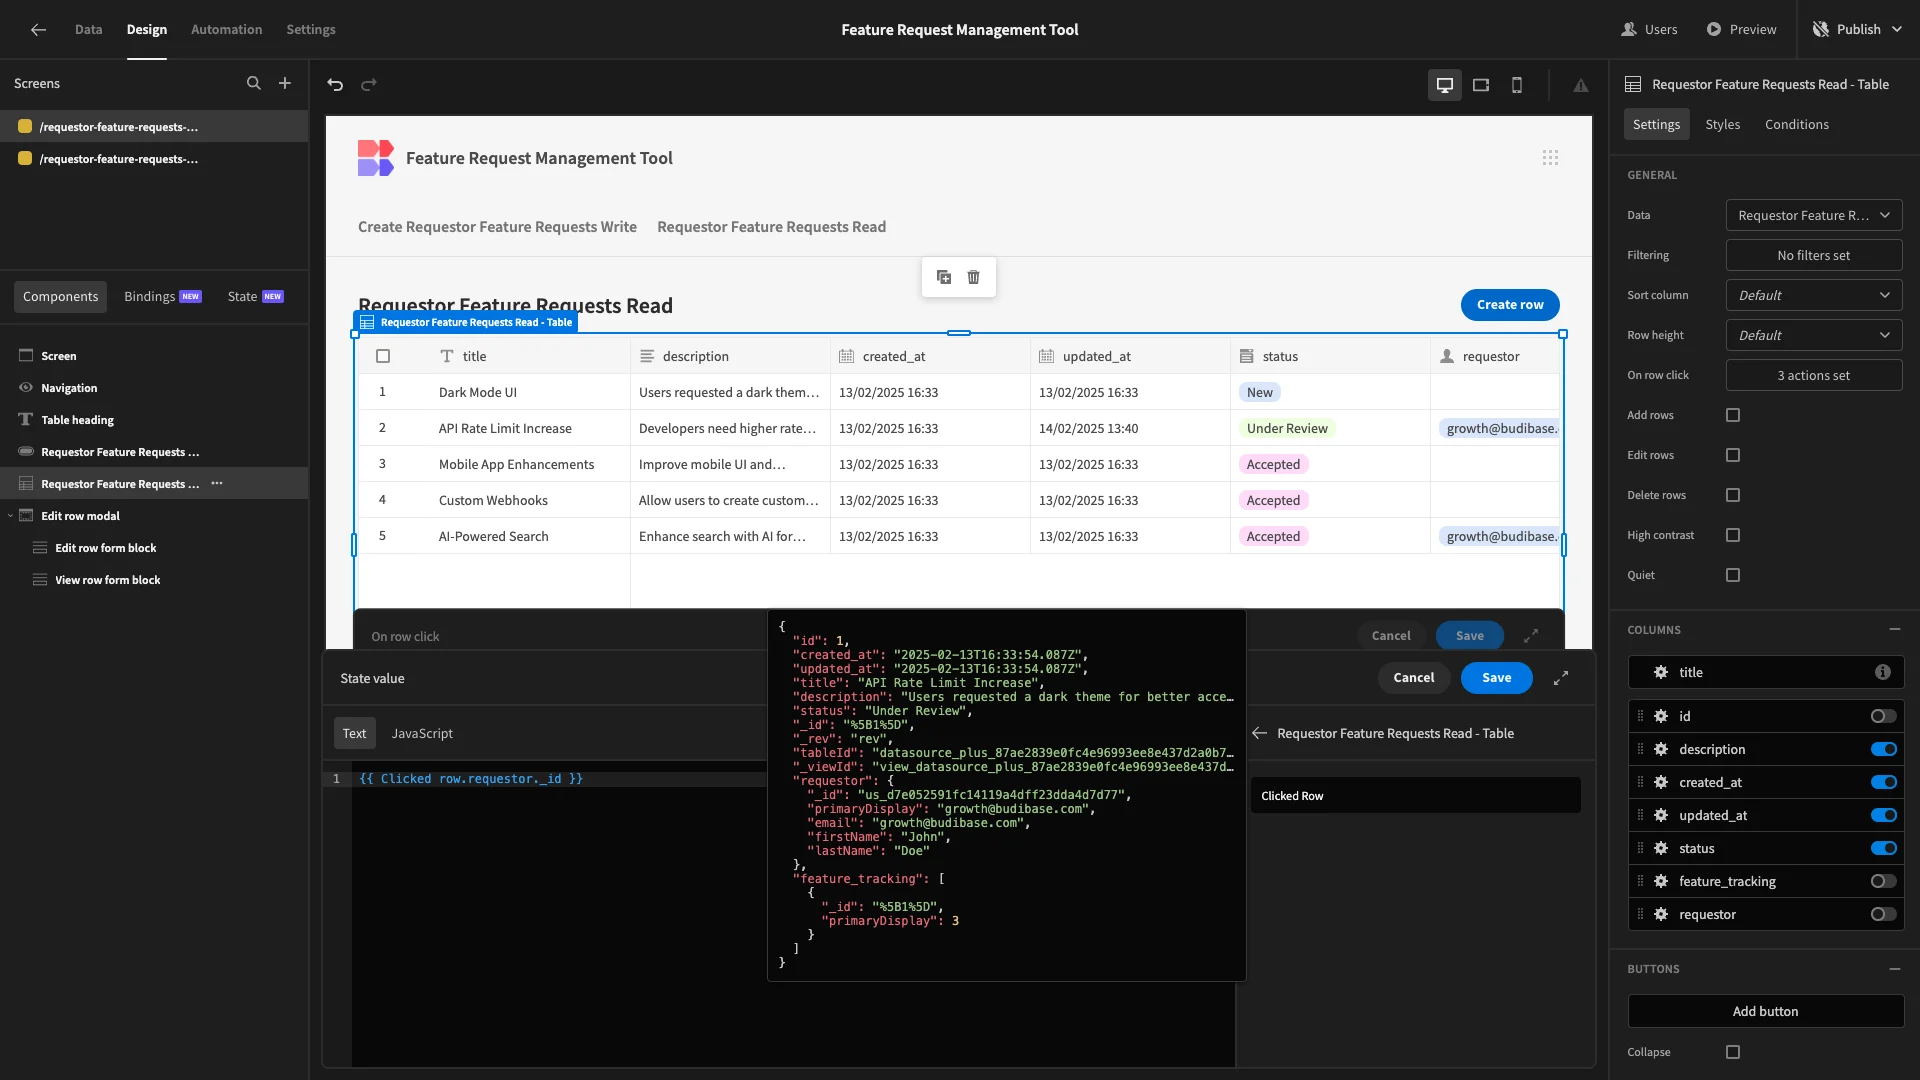
Back to our modal, we can then use this state variable within conditionality rules on each of our forms.
Conditionality rules can be used to hide, display, or update any native setting of a component, based on any data it’s exposed to.
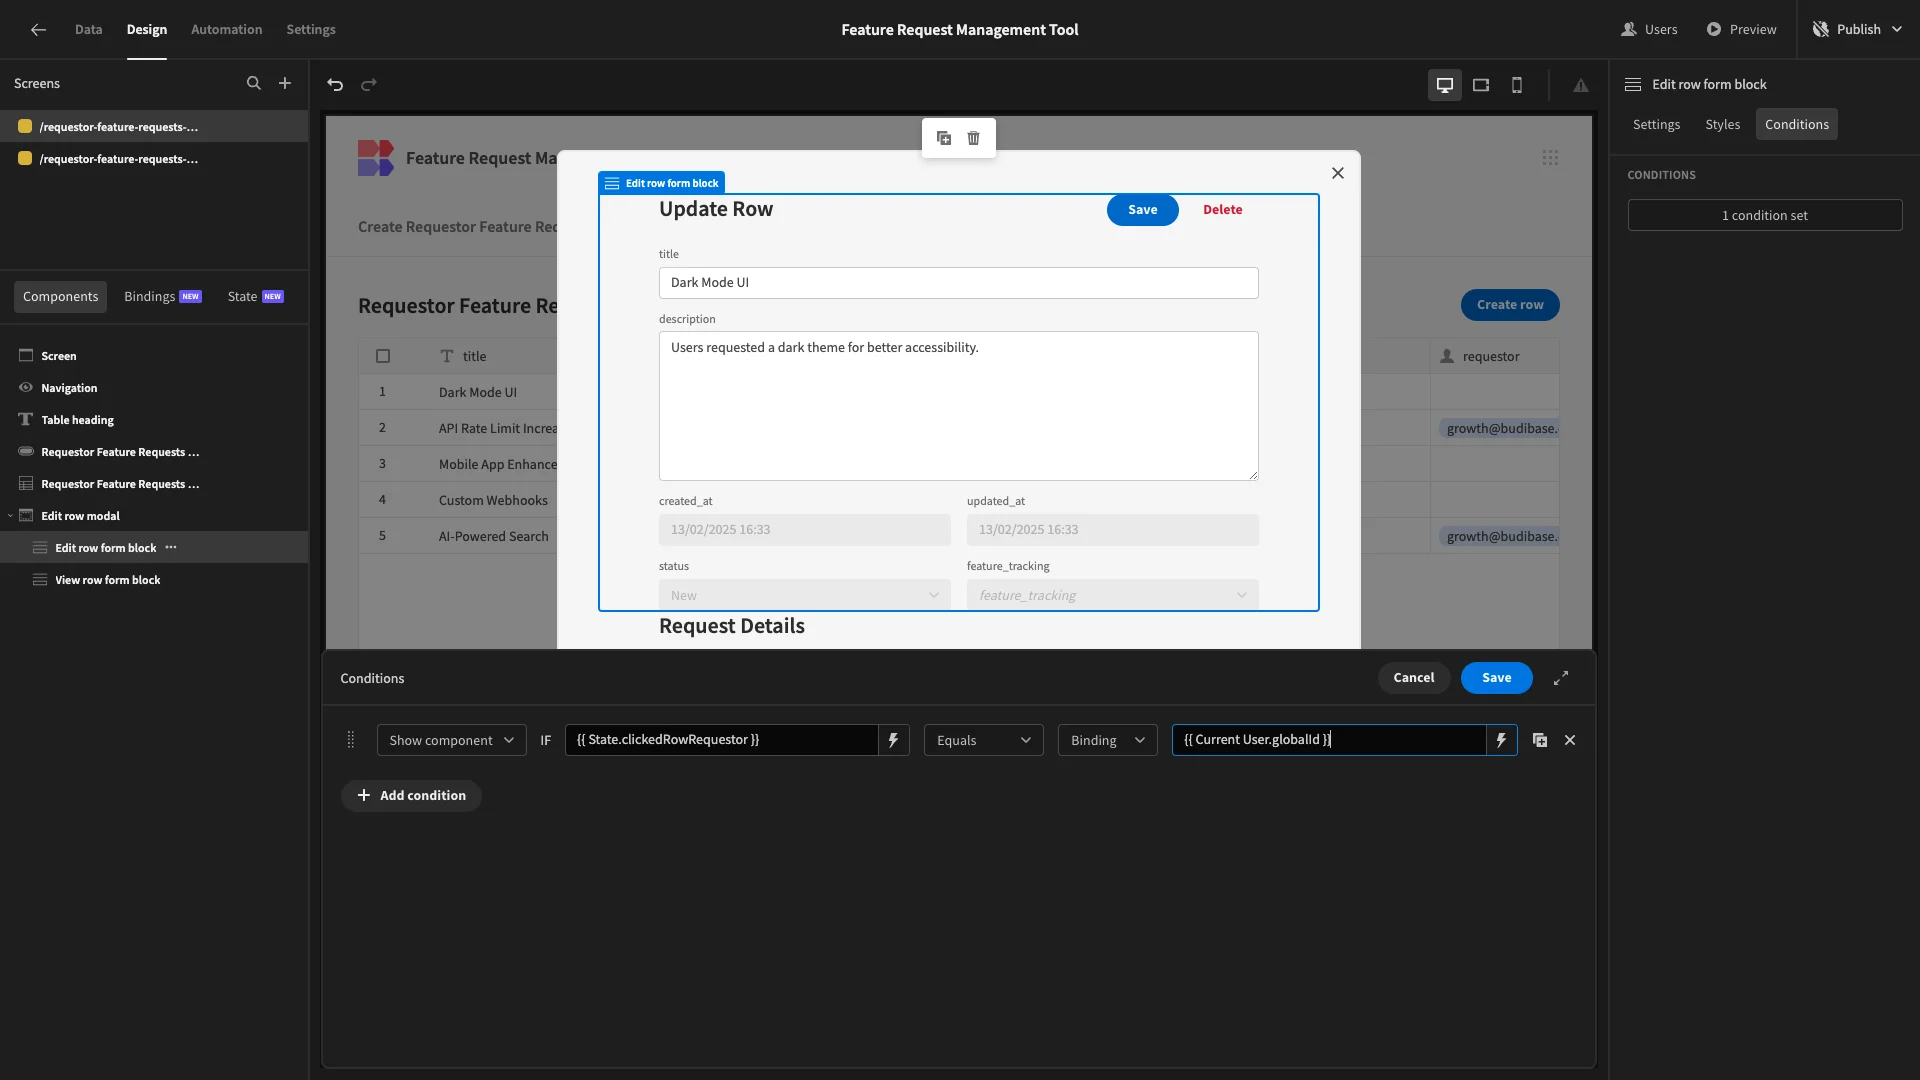
On our Edit form, we’ll add a rule to Show Component if {{ State.clickedRowRequestor }} Equals {{ Current User.globalId }}.
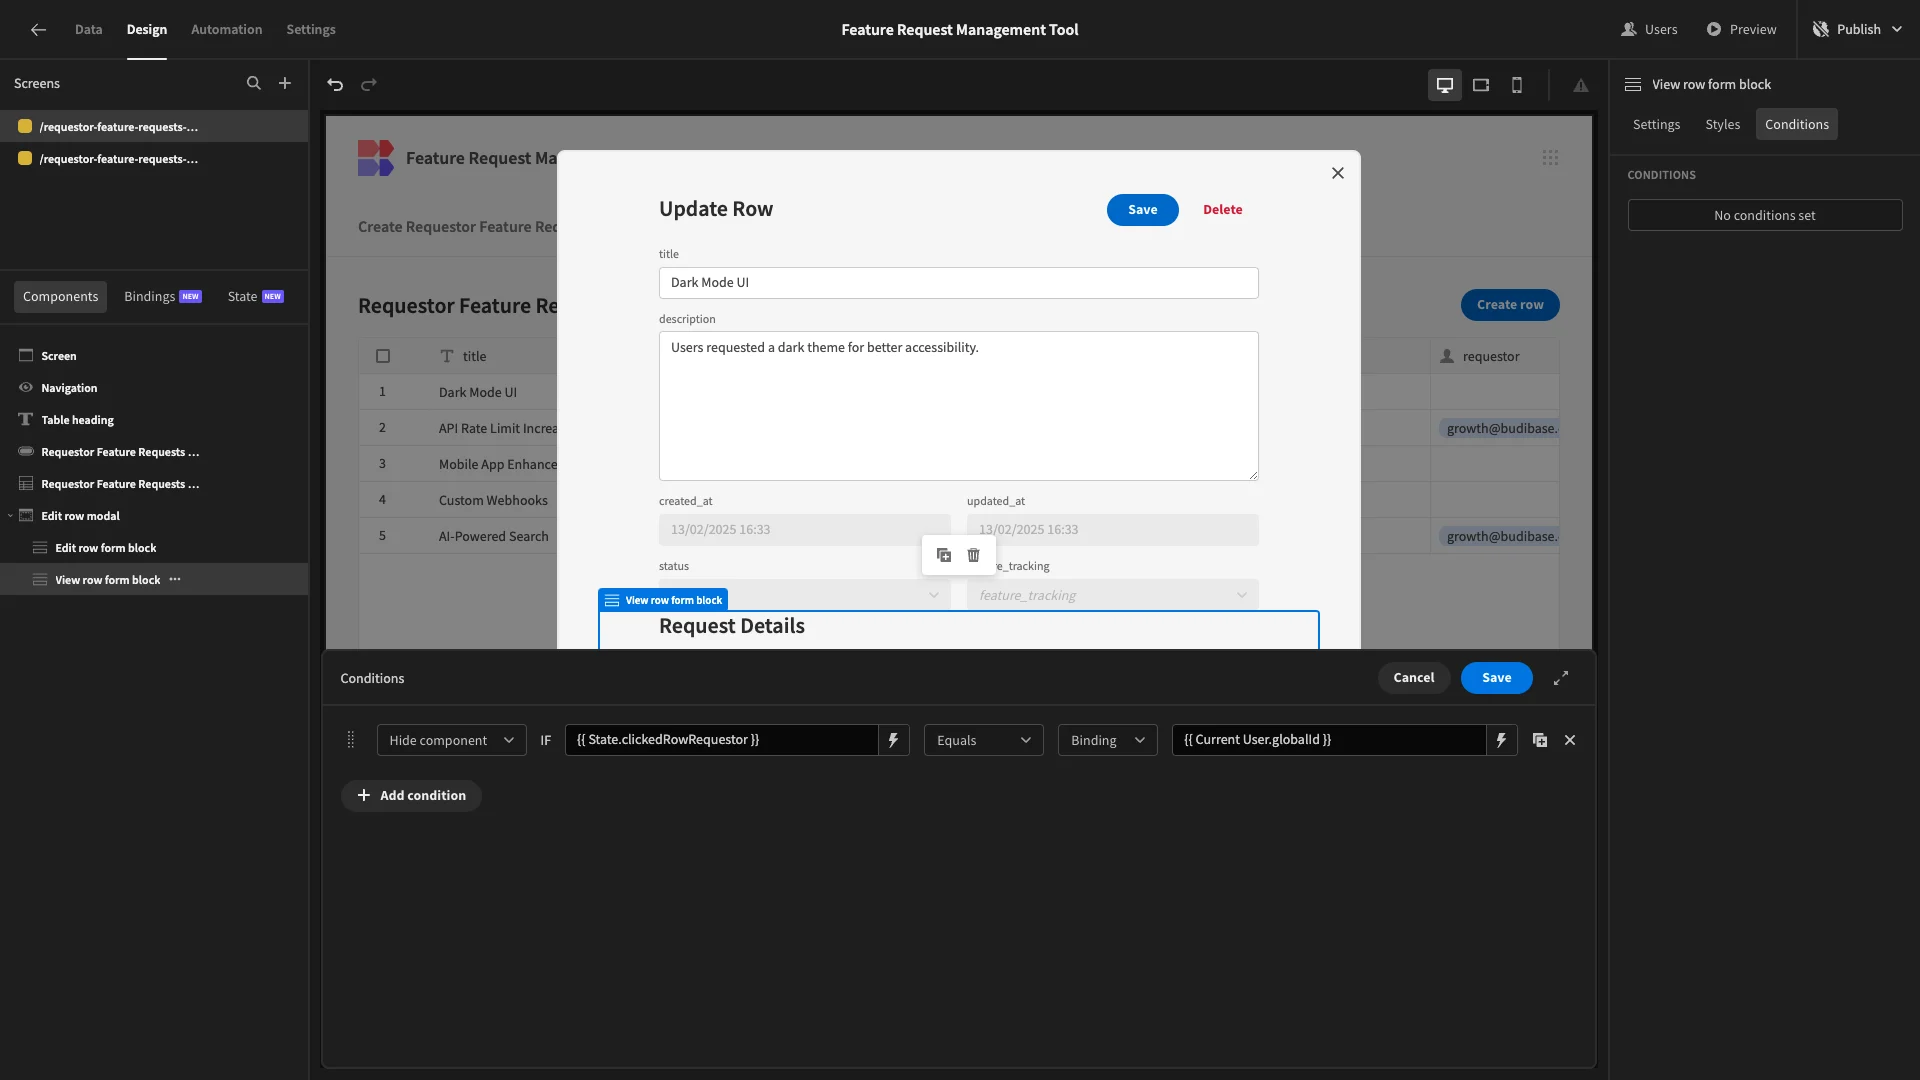
Then, we’ll add a corresponding rule to Hide our other form.
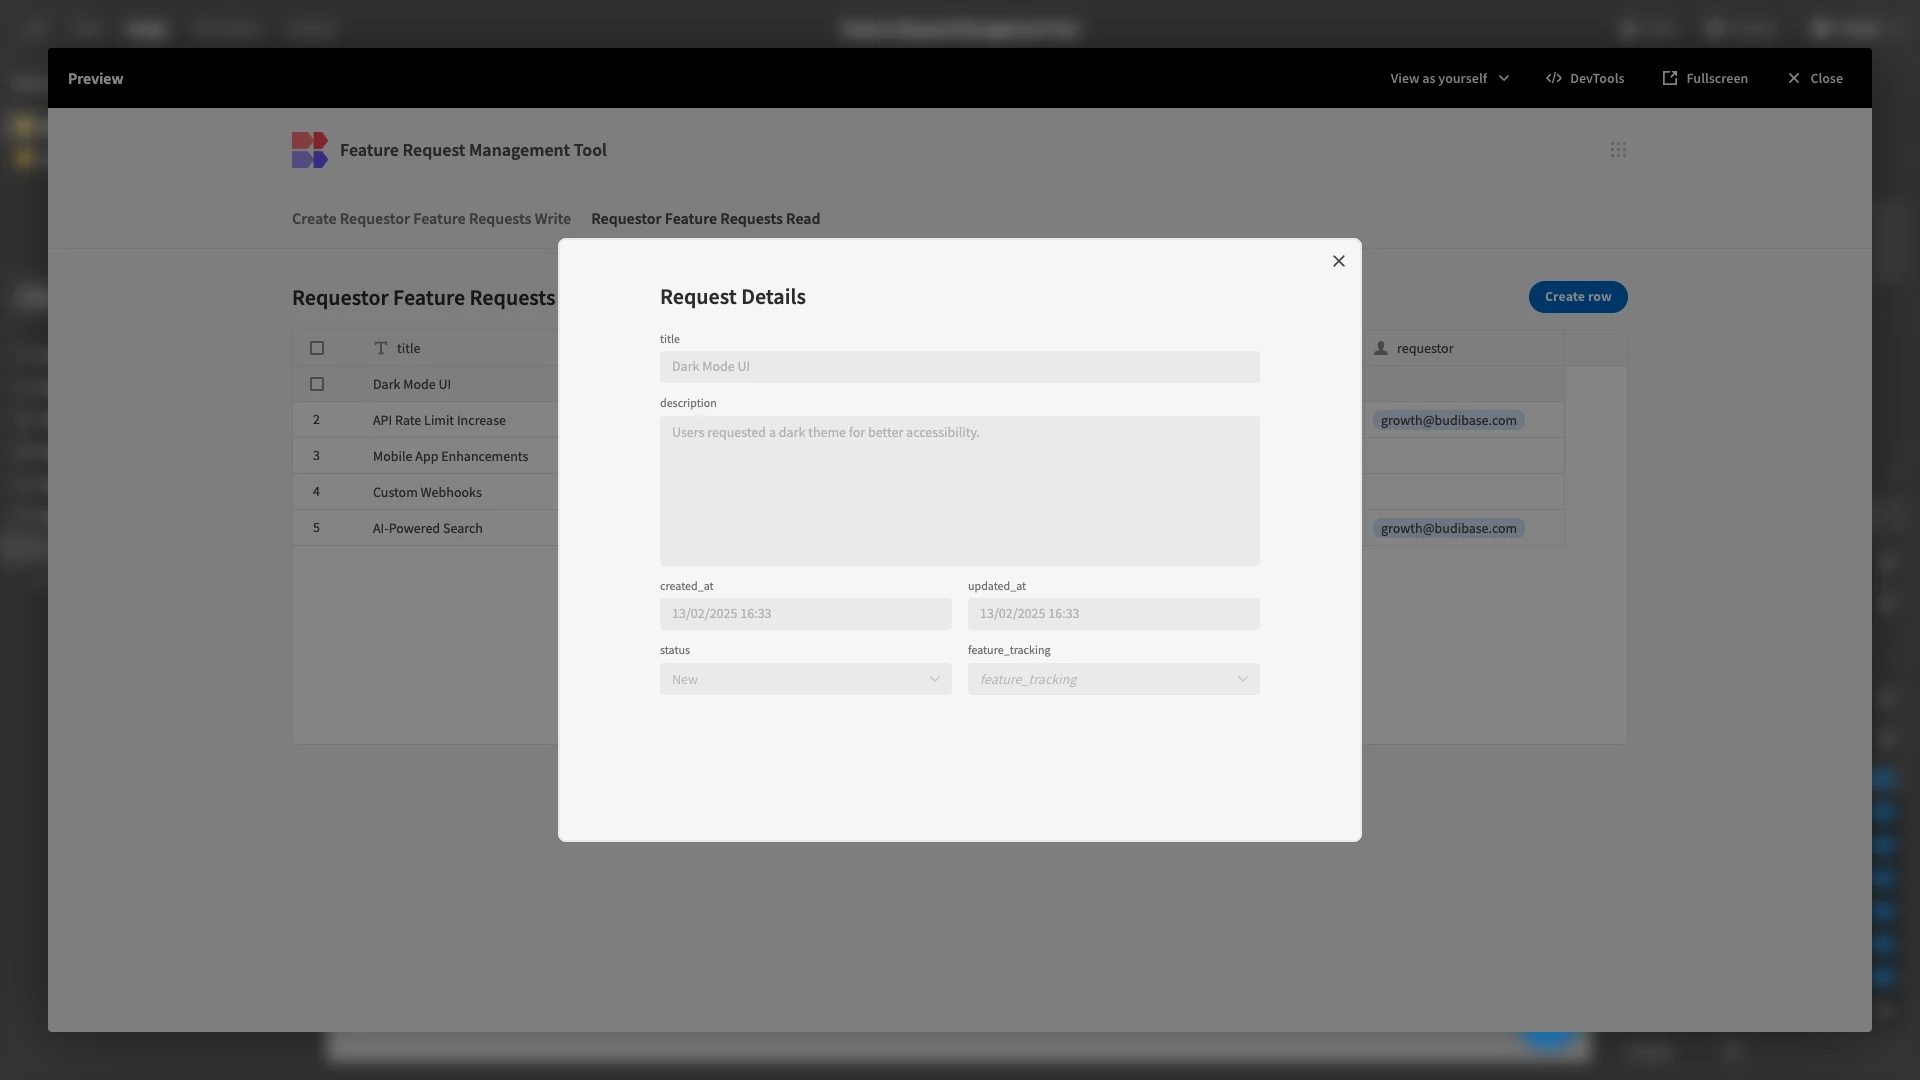
Now, when we preview our app, the rows we didn’t assign ourselves to earlier will display a read-only form.
Planned features
The last screen we’ll add for Requestors will enable them to search and view planned features. So, we’ll start by autogenerating a table screen from our Requestor Feature Tracking View.
This time, though, we’ll select the option for Side Panel Forms rather than modals.
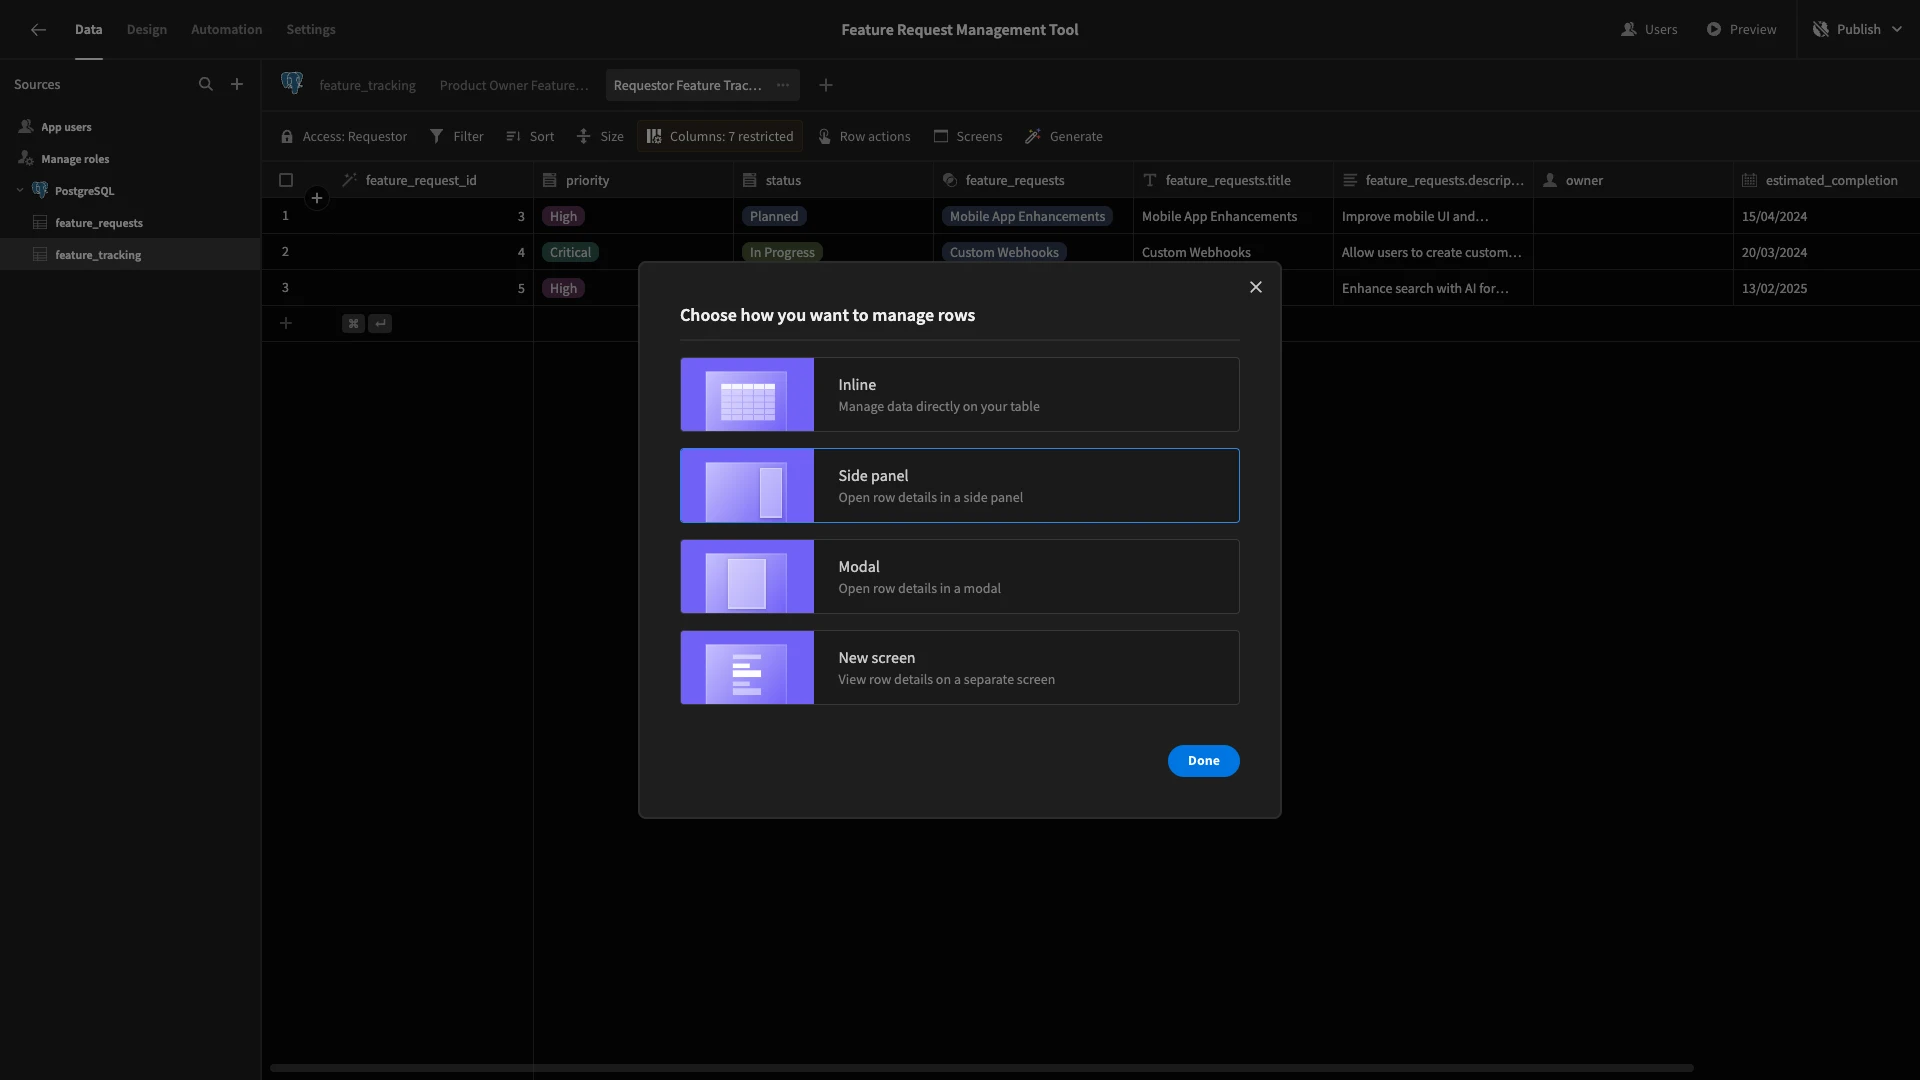
Here’s how this looks.
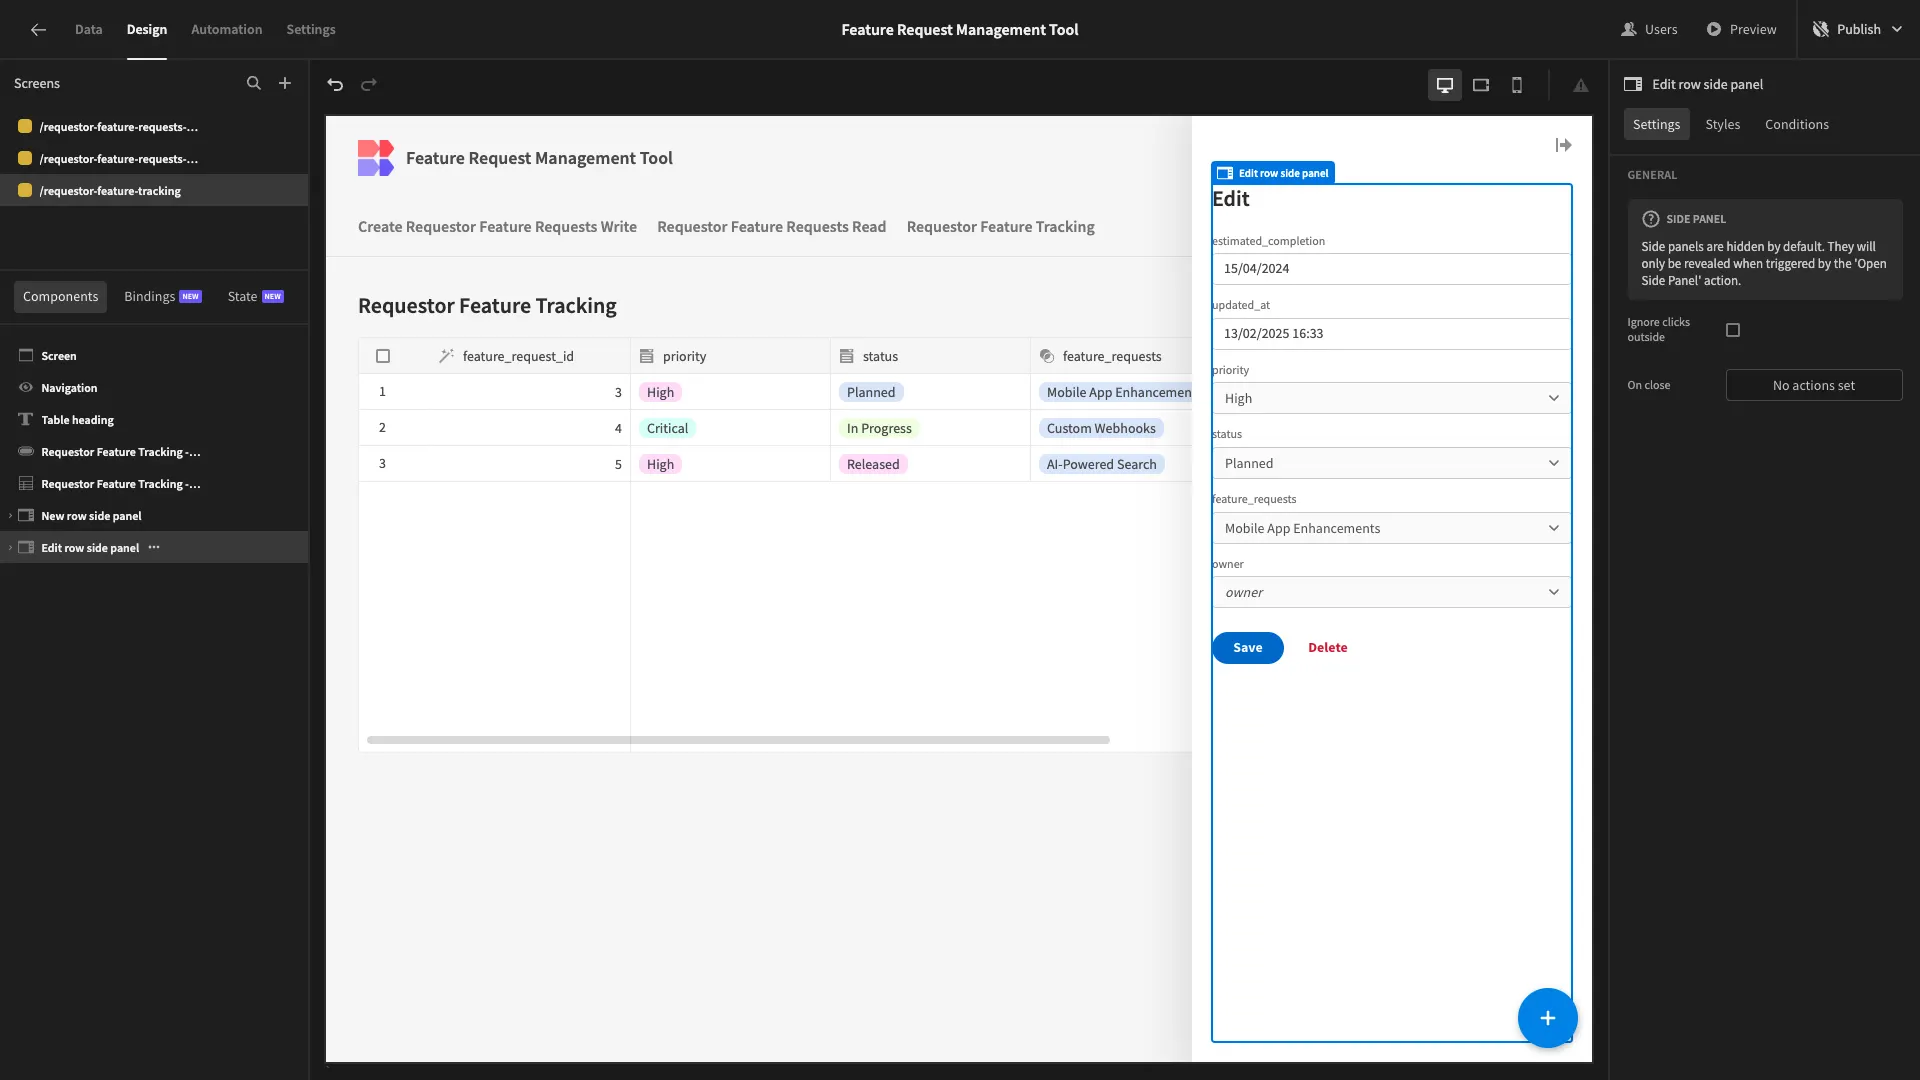
The main thing we need to do here is alter our Edit form to suit our purposes. We’ll start by setting this to be a View form, as well as removing the owner and feature_requests attributes.
We’ve also bound our form Title to the title attribute from the corresponding feature_requests row, using {{ Edit row form block.Requestor Feature Tracking.feature_requests.0.title }}.
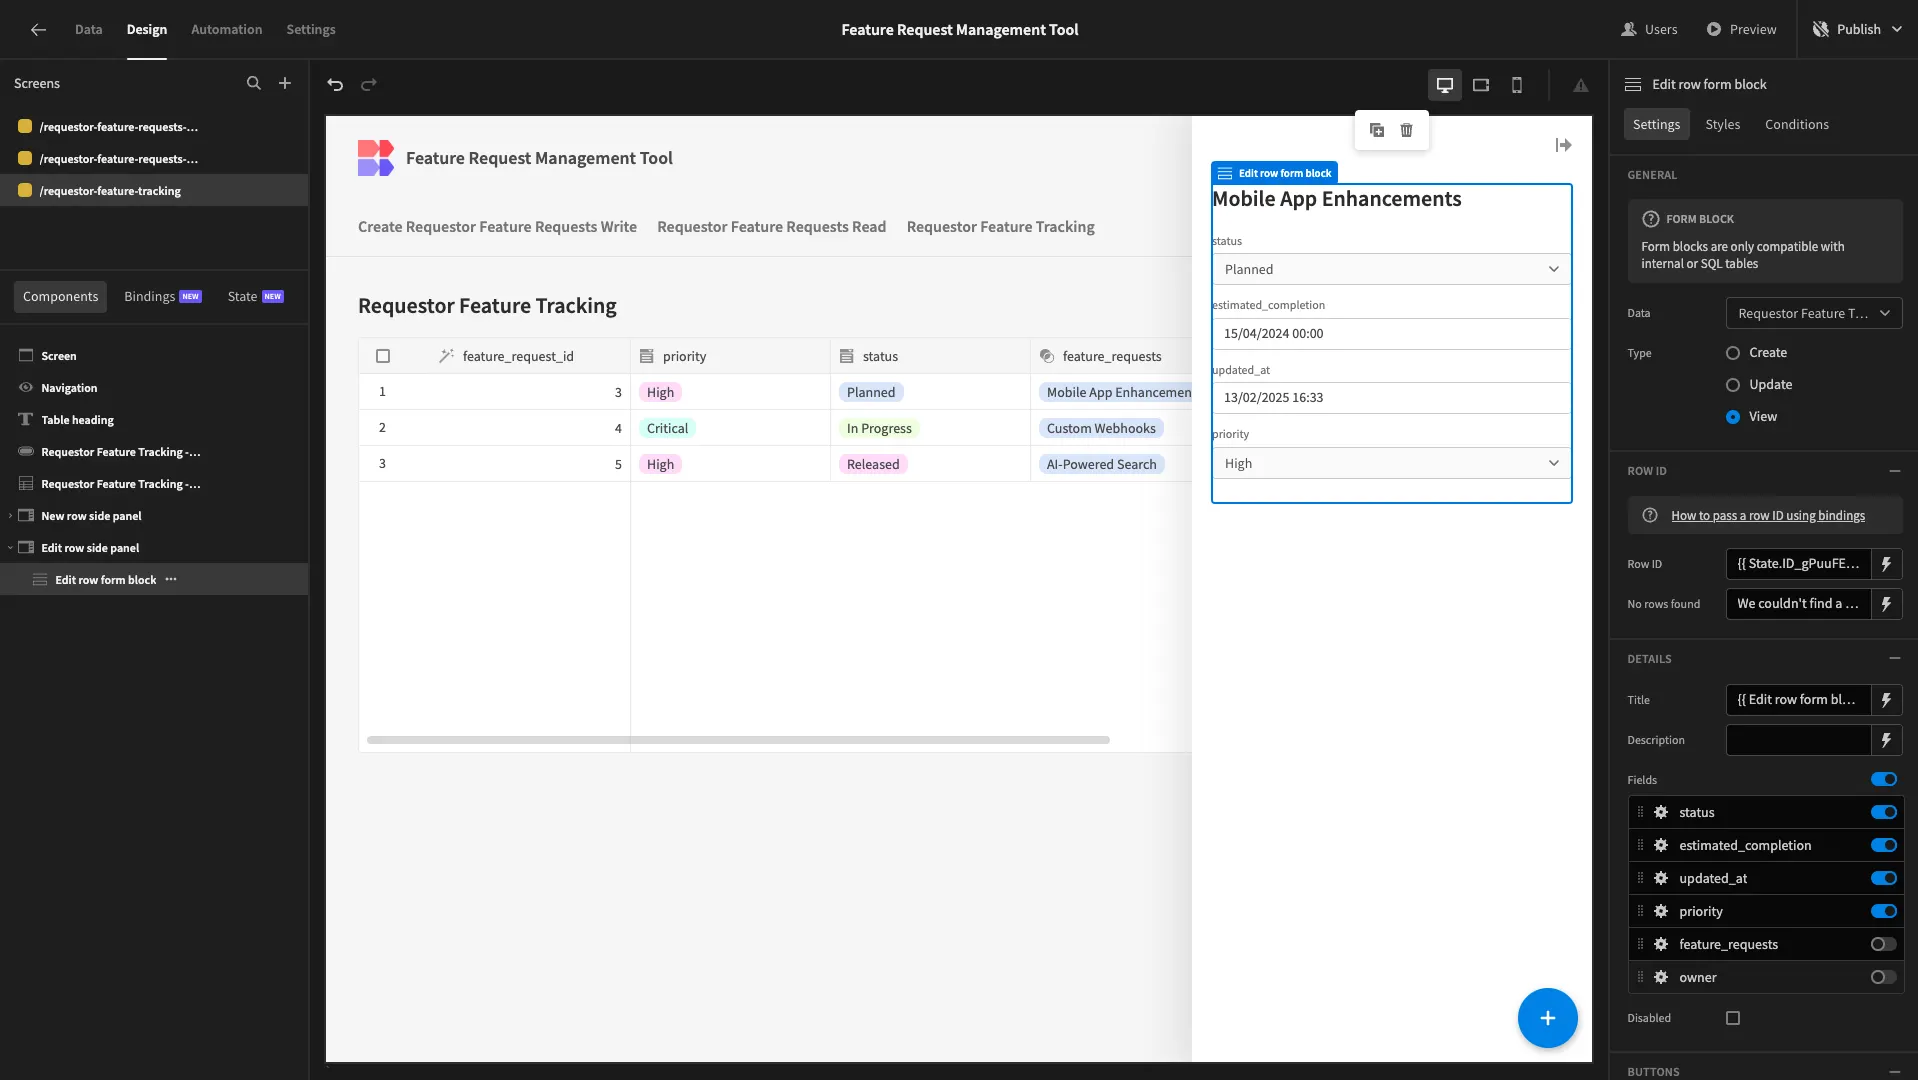
Our form is also missing the description of the original feature request. So, we’ll add a Long Form Text Field component beneath our existing Form Block and call this description.
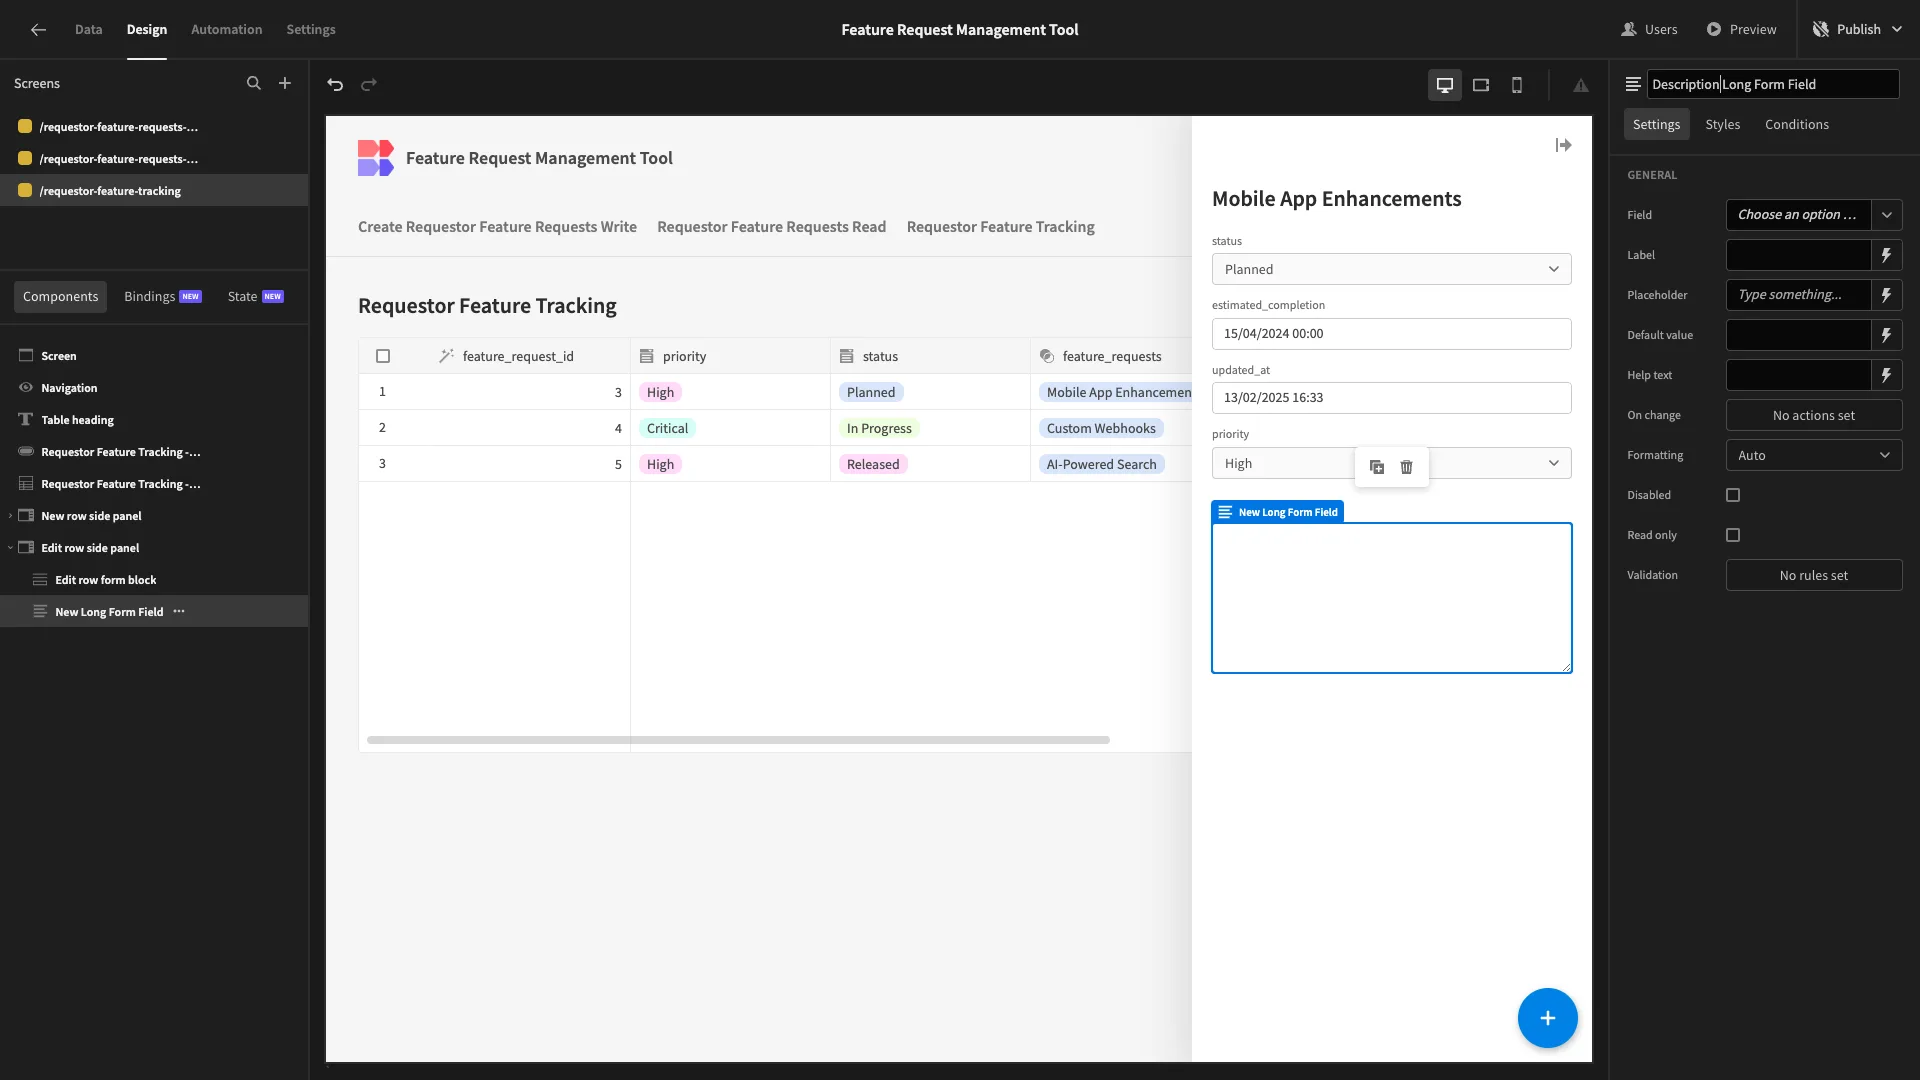
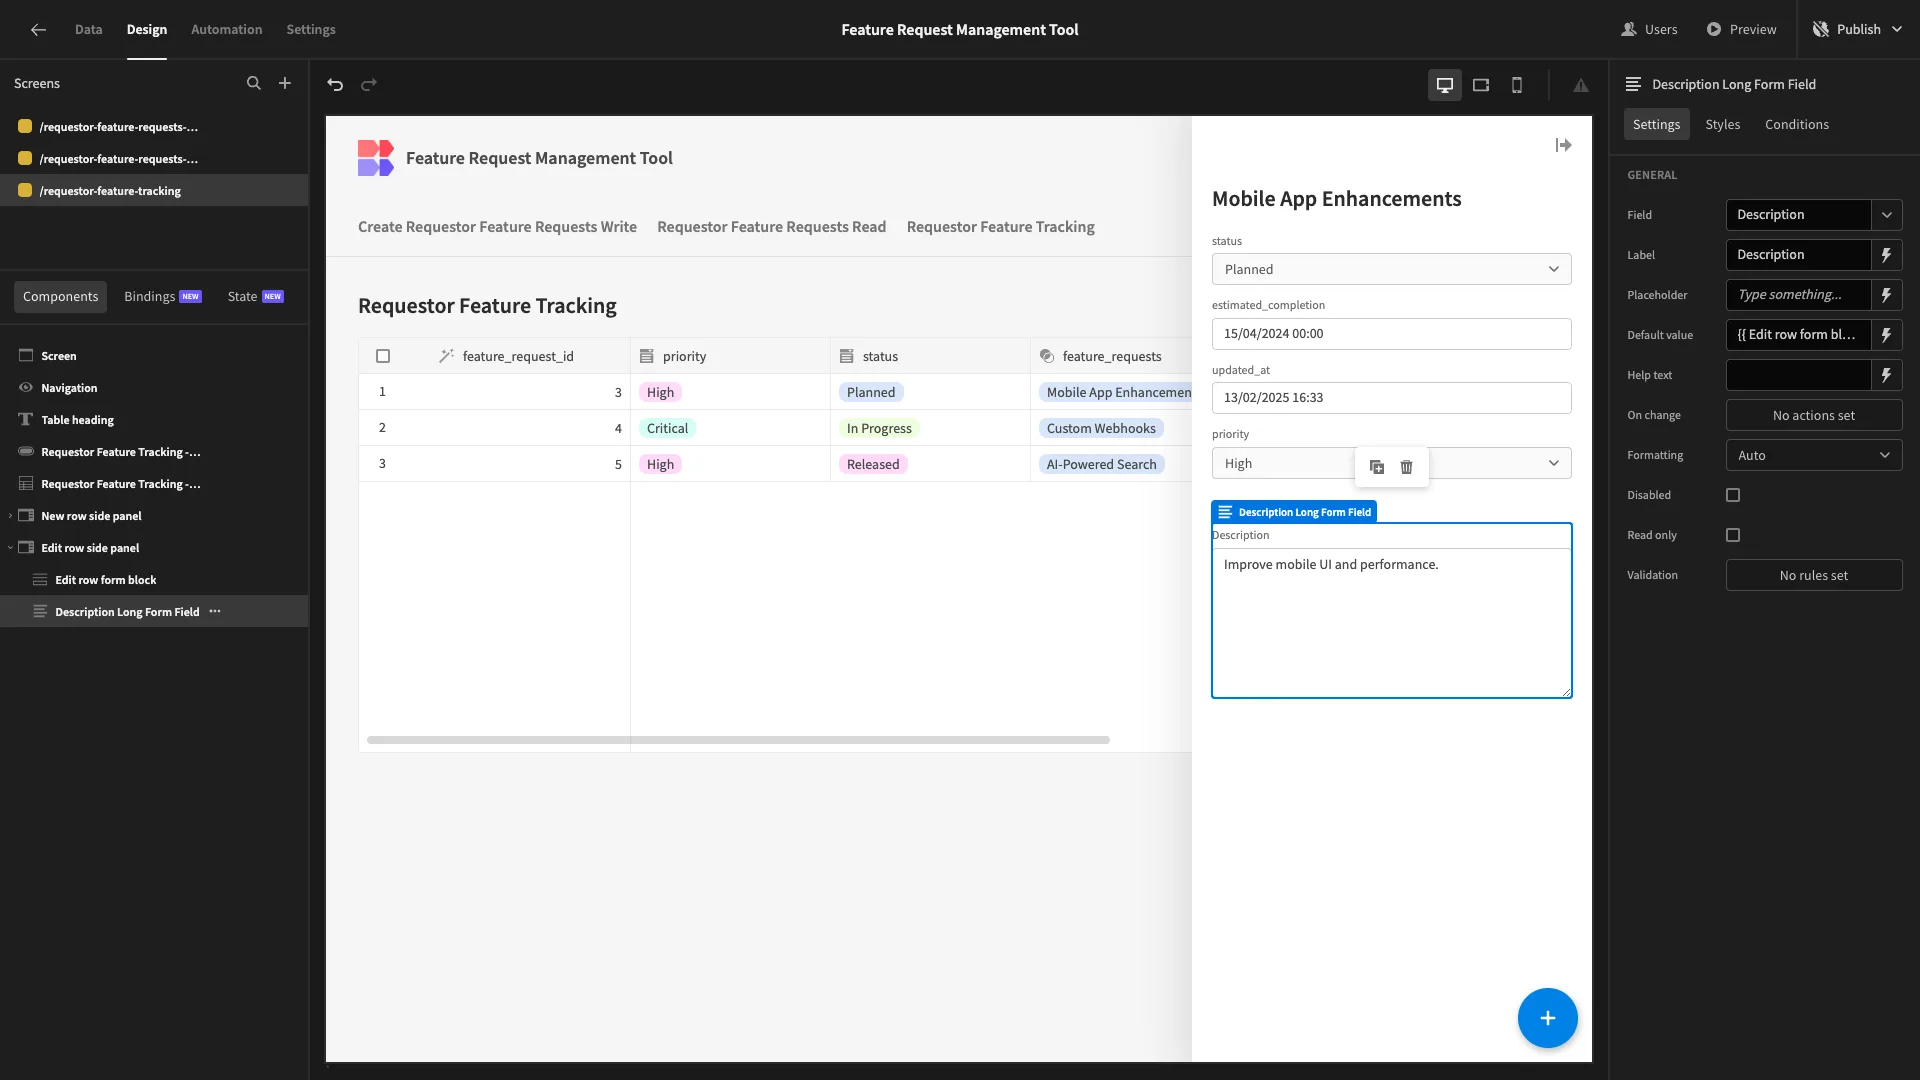
We’ll set the Field and Label to Description and the Default Value to {{ Edit row form block.Requestor Feature Tracking.feature_requests.0.description }}.
Our Requestors don’t have write permissions for this table, so we can delete the New Row side panel and corresponding button.
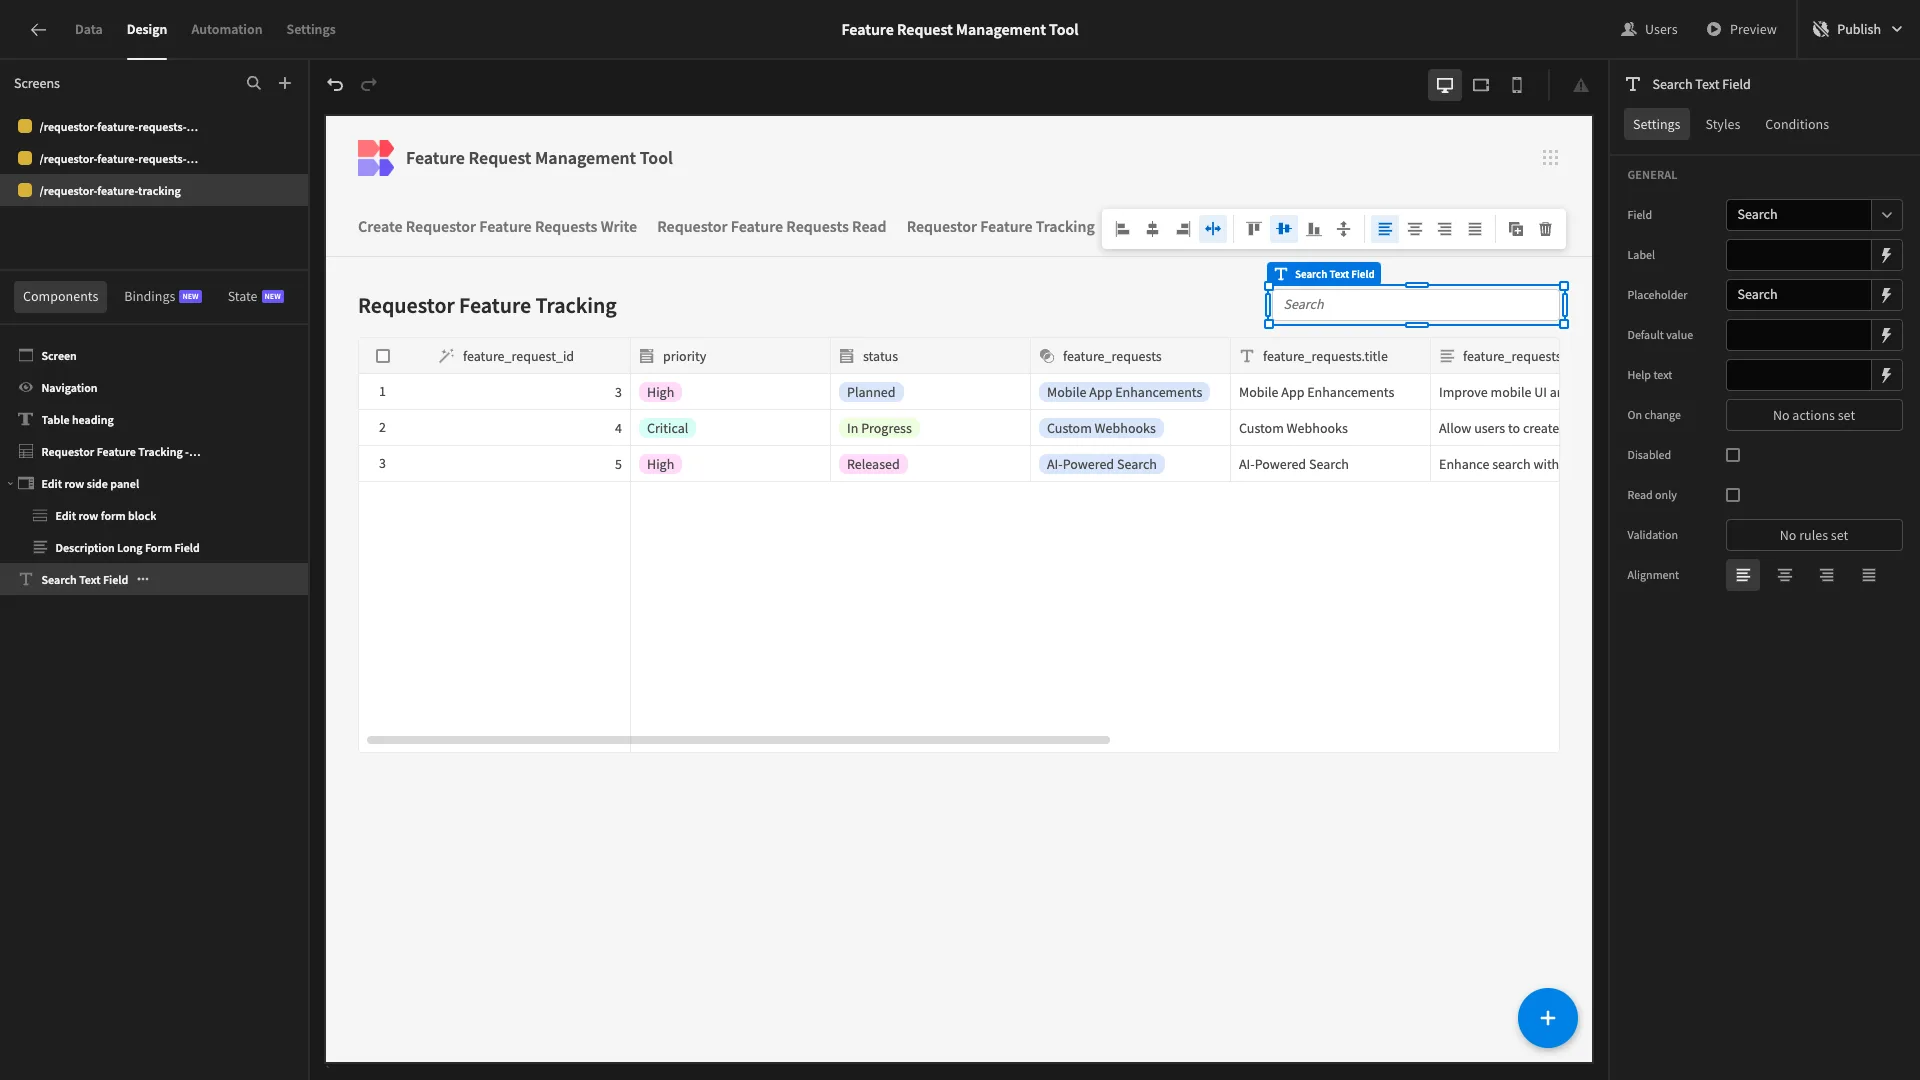
We also want to provide searchability on this screen, so we’ll add a Text Field component above our table, with the Field and Placeholder set to Search.
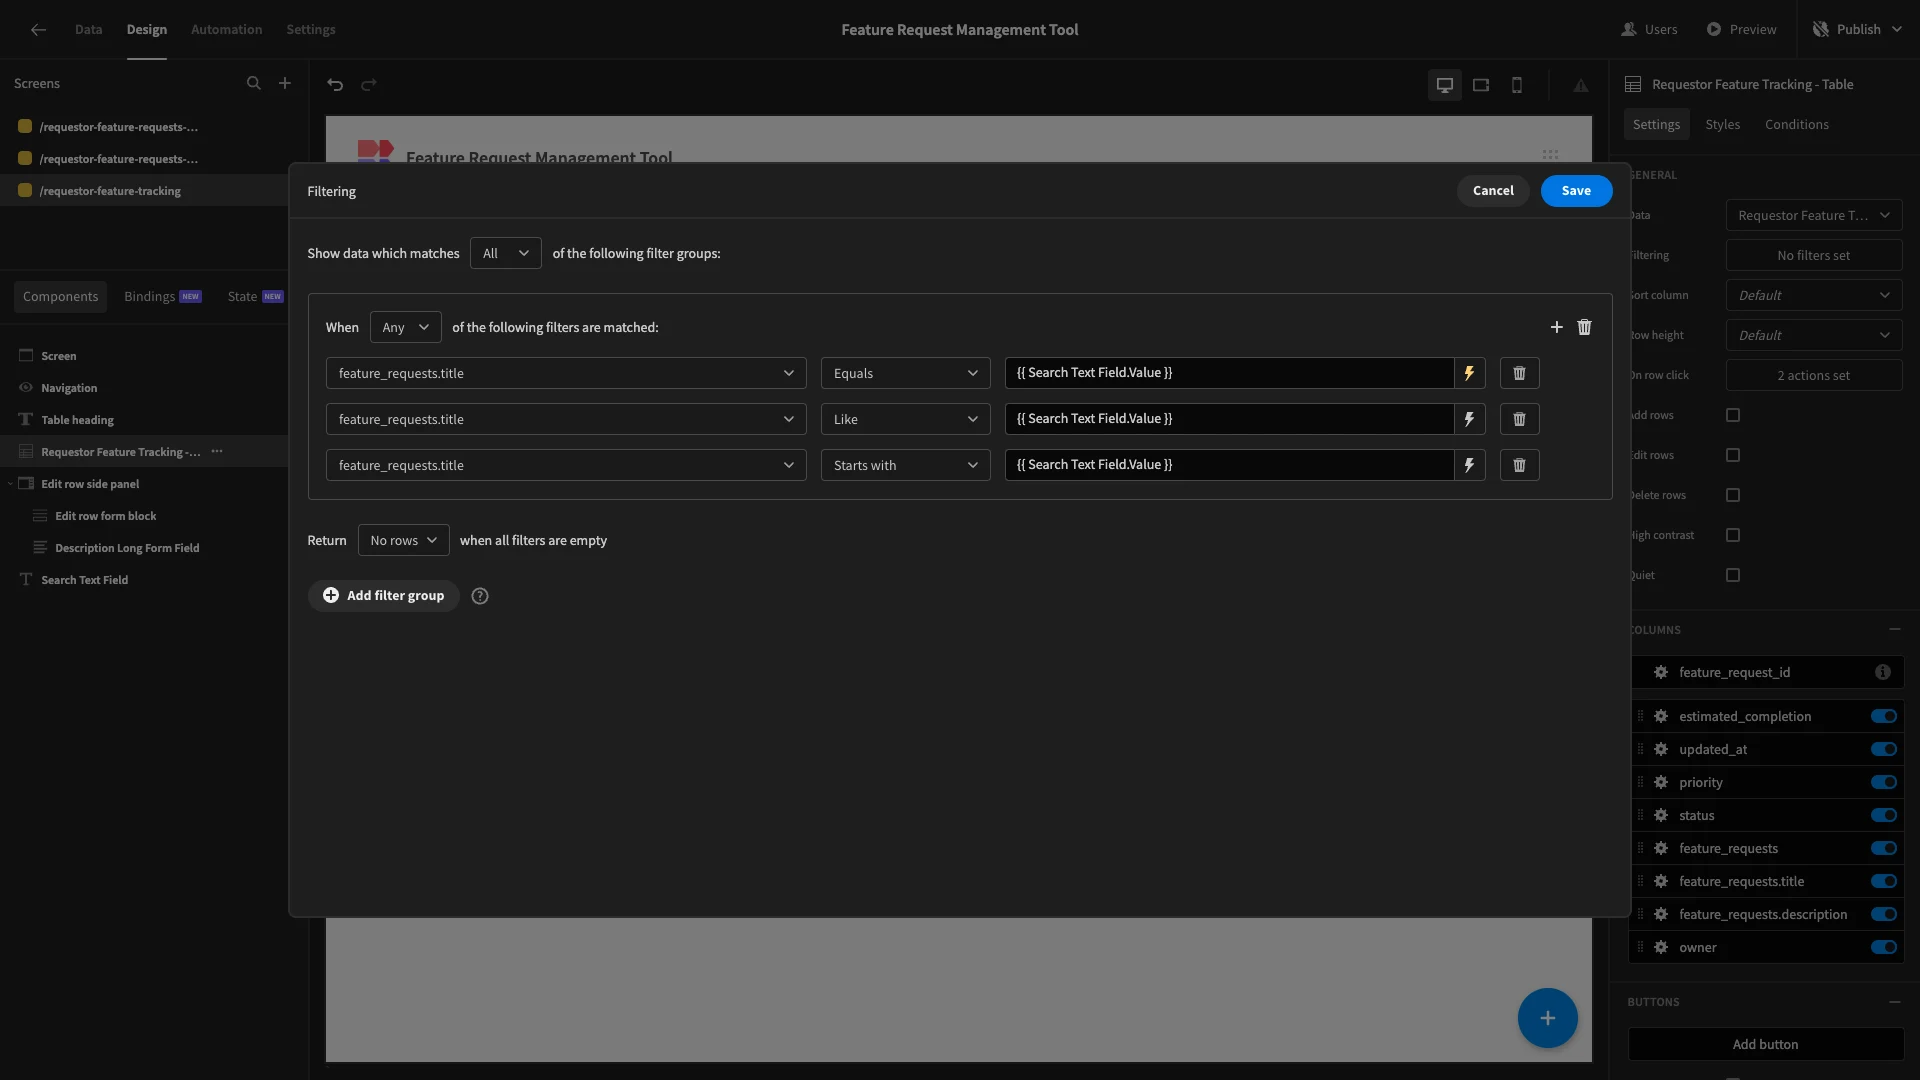
For this to work, we need to filter our table by the search field’s output.
We’ll open the Filter menu and create a group with three expressions for if feature_requests equals, is like or starts with {{ Search Text Field.Value }}.
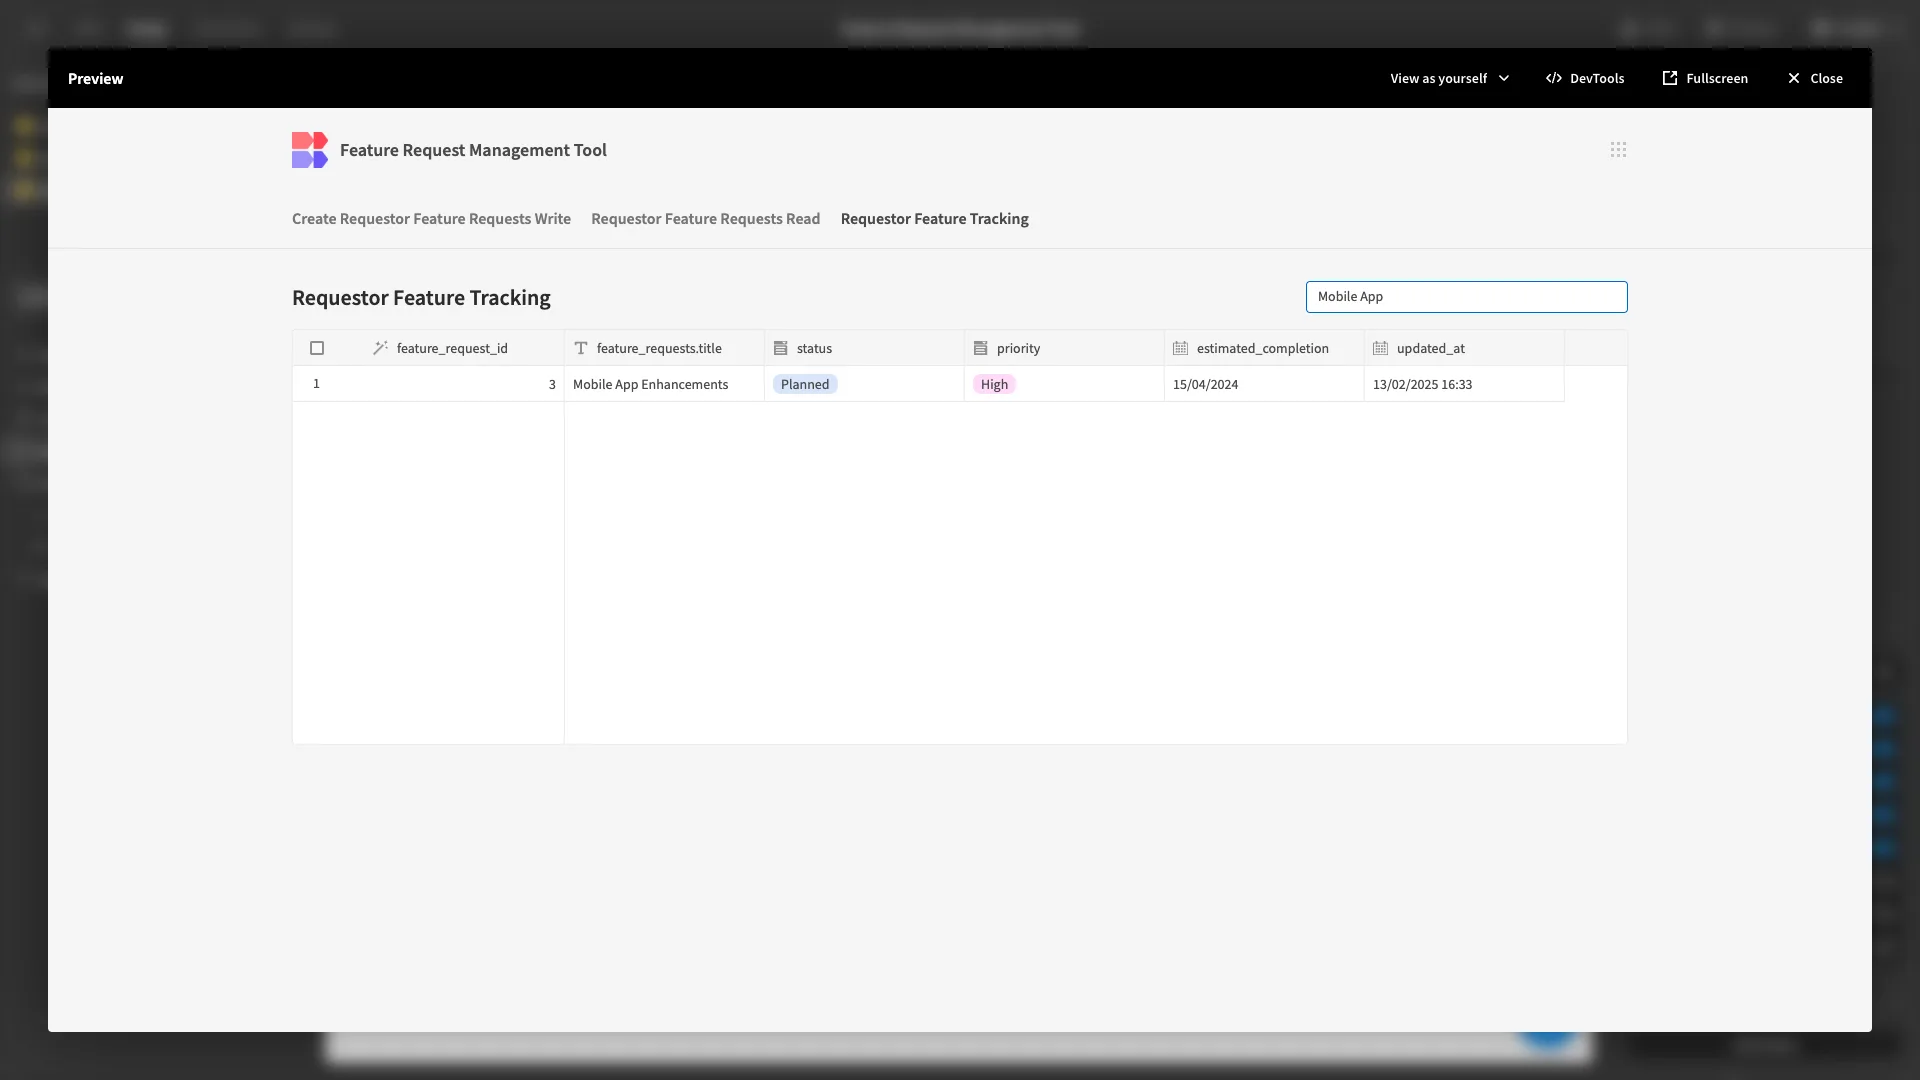
Now we can search for rows based on their title.
4. Adding an approval flow for product managers
Now that we’ve built all of our screens for Requestors, we can start building the corresponding UIs for Product Owners.
The goal is to enable them to respond to feature_requests and perform full CRUD actions on the feature_tracker table.
When they update a feature_requests row’s status to Accepted, we want a corresponding row to be created on the feature_tracker table.
We’ll achieve this using Budibase’s Automation builder.
Creating an automation rule
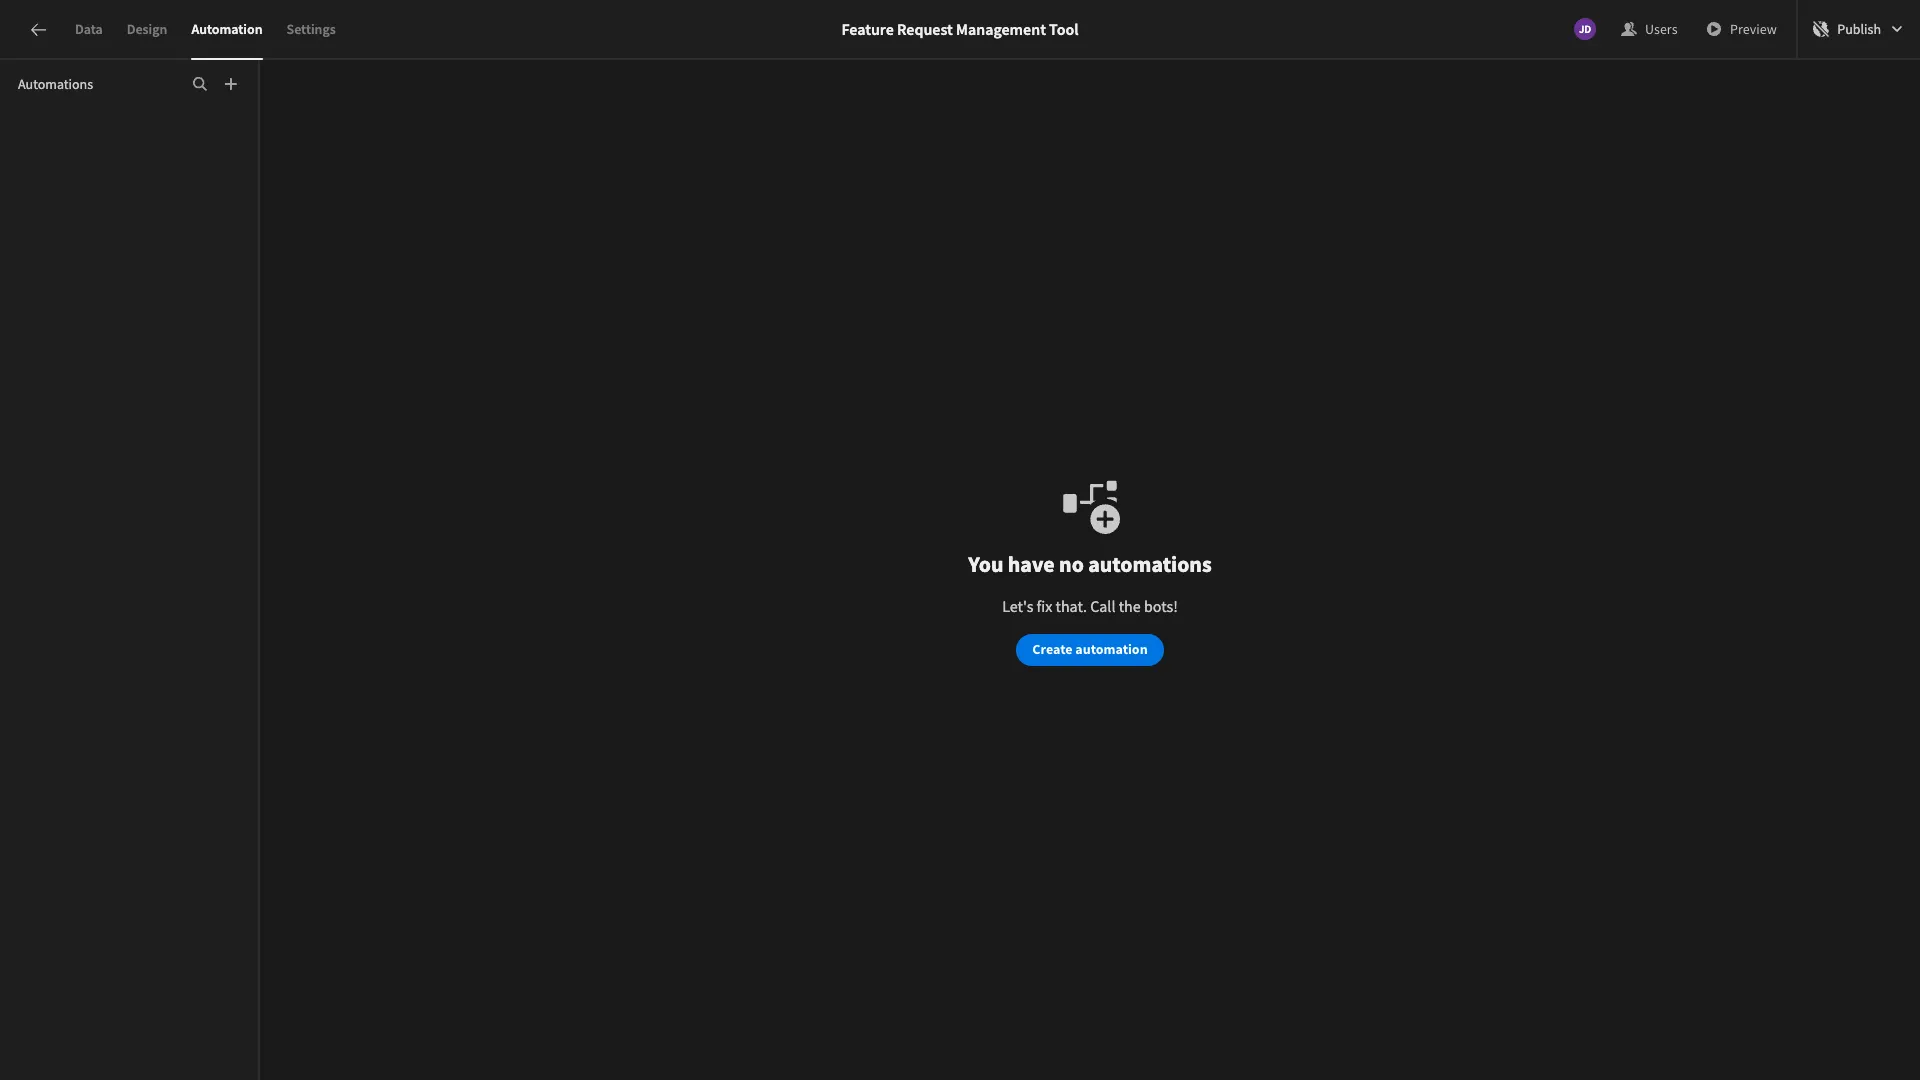
We’ll start by heading to the Automation section. Since we don’t have any automations yet, this is what we’ll see.
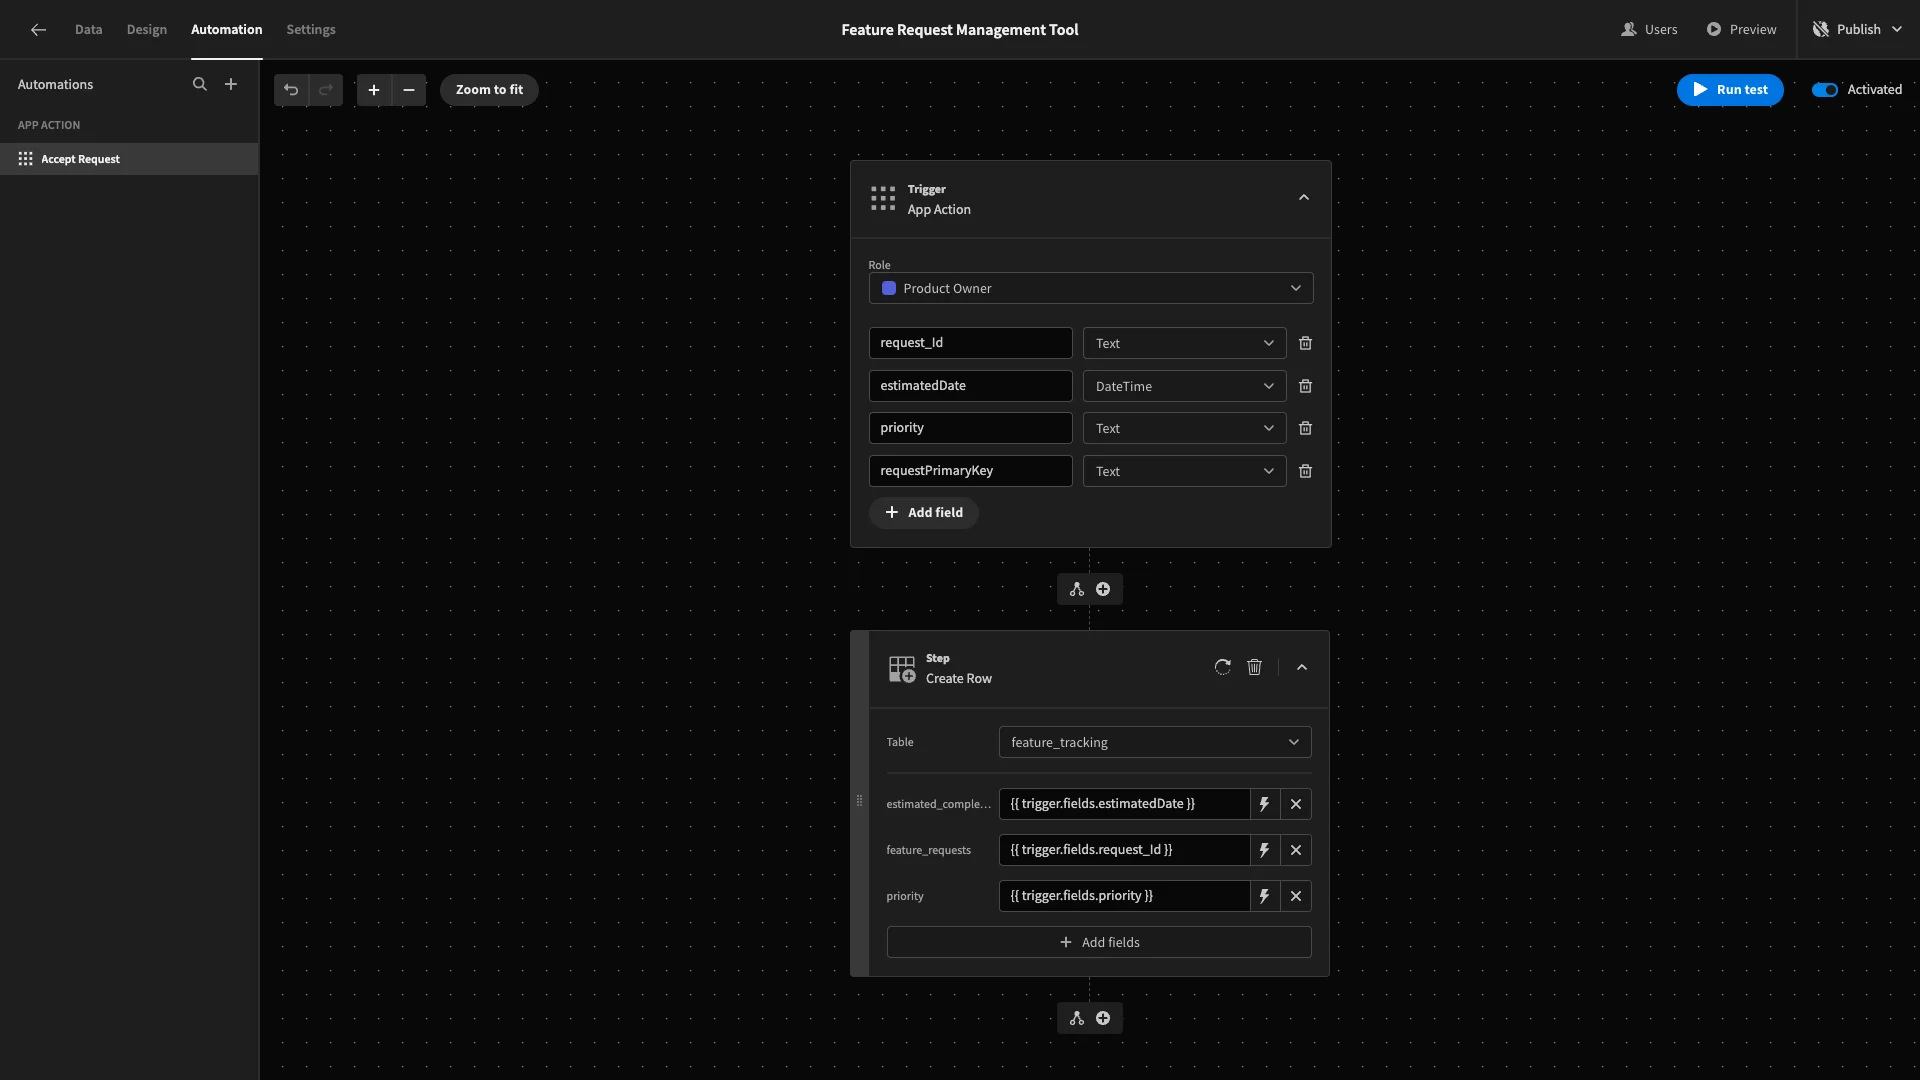
We’ll hit create automation. We’ll then be prompted to choose a name and a trigger for our new rule. We’re going to call ours Accept Request and select an App Action trigger.
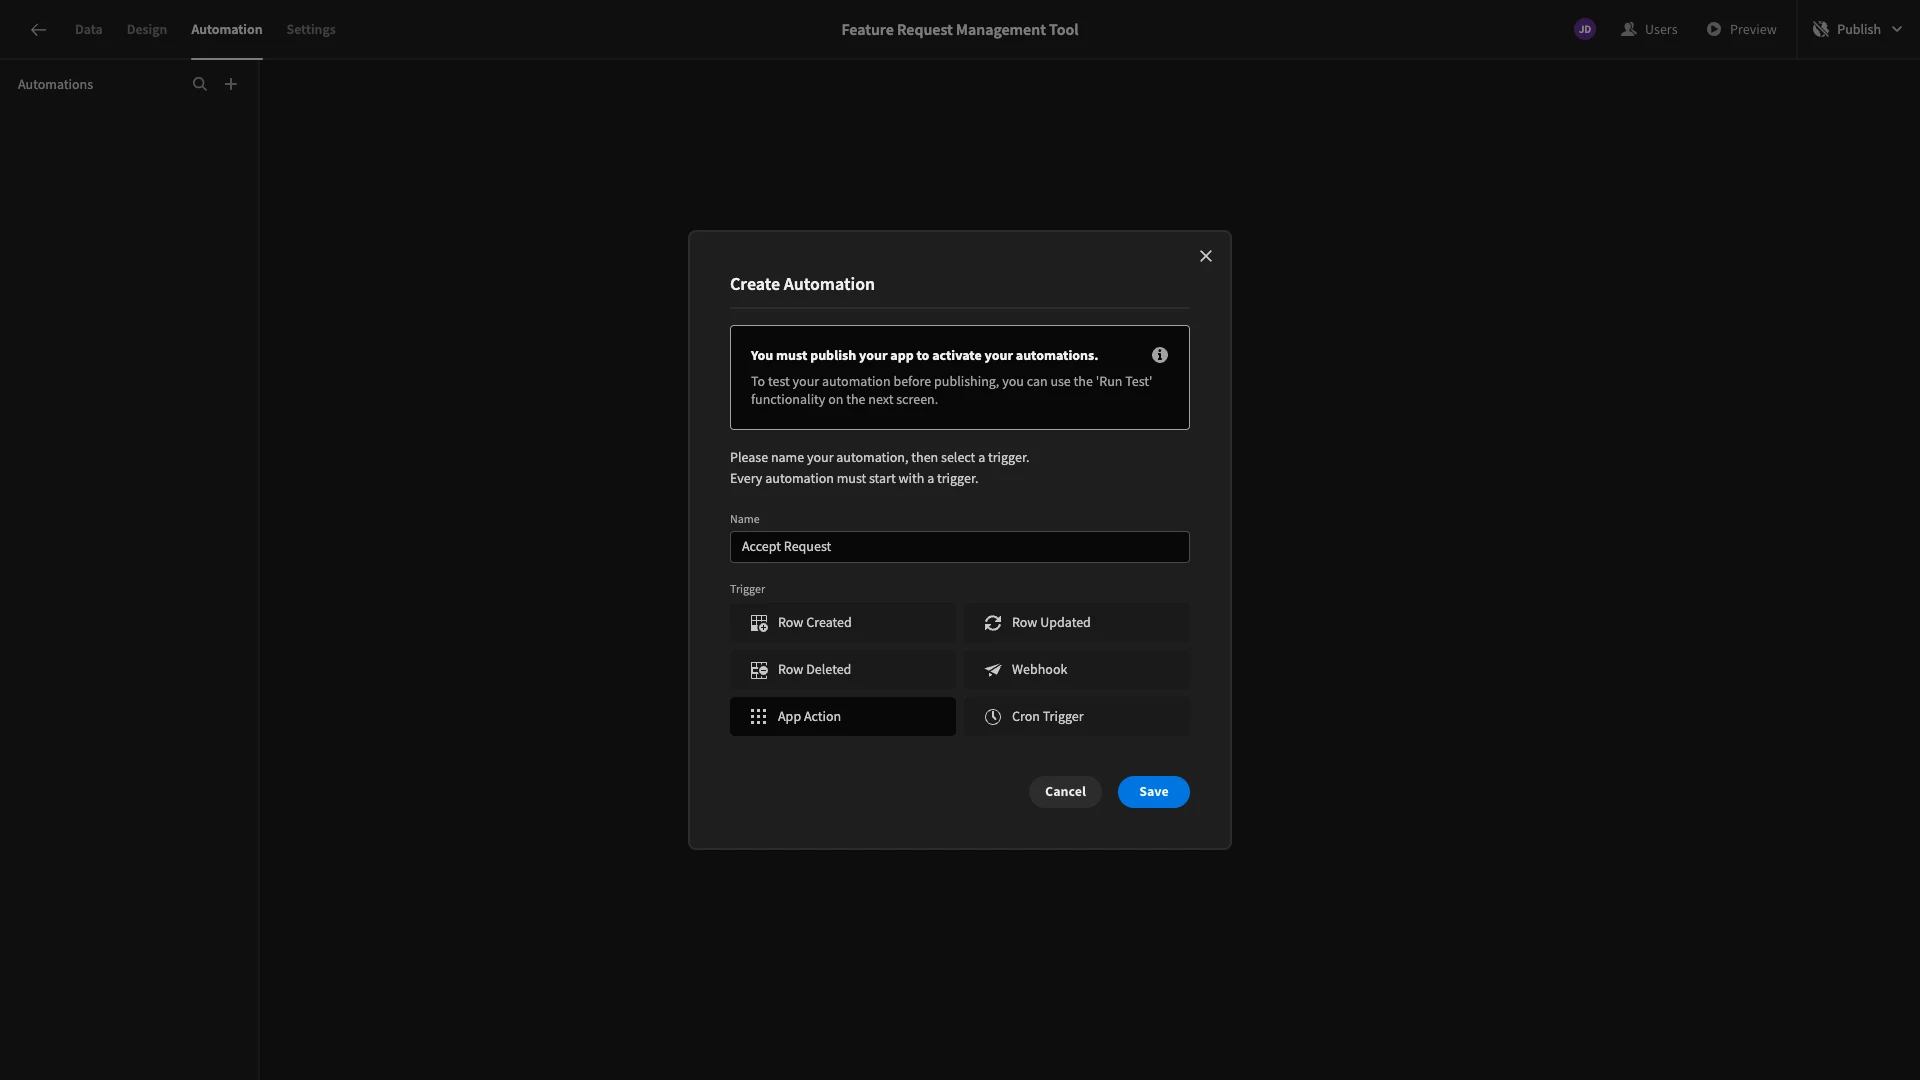
The App Action trigger allows us to initiate our automation elsewhere in the builder when end-users take certain actions.
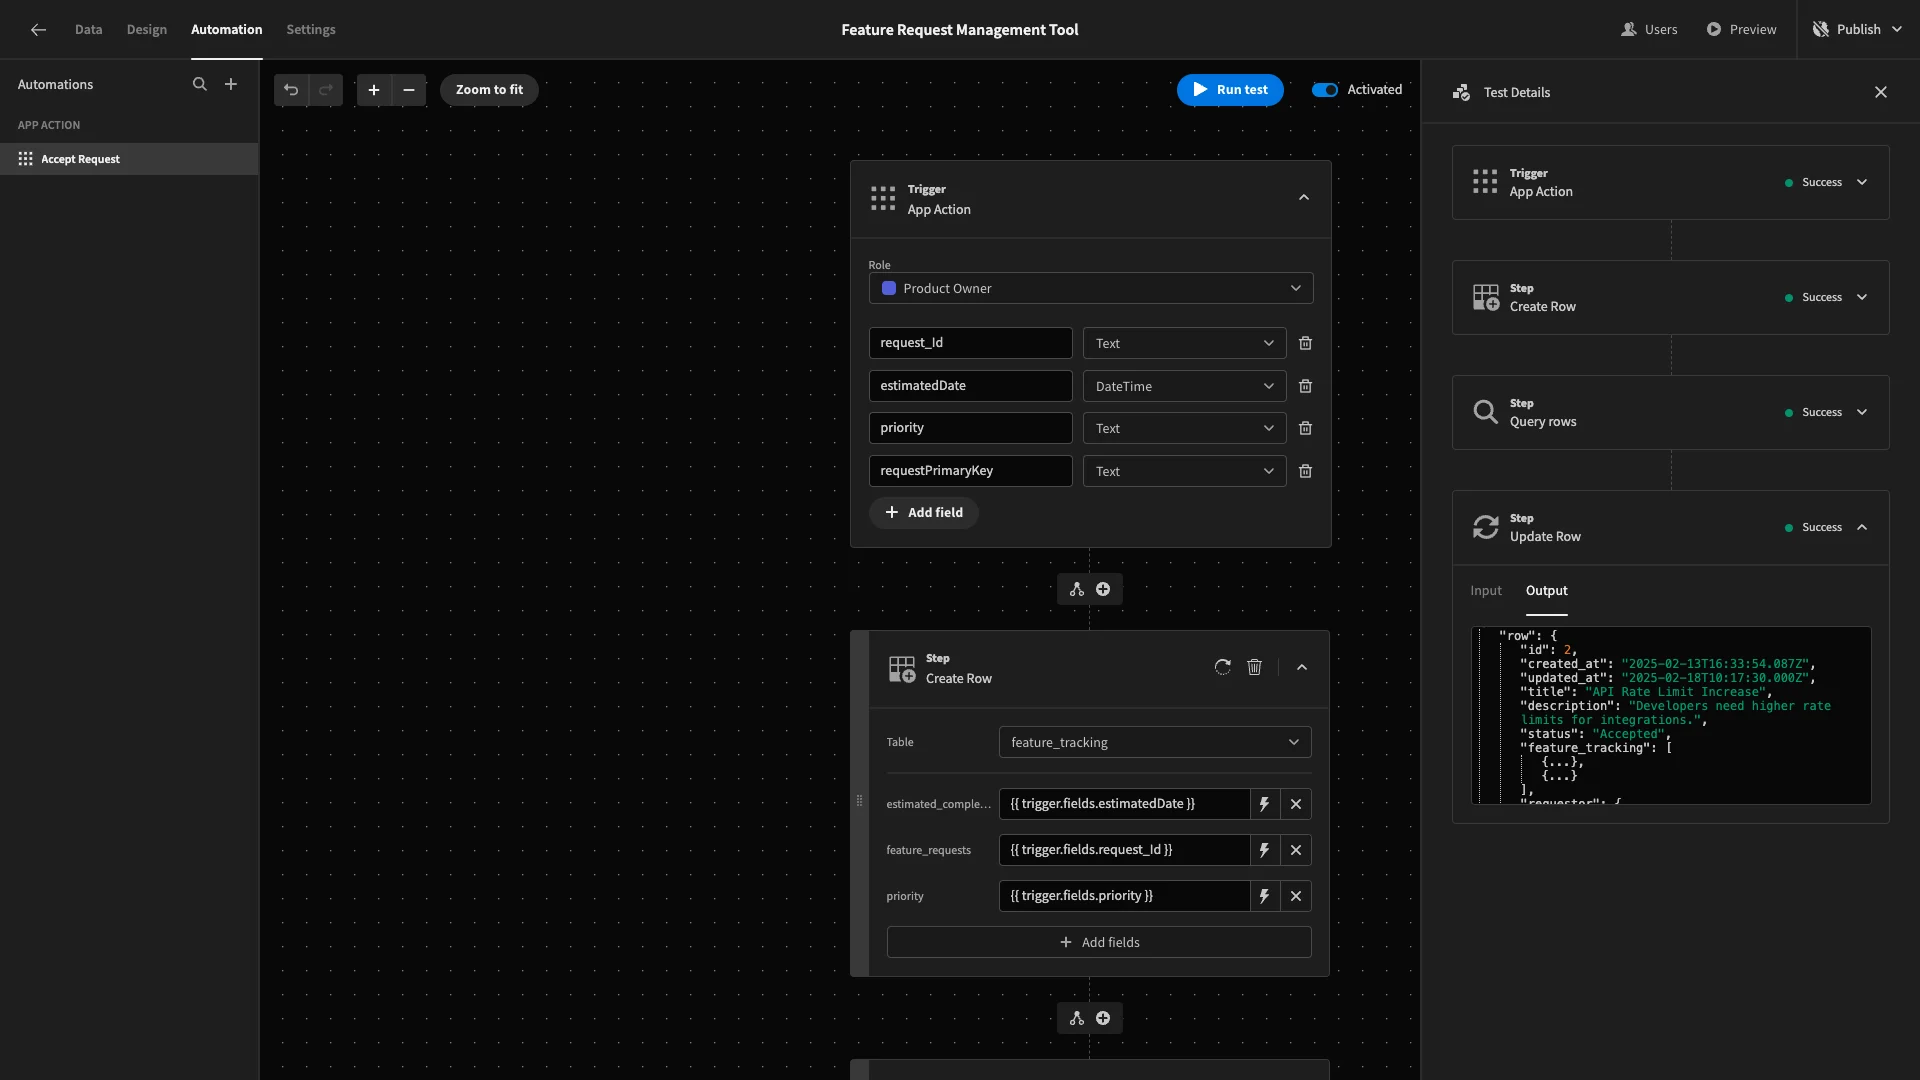
We’re going to set the role for our automation to Product Owner. We’re also adding four arguments called request_Id, estimatedDate, priority, and requestPrimaryKey. These are the fields we’ll need to perform our automation.
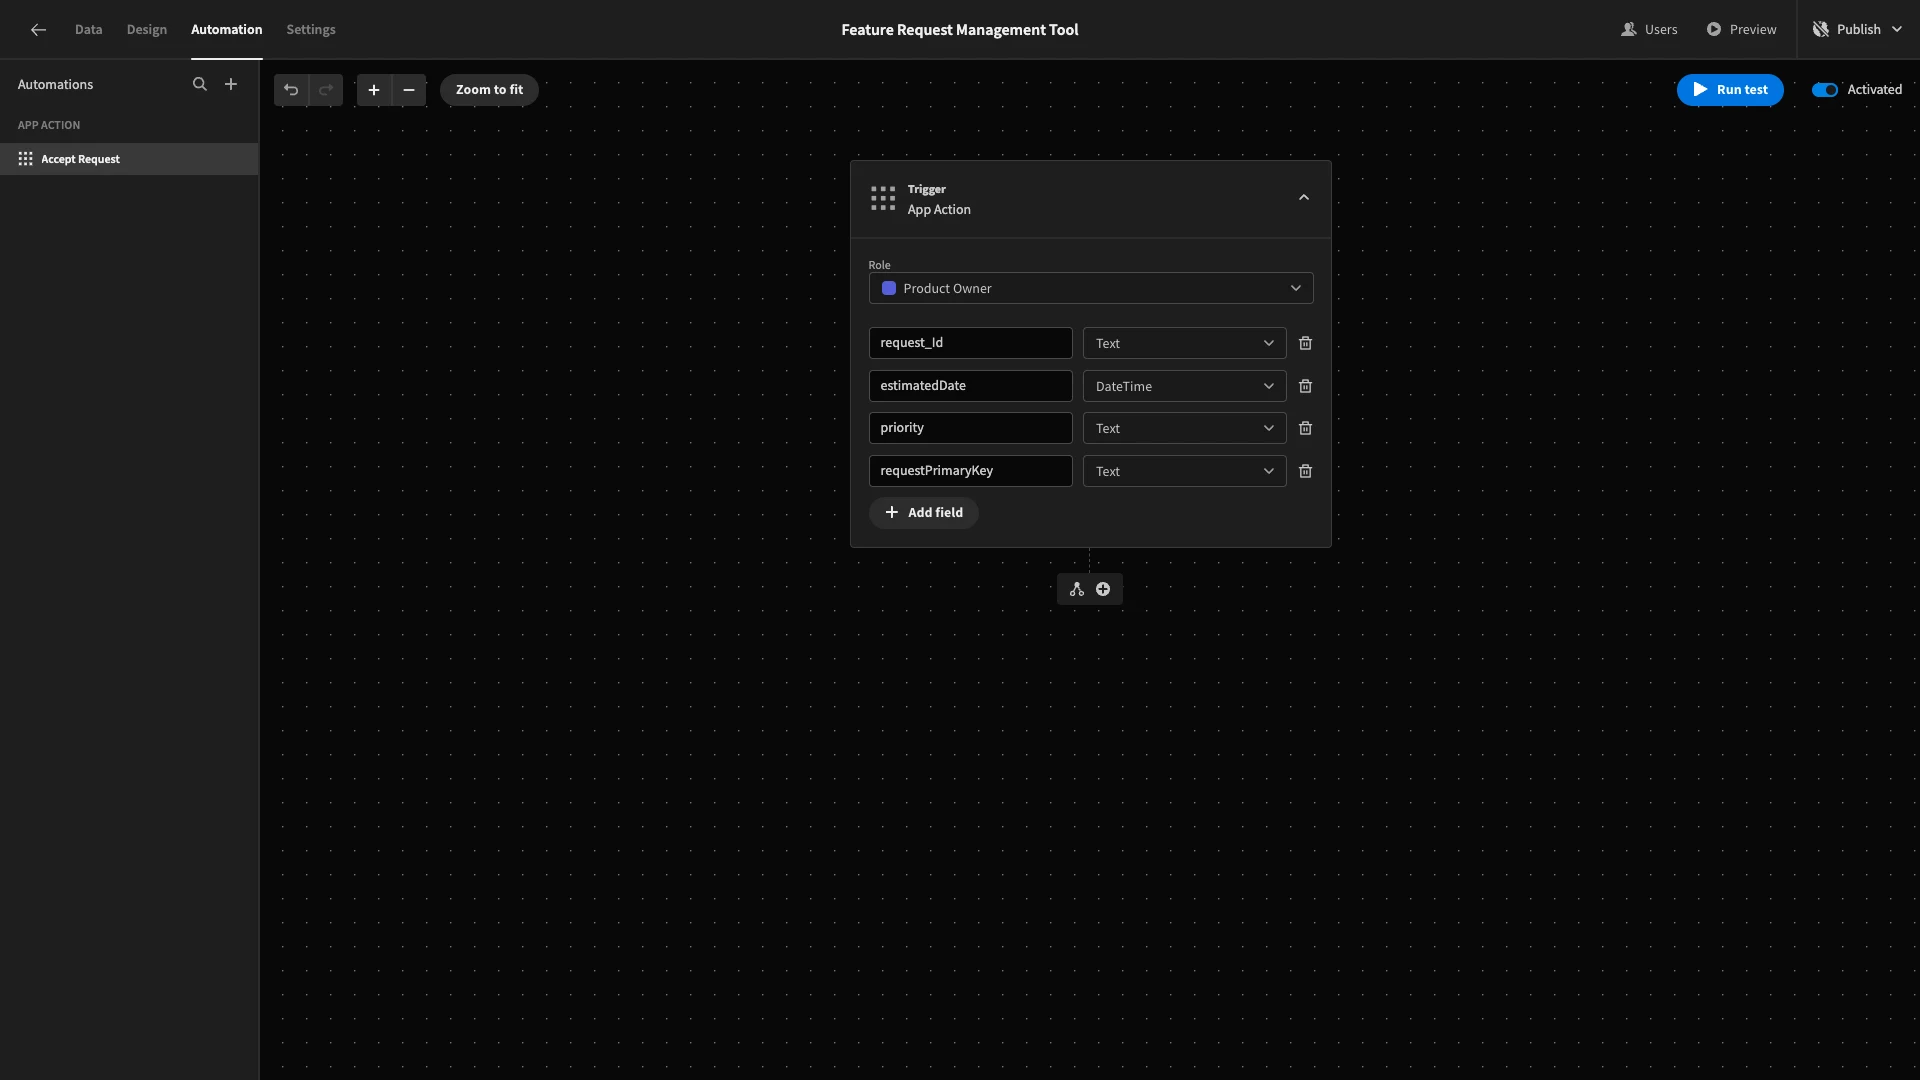
We’re using the name requestPrimaryKey to keep things readable, as our Postgres database and Budibase’s automatic data have similarly named id and _id attributes.
Let’s pause to recall what we want our automation to do. Firstly, we want to take data from a feature_requests row and use it to populate a new row on our feature_tracking table. Then, we want to mark the original feature_request as accepted.
So, we’ll start by adding a Create Row action. We’ll point this at the feature_tracking table.
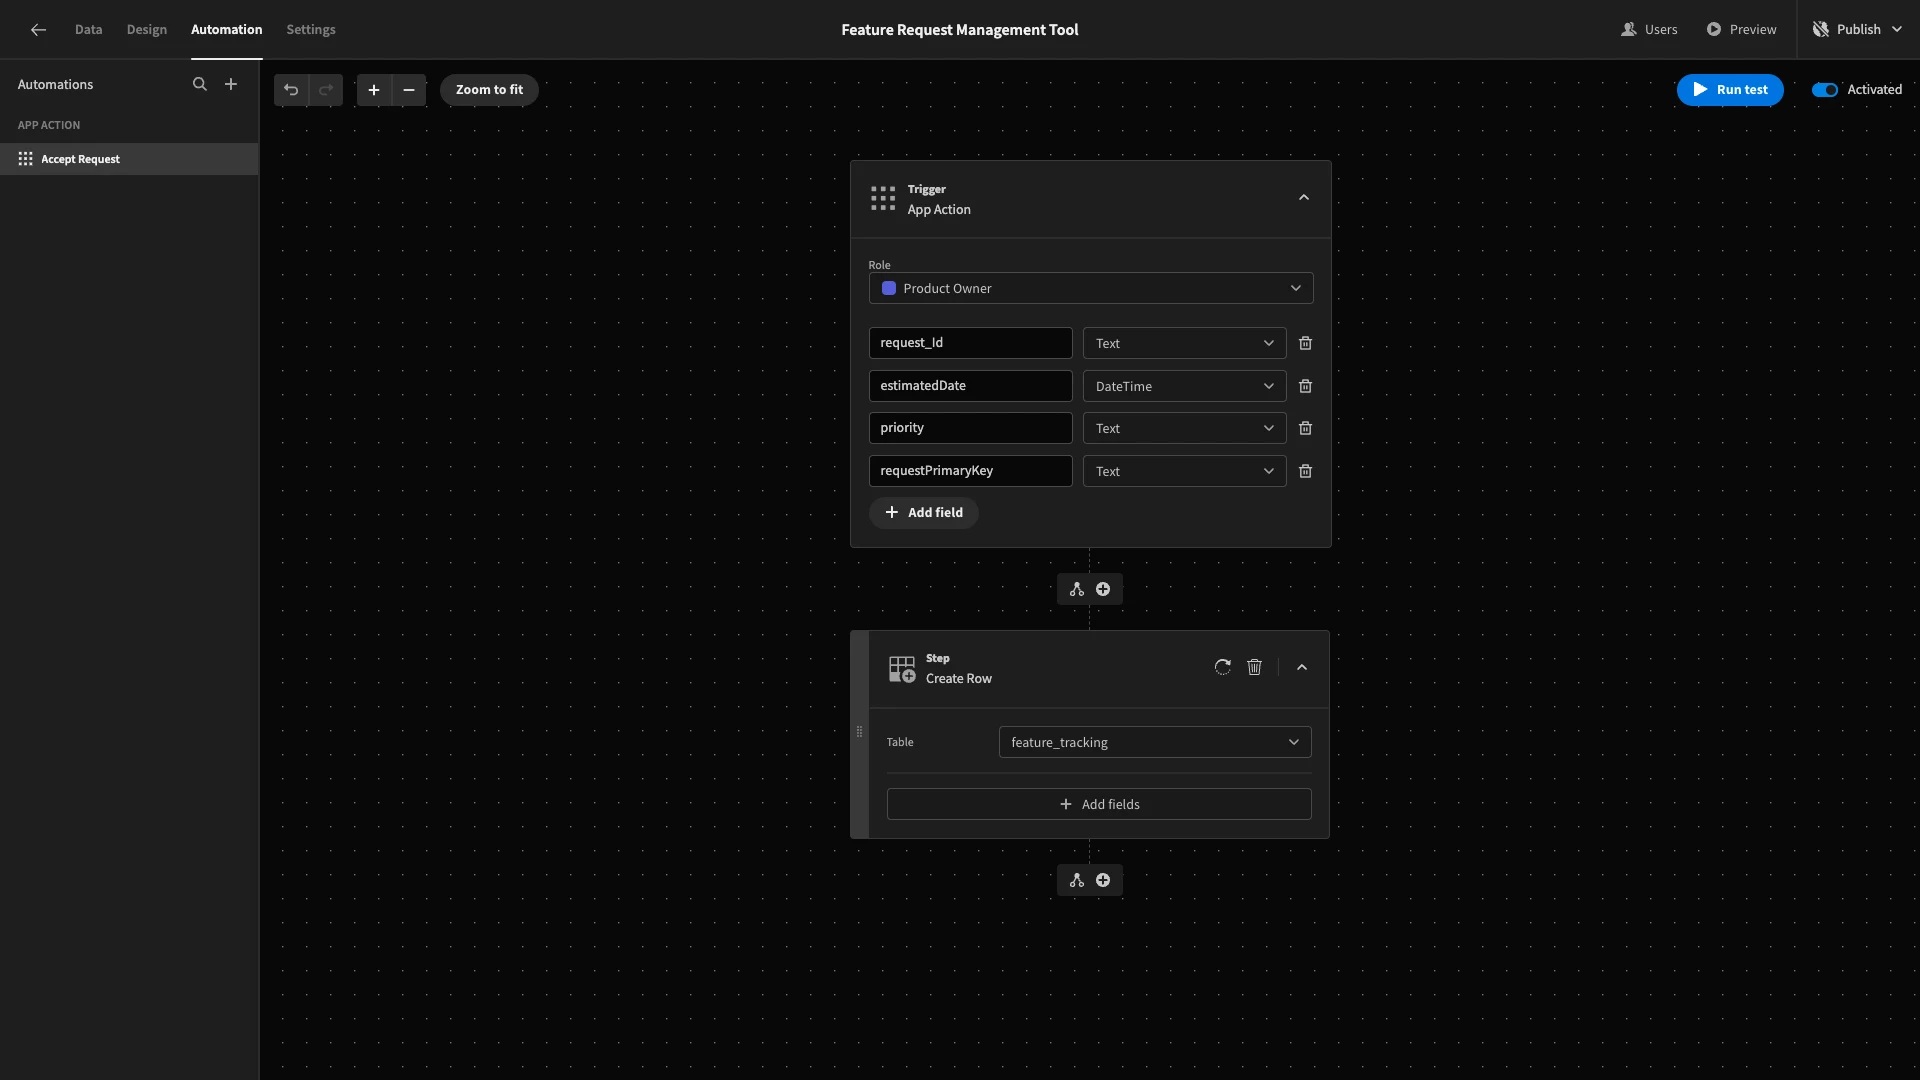
Recall that many of our columns have default values. We need to use our trigger fields to assign values to the ones that don’t. So, we’ll hit Add Fields and select estimated_completion, feature_requests, and priority.
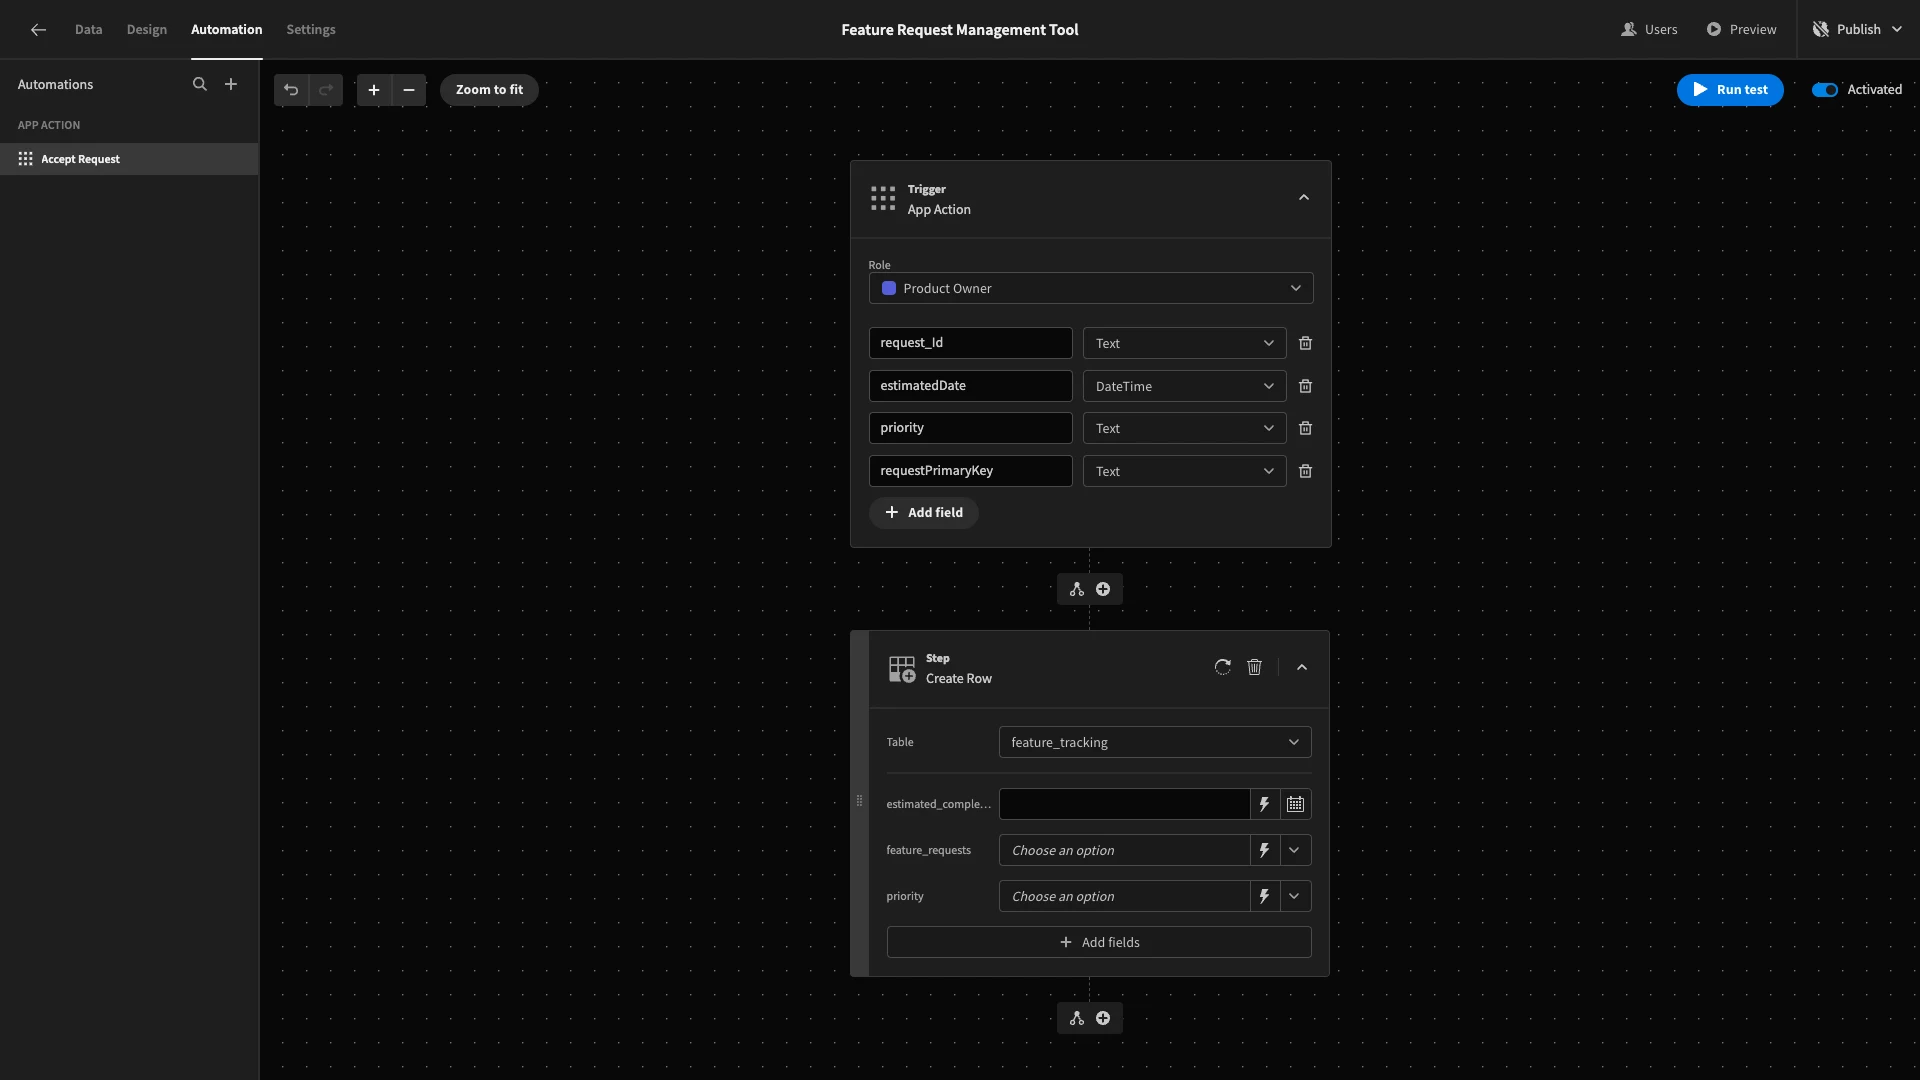
We can then use the Trigger Fields bindings to assign values to each of these. For instance, {{ trigger.fields.estimatedDate }}.
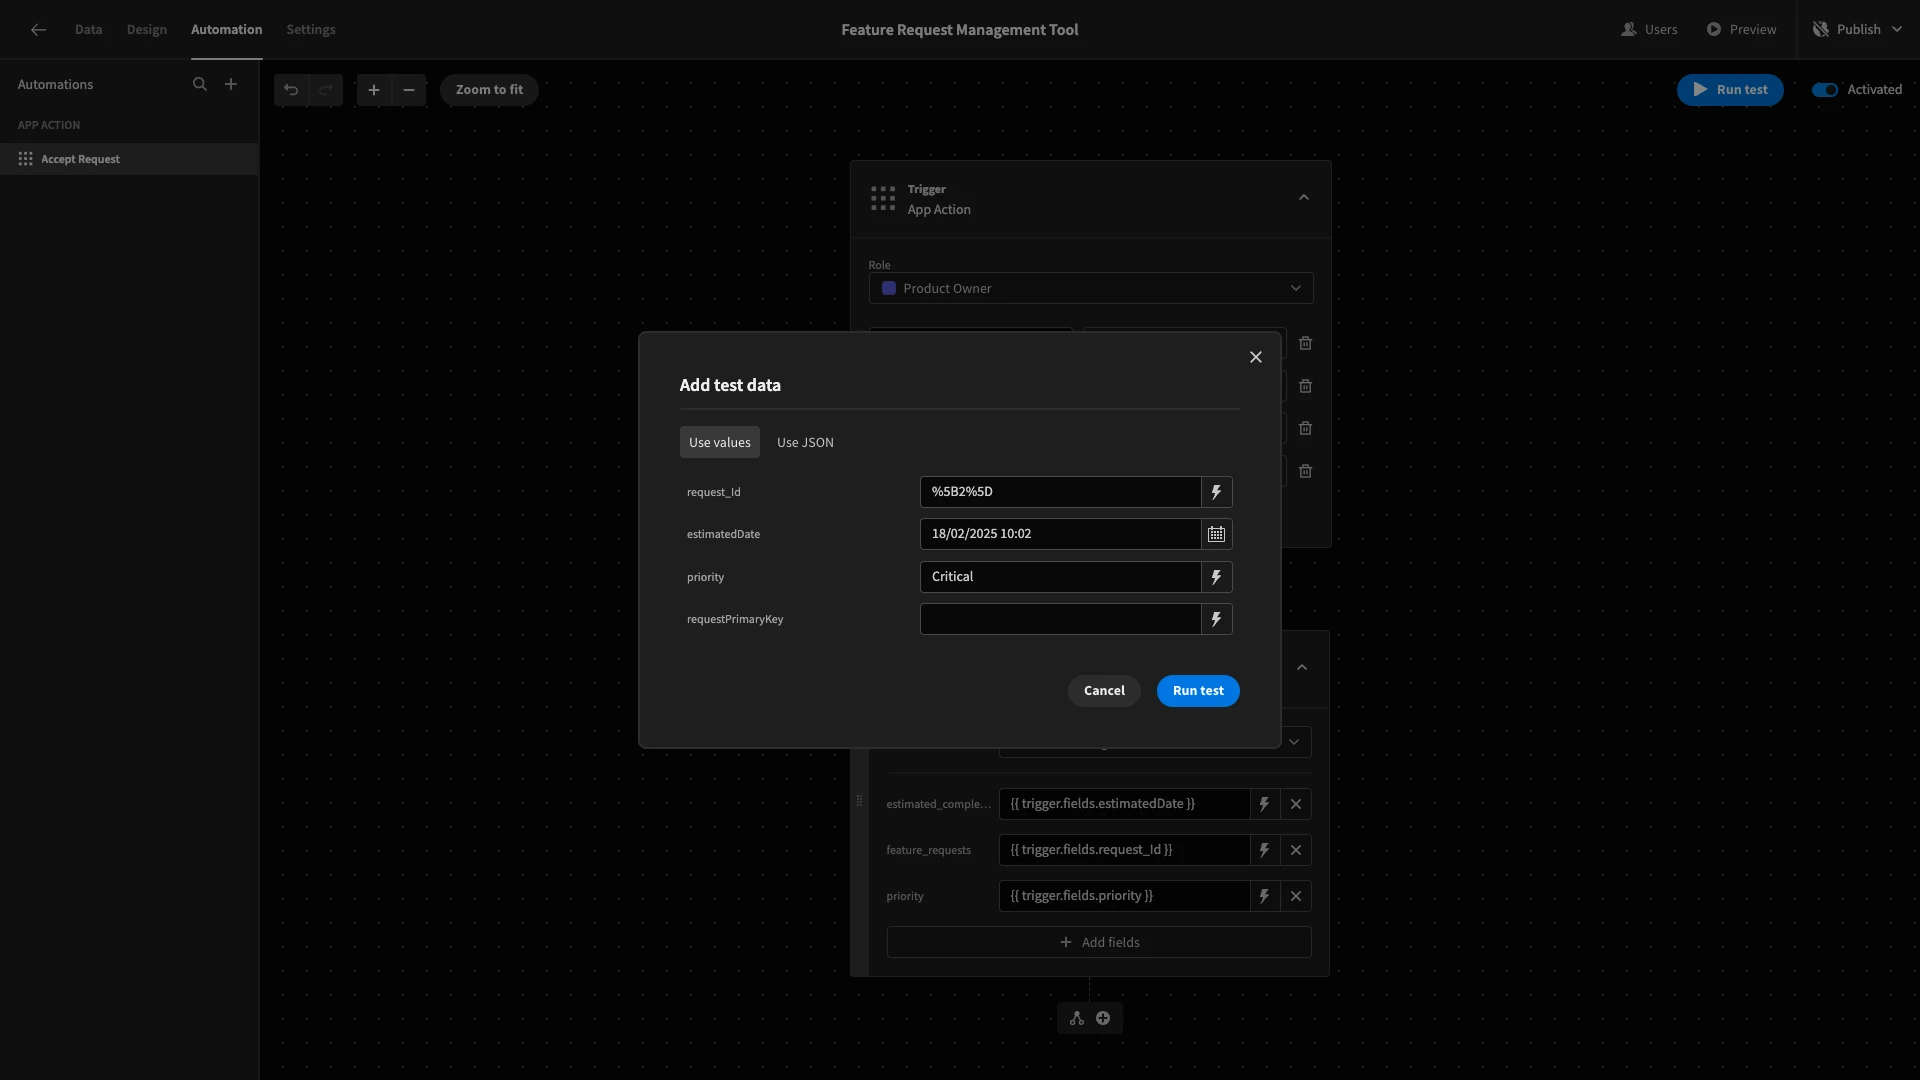
We’ll copy the _id of one of our feature_requests to use as test data and hit Run Test.
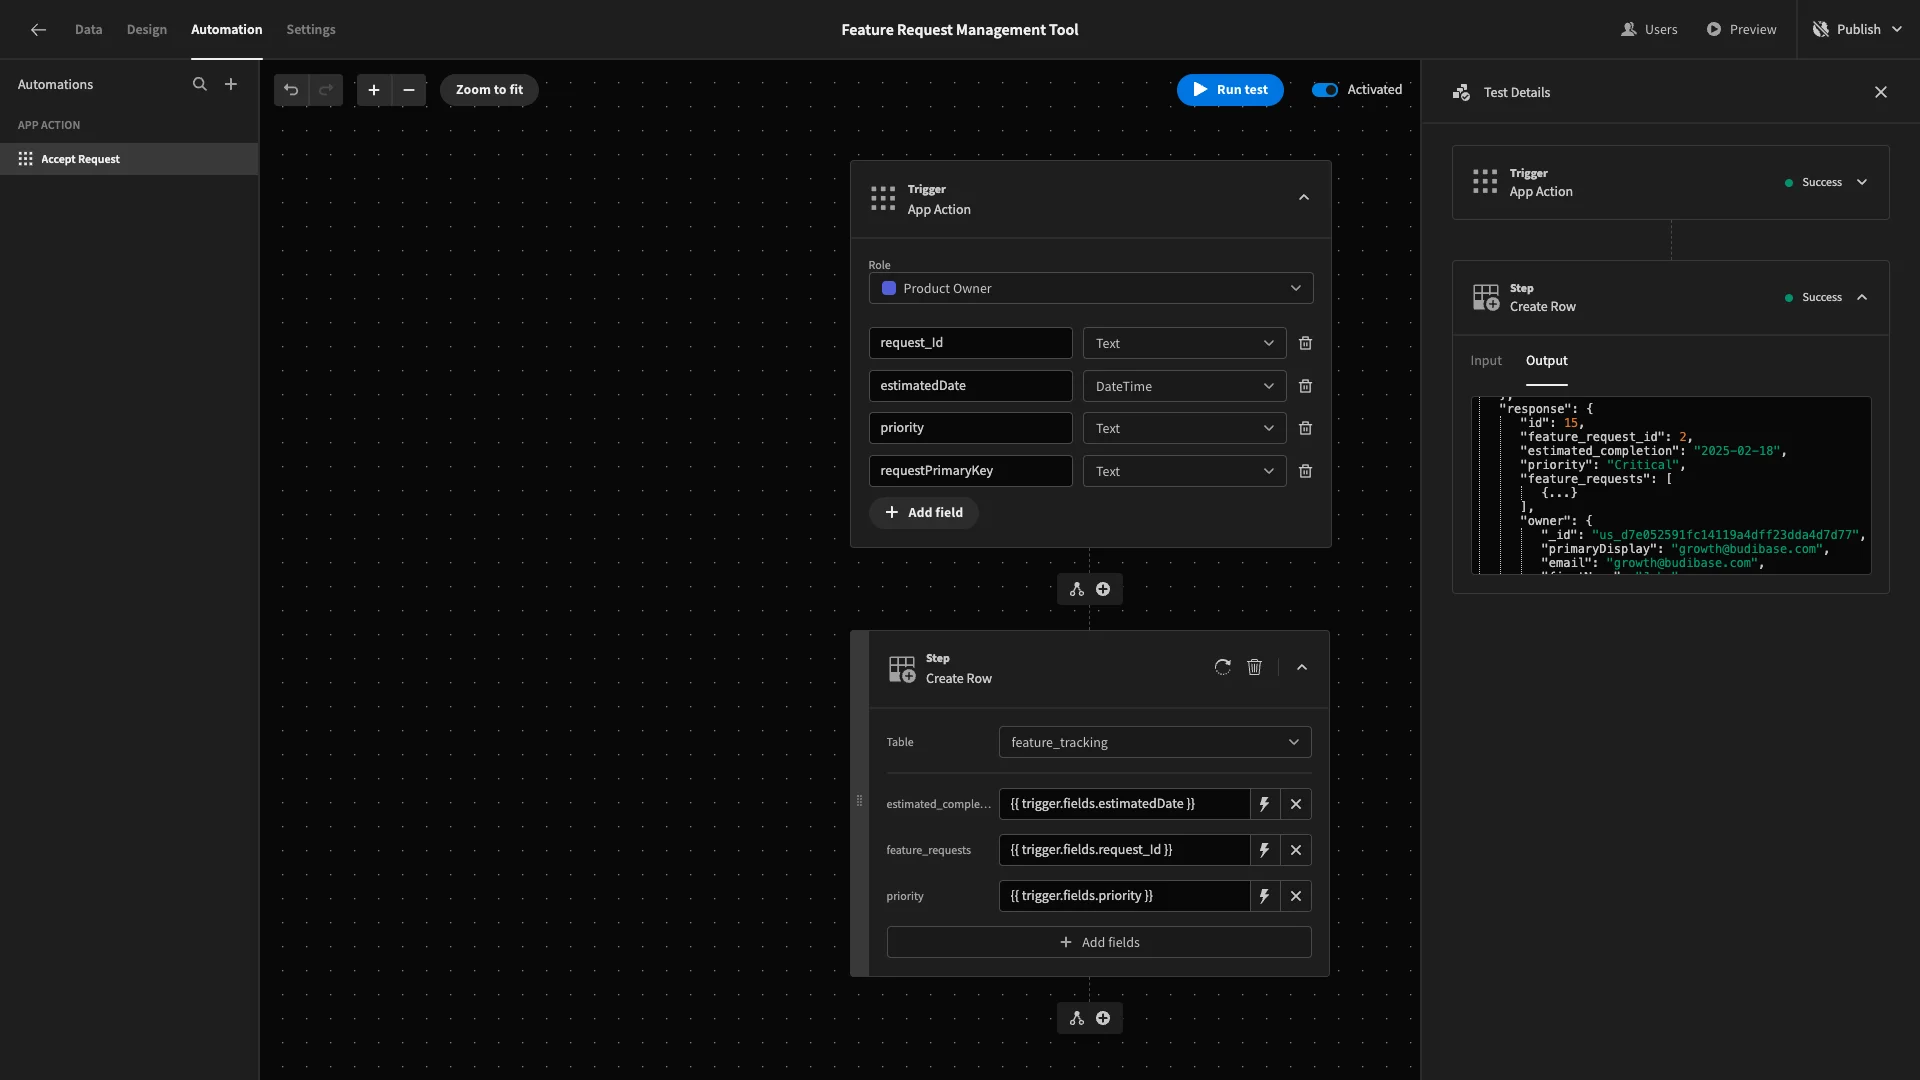
And then, we can verify that this worked.
Next, we want to update the appropriate feature_request to mark it as accepted. To do this, we’ll first need to add a Query Rows step, pointed at the feature_requests table.
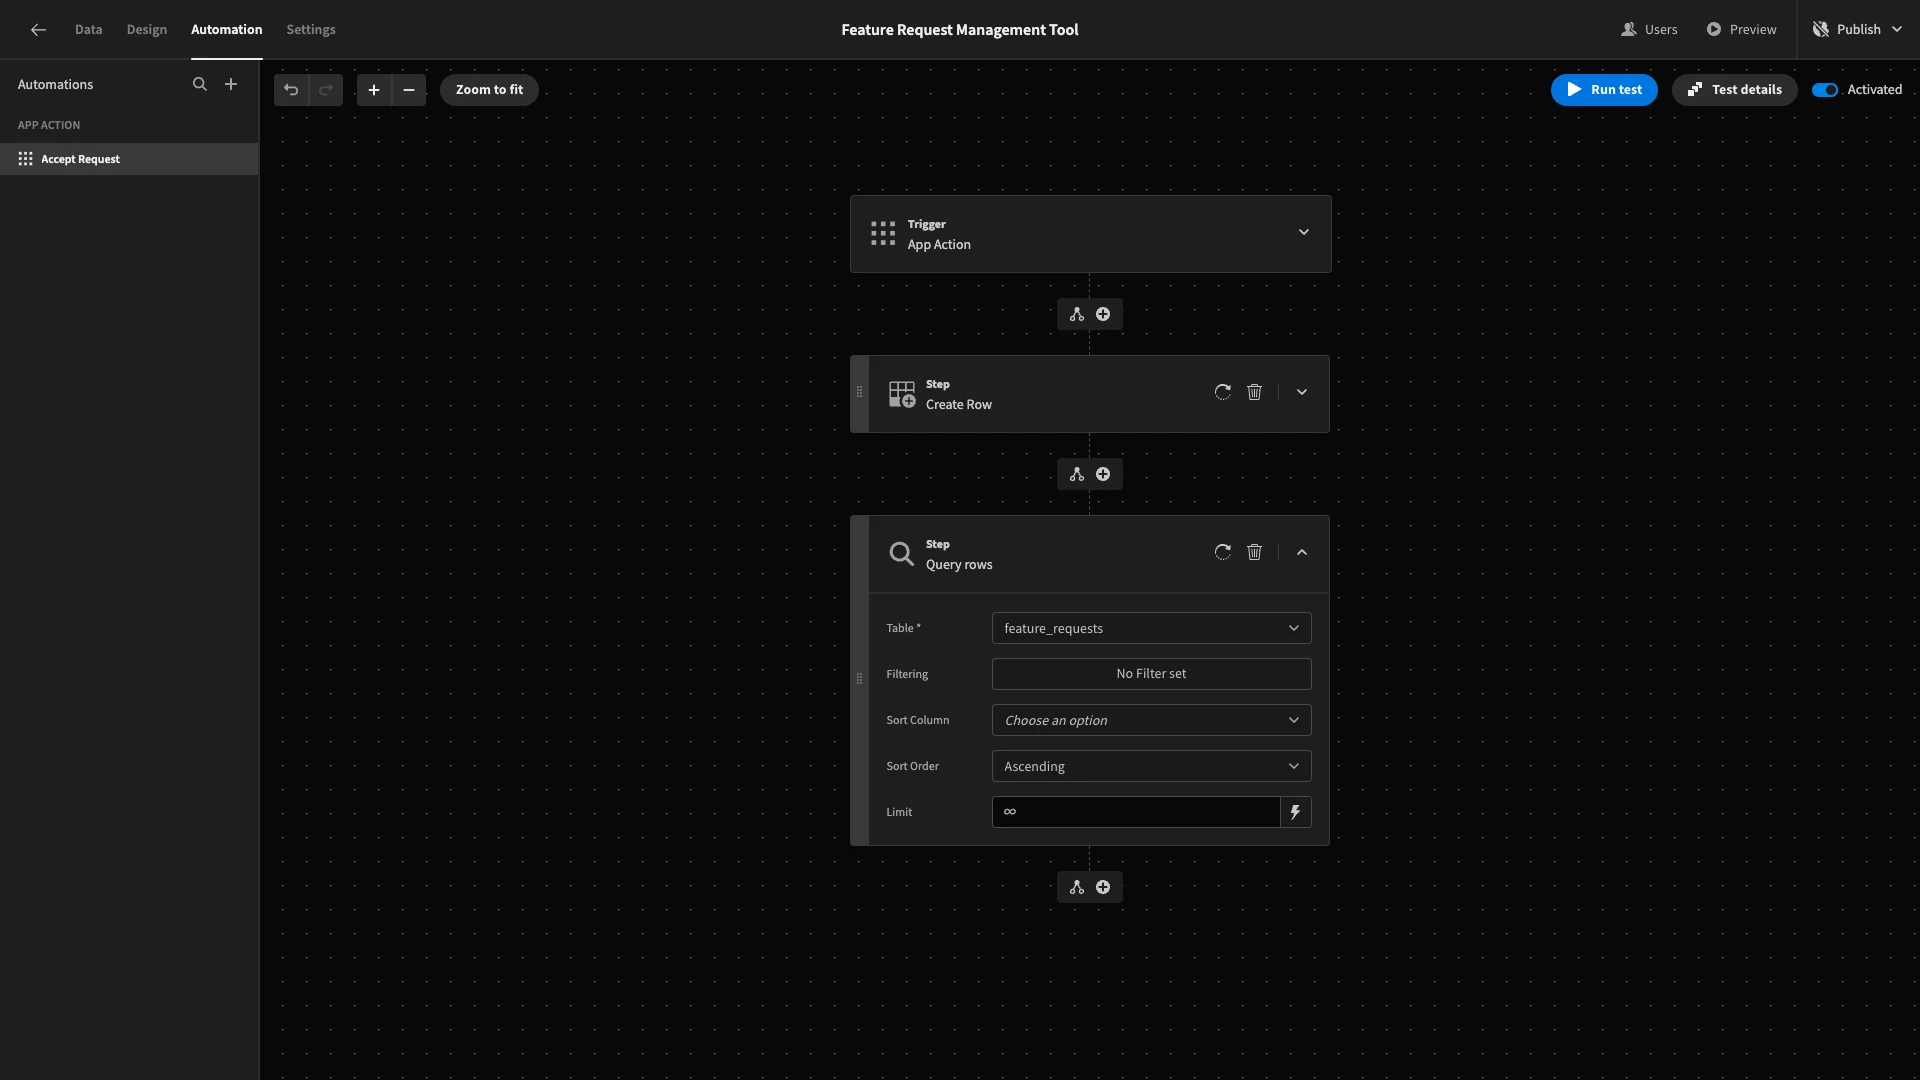
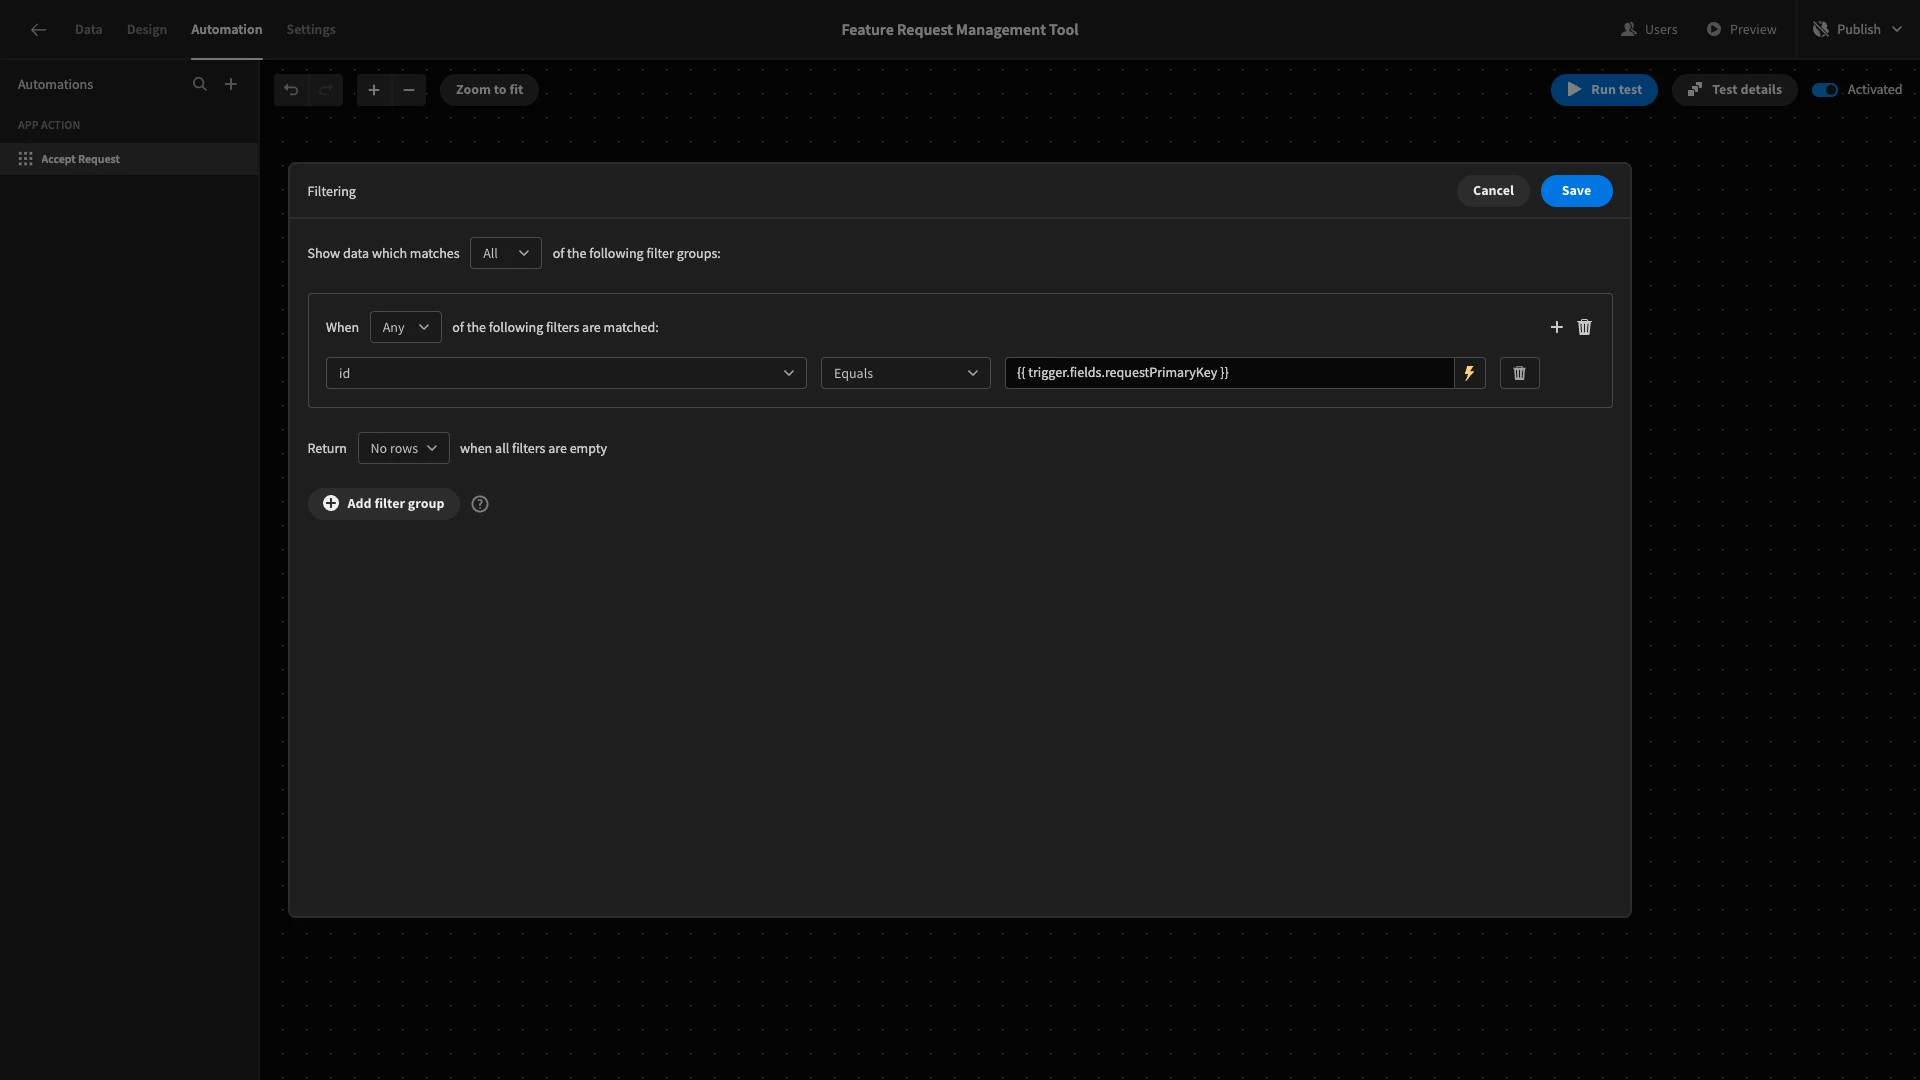
We’ll add a filter to this so that it only returns rows where id equals {{ trigger.fields.requestPrimaryKey }}.
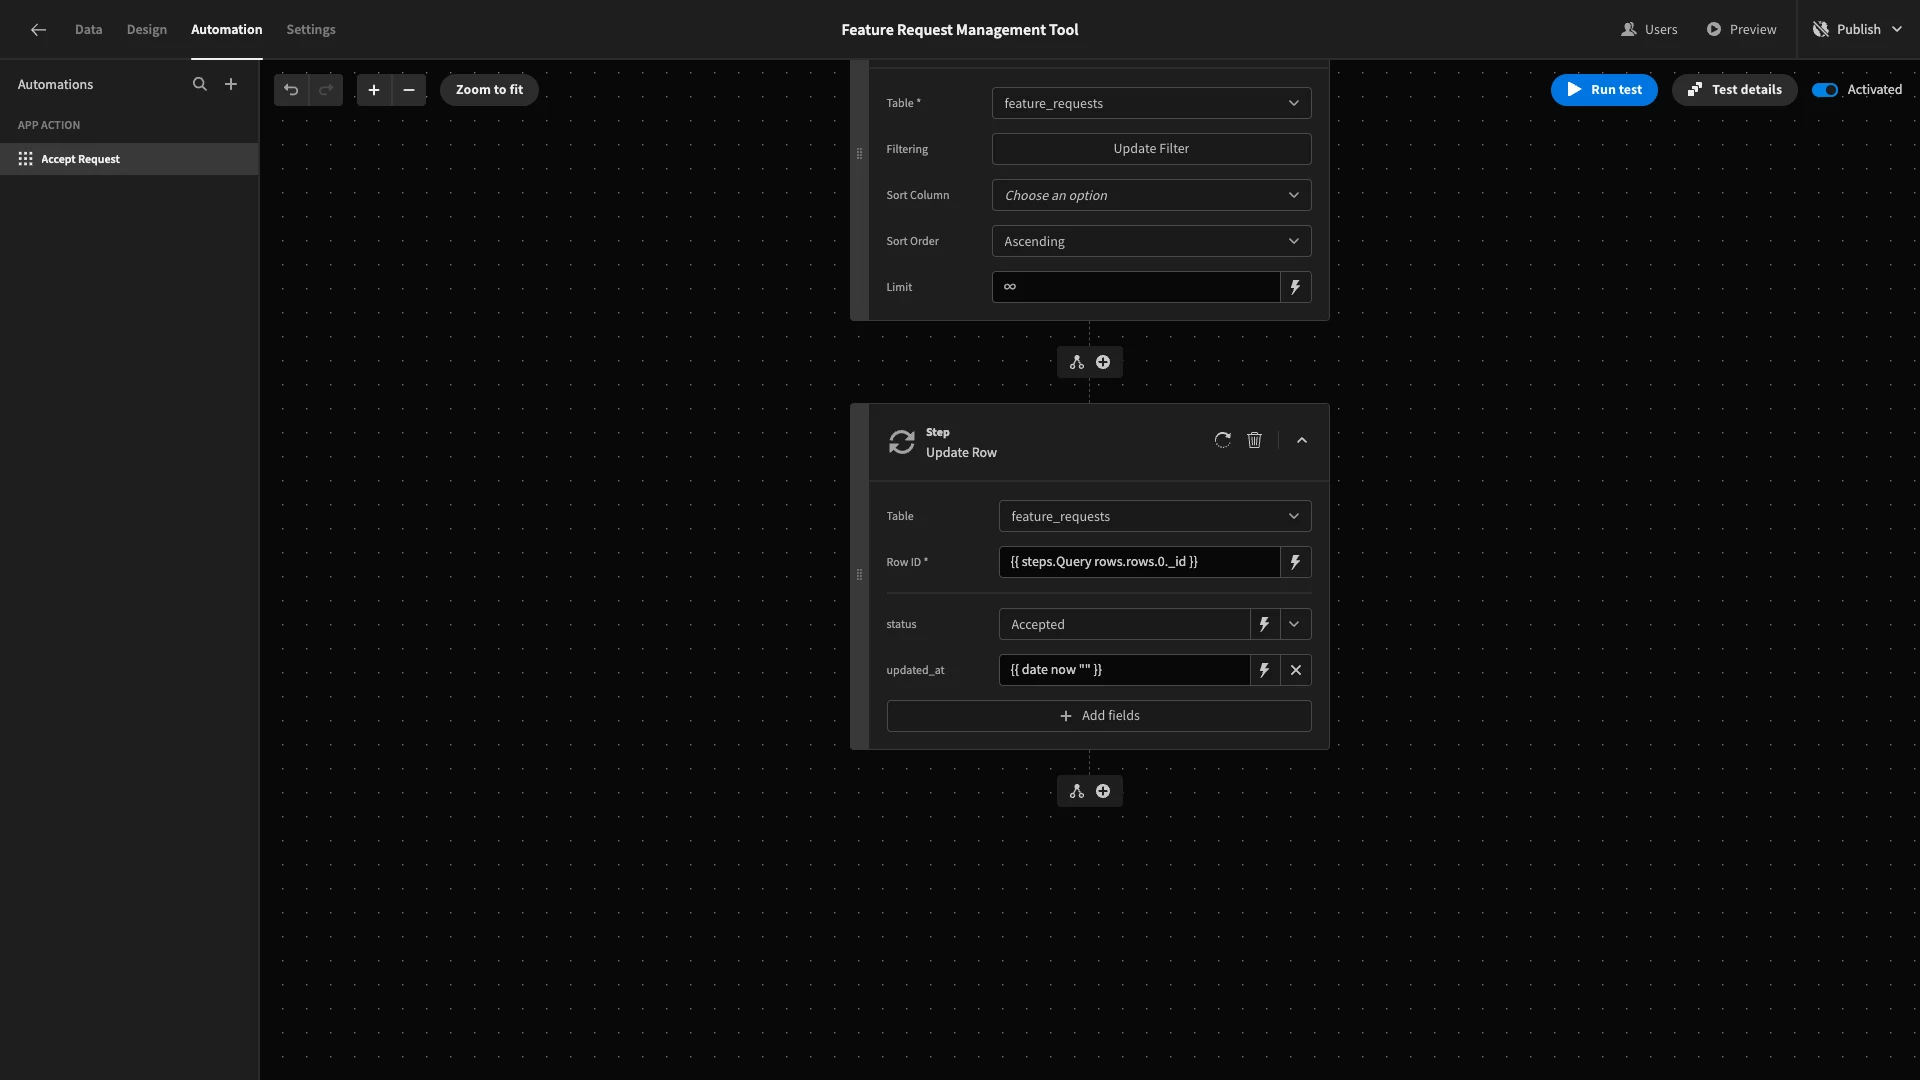
Lastly, we’ll add an Update Row action beneath this, using {{ steps.Query rows.rows.0._id }} as our Row ID.
We’ll then set status to Accepted and updated_at to the current timestamp.
We’ll then run our test again to ensure that this works as expected.
CRUD actions for open requests
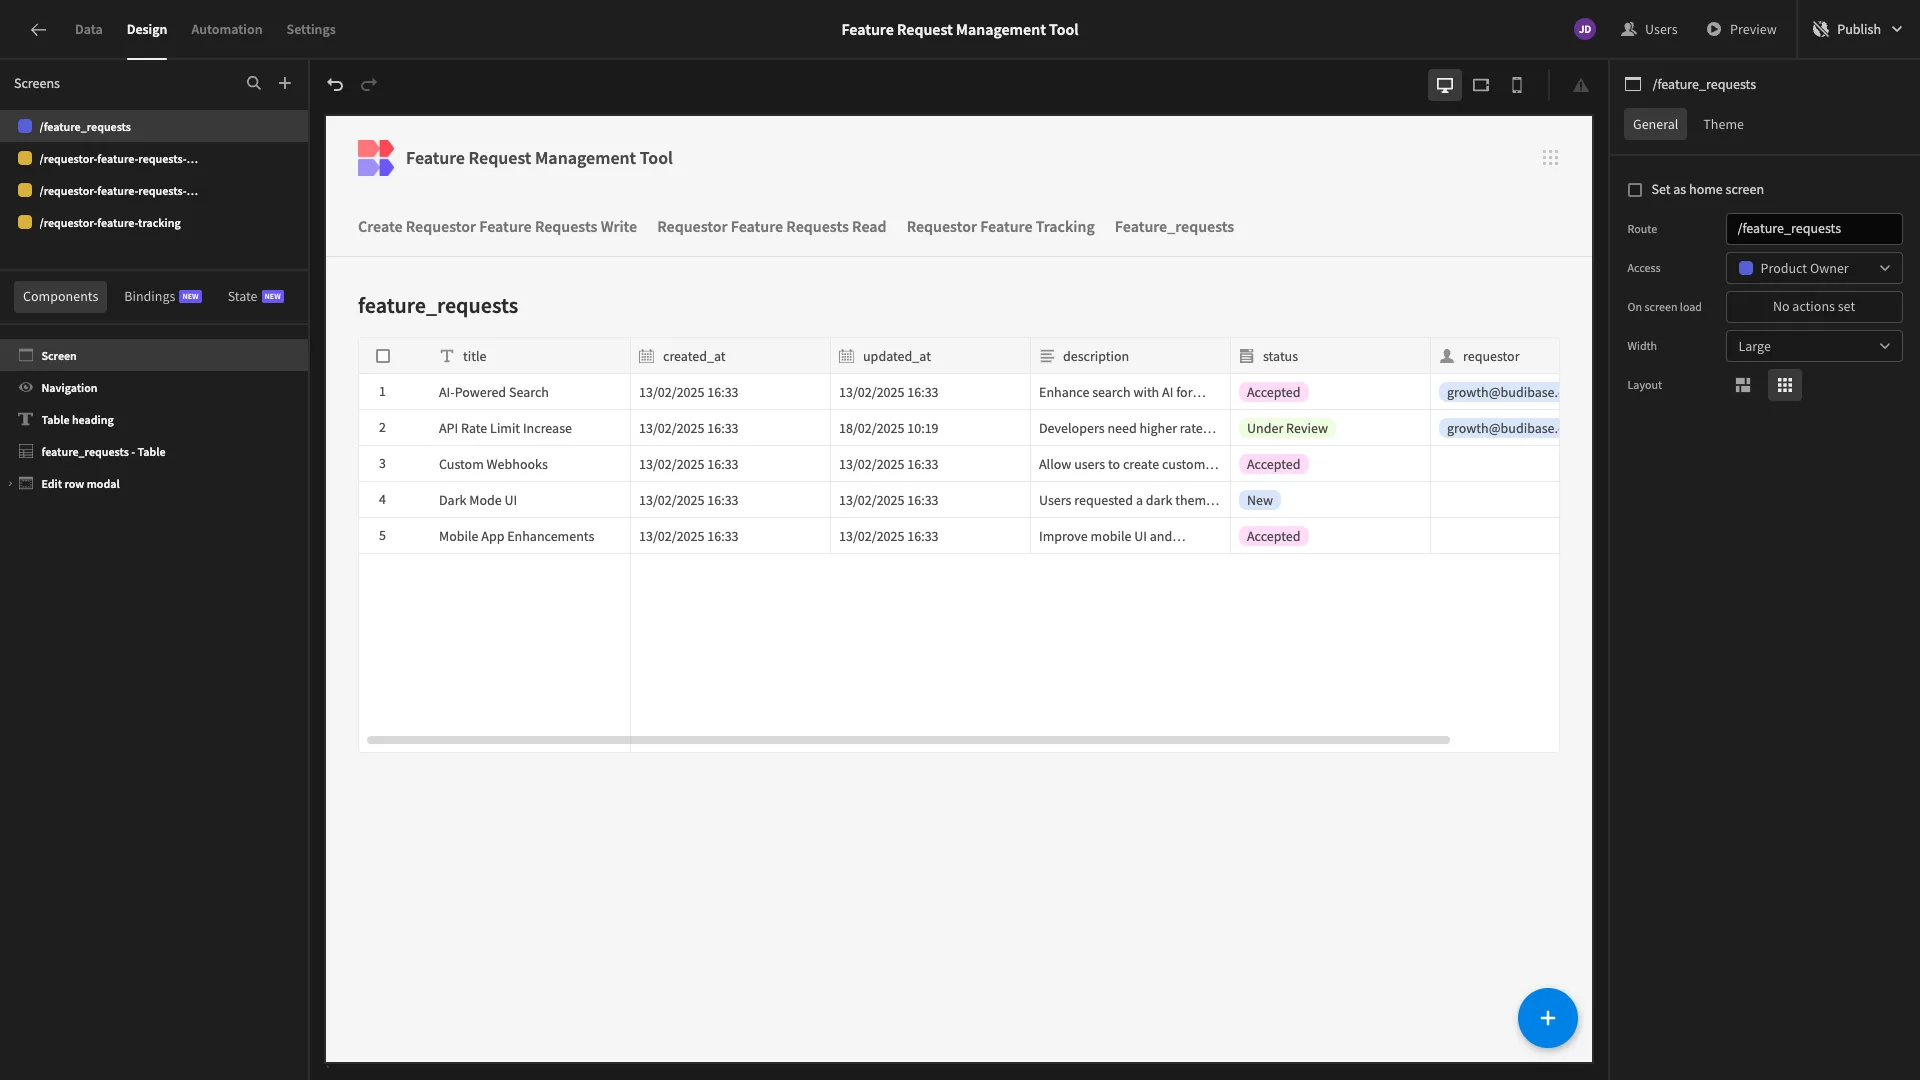
Next, we need to build a screen for Product Managers to handle incoming requests. We’ll begin by generating a Table screen with modal forms from our underlying feature_requests table.
We’ve started by tidying up our table columns and removing the components for creating a new row.
Within our remaining form, we’ll arrange our fields into columns, update our display text, and disable all fields except for status.
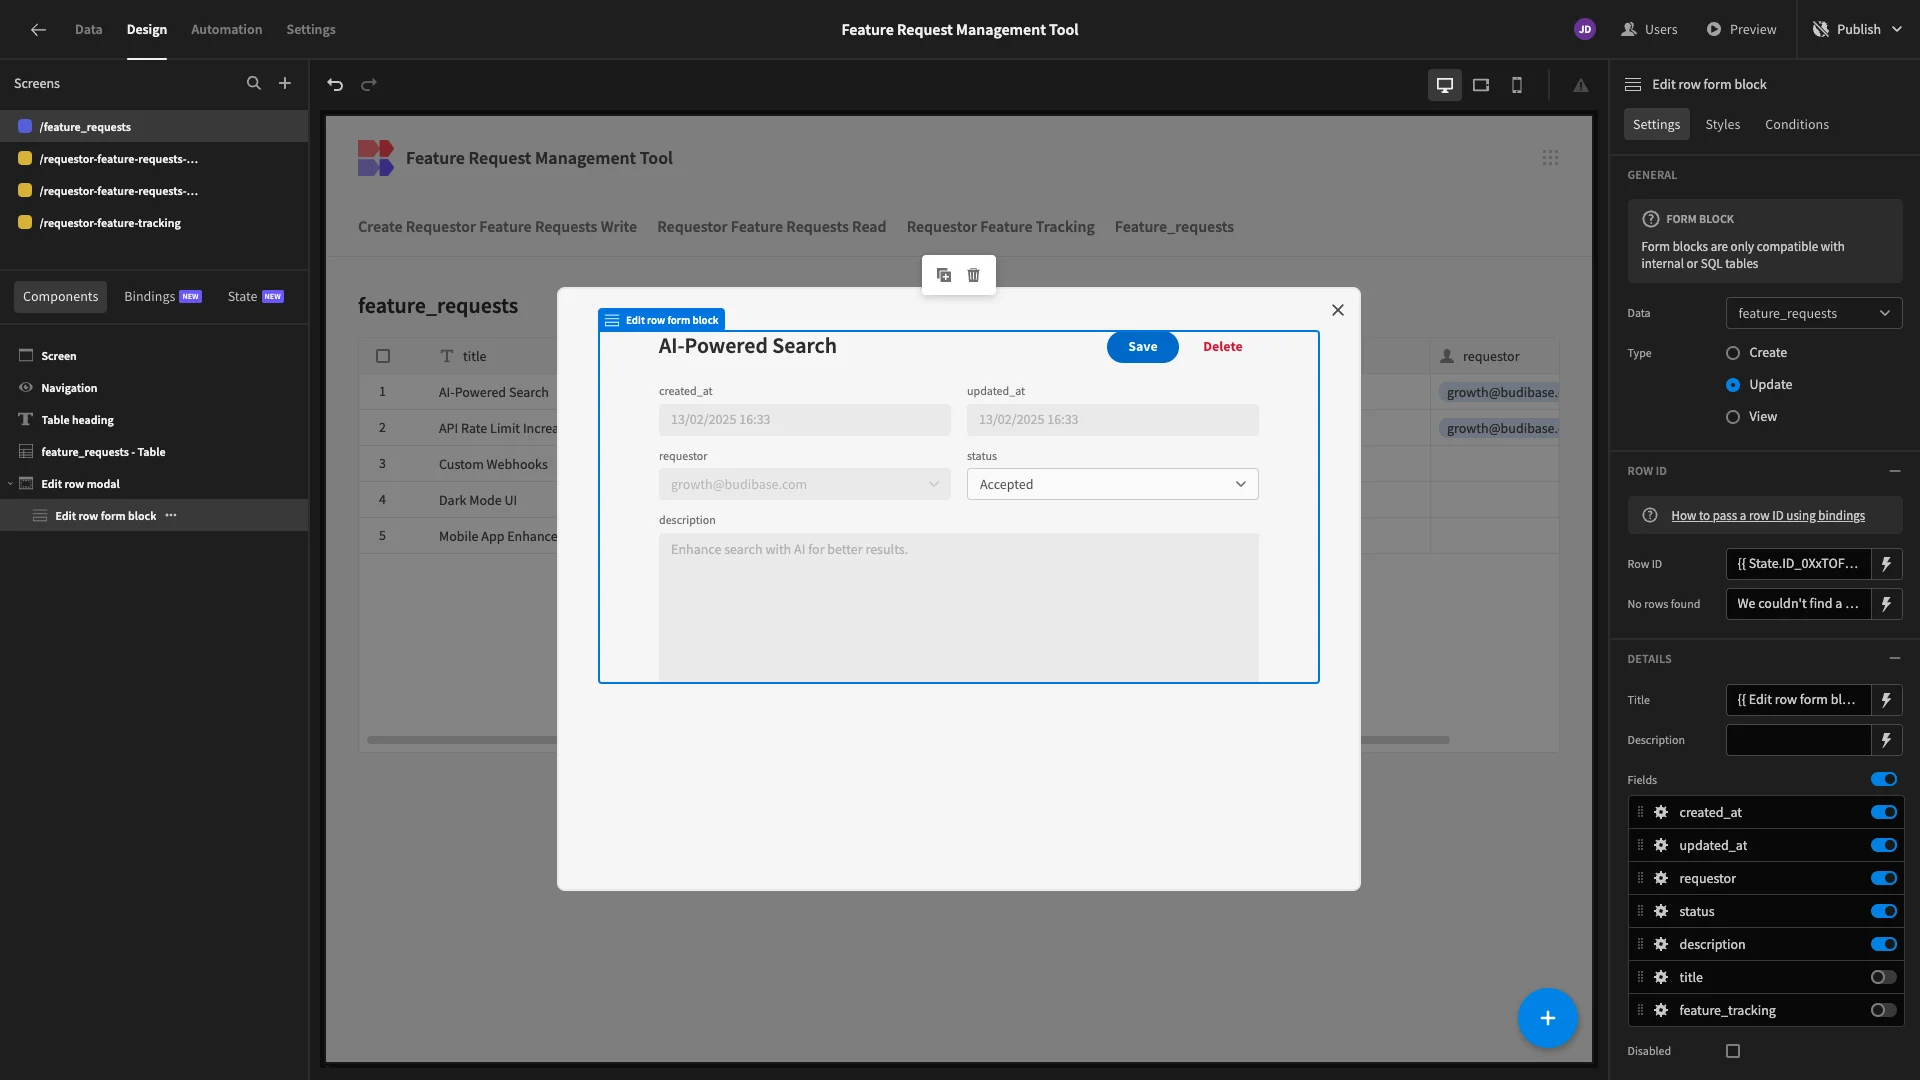
On the status field, we’re going to open the Validation Rules drawer and set a rule that this can’t be equal to Accepted. We’ll add the error message Request can't be manually accepted!
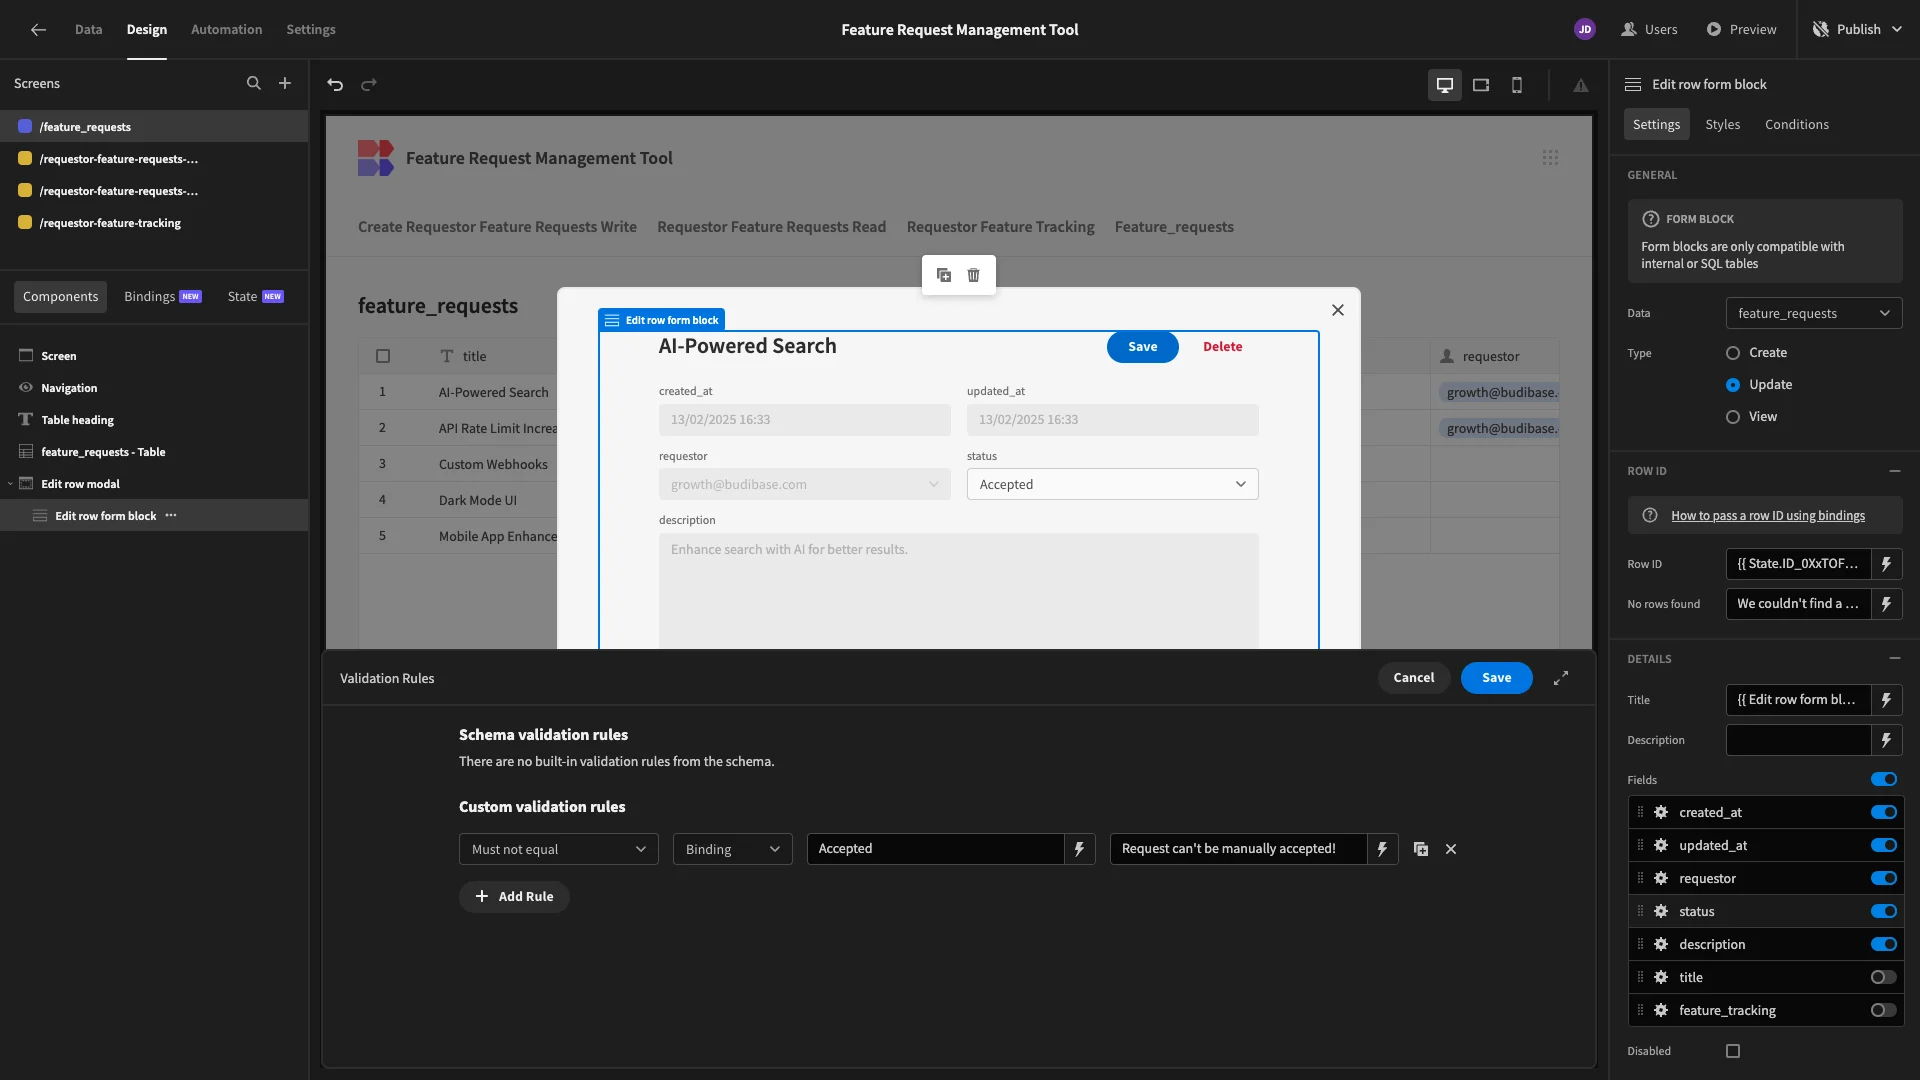
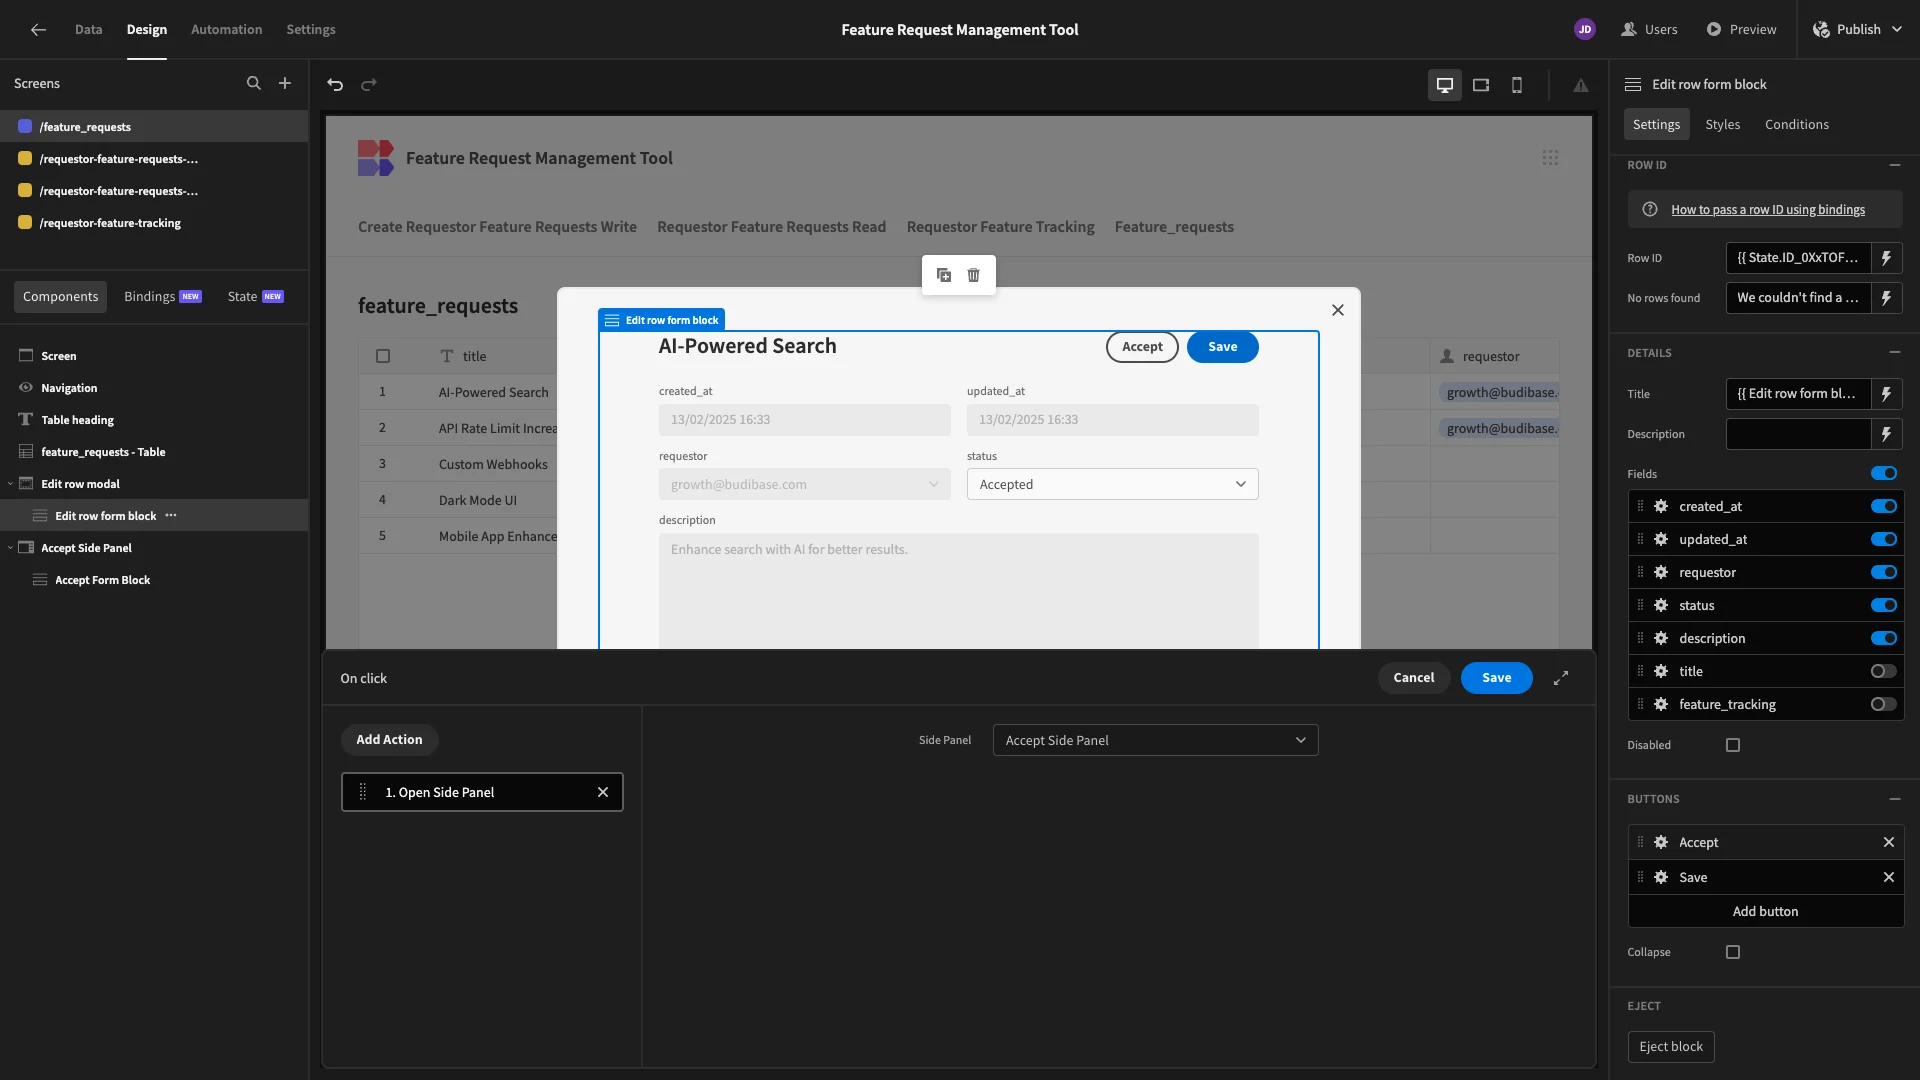
We’ll also remove our Delete button and add one that says Accept. We won’t set any actions for this just yet.
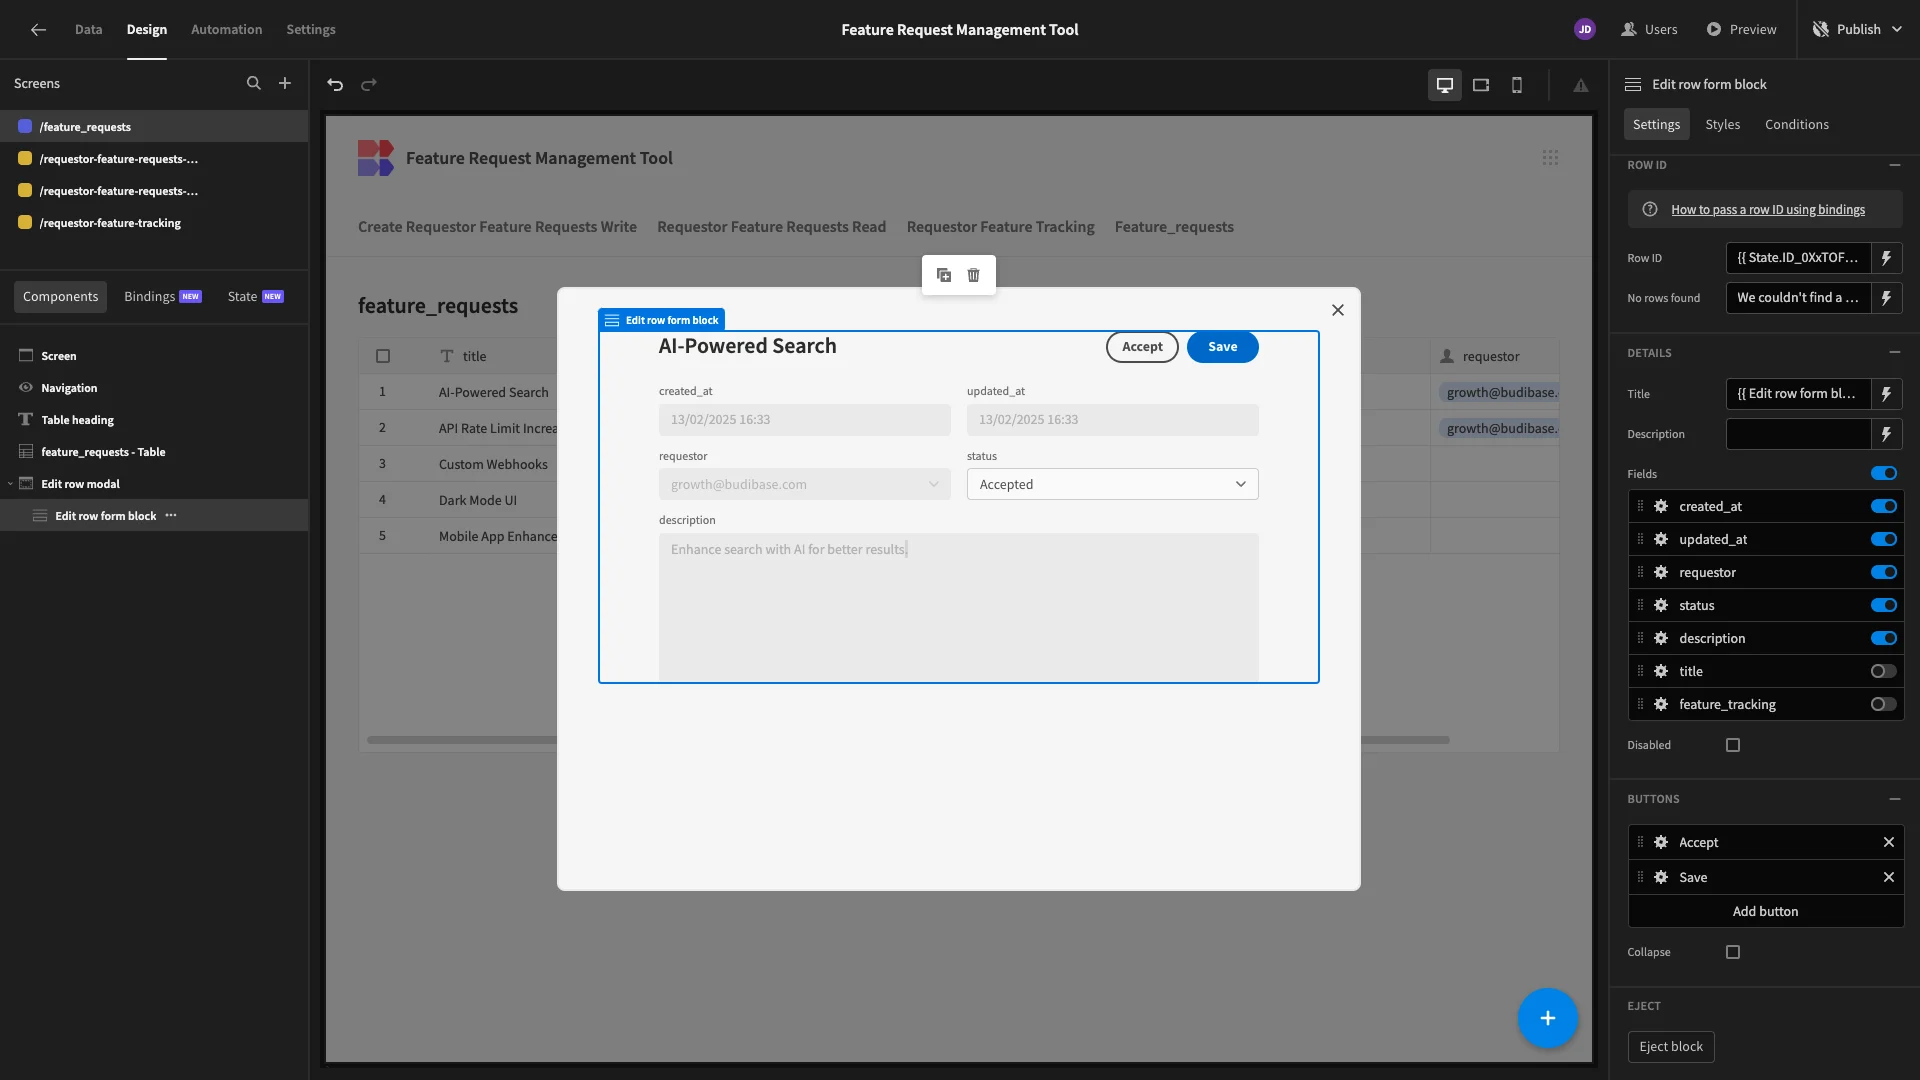
Next, we’ll add a Side Panel component beneath our Modal. We’ve called this Accept Side Panel.
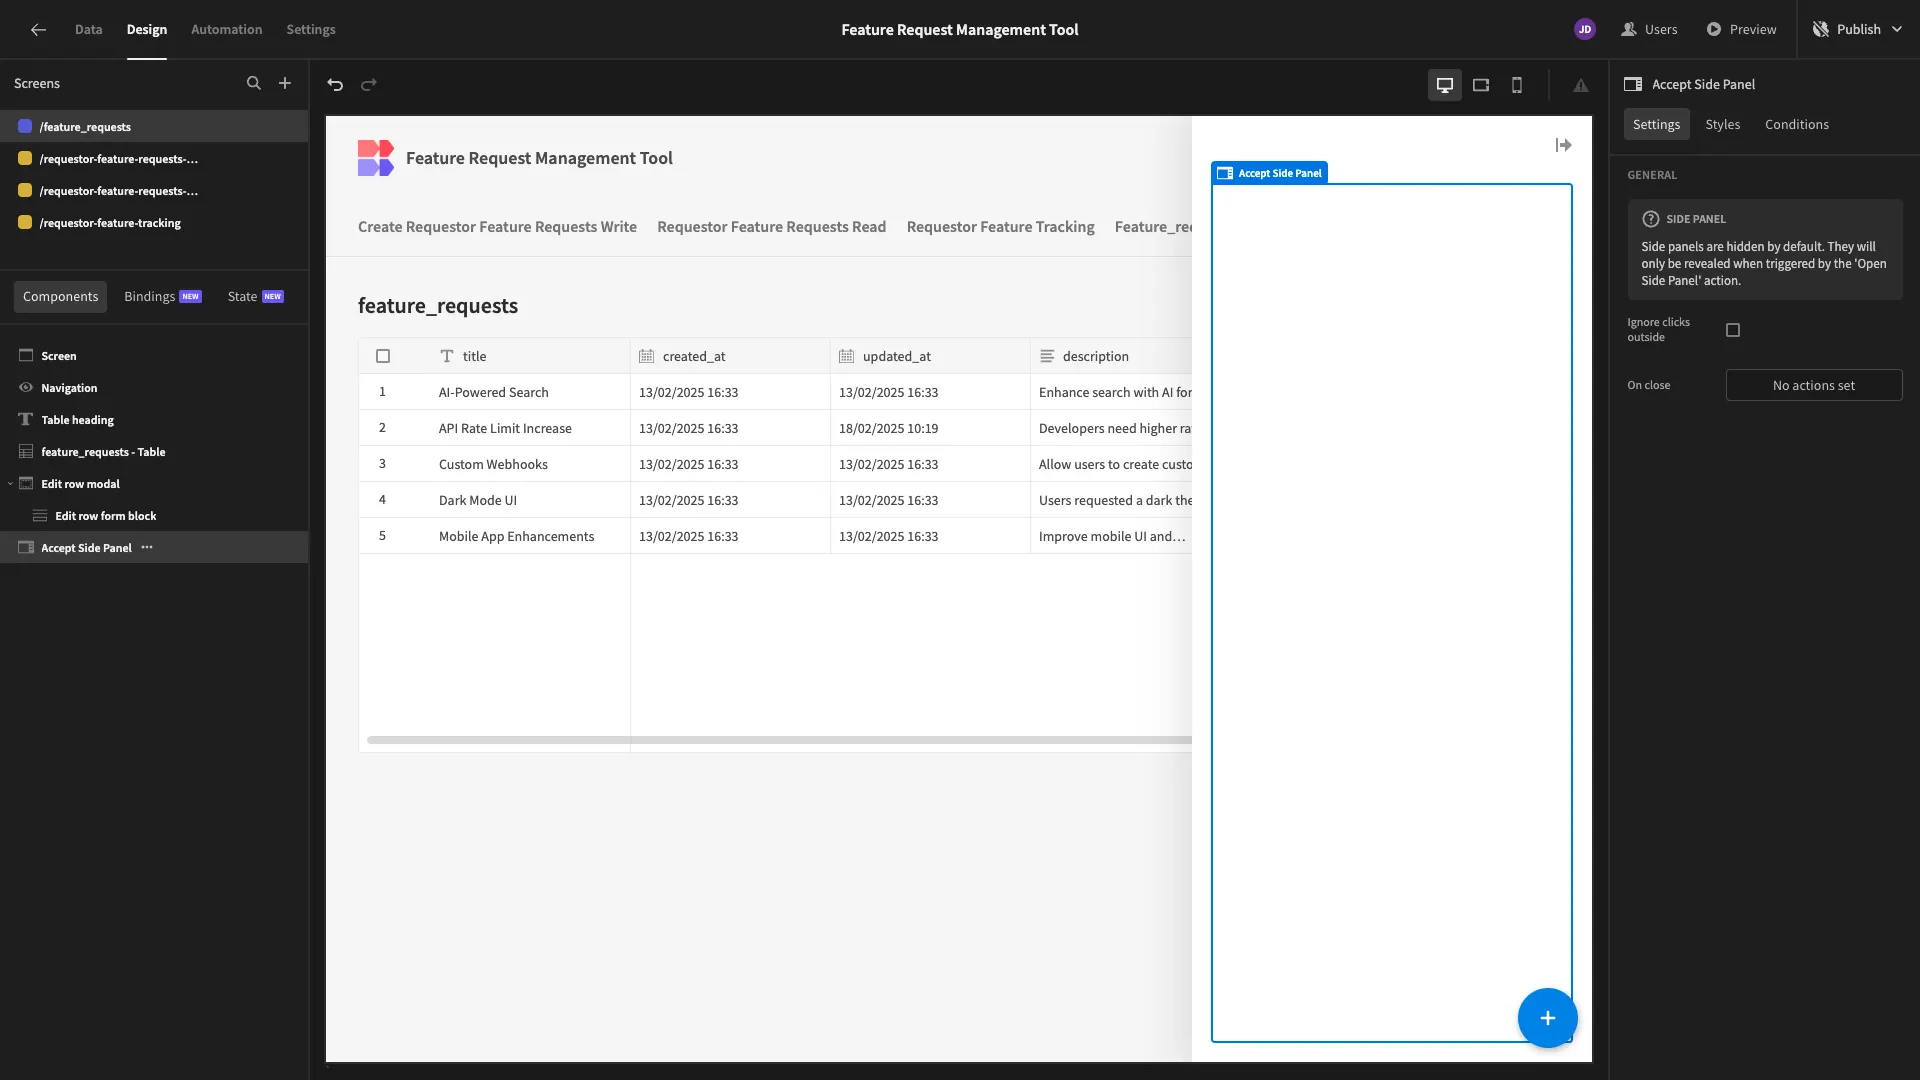
Inside this, we’ll nest a Create form for our feature_tracking table, disabling all columns except estimated_completion and priority.
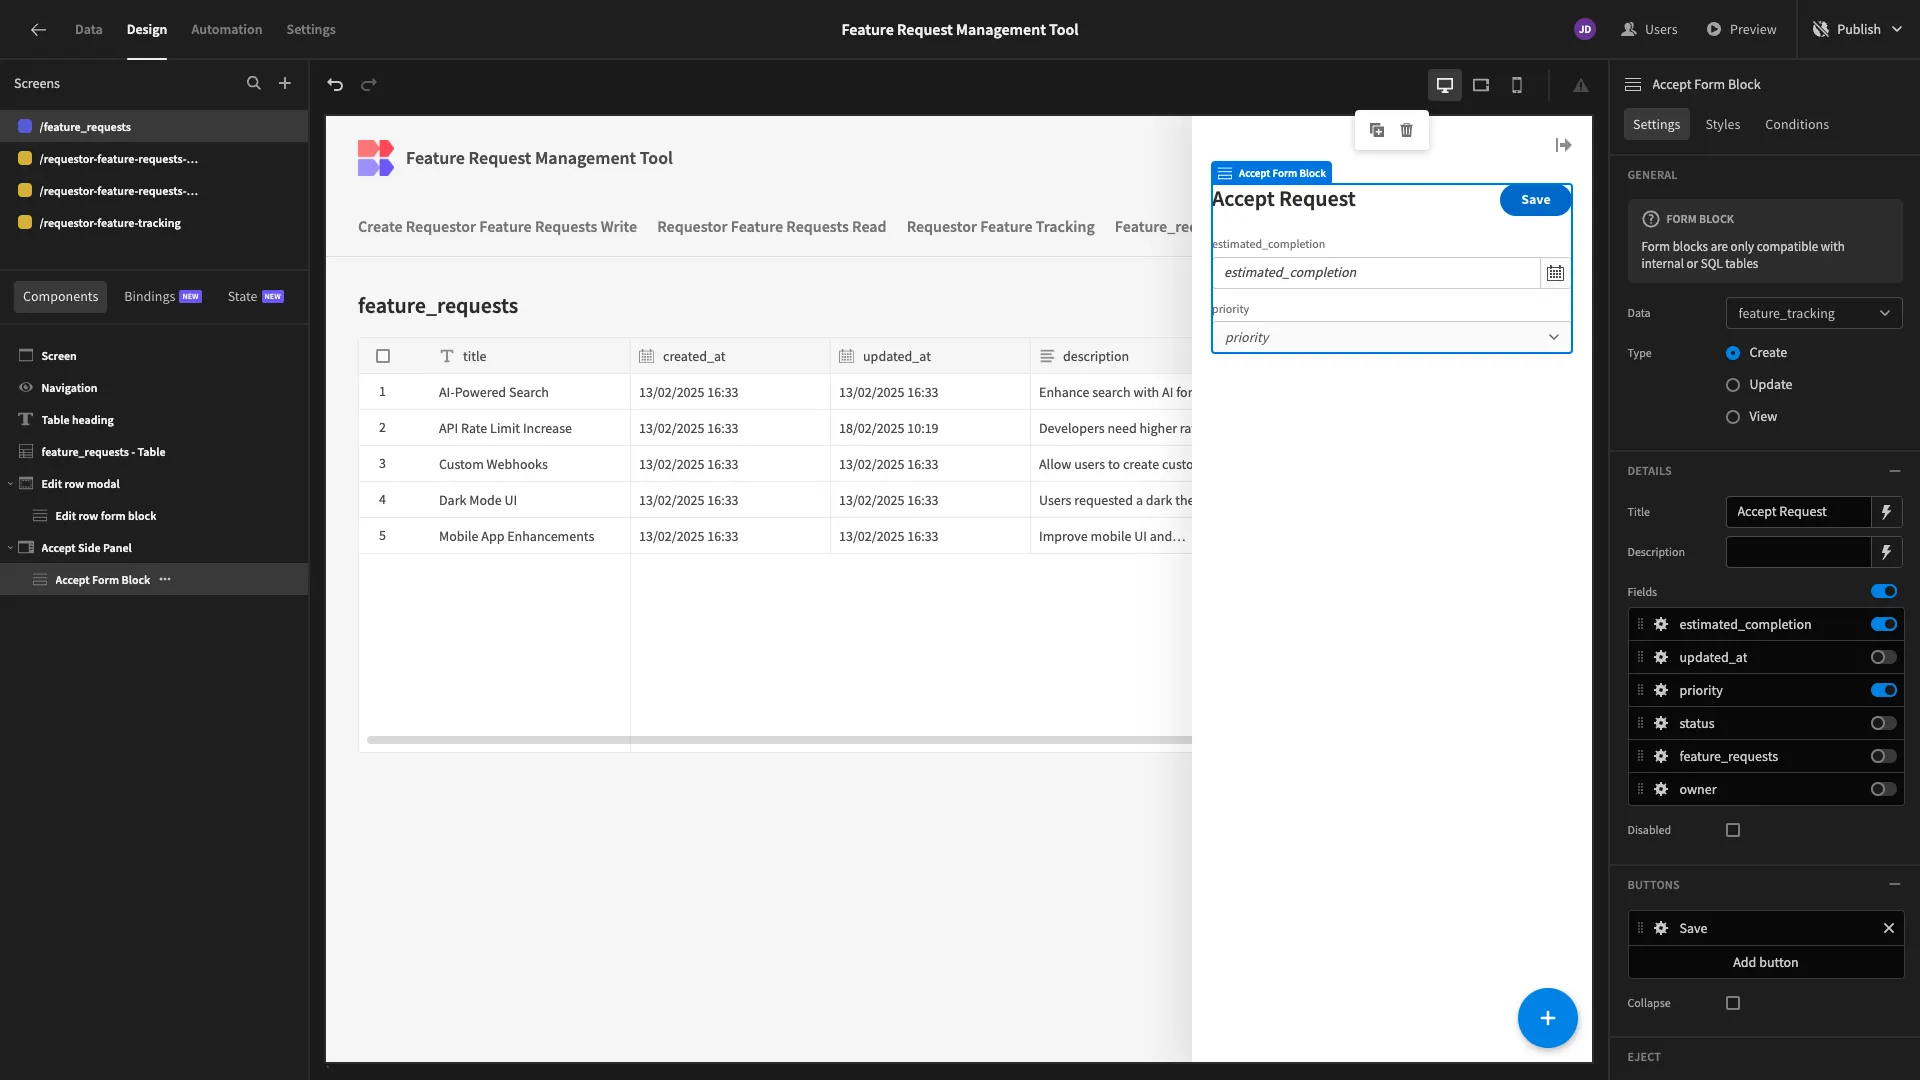
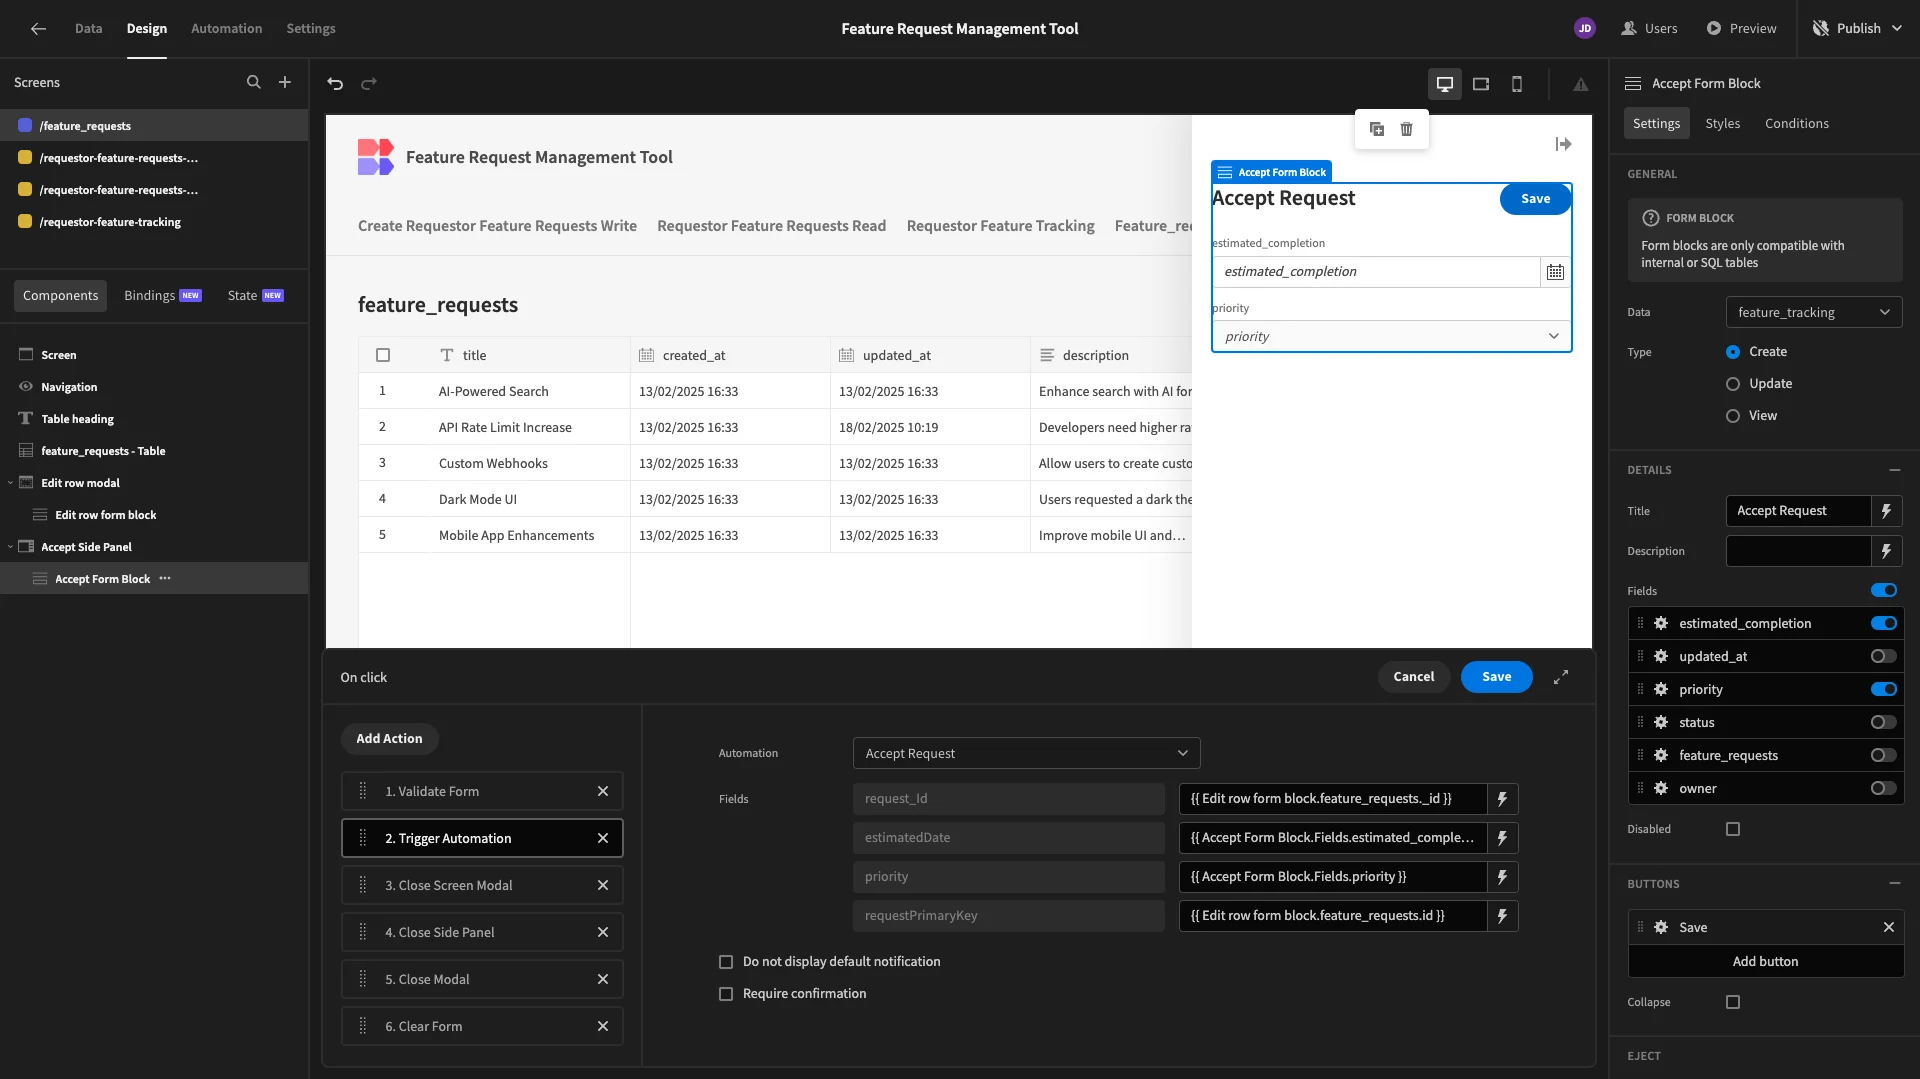
We’ll then open the Save button’s actions drawer, replacing the existing Save Row action with a Trigger Automation action.
We’ve used the following bindings to populate our four trigger fields:
- request_Id - {{ Edit row form block.feature_requests._id }}
- estimatedDate - {{ Accept Form Block.Fields.estimated_completion }}
- priority - {{ Accept Form Block.Fields.priority }}
- requestPrimaryKey - {{ Edit row form block.feature_requests.id }}
Lastly, we’ll head back to our feature_requests form, and add an Open Side Panel action to our Accept button.
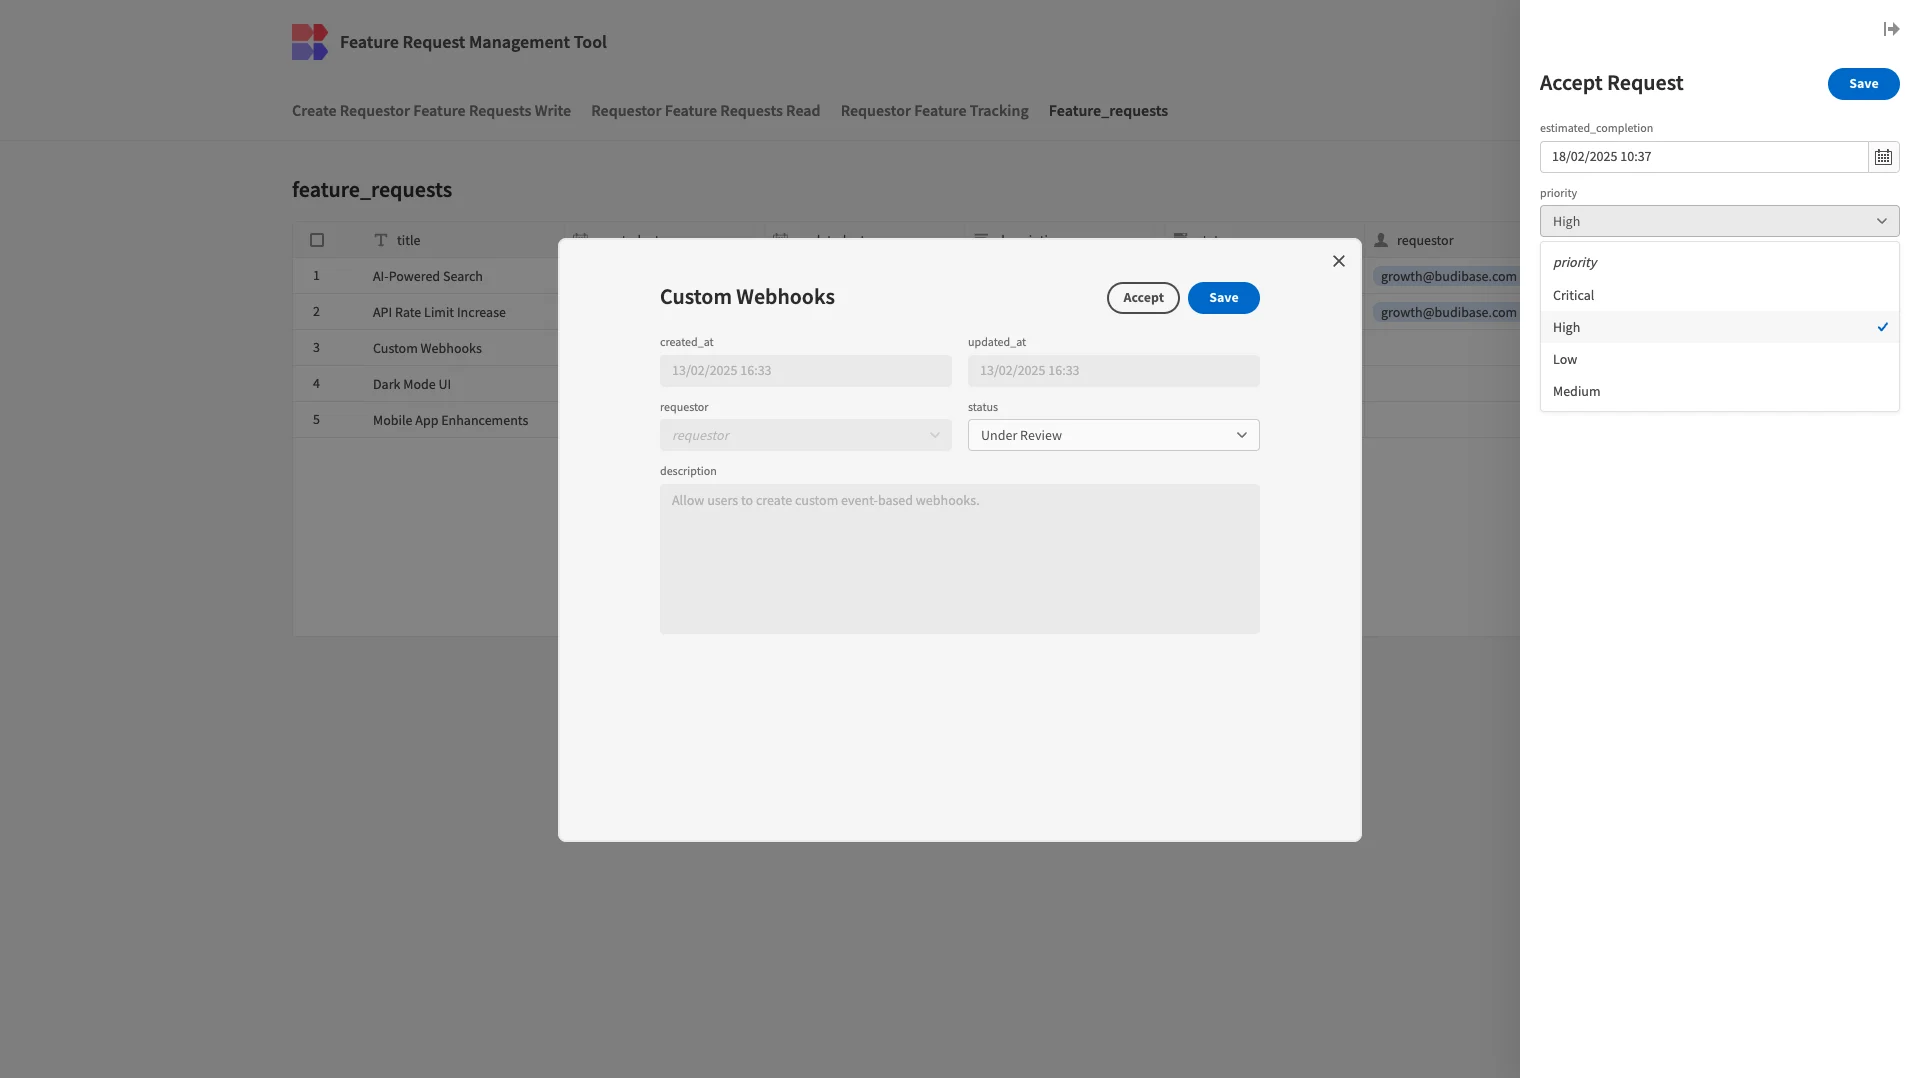
Since this is a live automation, we’ll need to publish our app to test its functionality.
CRUD actions for planned features
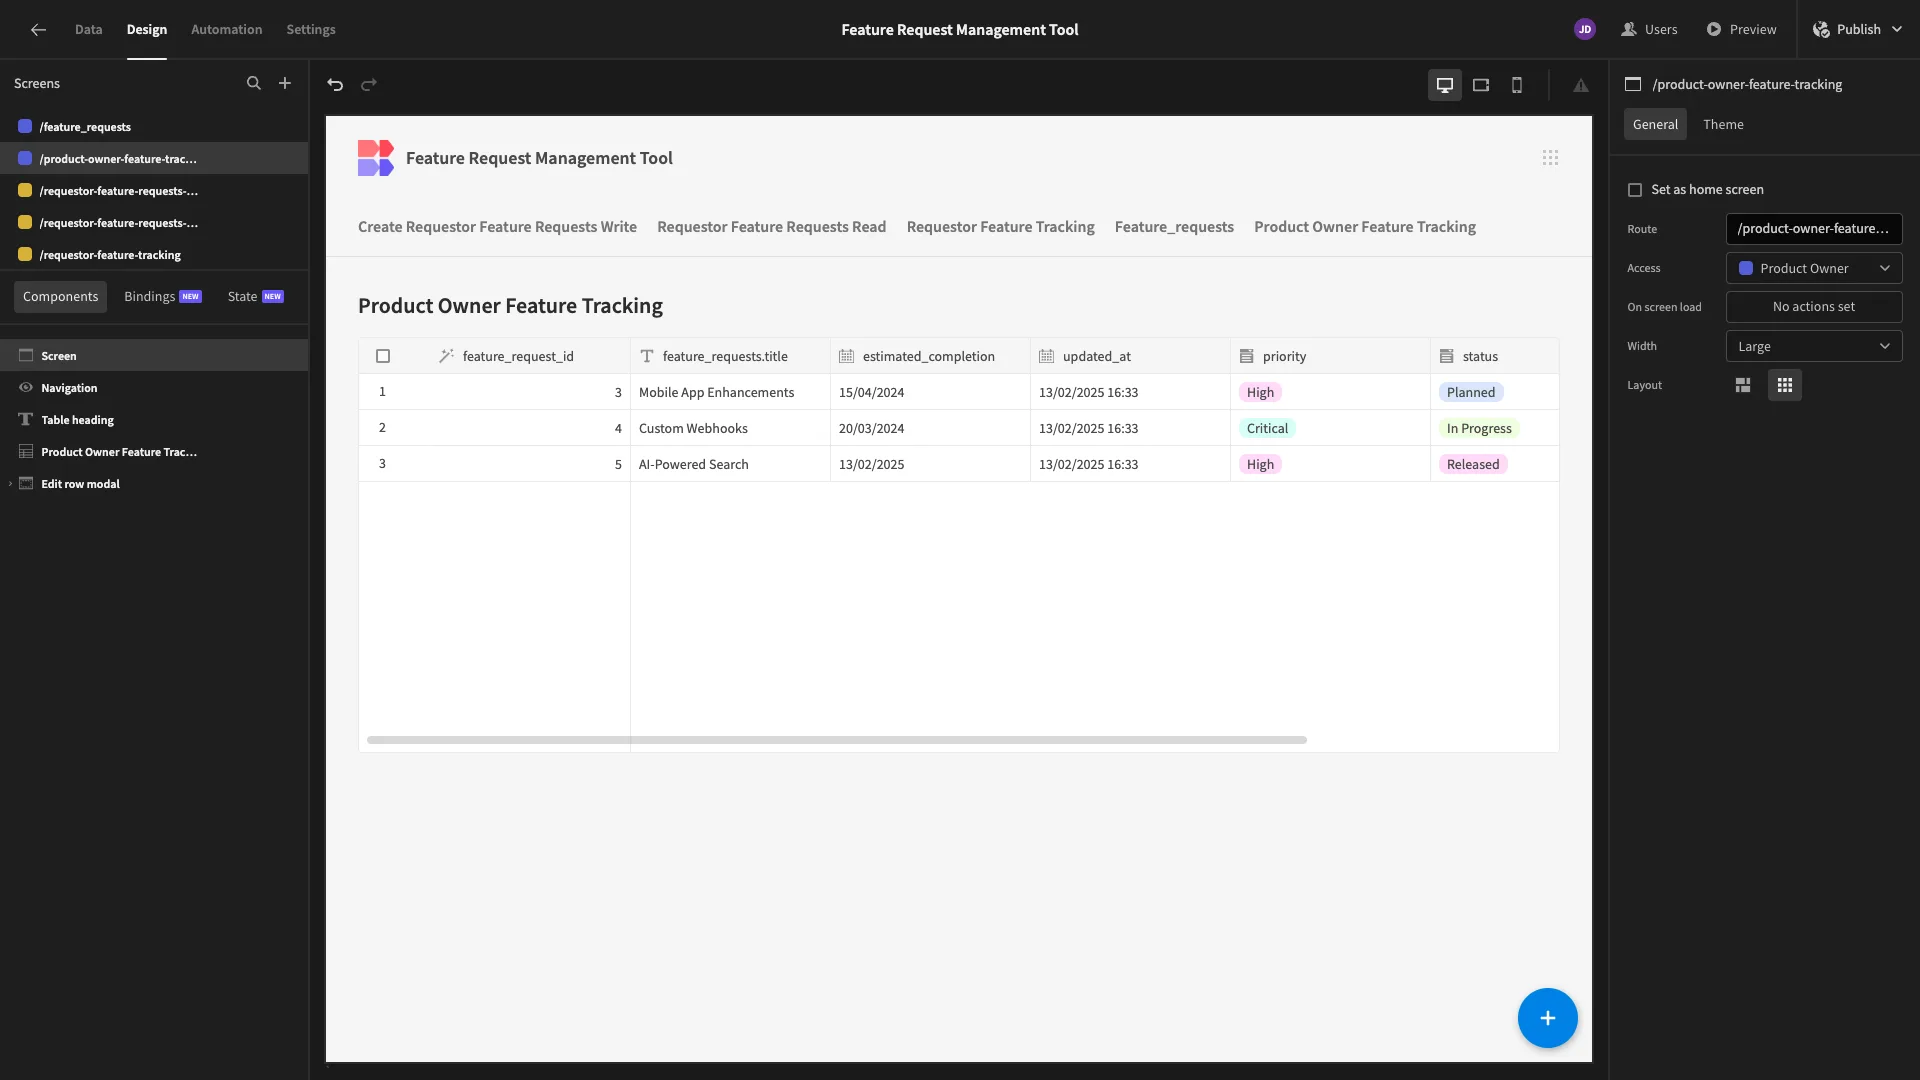
Lastly, we’ll add a CRUD screen for our feature_tracking table. Again, we’ll start with a Table UI with Modal forms, this time with our Product Owner Feature Tracking View. Again, we’ve removed the components for creating new rows and tidied up our table.
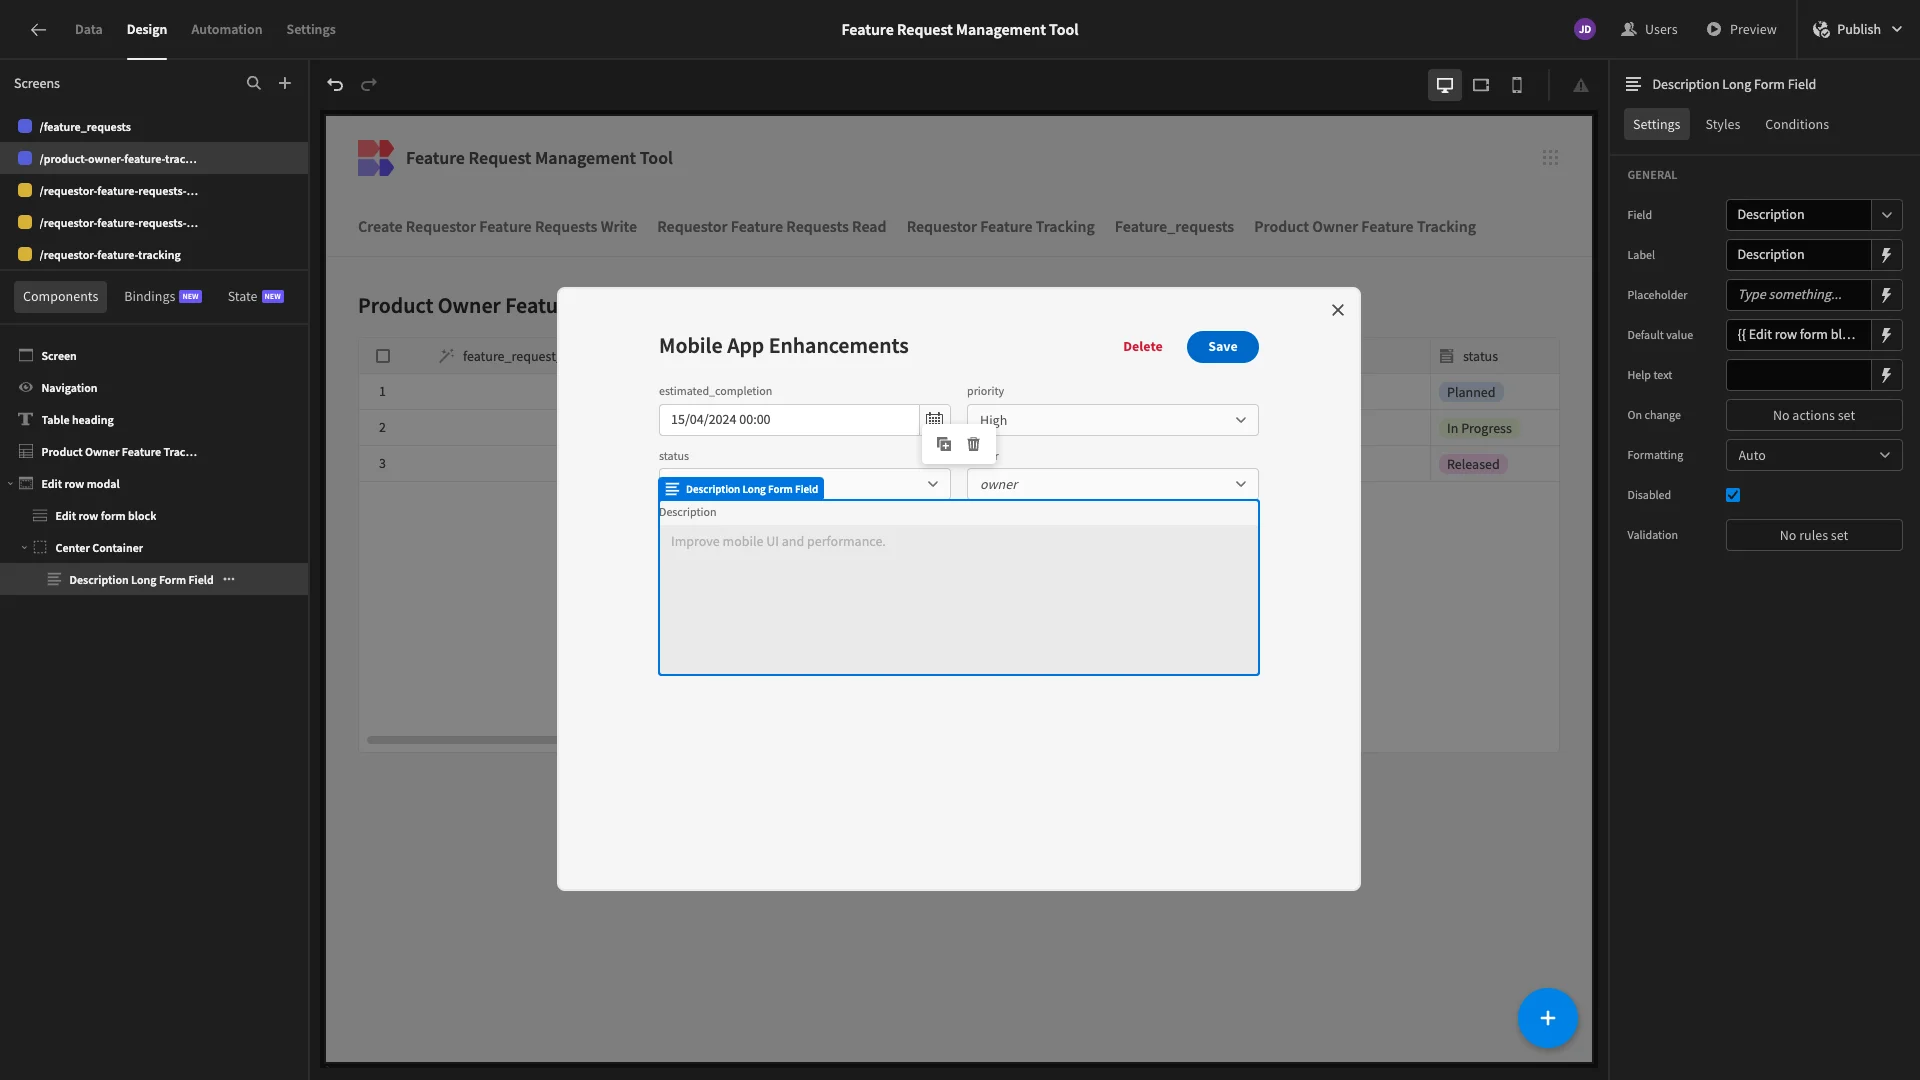
We’ll follow the same steps as earlier to add a description field to our remaining form, this time placing it in a container to center it.
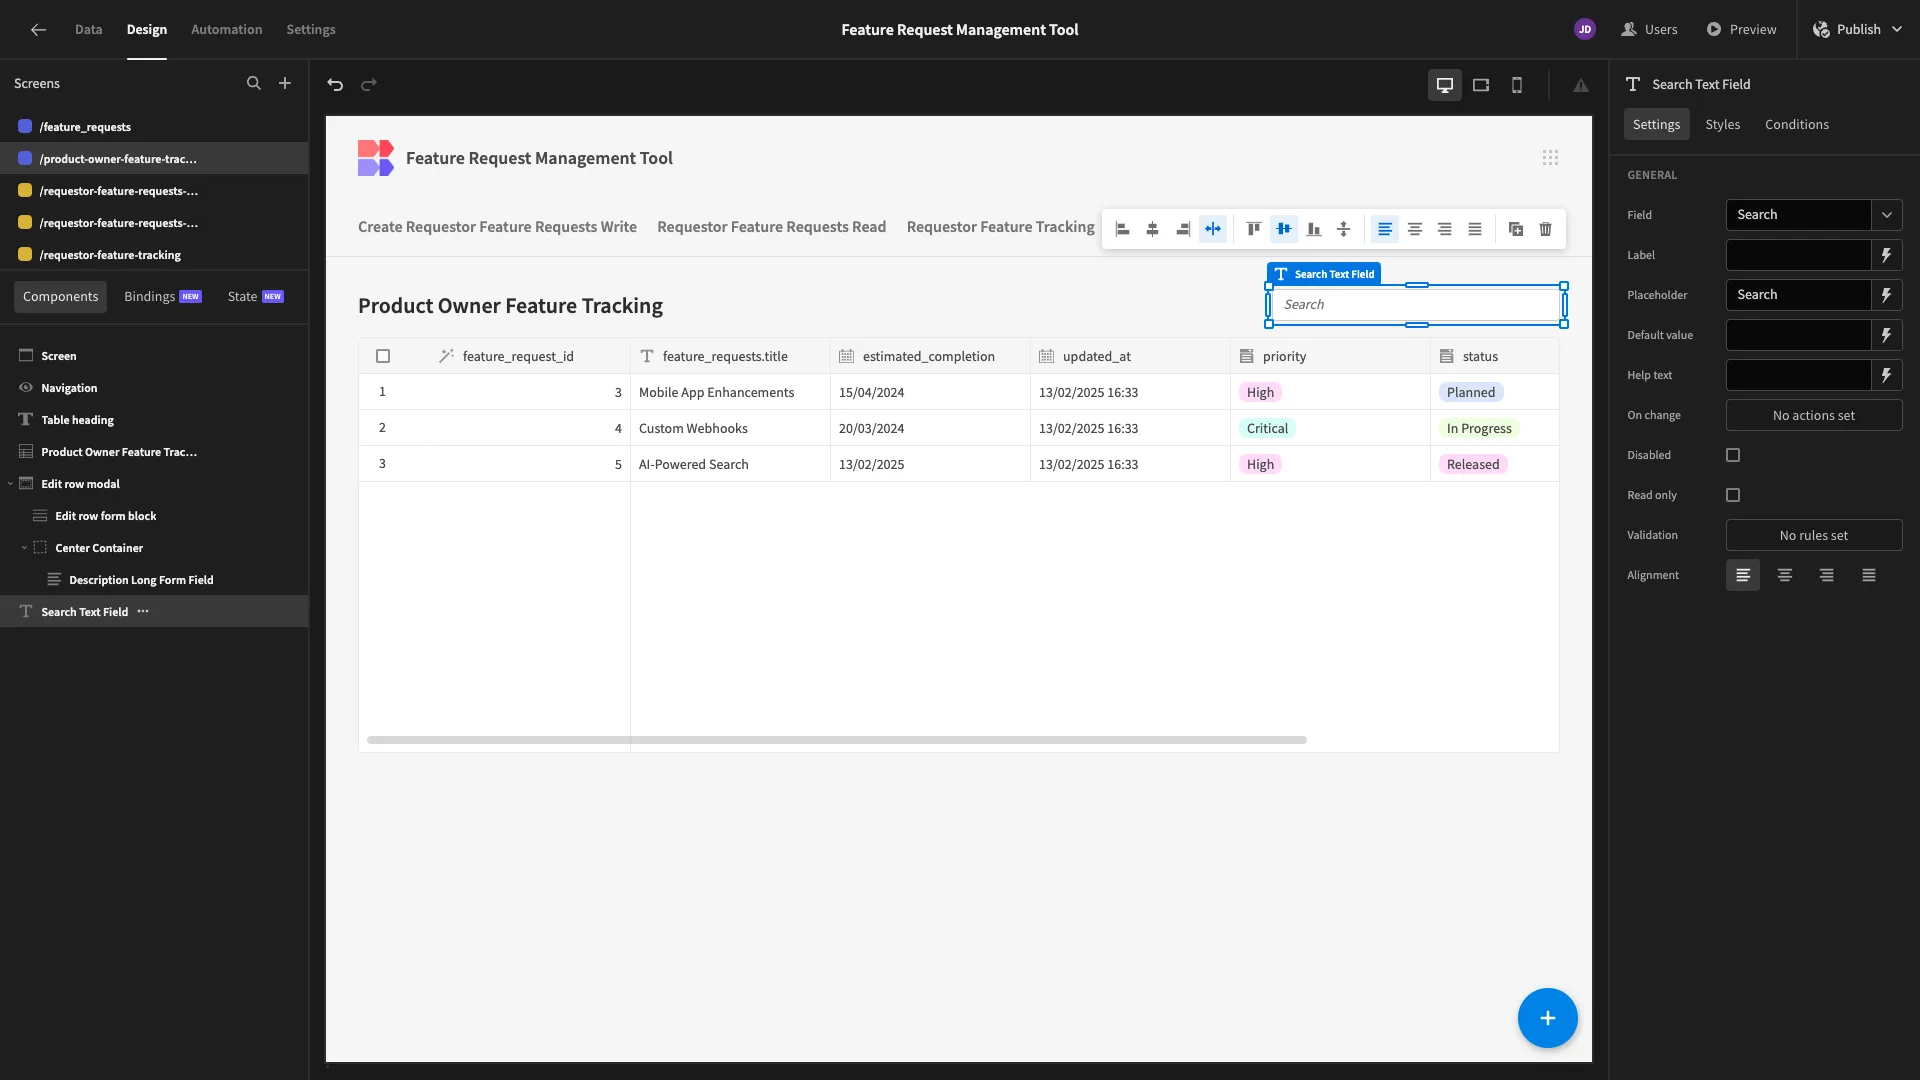
We’ll also add search functionality to our table, exactly as we did earlier.
5. Design tweaks, navigation & publishing
Functionally speaking, our feature request management tool is ready to go. However, we need to make a few UX improvements before we ship it to users.
Firstly, our navigation bar has gotten quite messy. Each class of users only needs to access two screens - one for feature_requests and one for feature_tracking.
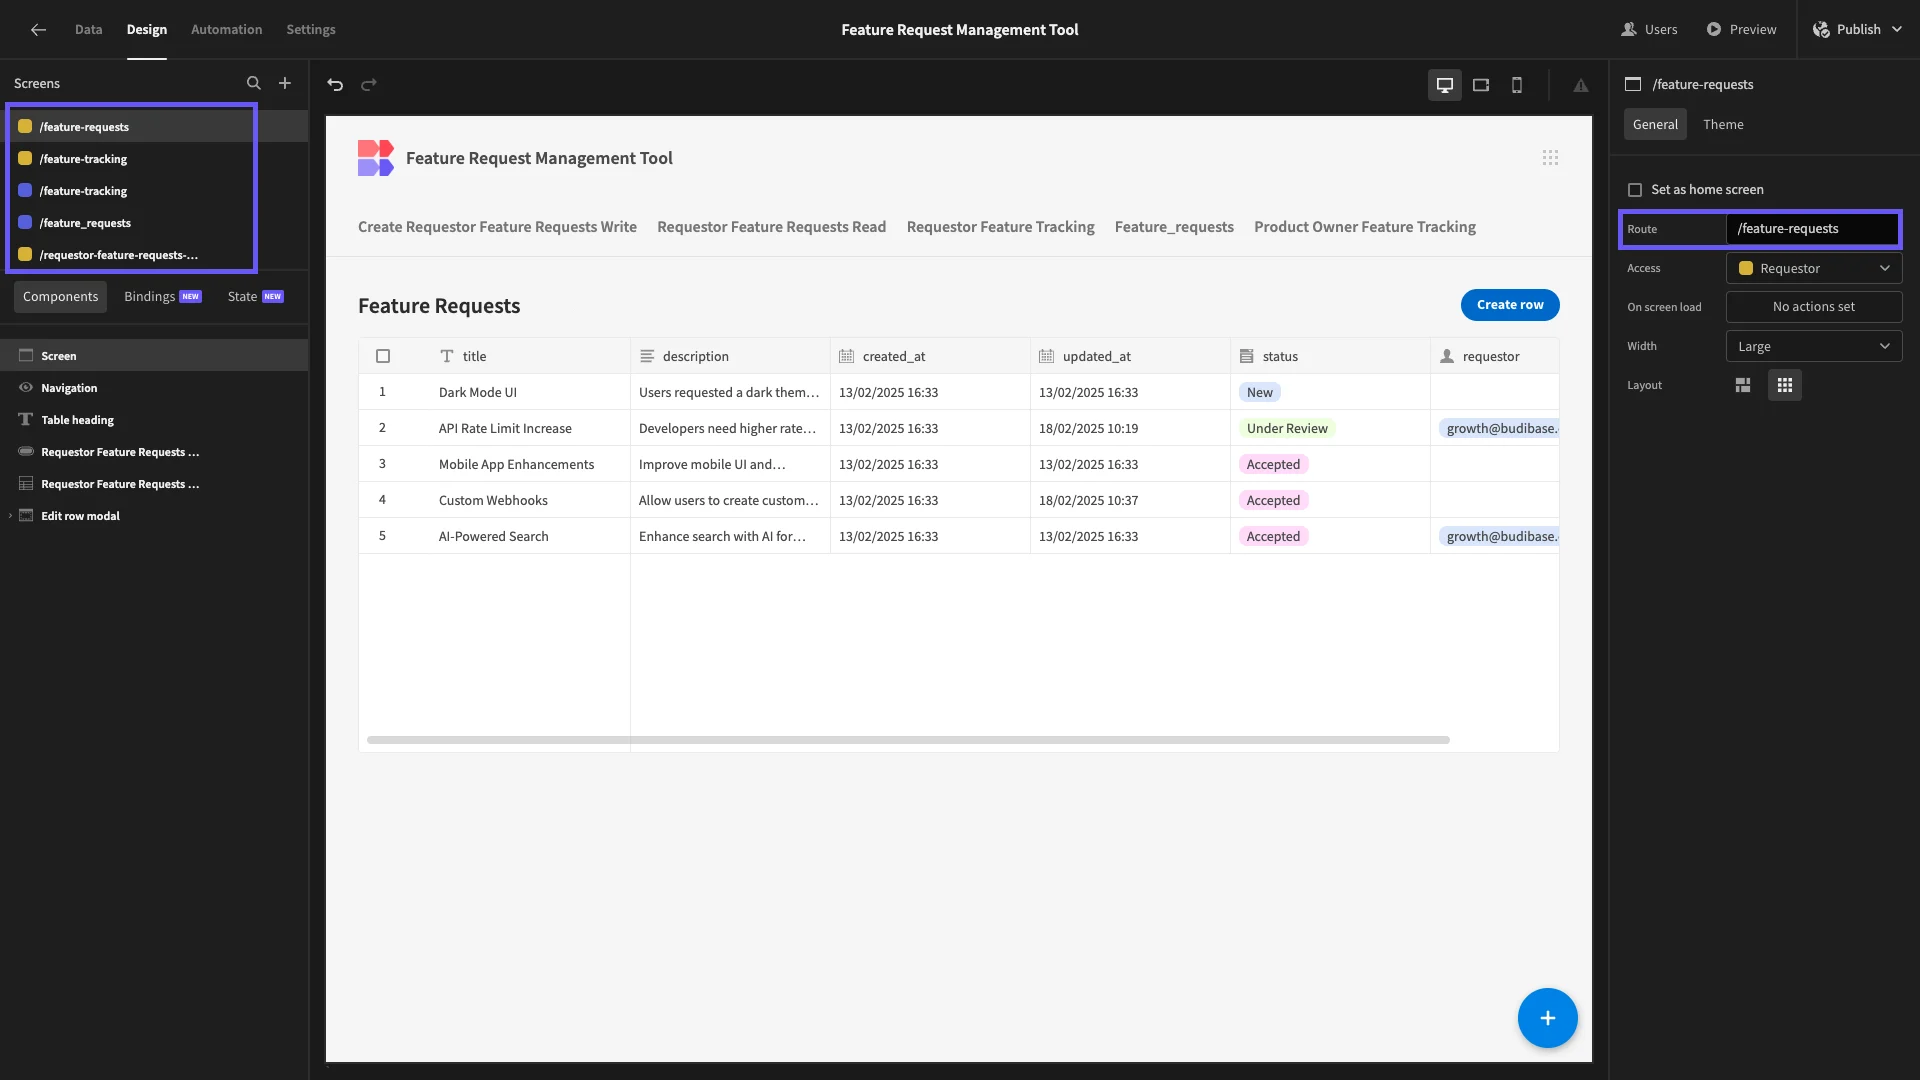
We’re going to start by changing the URLs for our table screens so that each group of users can access one screen called /feature-requests and one called /feature-tracking.
Where there are two screens with the same URL, users will be directed to the version that matches their role.
We’ve also updated the title on each screen to match.
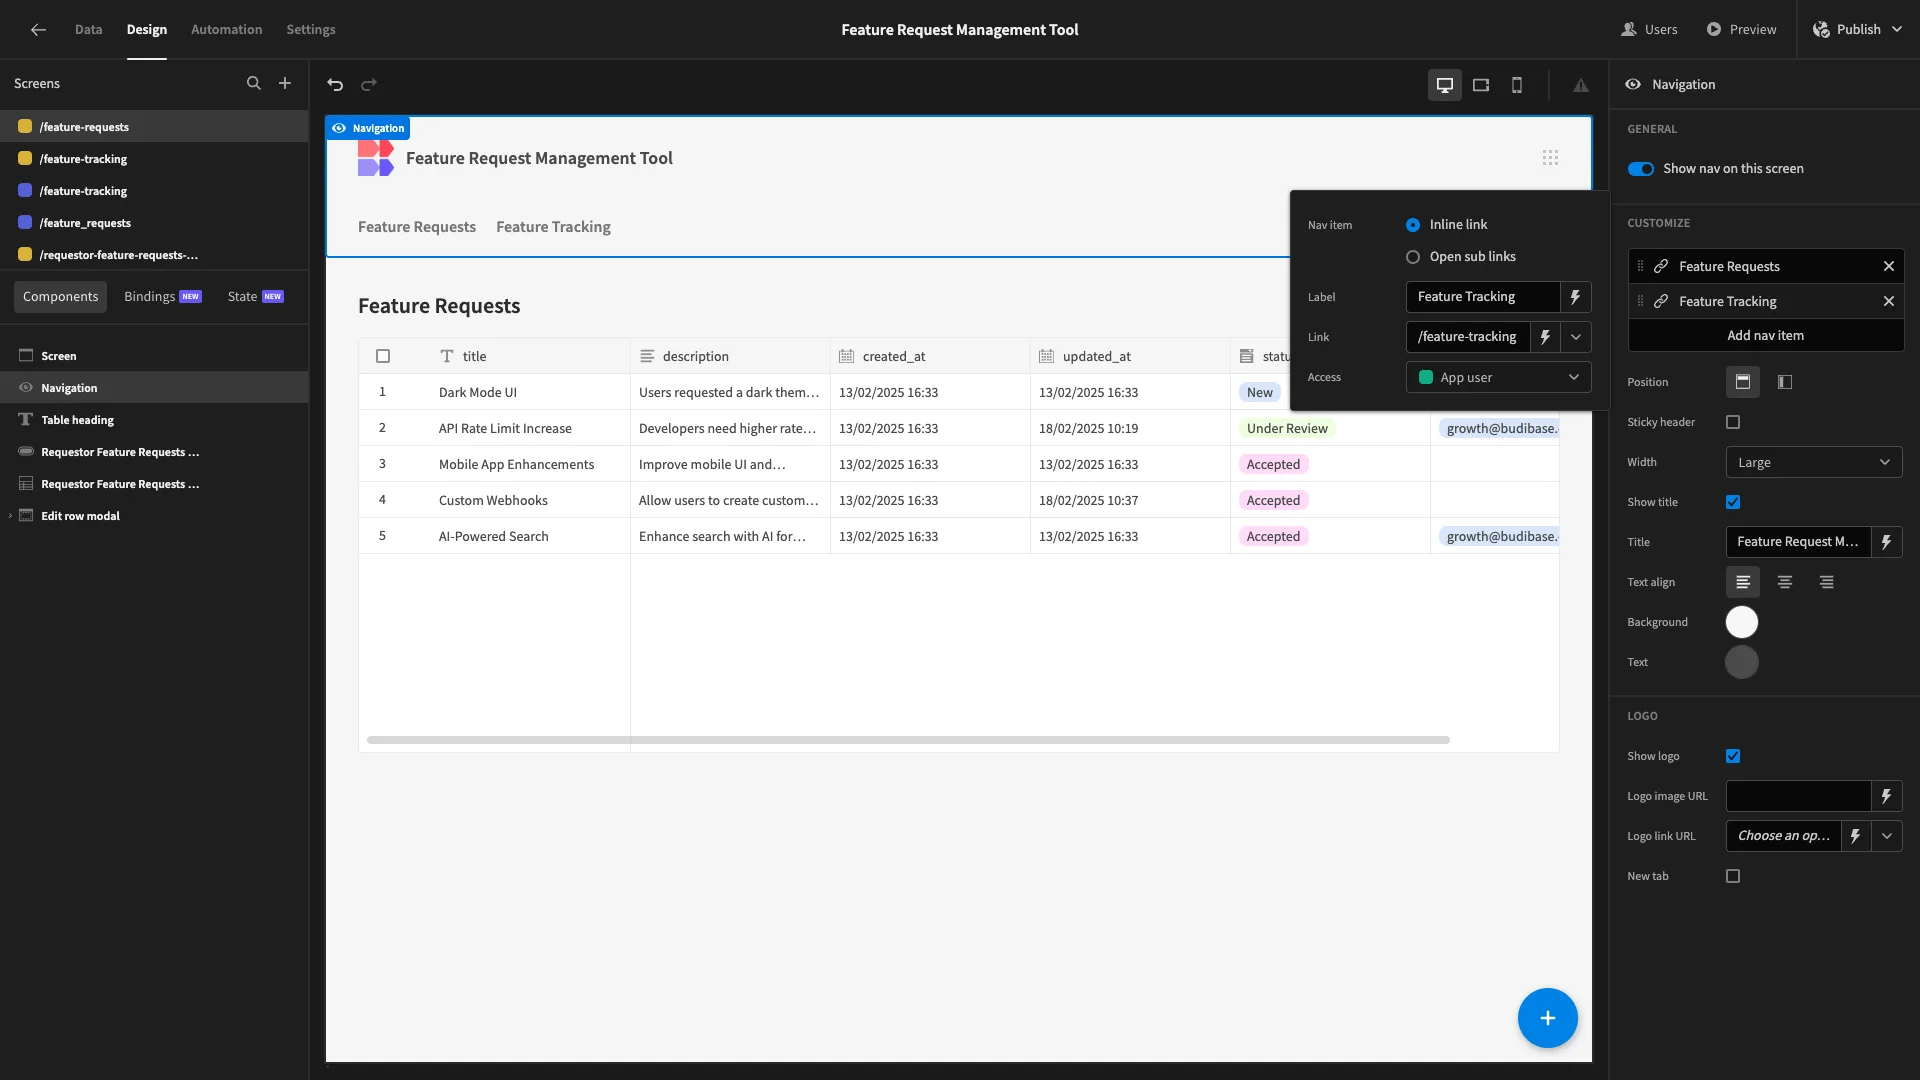
Now, under Navigation, we’ll set this to include only these two options.
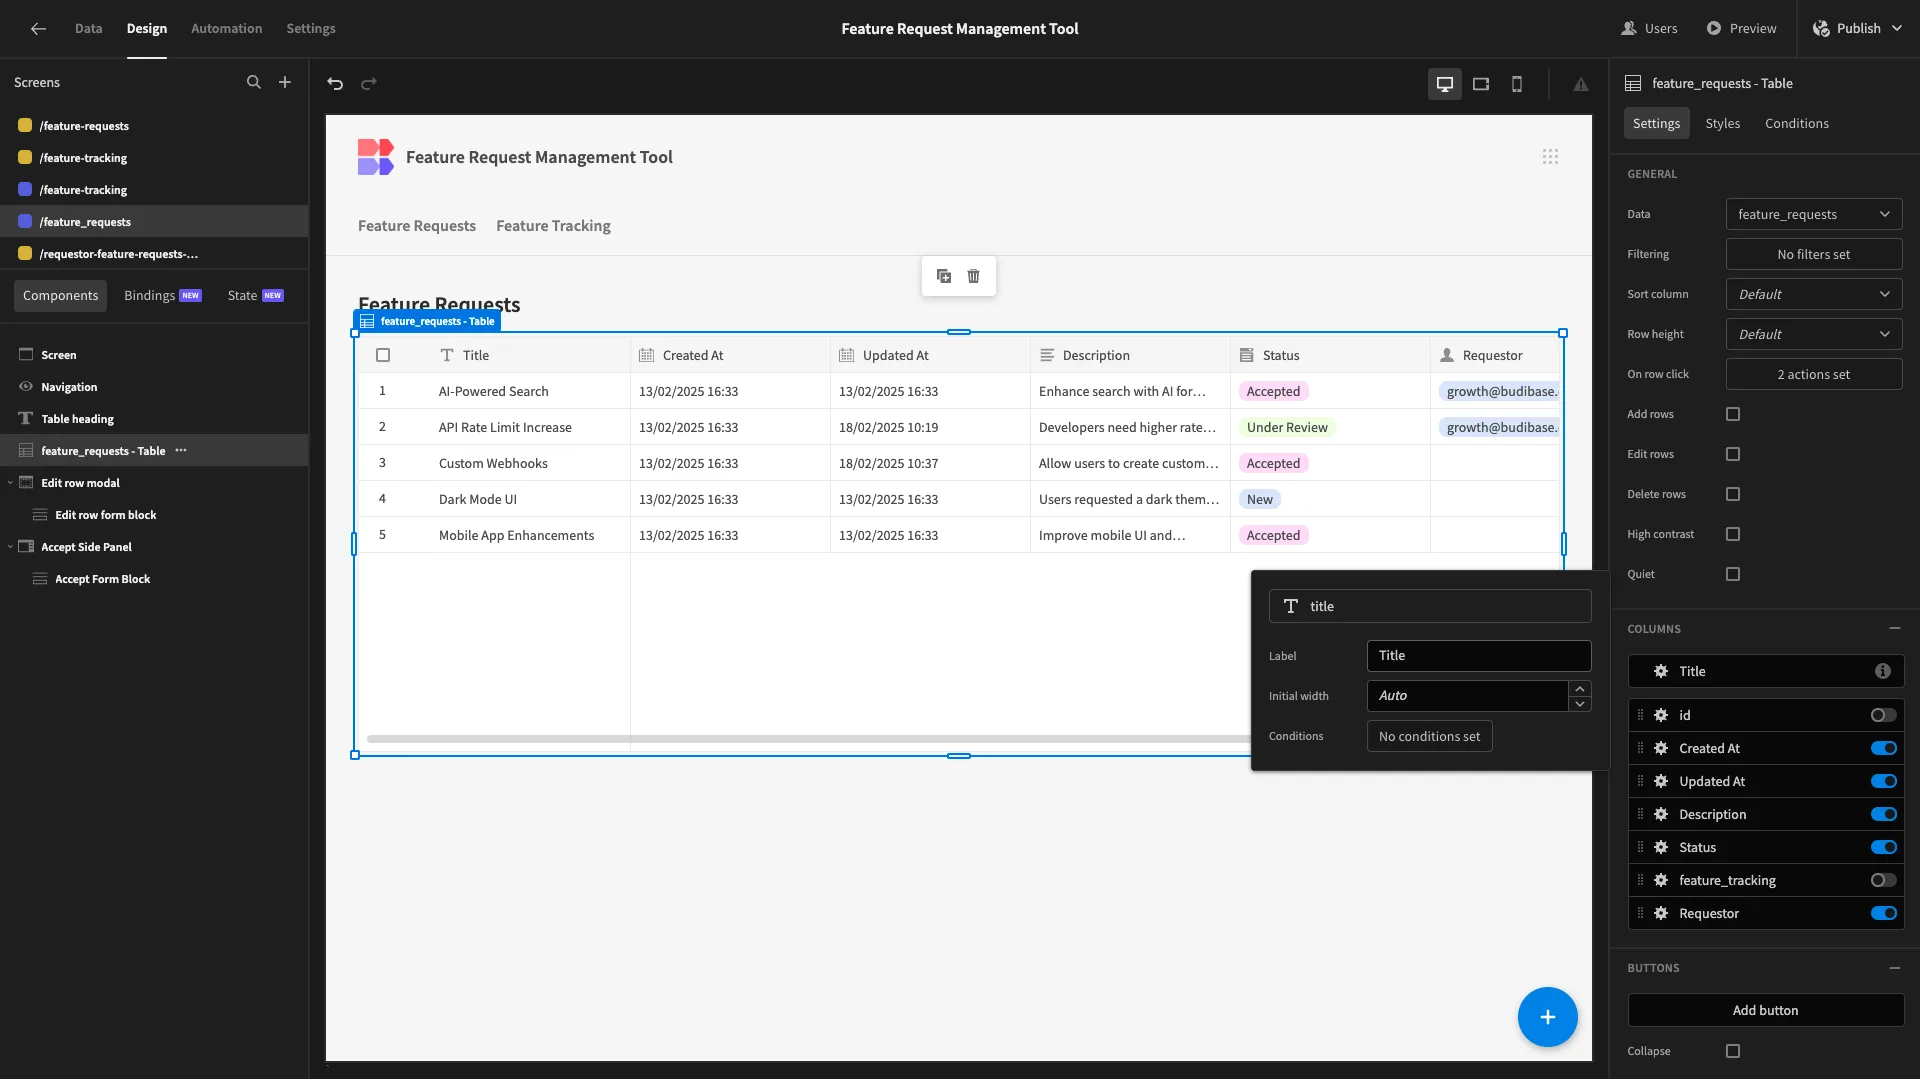
We can also go through our app and update the labels and display texts for our form fields and table columns to be more reader-friendly, rather than using the raw column names from our database.
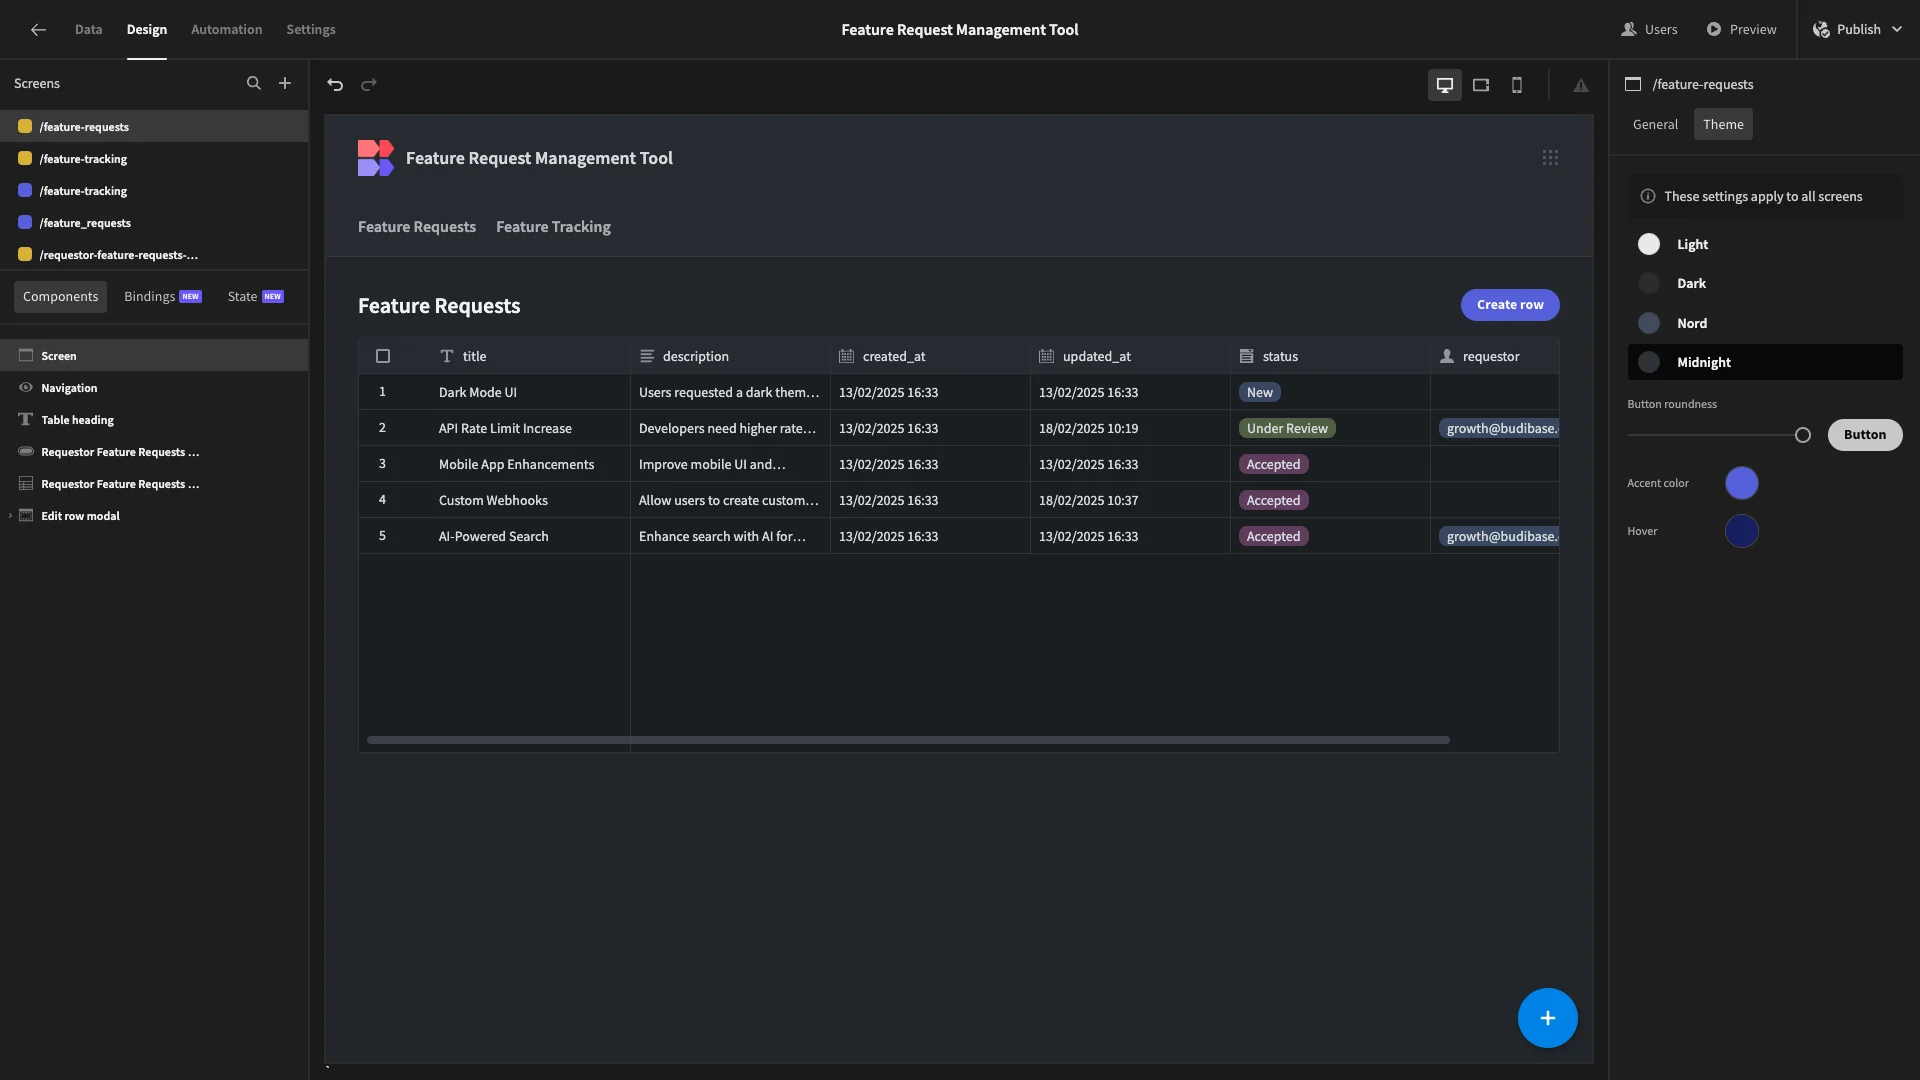
Lastly, under Screen and Theme, we’ve chosen Midnight. We’ve also updated our colors to better match the Budibase brand.
When we’re happy, we can hit Publish to push our app live.
Here’s a reminder of what our feature request management tool looks like.
Turn data into action with Budibase
Budibase is the open-source, low-code platform that empowers IT teams to turn data into action. With leading external data support, autogenerated UIs, powerful automations, free SSO, and optional self-hosting, it’s the fast, easy way to ship secure internal tools.
Check out our features overview to learn more.