Creating an Employee Management App | 6-Step Guide
Today, we’re going to build a relatively simple but no less powerful tool - an employee management app using Budibase.
Your employees - along with their skills, knowledge, and expertise - are some of your most valuable assets. Making better use of their time is an easy way to create huge efficiency savings.
And for that, we need proper oversight. Who is doing what - and when?
When you have a couple of team members all working in the same location, this isn’t such a challenge.
For bigger, remote, or dispersed teams, things can get very tricky very quickly.
We’re going to show you how you can build a fully custom solution for managing your employees, with minimal coding skills - in just four steps.
But first, let’s cover a bit of background.
What is an employee management app?
Employee management apps are used to control which colleagues work on different tasks. Essentially, we can add new tasks, and assign them to whichever employee is best placed to complete them.
This might be based on their skills, experience, availability, location, or any other business logic.
Within the same platform, individual employees can check the tasks that have been assigned to them, update their own details, or mark assignments as complete.
On top of this, we can also use them to handle employee’s personal details.
Depending on our needs, we might also want to build additional features around this. For example, reporting, automatic assignments, financial management, or integration with relevant third-party platforms.
What are we building?
Our employee management app will be based around two distinct types of users, each with their own responsibilities and requirements.
One group of users, with a role called Manager, will be able to create new jobs and assign them to employees.
A separate group of users, whose role is called Colleague, will be able to view jobs that are assigned to them and edit a subset of their attributes. They’ll also be able to view and edit their own personal details.
We’re building this on top of two tables in Budibase’s internal DB, but we could just as easily use an external data source, such as an existing relational database, NoSQL tool, API, or spreadsheet.
We’re also relying on the default roles within Budibase’s built-in RBAC system, although we could also create custom roles for a more complex use case.
By the end, we’ll have a fully customizable employee management app, ready to be deployed to the cloud or on-premises.
Let’s jump right in.
How to build an employee management app in 4 steps
If you haven’t already, sign up for a free Budibase account to start building as many apps as you want.
The first thing we’ll do is create a new app project and give it a name. We’re simply calling our Employee Management App.
1. Setting up our data layer
Once we’ve created our new app, we’ll be prompted to add a new data source. As we said already, we’re going to create our database from scratch, so we’ll hit the option to add an internal table.
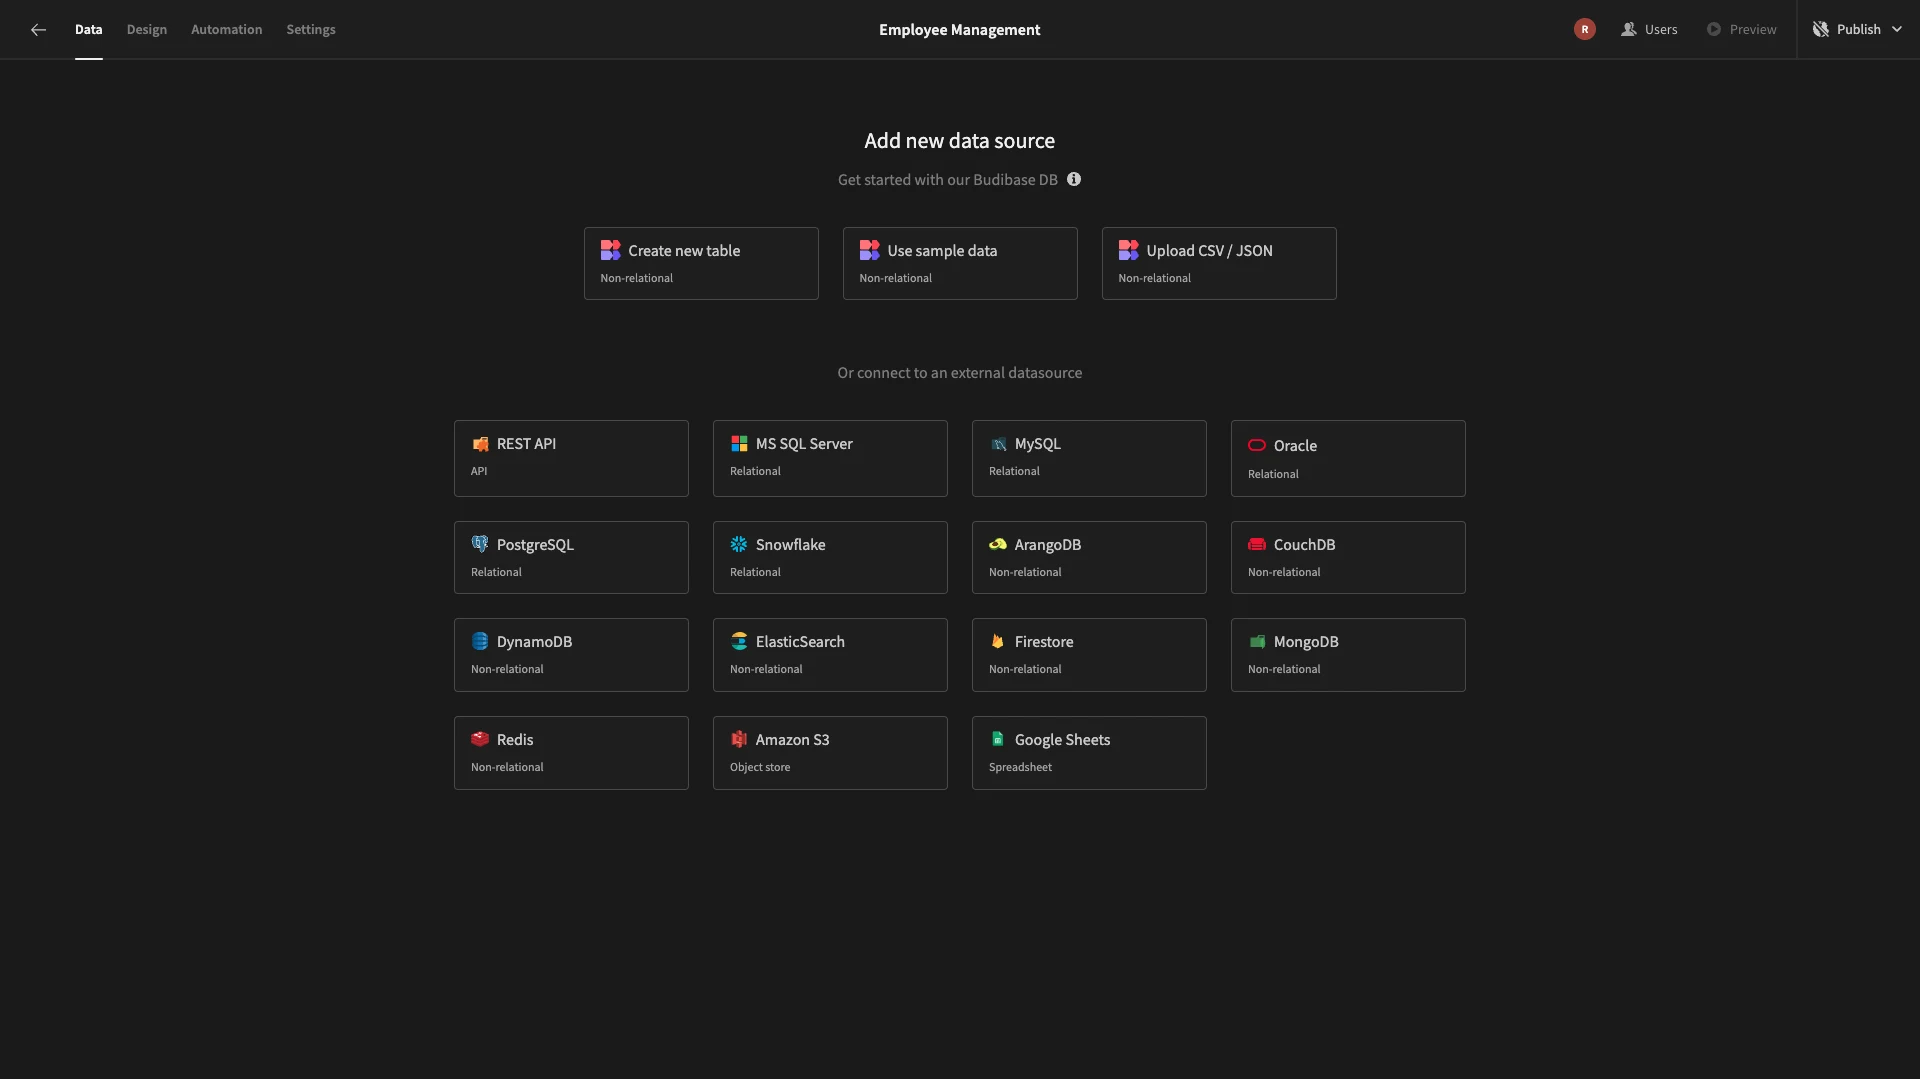
Creating tables
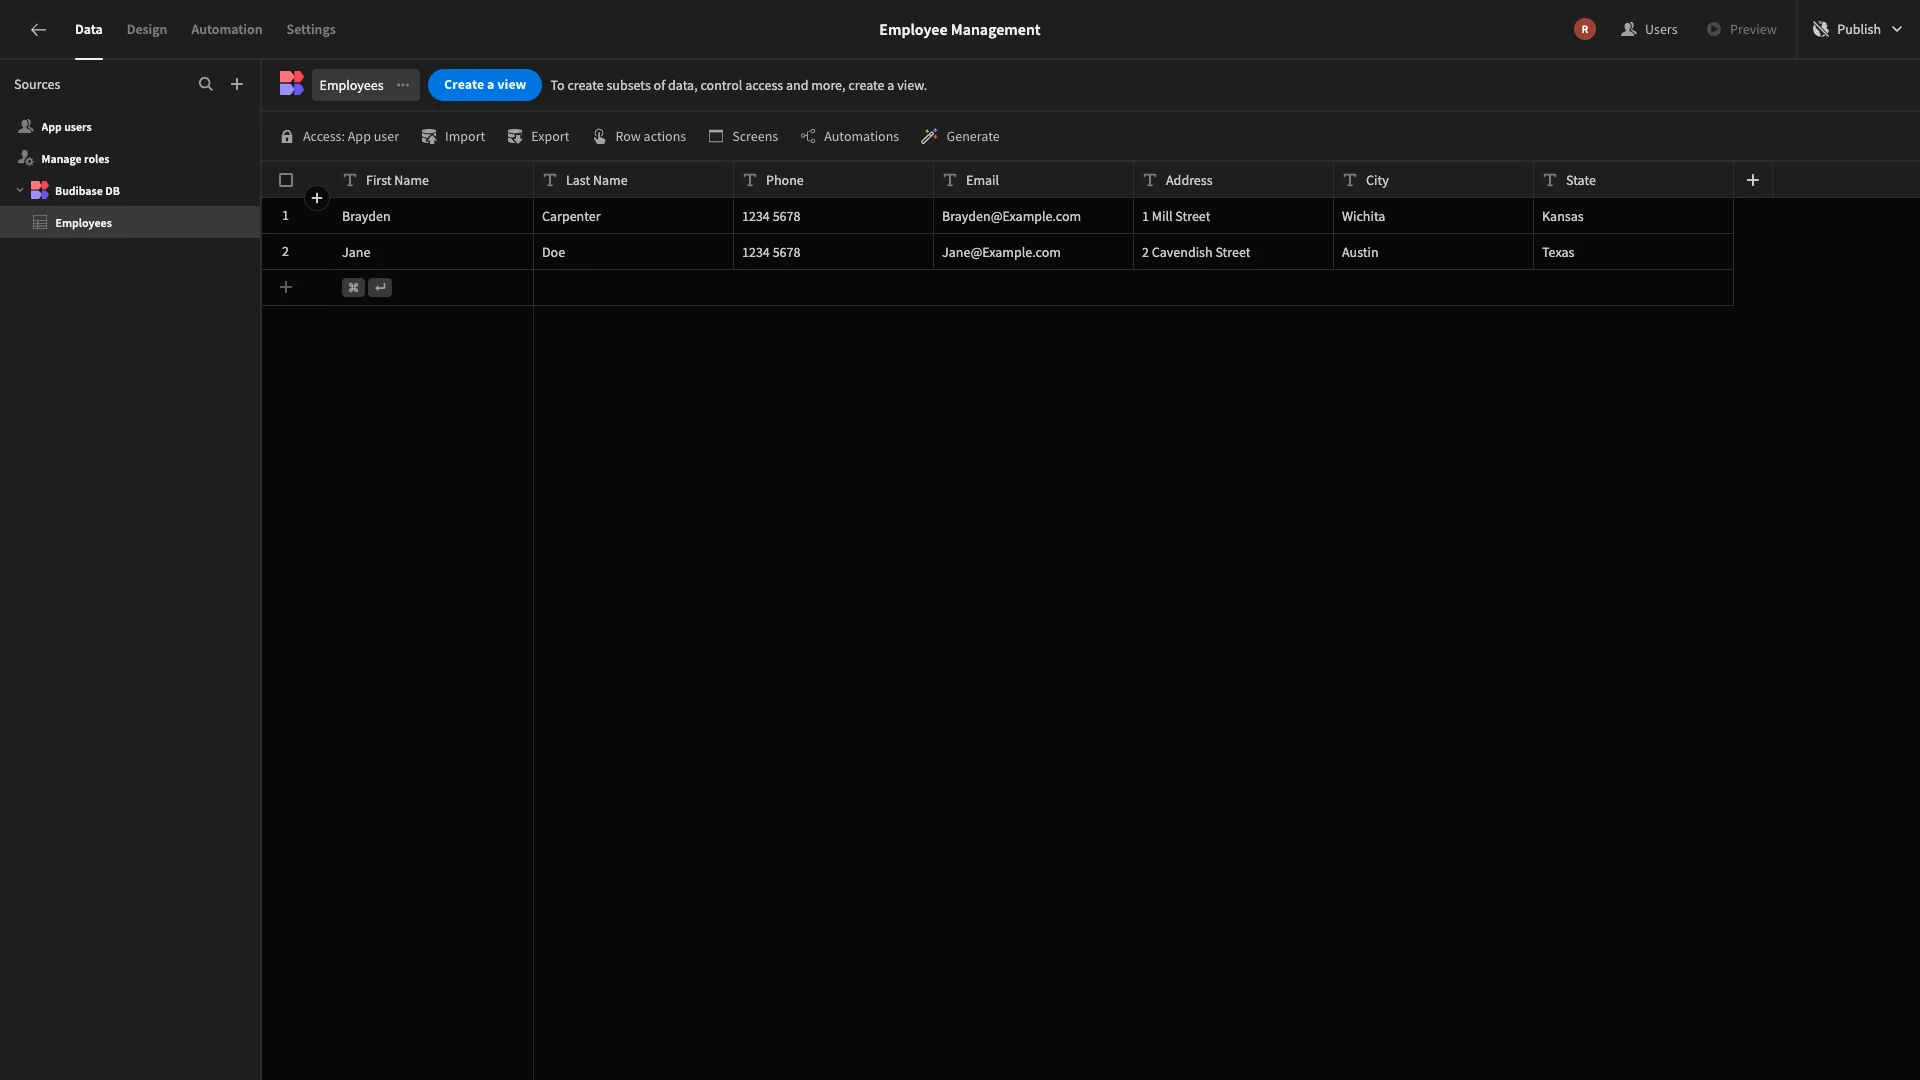
We’ll then be asked to give this a name. We’re going to call our first table Employees.
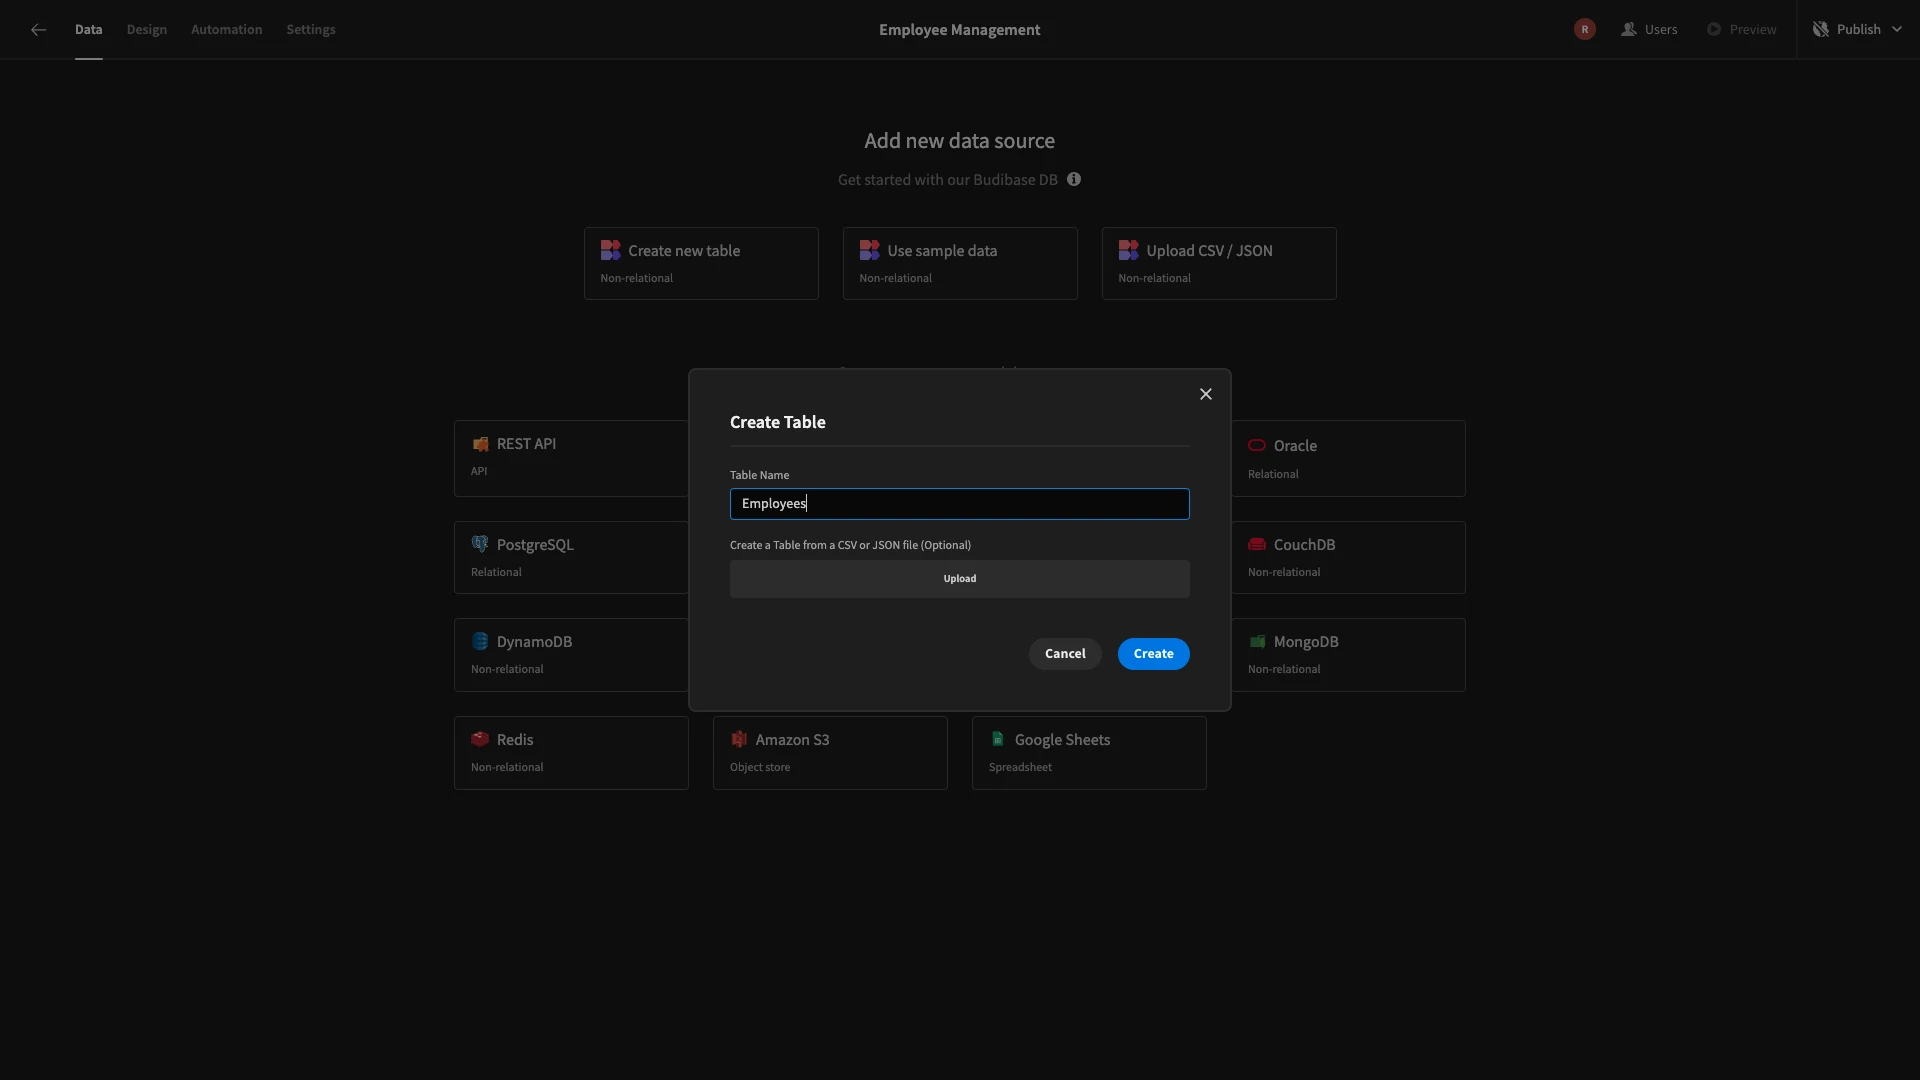
We now have a blank database table. We can use the plus icon to start adding columns.
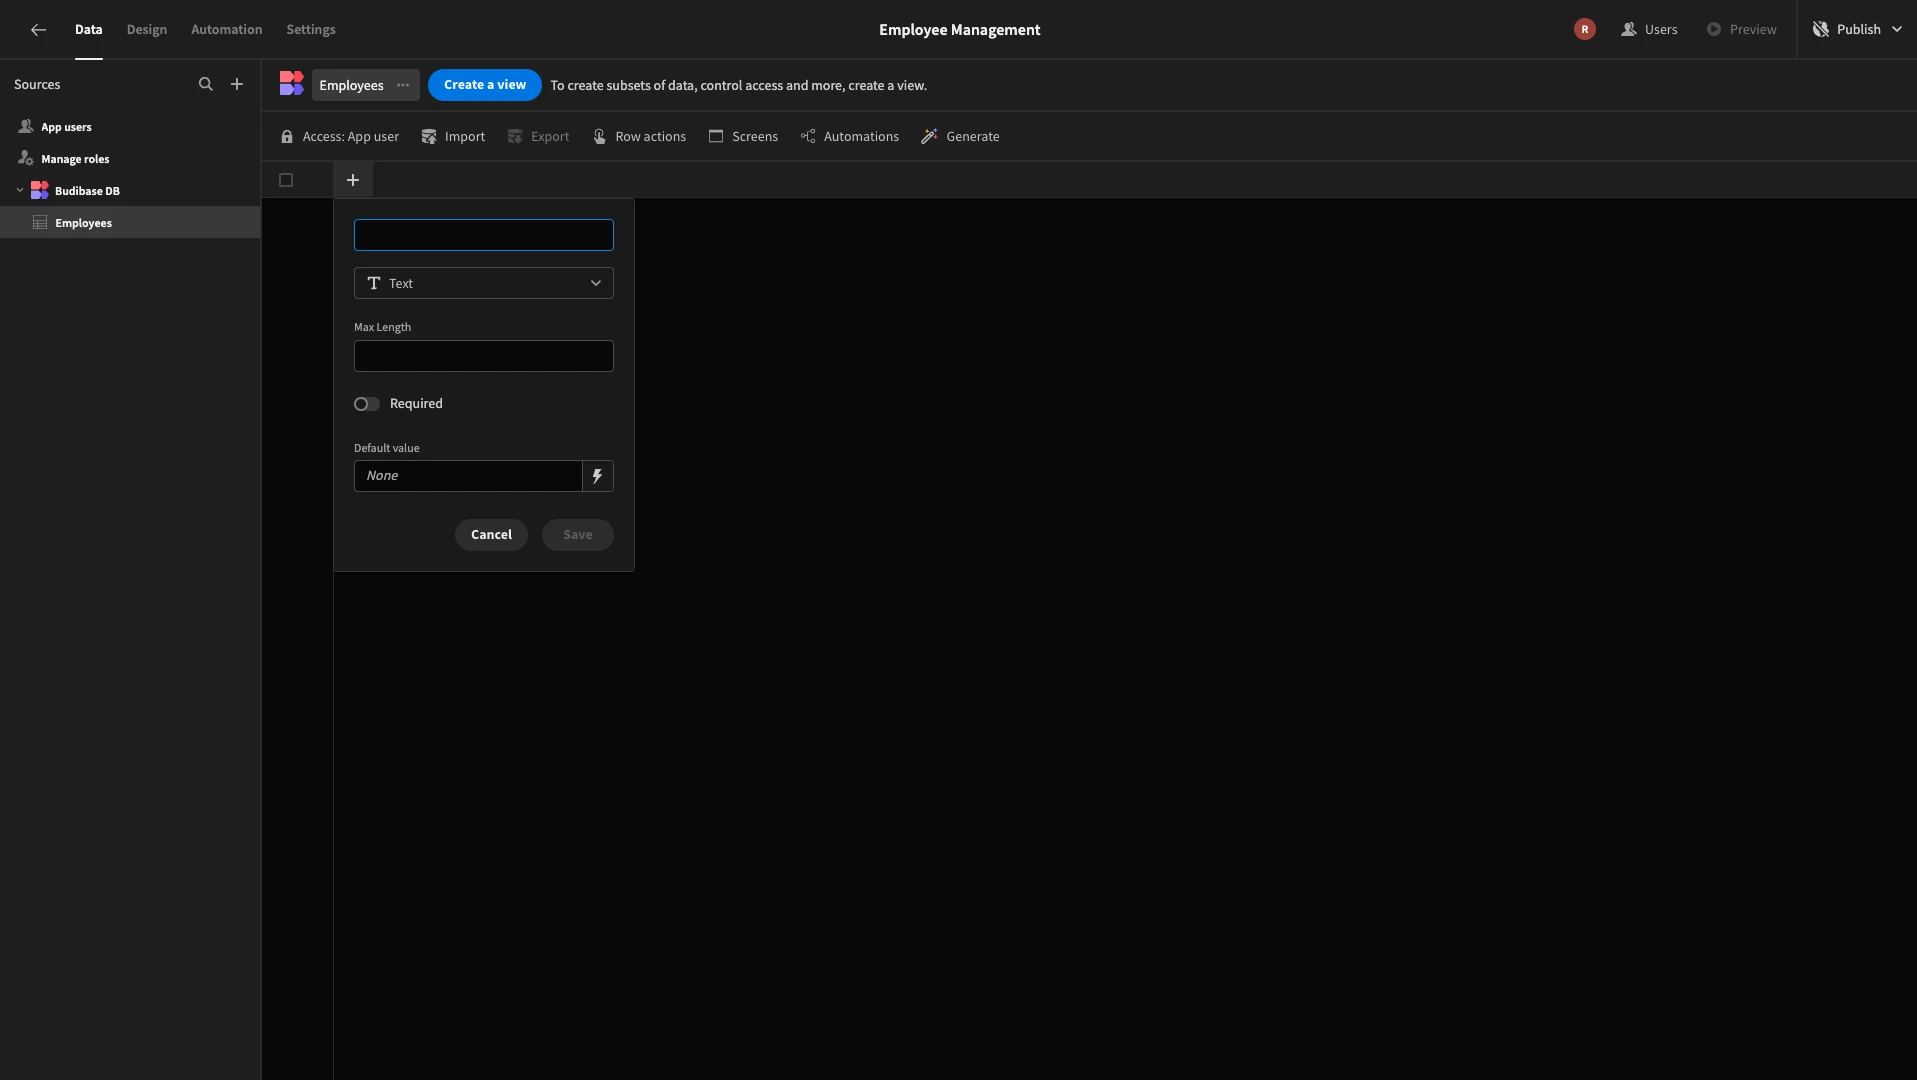
For each column we add, we need to specify a name and a data type. We can also add other configurations, such as default values or validation rules.
We’re going to keep our table relatively simple, adding the following columns:
- First Name - Text,
- Last Name - Text,
- Phone - Text,
- Email - Text,
- Address - Text,
- City - Text,
- State - Text.
All internal tables will also automatically store a unique _id attribute.
Here’s what this will look like:
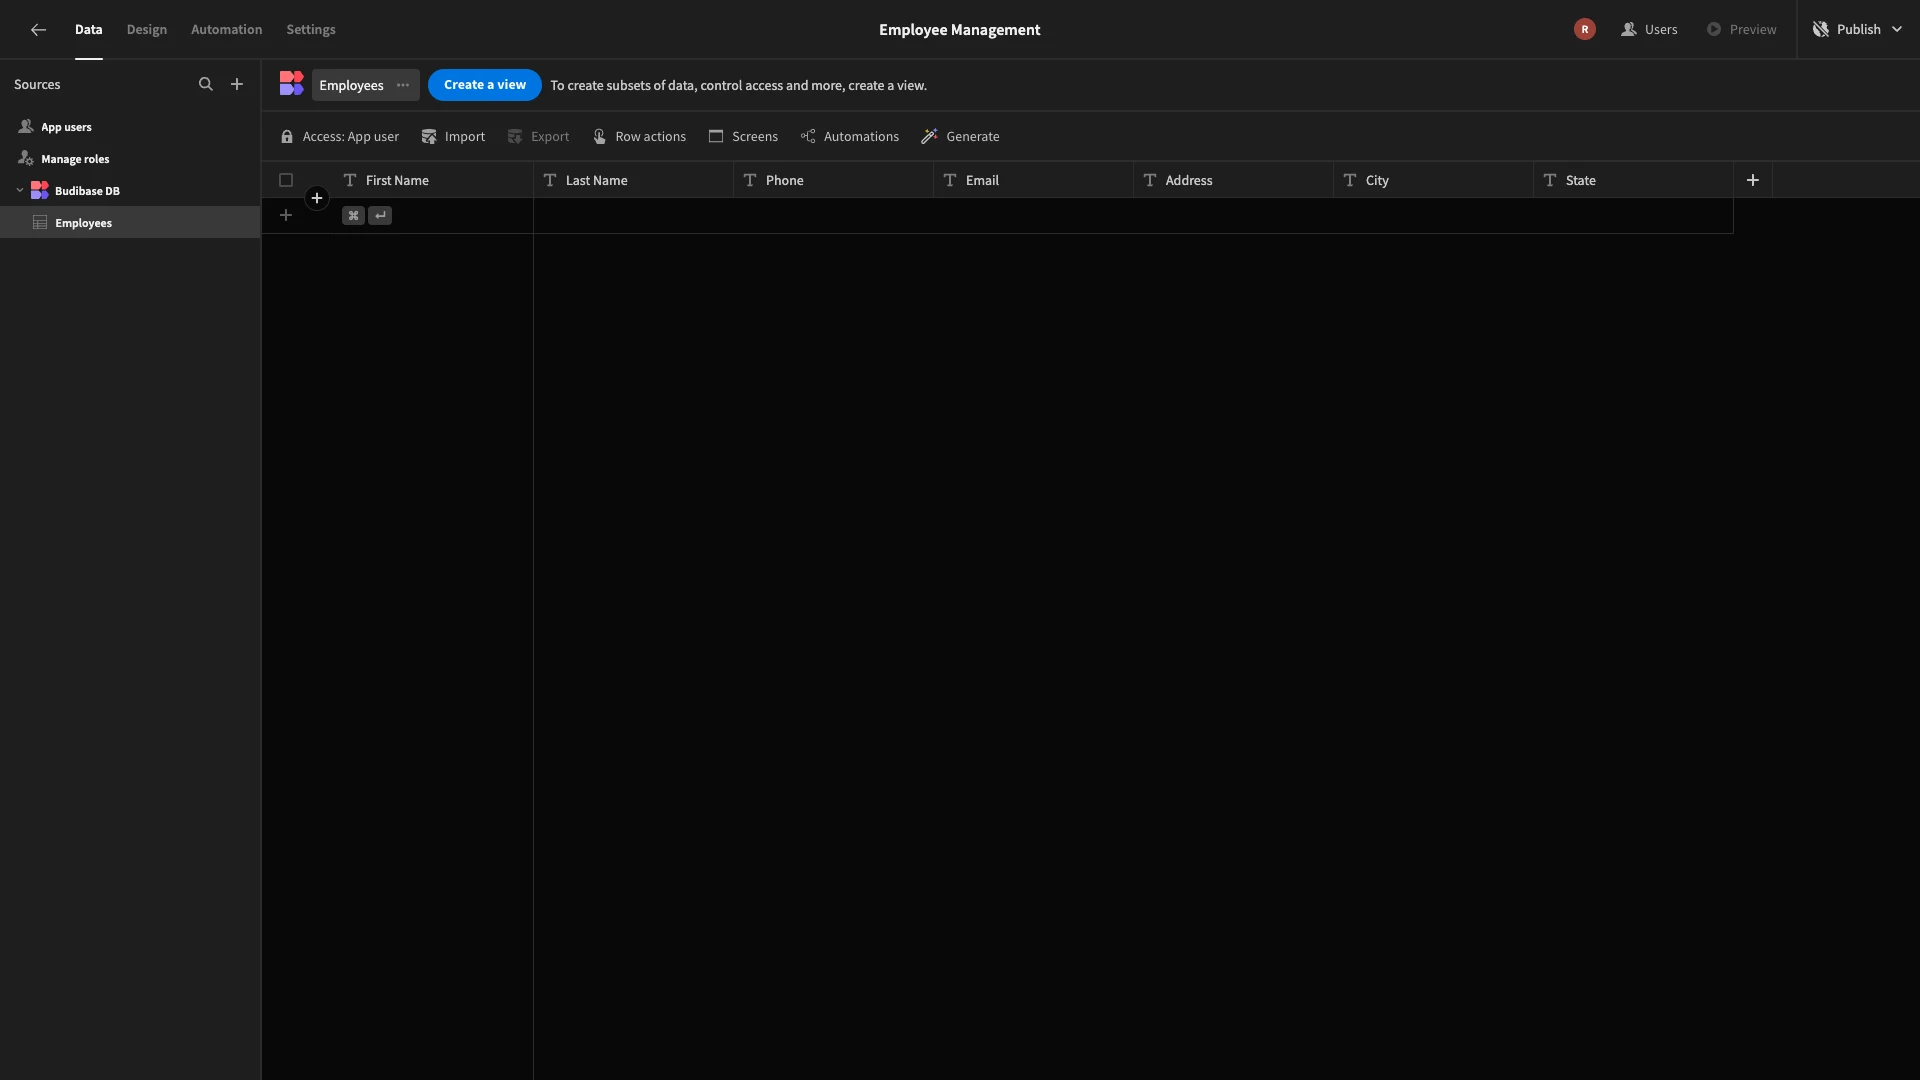
We’ll then add a couple of dummy rows using the Data section’s spreadsheet-like interface.
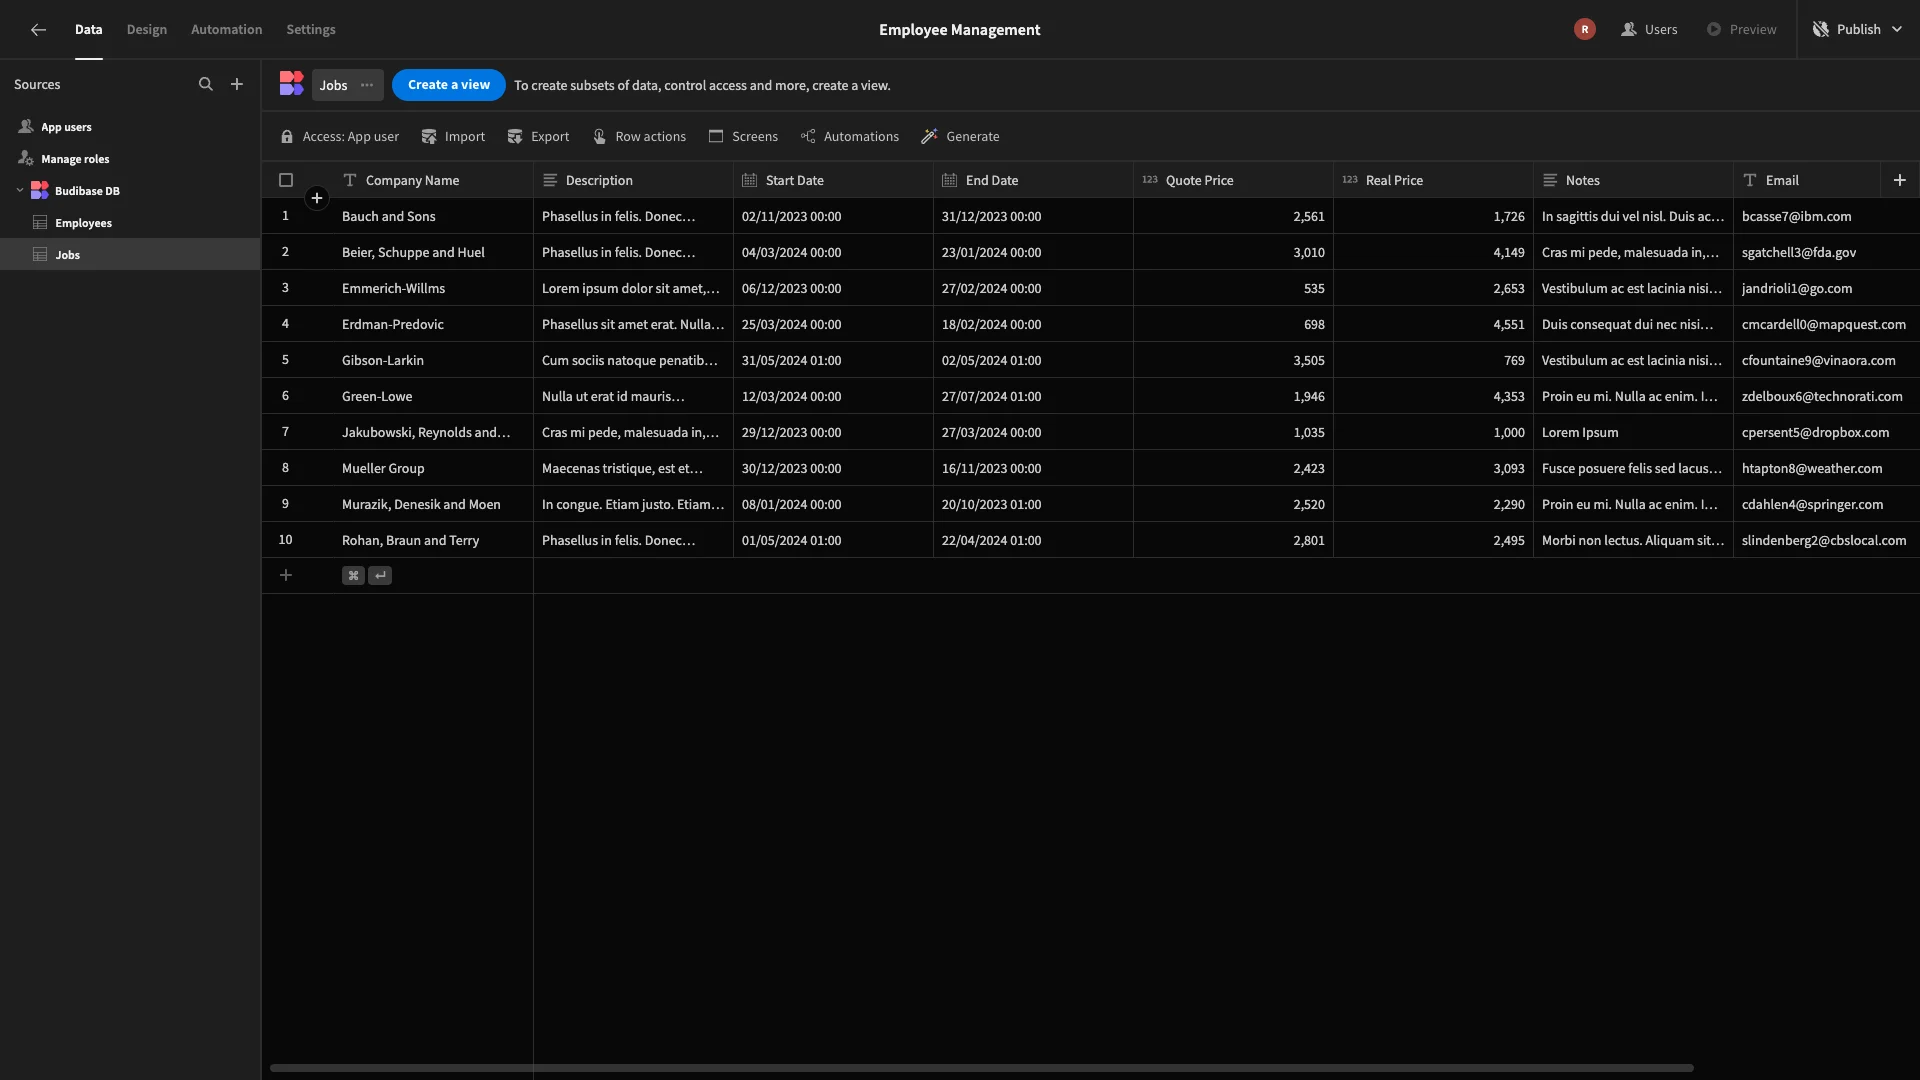
Then, we’ll add a second table called Jobs with the following columns:
- Company Name - Text,
- Email - Text,
- Description - Long-Form Text,
- Start Date - Date,
- End Date - Date,
- Quote Price - Number,
- Real Price - Number,
- Notes - Long-Form Text,
- Complete - Boolean.
Here’s what this will look like once we’ve added our dummy rows:
Defining relationships
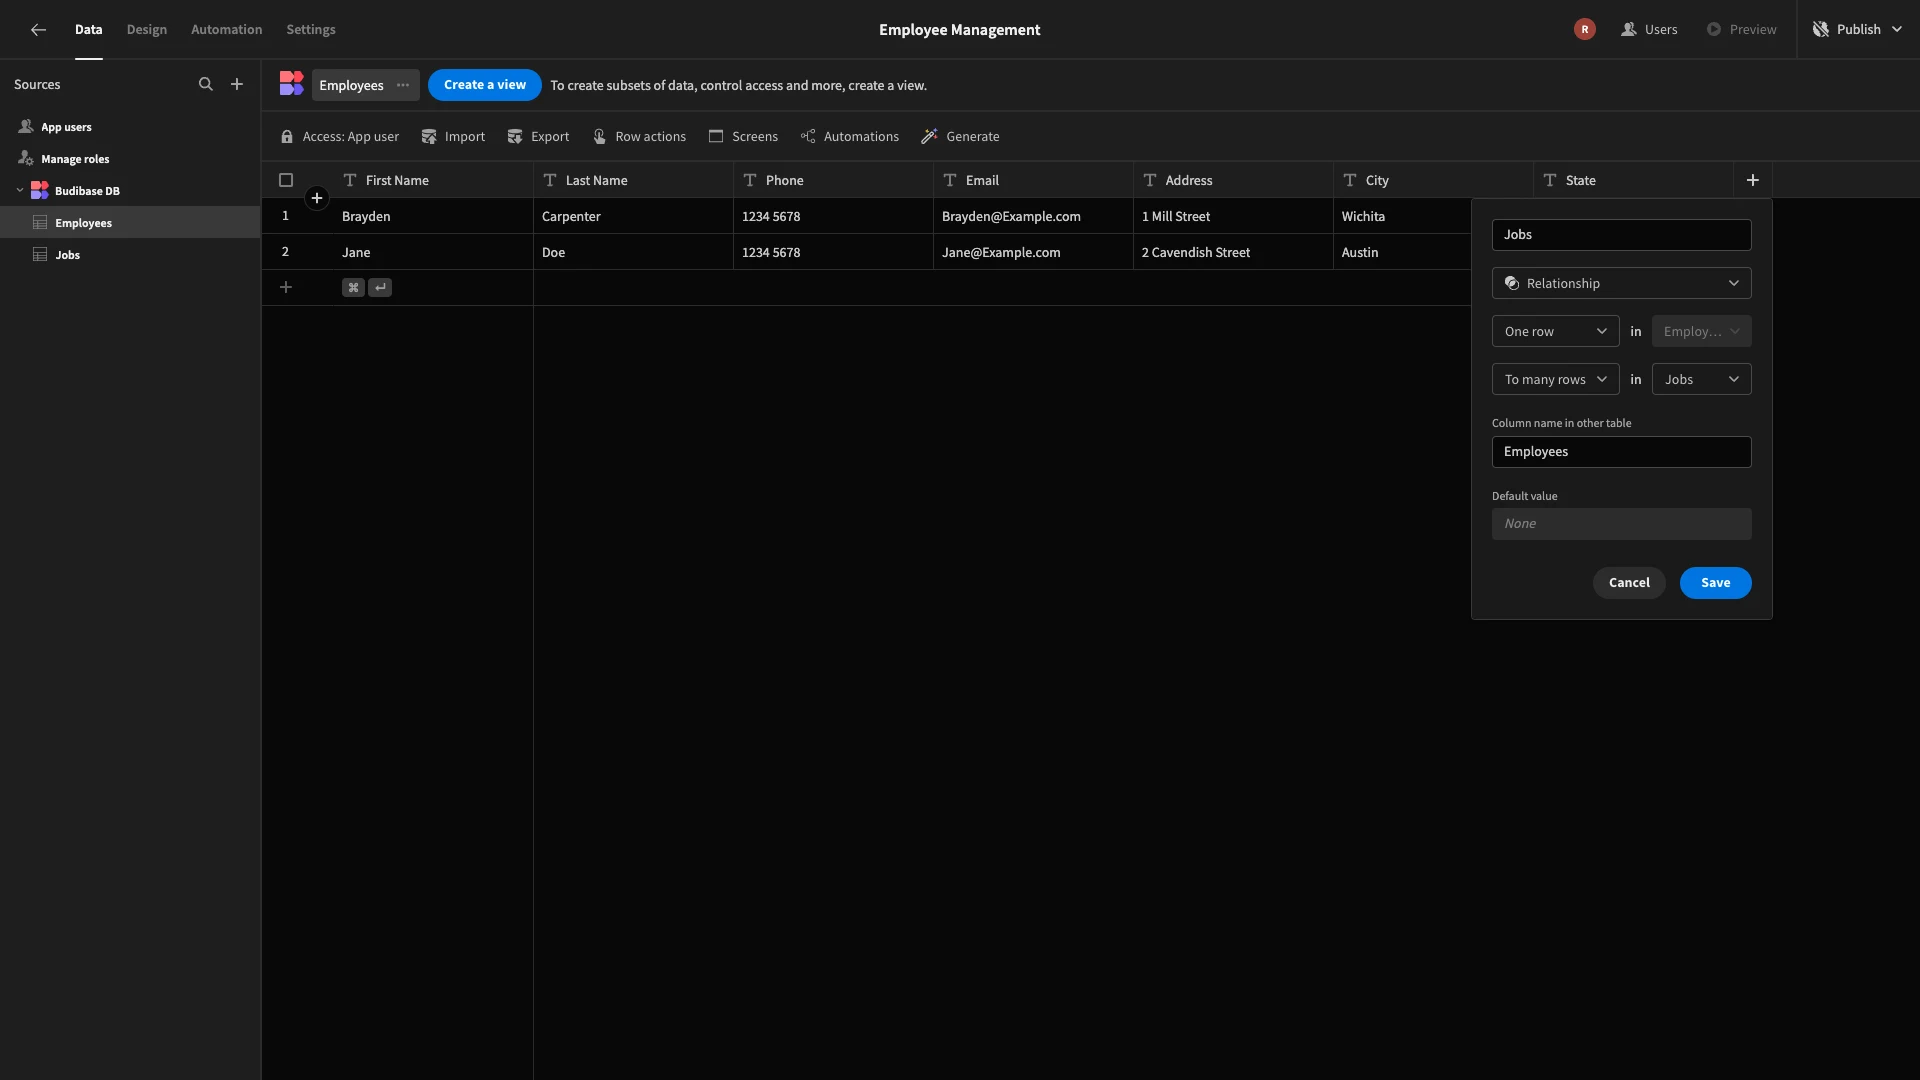
Next, we want to define the relationship between our two tables. Essentially, what we want to achieve is the ability to assign jobs to an employee. Each employee can have multiple jobs, but each job should only relate to a single employee.
In other words, we want a one-to-many relationship.
From the Employees table, we’ll add a Relationship column and call it Jobs. We’ll then set this to link one row in Employees to many rows in Jobs.
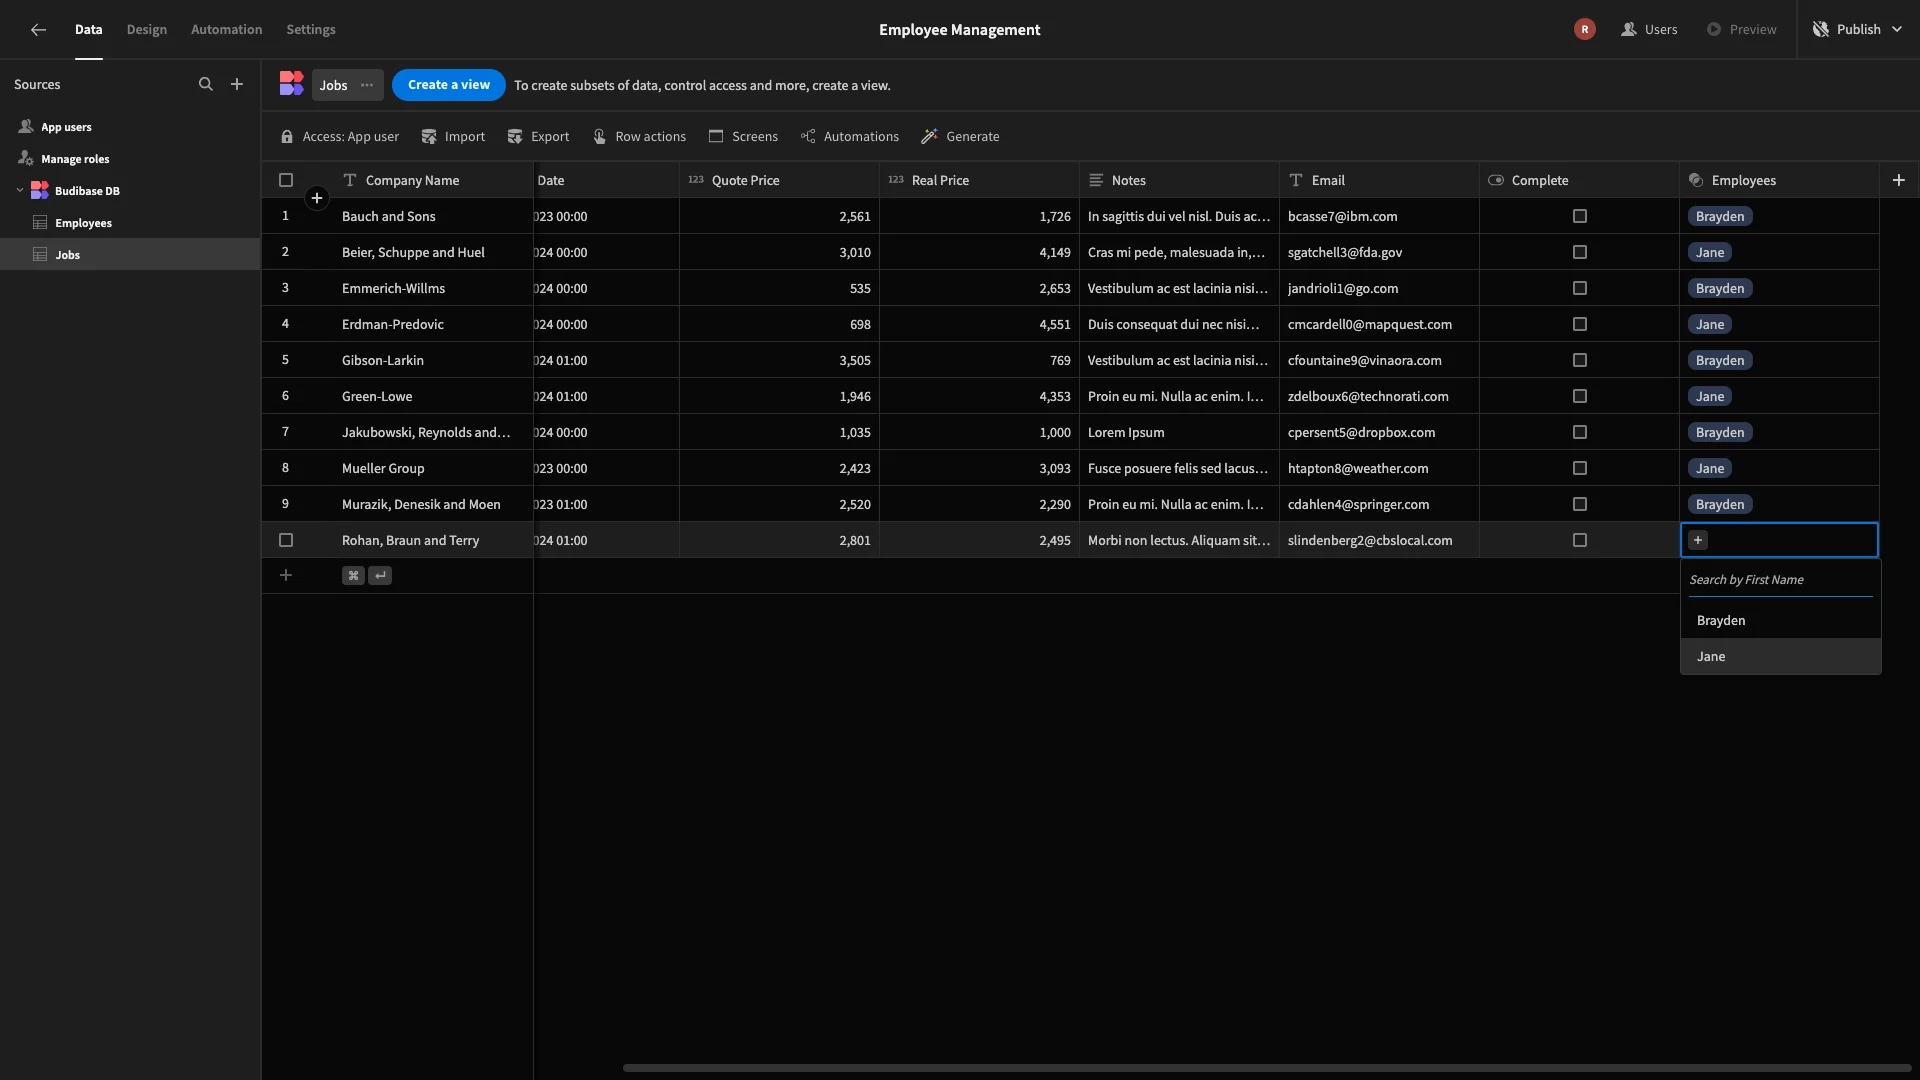
We can then set the relationships between individual rows across our tables by editing their values under our new column.
We’ll need to set this for testing purposes. For ease, we’re simply alternating between assigning each of our Jobs rows to our two dummy employees.
Adding a user column
Later, we’re going to set up our app so that Colleauge users can only view Jobs that are assigned to them. However, to achieve this, we’ll need to link our data to Budibase’s internal users table.
In Budibase, we can do this using one of two data types, depending on whether we want to assign rows to one user or many.
We’re going to head back to the Employees table and add a Single User column. We’ll call this BB User.
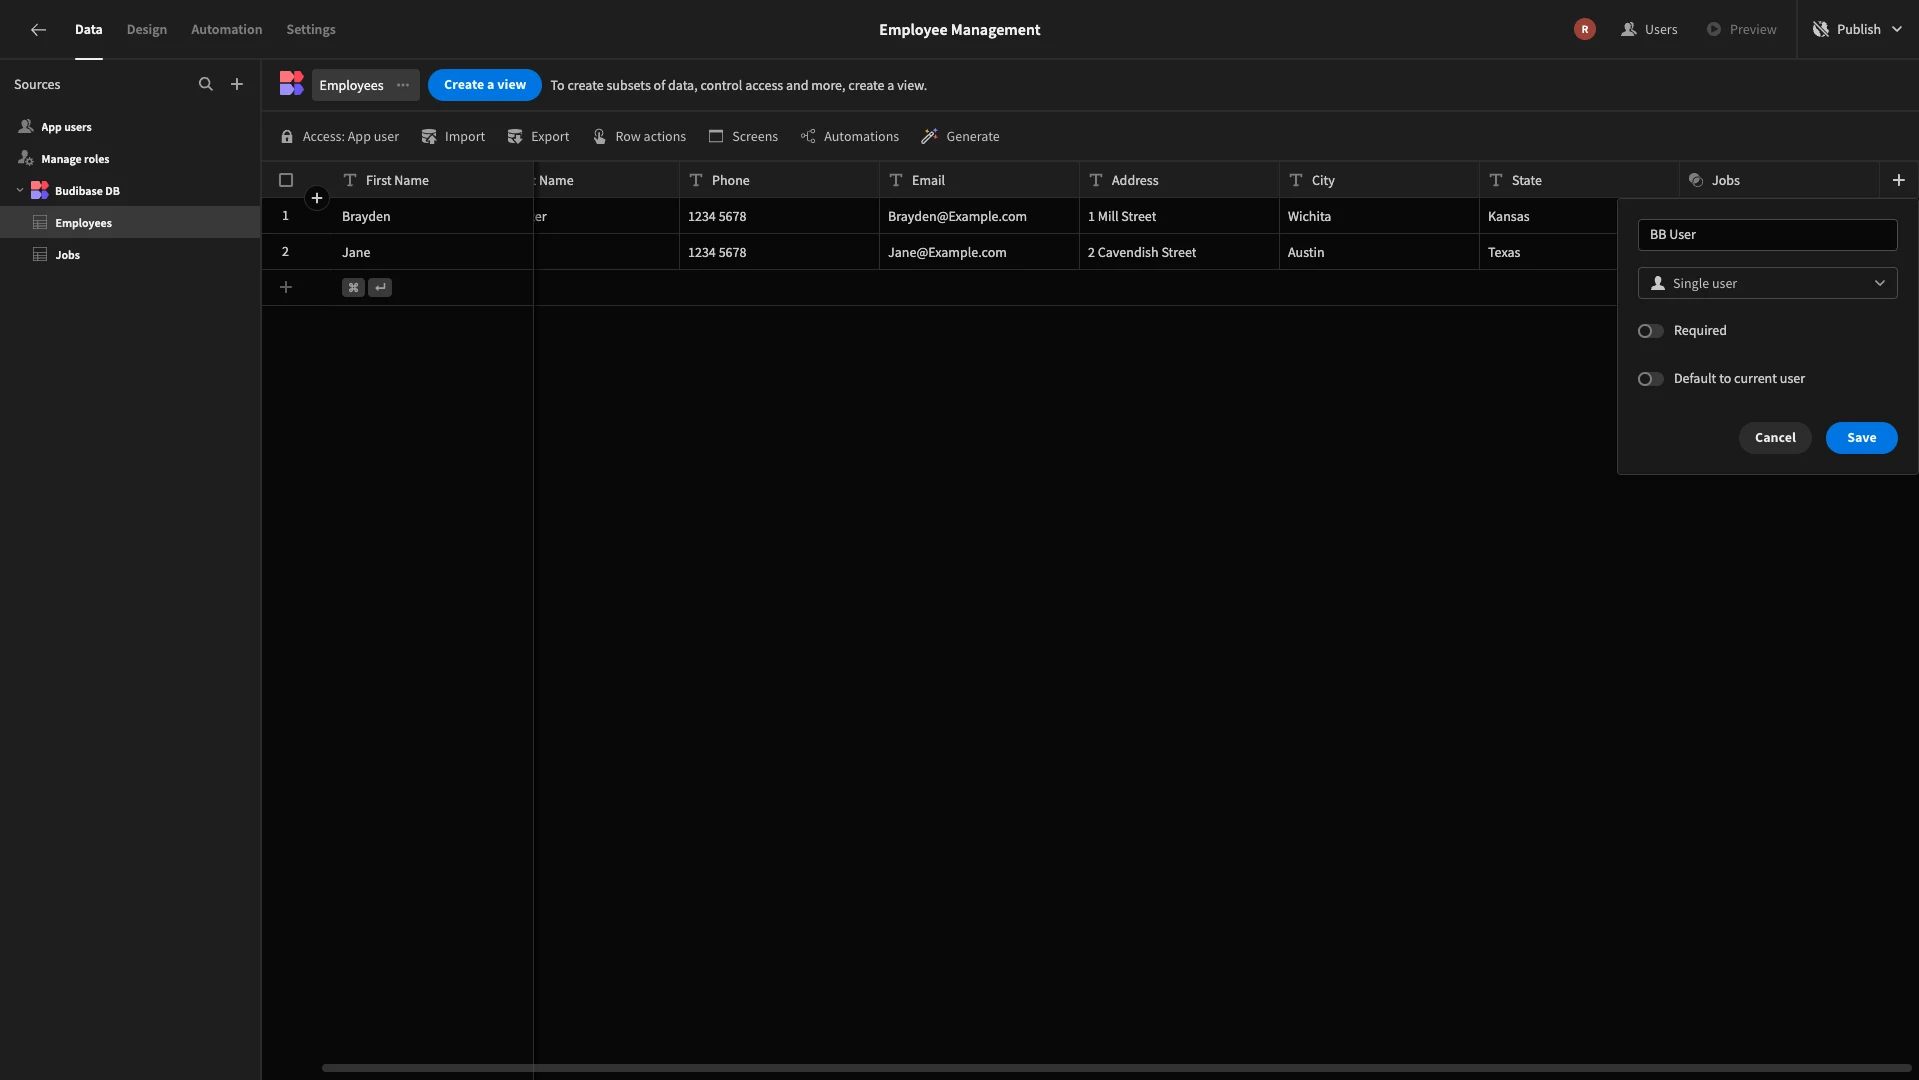
We’ll then need to assign ourselves to one of our employees for testing purposes.
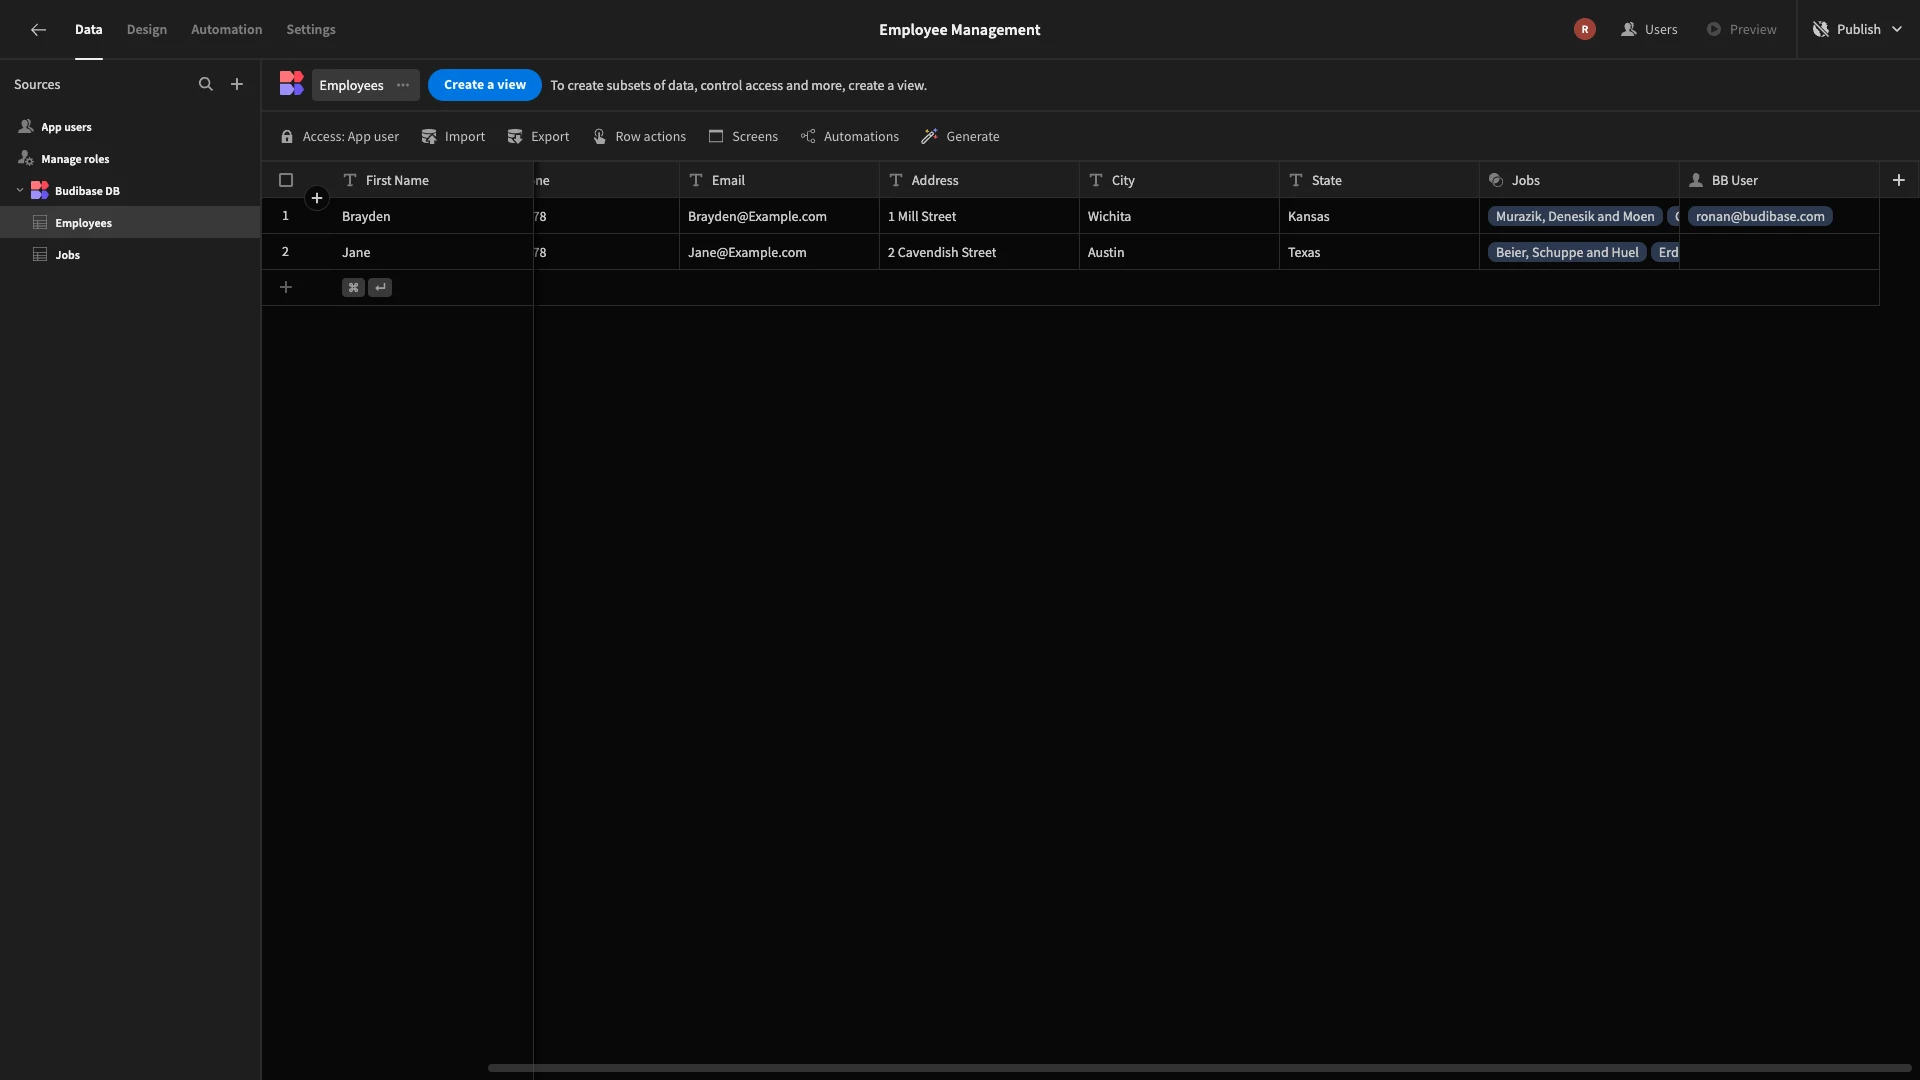
Now, the Employees table relates to rows in both the Jobs and internal Users table.
Creating user views
Next, we’ll use these relationships to allow us to create a filtered view for our Colleague users. From the Jobs table, we’ll hit Create a View.
We’re then prompted to give this a name. We’re calling it Assigned to Current User.
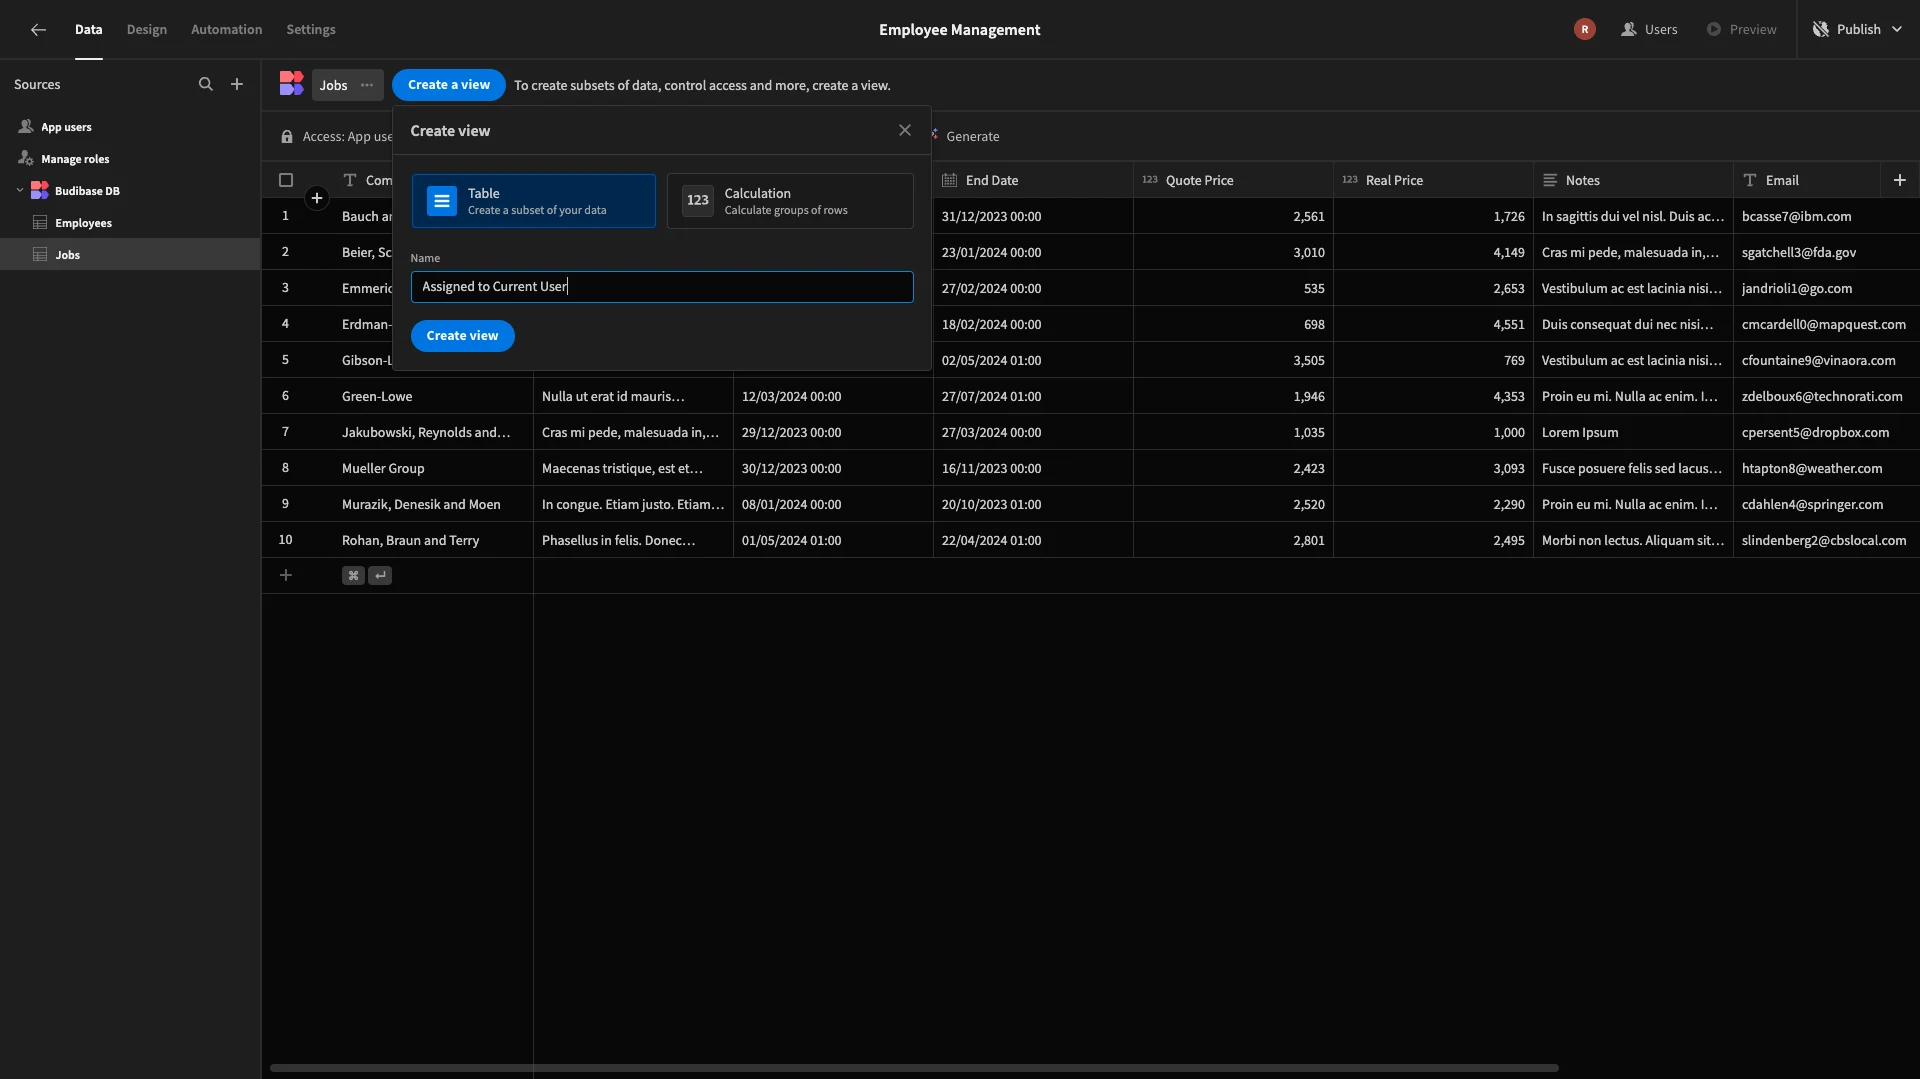
Our goal for this view is to enable Colleague users to view and edit the jobs that are assigned to them.
To achieve this, we’re going to filter our data based on the user that’s linked to the related Employees row.
We’ll start by hitting Filter.
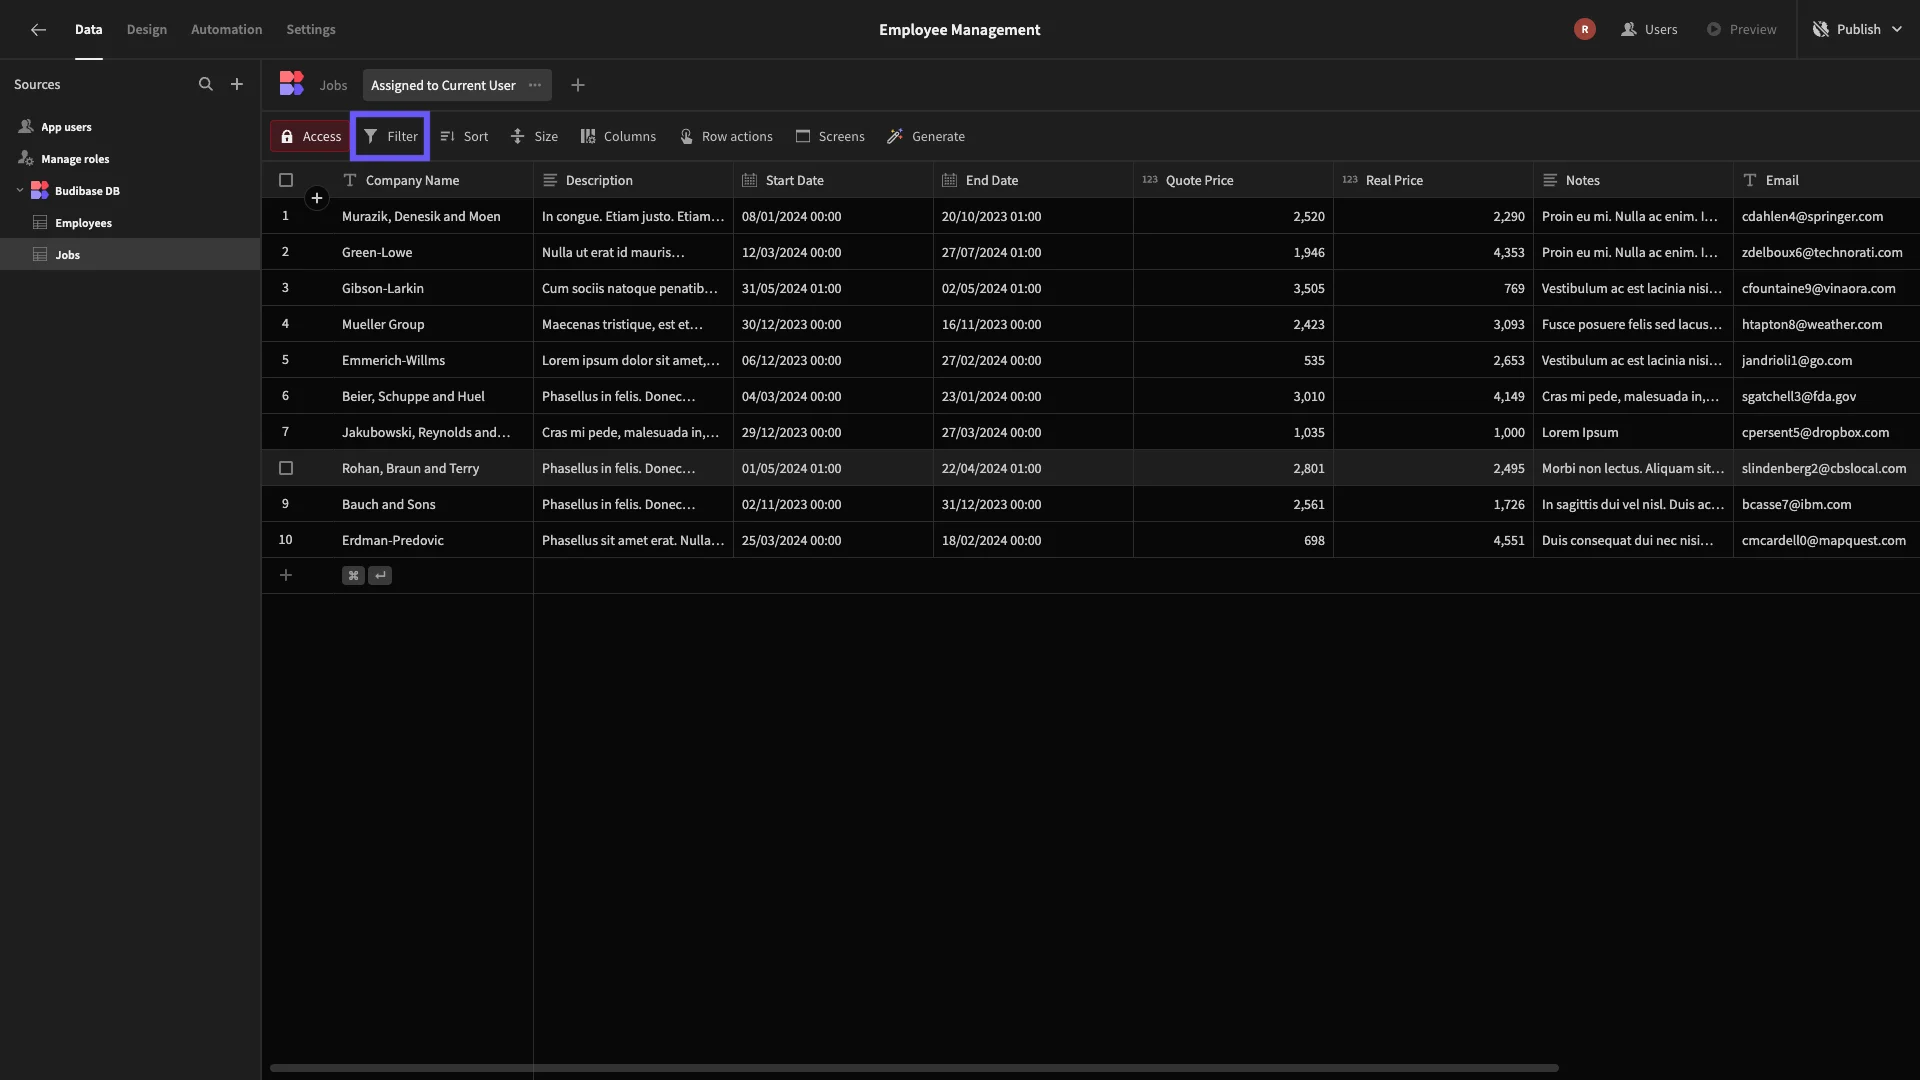
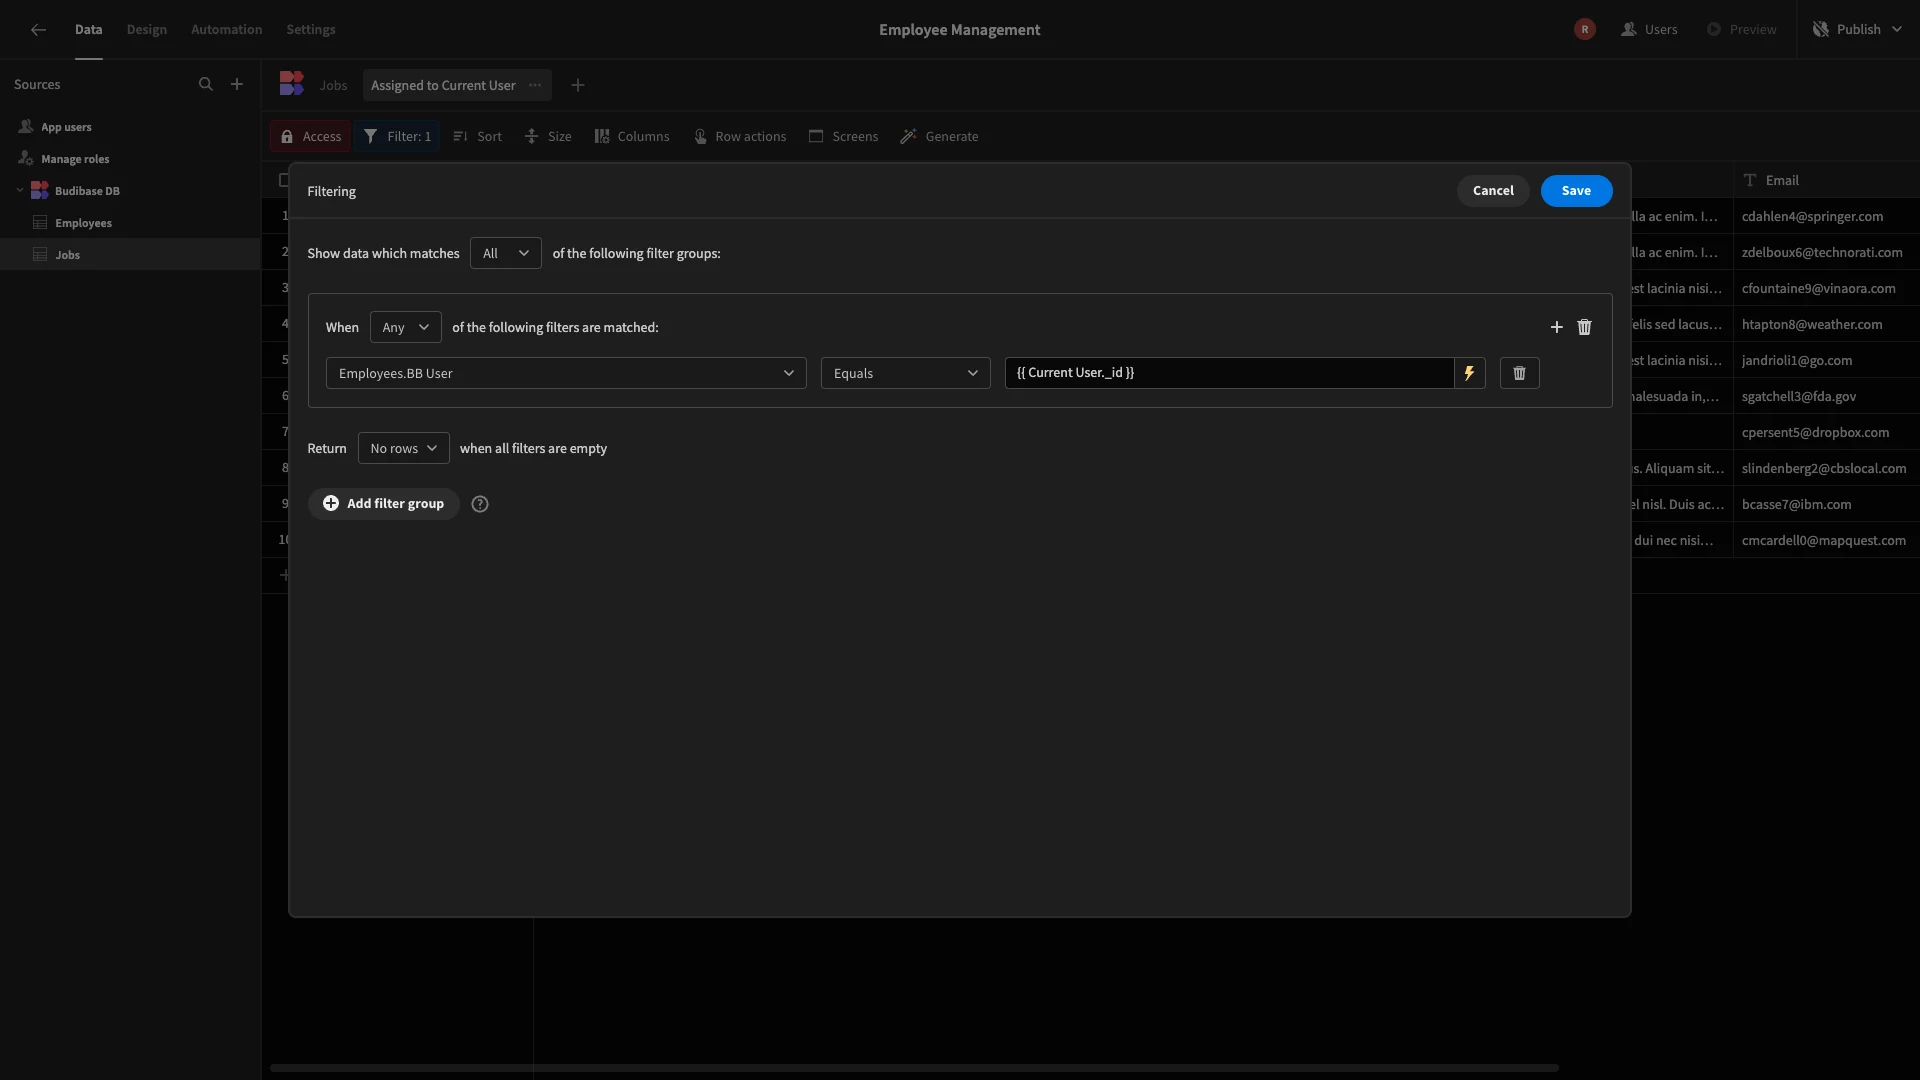
This opens a modal UI where we can create filtering expressions. Here, we can access all of the Jobs attributes, as well as the columns from related Employees rows.
We’re going to add a single rule to include rows where Employees.BB User is equal to {{ Current User.globalId }}.
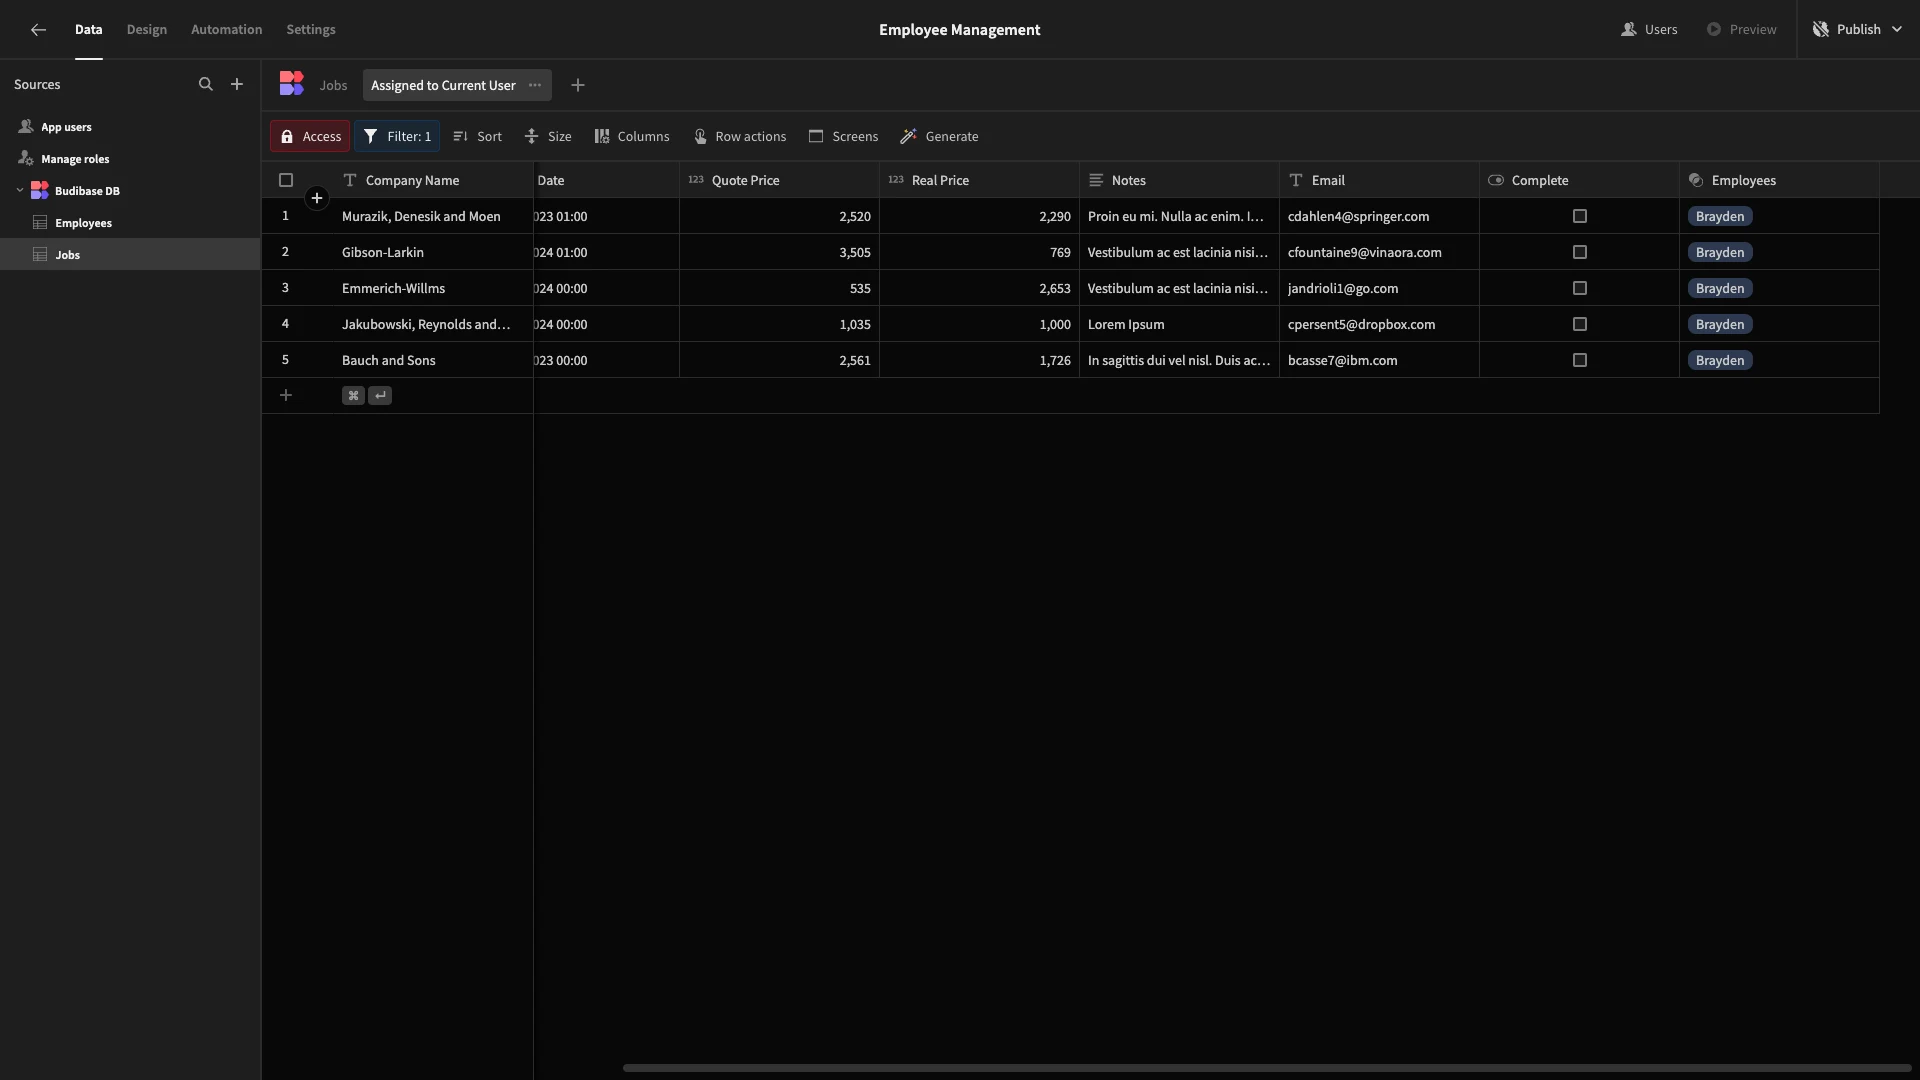
Now, we can only see the rows that relate to the Employees record we assigned ourselves to earlier.
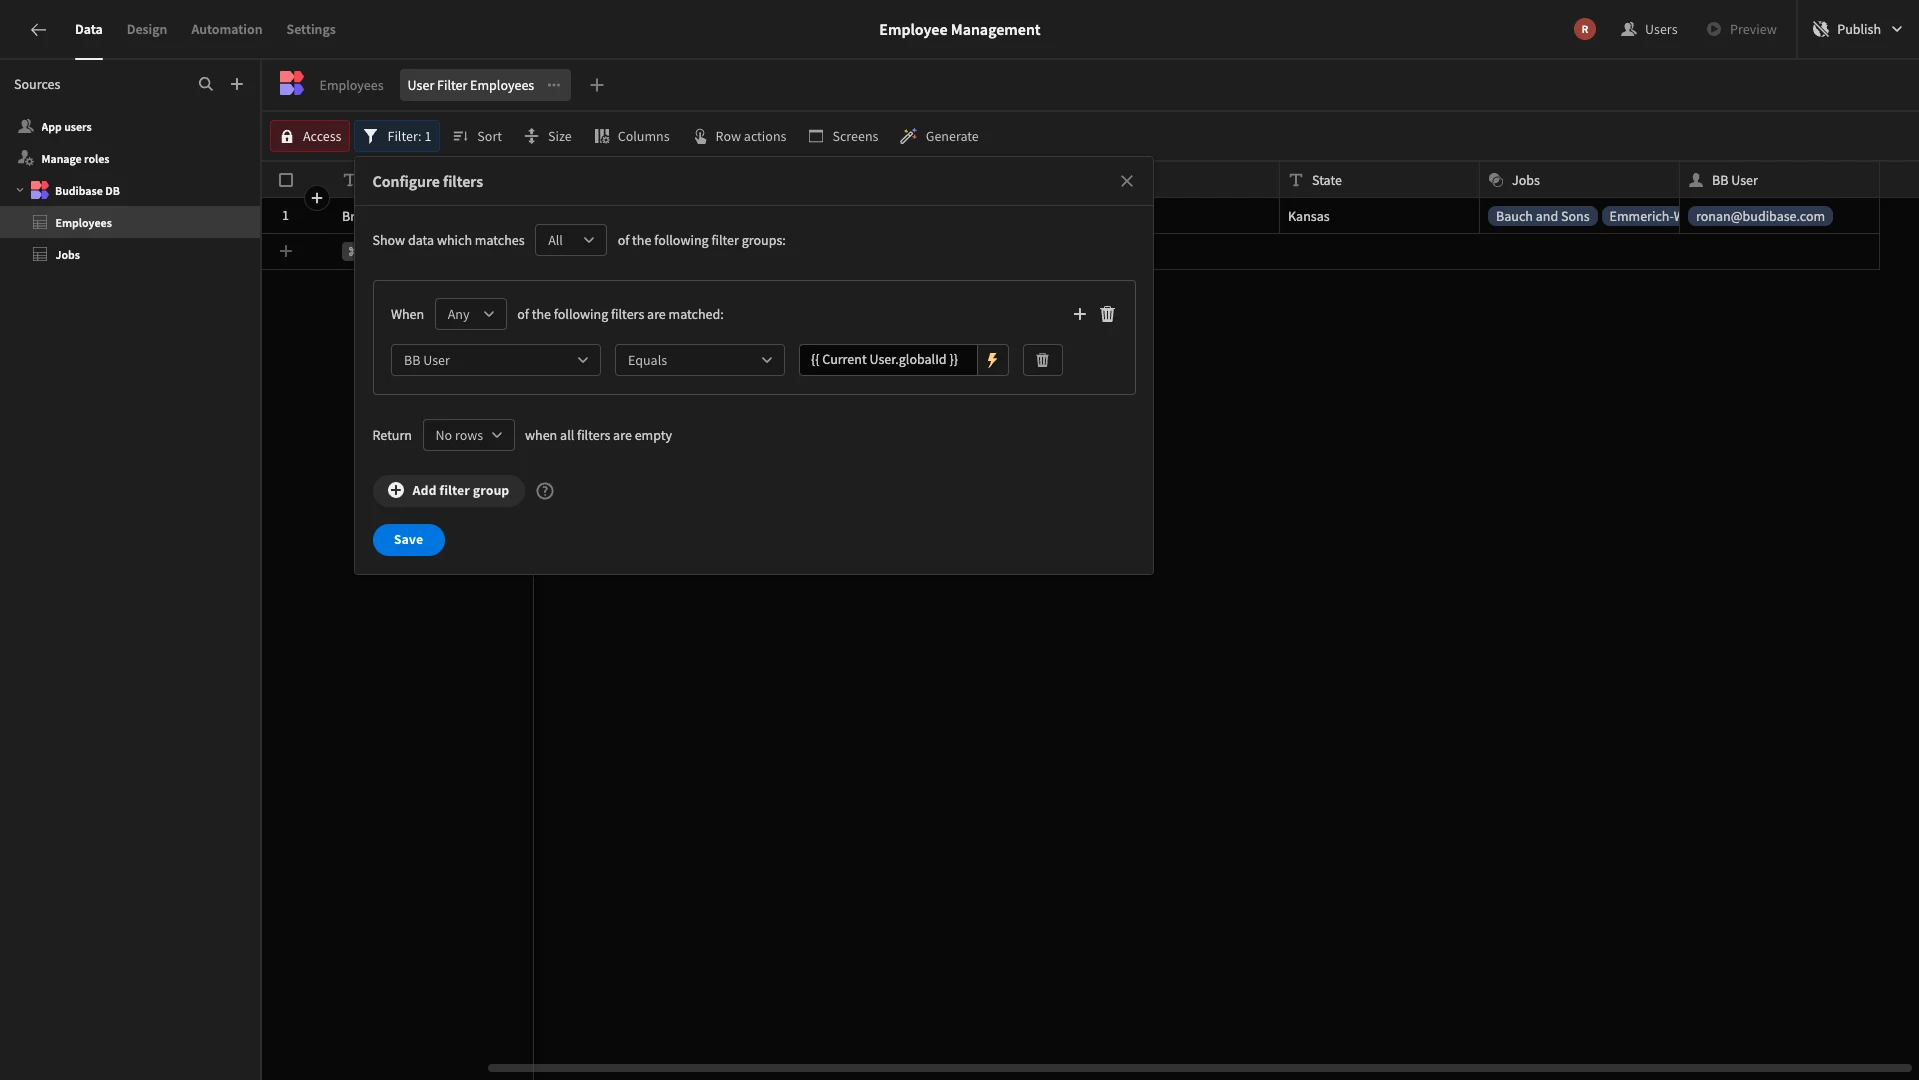
We’re going to repeat this process to create a similar view based on our Employees table. We’ll call this one User Filtered Employees. This time, we’re setting BB User to be equal to {{ {{ Current User.globalId }}.
We should only be able to see the singular row we assigned ourselves to earlier.
Configuring access rules
Lastly, in Budibase, we can configure or access rules from the Data section. These will then be carried across when we autogenerated UIs in the next section.
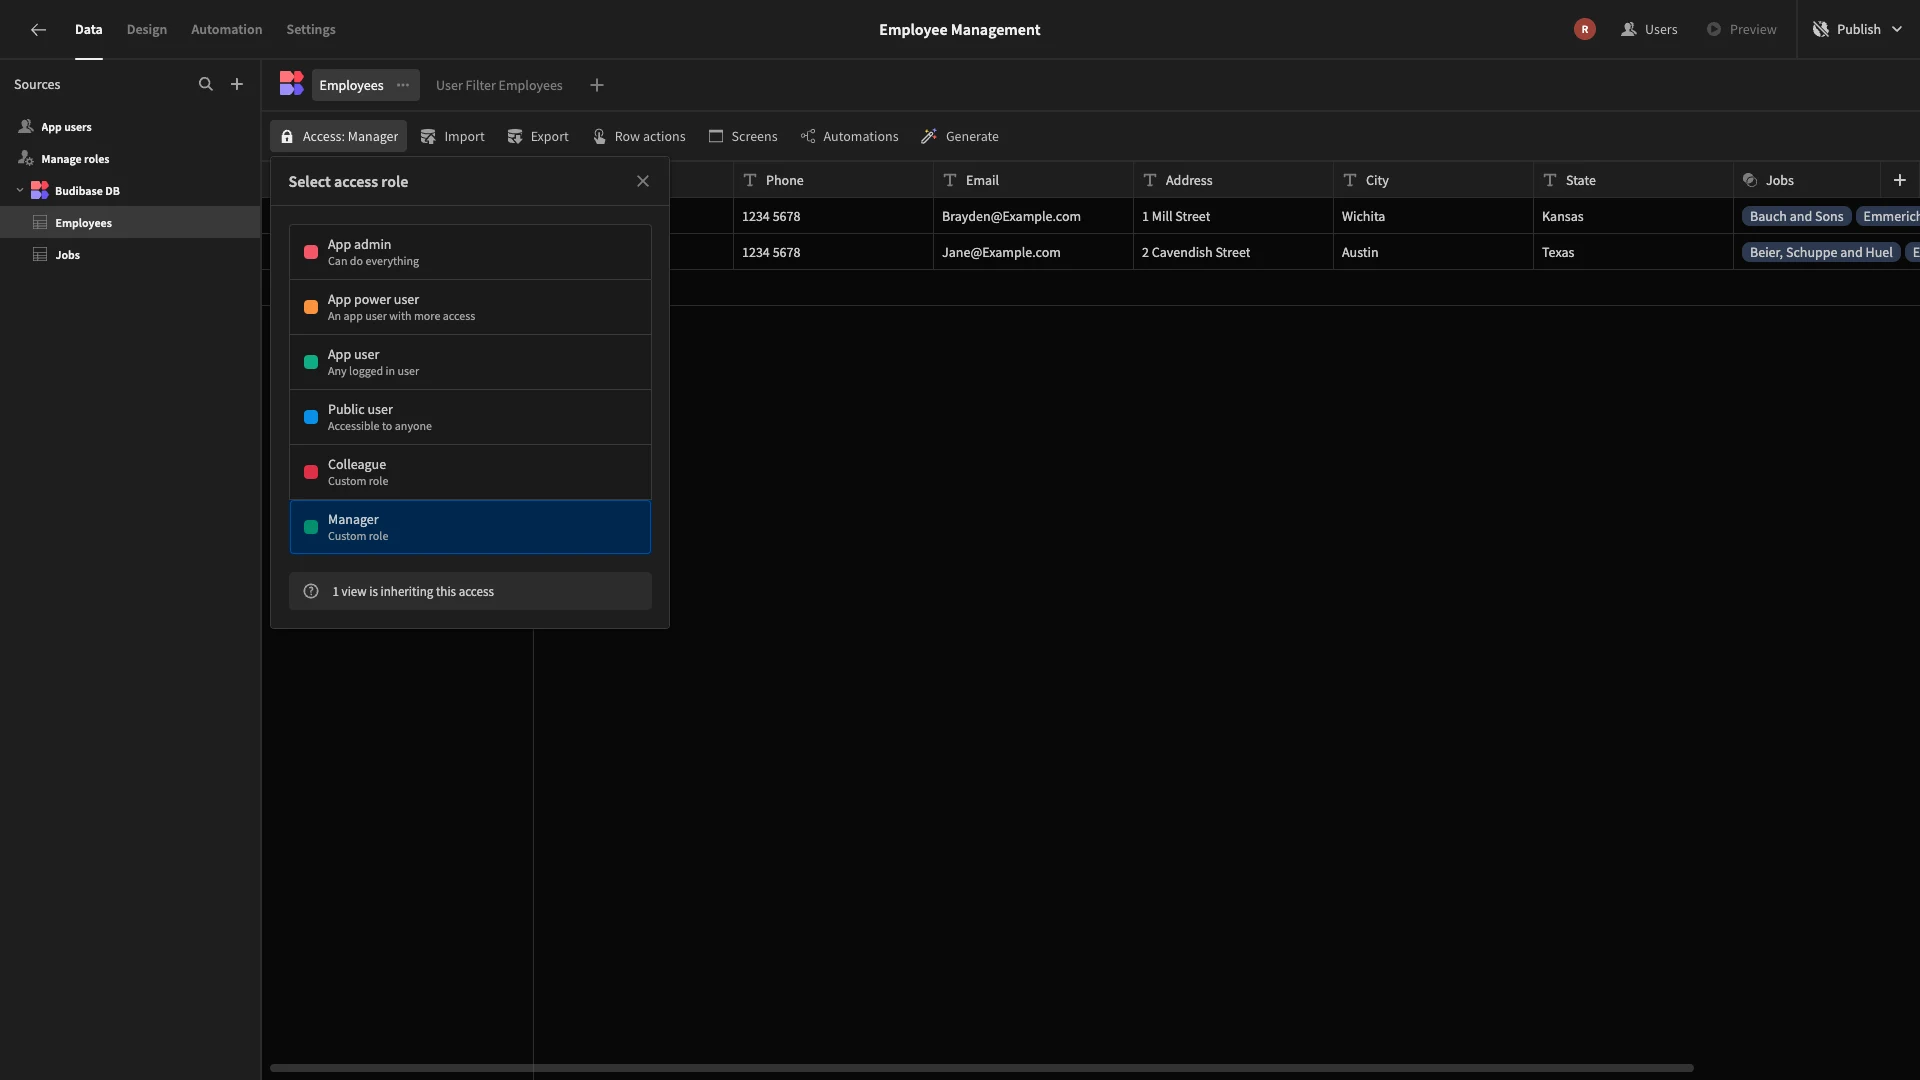
For the underlying tables, we want to reserve these actions for users with the higher Manager role on the wider tables.
So, under each of our database tables, we’ll hit Access. This opens the following modal, where we can set the minimum role for both read and write actions to Manager.
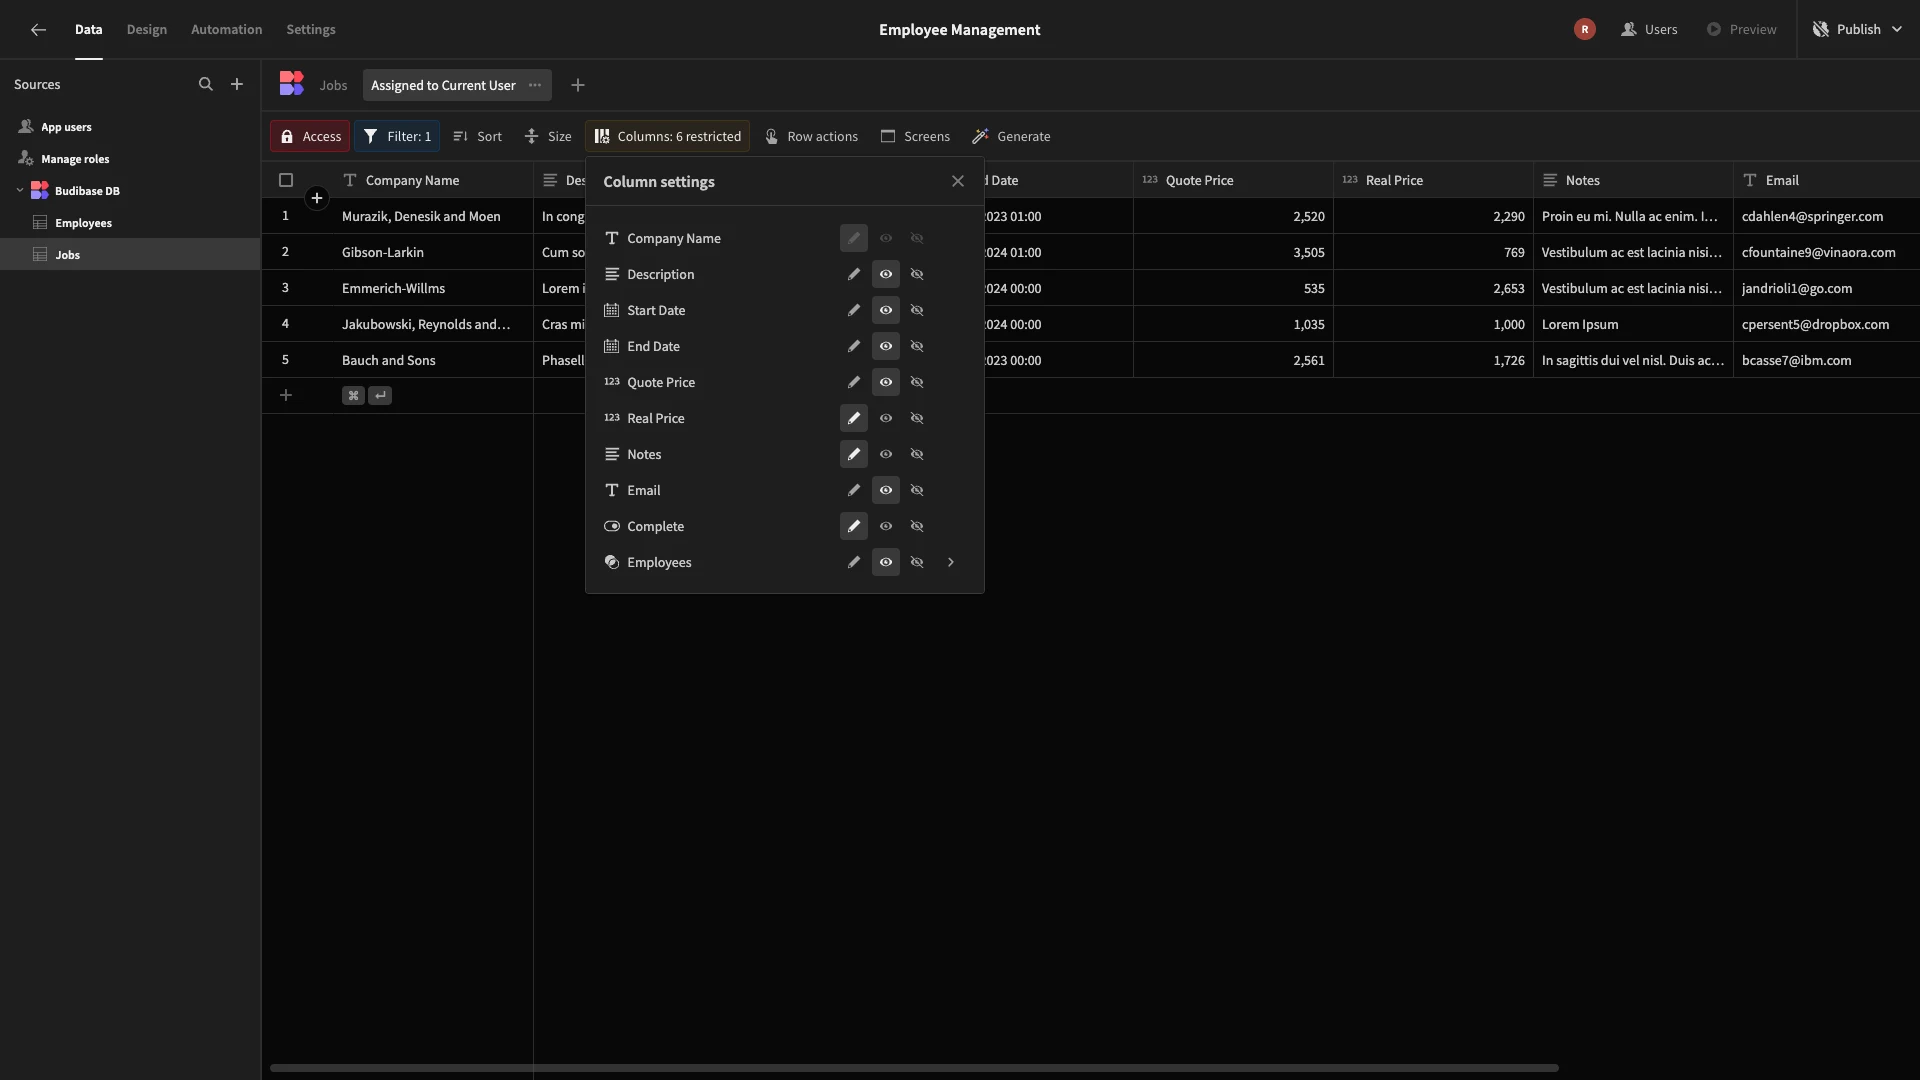
Within our two new Views, we’ll configure each of the columns we want Colleagues to be able to read and write under Columns. We’ll then set the Access for each to Colleague.
And that’s everything we need to do in our data layer.
2. Creating a CRUD screen for jobs
Next, we can start building our UIs. In Budibase, we can autogenerate functional CRUD screens based on connected data source, in just a few clicks. We can then apply extensive customization to suit our more specific needs.
The first screen we want to create will allow Manager users to perform full CRUD actions on our Jobs table.
Within the Data section, we’ll hit Screens and then Generate app Screen.
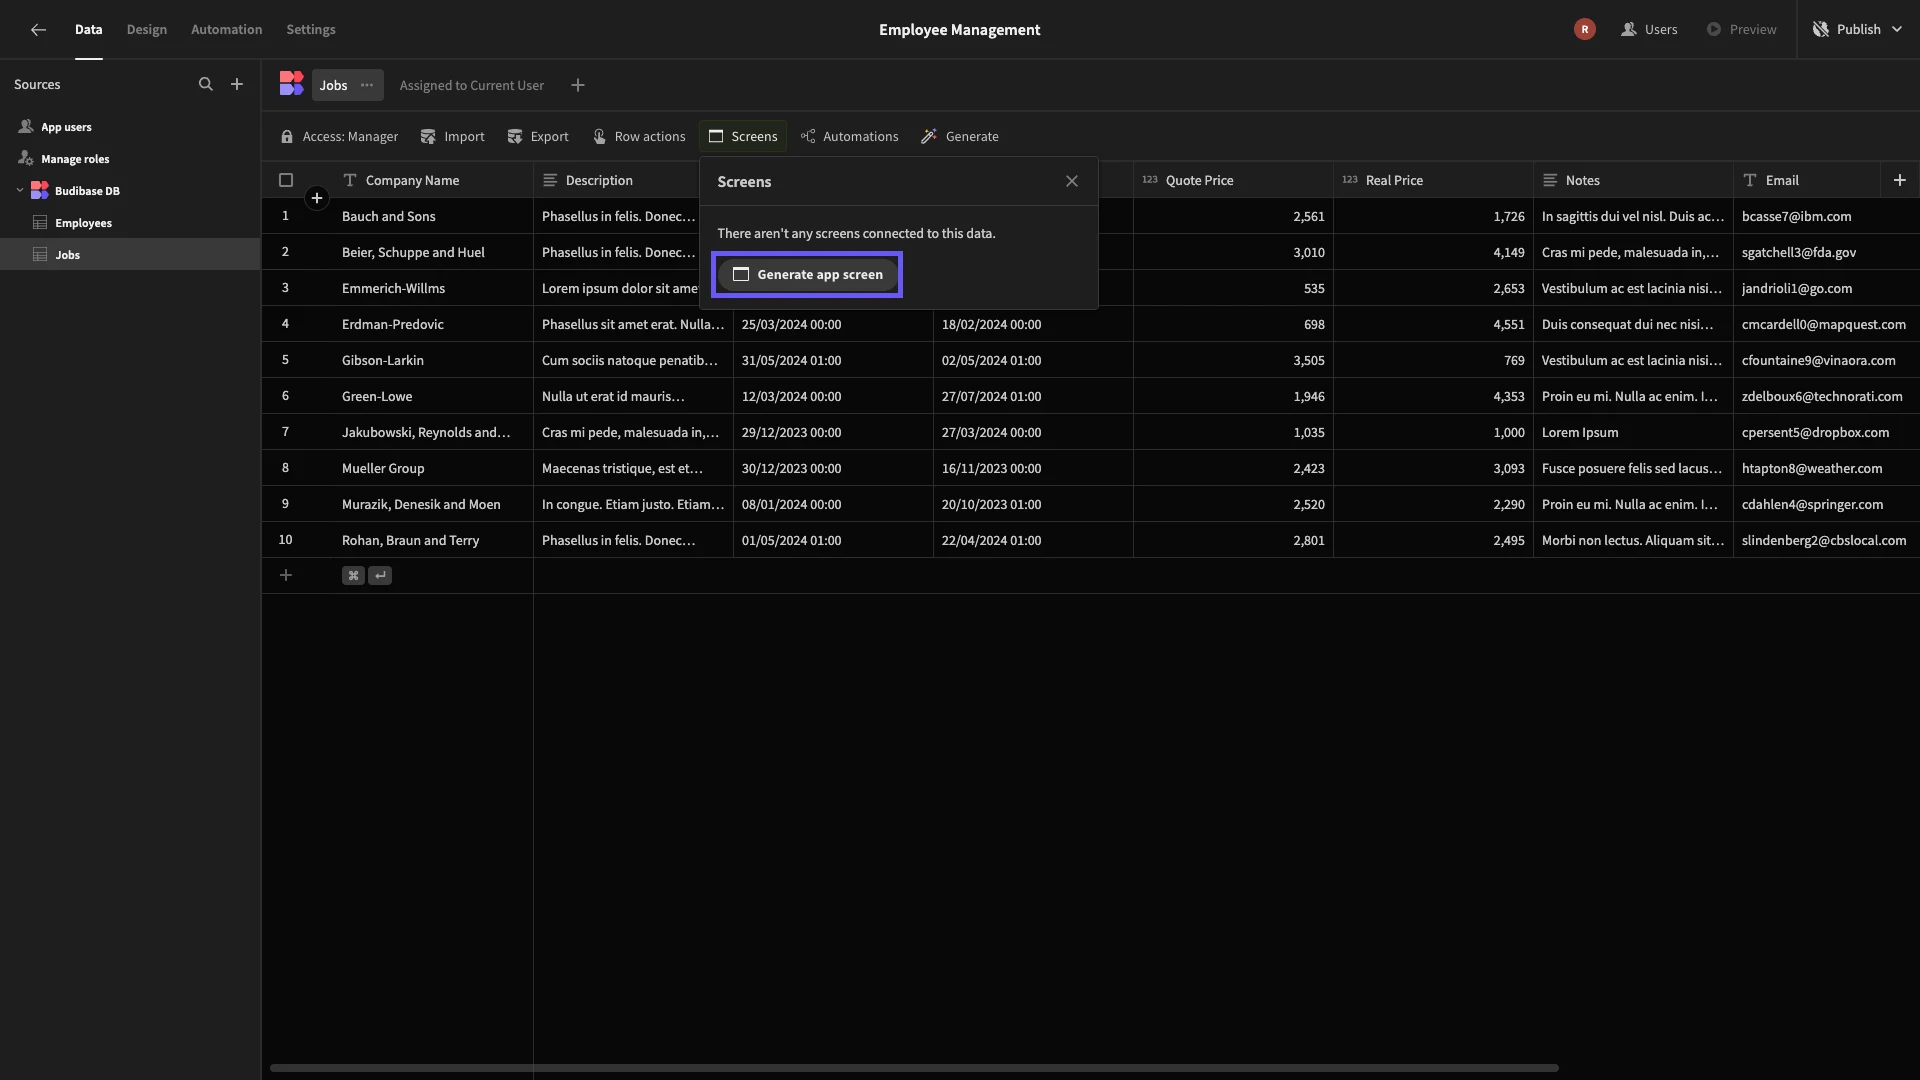
We’ll then choose Table to give us a CRUD UI.
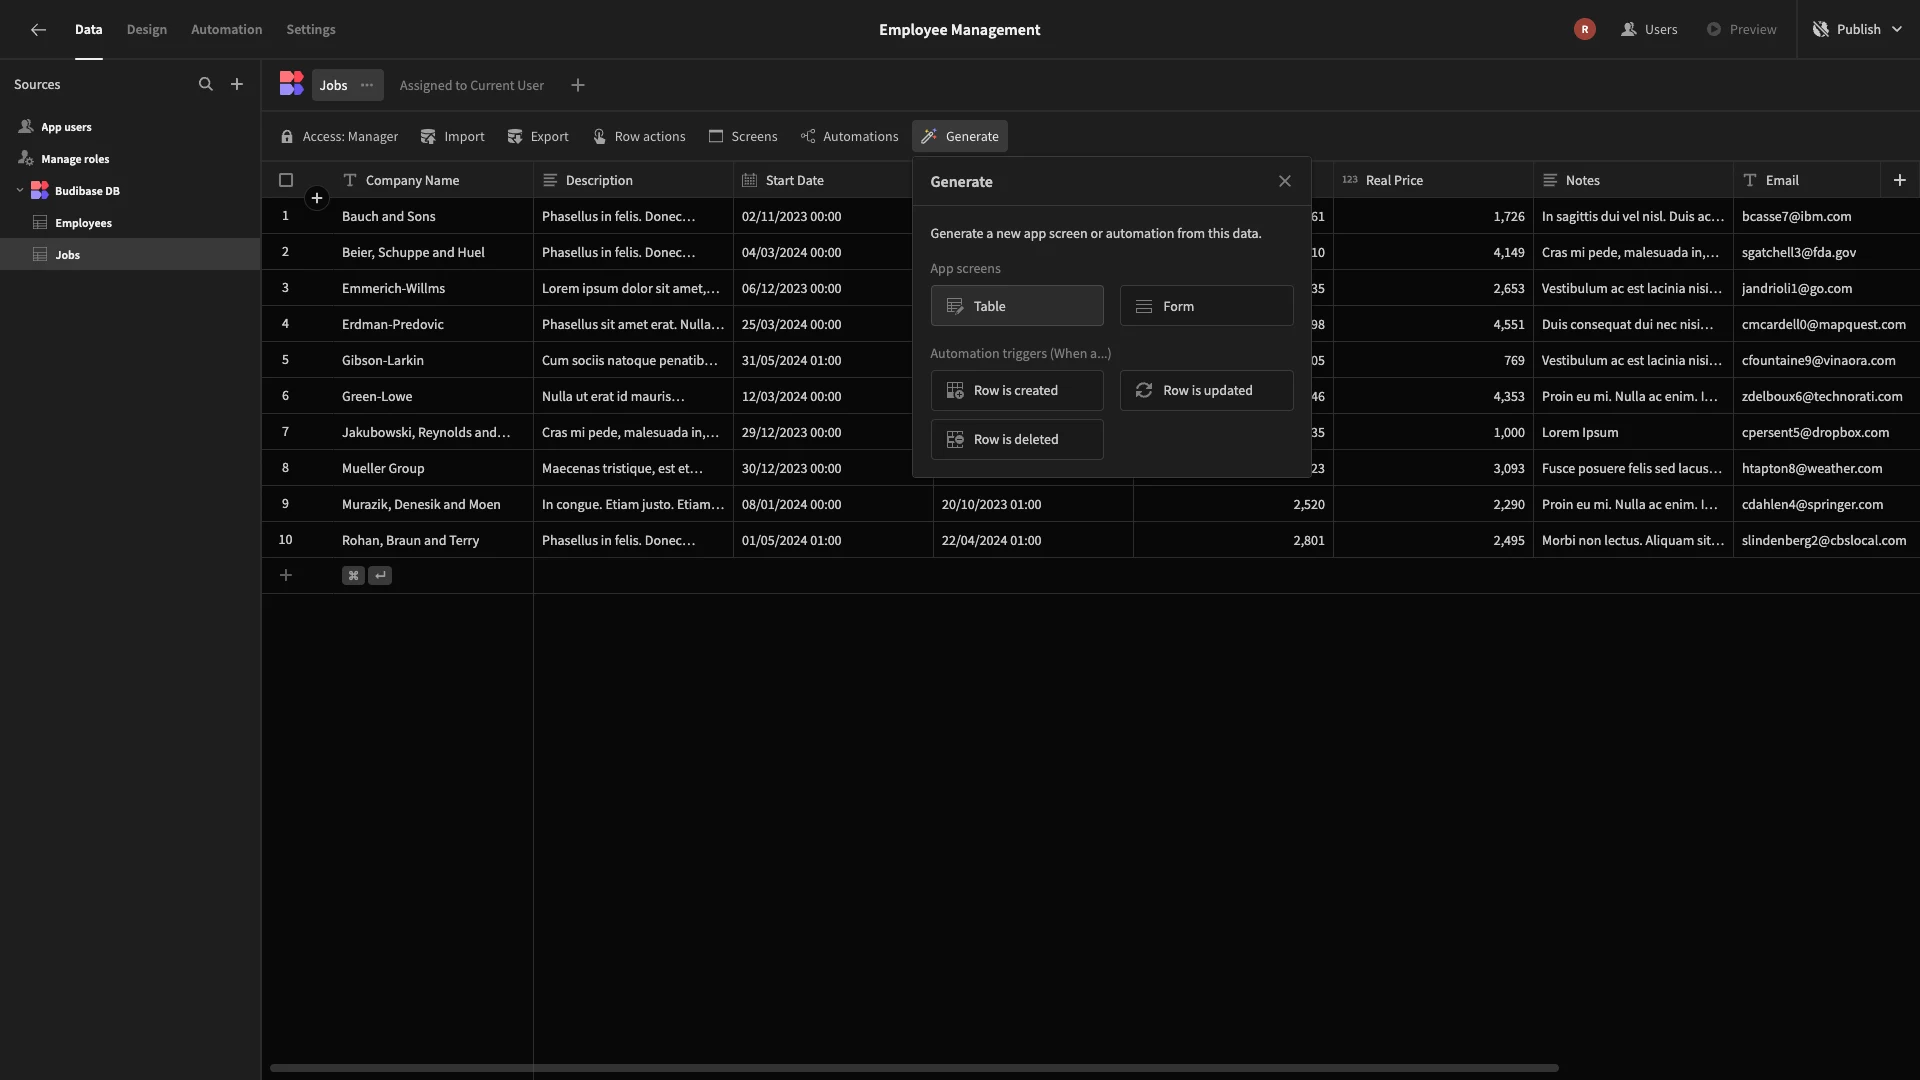
We’ve got a few options for how we’d like to display the form UIs for adding and updating rows. We’re going to choose the option to wrap these in modals.
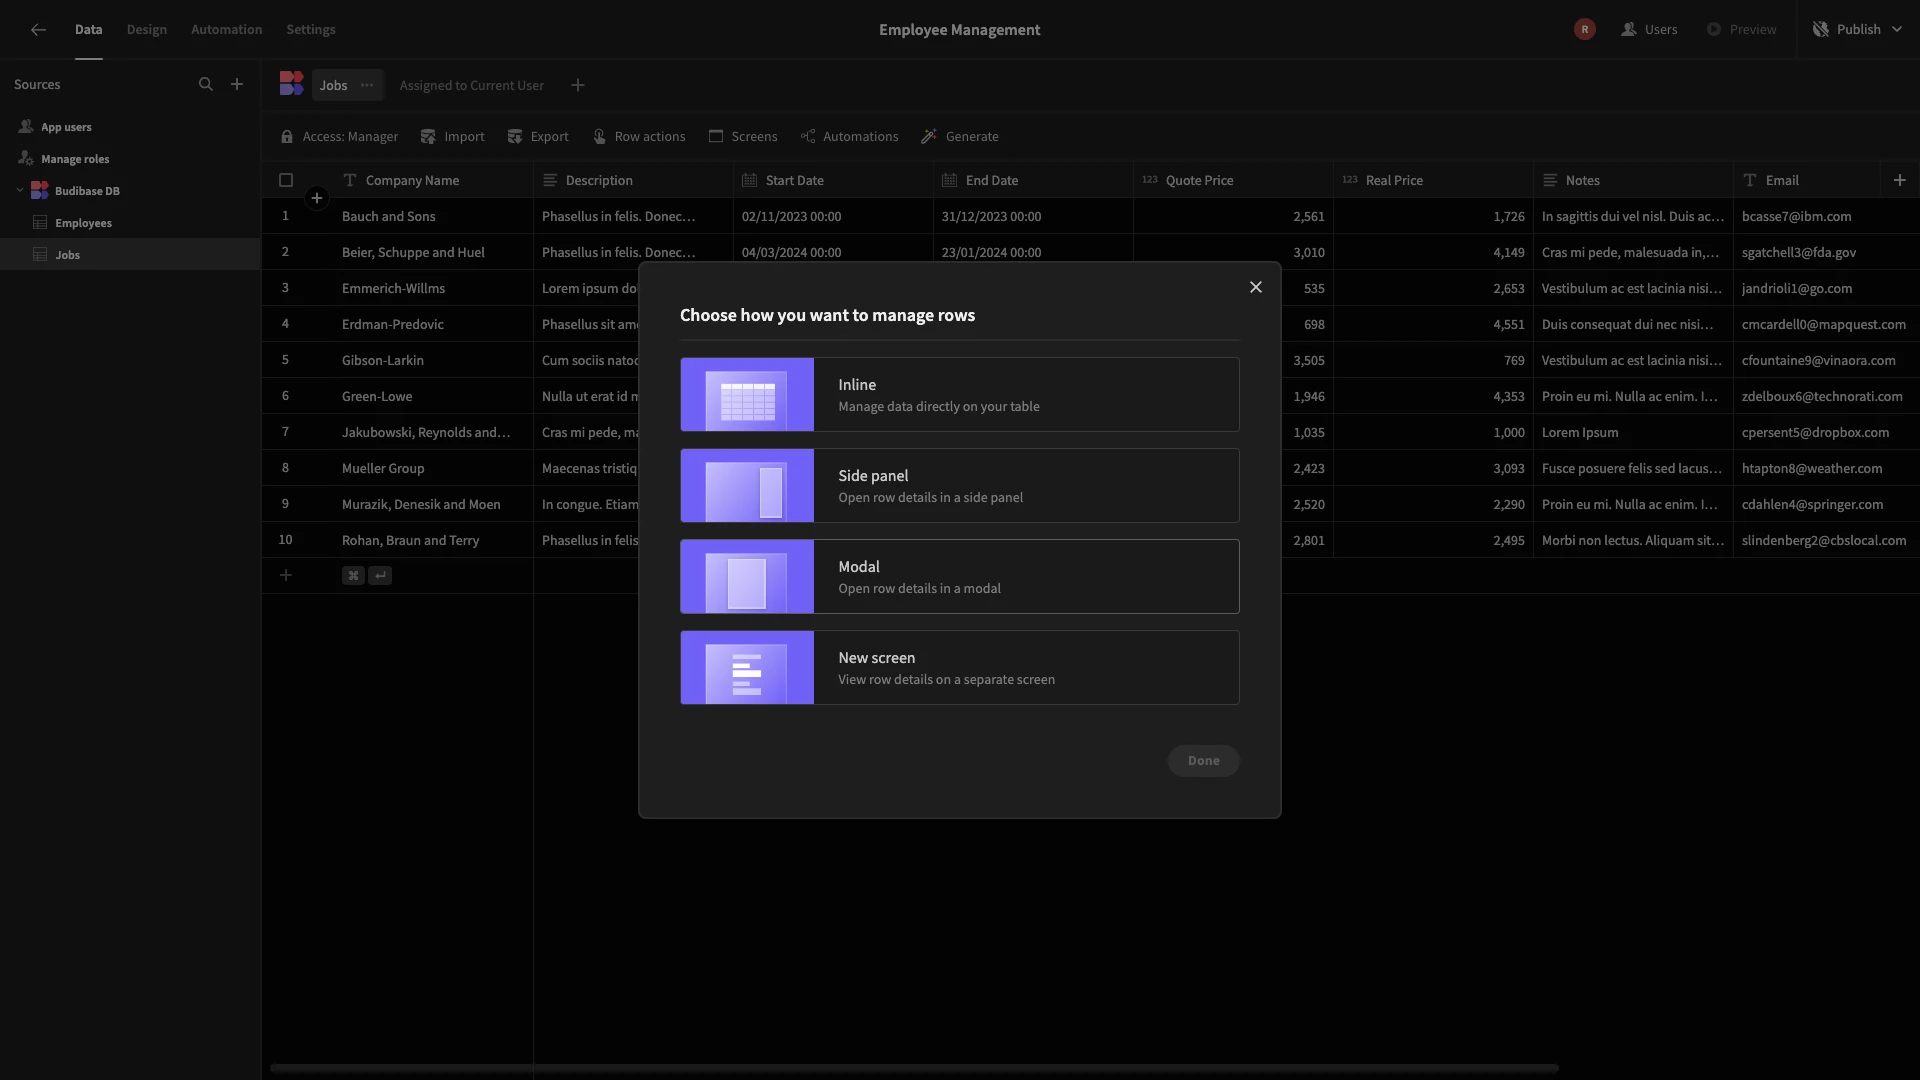
Here’s how our CRUD UI looks when we preview our app.
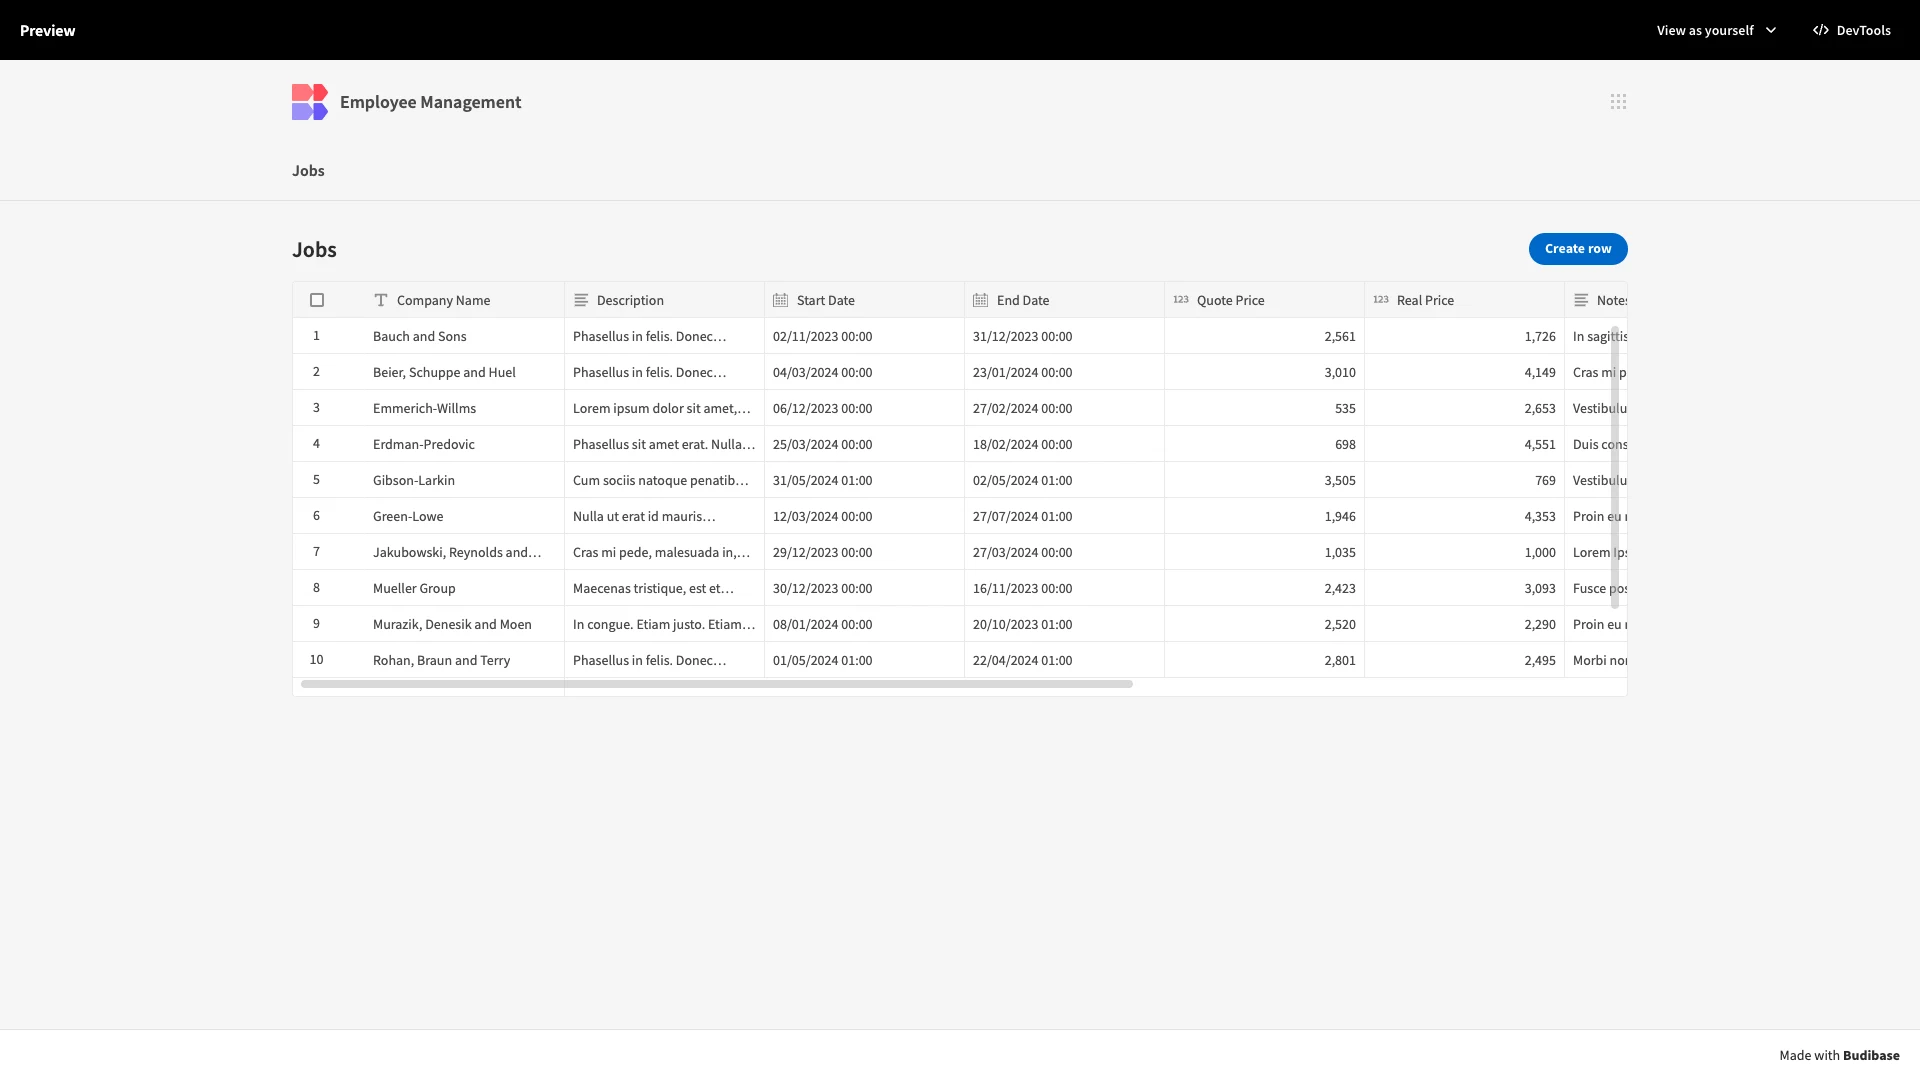
We can also click on any row to access a working edit form or use the button in the top right to add a row.
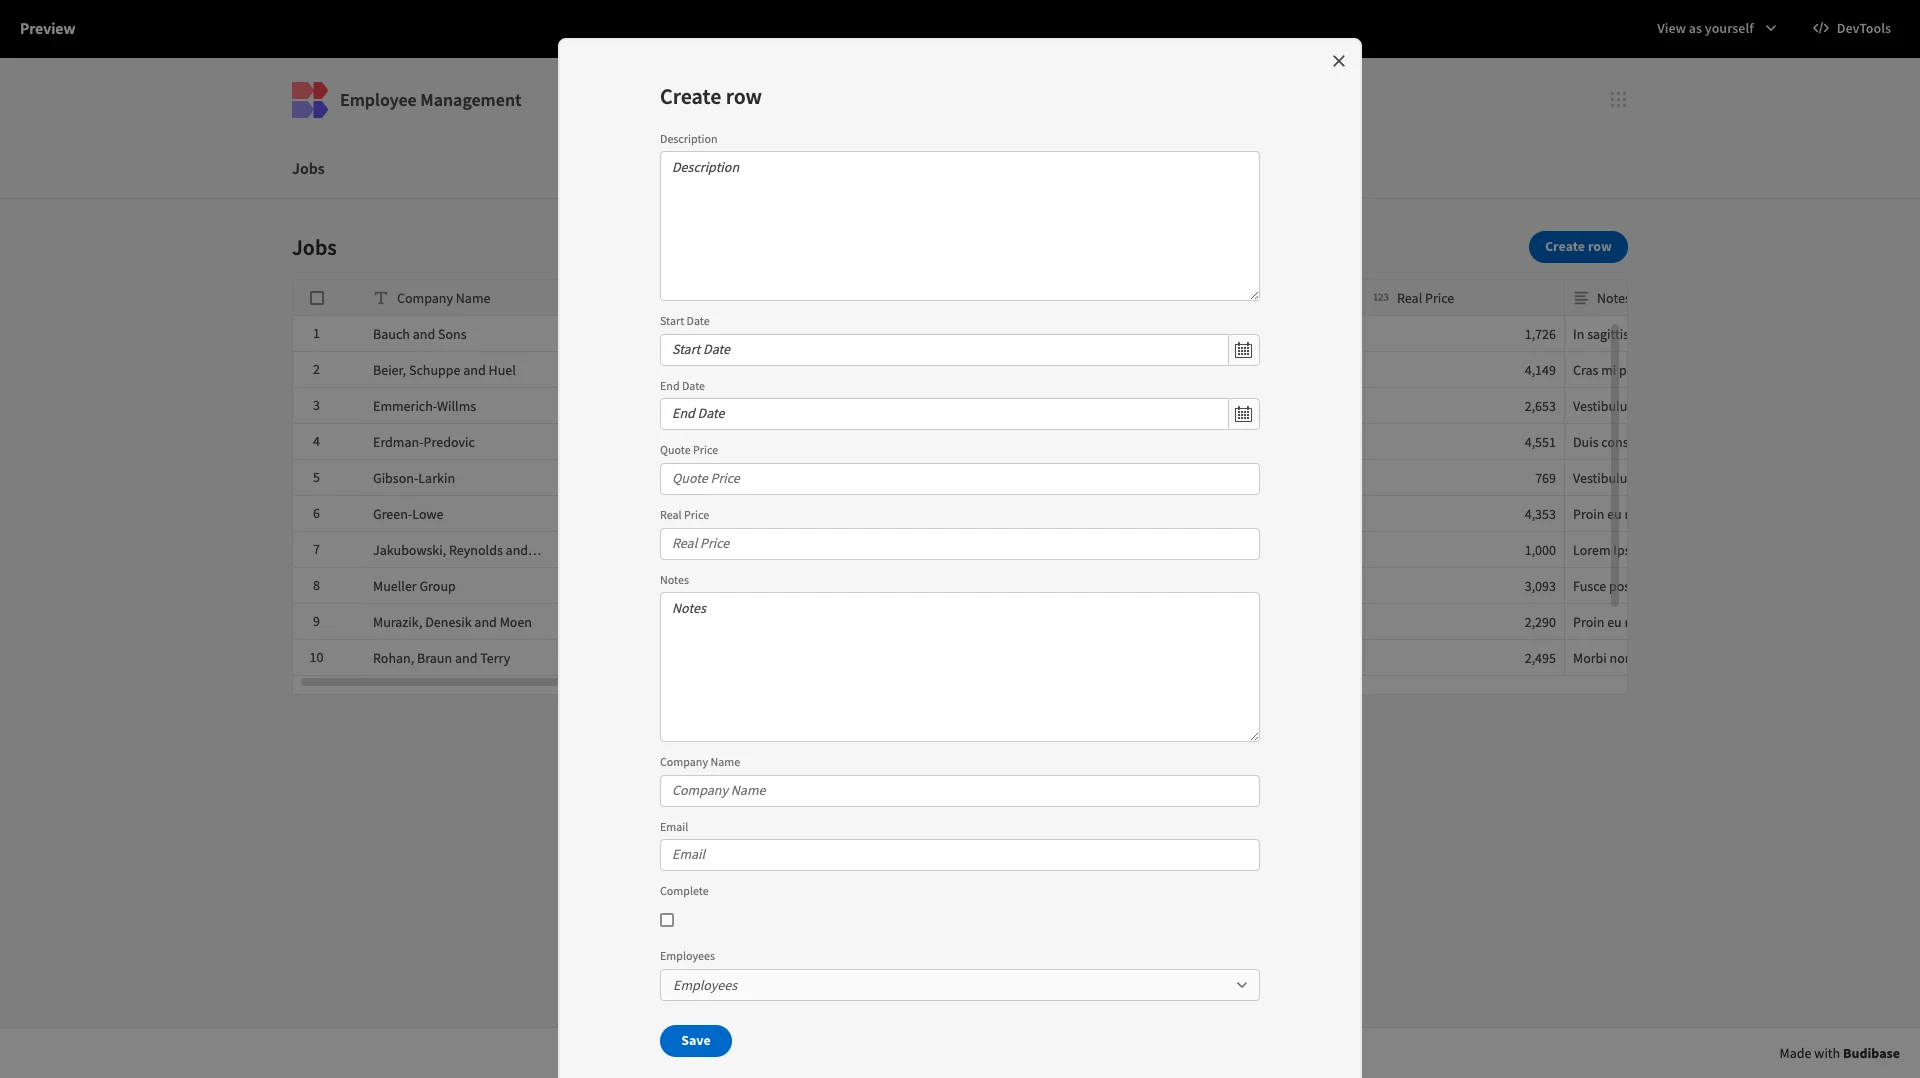
Our screen also inherits its minimum access role from the data we used to generate it, so only Manager users can navigate to it.
UI tweaks
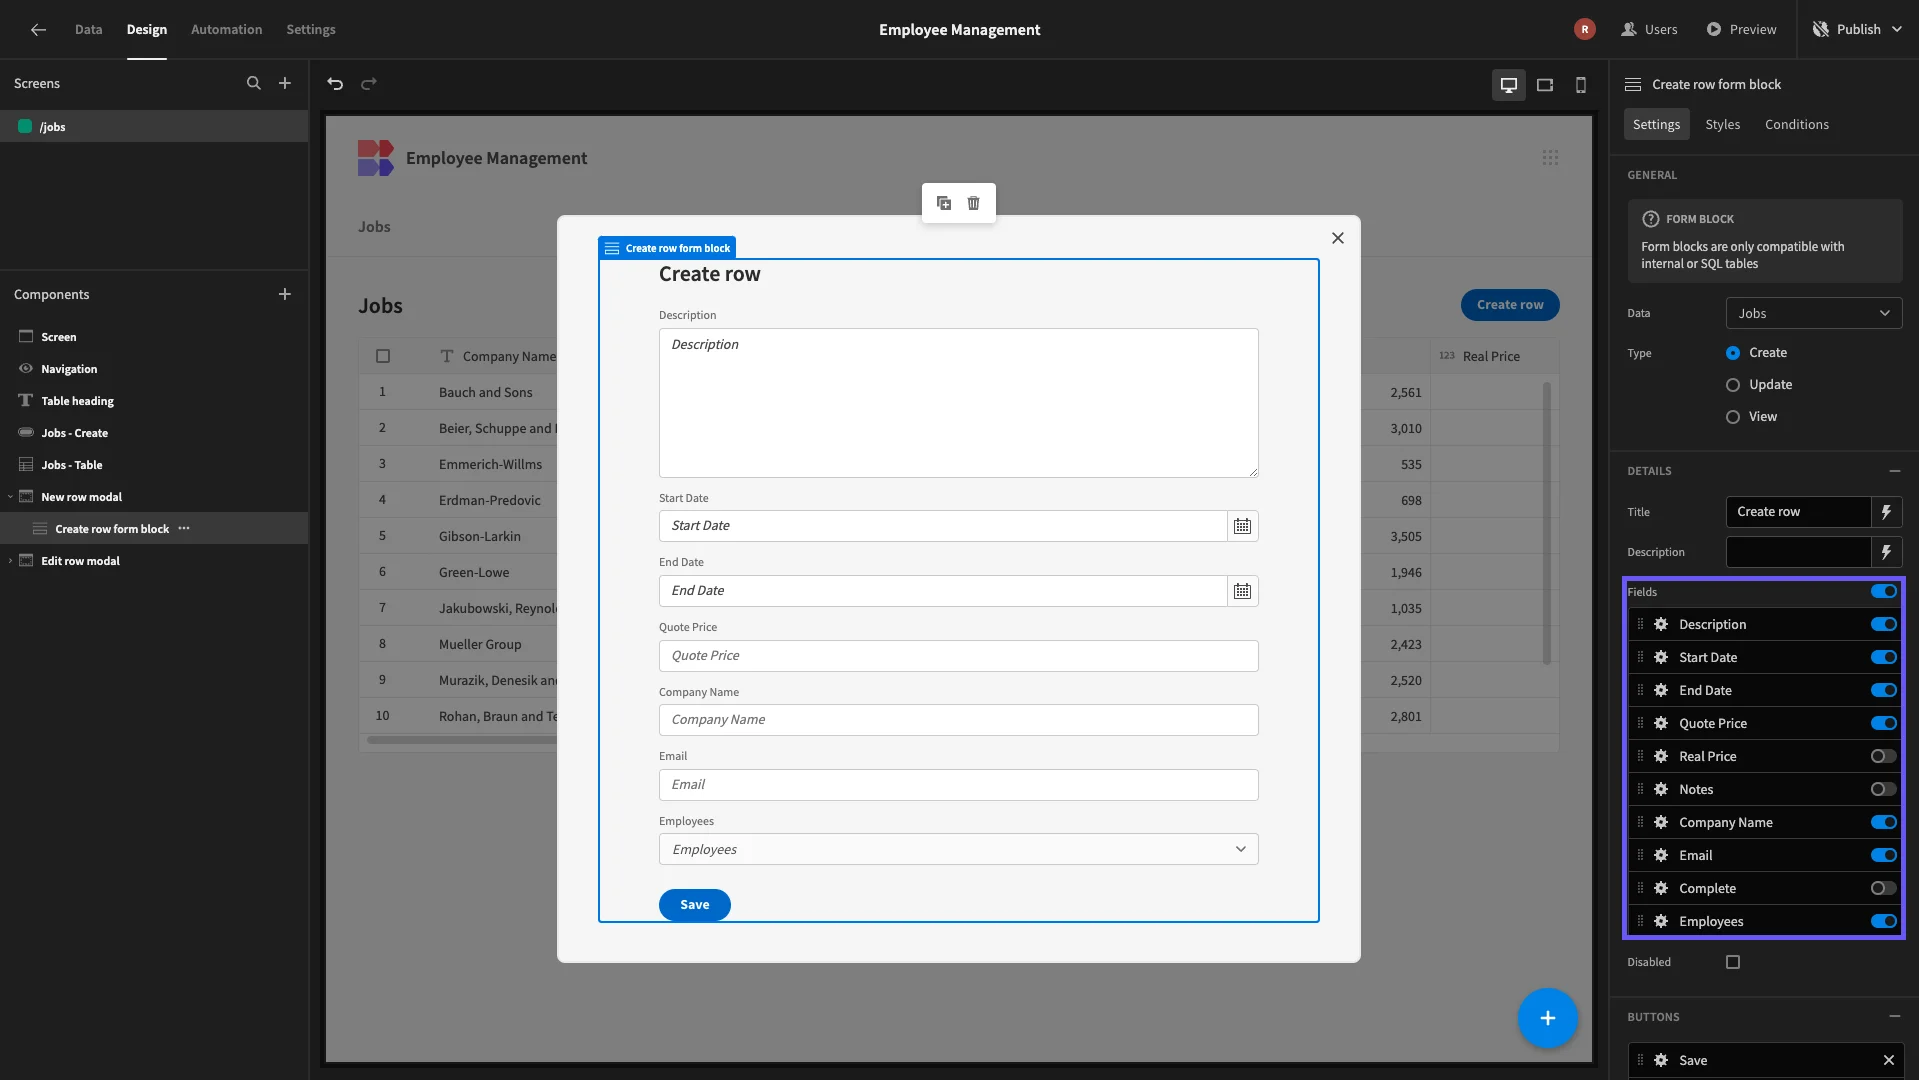
We’re only going to make a few minor adjustments to this screen. First of all, we don’t need all of the attributes on the Jobs table when a row is created. Specifically, we only want the Notes, Real Cost, and, Complete attributes to be populated later by the assigned agent.
So, we’ll select the component called create row form block. Here, we can deselect the fields we don’t need on the right hand side.
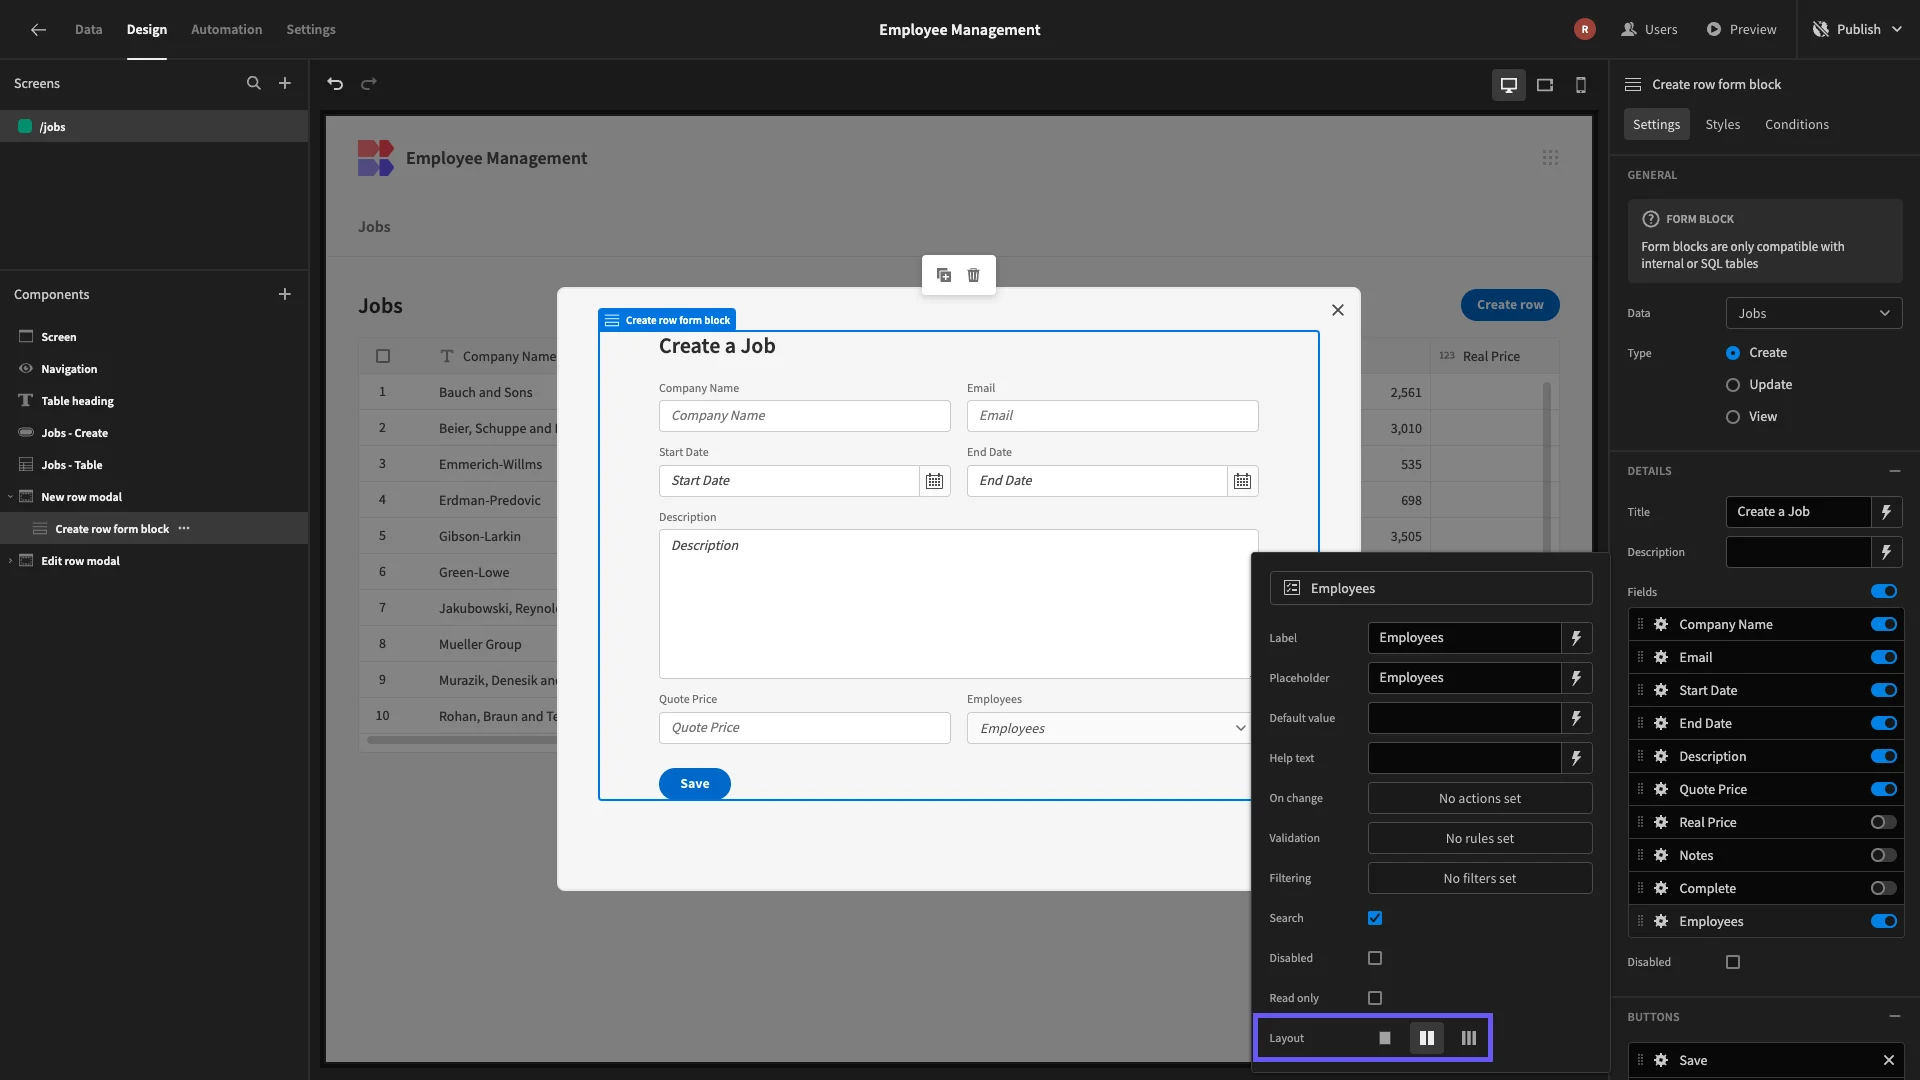
We’re going to use the Layout option to place all of our remaining fields, except Description, into two columns, making better use of the available space. We can also update the Title field to something more user-friendly.
Lastly, under Styles we’ll set our Button Position to Top.
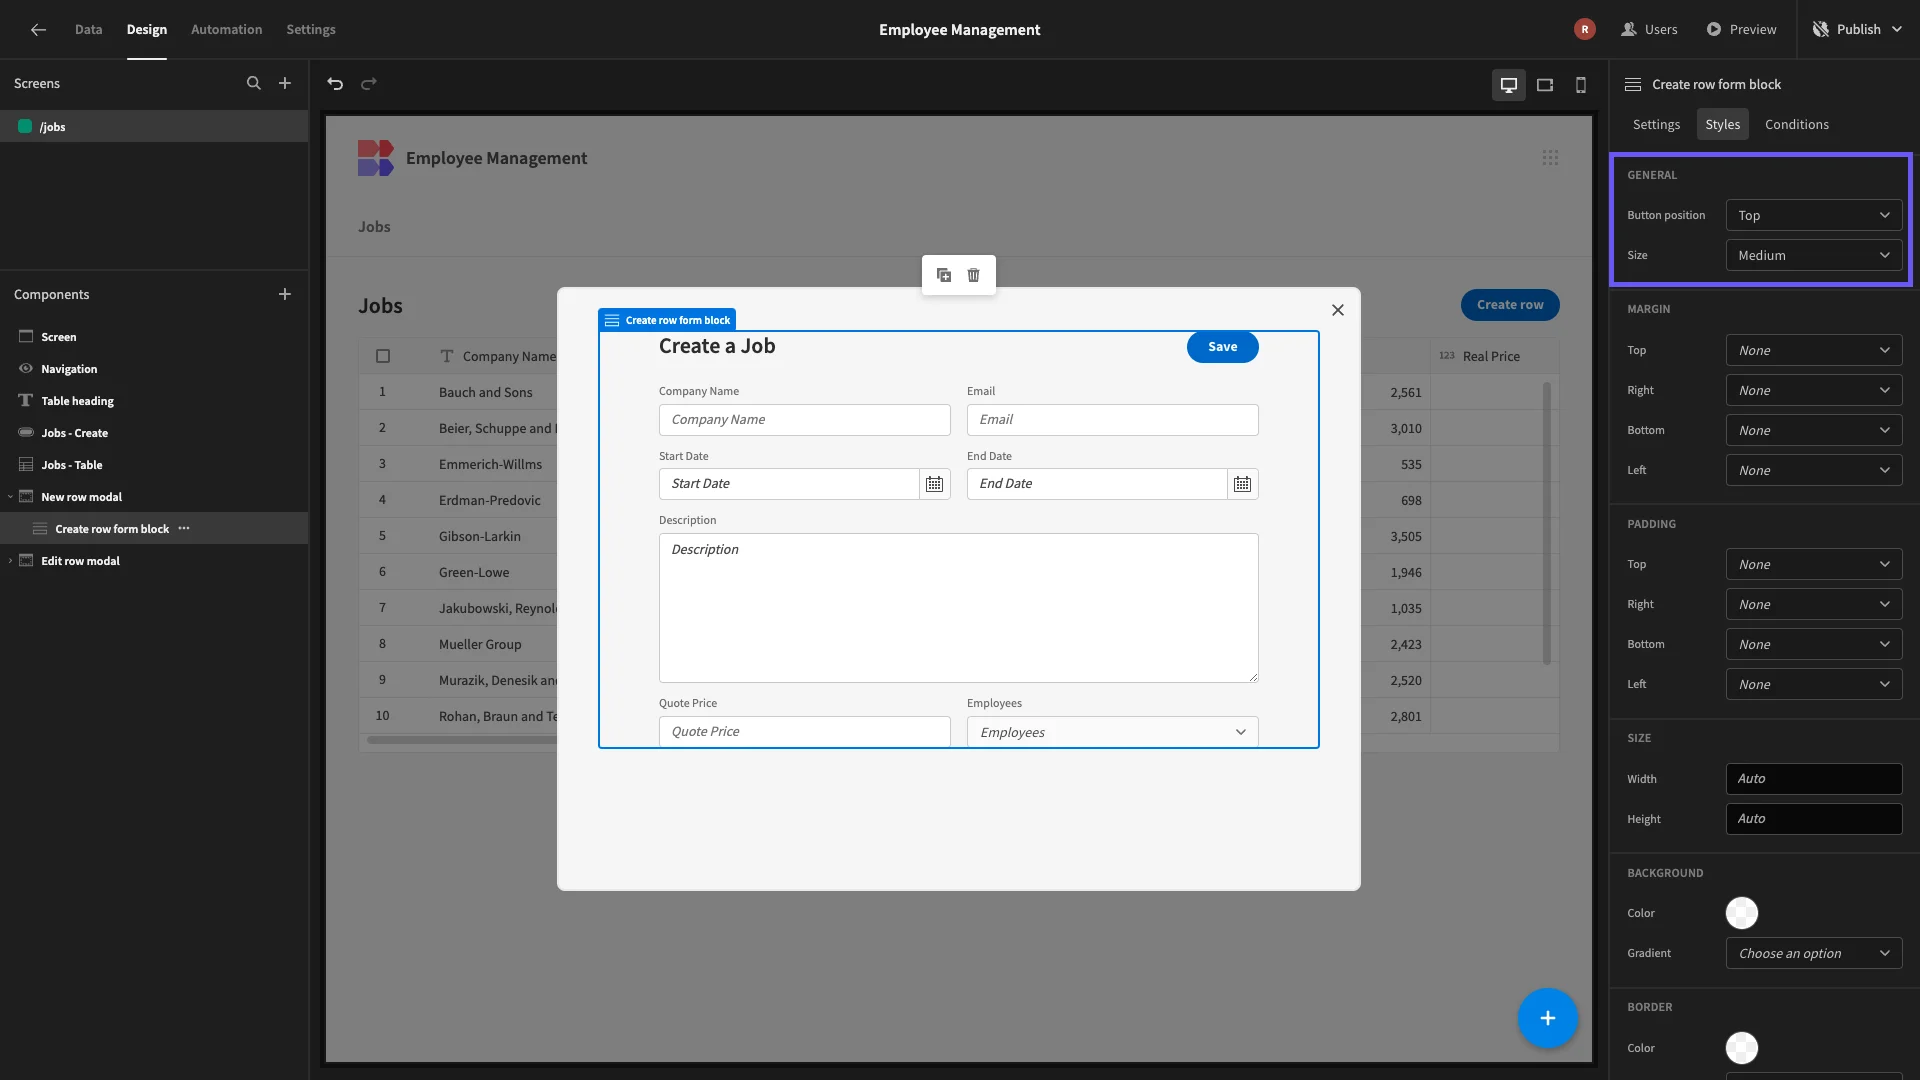
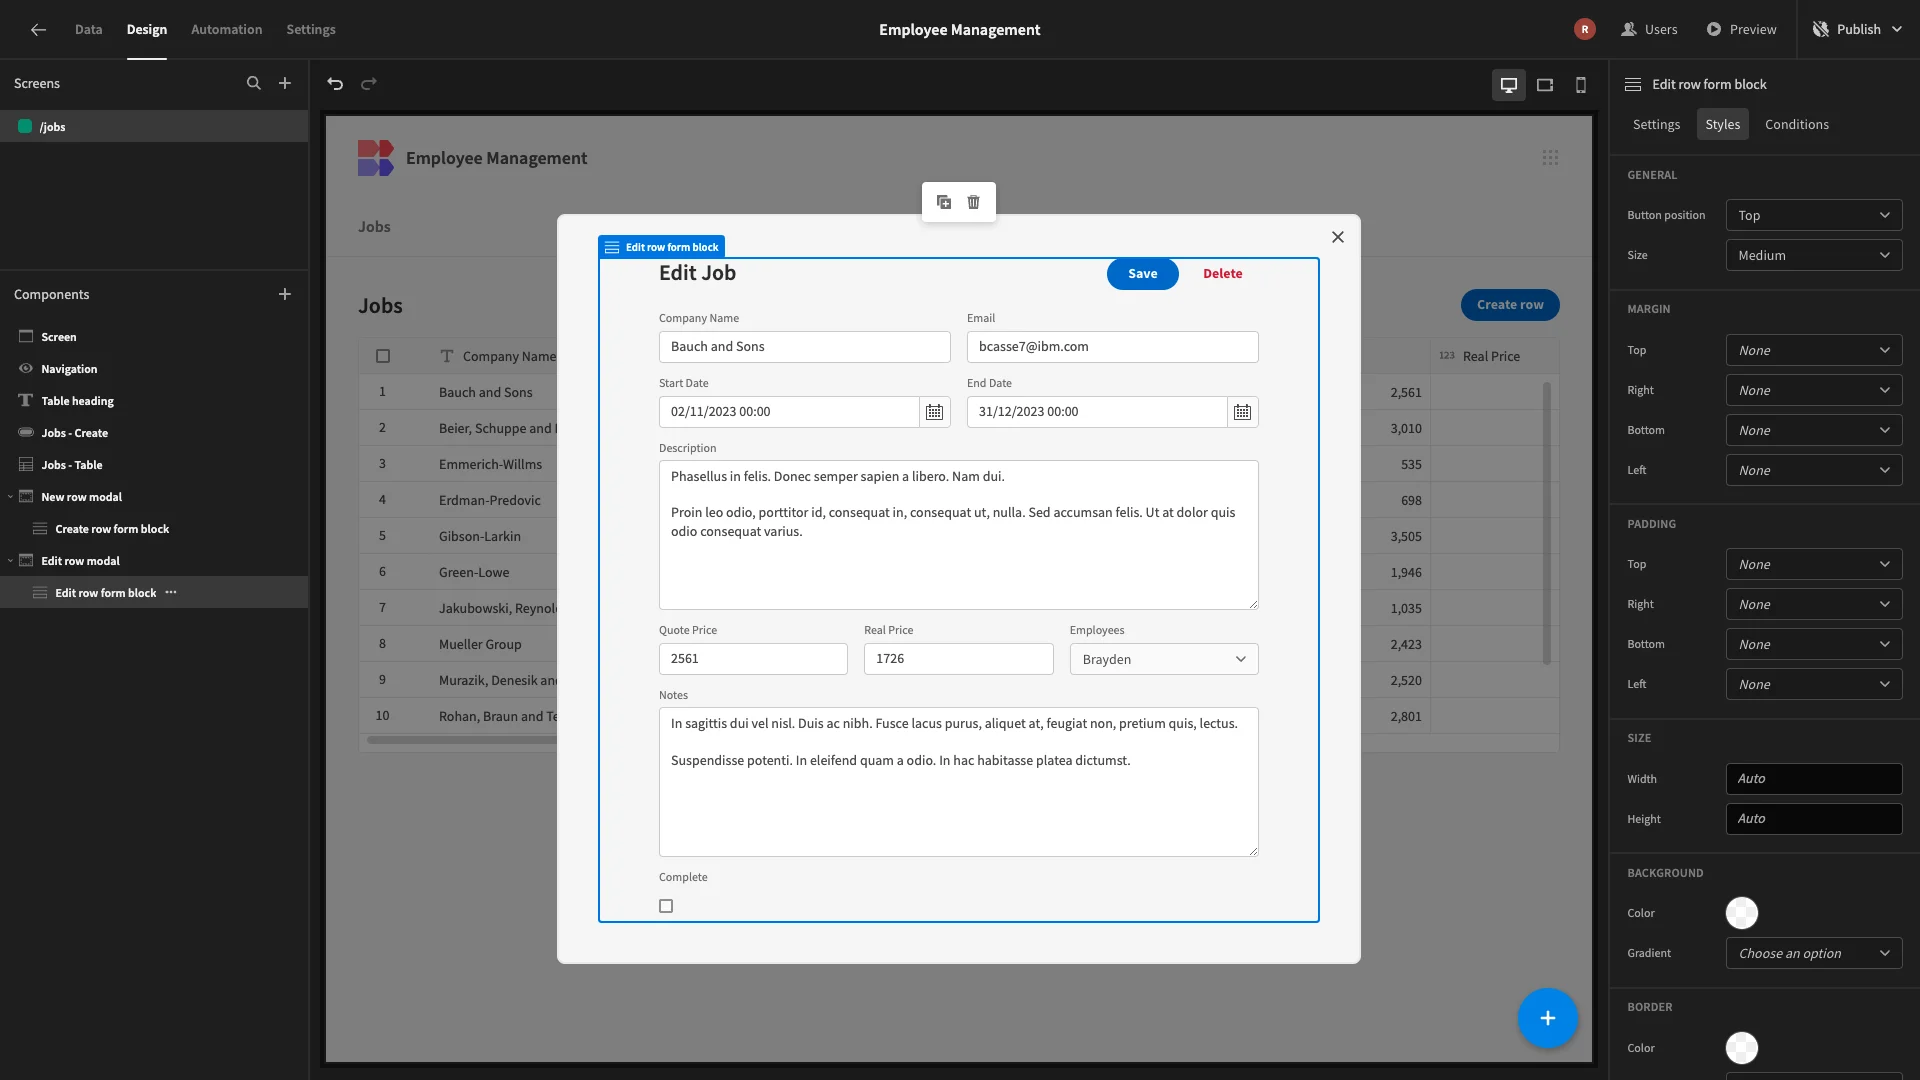
Our Edit form will retain all of the available attributes. So, we’ll simply repeat the process of moving our button to the top, placing our fields into columns, and updating our title.
3. Building a UI for agents
Next, we’re going to build a UI for Colleague users to do two things:
- View Jobs that have been assigned to them as well as edit only certain columns.
- View and update their own Employees record.
Head back to data section, and this time we’ll repeat the same process as before to create a CRUD screen using our Assigned to Current User view of the Jobs table.
Here’s what this looks like:
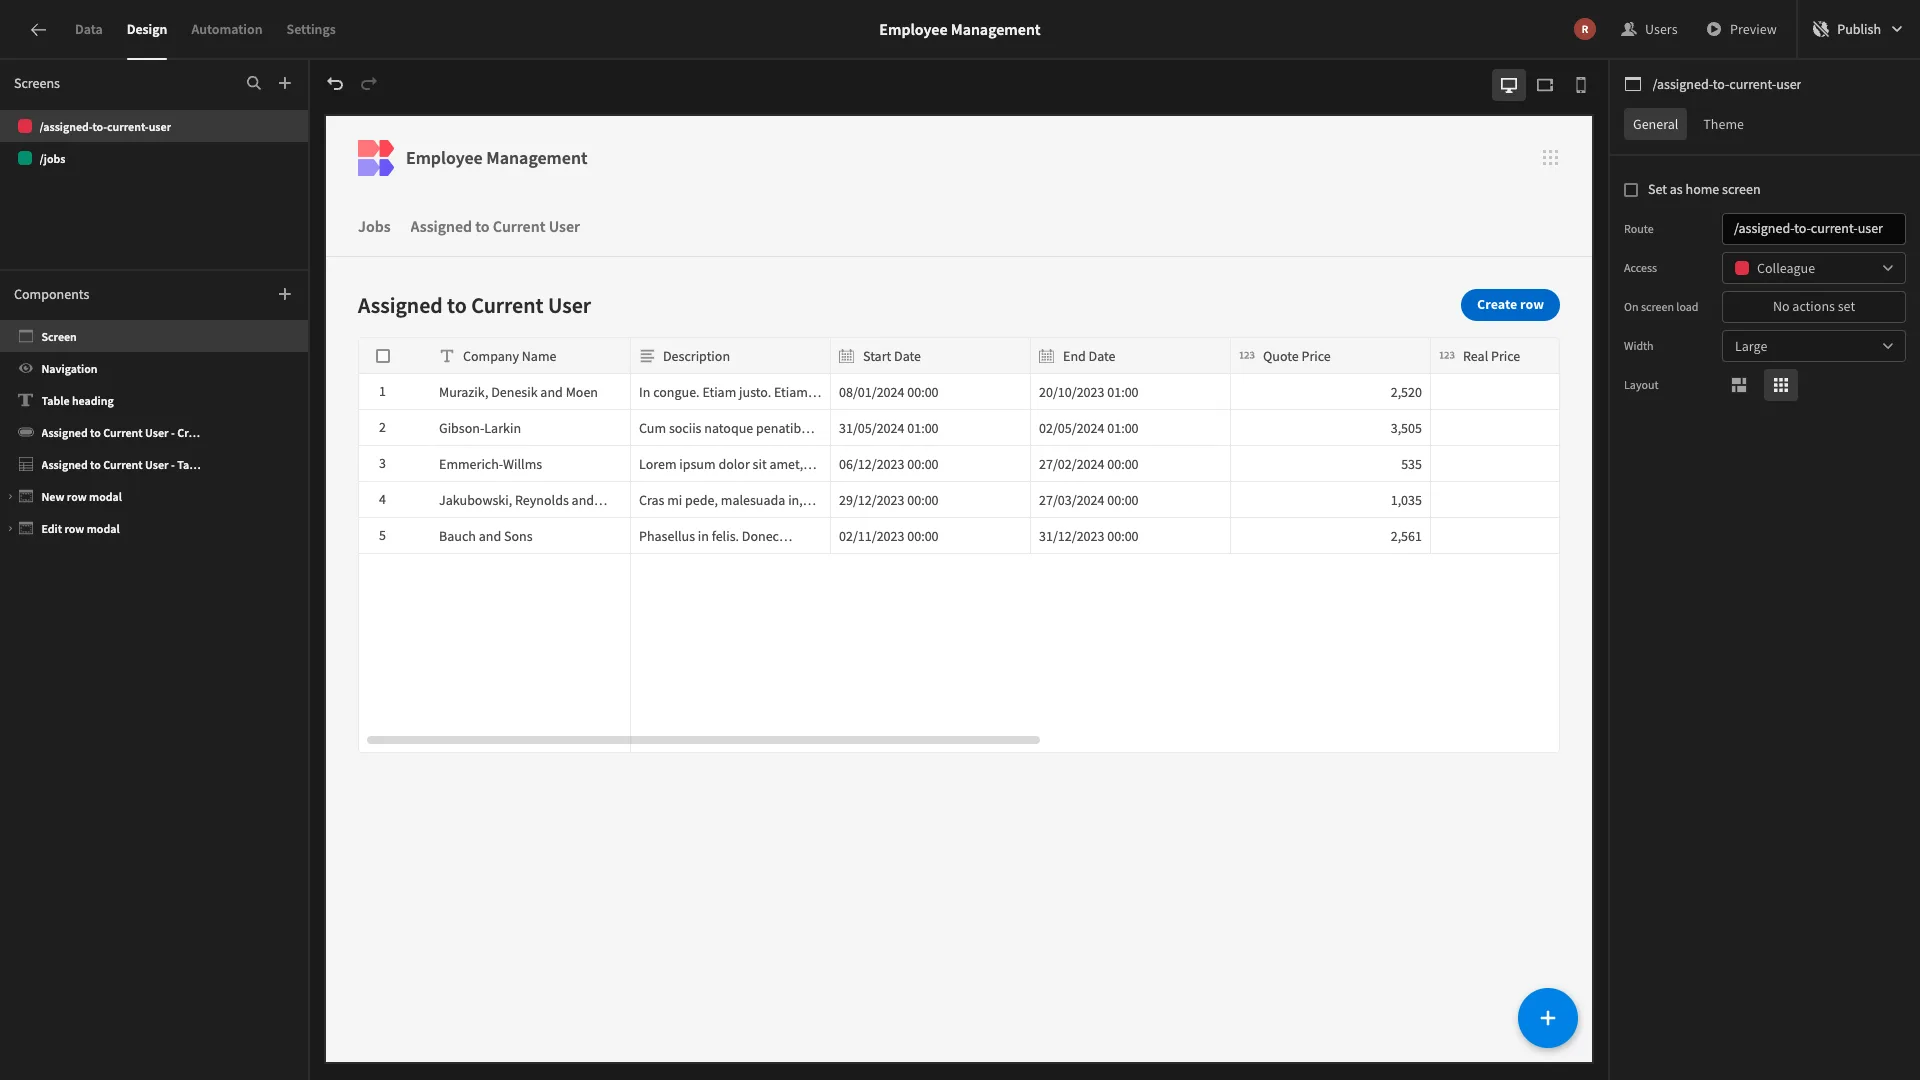
We’ll start by updating our Title to My Jobs.
Updating our edit form
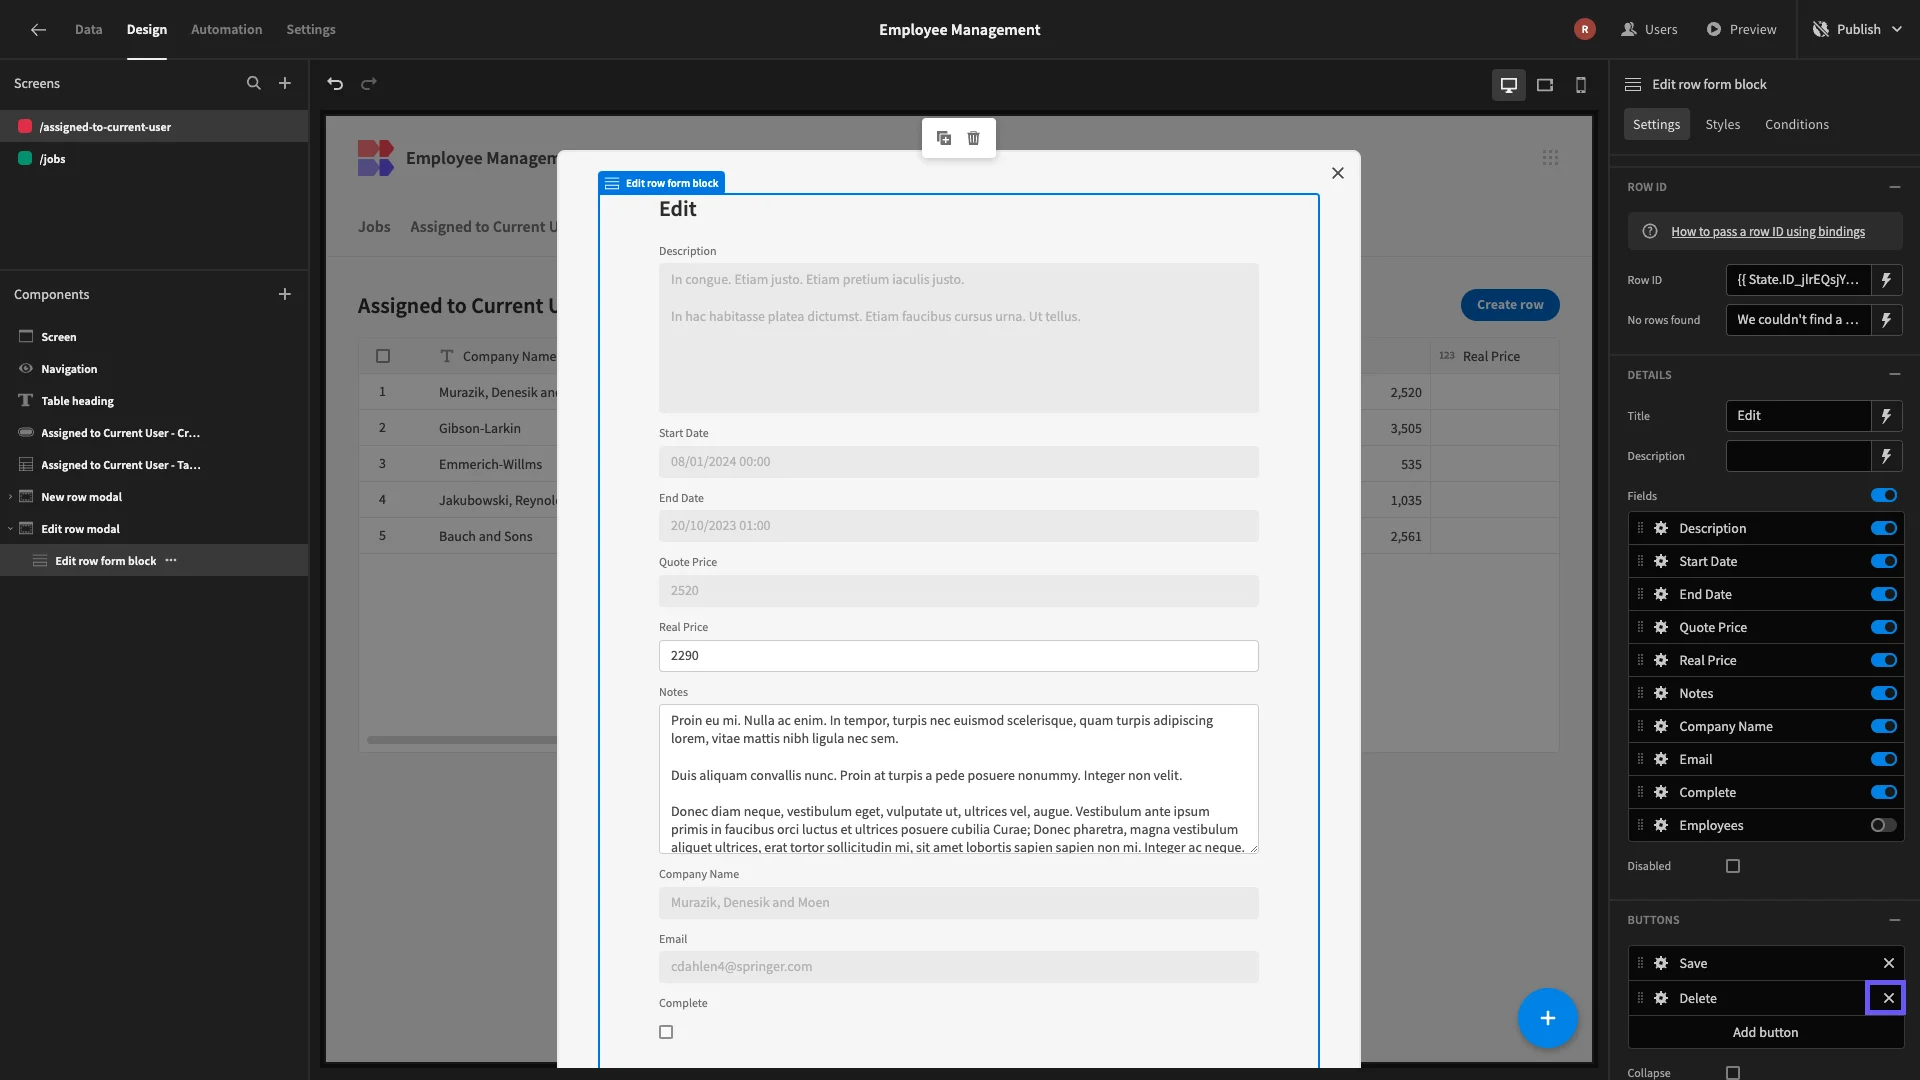
Within our Edit form, we’re going to disable all of the fields except for Notes, Real Cost, and Complete. Disabled fields will be visible but not editable.
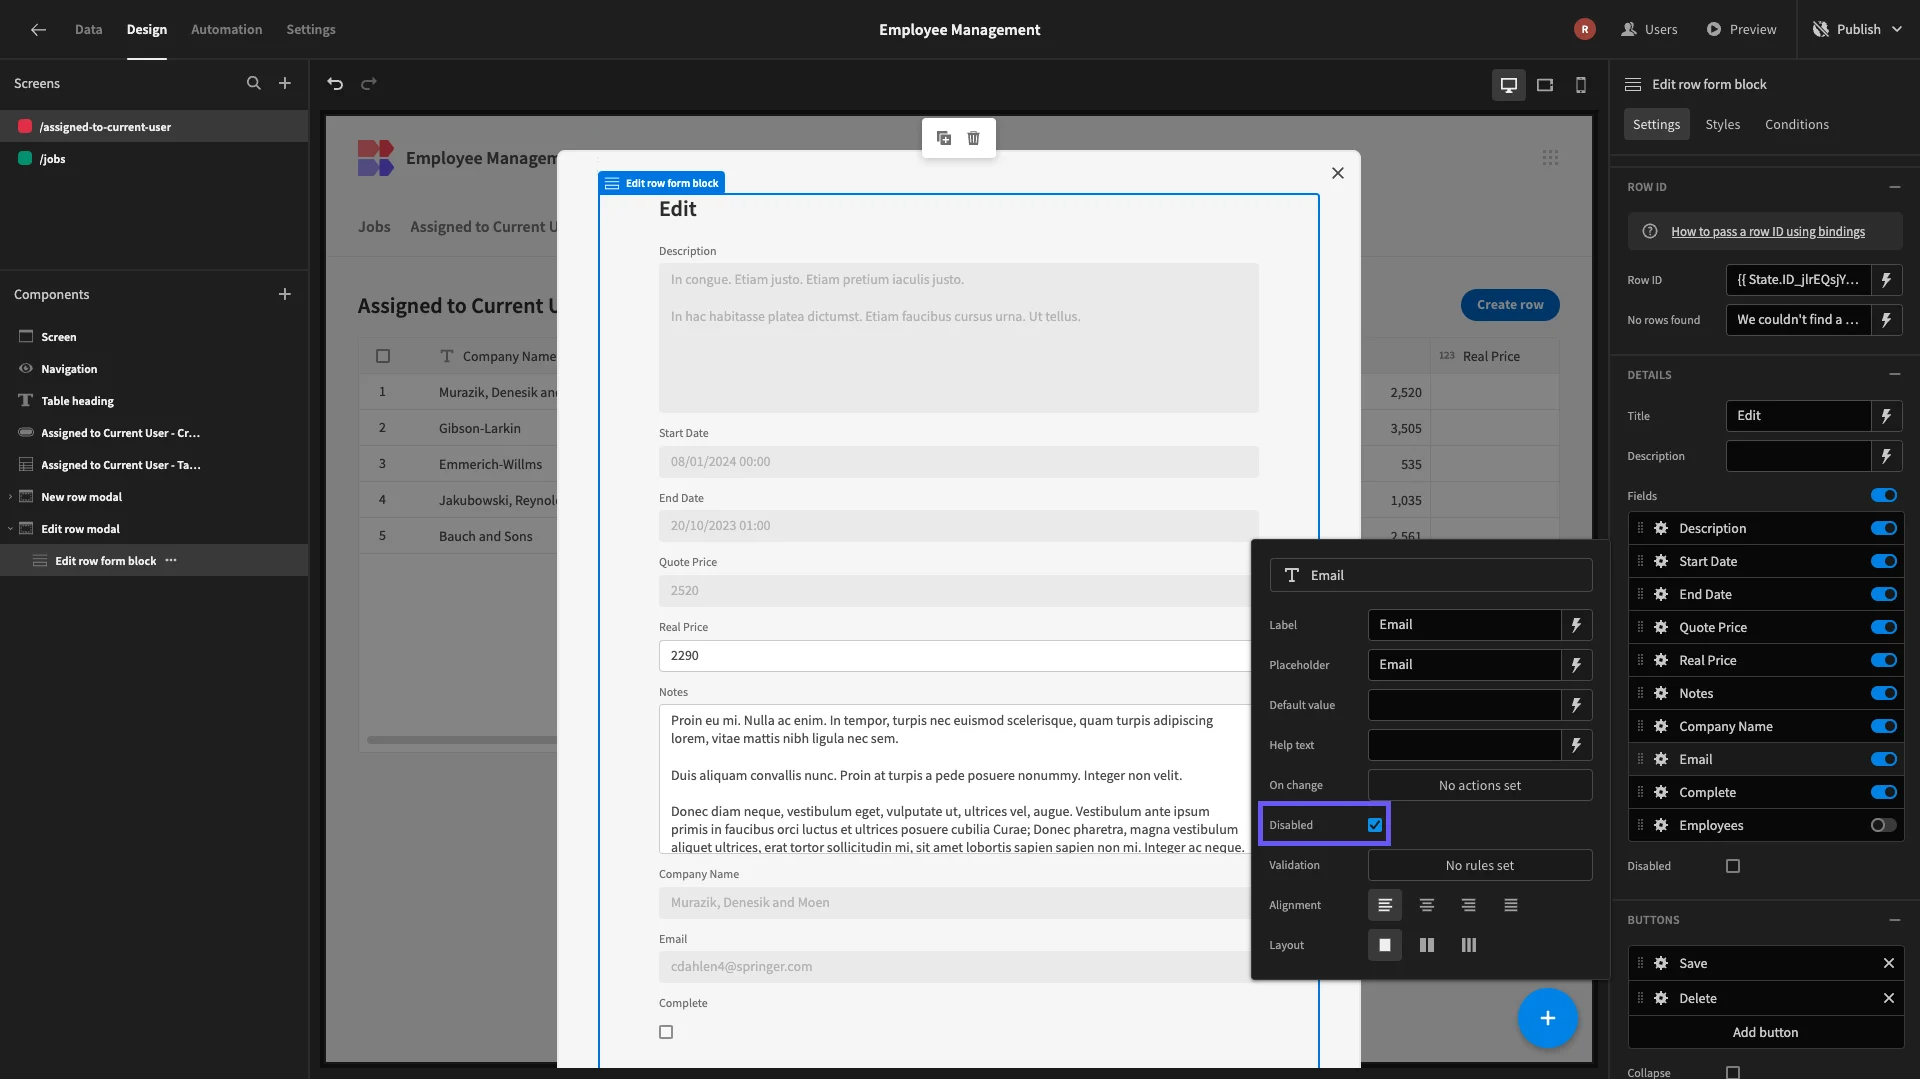
Colleague users shouldn’t be able to remove entries, so we’re going to delete the delete button.
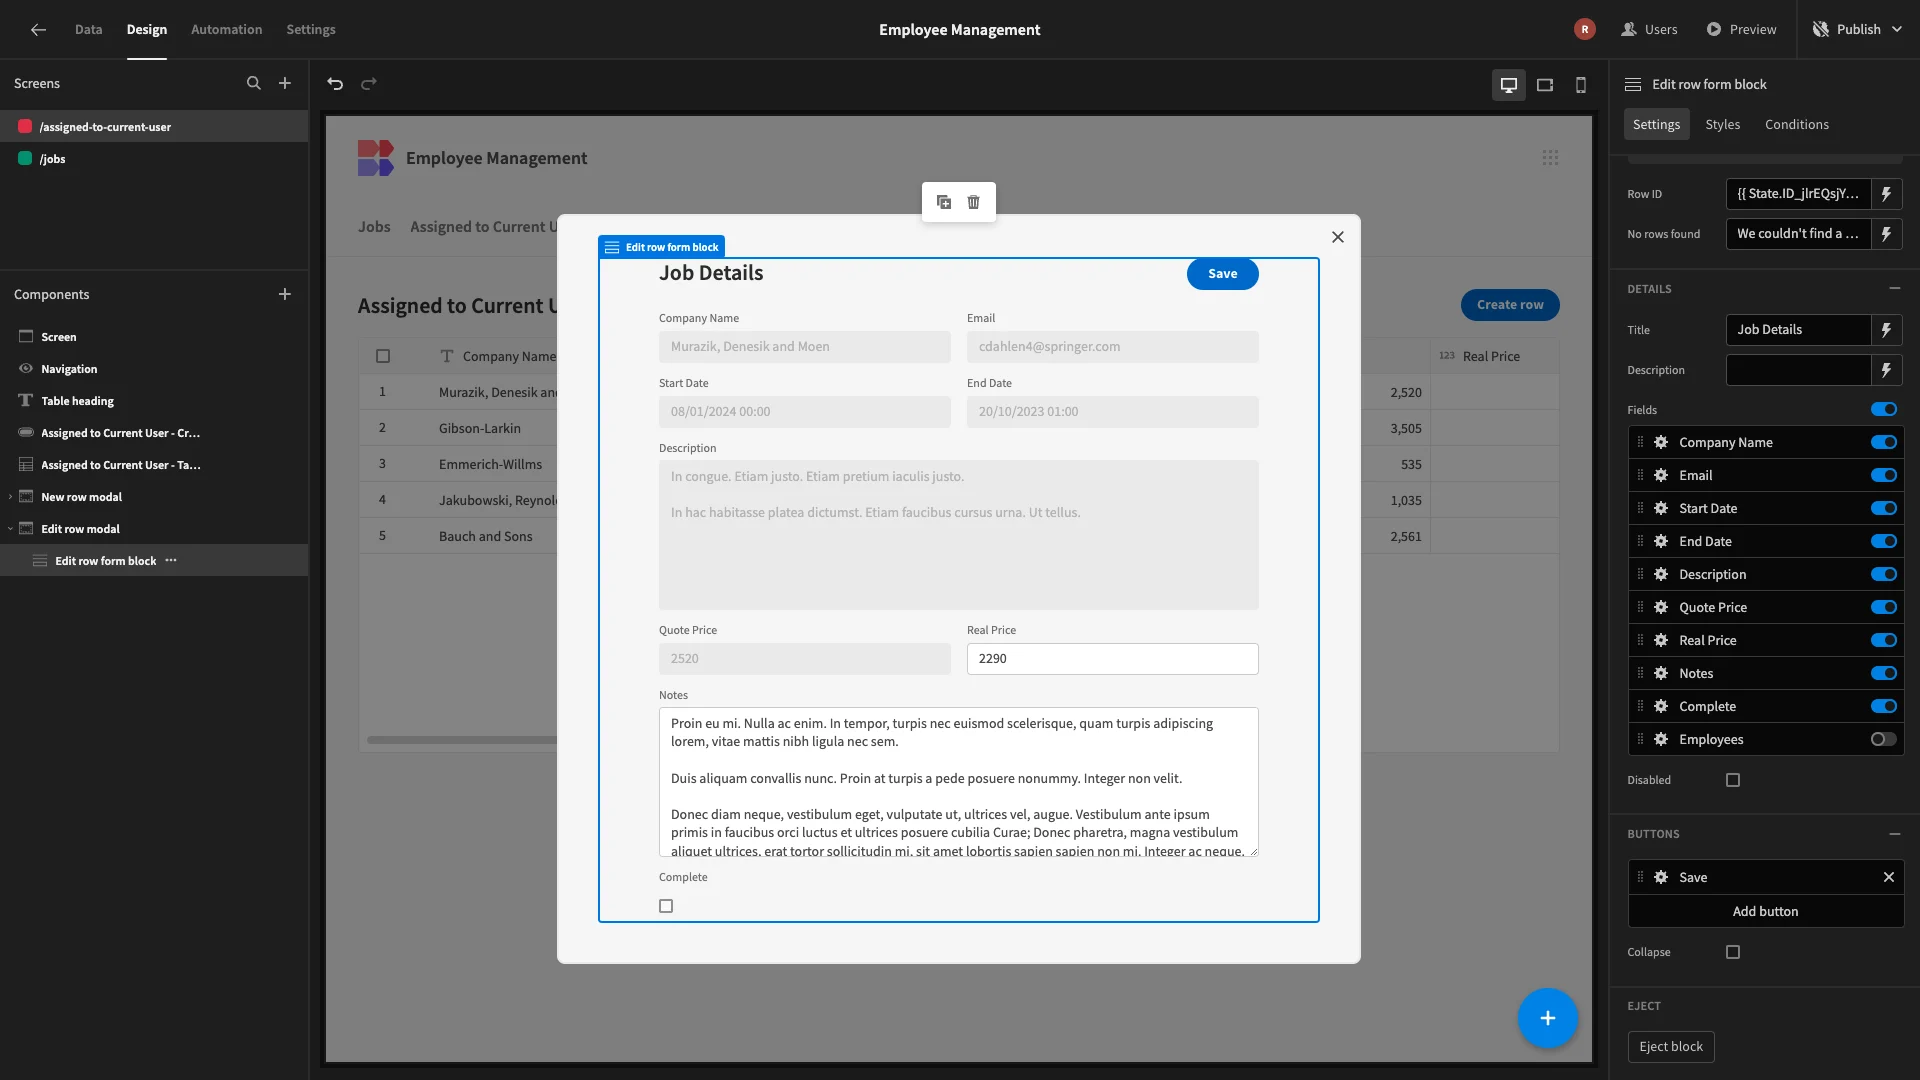
We’ll then repeat our UX change from earlier, updating the title, repositioning our button, and placing our fields into columns.
Building an employee details form
Colleague users shouldn’t be able to create jobs. So, we’re going to repurpose our other form to enable users to view and update their own details.
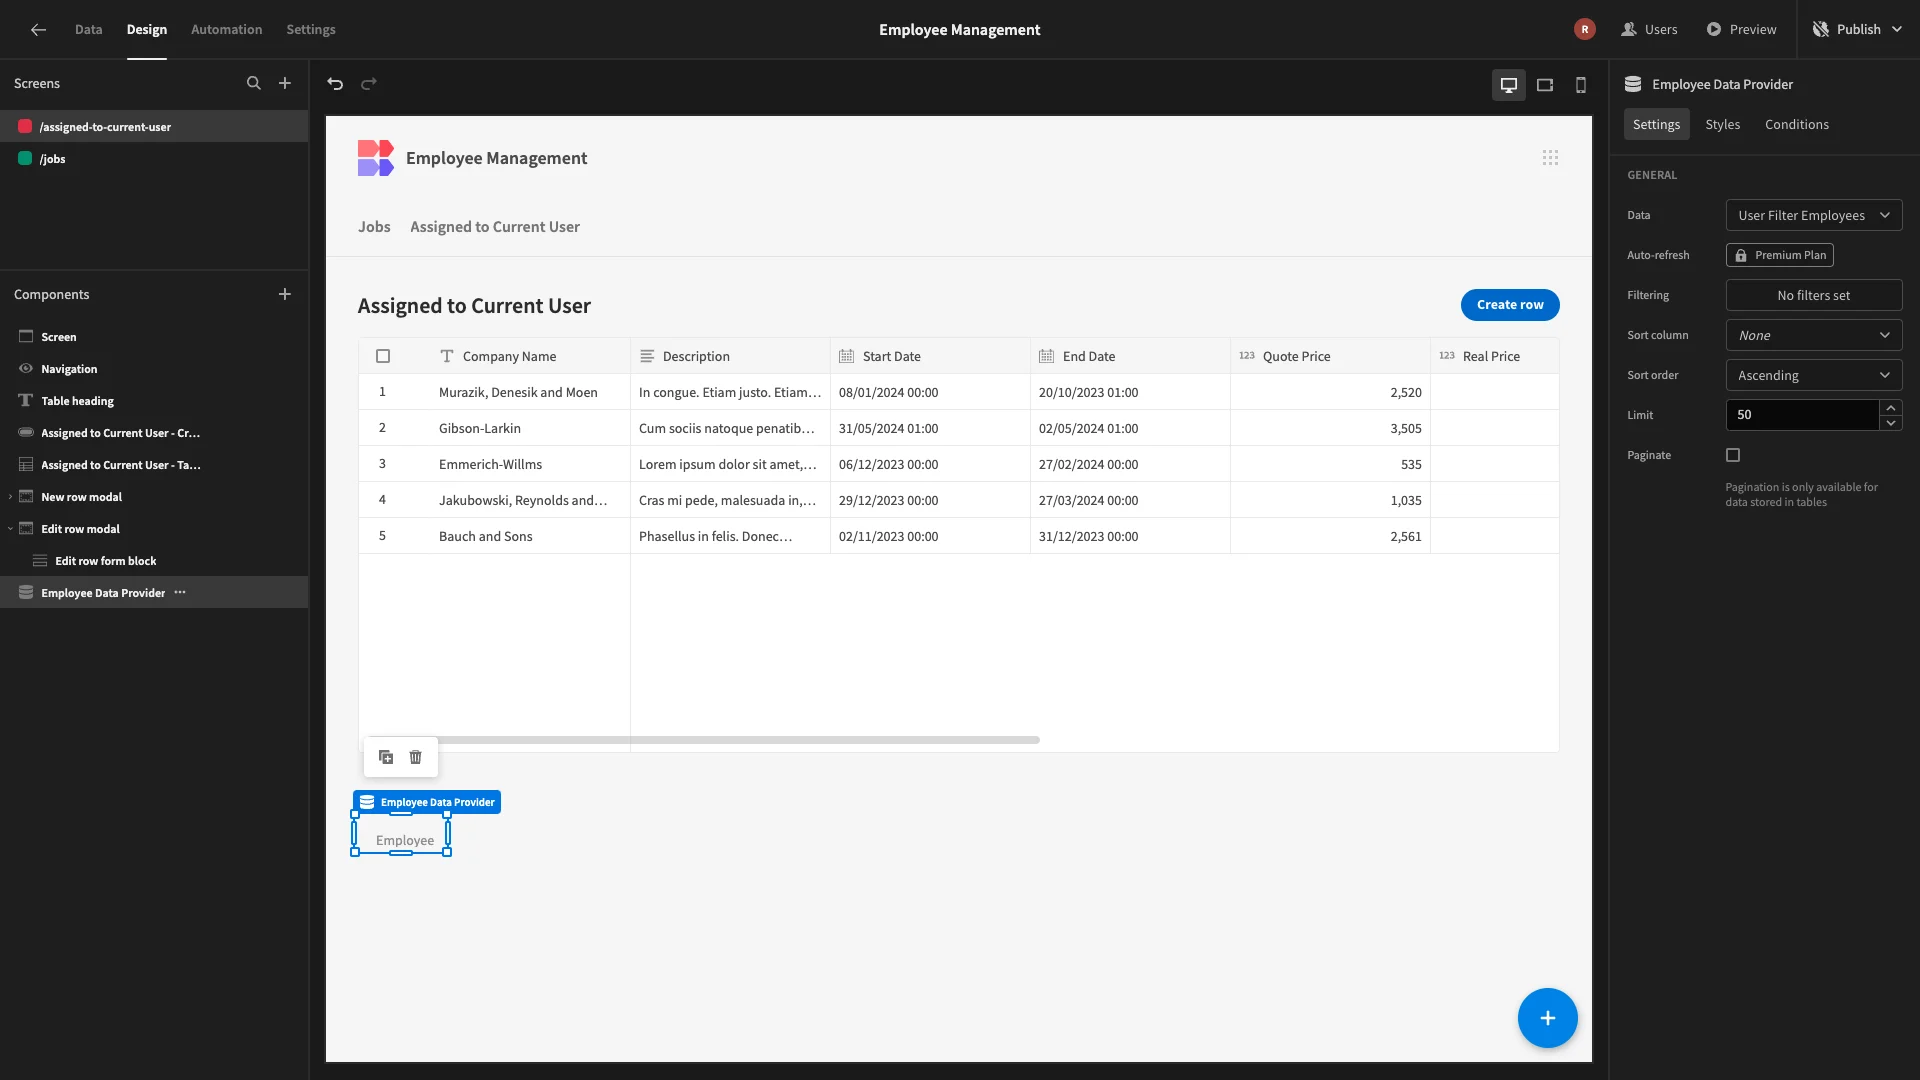
To do this, we’re going to need to expose our form to the relevant data. We’re going to add a component called a Data Provider, setting its Data to our User Filtered Employees view. This won’t be visible in the final UI, so we’ll simply drag it to the bottom of the screen.
Next, we’ll select the Save Row Form Block. We’re going to set its Data to our User Filtered Employees view too, as well as changing its Type from Create to Update.
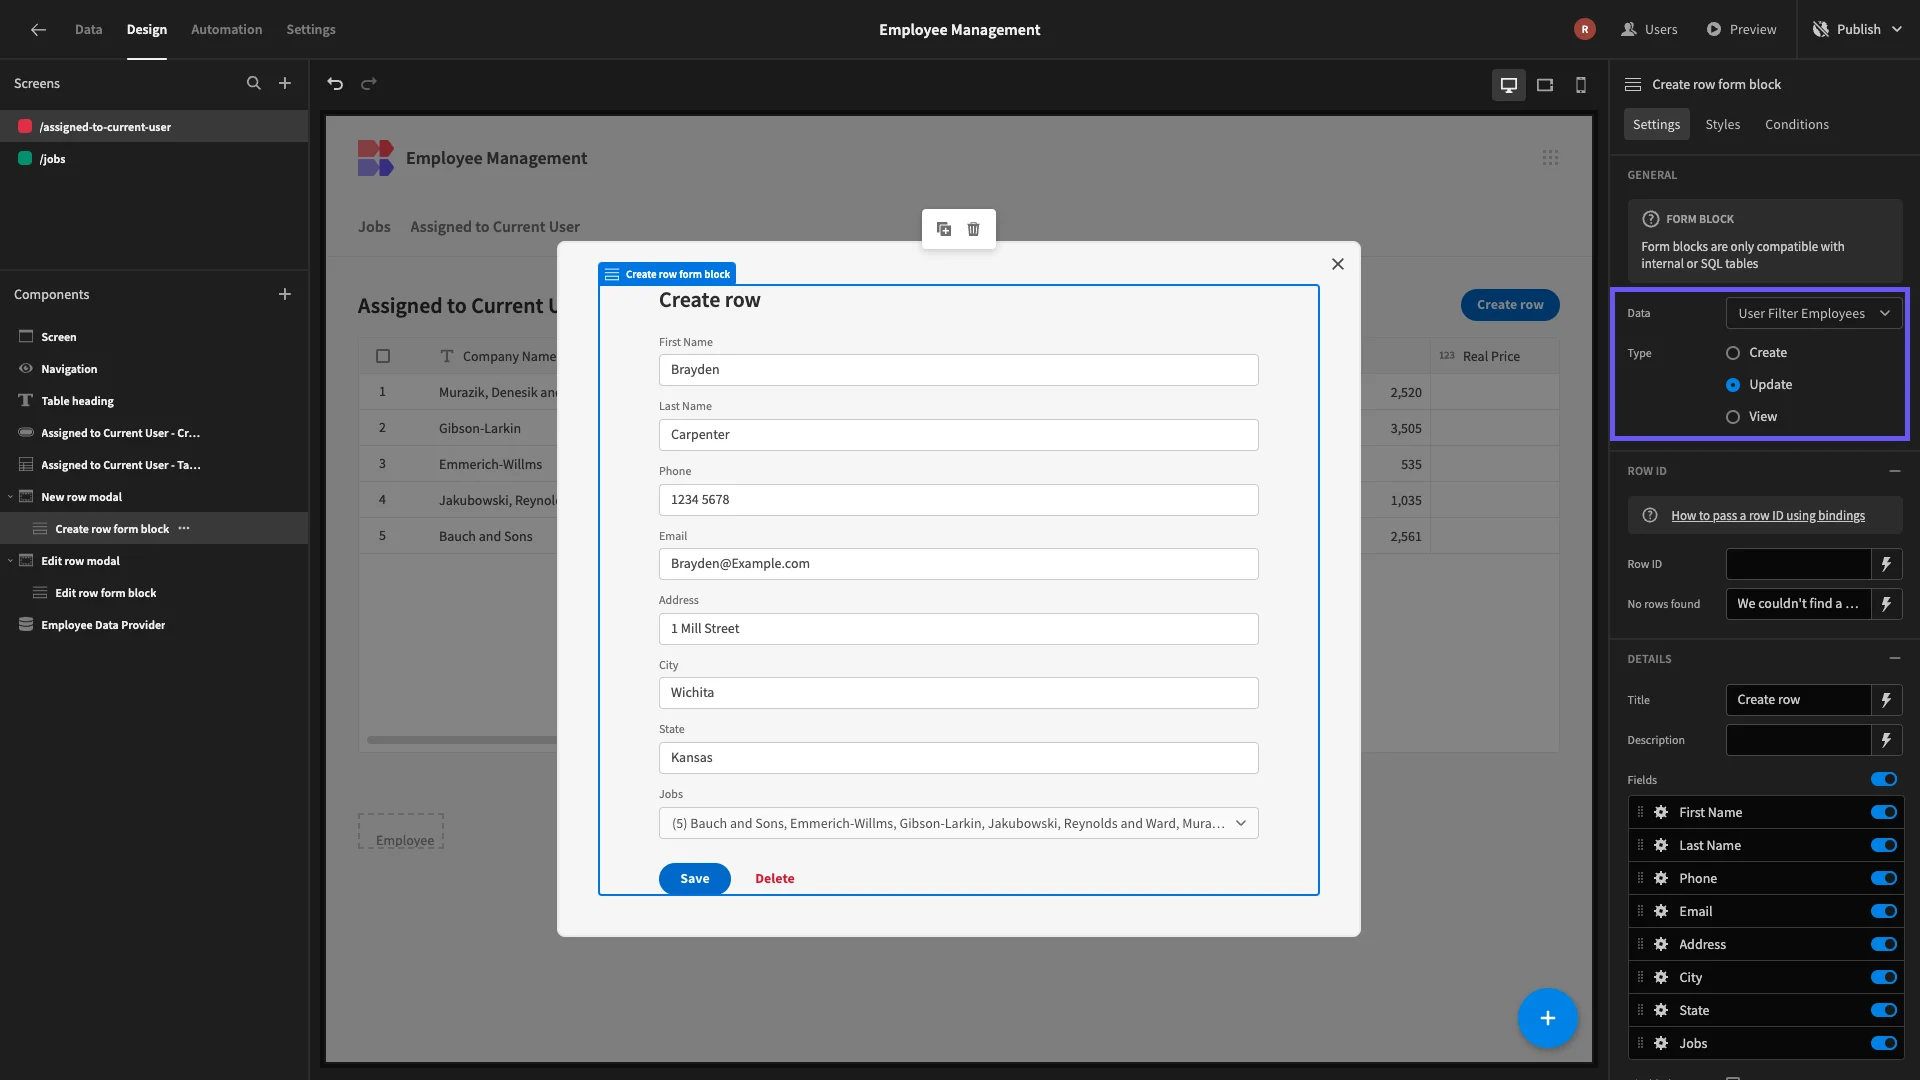
When we set a form block to Update, a new field called Row ID appears. This allows us to specify which row in our database we want to update by referencing its unique ID.
We want the row in our Employees table that matches the current user. We’ll get this from the output of the Data Provider we just created, using the binding {{ Employees Data Provider.Rows.0._id }}.
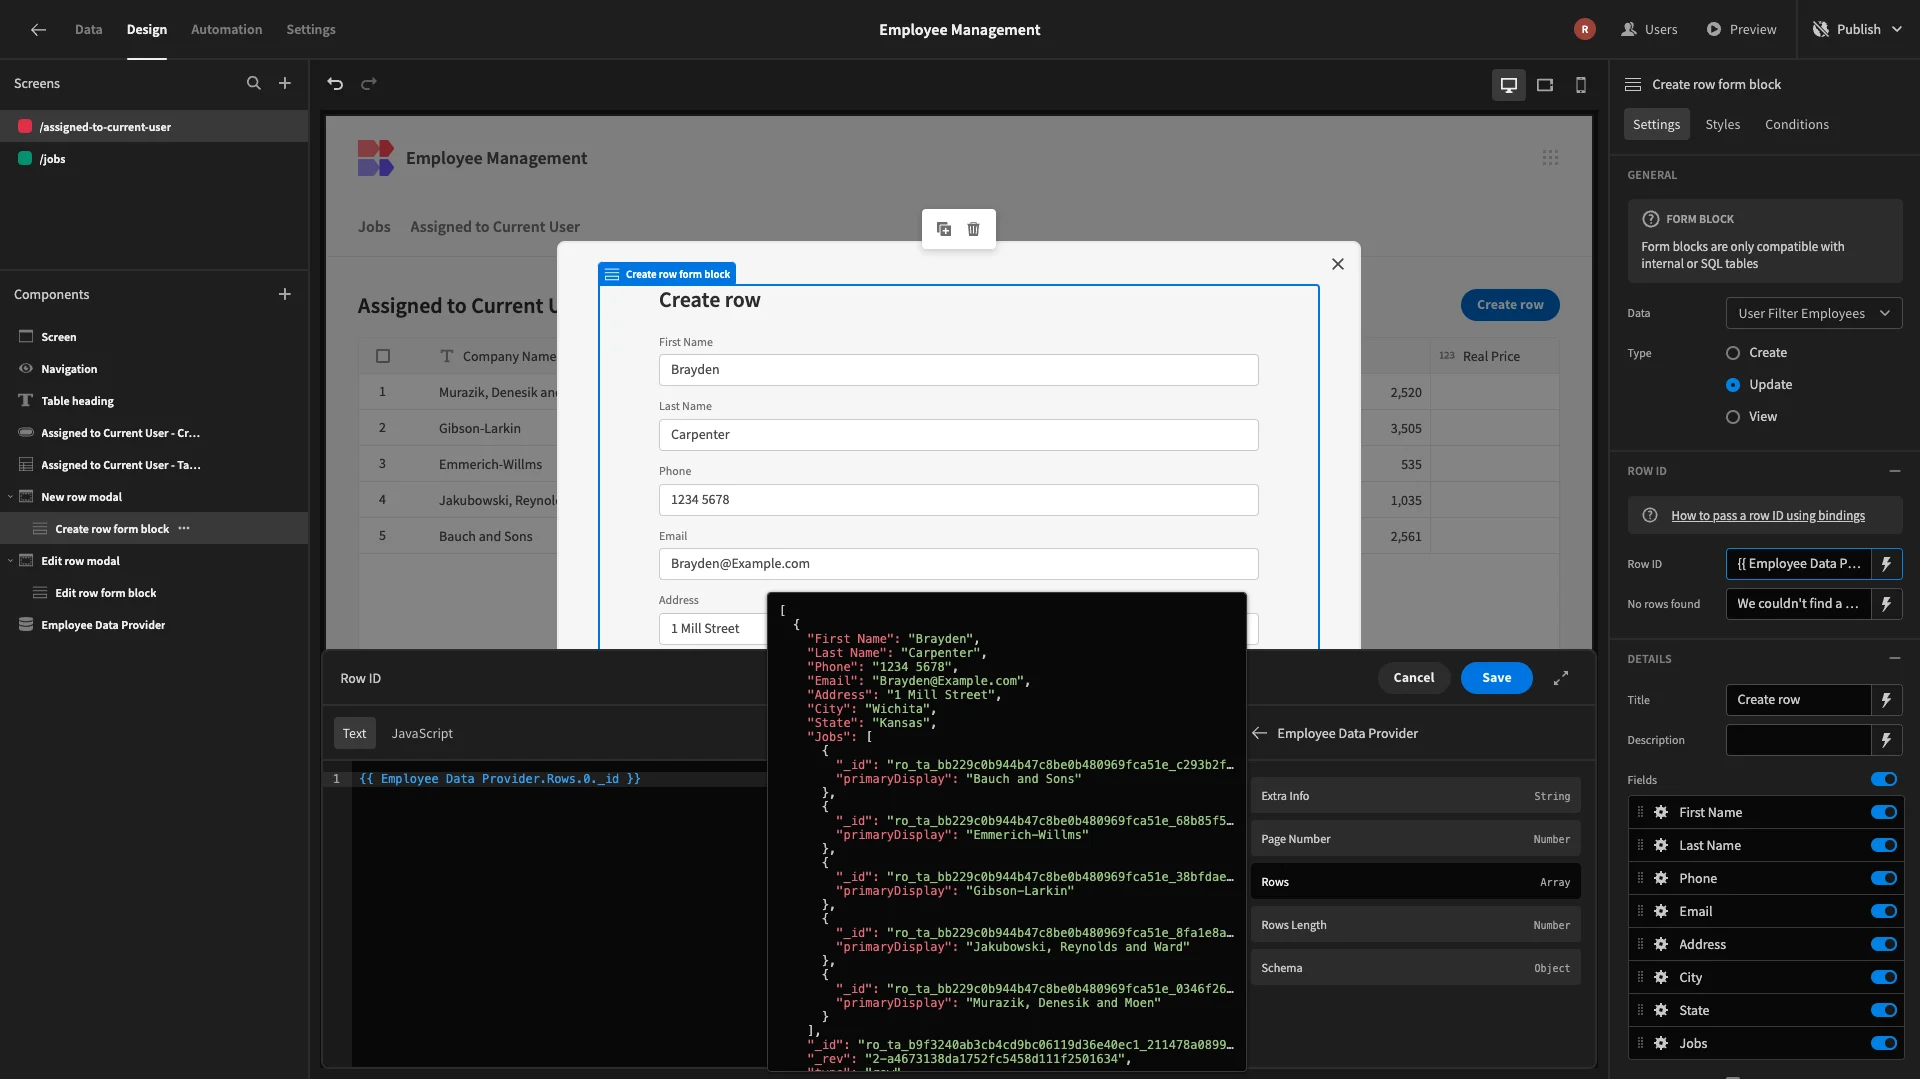
We’re going to Deselect the Jobs field, since we don’t want end users to edit this, before making the same UI tweaks as we have on all of our previous forms.
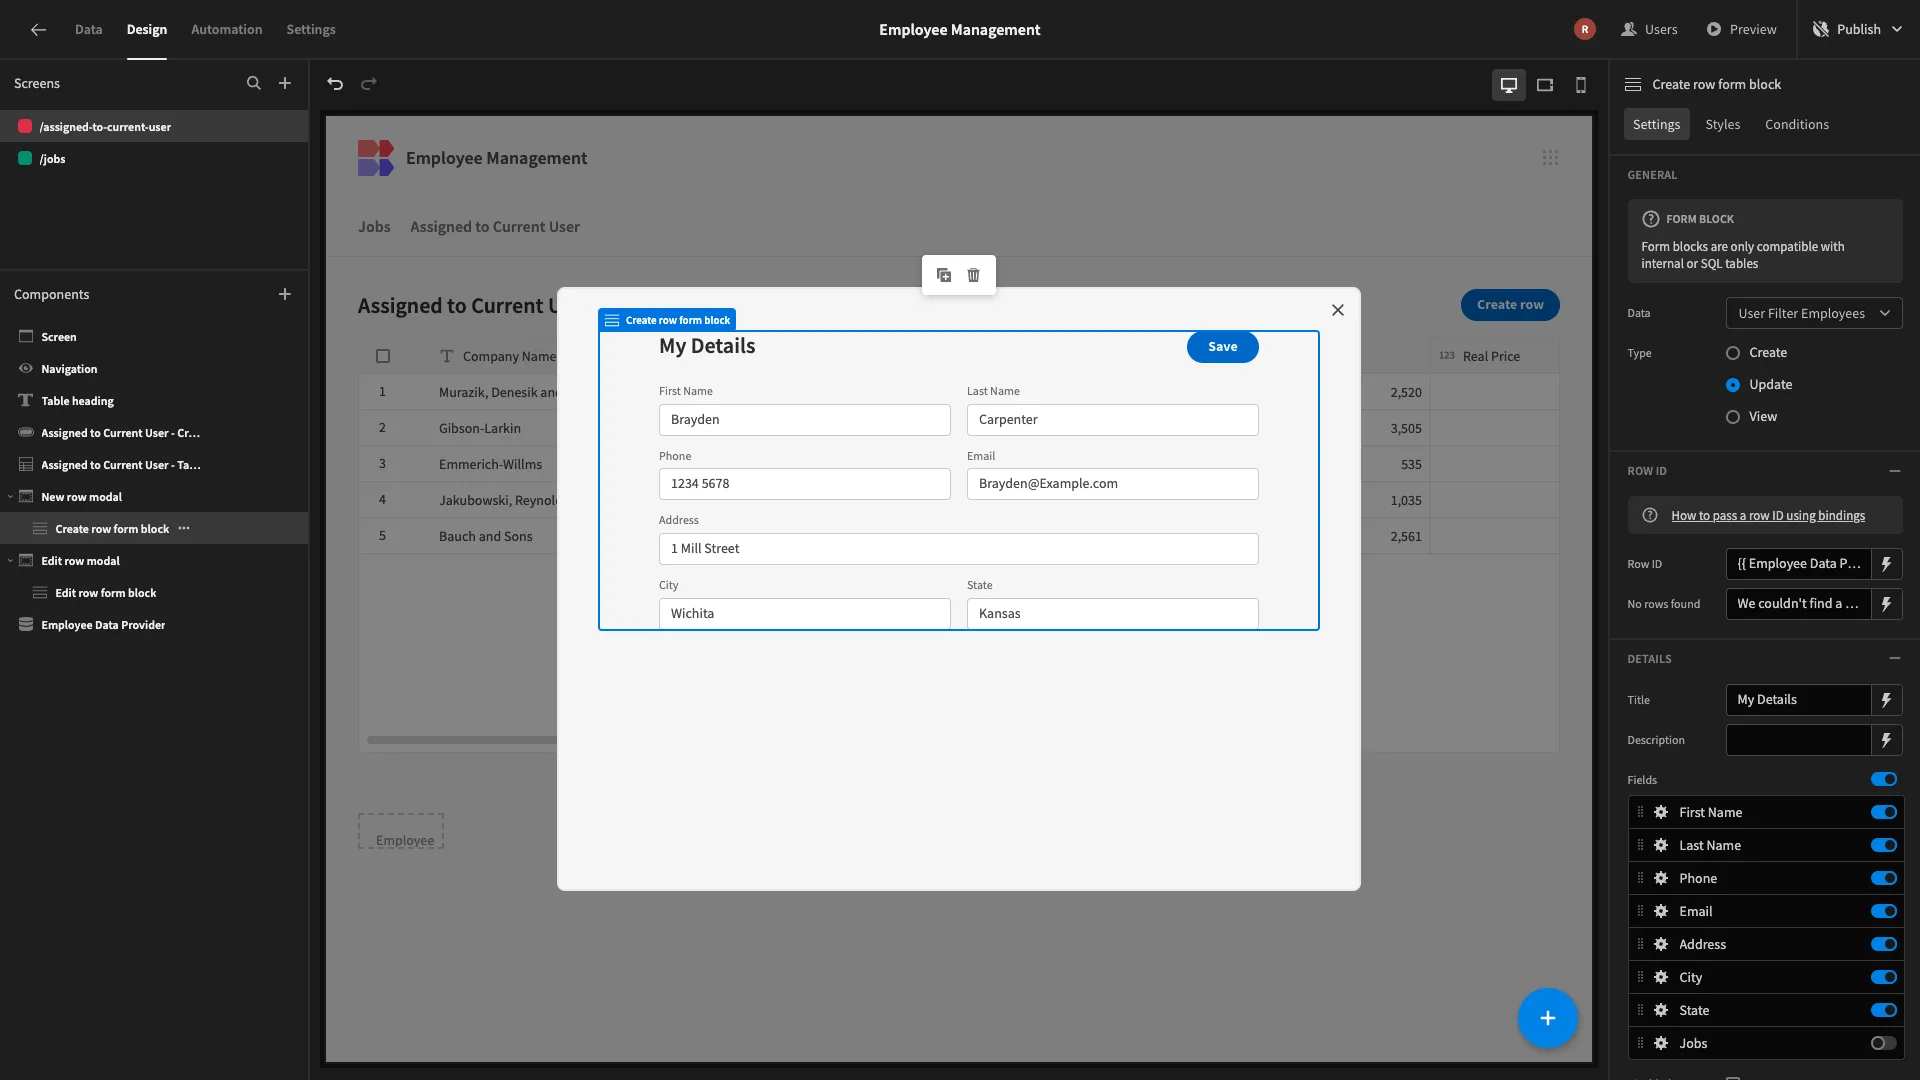
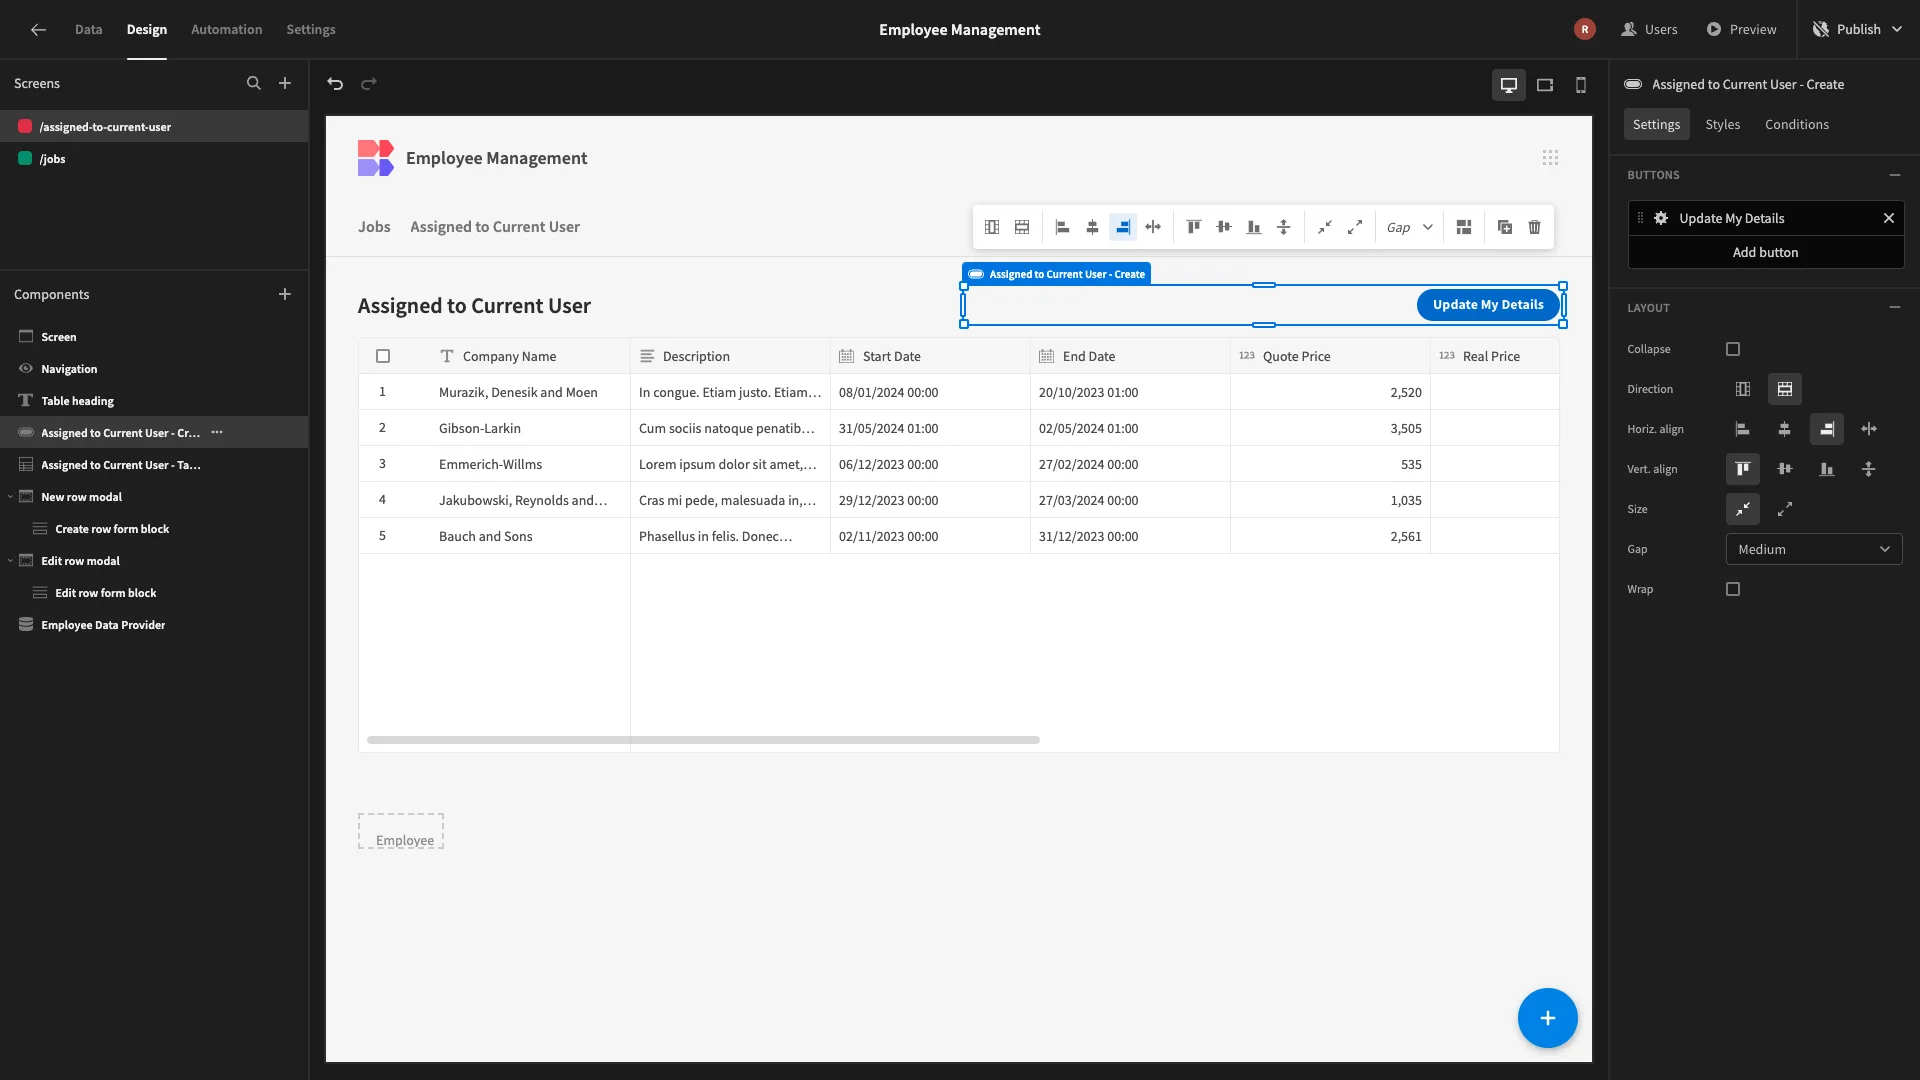
Lastly, we’ll update the display text of the Button we use to open this form.
4. Design tweaks and publishing
Functionally, our employee management app is ready to go. To finish it off, we’re going to make a couple of final UX changes.
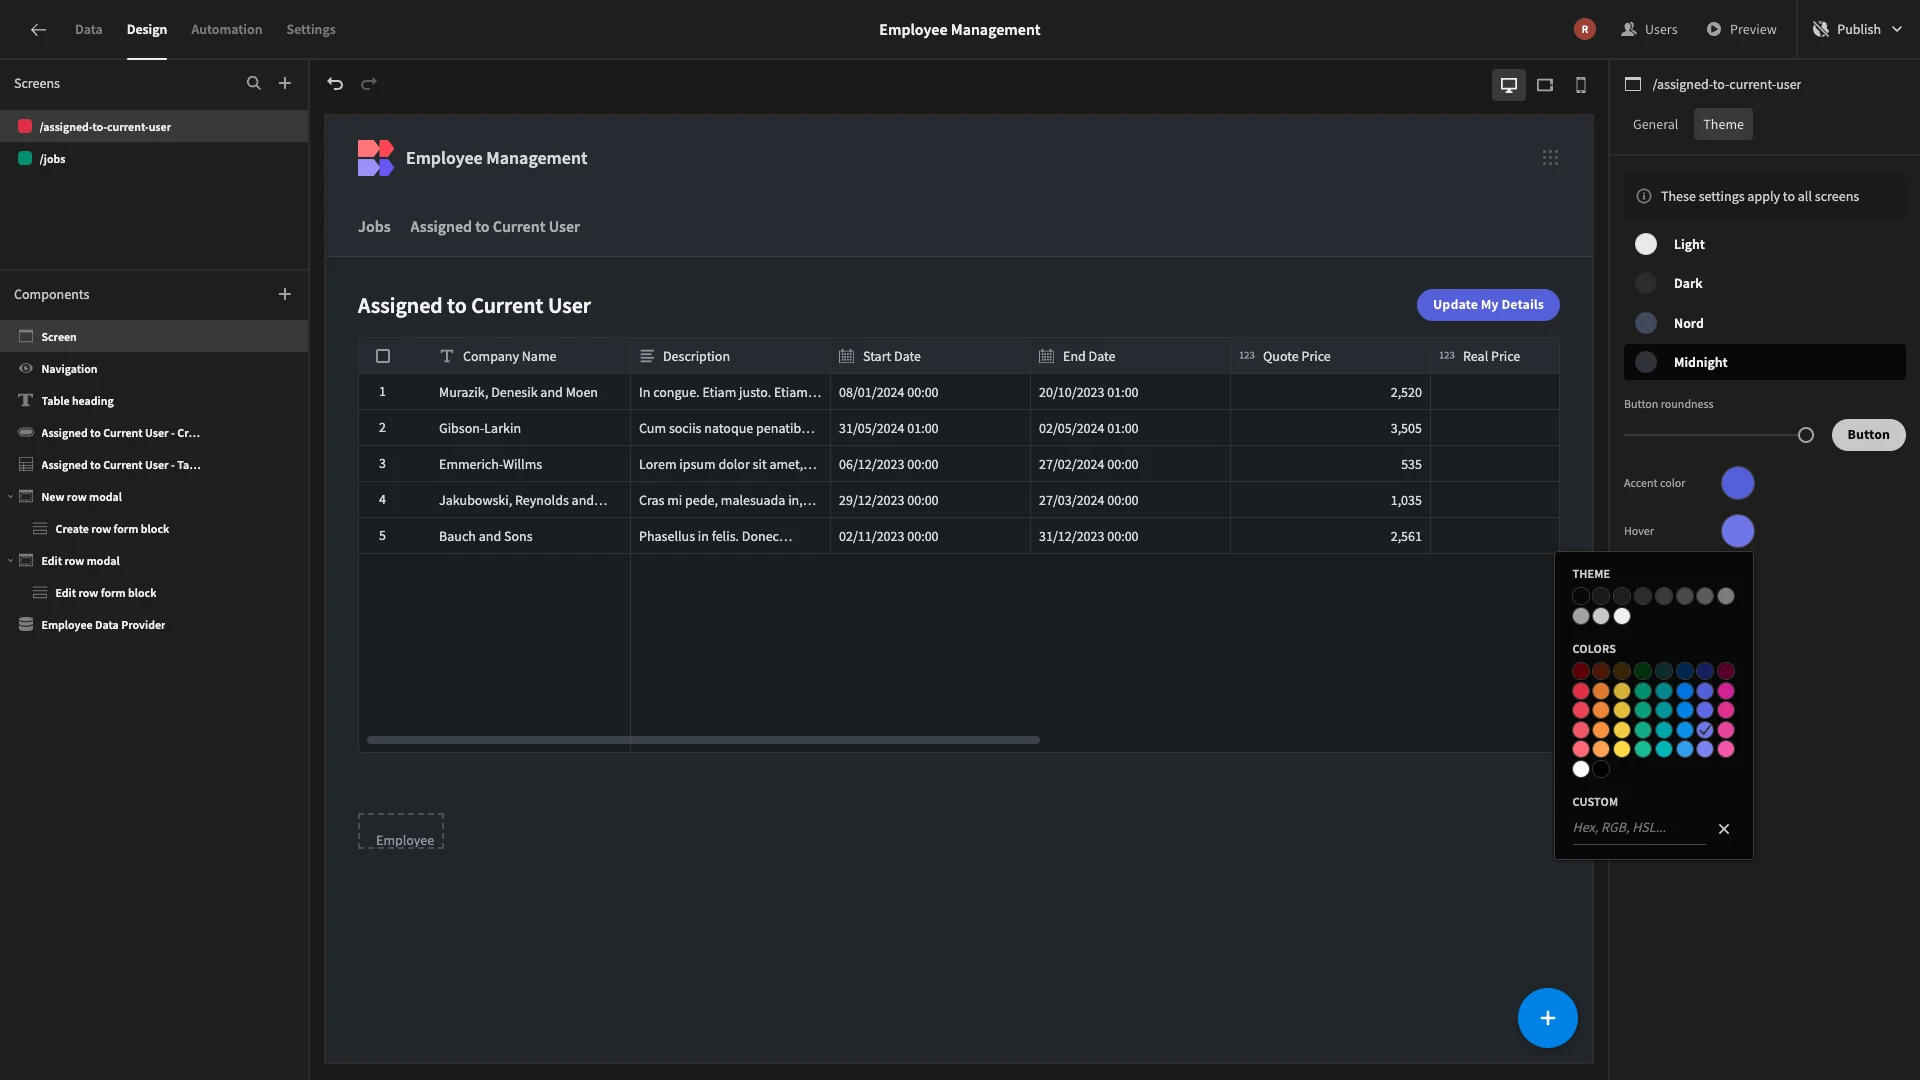
First, under Screen and Theme, we’re selecting Midnight.
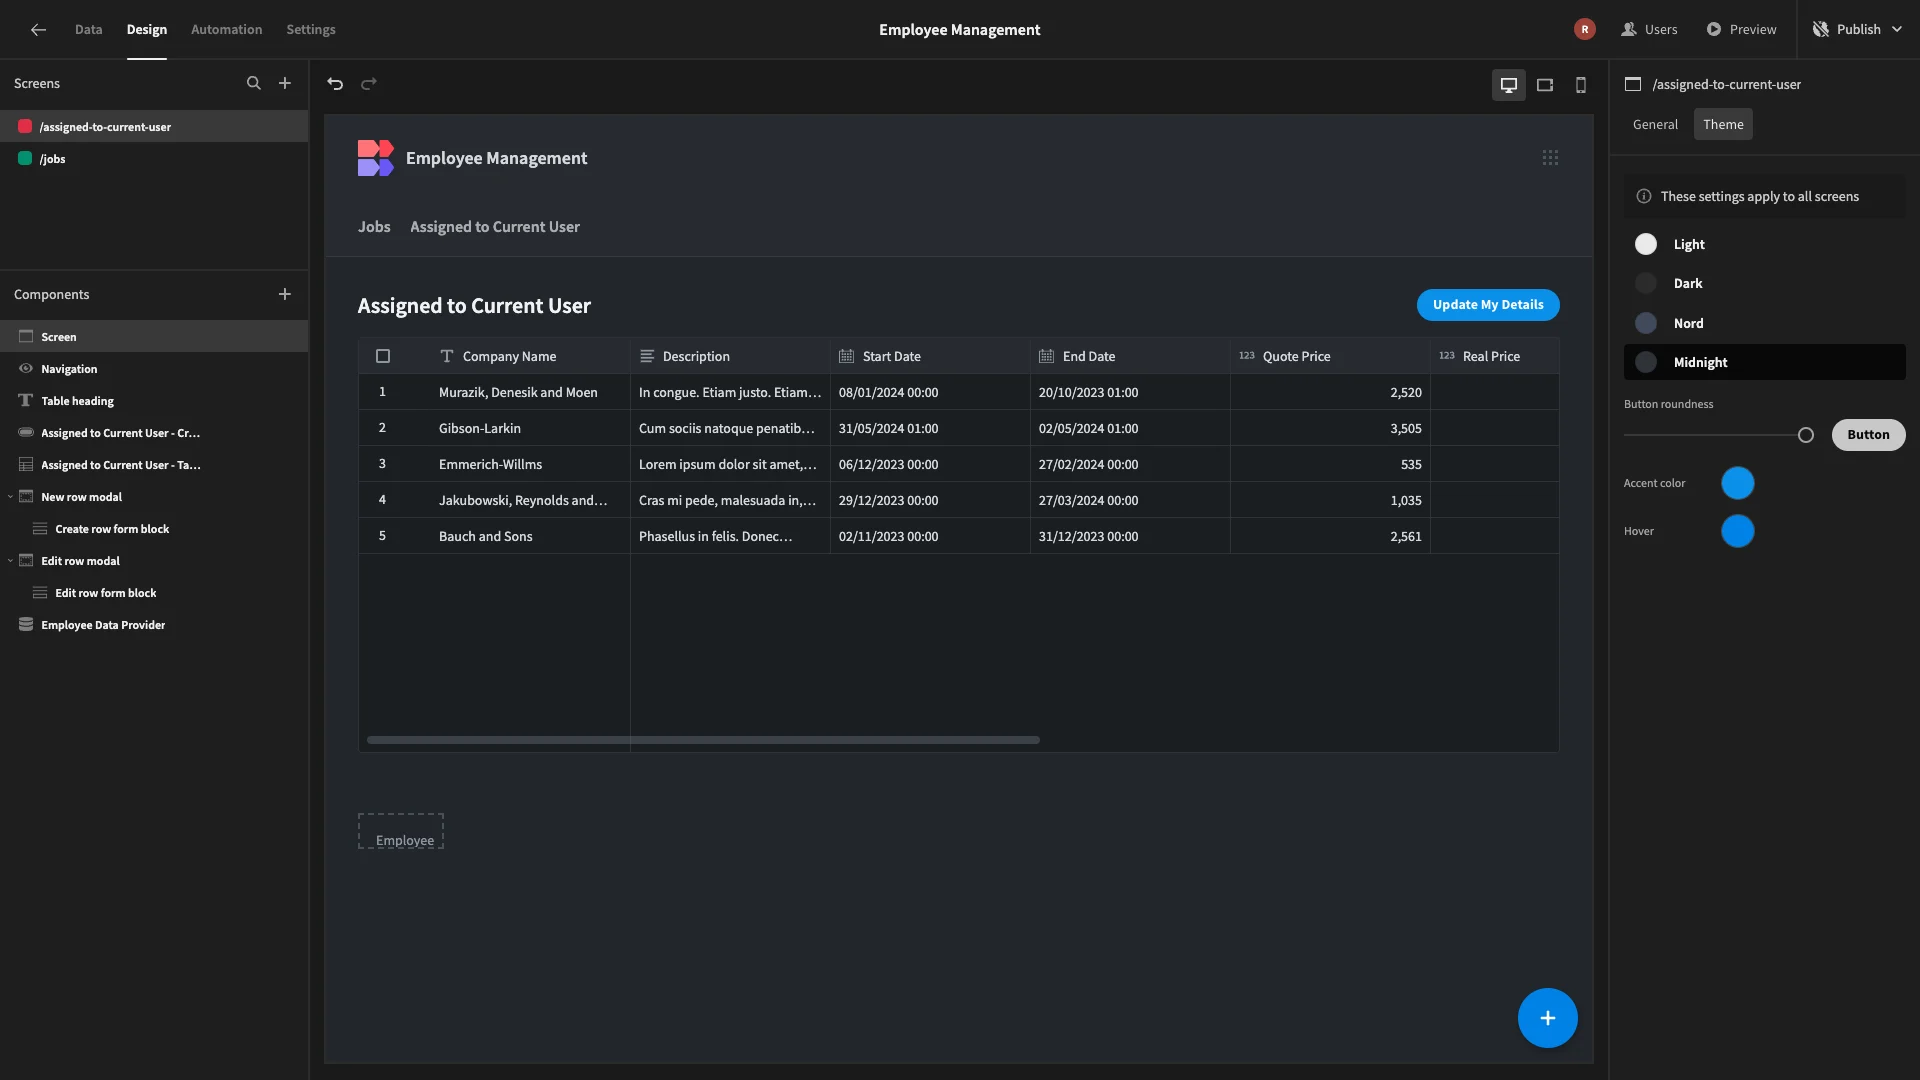
While we’re here, we’ll update our Accent and Hover colors to better suit our brand.
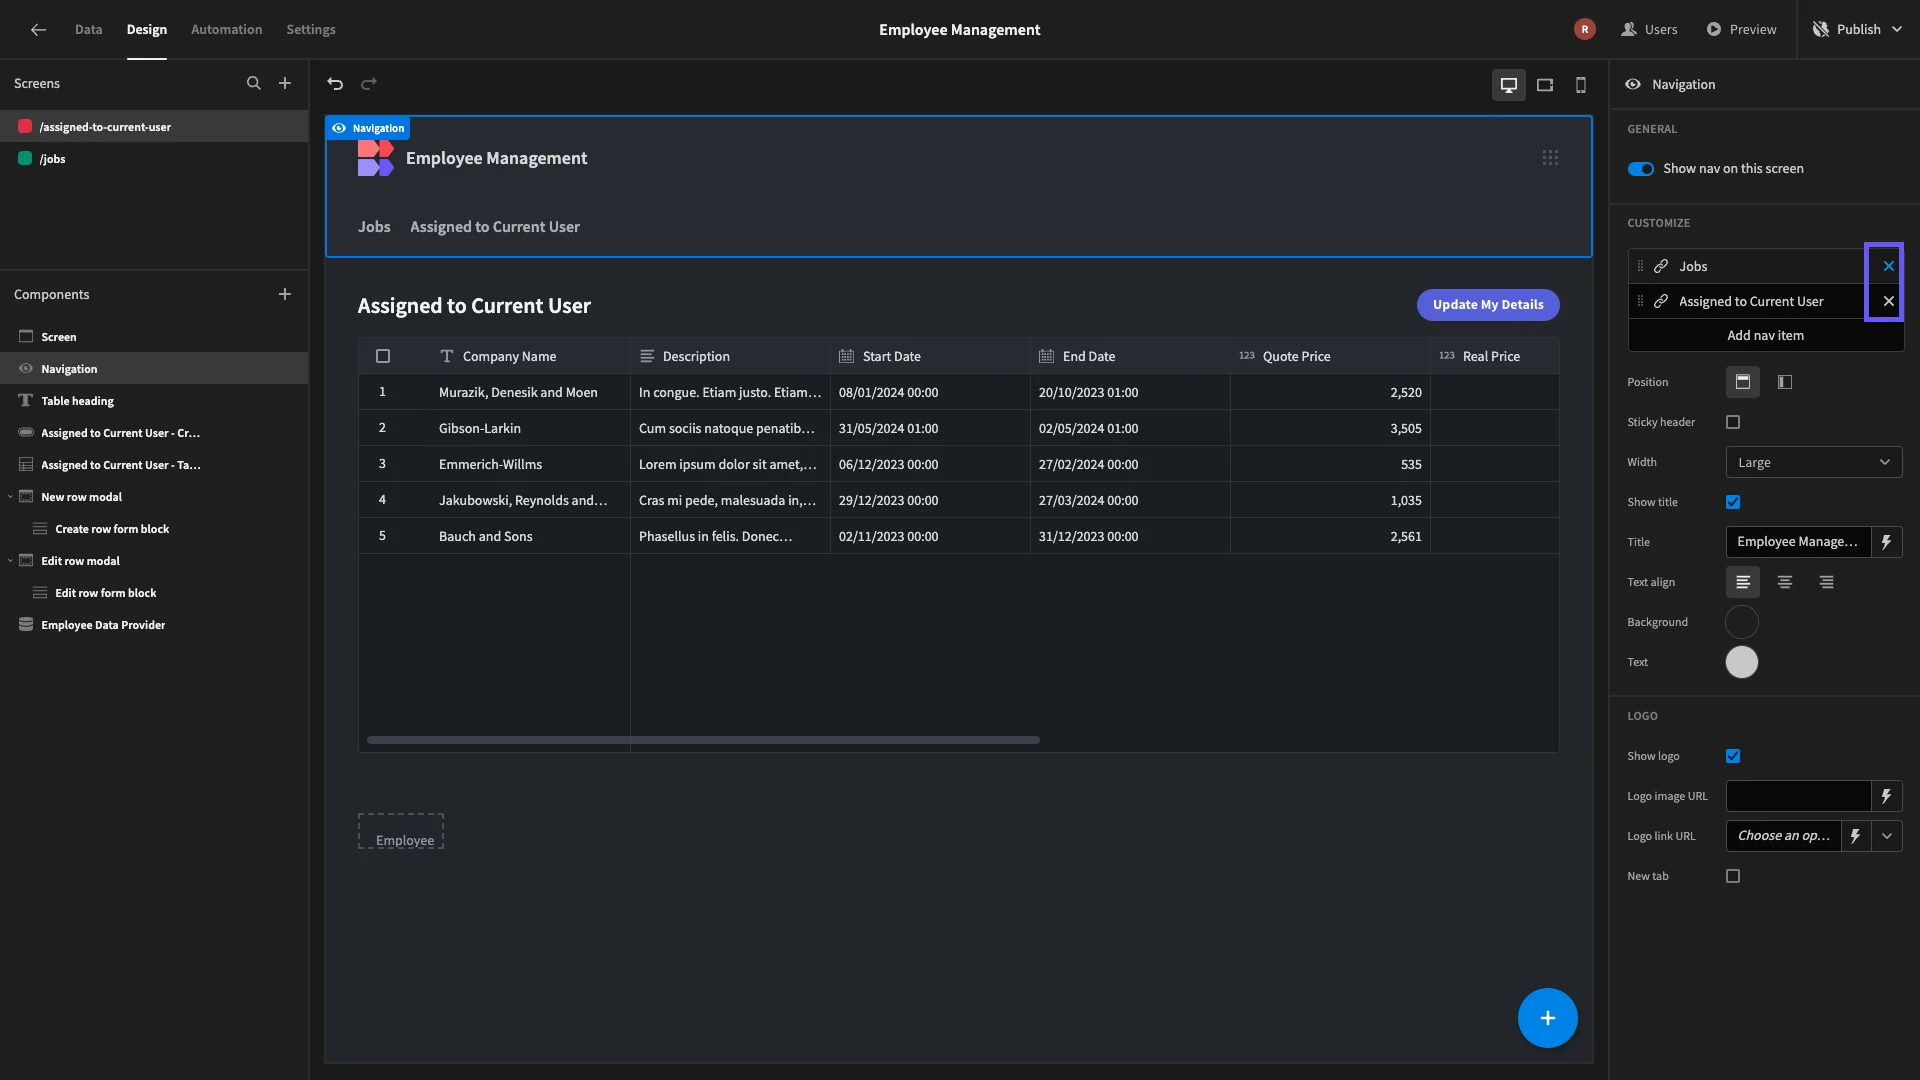
Lastly, we’ll head to Navigation and remove both links from our nav bar, as each group of users only needs to access a single screen anyway.
When we’re happy, we can hit Publish to push our app live for users.
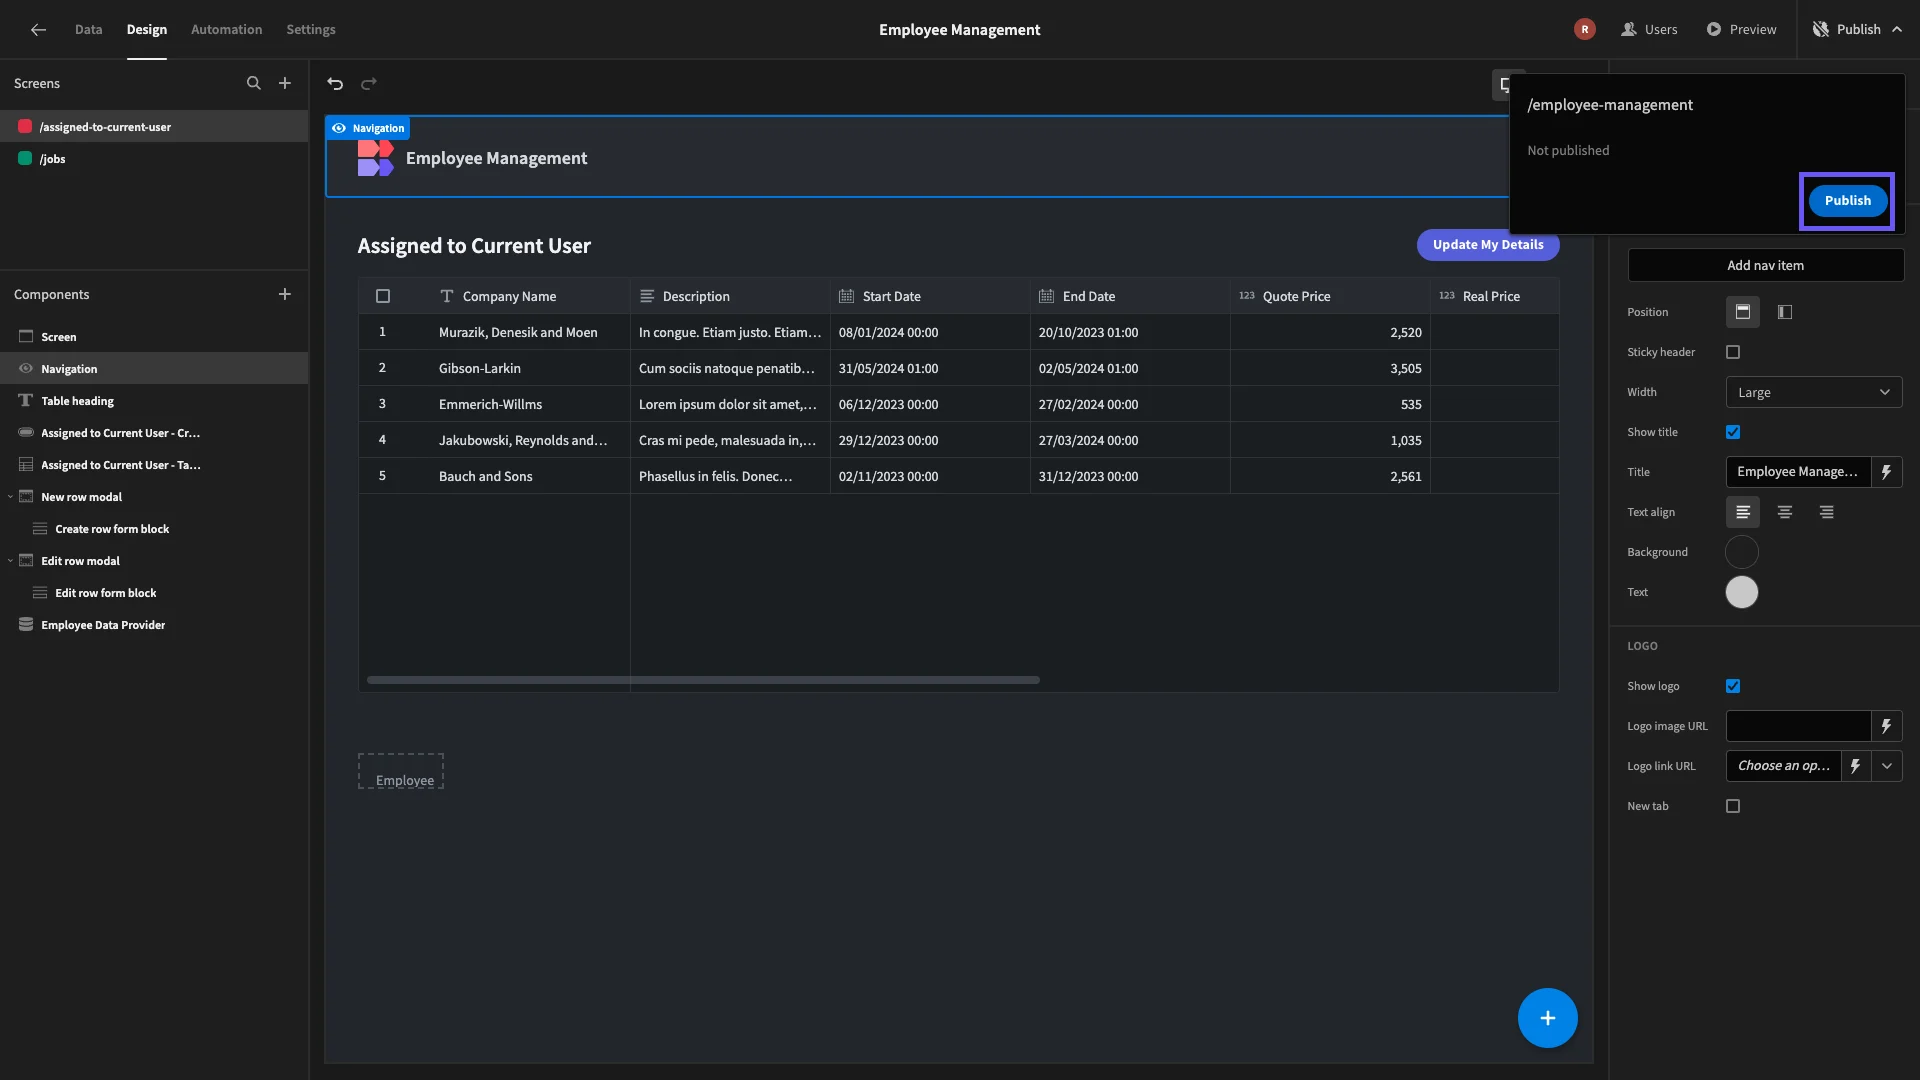
Here’s a reminder of what the finished app looks like.
Budibase is the fast, easy way to build secure workflows on top of any data. To learn more, check out our product page .