How to Connect an LLM to Postgres in 4 Steps
AI is forming a key part of more and more internal tools. At a basic level, this requires us to have the tools and techniques available to connect different layers of our applications to AI models, in order to perform functions.
Naturally, the database is probably the most important component to this.
However, this also poses some key challenges. For one thing, certain database engines have been quicker to adopt AI-ready functionality than others. On top of this, depending on the scale of what we’re trying to achieve, a few different connection methods might be appropriate.
Today, we’re exploring one important angle to this by checking out how we can connect an LLM to PostgreSQL, write prompts, and create AI-driven automations using Budibase.
Specifically, we’ll be covering:
- Why would you connect an LLM to PostgreSQL
- Options for connecting models to databases
- Building a ticket triage flow with OpenAI, Postgres, and Budibase
Let’s get started.
Why would you connect an LLM to PostgreSQL?
Postgres is one of the most ubiquitous databases around today. As a highly performant, flexible, open-source RDBMS, it’s often the go-to solution for all kinds of application projects.
This spans wide-scale usage by enterprises for internal tools, all the way down to hobbyist development projects.
So, if you want to build an AI-powered system, chances are you’re going to at least consider connecting an LLM to Postgres.
Another key part of this is that Postgres offers several benefits over other relational databases in its class, which makes it a strong choice for AI use cases. For example, it supports semi-structured data via dedicated types for storing JSON objects.
There’s also support for vectorization via the pgvector extension, making it a strong choice for situations requiring more complex data retrieval and usage of relational data.
Use cases can range from adding AI capabilities to existing workflows, such as data enrichment, validation, or automation actions, all the way up to more sophisticated, AI-centric solutions like agents, digital workers , and enterprise chatbots .
That leads us to…
Options for connecting models to databases
Depending on the complexity of what we’re trying to achieve by connecting our Postgres database to an LLM, there are a few distinct ways that we might go about this.
At a high level, this comes down to the fact that for more complex solutions, we’ll need to expose our model to our data in a more widespread manner. That is, for some use cases, our app might need to take more actions with our databases than others.
As such, it’s important to choose the right strategy here, in order to provide ourselves with adequate power and flexibility for our needs, without creating excessive development overhead or over-engineering a solution.
Nowadays, many advanced solutions rely on what are known as AI agent frameworks, such as LangChain. We can think of these as toolkits for connecting models to a range of tools and endpoints, including databases, enabling them to act autonomously in response to a prompt.
For example, a customer support AI agent might need to read our orders database, so that it can provide updates on the status of a requestor’s order, as well as taking any required follow-up actions.
Or, an IT agent might respond to a user’s prompt by searching relevant documentation and previous tickets to determine the appropriate troubleshooting steps.
This generally relies on a Model Context Protocol (MCP) server to enable the model to communicate with connected tools in a secure, standardized manner.
However, not all AI-powered applications require autonomy. In fact, just as many day-to-day use cases will only require a discrete number of pre-defined interactions between our model and database.
In these cases, we define some logic or a trigger event to pass values from our database to our LLM for processing, using a fixed prompt. This can be achieved by sending the prompt via a HTTP request, with the relevant values added in.
This could be hard-coded, but we can also leverage visual development and workflow automation tools to establish trigger logic, write prompts, populate values, and send data via HTTP requests, with minimal custom code.
In the following section, we’ll check out an example of how we can do this to connect LLMs to Postgres by building a ticket triage automation powered by OpenAI, using Budibase.
Building a ticket triage flow with OpenAI, Postgres, and Budibase
Budibase is the open-source, low-code platform that empowers IT teams to turn data into action.
With connectivity for a range of LLMs, RDBMSs, NoSQL tools, APIs, and more, alongside autogenerated UIs, a powerful visual automation builder, and optional self-hosting, it’s the ideal platform for building secure, performant internal tools at pace.
So, what are we building today?
As we said already, our example will use Postgres and OpenAI to triage incoming tickets. To achieve this, we’re going to do the following:
- Connect our database - Connect an existing Postgres database to Budibase, so that we can use and manipulate data directly within the Budibase builder and end-user apps.
- Set up our OpenAI connection - Add our OpenAI API key to enable us to use Budibase’s native integration to power our app.
- Create a triage automation - Creating logic so that when a new row is added to our database, data will be sent to our LLM to establish a category and priority level, which can then be added to the original row.
- Add a ticketing form UI - Lastly, we’ll use Budibase’s autogenerated screens to build a simple form for end users to submit tickets.
If you haven’t already, sign up for a free Budibase account to start building as many applications as you like.
Note, in this tutorial, we’re using a self-hosted instance of Budibase in order to access the OpenAI automation action, but you can also access a range of AI features in our cloud platform using BudibaseDB as your data source.
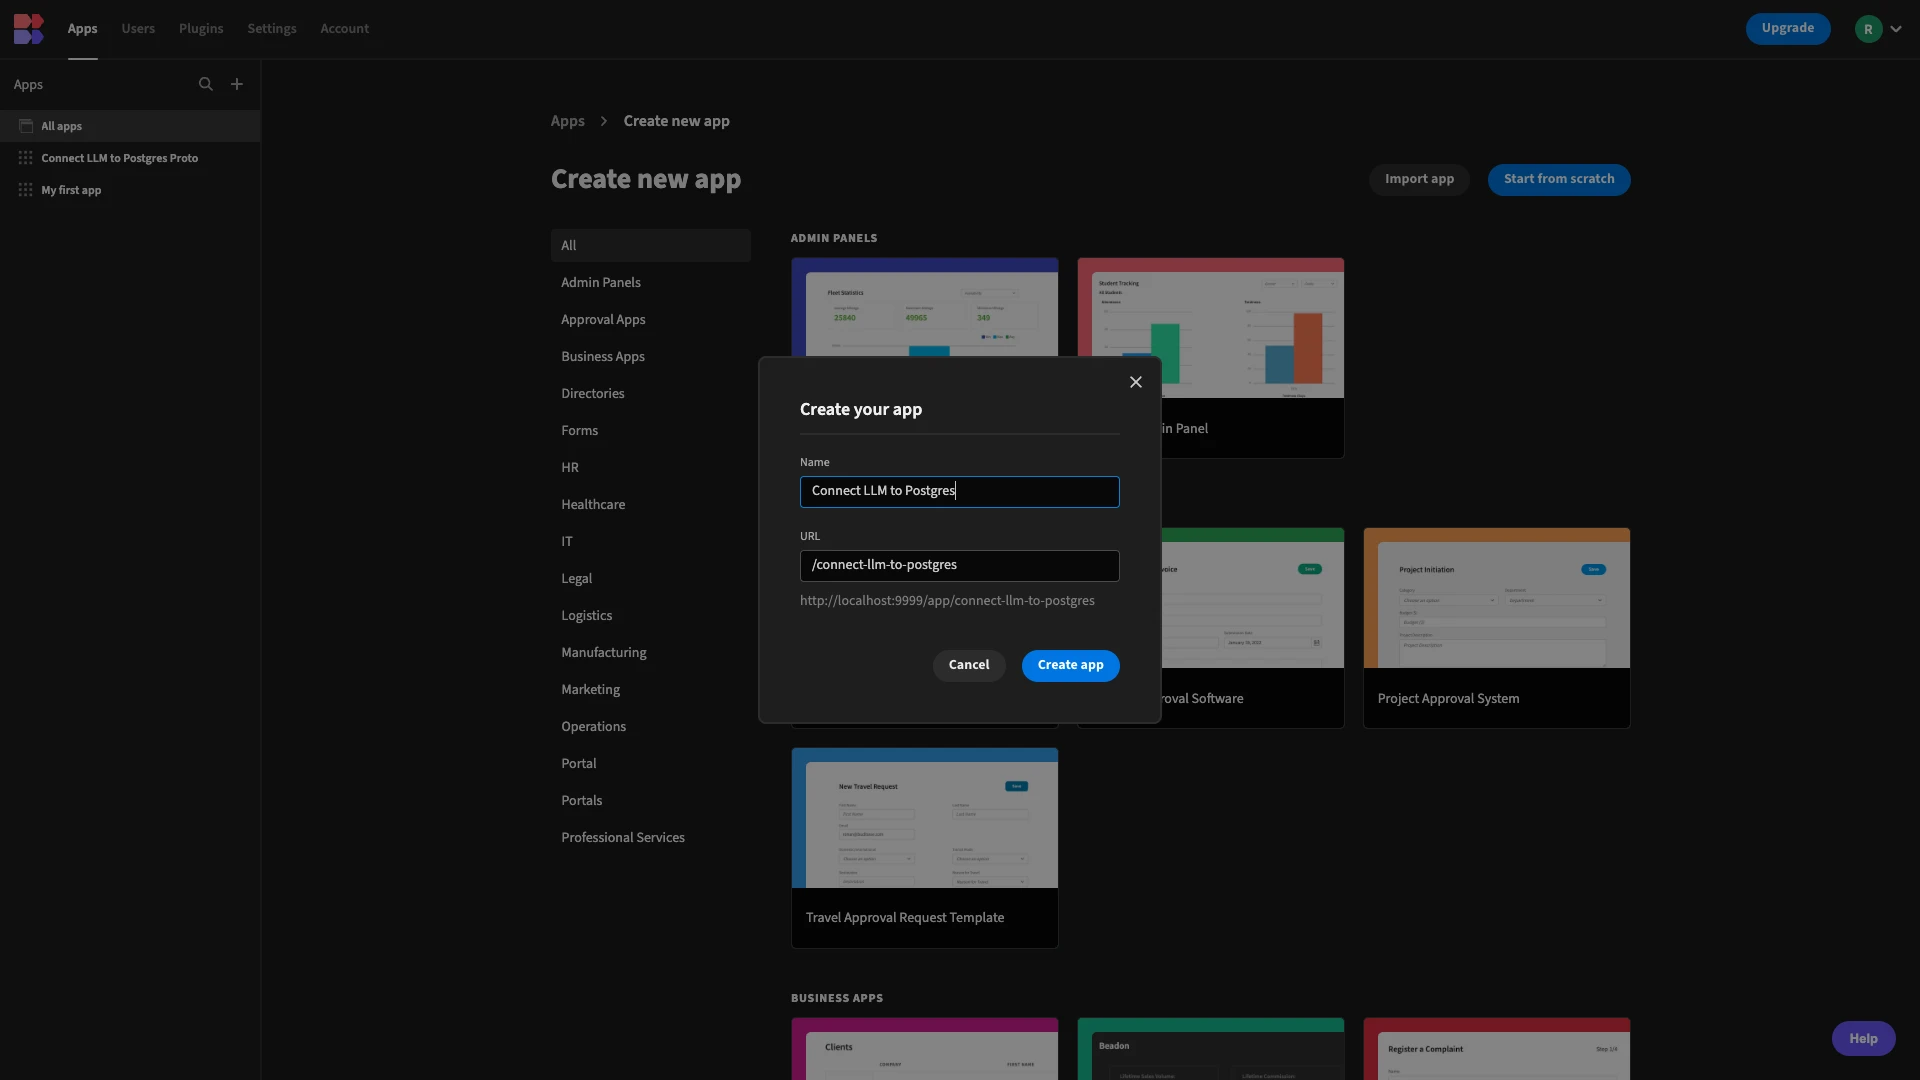
The first thing we need to do is create a new Budibase application. We have the options of using a pre-built template or importing an existing project, but today we’re starting from scratch.
When we choose this option, we’ll be prompted to give our new app a name, which will also be used to generate a URL extension. We’re simply calling ours Connect LLM to Postgres for demo purposes.
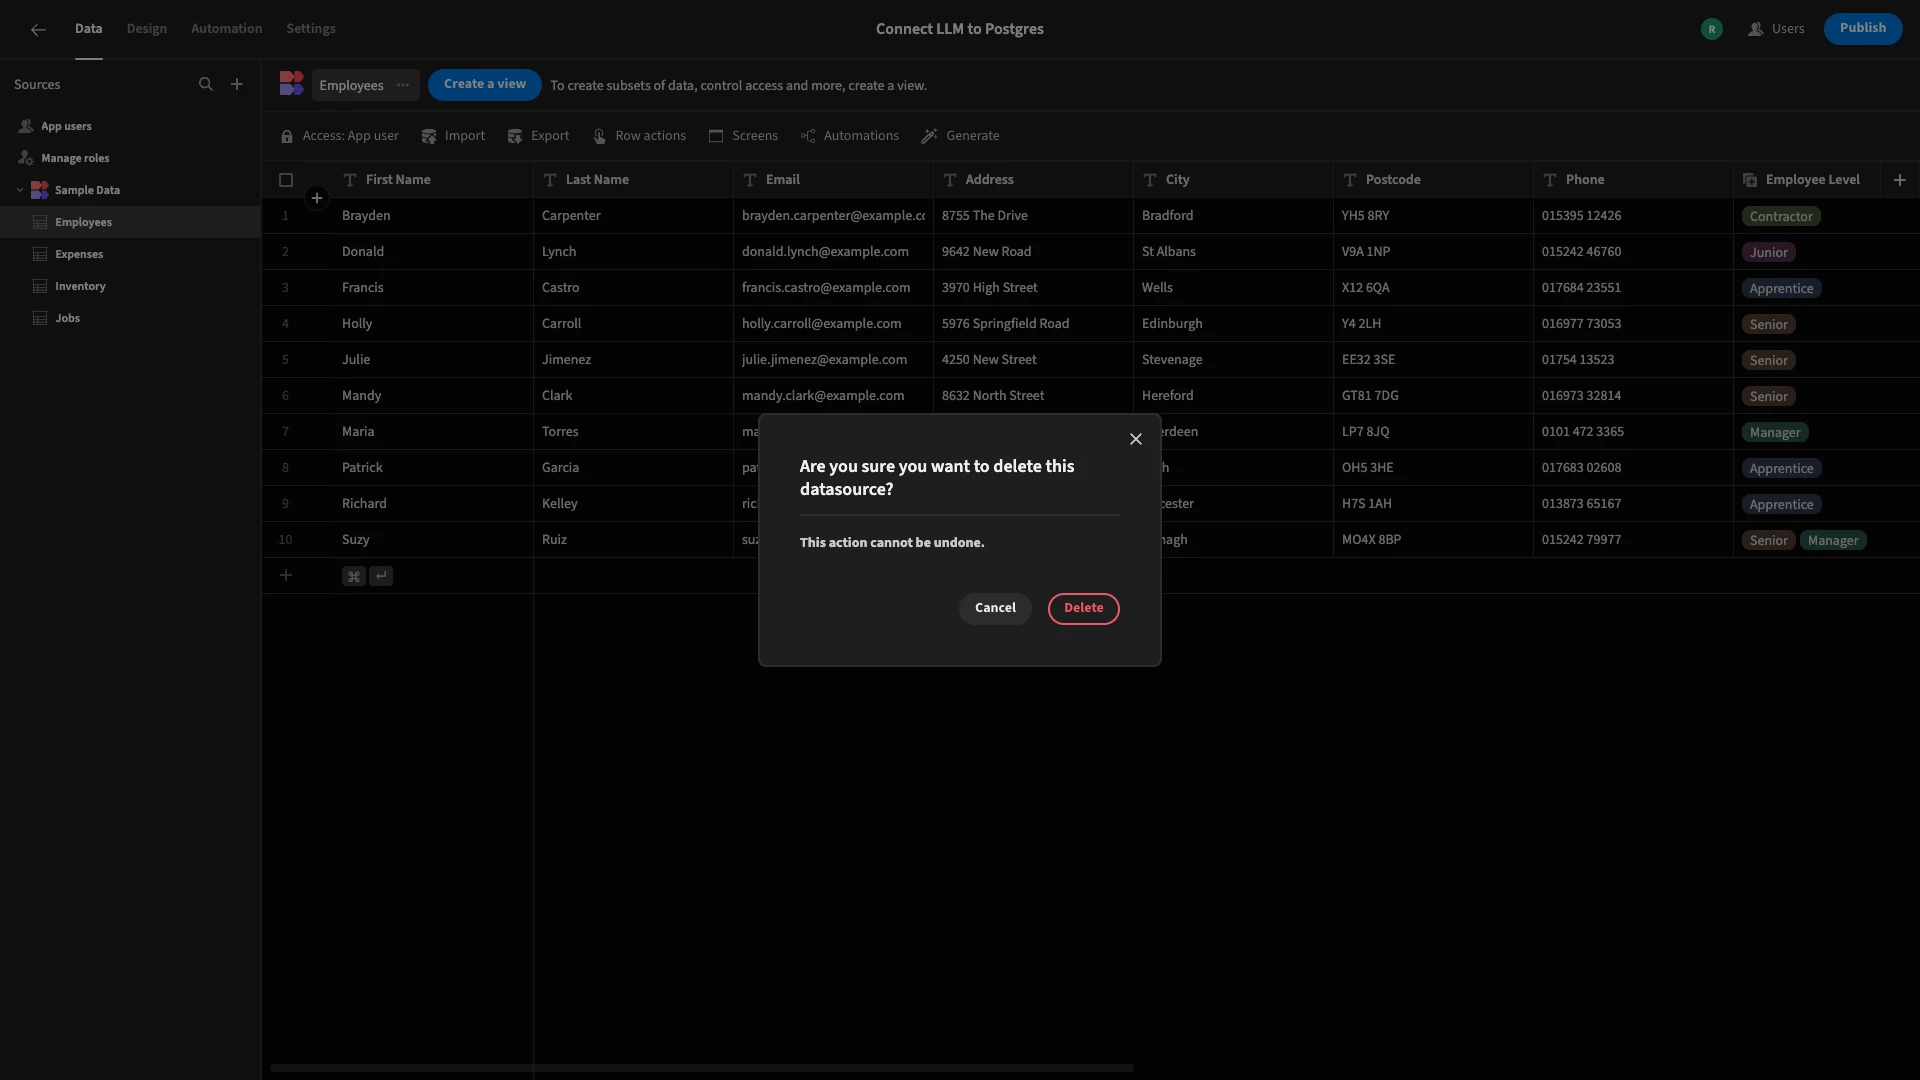
New Budibase applications ship with sample data and screens, which we can simply delete as we don’t need them for our purposes today.
1. Connecting our database
Once we’ve done this, we’ll be presented with the following screen, offering us a range of options to connect a data source to our app.
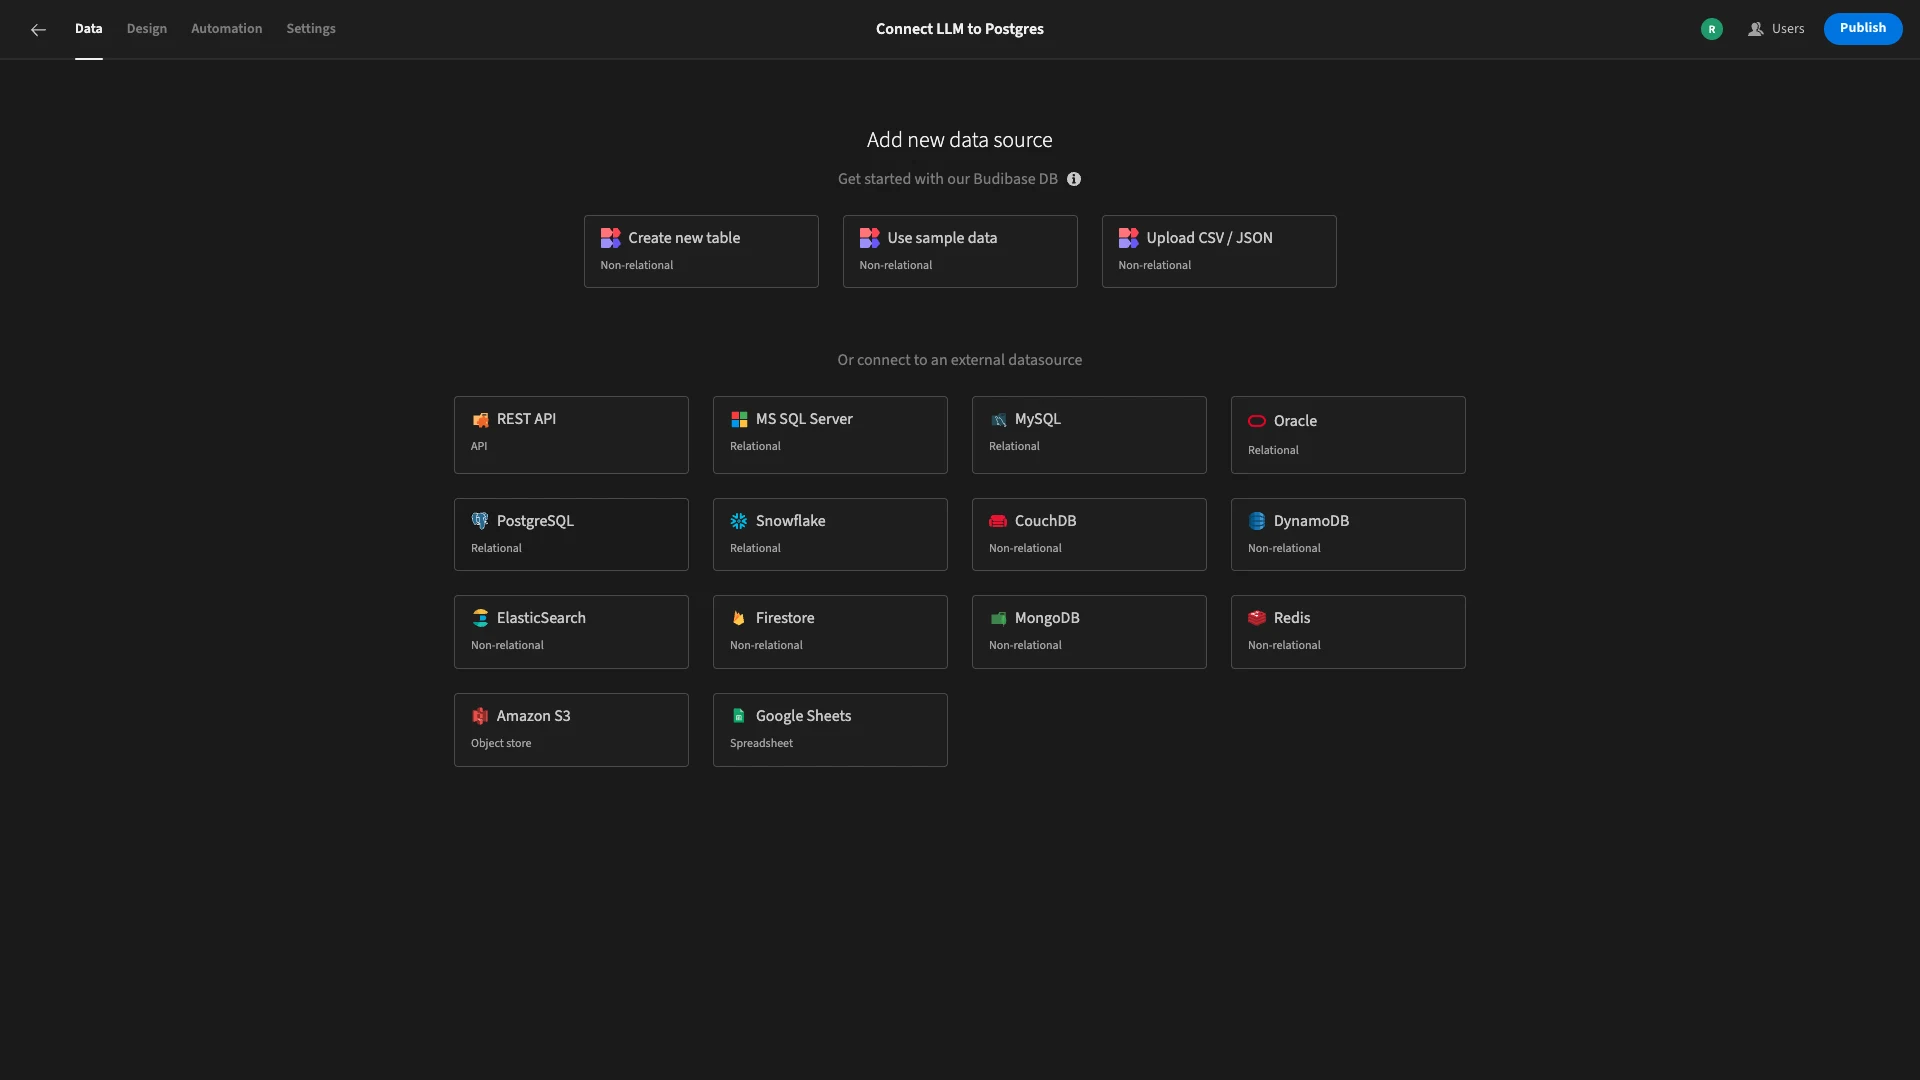
Budibase offers connectivity for a huge range of RDBMSs, NoSQL tools, spreadsheets, and APIs, alongside our built-in low-code database.
As you might expect, today we’re going to choose PostgreSQL.
When we click on this option, the following modal will open, where we can enter our connection details.
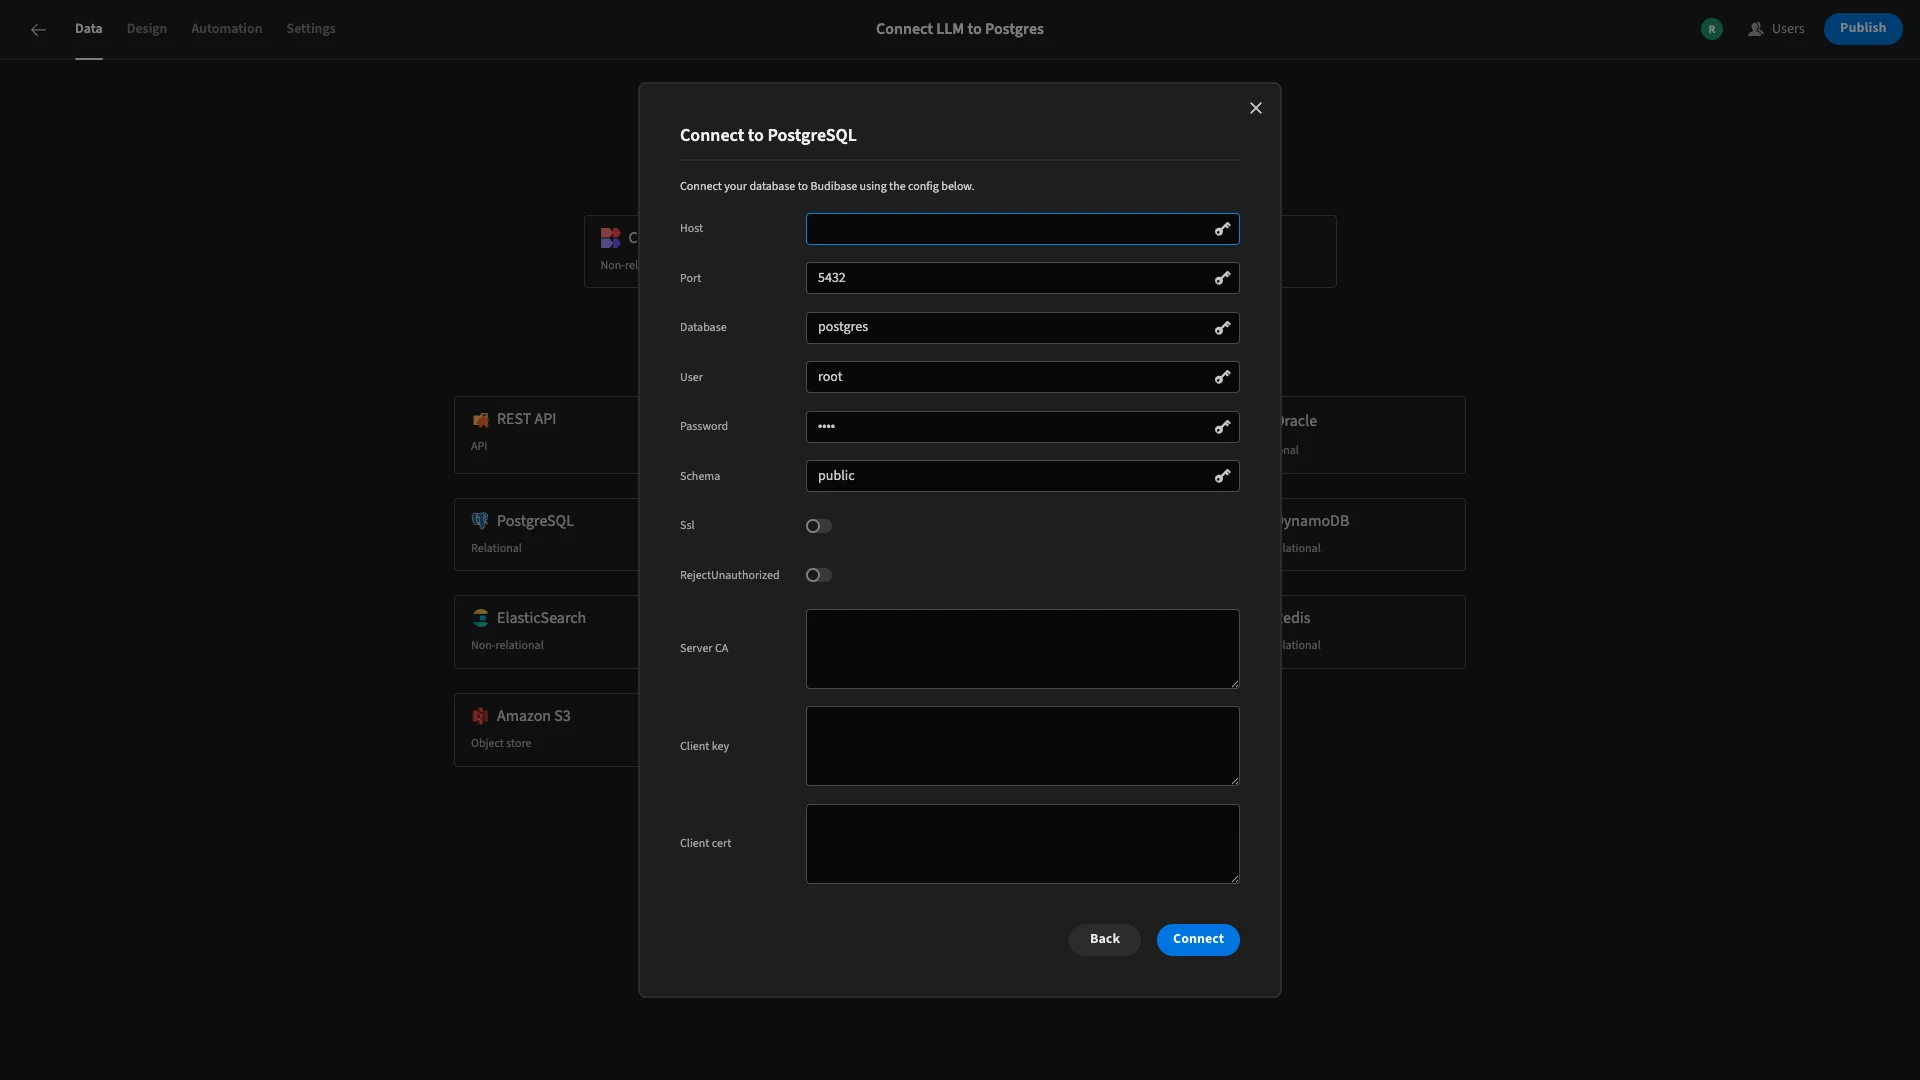
We can then choose which of our database’s tables we’d like to fetch, making them accessible within Budibase. Our database has a single table called tickets, so we’ll fetch that.
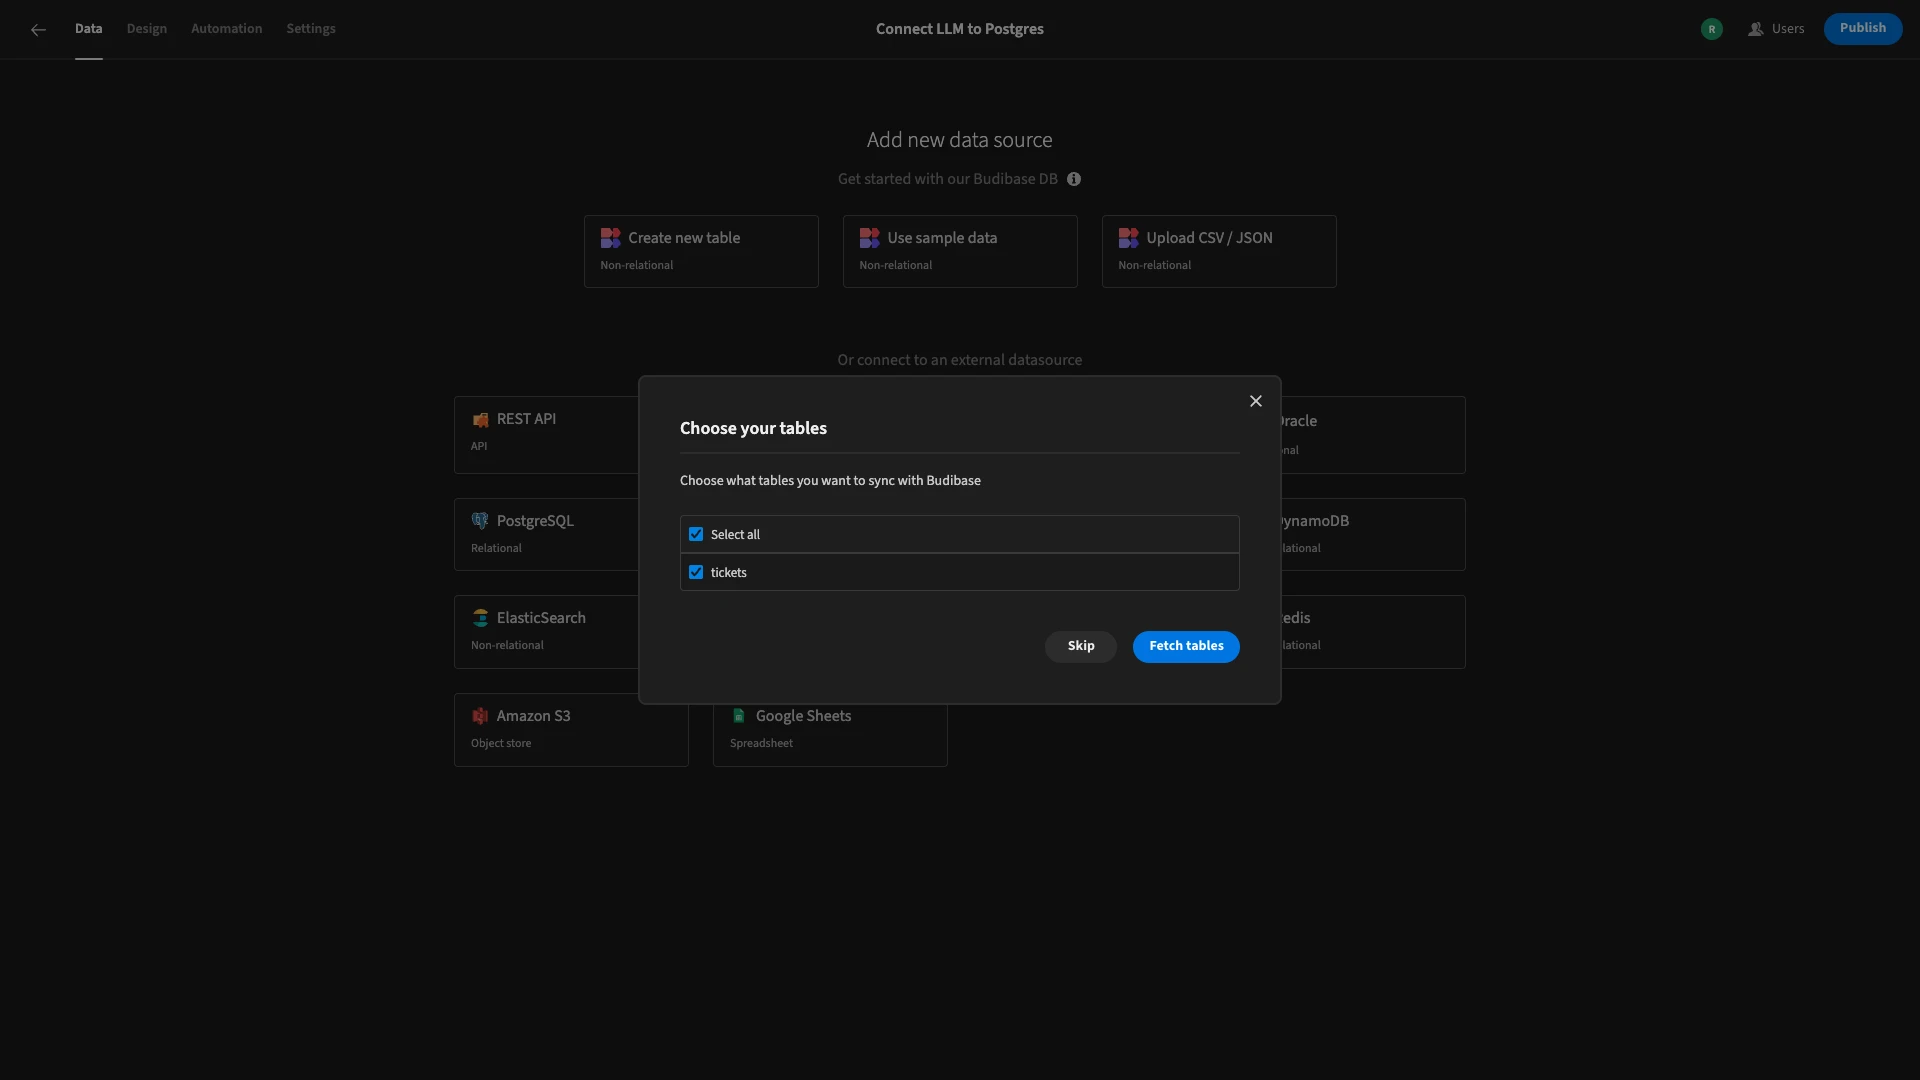
If you’d like to build along with our tutorial, you can use the following query to create our database:
 1CREATE TABLE tickets (
 2
 3 id SERIAL PRIMARY KEY,
 4
 5 description TEXT NOT NULL,
 6
 7 priority VARCHAR(20),
 8
 9 category VARCHAR(20),
10
11 status VARCHAR(20),
12
13 created_at TIMESTAMPTZ,
14
15 updated_at TIMESTAMPTZ
16
17);
You can use this one to populate it with dummy data:
 1INSERT INTO tickets (description, status, created_at, updated_at) VALUES
 2
 3('User cannot access VPN', 'Open', '2025-05-20 09:15:00+00', '2025-05-20 09:15:00+00'),
 4
 5('Email service is slow', 'In Progress', '2025-05-21 11:30:00+00', '2025-05-22 08:45:00+00'),
 6
 7('Printer not working on floor 3', 'Resolved', '2025-05-19 14:00:00+00', '2025-05-20 10:00:00+00'),
 8
 9('Unable to login to CRM system', 'Open', '2025-05-23 07:45:00+00', '2025-05-23 07:45:00+00'),
10
11('Request for software installation', 'Closed', '2025-05-18 16:20:00+00', '2025-05-22 15:00:00+00');
Here’s what our table looks like within the Data section of the Budibase builder.
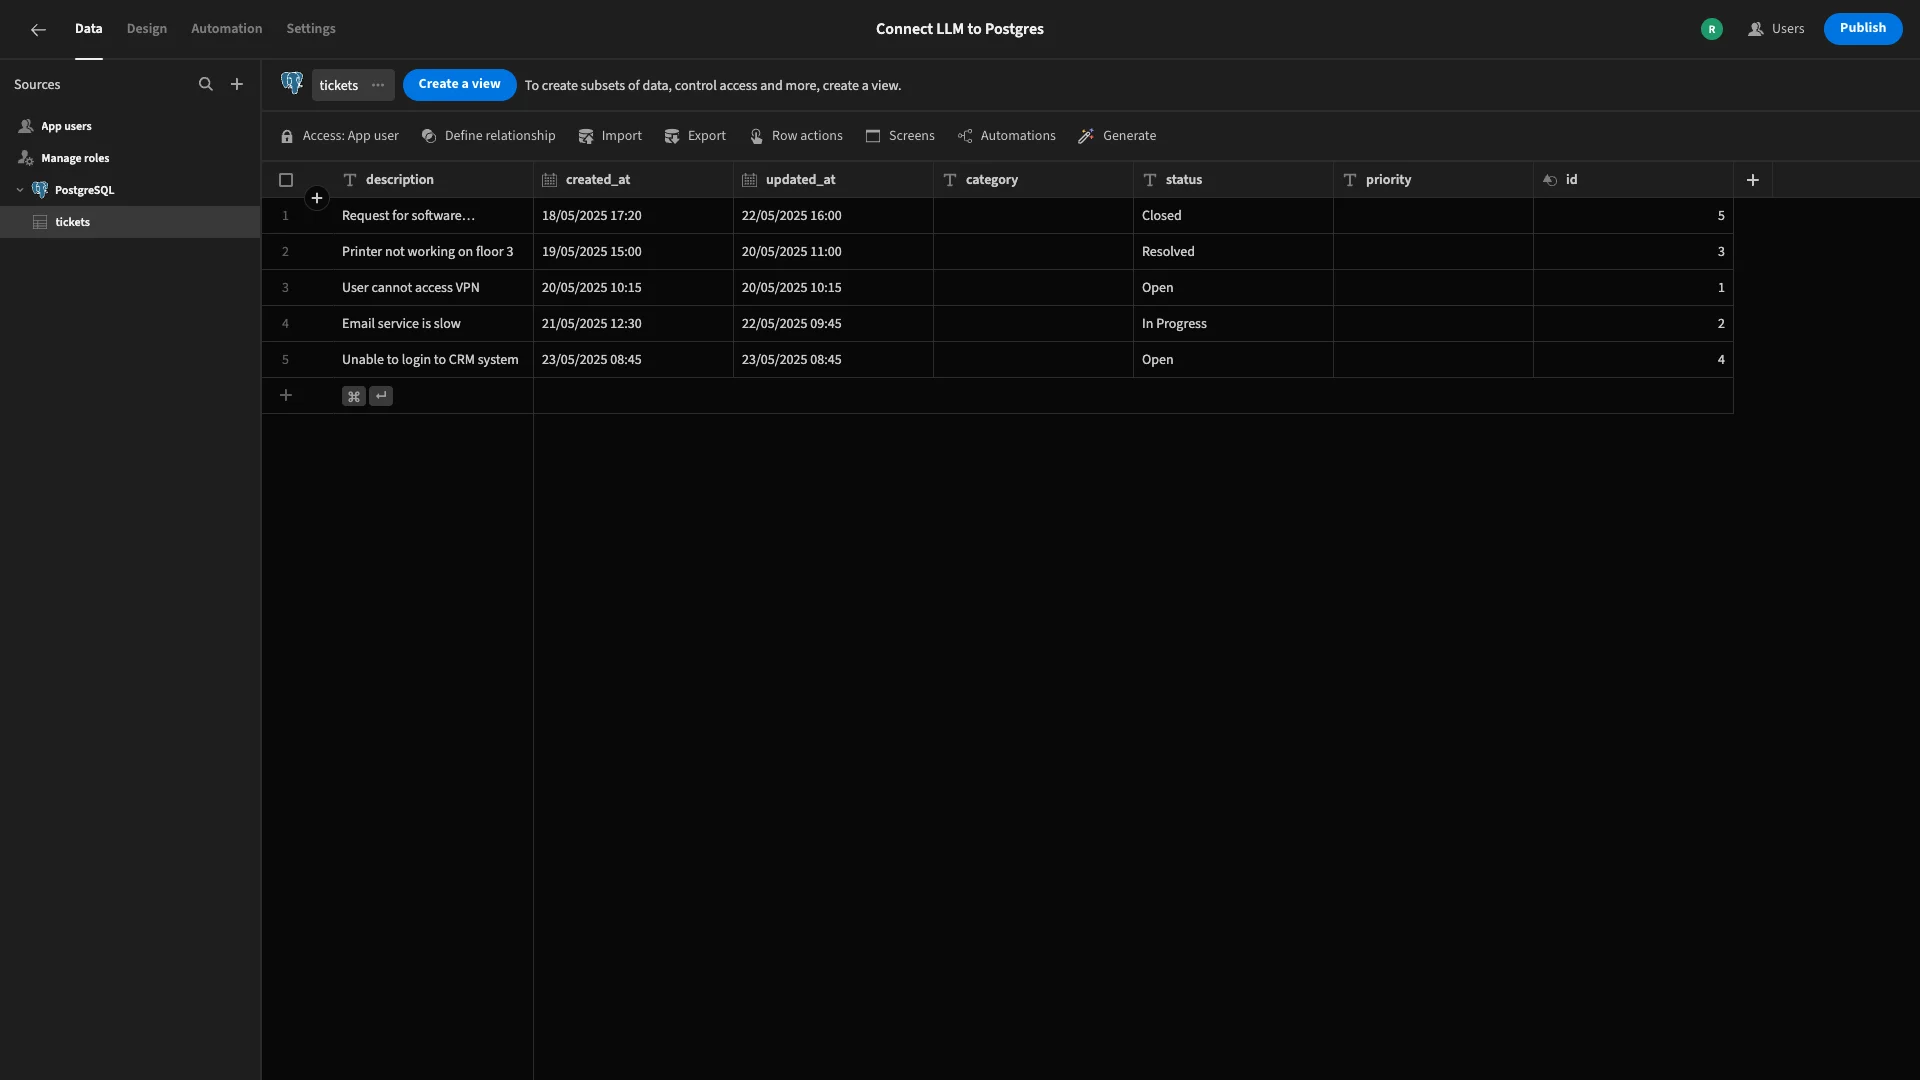
Note that the category and priority attributes are blank. In our final application, we’ll only ask end users to provide a description, with all other values being populated with by Budibase or our LLM connection.
Tweaking our database settings
To achieve this, we’re going to make a few minor changes to how Budibase handles our underlying database. Making these changes now will make life easier later, especially when it comes time to generate our UI.
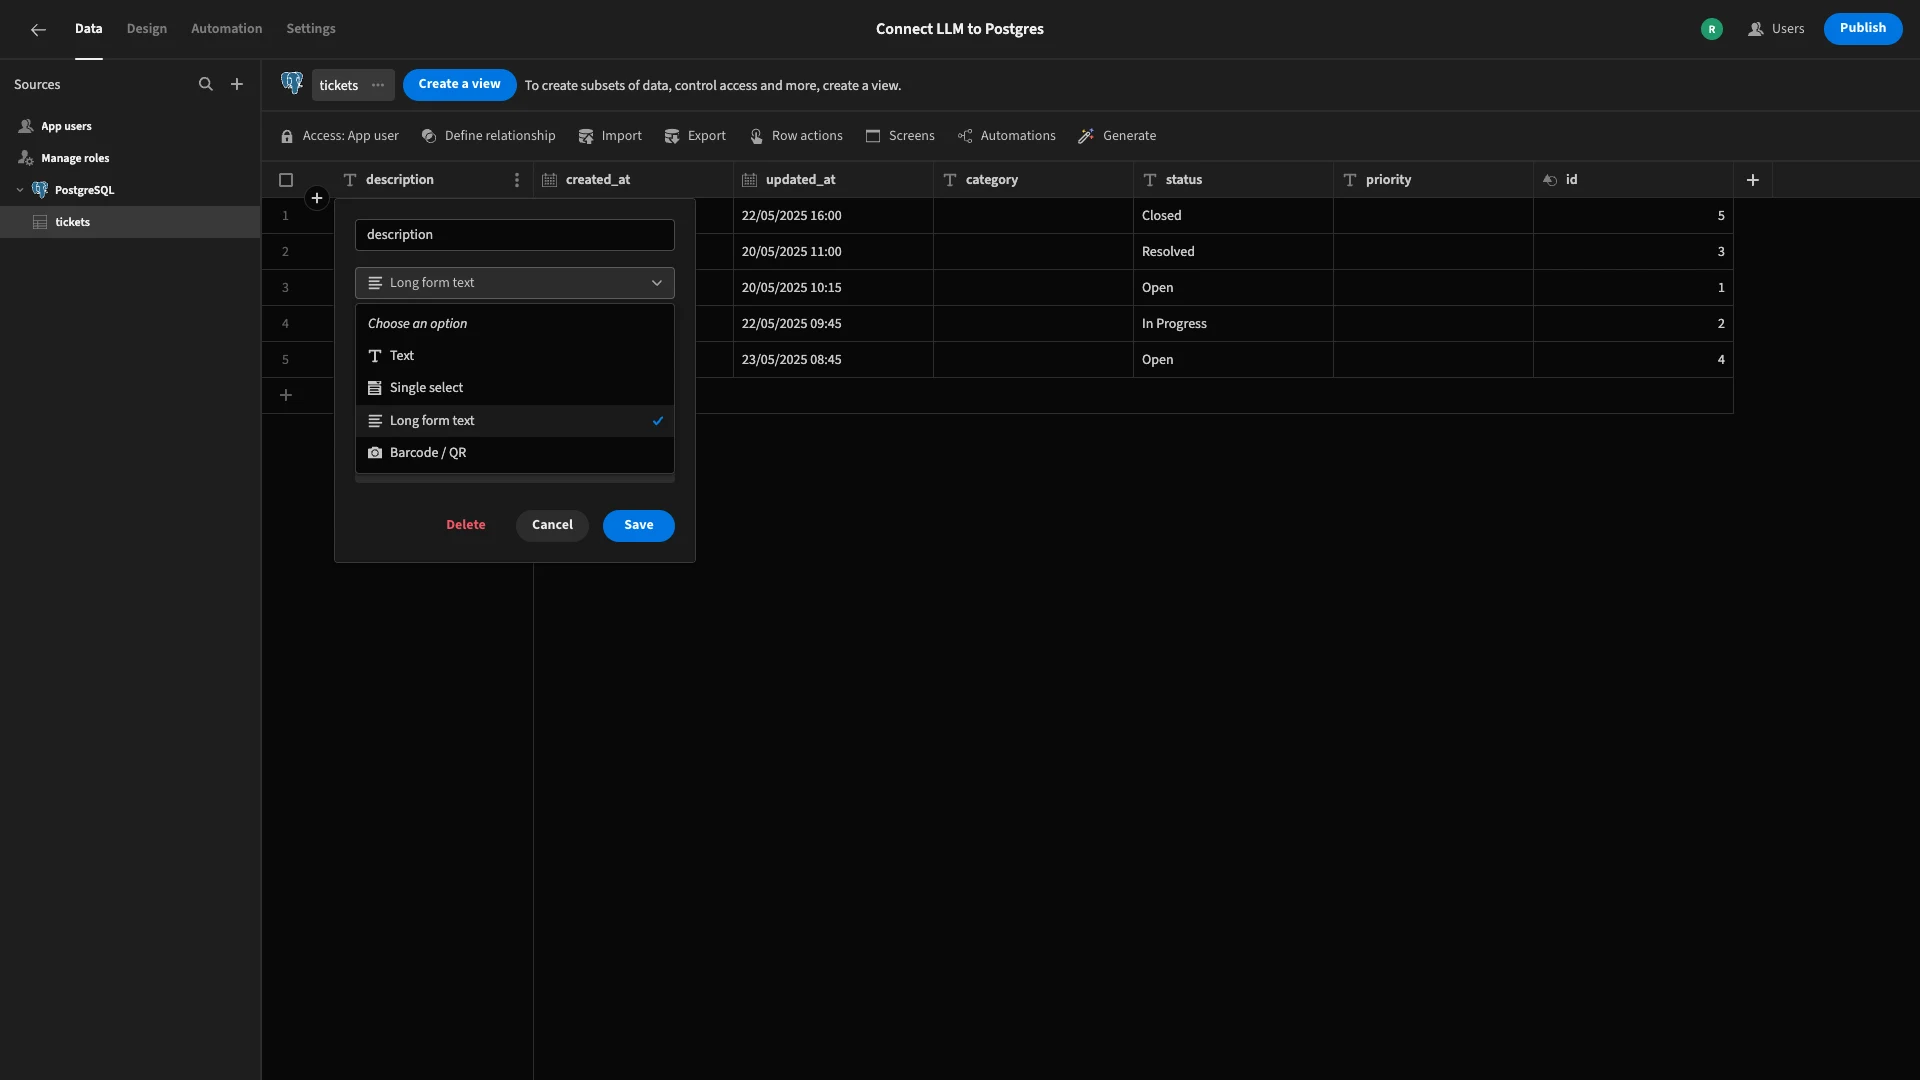
Firstly, our description column has the TEXT type in Postgres. To give users more space in our autogenerated screen, we’ll change this to the Long Form Text type within Budibase.
This will still be handled the same way in our underlying database, as Postgres uses a single type for all text columns, regardless of length.
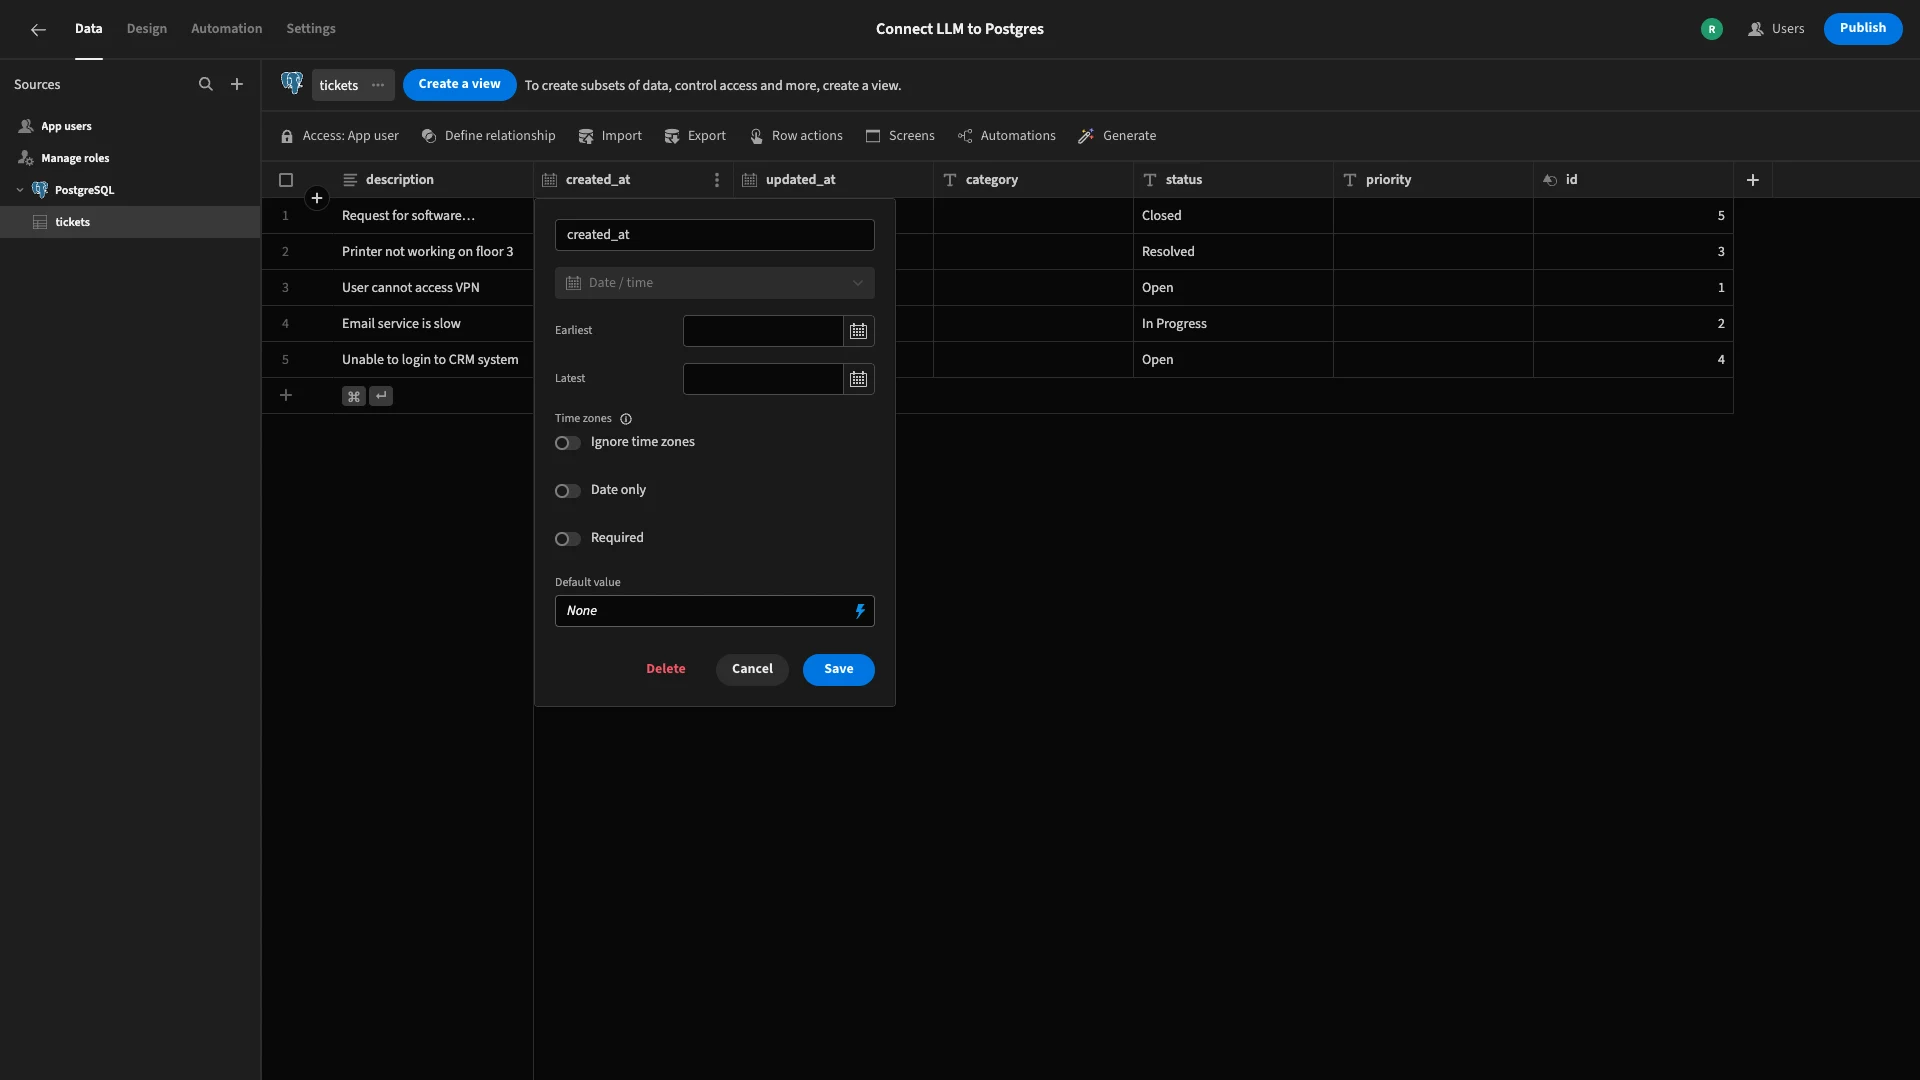
We don’t want to make end users populate the created_at attribute manually. Rather, we simply want to record a timestamp at the point that a ticket is submitted. We can achieve this using Budibase’s default values.
We’ll first hit the lightning bolt icon within the default value field to open the bindings menu.
Within this, we’ll choose the Server Date option.
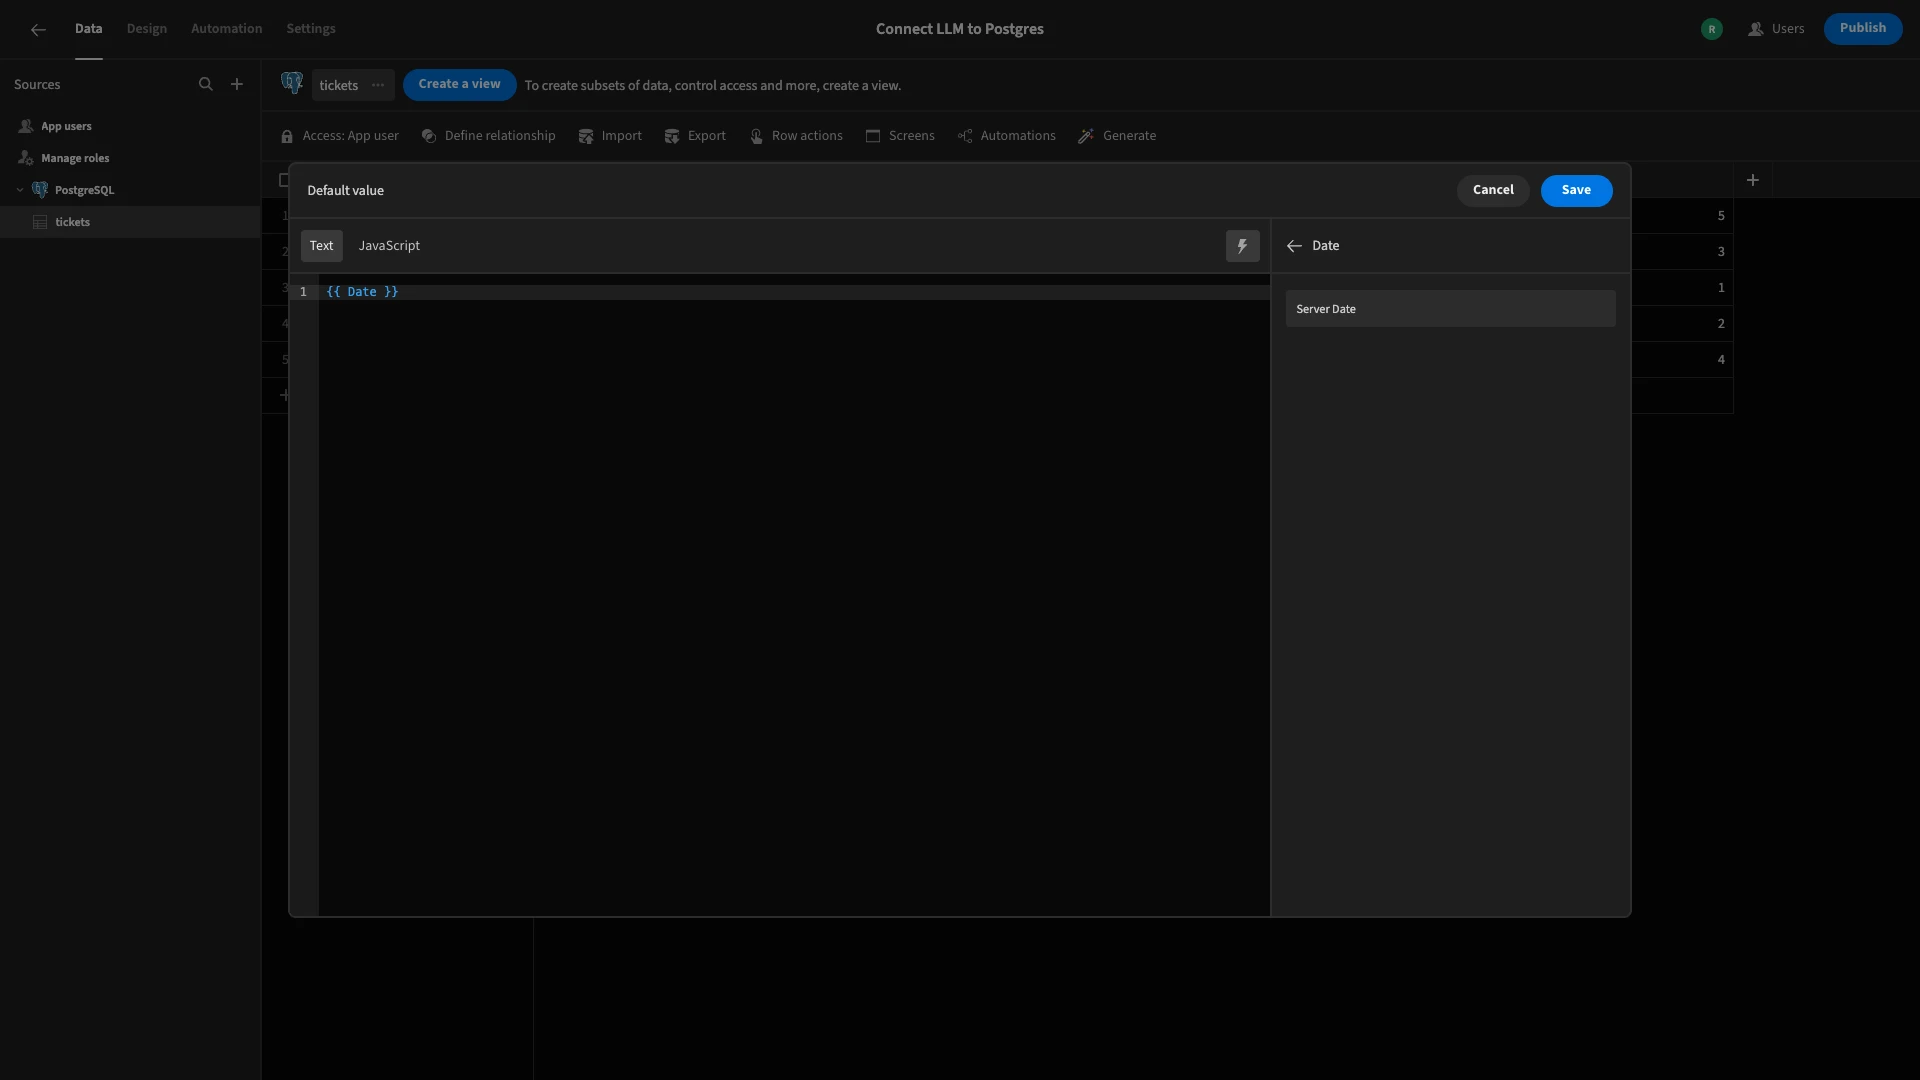
Now, when a row is added, Budibase will automatically populate the current date and time.
Lastly, there are several TEXT attributes in our table that we’ll only want to accept defined options for. These are status, category, and priority.
We’ll start by changing the type for the status column to Single select, choosing Open, Closed, In Progress, and Resolved as our options. We’ll also choose Open as our default value.
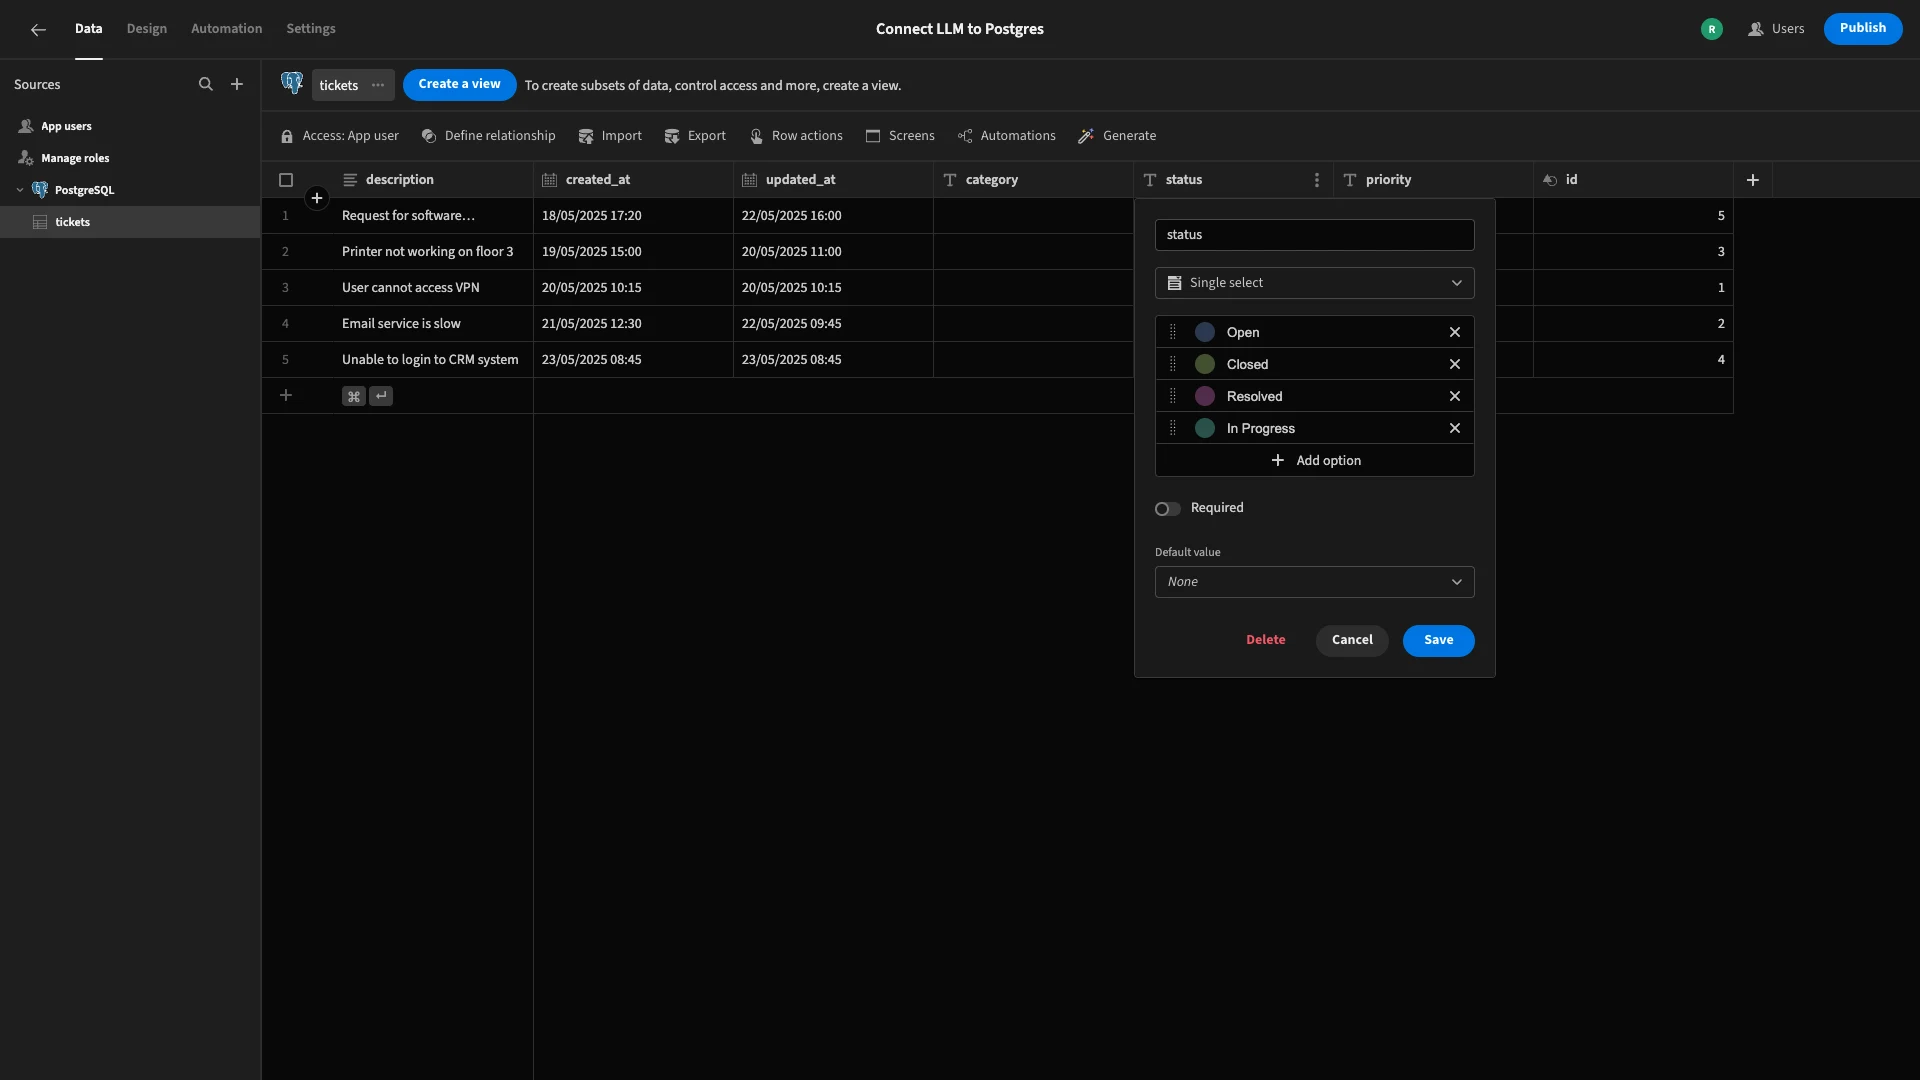
We’ll repeat this same process for priority and category, setting the following options:
- category -
Network Issue,Software Bug,Hardware Problem,Access Request,General Enquiry, andOther. - priority -
Low,Medium,High, andUrgent.
Note that these values are only chosen for demo purposes. You could easily swap them out for whatever suits your own real-world ticket triage workflows.
An additional benefit of using the single select type is that we’ll have better visual separation for values, both within the Data section and in end-user UIs, as we can see here with the Status column.
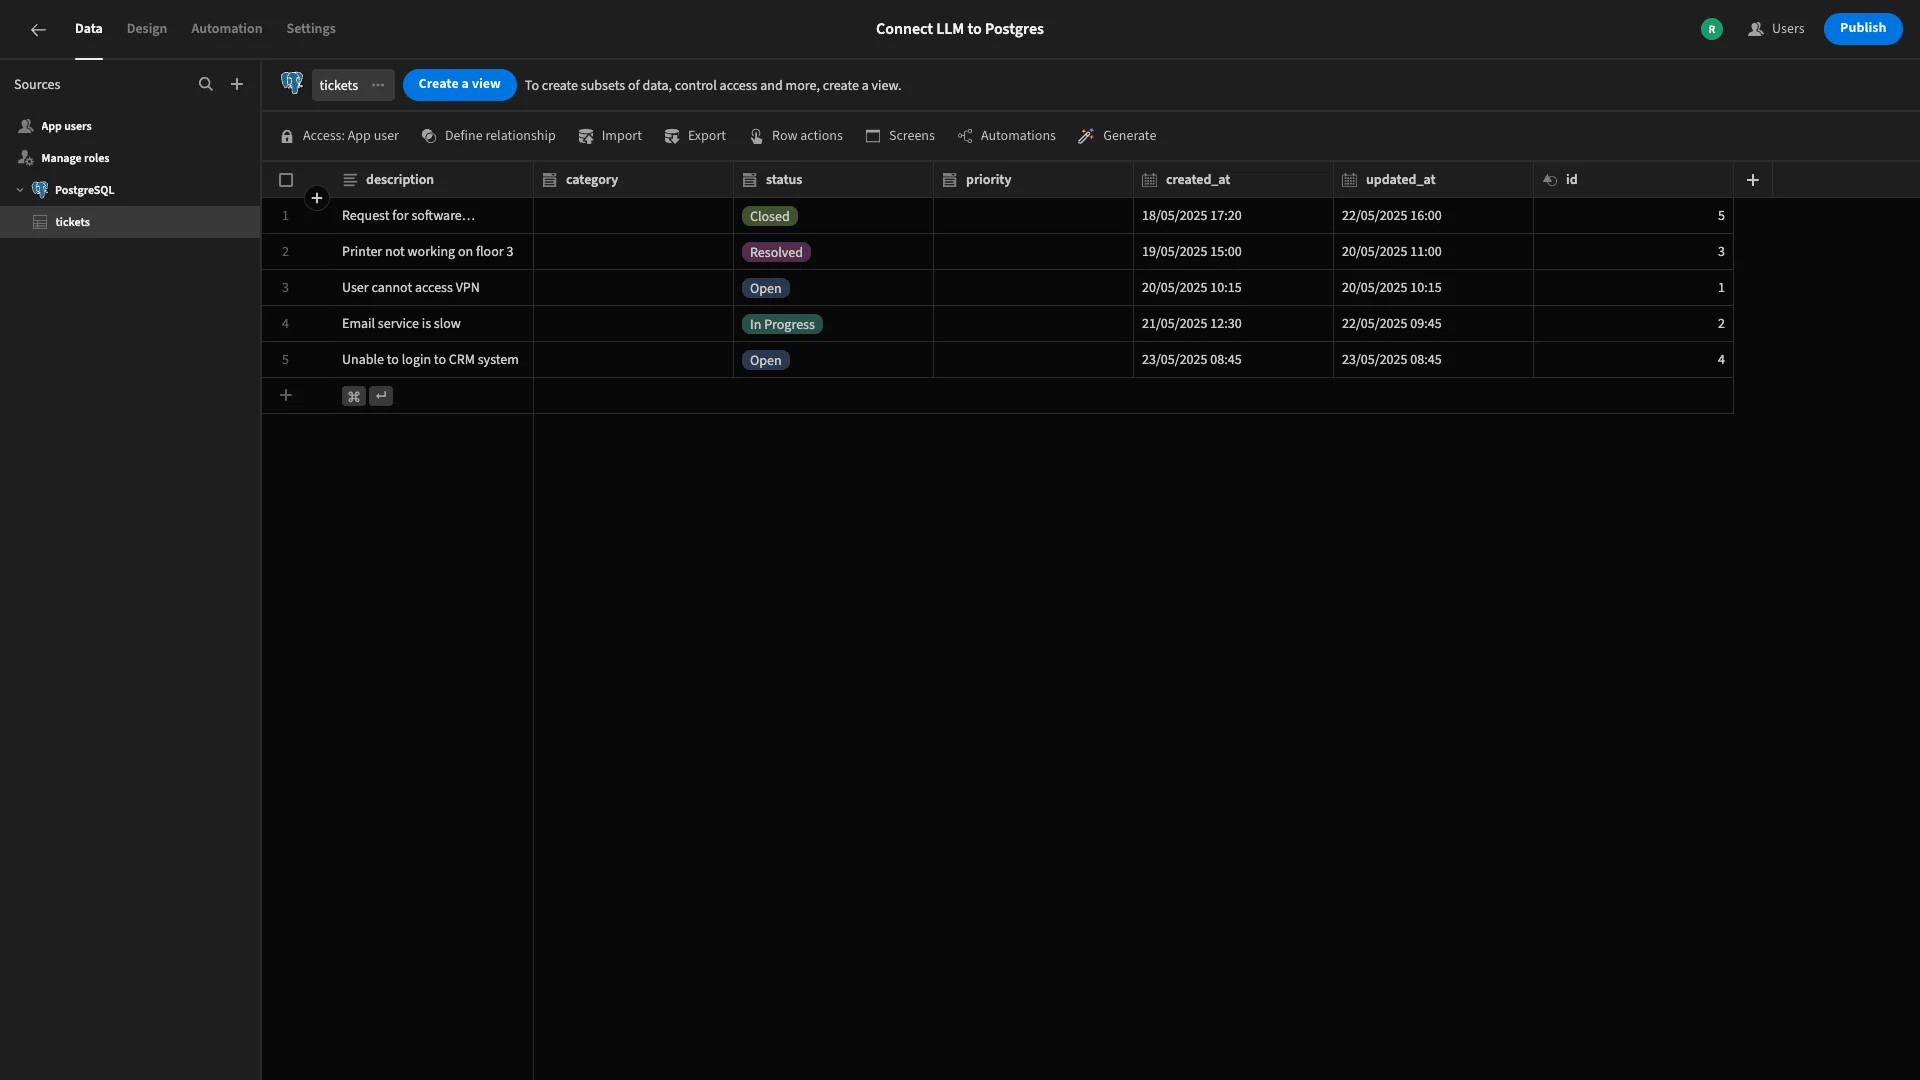
And that’s our data model ready to go.
2. Setting up our OpenAI connection
Next, we need to connect Budibase to our OpenAI account in order to connect an LLM to Postgres.
To do this, we’ll need to exit our application project and head back to the Budibase portal. Here, we’ll select the Settings tab. The first option here will be the AI settings menu.
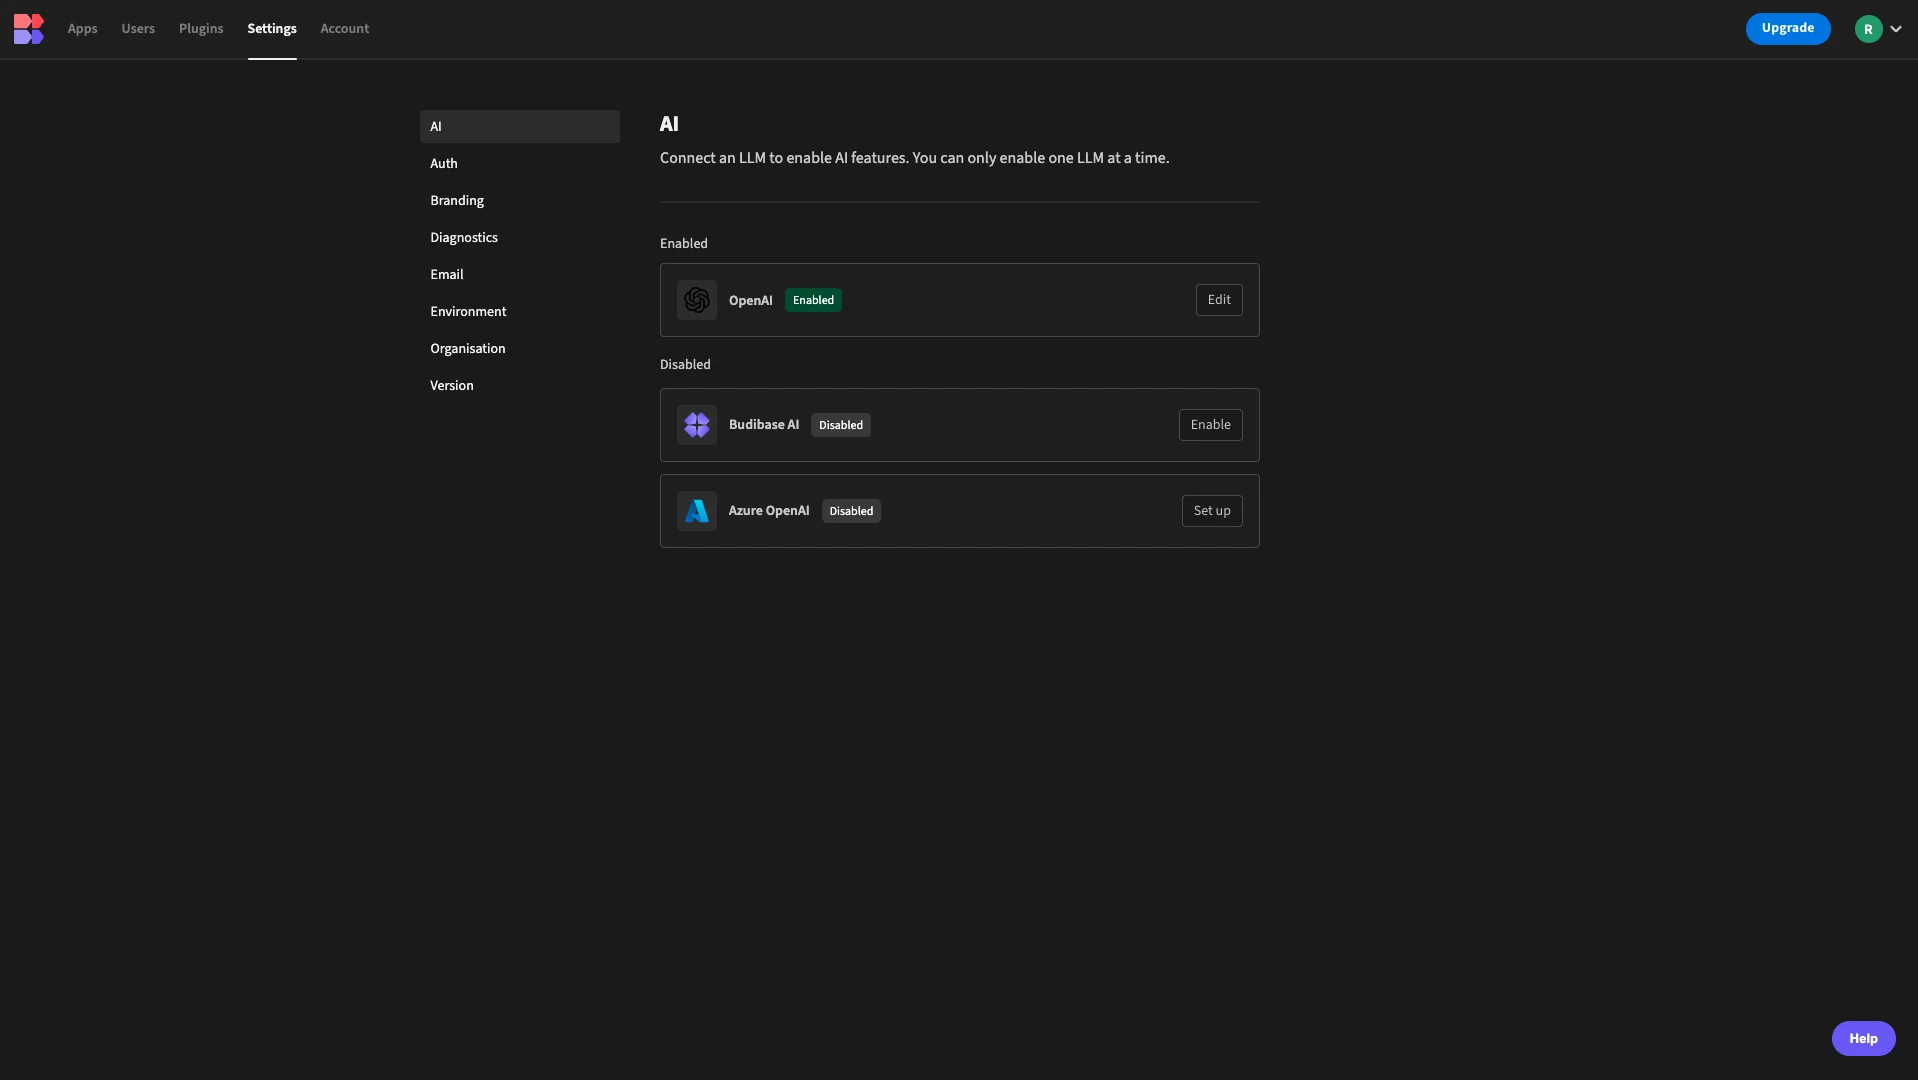
In this menu, we have the options of using OpenAI, Azure, or Budibase AI. To set up our OpenAI connection, we simply need to enter our API key and choose the specific model we’d like to use. For demo purposes, we’re going with GPT-3.5 Turbo.
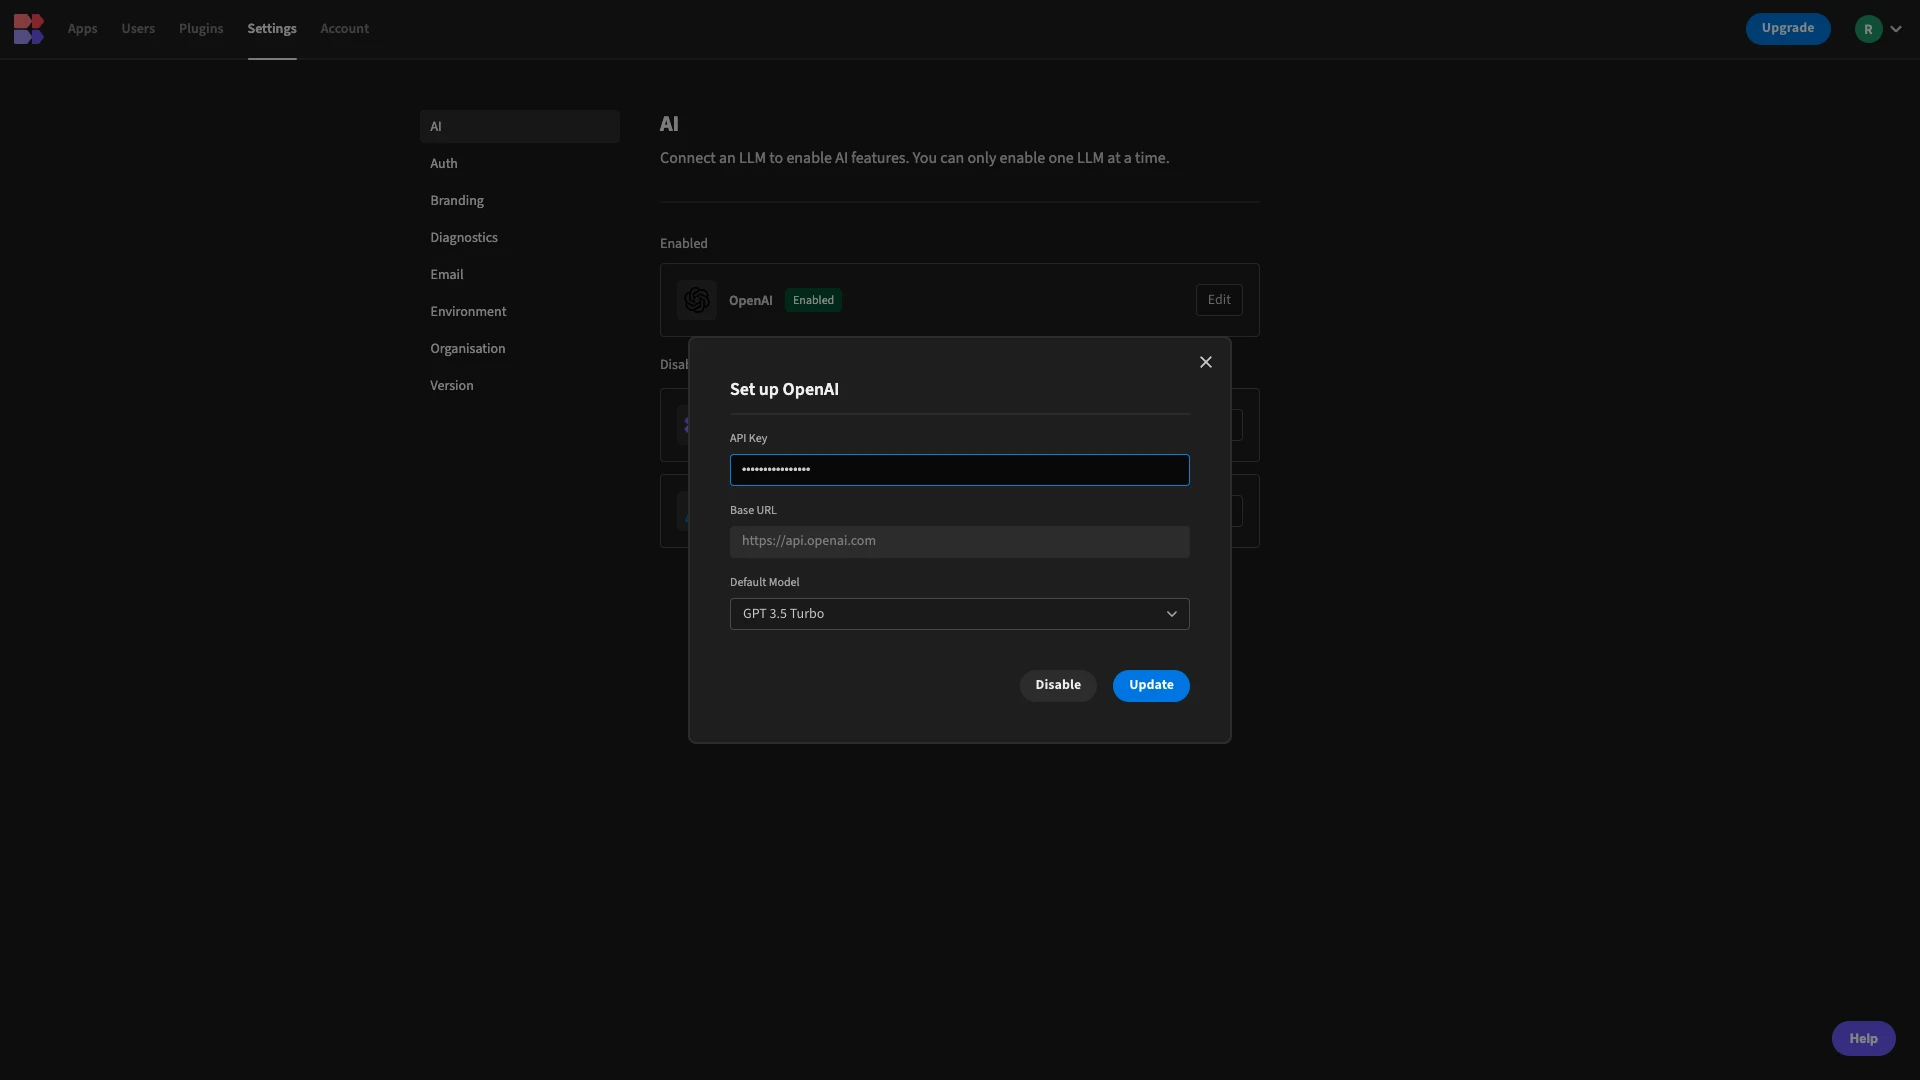
Note that Budibase also supports fully custom AI configs for a huge range of additional models, for customers on an Enterprise license.
Check out our pricing page to learn more.
3. Creating a triage automation
With our OpenAI configuration set up, we can start building our automation logic, using Budibase’s built-in OpenAI request action.
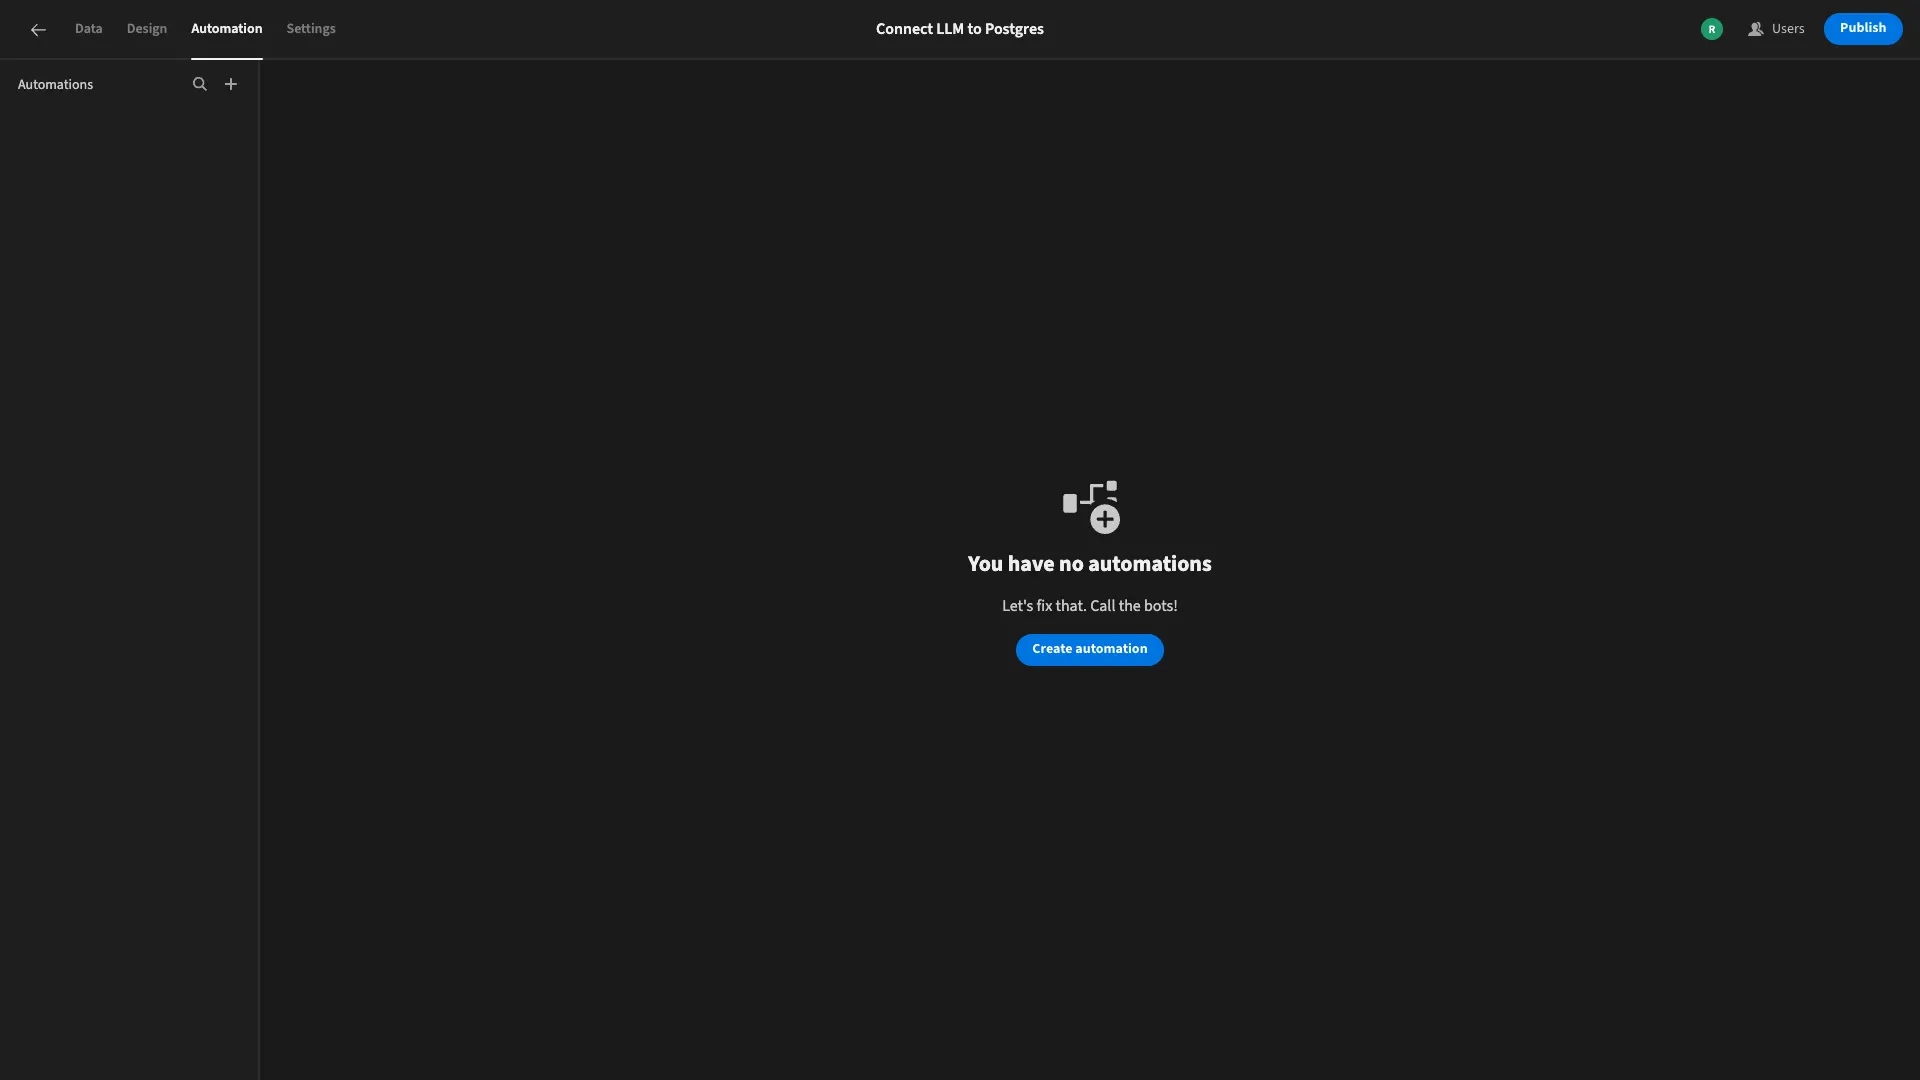
To start, we’ll open our app project again and head to the Automation section, where we’ll be prompted to create our first rule.
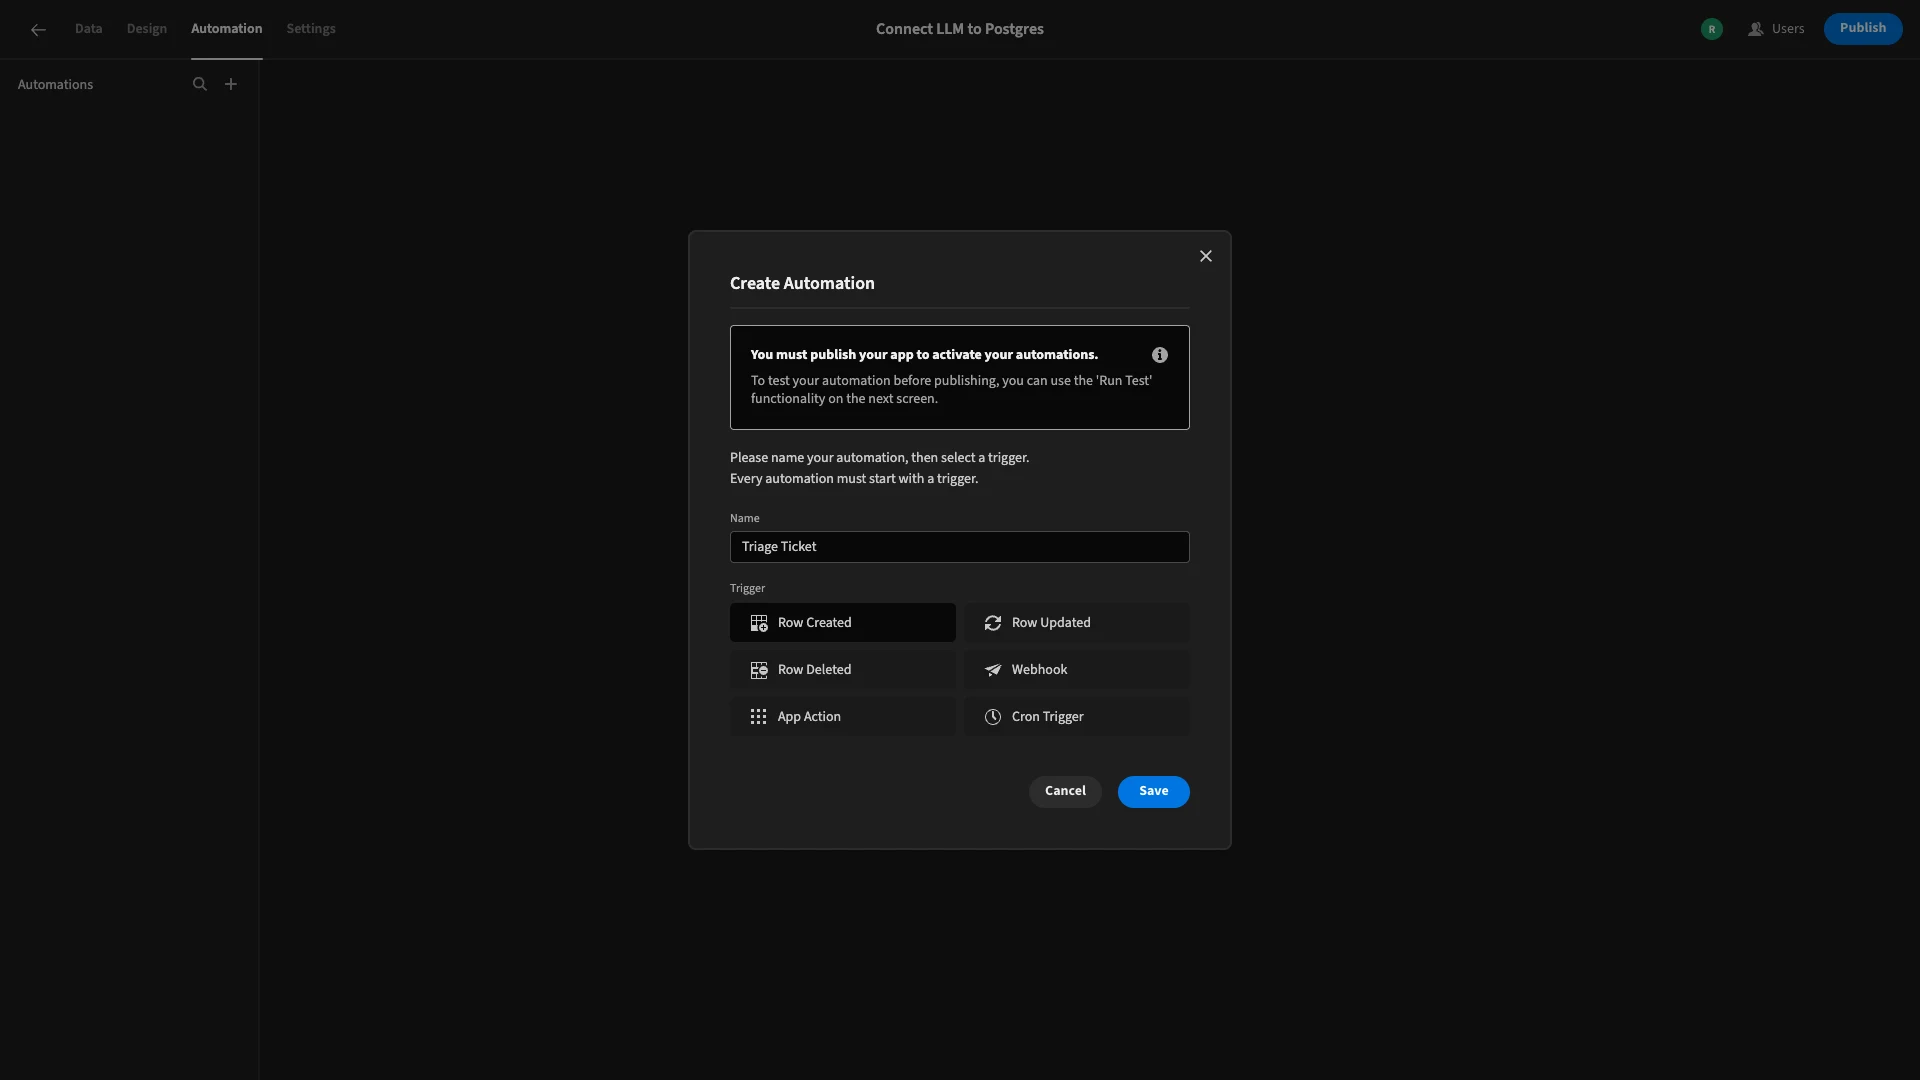
When we do this, we’re prompted to give our automation a name and choose a trigger. We’ll call ours Triage Ticket, selecting the Row Created trigger.
Here’s how our new flow will look.
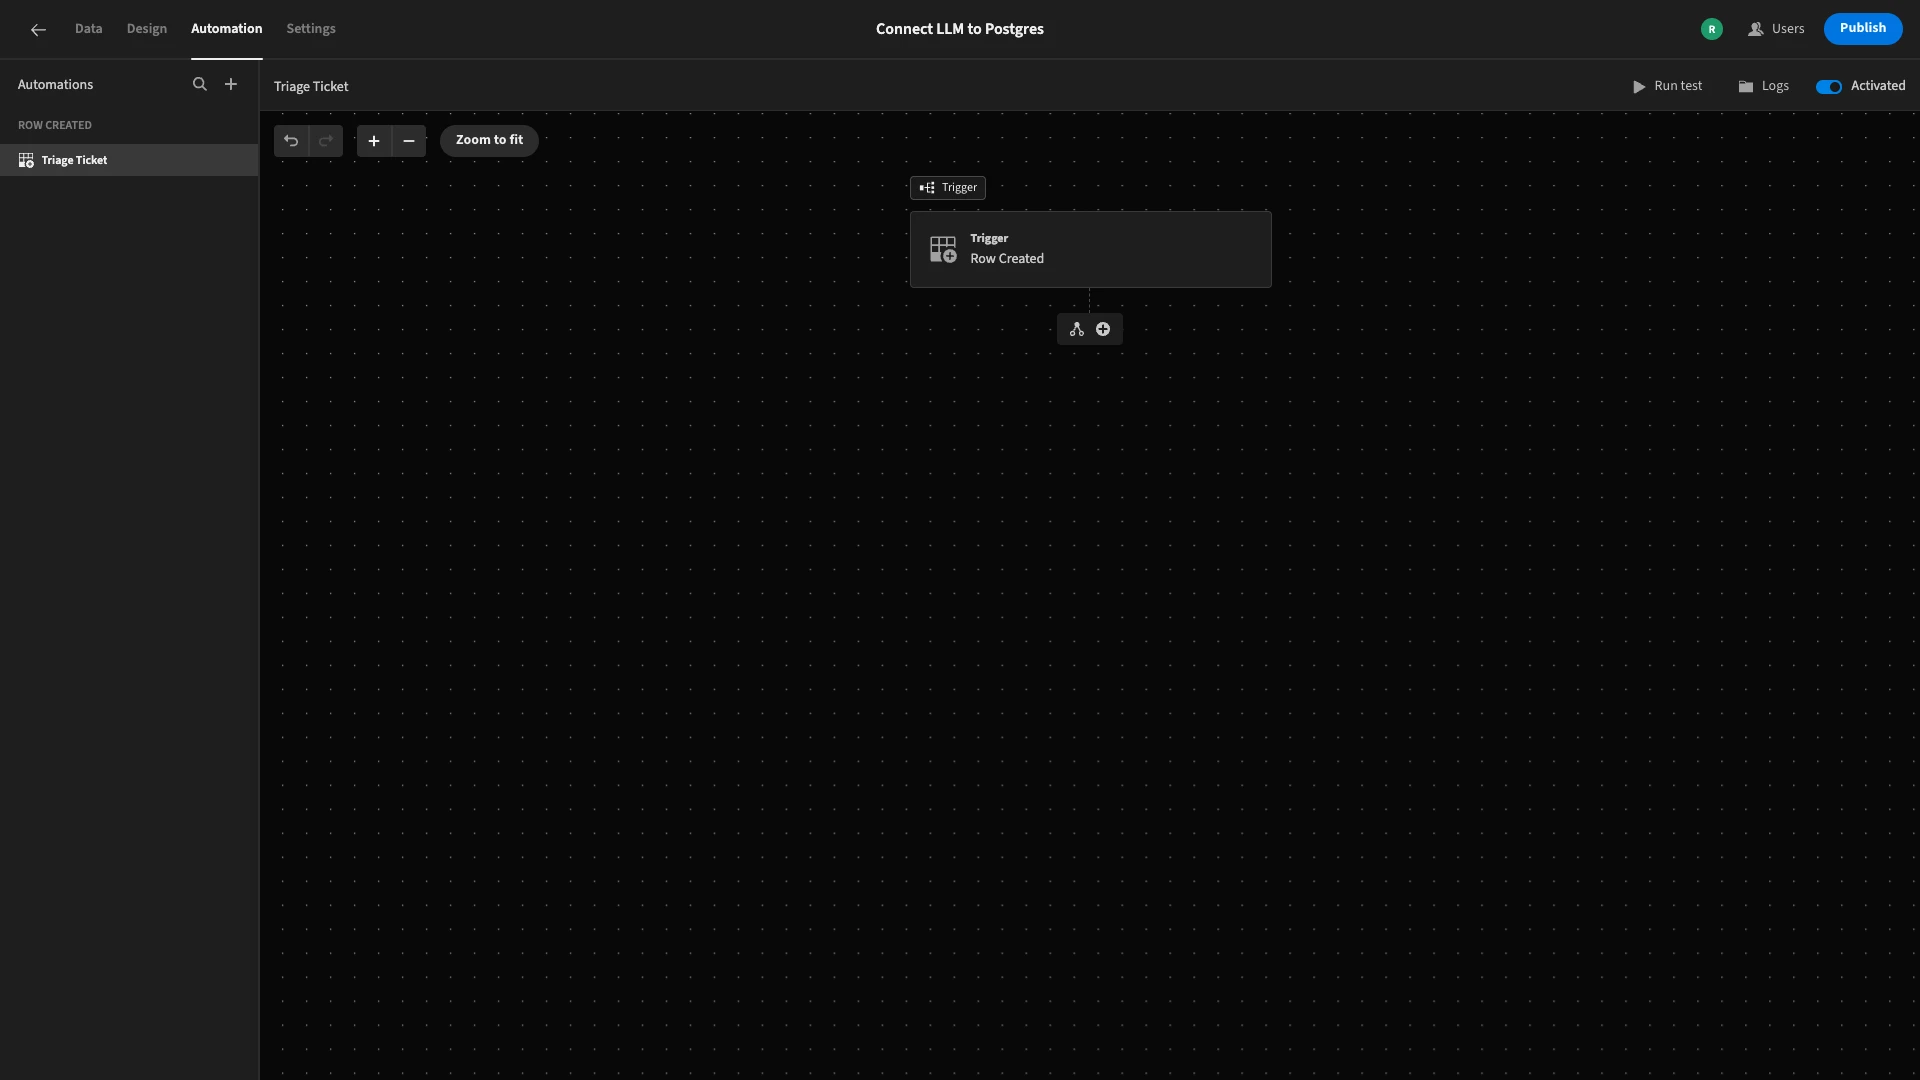
Before we add any actions, we’ll need to configure our trigger to point it at the right table. Firstly, we’ll click on the trigger block to open its options menu.
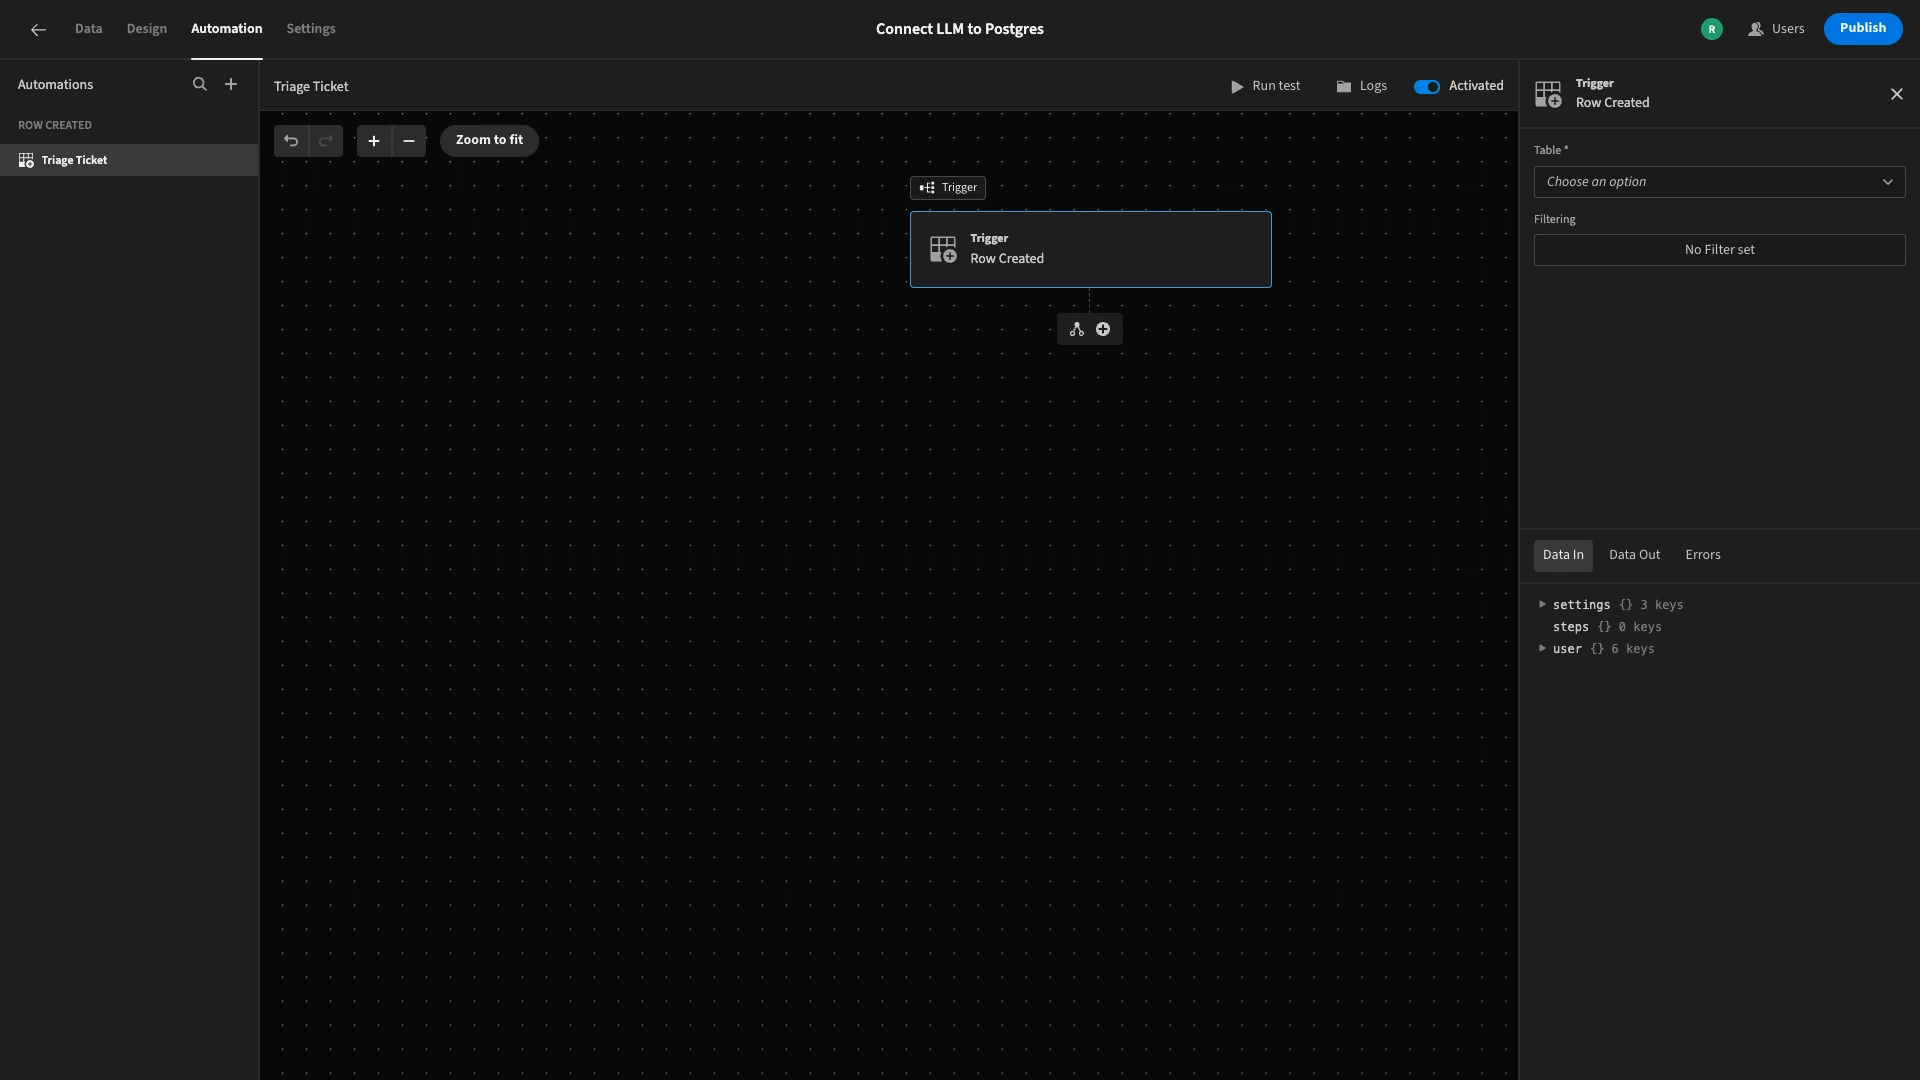
Here, we’ll set the Table to tickets.
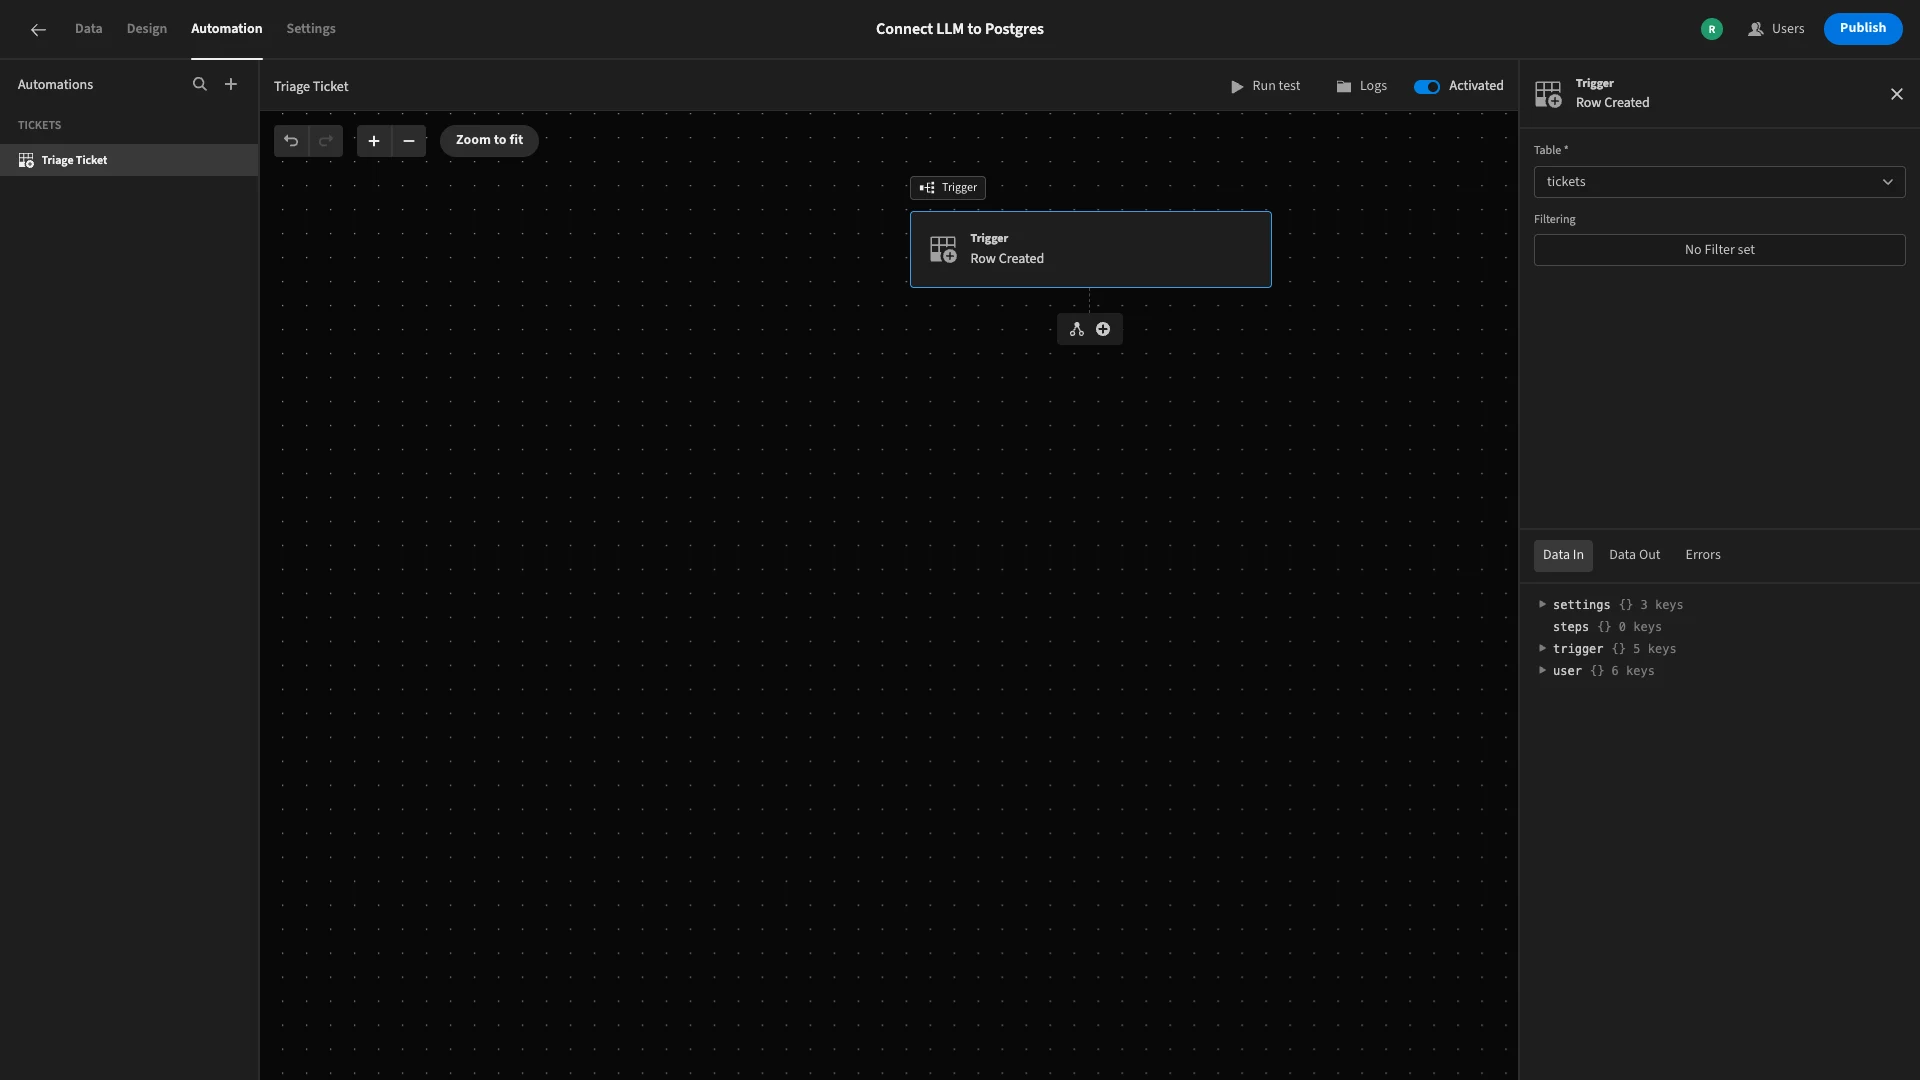
Now, we’re ready to create follow-on actions.
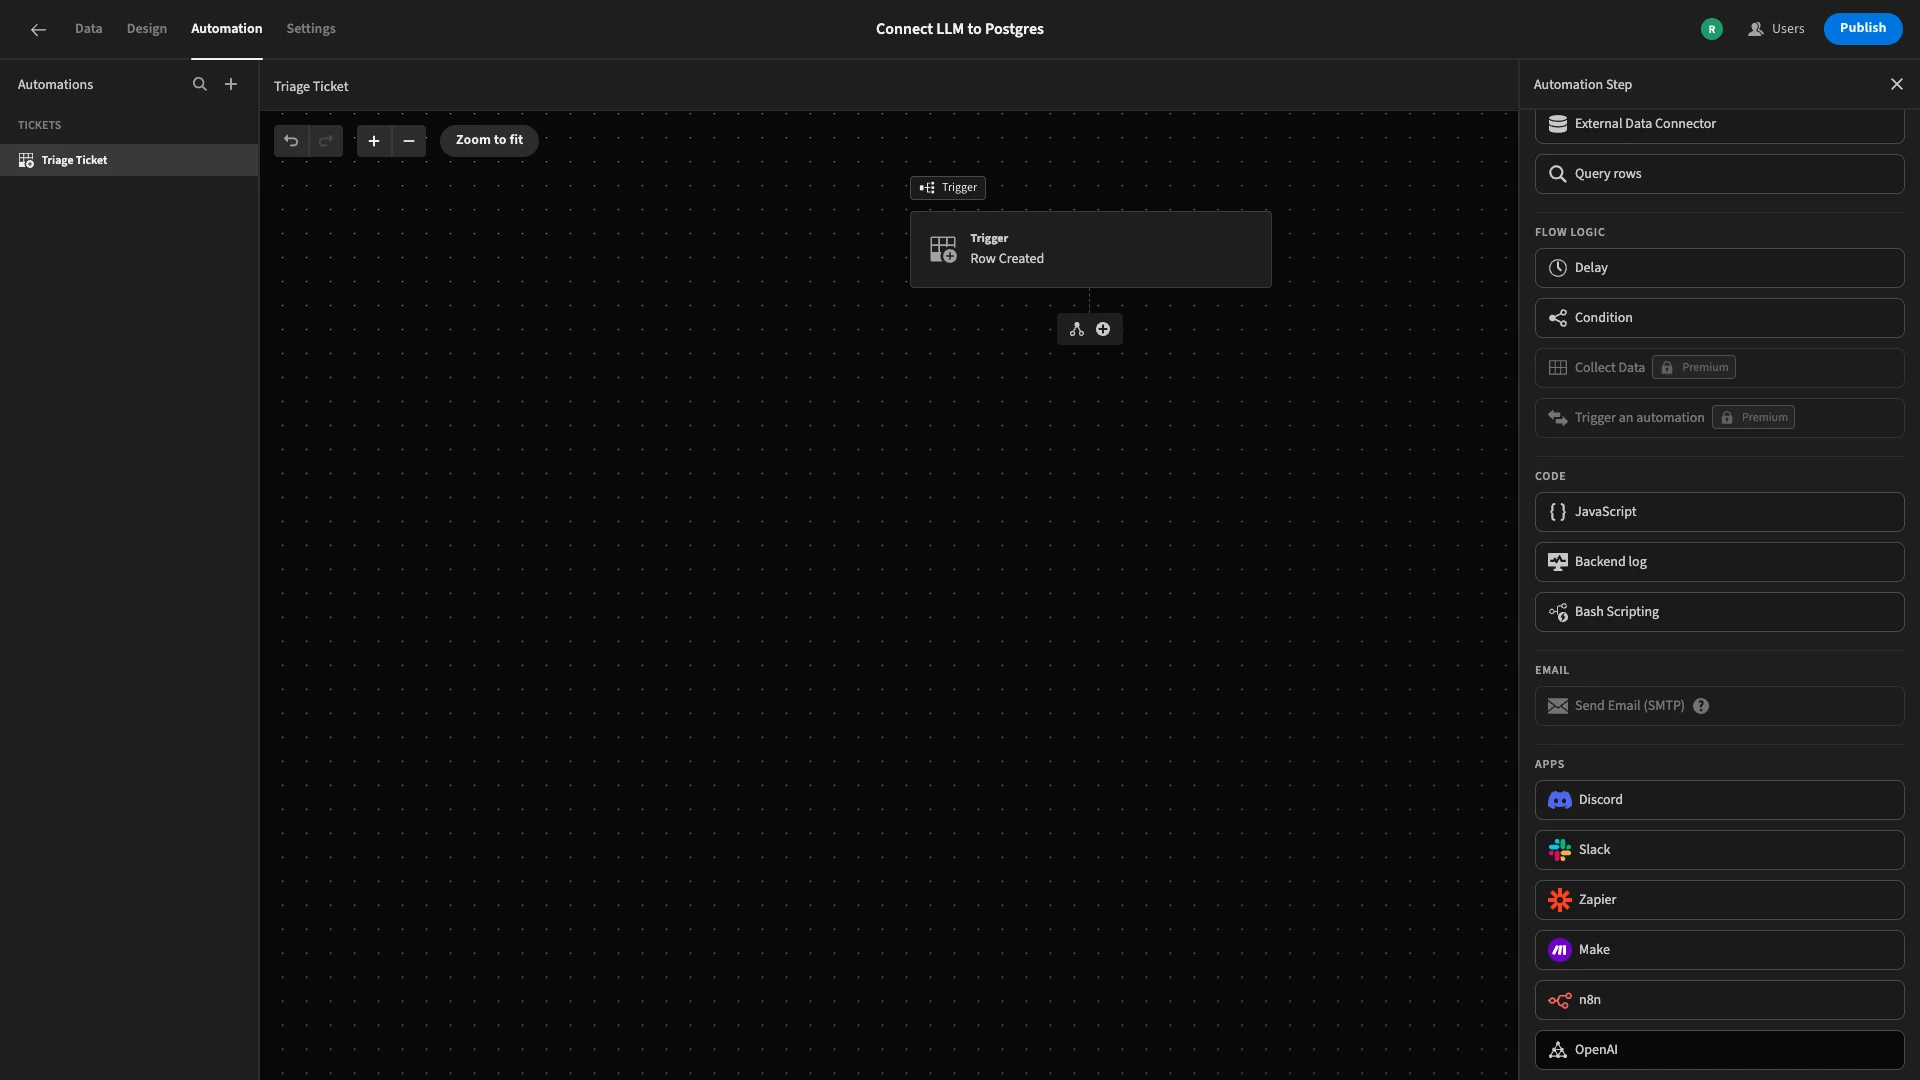
We’ll start by hitting the + icon beneath our trigger block. This opens a list of possible actions. We’re choosing OpenAI.
The OpenAI action accepts two settings - a prompt and a model. As we said earlier, we’re using GPT-3.5 Turbo for this demo.
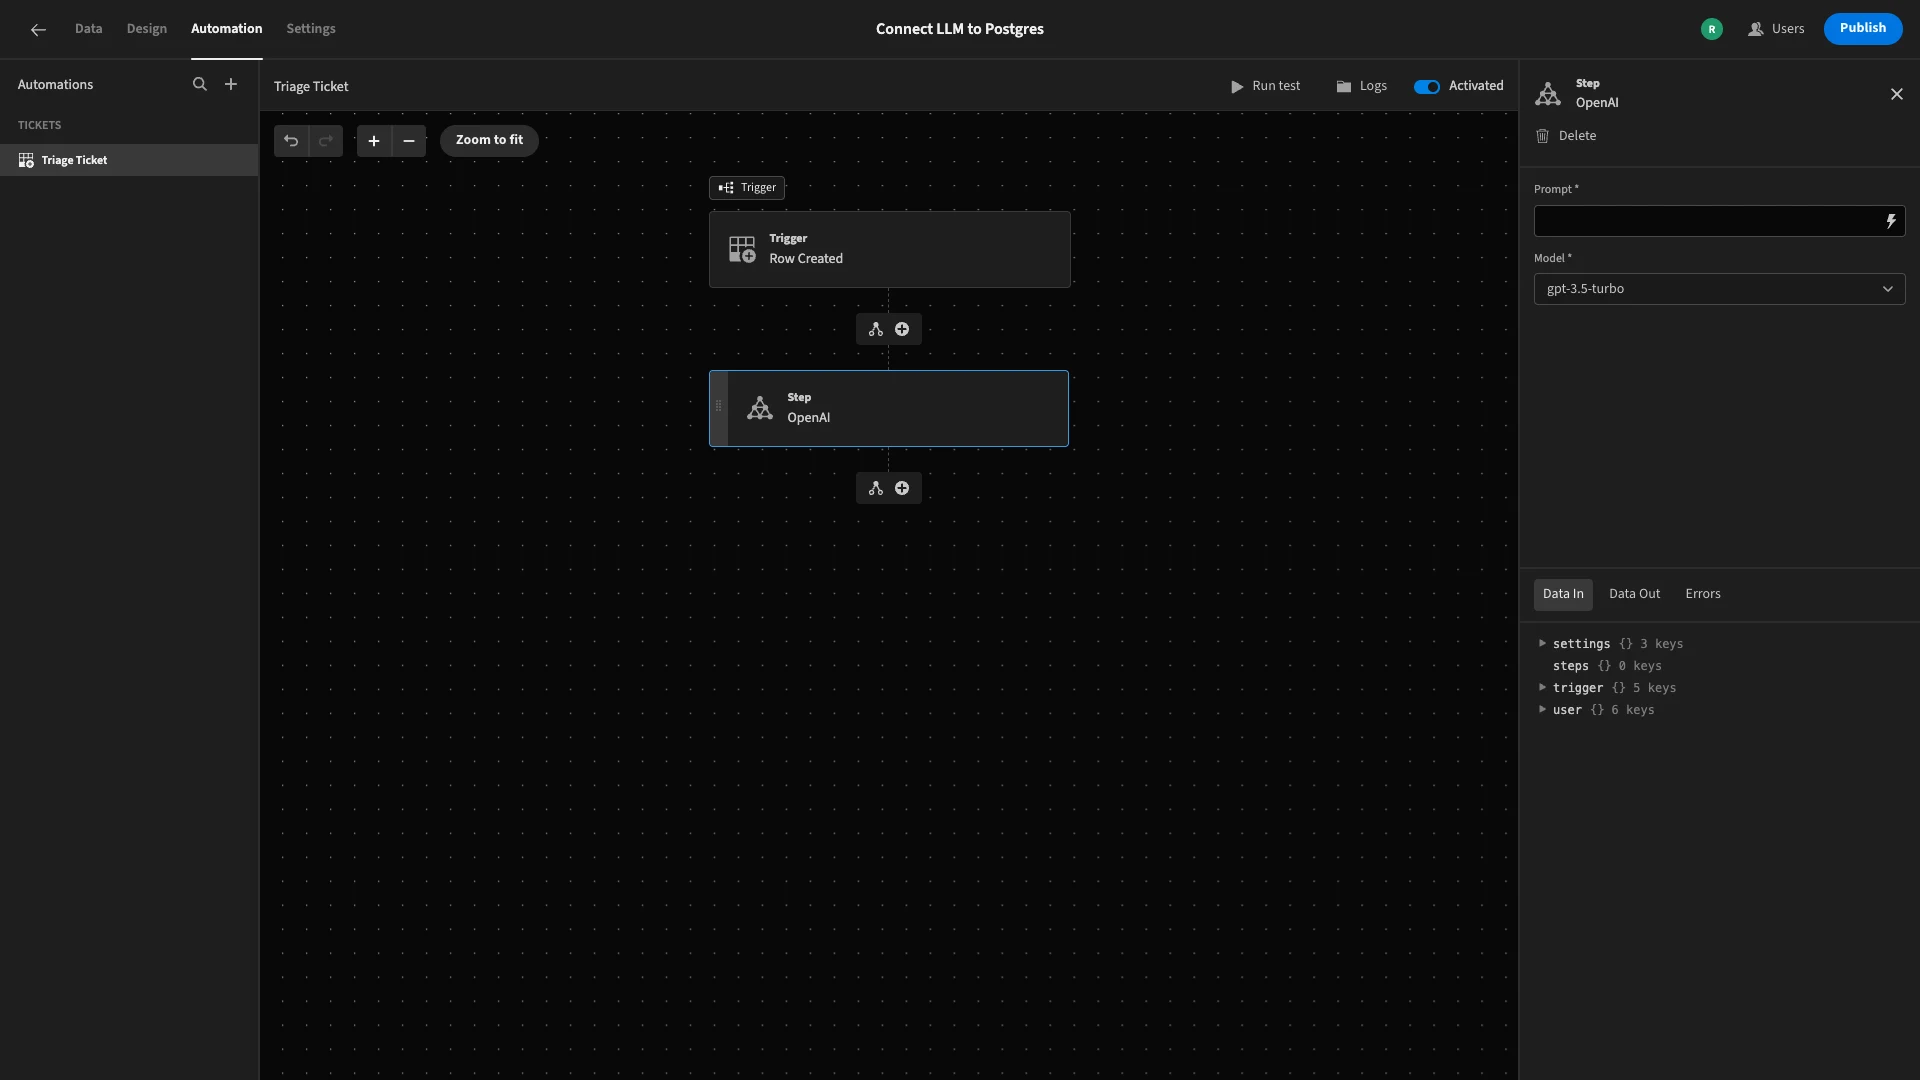
To give ourselves more space to work, we’ll hit the lightning bolt icon to open the full bindings menu for our prompt.
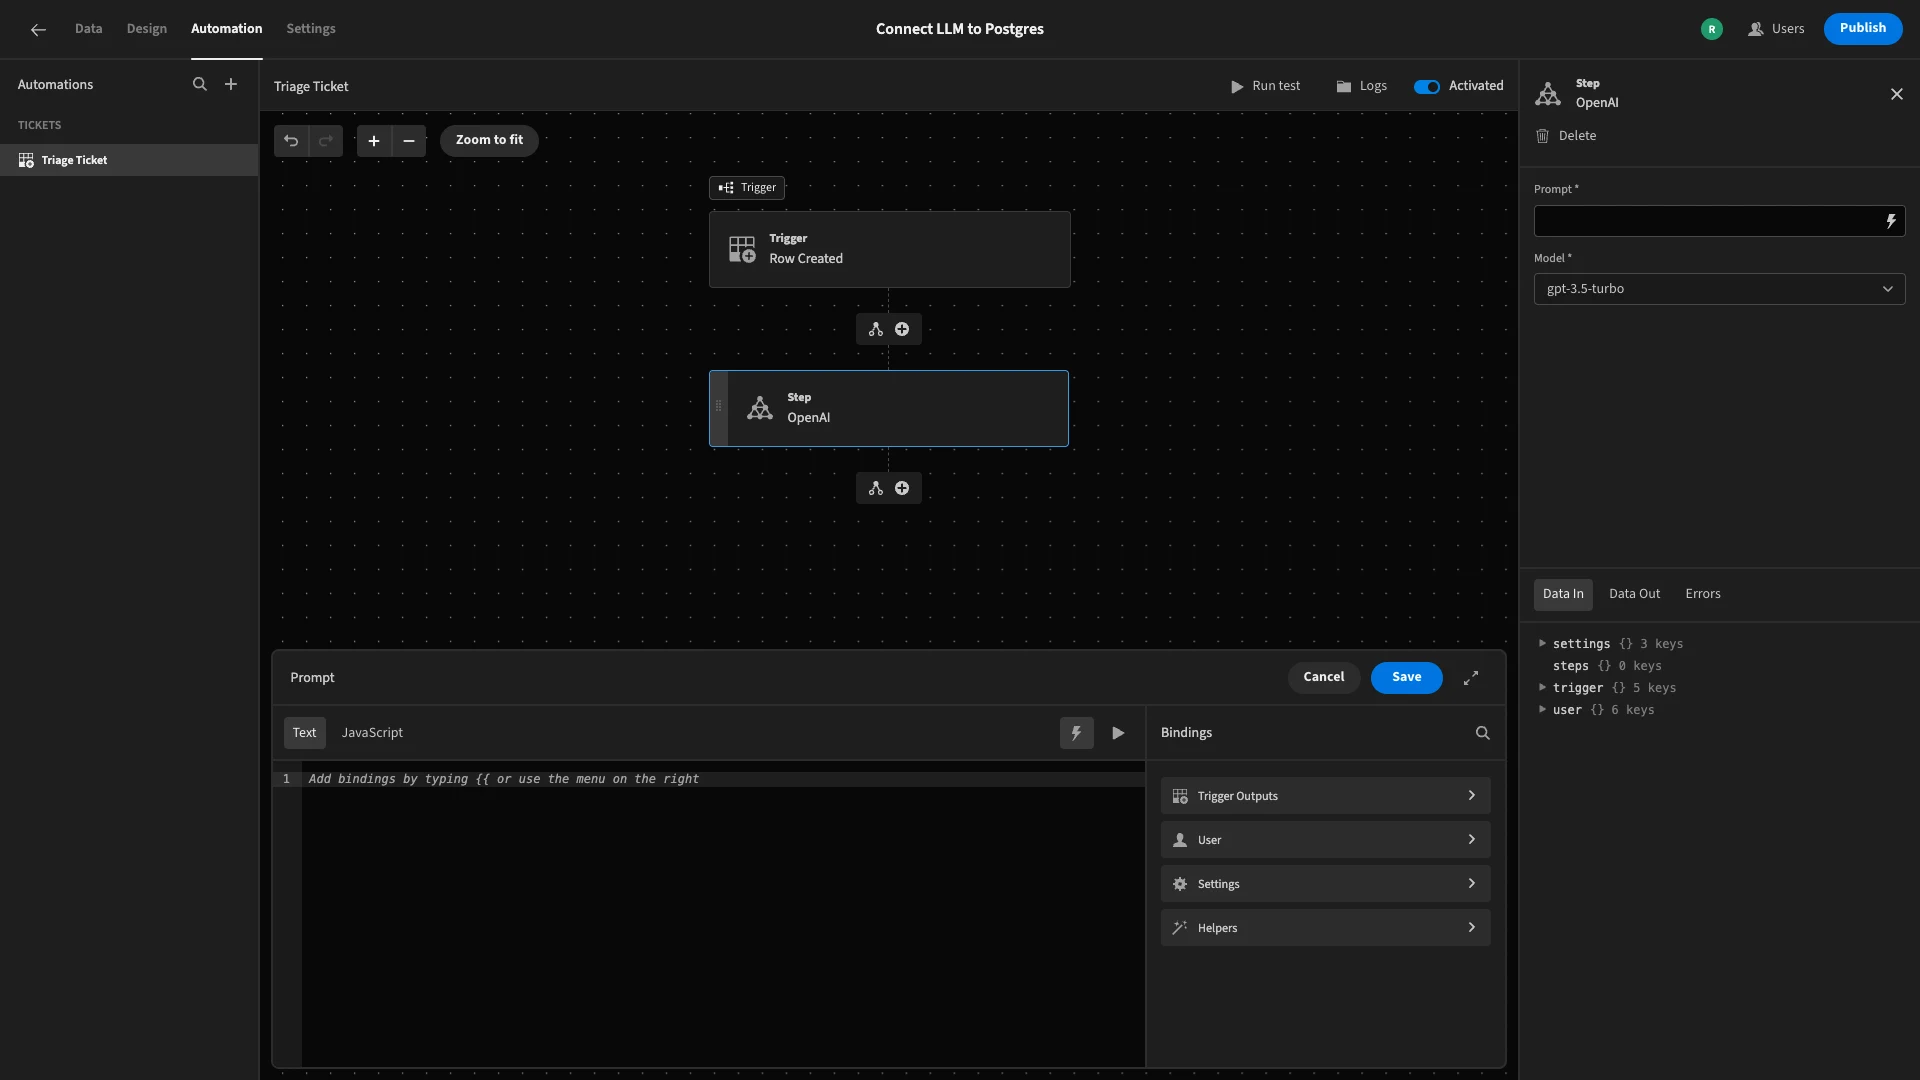
We could include just about anything here that we’d write in a ChatGPT prompt using the native interface. The important thing, though, is that we can use Budibase’s bindings syntax to pass the relevant row data for each execution of our automation rule.
We’re going to construct our prompts in three parts, in order to:
- Tell the model the information that we want it to provide, including the logic it should use to assign a value to the priority and category fields.
- Provide the relevant information from our submitted ticket, using bindings.
- Determine the format that we need the data to be returned in.
The first part of our prompt will be:
 1You are an IT service desk assistant. Given the following ticket description, identify the most appropriate category and priority level.
 2
 3Categories: Network Issue, Software Bug, Hardware Problem, Access Request, General Inquiry, Other
 4
 5Priorities: Low, Medium, High, Critical
 6
 7Use the following rules to determine priority:
 8
 9\- If the issue causes a complete work stoppage or affects many users, priority is "Critical".
10
11\- If the issue causes significant disruption but work can continue in a limited way, priority is "High".
12
13\- If the issue causes minor inconvenience or affects a single user, priority is "Medium".
14
15\- For requests like access or general inquiries without urgency, priority is "Low".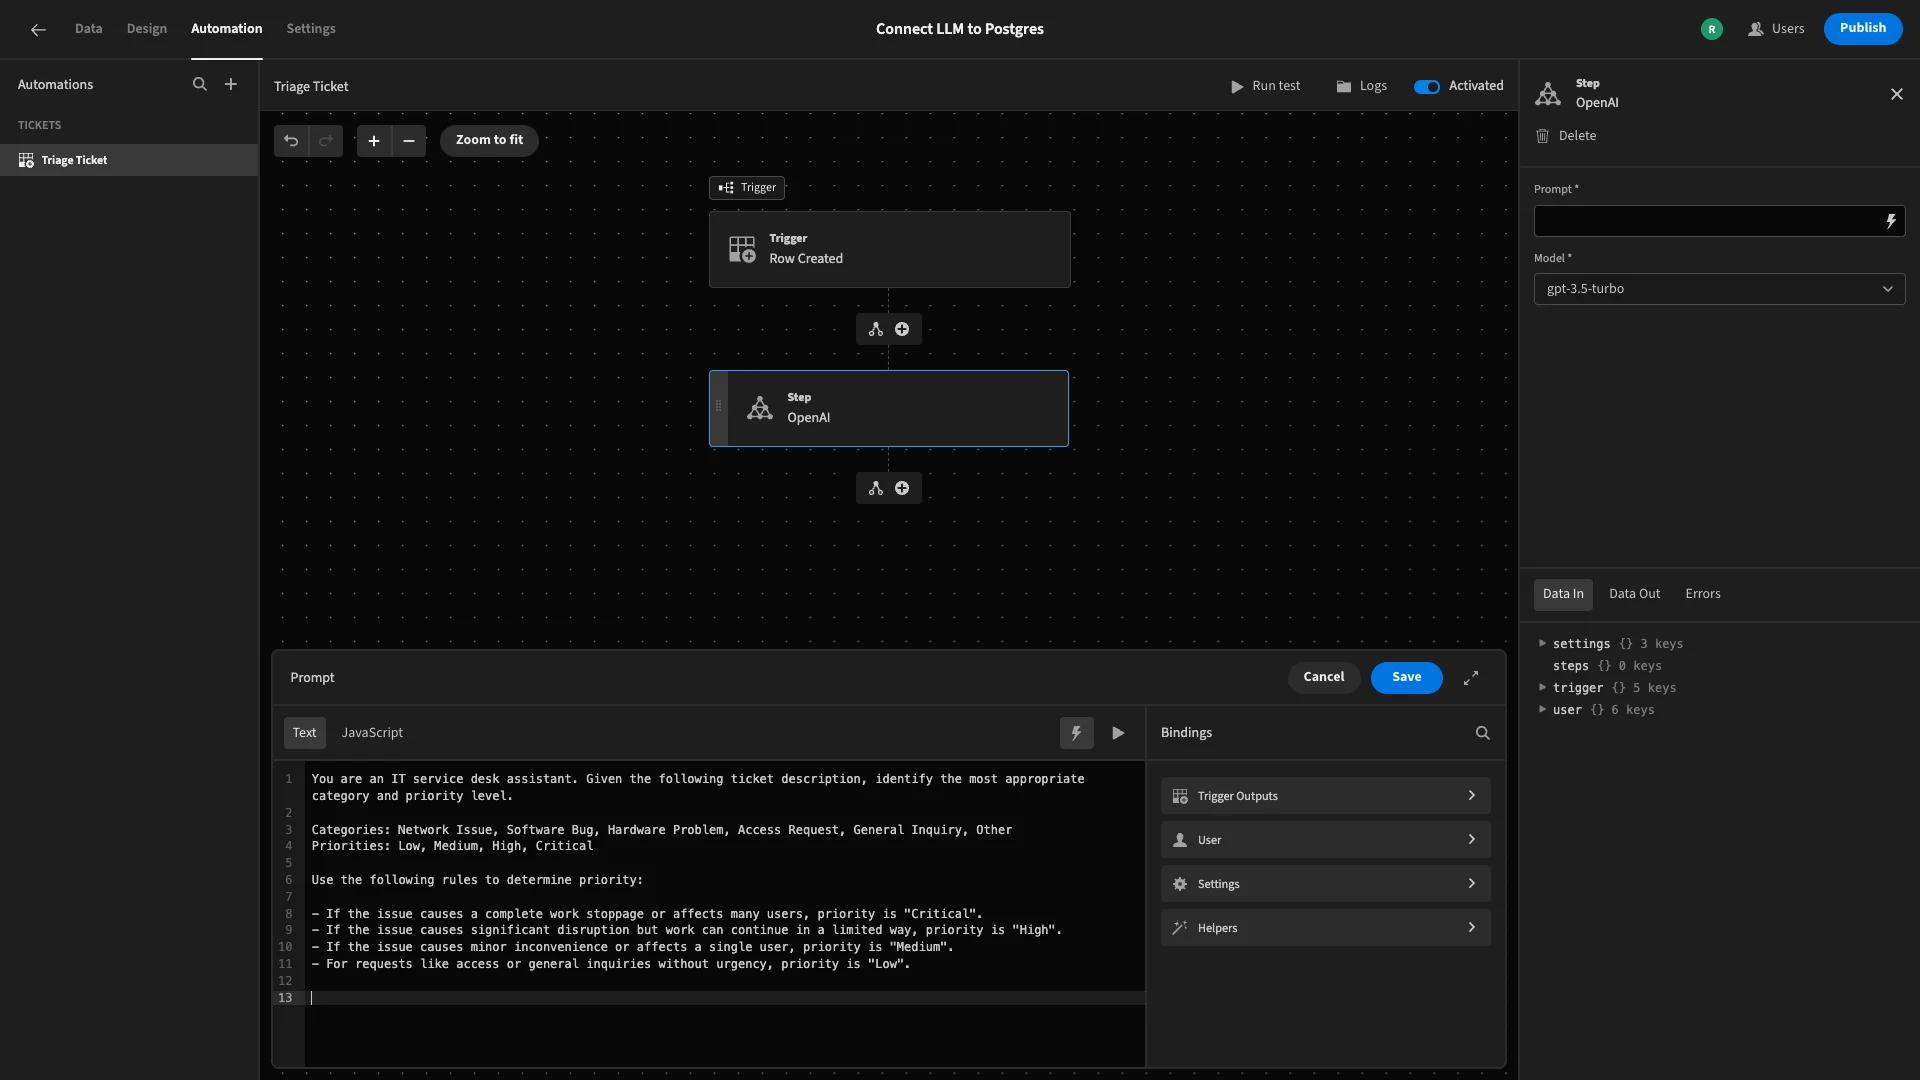
Next, we can access the description from our trigger row under Trigger Outputs in the bindings menu.
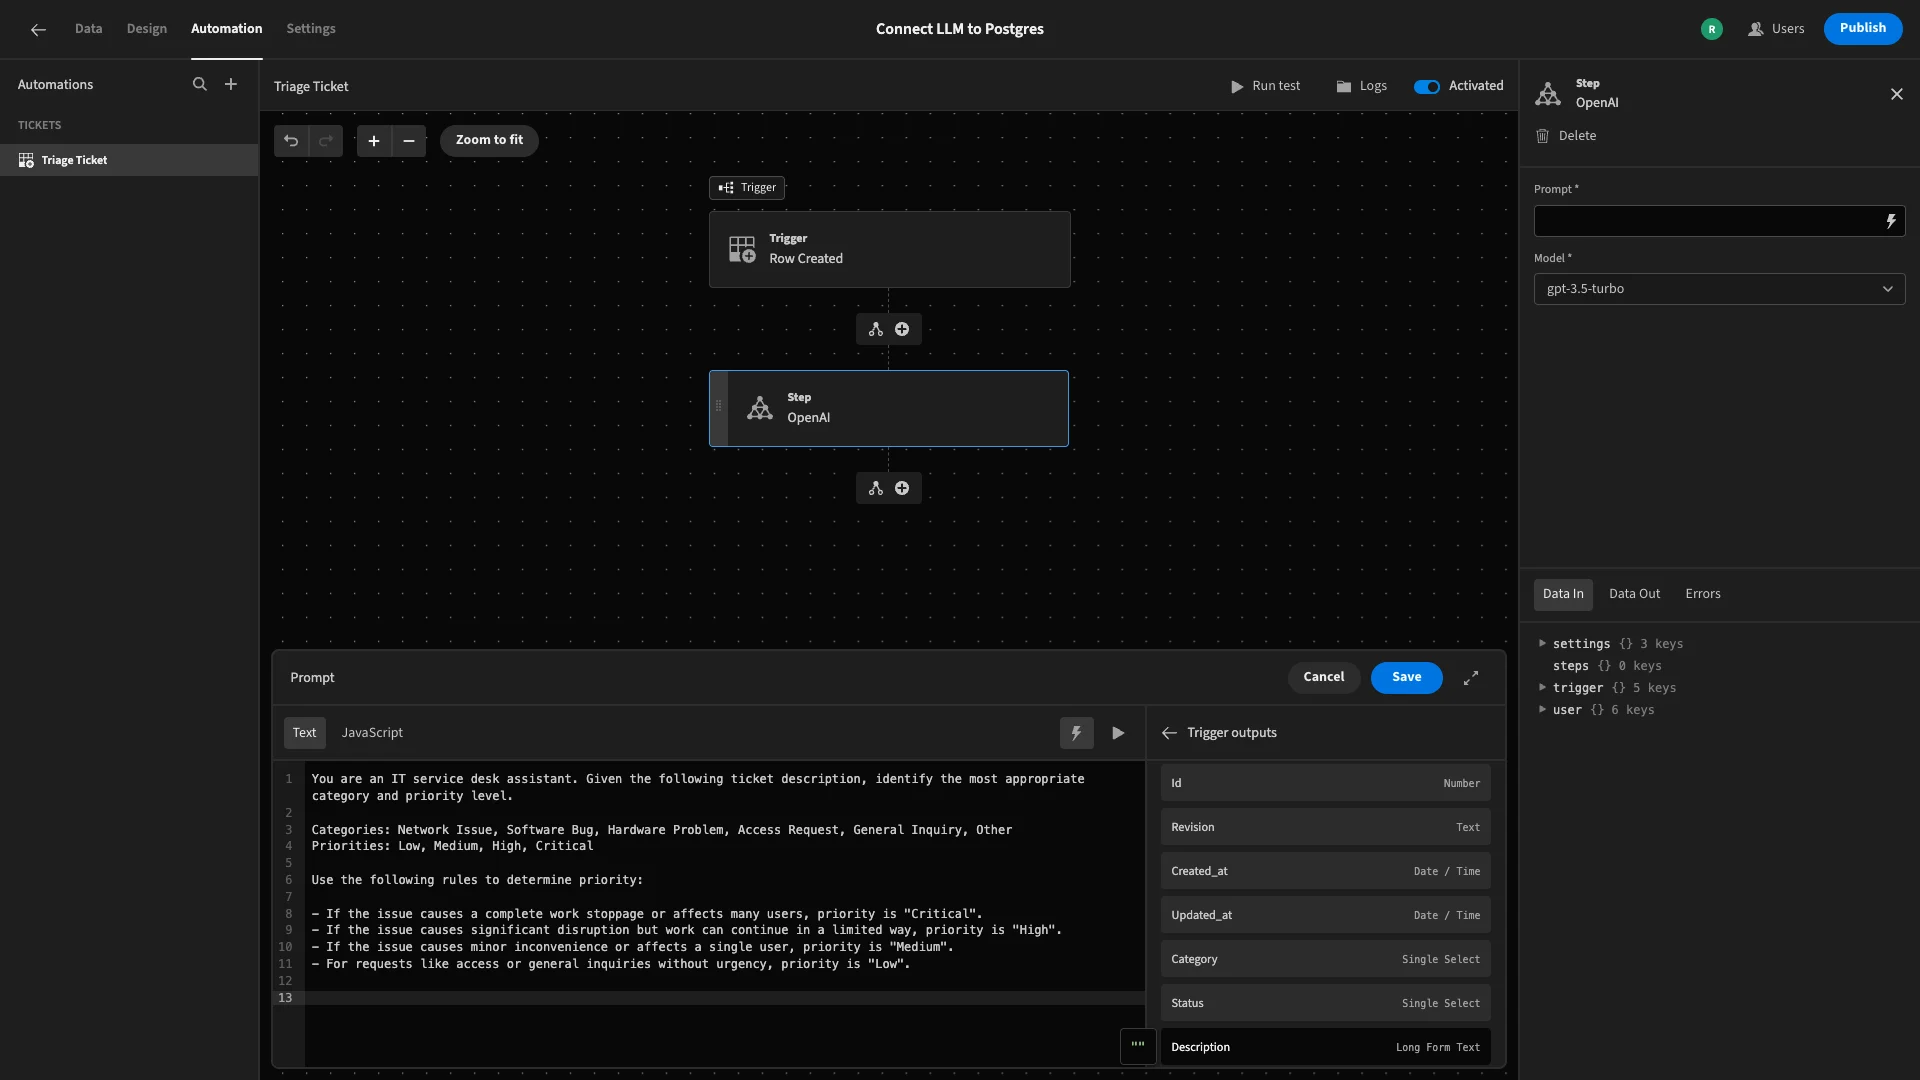
We’ll wrap this in text using the following beneath our existing prompt:
1Ticket description:
2
3"""
4
5{{ trigger.row.description }}
6
7"""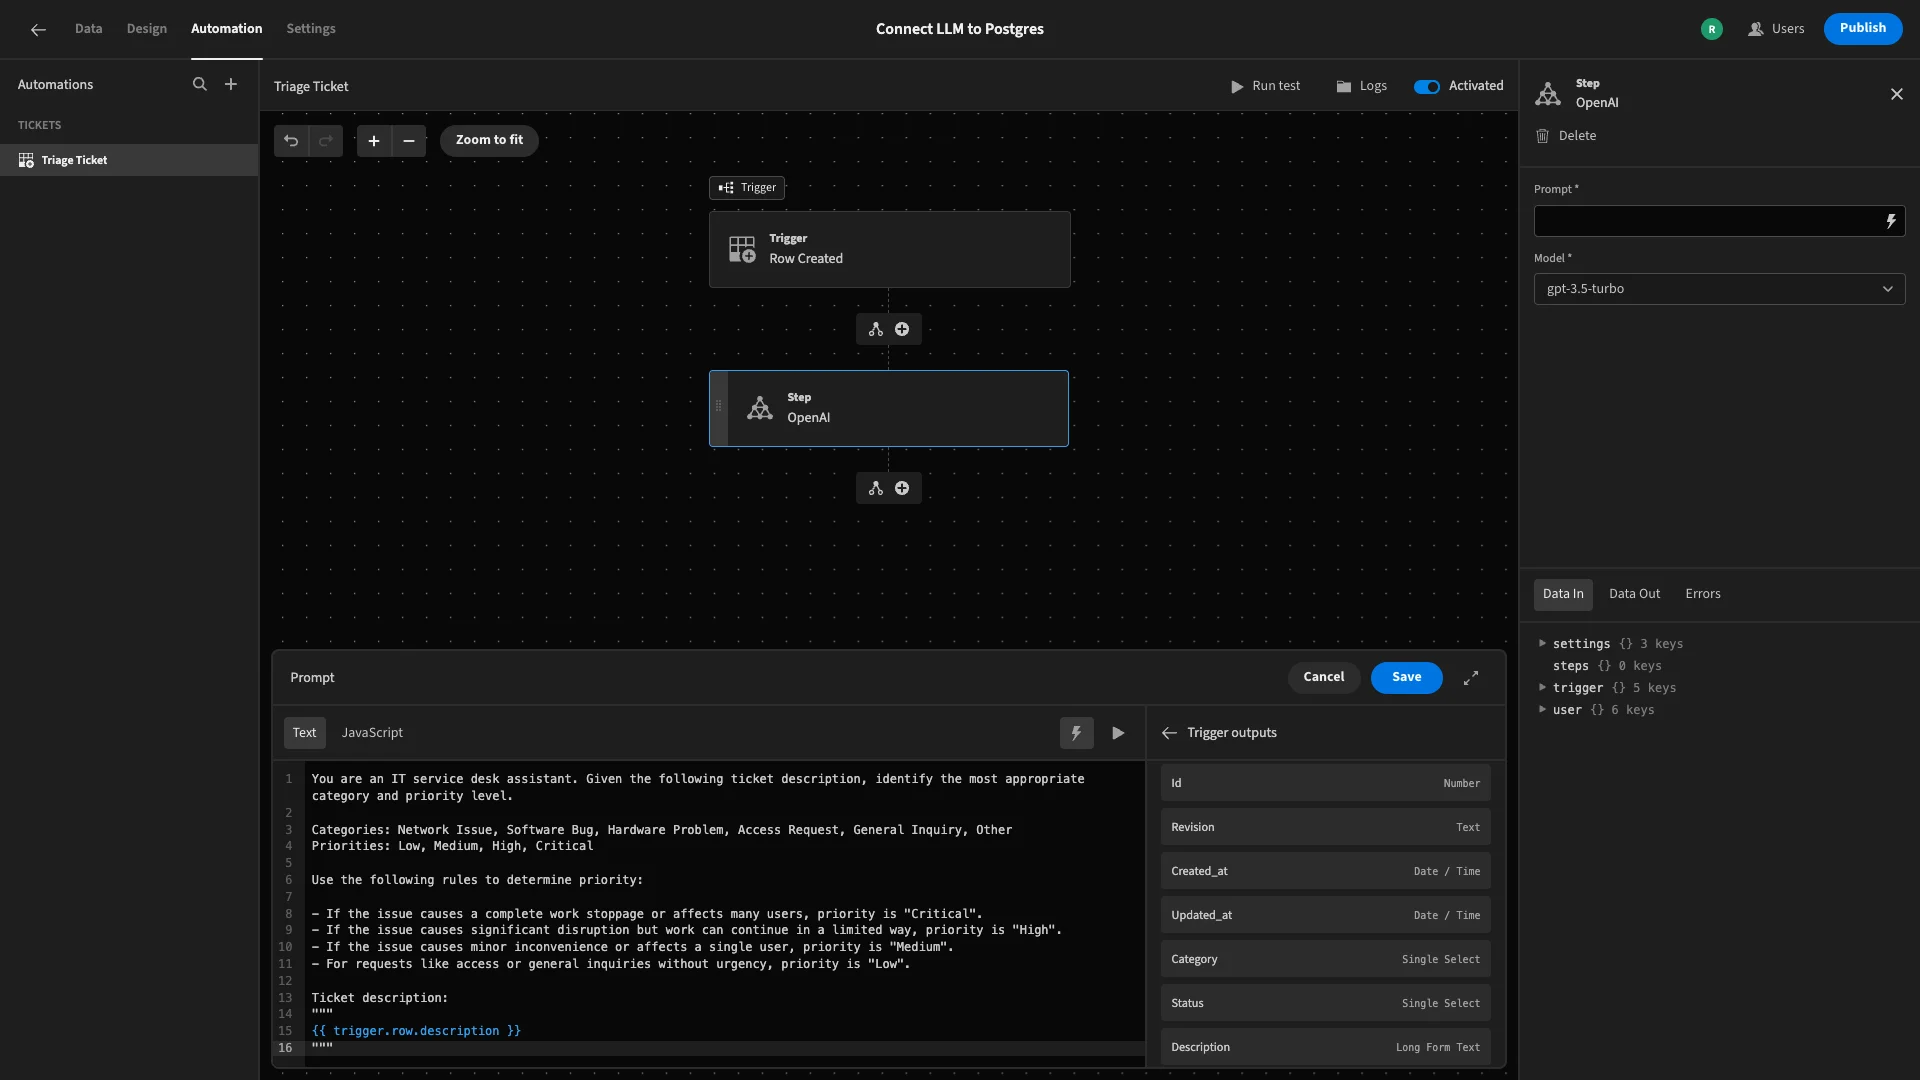
Lastly, we’ll specify the response format that we need, using:
1Provide your answer in JSON format with the keys "category" and "priority". For example:
2
3{
4
5 "category": "Network Issue",
6
7 "priority": "High"
8
9}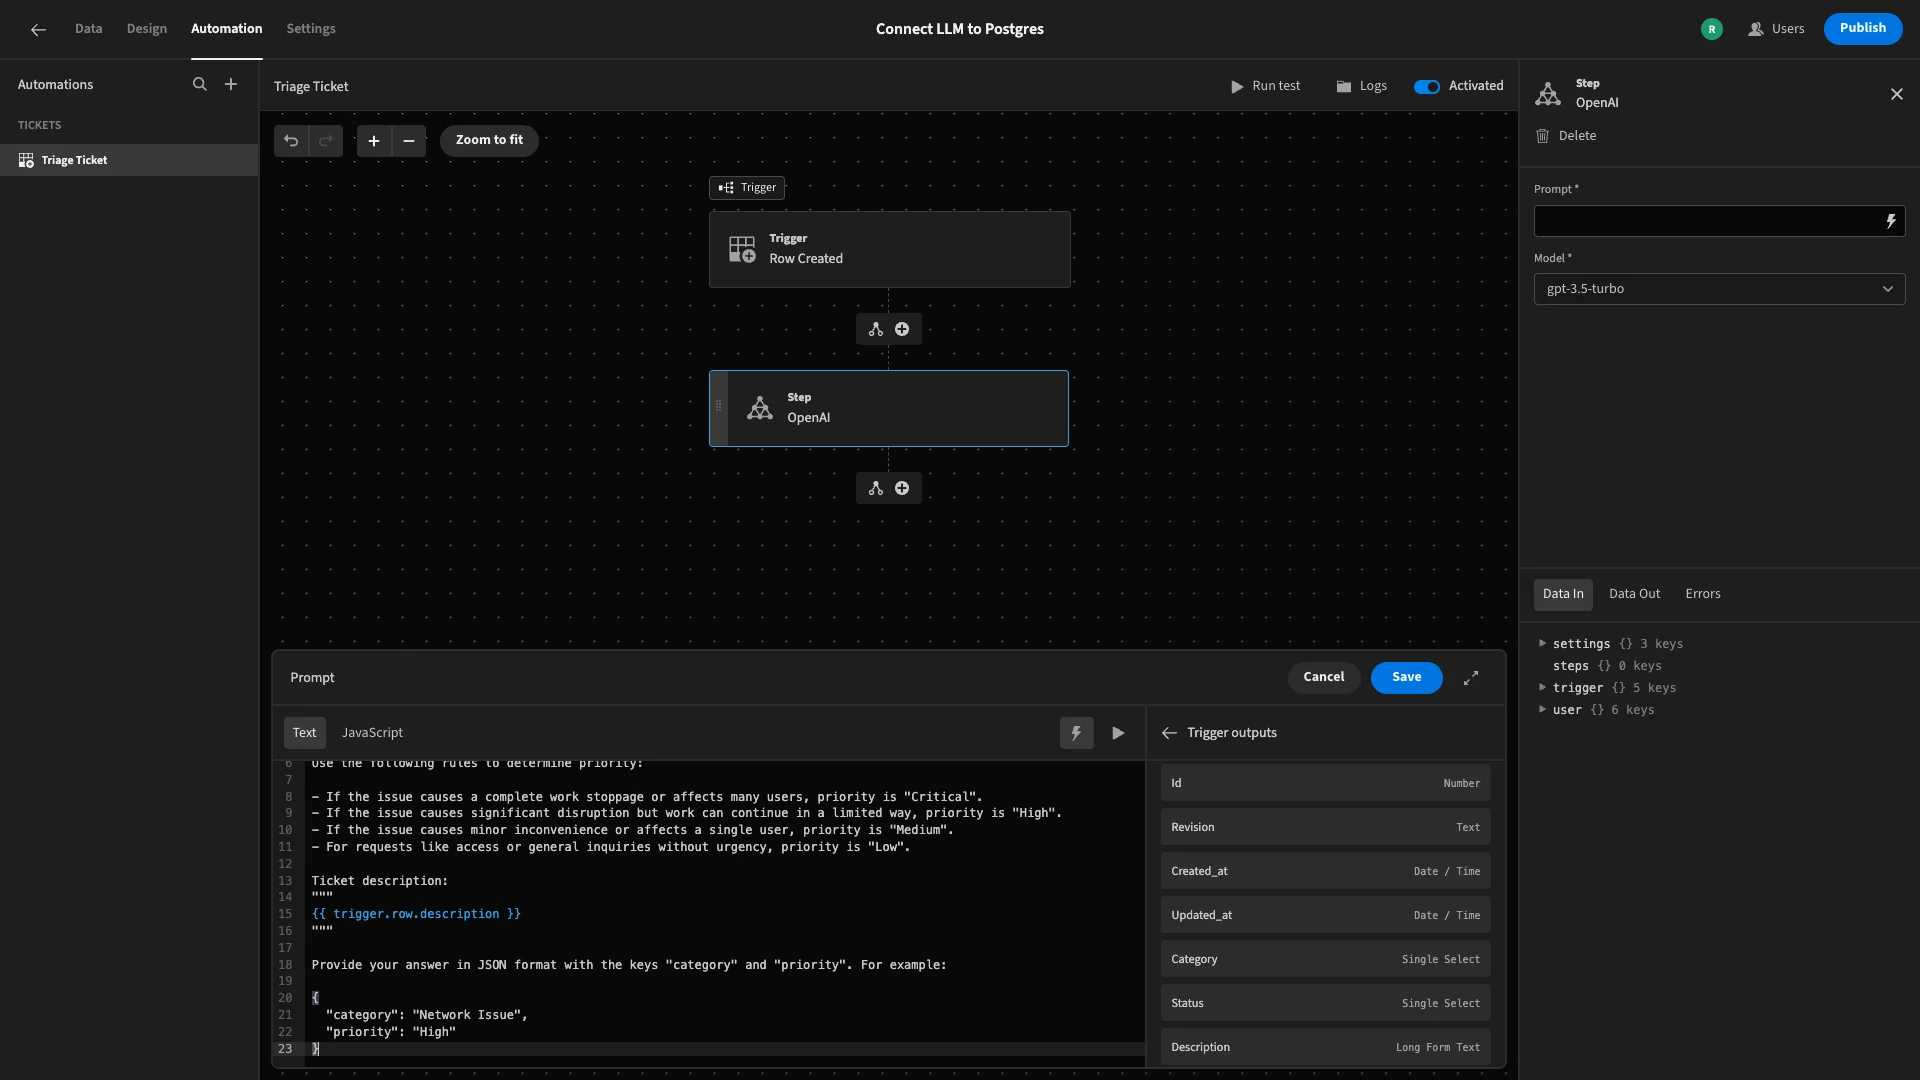
This means our completed prompt is:
 1You are an IT service desk assistant. Given the following ticket description, identify the most appropriate category and priority level.
 2
 3Categories: Network Issue, Software Bug, Hardware Problem, Access Request, General Inquiry, Other
 4
 5Priorities: Low, Medium, High, Critical
 6
 7Use the following rules to determine priority:
 8
 9\- If the issue causes a complete work stoppage or affects many users, priority is "Critical".
10
11\- If the issue causes significant disruption but work can continue in a limited way, priority is "High".
12
13\- If the issue causes minor inconvenience or affects a single user, priority is "Medium".
14
15\- For requests like access or general inquiries without urgency, priority is "Low".
16
17Ticket description:
18
19"""
20
21{{ trigger.row.description }}
22
23"""
24
25Provide your answer in JSON format with the keys "category" and "priority". For example:
26
27{
28
29 "category": "Network Issue",
30
31 "priority": "High"
32
33}
We’ll hit save, and that’s our prompt ready to go.
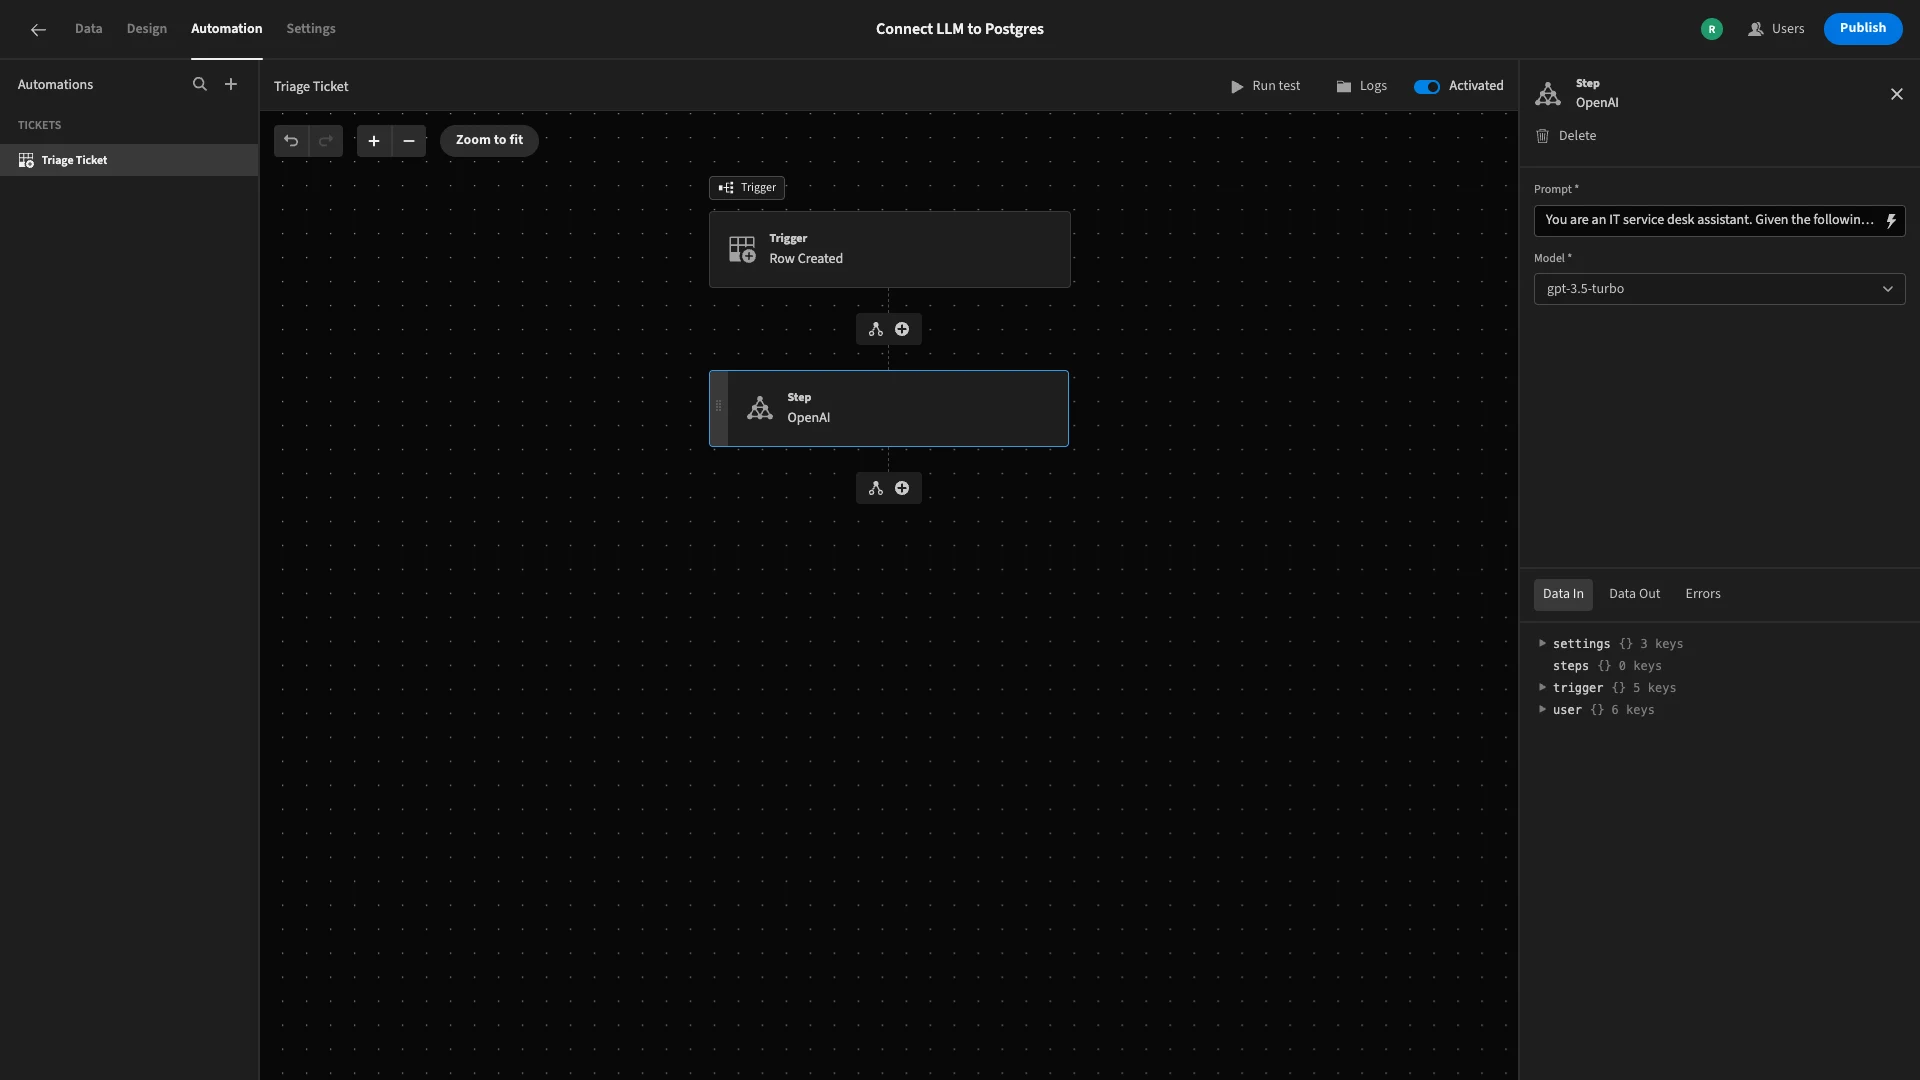
The final part of our automation rule will take the values that our model has provided for category and priority, and update the trigger row to populate these.
To achieve this, we’ll add another action block, this time choosing Update Row.
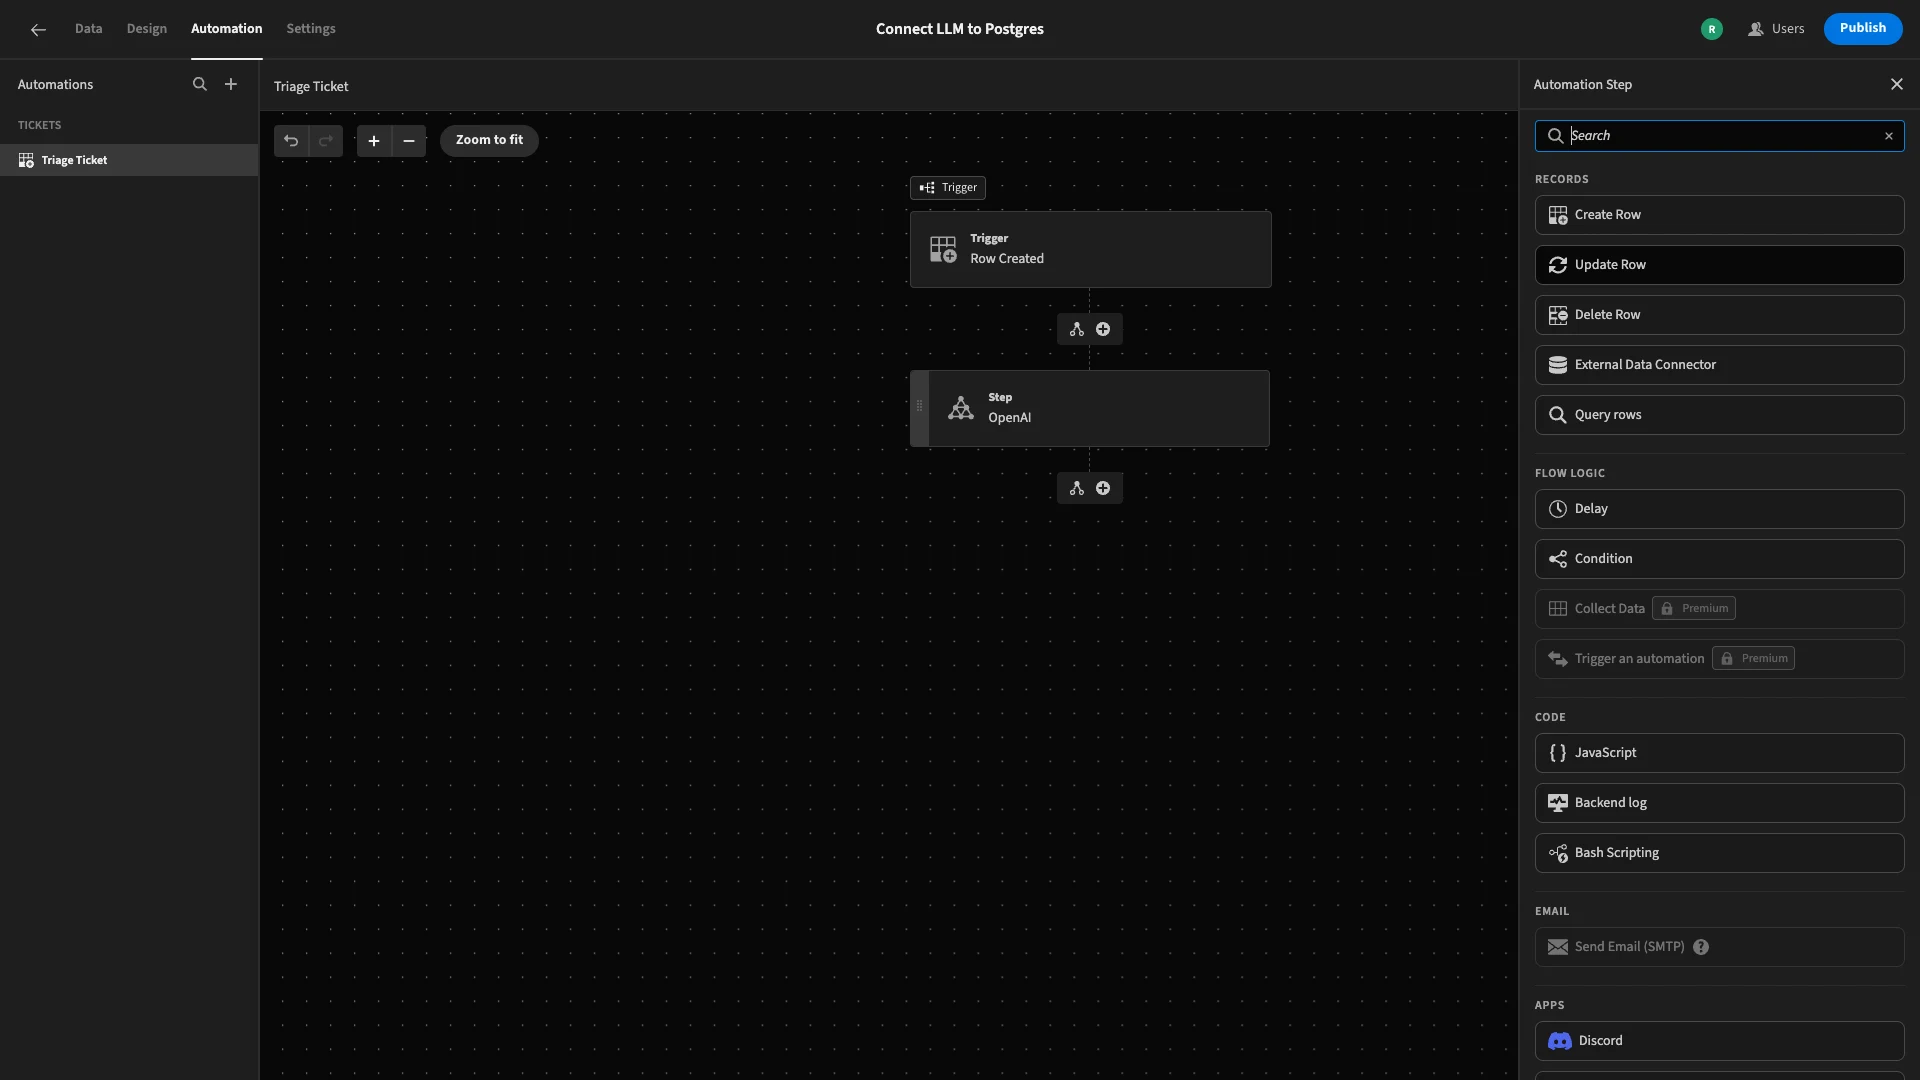
Again, we’ve pointed this at the tickets table.
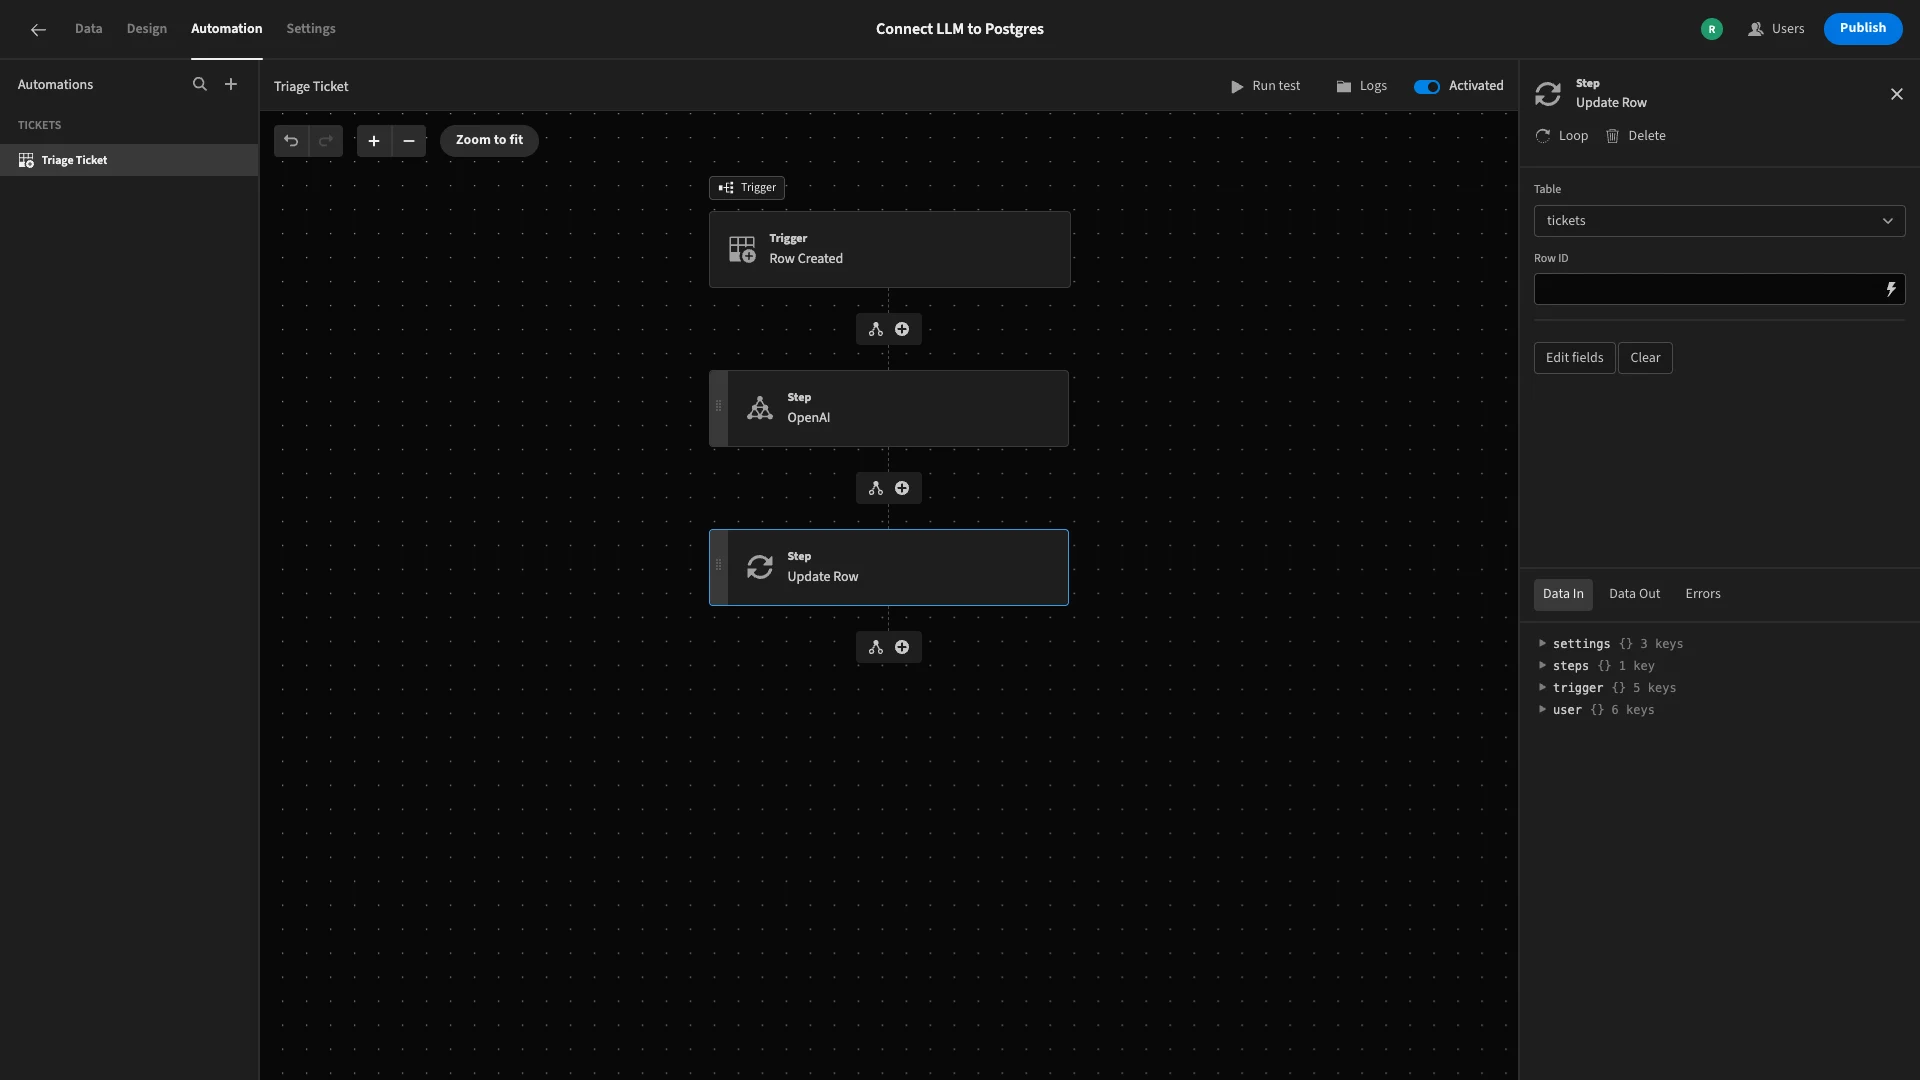
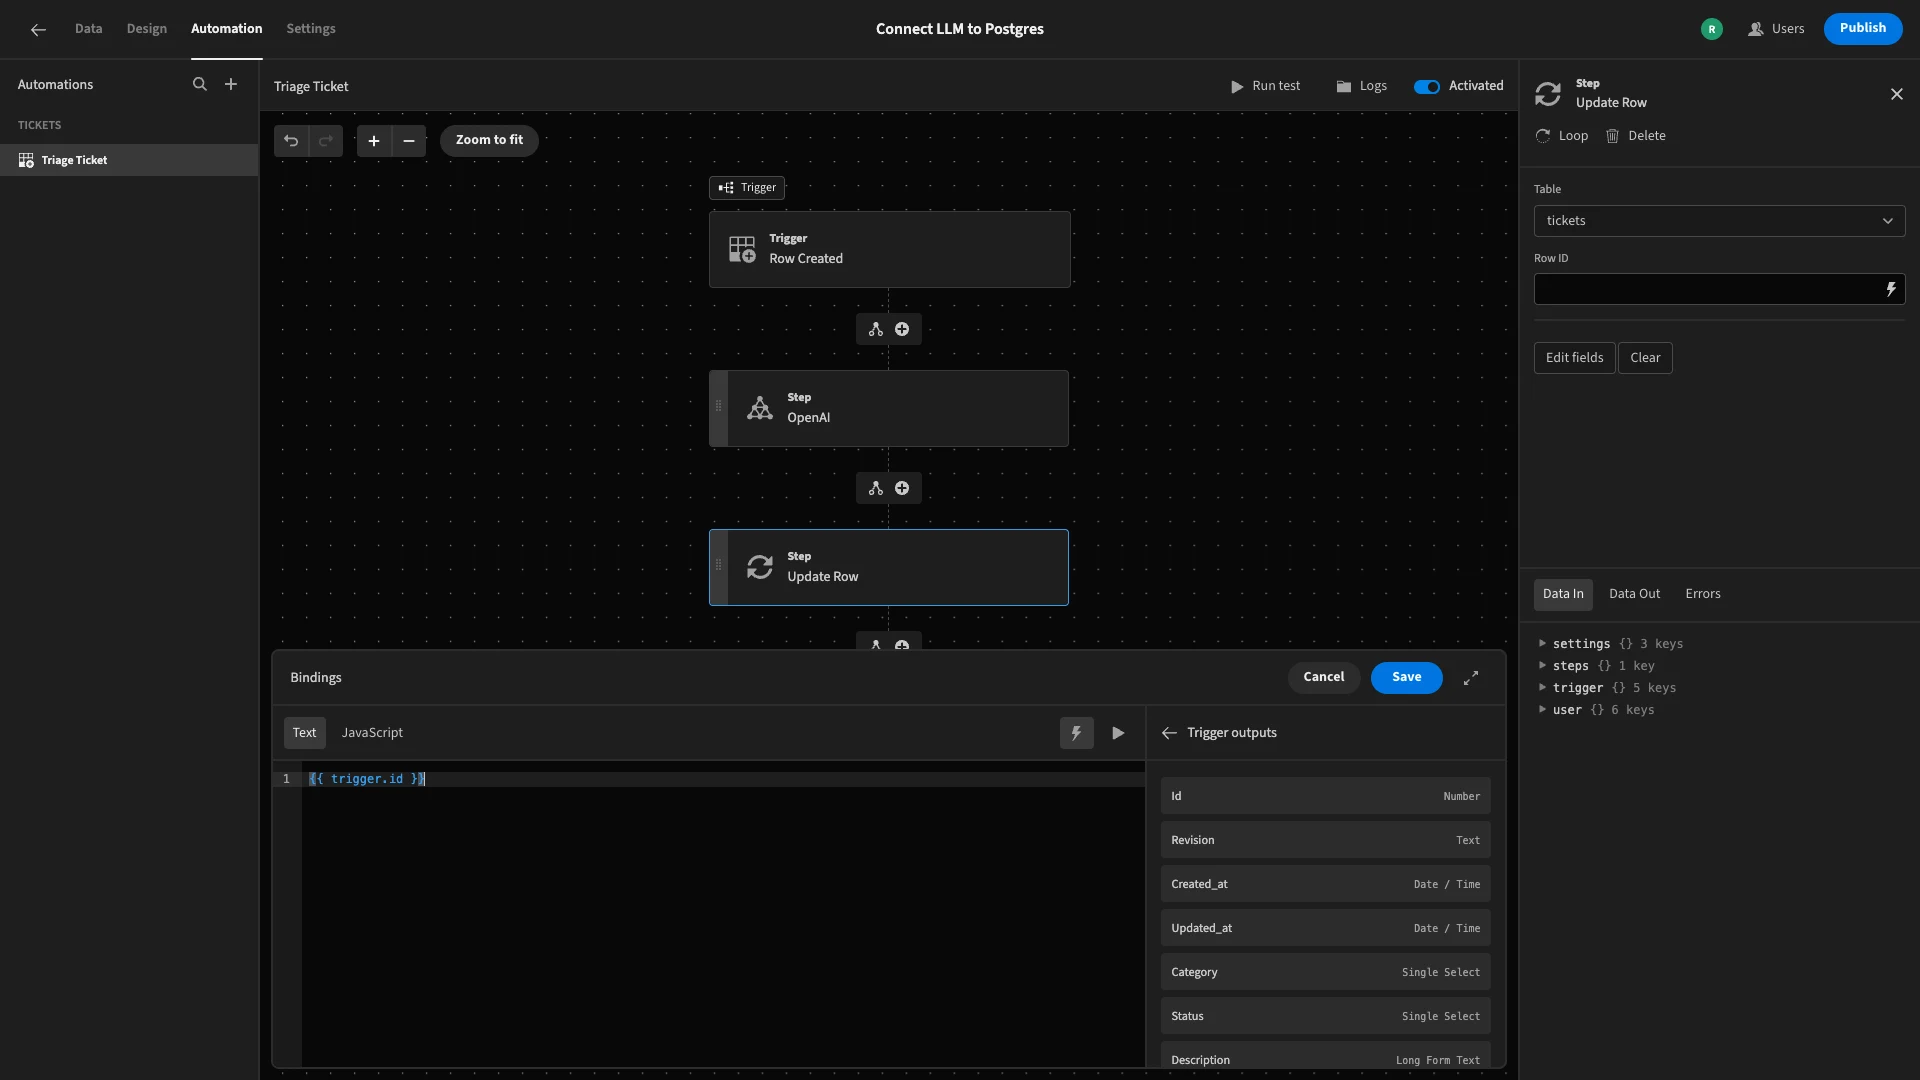
There’s also a setting here called Row ID. This determines which specific row in our database will be updated when this action executes. We need to set this to the ID attribute from our original trigger.
We can access this using {{ trigger.id }} in our bindings menu.
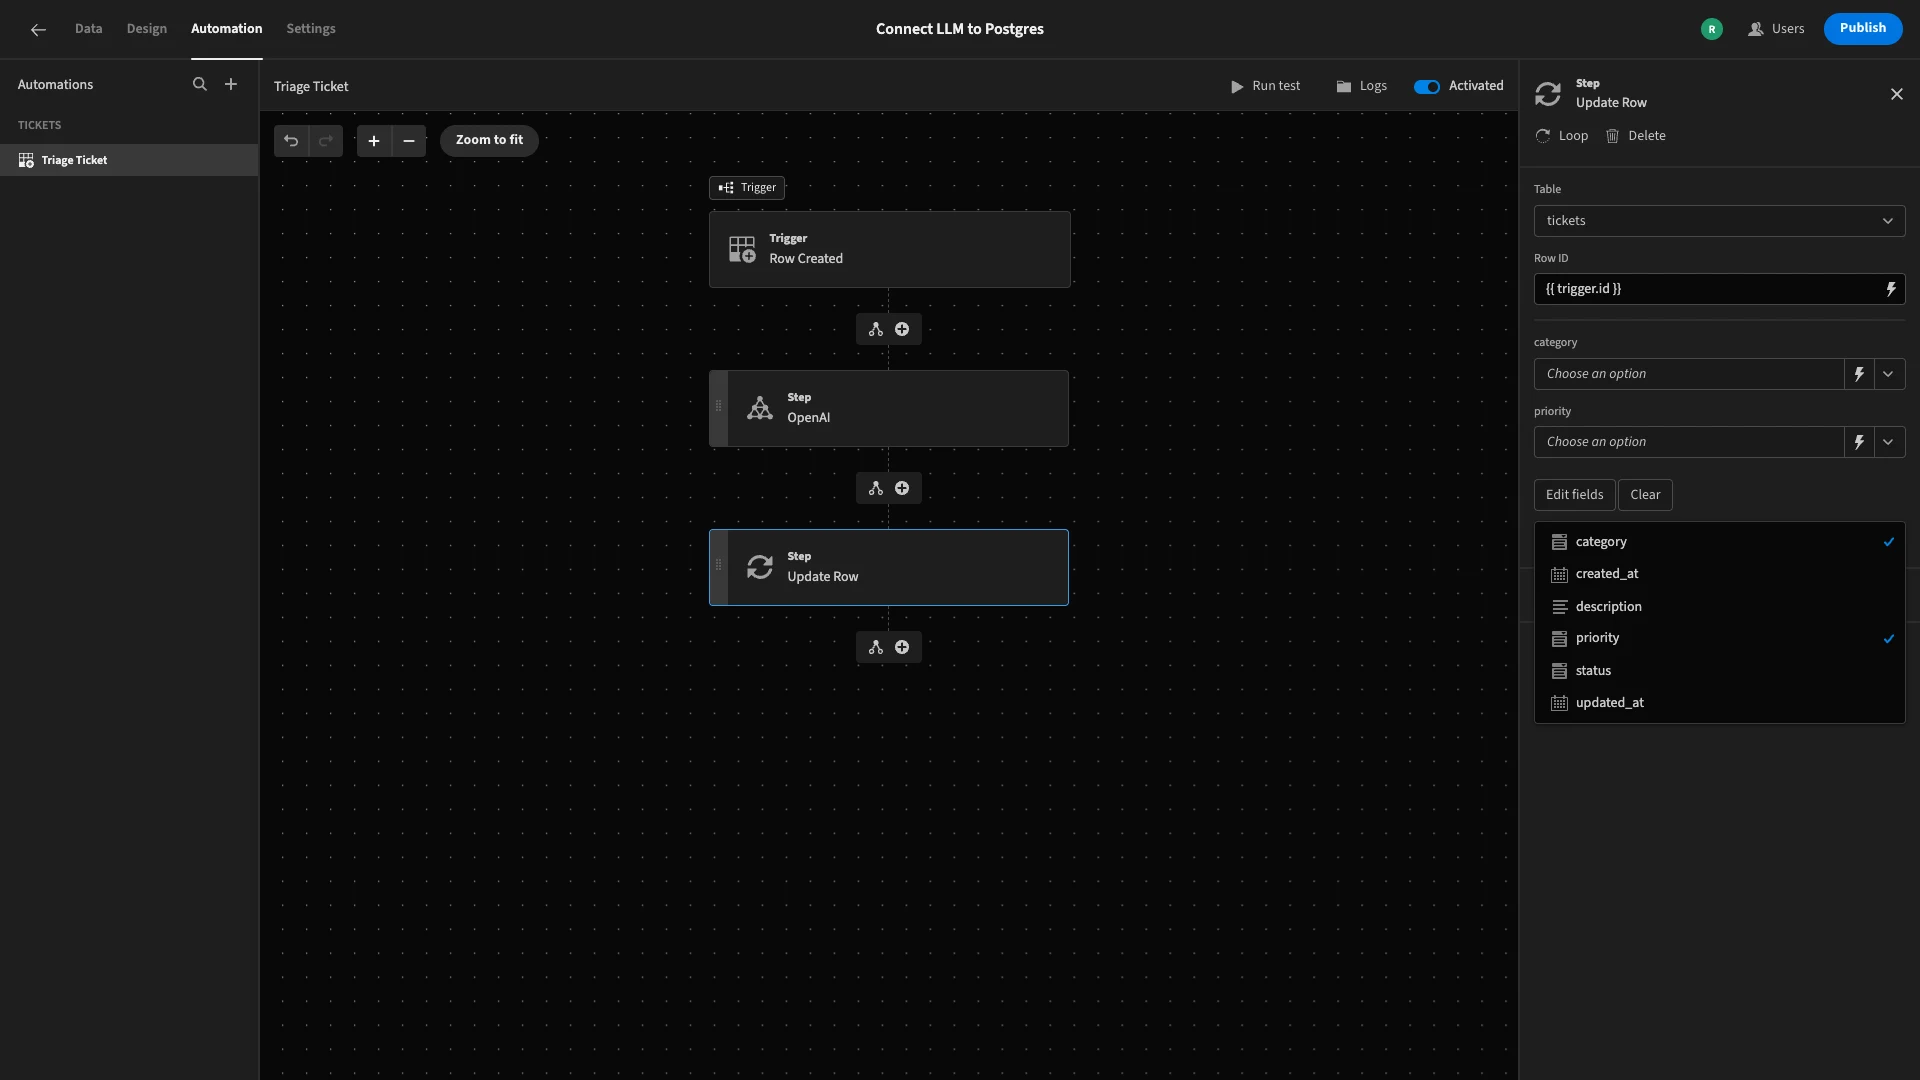
Next, we’ll hit edit fields, and select category and priority.
Sending the values from our LLM response to our Postgres database is a little bit trickier, because the data that we need will be provided in plain text - although this is going to be formatted like JSON.
So, we’ll need to use a little bit of JavaScript to isolate the values we need.
We’ll begin by opening the bindings drawer for the category value and selecting the JavaScript option.
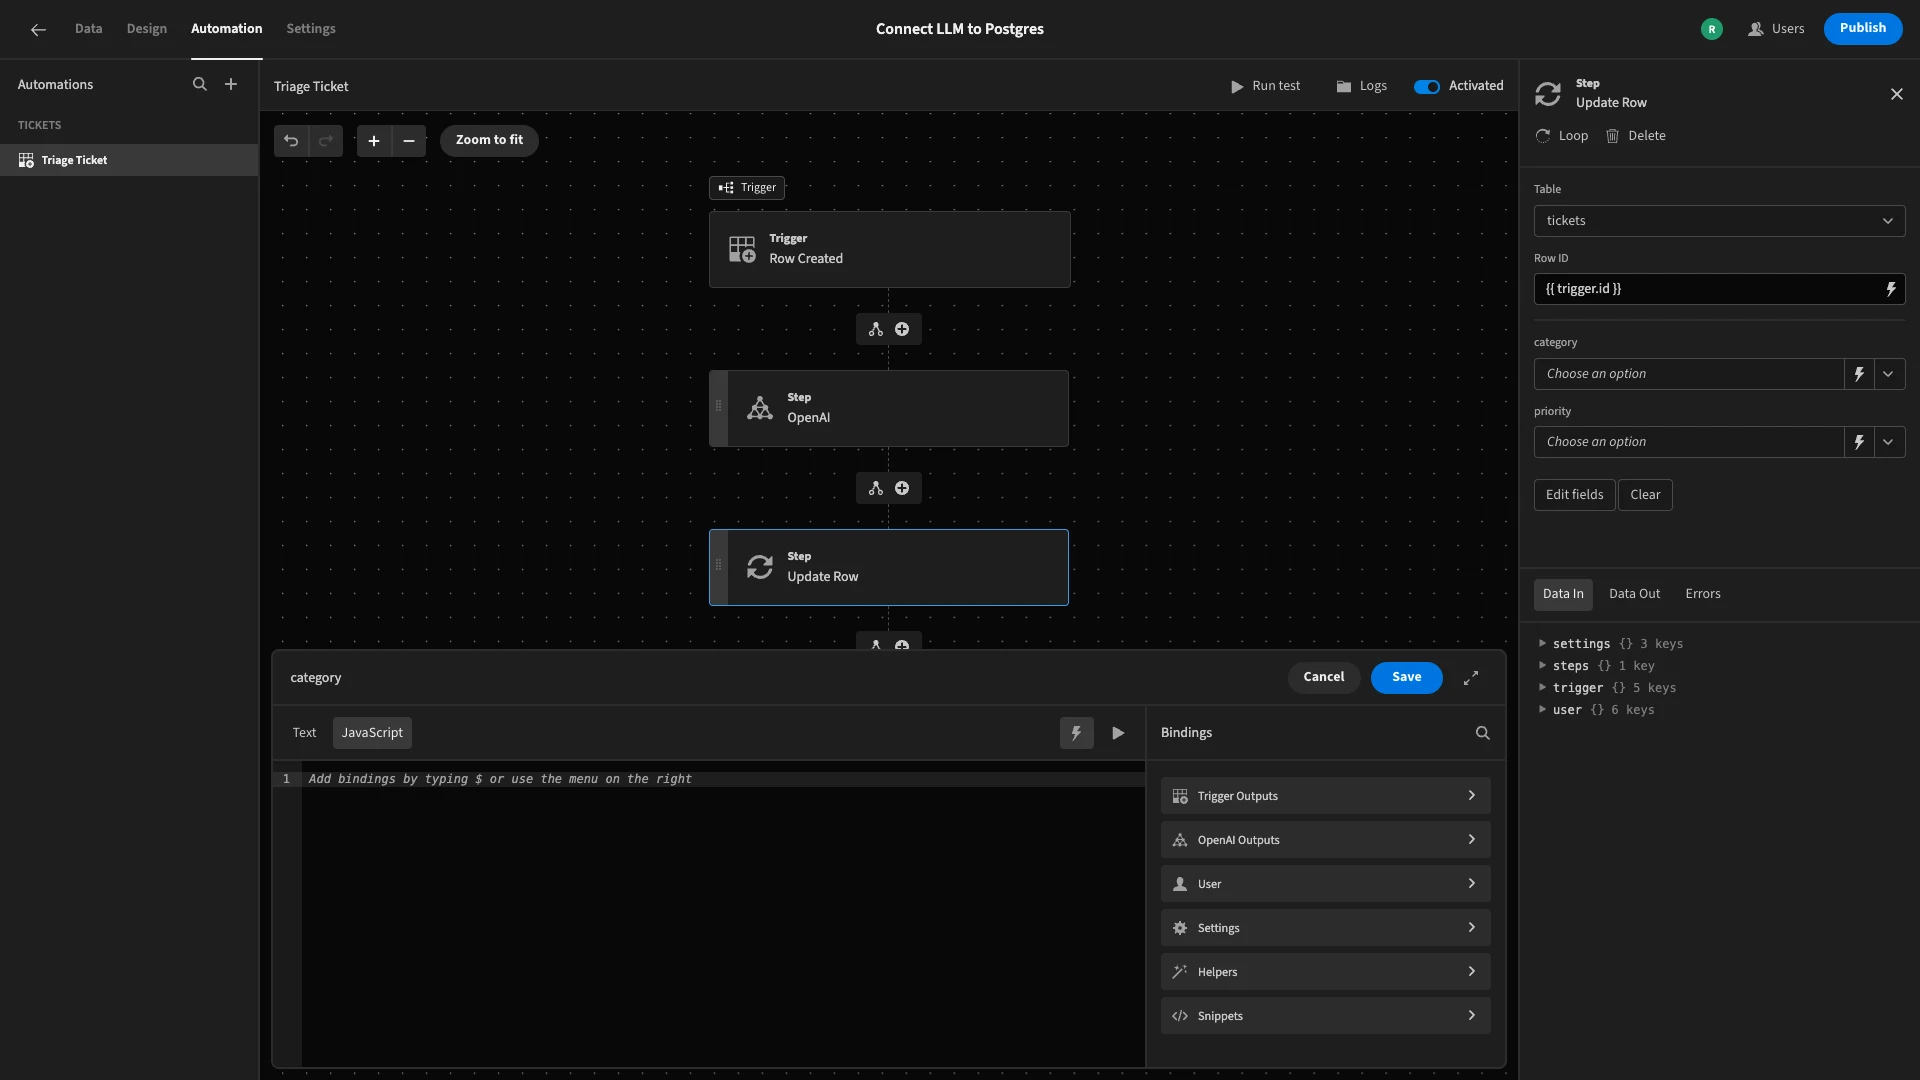
To do this, we’ll declare a variable and set its value by applying the JSON.parse() method to the output of our OpenAI step. We’ll then return the category value within this.
We can do this with the following two lines of JavaScript.
1var response = JSON.parse($("steps.OpenAI.response"))
2
3return response["category"]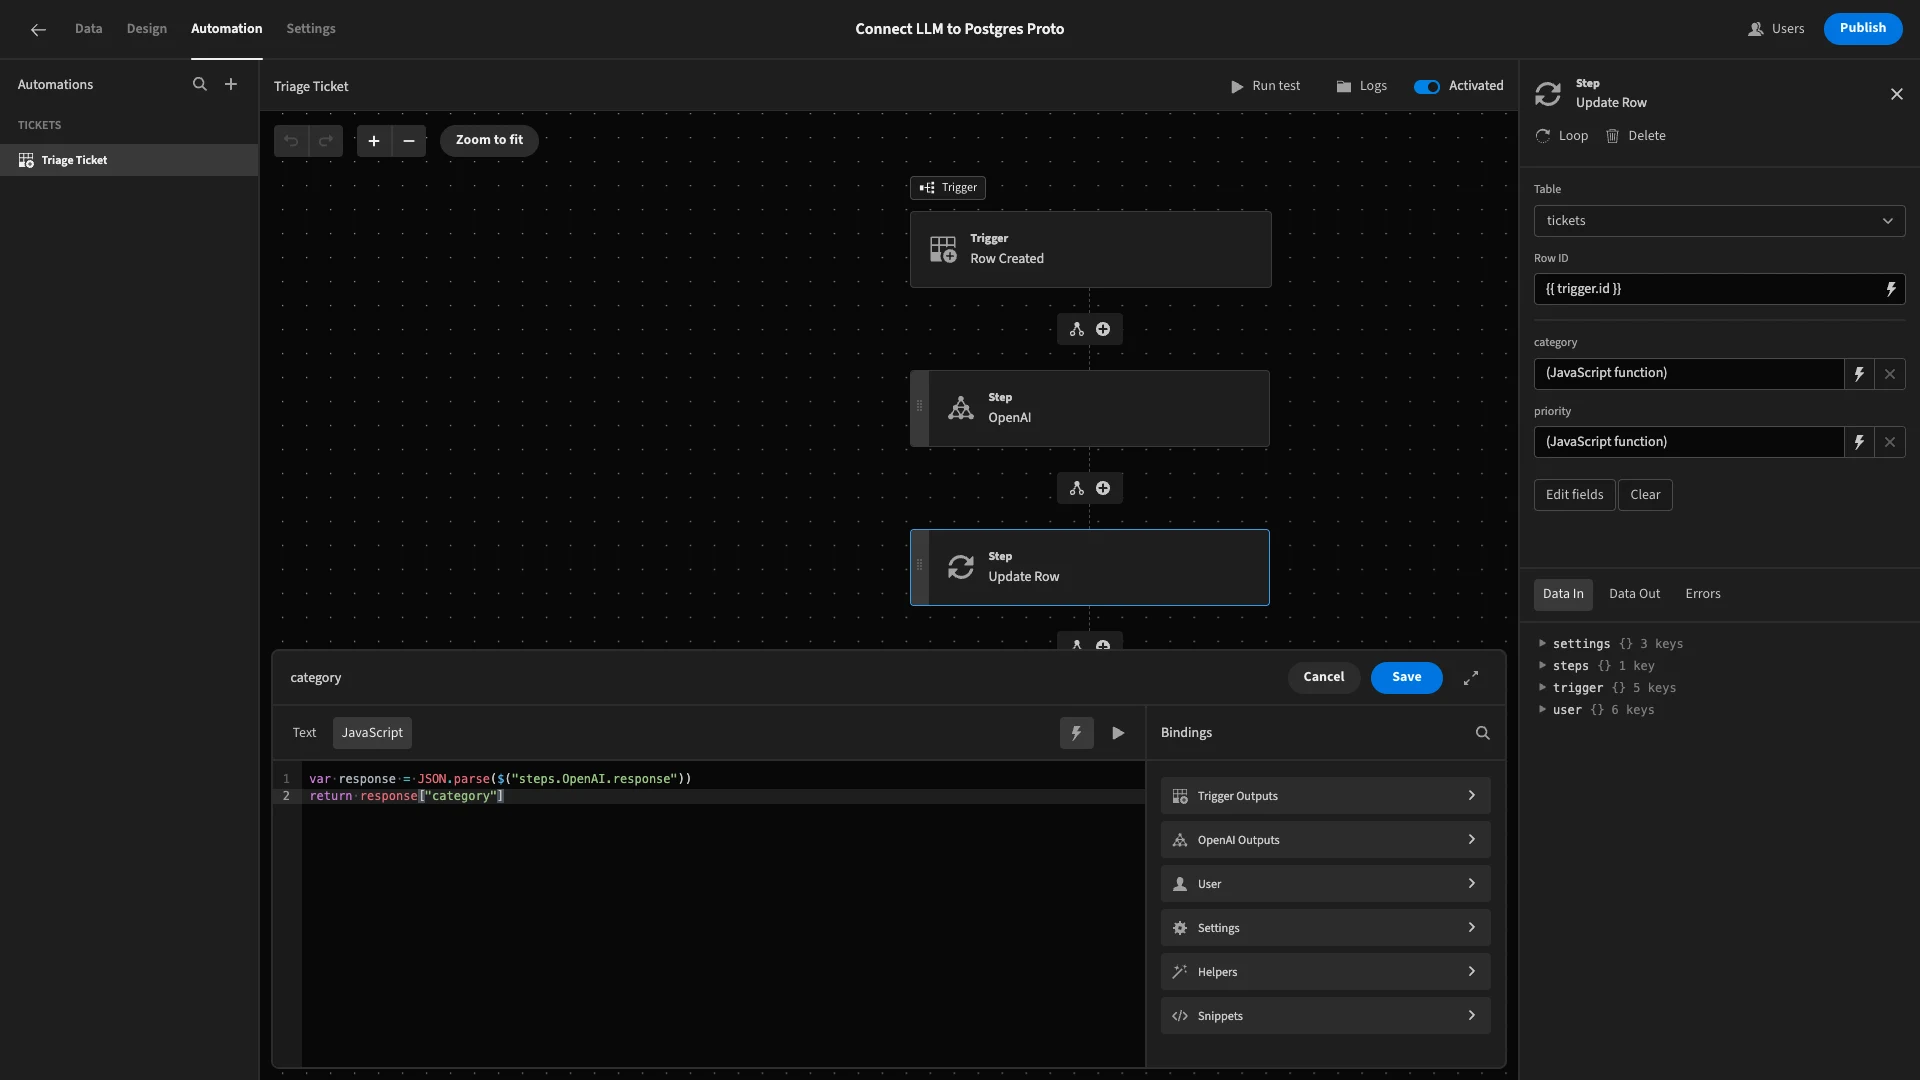
We can repeat this same process with the priority field, using:
1var response = JSON.parse($("steps.OpenAI.response"))
2
3return response["priority"]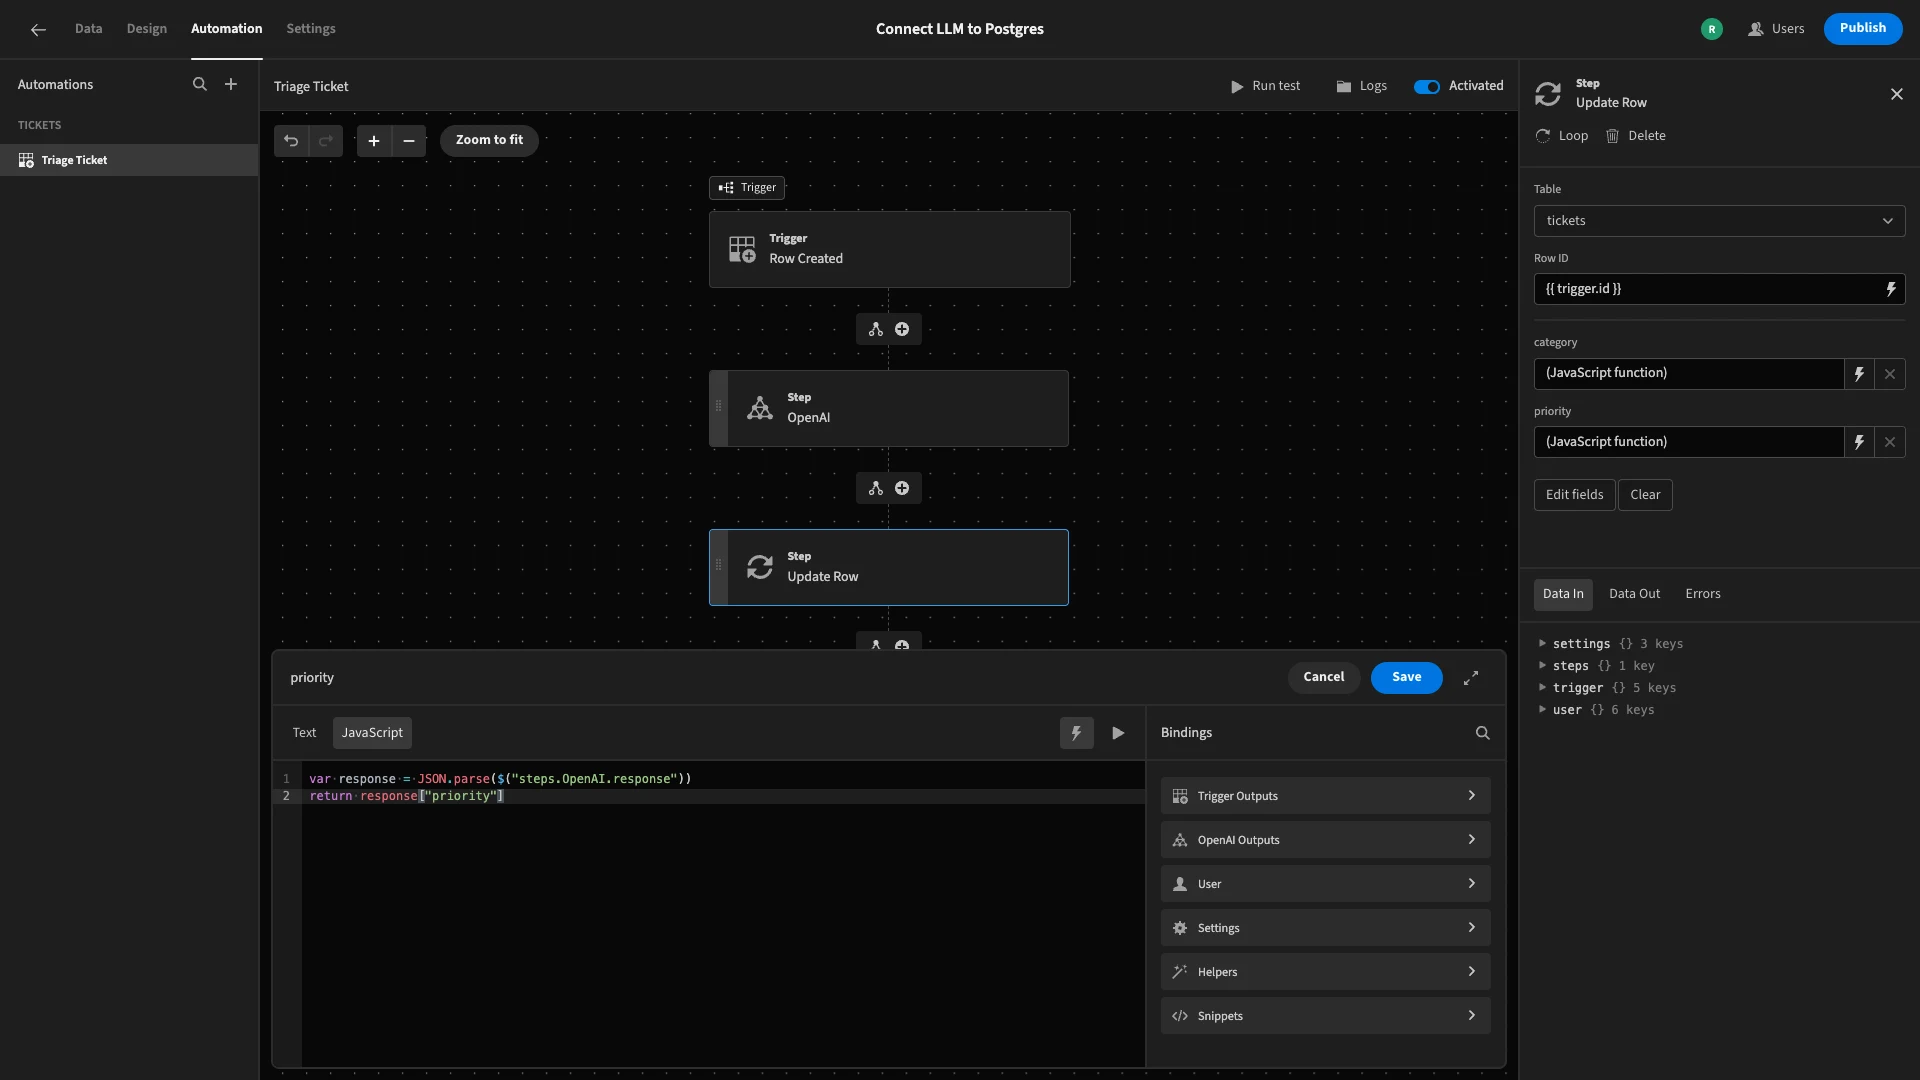
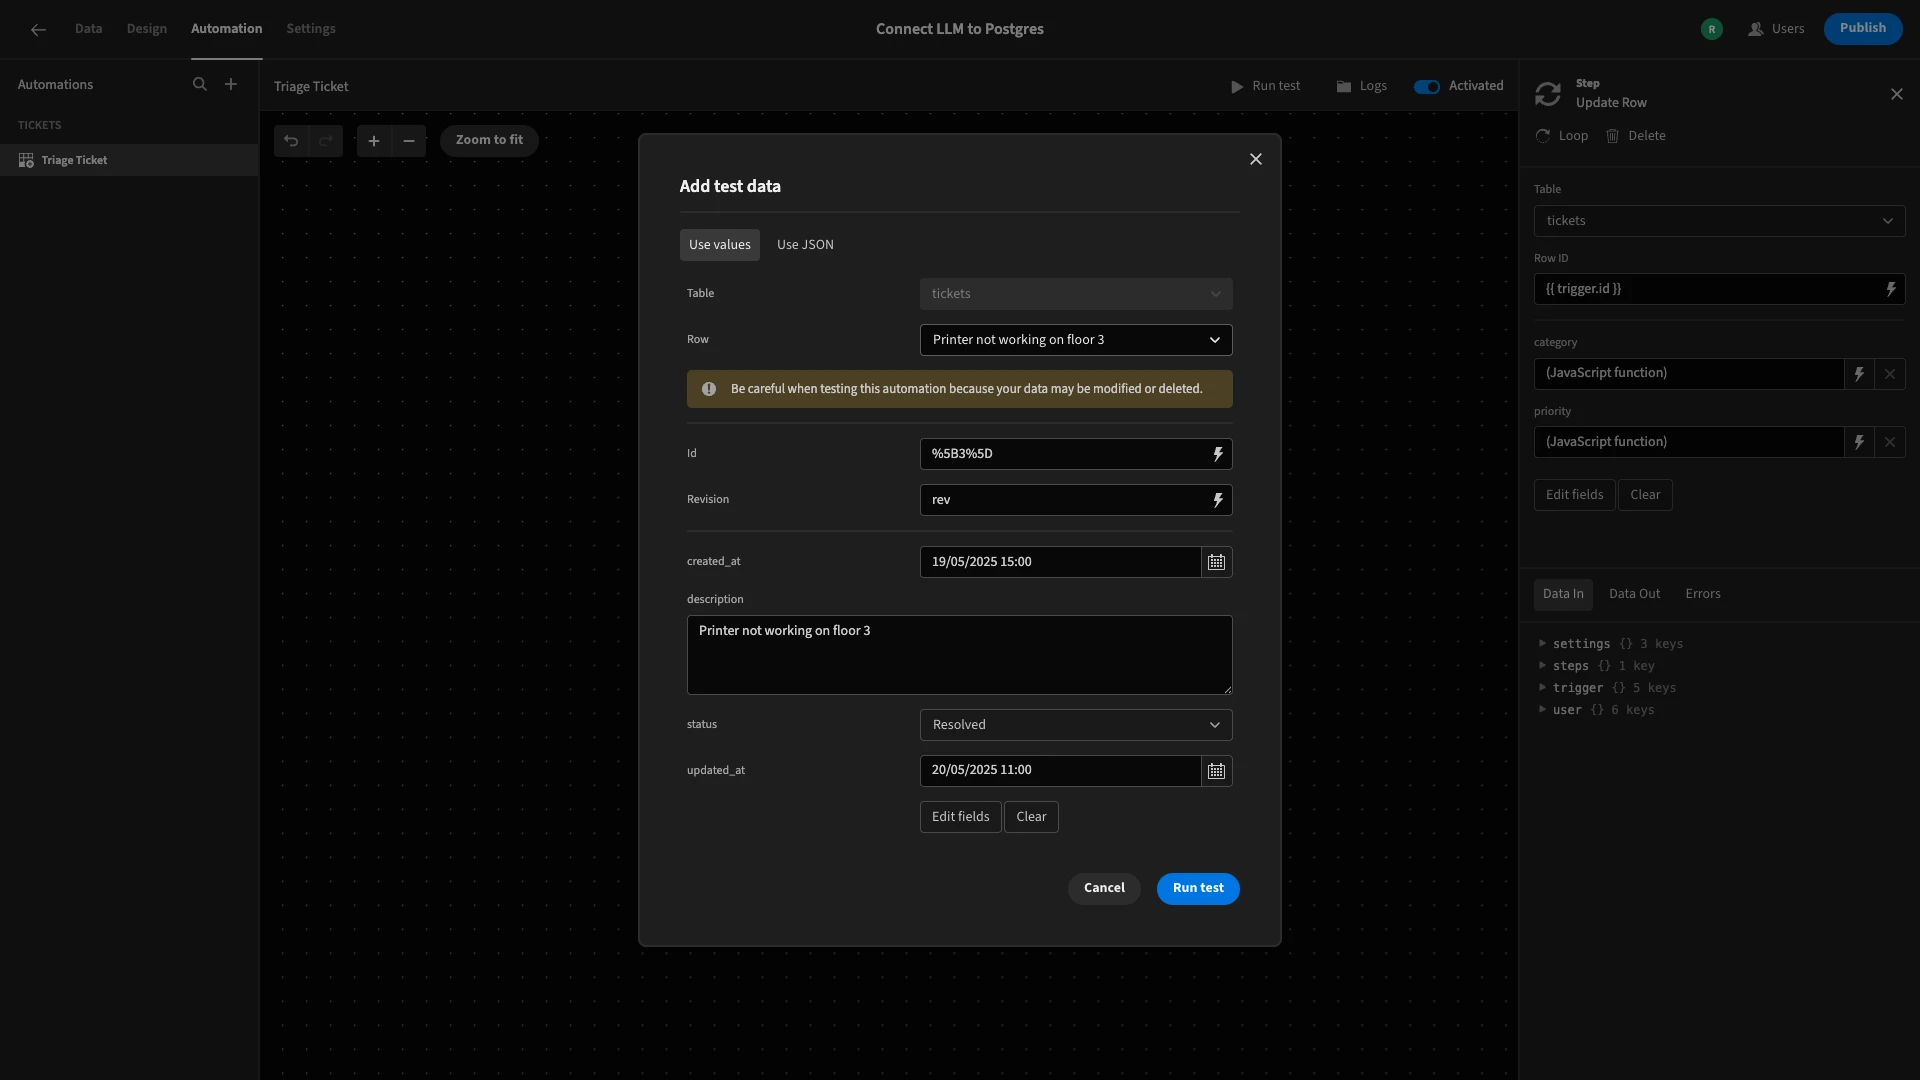
We can test this out by selecting an existing row.
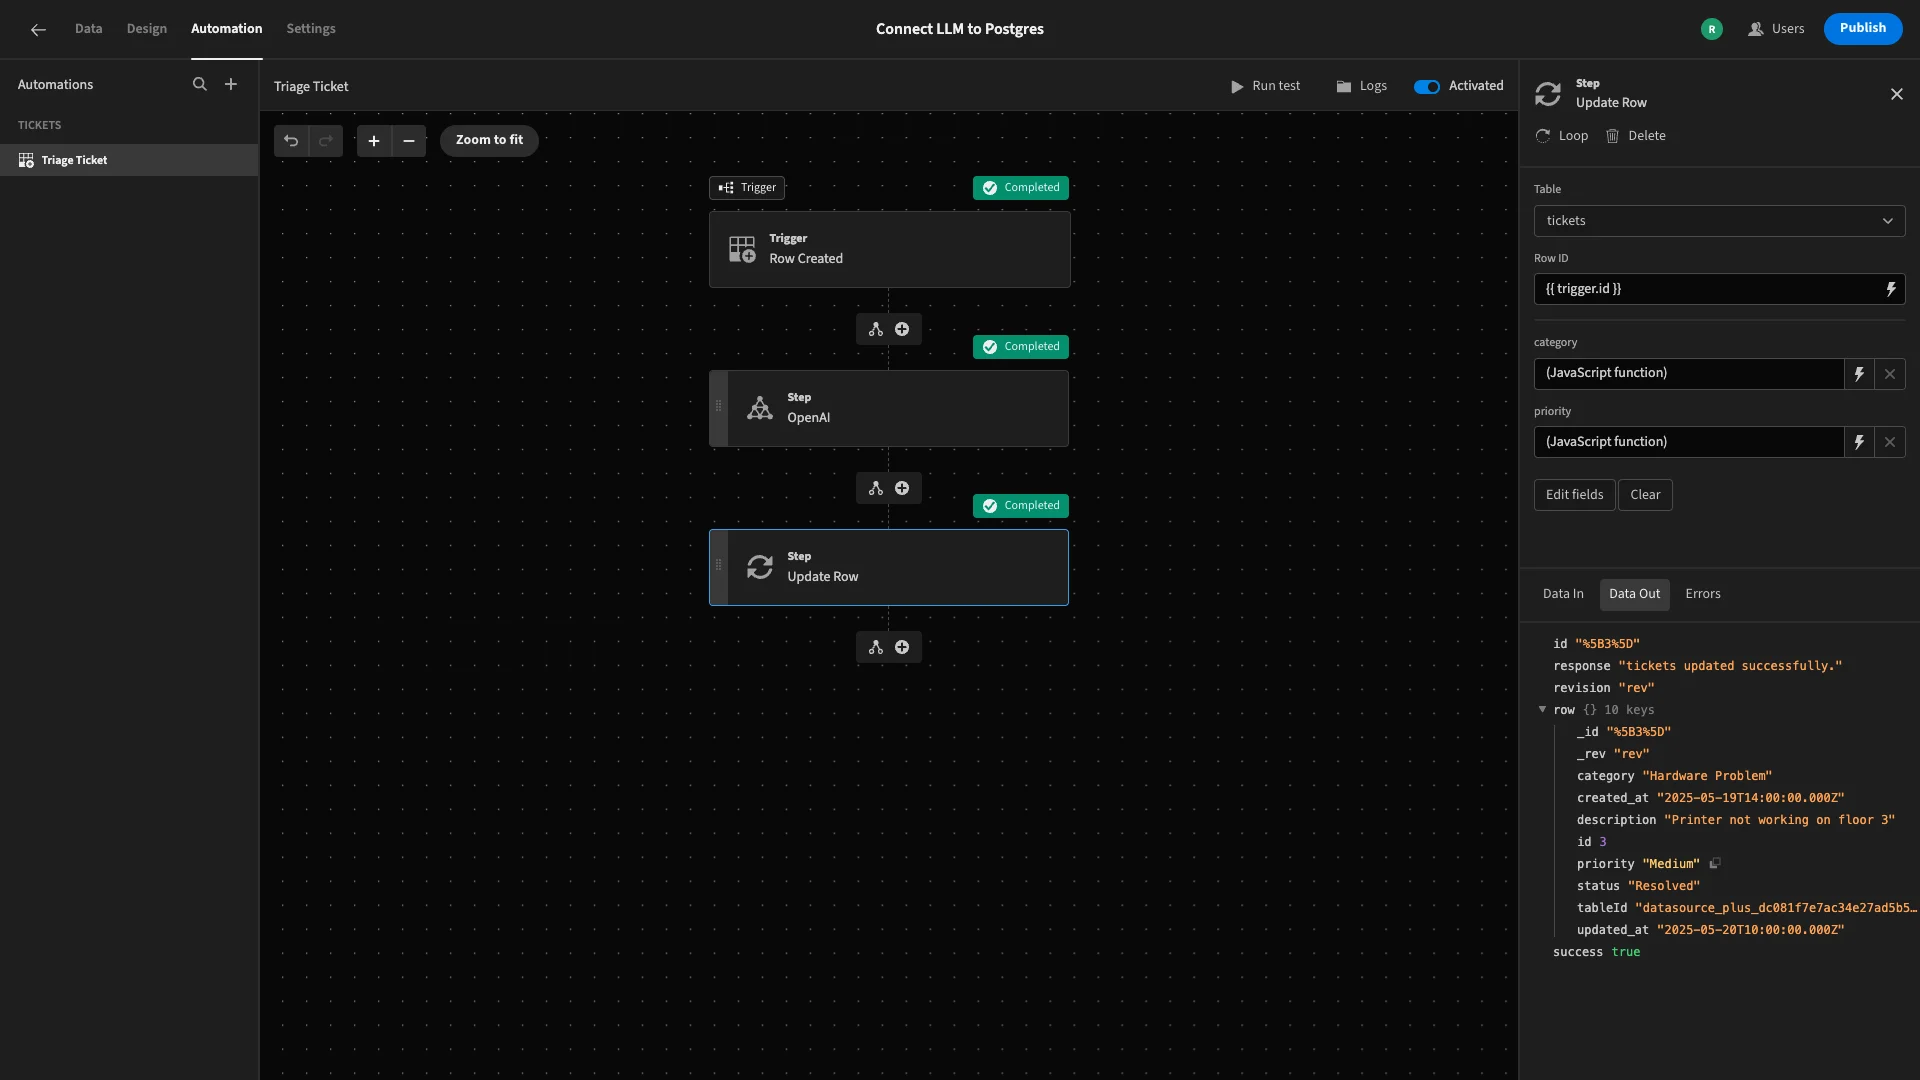
Under Data Out for our final step, we can see the values that have been saved, confirming that this has worked.
4. Adding a ticketing form UI
To complete our application, we’re going to add a simple form UI where users can submit tickets, using one of Budibase’s autogenerated screens.
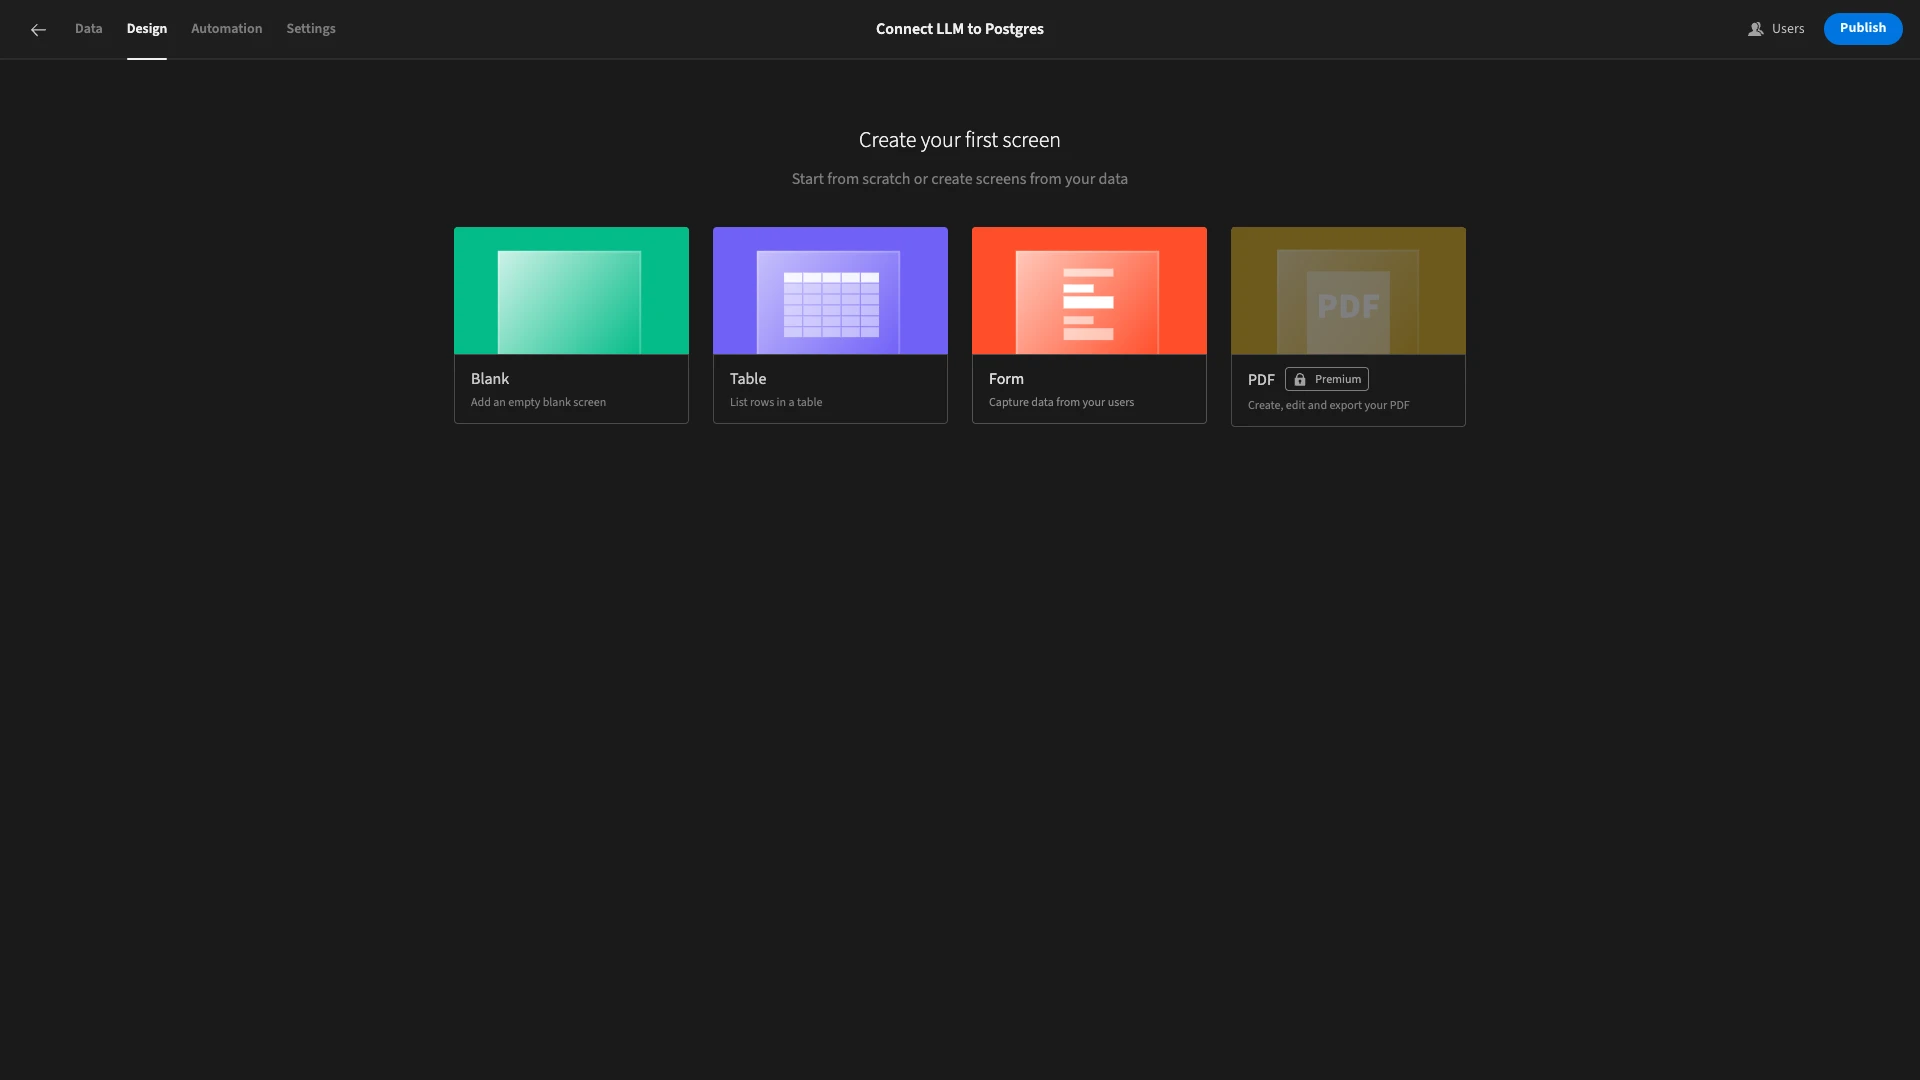
To start, we’ll head to the Design section, where we’re offered several layouts. Today, we’re choosing Form.
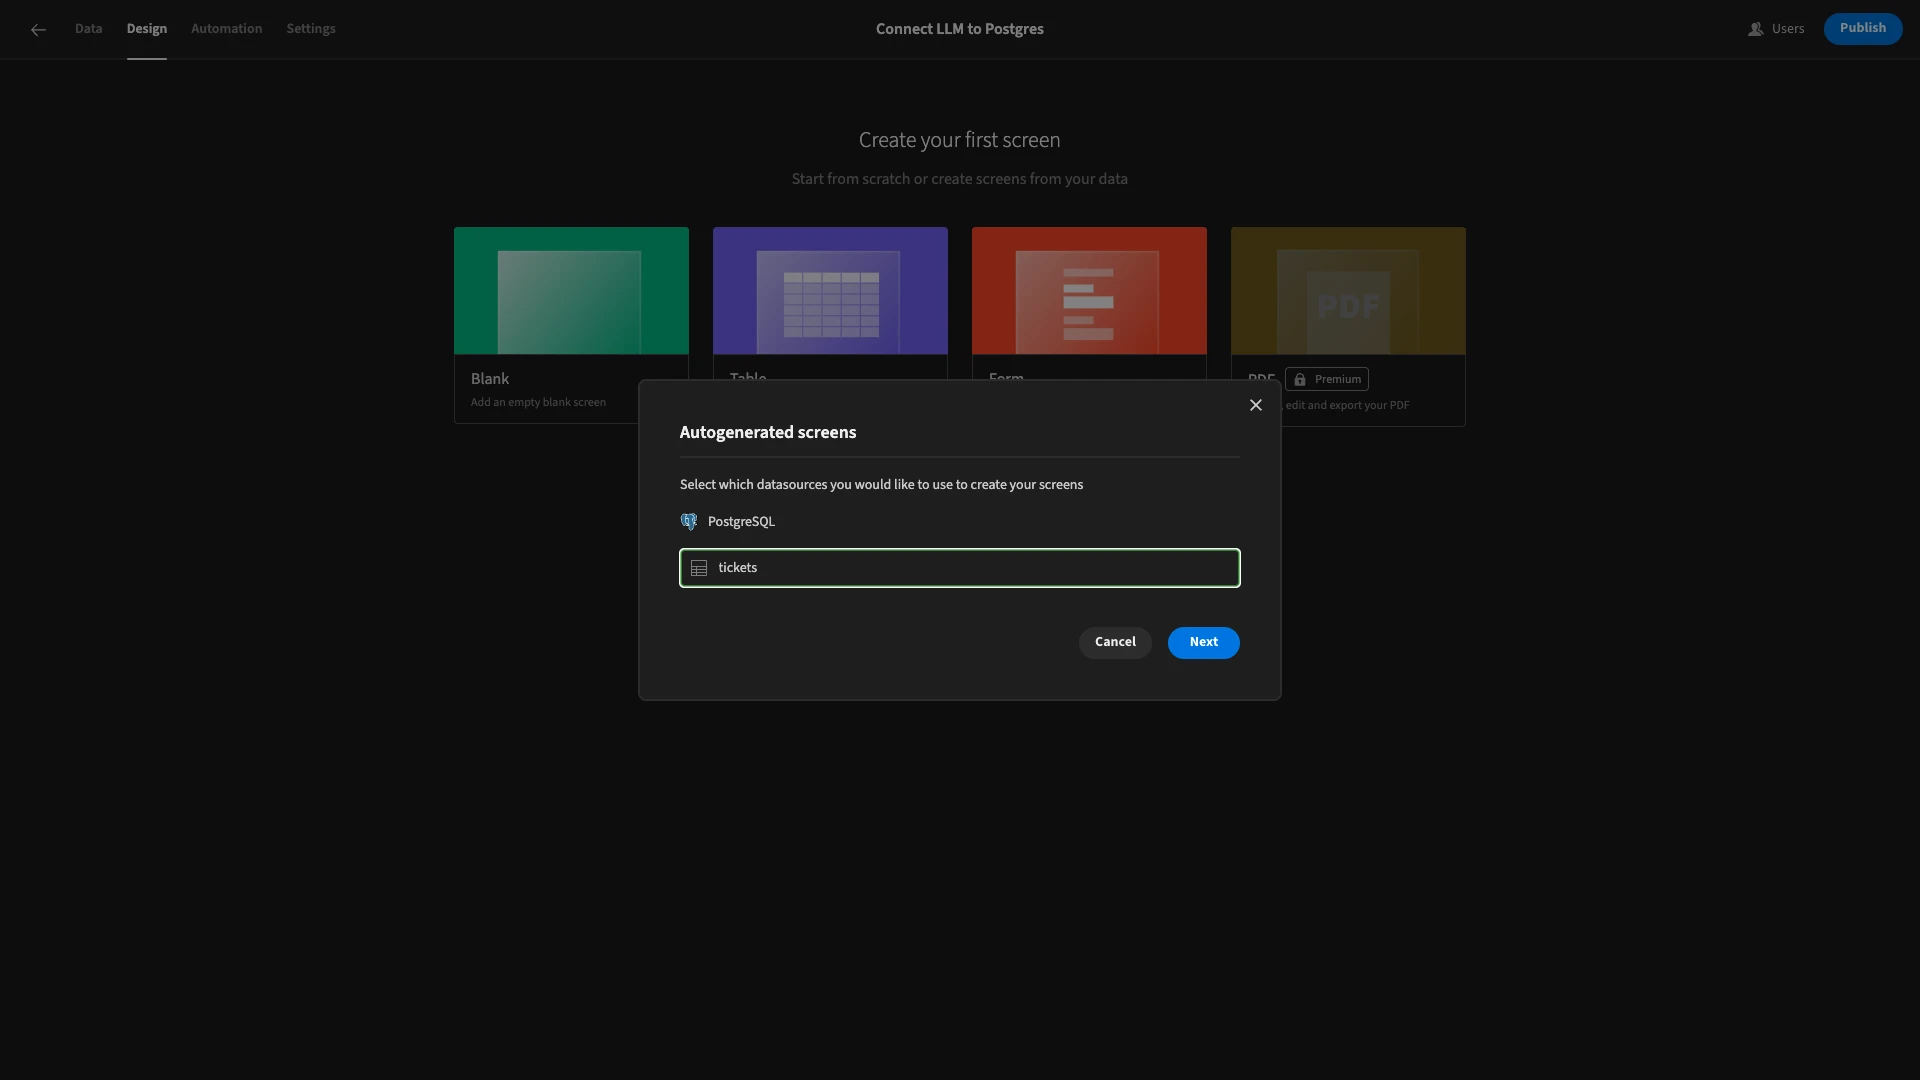
Then, we’re prompted to choose which table we’d like to base this on. As before, our app only has a single table, which we’re choosing.
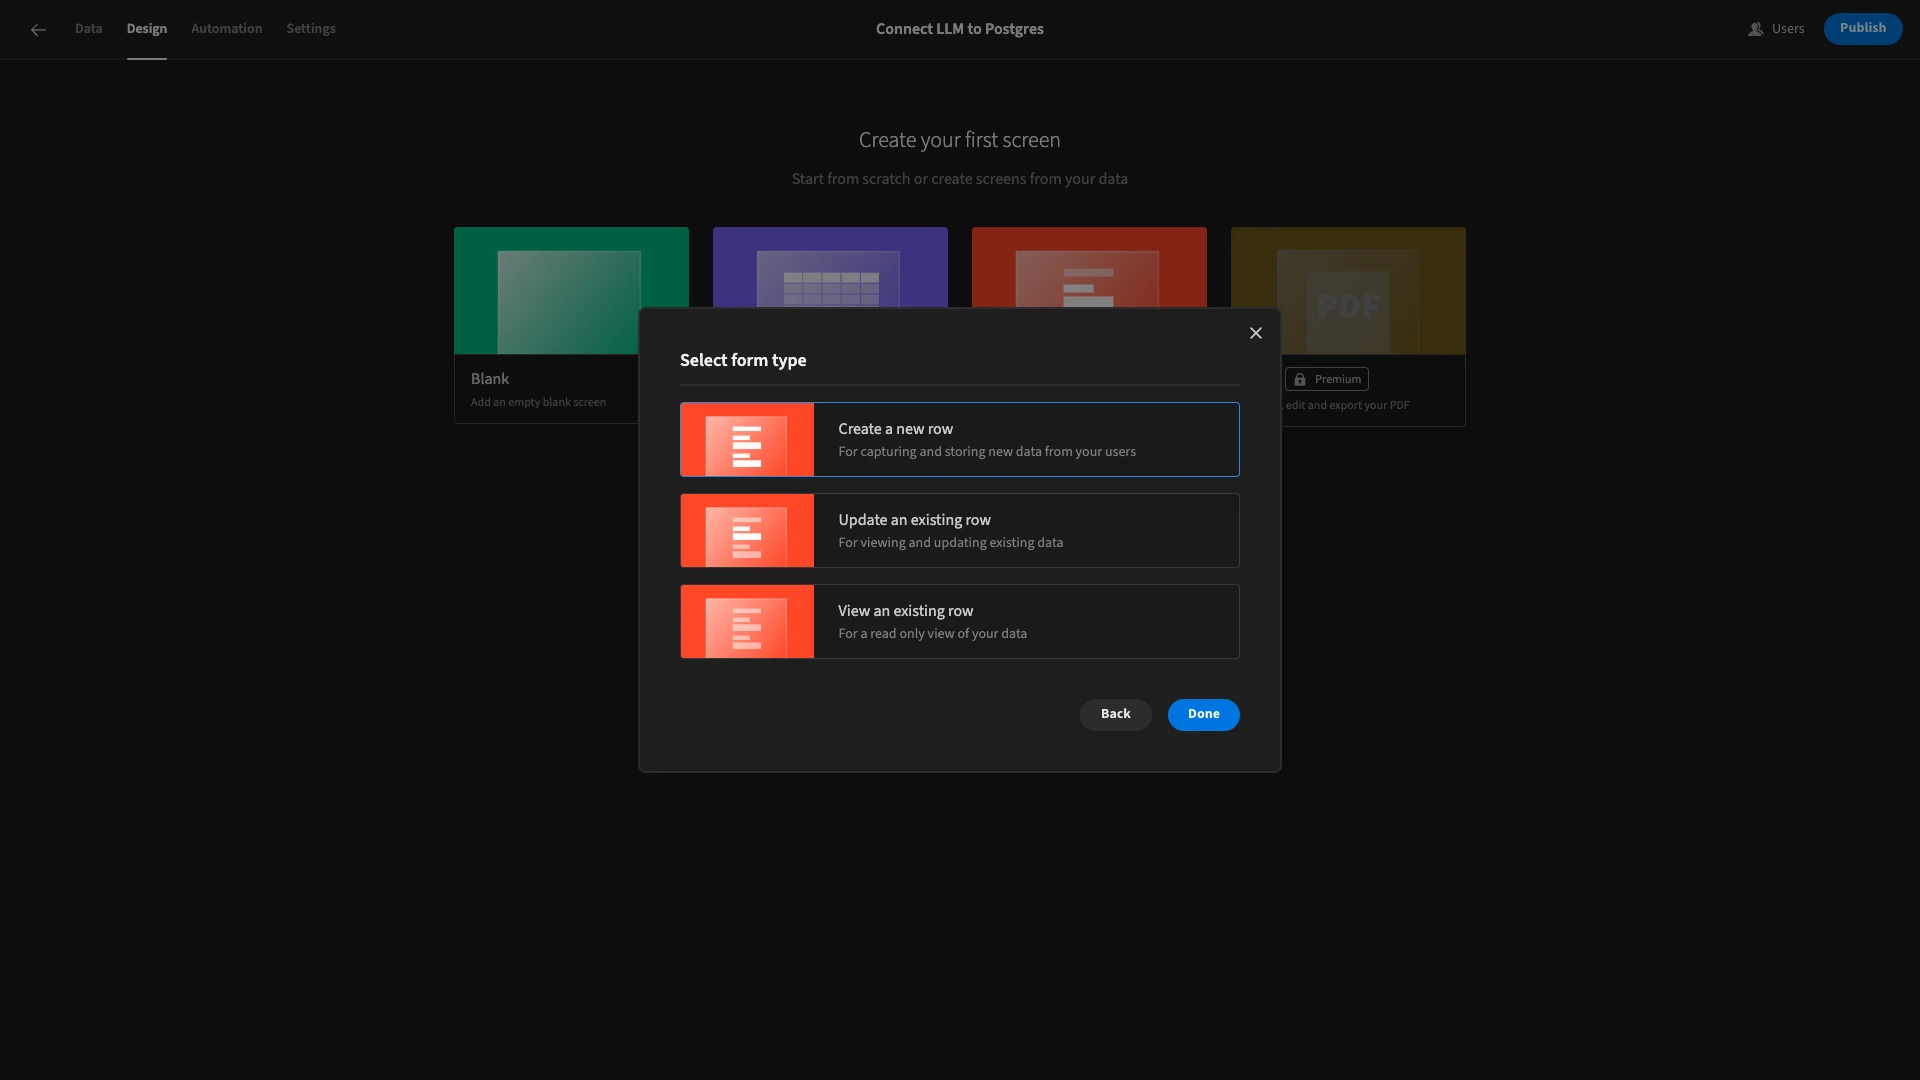
We’ll also need to choose which kind of operation our form will perform. We want to create a row.
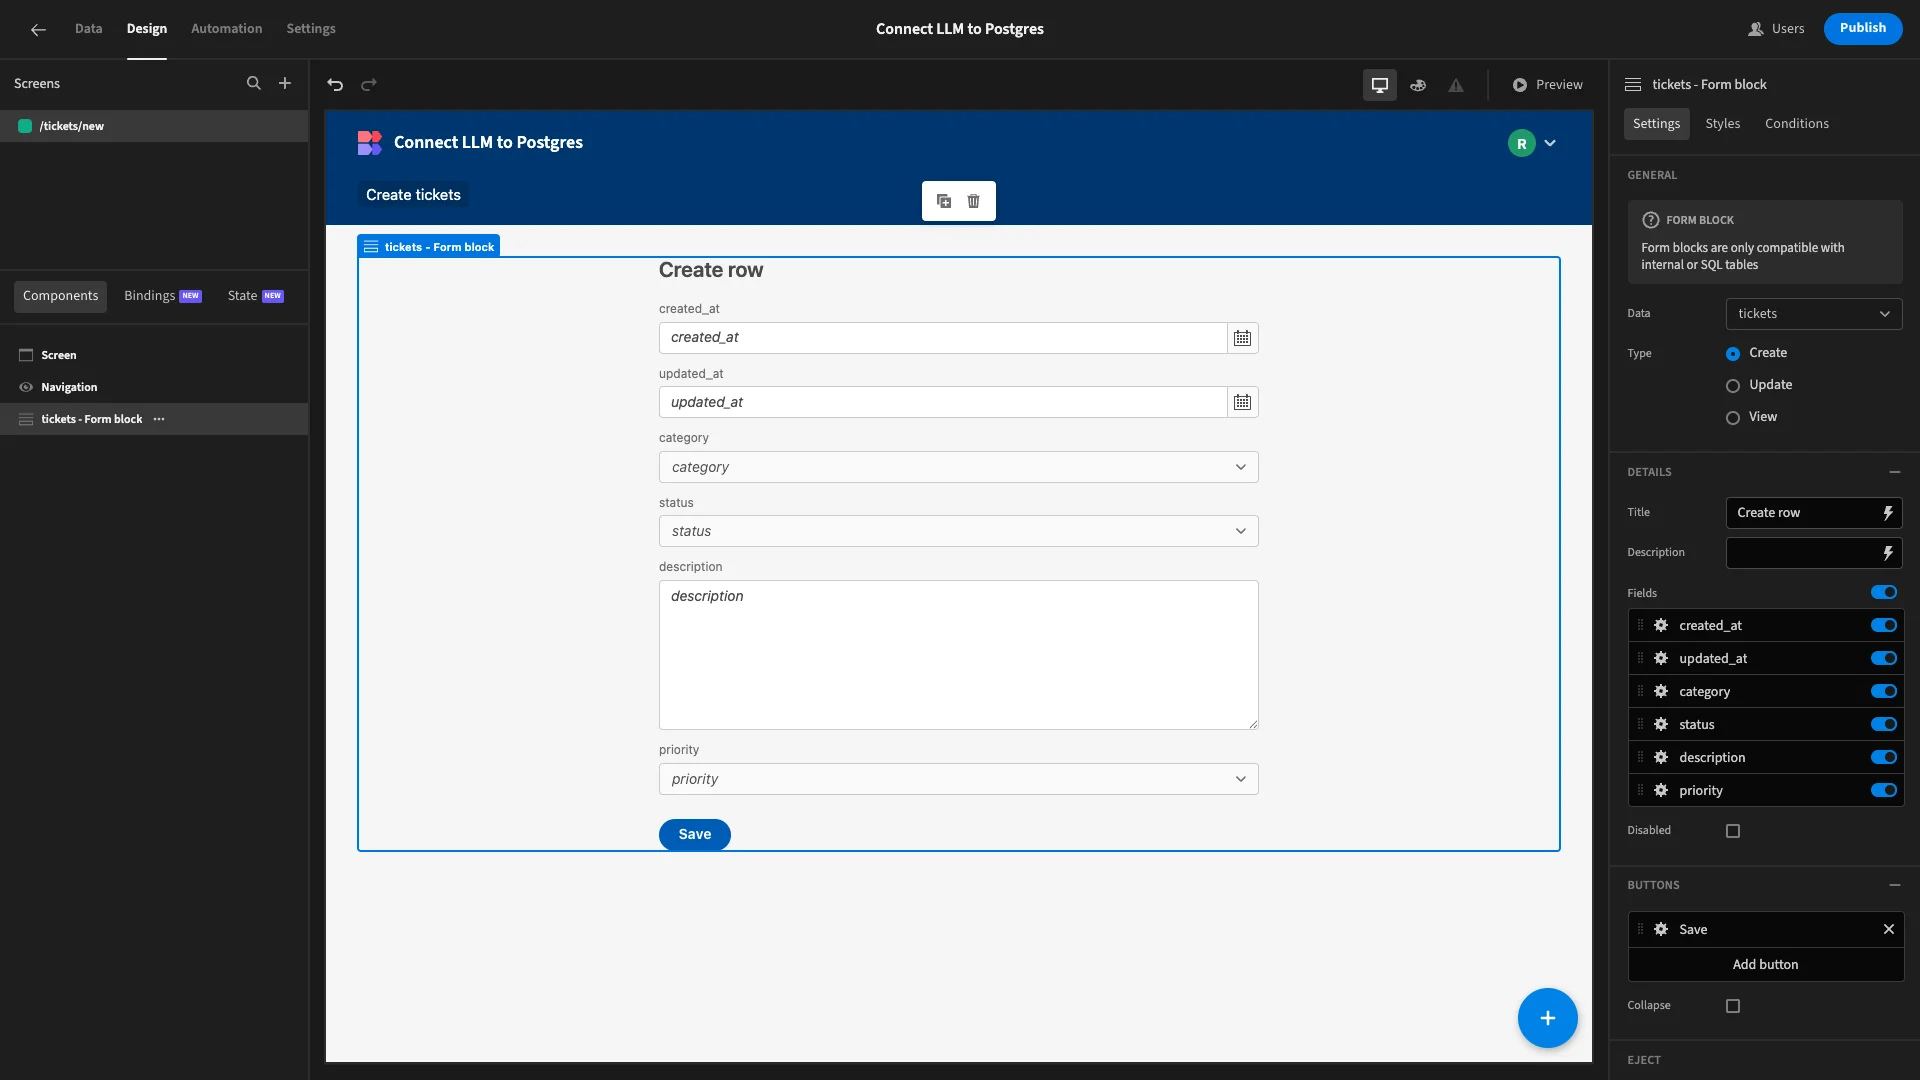
Here’s what the autogenerated screen will look like.
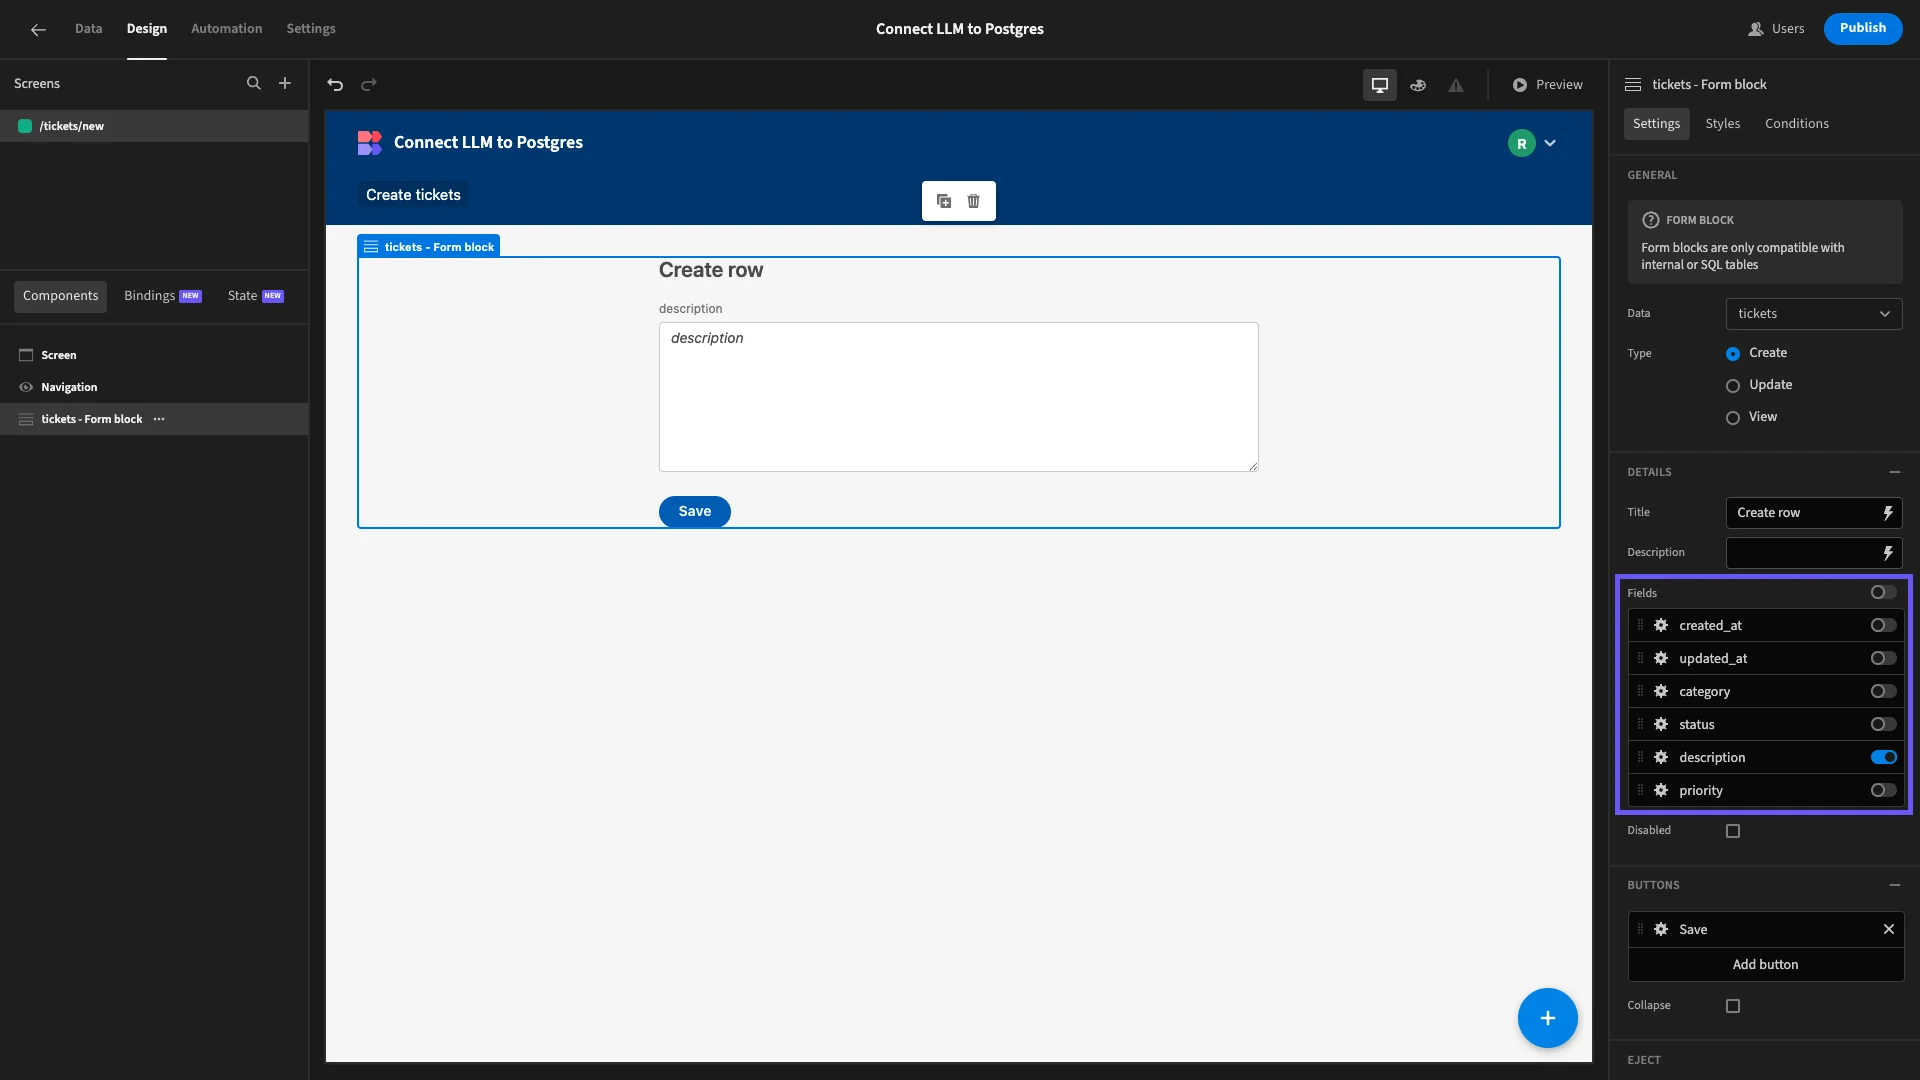
Most of our fields will be automatically populated, either using Budibase’s default values or via our LLM connection. Using the panel on the right-hand side of the screen, we’ll deselect all fields except for description.
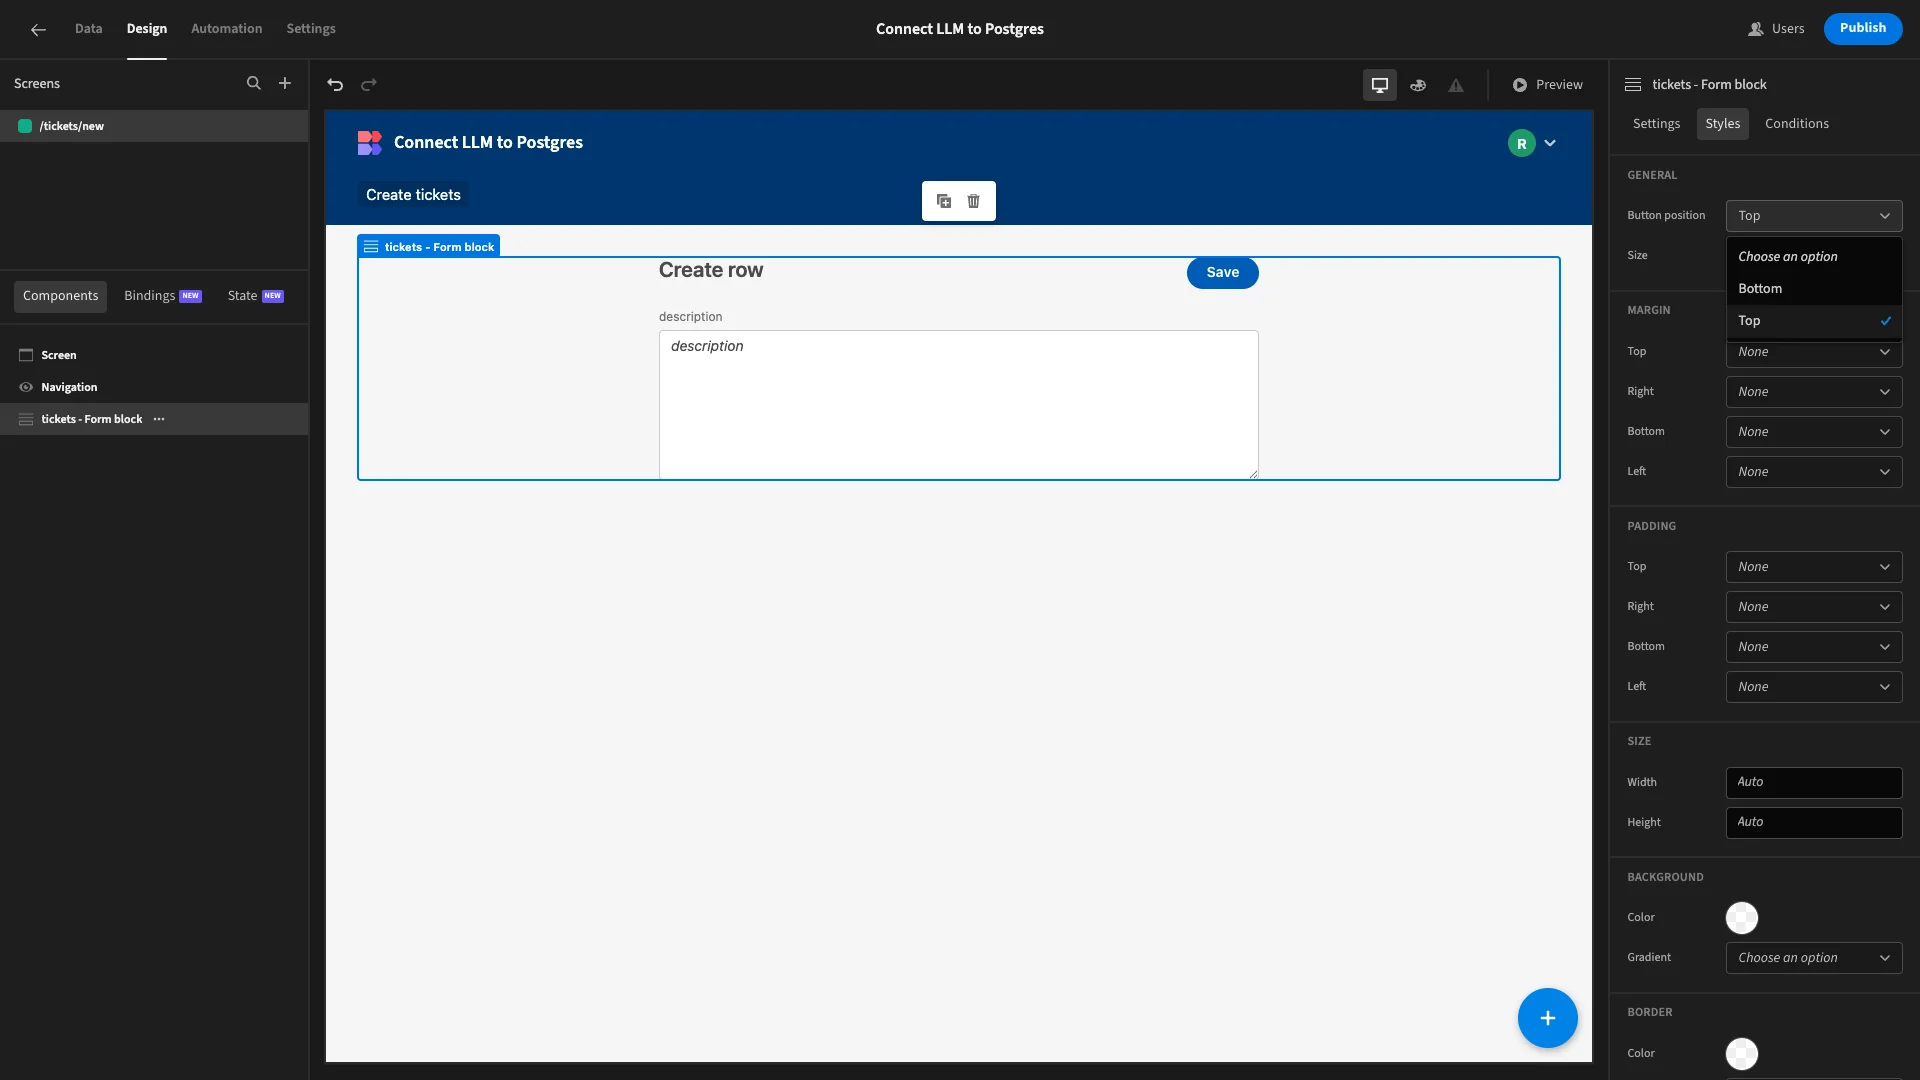
Under Styles, we’ll set our button position to top.
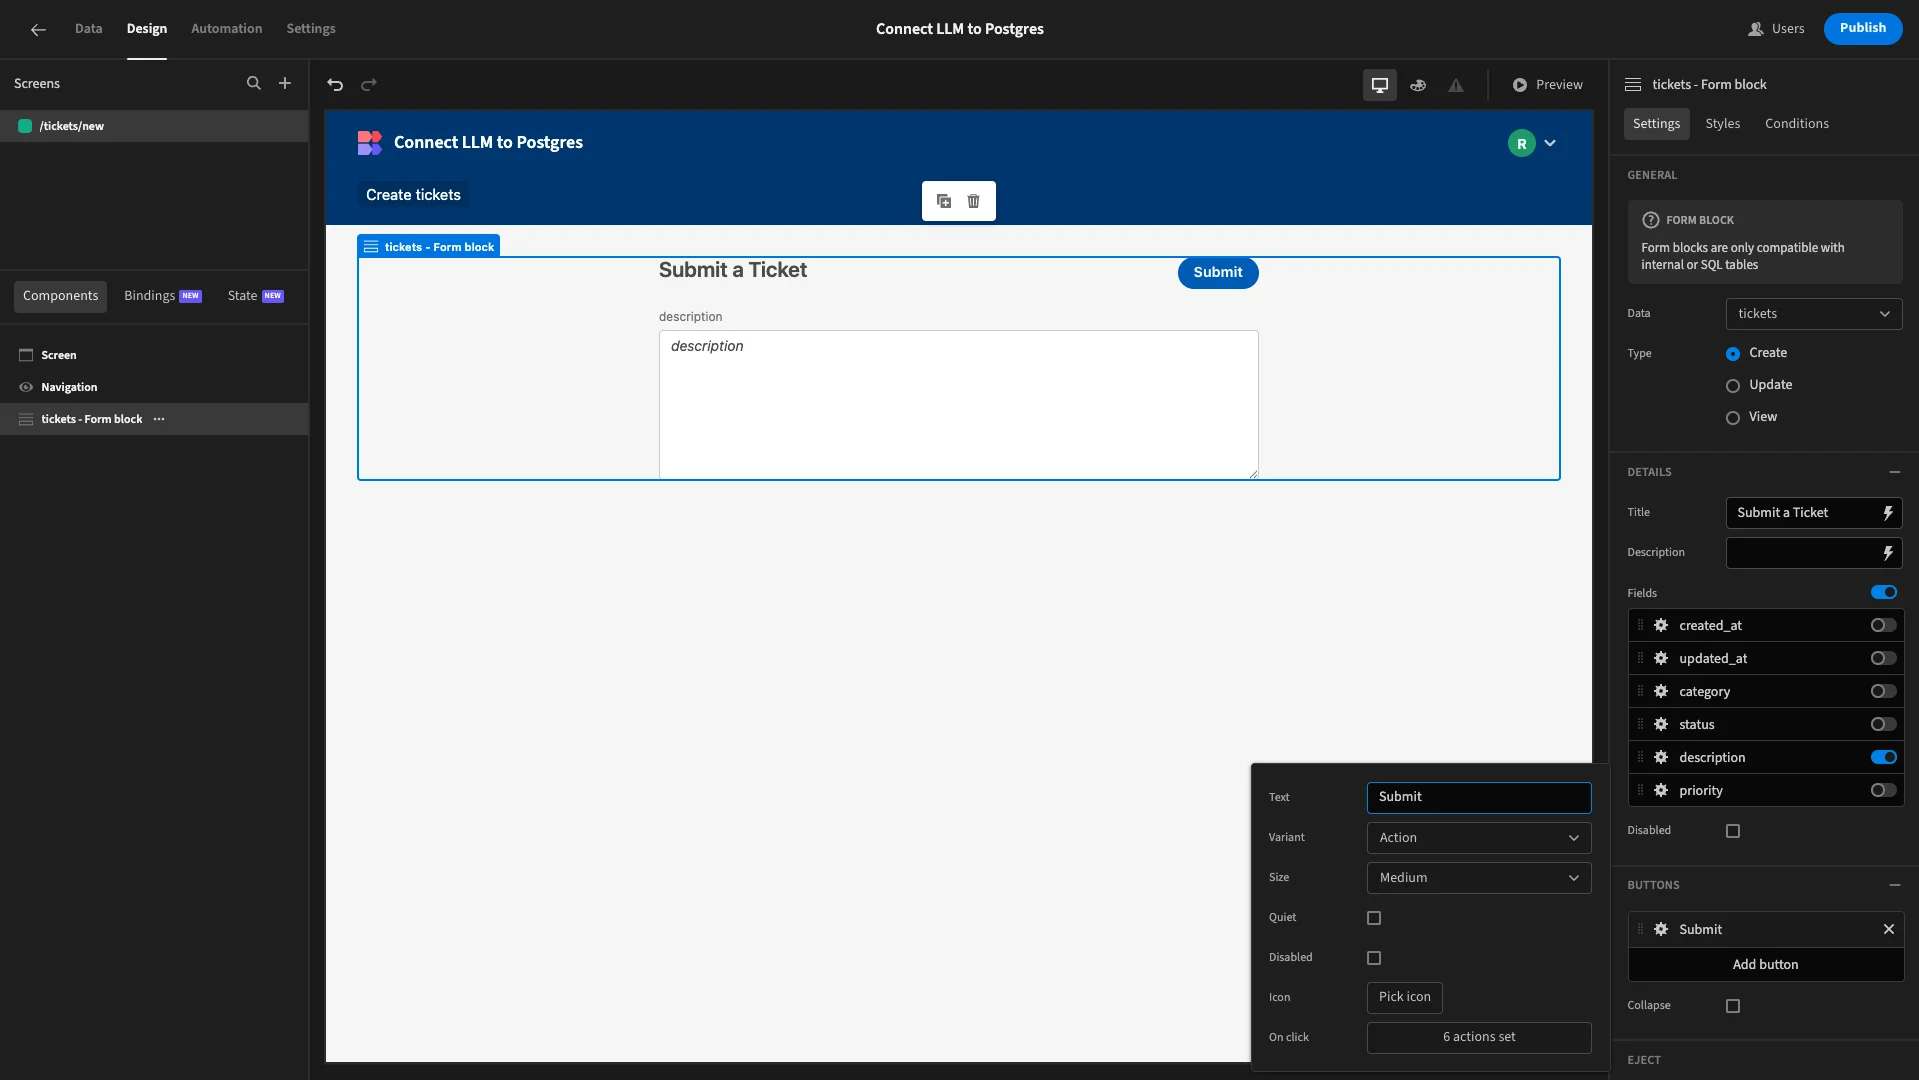
Then, we’ll set our Title and Button Text to more reader-friendly copy.
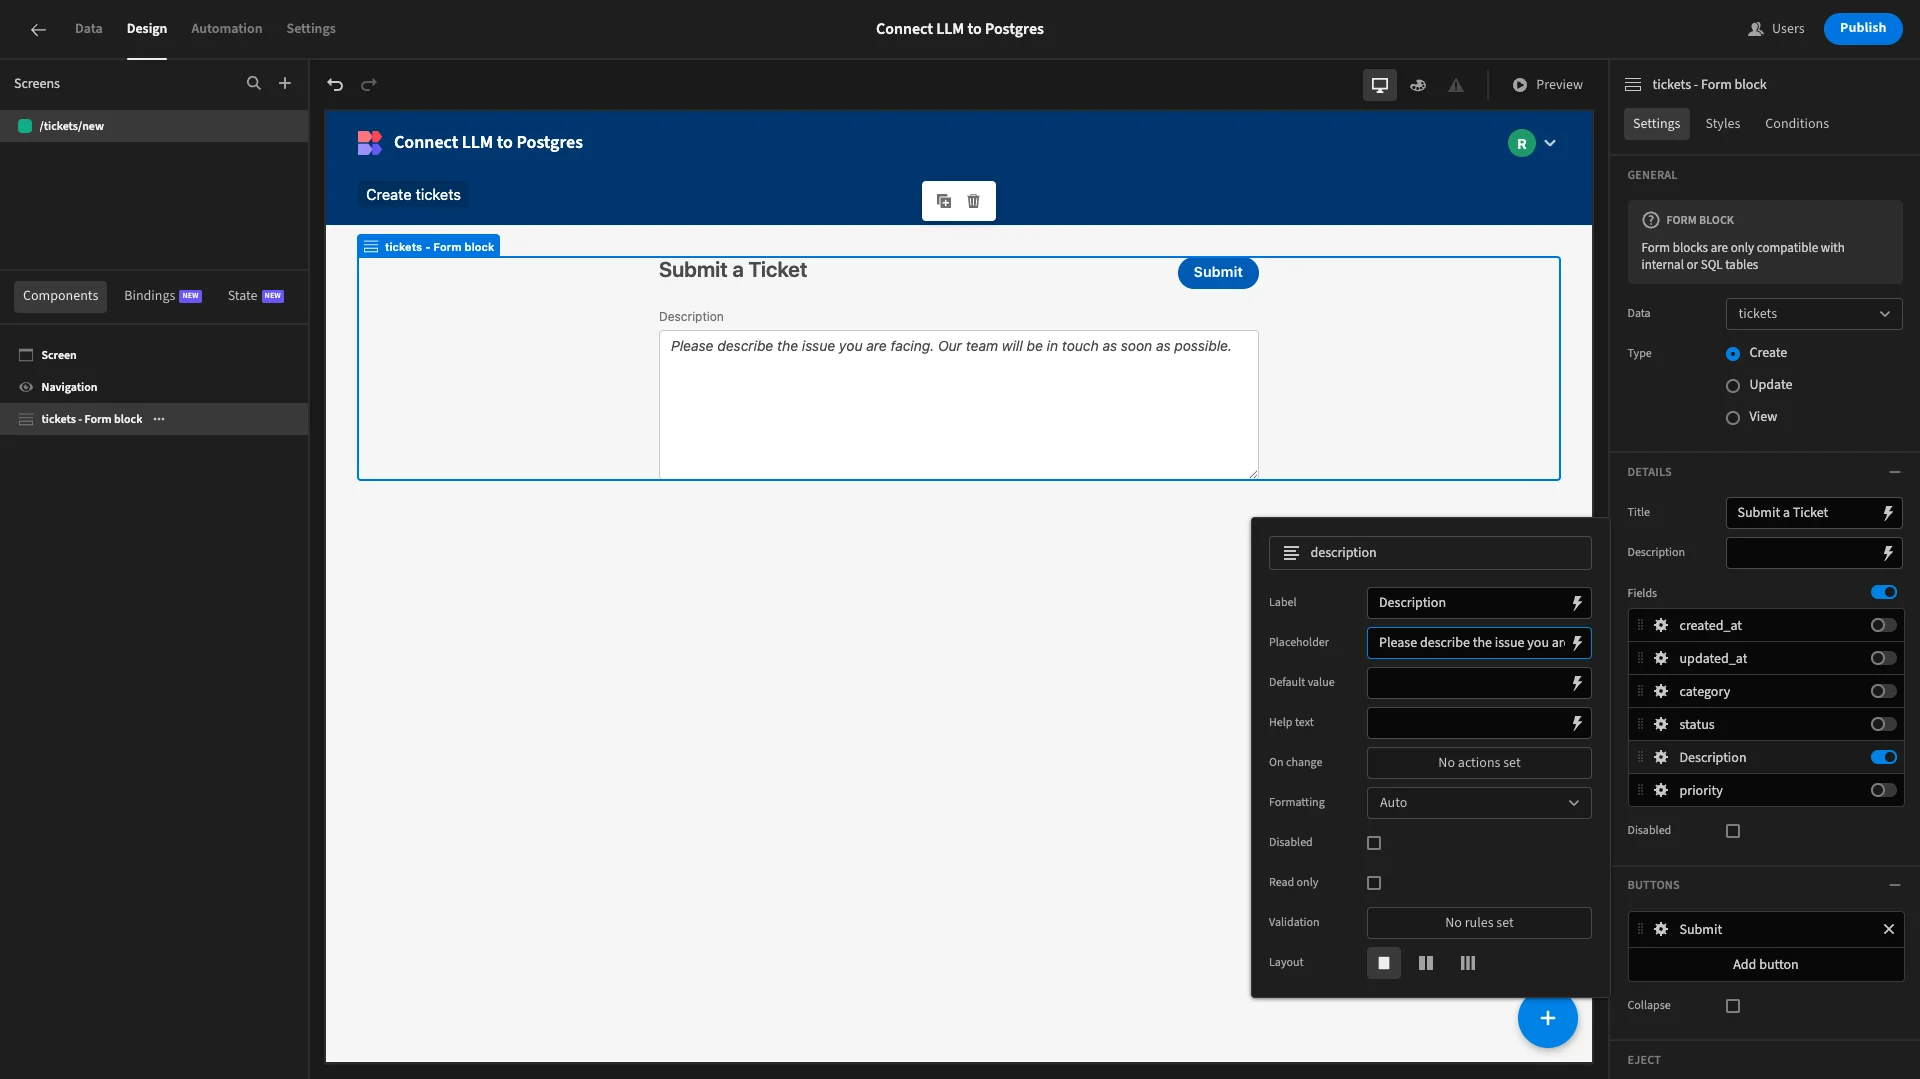
Lastly, we’ll also update the Label and Placeholder settings for our description field to be more human-readable.
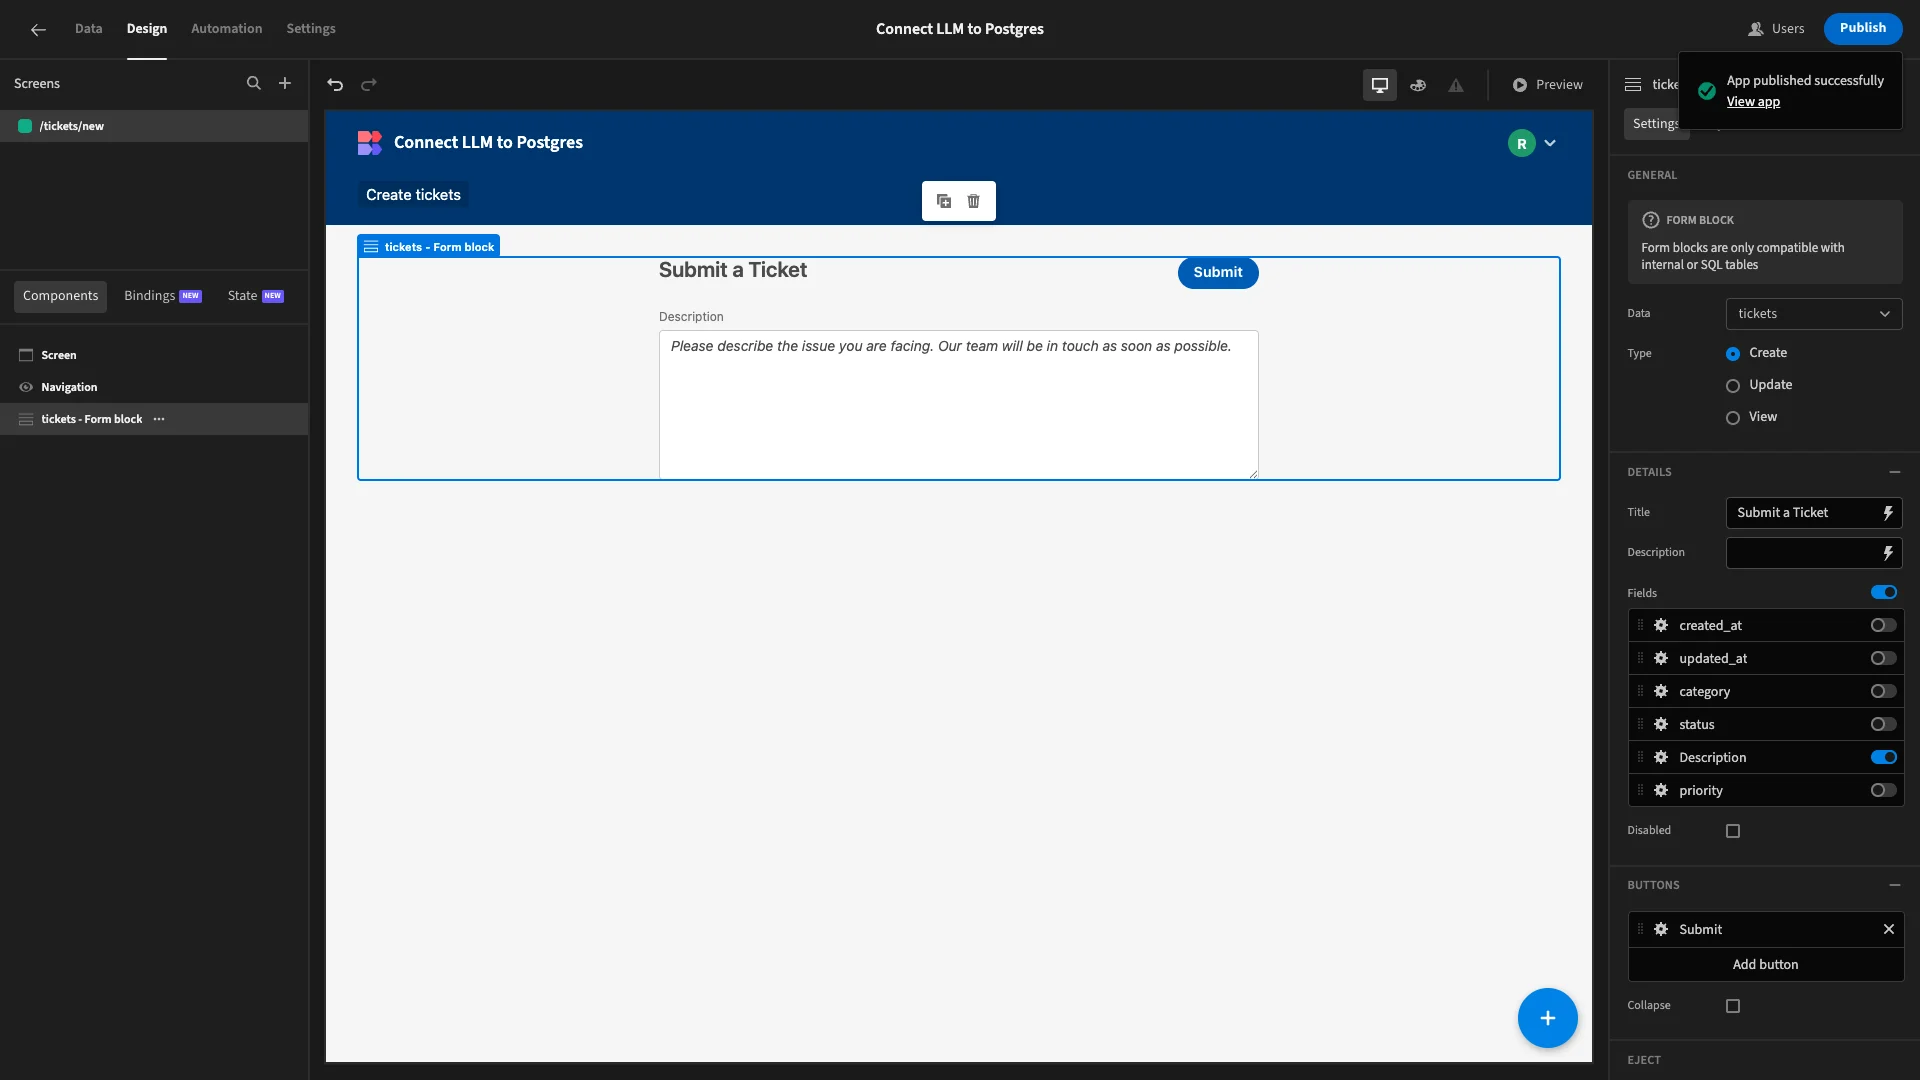
When we’re happy, we can hit Publish to push our app live, so our Postgres/LLM connection can start execution in the real world as we gather ticket submissions.
Turn data into action with Budibase
Budibase is the open-source, low-code platform that empowers IT teams to turn data into action.
With extensive support for all kinds of LLMs, databases, and APIs, alongside autogenerated UIs, visual automations, optional self-hosting, free SSO, custom RBAC, and more, there’s never been an easier way to ship professional, performant internal tools.
Take a look at our features overview to learn more.