How to Create Form Validation Rules
Form validation is essential to the accuracy, integrity, and consistency of our data. It’s also one of the key ways that we can enhance user experiences around data entry and management workflows.
These enable our form UIs to check that submissions comply with any rules that we have as part of our data model - as well as giving feedback to users where submitted values aren’t acceptable.
However, implementing this can present some pretty serious challenges. Traditional form builders rarely offer the flexibility we need for truly custom validation solutions. But, hard-coding solutions from scratch can require excessive development time and expertise.
Today, we’re covering everything you need to know about form validation.
Specifically, we’re going to cover the basics of what validation rules are, how they work, what kinds of rules we can create, and why we need them.
Then, we’ll see how Budibase makes it easier than ever to create advanced forms on top of any data - including building highly tailored, custom validation.
Let’s dive right in.
What are validation rules?
A validation rule is a piece of functionality within a form that controls the information that users can submit under particular fields.
For example, concerning the type, format, or content of a form response.
The most familiar example of this for many people will be websites or other services stipulating which kinds of passwords users can create. For instance, preventing us from using anything that’s too simple or lacks certain kinds of characters.
We can think of a validation rule as having two parts:
- The rule itself.
- What’s communicated to users when this is not met - and how.
Of course, in reality, things are a bit more complex than that.
Here’s what you need to know.
Server-side vs client-side data validation
The big distinction we can draw is between server-side and client-side data validation.
Basically, this refers to where a validation rule is applied. Client-side form validation is performed by the form tool itself in the front end. Server-side validation is performed in the back end by the underlying database server.
However, these serve slightly different goals.
Server-side validation is what’s used to apply constraints and maintain consistency within our data set. This prevents values that don’t adhere to our rules from being stored - whether or not we’re also using client-side validation.
Client-side validation applies these rules in the front end and won’t allow a database query to be sent if they’re not met. This serves a few key purposes, which we’ll return to in a minute.
You might also like our round-up of the top Retool alternatives.
Types of validation rules
Another key consideration is there are several different types of validation that we can apply to form data. One way of thinking about this is what the rule concerns.
The most common types of validation rules are:
- Required - specifying that a field can’t be left blank.
- Min/max - creating acceptable ranges for numerical data.
- Type - specifying that a value must be of a particular data type.
- Pattern - where entered values should follow a specific format.
- Min/max-length - an acceptable range of character counts.
These cover the vast majority of validation use cases without introducing the need for custom or hard-coded solutions.
In most web forms, these are implemented as HTML attributes on form elements themselves. Toward the end of this guide, we’ll see how Budibase makes creating and using validation rules a breeze.
Why do we need client-side form validation?
Earlier, we said that it’s server-side validation that actually prevents unacceptable values from being added to our database - but that client-side validation stops a query with these values from being sent in the first place.
So, what exactly is going on here - and, more importantly, why do we need both?
There are a couple of key reasons for this. One has to do with how we utilize computing resources.
Say we had a form on a busy website - accepting thousands of submissions every hour.
This would eat up a lot of expensive server resources. So, the efficiency savings of removing any requests that won’t be accepted anyway are pretty obvious. Client-side validation rules are one way to do this.
Besides this, we need to think about our users’ point of view when their submission is rejected by the server.
They might get a database error message that makes very little sense to them - leaving them confused as to what went wrong. Or, they might not be aware that there was an issue at all and think their data has been submitted.
Client-side validation rules are also important for guiding users through the process of submitting data that can successfully be added to our data set.
How to build 3 types of validation rules in Budibase
Now, let’s see some real-world examples of validation rules in action. As we said earlier, the majority of web forms implement validation by manually adding HTML attributes to specific fields.
Budibase is the fast, easy way to build advanced forms on top of any data source.
With our intuitive visual builder, you can create and configure powerful validation rules without the need for custom code.
Let’s check out how this works.
1. Schema-based validation rules
For our example, we’re using a client intake form that we’ve previously created.
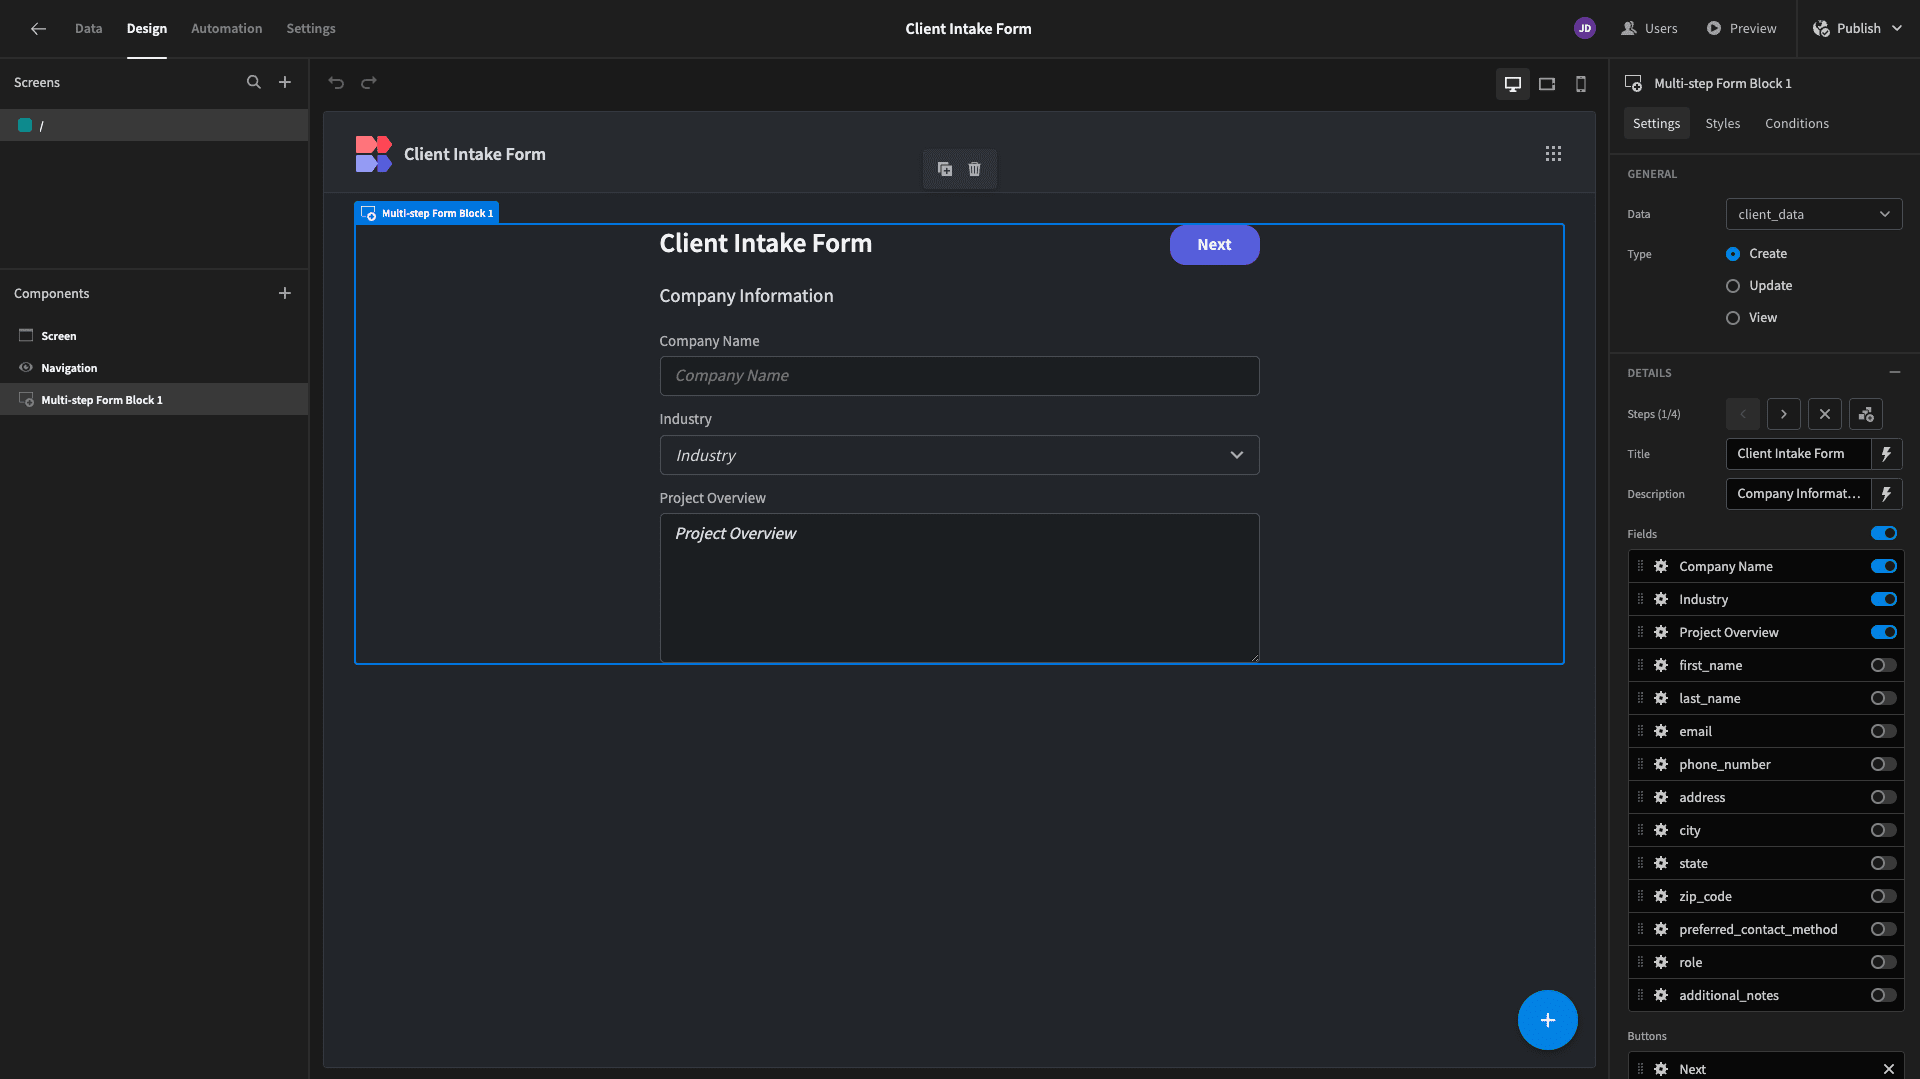
This is connected to an existing MySQL database:
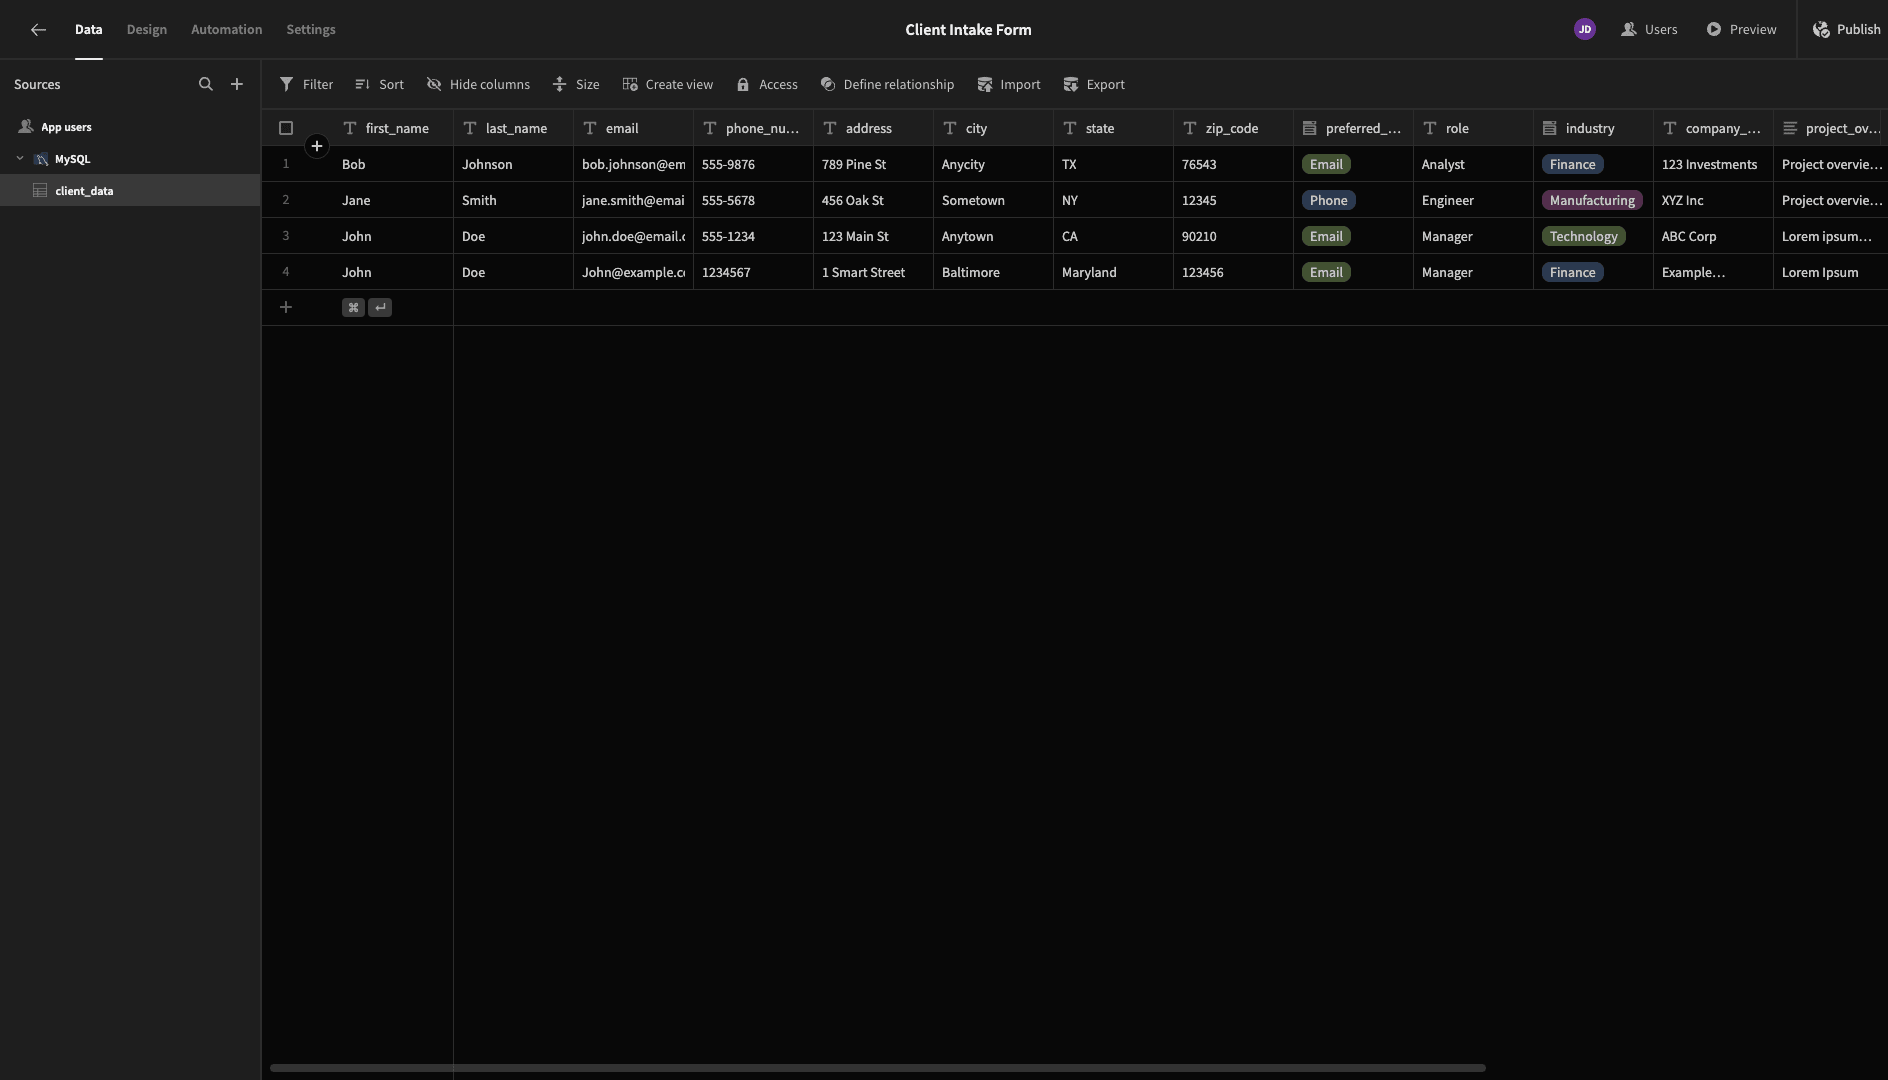
Some of our attributes already have constraints applied to them within our database schema. For instance, many of them have the NOT NULL constraint. Budibase can infer this when we connect to an external database.
So, we can see that some fields are already designated as Required based on the existing database schema:
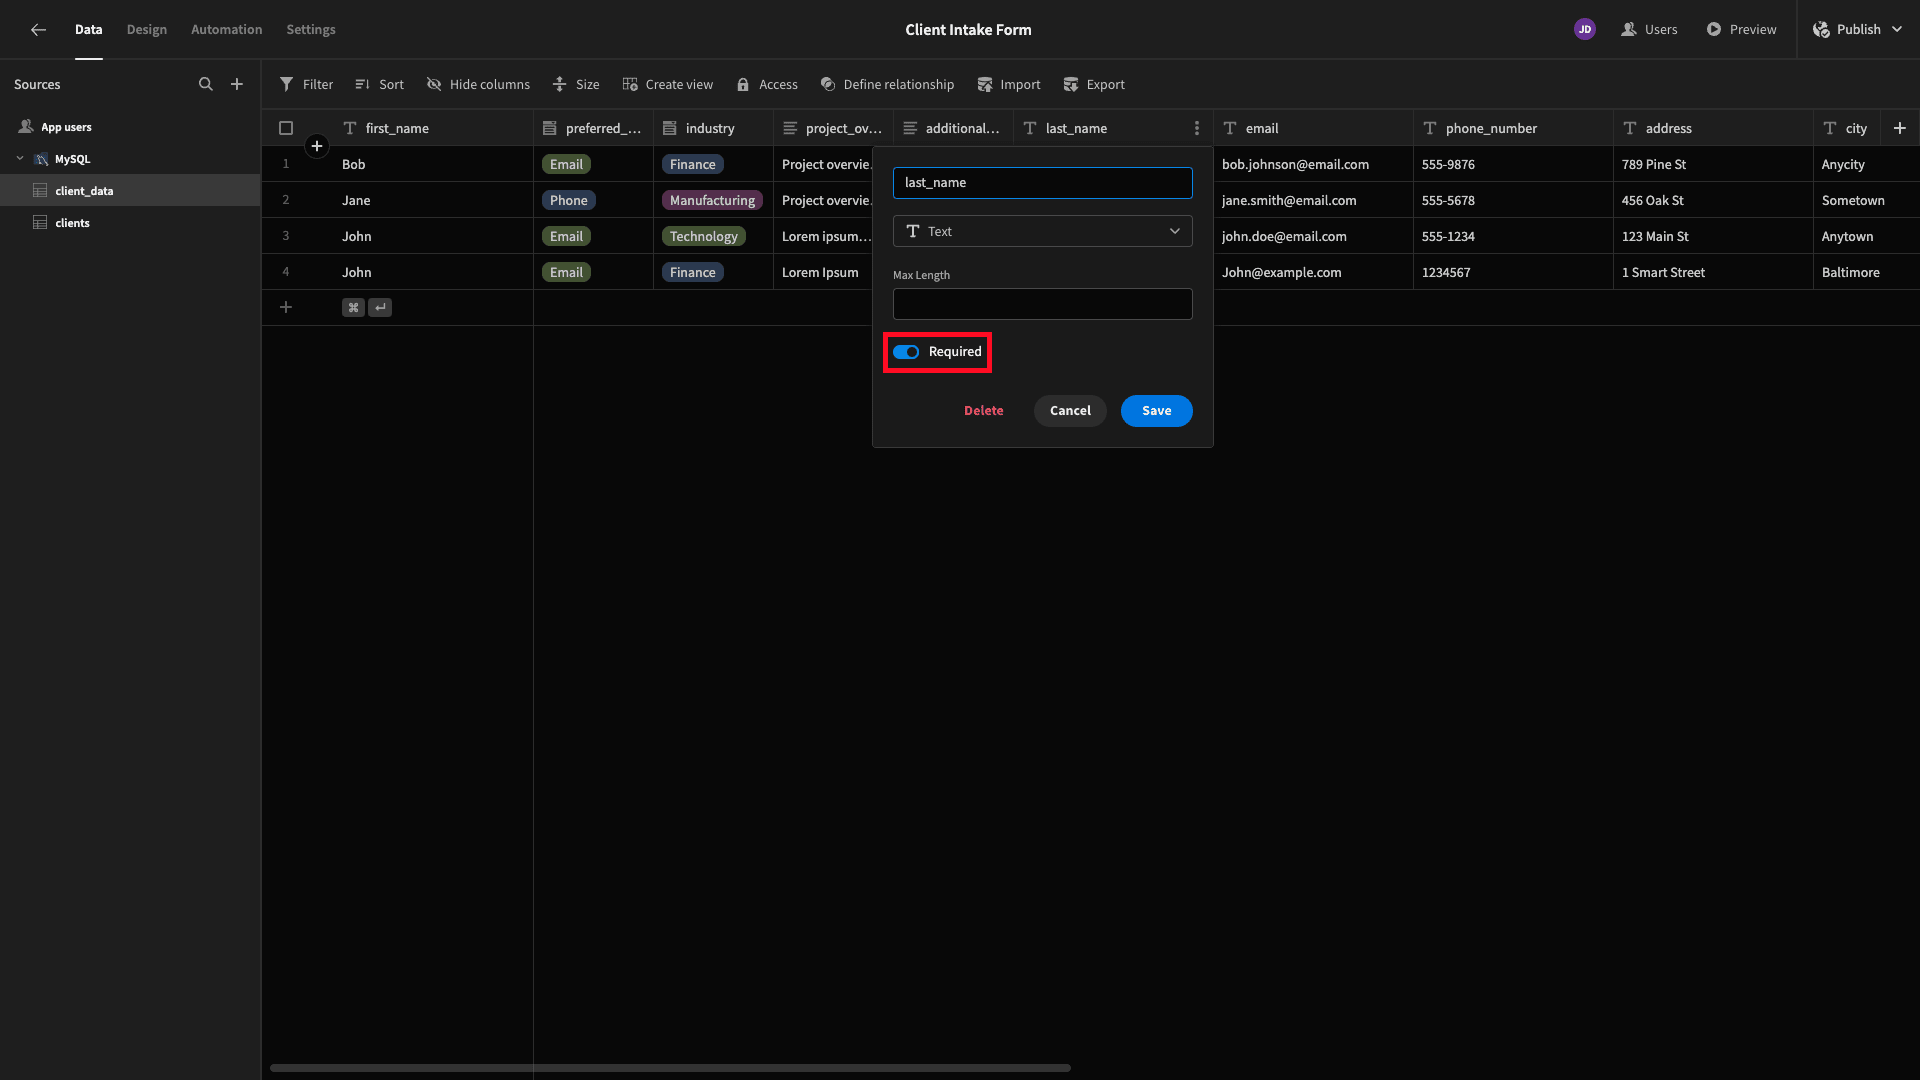
We can also apply new constraints to our columns within Budibase’s data section - with different options depending on the data type of a specific column. For example, you can see above that Text columns accept maximum length or Required constraints.
For numerical or date data, we can also specify minimum and maximum value constraints.

When we build forms in Budibase, we’re typically autogenerating them - either with an existing screen layout or a pre-built form block.
By default, these will already perform client-side validation based on the connected data schema.
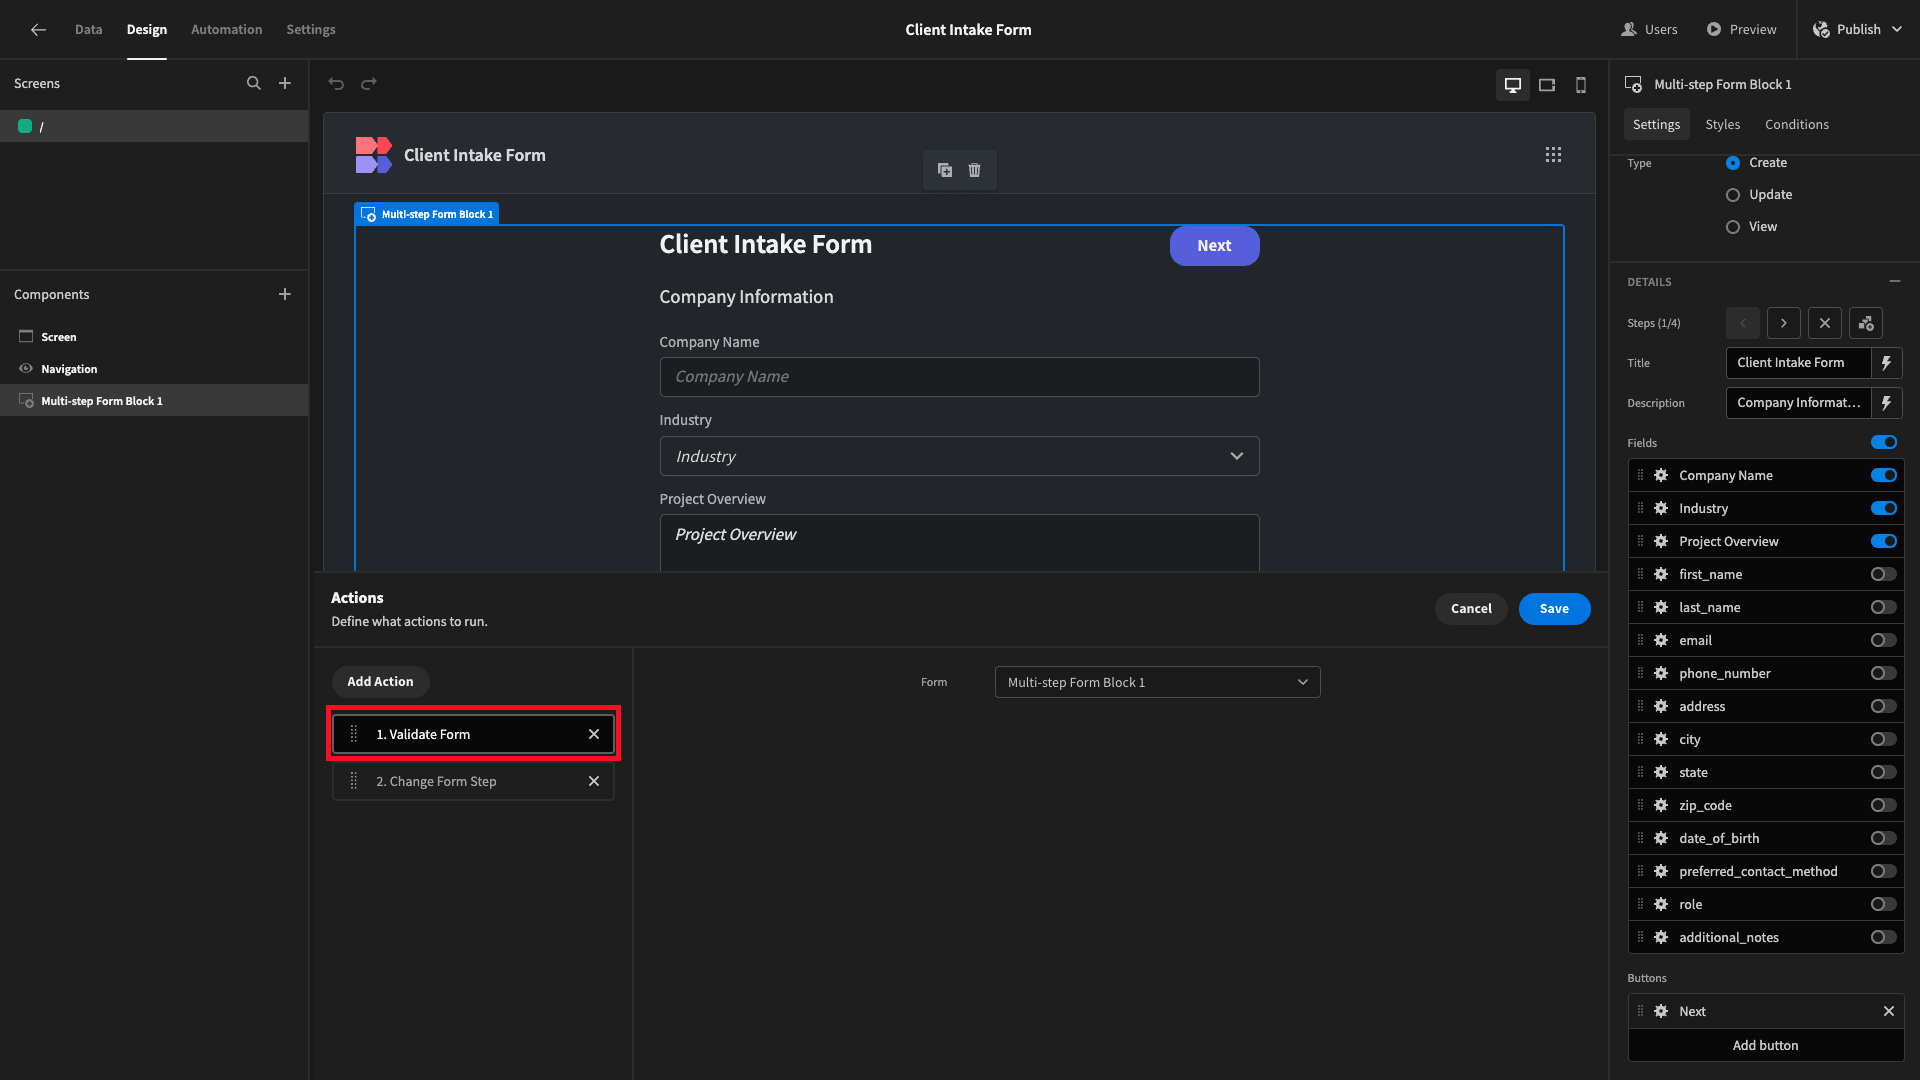
This is achieved using the Validate Form button action within Budibase’s Design tab.
Our example is built using a multi-step form block. Users can navigate between steps using the Next button. Each time this is pressed, a Validate Form action is performed:
So, if we try to hit Next without filling in a required field, we’ll see a corresponding error message:
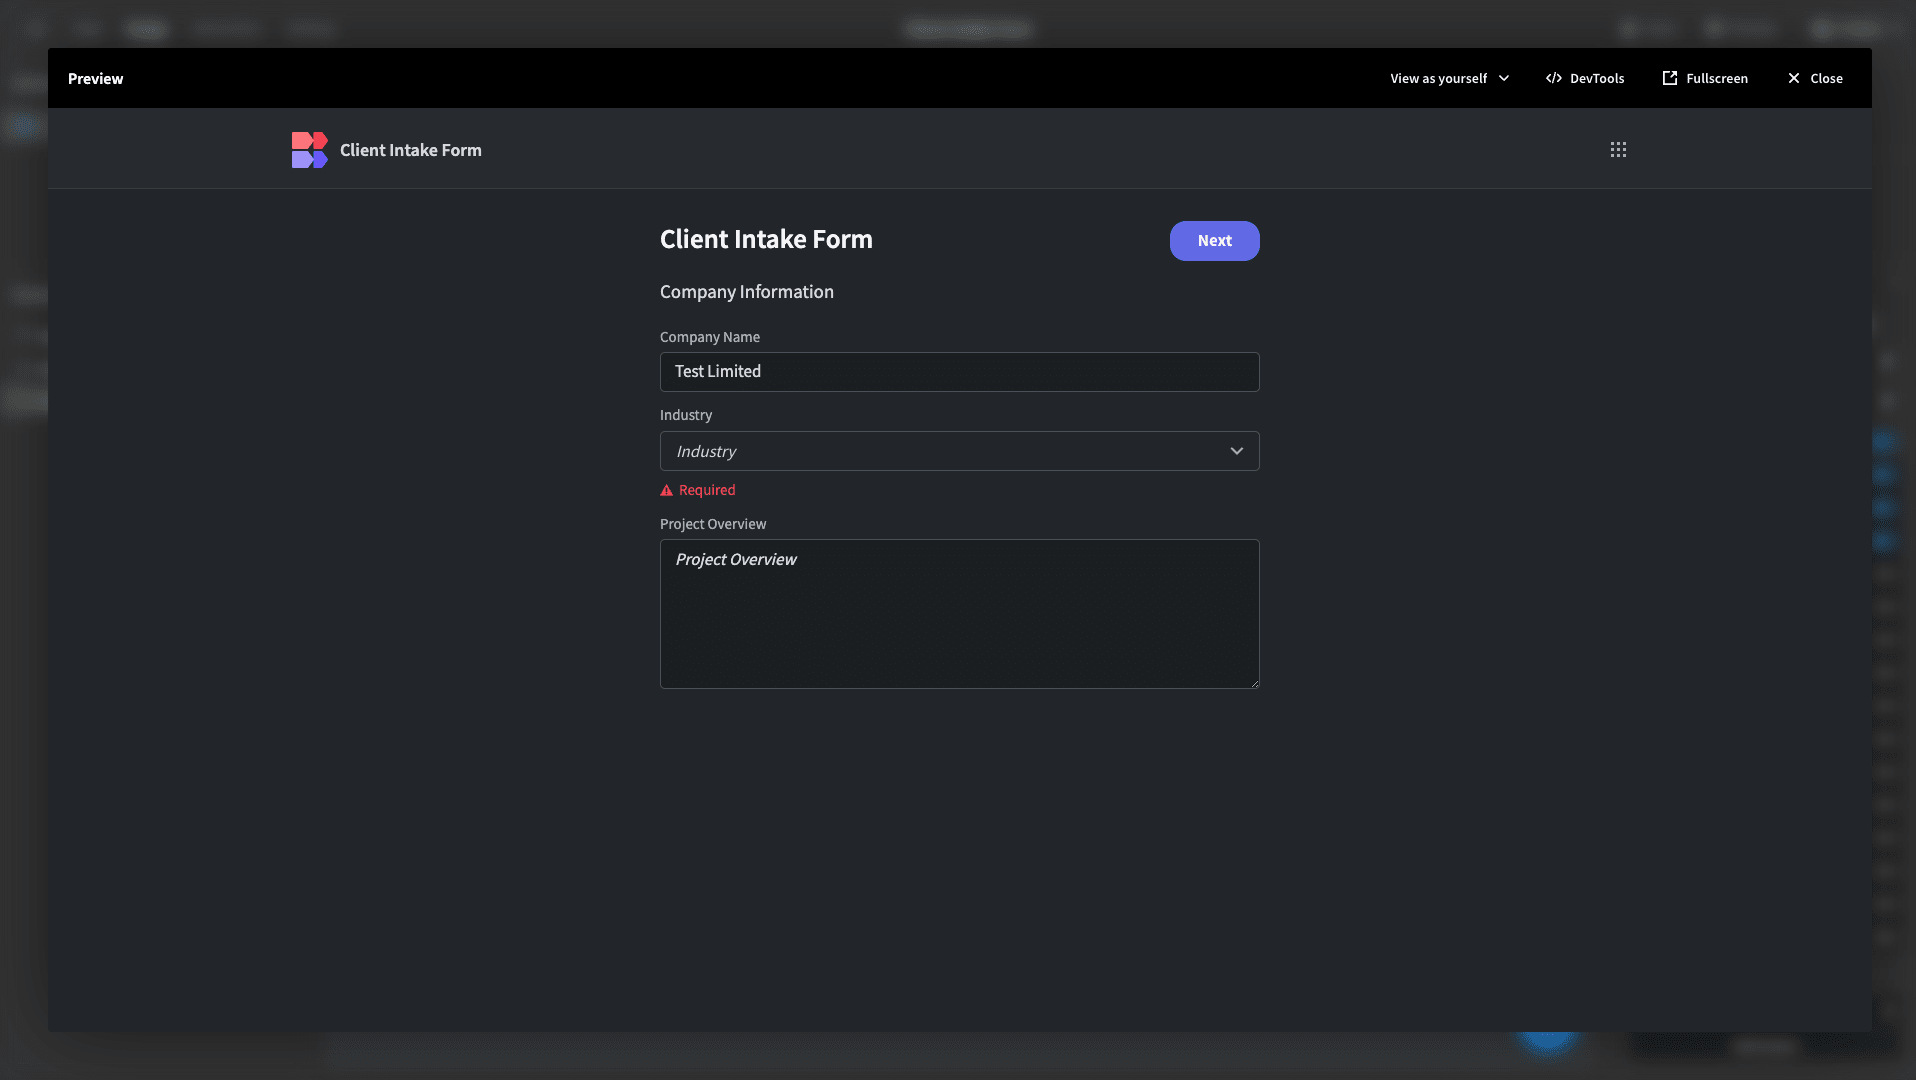
Therefore, in the vast majority of cases, schema-based validation will automatically be implemented when we build forms with Budibase. However, if we built a form from scratch rather than autogenerating it, we’d still have to add this step ourselves.
2. Custom validation rules
We can also easily add validation rules that aren’t part of our underlying data schema. For example, if we wanted to implement a rule within a particular form UI rather than for any CREATE or UPDATE action.
Every individual form field in Budibase has a dedicated drawer where we can create and configure custom validation rules.
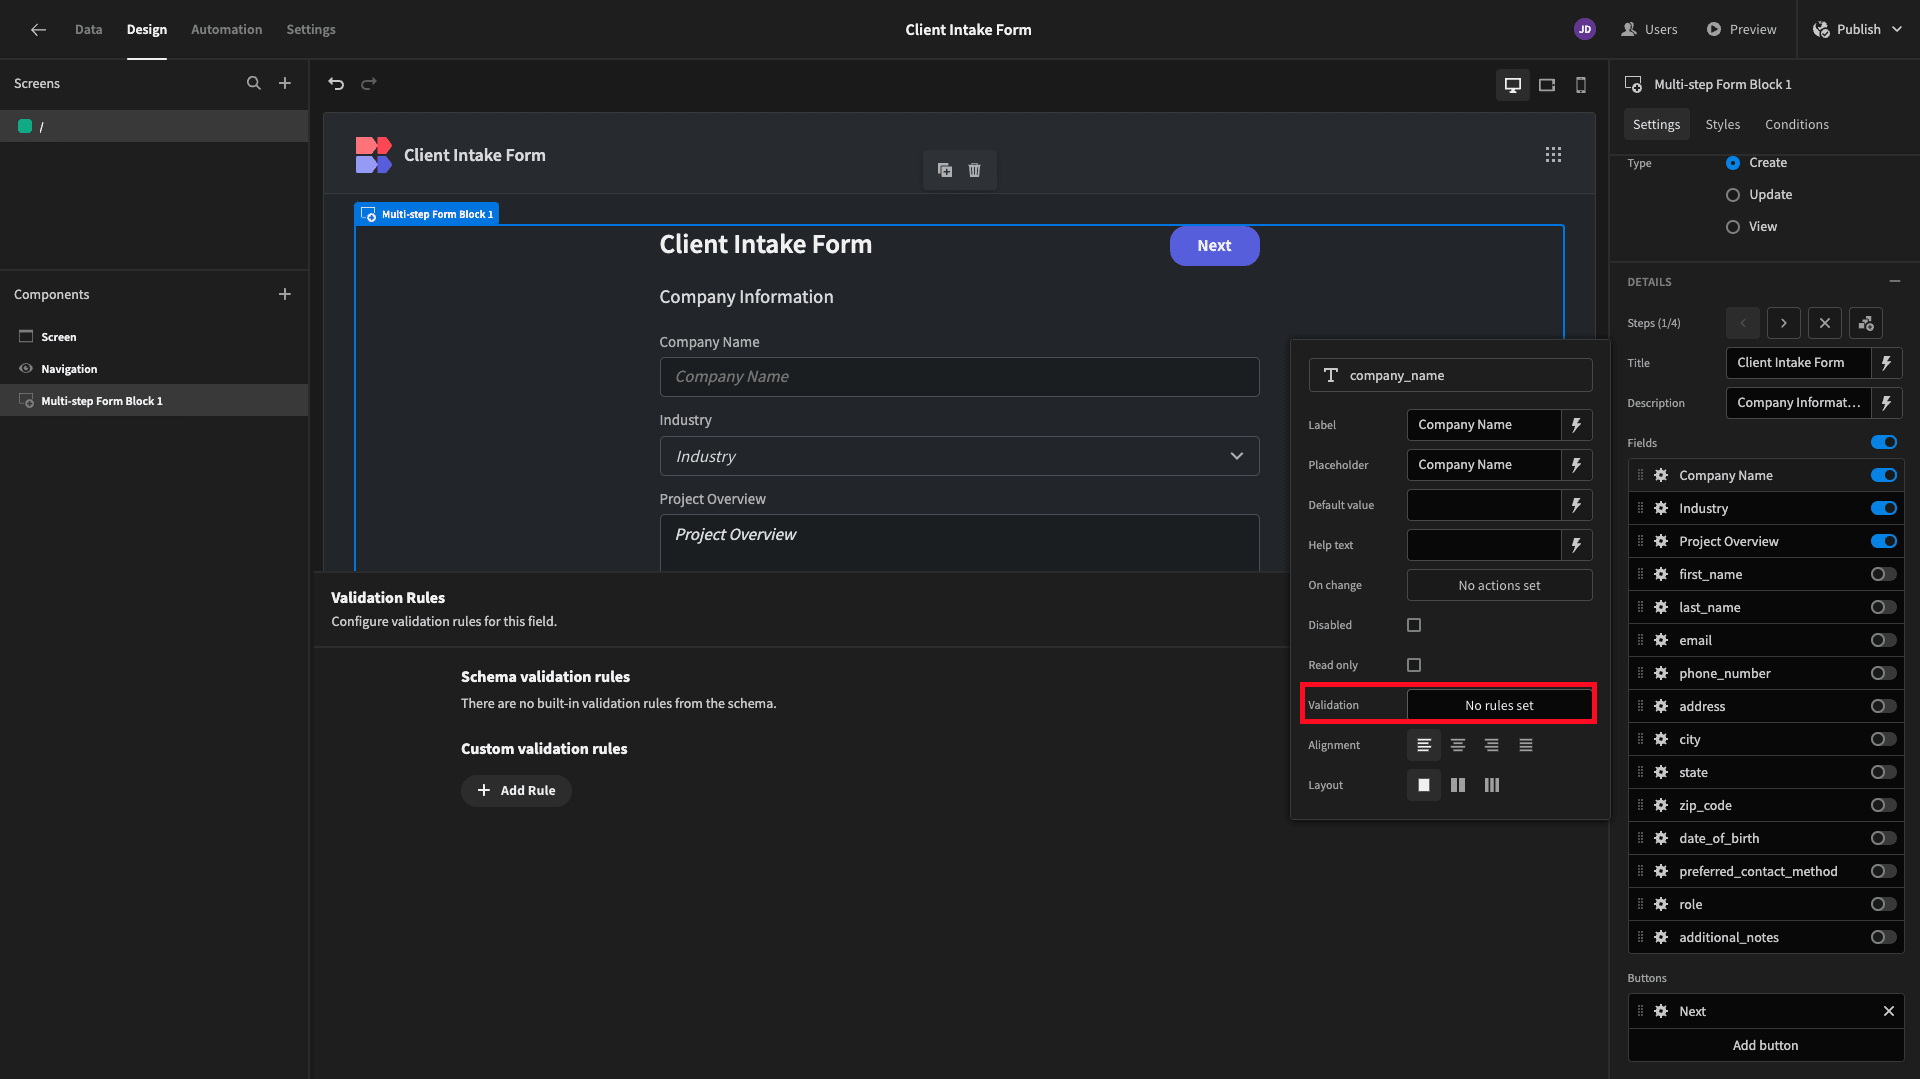
These have three parts - a constraint, a constraint value, and an error message.
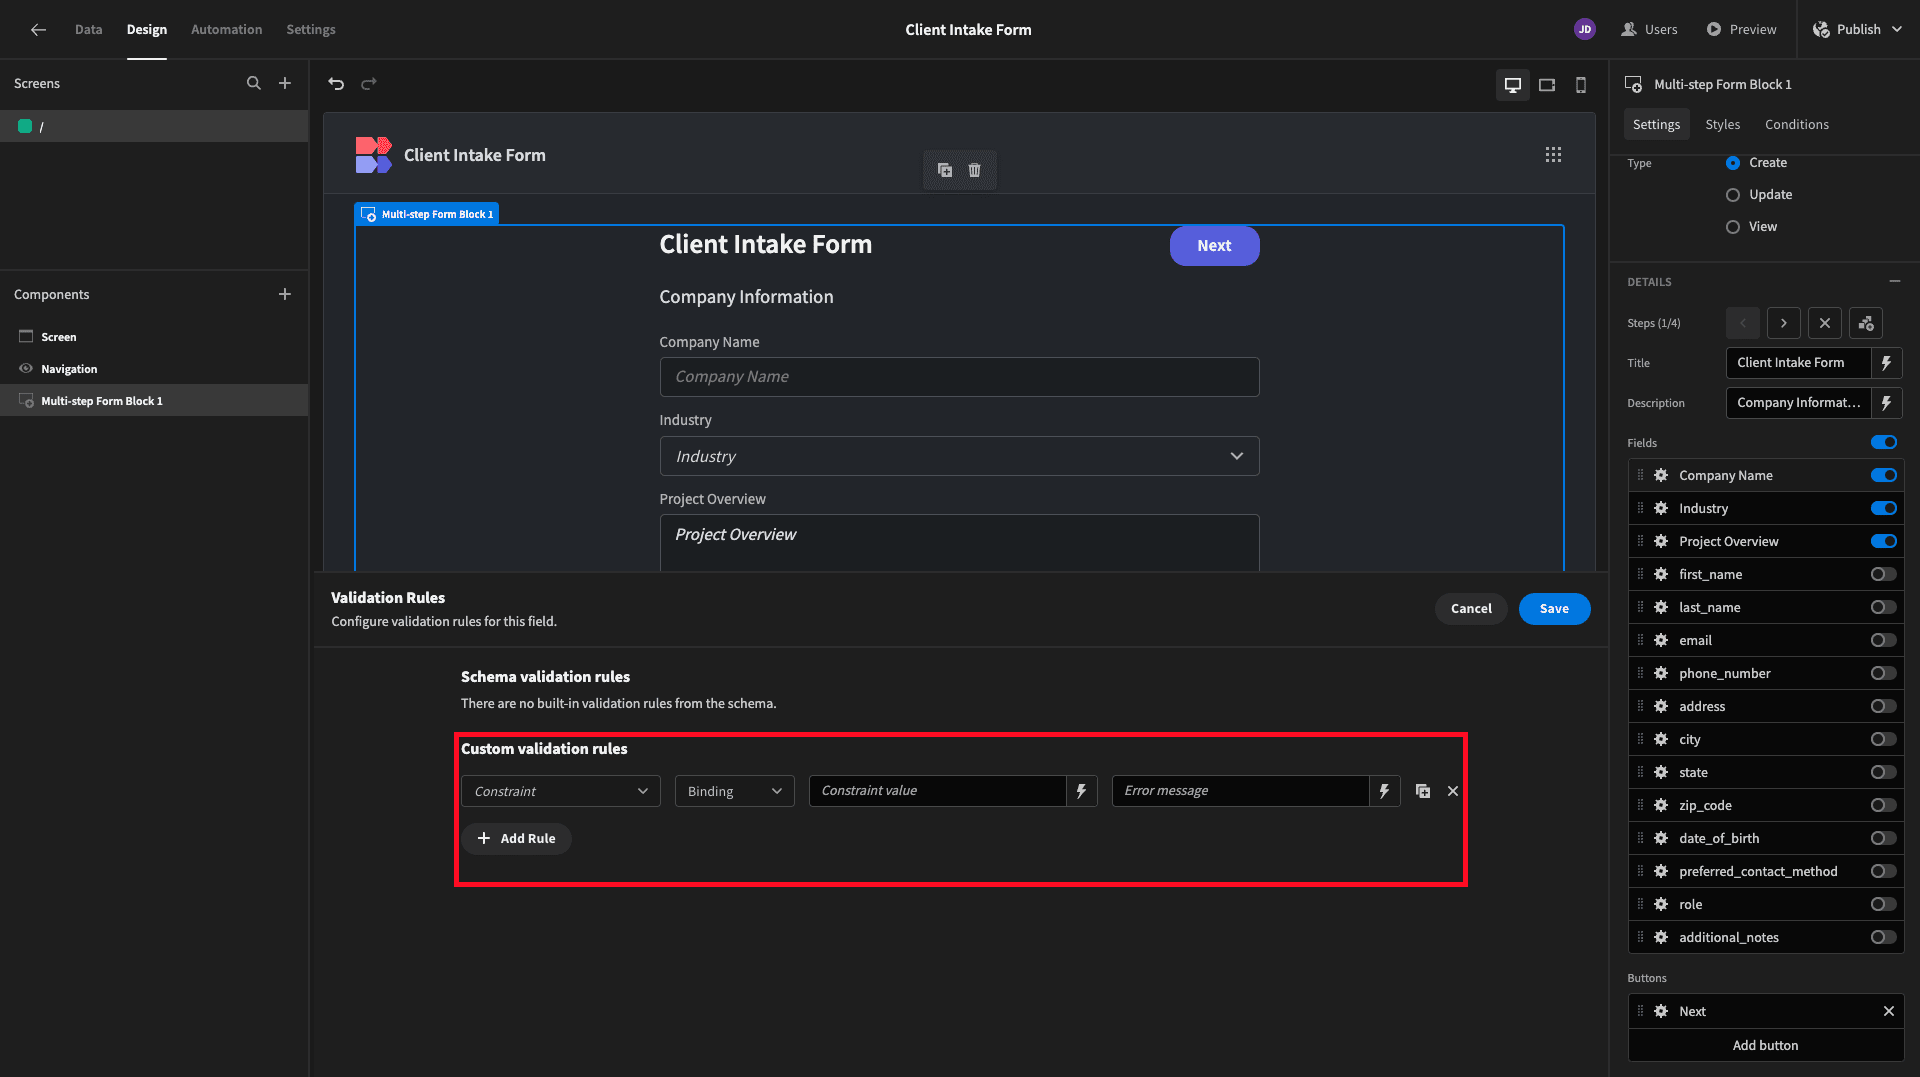
Our constraints can be selected from a list of existing options - including custom regular expressions:
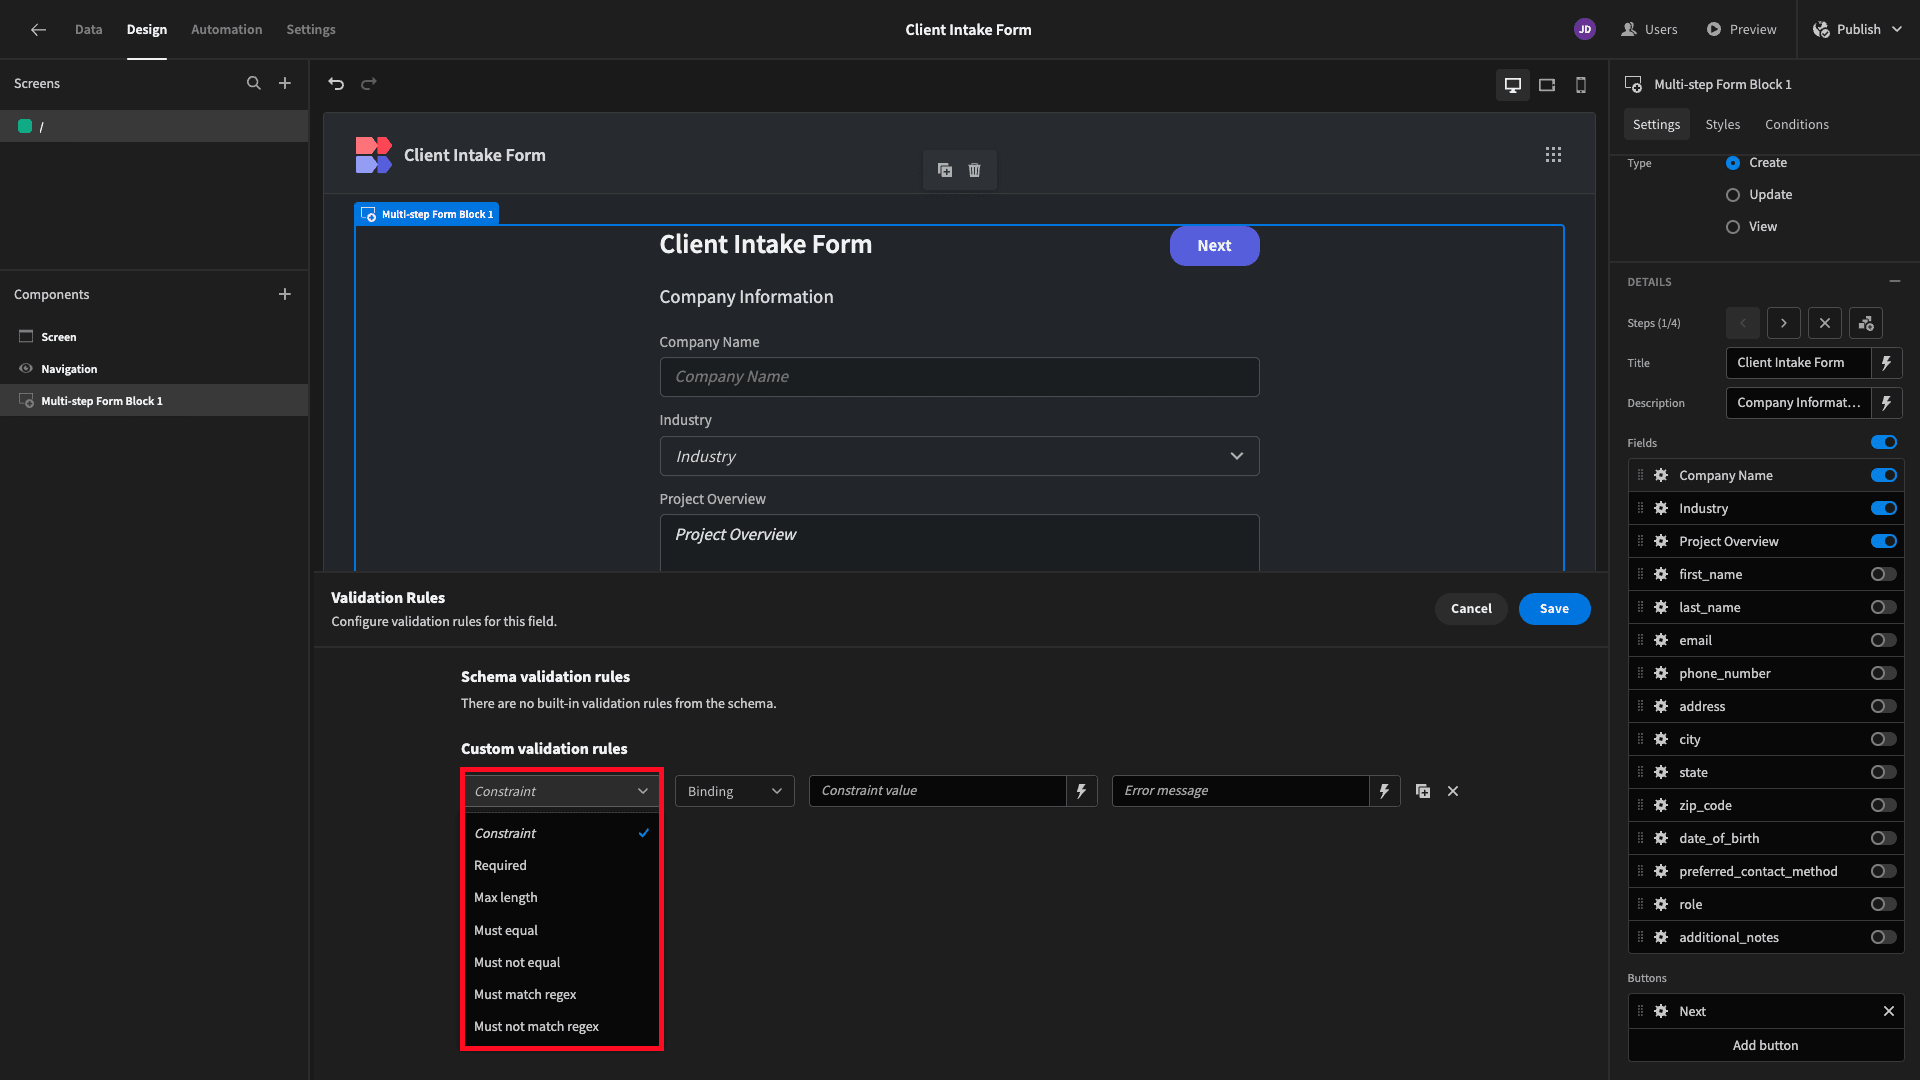
We can provide constraint values and error messages statically or using dynamic bindings.
This is crucial, as it means we can create highly customized values, leveraging any data that we expose our form to.
Let’s think about a few examples of how this might look in practice.
Say we wanted to create a rule where the email address that’s submitted can’t match the one the current user signed in with. We’d start by adding a Must Not Equal validation rule to our email field:
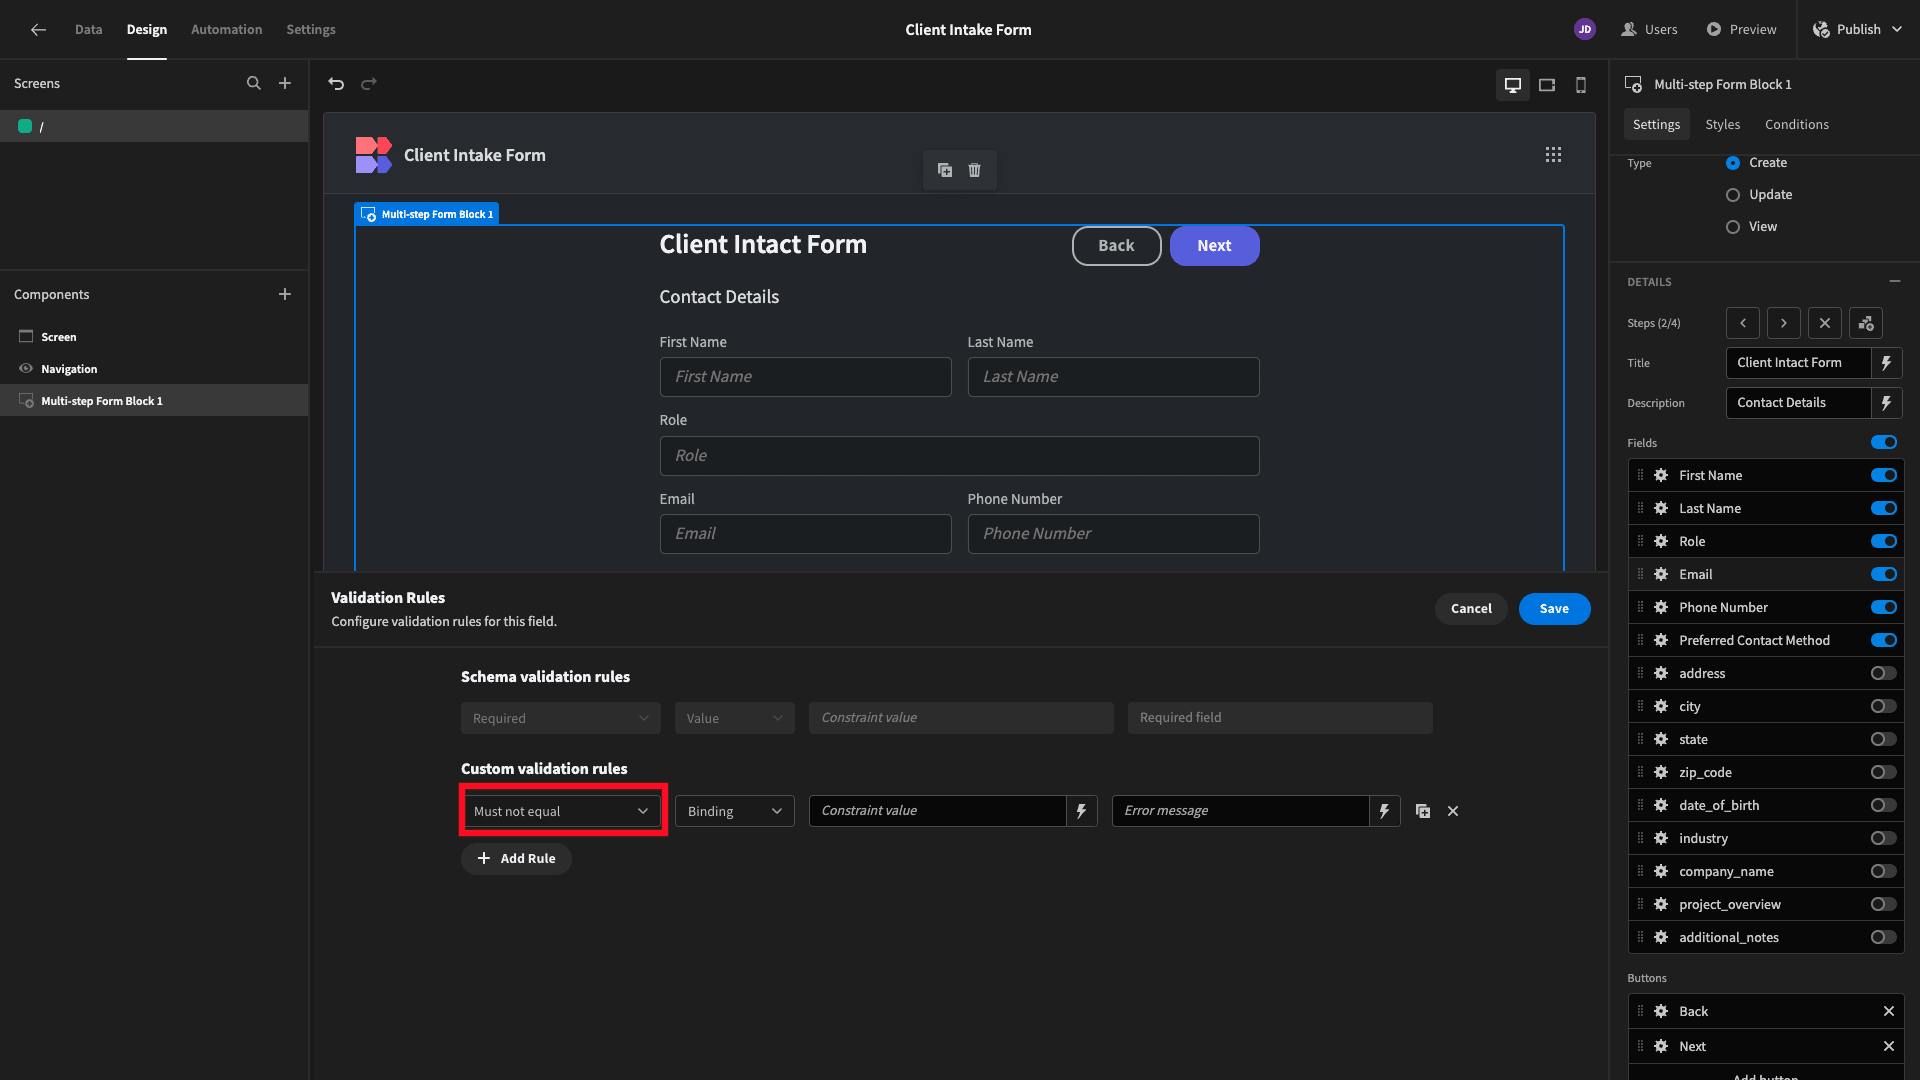
Next, we’ll open the bindings menu for our constraint value using the lightning bolt icon. On the right, we can see categories for all of the bindable values this component is exposed to. We can use these in handlebars or JavaScript expressions.
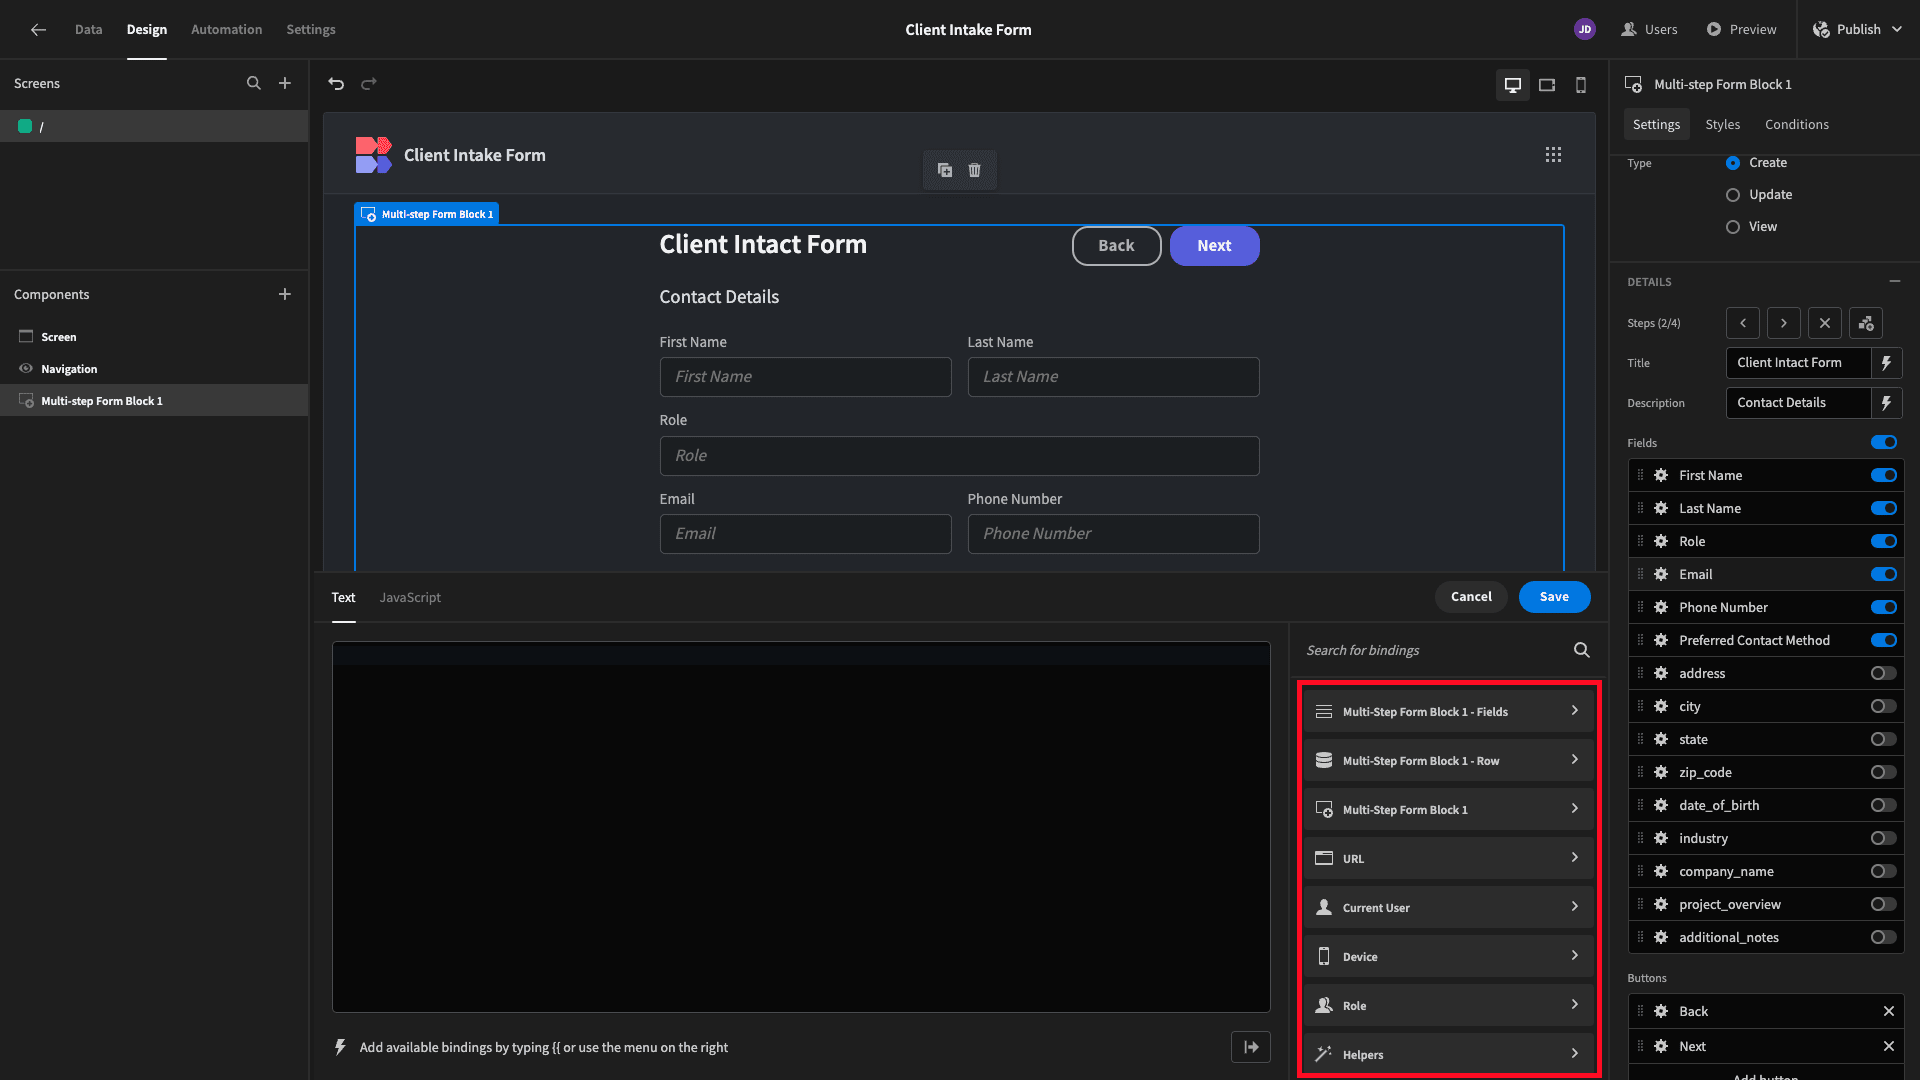
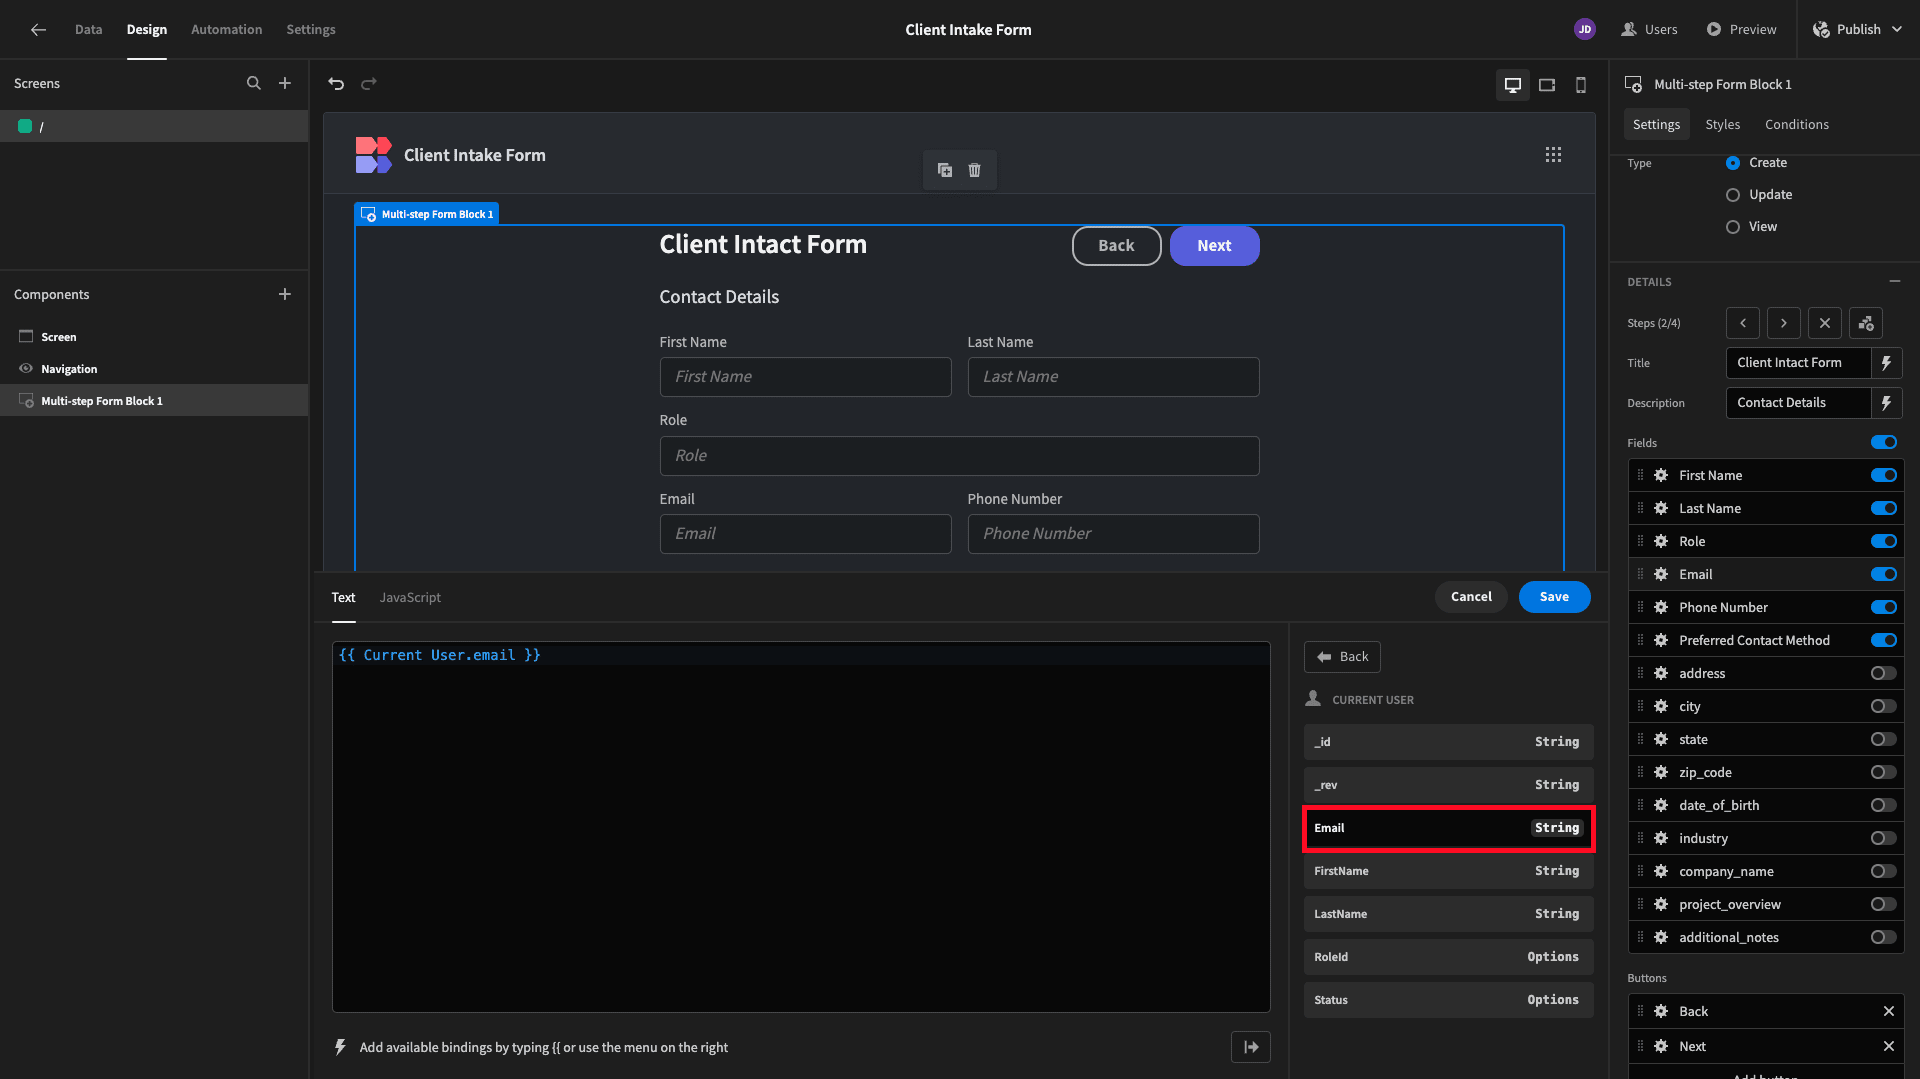
We’ll choose Current User and then bind our constraint value to their email address:
Then, we can input whichever error message we want:
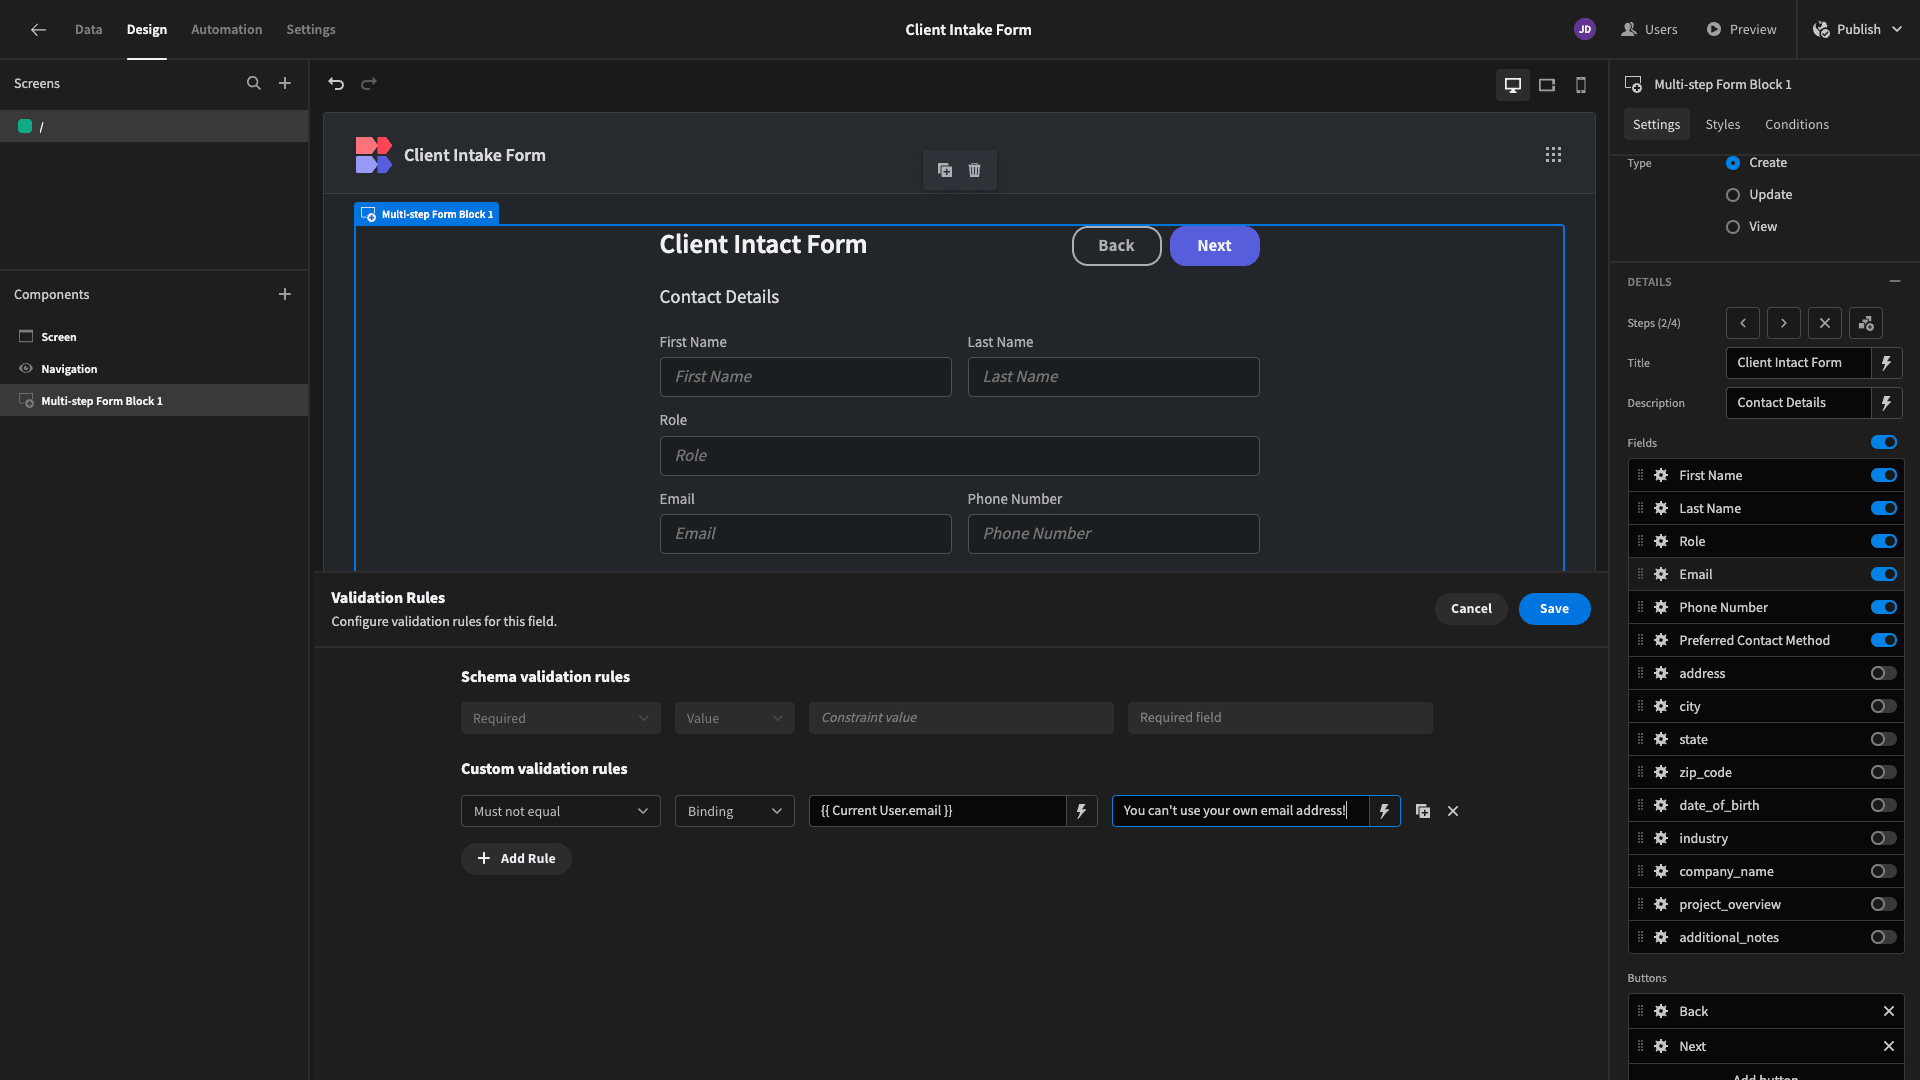
This is just using bindable values as they are - without any manipulation or transformation.
Using either custom JavaScript or Budibase’s library of built-in handlebar helpers, we can also create much more advanced validation rules with bindable values.
Say our form had an attribute for the user’s date of birth. We might want to apply a validation rule so that only users who are over a certain age can submit their data.
We’d start by adding a Min Value constraint.
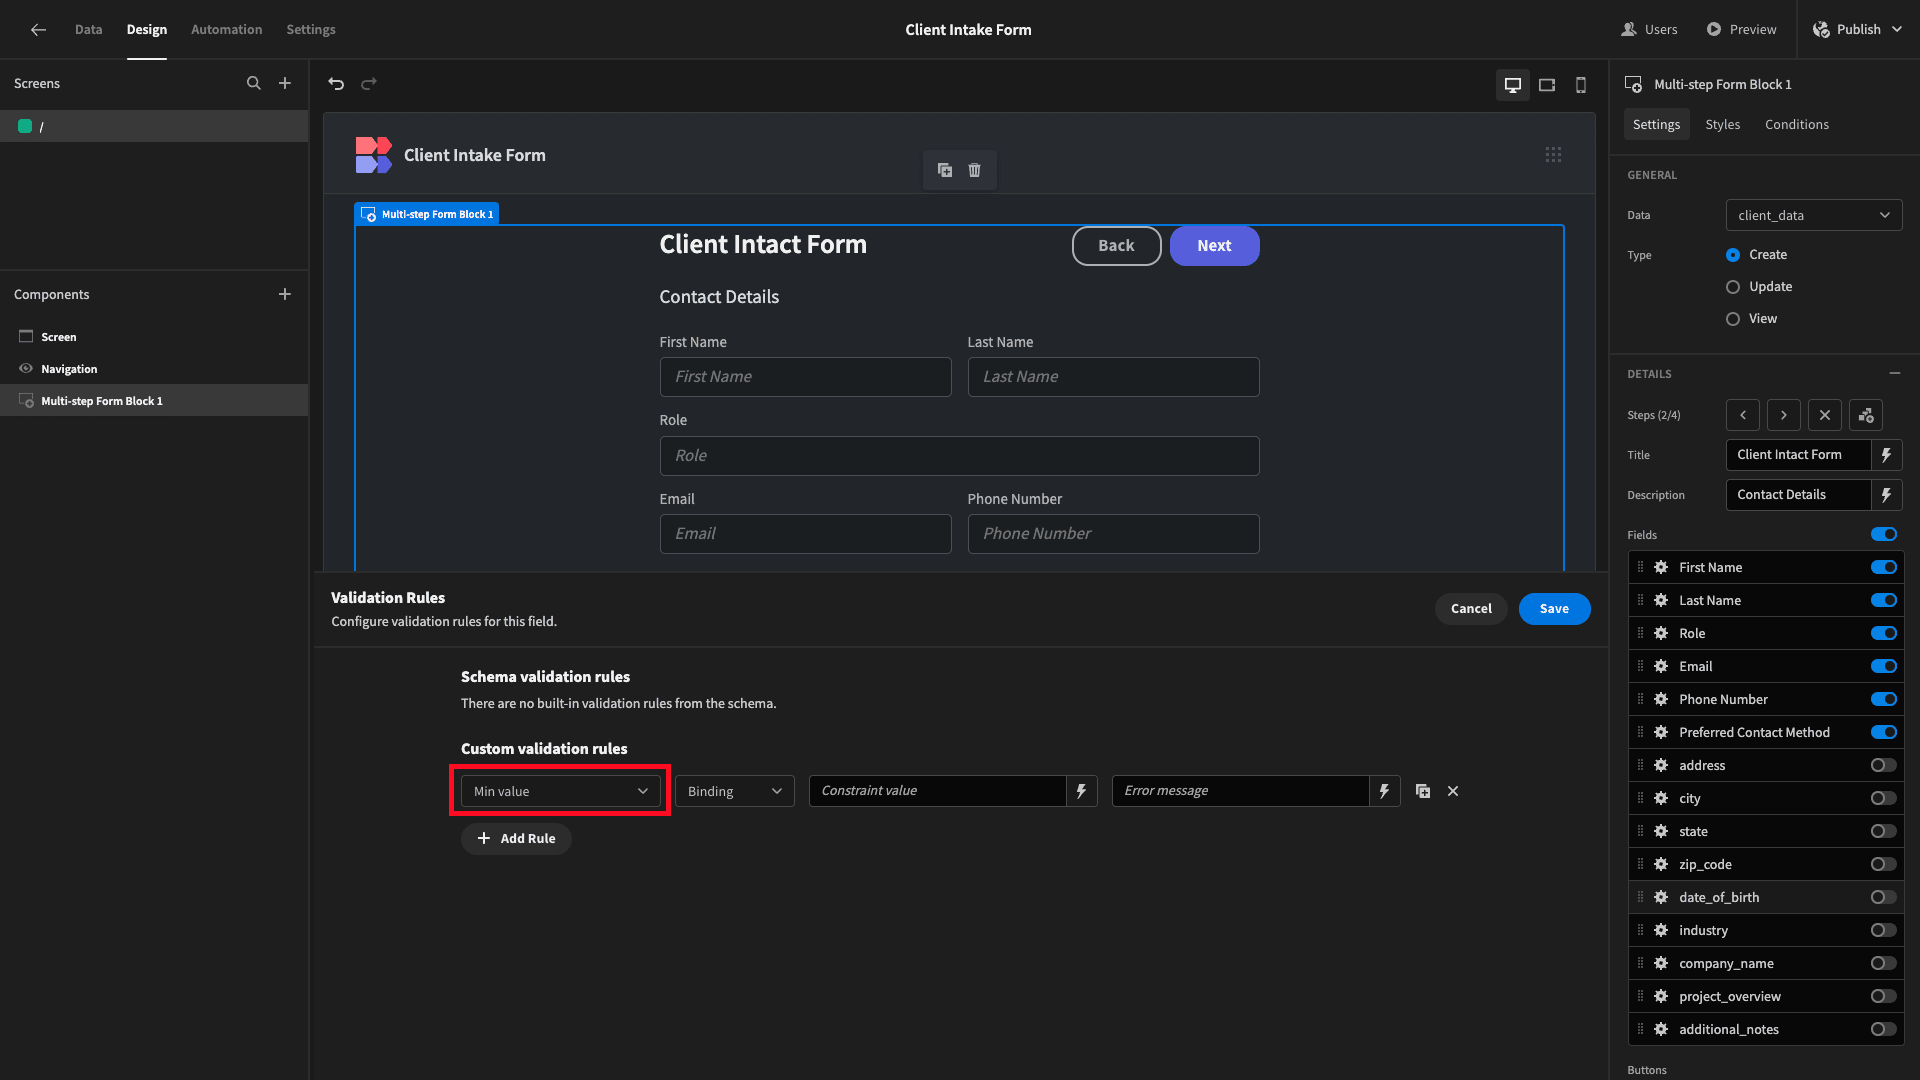
Then, we’d open the bindings drawer, this time opening up the JavaScript editor:
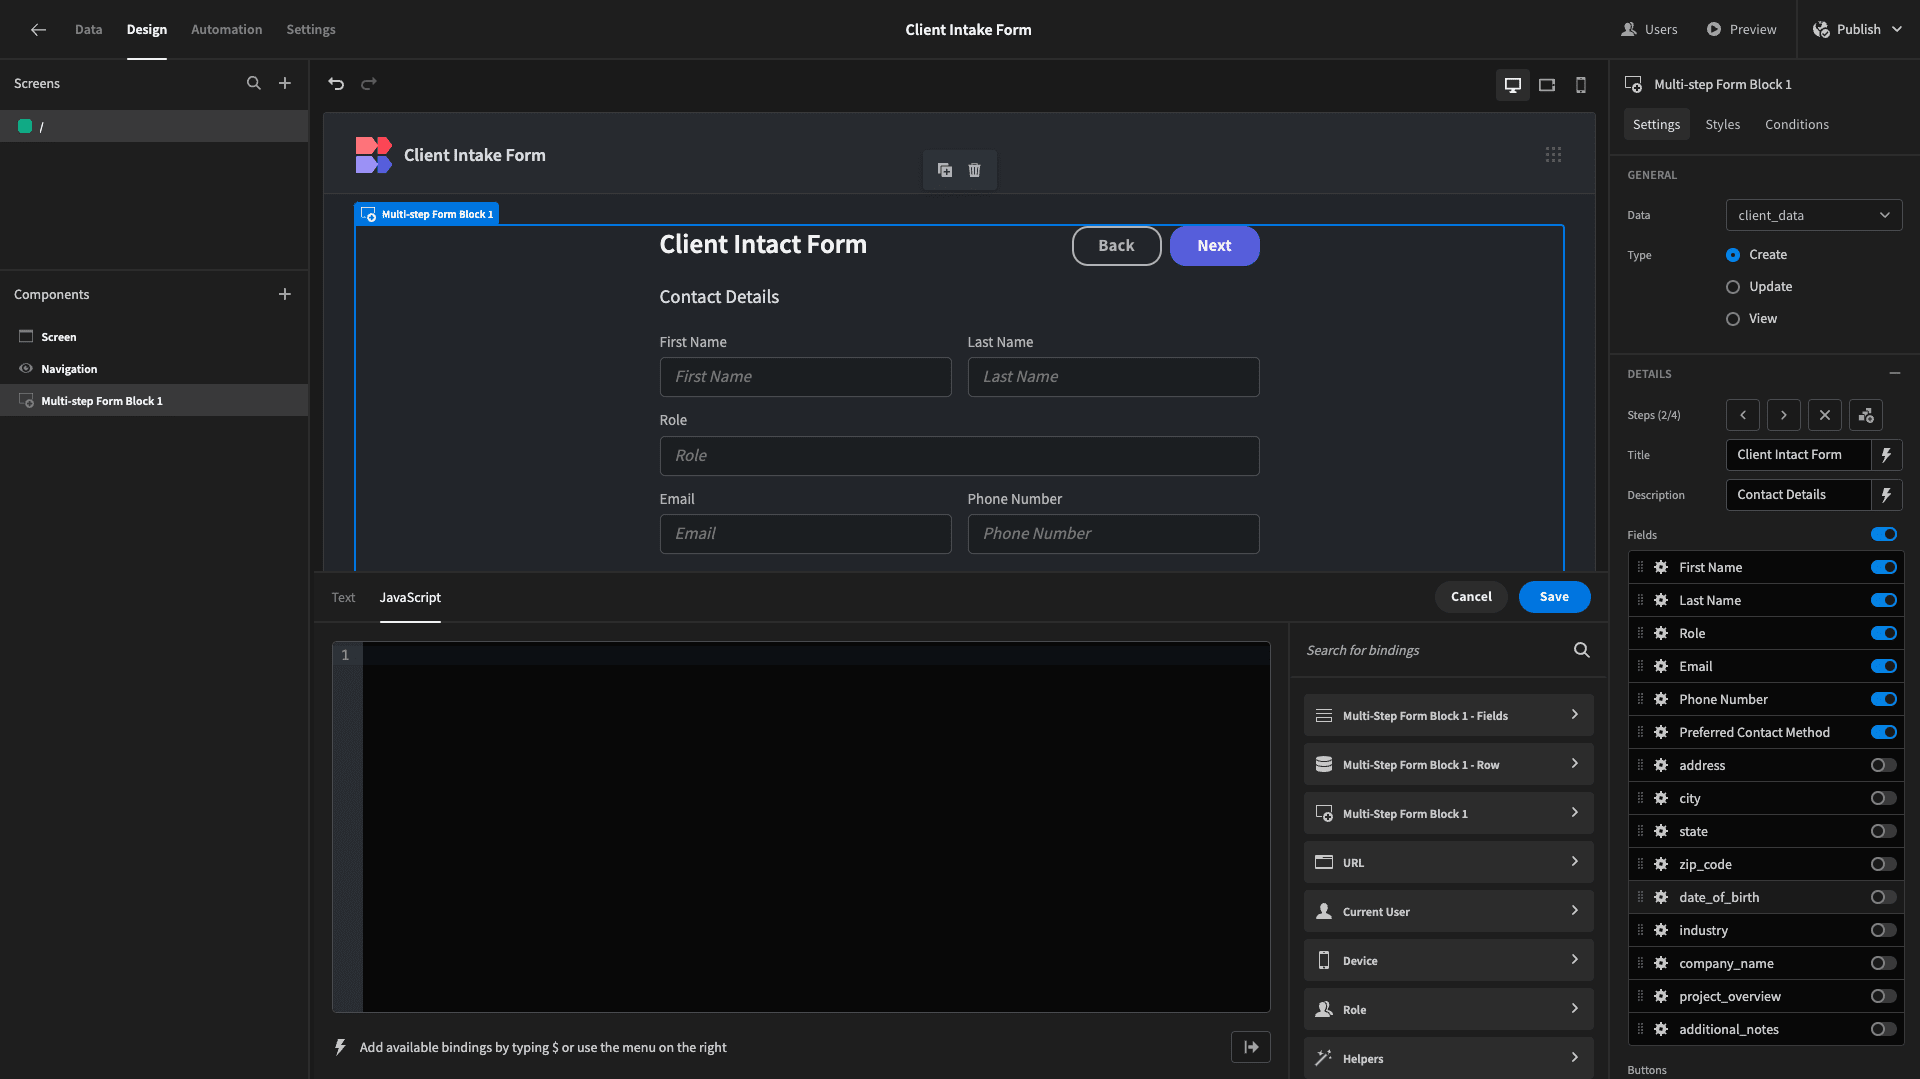
We could then use the following JavaScript expression to calculate the date 18 years before today:
1var currentDate = new Date();
2
3var eighteenYearsAgo = new Date(currentDate);
4
5eighteenYearsAgo.setFullYear(currentDate.getFullYear() - 18);
6
7return eighteenYearsAgo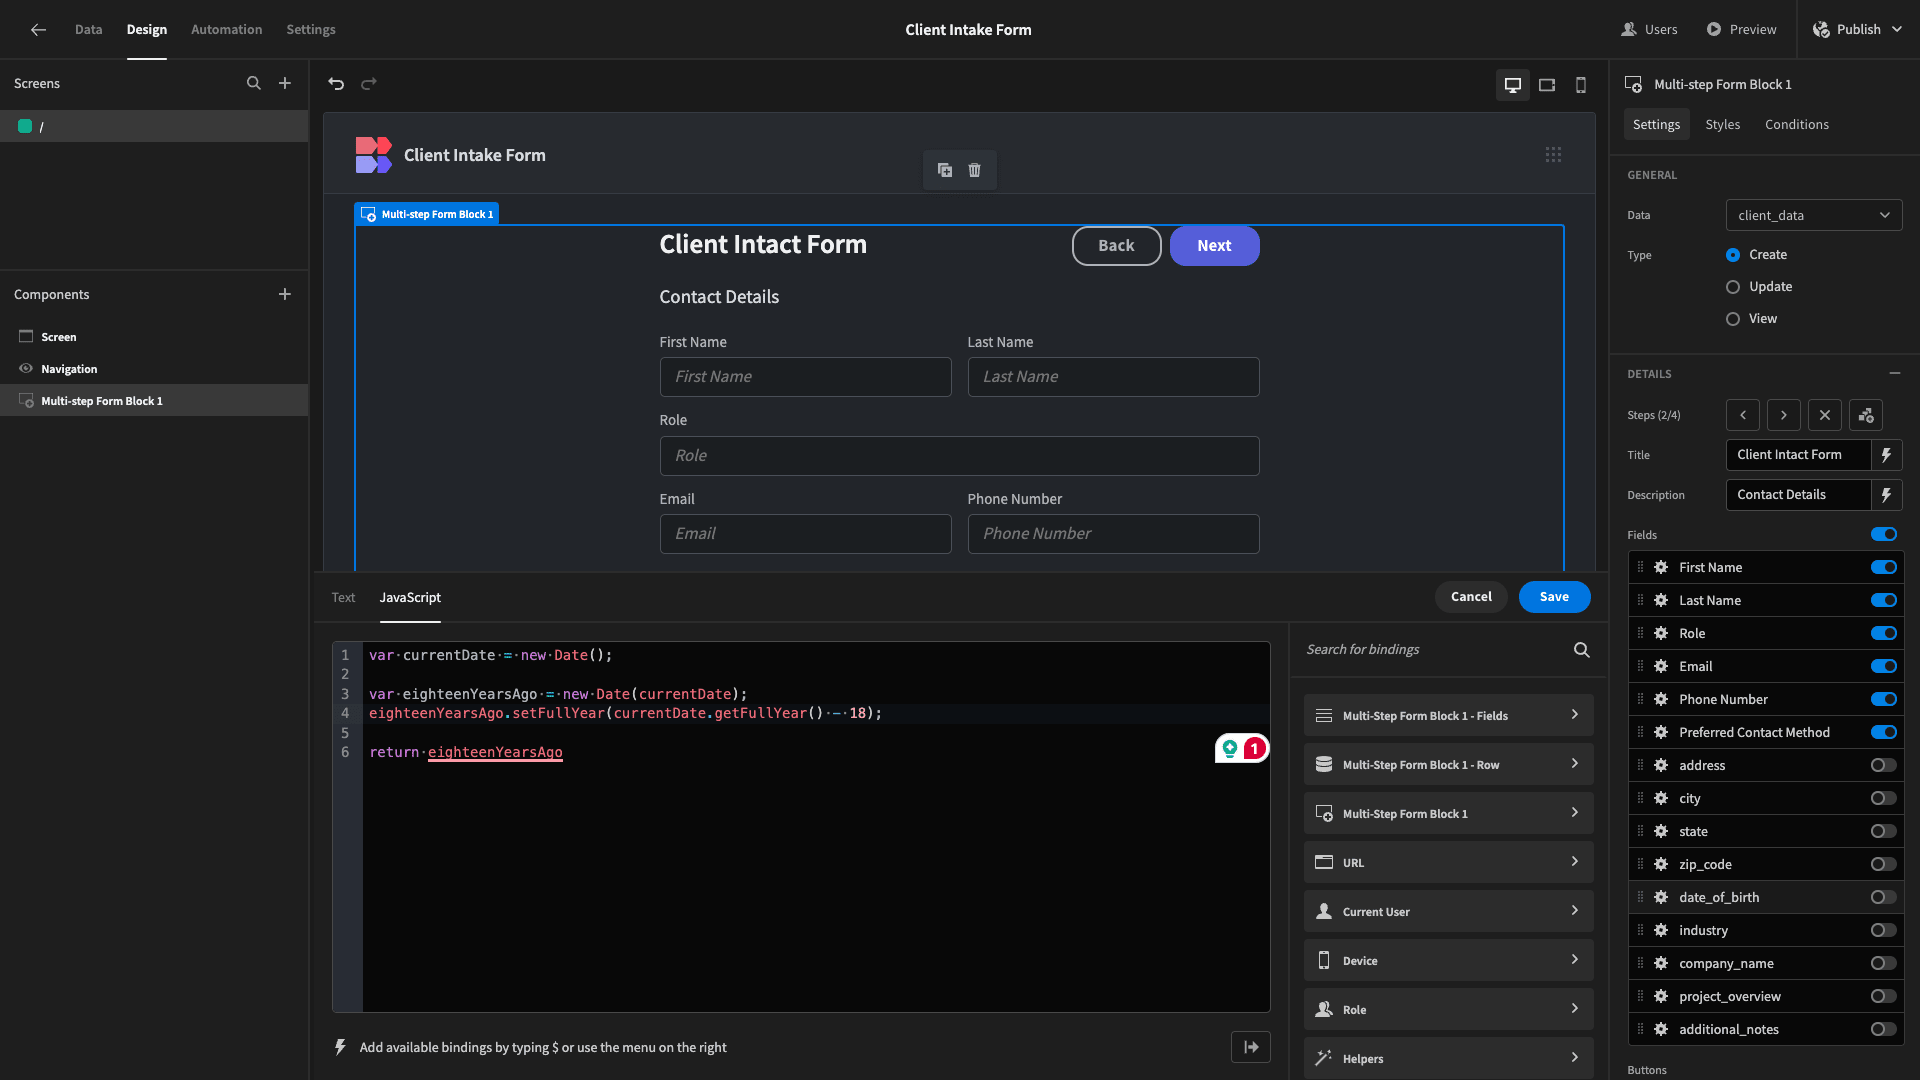
Of course, with custom JavaScript, we could achieve just about anything here. The point is simply to demonstrate the unique power and flexibility that Budibase offers us for creating custom validation rules.
Save this, and our form won’t accept submissions from users who are under 18.
3. Conditional validation
Building on from this, the last technique we’d like to show off is using Budibase’s custom form validation rules in conjunction with conditionality.
We can use conditionality to alter any setting of any UI component based on whatever rules we create. This includes custom validation rules for individual form fields.
This time, we have a simple expense submission form:

This contains fields called amount, description, and expense_date.
Let’s say we have an internal business rule that means most employees can only submit $50 worth of expenses for any given day.
We could do this using a conditional validation rule. To do this, we’ll need to eject our form block to access its underlying components.

Then, open the conditionality drawer for the amount form field.
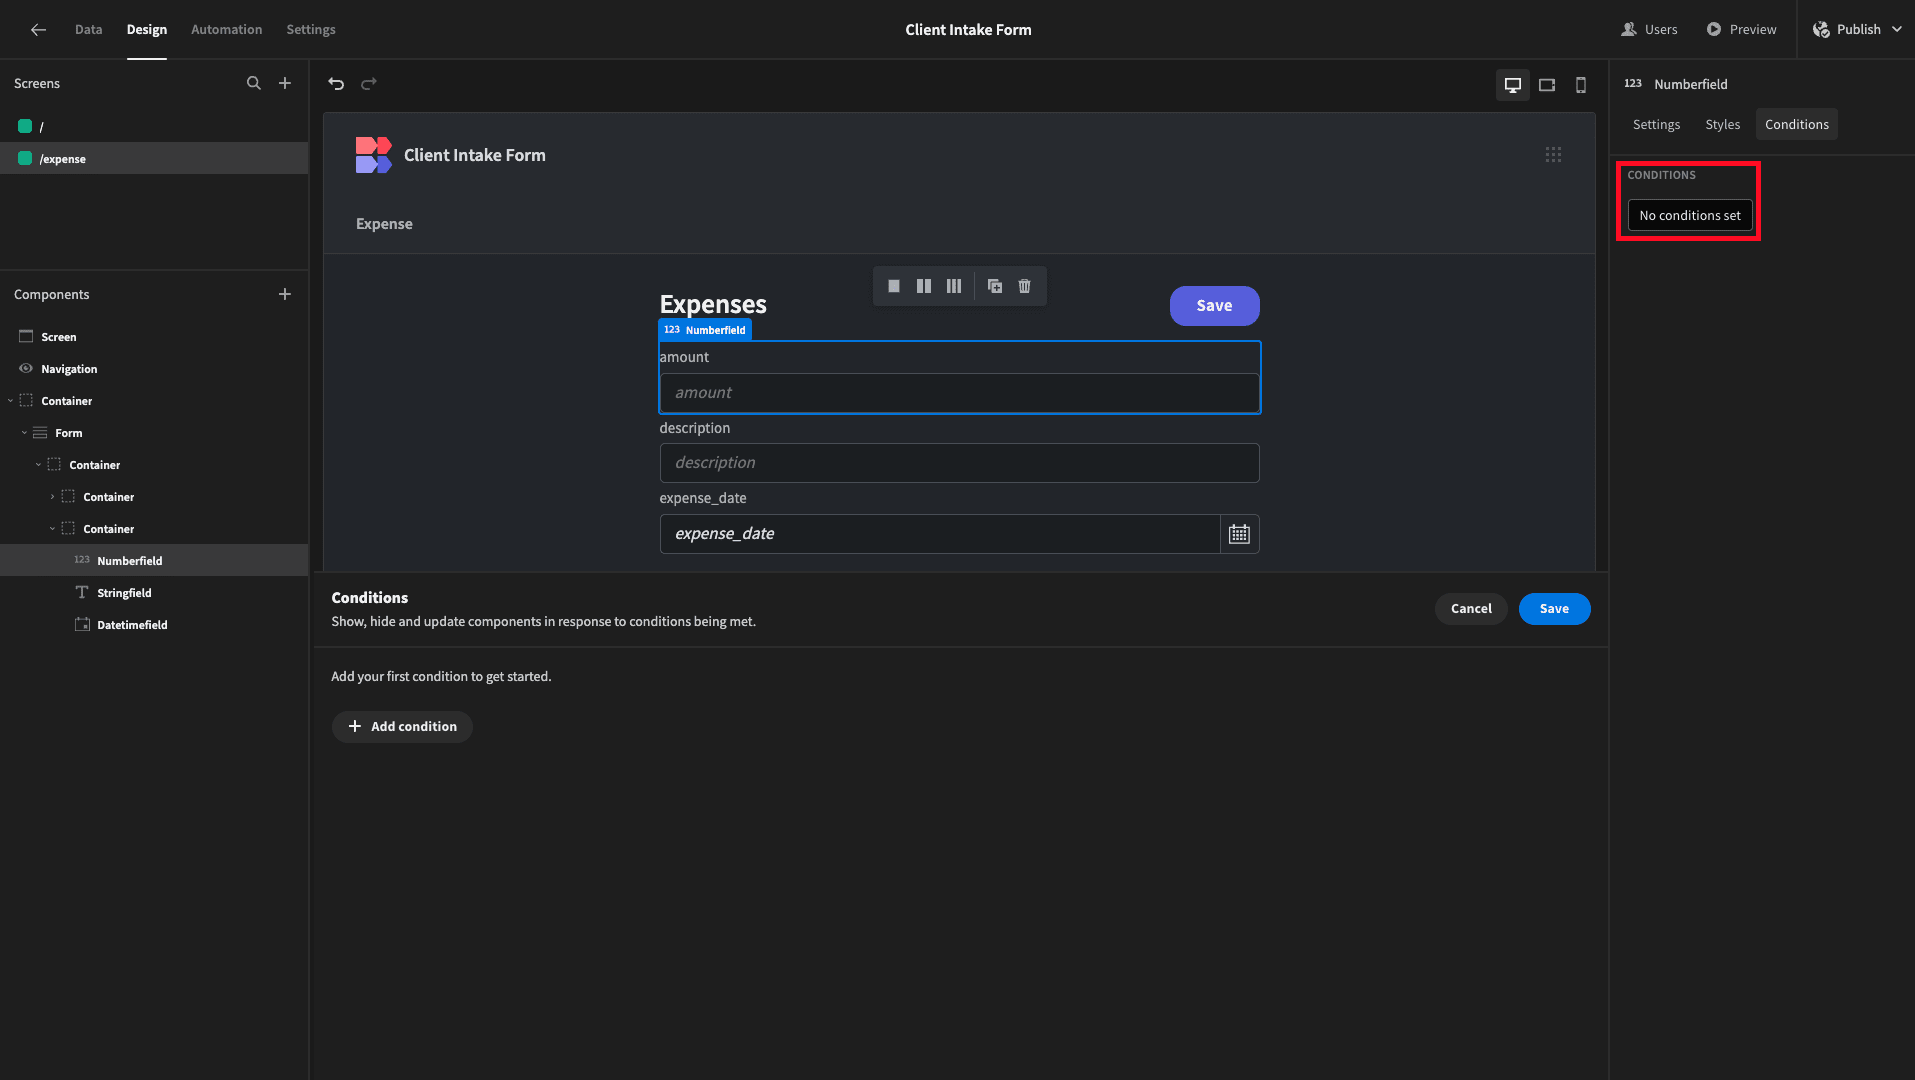
We’ll add an Update Setting rule, choosing Validation as our setting:
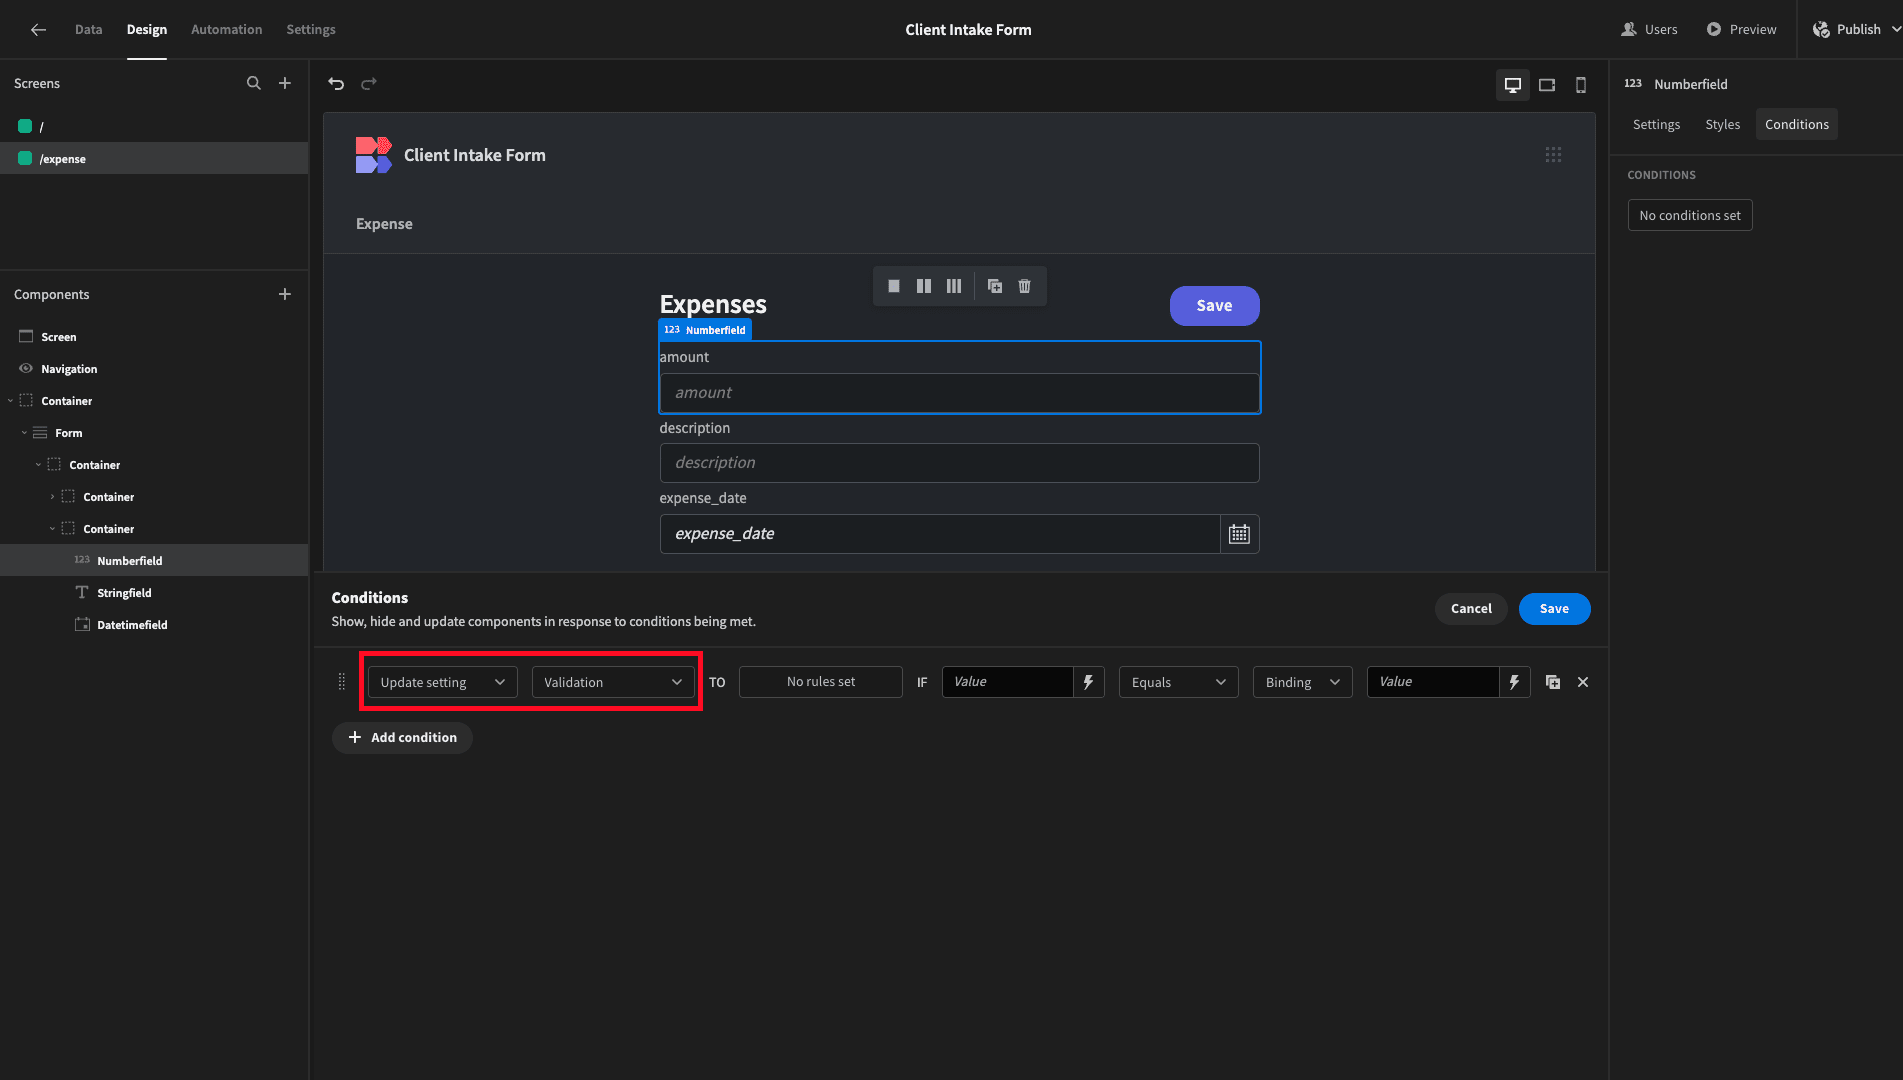
We can then use this button to open a separate panel to input our validation rule:

And we’ll add a maximum value of $50.

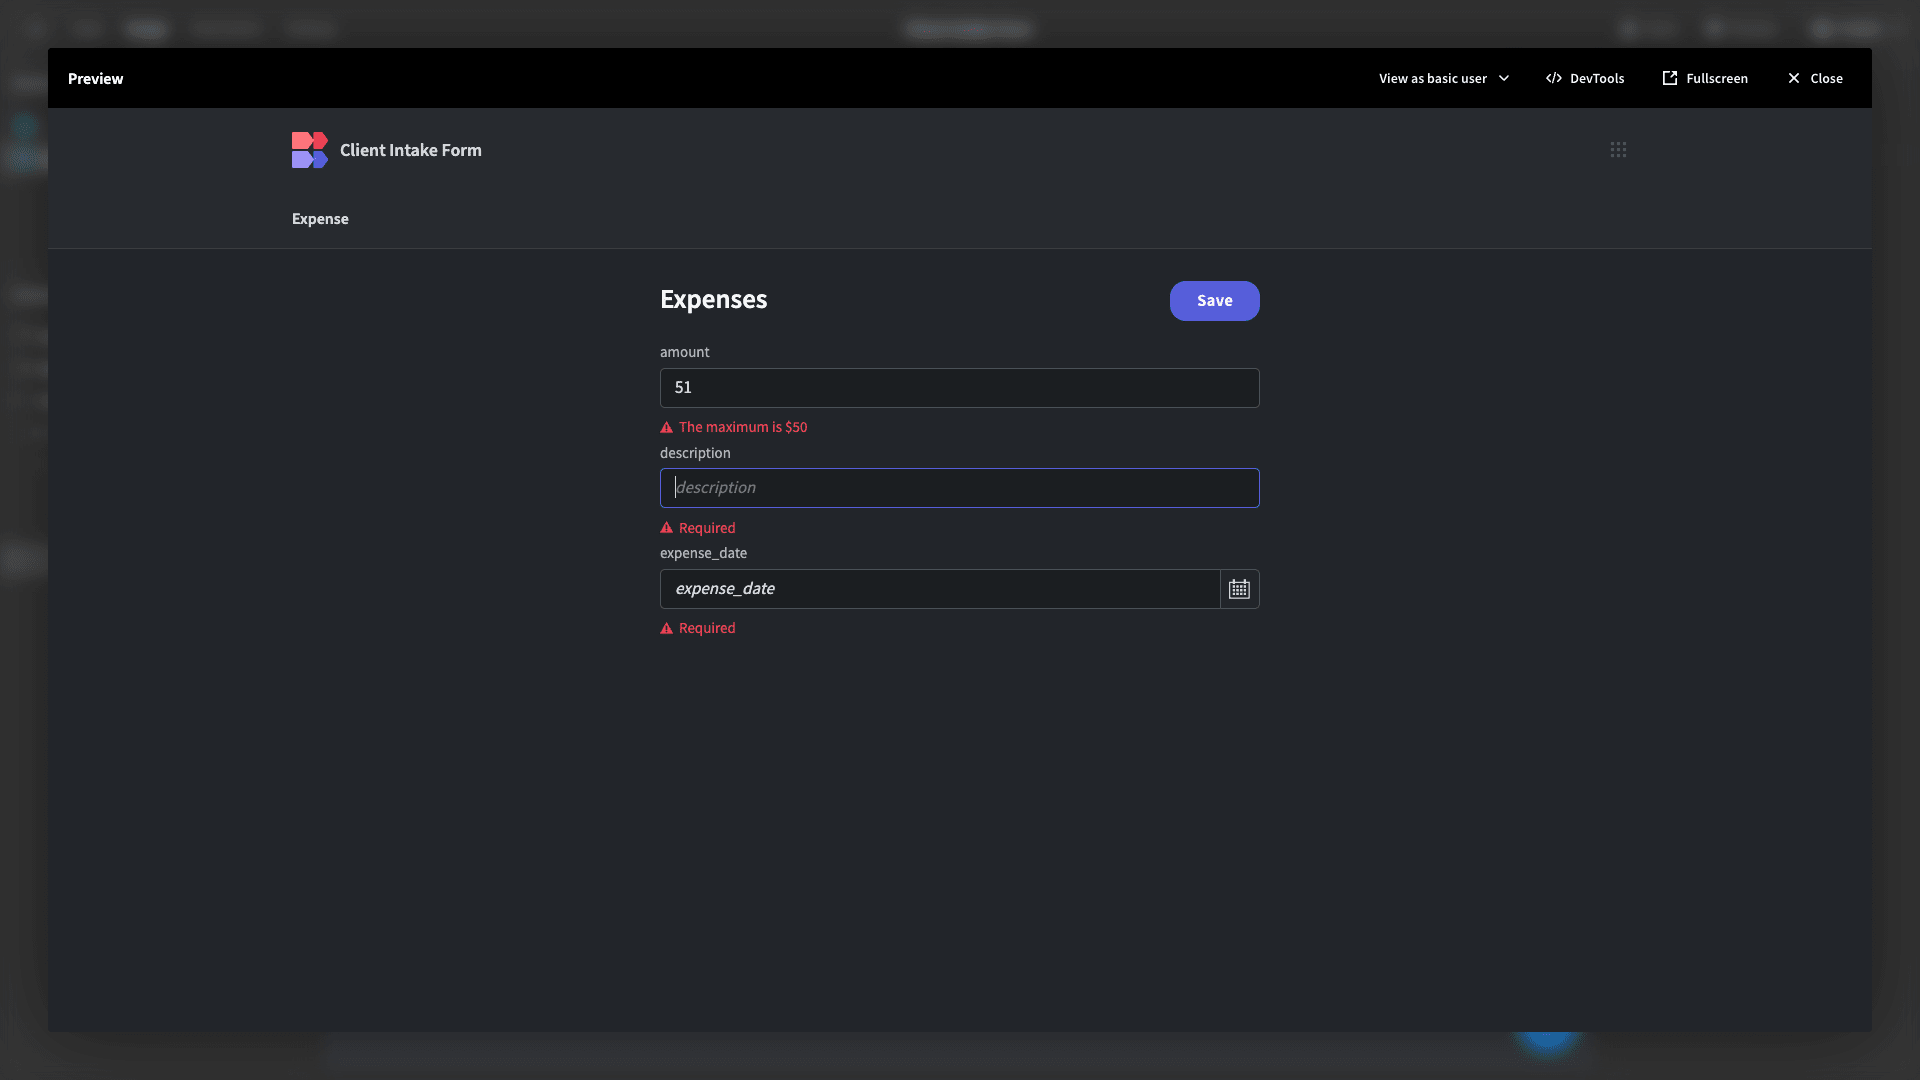
Hit save, and we can finish off our conditionality rule. So we want to apply this if {{ Current User.roleId }} is equal to {{ Role.Basic }}.

In other words, any user with the basic role assigned to them within Budibase’s RBAC system will have this validation rule applied to them, but other users will not.
If we preview our app as a basic user, we can see this in action:
Building advanced forms with Budibase
Of course, we can’t give a comprehensive account of every possible validation rule you might want to enforce.
Instead, what we set out to demonstrate was the extensive flexibility that Budibase offers us to build advanced forms with minimal custom code.
To learn more about how this works in practice, check out our forms page .