How to Send Form Data to an API in 4 Steps
Populating API requests is one of the most basic, universal use cases for web forms. However, building forms to do this manually can be a laborious, time-consuming process. It’s also beyond the skills of most non-developers.
But there is a better way.
Today, we’re checking how Budibase can be used to send form data to APIs. Specifically, we’re going to see how we can create and store dynamic REST requests, along with custom UIs, to populate them in a matter of minutes.
Even better, we won’t need to write a single line of custom code.
Let’s jump in.
When do we need to send form data to APIs?
APIs are some of the most fundamental building blocks of how we handle data and build web solutions. They’re a method for sending data back and forth between different applications and other nodes in a defined, controlled format.
While API requests can often be populated and triggered programmatically by system events, we’re just as likely to need human inputs.
For a very basic example, say we had a data set that’s stored in a legacy application - so the easiest way to query it is via API requests.
It would be unviable for our data entry team to manually write these requests each time they need to create a record - so we need forms to create and update our data.
In other words, we need to send form data to APIs in any situation where we want to build repeatable, user-friendly workflows for populating requests.
You might also like our round-up of the top Retool alternatives.
So…
What are we building?
We’re actually going to build two forms today using an API that stores questions for a survey.
Here’s an example of the data objects that are stored for each question:
 1{
 2
 3 "id": 1,
 4
 5 "question": "Favourite programming language?",
 6
 7 "published_at": "2015-08-05T08:40:51.620Z",
 8
 9 "choices": [
10
11  {
12
13   "choice": "Swift",
14
15   "votes": 0
16
17  },
18
19  {
20
21   "choice": "Python",
22
23   "votes": 0
24
25  },
26
27  {
28
29   "choice": "Objective-C",
30
31   "votes": 0
32
33  },
34
35  {
36
37   "choice": "Ruby",
38
39   "votes": 0
40
41  }
42
43 ]
44
45}
For the purpose of our forms, we’re only worried about a handful of these attributes. These are the id, question, and choice fields.
Everything else is beyond the scope of what we want to achieve today.
Our two forms will trigger the following:
- A POST request for creating new records.
- A PUT request to update existing records.
Let’s jump right in.
How to send form data to an API with Budibase
Budibase is the fast, easy way to build advanced forms on top of any data source.
If you haven’t already, sign up for a free account now.
1. Creating our API requests
We’ll start by creating a new Budibase application. When we do this, we’re prompted to choose which type of data we’d like to connect to.

Budibase features an internal low-code database, as well as dedicated connectors for all kinds of RDBMSs, NoSQL tools, APIs, and more.
Naturally, today, we’re choosing REST API.
When we do so, we’ll be brought to this panel, where we can start creating queries.

As we said earlier, we’re eventually going to build two forms - for updating or creating records.
So, we’ll need two corresponding requests to our API.
Let’s take each one in turn.
POST request
POST requests are used to instruct the API server to create a new record. We’ll create this first since it’s going to be slightly simpler than our other request.
We’ll start by hitting Create New Query, bringing us to this page.

First, we’ll choose a method for our REST request and input our endpoint. We can also give our request a more descriptive name.
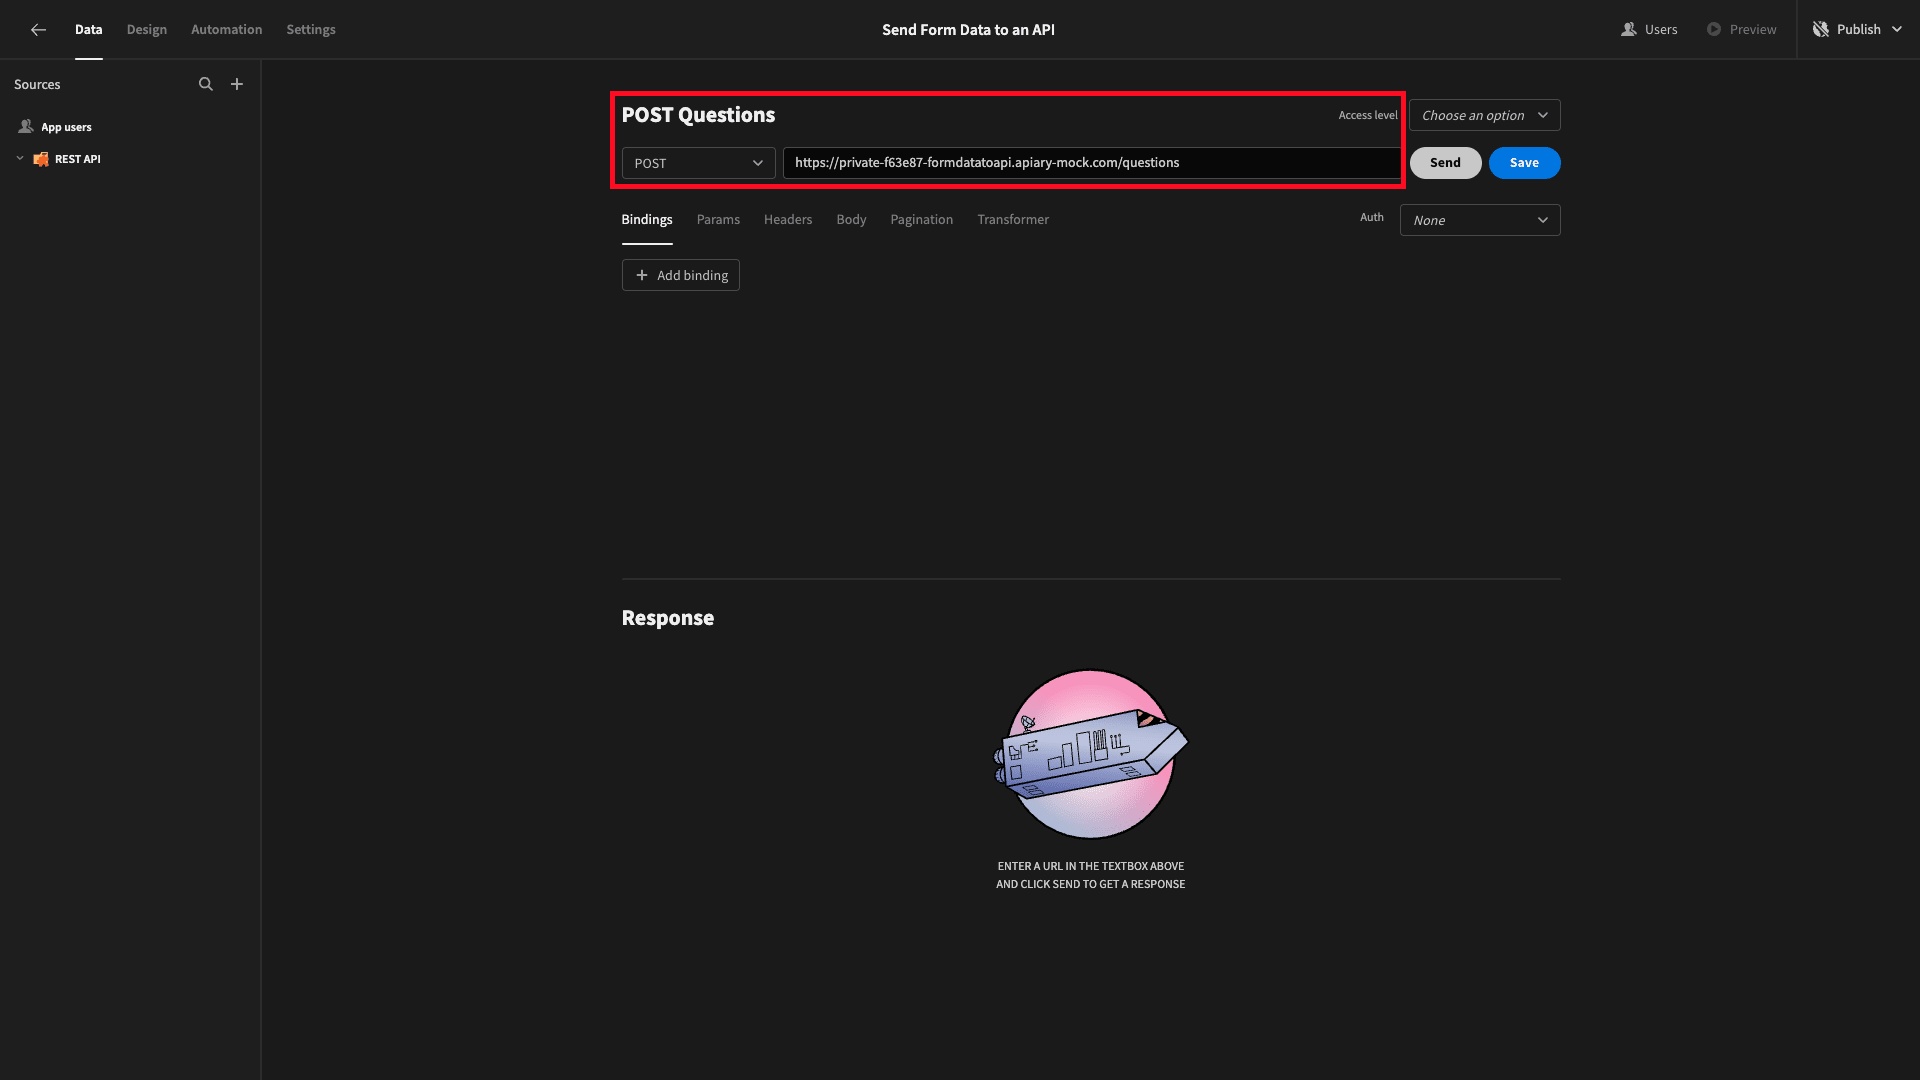
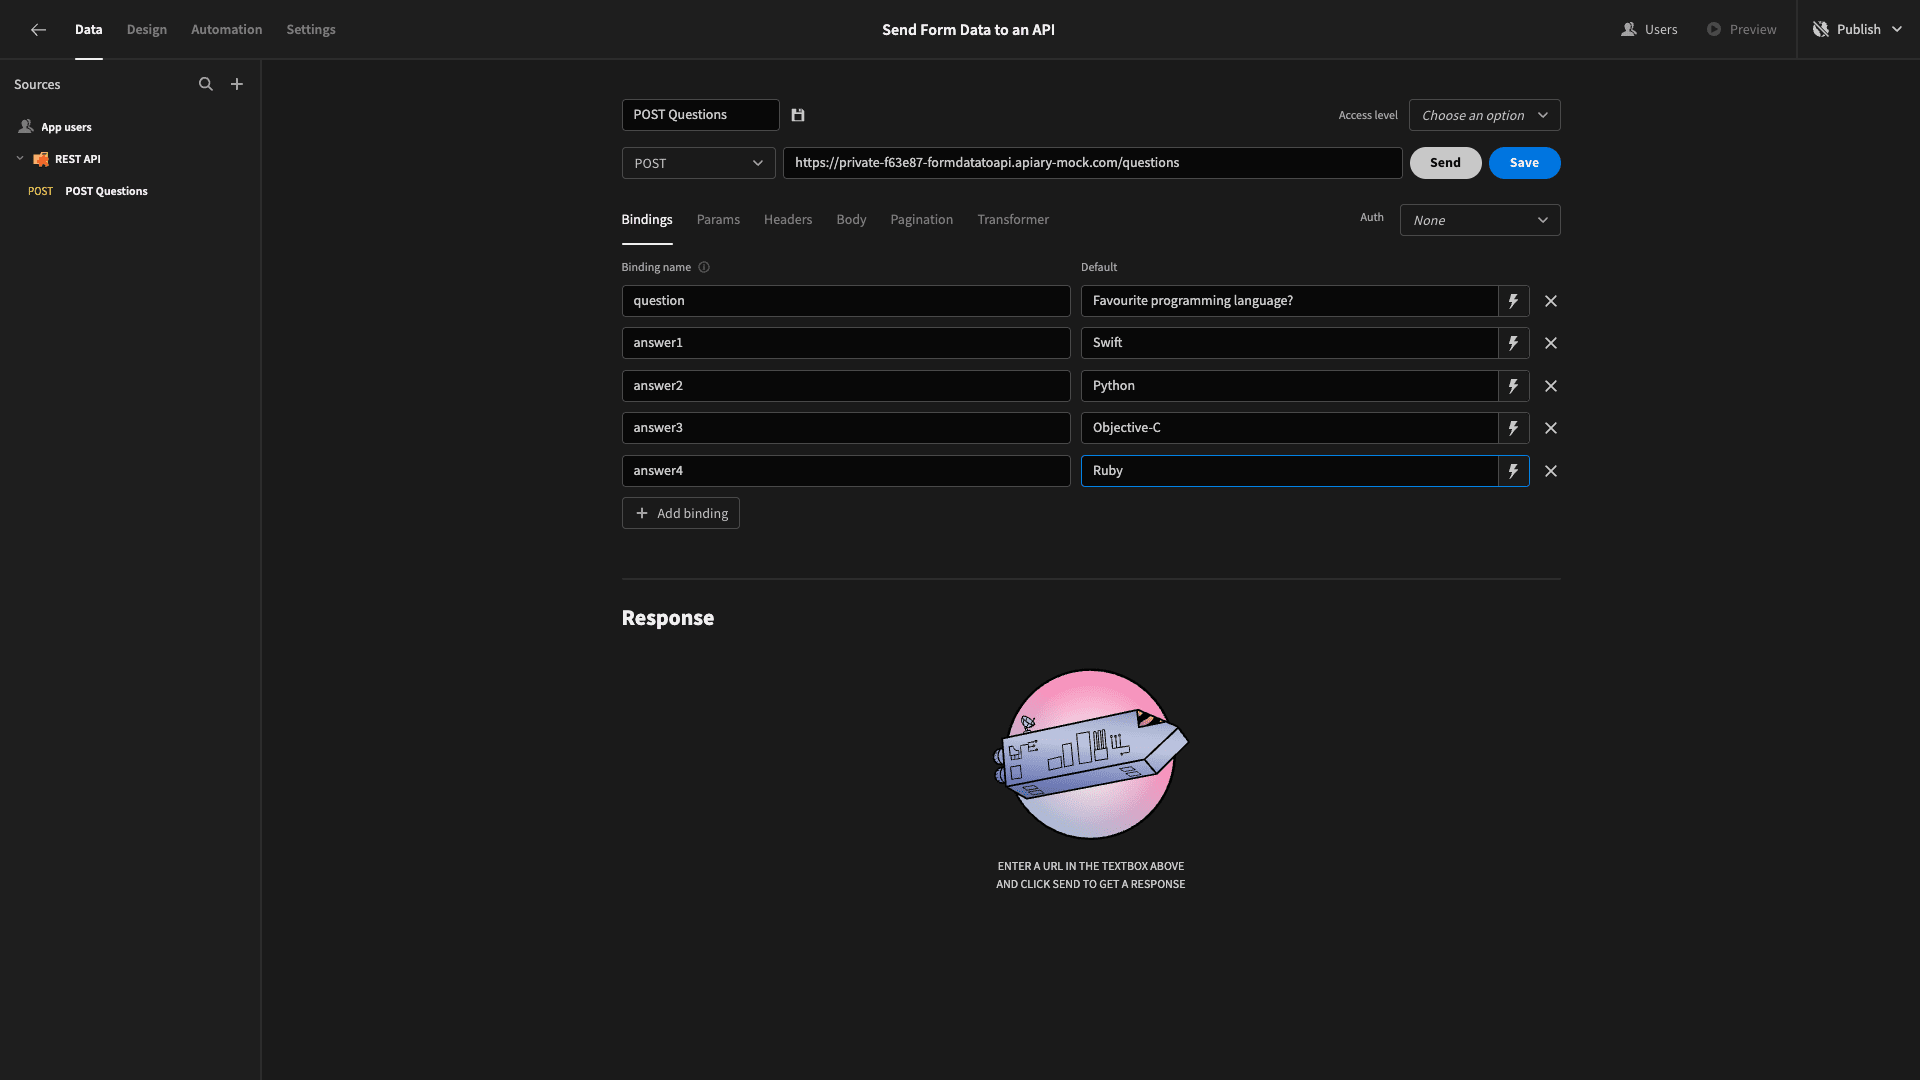
We know that our API endpoint accepts five parameters - a question and four possible answers.
All of the other attributes in the schema we saw earlier will be generated by the target application itself - so we don’t need to worry about these.
Budibase gives us the option to create bindable values that can be used as dynamic variables throughout our REST requests. We can give these default values and then assign them with real information elsewhere in our application.
We need to create a binding for each of the parameters in our REST request body. We’ll then use form inputs to populate these later.
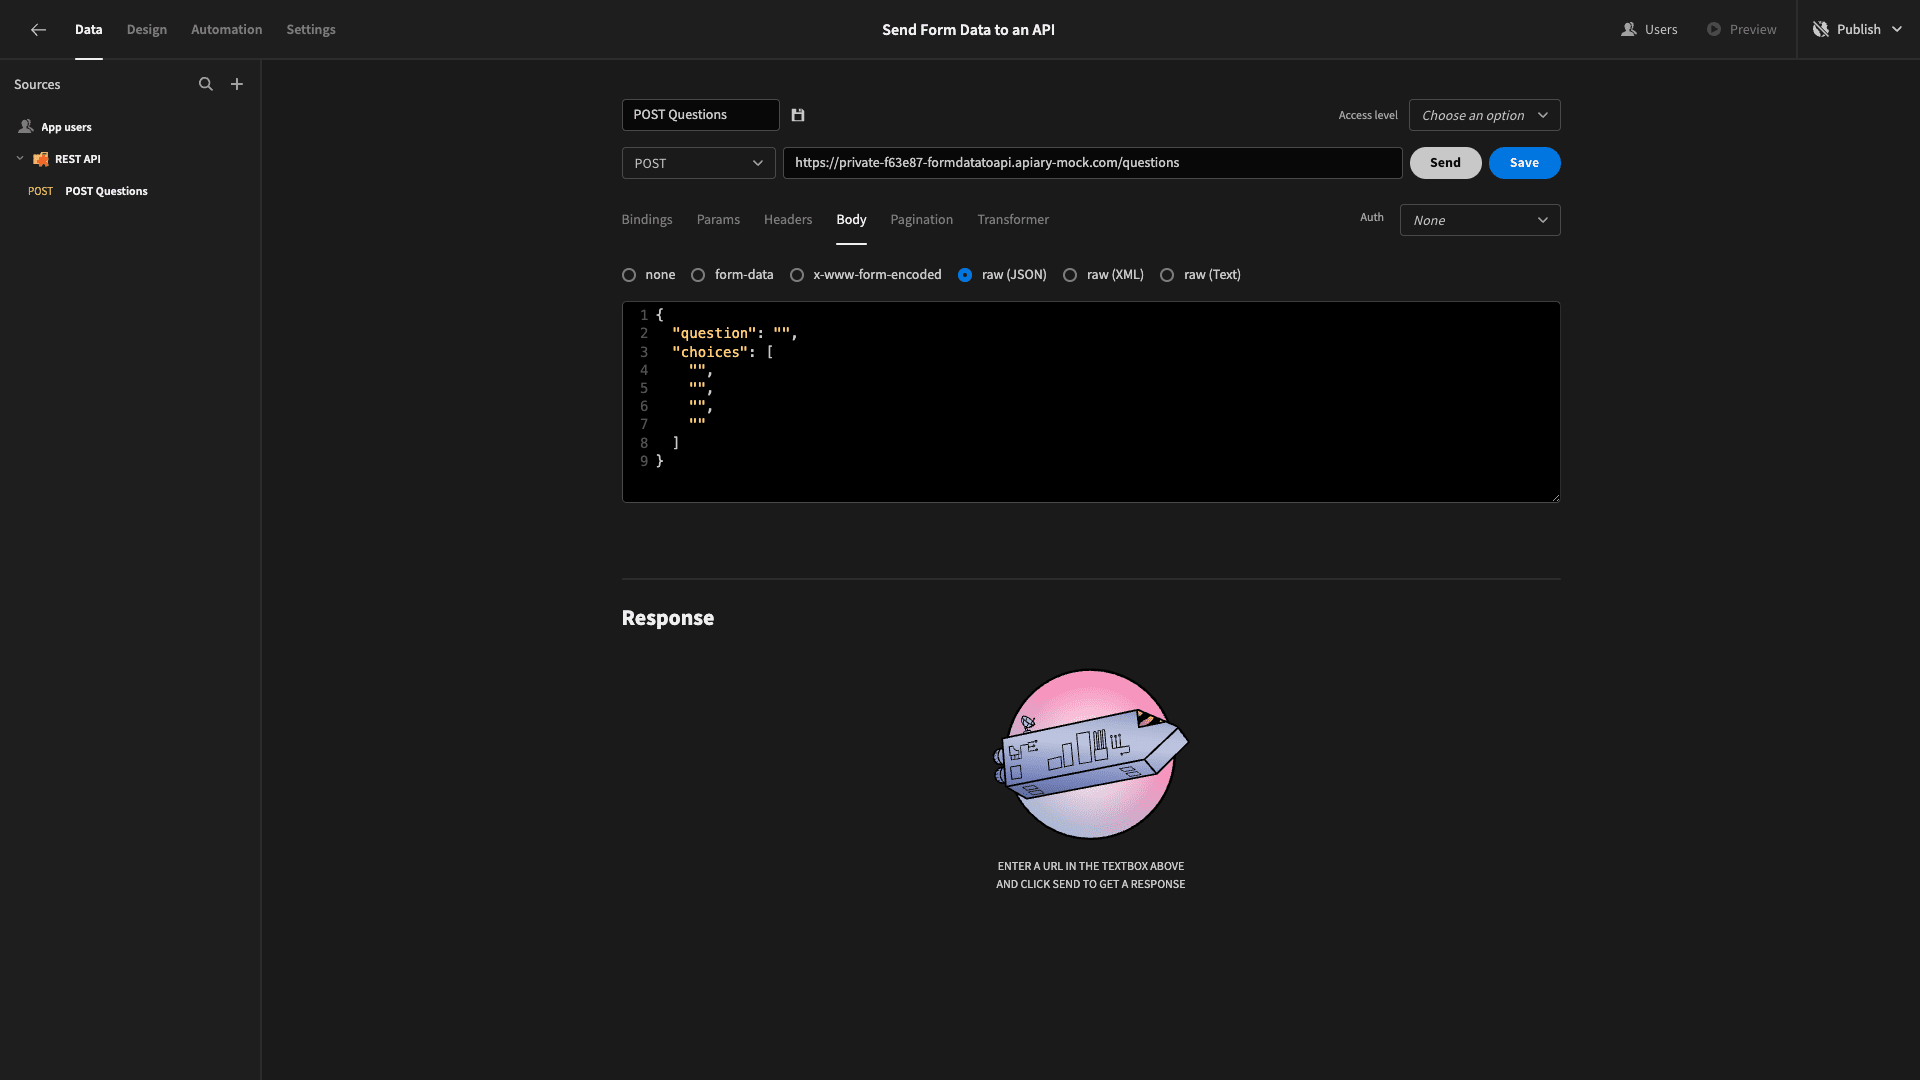
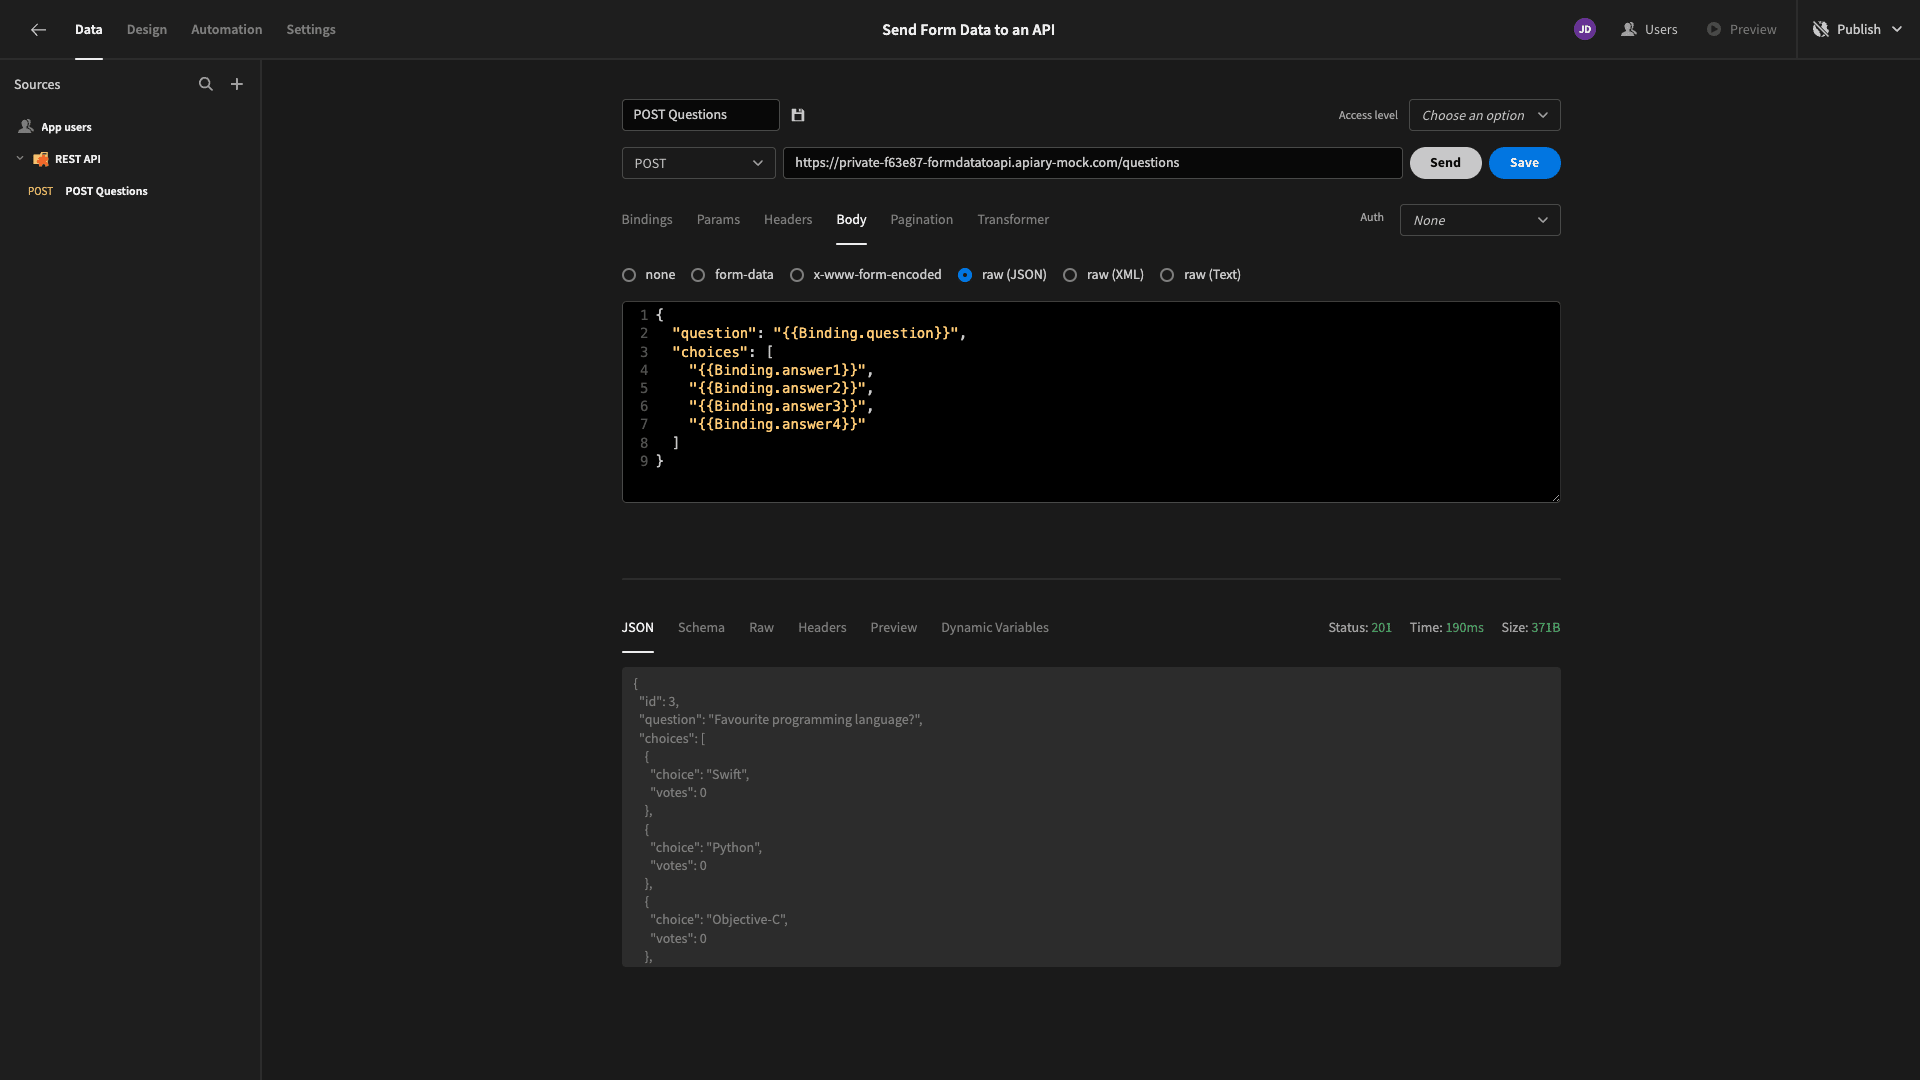
With these in place, we need to create the body of our request - which we can include our bindings within.
We can do this using a form interface, but since our schema that we saw earlier contains a nested array, we’re going to use the JSON editor:

We’ll start by adding the basic structure of our body parameters. We know from our API docs that our request body should look like this:
 1{
 2
 3 "question": "",
 4
 5 "choices": [
 6
 7  "",
 8
 9  "",
10
11  "",
12
13  ""
14
15 ]
16
17}
So, that’s what we’ll add.
Then, all we need to do is populate the blank values with our bindings. We can reference these in the format {{Bindings.bindingName}}.
So, our completed JSON object will be:
 1{
 2
 3 "question": "{{Binding.question}}",
 4
 5 "choices": [
 6
 7  "{{Binding.answer1}}",
 8
 9  "{{Binding.answer2}}",
10
11  "{{Binding.answer3}}",
12
13  "{{Binding.answer4}}"
14
15 ]
16
17}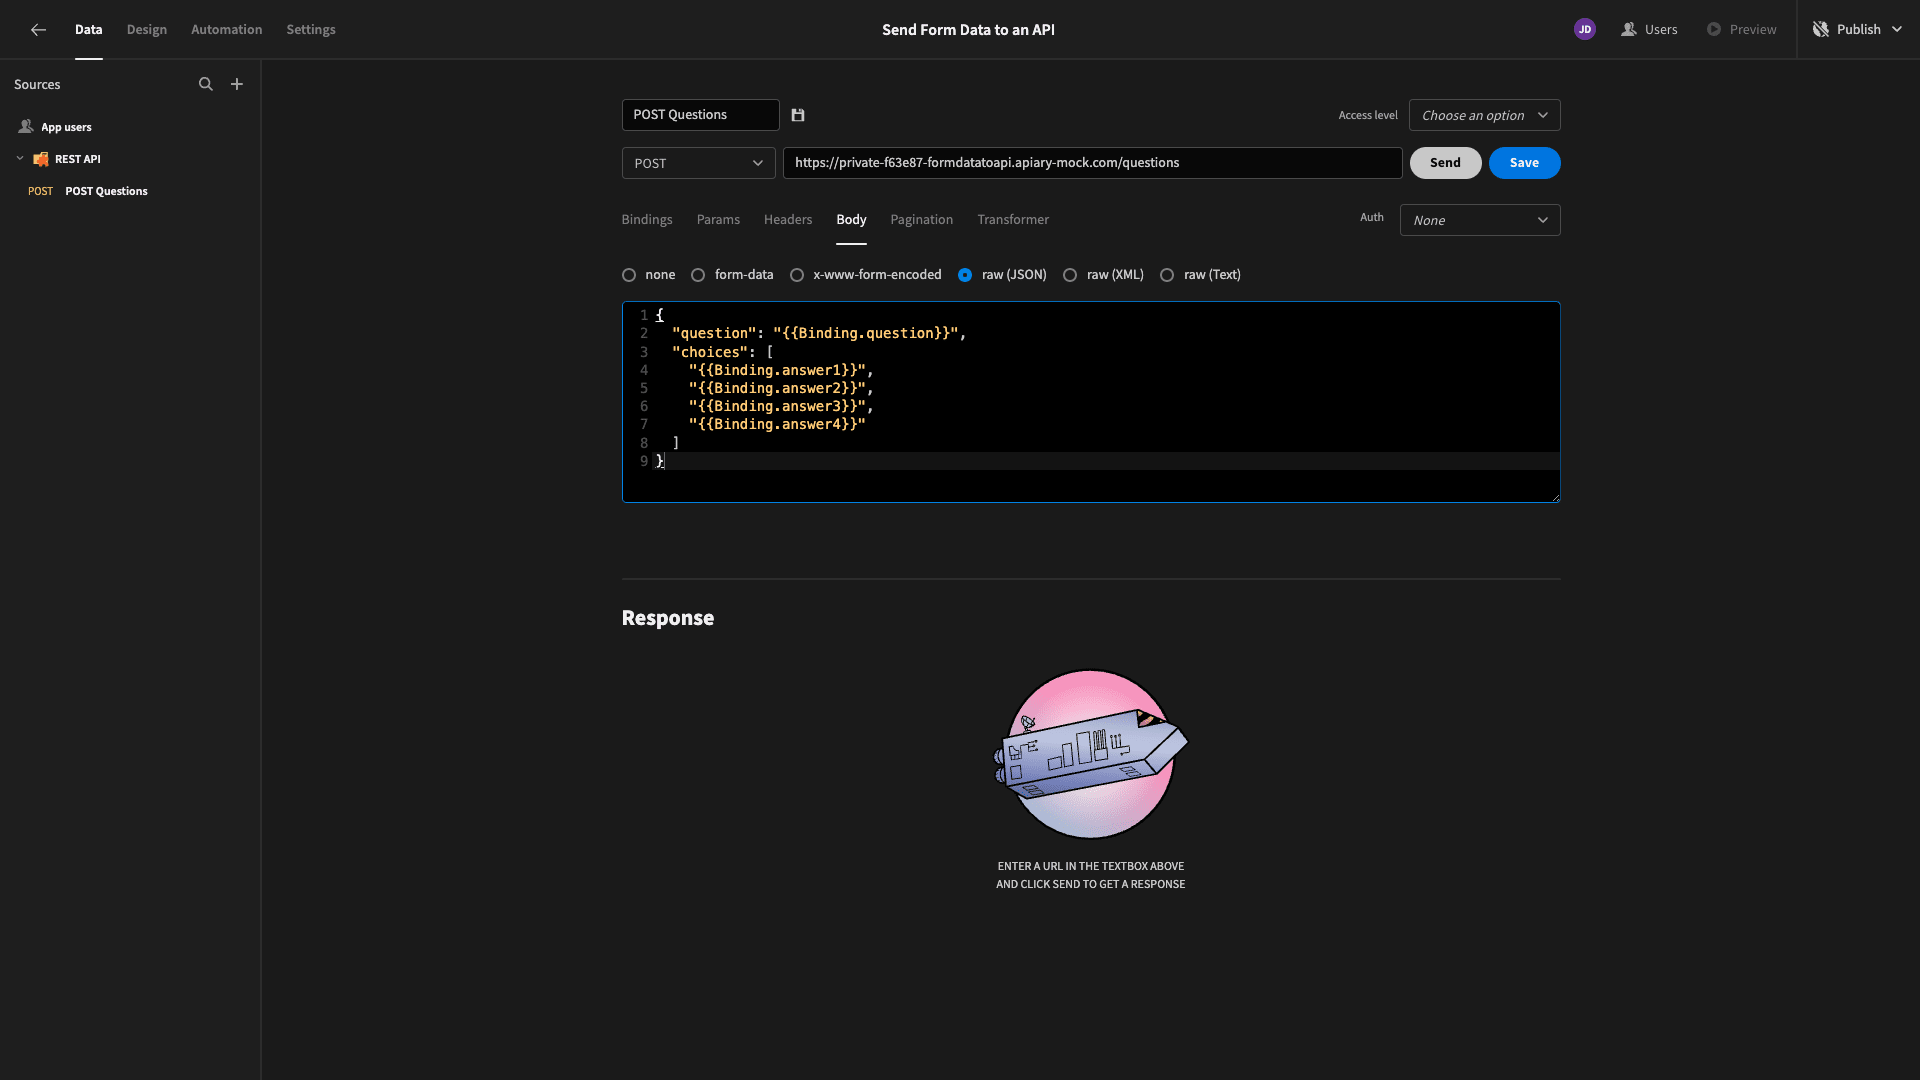
When we send our request, the API responds with the complete data object that’s been saved.
PUT request
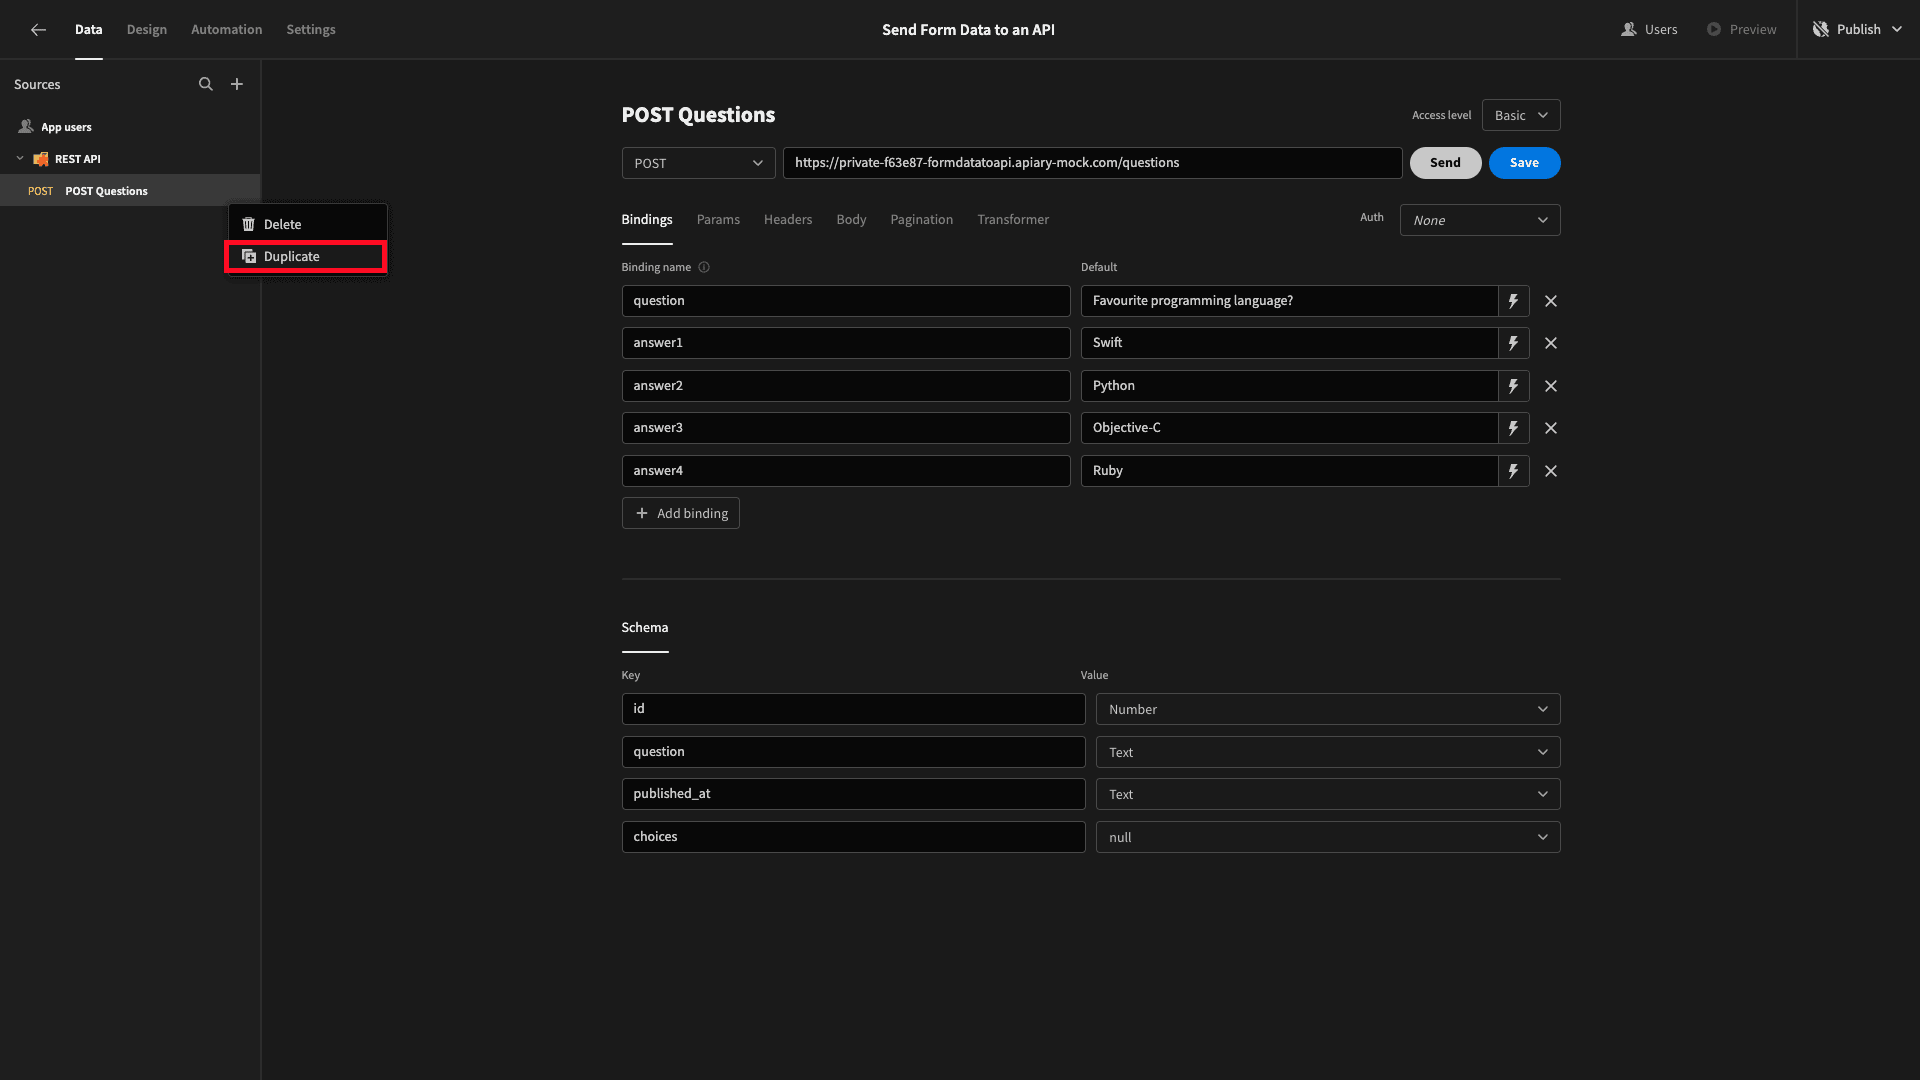
For our second request, we can start by duplicating this existing one.
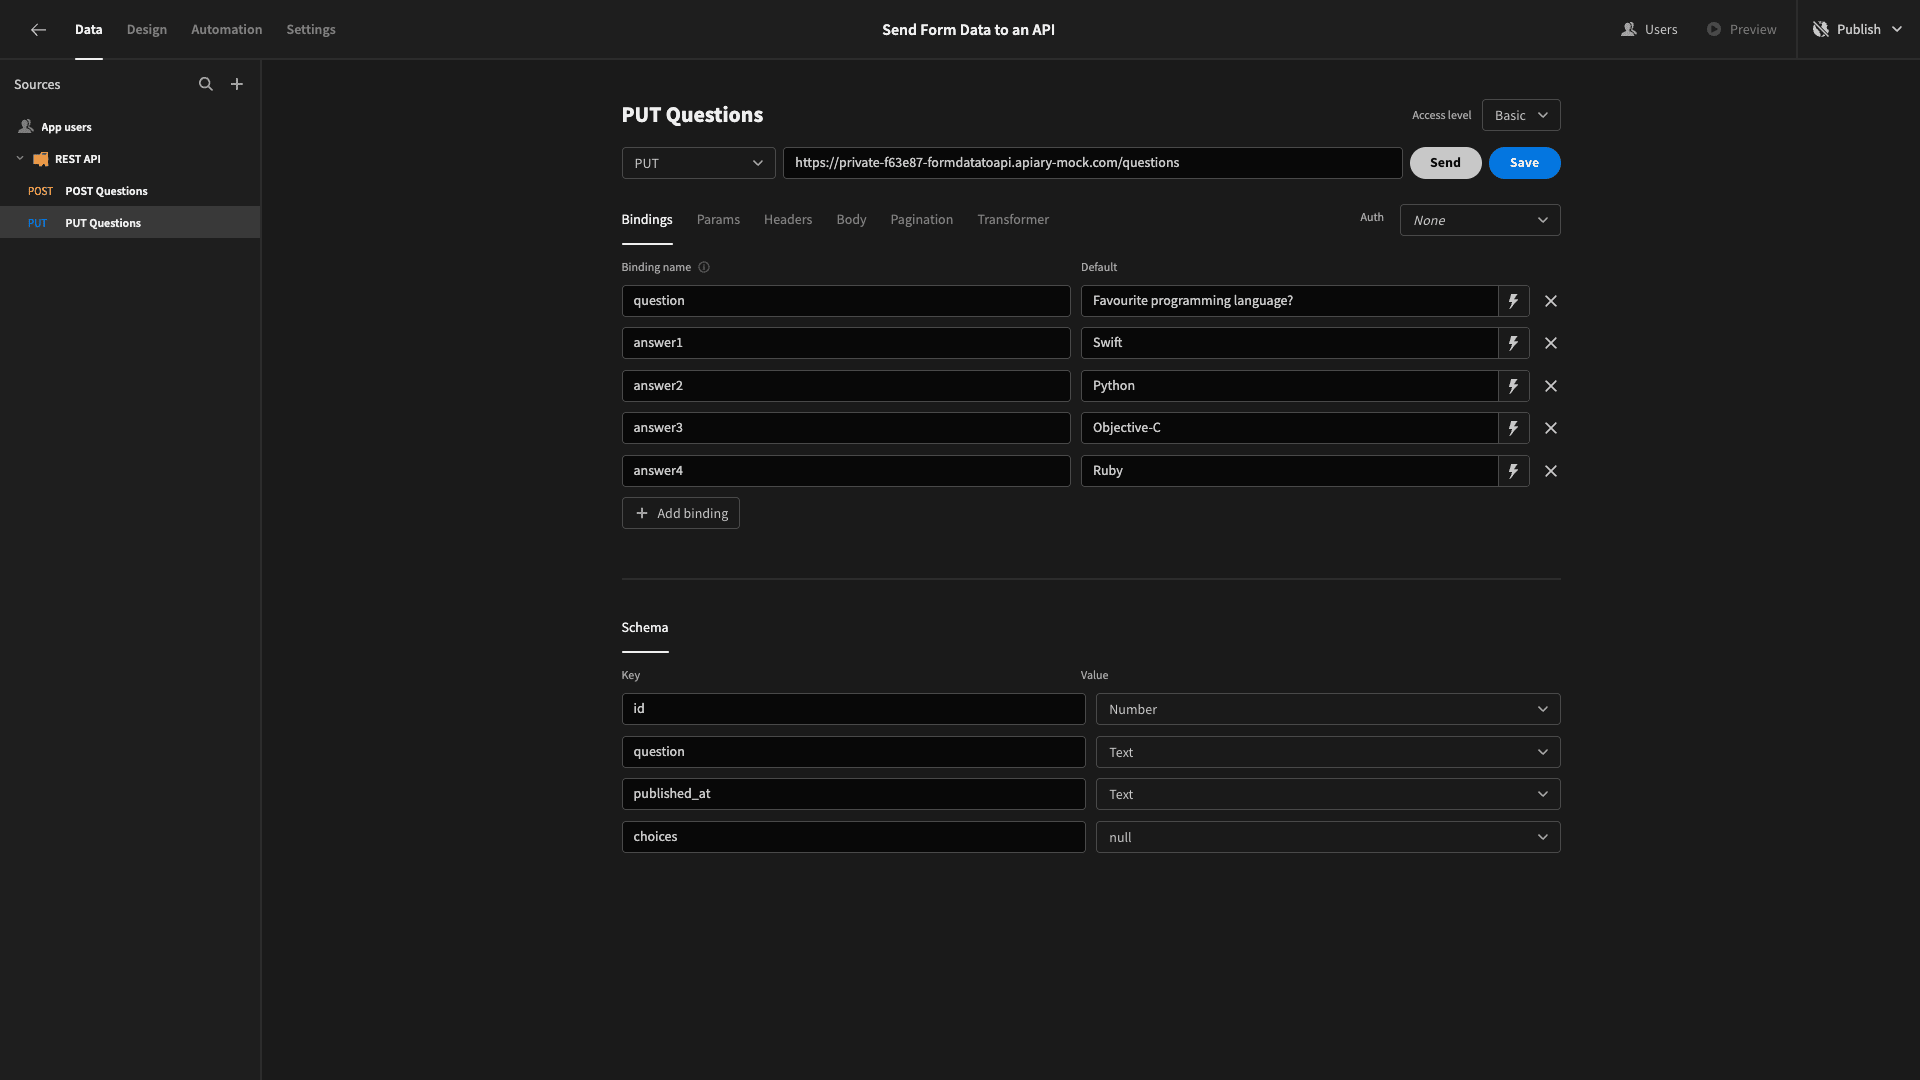
Then, we’ll update our method, endpoint, and the name of our request:
Now, the data schema for this request is basically the same - with the addition of an extra attribute for the question’s id.
This is used to identify the record we want to update with our API request.
So, we’ll add this to our bindings and request body.
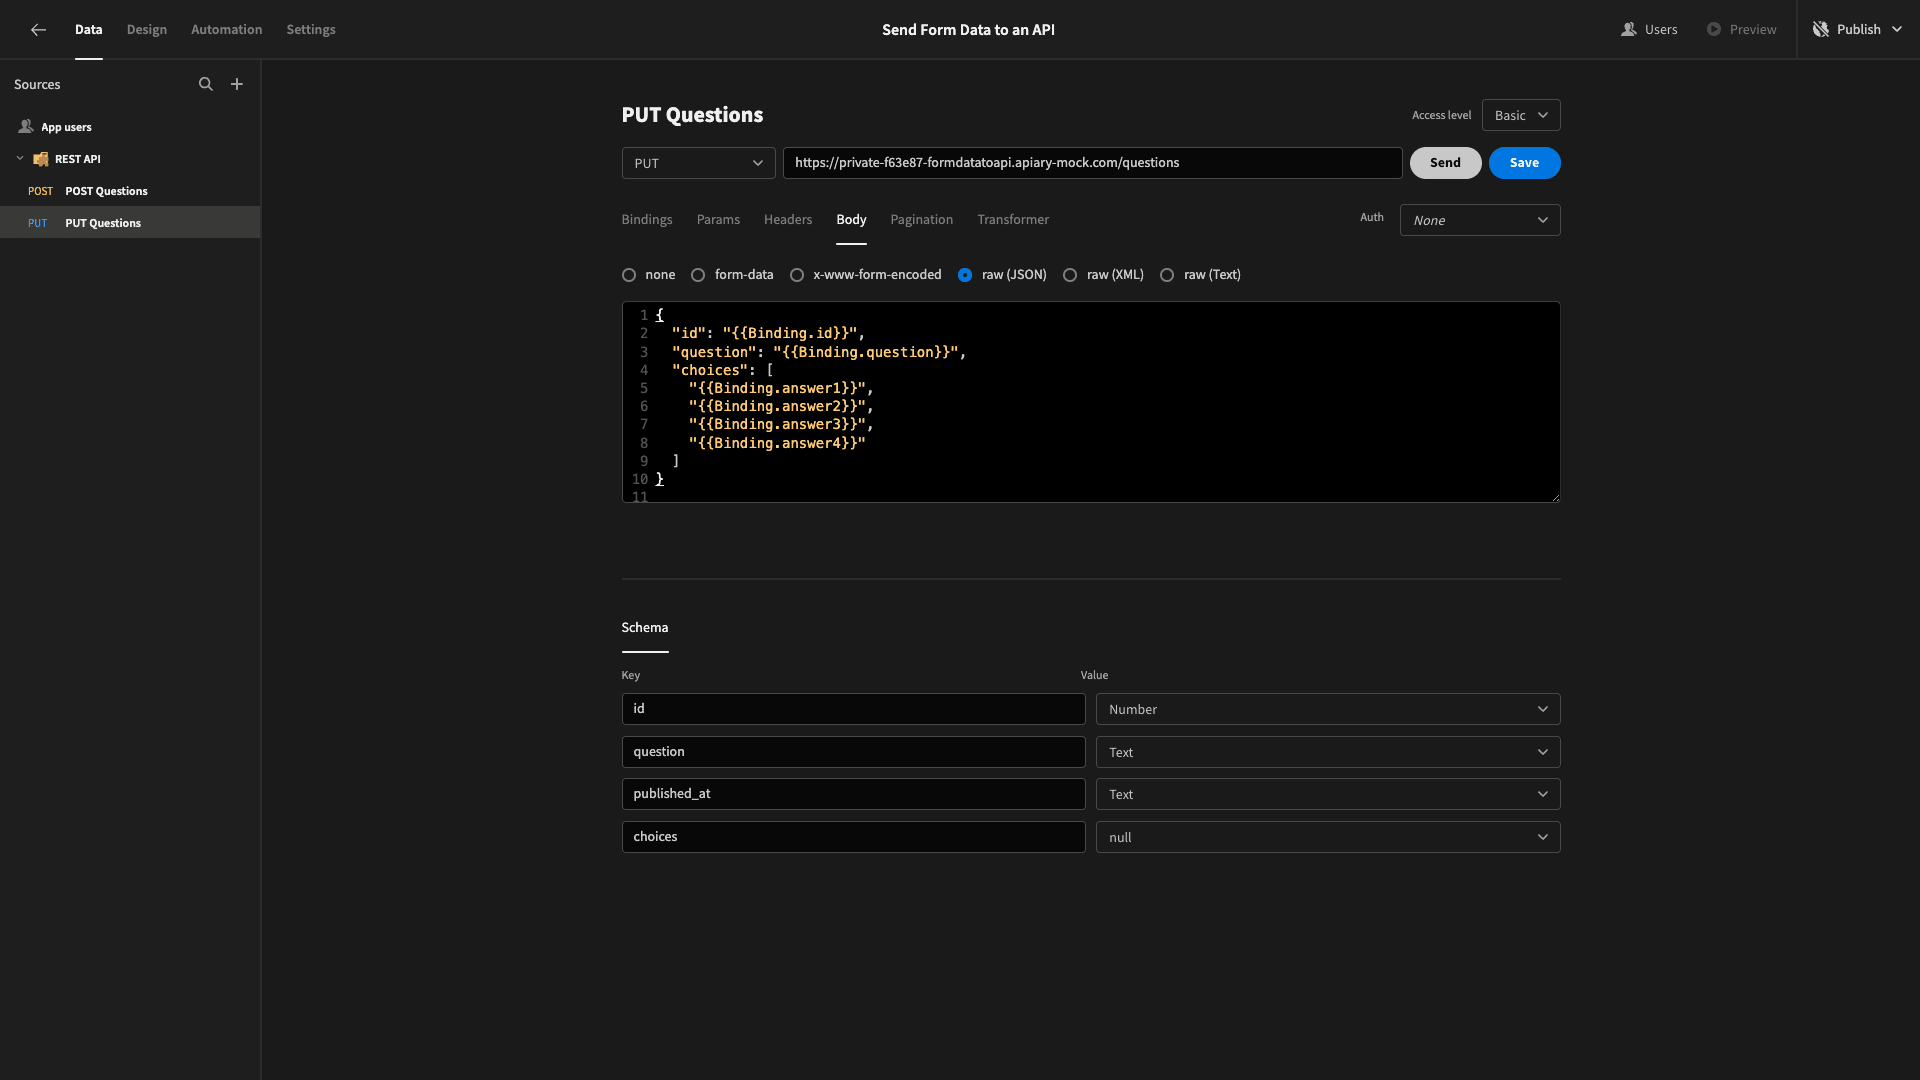
Once we’ve tested that and we’re happy that it works, we can start building our forms.
2. Building our POST request form
Start by heading over to Budibase’s design tab. Here, we’re given a few options for how to create our first UI. We’re going to choose Blank Screen.
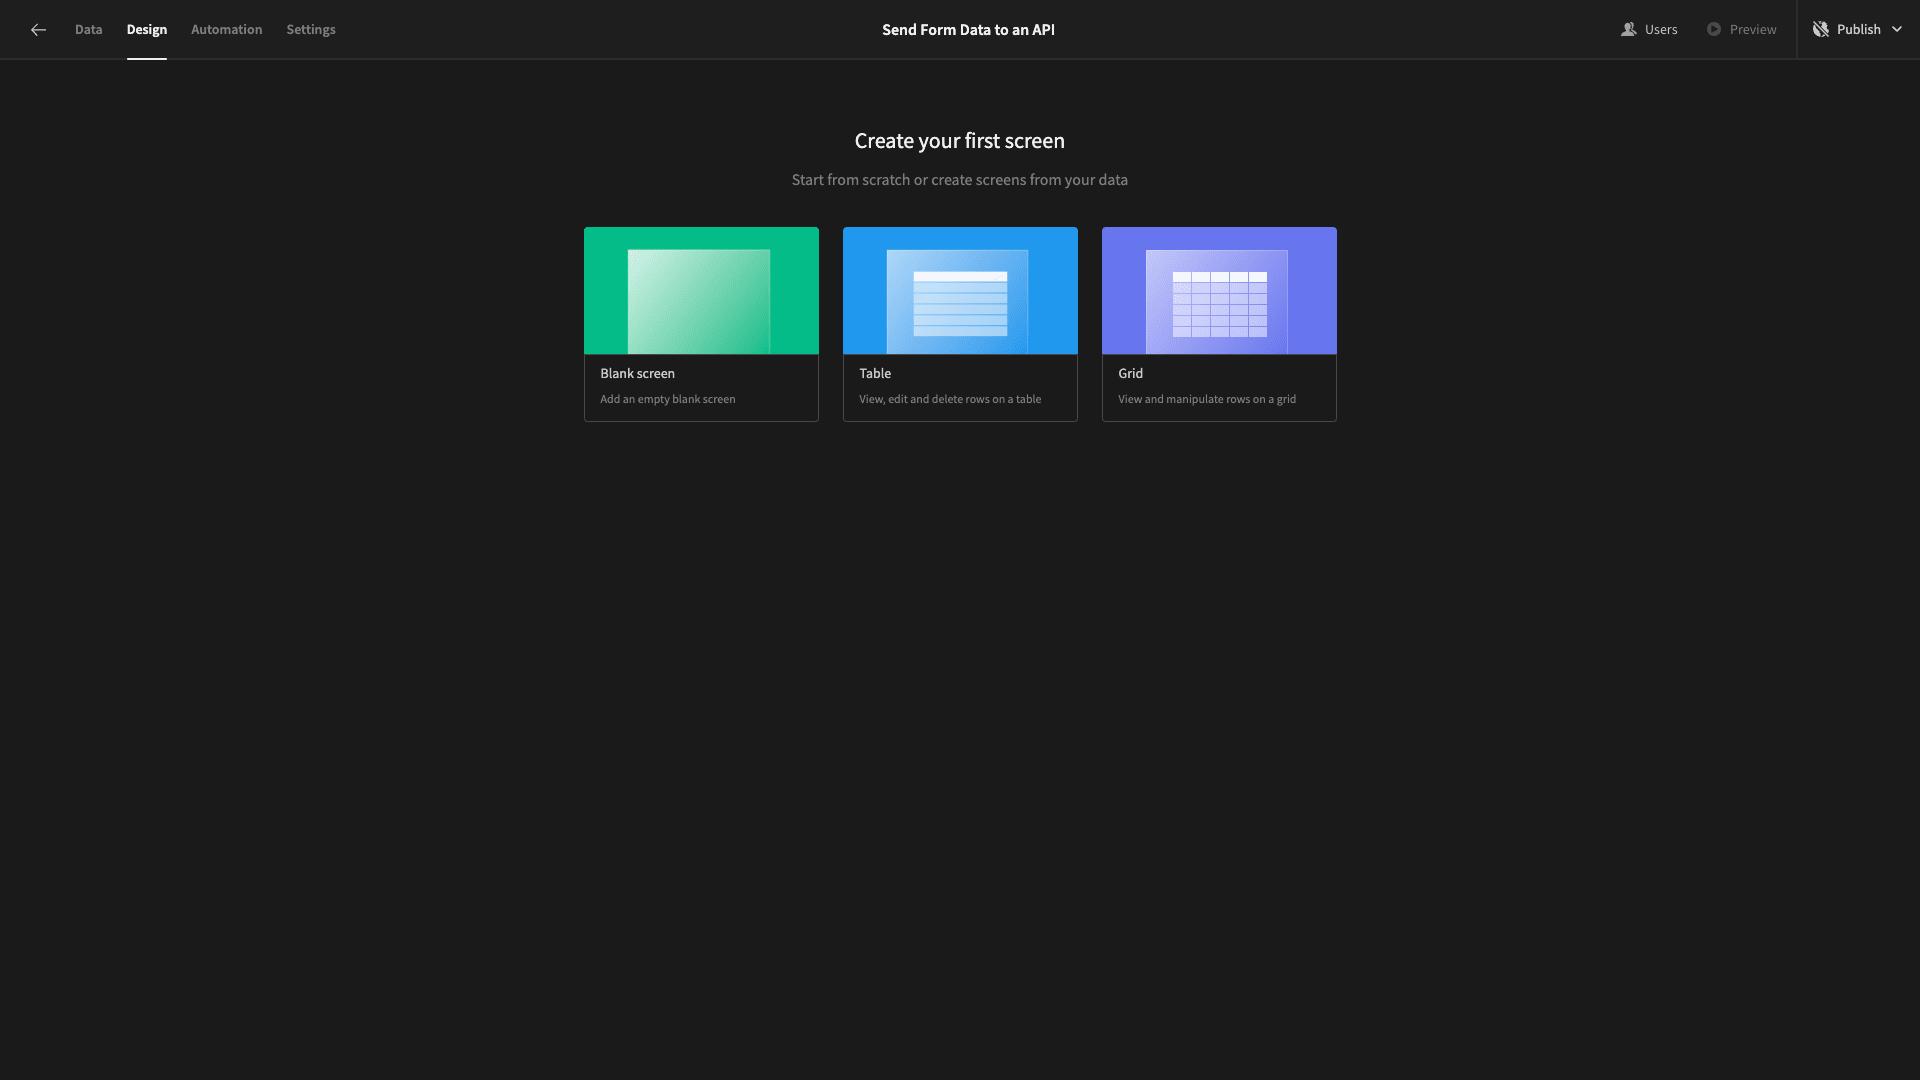
Then, we’re prompted to give our screen a URL path. We’ll call ours /post-form.

Here’s our blank screen.
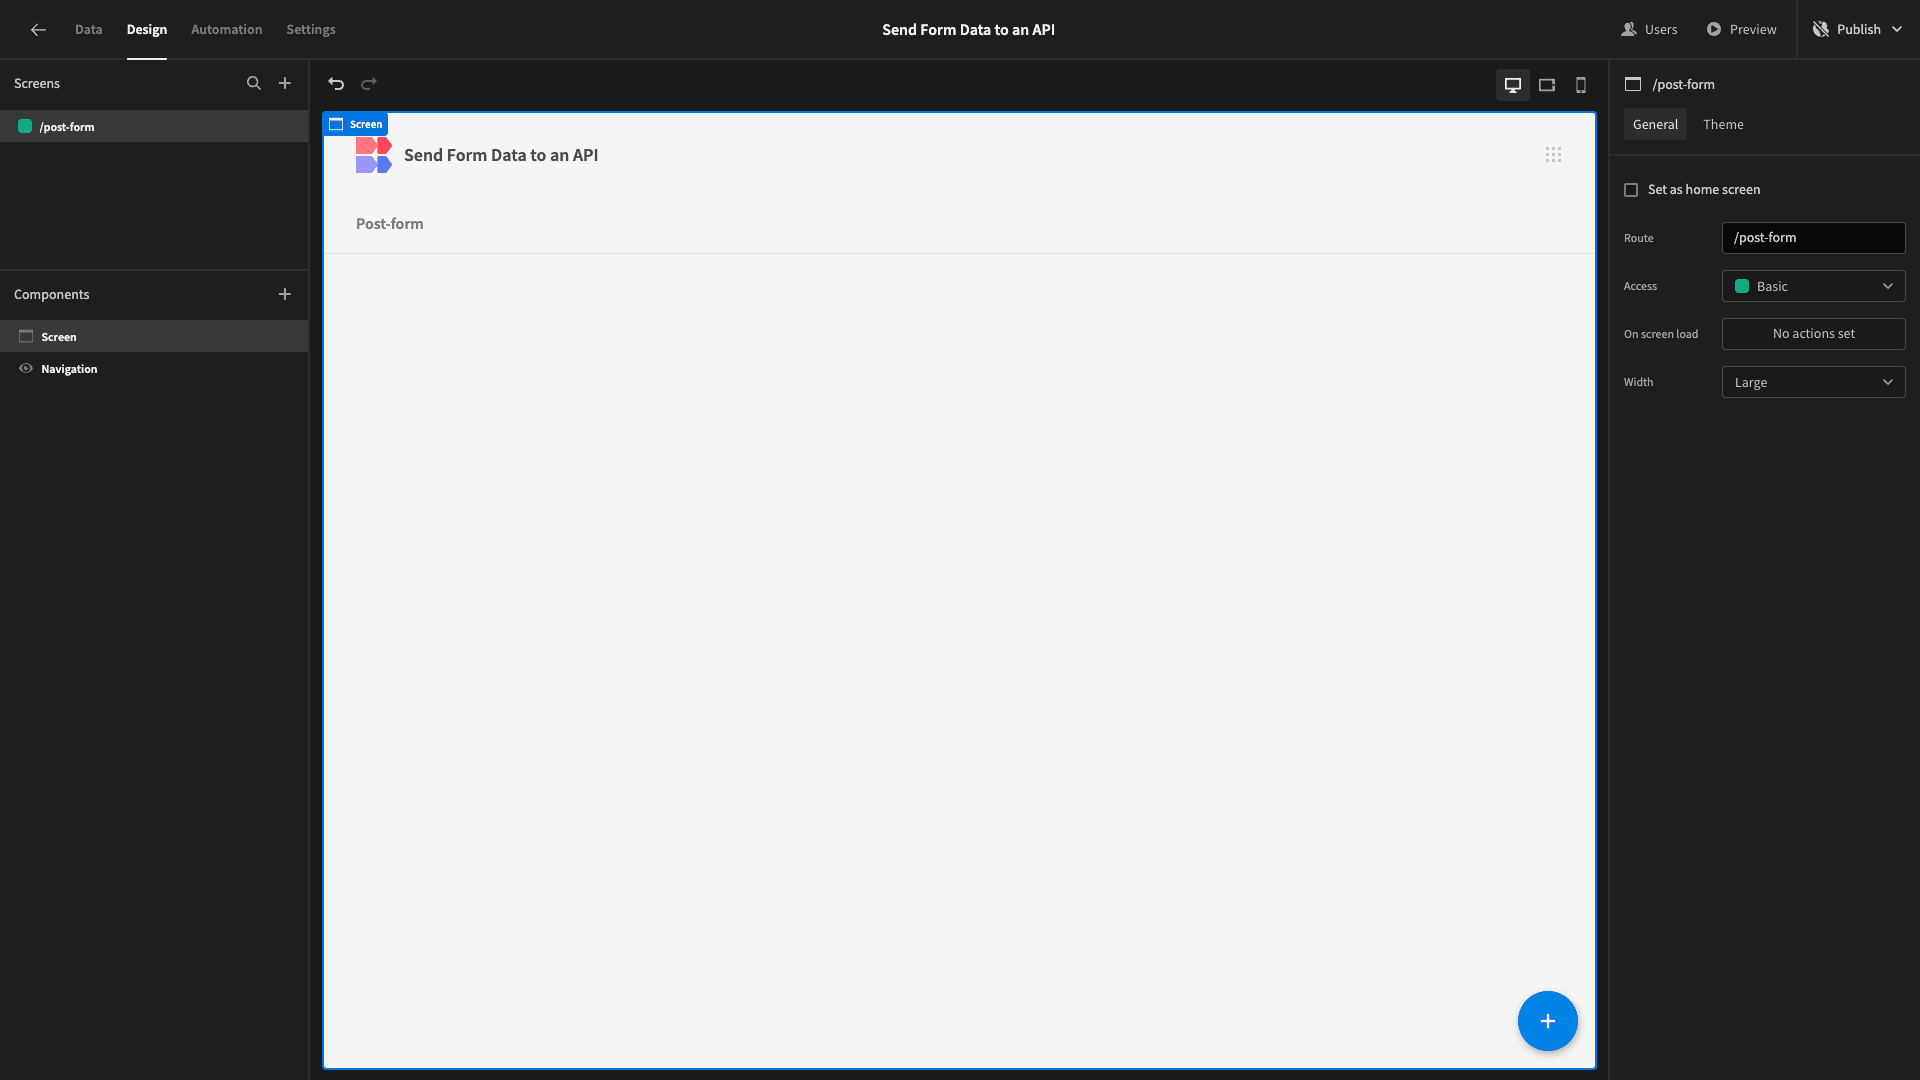
The first thing we’ll add is a container, with its horizontal alignment set to the center.
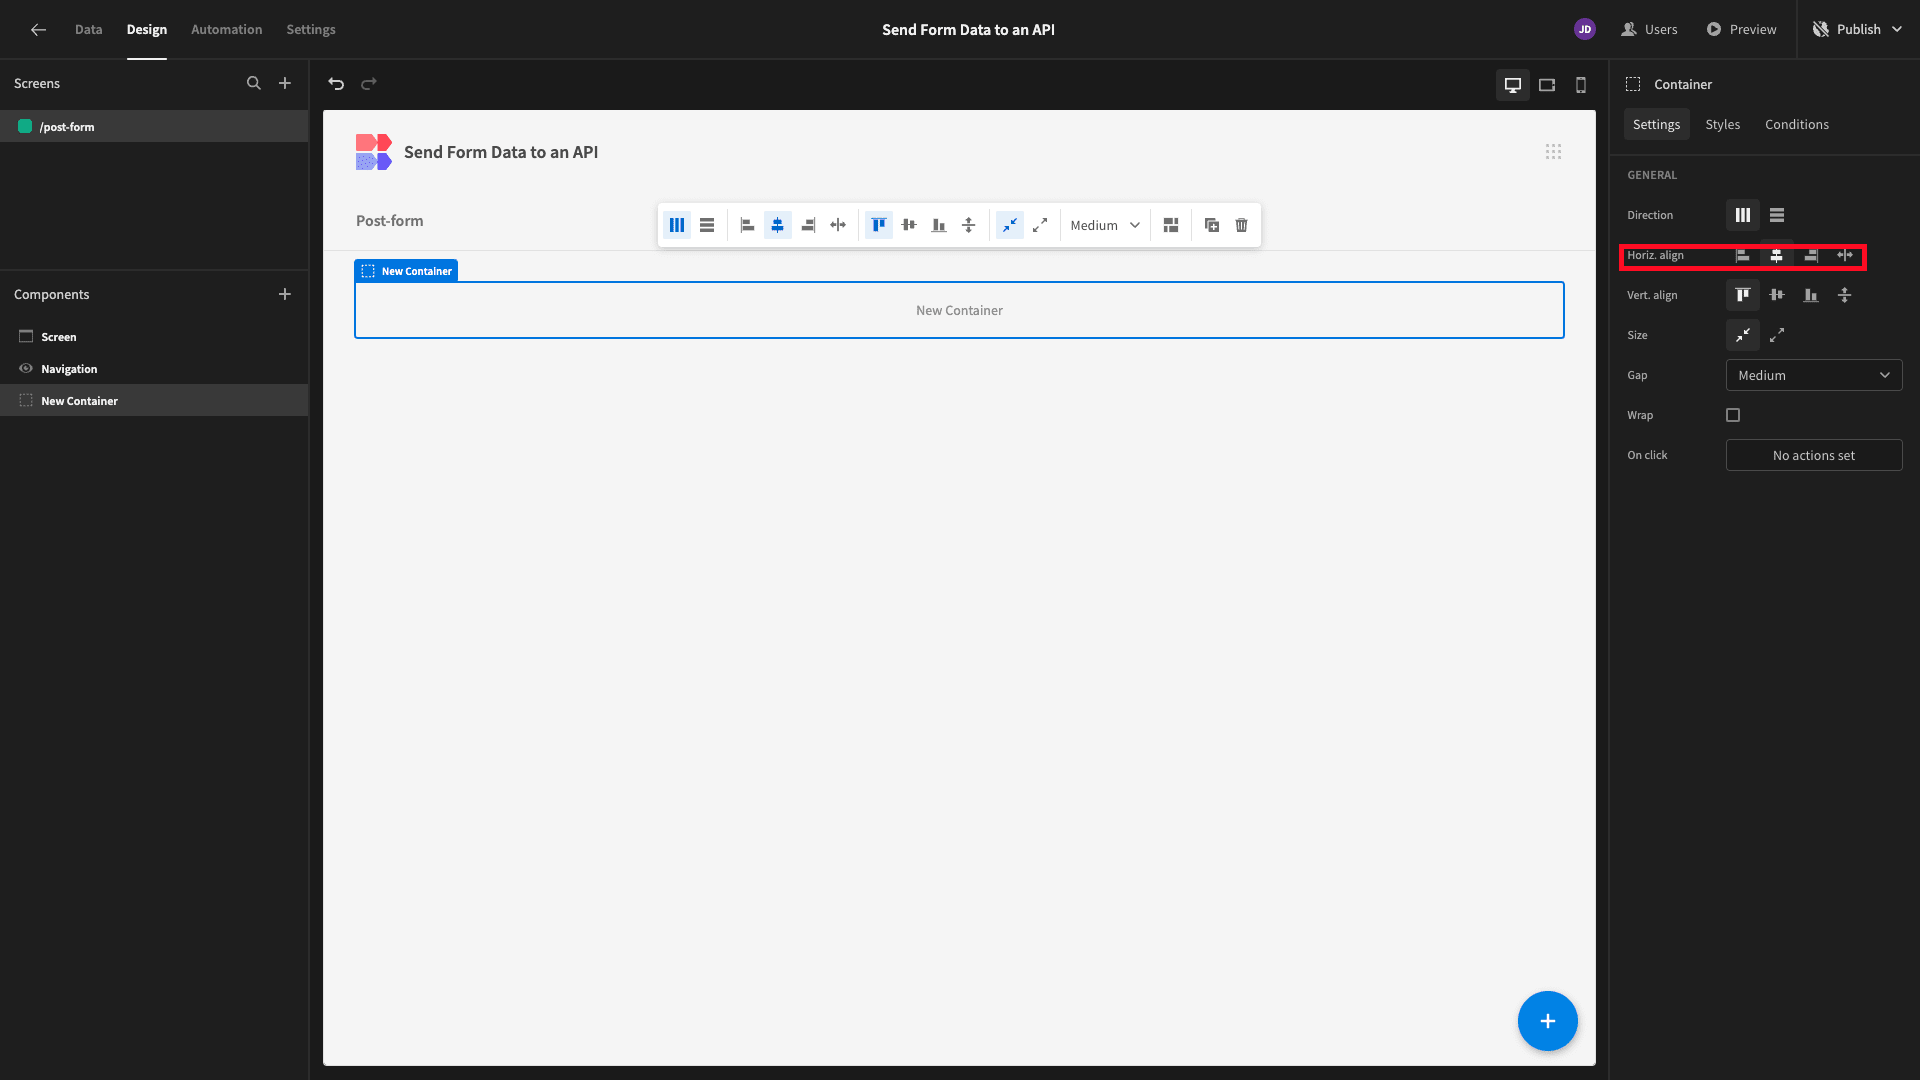
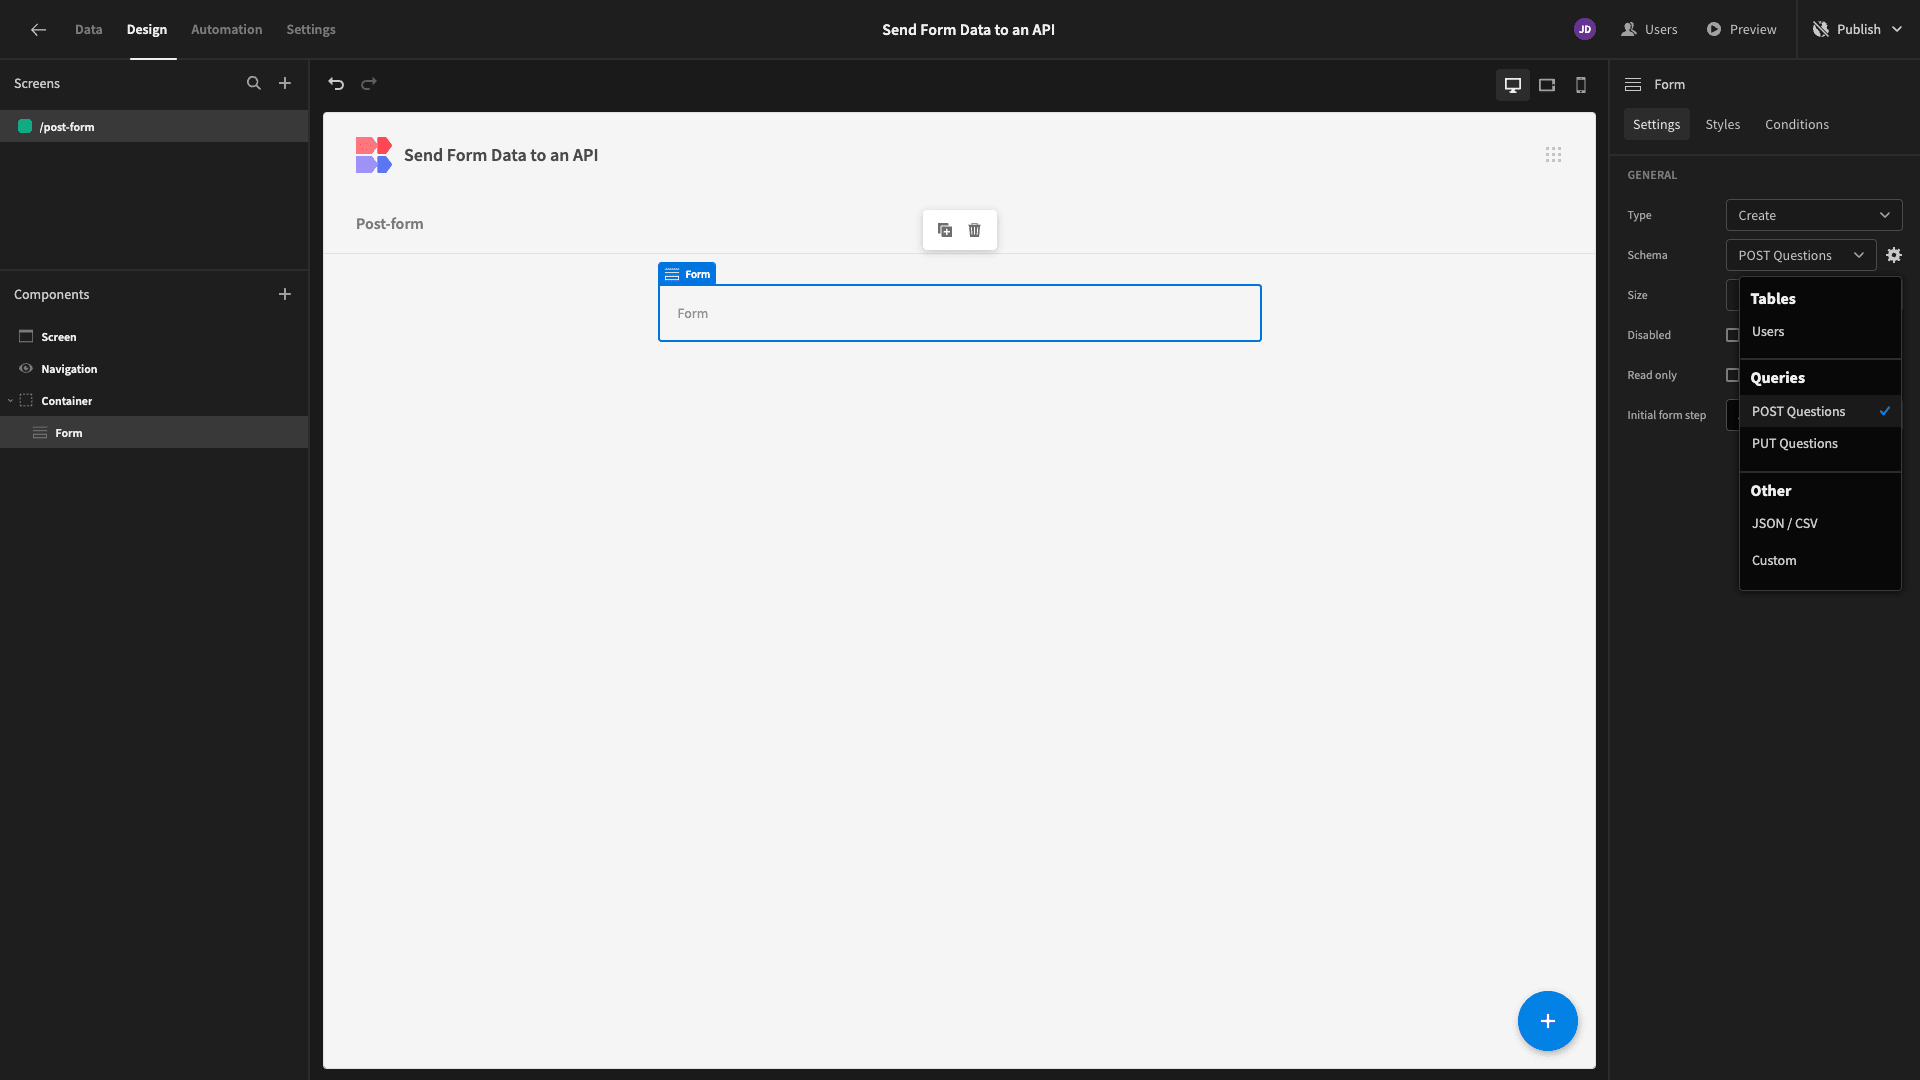
Inside this, we’ll nest a Form component and set its width to 600px.
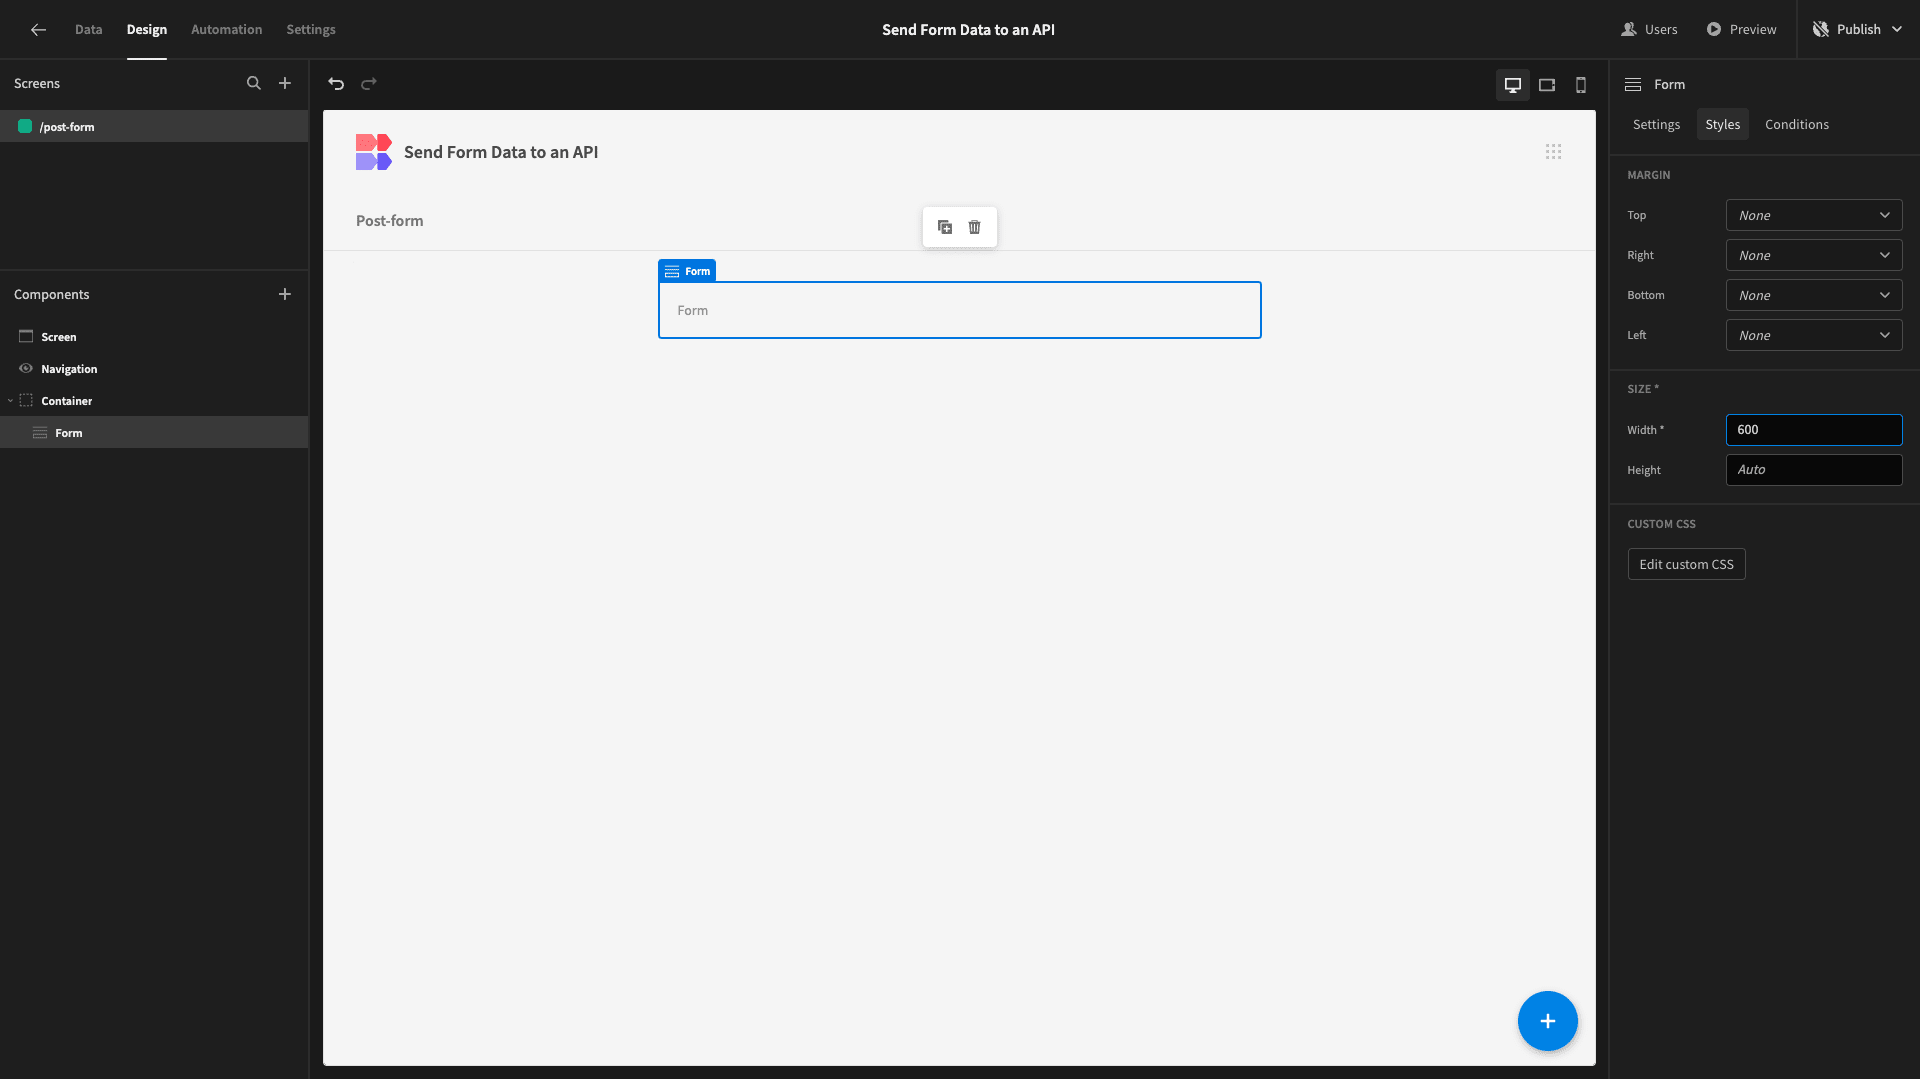
We’ll then set its schema to our POST request.
Inside our Form, we’re going to place a container with its direction set to horizontal.

Inside this, we’ll place a Headline and a Button.
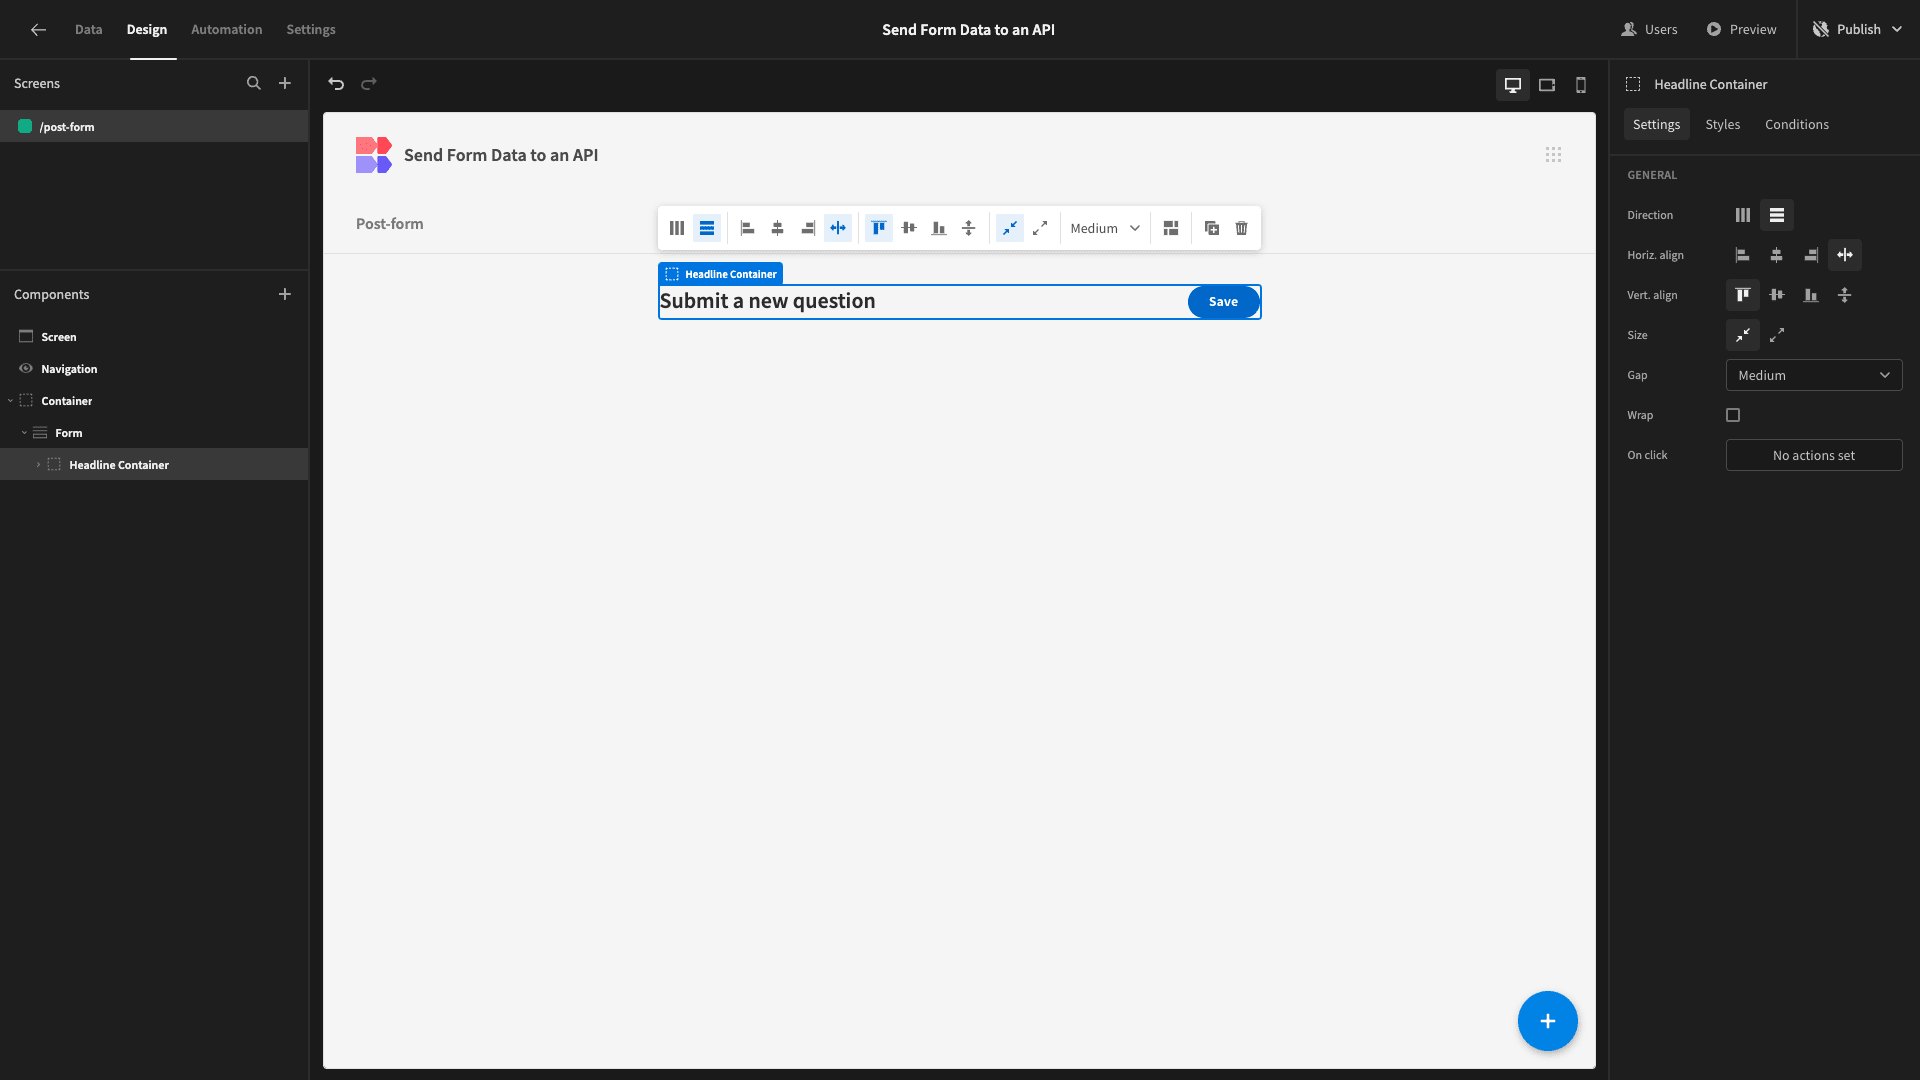
We’ll define what our button does in a minute. For now, we’ve simply set its Text attribute to Save.
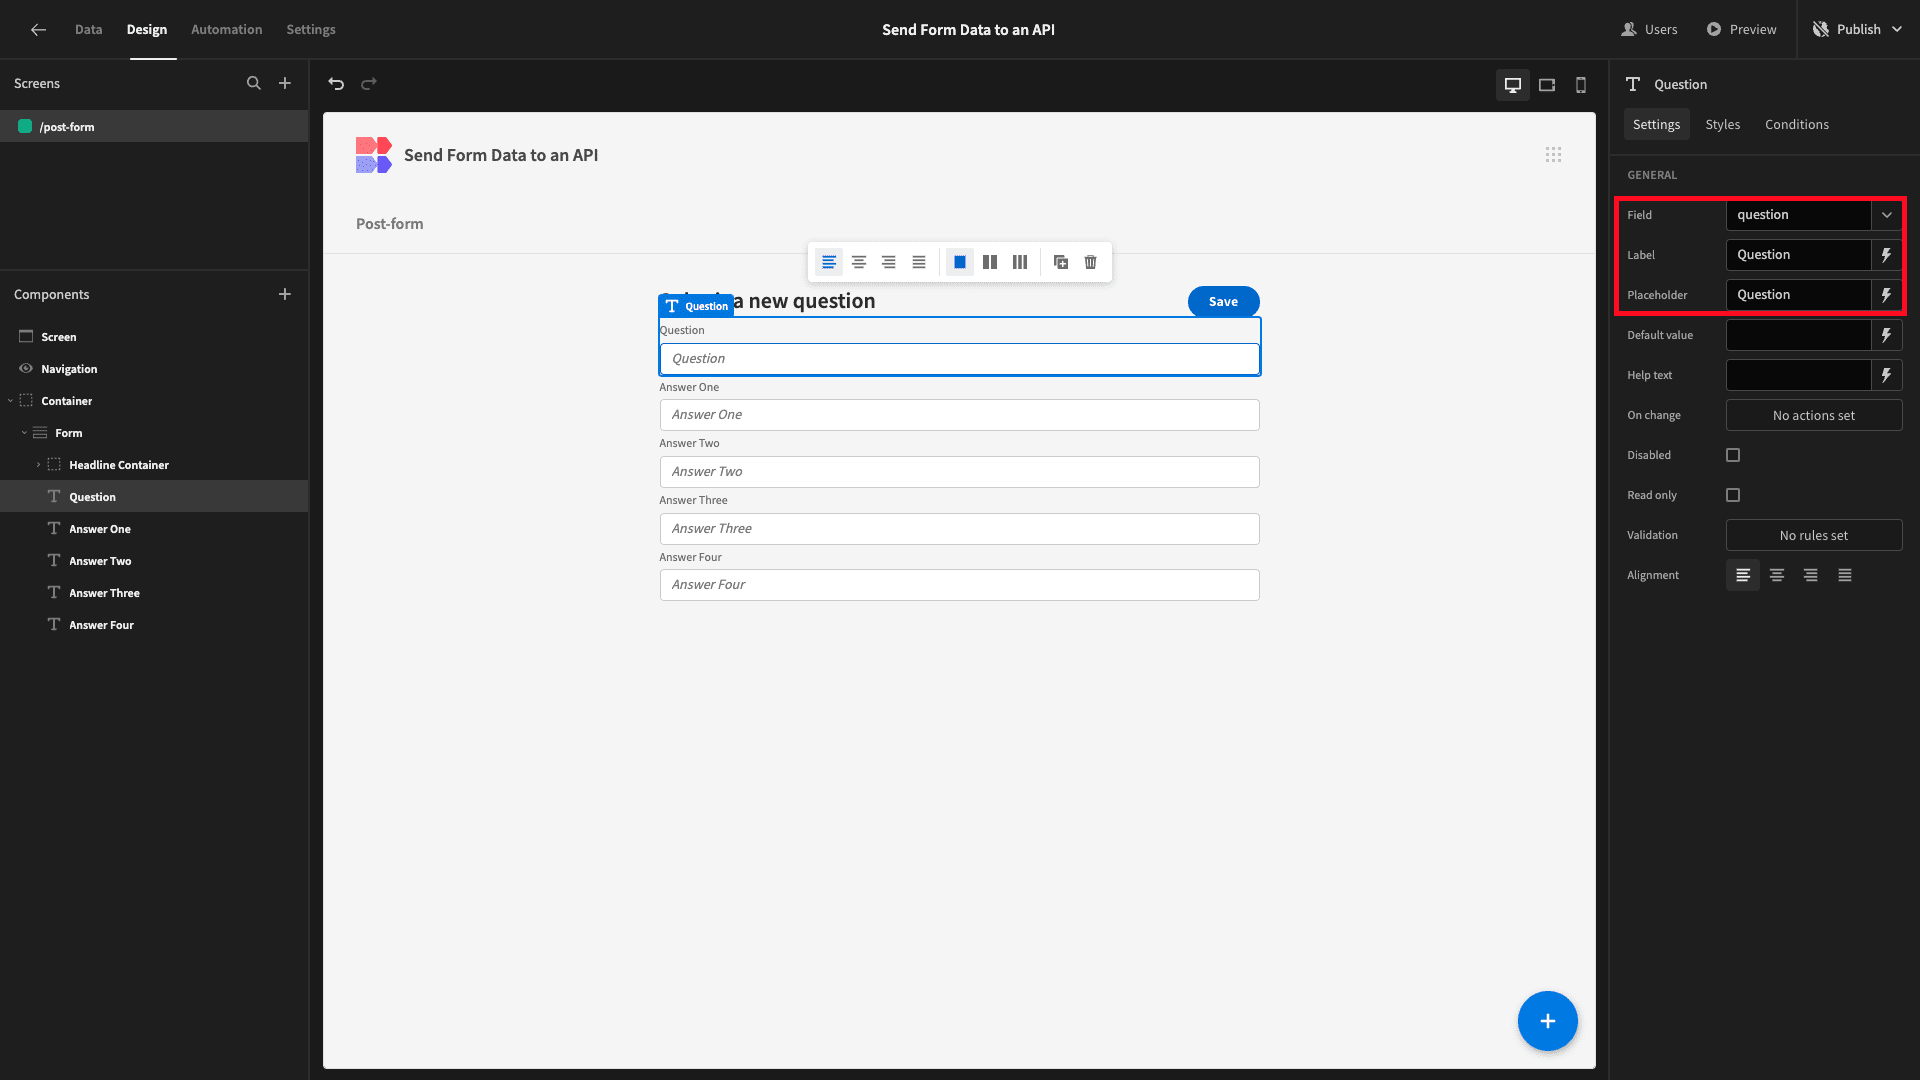
Remember, our schema for this request consists of a question and four possible answers. So, we’ll next add four text fields beneath our container.

Since we set the schema of our form to our API earlier, these are already configured to the right fields.
We just need to tidy up their display texts using the Label and Placeholder fields for each - for human readability.
We’ll then open the Actions drawer for our button and add an Execute Query action, setting it to our POST request.
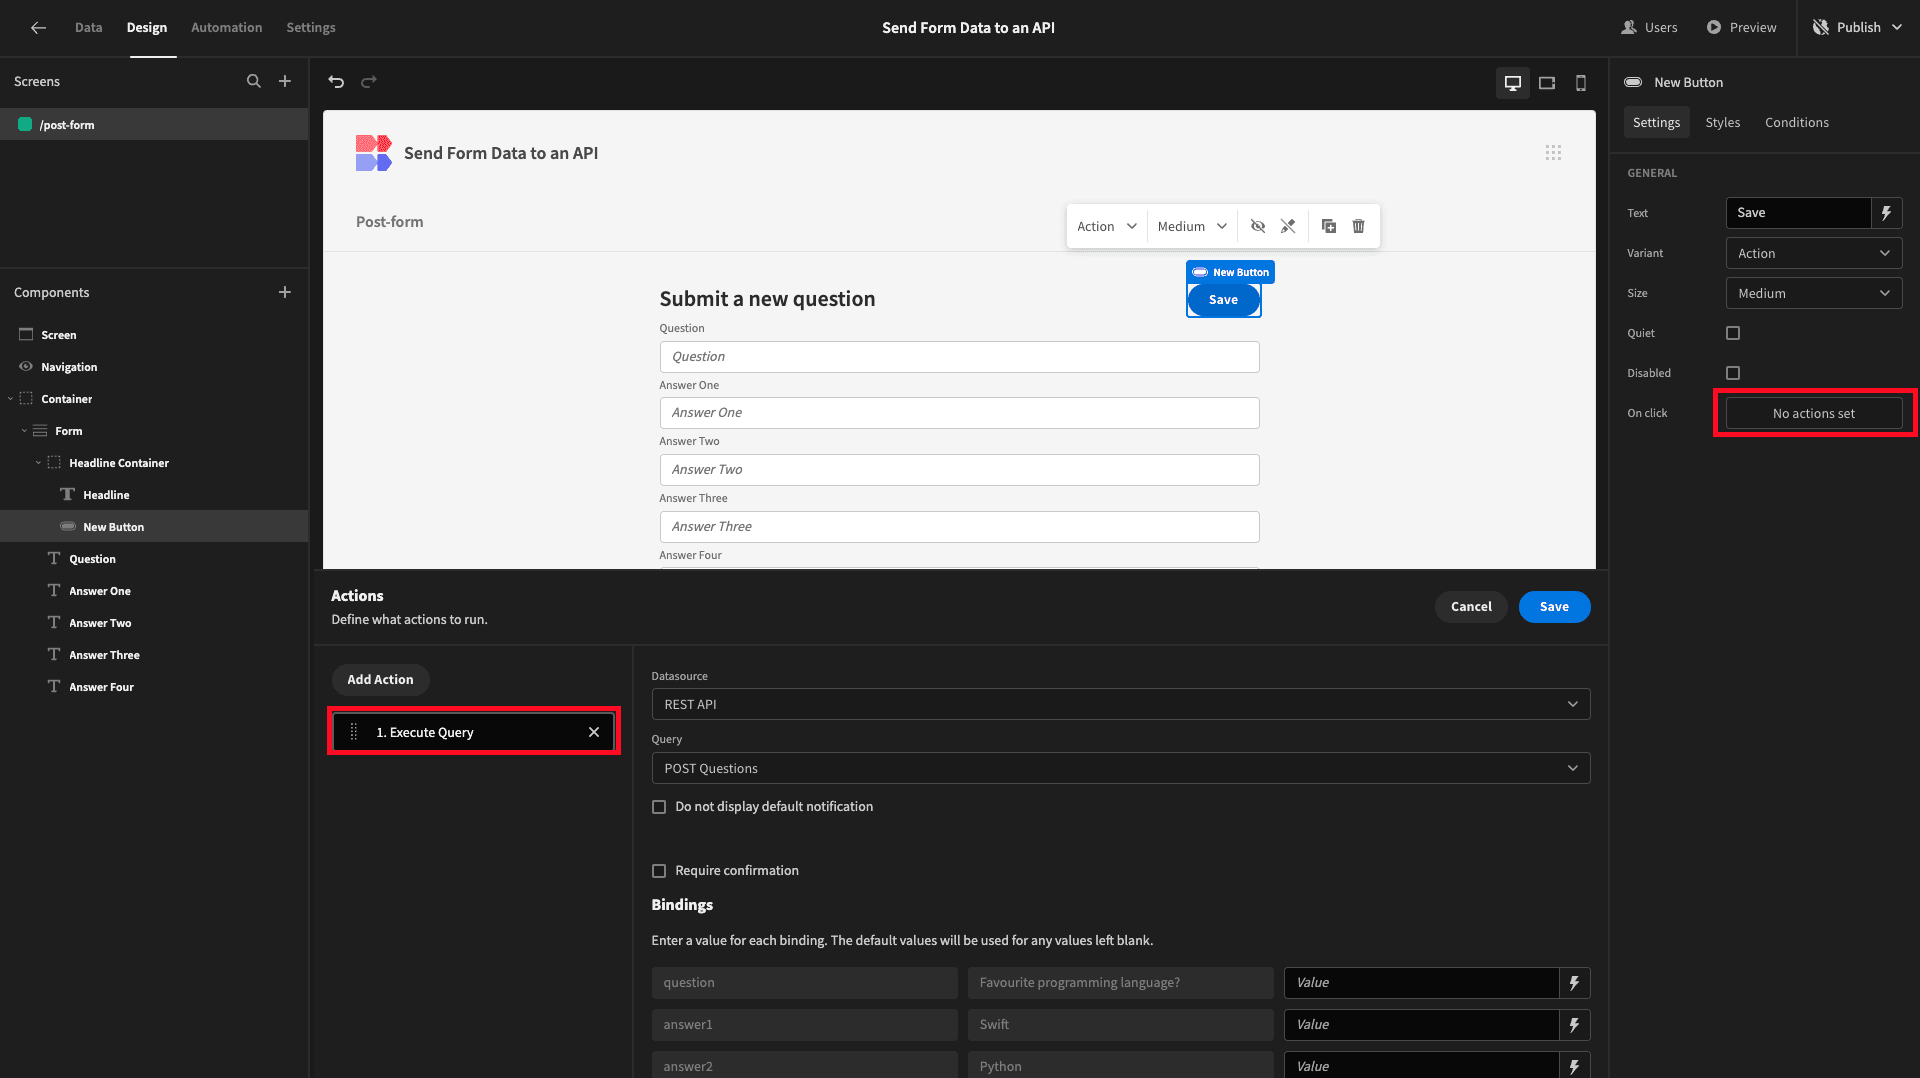
Here, we can use the lightning bolt icon to configure values for each of our bindings.
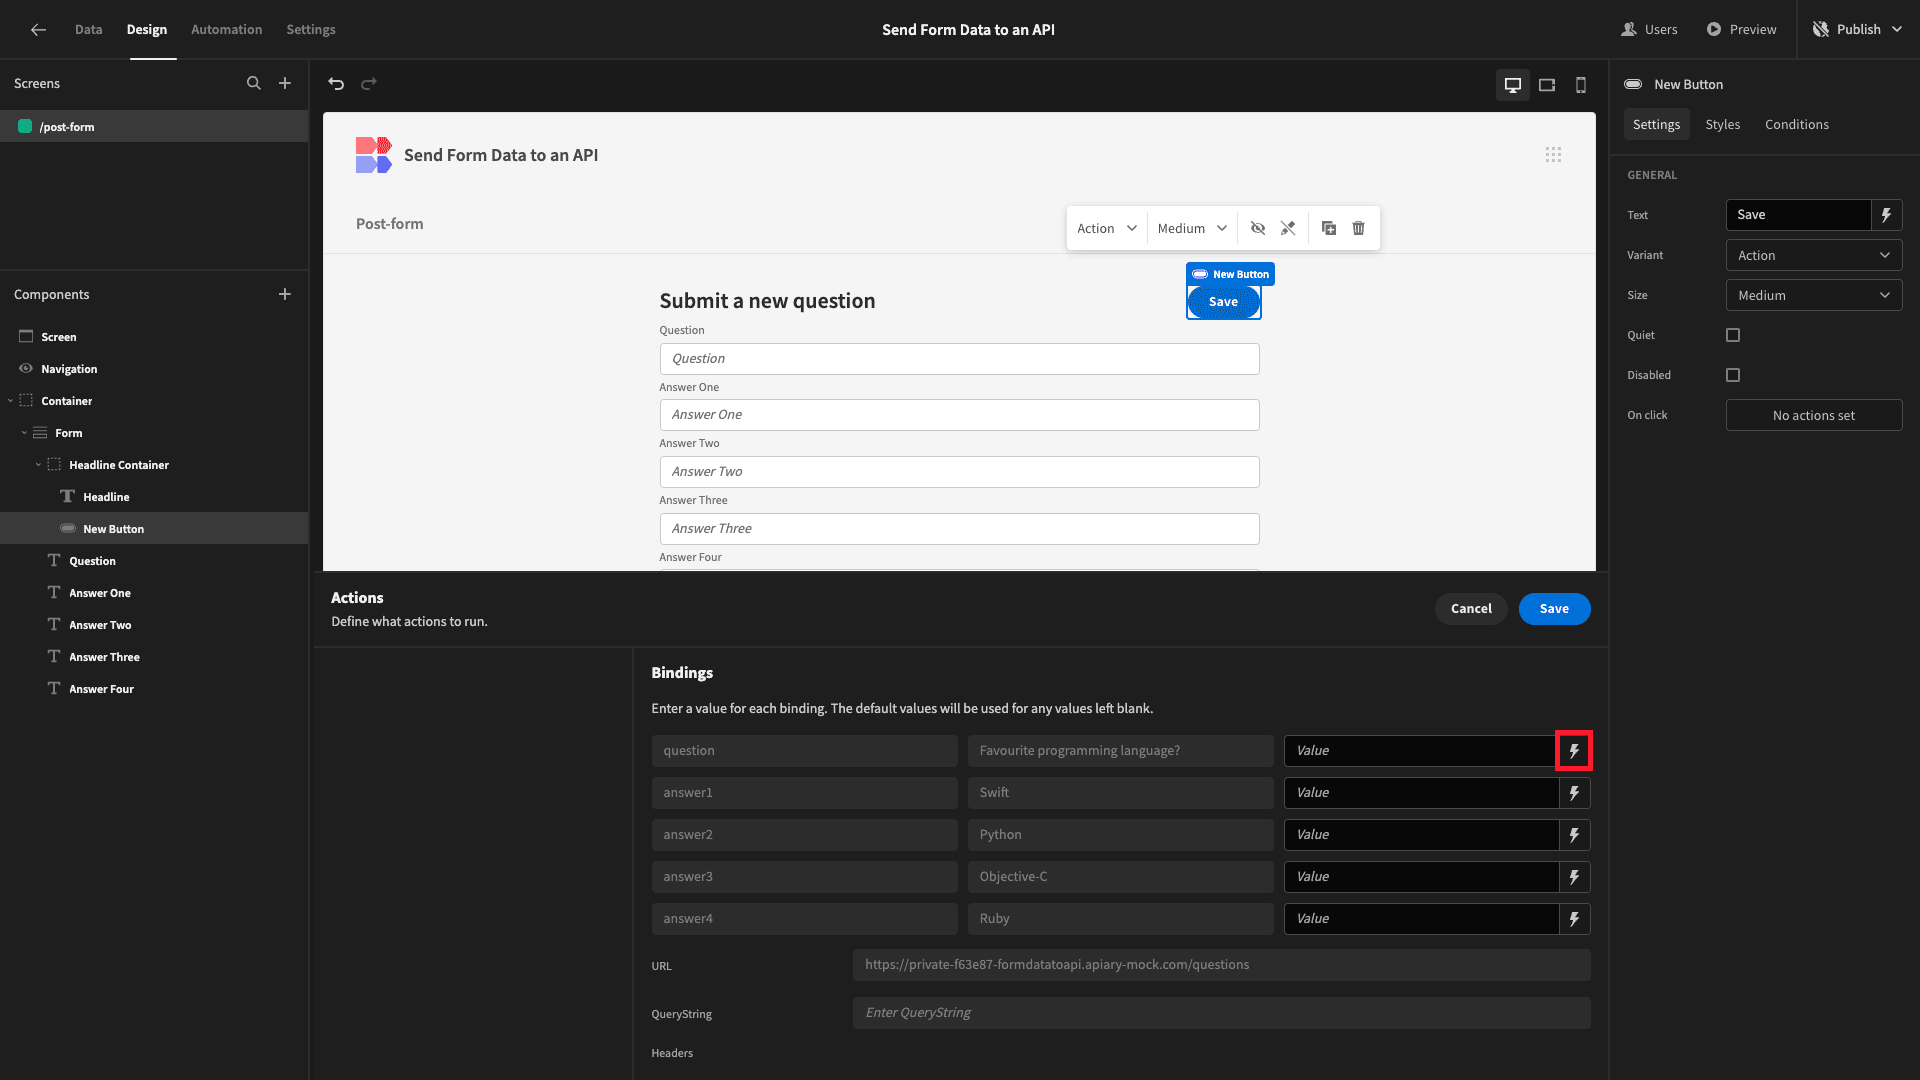
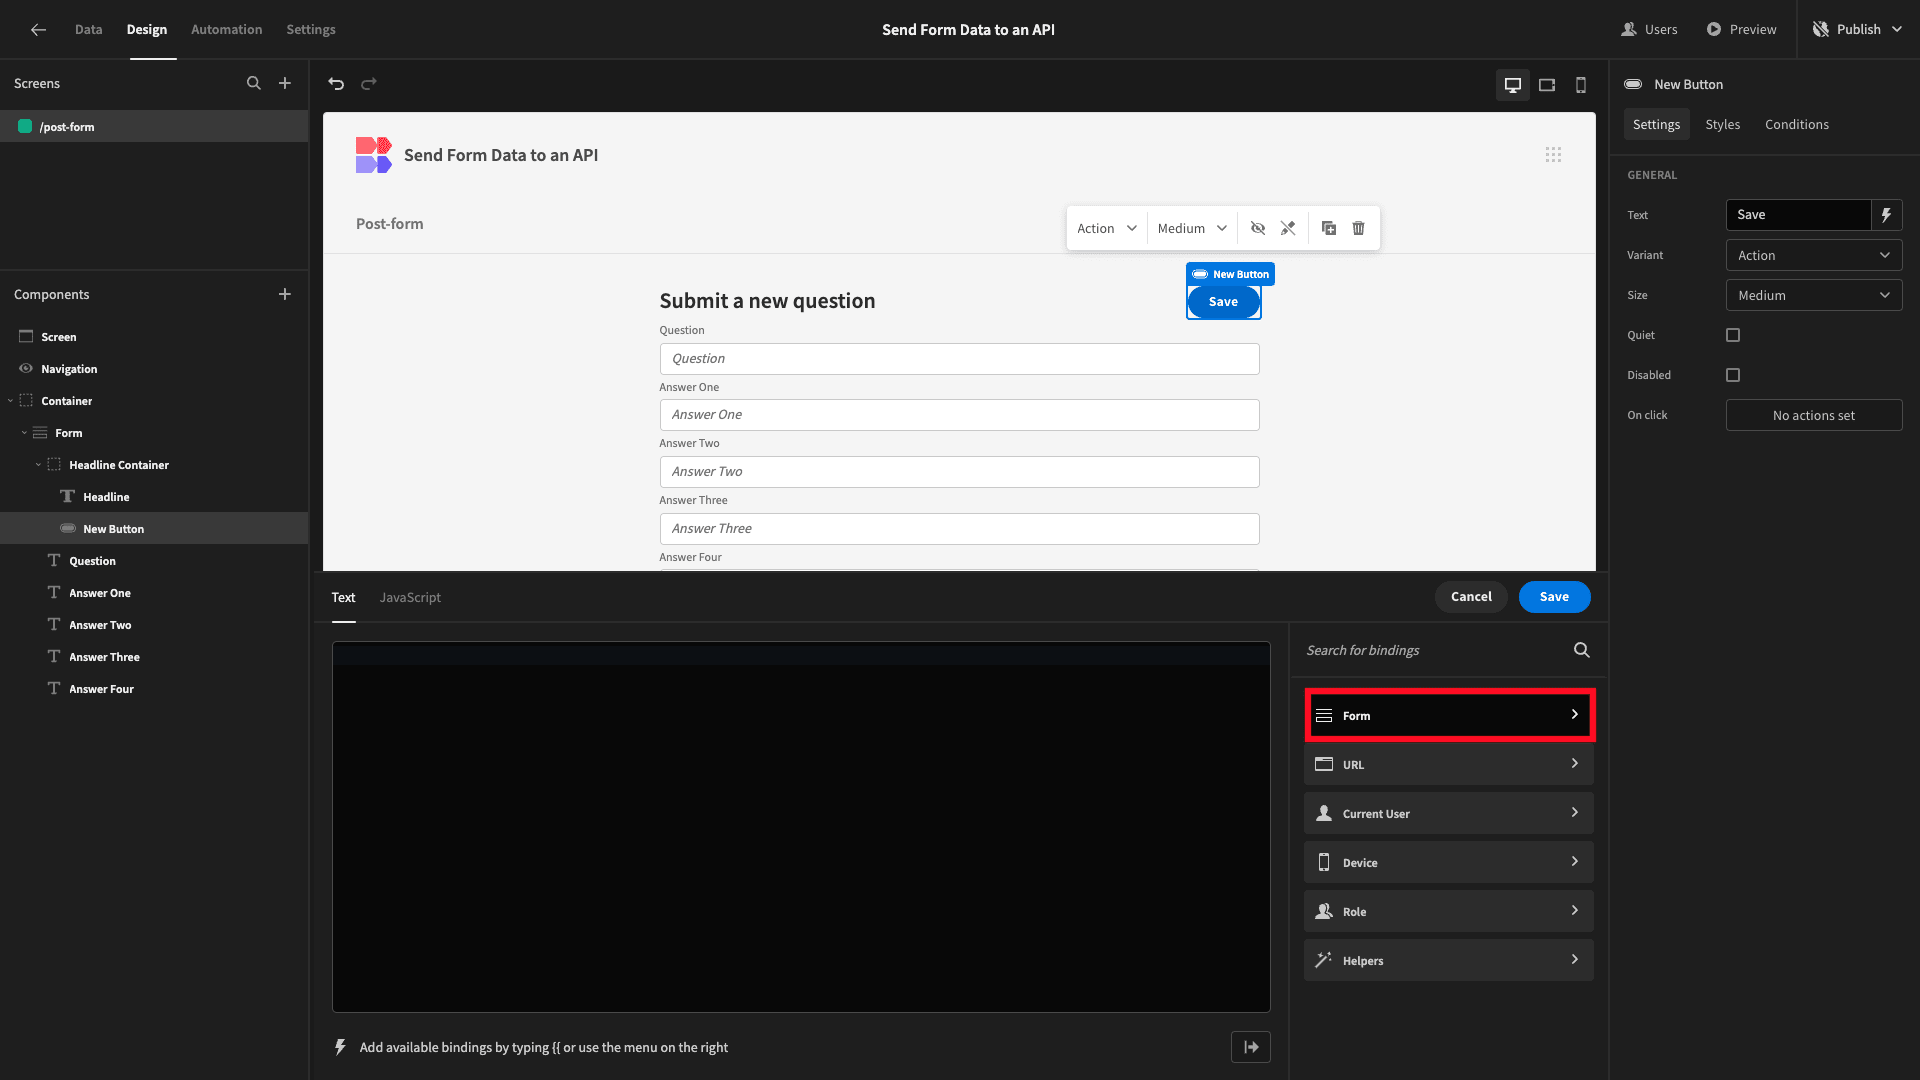
We can choose any value our button is exposed to to use within handlebars or JavaScript expressions.
First, we’ll click Form.
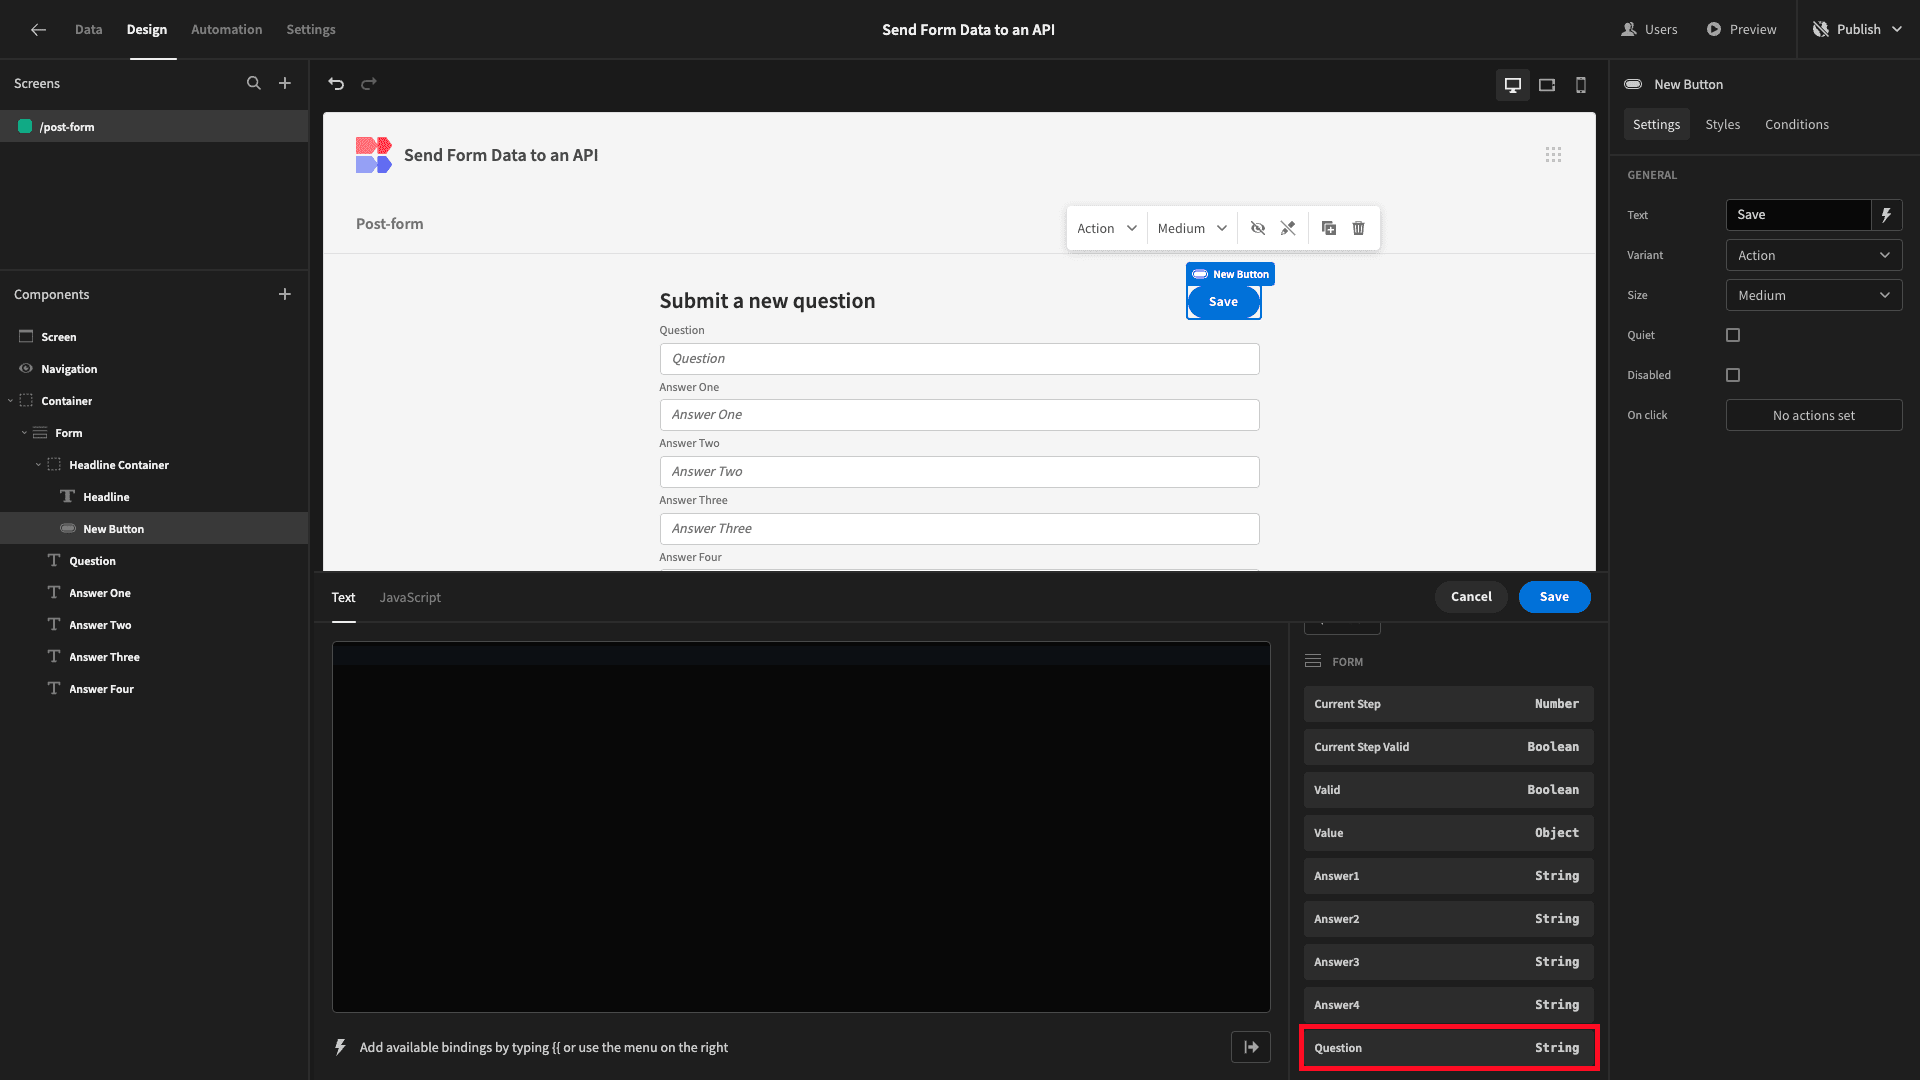
And we’ll choose the relevant form field for each bindable value.
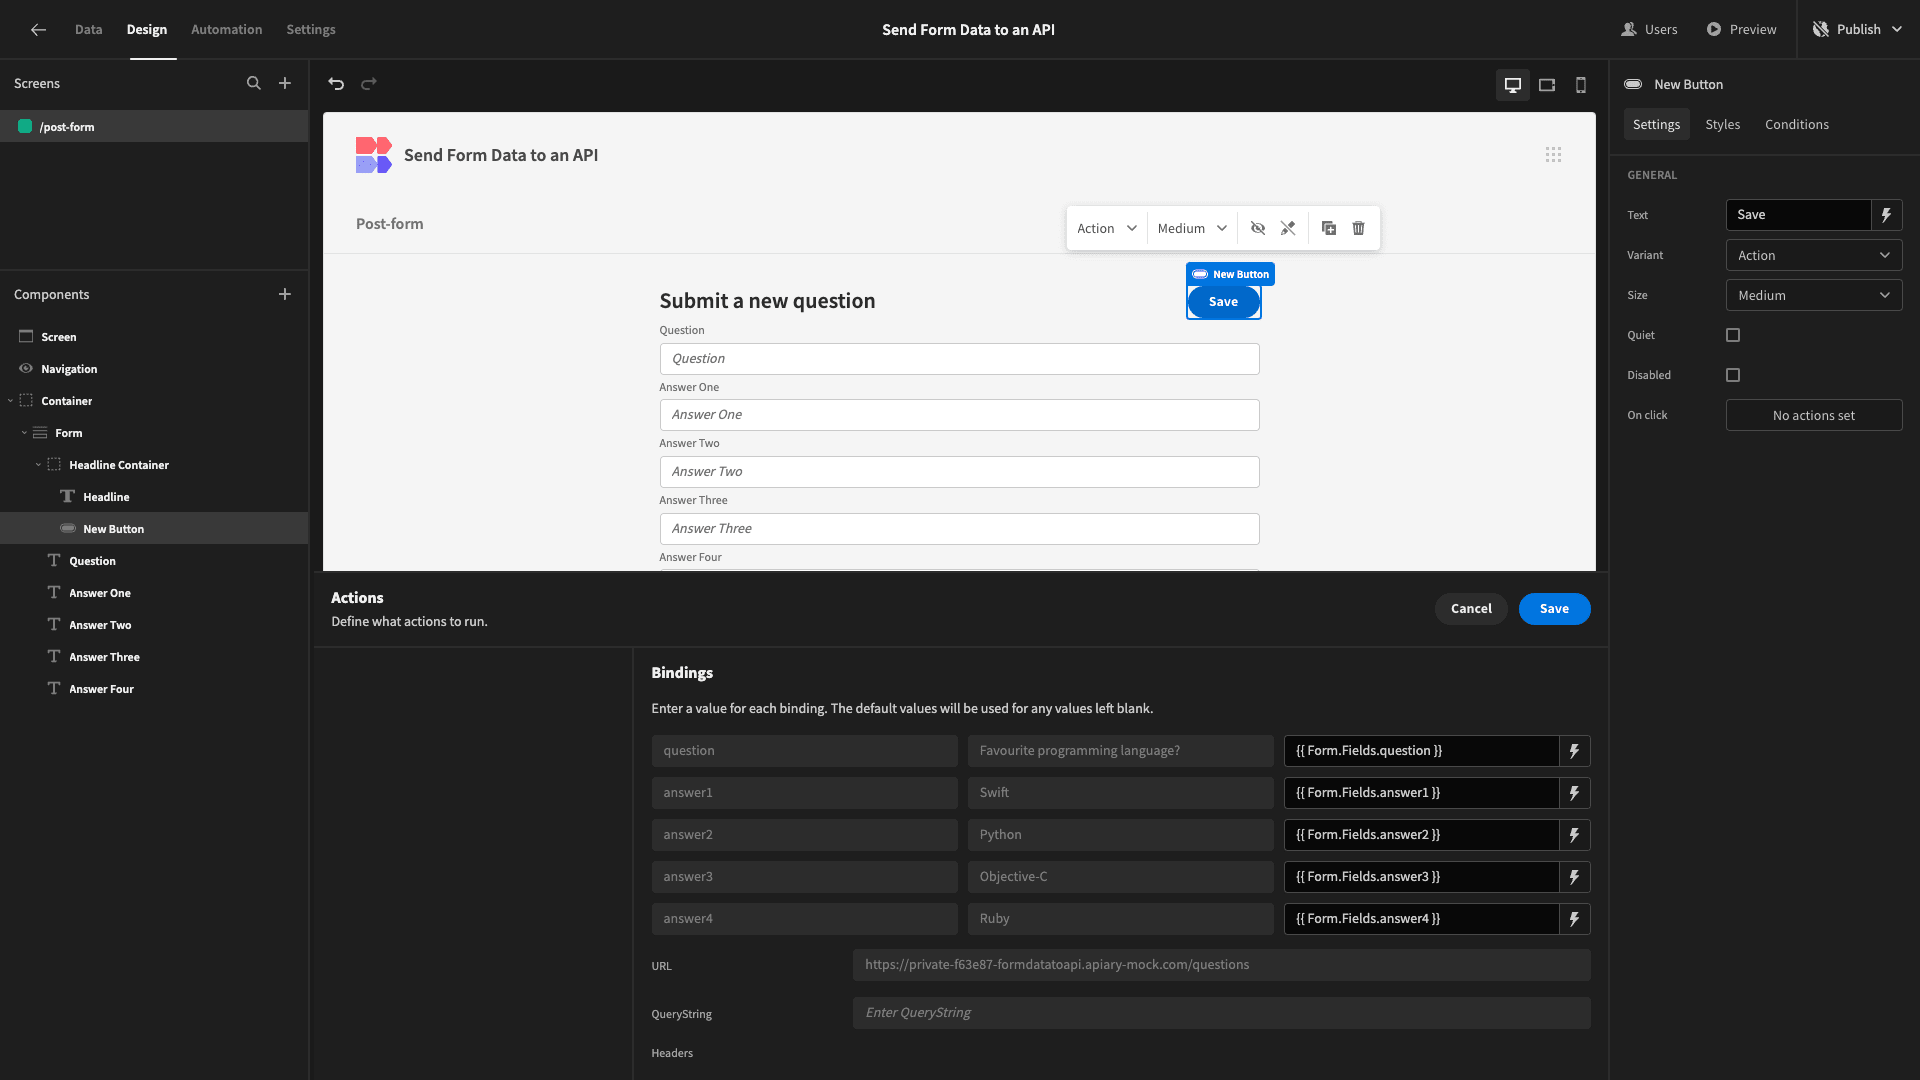
That’s our form completed - but we need to test it to verify that it works.
To do this, we’ll open our app preview and add some new values.
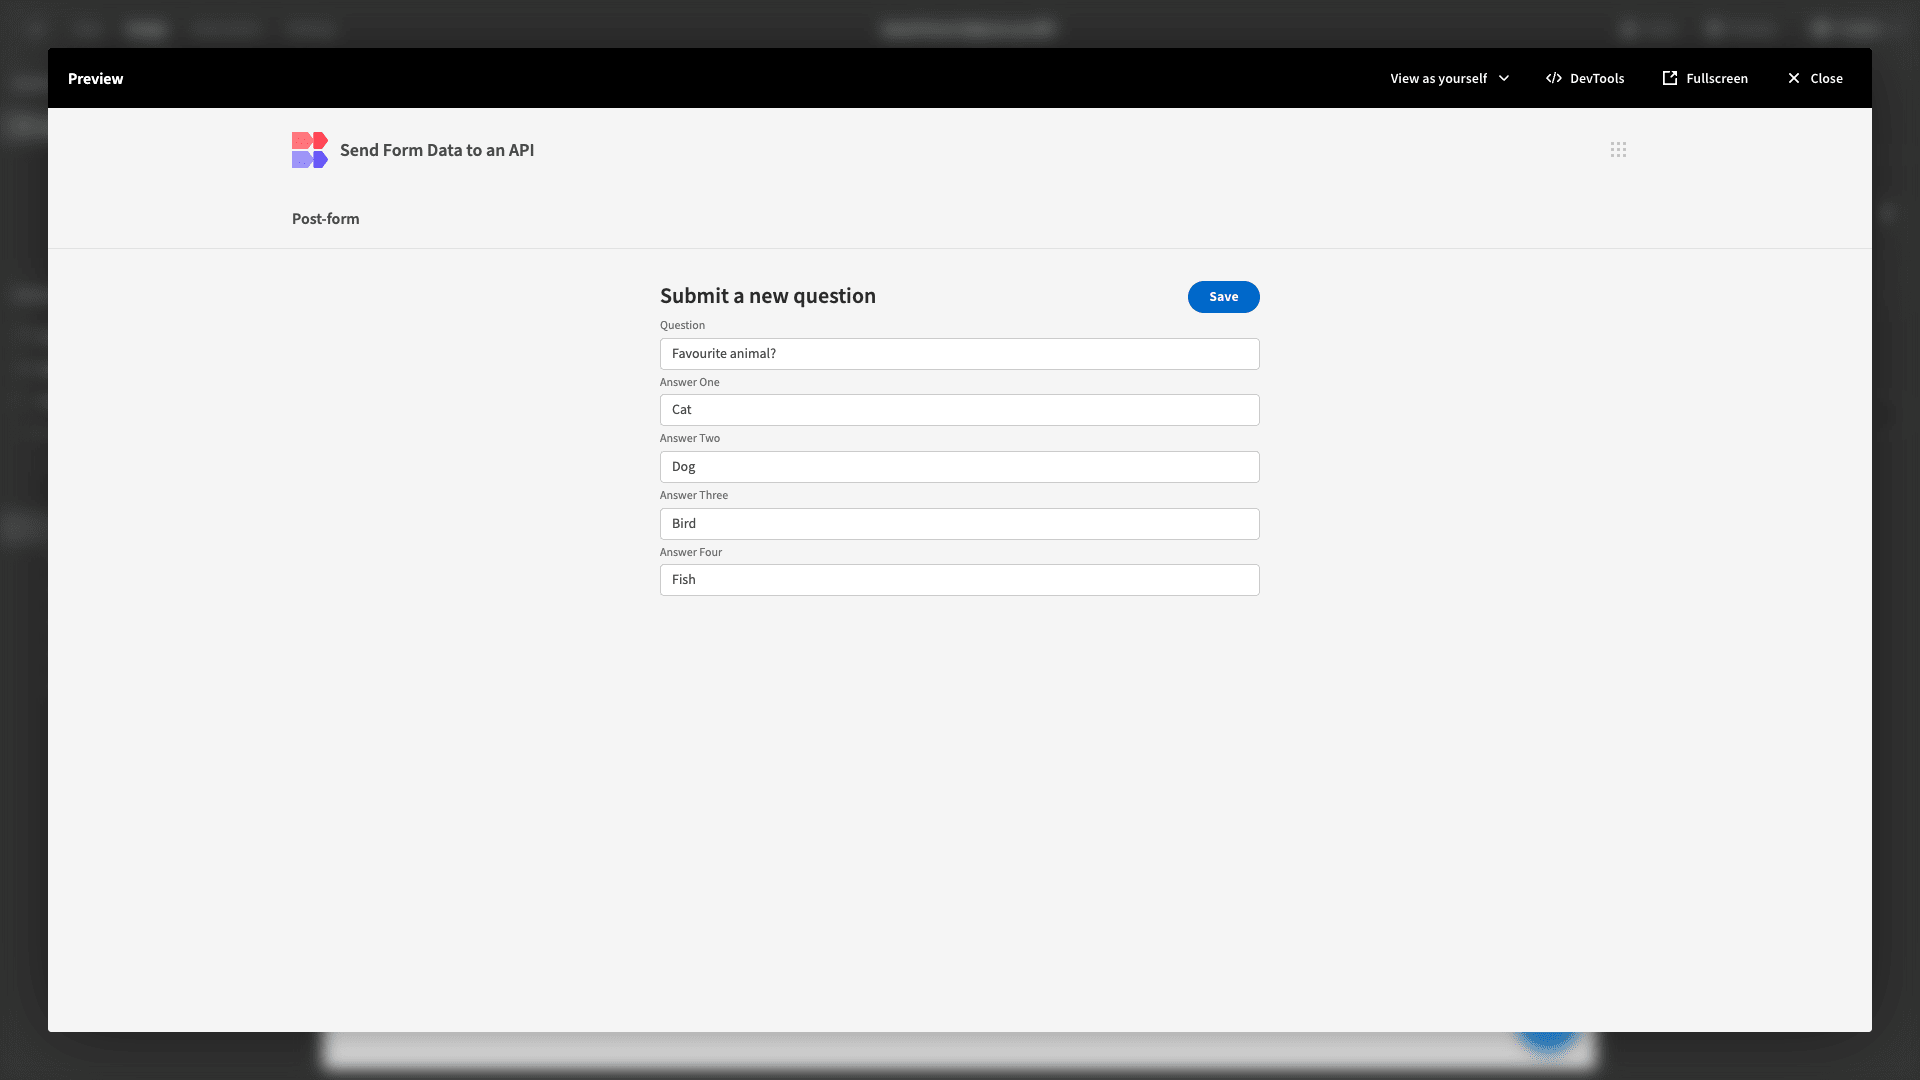
We can then check that this worked in our API server’s admin panel.
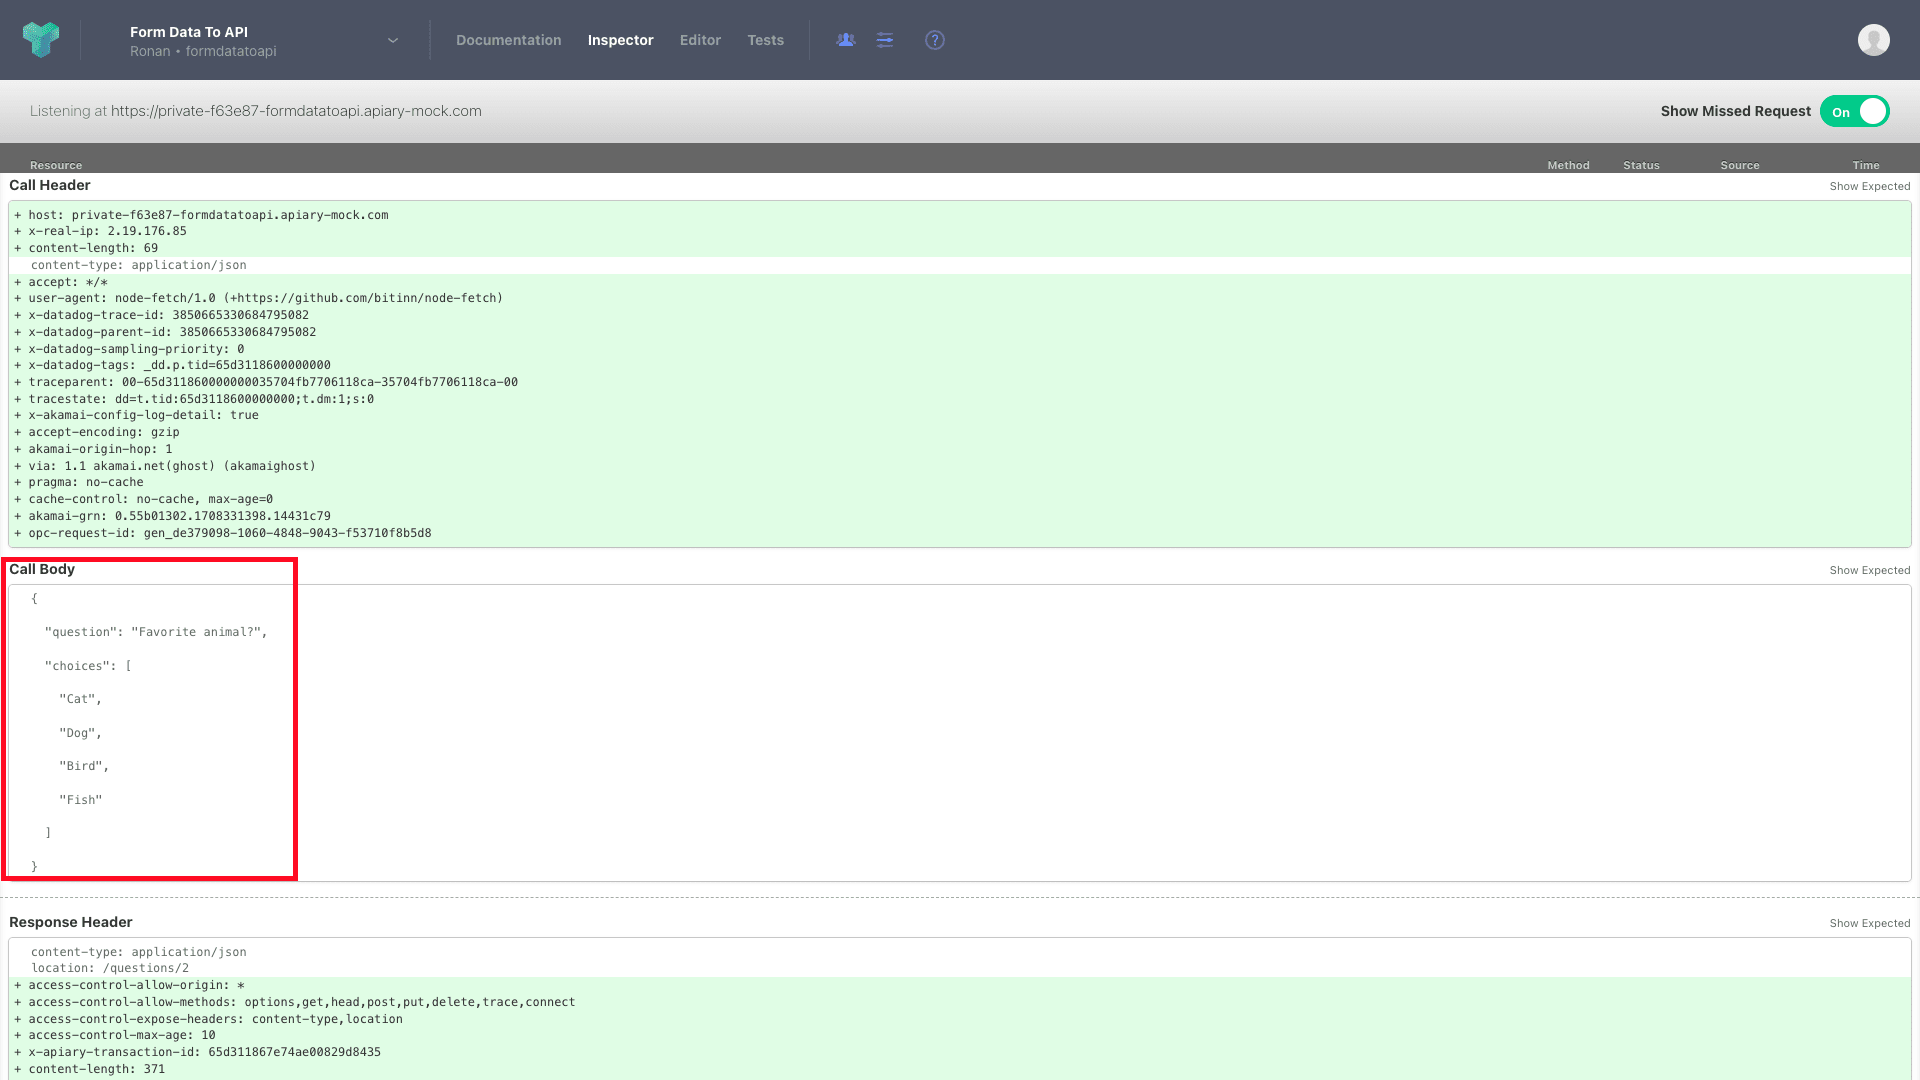
3. Building our PUT request form
The form we’ll use to send data to our other API request is very similar to this first one, so we’ll start by duplicating our existing screen.

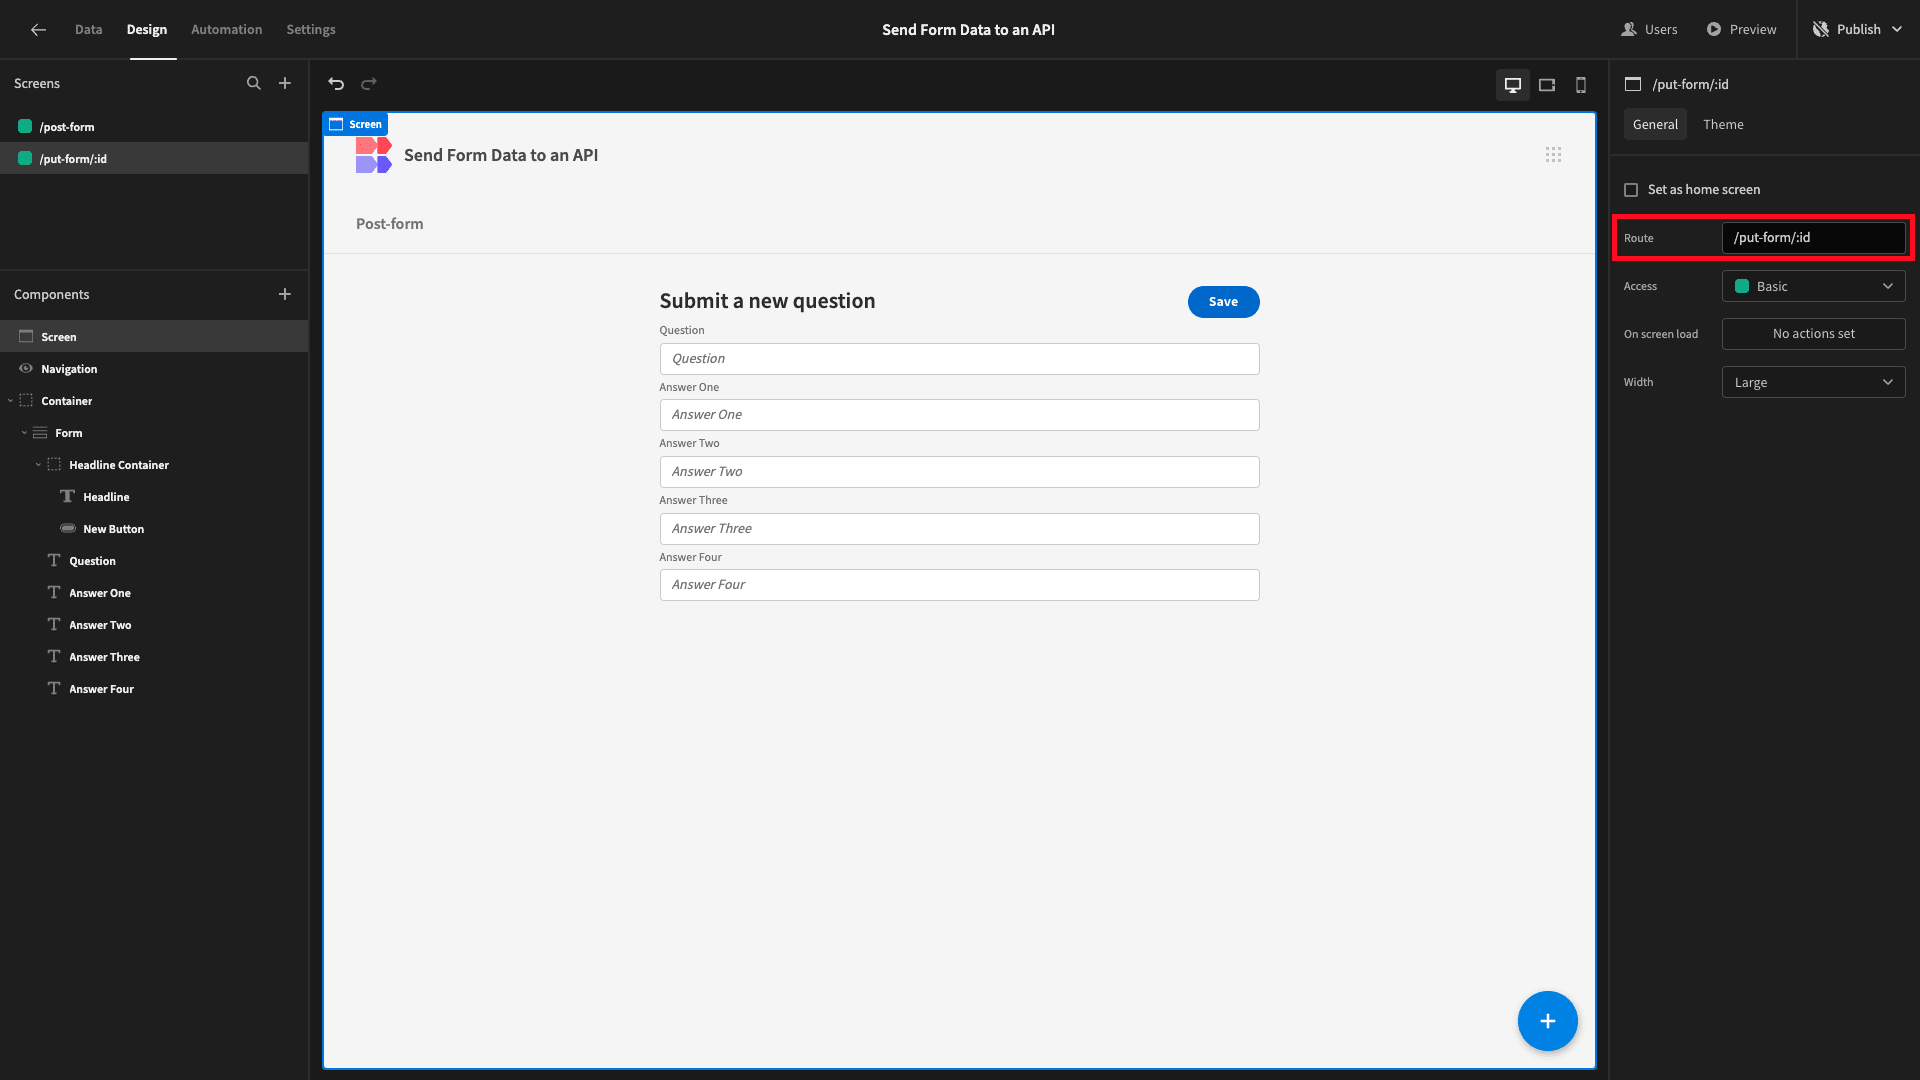
This time, we’ll set the URL path to /put-form/:id. This will allow us to pass an attribute called id to this screen later via its URL.
We’ll start by updating our Form’s Type to Update and its Schema to our PUT request.

Now, we need a way for users to choose which specific entry they want to update. We could allow them to do this manually by specifying an ID. However, this isn’t a great experience, as users will need to know which ID corresponds to each question.
It’s better if we give users a way to choose from a predefined list of options.
To do this, we’ll need a GET request that returns all of our questions.
We’ll head back to the data section and add a third request, choosing GET as our method and inputting our endpoint.

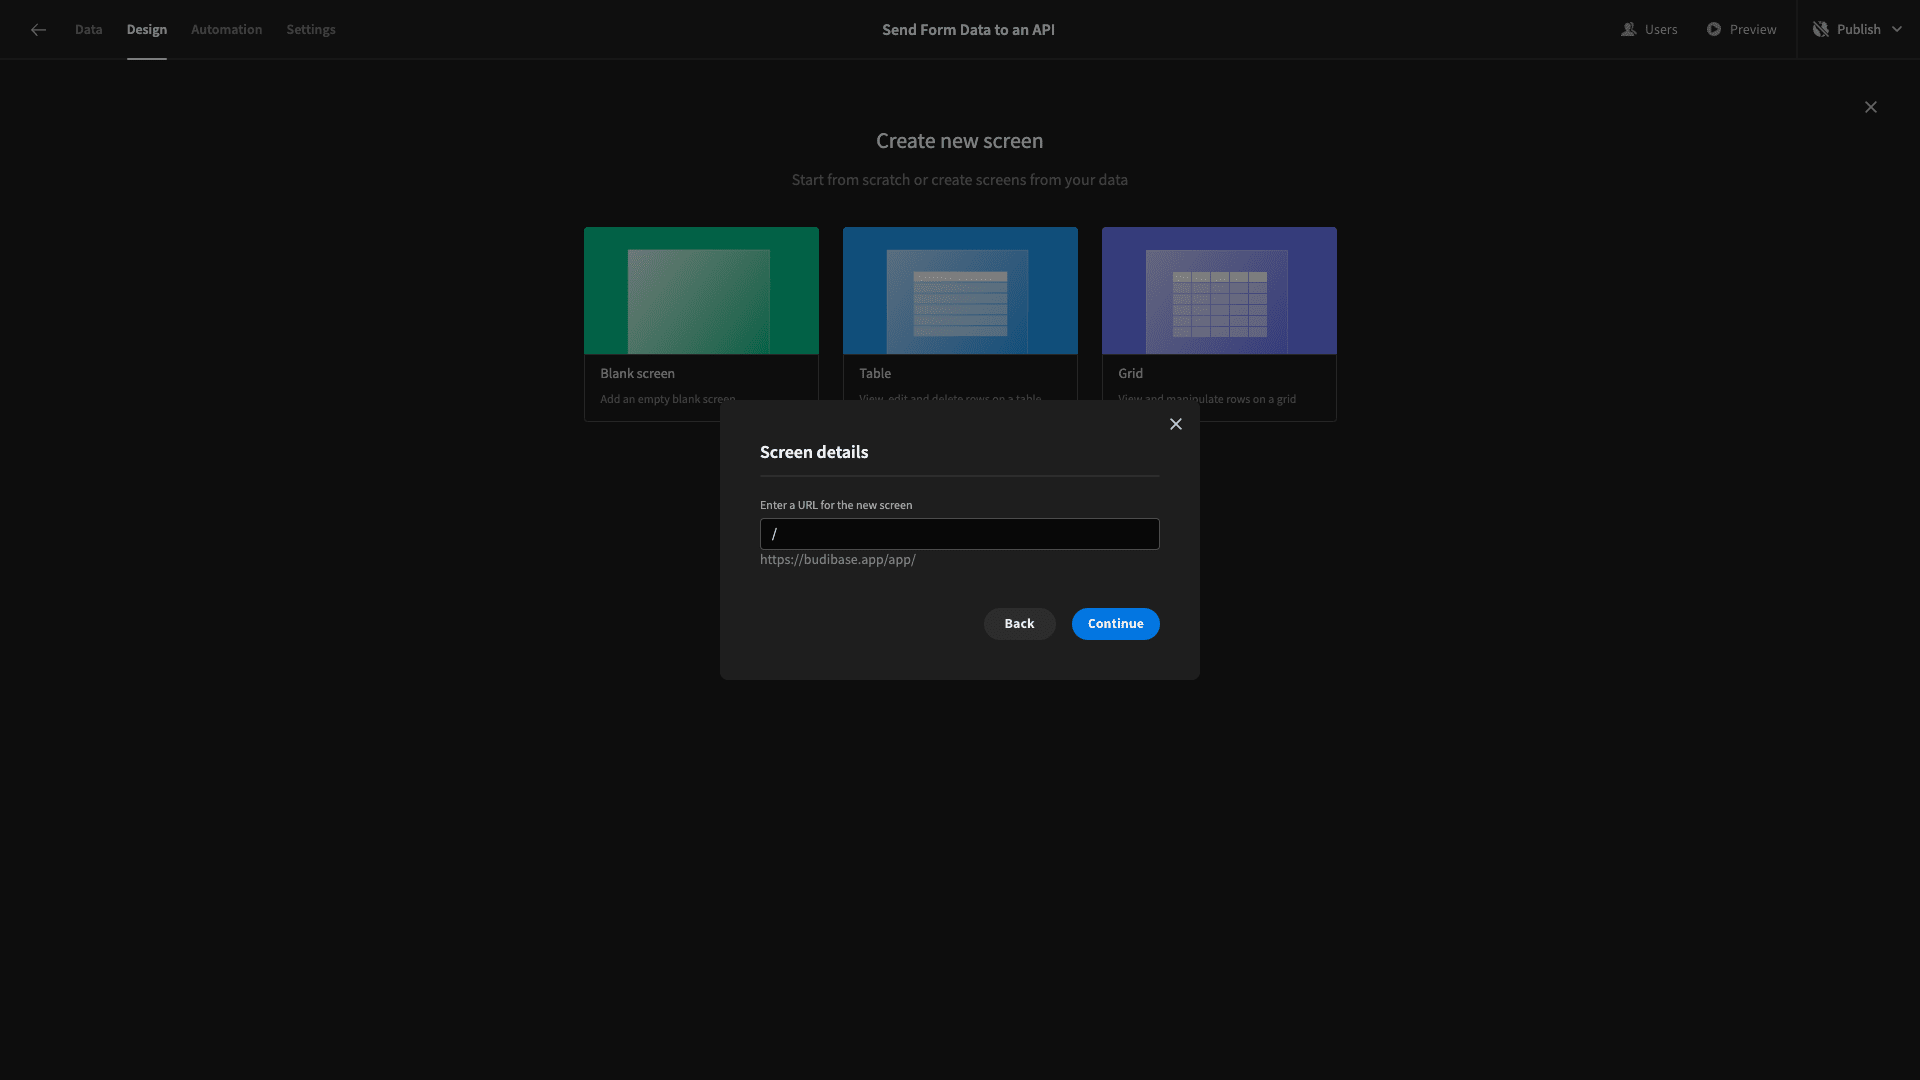
Then, back on the design tab, we’ll add another screen, setting its URL to ‘/’.
On our new blank screen, we’ll add a Table Block. We’ll set the Data option for this to our new request.
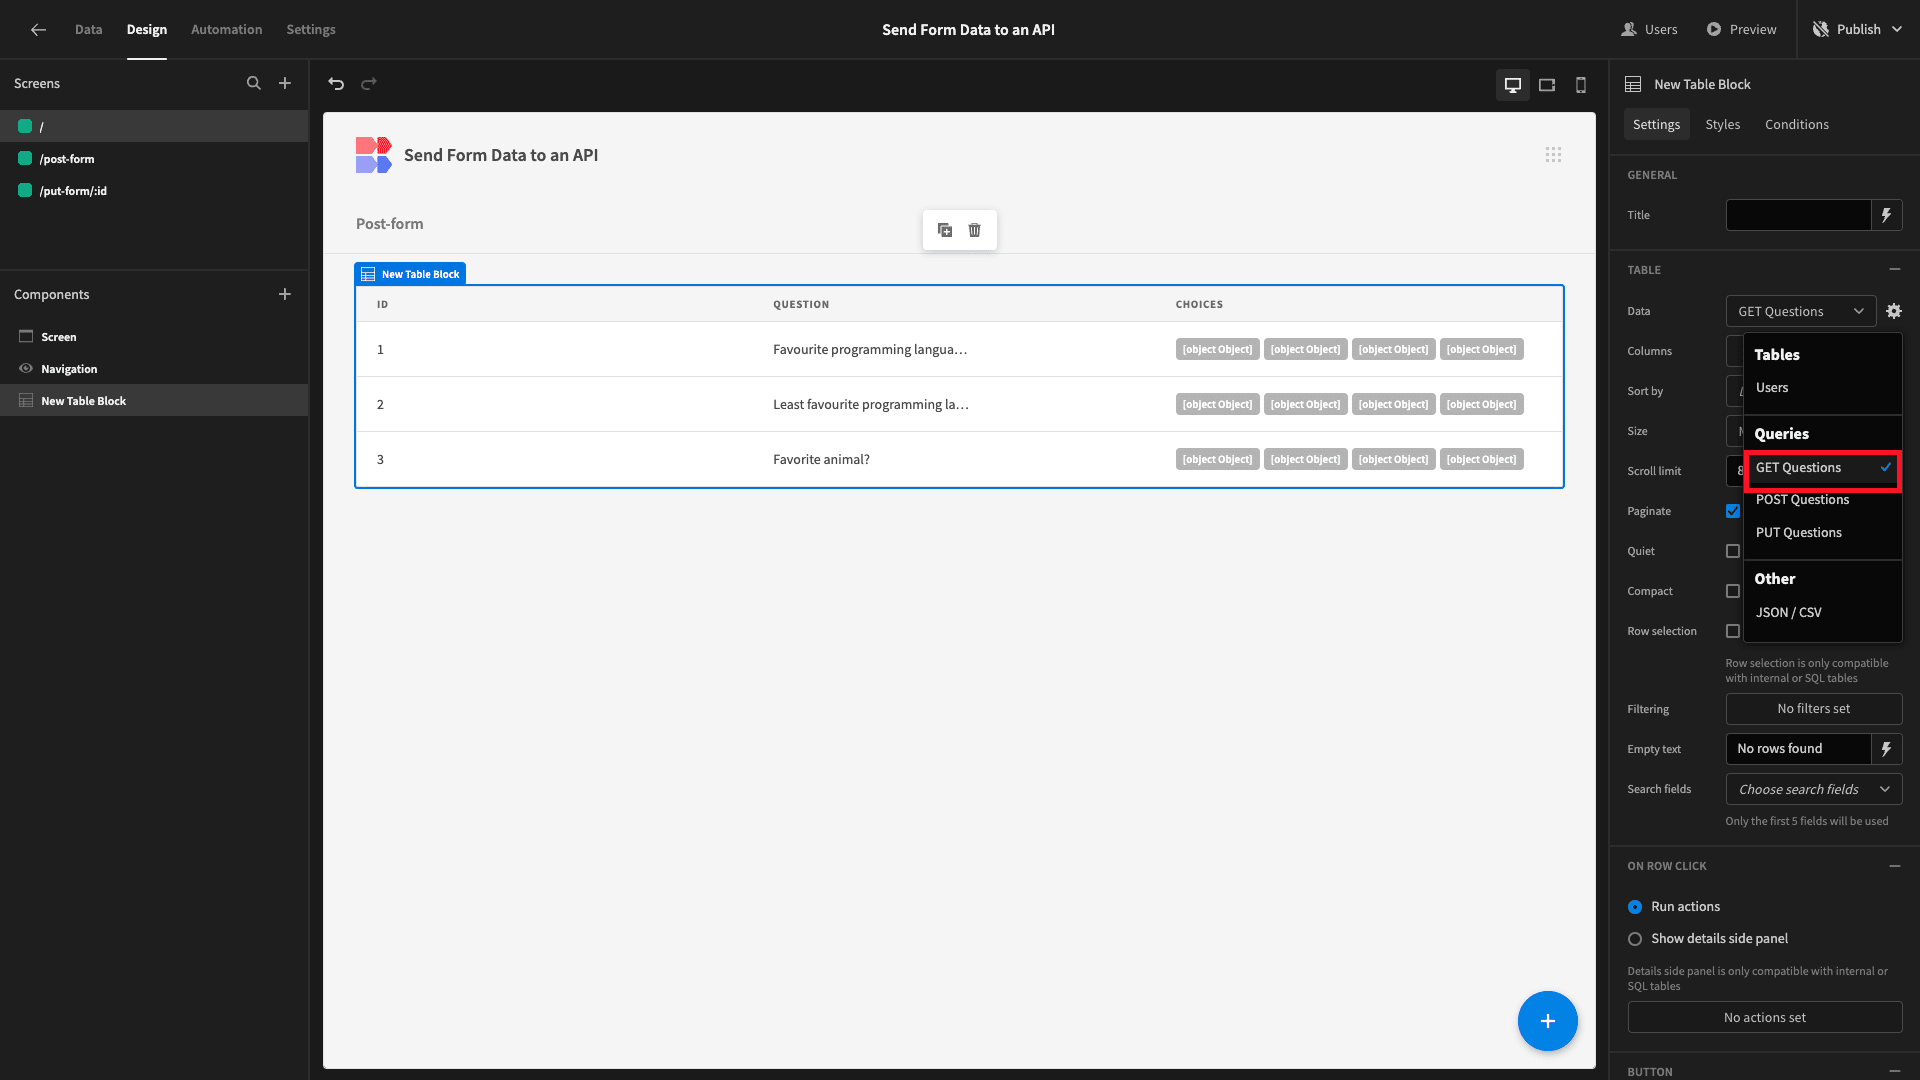
Our choices for each row are a series of nested objects, which aren’t going to look neat in a table. We’ll use the Columns drawer to set it so that only the ID and Question fields are displayed:

We’ll also set the width of our Questions column to 50% so that the text isn’t truncated.
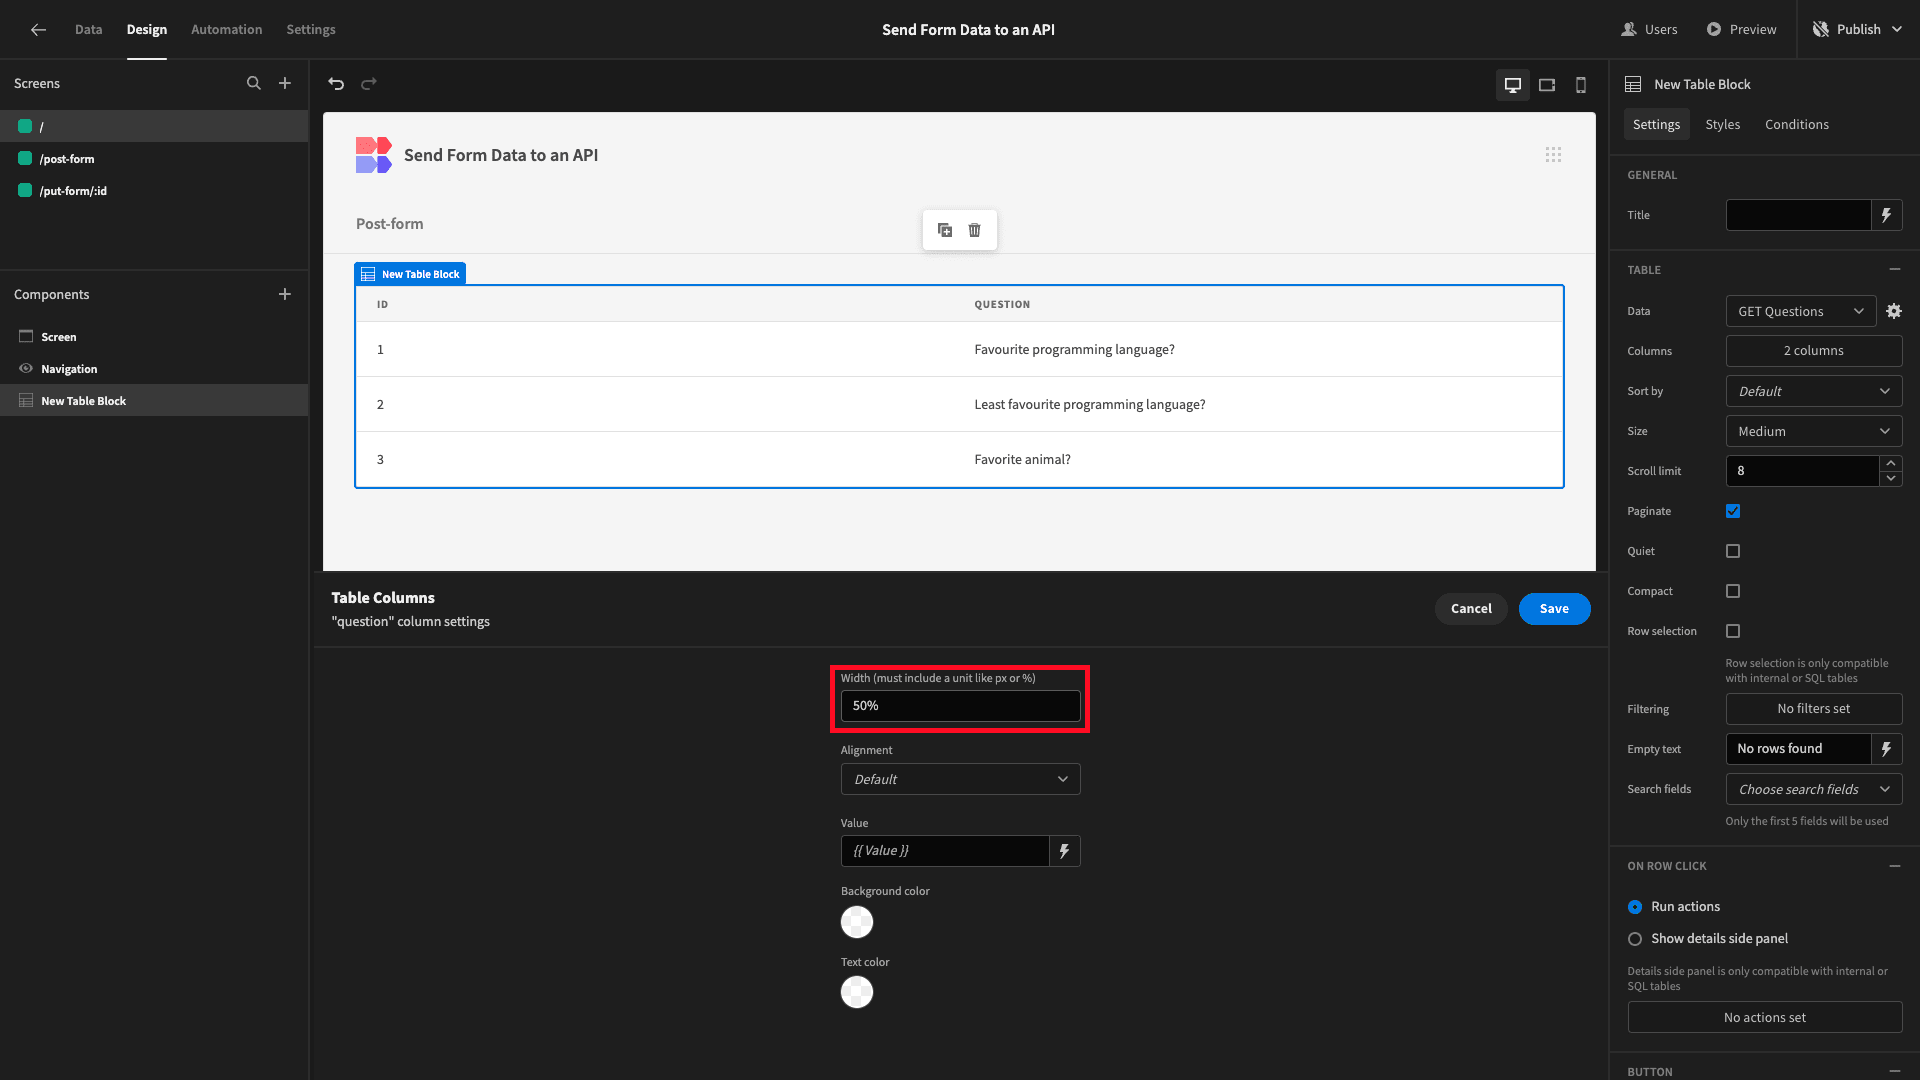
This is much neater.
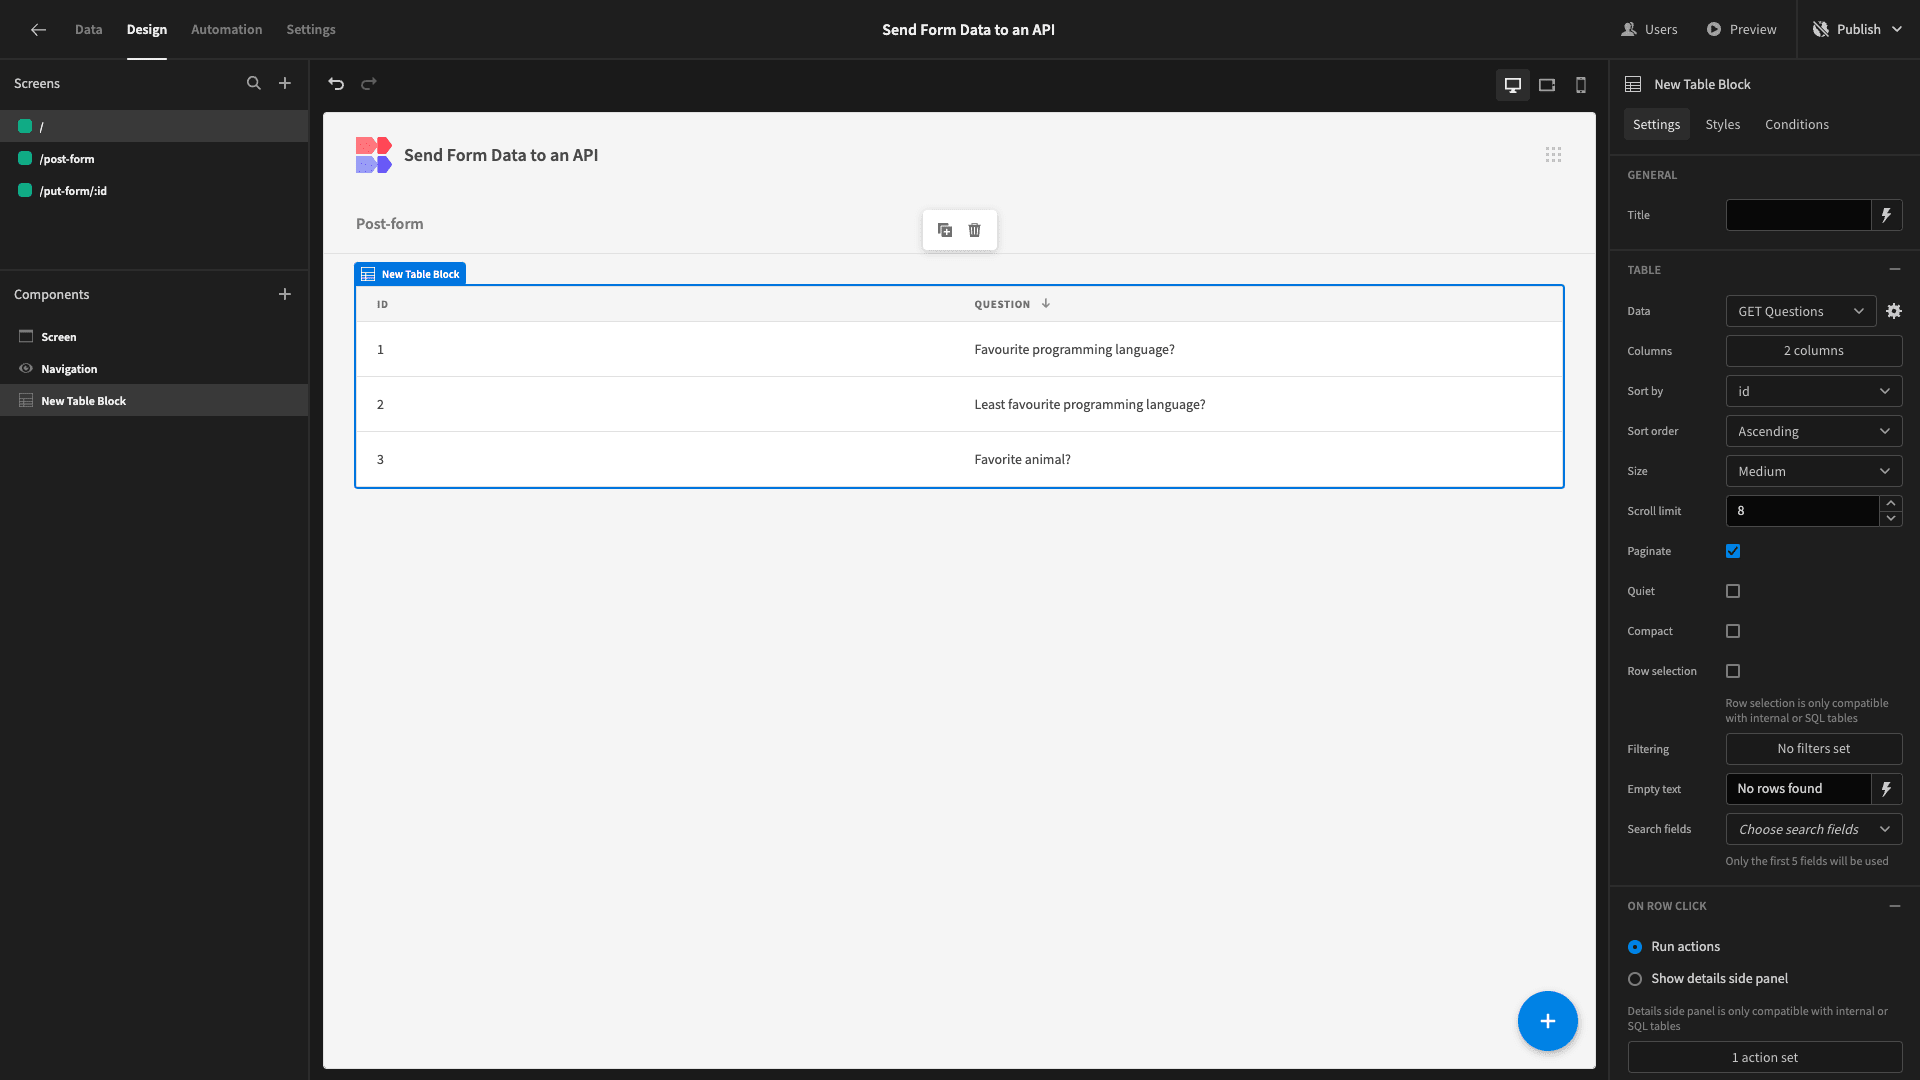
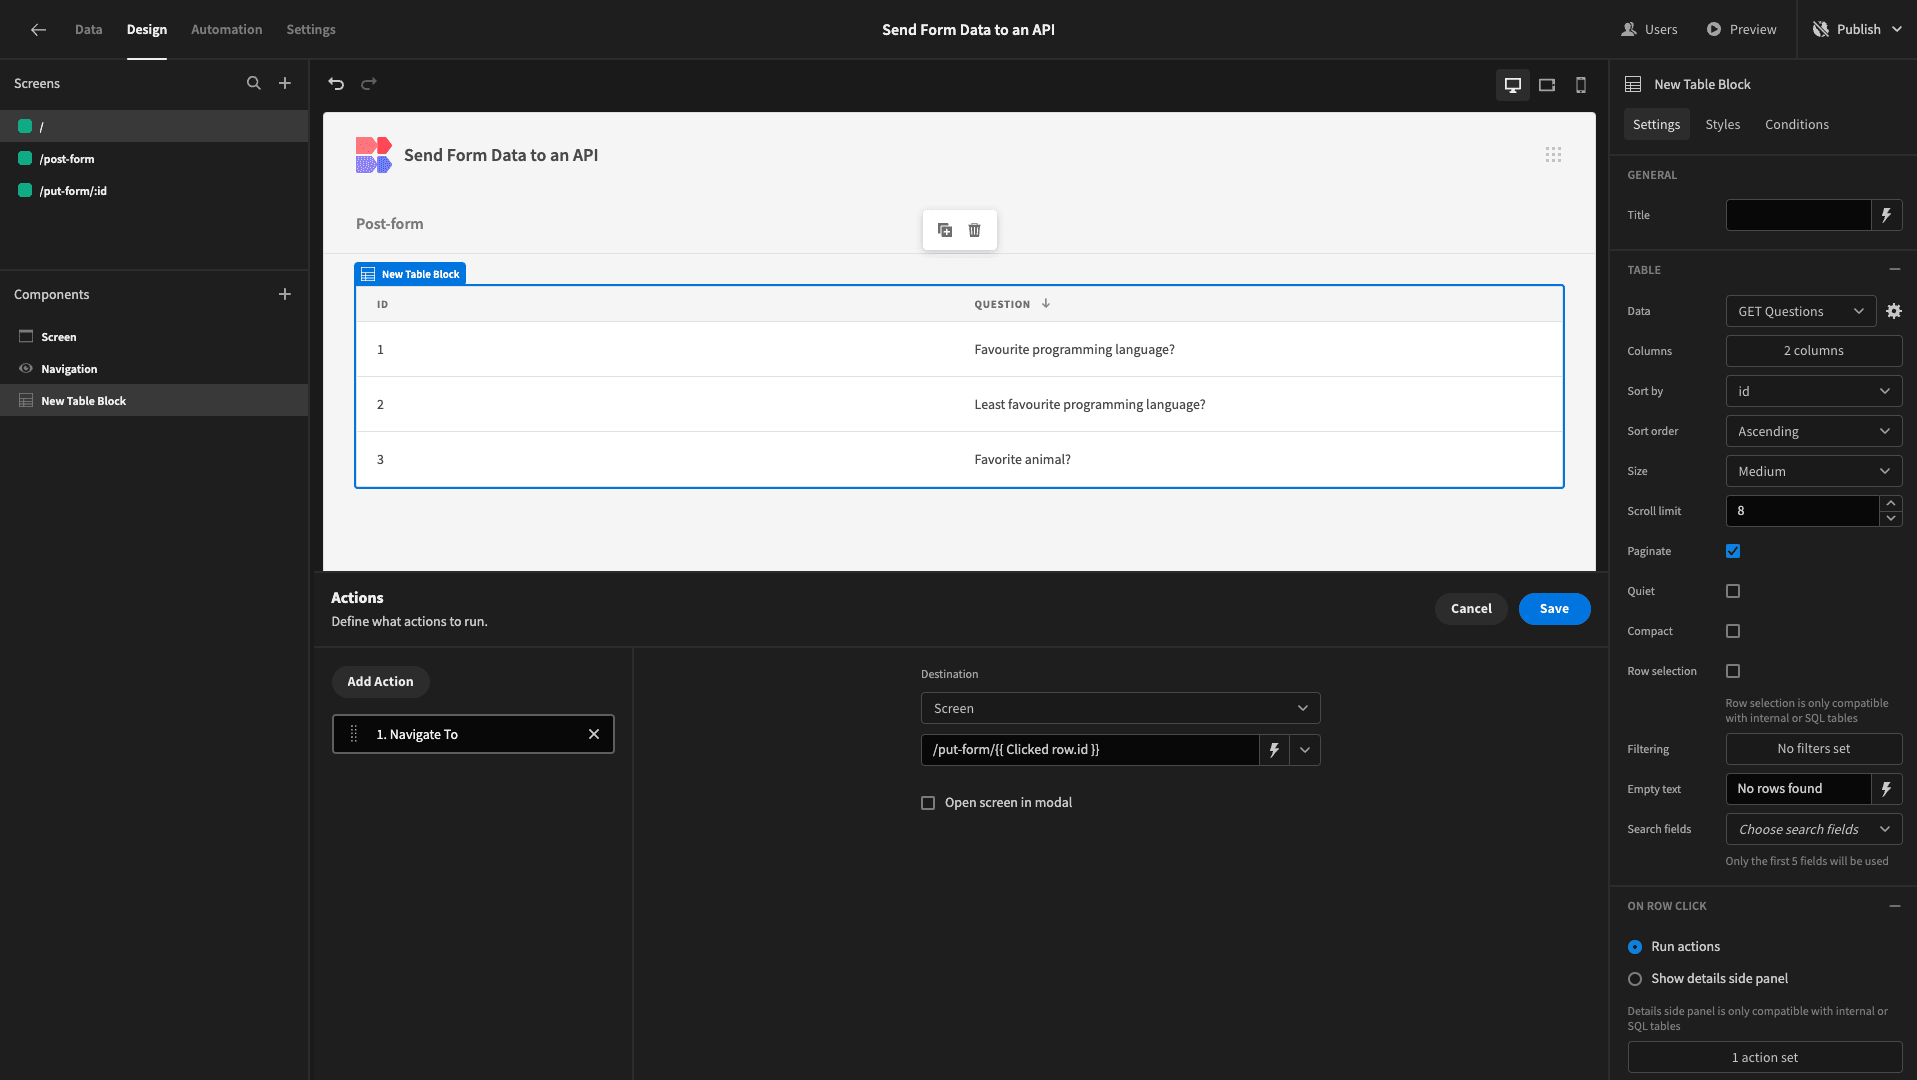
When a user clicks on any of our rows, we want to navigate to the PUT form to update the relevant data object.
To do that, we need to add an on-click action.
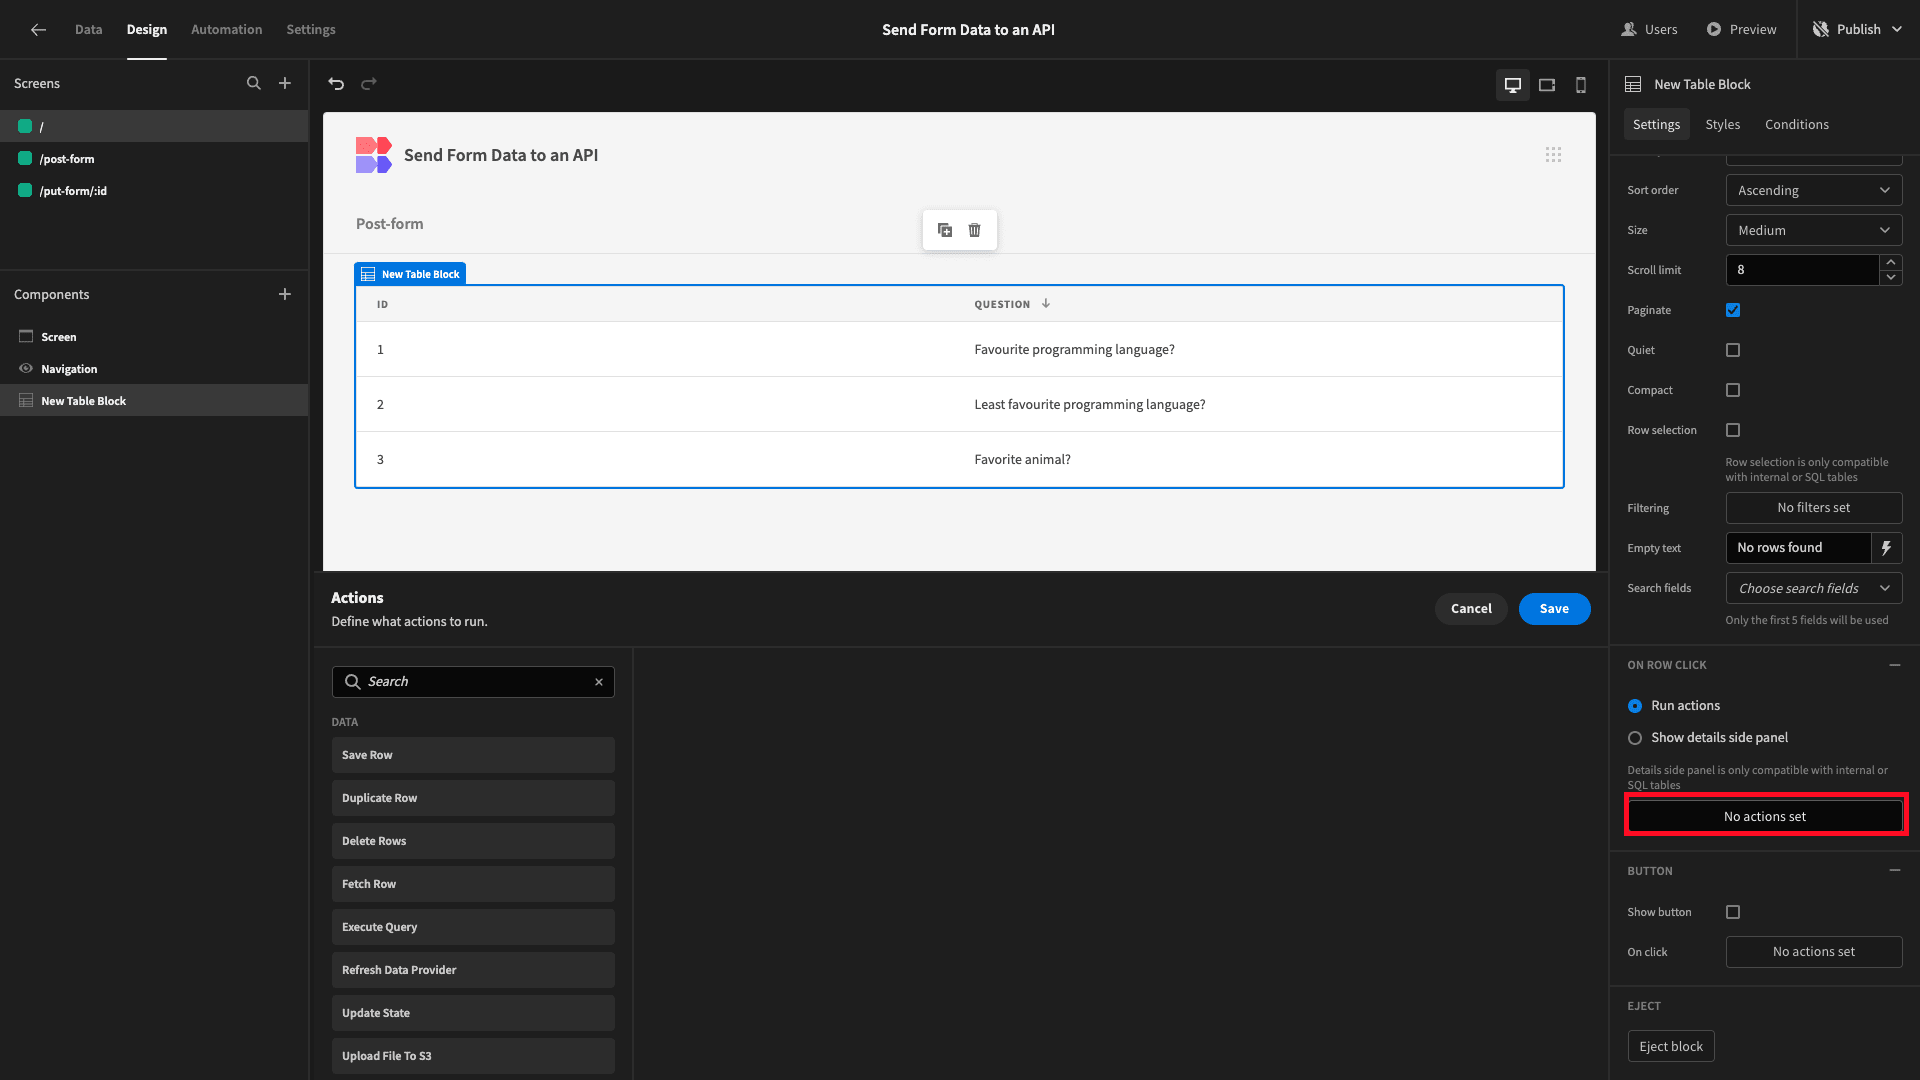
We’re going to add a Navigate To action and set the page path to:
1/put-form/{{ Clicked row.id }}We’re using the {{ Clicked row.id }} binding to populate the :id variable that we added to our URL earlier.
So, when we change screens, we’ll have a way of identifying the relevant entry for our PUT request.
Now, head back to our PUT form.
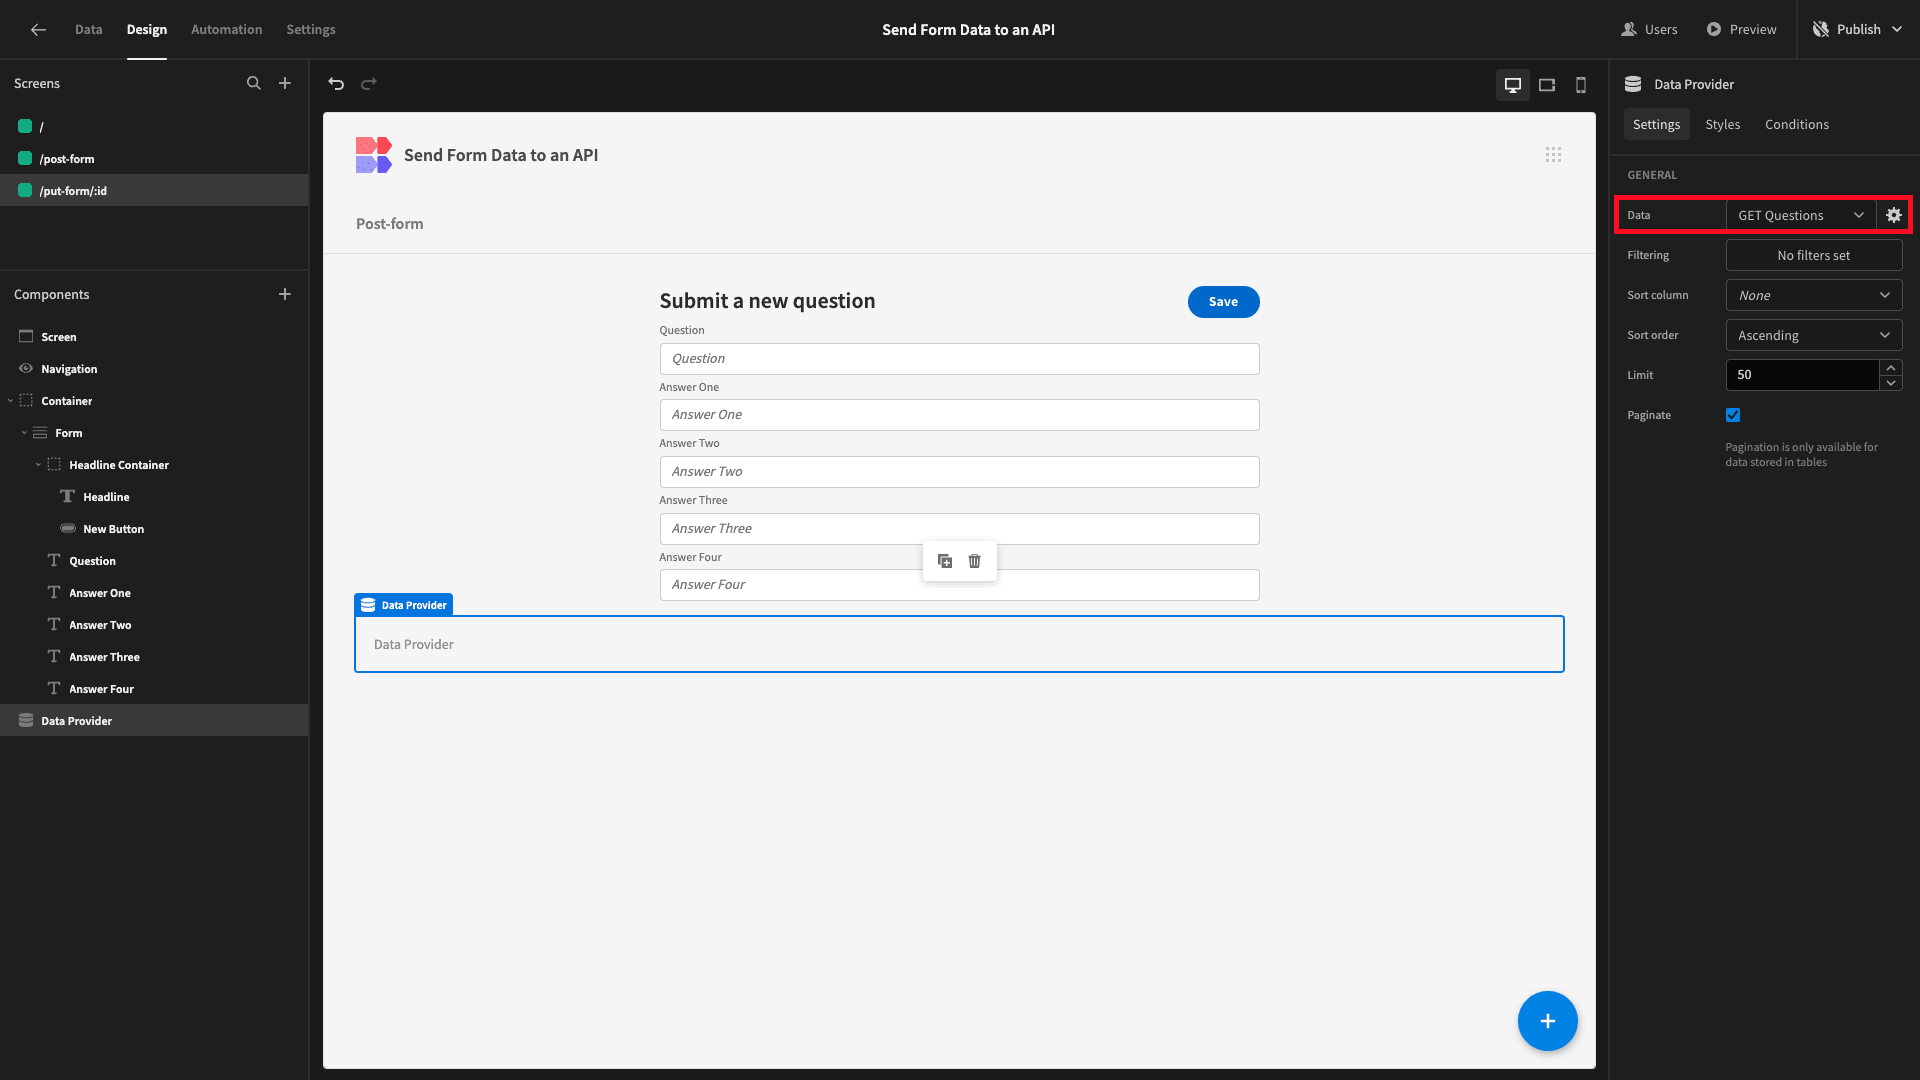
The next thing we need to do is make it so that the existing values for each of our fields are populated when a user navigates to this screen. To achieve this, we’ll add a Data Provider beneath our form.
We’ve set the Data field to our GET request.
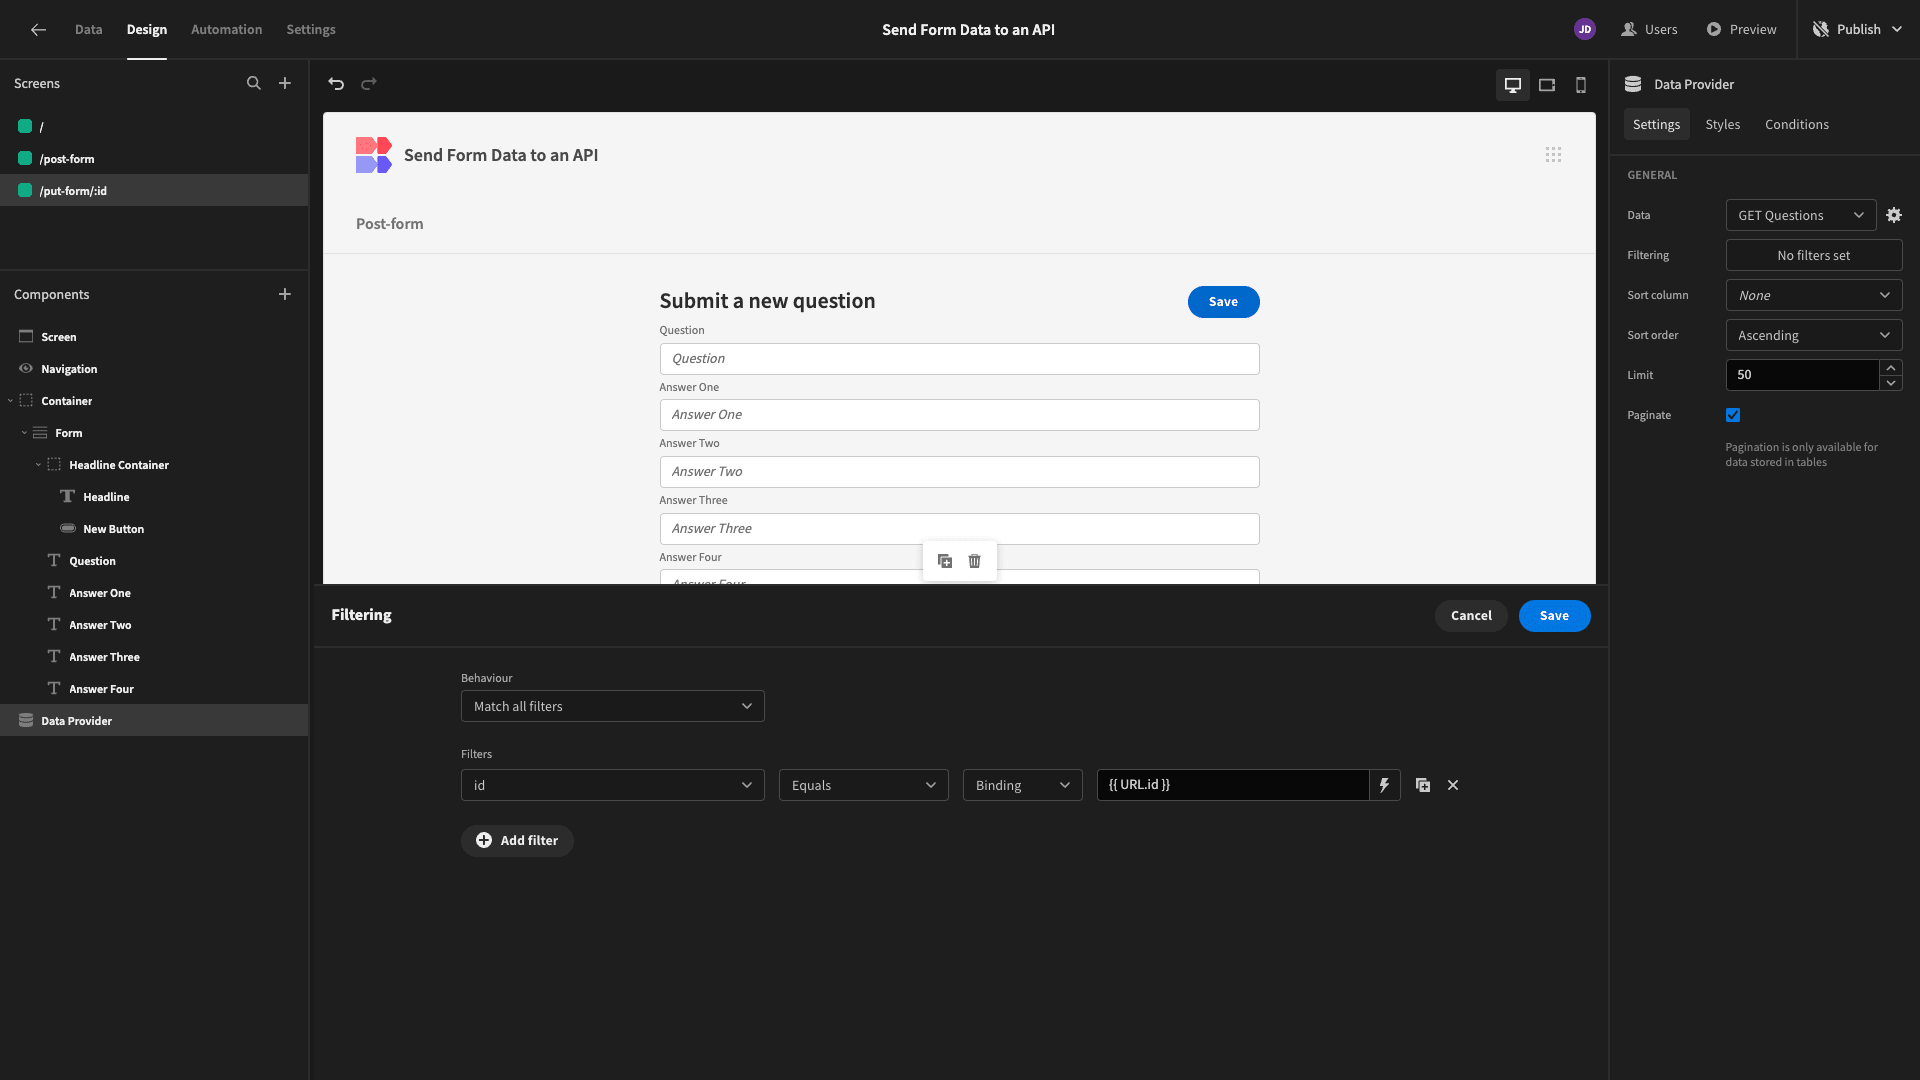
We then need to add a filter expression to retrieve only the row where the id attribute matches the one we stored in our URL.
We can then use the Default Value field for each of our form fields to populate this information.
Our data schema contains several nested objects, so it’s worth taking another look at what we’re dealing with.
 1{
 2
 3 "id": 1,
 4
 5 "question": "Favourite programming language?",
 6
 7 "choices": [
 8
 9  {
10
11   "choice": "Swift",
12
13   "votes": 2048
14
15  },
16
17  {
18
19   "choice": "Python",
20
21   "votes": 1024
22
23  },
24
25  {
26
27   "choice": "Objective-C",
28
29   "votes": 512
30
31  },
32
33  {
34
35   "choice": "Ruby",
36
37   "votes": 256
38
39  }
40
41 ]
42
43}
The binding for our question attribute will be:
1{{ Data Provider.Rows.0.question }}For our choices, we’re using:
1{{ Data Provider.Rows.0.choices.0.choice }}
2
3{{ Data Provider.Rows.0.choices.1.choice }}
4
5{{ Data Provider.Rows.0.choices.2.choice }}
6
7{{ Data Provider.Rows.0.choices.3.choice }}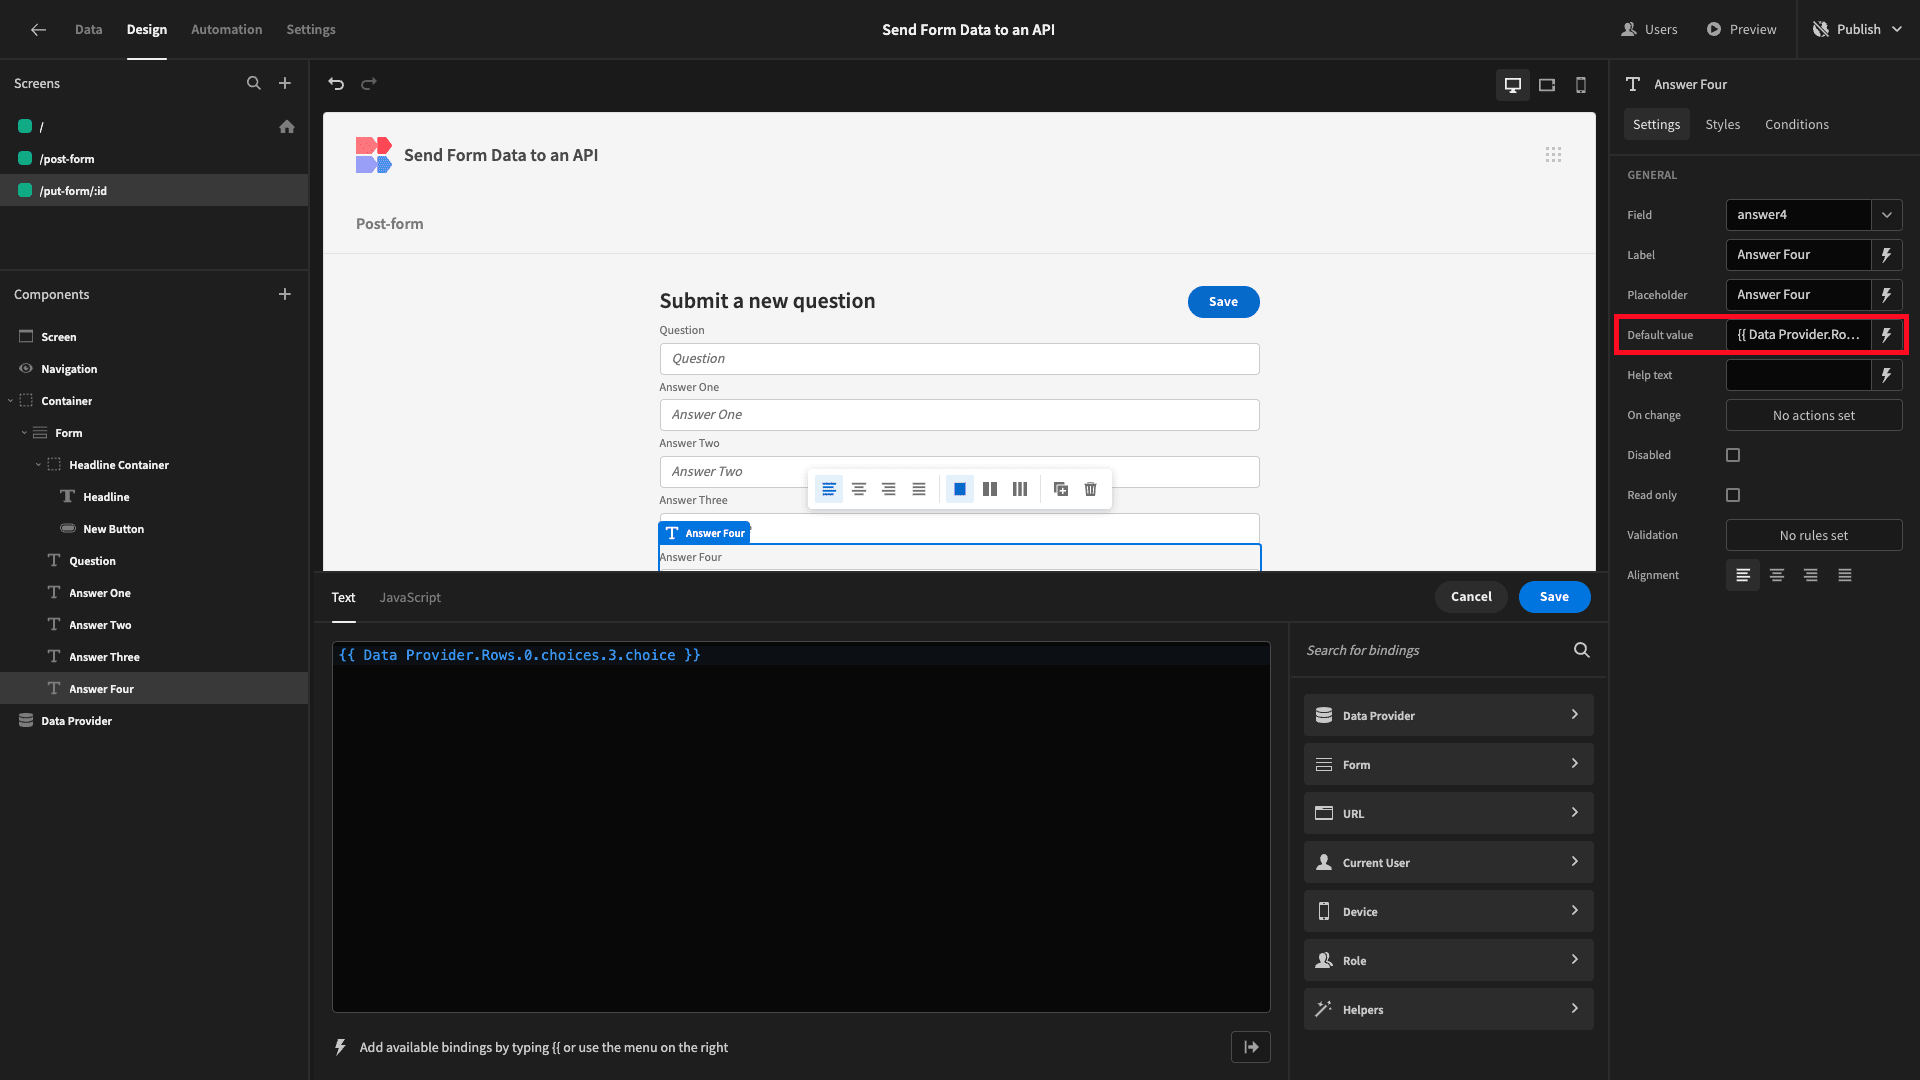
We can then preview our app to confirm that this has worked.
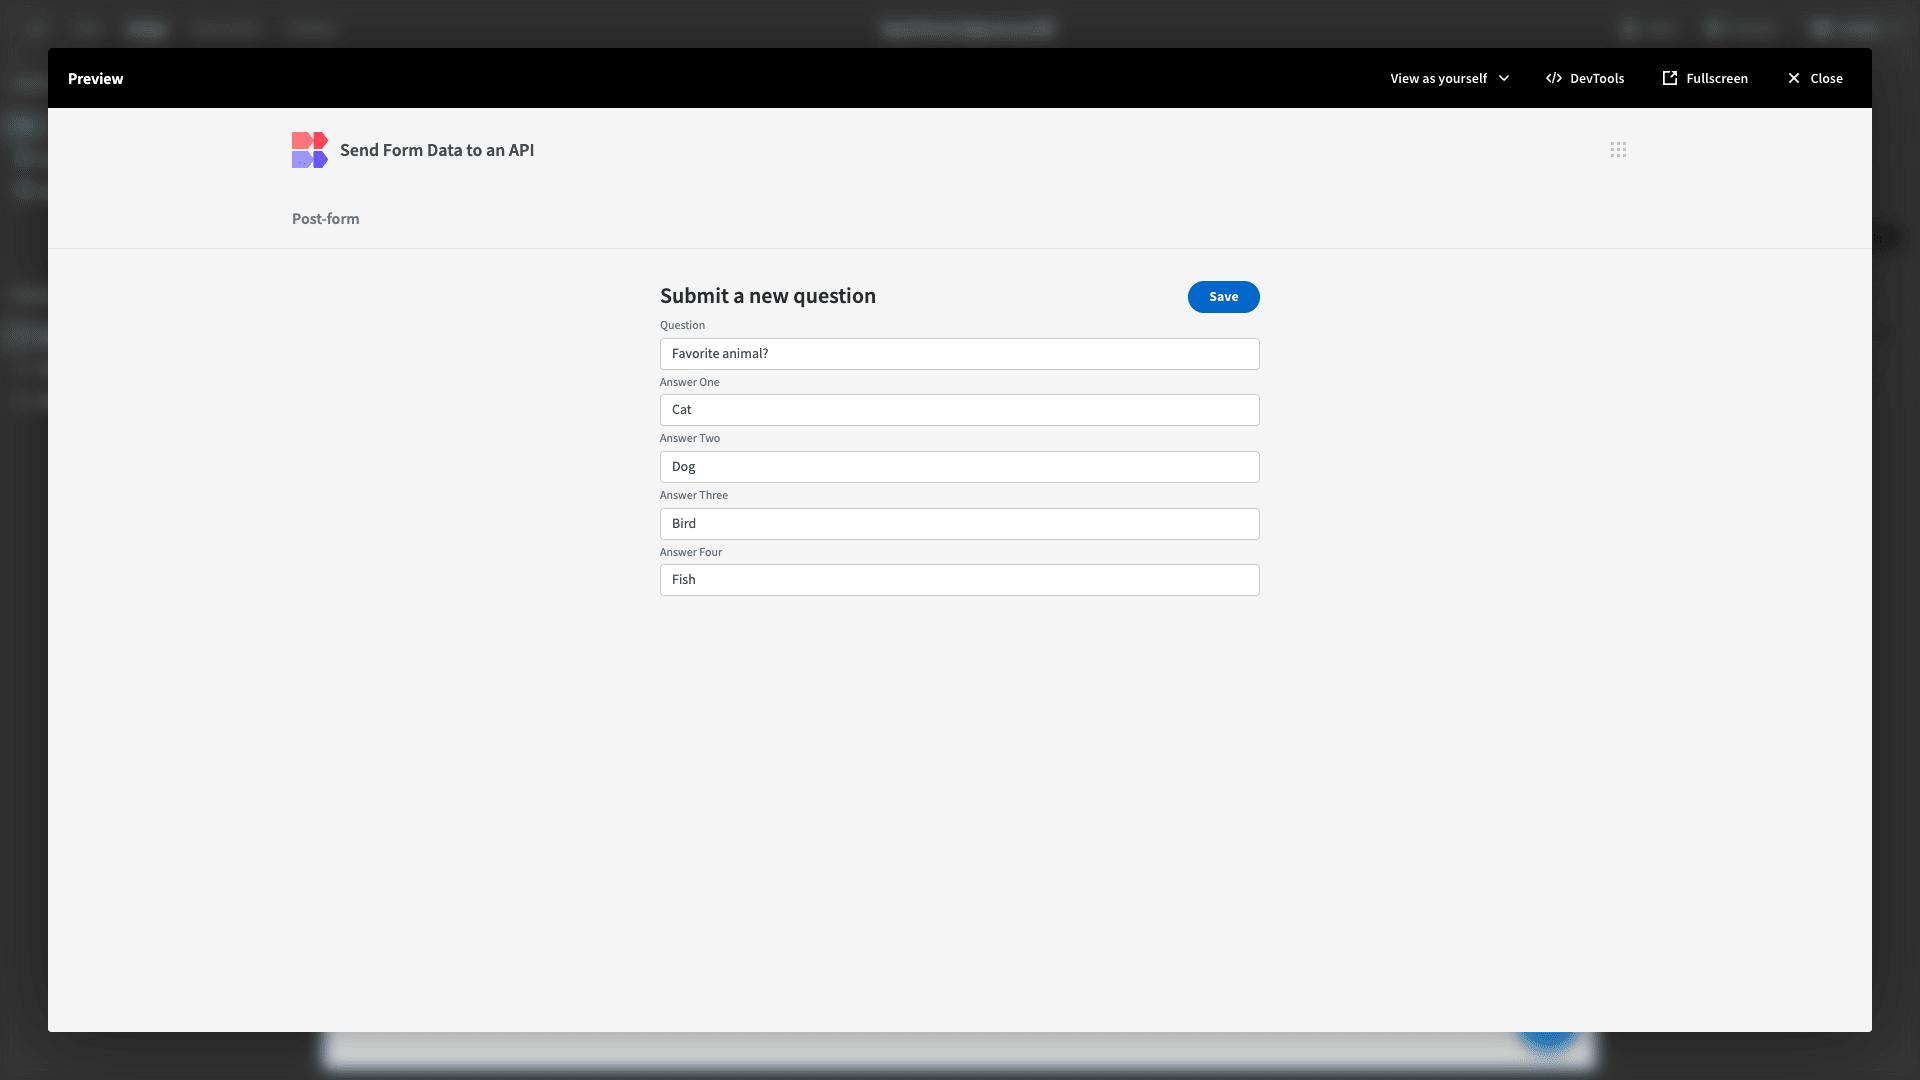
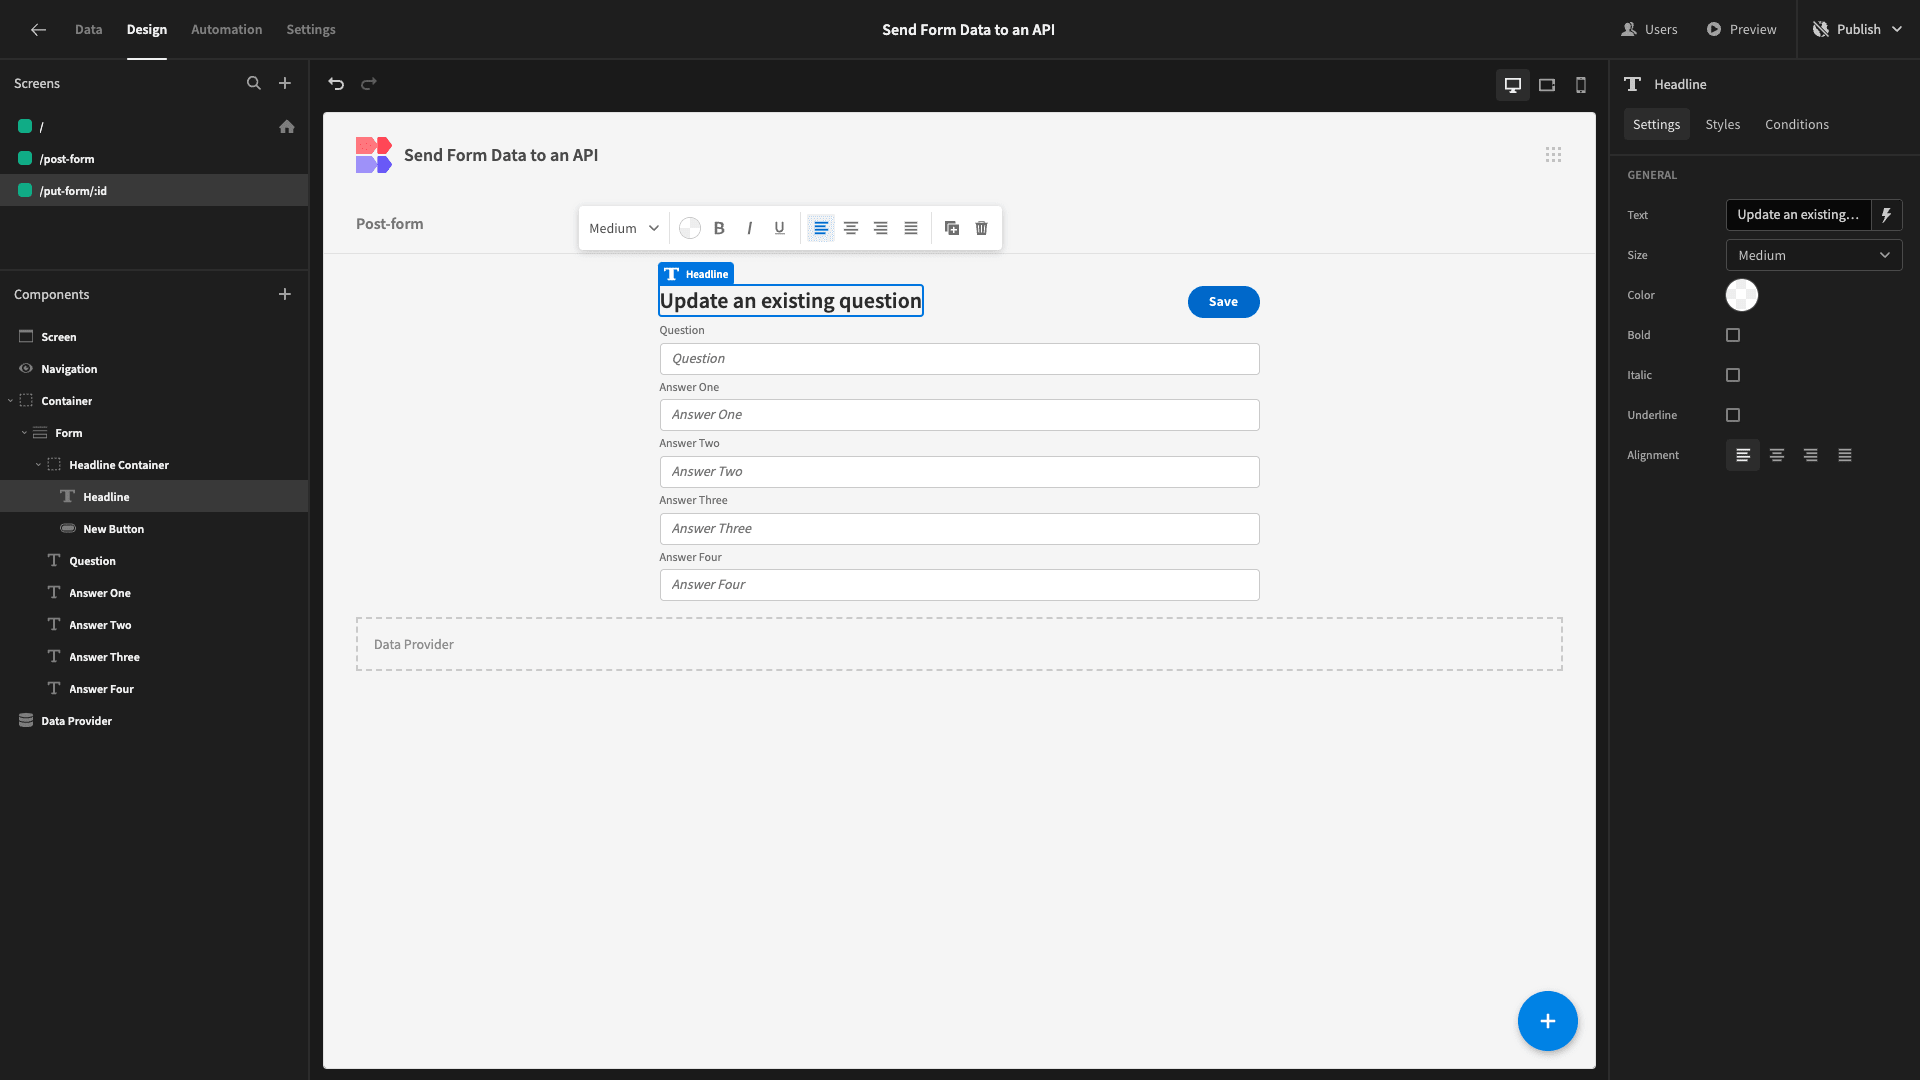
We’re almost done with this form, but we should also update our headline component with new display text.
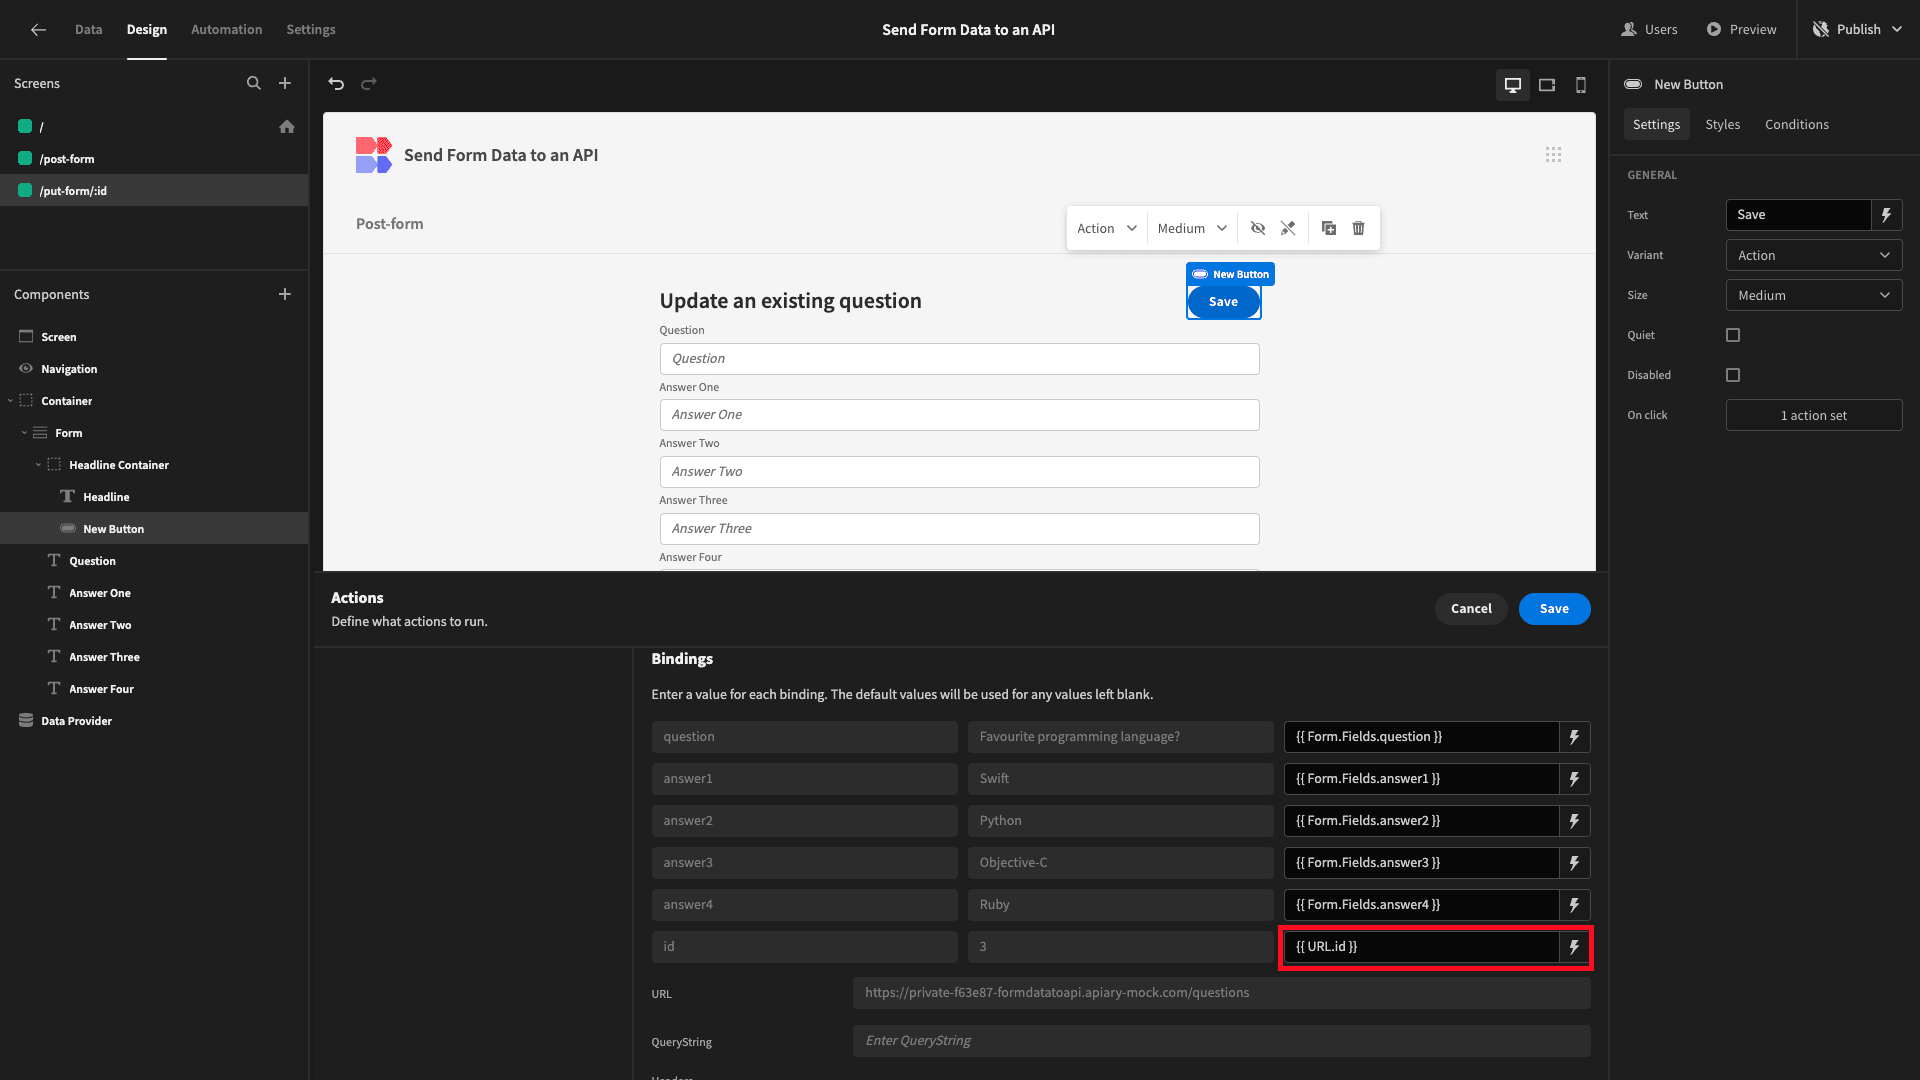
The last thing we need to do is update our button action to populate our PUT query with our form data.
So, we’ll alter our existing button action to do this.
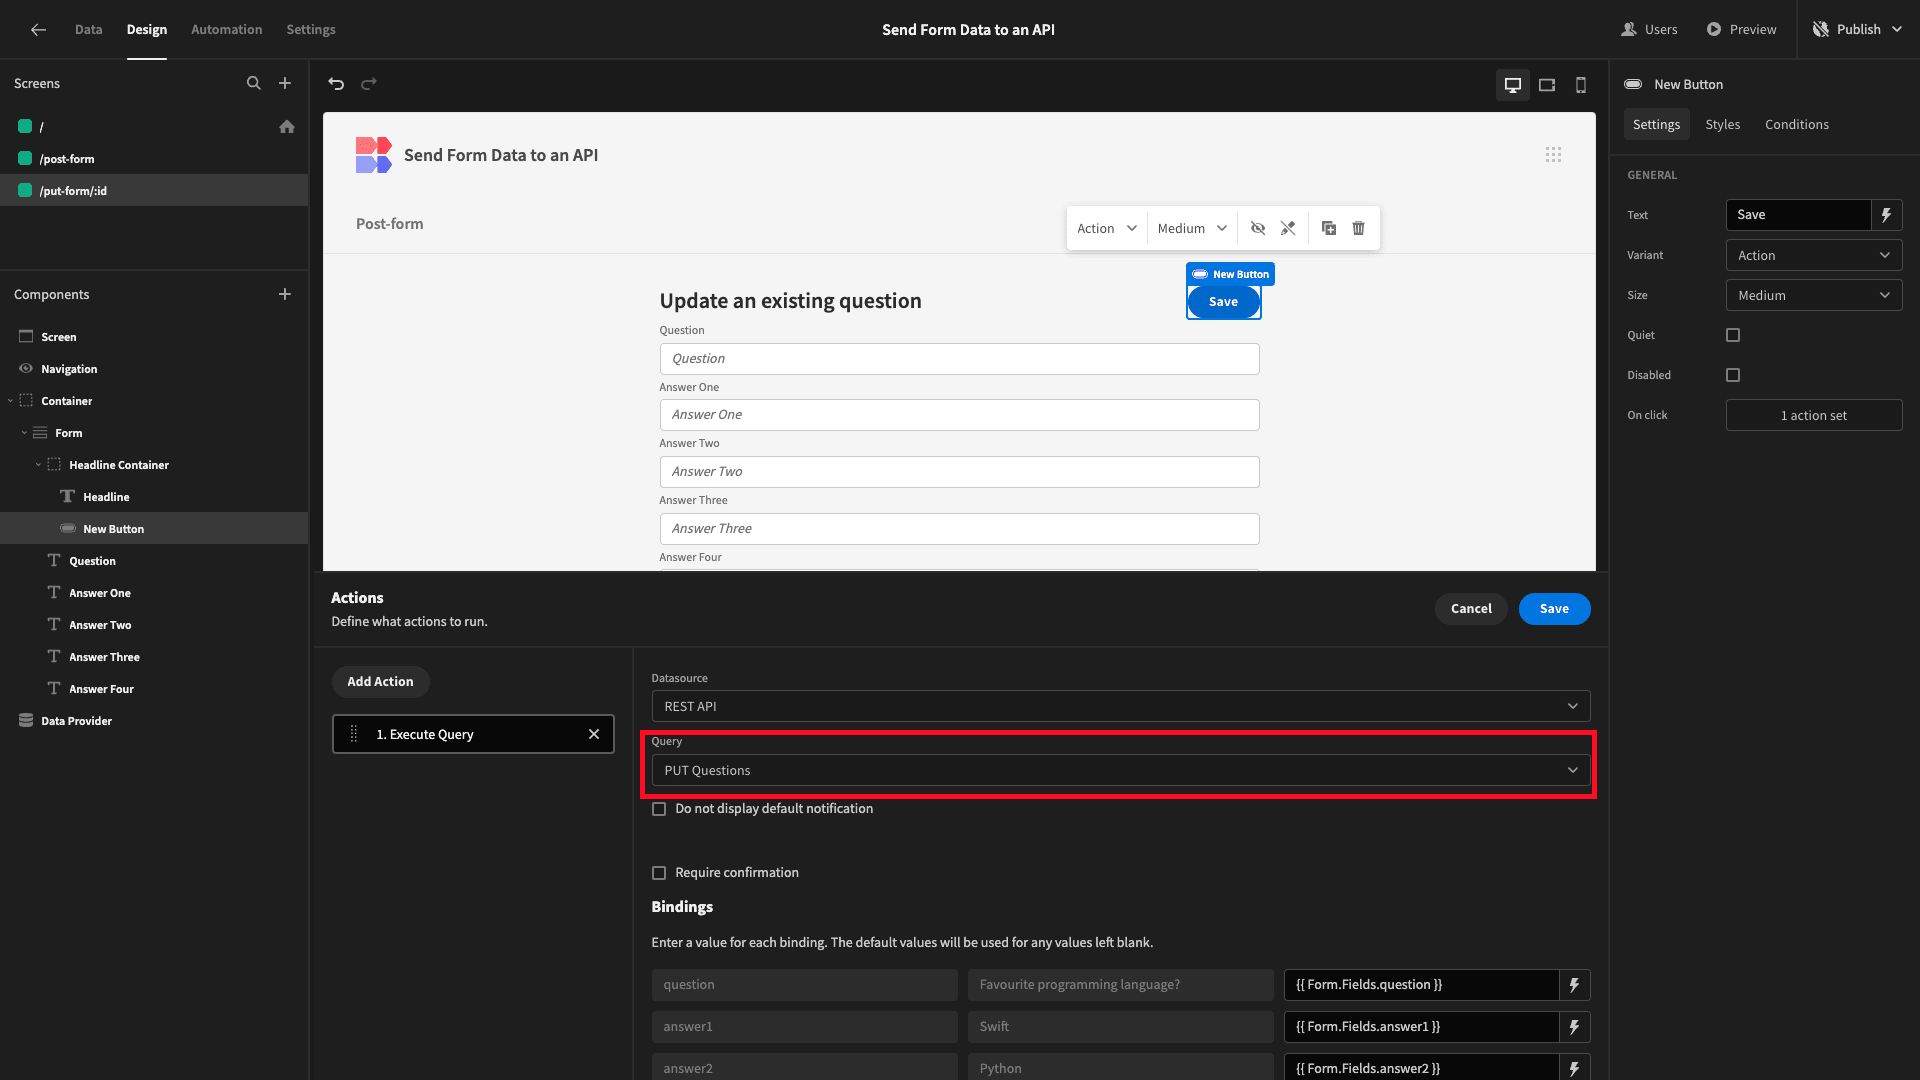
All of our existing bindings are still present.
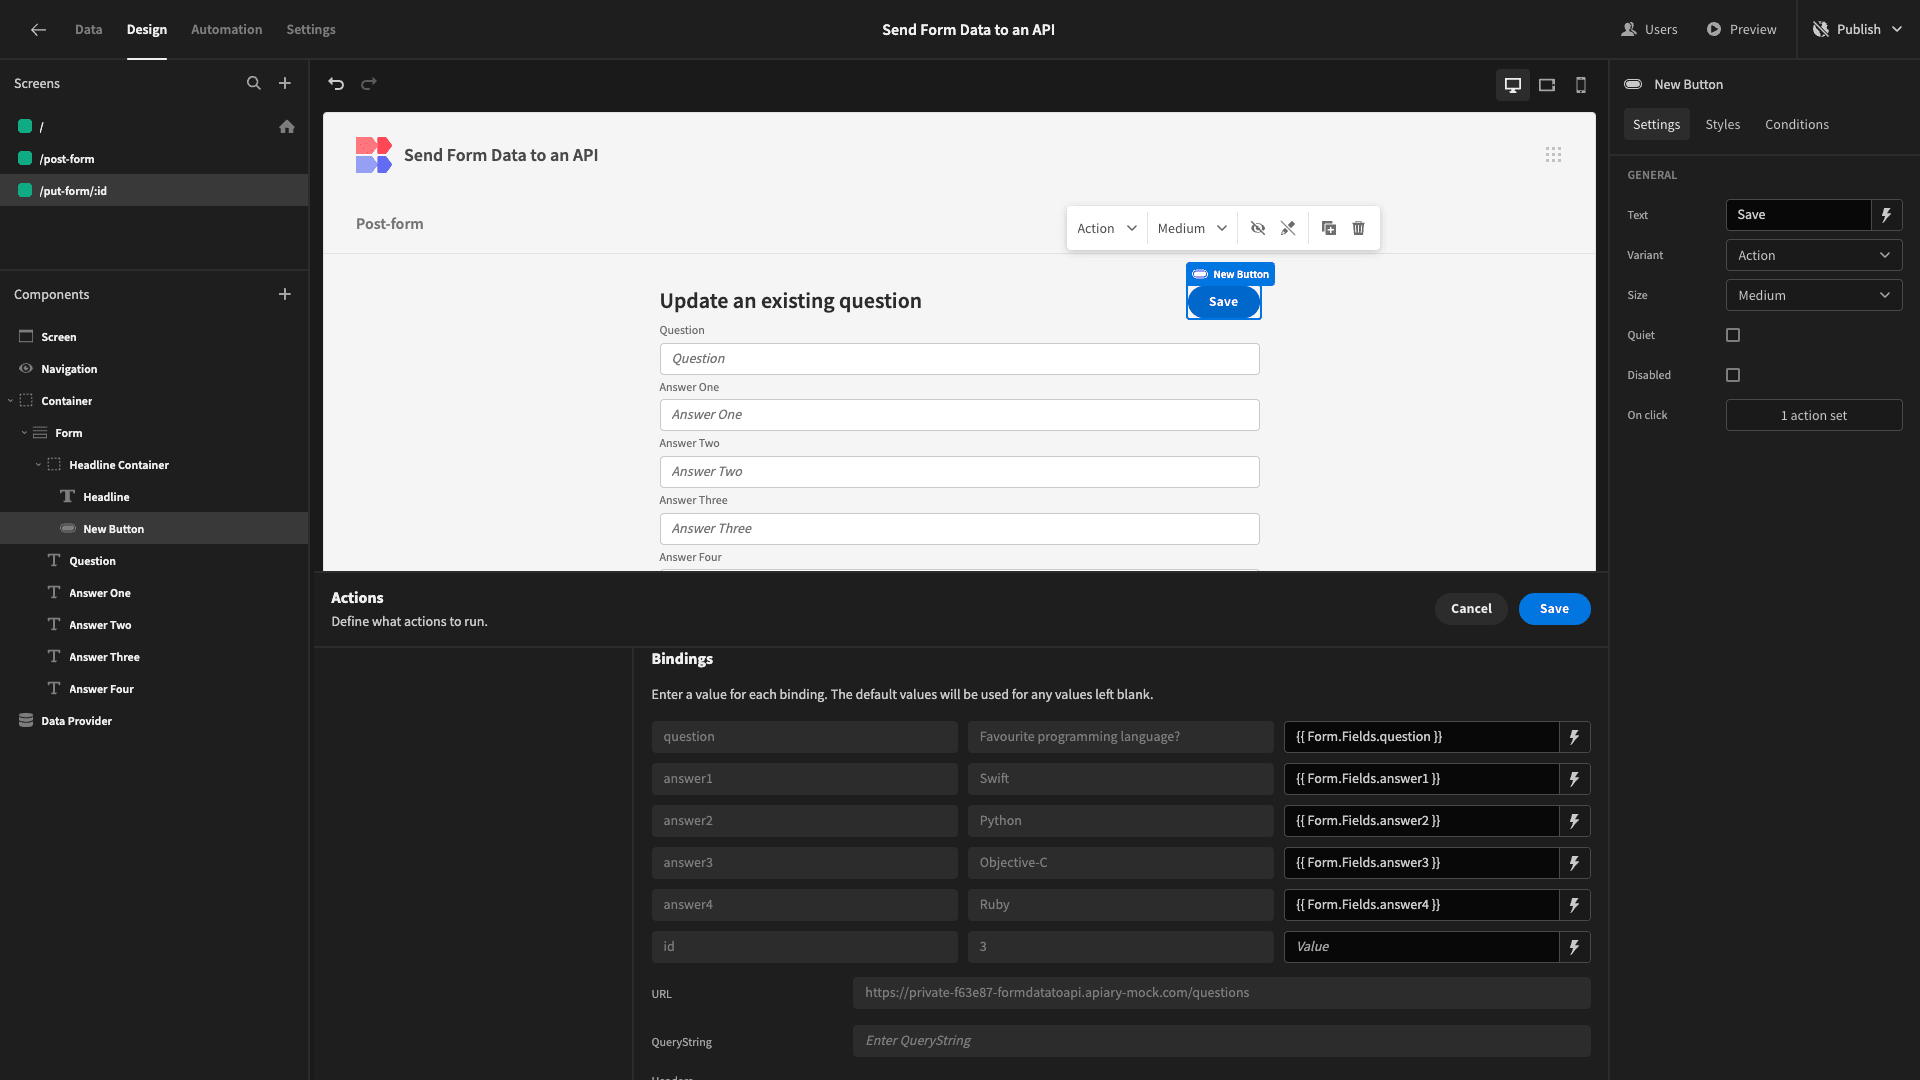
The last thing we need to do is assign a value to the id binding, using {{ URL.id }}.
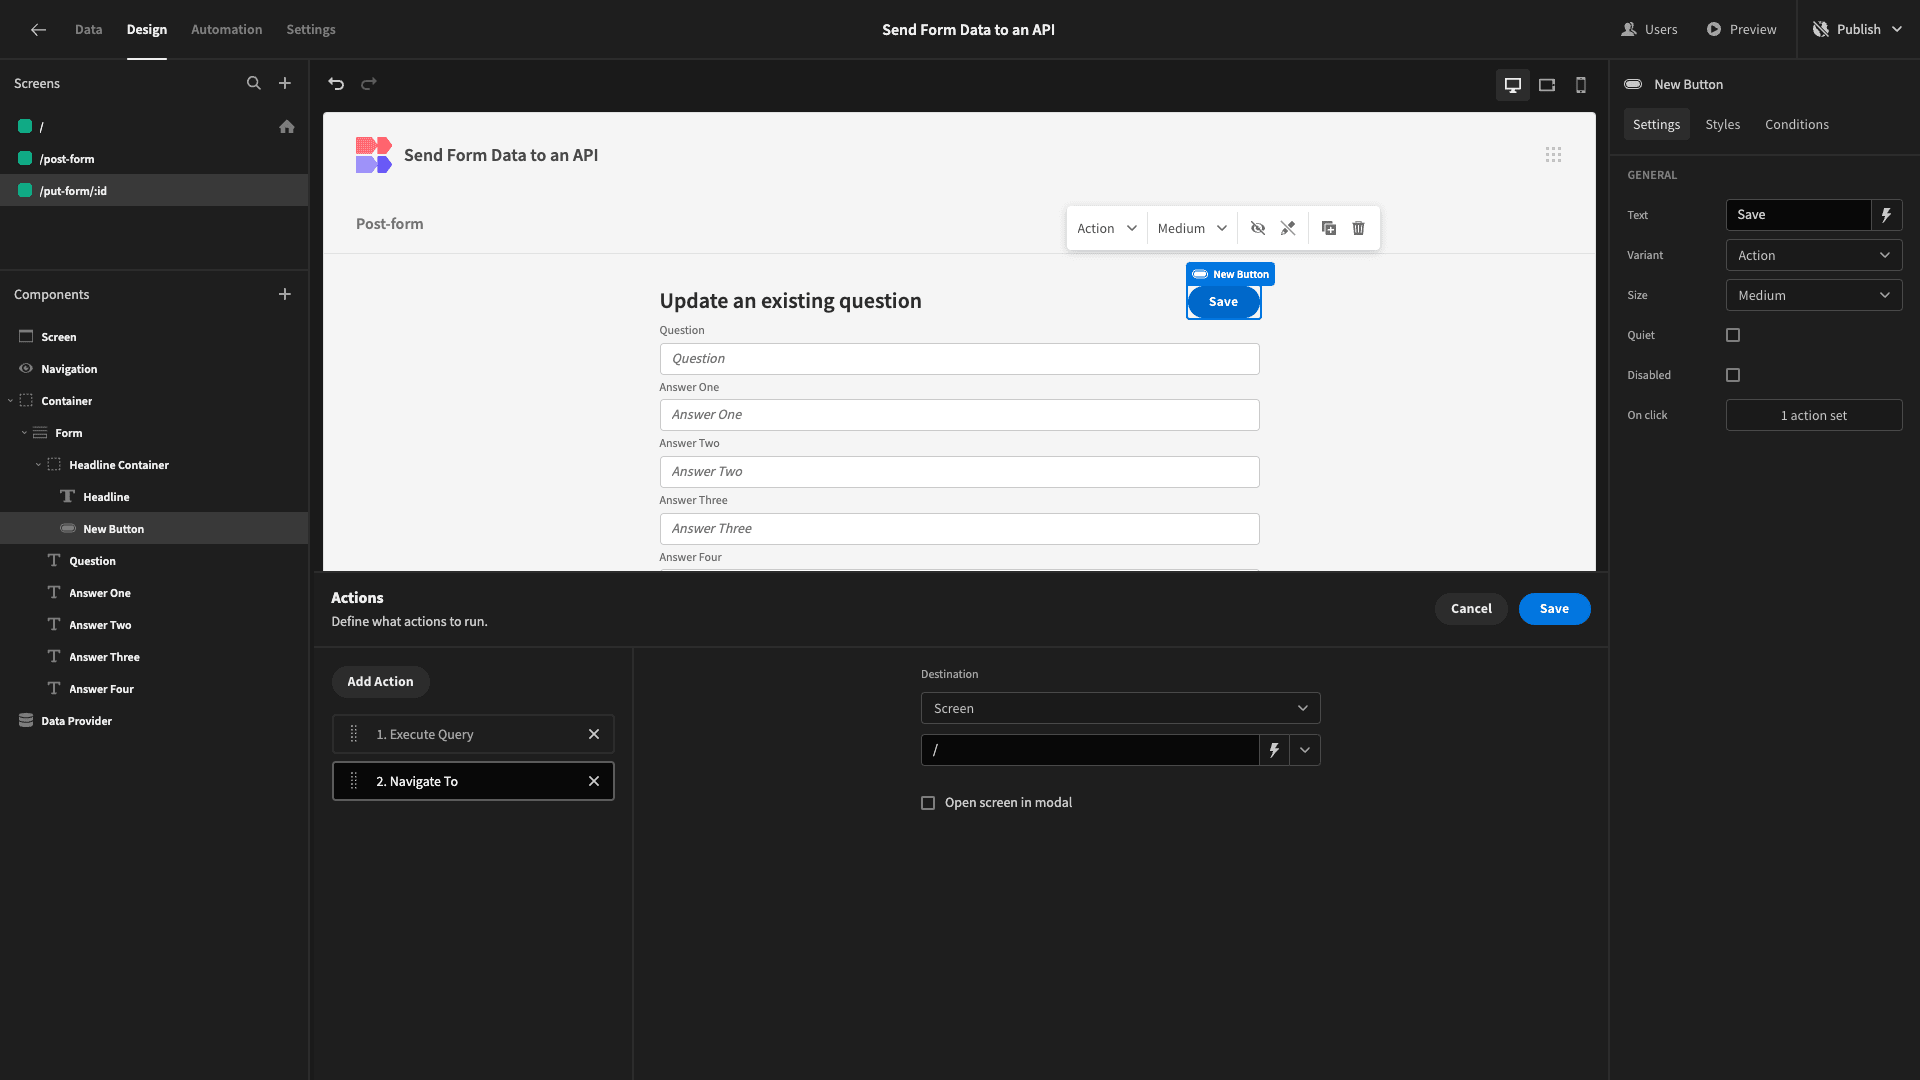
While we’re here, we’ll create a second button action to navigate back to our home screen when a submission is made.
We can do the same thing on our other form screen, too.
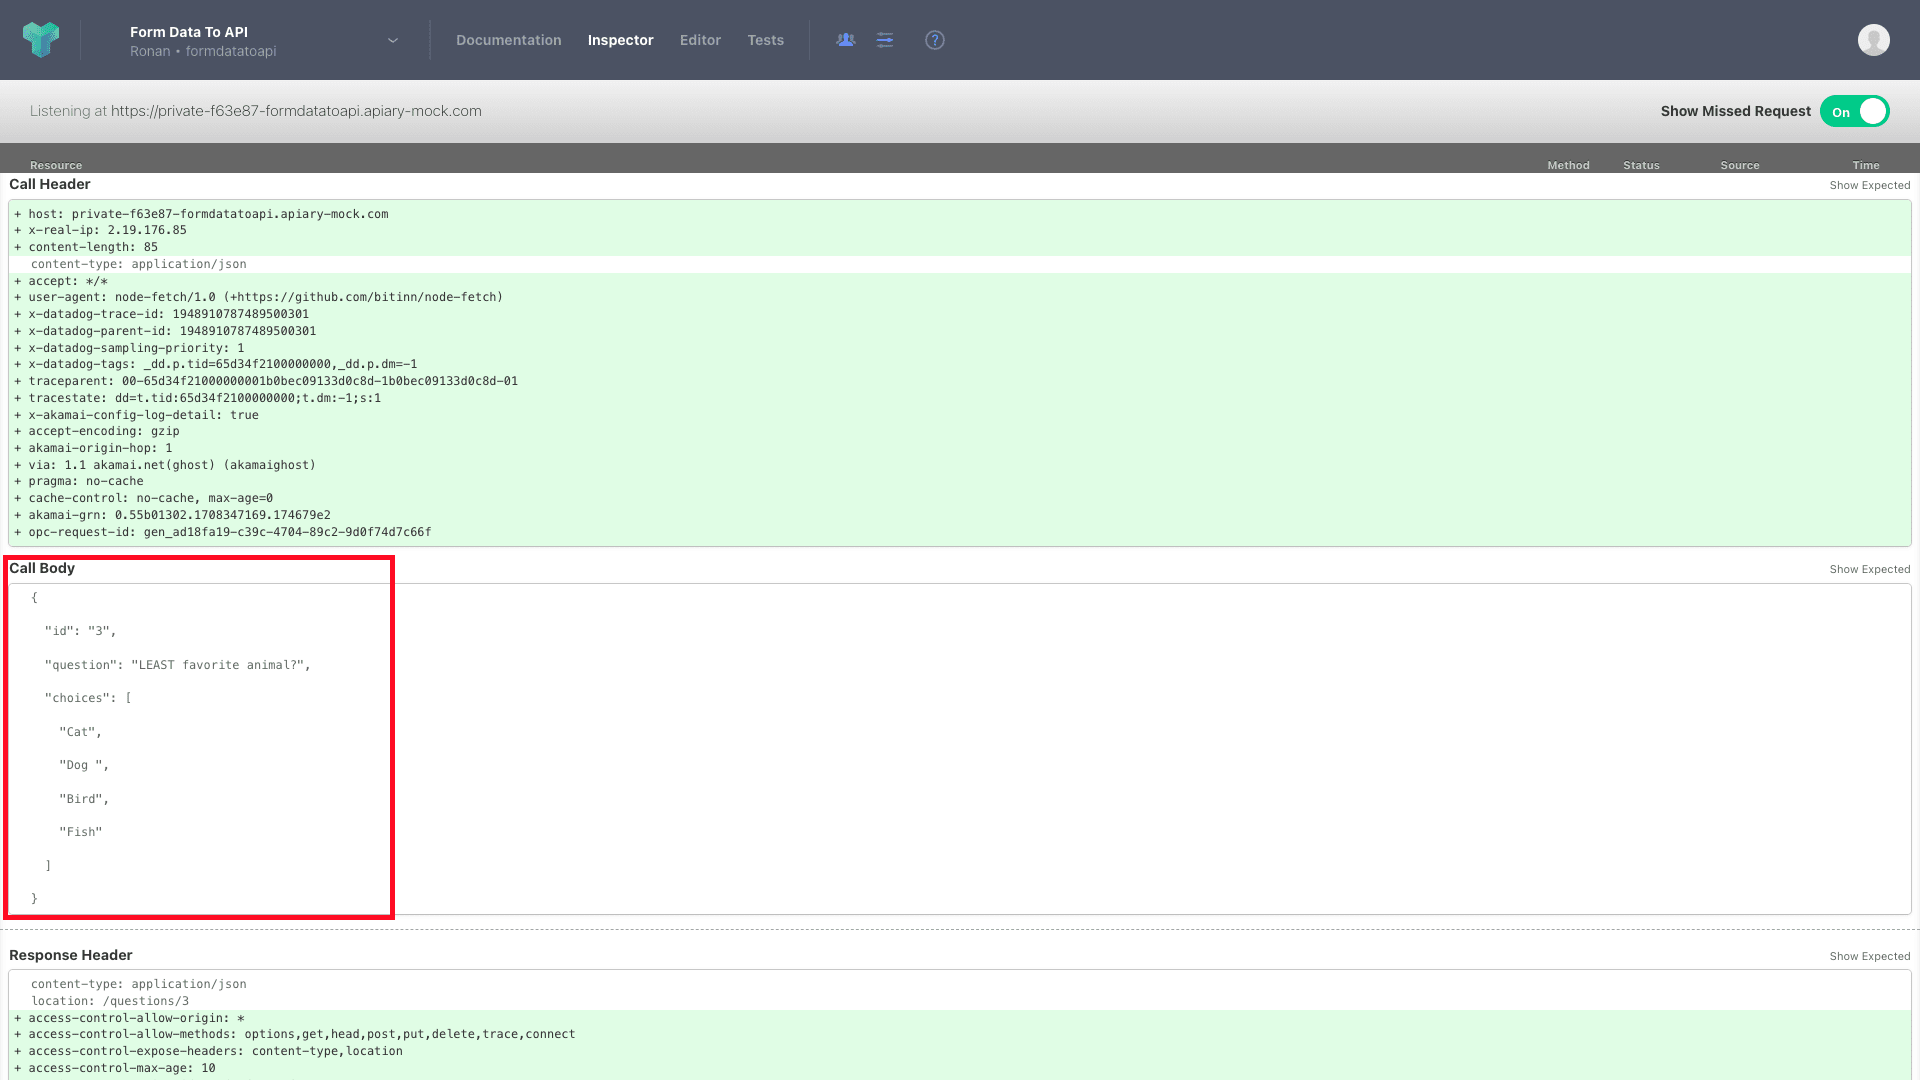
Once again, we can preview our app to test that we’re sending form data to our API correctly.

And we can confirm this in our API server’s admin panel.
Now, we have two fully functional forms for sending data to our API.
4. Design tweaks and publishing
Before we wrap up, we’re going to make a few tweaks to our app’s UI.
First, under Navigation, we’ll hit Configure Links to set how we want each page to appear in our nav bar.

Then, under Screen and Theme, we’ll choose Darkest.

Once we’re satisfied, we can hit Publish to push our app live.

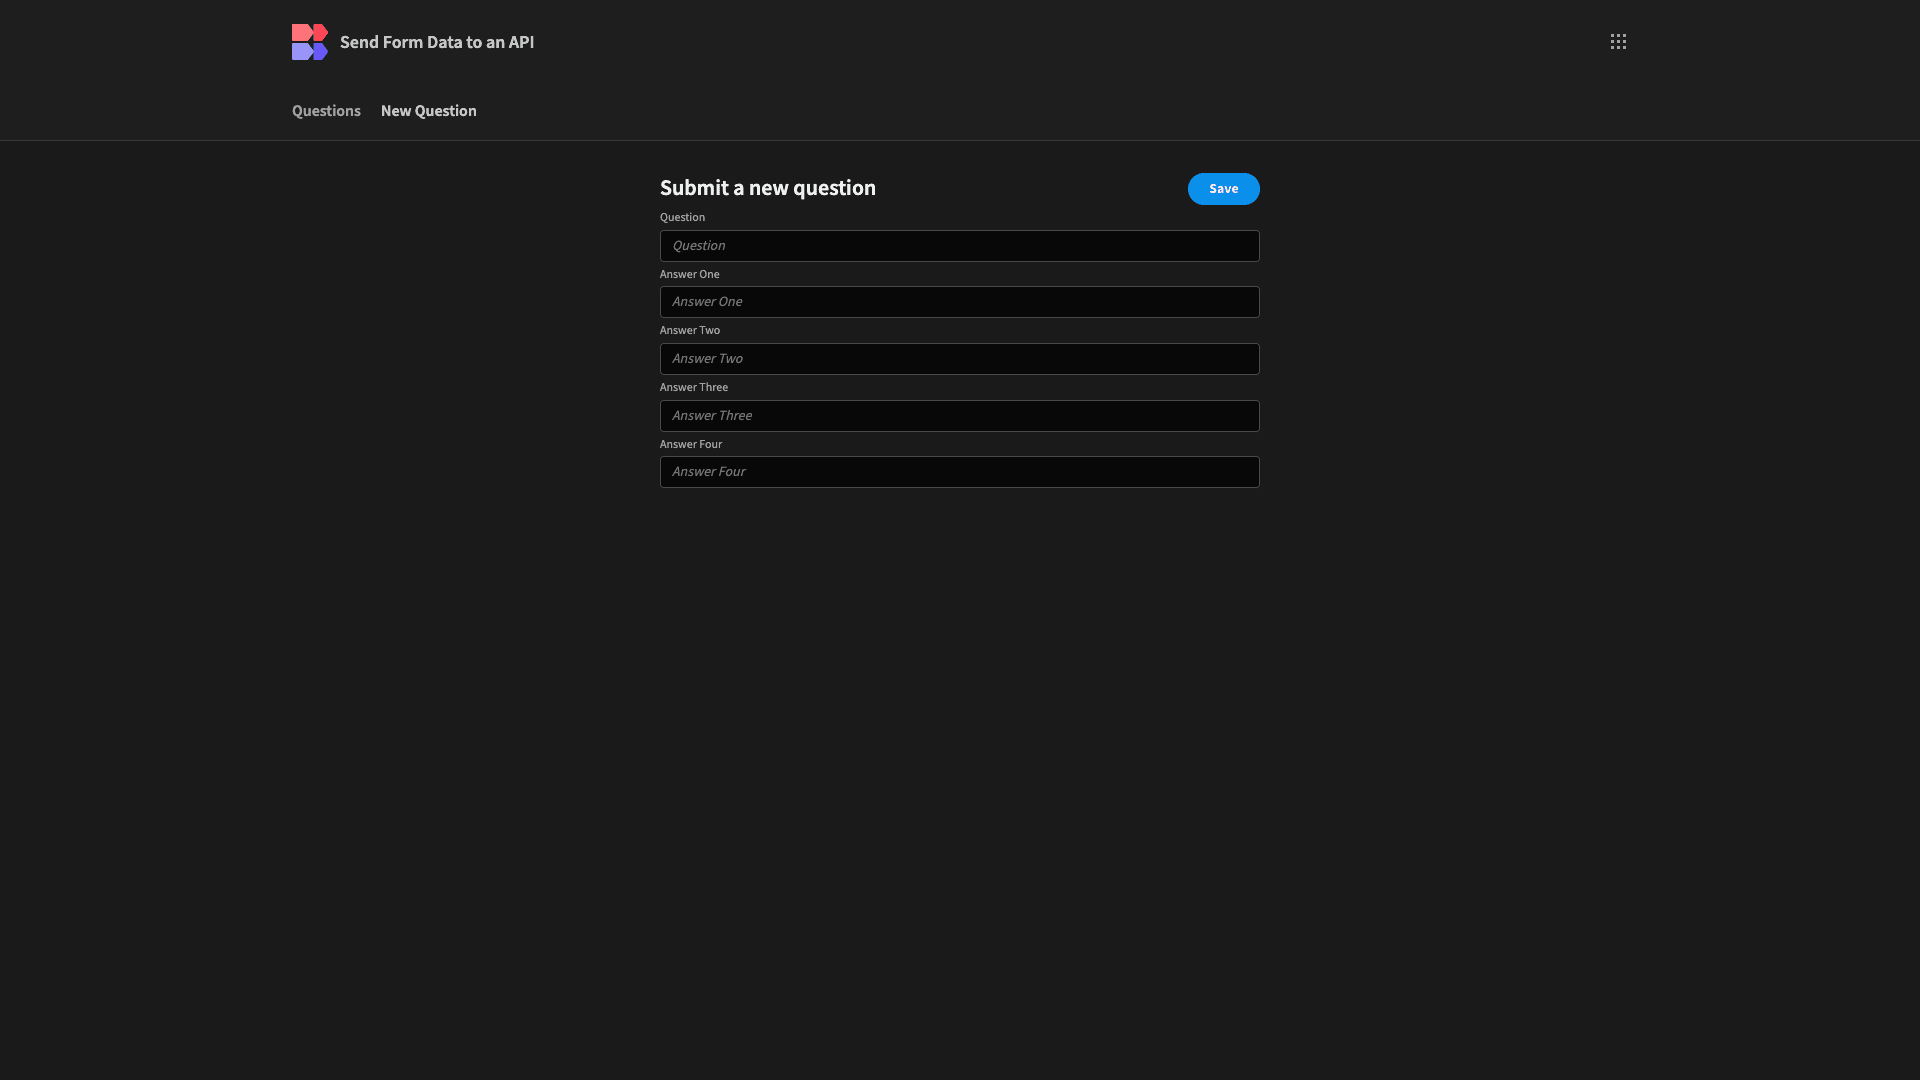
Here’s a reminder of what our finished app looks like.
If you found this guide helpful, check out our digital forms page to learn more about how Budibase empowers teams to build advanced forms on top of any data source.