How to Send Form Data to JSON: 4 Methods
Web forms are some of the most basic applications around. But the value we get from them really depends on what we can do with the data we gather.
Most form builders are kind of limited in this regard - largely restricting us to their built-in databases.
We can also go down the route of building fully custom forms. This provides greater flexibility, but it also requires a lot more from us in terms of time, effort, and expertise.
Today, we’re checking out how Budibase can be used to build advanced forms for generating JSON objects - in a wide variety of contexts.
Specifically, we’ll look at four approaches to doing this, including using our internal database, generating JSON blobs in front-end interfaces, sending JSON objects via REST requests, or creating records in external object stores.
Even better, with our open-source, low-code platform, you can do all of this without writing a single line of custom code.
Let’s jump in.
Why do we need to send form data to JSON?
JSON is one of the building blocks of modern programming. Essentially, this is a language-agnostic text format for storing, transmitting, and manipulating data.
This allows us to create flexible data objects made up of key/value pairs and arrays.
So, when we’re able to save or use our form submissions as JSON objects, we can leverage this data within any tool, language, or framework that supports this.
We could effectively then do just about anything with this data.
A basic example would be using form interfaces as a user-friendly way to trigger API requests.
Additionally, storing data as JSON objects rather than in a tabular structure means we can use a flexible schema - rather than the rigid structure imposed by a traditional RDBMS. Therefore, we might need a JSON form for creating or updating unstructured data.
Generating JSON from form data in Budibase
Budibase is the fast, easy way to build advanced forms on top of just about any data source.
If you haven’t already, sign up for a free Budibase account to start building unlimited forms.
1. JSON fields in BudibaseDB
The easiest way to create JSON objects from form data is using the built-in JSON attribute type within our internal database, BudibaseDB. This is a data column that allows us to store JSON blobs as values.
We’ve started by creating a new Budibase application and selecting an empty BudibaseDB table as our data source.
Our table is called ‘submissions’.
Here’s what this looks like:
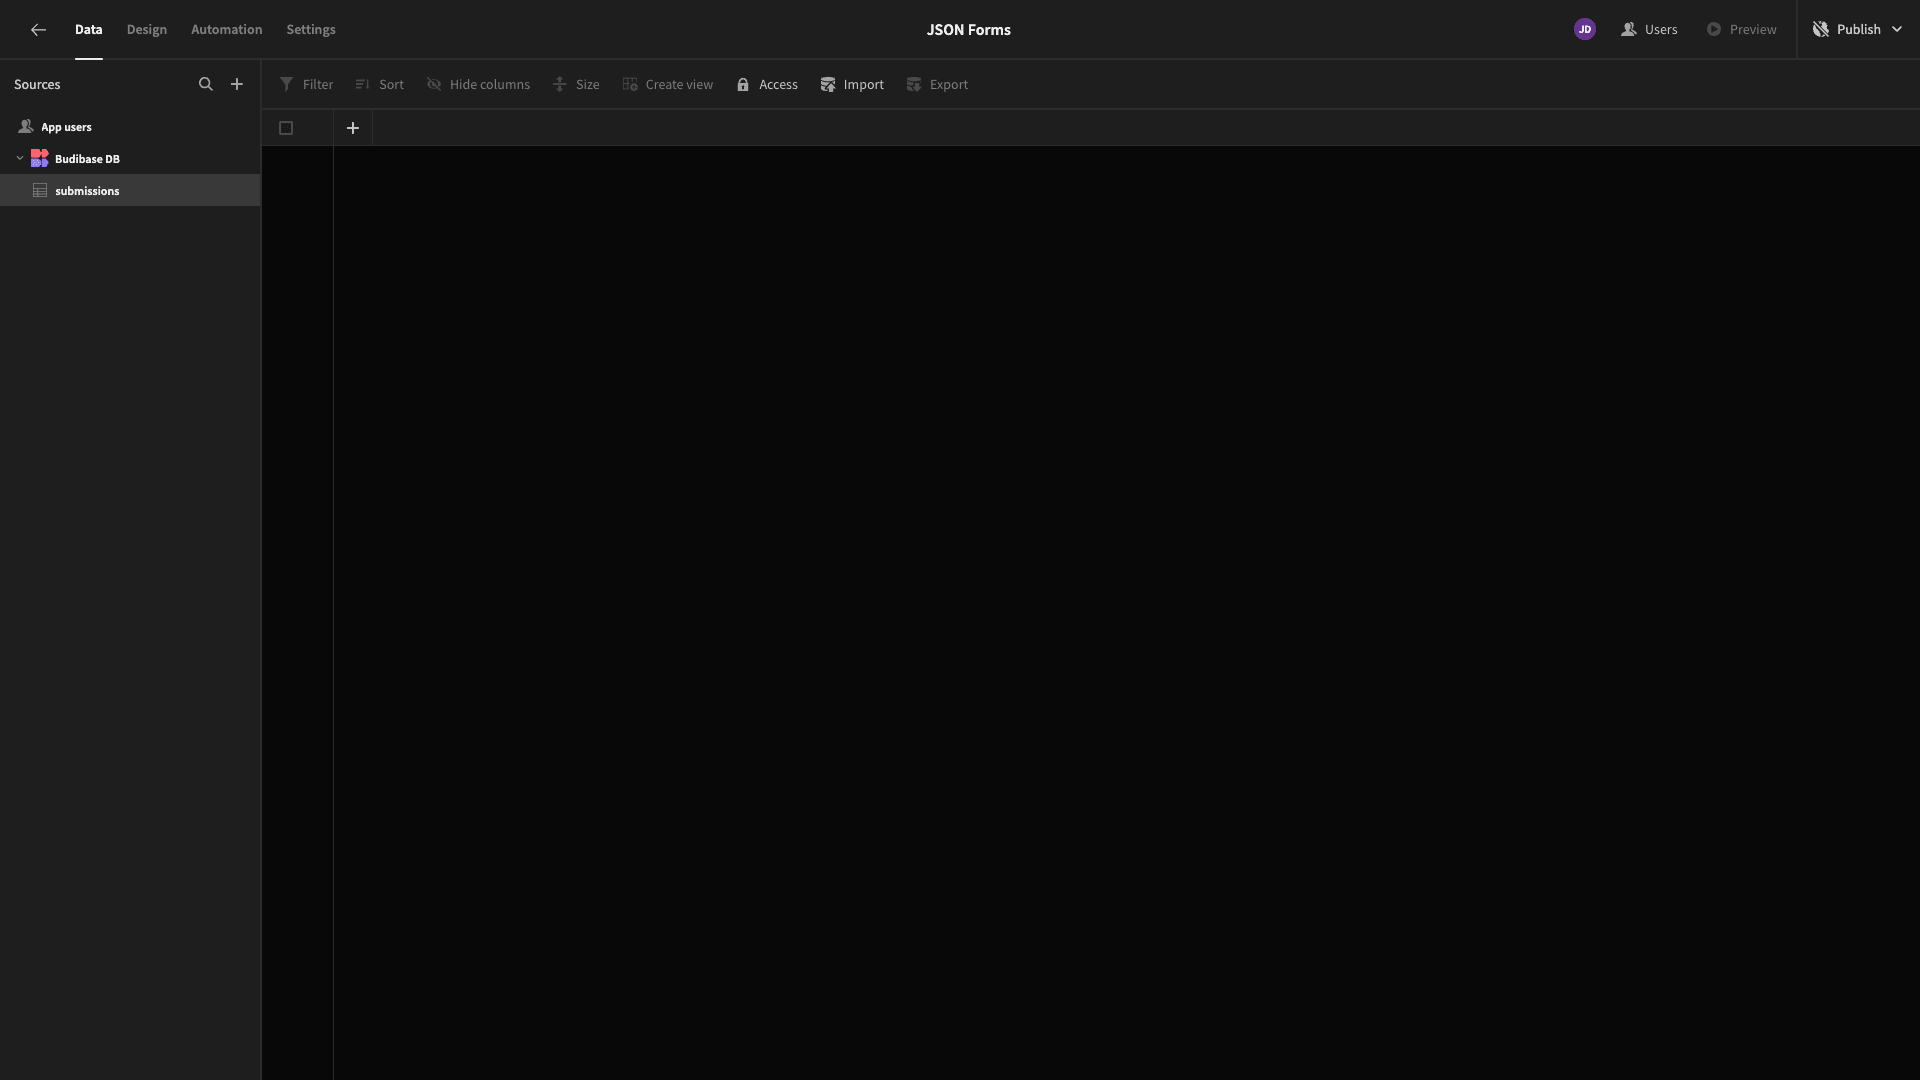
We can use the plus icon to add a column.

We’ll call this ‘people’ since our example JSON objects will relate to people, and we’ll choose JSON as the Type.
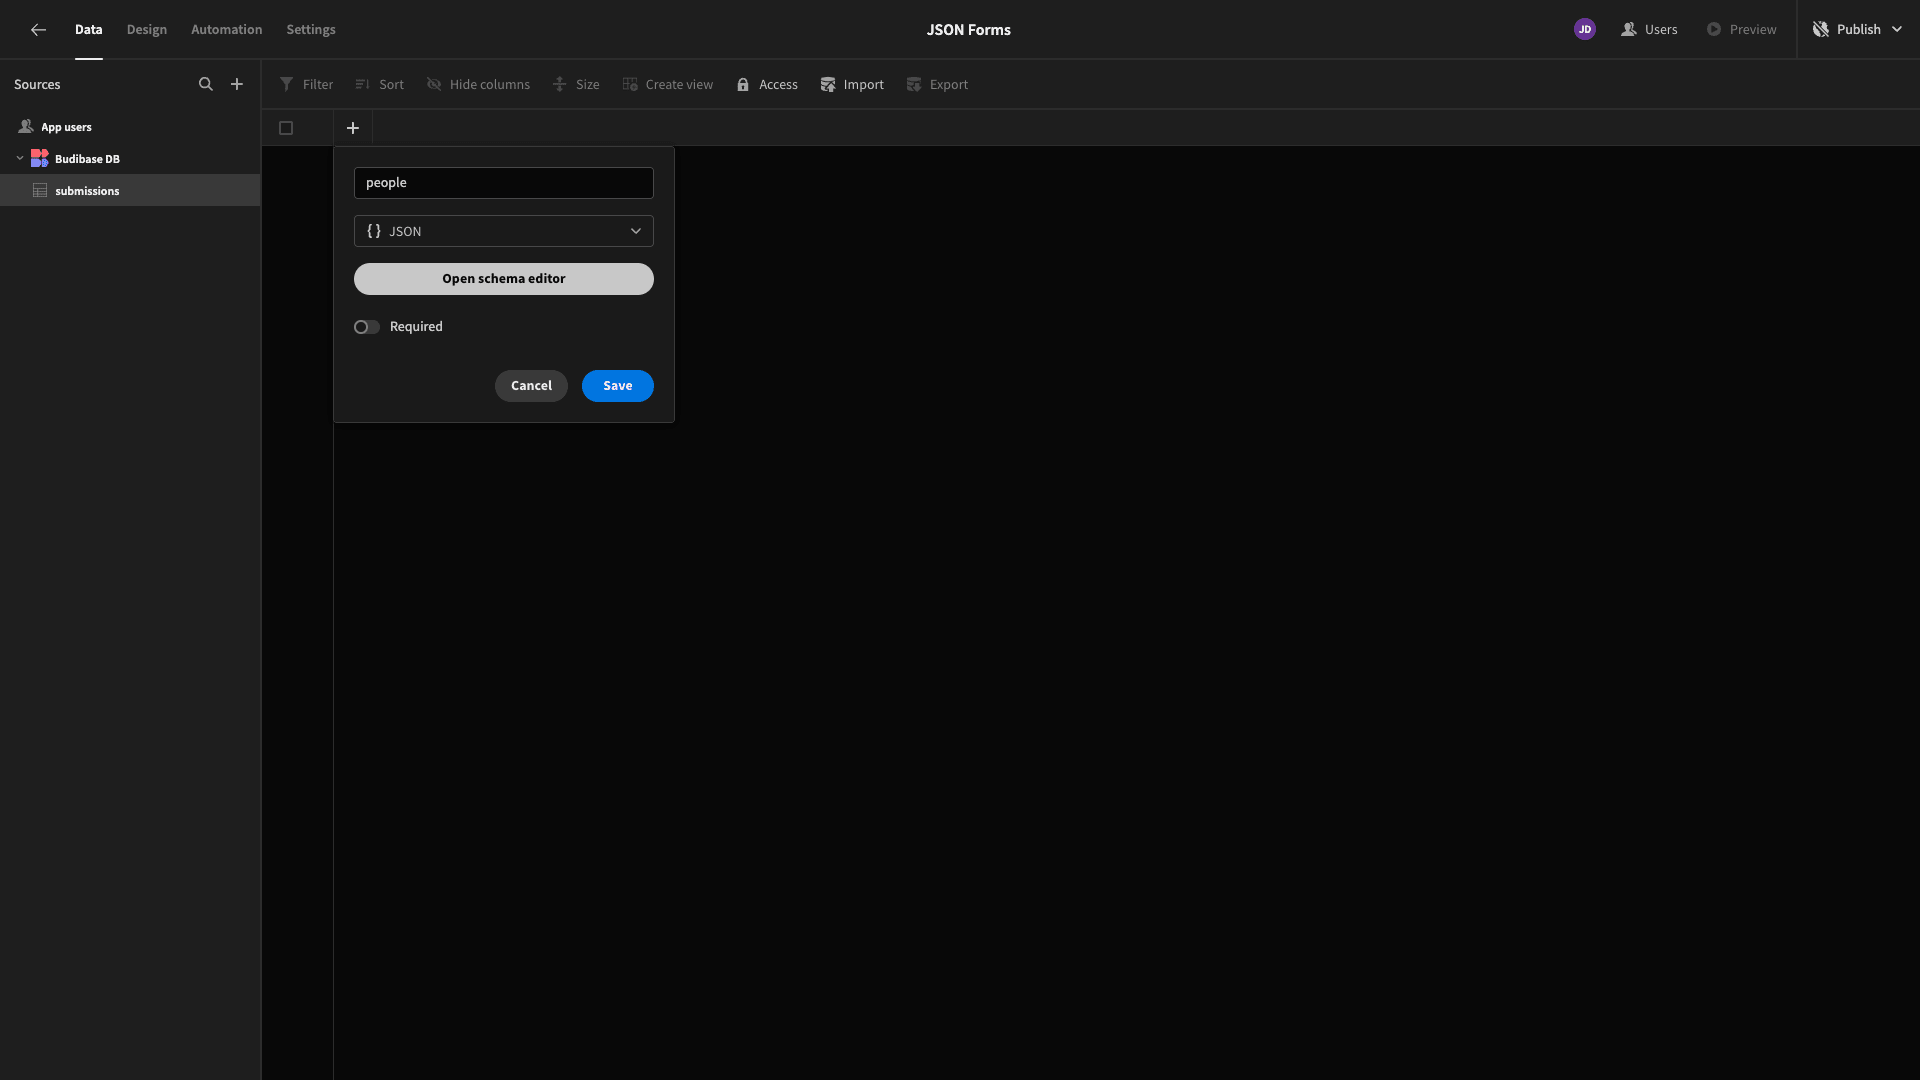
We’ll use the button to open the schema editor. Here, we can paste in an existing JSON object to infer the schema, or we can build this from scratch using a form-like interface.
We’re doing the latter.
We need to specify the Key and Type for each of the attributes in our schema:
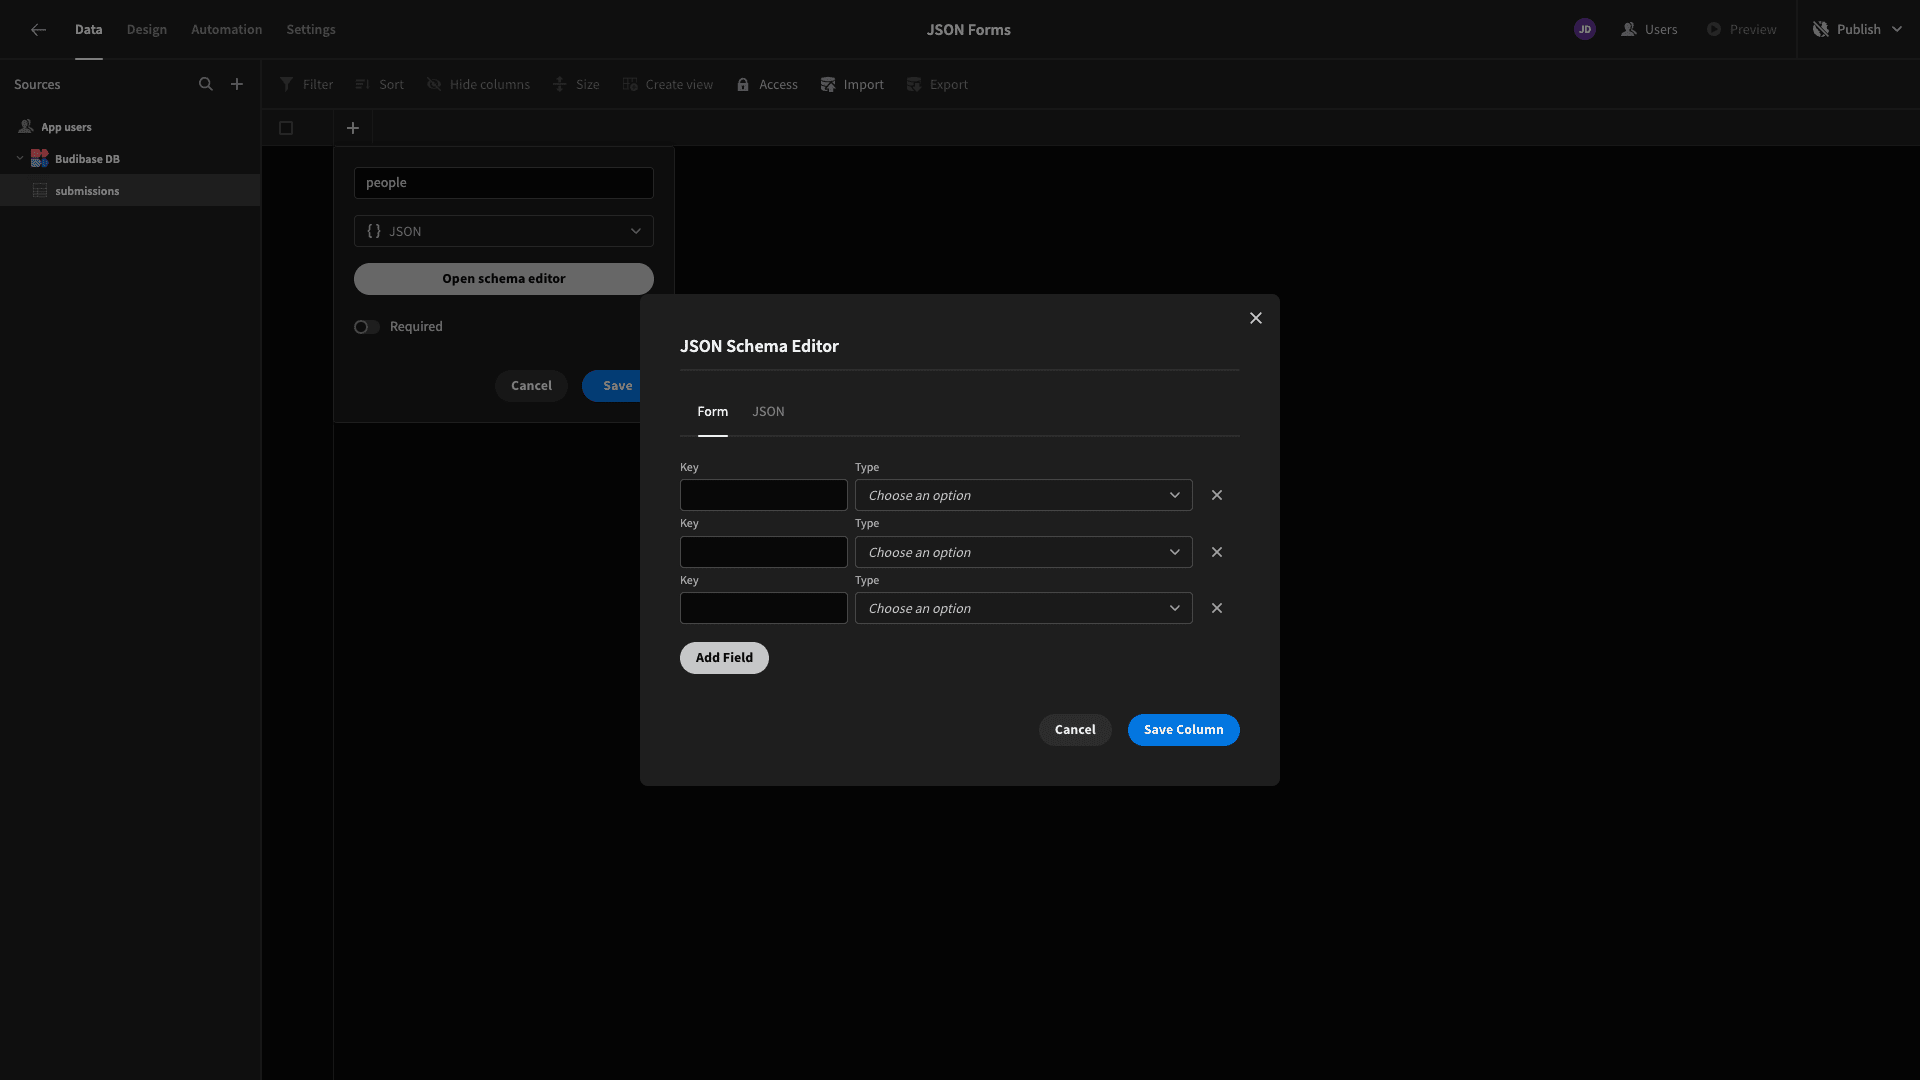
For the sake of demonstration, we’re adding three text fields, which we’ll call ‘name’, ‘country’, and ‘pets’.
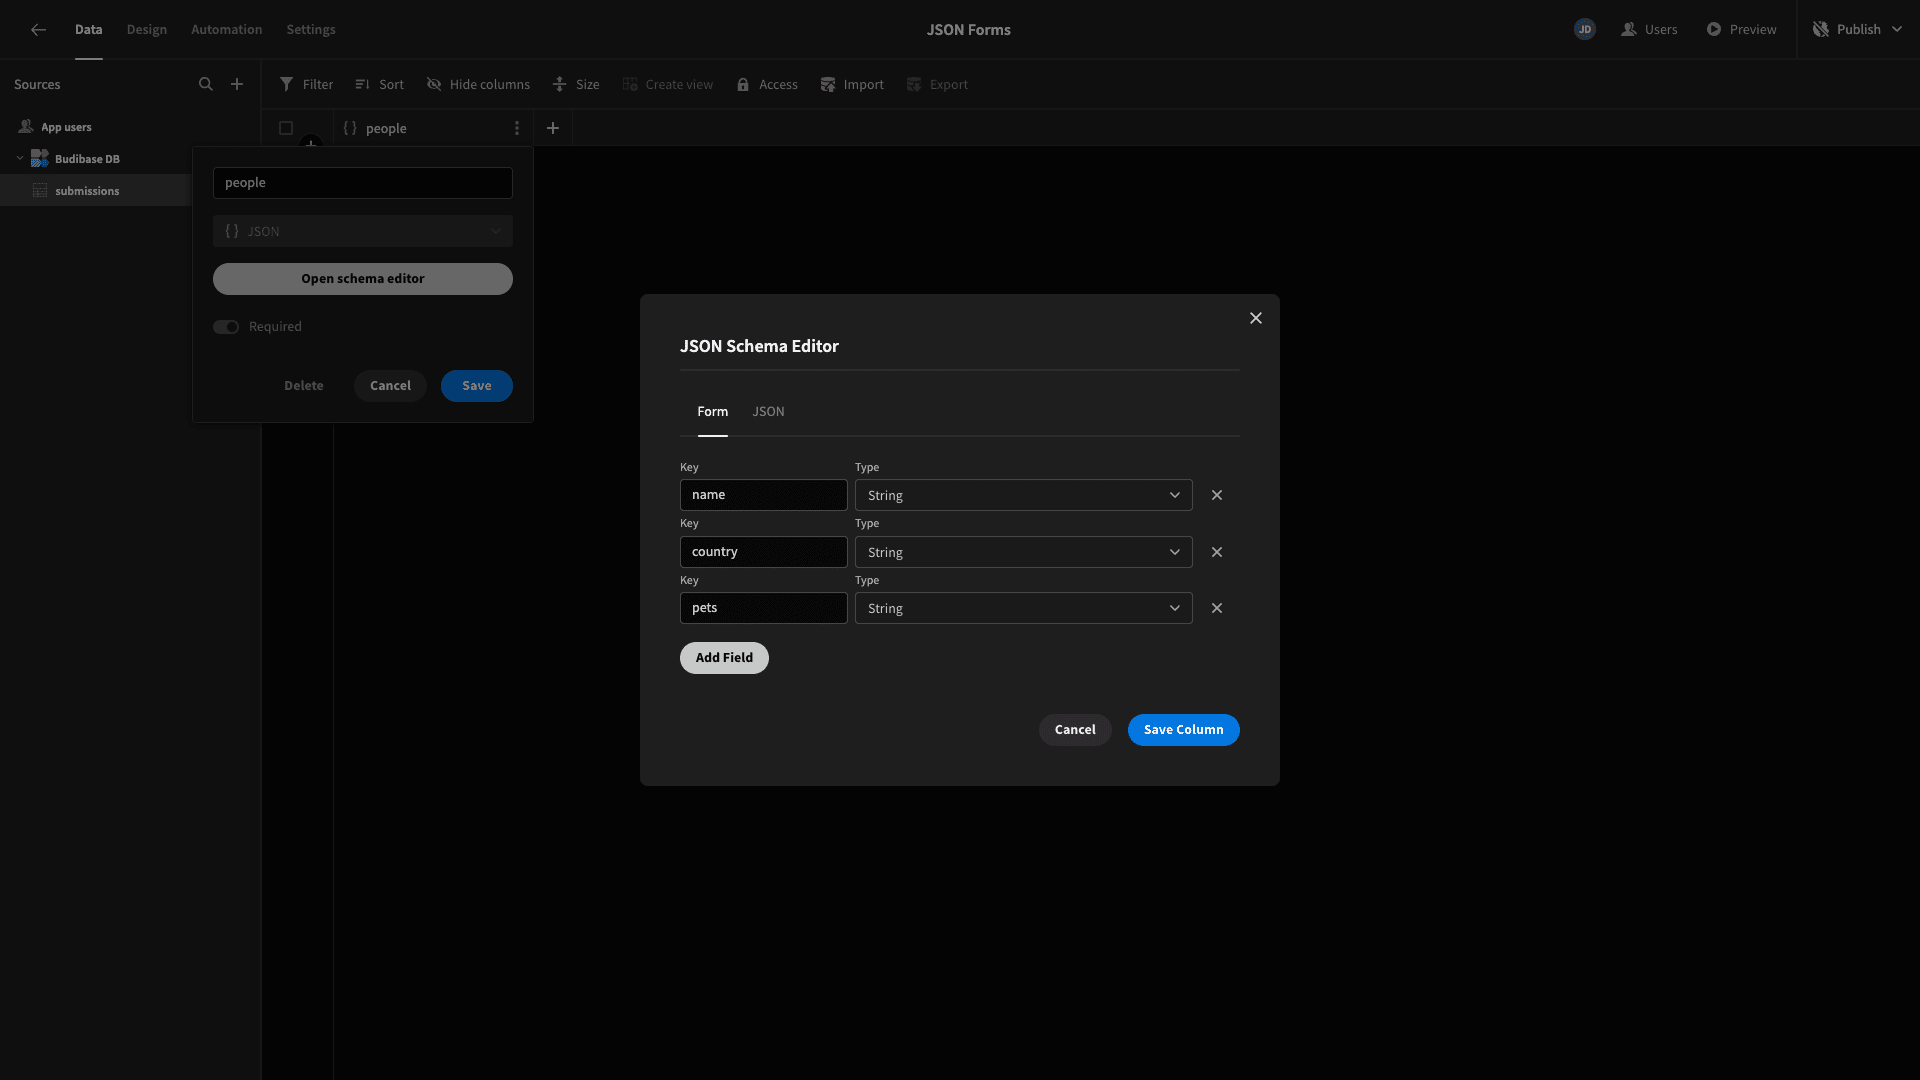
We’ll save that and head over to Budibase’s Design tab. Here, we’re prompted to choose how we want to create our first screen:
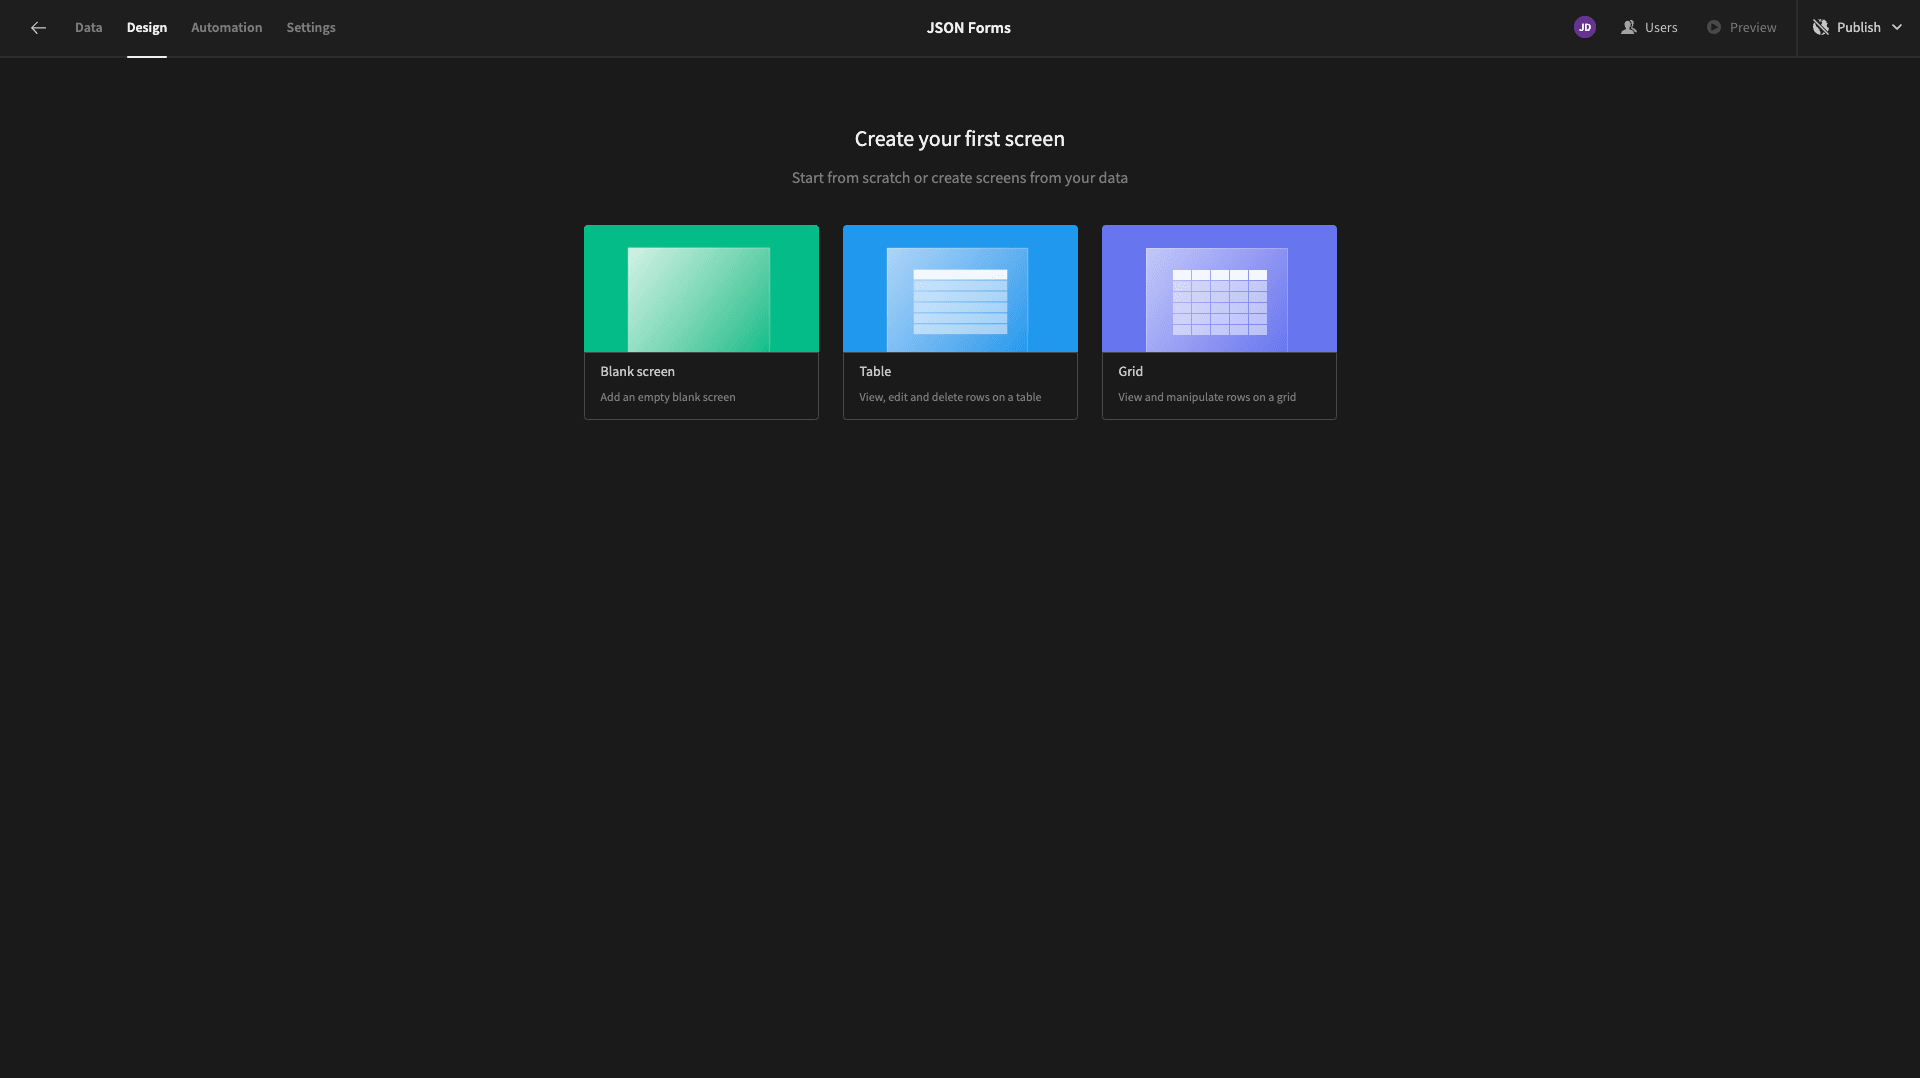
We want to start from scratch, so we’re selecting Blank Screen.
We’re then prompted to choose a page path for this screen. We’re going with ‘/internal-form’, since we’ll be building a few similar forms later.
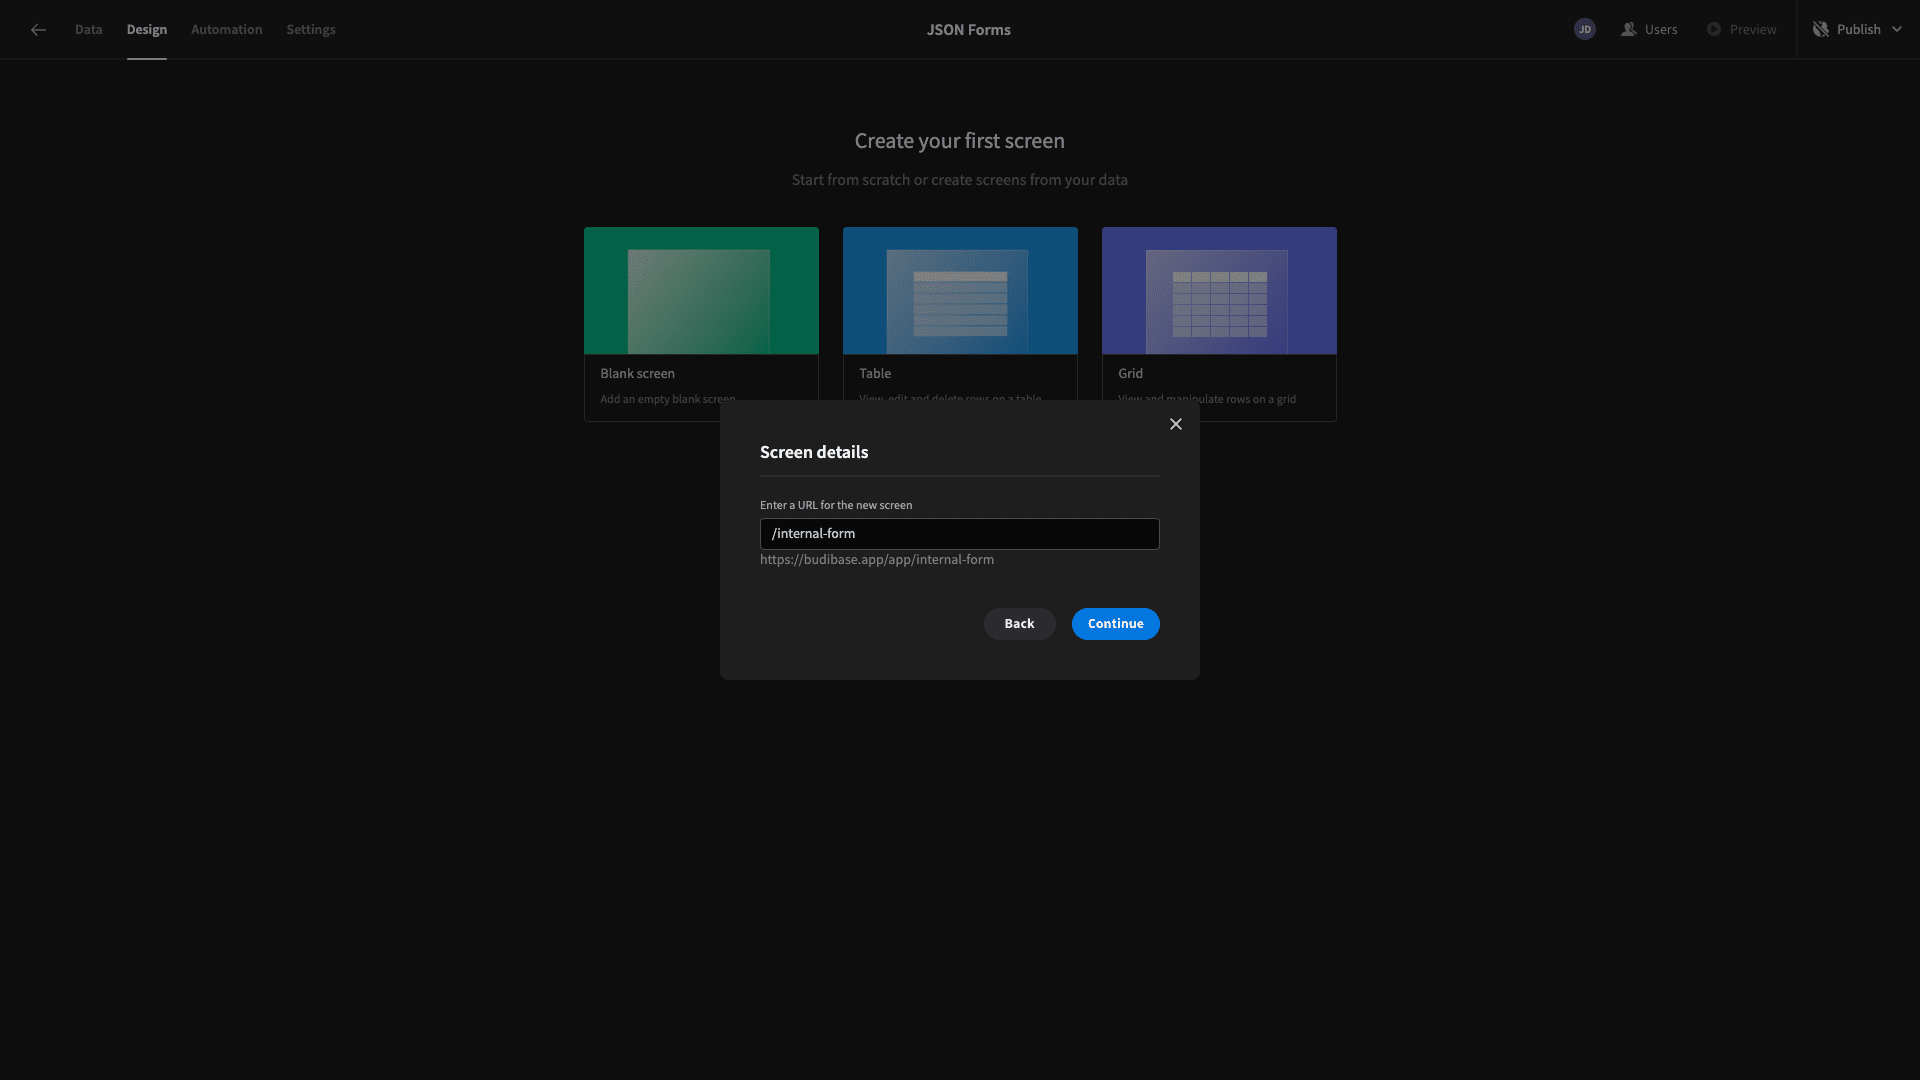
Here’s our blank screen:
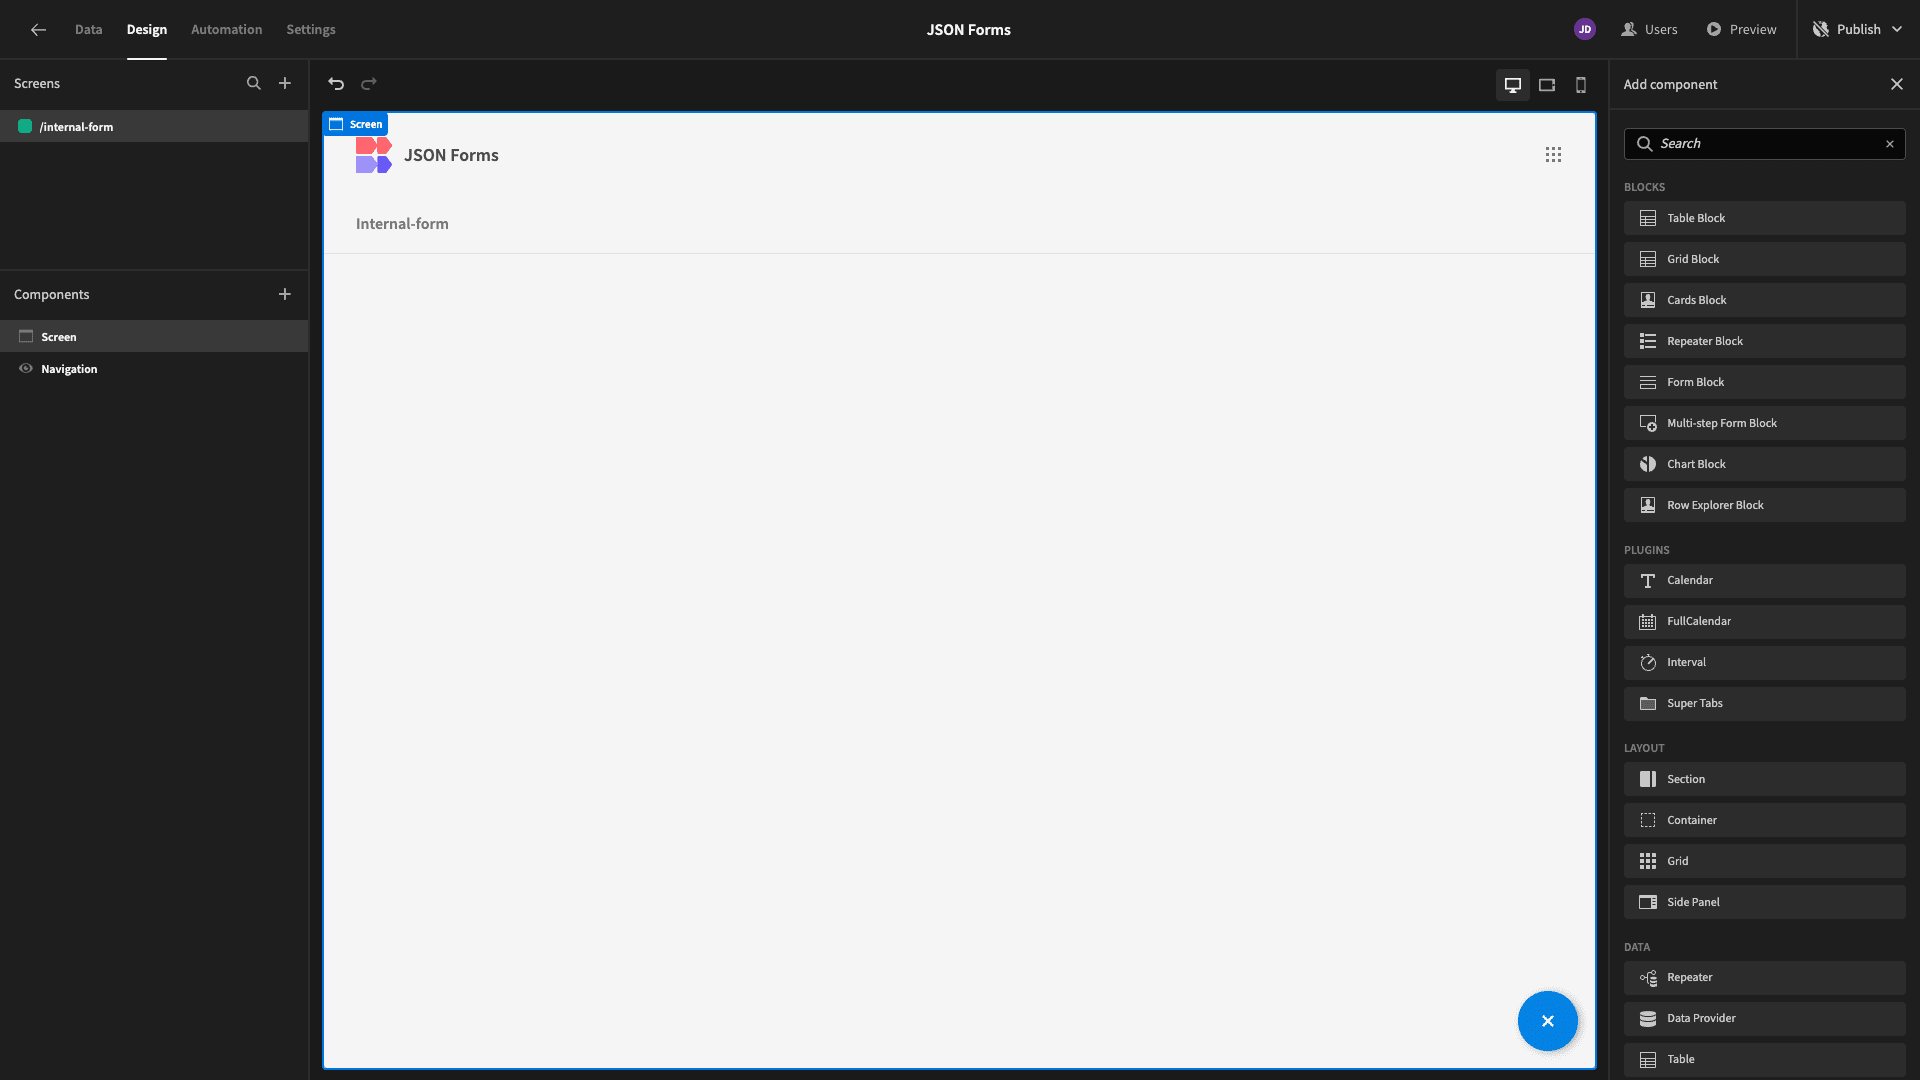
We’ll start by adding a component called a Form Block. This is a preconfigured set of UI elements that generates a form based on connected data tables.
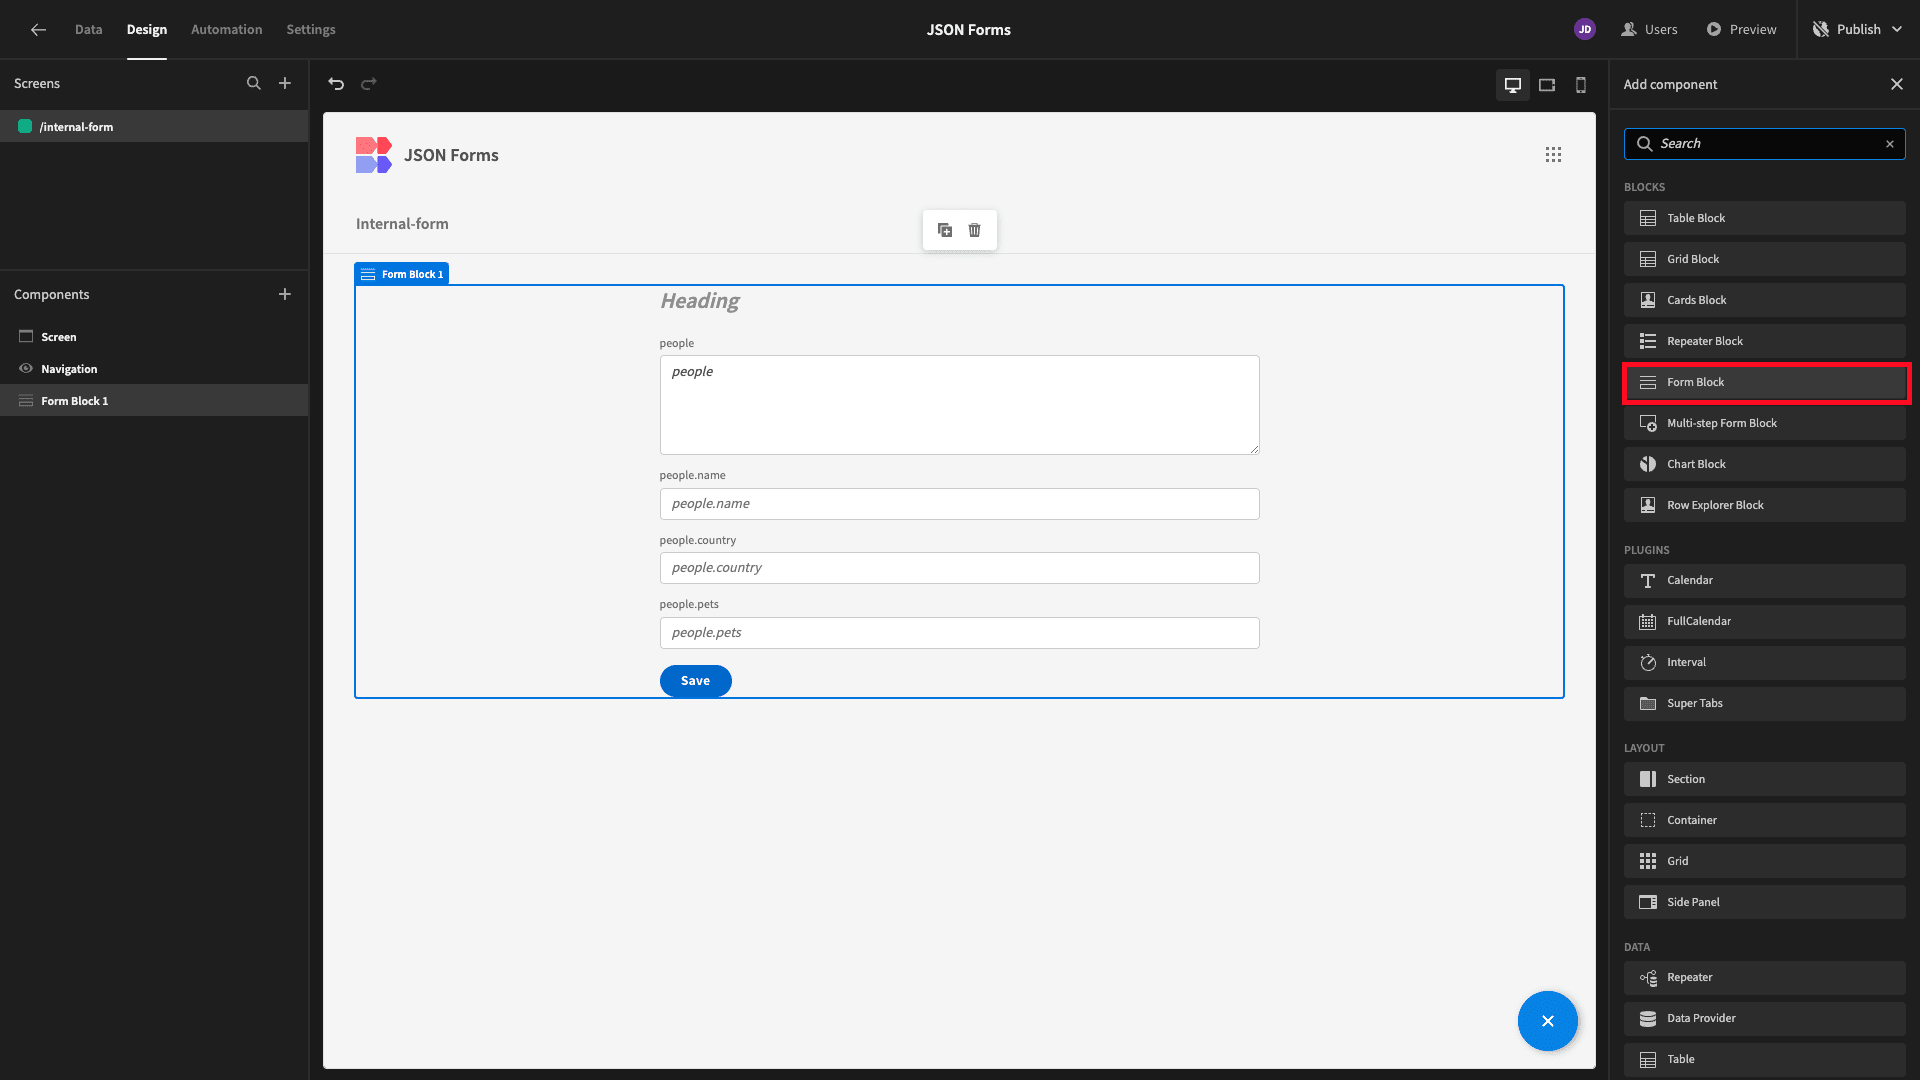
This looks a little bit strange.
The reason for this is that when an internal table contains a JSON attribute, the form block will output fields for each individual attribute in its schema - as well as a field for inputting an entire JSON blob manually.
We can then select which we want to use.
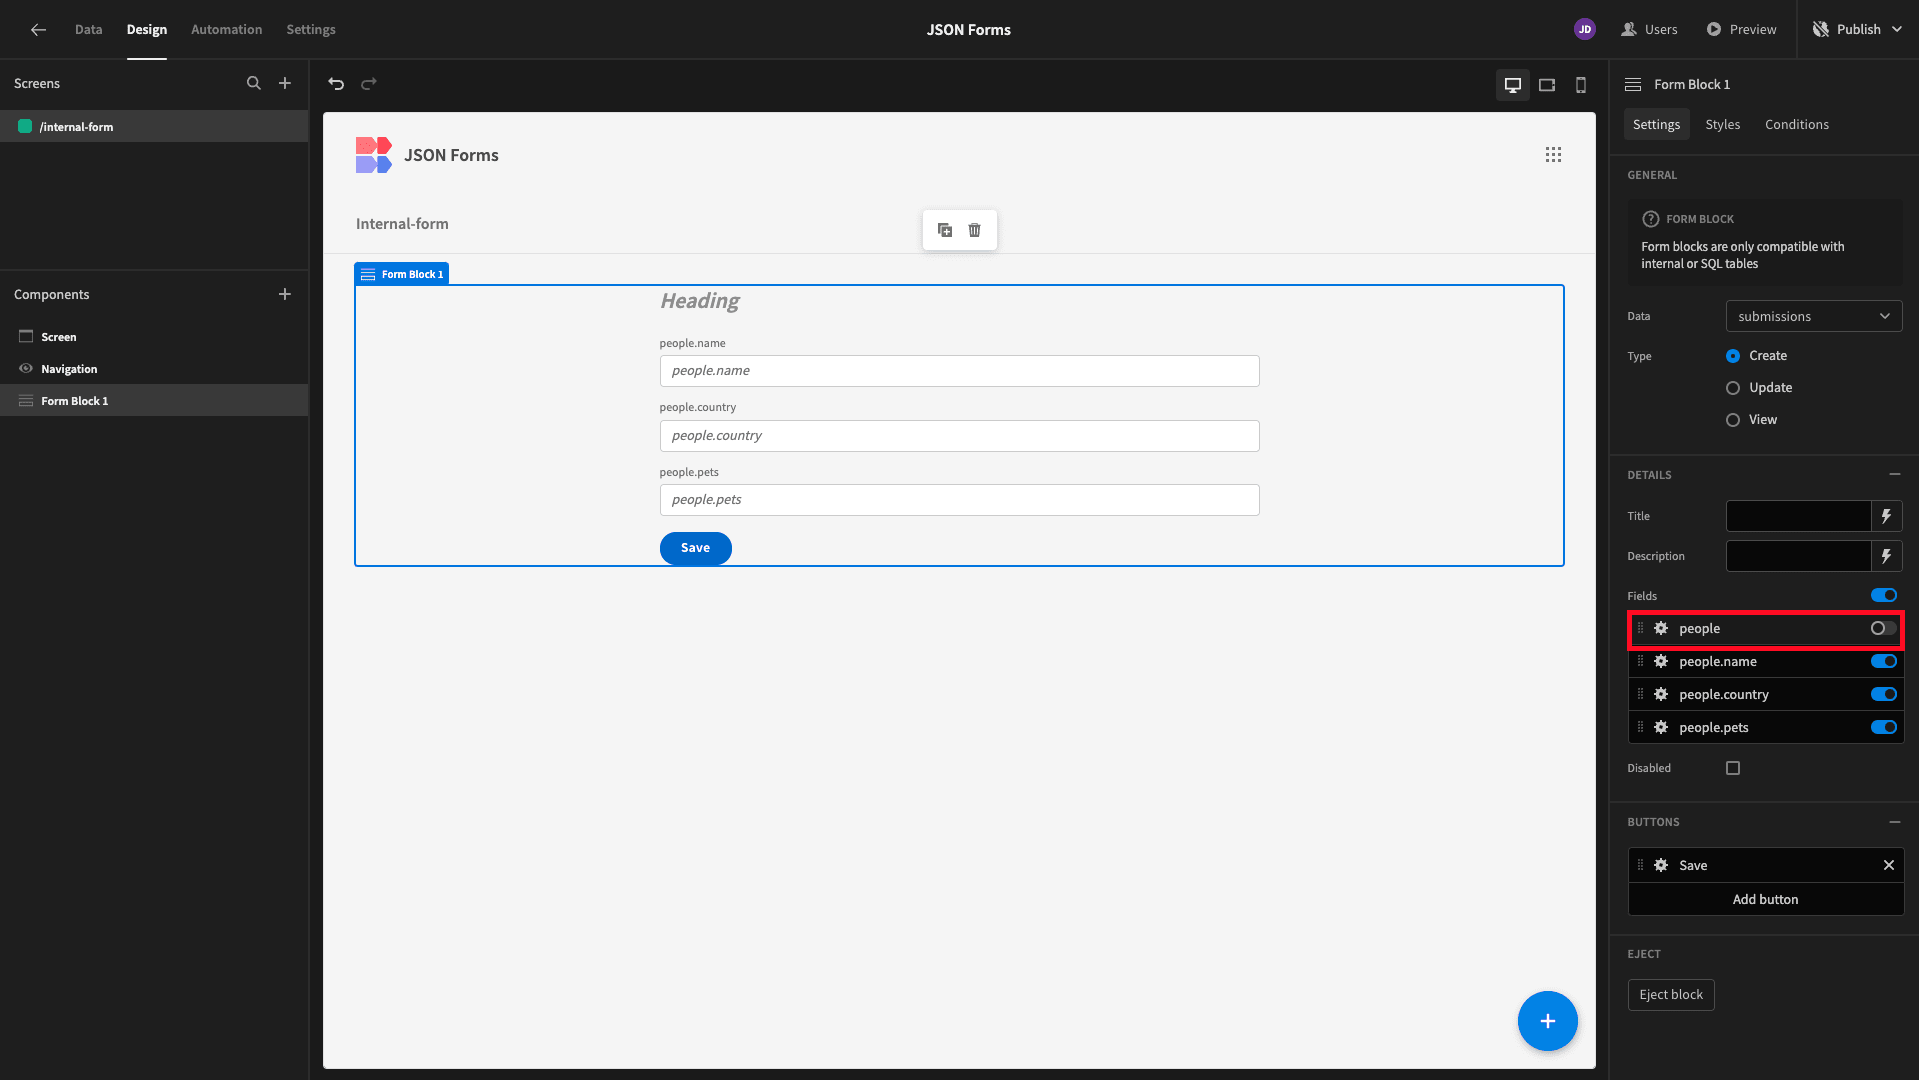
For this form, we want to keep things as simple as possible. So, we’ll use the options on the right-hand side to deselect the long-form field for the people attribute:
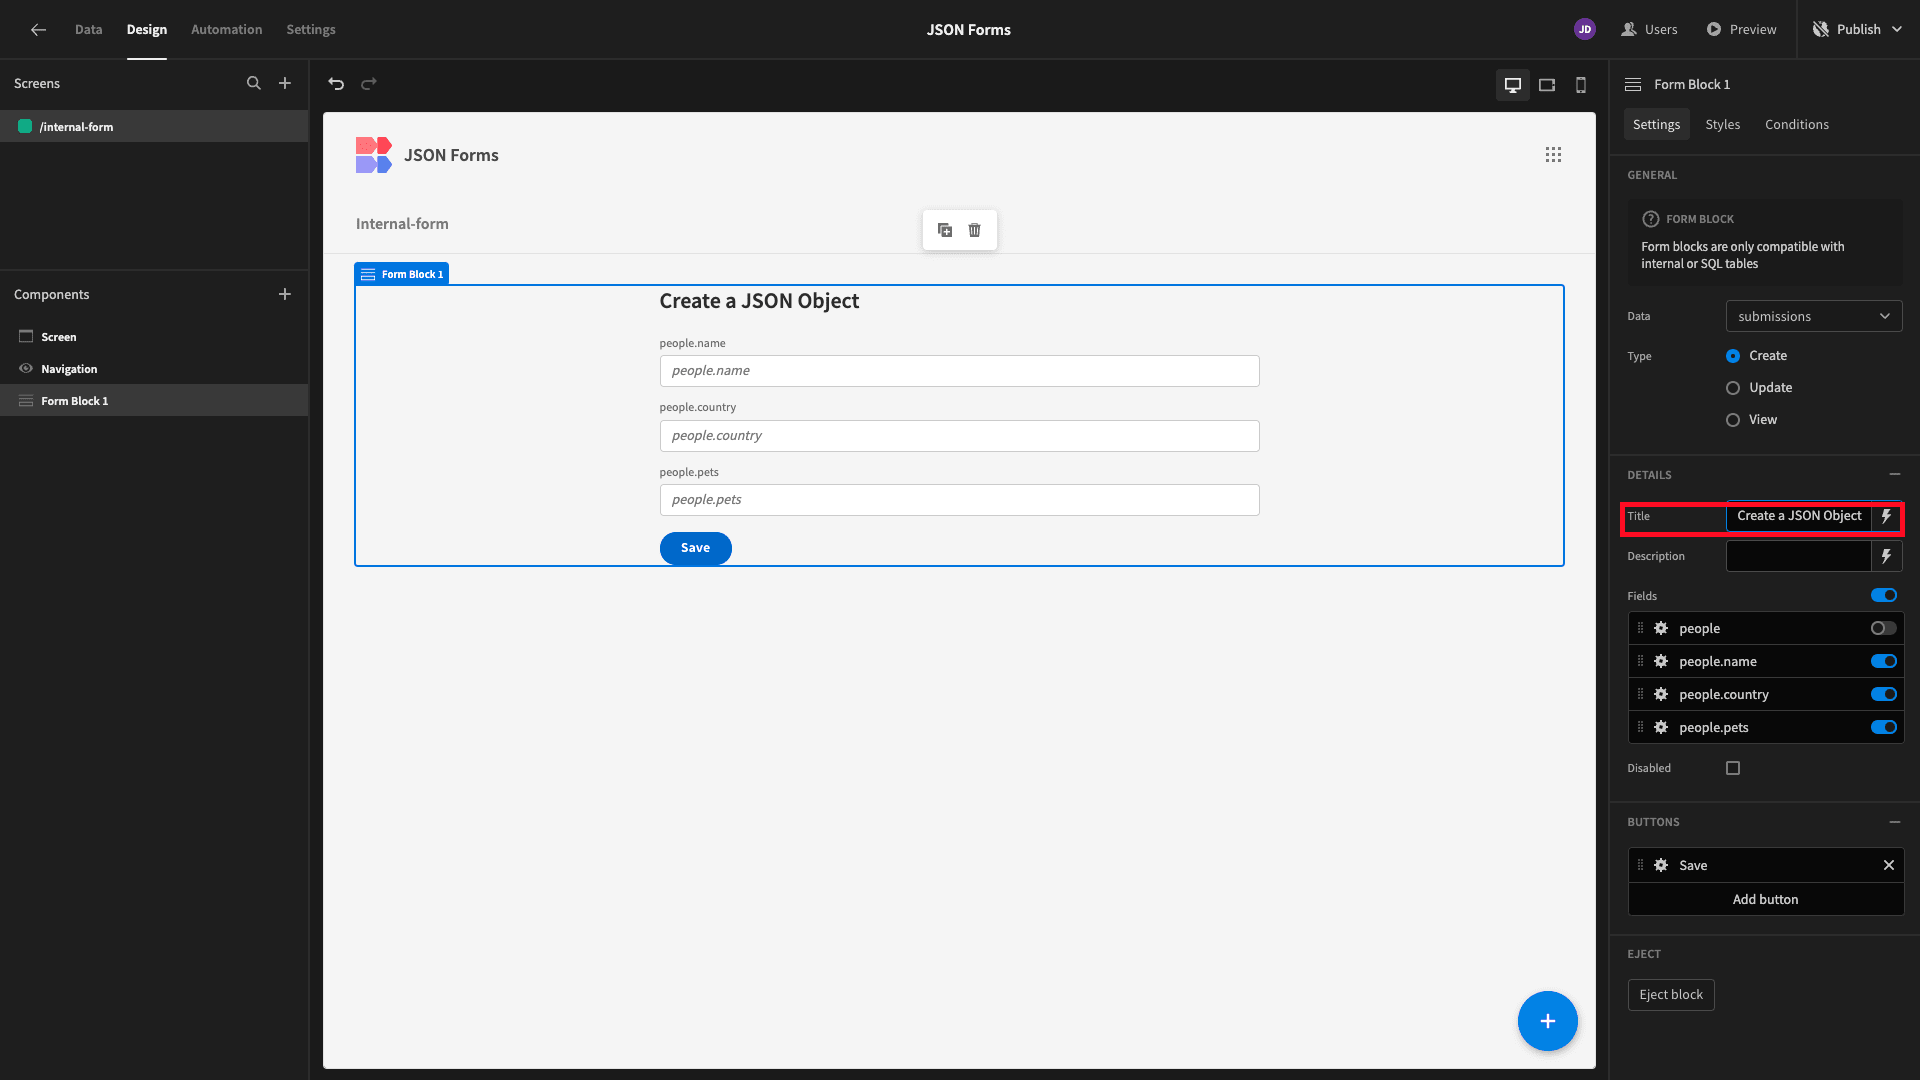
We also want to improve our design slightly, so we’ll set the Title to something more descriptive:
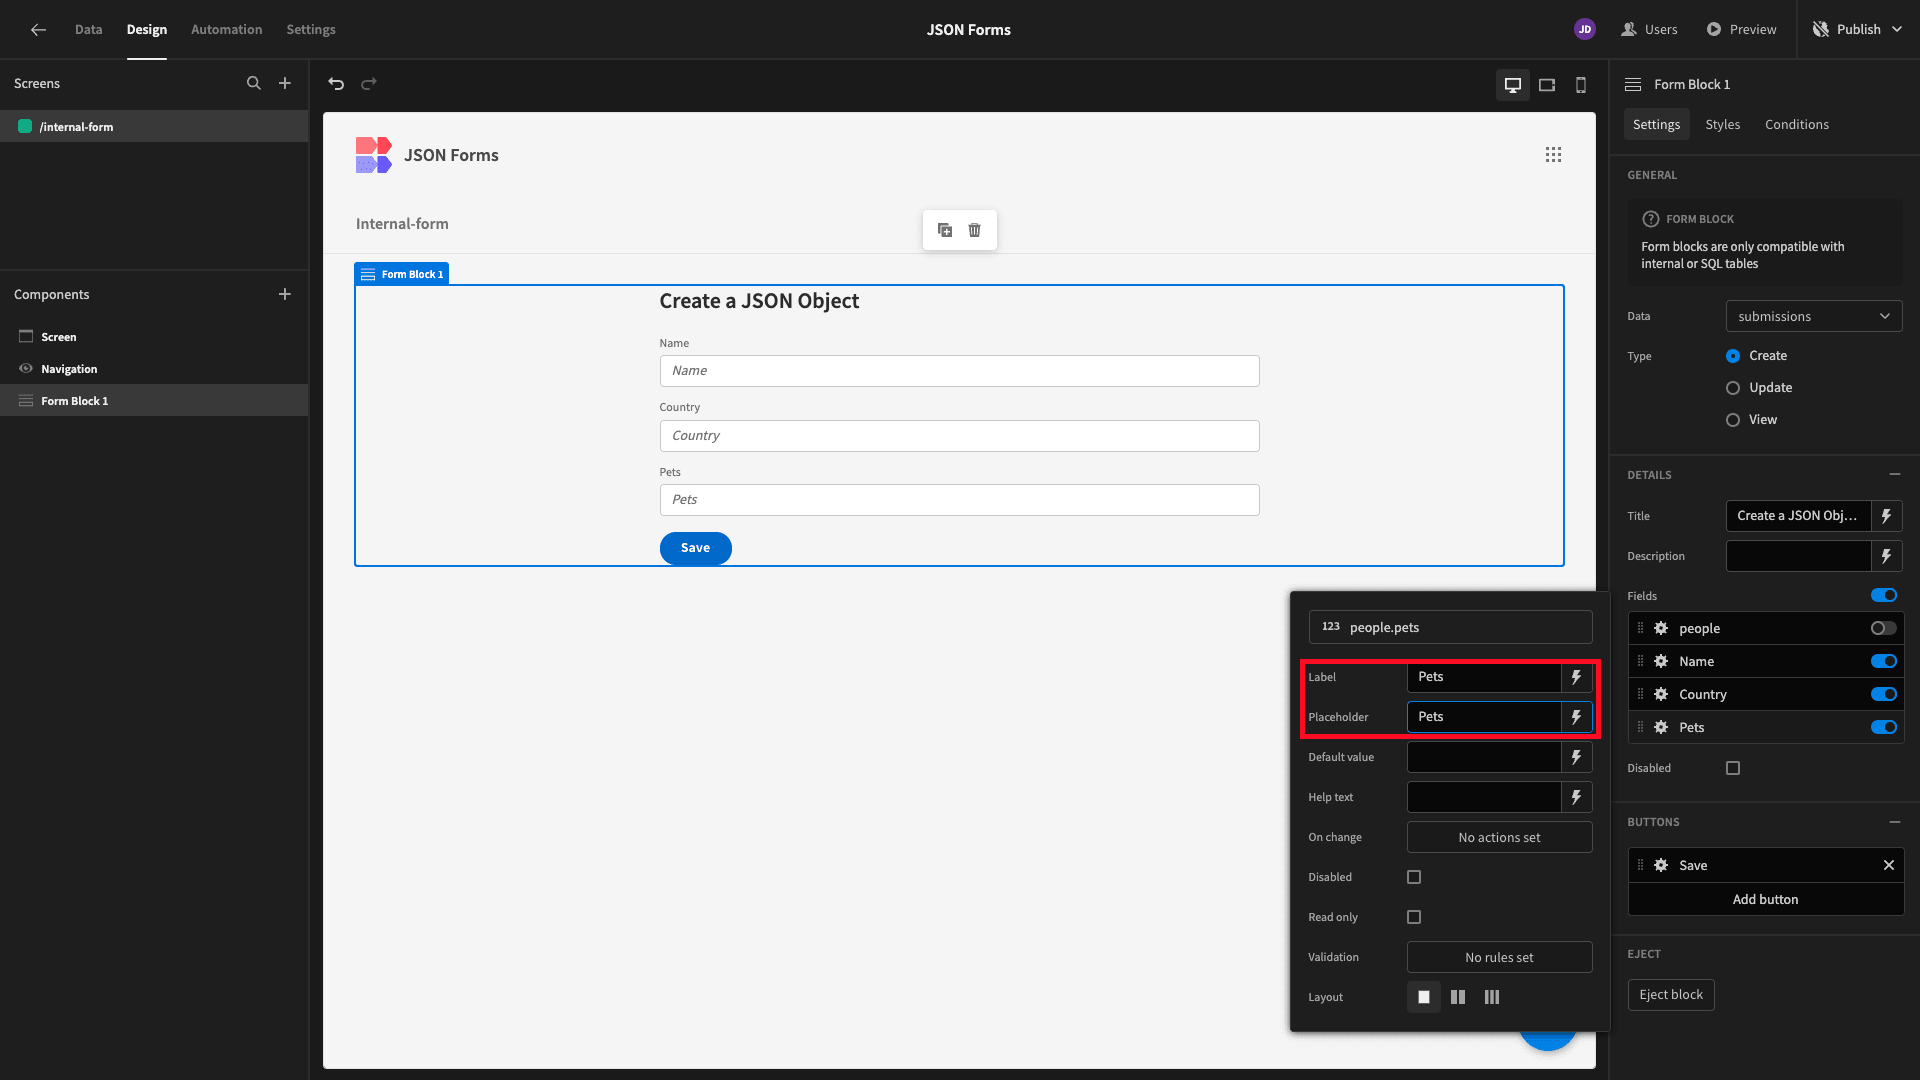
Update the display texts for each of our fields:
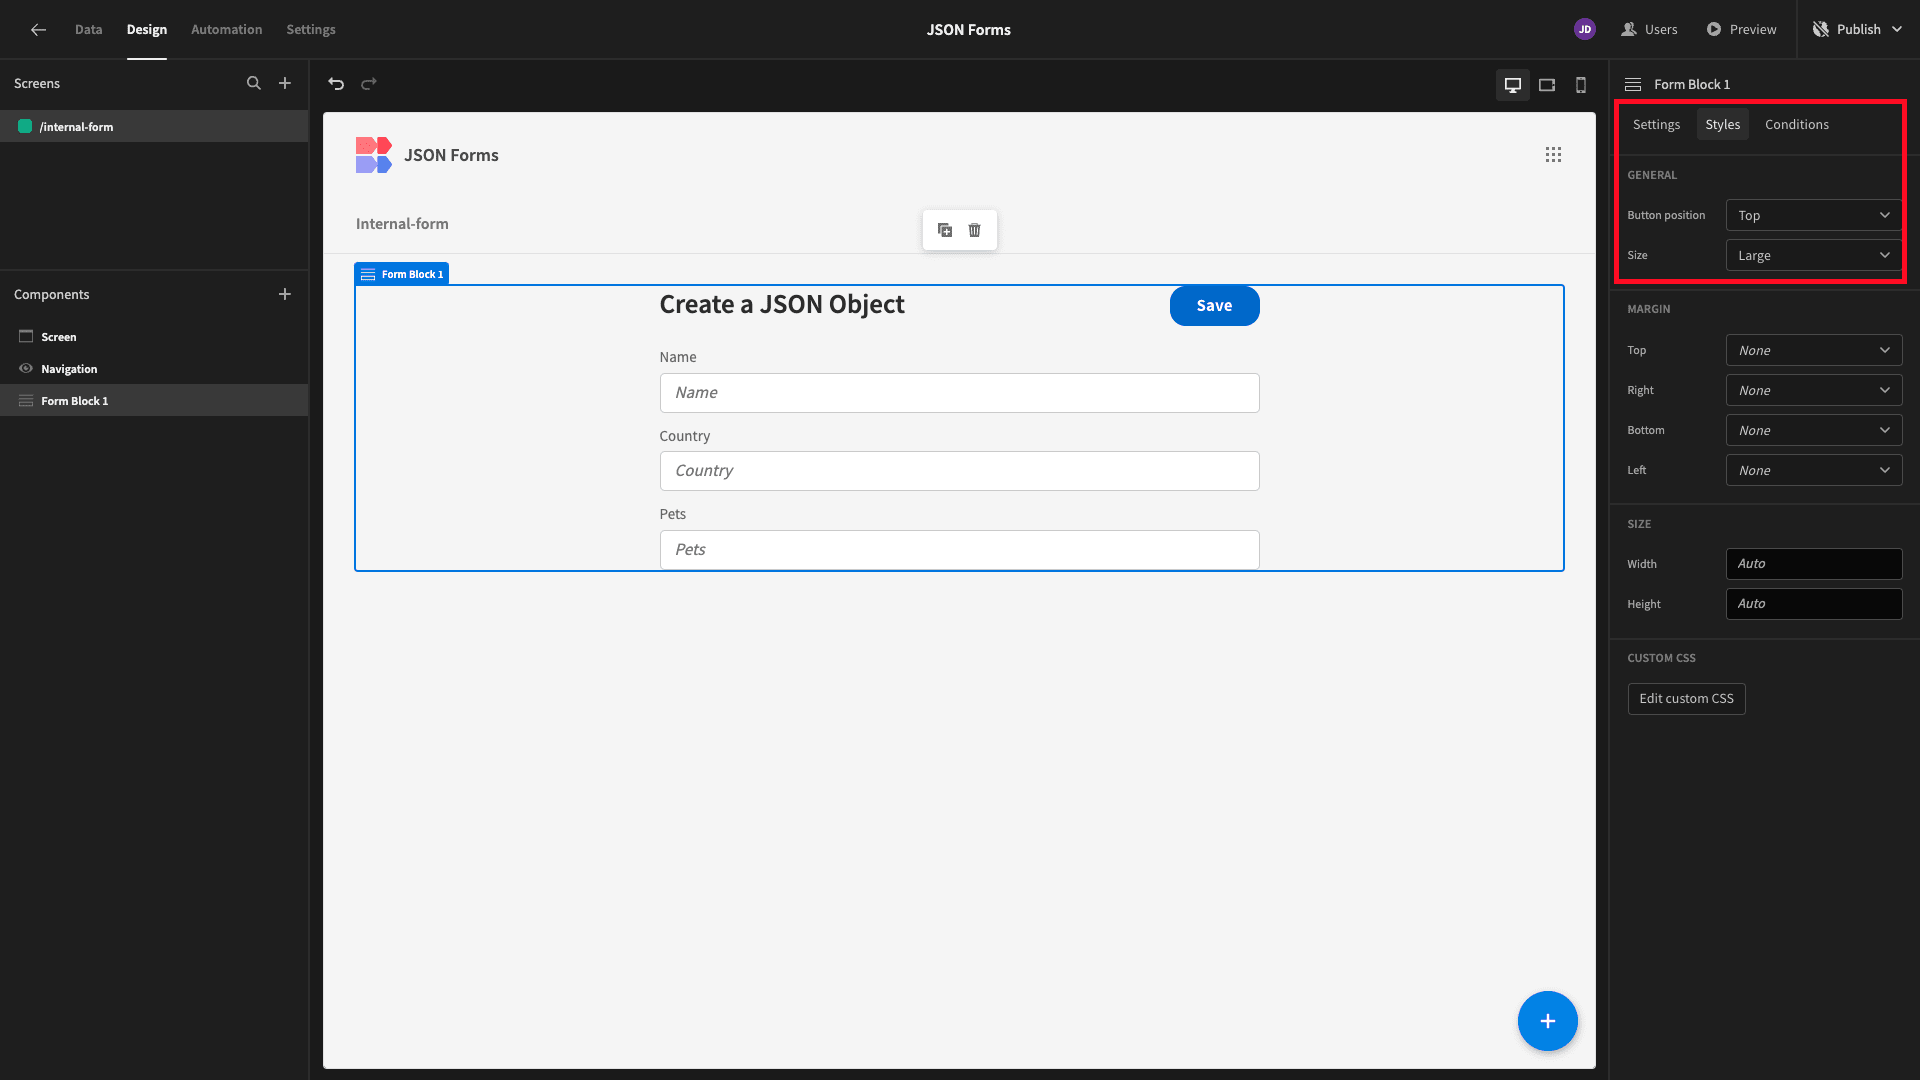
And reposition our Save button to the top of the UI. We’ll also set the Form Block’s Size attribute to Large:
Next, we’ll open up our app preview to test this out by adding a submission.
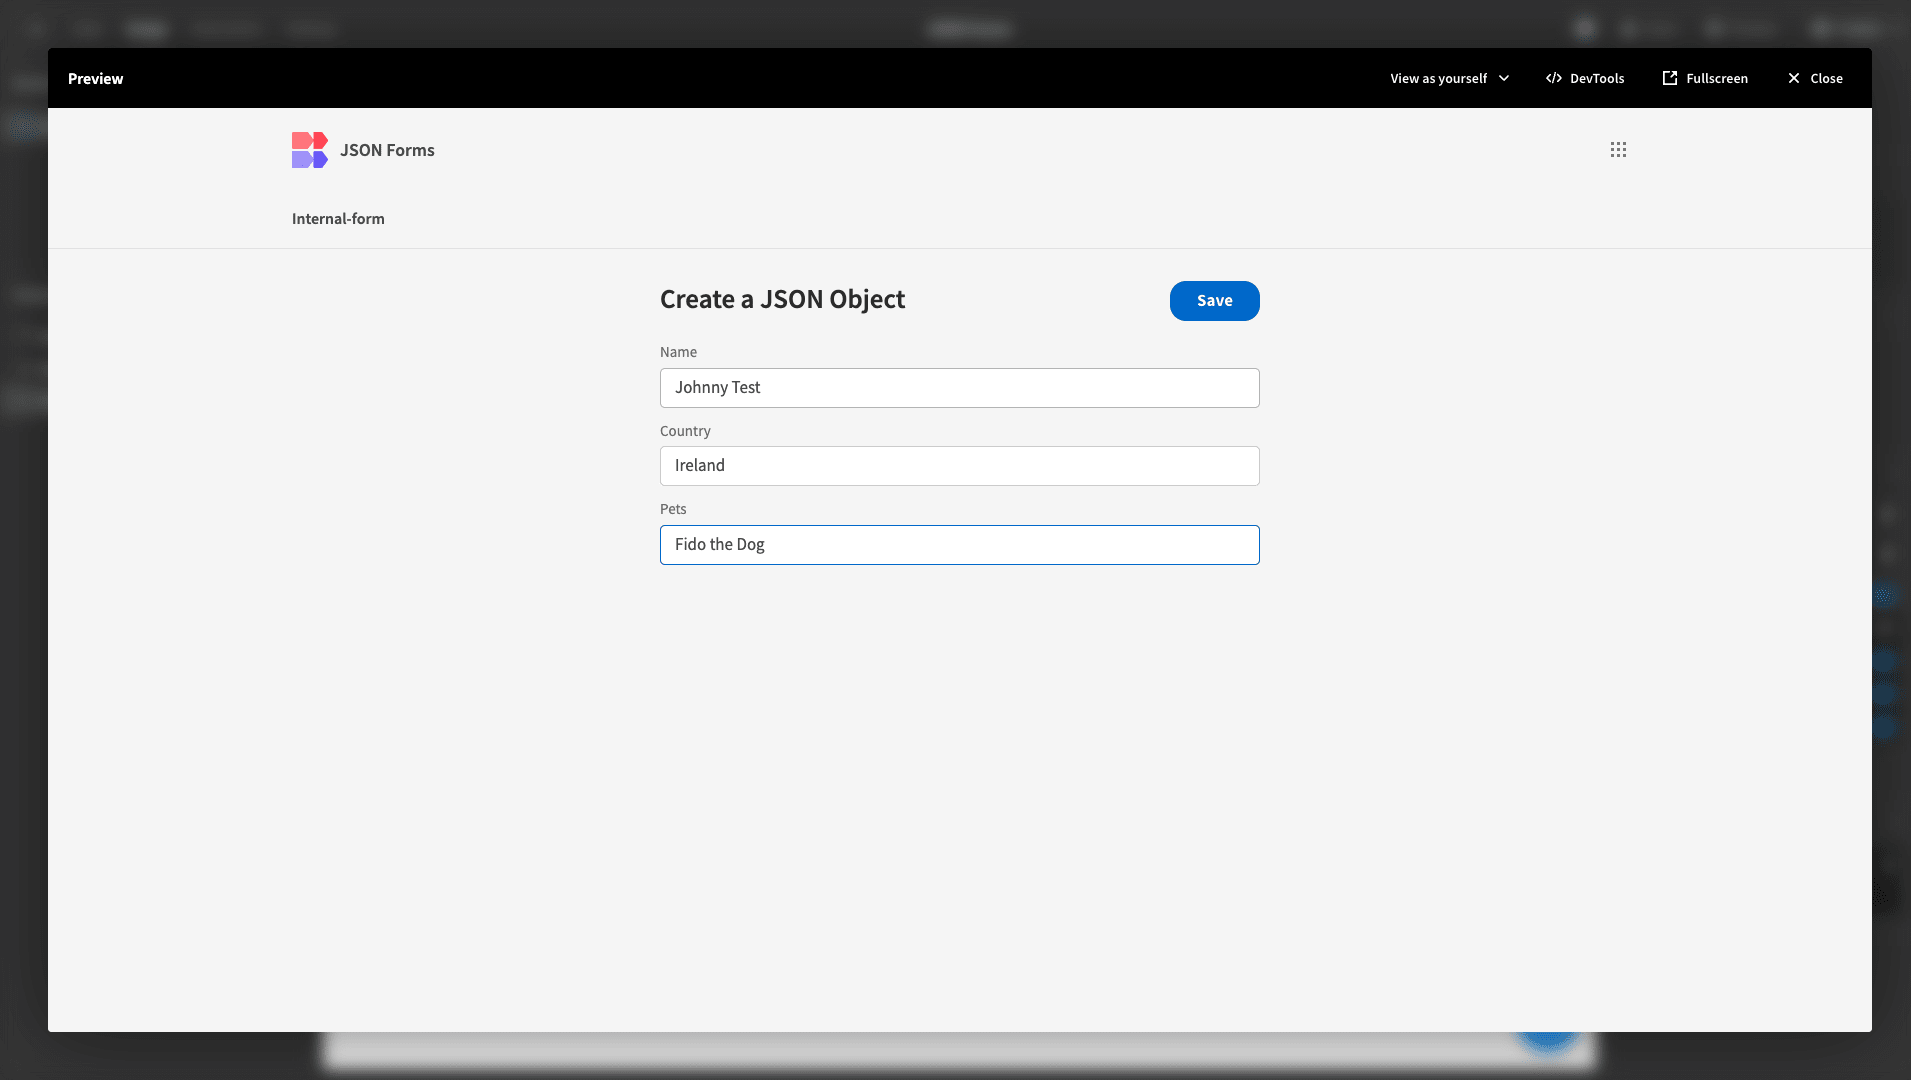
We can then head back to our data table to confirm that our form data has successfully been saved to our JSON column.
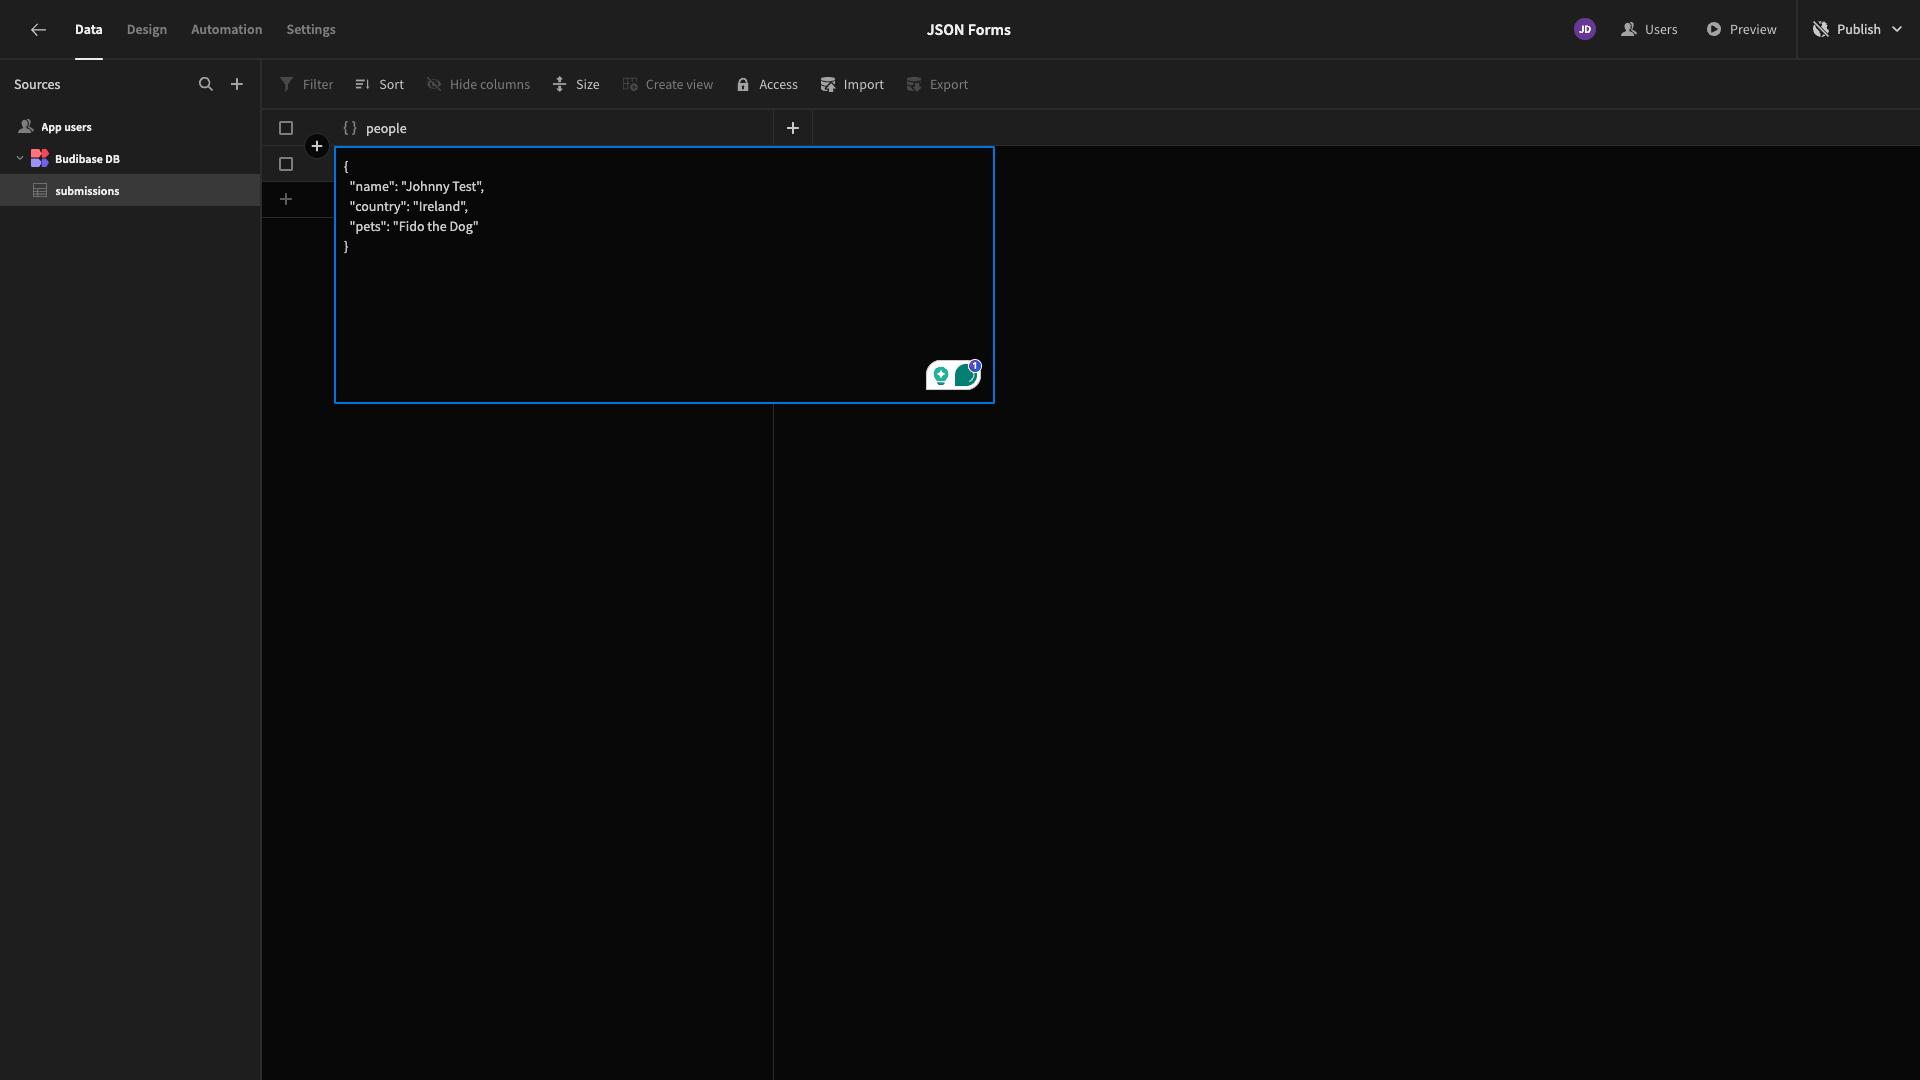
2. Displaying JSON in Budibase UIs
For our second method, we’ll carry on using the same form. We’re going to add some front-end functionality so that when a user fills in all three form fields, we’ll display a stylized JSON blob down below.
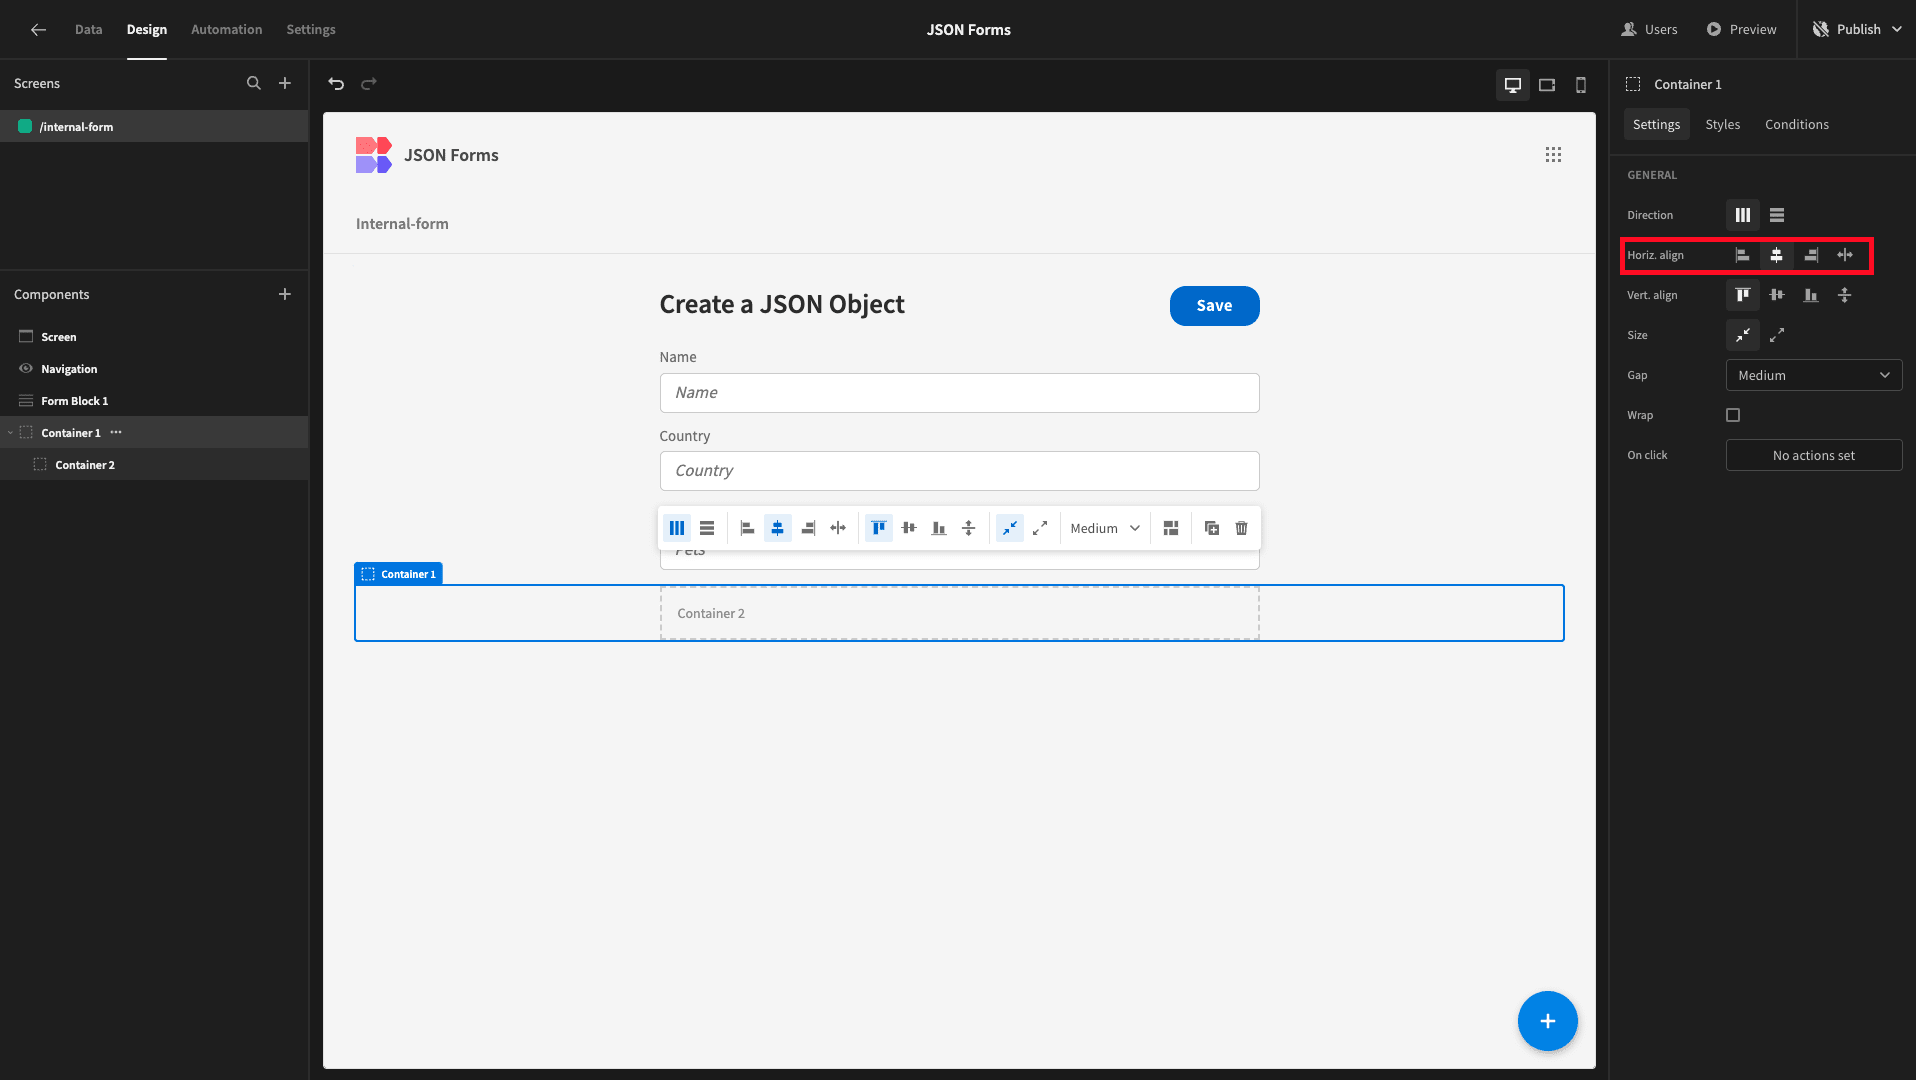
We’re going to start by adding two nested containers beneath our form block just to give us a bit more control over how our JSON blob will appear on the screen.
We’ve set the horizontal alignment of the first to the center:
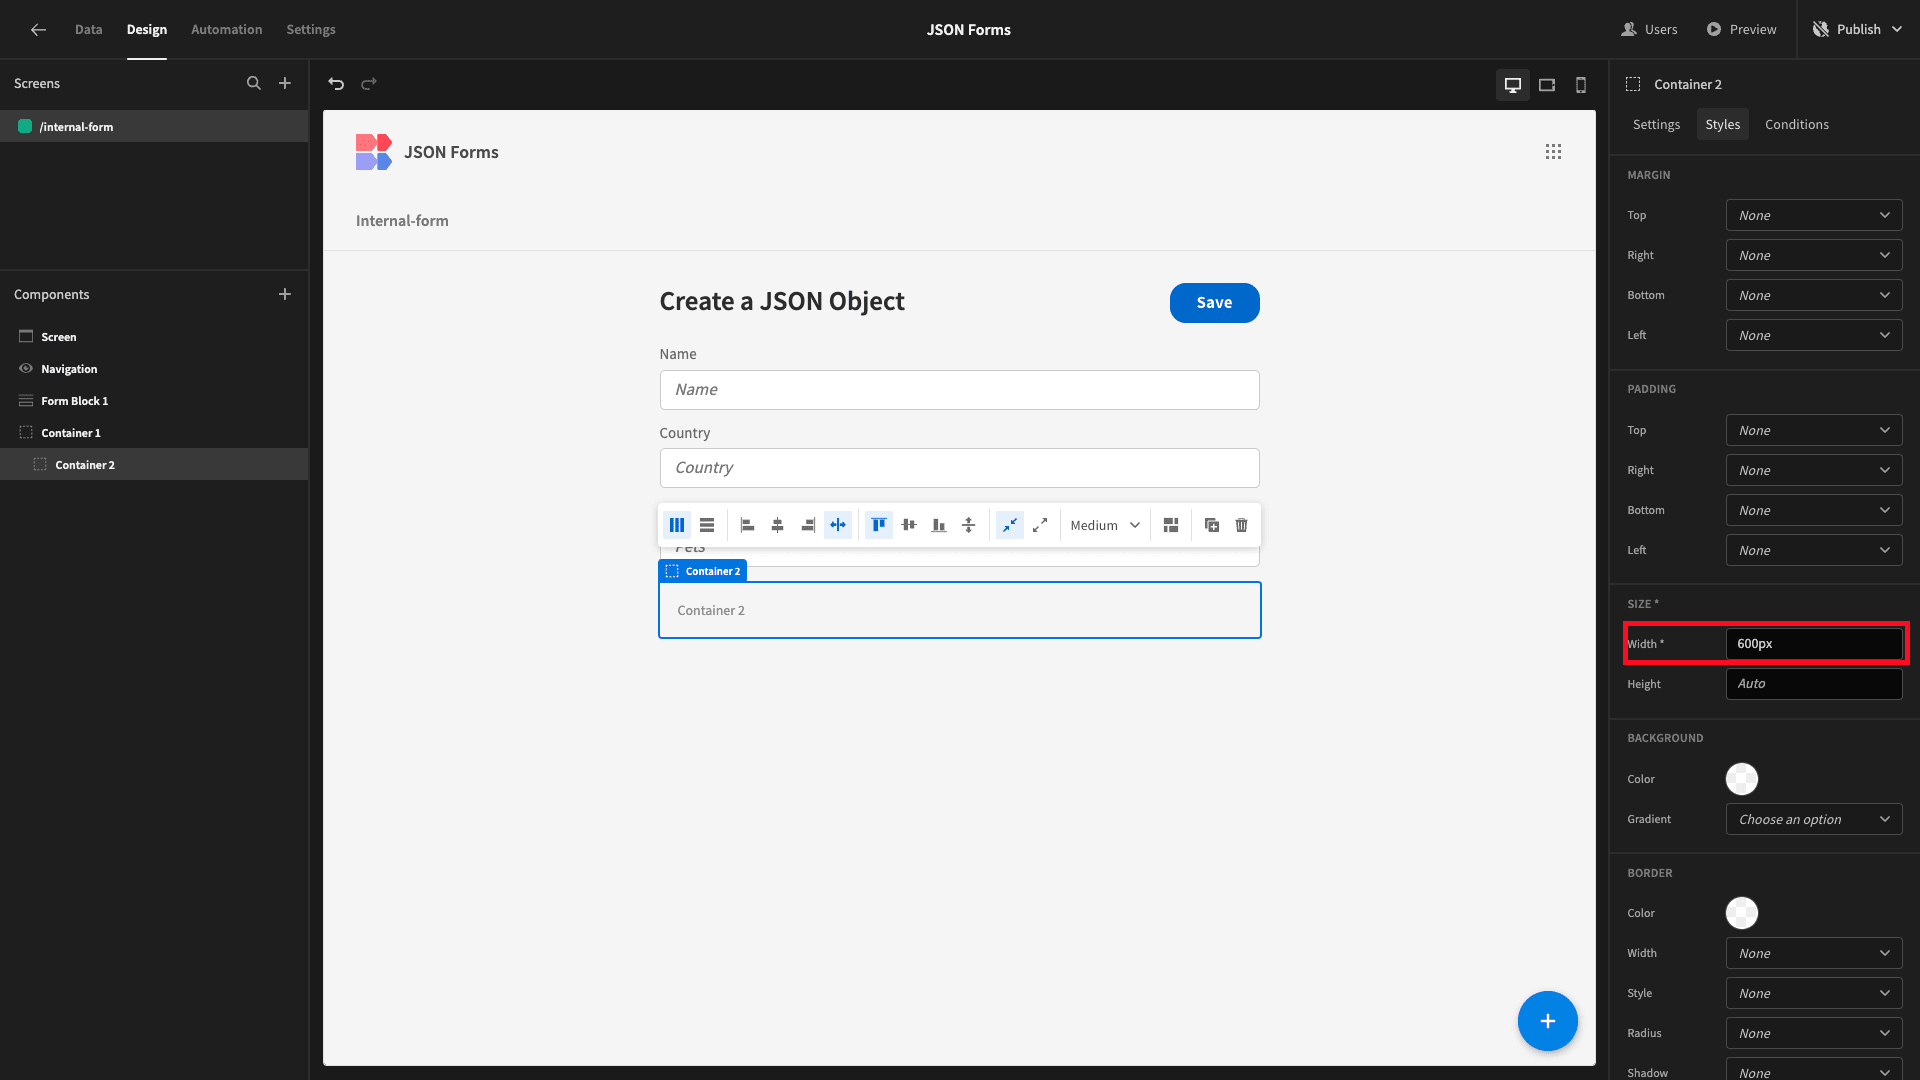
And given the second a custom width of 600px, which matches our form:
Inside this, we’ll add a Markdown Viewer component.
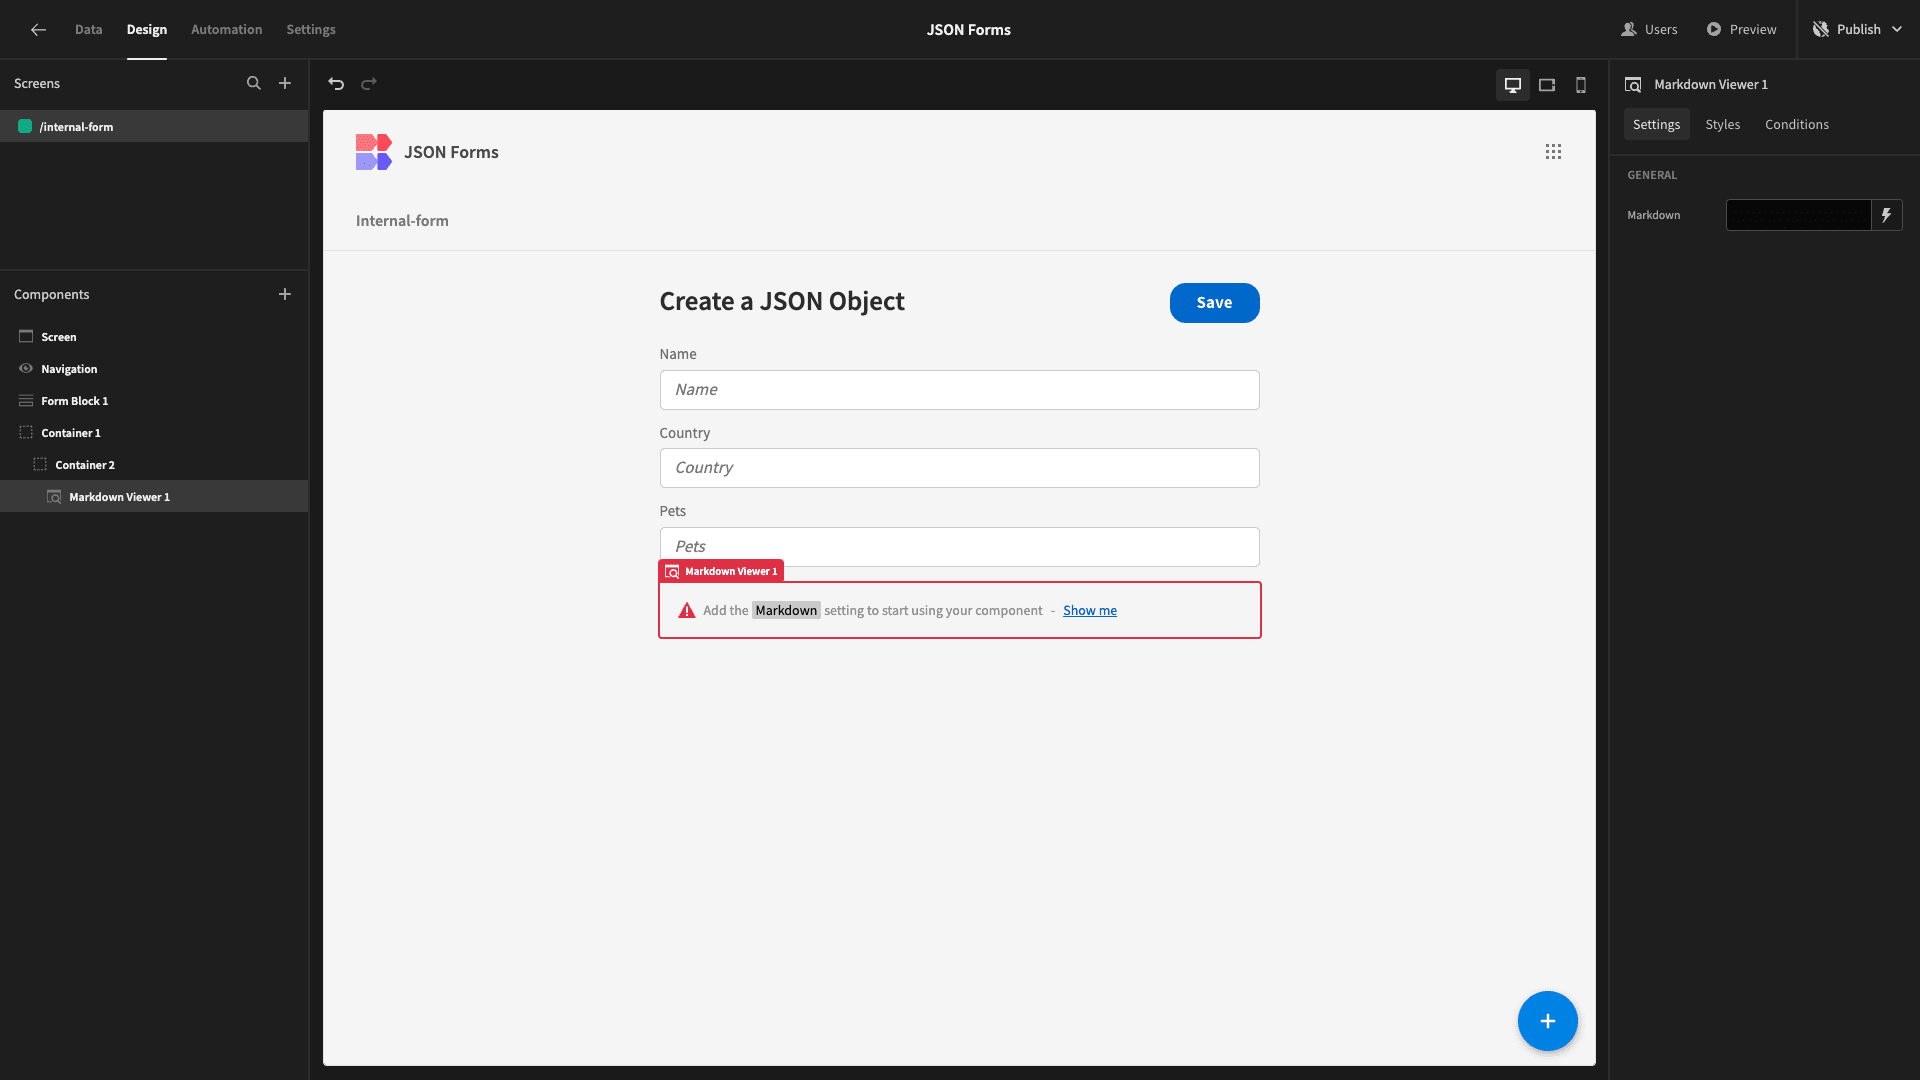
We want this to display a subheading followed by some appropriately stylized text for our JSON blob. Markdown has built-in functionality for stylizing code snippets.
The specific Markdown expression we’ll use for this is:
 1\### JSON:
 2
 3\```json
 4
 5{
 6
 7"name": "{{ Form Block 1.Fields.people.name }}",
 8
 9"country": “{{ Form Block 1.Fields.people.country }}”,
10
11"pets": "{{ Form Block 1.Fields.people.pets }}"
12
13}
14
15\```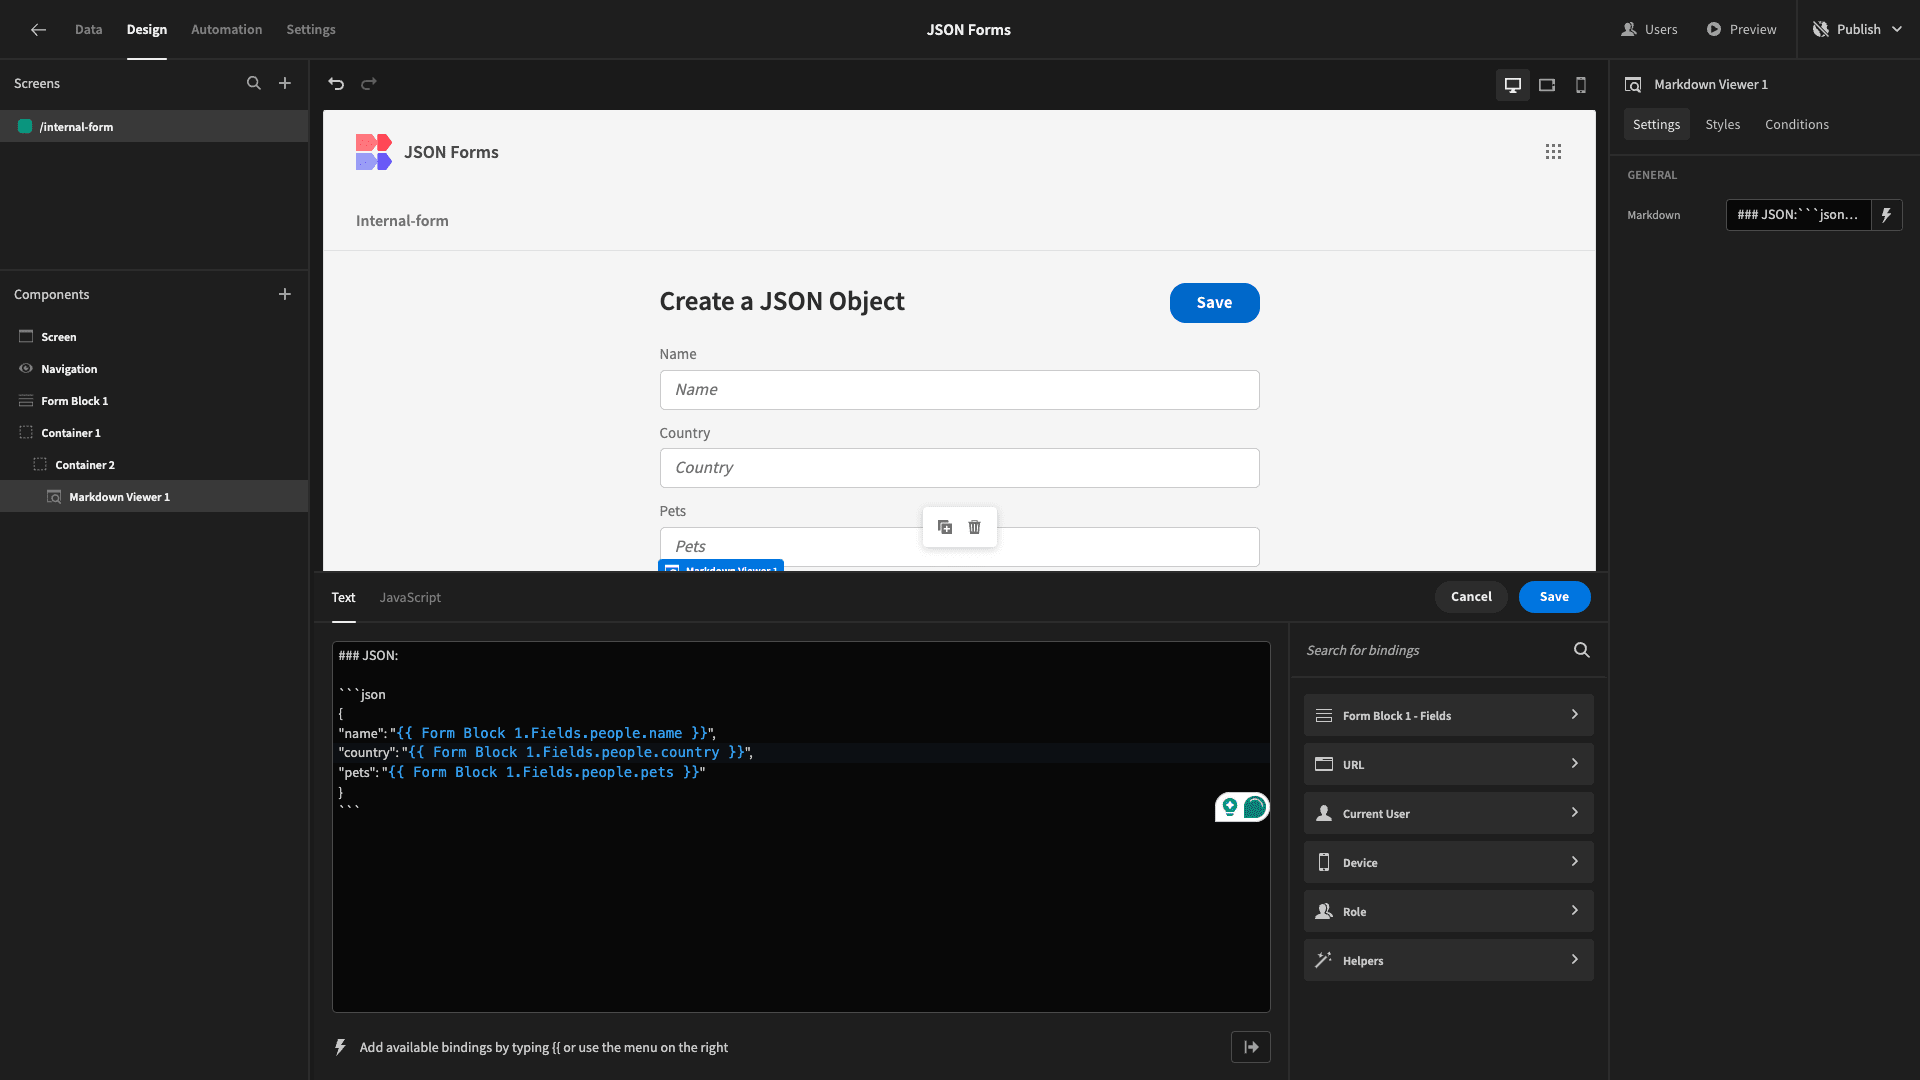
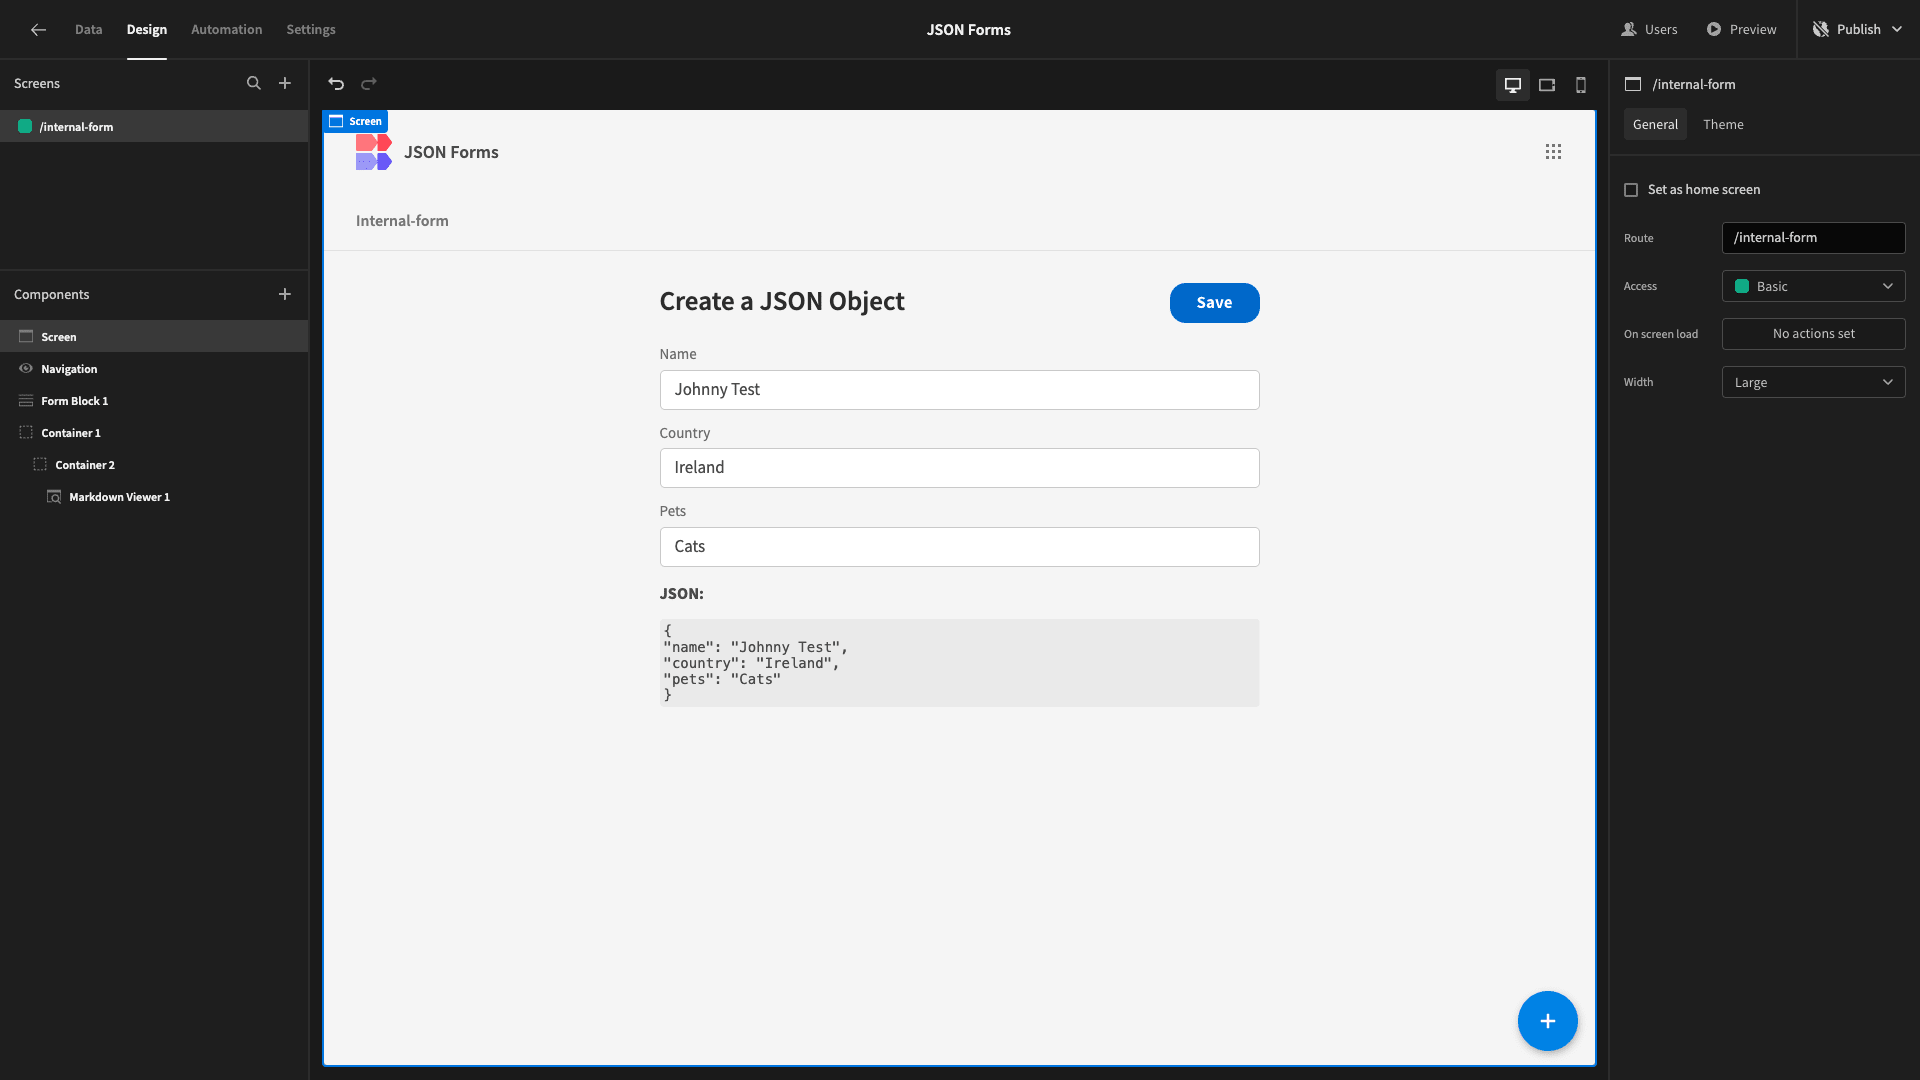
Here’s how this looks when a user fills in all of the fields:
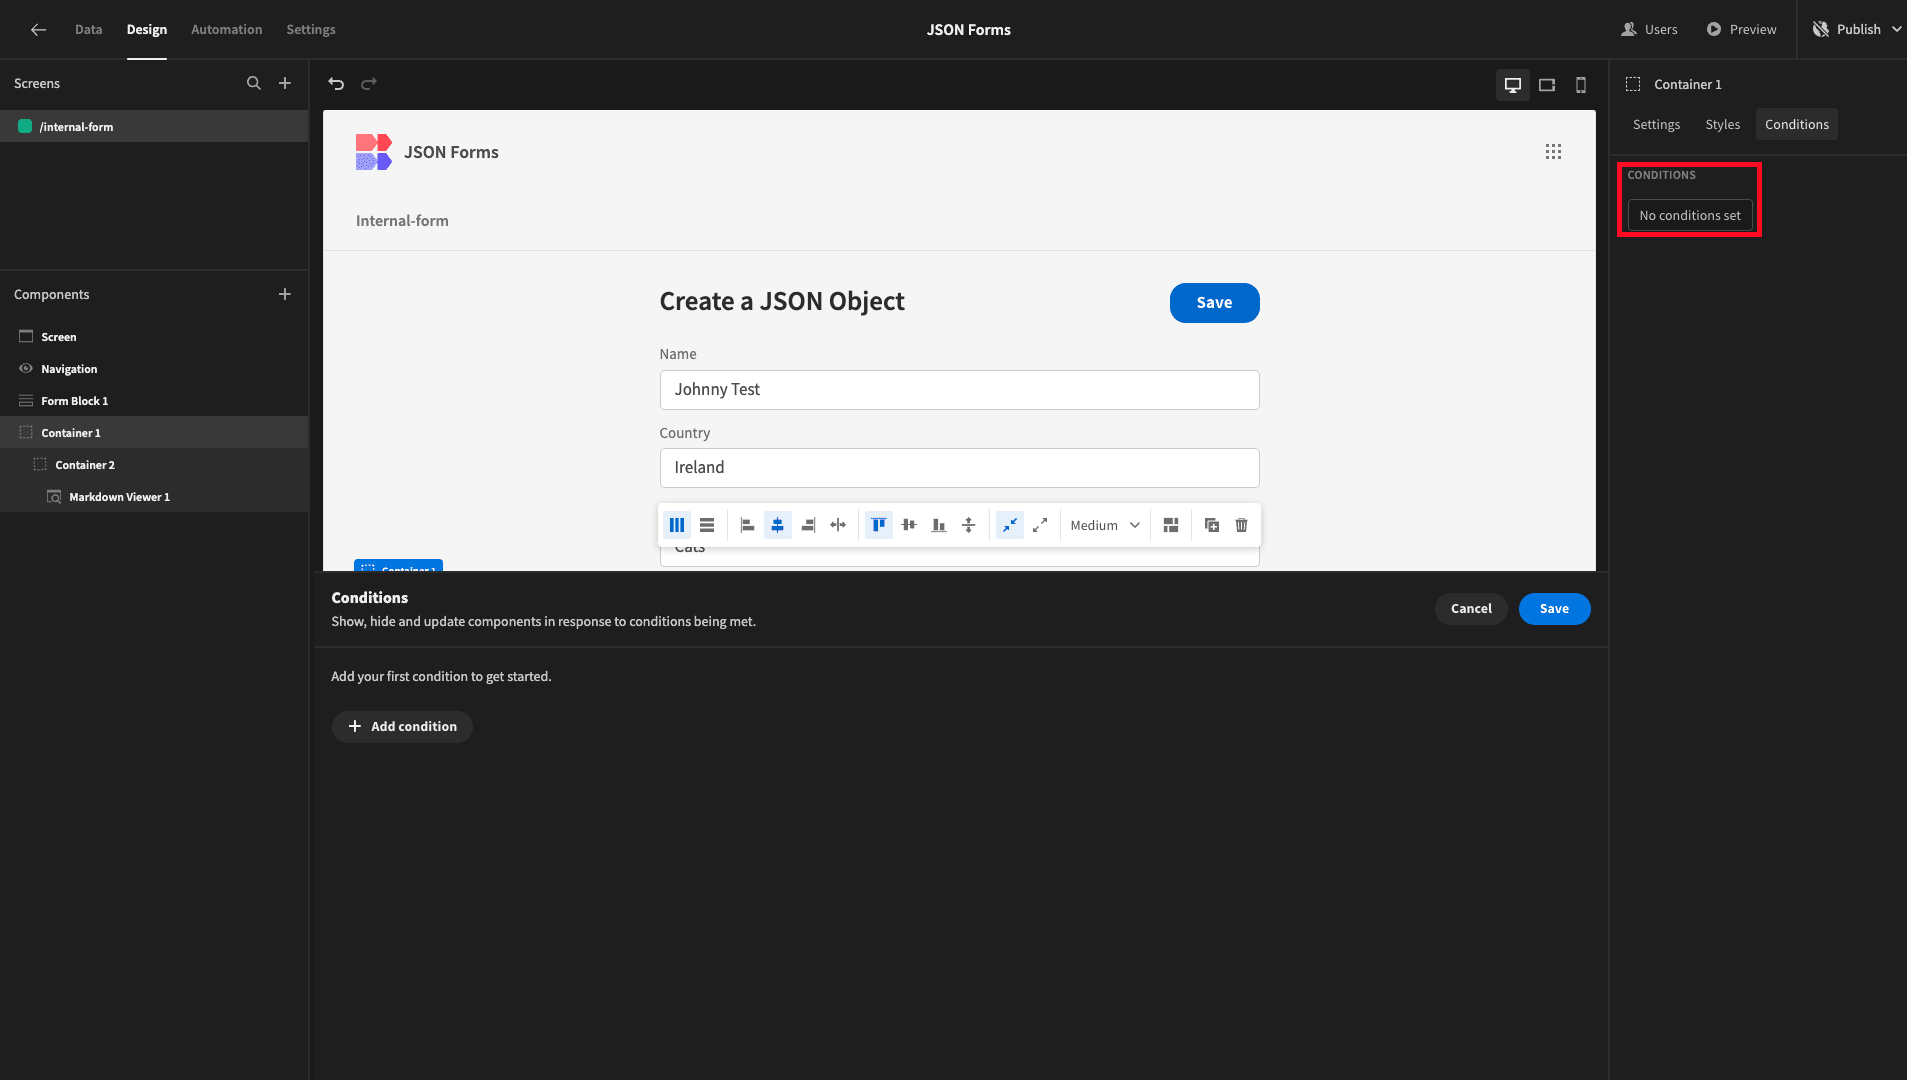
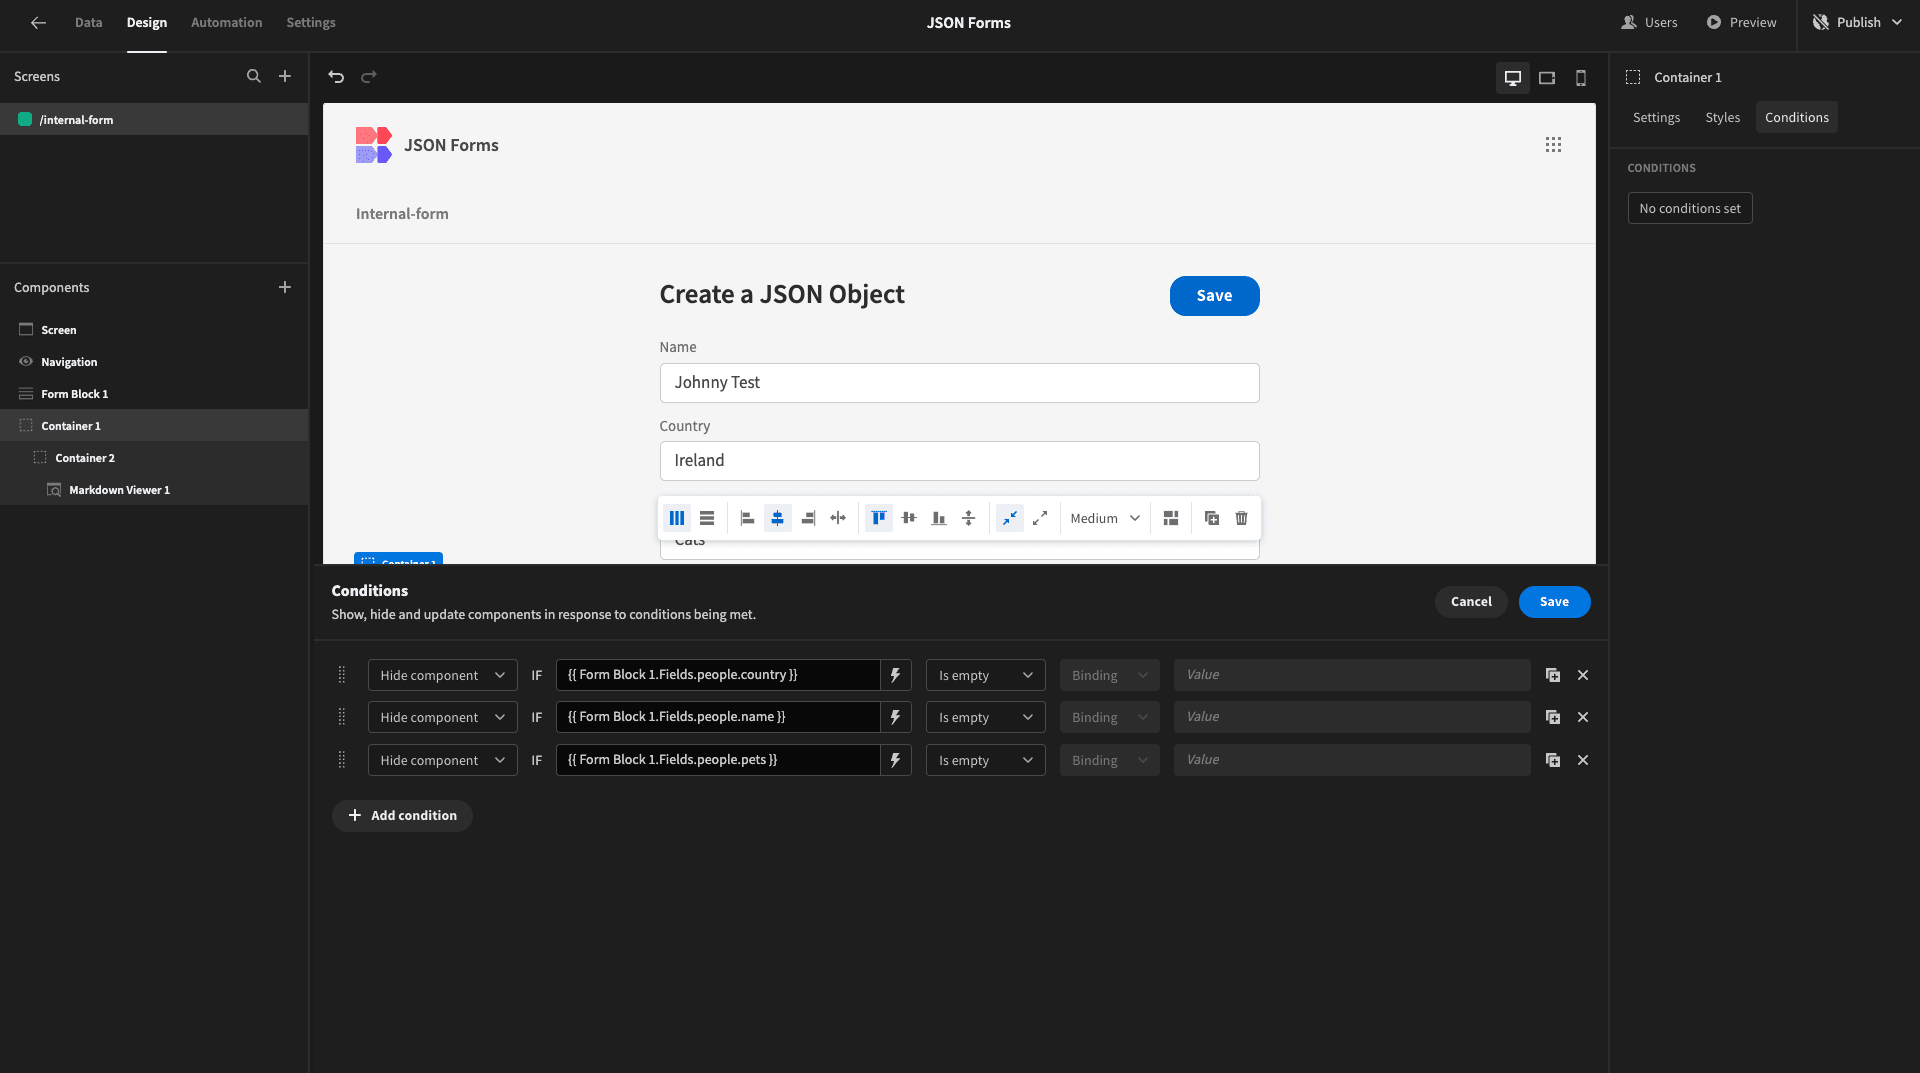
But we only want this to appear when all three fields are populated. To achieve this, we’ll start by opening the conditionality editor for our first container:
We’ll add three rules so that our container - along with all components nested inside it - is hidden if any of our three form fields is blank:
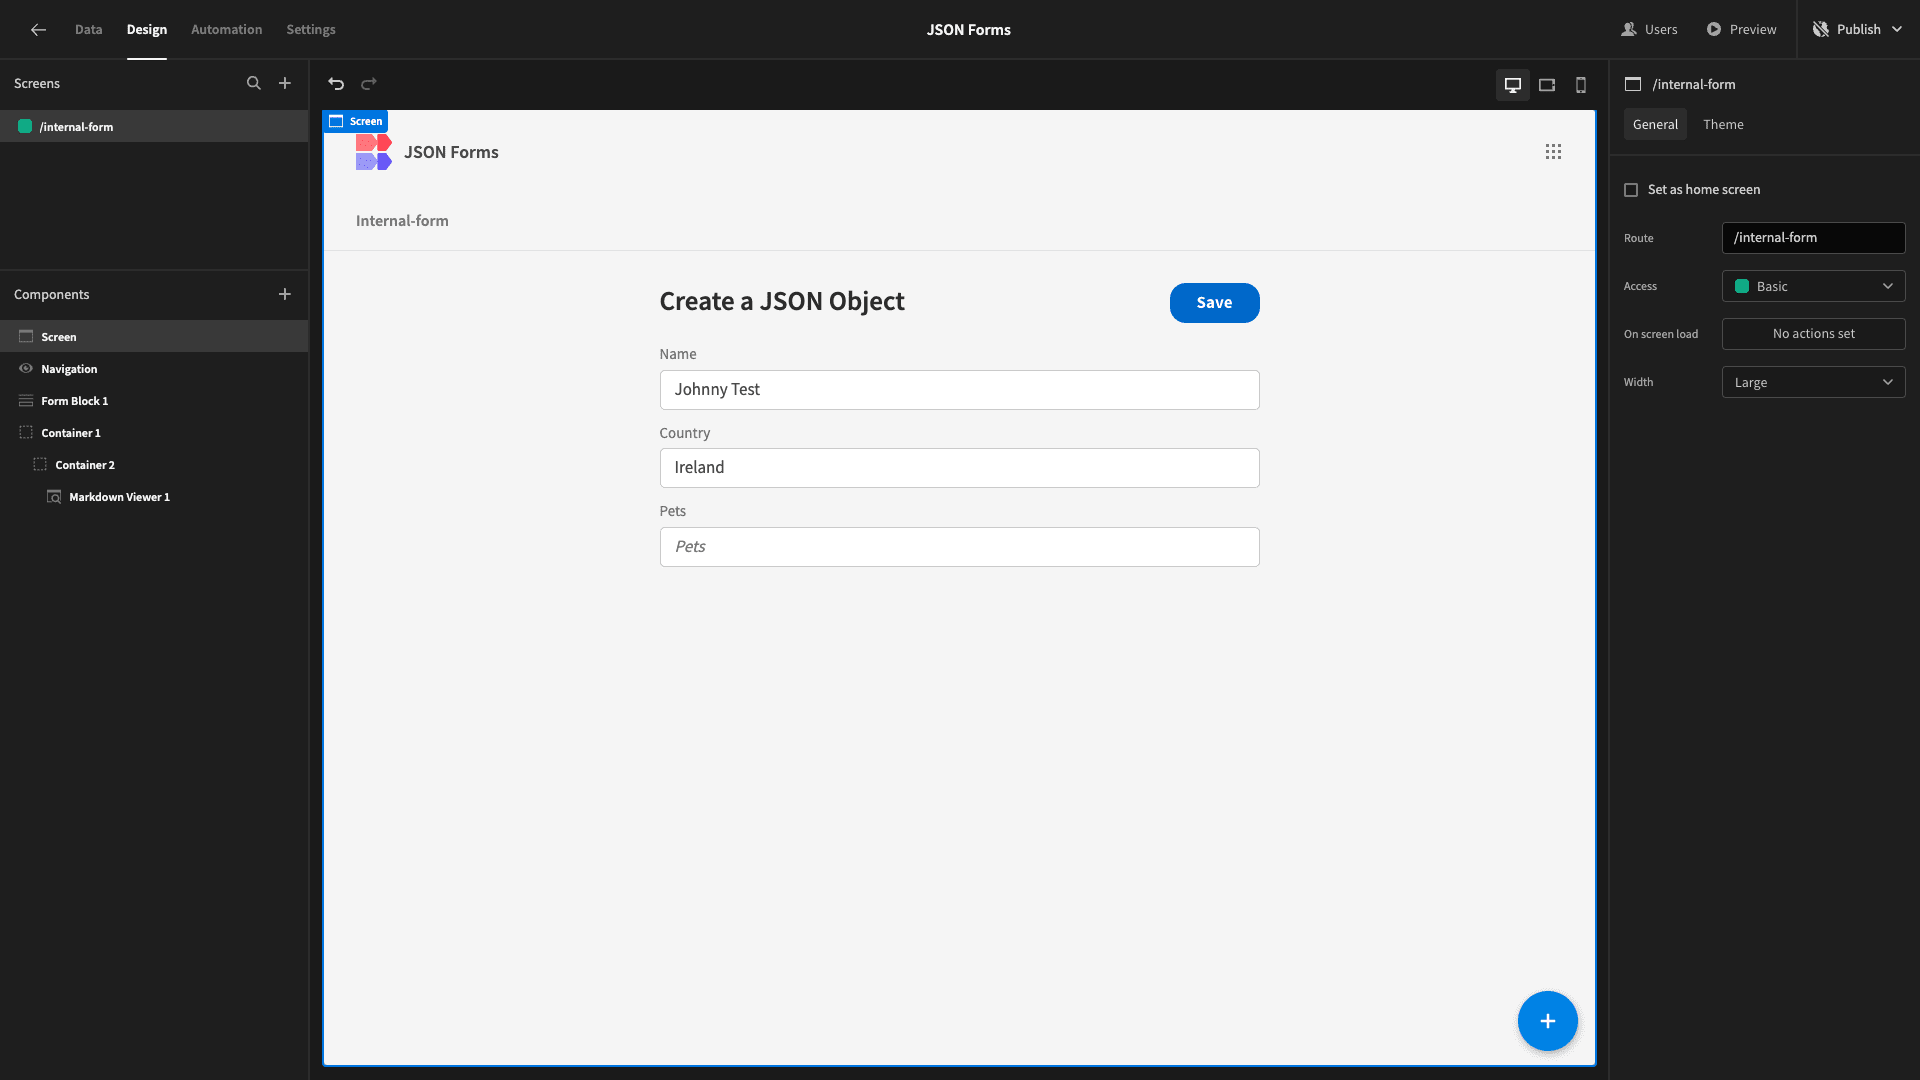
Now, if we blank out one of our fields, the Markdown Viewer disappears again.
3. Sending form data to JSON via REST requests
Our next method is probably the most common use case for sending form data to JSON objects.
That is, using a form to populate the body of an API request.
The beauty of Budibase is that we can build forms to do this for any RESTful API.
For an easy demonstration of how we can build a form to accomplish this, we’re going to send a request to a WebHook, which triggers an automation in a separate Budibase application. The automation simply receives incoming requests and logs their bodies.
This is configured to accept the same JSON schema as our previous examples.
Head back to the Data tab, and we’ll add a new REST API data source.
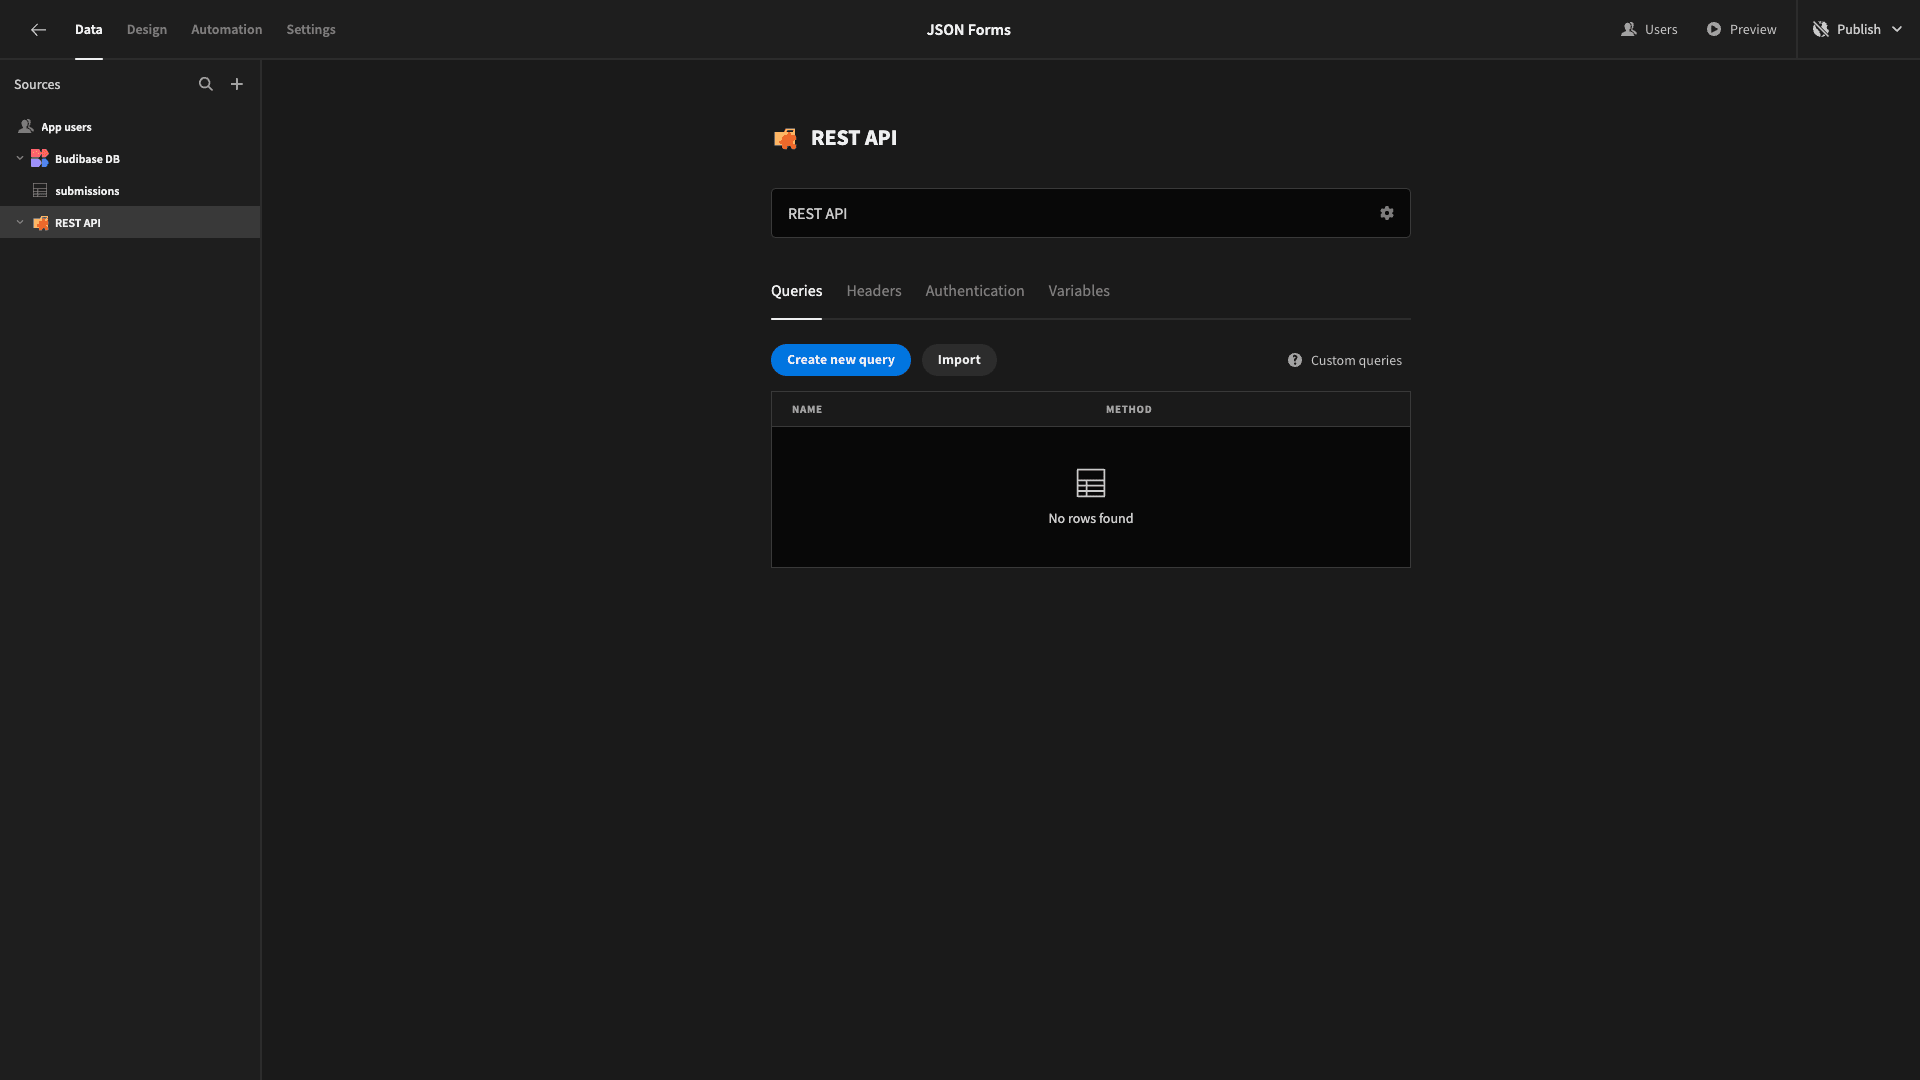
We’ll then hit Create New Query.
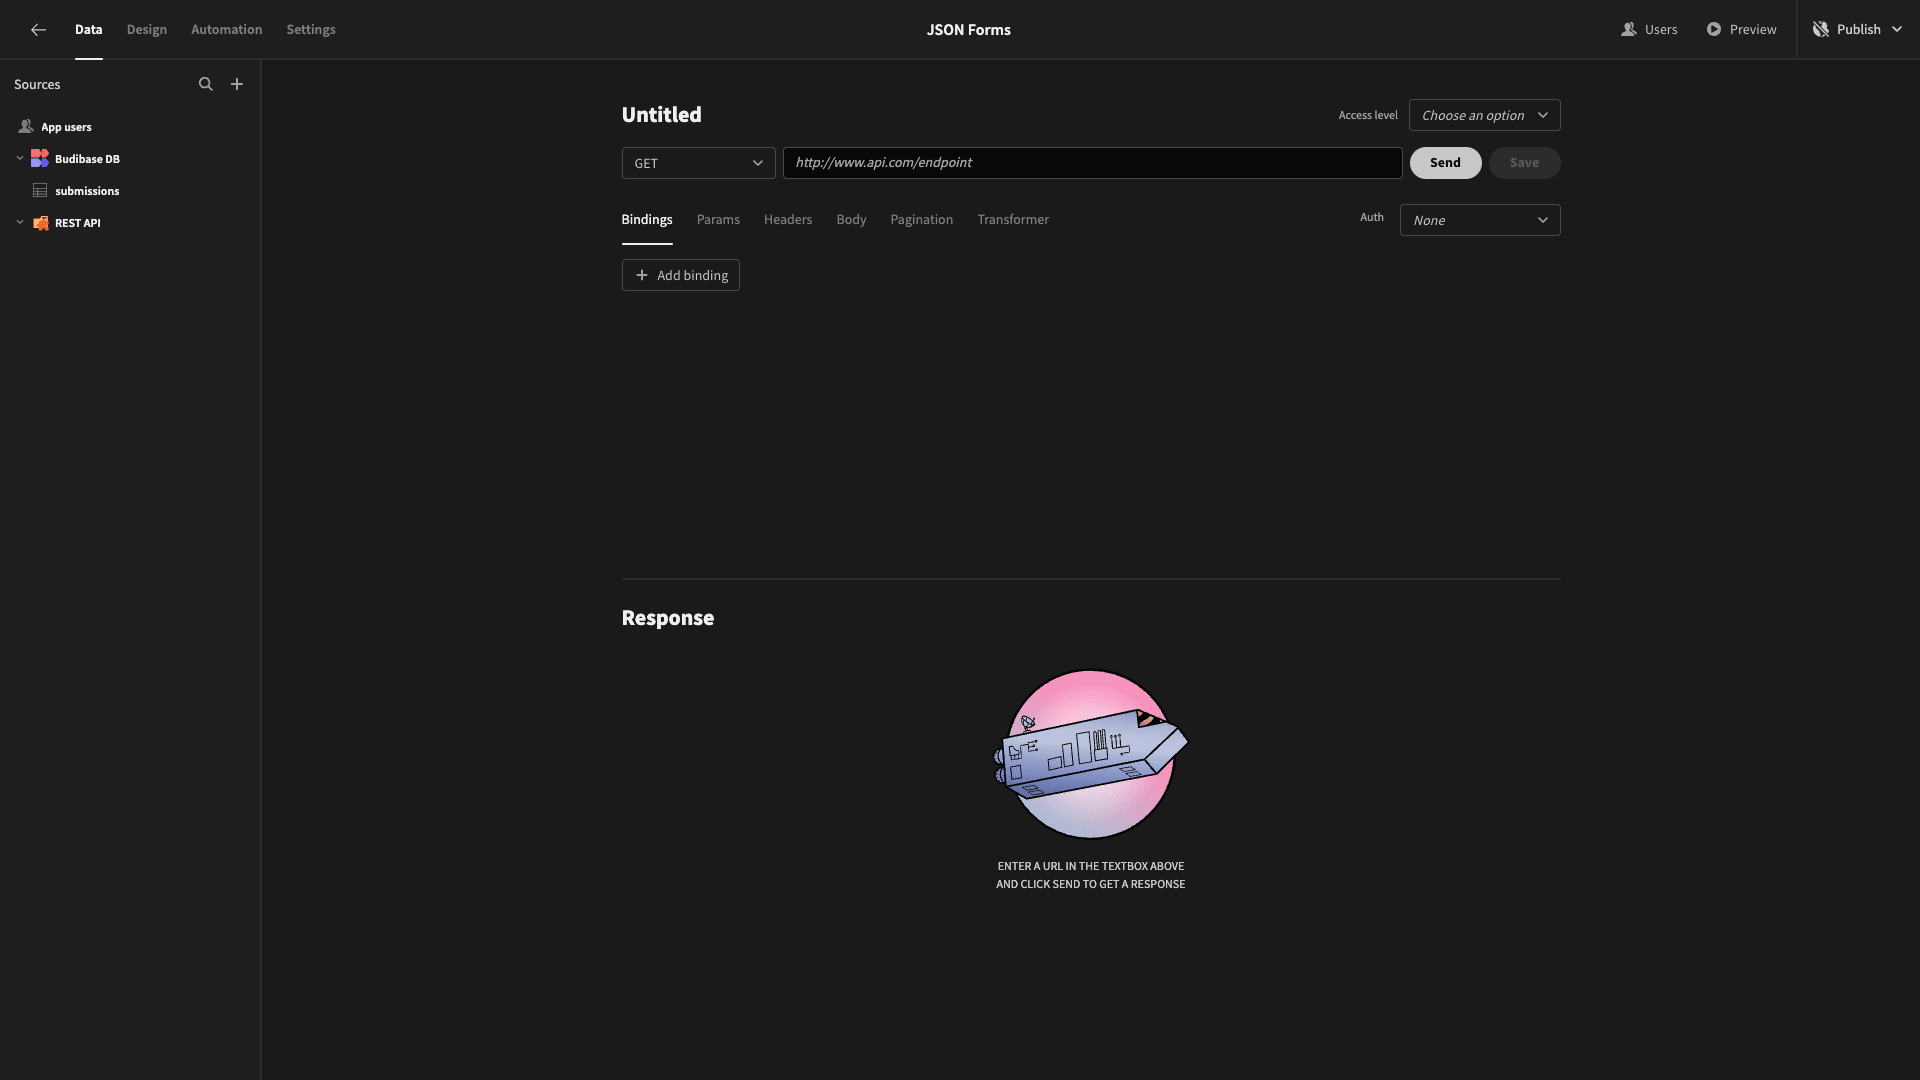
We can build a request by selecting a method, inputting our endpoint, and configuring whichever headers and parameters we want.
With Budibase, we can also specify bindable values, which we can assign values to later when our API request is triggered - either by a UI action or a back-end automation.
We’ll update the method to POST and input our endpoint.
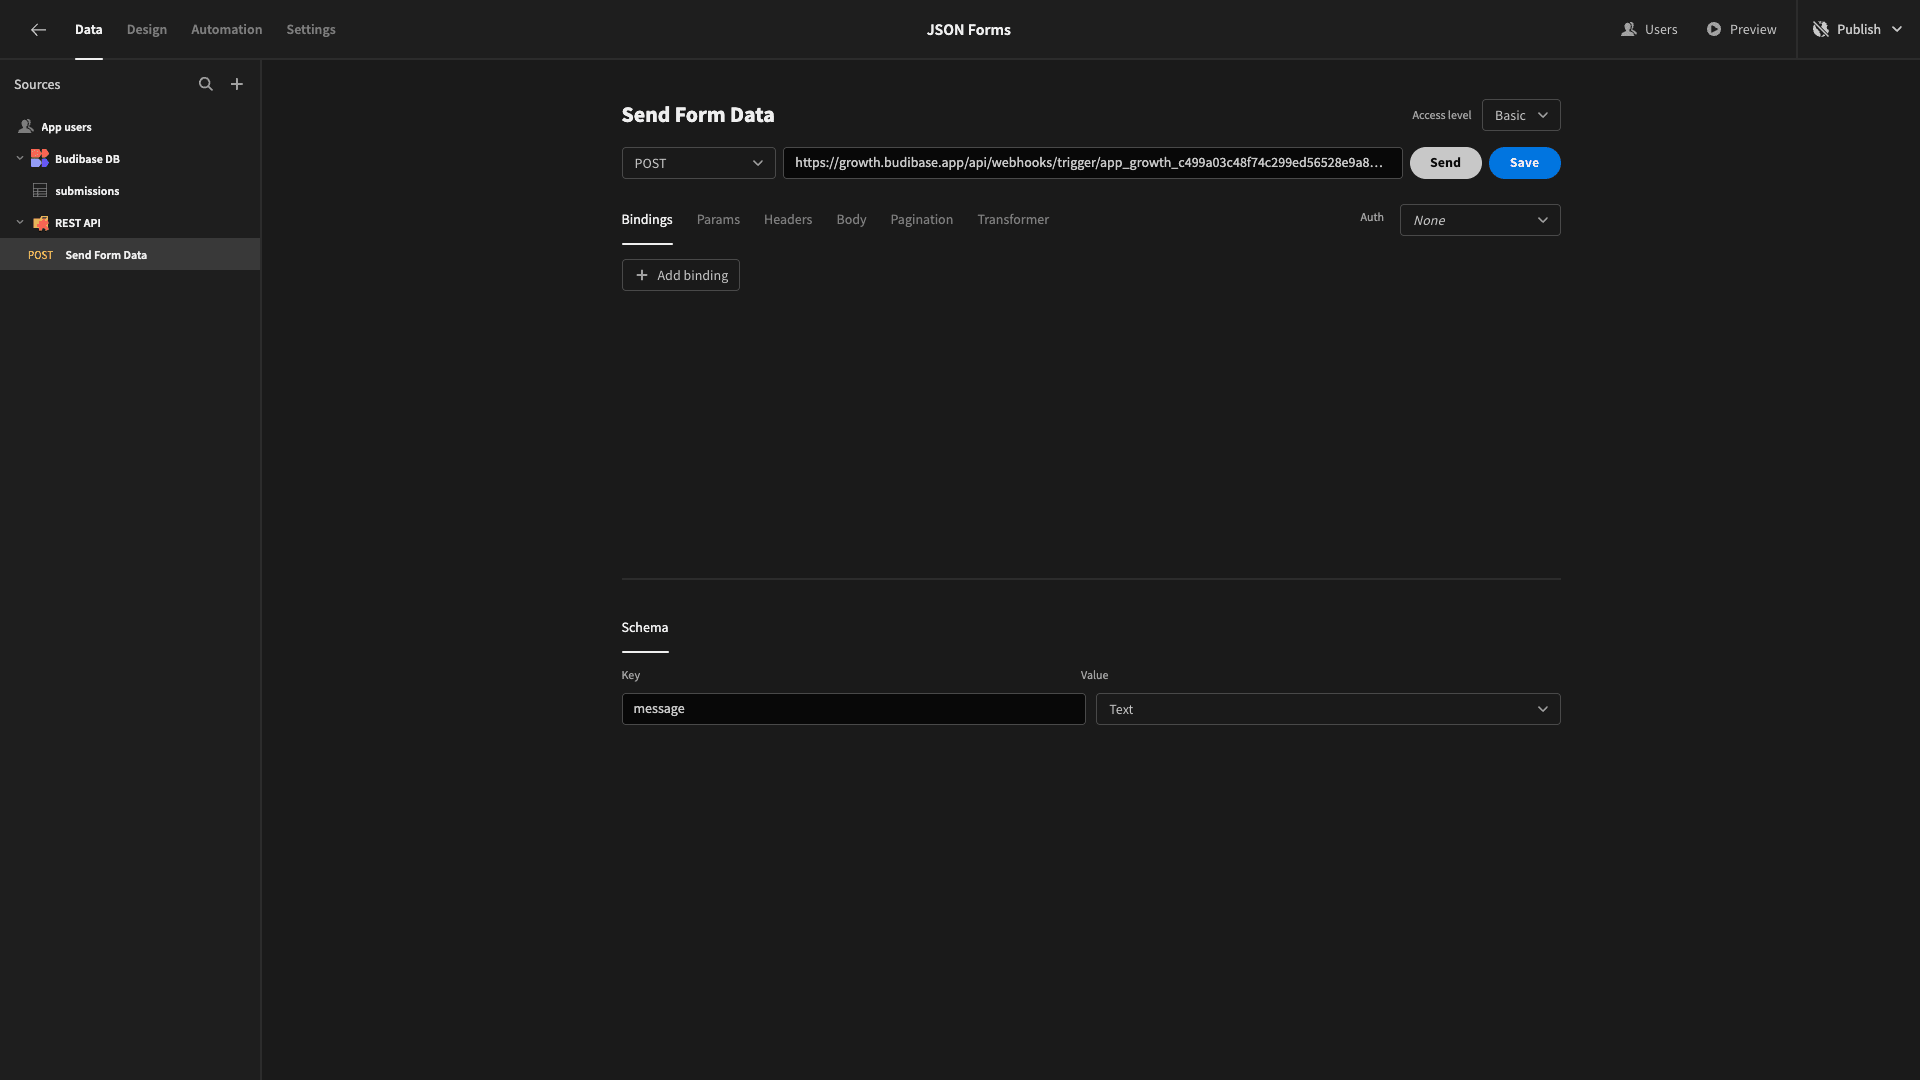
Next, we’re going to start adding our bindings. These comprise two parts:
- A name - which we use to refer to our binding when we want to assign a value elsewhere within Budibase.
- A default value - which is used as a fallback when no other value is assigned.
We’re going to add three bindings - corresponding to the attributes in our JSON schema from earlier.
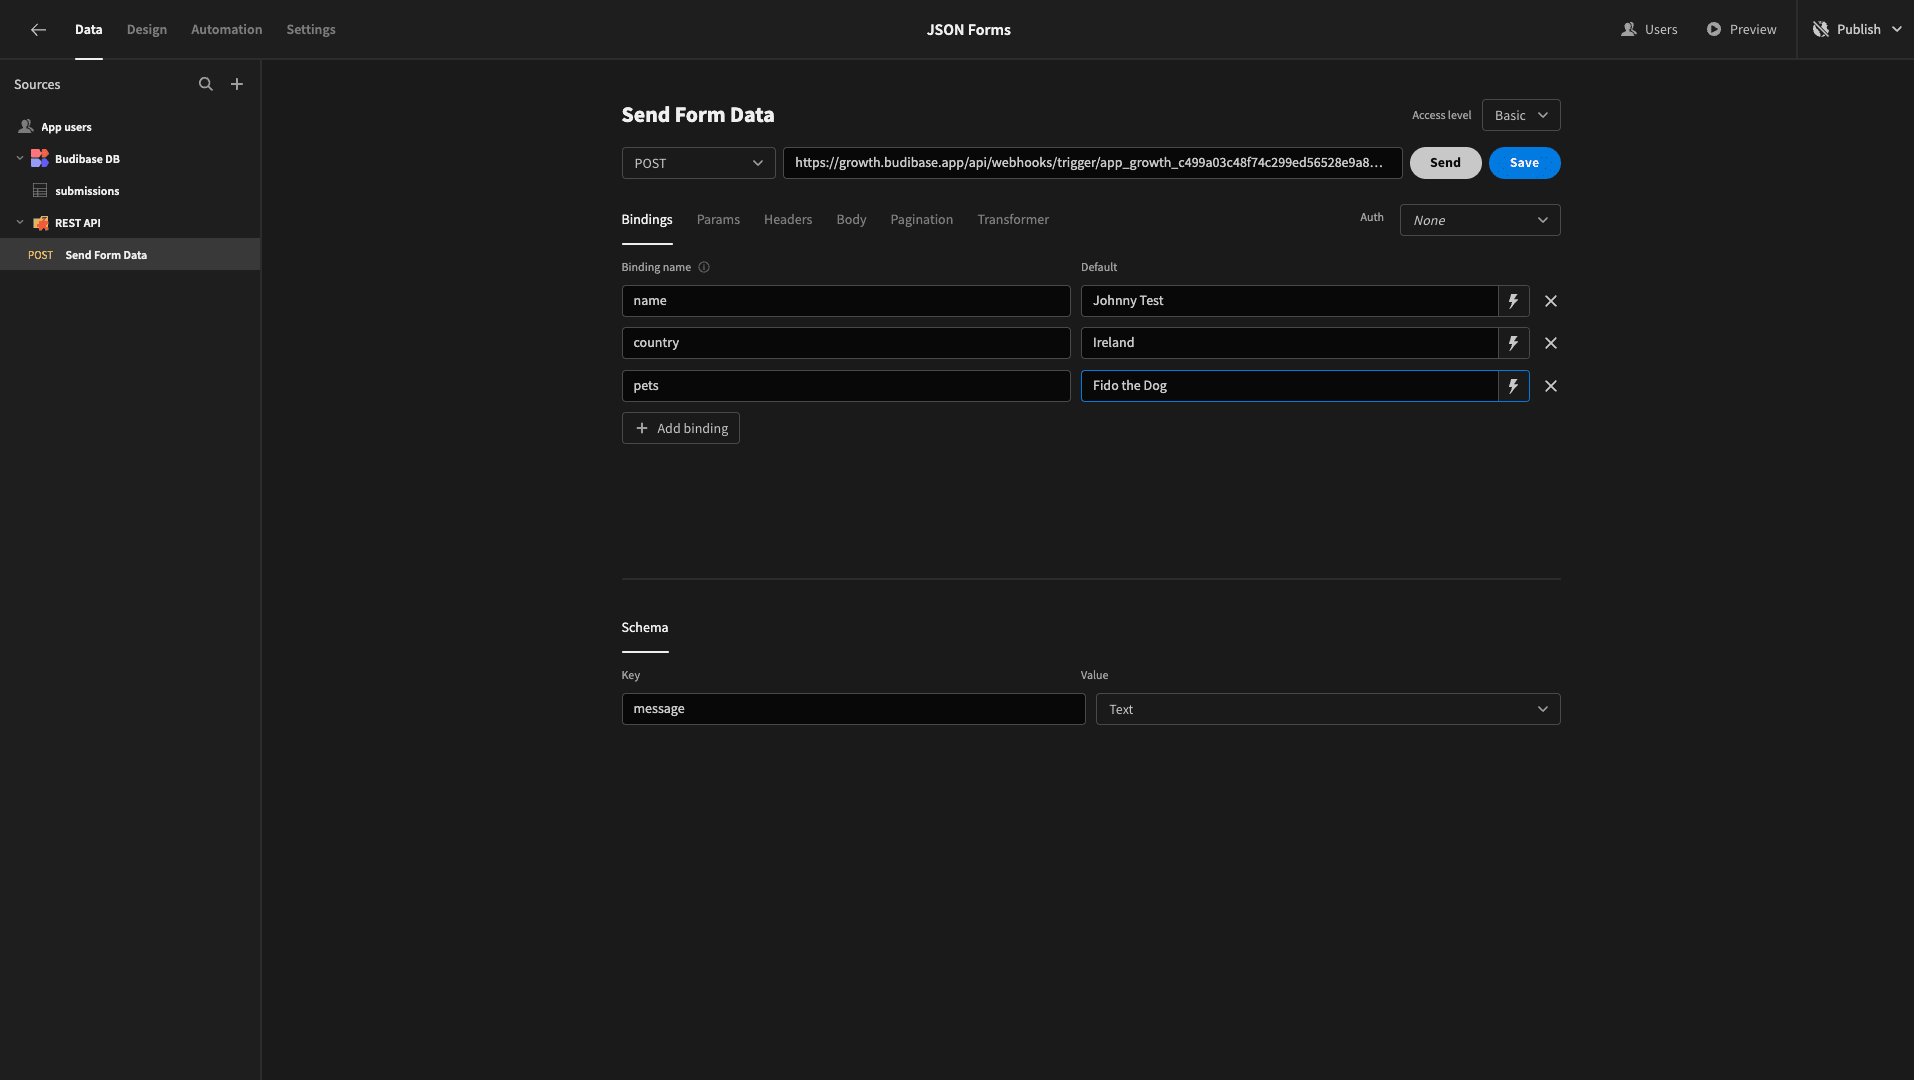
Next, we need to populate the Body of our request. So, head to the Body tab and add three parameters.
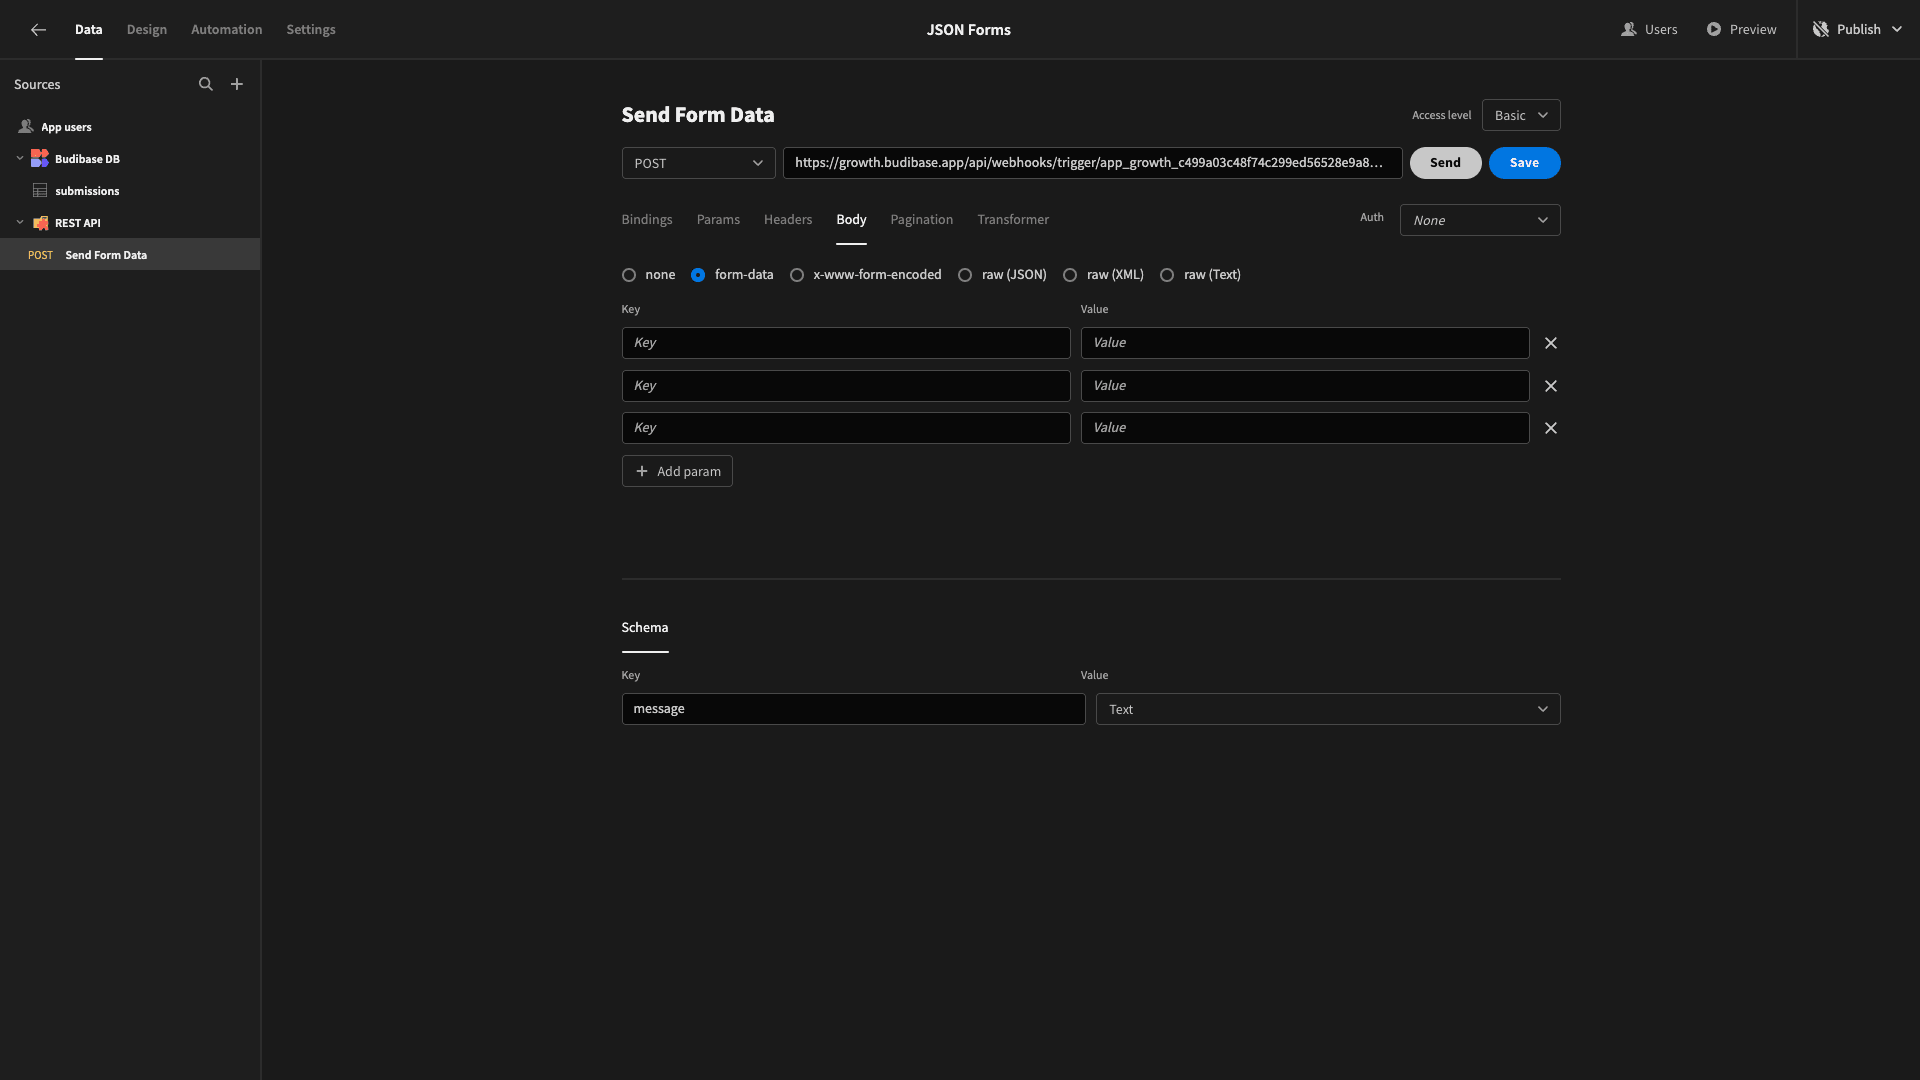
We’ll use the same keys as before. We can set the values to our bindings using handlebars expressions in the format {{ Binding.bindingName }}.
When we hit Send, we can see from the response that our WebHook fired successfully.
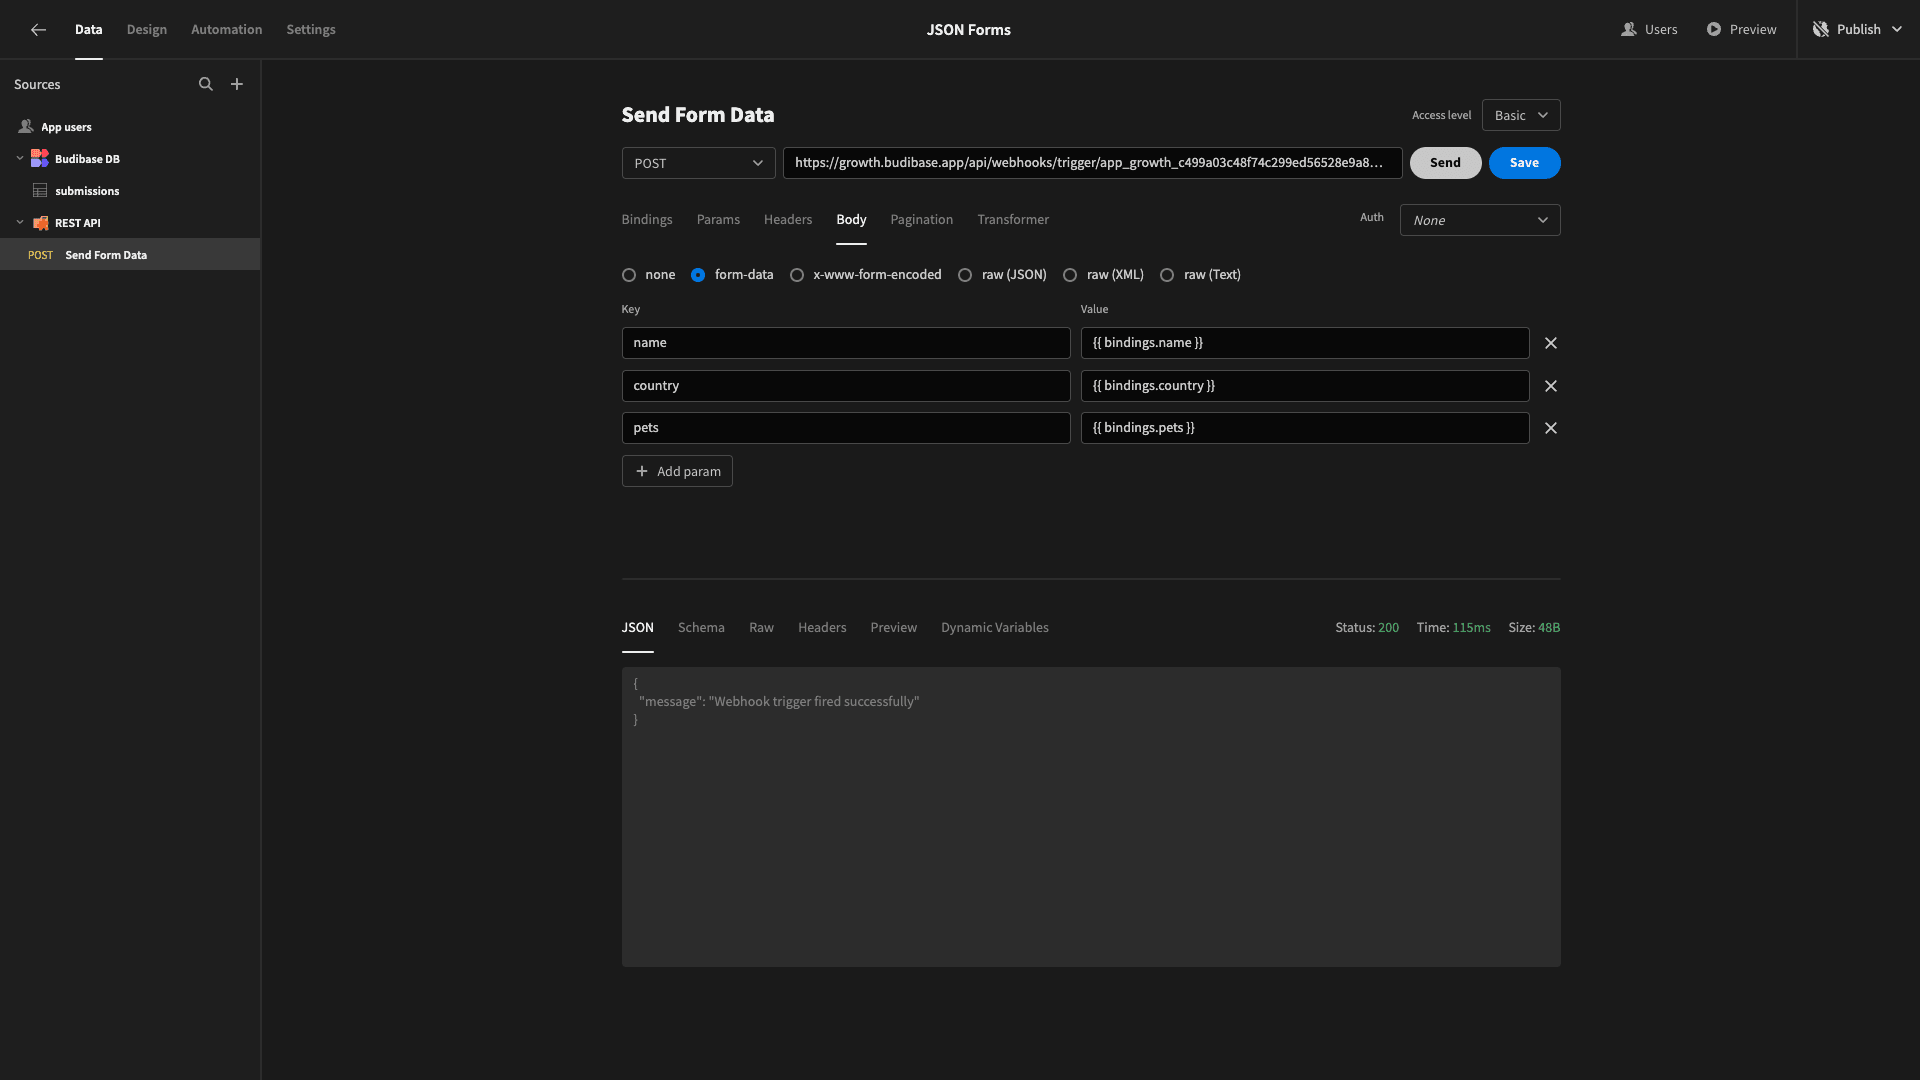
We’ll also want to head to the target of our API request to verify that the right JSON data blob was received.
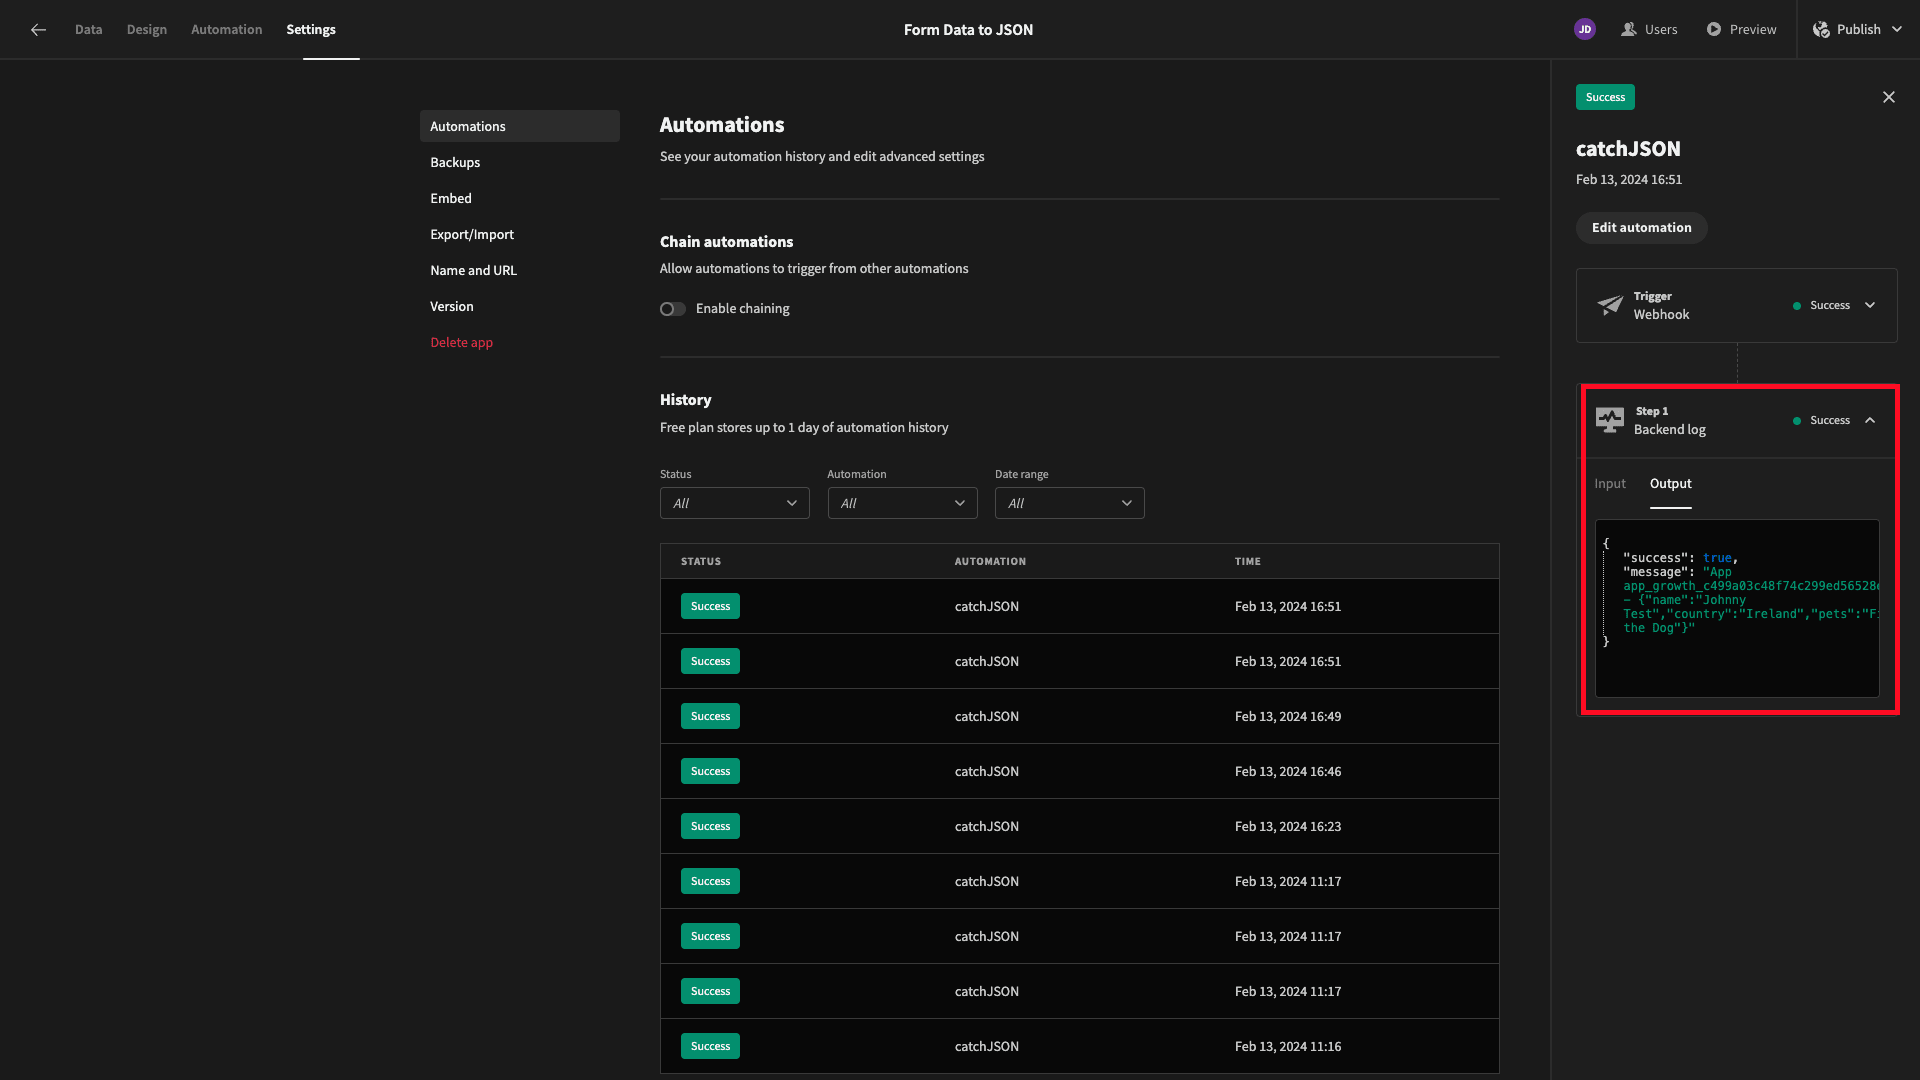
Once we’re satisfied that our API request works, we’ll head back to the design tab to build the corresponding form.
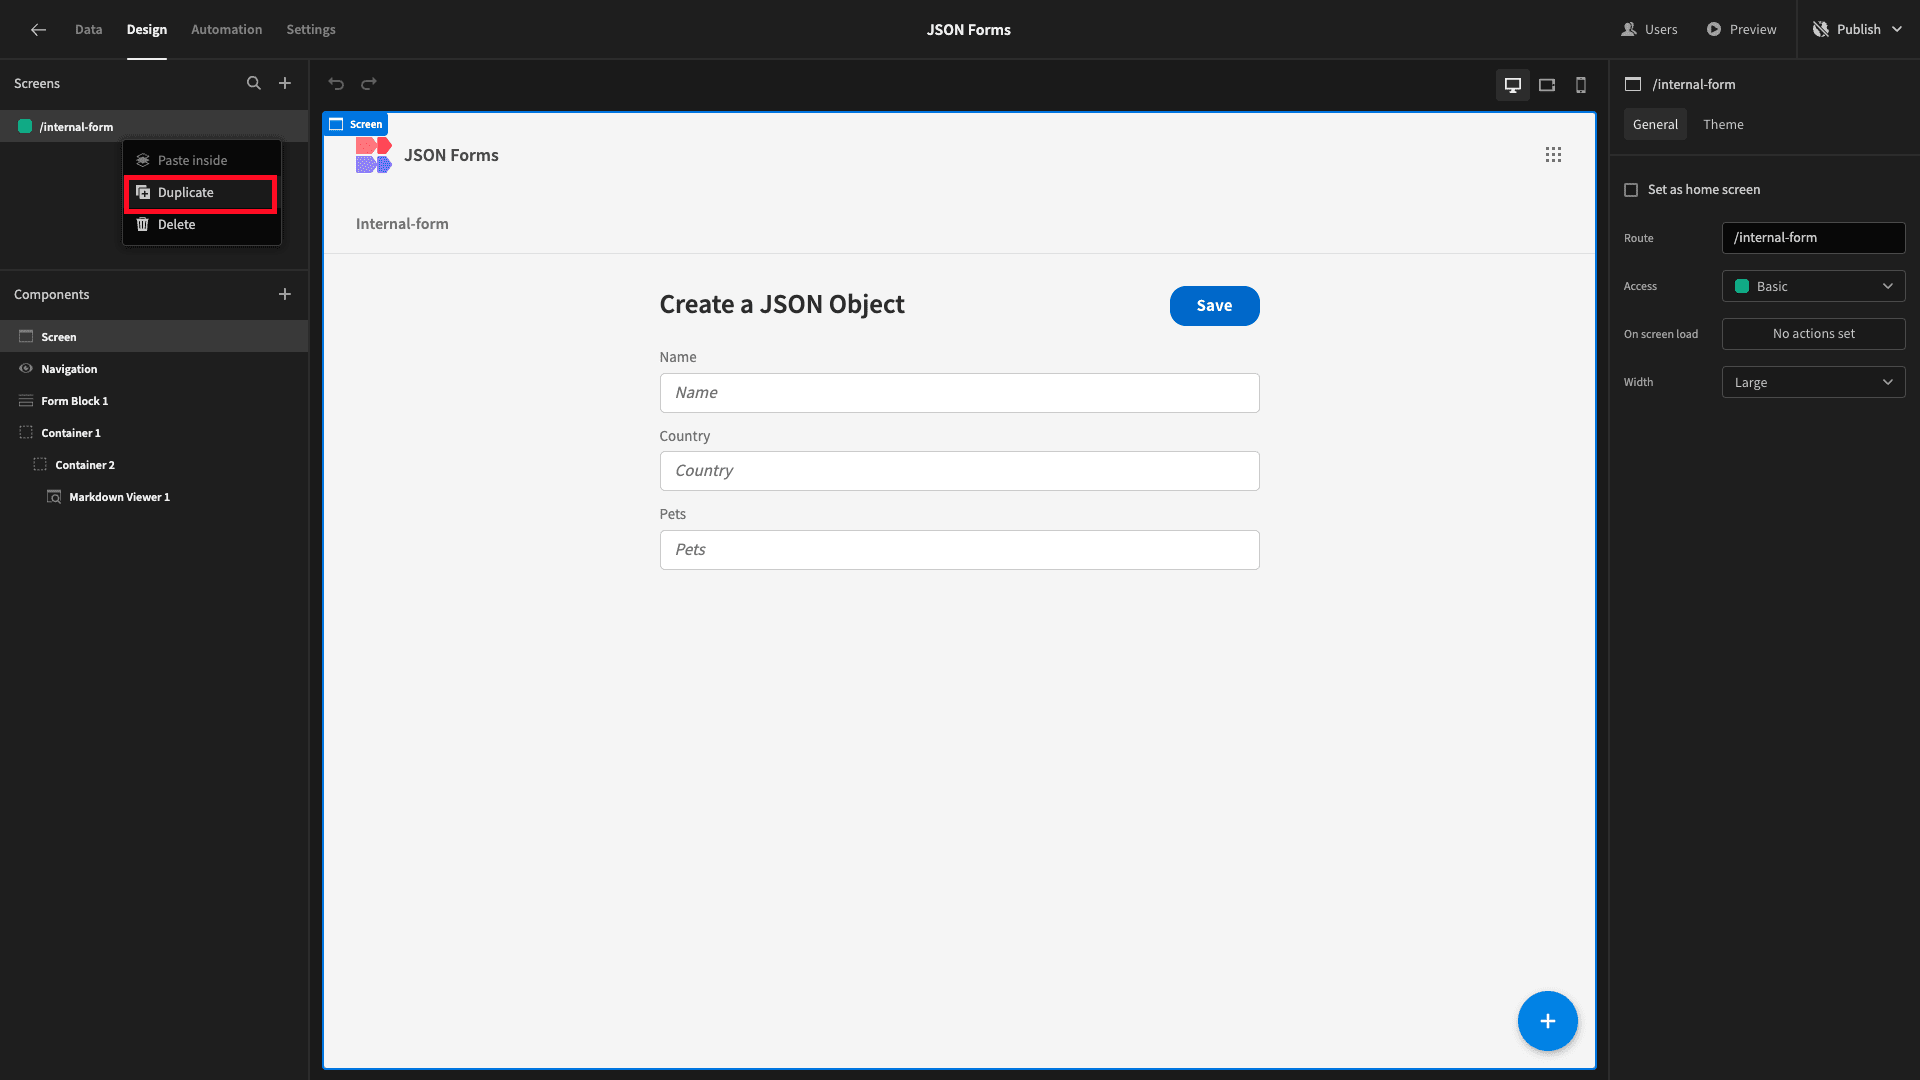
The easiest way to do this is to start by duplicating our existing screen.
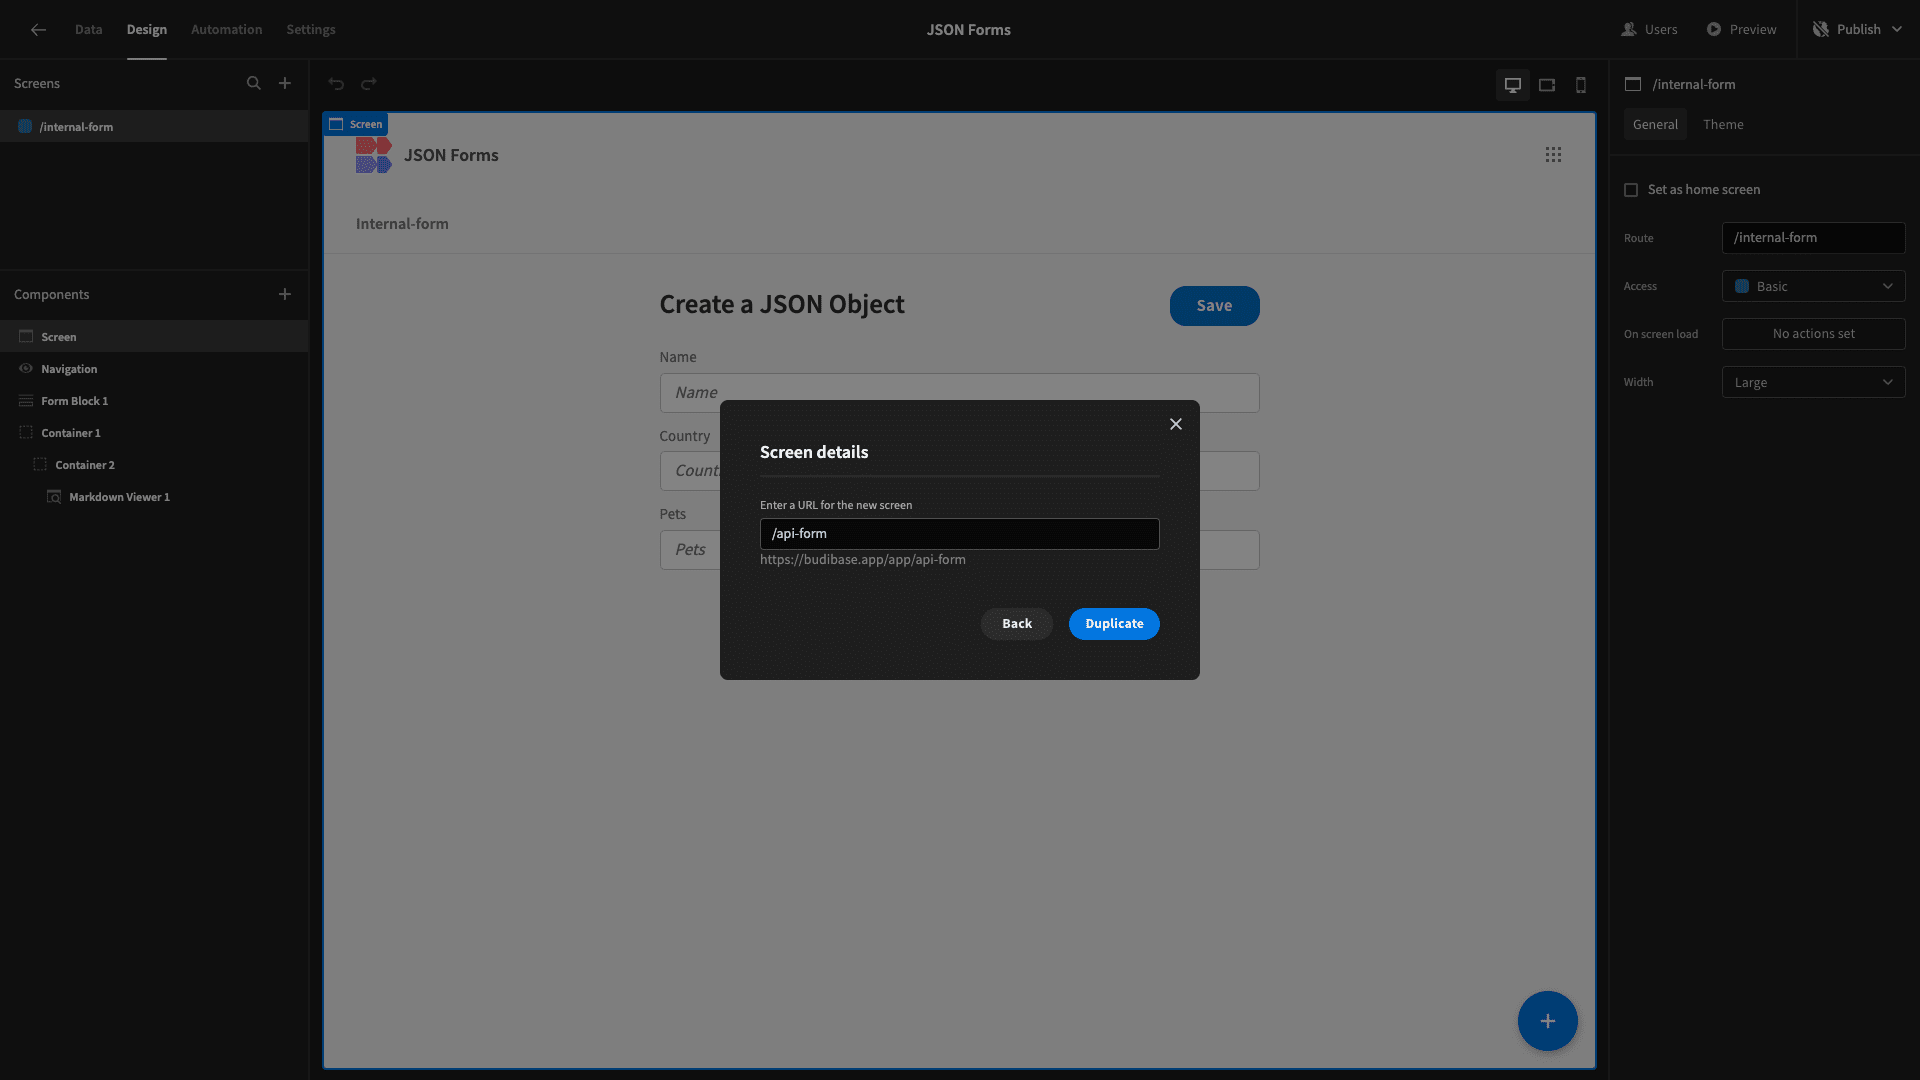
We’ll call this one /api-form.
Now, we have a slight problem here. Our form is built using a Form Block, but this only supports data in internal tables or external SQL databases - not custom REST requests.
To build a form for our API request, we’ll need to Eject our Form Block, exposing its underlying components:
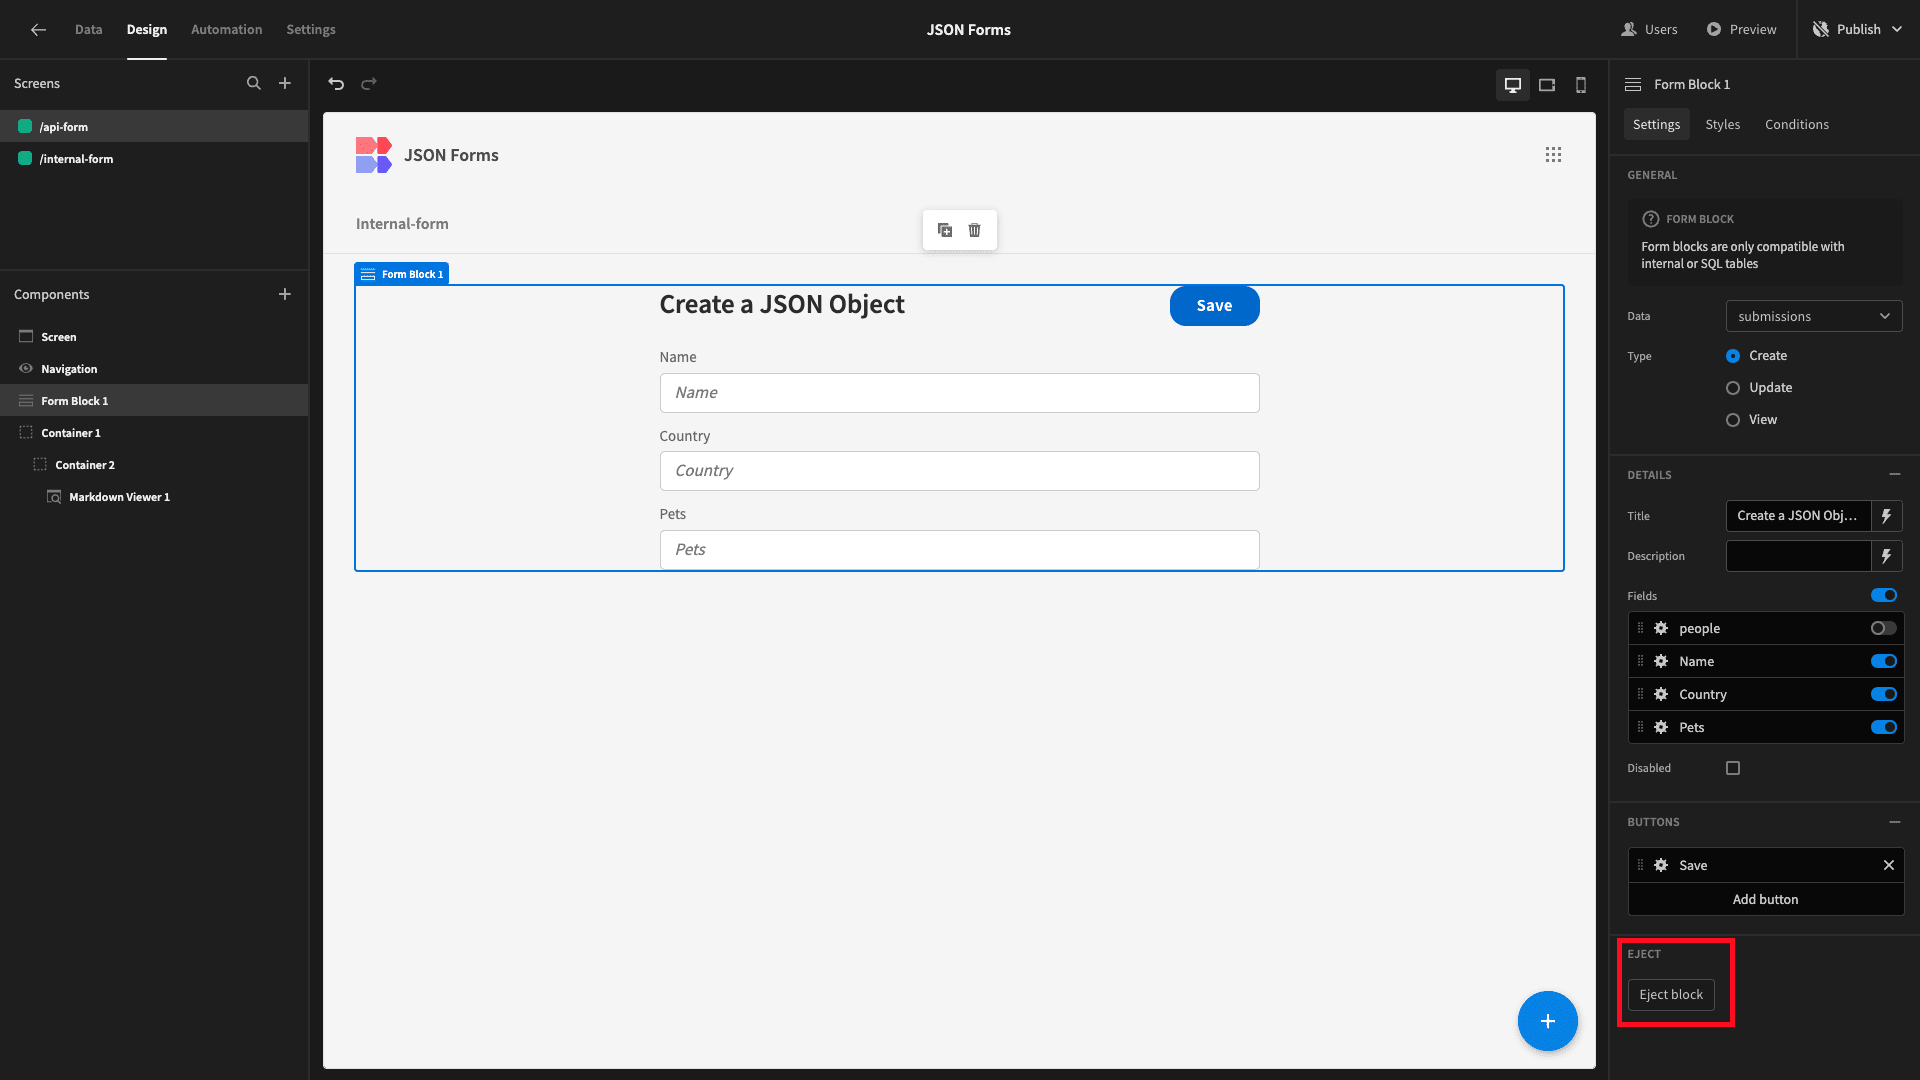
These are all nested inside of a Form component. We’ll set the Schema for this to our new query:
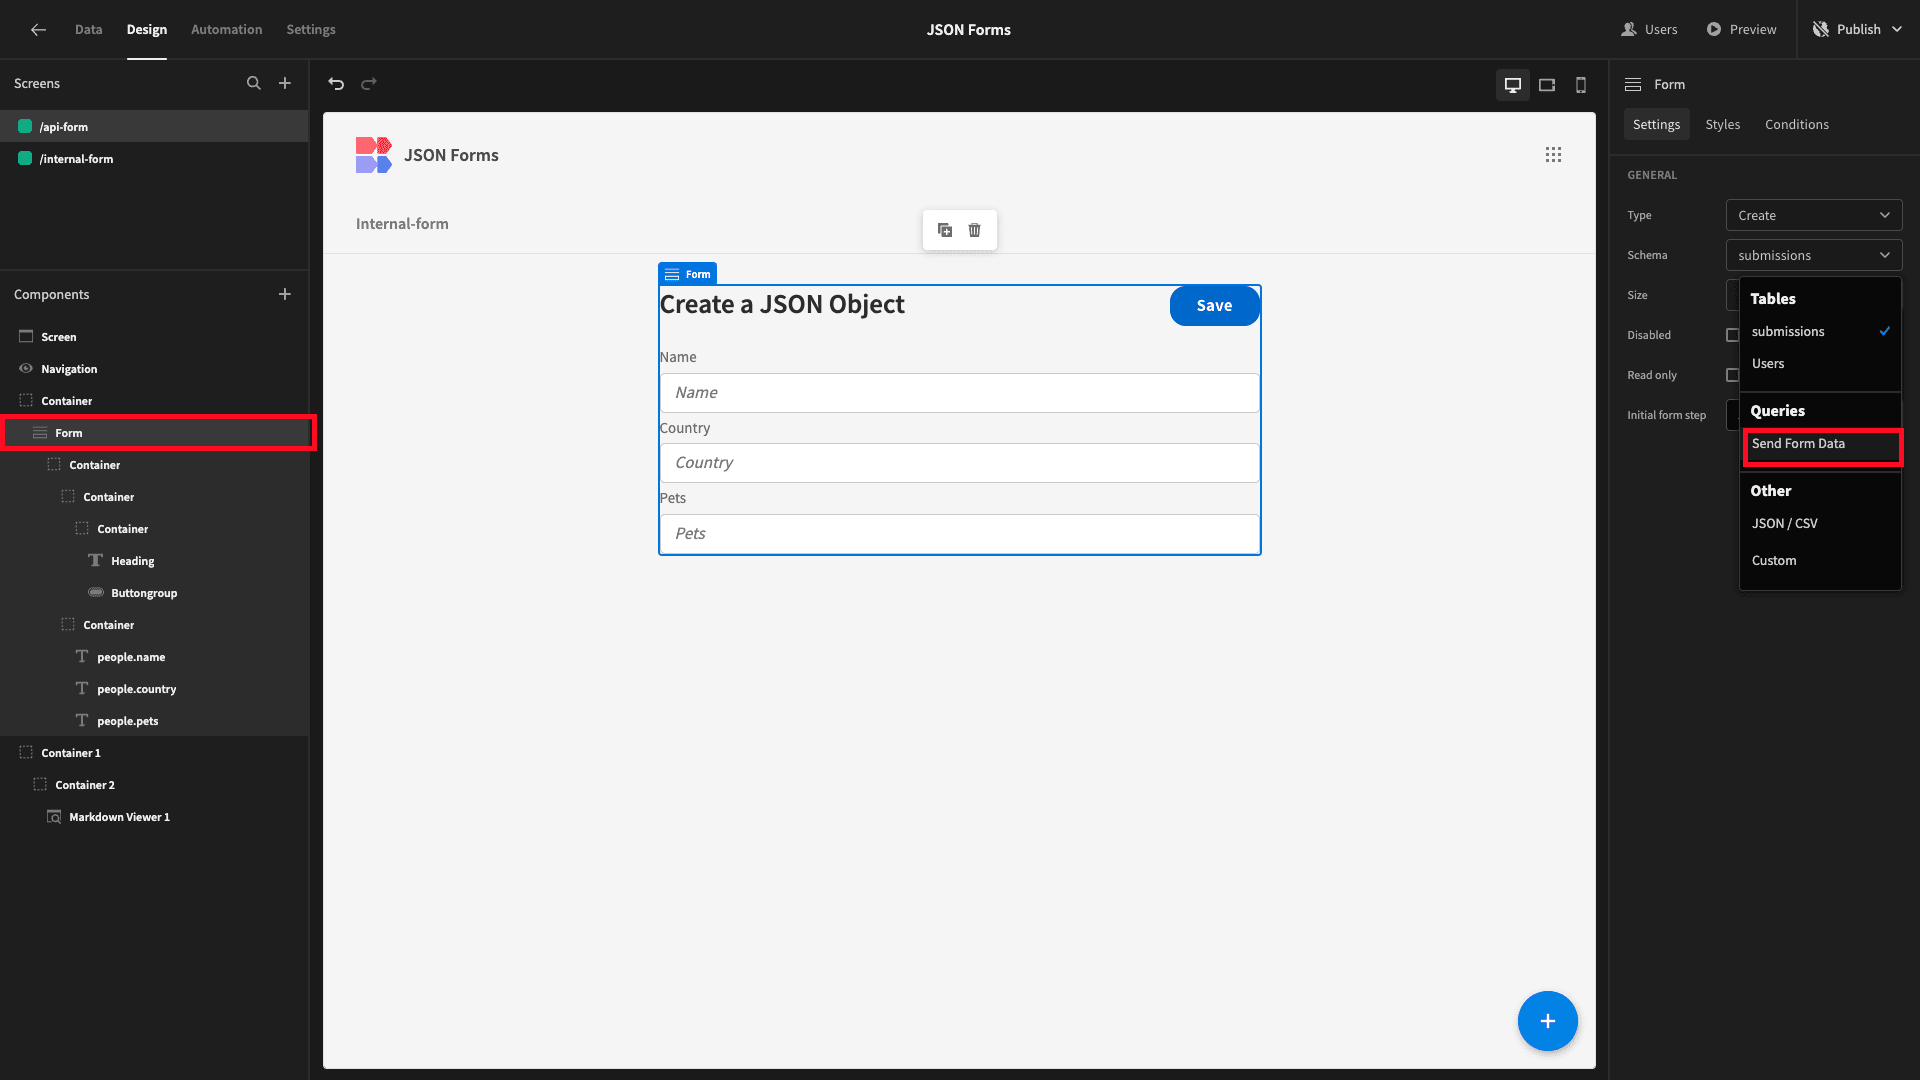
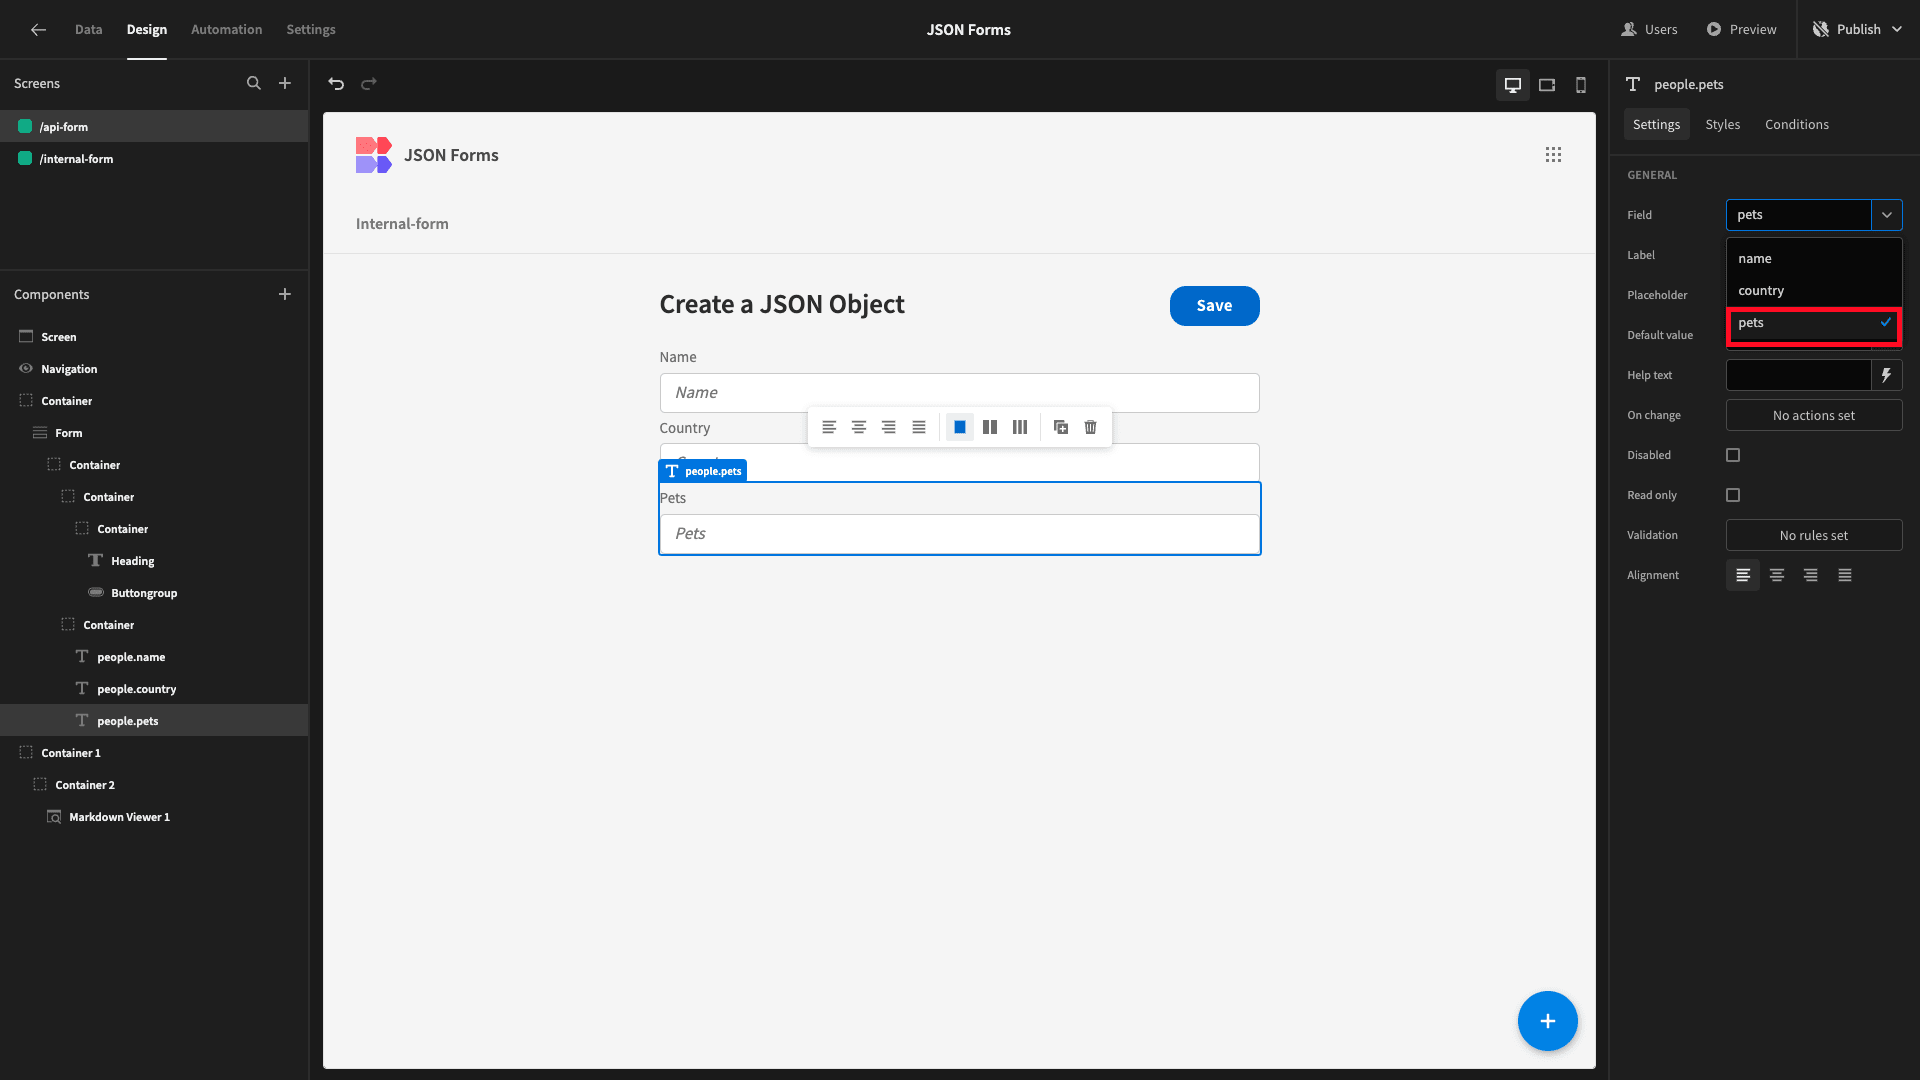
Our request fields also have slightly different names to the equivalents in our internal database, so we’ll update the Field setting for each of these to match:
We want our request to be triggered each time a user hits Save - using our new form fields to populate the bindings we created earlier.
We’ll start by opening the Actions menu for our button:
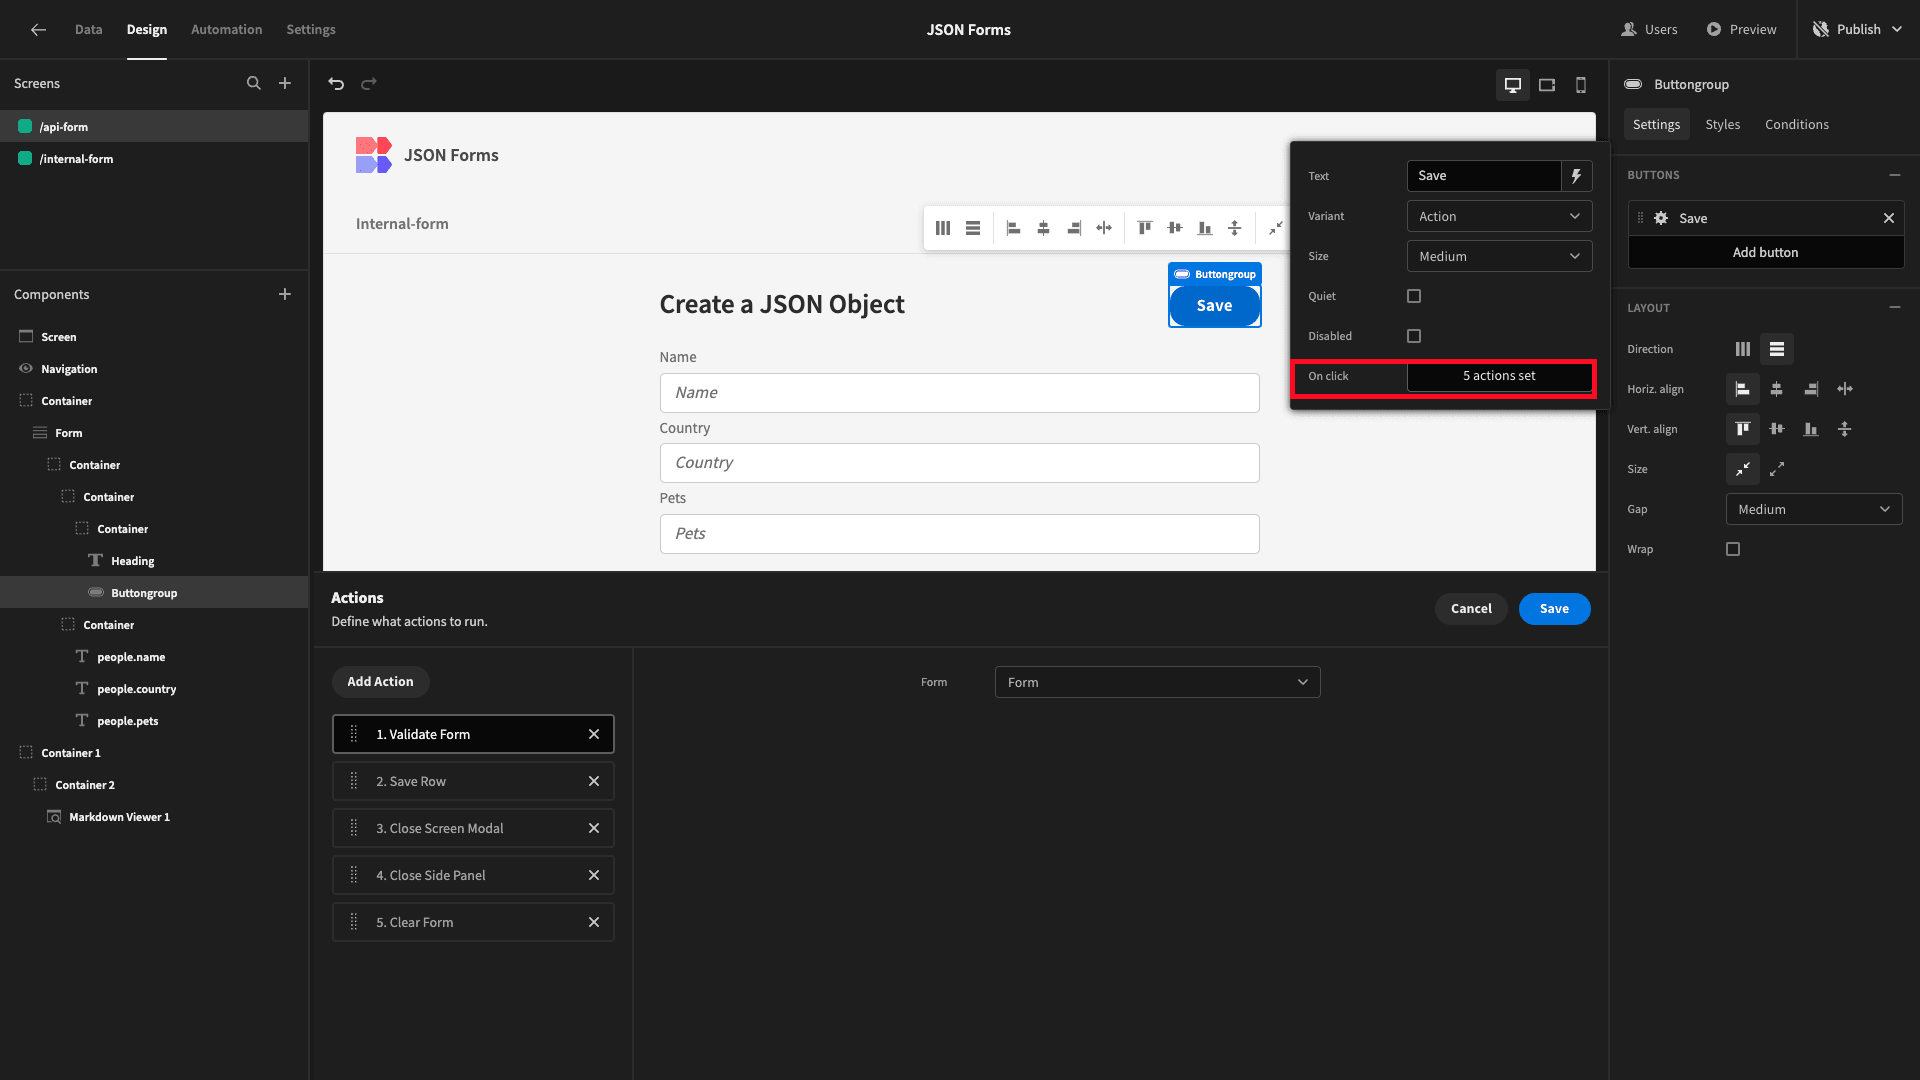
Then, we’ll remove the Save Row action and replace it with an Execute Query action - which we’ll set to our new query:
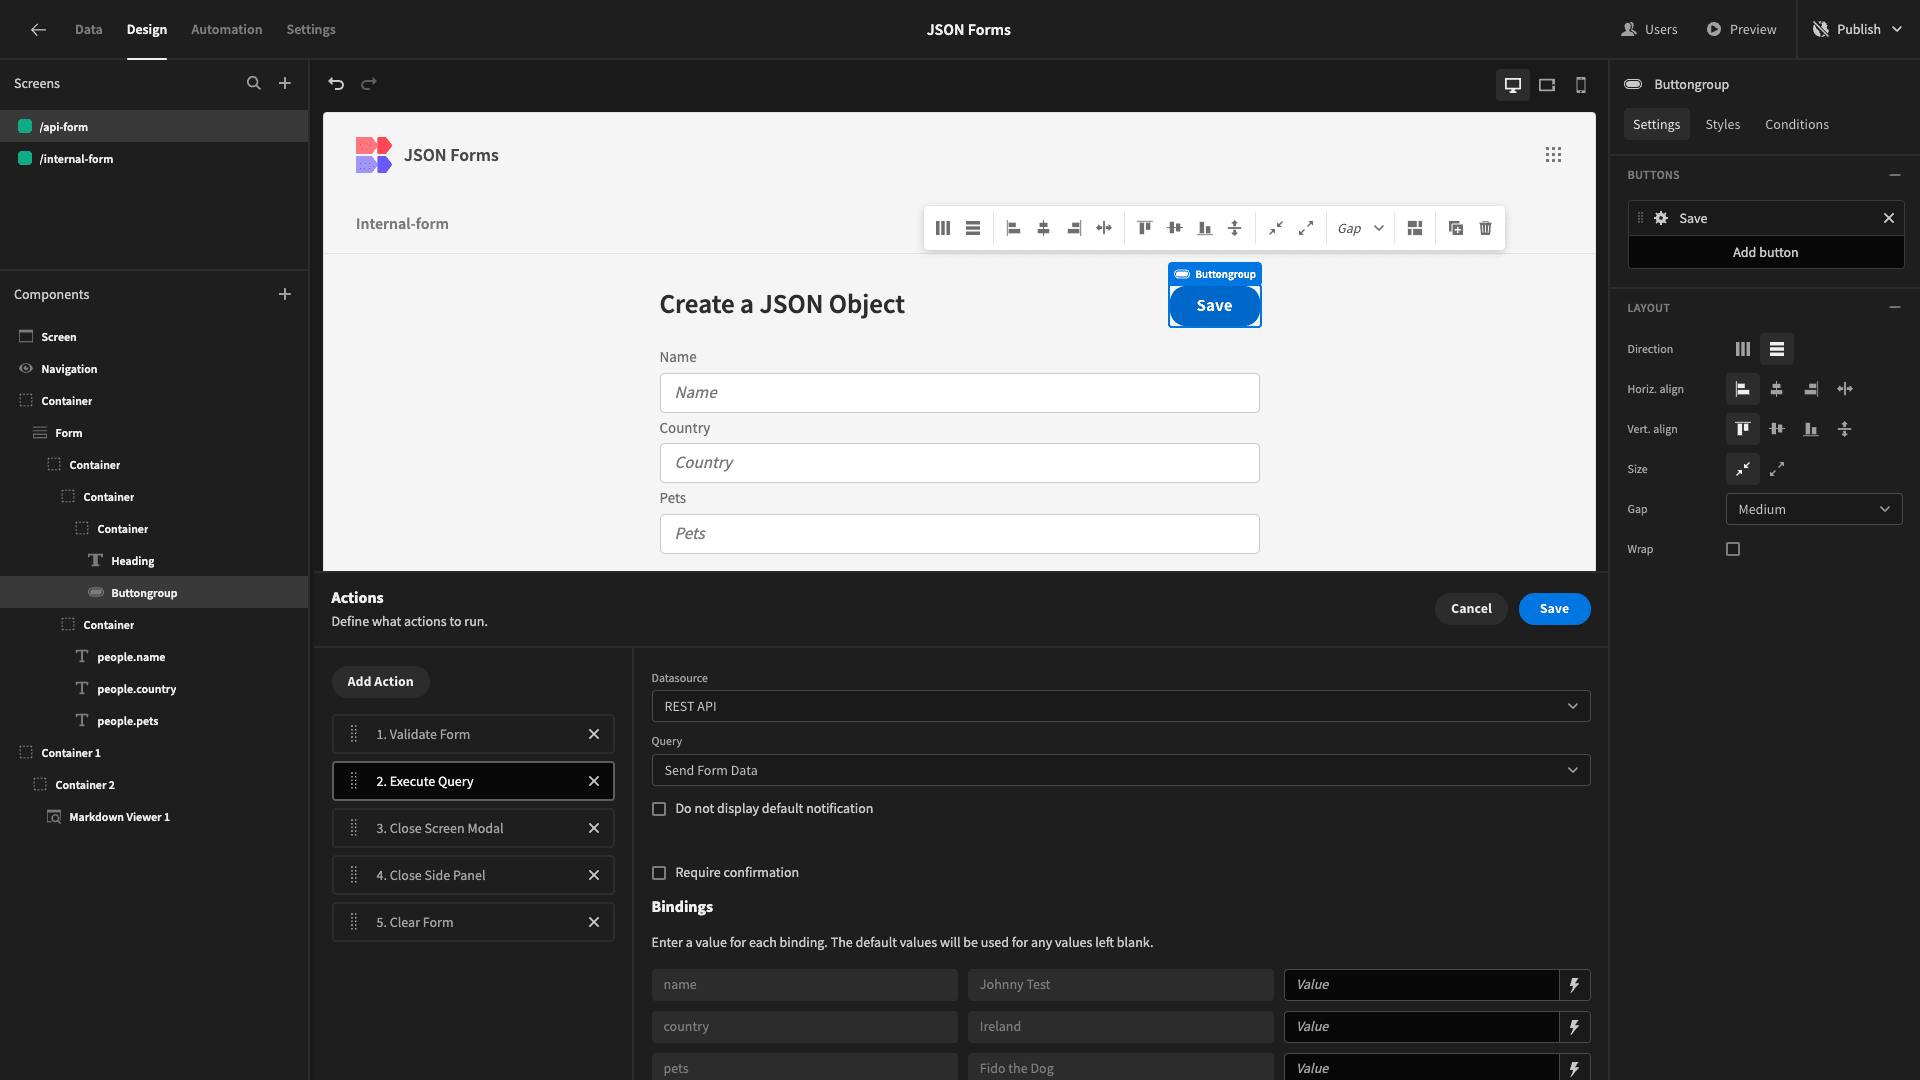
Lastly, we’ll populate our bindings with our form fields in the format {{ Form.Fields.fieldName }}.
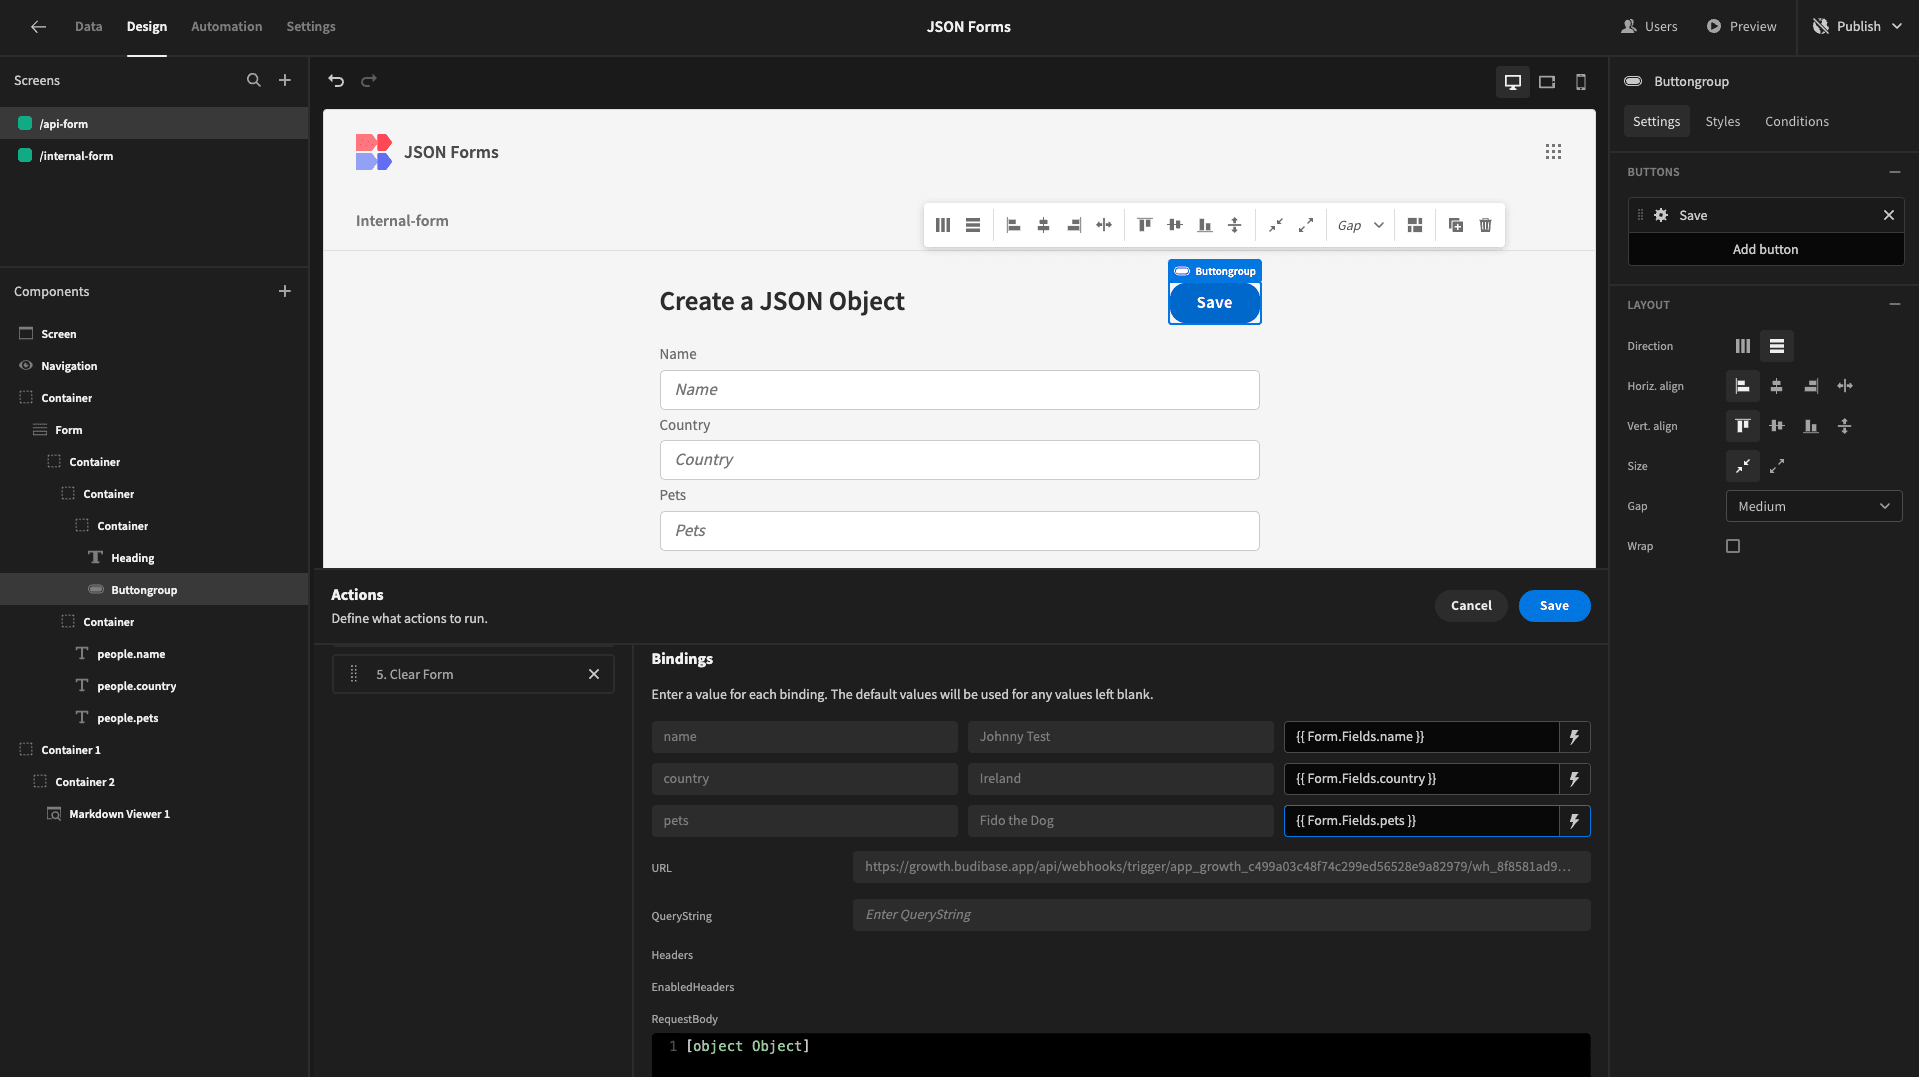
Once again, we can test this by previewing our app, filling in the form, and confirming that our API target has received a JSON object from our form data, as we’d expect.
4. Creating forms for object stores
Lastly, something that makes Budibase really special is the power to build form UIs on top of NoSQL or non-relational databases.
In terms of sending form data to JSON, the key use case here is object storage. In very basic terms, these are databases that store information about entities as a series of JSON objects.
For instance, MongoDB.
The benefit of object storage over tabular databases is that we don’t have to adhere to a strict schema. Rather, we can store different attributes about each individual entry.
Let’s see how Budibase can be leveraged here.
We’re going to start by adding another data source to our app, this time choosing MongoDB. We’ll be prompted to enter our connection string and the name of the database we want to connect to.
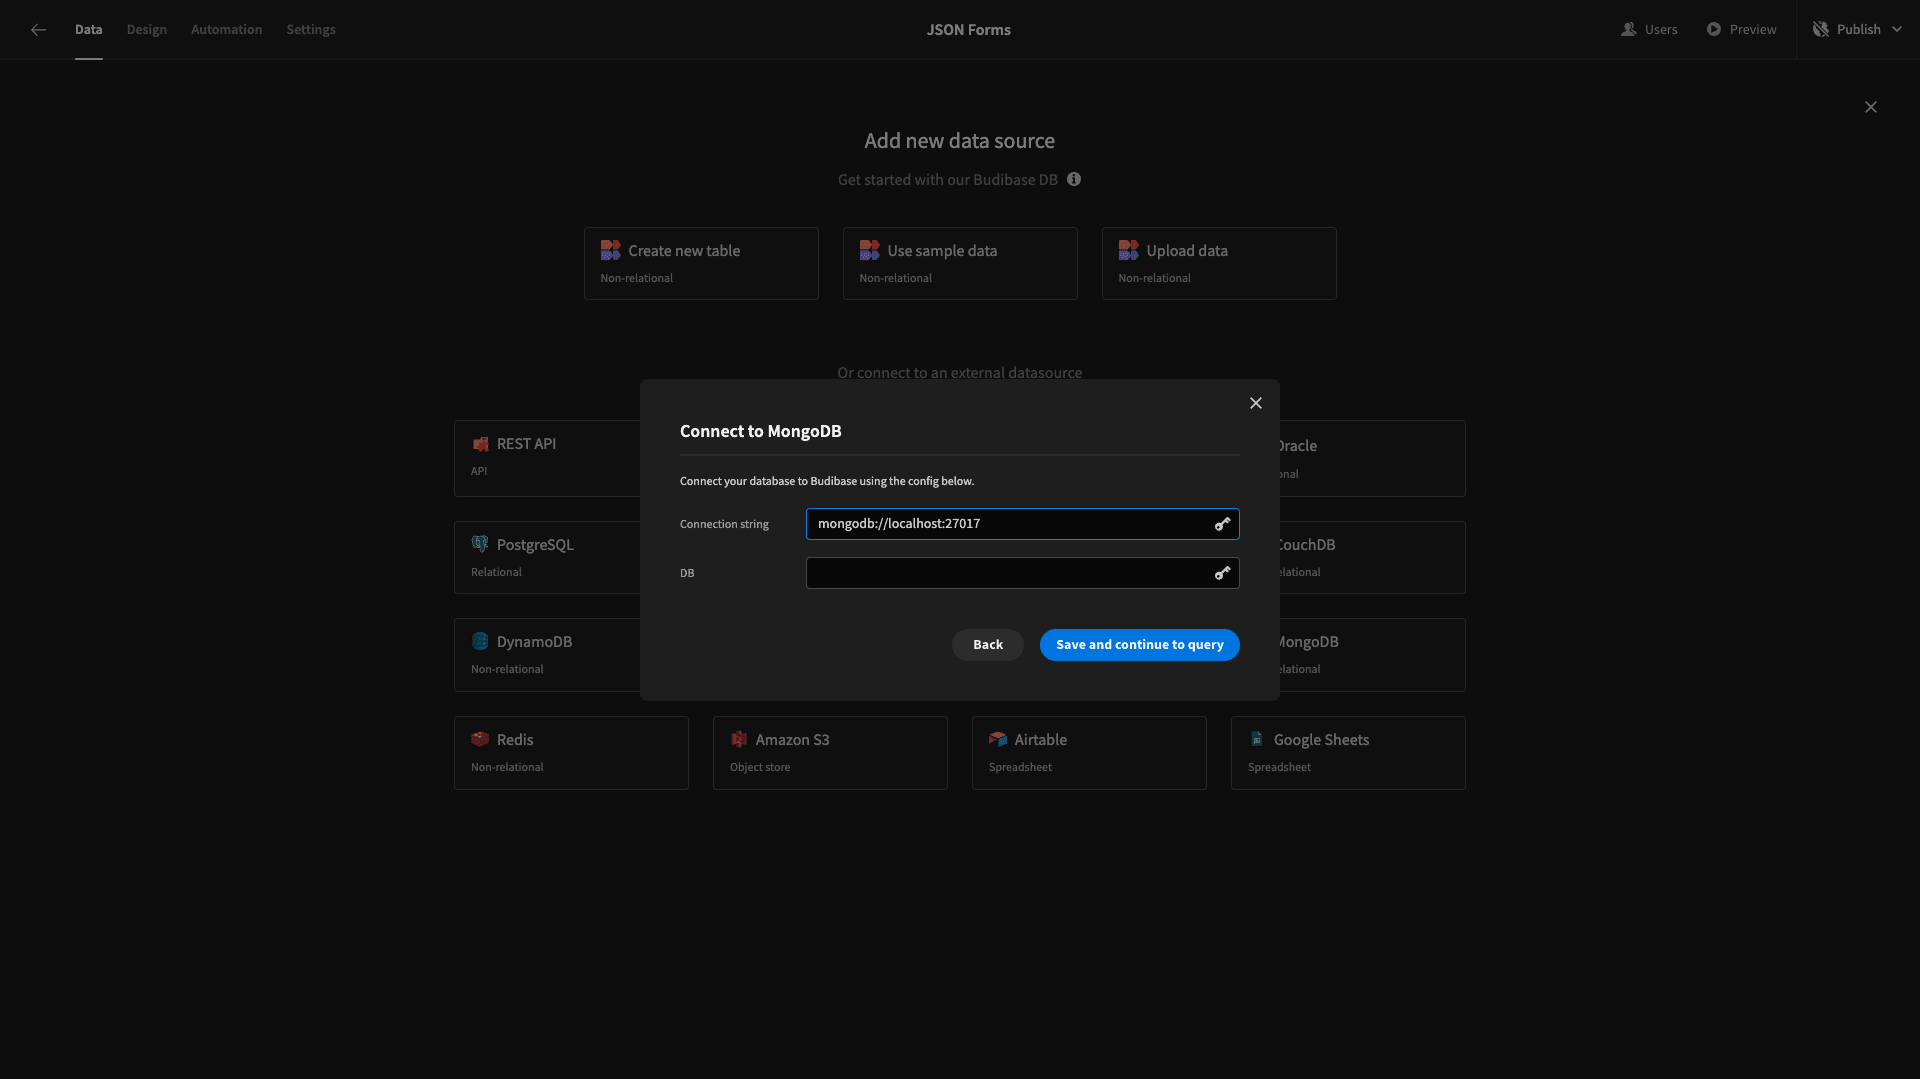
Once we’ve entered this information, we can start building our query. Our Function is Create, and our Query Type is createOne:
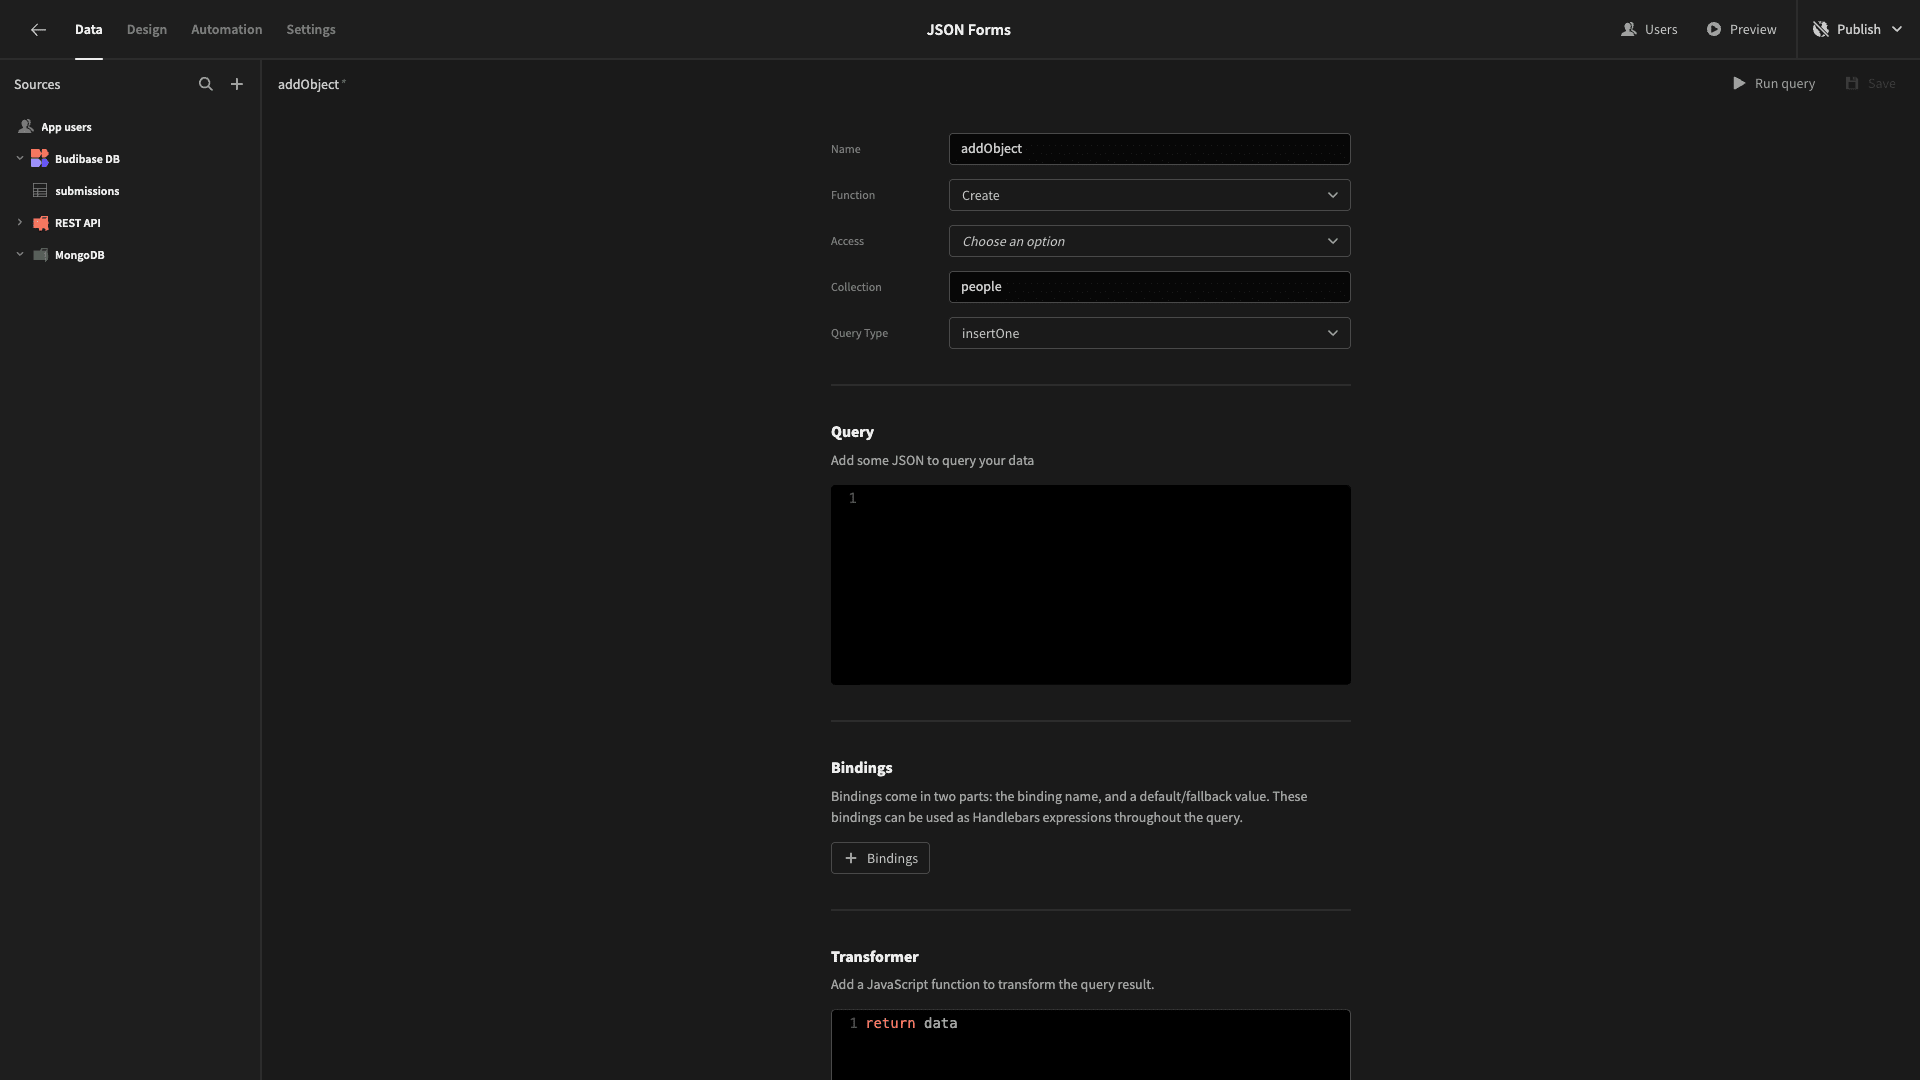
Before we write our query itself, we’re going to add some bindings again.
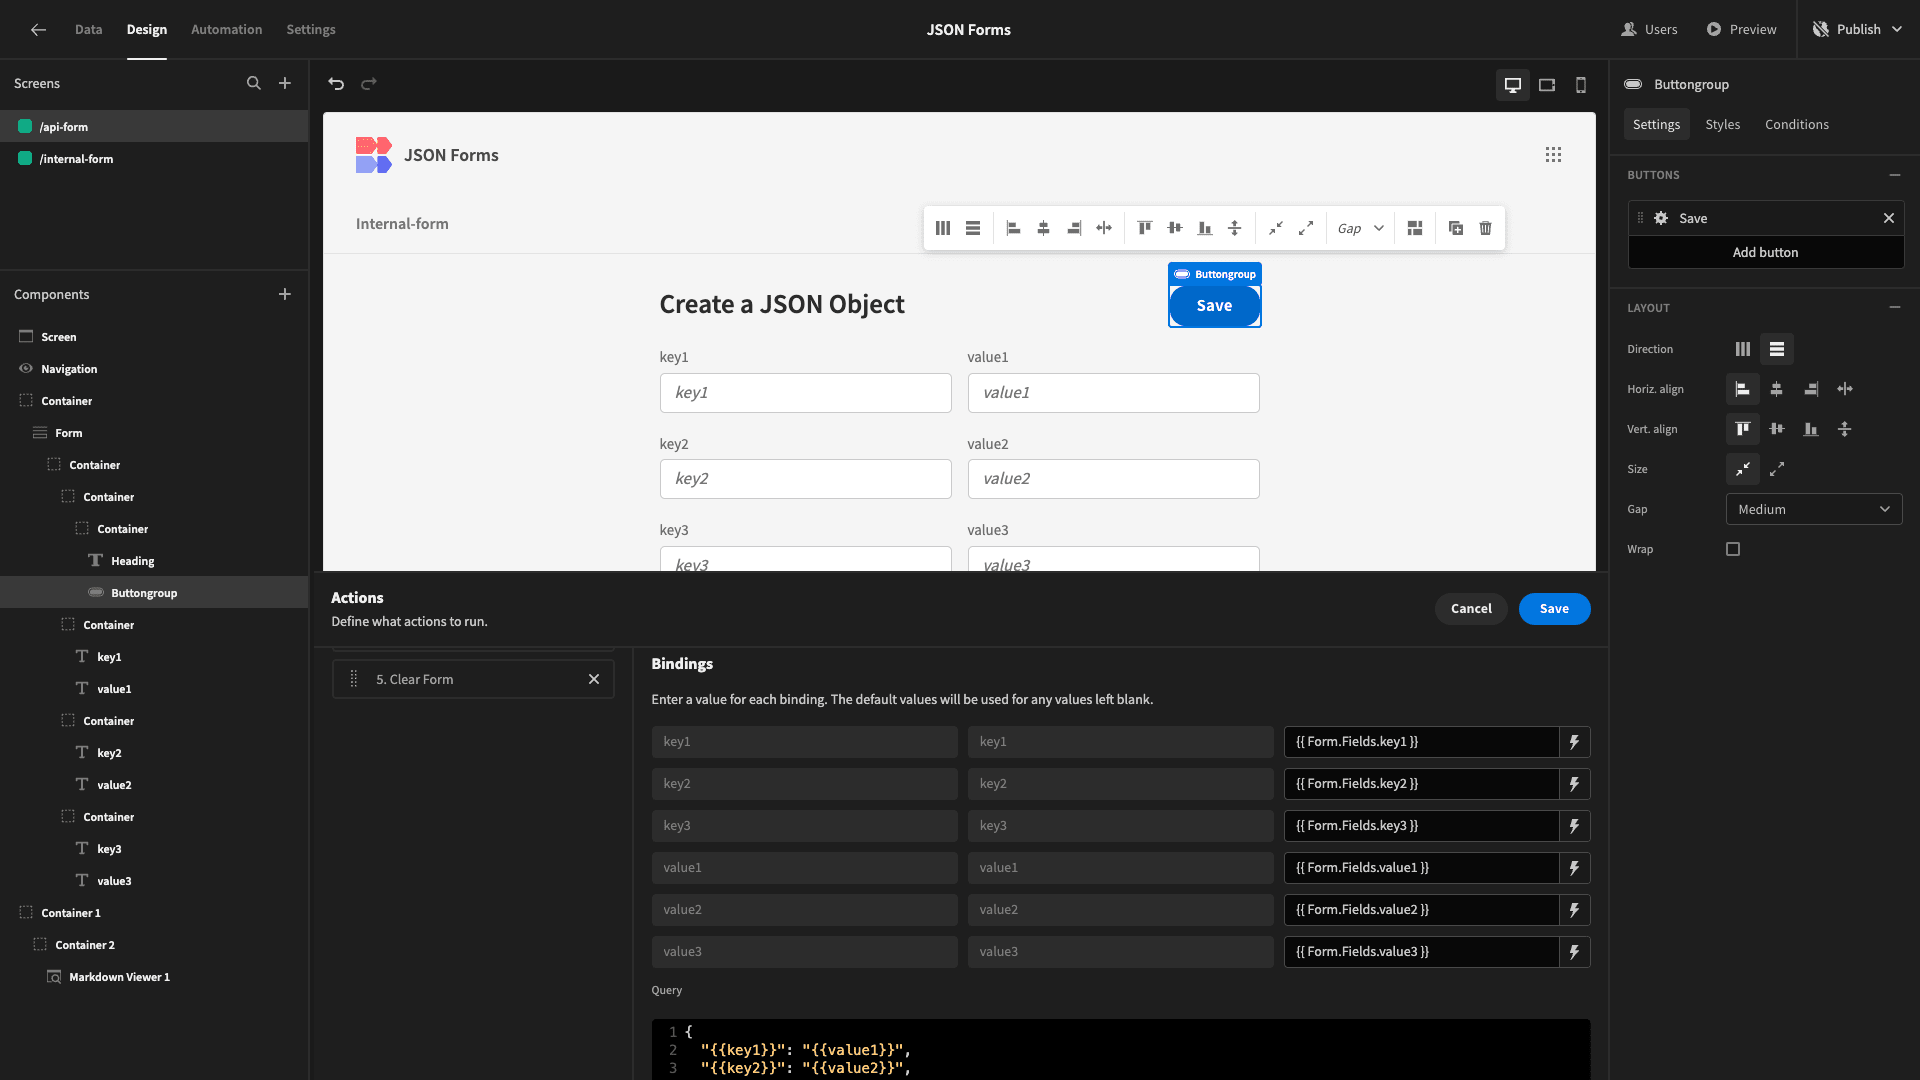
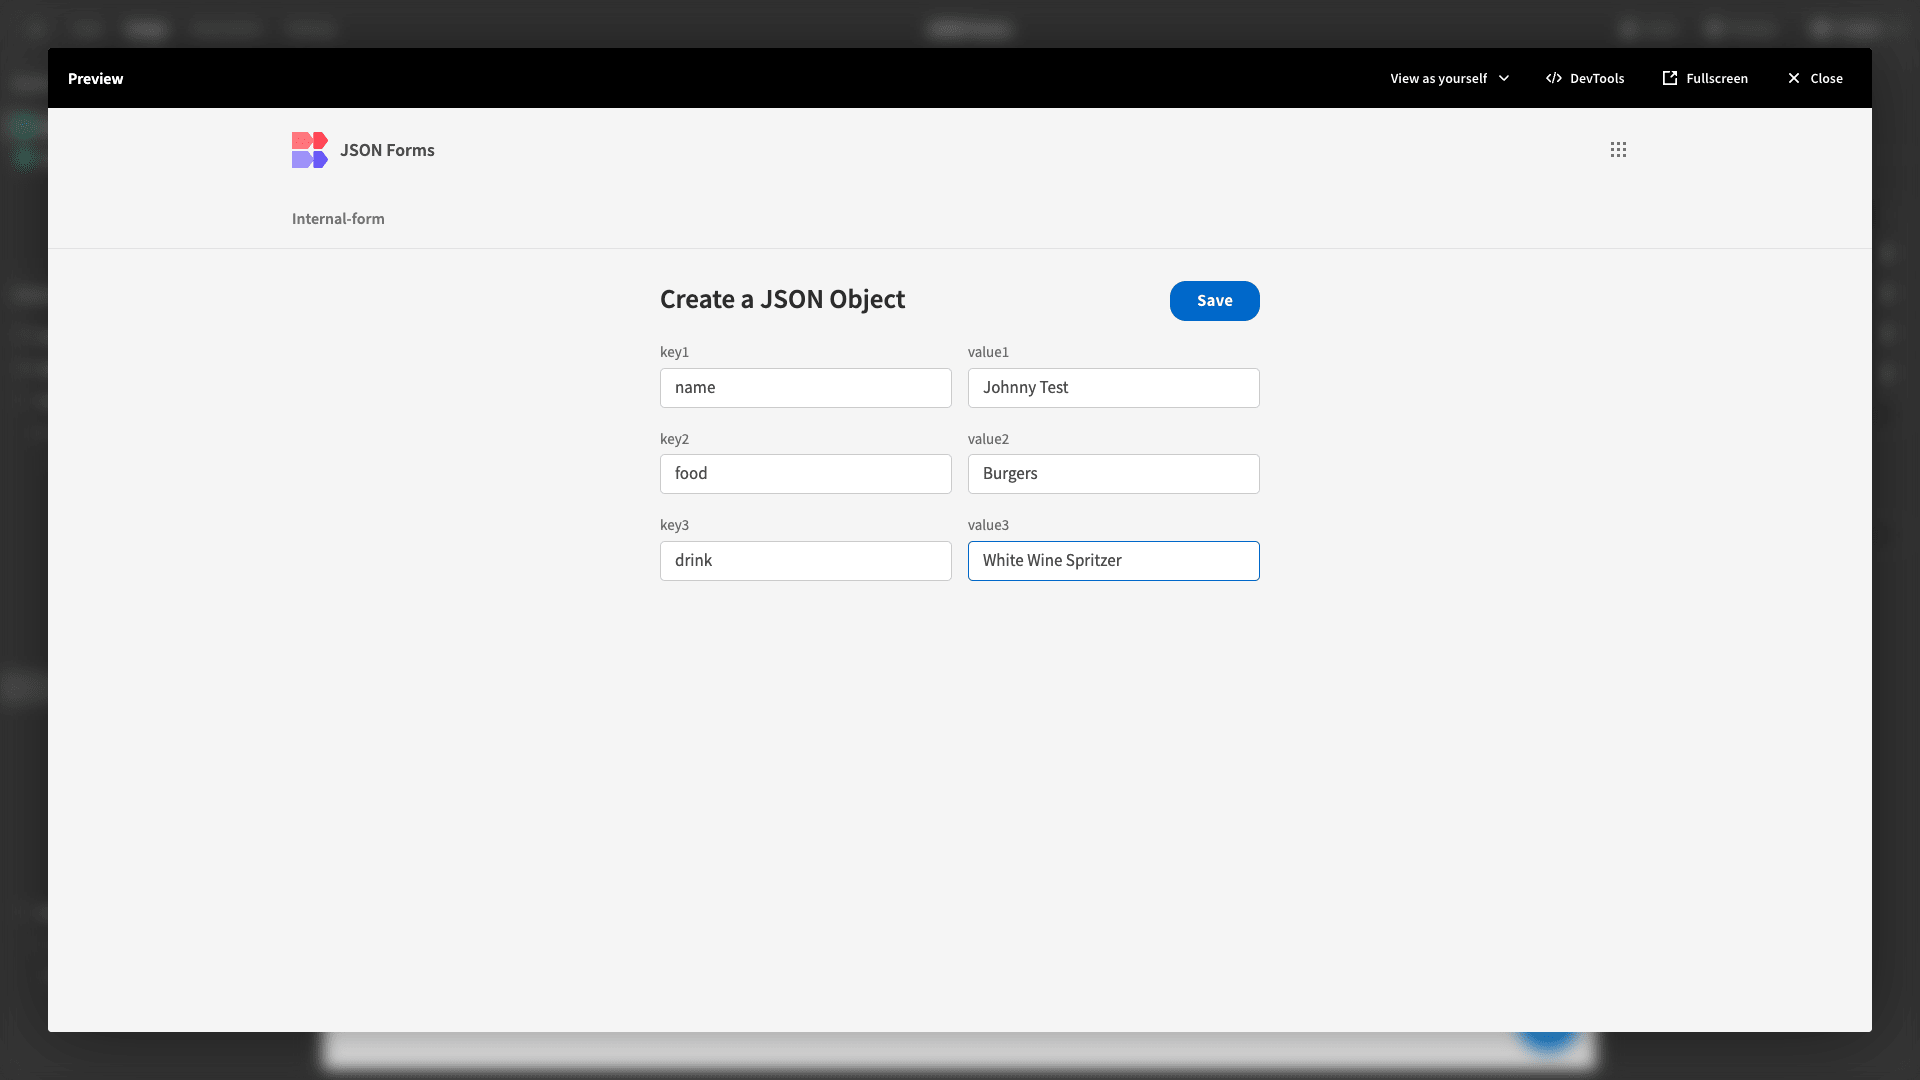
For our demonstration, we’d like users to be able to add three custom key/value pairs - although we could make this more complex if we wanted to. So, we need six bindings - three for keys and three for values:
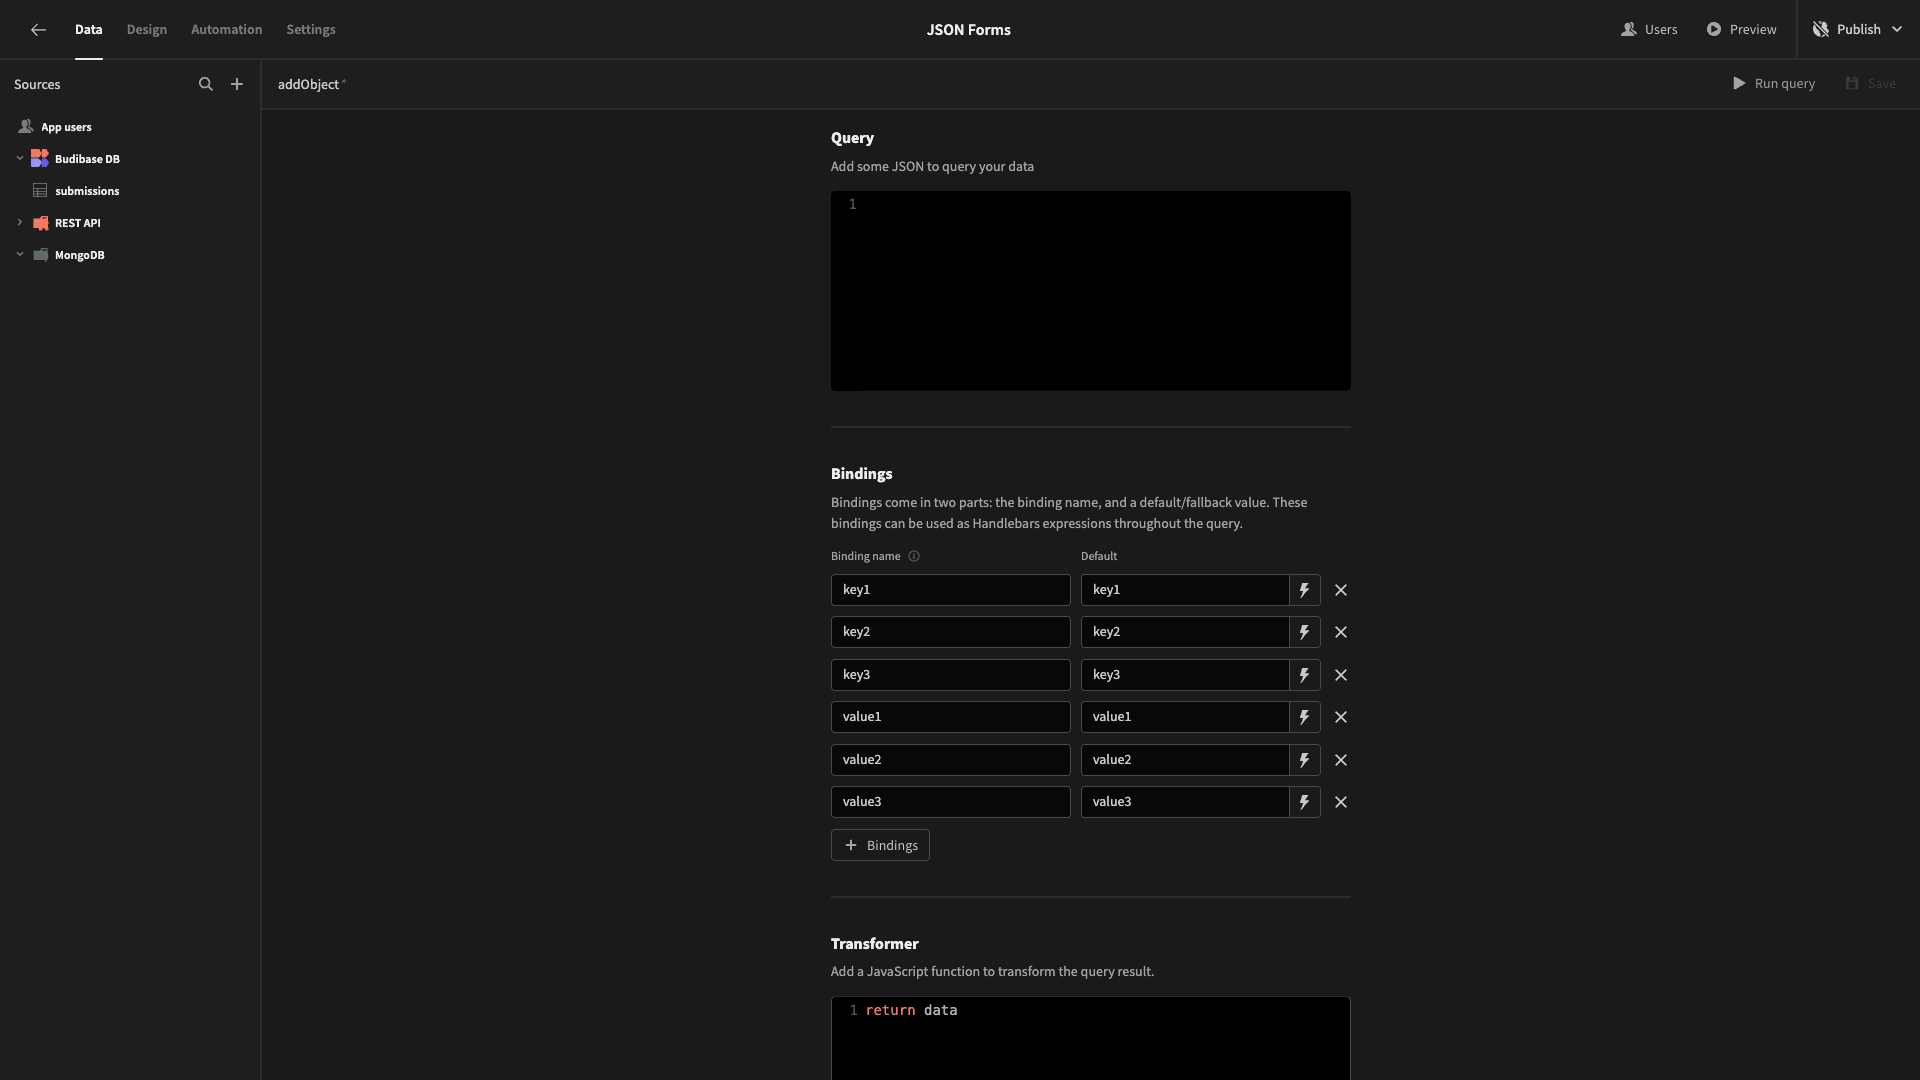
Now, to write our query, we simply have to arrange our bindable values into a JSON object - such as:
1{
2
3 "{{key1}}": "{{value1}}",
4
5 "{{key2}}": "{{value2}}",
6
7 "{{key3}}": "{{value3}}"
8
9}We’ll then run our query:
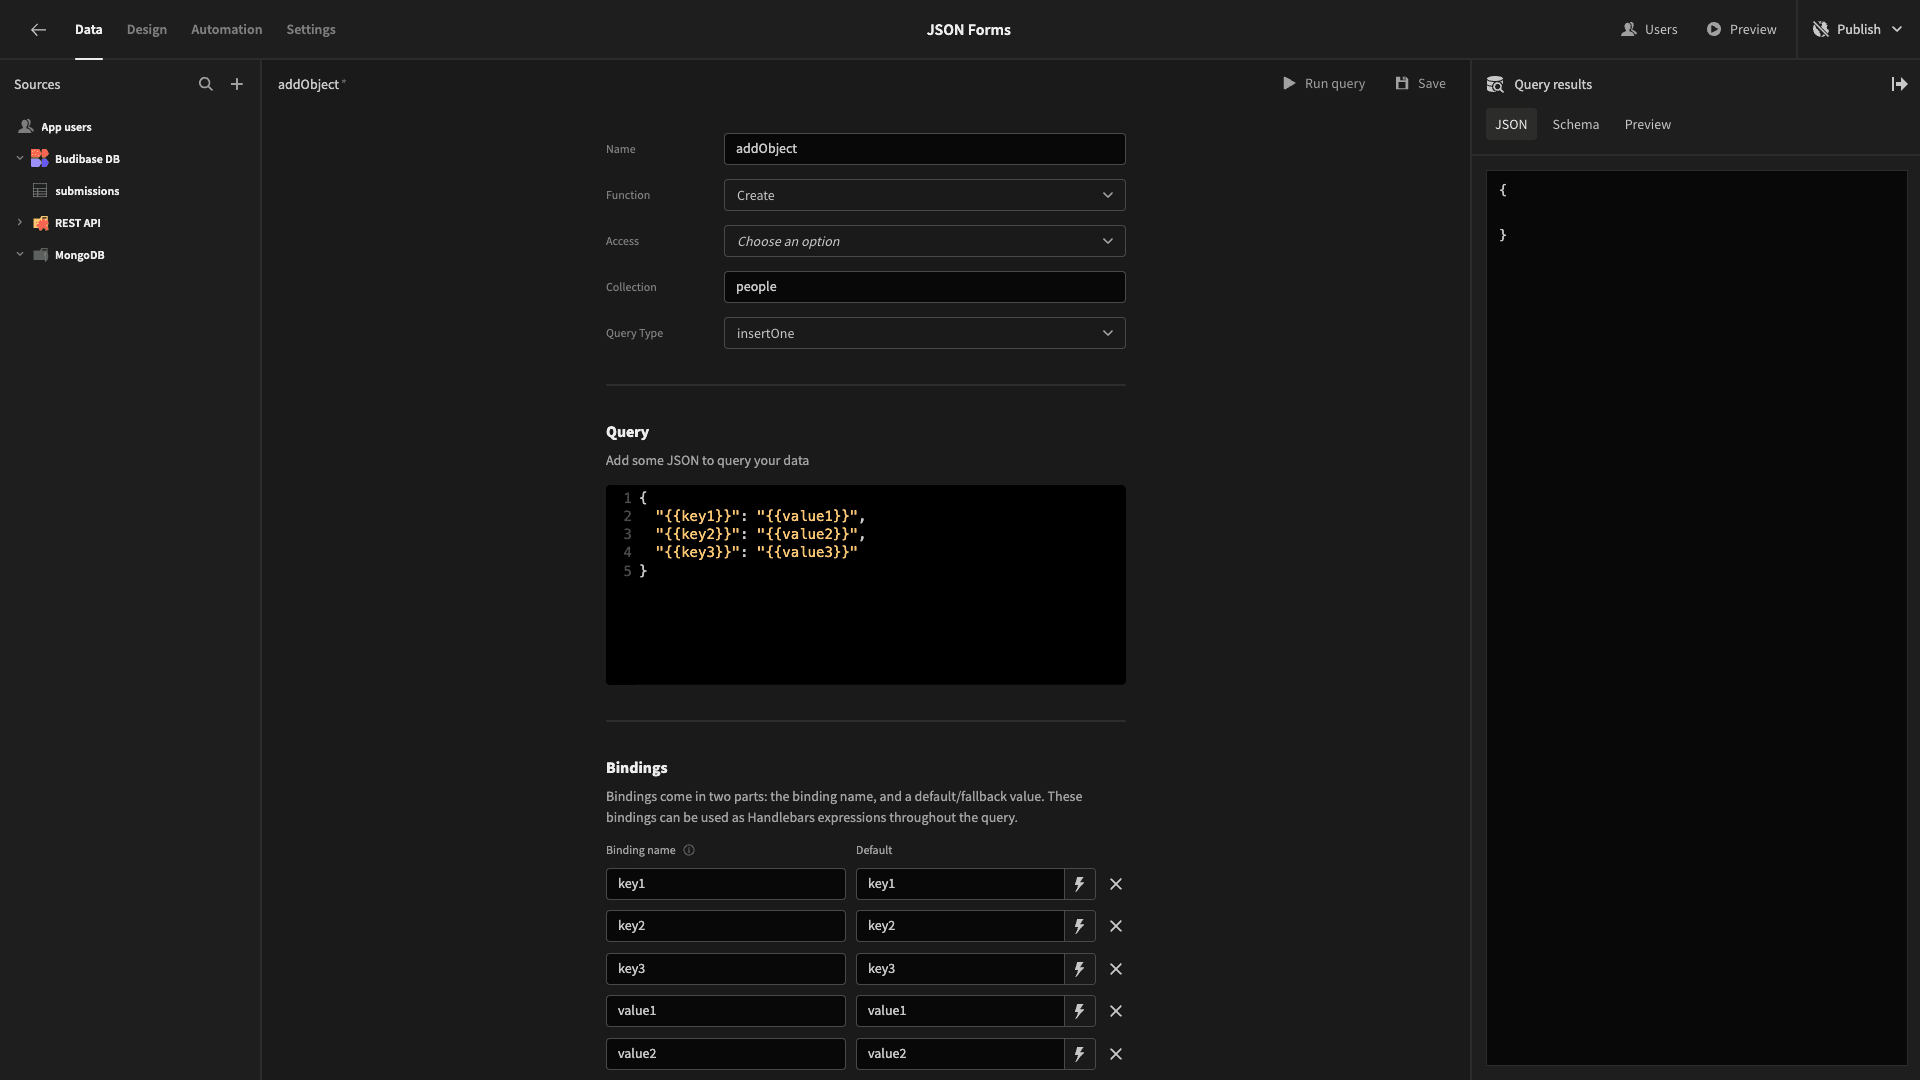
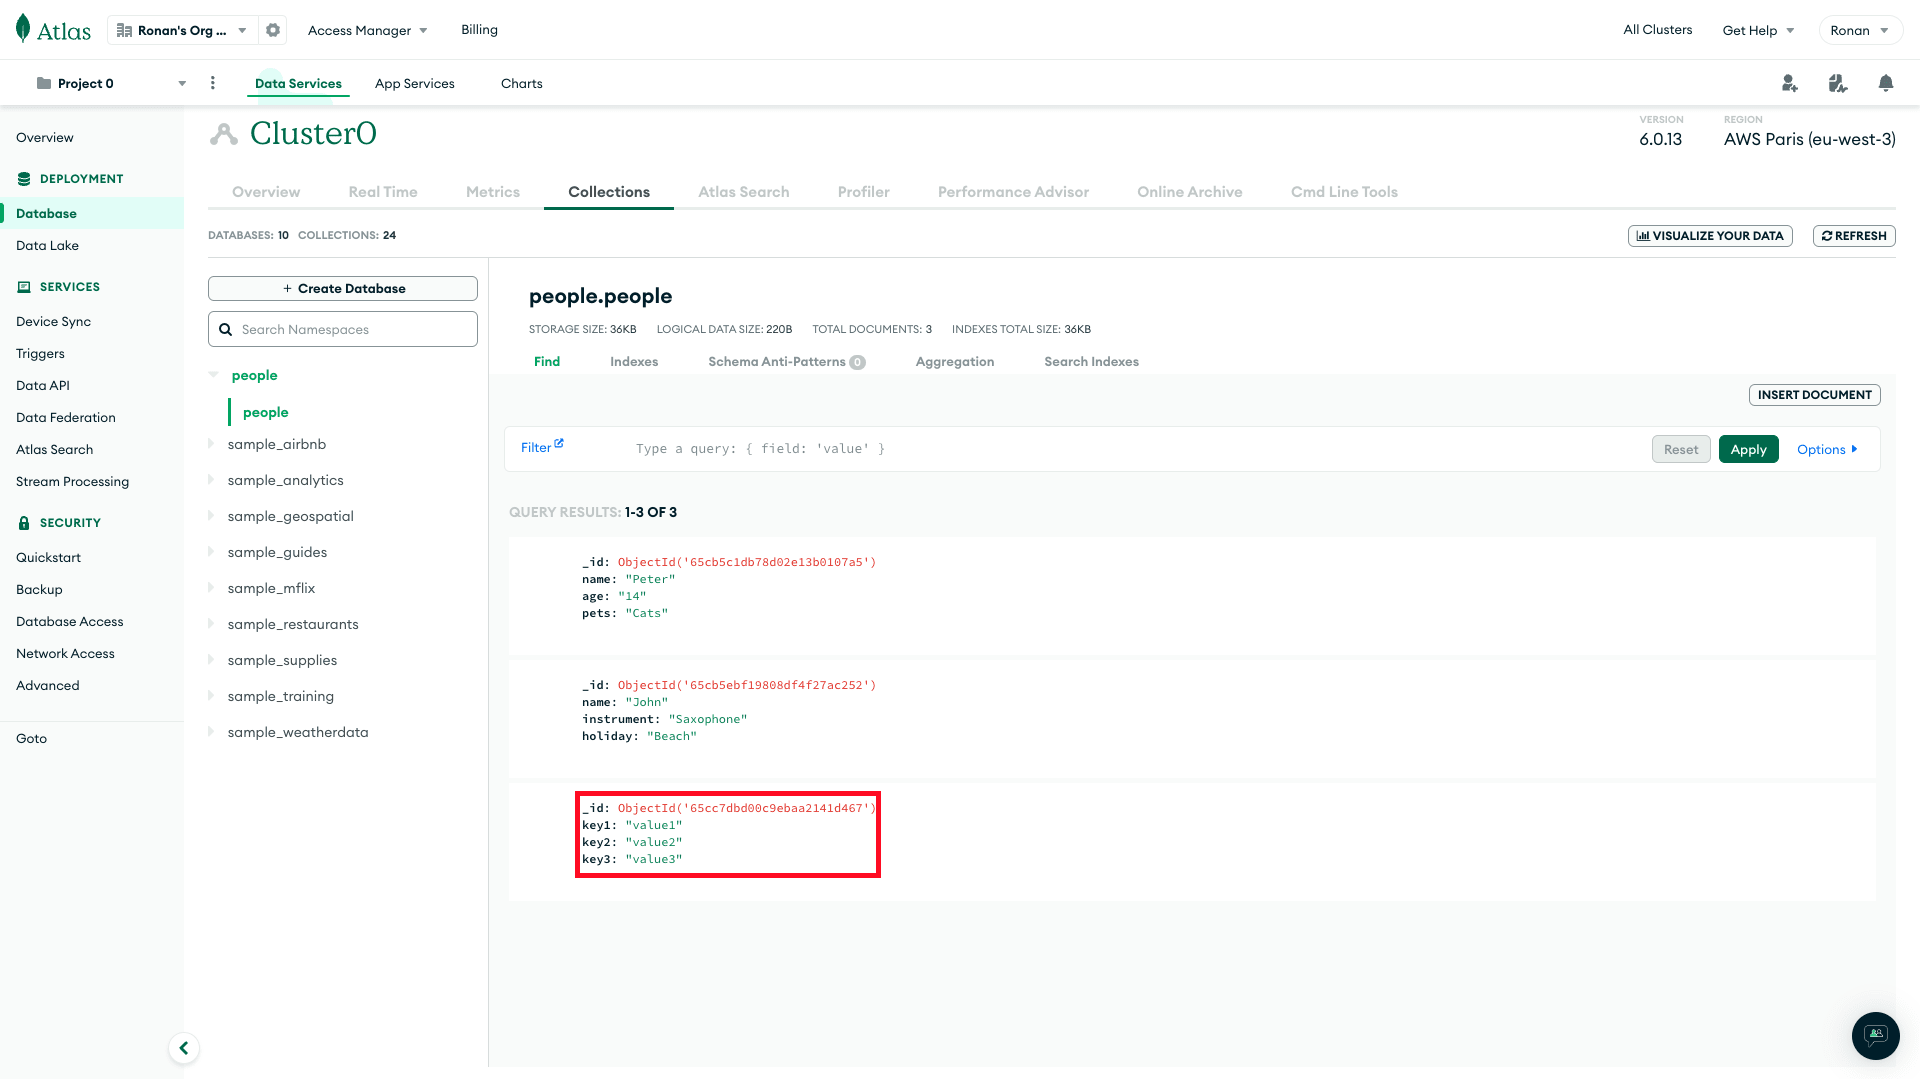
Nothing is returned as we’re creating data in our database, not reading it.
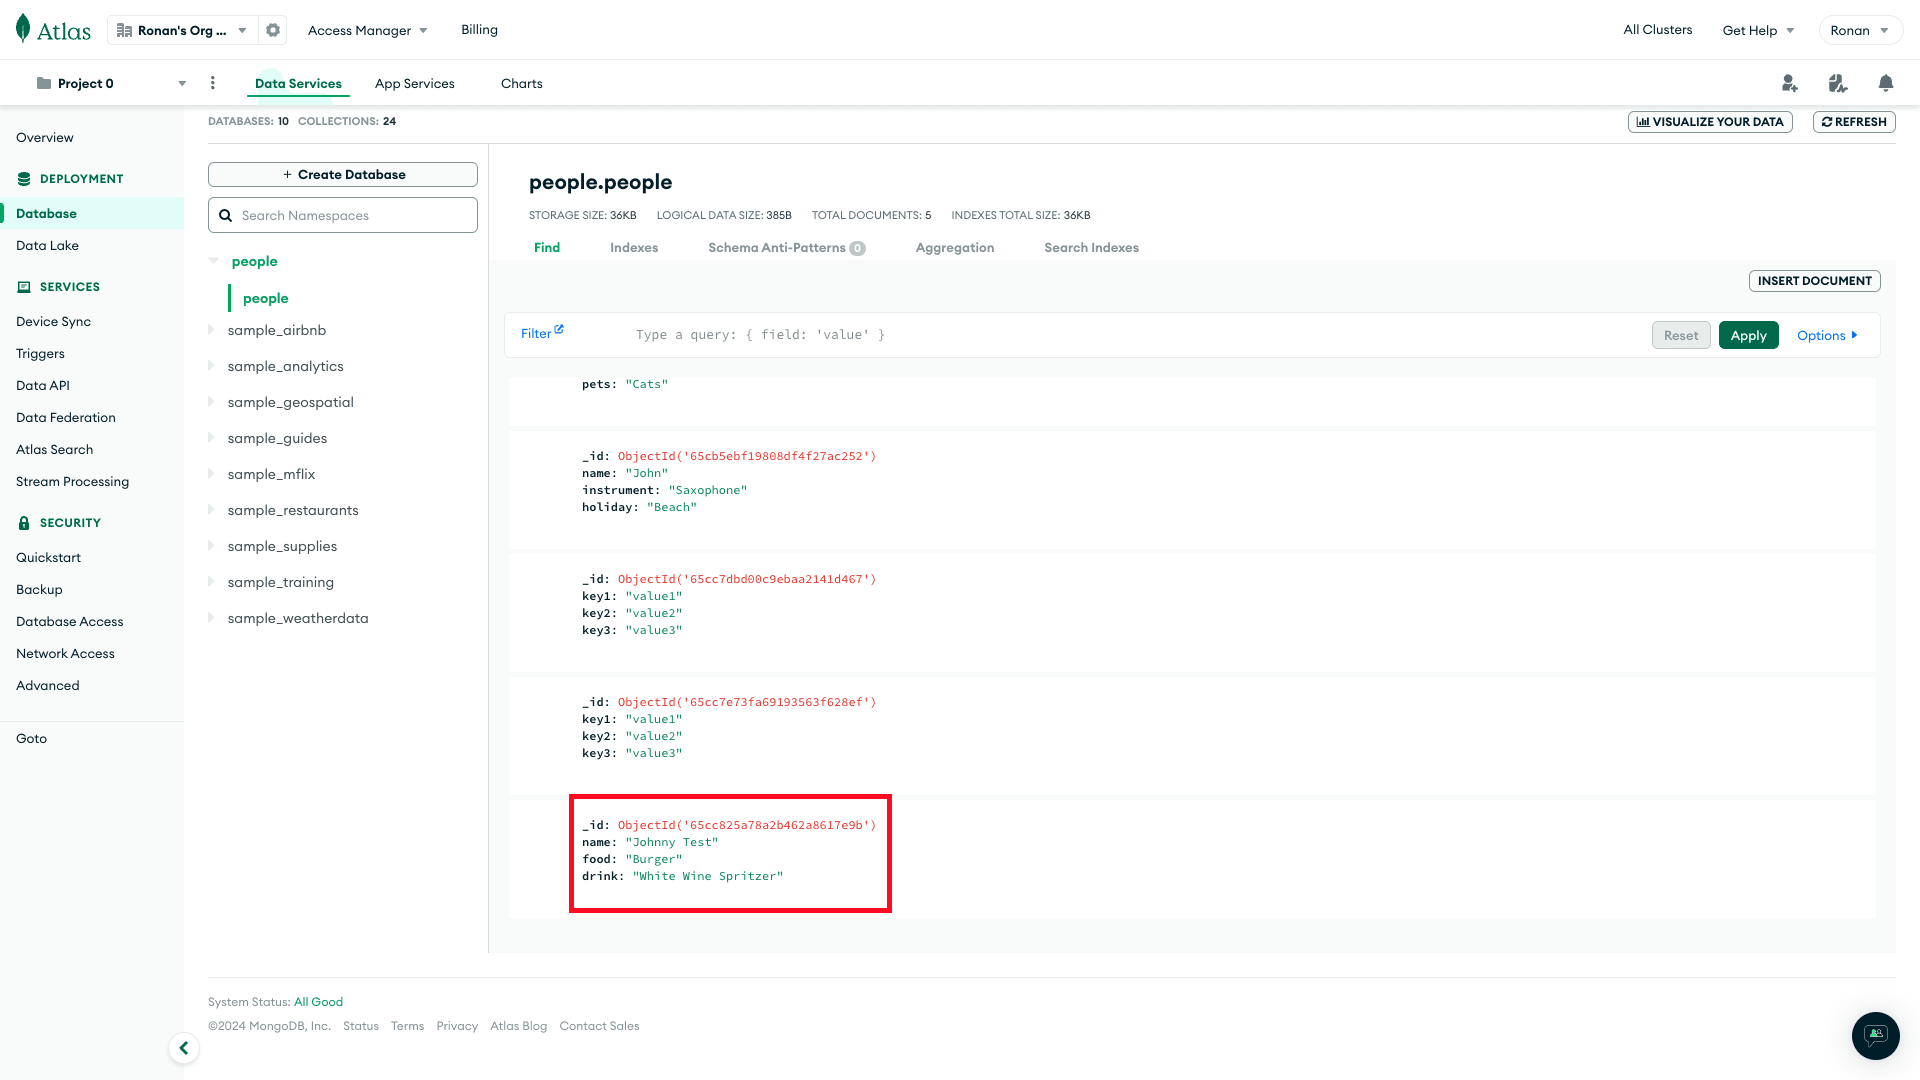
So, we need to head over to our MongoDB instance to check if our new object has been saved.
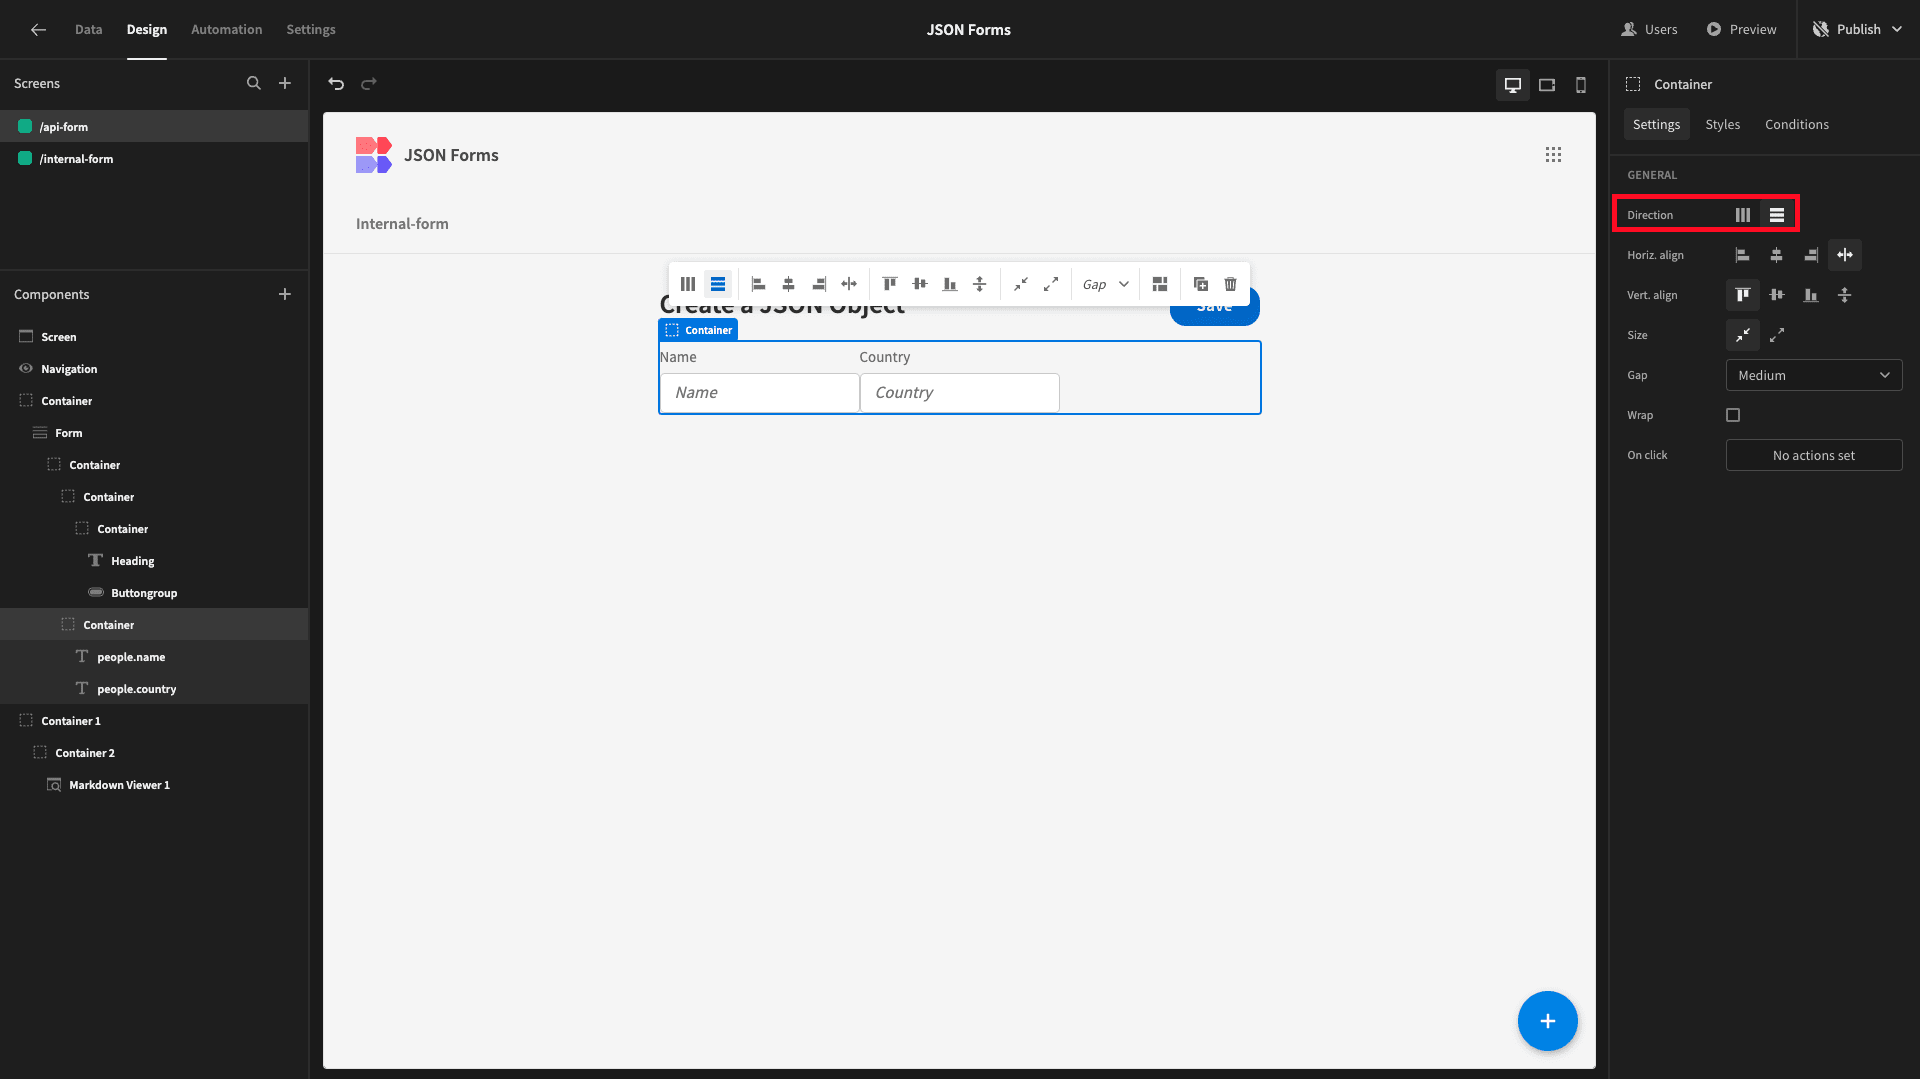
Let’s head back to the design tab, duplicate our previous screen, and set its Form Schema to our new query. We’ve started by deleting one of our form fields and setting the Direction of the parent container for the remaining two to horizontal:
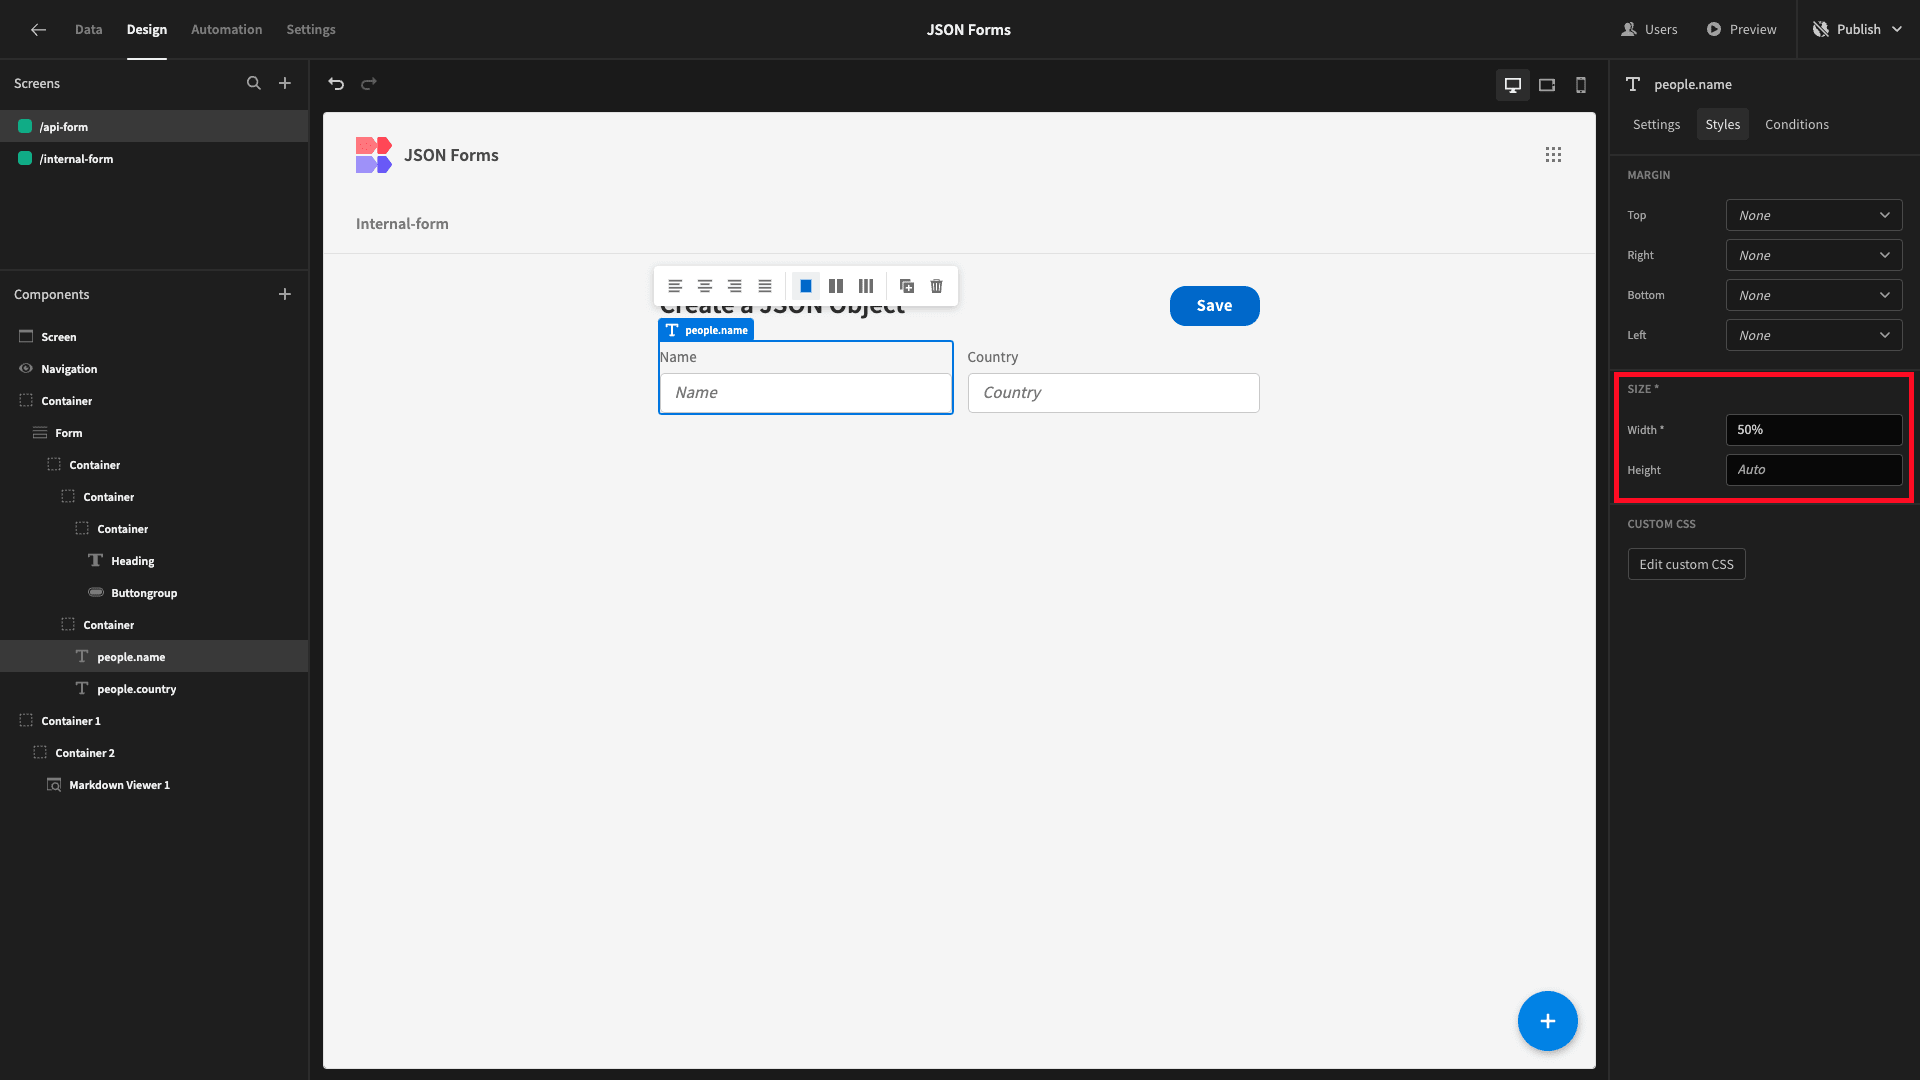
We’ll also give each of them a custom width of 50%.
We’ll also need to update our Field, Label, and Placeholder for each of these:
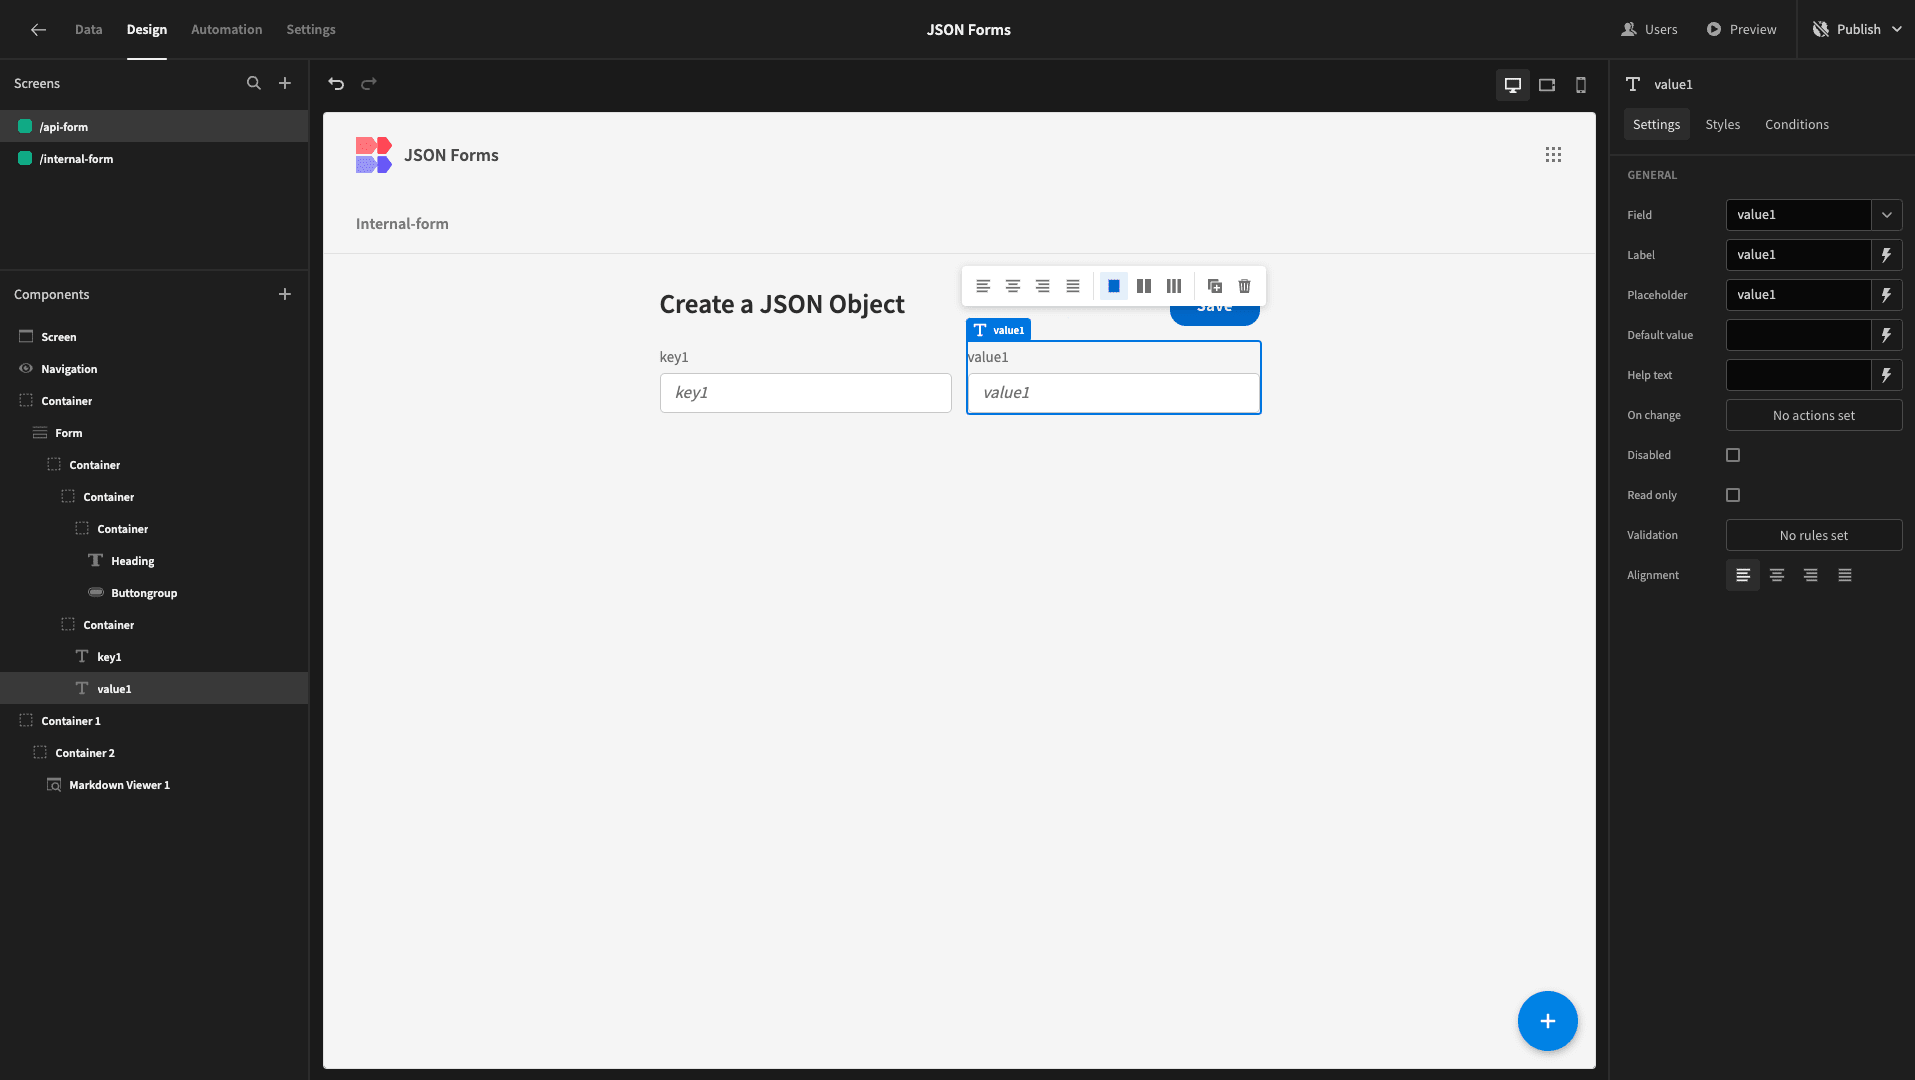
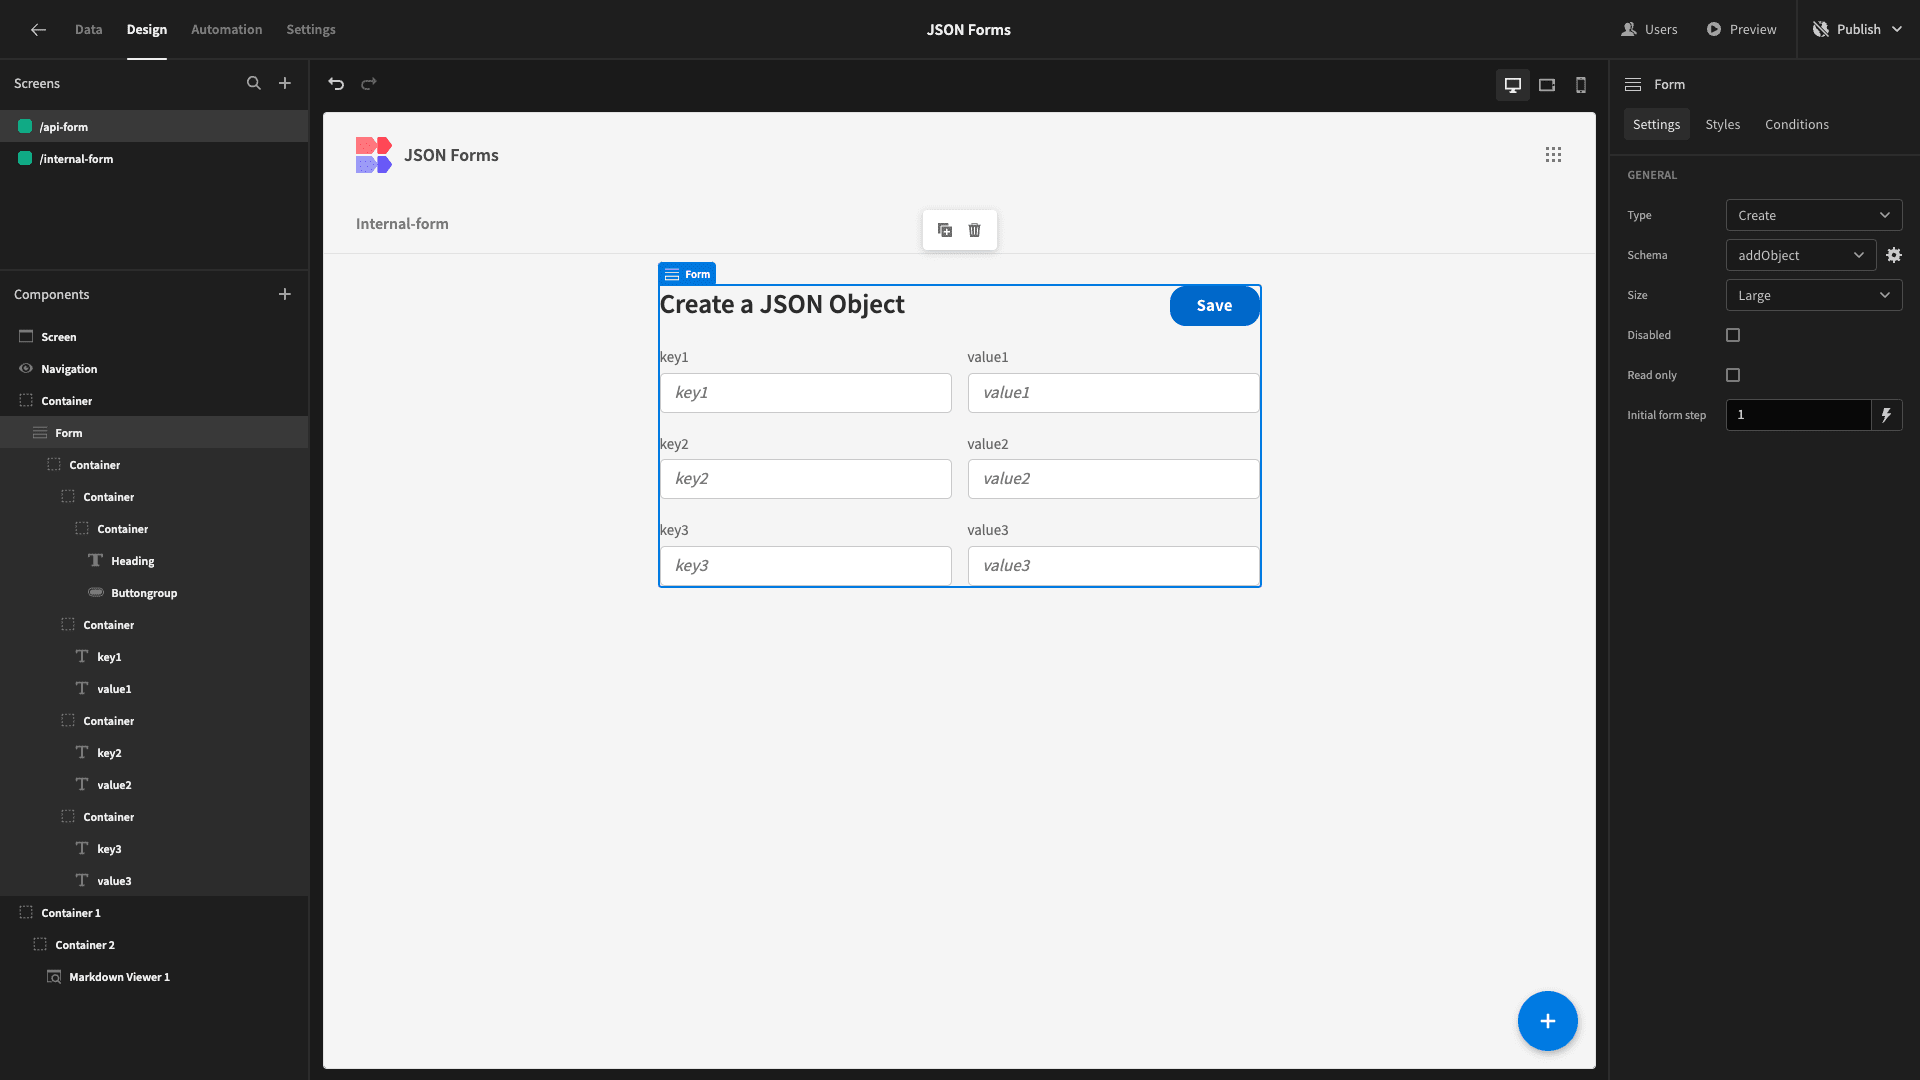
We’ll then add two duplicates of our container, each time updating the options for our form fields to match our next key/value pair.
Lastly, we need to update our button action to match.
So, we’ll swap our Execute Query action to our new query:
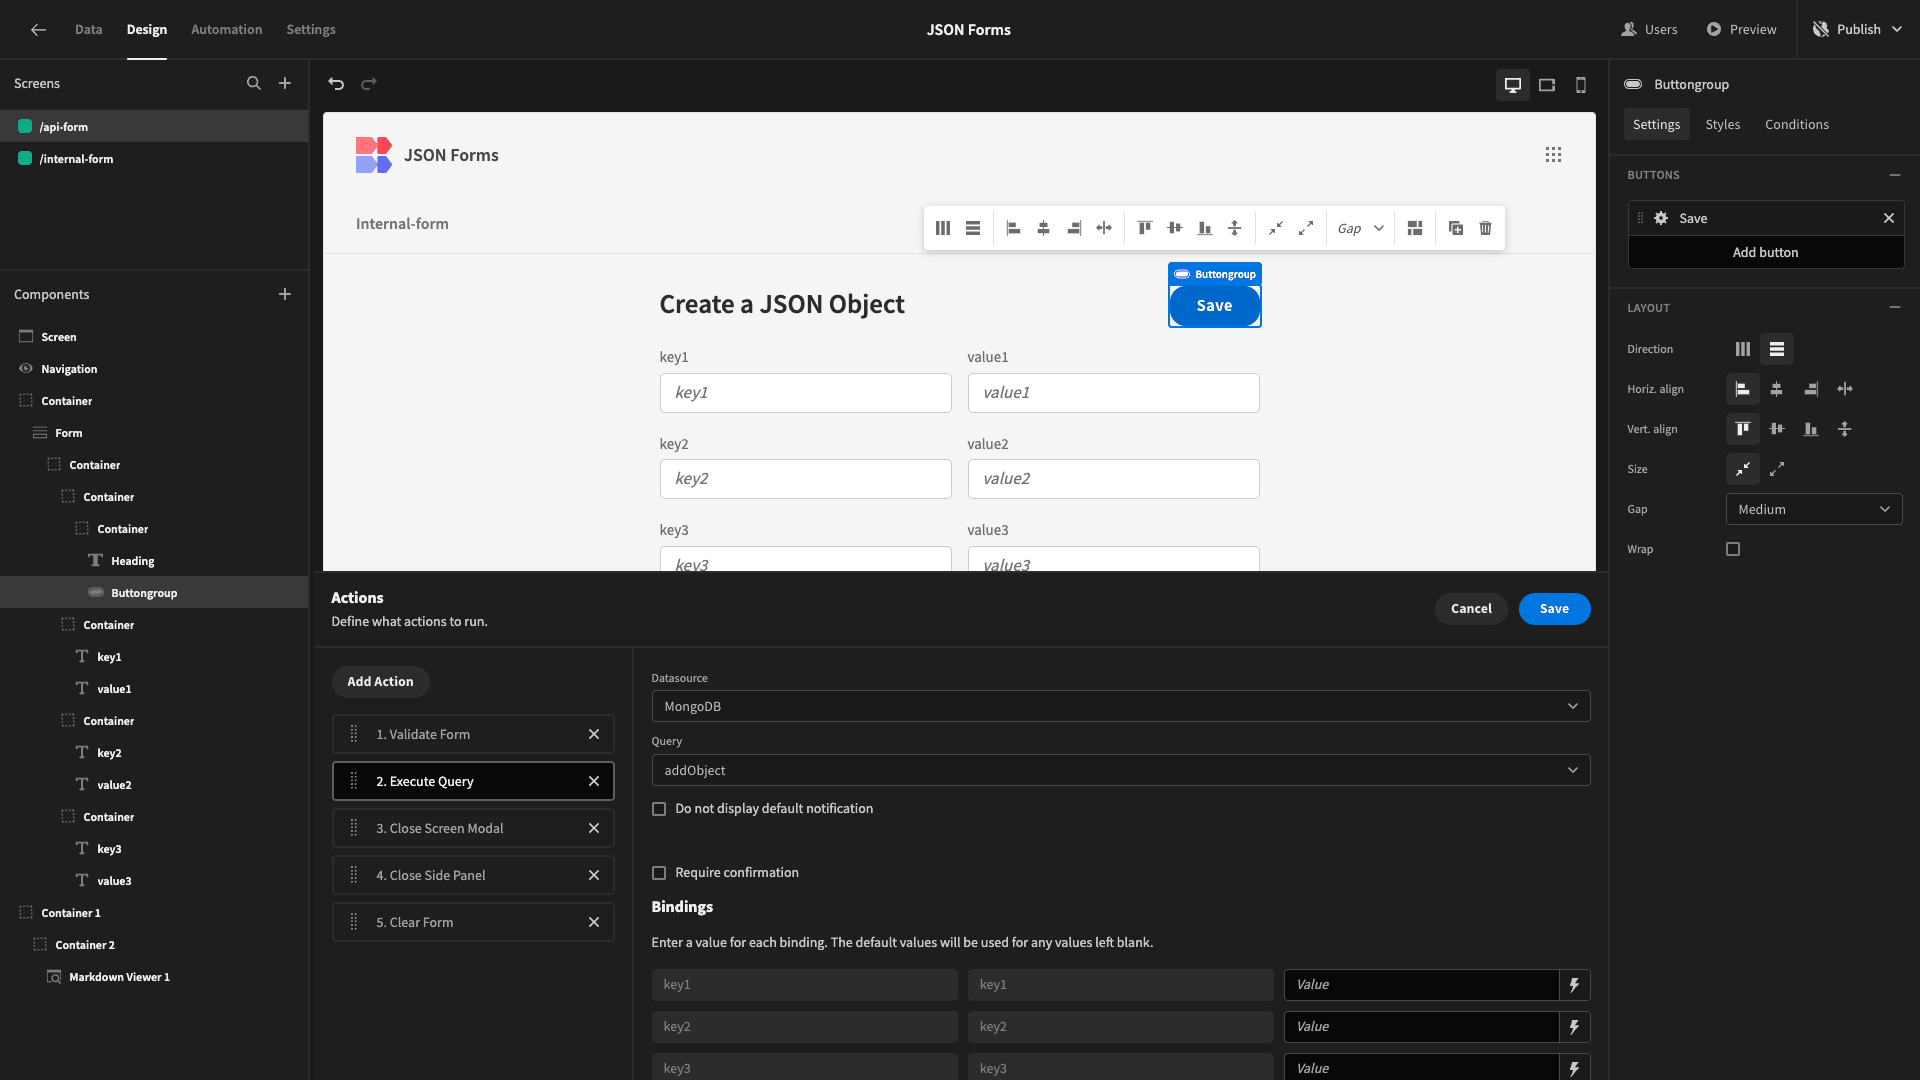
We can then input all of our new bindings in exactly the same way we did before.
And - as ever - we can test this out by previewing our app and filling in our form.
Then, we’ll head back to MongoDB and confirm that this has worked.
Build advanced forms on top of any data
Today, we set out to show you some of the key ways that we can use Budibase to build forms for generating and saving JSON objects.
Budibase empowers teams to turn data into action. Our open-source, low-code platform is the fast, easy way to build fully custom form UIs on top of just about any data source.
To learn more, check out our forms page .