
When building a web app, your choice of data source is critical. Deciding how and where to store, access, and manipulate data is fundamental to every successful app project. Today, we’ll be looking at everything you need to know to get this decision right.
We’ll start with the basics, including what a data source is, the different ways web apps access data, and how this fits into your wider app architecture.
Then, we’ll move on to some of the theory, including key terminology, before covering more specific technical considerations for common app data sources.
Finally, we’ll look at the key use cases and business challenges you can solve using different data standards, and how Budibase is leading the charge in simplifying the app-building process.
Let’s start with the basics.
What is a data source?
As the name suggests, a data source is where your app pulls data from.
In the most basic terms, this means where your app’s data is stored. This also includes how your app connects to this data. This might be a database, a spreadsheet file, or a connection to some other source of data, like a sensor input.
Take the example of an eCommerce store. We’re all familiar with the front end of an online shop, but not everybody knows what’s going on behind the scenes. Most eCommerce UIs connect to a number of key kinds of data.
This includes querying and recording:
- Product information.
- Customer data.
- Inventory details.
- Website analytics.
- Sales/marketing data.
- And more.
So, to be effective your simple eCommerce store will likely rely on several data sources.
This might include dedicated sources, like databases or flat files, and connections to third-party tools, like your CRM, inventory management software, or website analytics platform.
Why does your app’s data source matter?
These days, businesses rely more heavily on data than ever before. While the benefits of this are too obvious to count, the data revolution also presents many challenges. The reality is that many businesses have more data than they know what to do with.
Even worse, most of this probably lives in a variety of spreadsheets, legacy tools, or SaaS platforms - leading to poor data integrity.
A strong understanding of web app data sources is the first step towards overcoming this.
That is, working knowledge of how data is accessed by web apps allows you to make more effective decisions when it comes to procuring tools and managing processes.
Let’s take a look at the basics of how web apps use data.
Where is web app data stored?
Probably the biggest difference between web apps and local software is where the required data is stored. In a local tool, data is generally stored on the same machine as the application itself.
With web apps, things are a little bit more complex.
Web apps are stored on servers that are completely separate from the end user's device. Users then access them through their browsers. Depending on the app, the data source may be hosted on the same server, or in a completely different location.
For example, your web app might pull data from a dedicated internal table. It might equally rely on existing data from external tools, legacy systems, or some other repository. When we develop data apps, we might need to use one as a primary data source - requiring data migration to get up and running.
Let’s take a deeper dive into how web apps work, and some of the more specific types of data sources they can use.
The basics of web app architecture
Of course, web app architecture is a vast topic in and of itself. In fact, there are many ways to structure an app. What’s important for our purposes is understanding the principle of thinking about app architecture in terms of layers.
It’s useful to think of any web app as having three layers:
- A UI/Presentation Layer - Where users can interact with stored data.
- An Automation/Business Logic Layer - This processes data, based on defined rules.
- A Data Layer - Where data is stored, accessed, and organized.

Of course, we’re mostly concerned with the data layer today. Essentially, this includes any internal data sources, as well as different ways of connecting to external ones.
Here are the four key different types of data sources.
1. Databases
Databases are undoubtedly the most common kind of data source. When talking about web apps, it’s important to note that database refers to the data which is stored, as well as the technology used to create the database itself.
A database is a way of organizing information into tables. Each table has a set of columns, representing the different attributes, and rows, representing individual instances. This allows us to store large amounts of data in a consistent manner.
Most modern databases are created and maintained using SQL. Other tools are also used for more complex data science, data analysis, and machine learning functions.
SQL has been the dominant database language for decades, thanks to its intuitive query syntax, and relational model.
Databases might be stored alongside the rest of the application, or queried from an external location.

Database views
A view is a subset of a wider database, based on a specific query. To return to our eCommerce example, this could mean using a query to create a view for a single product category.
Often, when a web app relies on views, the actual source is the wider database.
In other cases, the view itself might be the data source. Say you might have a large, wide-ranging existing dataset, but only need a tool for a specific function, that only requires a small subset of this.
Using a relevant database view as your data source is often the simpler, and more effective solution in this.
2. Flat files
Flat files are a popular data source for simple applications. This means using a text file, like a CSV, as the basis of your data layer.
For traditional developments, there are two common ways of doing this:
- Adding flat files to your app’s directory.
- Loading a flat file into a SQL database.
There’s a degree of tradeoff here between functionality and development work, at least for traditional app builds.
This has changed somewhat with the rise of low-code development and other tools. For example, Budibase offers a built-in database, with support for CSV uploads.
This means you can quickly create a data layer with advanced functionality, without any SQL knowledge. You can even create simple relationships between data tables, at the click of a button.
3. Web services
Web services can be used as an app’s data source, particularly for leveraging data that’s owned or managed by a third party. For example, you might need to access data from a third-party tool, or from a public resource in your app.
Basically, a web service is a publicly accessible data set, that you can query from your app.
Say you wanted to make a tool to report on your investment portfolio’s growth. Naturally, you’d need to know the current value of each of your stocks or other assets. In this case, you’d use a web service to provide your app with up-to-date prices.
Web services typically deliver XML data, using HTTP. While they’re openly available, they’re often only designed to offer specific, limited functionality, often in a read-only format.
So, in our investment portfolio example, the web service provider might be happy for you to access and display asset prices, and not much else. To calculate the total value of your portfolio, you’d also need a data source to query your specific allocation of each asset.
You’d then need to calculate the total value of your portfolio using these two data sources, in the app’s business process layer.
With limited functionality, web services are generally less popular nowadays than APIs.
4. APIs
API stands for Application Programming Interface. In simpler terms, an API is a set of functions that allows two pieces of software to interact with each other. In fact, a web service is a kind of API.
With APIs, different platforms can send data back and forth using HTTP, normally in an XML or JSON format. APIs are also more appropriate for transferring non-public information, using security keys or tokens to authenticate different users and platforms.
In other words, this makes it possible to privately query only your own data, from a third-party tool.

APIs are also designed to offer more extensive functionality. Whereas web services are intended to offer specific, limited information, APIs provide more flexibility.
Let’s return to our investment portfolio example.
Say you use one service to invest in single stocks and bonds, and another to buy mutual funds. You don’t have a single platform where you can log in and view your total portfolio value at any given moment.
If both platforms offer APIs, you could quickly create a tool to calculate your total portfolio value, using up-to-date prices and allocation data. Depending on the specific platforms, you could even carry out investment actions in both, from a single tool.
What is a data source name (DSN)?
Another term you’ll frequently come across is the data source name (or DSN), sometimes also referred to as the data source’s connection string.
As the name suggests, this is a descriptive name for the data source. This is used by users and systems alike when submitting queries. In other words, the DSN is how you refer to a data source when connecting it to your web app.
At the most basic level, this includes information like what your data source is called, and where it is located. However, DSNs often include additional attributes relating to how to access the database.
These can include:
- User IDs,
- User passwords,
- Database driver information,
- And more.
The DSN is set by whoever created the data source you’re using. So, if you’re creating your app’s data source from scratch, you’ll need to set this yourself. If you want to use an existing data source, you’ll have to use its existing adhere to its existing naming convention.
Data access layers
When talking about data sources, it’s also important to have a grasp of how web apps connect to data. We touched on this a little bit earlier. Recall that the data layer is where your app stores, accesses, and manages data.
The data source is the part of this that handles storage.
The other elements of the data layer are concerned with connecting your app to the source. This is fairly simple if your app only has one data source, but things get more complicated if you need to query multiple databases or APIs.
The second element of your app’s data layer is tasked with managing this. It’s known as the Data Access Layer (DAL).
Here’s what you need to know.
What is a data access layer?
In the most basic terms, the data access layer is the link between where your app data is stored, and your business process layer. Say for example you have an app that automatically qualifies leads for your sales team, based on website interactions.
For argument’s sake, a lead is classified as ‘cold’ until they’ve visited your site five times. Then their status changes to ‘warm’, and one of your salespeople can contact them for a meeting.
That means you have two data sources - your list of leads, and your website analytics. The business process layer determines the status of each lead, based on their on-site behavior.
You need a data access layer to connect these sources to where they’re processed and ultimately presented.

In our example, the data access layer needs to do two things:
- Relate the relevant user in the website analytics to the correct row in the leads table.
- Allow the business process layer to count website visits, and update the status of each lead.
Let’s look at what a DAL does a little bit more concretely.
How does a data access layer work?
The core role of a data access layer is to perform set functions on your data, between the source and your business logic layer. Our previous example was a fairly simple app, but it actually contains quite a few tasks for the DAL to perform.
Moving away from our example, any effective data access layer does some combination of the following:
- Connects the data source to the process layer.
- Manipulates and relates data across different sources.
- Validates data, according to defined rules.
- Performs simple CRUD operations.
- Filters data and creates views.
Notice that these are all functions that go on behind the scenes of your app.
Really, these are the core data management tasks of any application, so the DAL is a crucial part of your app.
If you build a tool from scratch, using traditional development methods, these functions will need to be hardcoded.
More modern development tools have made this easier. For example, in no/low-code tools, like Budibase, most of the work of creating a data access layer is done for you.
Rather than creating your DAL from scratch, different configuration options are available in the builder UI itself. In other words, the core functionality is built-in, you just need to decide how you want to use it, with simple interface actions.
For example, by defining the specific queries to your data sources, creating filtering rules, or building UIs to trigger CRUD actions.
Data types, formats, and standards
Of course, there are countless different kinds of data. To make matters slightly trickier, different data sources format these differently.
To create, use, and manage different data sources, it’s vital to have a firm grasp of both the different kinds of data you’ll be working with and the different ways these can be formatted.
This becomes all the more important when it comes to working with multiple data sources, that might use different formatting standards.
Let’s start by looking at the different types of data you’re going to encounter while building apps.
Types
There are a number of different kinds of variables that data sources can store. These will be familiar to anyone with development experience.
To frame our discussion of how data sources handle these differently, here’s a quick summary:
- Strings - Textual data, using different combinations of letters, numbers, and special characters.
- Integers - Numerical data, storing whole numbers.
- Floats - Numerical data, storing decimal numbers.
- Boolean data - True/False data.
- Enumerated types (options) - Set textual or numerical options.
- Arrays - A list of variables, in a specified order.
- Date/Time - Variables that store dates, times, or both.
- Attachments - For storing or sharing files from within a database.
- Relationships - Variables that set relationships between rows on different data tables within a database.
Different conventions also exist for each of these types of data. For example, some data sources may treat all numerical data the same, with no distinction between floats and integers.
Others may provide subcategories of any type of data. For example, Budibase’s built-in database offers a distinction between normal strings and long-form text variables.
As such, it’s important to have a clear picture of how each of your data sources names and categorizes different types of data.
Formats
How each data type is formatted within your source is also vital. When working with multiple data sources, formats must be consistent to maximize interoperability. However, this is more of a concern with certain data types than others.
For instance, there are a number of different formats for date and time data. Comparing or manipulating date data in different formats is difficult, or even impossible in many cases.
There are two key ways to work around this:
- Ensure consistent formatting across different data sources.
- Transform data into a consistent format in the app’s data access layer.
We’ll cover each of these in more detail a little bit later. For now, let’s look at some of the different formatting issues you’re likely to encounter.
Strings
Strings will largely be treated the same way across all of your data sources, with little difference in formatting. One difference you will encounter between strings in different data sources is the maximum lengths of different sub-types.
For example, MySQL offers a range of different kinds of strings, with maximum lengths between one and 4294967295 characters, or 4GB. Some of these have predefined maximum lengths. Others can be set manually.
By contrast, Postgresql only distinguishes between three types of strings, with fixed, variable, or unlimited lengths.
While strings are less likely to lead to major issues in terms of formatting, it’s still important to keep in mind how this will play out when working with multiple data sources.
Numerical data
Similarly, different data sources have their own ways of sub categorizing numerical data. We’ve touched on this already, with the distinction between integers and decimals. Some data sources will make this distinction. Others won’t.
This can create problems when you try to send a decimal to a variable that’s expecting an integer.
Like with strings, you’ll also encounter differences between the max lengths of different number variables. However, this is slightly more complicated with numerical data, as maximums can apply to the number itself, or its length.
That is, data sources can limit both the character count and the value of numerical data. This limits the size of the number and its level of specificity in decimal places.
Date/Time
Date/Time variables have the most variation in formatting between data sources. In fact, you’ll find huge inconsistencies in the way dates are formatted. For example, different sources might count months, weeks, or days starting with one or zero.
If you’re working with legacy data sources, dates might simply be stored as a string. Additionally, there are different conventions for printing dates, both in terms of the character count, and the order of days, months, and years.
This becomes a problem when manipulating temporal data across multiple data sources. To avoid errors, dates and times should be transformed into a consistent format while being passed through your data access layer.
Creating a data model for your web application
For even the simplest of web apps, creating a data model is critical. The choices you make in terms of your data models and data sources are highly related, and often intersubjective. That is each one influences the other.
If you build a data source from scratch, you’ll also need to define a data model that suits your business needs. If you rely on existing data sources, you’ll need to ensure that they fit your wider data model.
Let’s explore how your choice of data model impacts the success of your apps. First, the basics.
What is a data model?
You can think of a data model as a map of all the variables your app needs to function correctly.
This includes:
- The variables you need.
- How these are operationalized.
- How these are formatted.
- The relationships between different variables.
- Which parts of the system need to access different variables.
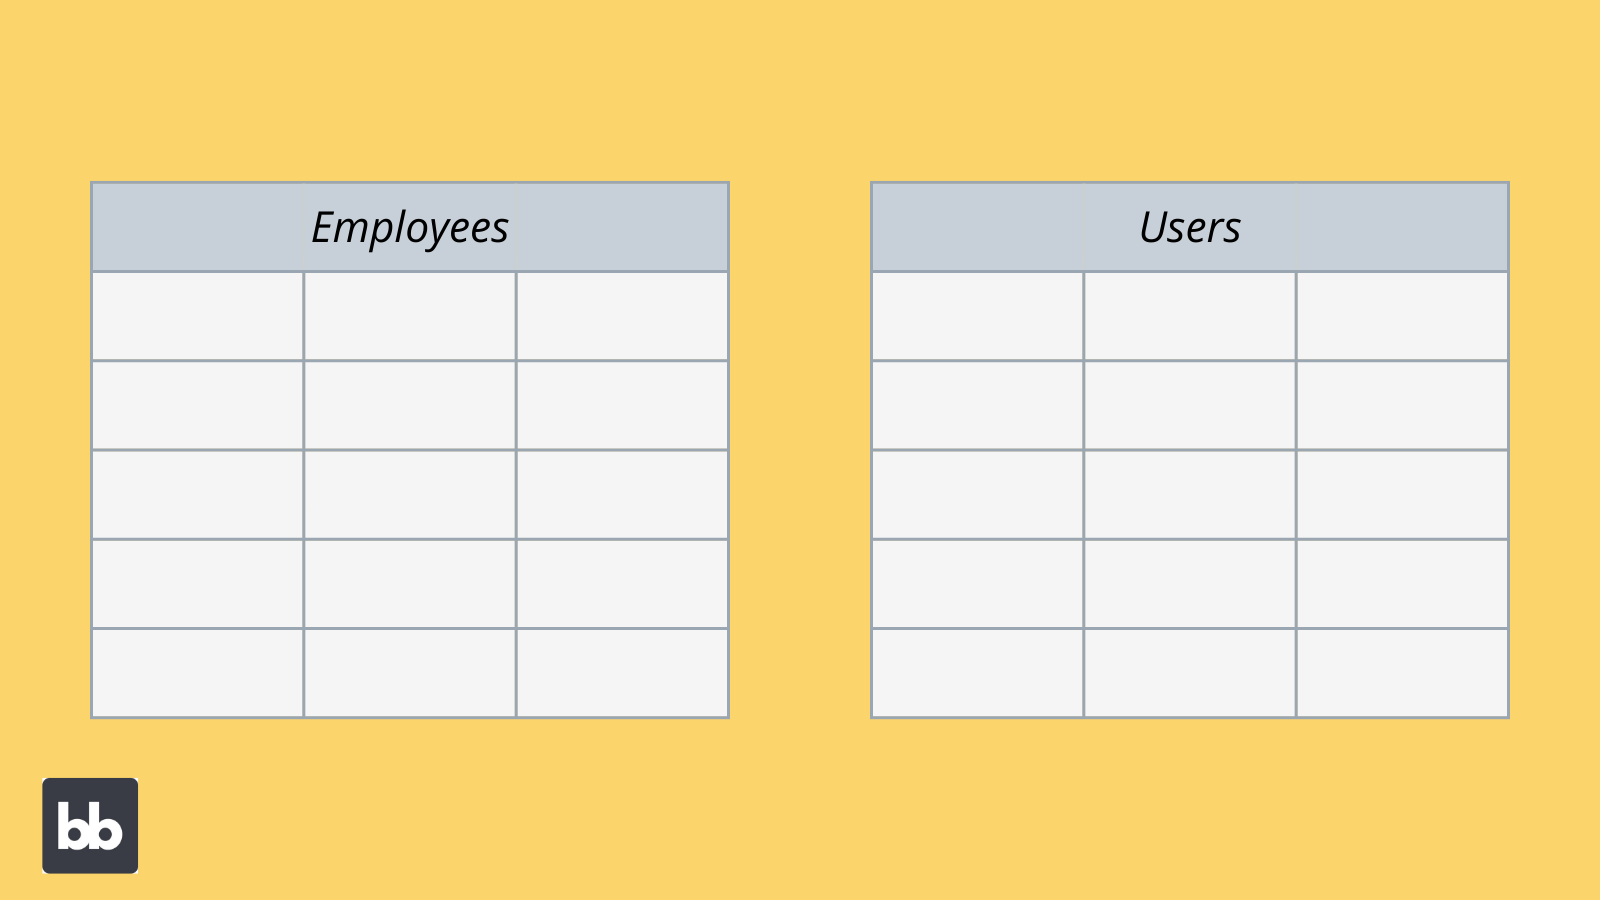
Say you have a simple employee directory app. The idea is to allow members of your team to find each other’s details or update their own. To build this, you decide to create a simple database, to act as your data source.
Defining a data model means deciding what information you’ll actually need to store in your database for the app to do its job. In this case, you’d create two tables.
These would be:
- Employees - To store employee details, including names, job roles, biographies, photos, locations, and any other relevant information.
- Users - To store and authenticate log-in information for each individual user.
You’d then need to relate each user to the relevant row in the employees table, to allow them to edit their own details.
Within each table, you’d need to define the exact variables you want to include, as well as their formatting standards, to achieve your desired functionality and UX.
Of course, this is easier said than done. With that in mind, let’s dive a little deeper into how to build a data model.
How do you build a data model?
In many ways, your data model is the first link between your business requirements and your app’s functionality. The goal is to translate your business needs into a concrete plan for the data you’ll need to meet them.
You can think about your data model as having three levels:
- Conceptual - This is concerned with the kinds of data your app needs to meet your business requirements, in broad, non-technical terms.
- Logical - This is a firmer outline of the relationships and structures of your data model, in terms of how they’ll fit into different processes.
- Physical - The specific configuration of how you’ll store data, including fields, data types, schemas, and other technical details.
We’ve created an in-depth guide on how to create a data model. For today’s purposes, we’ll just provide the key points.
To create an effective data model, use these four steps.
1. Gather and analyze business requirements
Obviously, the first step is understanding what you actually need your application to do. This is a multi-stakeholder process, involving developers, designers, end-users, and more.
The idea here is to map out what your users need to do, and what the app should do in response.
This could be as simple as a list of tasks that the app’s users will perform. You might also create a more detailed plan for the kinds of tasks that will be automated, and outline the rules you’ll use to govern this, at least in the abstract.
We don’t need to figure out every detail at this stage. We just need a vision of what our finished app should look like.
Let’s return to our employee directory example. A quick brainstorm might lead to the following requirements:
- The directory should store information about employees, their contact details, their role in the organization, and their background.
- Employees should be able to quickly look up and view information about their colleagues.
- Employees should be able to quickly contact their colleagues.
- Employees should be able to update their own information.
- Administrators should be able to add and remove employees or edit any employee’s details.
2. Define your entities
The next step is to define our entities. These are the objects that we need to create to build our app. Within the data source, each one will have its own table. If we’re relying on existing data, we might rely on several sources to create the entities we need.
In our example, we essentially have two entities - employees and users. If we wanted to add more complex functionality, we want to add additional entities, for example, departments, roles, teams, or offices.
For now, though, we’ll stick with two.
3. Create attributes
Now that we have our entities, we can think about the attributes we need each one to have, and the type of data we’ll store.
Essentially, these are the variables we’ll store against each user and employee. For employees, the first step is deciding what information we want to display in our directory.
Based on our requirements, we’ll need the following variables:
- Name (string).
- Email (string).
- Phone (string).
- Department (string).
- Role (string).
- Biography (string).
- Date of birth (date).
- Staff bio (string).
For our users, we’ll need the following attributes:
- Name (string).
- Email address (string).
- Access role (enum).
- Authentication information.
But wait!
If you have a large organization, chances are you have more than one employee with the same name. To avoid mistakes, we’ll also need to give each row in both tables a unique ID. This is crucial for building relationships between tables.

4. Build relationships
Finally, it’s time to start building relationships between our entities. This means tying a row in one of our tables, to one or more rows in another. Specifically, we’ll need to create a one-to-one relationship between our users and employees.
Every employee in our directory should have a corresponding user entry. This is to ensure that users can edit their own details, and not anyone else’s.
This is just one way of using relational data. We’ll cover relationships in more detail shortly.
What if your needs change over time?
With certain data sources, changing needs can create problems. Creating a data model is one of the first steps of building an app. Still, it’s important to have the flexibility to allow your tools to evolve.
For example, with Budibase you can quickly add new columns within our built-in database, making it easy to add new attributes to any table, at the click of a button.
Understanding database schemas
Once you’ve created a data model, it’s time to start turning this into a concrete data source. If you want to build your source from scratch, the next step is to define your database schema. Luckily, you should have already done most of the legwork in the previous section.
What is a schema?
A schema is a blueprint that a database is built around. This includes:
- The fields the database contains.
- The names you’ll use for each attribute.
- How these fields are formatted.
- Any rules governing each field.
- How each of the fields fits together.
You can think of this like turning your data model into a technical framework to make it a reality.
Creating a schema means deciding how you’ll structure your app’s data. Your schema should also outline how different variables are organized and related to each other. That is, which attributes will be used to join rows across different tables.
Why do you need a database schema?
The key benefit of creating a schema for your database is that you know what you’re building before you build it. This means that you can be confident that your data source will actually meet your business requirements.
This is also crucial for scalability, in terms of both users and functionality. For example, without a schema, your database might work okay with a couple of users. If you don’t put in the work of defining a structure and rules, it’s unlikely to work properly for thousands.
Similarly, you might build a tool that meets your current needs without thinking much about how to structure your database. As your needs evolve, you might then find that you want to add new functionality that your data layer can’t support.
What should your schema contain?
So we know that a database schema is an outline of how your data is organized and structured.
Let’s look in more detail at what this should include.
As we touched on previously, the schema contains the names, types, and rules associated with all objects and their fields. For example, certain fields may be required to be unique, not empty, or have some other constraints placed on them, like default values.
Additionally, your schema should map out the relationships between different entities. There are several different models which can be used to do this. Check out our article on database schemas for more information.
Data sources and relationships
We’ve touched on relationships between data already. We saw earlier that we can use a simple relationship to tie users and employees together in our directory app example. This is perhaps the most basic kind of relationship - mapping one entity to another.
However, relationships can be much more in-depth and complex than this. To see how this impacts your choice of data sources, let’s take a closer look at relational data.
What is relational data?
Relational data is a collection of entities that are structured in a way that facilitates interaction. This means creating multiple tables, each with a column to assign a unique identifier to individual rows.
Each row on one table can then be associated with rows on other tables, using this unique identifier.

When one row in an entity is related to a single row in another, this is called a one-to-one relationship. If a single row in one entity is related to several rows in another, it’s a many to one relationship.
Relational data is most often associated with SQL, but there are other database standards that support relationships between entities.

Other types of data sources do not support relationships between data. These days, many of the most popular options fall under the NoSQL umbrella.
NoSQL data sources can offer better flexibility, horizontal scaling, simplicity, and faster response times for certain operations.
Benefits of relational data
Relational and non-relational data sources each offer pros and cons. To help make an informed decision, it’s important to understand the benefits of working with relational data.
The key benefit of using a relational database is the ability to define, manage, and even automate the ways different entities interact.
Say for example you have a tool for booking meeting rooms in your office. You might need three tables, for rooms, users, and booking requests.
Building relationships between these three tables allows you to build a better, more efficient workflow. For example, you can prevent users from making multiple bookings at one time, and ensure rooms are not double booked.
Relational data sources also open up opportunities for analyzing different kinds of data. For example, we could quickly count the number of booking requests that are made for a particular time, to gain an insight into the demand for resources.
Besides this, relational data sources offer a high degree of reliability and integrity. You can also create a relational schema that maximizes ease of access.
How to manage and access data in your app
Your data source has a huge impact on how your users interact with your app. This affects actions users can take, as well as how data is presented to them. Of course, your DAL and any data connectors or transformers you use will also play a role here.
Before we dive into this, let’s take a step back and look at the kinds of things users need to do with app data.
App interfaces, queries, and data management
Any data-related action is a query. Essentially, this is an instruction that you send to your database to retrieve or manipulate data.
Different data sources use different terminology for creating queries, but the basic actions you can take are generally the same. There are four basic actions you can take to retrieve data about individual rows.
These are often summarized with the CRUD acronym:
- Create.
- Read.
- Update.
- Delete.
Each of these can be built on, for example by adding filtering rules, join statements or other conditions to your query.
However, not all data sources use the CRUD framework to define queries. REST and SQL each have their own terminology to refer to these basic queries. With that in mind, let’s take a look at the four basic actions you can perform on app data.
Accessing
Accessing data is the most basic kind of query. This is an instruction for the database to return a particular value. You might then display this to users, manipulate it somehow in your business process layer, or pass it to another data source, with a second query.
In SQL, this means using the SELECT command.
You can access individual rows, columns, values, or entire tables. Depending on your app, you might display this information in tables, embedded in text, cards, or any other UI component.
Alternatively, you might use a similar query to call a piece of data, so that you can apply a set process to it, without necessarily displaying it to users.
Say your data source was a record of all of your customers’ names and emails. To send an automated email, you’d need to access this information, and send it to your mail client. You probably wouldn’t need to display the information to app users.
Accessing data to display within your app means relying heavily on bindings. We’ll cover this in more detail a little bit later.
Creating
Create actions are used to record new information. More specifically, this means creating a new row within your data source. Depending on your database schema, there’s a variety of information you might need to provide here.
In SQL, this means using the insert command.
Unless you want to create a blank row, you’ll need to provide the data that you want to add to your table. This forms part of the query itself. The query includes what fields you want to populate, with what specific information.
Of course, we might have set our database schema to auto-populate certain values, such as the row number or a unique ID.
Let’s say your data source is still a list of customers’ email addresses. If you want to add a new customer to the list, their information needs to come from somewhere. For instance, your eCommerce platform, or a signup form on your website.
There are a number of ways to furnish queries with data. The most common involve using:
- User-provided data - Including form responses.
- Secondary data sources - Passing data from one source to another.
- System-created data - For example, logging timestamps, user information, and different app actions.
- Formula data - Applying a set formula to values in existing entries, and creating a new row based on this.
In reality, you’ll often rely on a combination of the above for creating new database entries.
Updating
Other times, you’ll want to edit the values that are stored in existing rows. In the CRUD model, this is called an update action. In SQL, it’s also an UPDATE command. To perform this query, you’ll need to do two things:
- Identify the rows and values you want to update.
- Provide the values you want to replace them with or the rule you’d like to apply.
For example, our email list could have a third column, storing the status of each customer. To keep things simple, let’s say this stores a boolean value for whether or not we’ve contacted the customer.
When the row is created, we provide a default value of FALSE. When we send this customer an email, we’ll need to replace this with TRUE, by defining a rule in our business process layer.
Or, we might give users the ability to update their email addresses, using a form. This means sending the form data as an update query to our existing data source.
Notice that in both of these examples we updated the row with an explicitly defined value. We can use any of the same kinds of data to populate our query as we would for creating a row.
We could also create a query to update a row using its existing data, and a defined rule. Maybe we want to count how many emails we’ve sent to each customer.
We could store this information in a fourth column, with a default value of 0. Then, we’d need to create a query to tell the data source to add one to this value, every time our system sends out an email to a particular customer.
We could do the same thing with any other mathematical operations, or create other rules to apply to our data in an update query.
Deleting
As the name suggests, a delete action or DELETE command means erasing a row entirely. Again, there are two parts to this type of query:
- Setting conditions to identify the rows you’d like to delete.
- Instructing the data source to delete them.
This first part here is arguably the most important. For example, you’d use the WHERE command in SQL to specify the unique ID of an individual row you want to delete. Or, you might use other fields in your database schema to set different conditions.
For example, if a client went bust, we could delete any row in our contact list, where the email address ends in their domain name. Or, we might delete any customer that has received more than ten emails, or anyone who has never opened one.
Remember that if we set our WHERE statement incorrectly, we could accidentally delete data that we actually want to keep. If we fail to set a WHERE statement, we’ll delete the entire table.
Then you’d really have some explaining to do.
Of course, it’s critical that users can delete data, but it’s important to mitigate against the risk of human error too. So, you might want to restrict delete queries to certain users, or at least limit the ability to delete multiple rows at once.
Advanced queries
Building on these four basic actions, you can also create more complex queries. For example, you might create a more specific query to access and database entry that meets certain conditions, based on its values in individual columns, or other attributes, like who created it.
You can also use queries to access information about the wider dataset. Say for example you had an order management system, that stores the value of each sale on your online store.
Users will likely need to quickly access a total for all these sales, broken down by day, week, month, or year. This is another kind of query.
In SQL, you’d use the SUM command to achieve this. Similarly, you could use the COUNT function to return the number of rows that meet a certain condition, or AVG, to return the mean value.
Querying data with user actions
Now that we have a better understanding of the kinds of queries that are available, it’s time to think about how to perform these with in-app actions. Obviously, we can’t expect our app’s users to write out a SQL command every time they need to find a piece of information.
Instead, we need to do two things:
- Define the queries that will be possible in the app.
- Assign these to user actions.
So the app stores the query, and we set a rule to trigger it when the user carries out a particular action.
Let’s take a look at the key ways we can do this.
Displaying data
To display data to users, we essentially need to trigger a READ action, when a particular app screen or UI element is loaded. For a very basic, one-screen app, the query would be triggered any time the user logs in or refreshes their screen.
For a more complex app, it could be triggered any time the user navigates to a particular screen.
We can display data by binding the output of a particular query to tables, charts, text, cards, forms fields, or any other UI element. Again, we’ll cover how to work with data bindings more fully a little later.
Forms
Remember that to create or update rows, we need to furnish our query with the values we want to store. Forms are the perfect way to do this using user-provided data. In the most basic terms, this means creating a query and tying each value to a form field.
Our query will include the columns we want to record data for, and instructions for which form field to use for each of the values.
In other words, we’d bind the form field to the corresponding column name in our query, to save the data. The same idea applies to both creating and updating records. Notice that so far we’ve only touched on how to populate our query with data.

We still need to trigger the query. We’ll delve further into this shortly.
We can also use forms as part of create and delete actions. Specifically, forms allow users to filter, search, and isolate specific entries in a data source.
Say you have a SQL table, with 10,000 entries, of all of your customers’ contact details. Only, most customer service agents don’t know SQL. Even if they did, they wouldn’t want to write a new query every time they need to look up a phone number.
So, you’d build a search form UI, and bind the name column in your query to whatever the agent types into your form field. Then, we could simply trigger the query when the user hits the enter key.
Buttons
Button components are probably the most common way to manually trigger queries. A second ago, we looked at how to use forms to populate create and update queries. Next, we’d want to give users a way to trigger the query, once they’re satisfied with the information they've given.
Chances are you’d do this with a button action, with a CTA like Save or Confirm.
But just think, how much can we trust our users to provide good data? After all, they don’t know the ins and outs of our data source’s schema. What happens if a user repeatedly clicks the save button?
How do we prevent duplication, or a database full of countless empty rows?
To get around these problems, we’d also need to perform some validation on our form data. This means creating rules that reflect our database schema, and applying them before the query is triggered.
For instance, stipulating which fields are required or optional, what kind of values we need, and any other conditions or formatting rules.
When the user presses the button, the validation is triggered. If this is successful, it triggers the query.
If the rules are met, the data is saved. If they aren’t, it isn’t, because the query is never sent. This keeps your user-provided data consistent, as well as keeping your query count to a minimum.
Automations
You can also query your data source, based on automation rules. That is, you configure your business process layer to trigger the query, based on a set event. This could be a user action, a system event, or even a trigger in an external tool or another data source.
Let’s stick with our customer service example. When a customer calls your support team, the agent is going to need their information. For example, their personal details, previous orders, and any interactions they’ve already had with your team.
Looking this up at the start of each call wastes time, so you decide to automate the process.
An automation could be triggered any time you get a new call to your softphone. Then, you could automatically query any entries with a phone number matching the one the customer is calling from.
Your agents can simply confirm that they’re speaking to the right person, with the same security questions they’d already ask. Of course, they’ll still need to be able to look up customers manually, for fringe cases.
Queries can also be used to trigger automations. Say your data source is built around two tables, one for customers and one for orders. When a customer orders something, we’ll need to access their details, send them a confirmation email, and update their lifetime value.
So we create an automation, that’s triggered any time a new row is created in our orders table. This executes two queries on the specific customer’s row in our customers table.
First, we use a read query to get their details and pass them to our email platform. Second, we use an update query to add their latest order to their lifetime total.
Working with data bindings
Earlier, we referred to the need to bind data to different queries. We’ve seen that queries are the core of how we use app actions to access and manipulate our data source. However, in all of our examples, we’d need to bind values to our query, and vice versa.
With that in mind, here’s everything you need to know about working with bindings.
What is data binding?
Data binding is when you define a link between two values across different data sources. This might mean binding the value of a field in one table, to a specific value in another.
It could also mean binding an object in your UI to a particular value in your data source, or the other way around.
We touched on this in the context of using forms to query data. In this case, we’d have a form field that corresponds to at least one of the headings in our data source. For the sake of argument, let’s say it’s a column called customer_first_name.
We also need a way of referring to the value in the form field. This will vary, depending on how you build your UI. For now, we’ll call this form_input. Obviously, if we had a form with more than one field, we’d need to be more specific.
Now we have two values, that we can bind together, by creating a query that returns any row where customer_first_name is equal to the current value of form_input. If the user types Jeff, we’ll get all the Jeffs, if they type Andrea, we’ll get all the Andreas.
The same principle applies when you need to bind values between two different data sources. Earlier, we had an example of an app with two tables for customers and orders. These would likely use a many-to-one relationship to attach each customer’s orders to their core record.
There are countless ways you could use bindings here. For example, we could use bindings to create a column in the customers table for the sum and average of all of their order values.
We could also bind the customer’s existing information to any new order rows, to speed up the checkout process.
Why do you need bindings?
You can think of bindings as a way of referring to values in different data sources so that you can use them throughout your app. As you can probably tell from the examples above, this is useful in all kinds of situations.
Most of the time, bindings use a short hand, to make it easier to refer to a value in a particular location.
In technical terms, there are countless benefits of doing this. These include making your code faster and more readable. Bindings also speed up the process of building apps, by eliminating the need to manually find and set values.
Critically, binding values allows your UI to display real-time updates, based on the information users provide. Naturally, doing this in one form or another is crucial for almost any modern web application.
With bindings, you can also easily alter and manipulate data before passing it on. For example, by applying numerical operators to values, or manipulating strings.
How do you bind data?
Unfortunately, as with many things, it depends. Different programming languages, app-building tools, and frameworks have their own rules and syntax for binding variables to one another.
When working with values stored in a database, you’ll need three pieces of information about a variable. These are its:
- Table.
- Index.
- Field.
Here, the index can mean the row number if you’re working with an entire table. If you’ve already filtered your table down to a small number of rows, it will be the index of the filtered values.
Different languages will each have their own syntax for creating bindings, based on this information.
Let’s use our customers and orders table again. Remember, these use a many-to-one relationship, so each customer can have many orders, but each order can only be related to one customer.
Within Budibase, to retrieve the price of a customer’s first order in JavaScript and bind it to a new column in the customers table, we’d return something like $(“orders.0.price”), as a formula variable for each customers row.
Noted that, in JavaScript, the index of the first item in an array is always 0, rather than 1.
To do the same with the order number of their most recent purchase, we’d need to know the number of orders they’ve made, to get the index of the last one. We could use the following code:
let i = $(“orders”).length - 1;
return $(“orders.i.orderNumber”);
Or we could calculate each customer’s lifetime value in a new column, with the following bindings:
let totalValue = 0
for (i = 0, i < $(“orders”).length, i++){
totalValue += $(“orders.i.price);
}
return totalValue;
We could use any of these binding expressions in our customers table itself, or elsewhere in the UI. These are just a couple of examples to highlight the flexibility and ease of working with data bindings.
Data bindings in Budibase
For maximum power and ease of use, Budibase offers data bindings with JavaScript and Handlebars expressions. To make life faster and easier, our bindings are fully contextual, with each possible option for any component or column displayed as a simple dropdown menu.
In other words, you can simply select the values you want to bind, with no coding skills.
We also provide a library of Handlebars transformers, for performing a range of processes on bindable data. Alternatively, you can use our built-in JavaScript editor to build a complex custom formula to bind data across your app’s UI and back-end.
Data visualization
Another key use of creating bindings between your data sources and UIs is visualization. Users, particularly admins, need fast, easy access to insights. Visualization is an effective way to summarize data for key decision-makers.
Let’s see how this works in the context of web app data sources.
What is data visualization?
In its most basic form, data visualization means taking raw values and building charts and graphs around them. The goal is to provide instantaneous snapshots of key metrics. For example, you might use visualization to create an admin panel or dashboard for your app.
Here, you might provide charts for key user metrics, technical information, or other system data.
Data visualization isn’t so much concerned with viewing single values. Rather, the idea is to identify trends in how these values change in time, or across some other secondary metric.
You might want to group different rows by one attribute and compare the total values of another. For example, if you wanted to compare the performance of sales teams in different locations.

Why use bindings for visualization?
Bindable data is crucial for effective visualization. Of course, you could just manually assign values to your charts. However, this wouldn’t be very useful. For one thing, you’d have to update them again each time something changes.
Binding data allows you to create charts that update in real-time.
That is, you can bind your charts to the values you want to visualize, and these will update as and when the respective values in your data source change.
This is crucial for your dashboards to be of any use.
Bindings also allow you to transform data before visualizing it. For example, you might need to apply a coefficient to numerical values, remove certain characters from strings, or apply some other kind of transformation.
Alternatively, you might want to visualize a function of two different values.
Say, a customer's lifetime value, and their total number of orders. We could bind these to a formula, dividing one by the other to create a report on average order values, without storing additional data.
Data visualization in action
Data visualization is critical for a range of web app projects. Any tool that reports or displays statistics requires visualization. As we said earlier, this could be as simple as creating a dashboard to report on usage within your app.
Other times, you’ll need to build more advanced visualization tools. One of the most common ways to do this is by providing functionality for users to filter and manipulate data on the fly. For example, you might want to drill down into sales figures across different countries.
Just like earlier, we could use a form field to achieve this. This time, we’d use a drop-down selector, instead of a text field. Using bindings, we can query our data source, where the country attribute matches whichever option the user chooses.
We’d then bind our chart to the values returned by this query, so users can quickly filter and visualize different data, in real-time.
How to source data for your web app project
So far, we’ve mainly talked about the technical side of choosing a data source for your app project. There’s also the practical question of how to acquire data. This can have as much of an influence on your project as your technical considerations.
Of course, we touched on this earlier, when we discussed the different kinds of data sources. Recall that web apps can query data from third-party tools, external databases, or your own internal sources.
For the third option, and to a lesser extent the others, there’s still the question of where the actual data itself comes from.
Say for example you want to build a data source from scratch. You follow all of the information above, by drawing up a data model, building a schema, and creating the perfect database for your app. You could even write all of the queries you’ll need, and bind these to your UI.
You’d have a perfectly viable data source, only it would be empty.
Let’s take a look at where data for web apps actually comes from.
Existing vs gathered data
The goal of your project is the key thing here. Some tools are built specifically to gather data. Others only need to process or display existing data.
Most apps fall somewhere in between these two categories.
A survey app is a great example of a simple tool, that really only gathers information. If we wanted to launch a survey app, we’d still need to choose the right data source. However, except for the purposes of testing, it wouldn’t be a problem if this was empty when we launch.
On the other hand, many tools would be pretty useless without existing data. Say you wanted to build a fleet management system. You’d need a record of all of your vehicles, as well as their maintenance needs, locations, fuel consumption data, and more.
Before the app can be used for its core purpose, you’ll either need to source this information from somewhere, or gather it yourself and populate your database.
In reality, neither of these examples is likely to exclusively gather or process data.
For our survey app, you’d obviously want to be able to process and analyze responses. For a fleet management tool, you’ll want your team to add new vehicles without getting under the hood of your database.
Rather, the distinction we want to highlight is whether or not the app can perform its core functionality without existing data.
Where to find data for your web app
For many projects, it’s going to be preferable to use an existing dataset, instead of gathering values from scratch.
Assuming that this is possible anyway.
There are a number of reasons for this. For example:
- Building a dataset takes time. This adds excessive avoidable costs to your project.
- Existing datasets help to ensure consistency across tools. When multiple platforms can manipulate a single dataset, there is less scope for redundancy and inconsistency.
- Existing datasets facilitate integration. Building tools around existing data makes it easier to integrate different platforms, for fully streamlined workflows.
But where does this data come from?
The answer is potentially a number of places. Nowadays, most businesses are sitting on reams of data. The trouble is that it’s typically dispersed, disorganized, and often hidden. There are also countless publicly available sources of data.
Some of the most common sources of existing data include:
- Public databases, APIs, and web services.
- Existing tools in your software stack.
- Connection to SaaS platforms.
- Legacy systems.
- Private databases.
- Other business assets, including spreadsheet data.
Often, you’ll rely on some combination of these. For example, you might need to build an inventory management tool, after moving to a new SaaS ecommerce platform.
In this case, you’d want to migrate your legacy data from your old IMS, to bring it forward to your new system. You’d then use your ecommerce platform's API or webhooks to populate your IMS with new data, to fulfill orders.
Data storage
Then there’s the question of where your data source will live. Or, in more technical terms, how and where it will be hosted. This will have a major impact on key aspects of your app’s functionality, particularly with regard to access.
There are essentially four options here:
- Cloud storage.
- On-premises.
- Local storage.
- Hybrid options.
Each of these has distinct pros and cons. Let’s take a look at some of the advantages of each, and the situation where they’re most suitable.
Cloud storage
Nowadays, cloud storage is one of the most popular options for hosting application data. This means storing your data source on a remote server and accessing it either through the public internet or a private network connection.
The servers themselves are typically owned and managed by a third party.
There are several huge benefits to this. One of the largest is allowing users to access data anywhere, from any device. This is critical in the modern world of remote teams, international workforces, and home offices.
Cloud hosting also offers fast, hassle-free deployment. You don’t have to worry about maintaining your own infrastructure, as you’re paying someone else to do it for you.
However, there are also disadvantages to a fully cloud-based data source. For one thing, you might find yourself locked into a particular vendor, with high subscription fees.
For another, you won’t have full control over the security of your app data. With both of these concerns, it’s important to thoroughly research different vendors, to ensure you choose the best option for your needs.
On-premises
On-premises means storing app data on your own infrastructure. For example, servers in your office or even your own data center. This might mean that only users in a specific location can access your data.
Or, you might still provide remote access, creating something resembling a private cloud.
Obviously though, this means that you’re responsible for maintaining your own infrastructure. Of course, this comes with costs, especially if you don't already have in-house hosting capacity.
However, in the long term, this can also be more cost-effective than a cloud solution, especially if you already own your own infrastructure.
The key benefit of on-premises storage is security. More specifically, this means complete control over the security measures you put in place.
On-prem storage also eliminates the possibility of vendor lock-in. That is, when you control your own infrastructure, you don’t need to worry about getting stuck with a subscription fee for a sub-par vendor.
Local storage
Local storage means that some or all of your app files are stored on the user’s machine. These days, this isn’t a particularly common option for production apps, except for fringe cases. In decades gone by, it was really the only option.
Some of you will remember floppy disks filled with spreadsheets.
The obvious downside of working with local storage is that if something happens to your device, there might not be much you can do to recover your data. It’s also difficult to collaborate with colleagues, or access app data from a different device or location.
The upside is that local storage is very cheap. As in, you already have a computer, and you don’t need to pay for any additional storage facilities.
There are also certain situations where you might opt for local storage for security purposes. For example, if stored data was incredibly sensitive, you couldn’t risk keeping it on a networked device.
Other times, you might simply store a recent version of your data source locally, and sync this later with a shared instance. You might need to do this to provide a progressive web app to users with spotty internet connectivity.
Local storage is also helpful for certain development tasks, including prototyping or creating proof-of-concept apps. This allows you to get on with building software, without spending time configuring a host for your data source.
Hybrid options
Then we have hybrid approaches. That is a combination of some or all of the above. So you might store some data in the cloud, some on your own infrastructure, and some on users’ machines.
This could be backups of the same data, or it could mean storing entirely different data sources in different locations.
We already touched on a form of the first option when we mentioned progressive web apps a second ago.
You might opt for the second option if you have multiple data sources with different security and access needs. Let’s say you have two data sources for a medical app. The first is a simple contact list. The other is a complex set of patient records.
You might decide you want to be able to access patients’ contact information remotely, but their health records need additional security, and you only want them to be accessible at head office.
This is an example of a time when you might choose hybrid storage.
Internal and external data sources
We can also make a distinction between internal and external data sources. Each of these has its own advantages and use cases. However, in many cases, the goal of your project will determine which you use.
Let’s take a look at each one in turn.
What is an internal data source?
Broadly speaking, an internal data source is generated within your business or organization. Often, this is information that’s gathered within your day-to-day operations. For example, inventory, product, sales, or campaign data.
In other words, you can think of this as your own business data.
This includes anything that you don’t have to rely on a third party, like an external platform, or a public database to acquire data.
As such, internal data sources are primarily used for apps that gather, process or display your internal business data.
In the context of web apps, you’ll also encounter the term internal database. This is a database that’s literally internal to the app itself. This might mean one of two things:
- The data is stored in the same repository as the app’s actual code.
- The database is native to the development tool used to build the app.
BudibaseDB, our built-in database, is an example of the latter.
What is an external data source?
As the name suggests, external data sources are generated outside of your organization. For example, publicly available data, connections to third-party tools, or any data that you buy or source from partners.
Often, this is data that you need for your app, that you simply can’t source internally. For example, you might need to draw on wholesale price data for a manufacturing resource planning tool. You might access this from suppliers via an API or web service.
Or, you might want to build an app to add specific functionality to an external tool. For instance, adding an escalation workflow to your lead generation platform. We’d need to connect to data that’s external to our app for this to work.
External data sources can present challenges that you won’t encounter when working solely with internal data. These include reliability, consistency, and flexibility issues.
However, many projects require you to know how to work with external data.
Working with external data sources
Unfortunately, there’s no single way to work with external data. In reality, you need to know how to work with the specific source that you want to use. This can include specific query languages, configuration options, authentication methods, and more.
However, many facets of working with external data are similar across different sources, at least in theory.
With that in mind, let’s look in more detail at some of the most common types of external data sources for building apps.
External data connectors
The first task is actually connecting your app to the external data source. There are a number of ways to do this. You could manually configure this in your source code, by pointing to the location of your data source, along with its URI, type, and any credentials you need.
That is, of course, assuming that you know how to do this.
To simplify this process, you can also use a dedicated data connector.
What is a data connector?
A data connector is a feature of many app-building tools, that makes it easier to connect to a specific type of data source. The idea is that you can simply input key information in the app builder’s UI, rather than manually configuring the connection.
This includes the data source:
- Location.
- URI.
- Type.
- Rows and columns that you want to query.
- Required authentication details.
- Required libraries.
You can think of a data connector as being a bit like a template for connecting to external sources. All you need to do is fill in the blanks.
You can also use a data connector to define the specific queries that you want to trigger from within your app, including binding specific attributes to different UI elements or process inputs/outputs.
With that in mind, let’s look at some of the most popular types of data connectors.
SQL
We’ve mentioned SQL databases a few times already. Recall that SQL is a query language, used to build and manage relational databases. There is actually a range of different kinds of SQL databases, including MySQL, MSSQL, and Postgres.
SQL databases are ubiquitous. They’re used by countless businesses for storing everything from simple internal data to massive enterprise datasets and publicly available resources.
For most SQL data sources, you’ll need to provide information including:
- The Host & Port.
- Your user credentials.
- SSL information.
- The database name.
For Postgres, you’ll also need to provide information about the database schema.
It’s important to note that if your SQL database is hosted in the cloud, you’ll need to whitelist your IP address or the IP address of whichever app builder tool you’re using.

SQL data source use cases
There are countless situations where you might need to use a SQL data connector. Really, this includes the majority of times that you’ll need to connect to an external database. For example, when modernizing or replacing existing systems.
You’ll also often need to use a SQL connector when building tools around large existing datasets.
REST API
REST APIs are probably the most common way to connect to data from external platforms, including other apps, over HTTP. In other words, this allows applications to make HTTP requests to transfer data to one another.
Since APIs are generally accessed through the public internet, their location is simply a URL. To connect to the API, you simply input this in your data connector, along with any authentication credentials you might need.
You can then configure the queries you want to use, or import all of the queries that the API supports. You’ll also need to create bindings between these and elements of your application’s UI.
It’s worth noting that REST sources use their own terminology for different queries or requests. Helpfully, these map neatly onto the CRUD framework we looked at earlier.
The types of REST requests you can send to and from your app are:
- Get - To request data.
- Post - To send new data to the data source.
- Put and Post - To update existing values.
- Delete - To remove existing values.
Note that a specific API might only allow you to make some of these requests. For example, if you’re working with a publicly available data source, you might only be able to send GET requests, while the others may be reserved for the controller themself.
This helps to ensure accuracy and validity.

Sending REST requests to your app from external tools
Another huge benefit of REST APIs is that you can send data back and forth between apps. That is, it’s not a one-way street. This is critical for building integrated workflows.
Budibase offers a public API, for exactly this reason.
Say you built a customer-facing web app, with an internal database. For this example we’ll put our marketing hats on, so we don’t need to worry about what the actually app does.
We want to connect it to our website analytics, so we can compare retention and behavior, based on how different users find our website. For instance, through social media, PPC, or SEO. The goal is to figure out which acquisition channel brings us the most engaged users.
For simplicity’s sake, we’ll say users sign up to the platform before they leave our website. That way, both platforms know individual users’ emails. This makes our REST requests easier.
Assuming our website analytics tool supports this, we can simply send a GET request to our web app. We can retrieve the user data we need, and add this to our acquisition reports, to compare across channels.
REST data source use cases
REST APIs are used to connect to public data sources, as well as private data stored by external tools. For example, you might need real-time access to public information, like weather reports, stock prices, news reports, and more.
You can also use REST requests to connect to data from other tools in your software stack. All kinds of platforms provide API endpoints, including CRMs, invoicing tools, messaging apps, and much more.
Excel, Google Sheets, and flat files
A simple way to leverage external data is by building apps around spreadsheets. These days, there are a couple of different ways of going about this:
- Importing spreadsheet data into your app’s database.
- Connecting directly to cloud-based spreadsheet tools.
The second option is becoming much more common, as more and more businesses move to cloud-based tools like Google Sheets and Office365.
Importing spreadsheet data means transferring it to a more sophisticated database standard. For example, by building SQL tables. Alternatively, app builders with a built-in database, like BudibaseDB, allow you to simply import CSV files.
Alternatively, you can access cloud-based spreadsheets, using dedicated data connectors. The benefit of this is that your team can still use your spreadsheet tool to manipulate and access data, in sync with your application.
If you use an app-building tool that supports these, connecting to data is incredibly easy.
For example, Budibase supports Google Sheets as an app data source. Just authenticate your Google account, provide your spreadsheet ID or URL, and select the tables you need to query.

Use cases for spreadsheets and flat files
Obviously, businesses use spreadsheets to store all kinds of data. The problem is that this is often disorganized and uncentralized. Despite the ubiquity of spreadsheets, it’s also not the most user-friendly way to manage datasets, especially at scale.
Say you have a large spreadsheet and a dedicated data entry team. If you had two or three colleagues entering data on the same sheet, issues could occur, but it’s unlikely to be the end of the world.
If you had hundreds or even thousands of users entering data on the same sheet, it would be a recipe for disaster.
One of the key use cases here is creating dedicated tools for simple admin tasks, like data entry, or lookup.
Other external databases
These days, businesses are turning to a range of different data management solutions, including NoSQL solutions, dedicated cloud platforms, open-source tools, and traditional databases with spreadsheet-like UIs.
For example, Budibase offers data connectivity for Airtable, MongoDB, CouchDB, Oracle, and more.
Each of these tools offers its own unique advantages and use cases.
One thing they have in common is that they are typically built with a view to high levels of connectivity. This means that setting up a connection is relatively straightforward.
For example, when working with Airtable, you only need to provide an API key, and the ID of the database you want to connect to. You can then build out your queries by defining JSON objects and binding them to different UI elements in your app.

Use cases
Use cases here are varied and largely relate to the use cases for the database tools themselves. You might want to connect to one of these platforms, simply because it’s where the data you need is stored.
Alternatively, you might opt to build your data source from scratch using one of these tools, because its specific functionality suits your needs.
So, you might choose MongoDB because you specifically want a NoSQL solution, or CouchDB because you want to work with an open-source database tool.
External data sources and transformers
Often, data from external sources doesn’t quite meet your requirements. This might be in terms of format, content, or presentation of values. In these cases, you’ll need to transform the values to more closely match your needs.
To some extent, this is inevitable when working with a dataset that wasn’t specifically created with your app project in mind.
When you send a query, most external sources return data in the form of one or more objects. These are sets of key-value pairs, representing rows in the database. The key is the name of the column. The value is the data stored in that column, on a particular row.
Transformation means defining and applying a rule to alter a value before it’s passed onwards to be processed by your app.
Depending on your data source, this might be done as part of the query itself. Transformations are pieces of code that are applied to the output of a query.
For example, in Budibase, you can define these rules when you’re setting up your external data connection, using our built-in JavaScript editor.
Let’s take a look at some of the key situations when you’ll need to transform data.
Changing data types
One of the most obvious examples of a transformation is altering the type of a particular value. For example, transforming someone’s date of birth to a numerical value for their current age.
You could also use transformation to parse a number from a string, or set rules to create boolean values.
In some cases, this can be as simple as applying a built-in JavaScript method, like value.toString(), or declaring and returning a variable with a function, such as:
var newValue = Number(value);
return newValue;
Other times, the transformation might be more complex. Say you had a set of B2B leads, including each company’s employee count. For the purpose of your app though, you simply need a boolean value, for whether or not they’re an enterprise.
If we define an enterprise as any company with 1,000 or more employees, we could use a transformation like:
if (employeeCount >= 1000){
	return true;
	}
else return false;
For certain sources, you can build this into your queries. For example, by using a CASE statement in SQL.
Reformatting data
Earlier, we saw that there are different ways of formatting data of the same type. Again, these kinds of transformations are relatively simple. For example, transforming an integer to a float, rounding a decimal value, or reformatting a date.
The goal here is to get data into a format you can use in your app, without compromising the actual values as such.
Dates are a helpful example here, as there are a large number of different formats out there.
These vary in how easily understood they are by both users and systems. Common date formats include:
- Date strings - such as 01/01/2000 or January 1 2000.
- ISO8601 dates - ie 20000101T000000Z.
- Numerical dates - the number of milliseconds since January 1st 1970.
- Proprietary formats - some variation of the above, used by a specific system.
Within each of these formats, there can also be variations. For example, inclusion or deletion of times-of-day, the stipulation of timezones, or local conventions for ordering the day, month, and year.
It’s important to pay careful attention to the format of dates returned by external data sources. If necessary, you can use transformations to change the format of dates, to better match the needs of your app project.
Advanced transformations
We can also use more complex transformations to expose data hidden in our query outputs. Let’s say we’re still querying our list of B2B leads. This time, we want our app to help us figure out where to focus our sales efforts.
In addition to their number of employees, our list also includes the state where each lead is based. We can use the same transformation as before to identify whether or not each business is an enterprise.
The next step is to group the entries by state. We can then iterate through each state, counting the number of enterprises, using a for loop.
If we discovered that the majority of enterprise leads were on the east coast, we might decide to move more of our sales team’s working hours to EST.
This is just one example of the kind of insights we can gain from external data sources using transformers.
Note that you may be able to achieve the same result without using a transformer. For instance, by building the same rules into a SQL query. This is what’s known as an aggregate property.
Working with multiple databases
We mentioned earlier that some app projects might require more than one data source. We’ve even touched on a couple of examples of this already. This can present some pretty serious challenges.
So much so, that we’ve created a dedicated guide to working with multiple data sources.
For the purposes of this article, here’s a quick summary of what you need to know.
Why would you need more than one data source?
There are countless scenarios where you might need to draw on more than one data set. Obviously, this includes any situation where the data you need for your app is stored across different locations.
However, this fact alone doesn’t necessarily mean your app will need multiple data sources.
For example, you might have several spreadsheets that store different customers’ contact details. Rather than using each of these as a distinct data source for your app, you’d probably opt to unify them into a single, more manageable database, and base your app on that.
Or, you may have multiple internal datasets, storing completely different kinds of information, but you want to build a single tool to manage them. Again, it might be more practical to unify these into a single data source, especially if won’t be relied on for other purposes.
However, you’re more likely to need multiple data sources if there’s a good reason to carry on storing information in different places. For example, if migrating data will cause issues in other platforms, or you simply don’t control the data source.
For example, you may want to build a tool that keeps track of how quickly each of your clients settles their invoices. For this to work, you’ll need real-time data from both your CRM and your invoicing platform.
The thing is, you’ll still primarily manage the data using your existing platforms. This is the kind of situation where knowing how to work with multiple data sources is vital.
Challenges of working with multiple sources
Of course, this is easier said than done. In fact, drawing on different data sets can bring a number of challenges. Issues can stem from inconsistent quality, formatting, content, and granularity across different sources of data, among other factors.
In some cases, values in different sources might even conflict with one another.
Besides this, the more external sources you work with, the more third parties you’ll be reliant on. This can leave you more vulnerable to service outages, or even security breaches, in certain cases.
The key is knowing how to mitigate these challenges.
How to manage multiple data sources
Luckily, many of the challenges of working with different data sources at the same time can be overcome using techniques we’ve already discussed.
For example, part of building an effective data model is a thorough operationalization of each variable and attribute our app will handle. As we mentioned, there are times when different data sources may give conflicting values for the same attribute.
In these cases, we need to identify which source offers the more reliable, accurate, and up-to-date value for each shared attribute. That way, we know which source to prioritize when values conflict with each other.
We can also overcome inconsistencies in formatting and granularity, by following the steps outlined earlier for transforming data.
Mitigating issues arising from third parties is a little bit trickier.
Arguably, the best thing you can do is to thoroughly vet data sources before investing time in building your app around them. This includes researching them in terms of security and reliability.
Obviously, if multiple sources exist, you want to opt for the one with the best record on both. Of course, this isn’t always possible.
There are a number of other steps you can take to mitigate these issues. Once again, you can check out our in-depth guide on how to integrate multiple data sources to find out more.
Data management challenges
No matter what source you choose, managing data for your web app presents several operational challenges. In turn, these can quickly compromise your app’s functionality, performance, user experience, and return on investment.
As such, it’s important to have a strong understanding of key data management challenges, and the steps you can take to avoid them. That way, you can build a faster, more effective tool.
Redundancy
Redundancy means storing data that’s duplicated. Most often, this means that a piece of data is stored twice, in different places, in the form of duplicate entries. This might be within a single database, or across multiple sources.
In some cases, this might be done deliberately, as a form of backup or security safeguard.
This can actually be advantageous, as long as you have a clear system in place for which version takes precedence.
When redundancy happens by accident, or when there isn’t a clear hierarchy in place for different versions, things quickly get messy.
Specifically, you could encounter issues such as:
- Querying anomalies.
- Corruption risks.
- Excessive file size.
- Inconsistency.
- Increased costs.
- And more.
Naturally, each of these is best avoided.
Luckily, there are a number of measures we can take to avoid unintentional redundancy. Firstly, there’s devising an effective database schema, with rules controlling which attributes can accept duplicate values.
This is the most effective way to prevent redundancy within a single database.
Beyond this, there are a number of other techniques you can use, including:
- Using a master data source across different applications.
- Data normalization
- Enhanced user training.
- Data validation.
- Defined data lifecycles.
Inconsistency
Inconsistency occurs when there is a discrepancy between duplicated data. This might be in terms of the format of values, or in the values themselves. This can lead to the same problems as redundancy.
There’s also the obvious problem of determining which entry holds the correct values.
This can have serious real-world consequences. For example, if you have inconsistencies in a HR dataset, with different emergency contacts listed for certain employees. If something goes wrong, this could mean your team doesn’t know the right number to call.
We can also use many of the same techniques to prevent inconsistency as we would to prevent redundancy. That is, if redundancy doesn’t occur, then inconsistency will also be prevented.
We’ll still need to prevent inconsistency in cases where redundancy is desirable.
Once again, a large part of this is defining clear processes for which data source takes precedence in the case of inconsistencies. This could be based on the inputs tied to a particular source, or you might simply prioritize newer values.
We can also prevent inconsistency with automated queries. So, if we have two data sources that have some attributes in common, we can configure processes to ensure that each is kept up to date with the other.
Stale inputs
Stale or outdated data can cause innumerable problems. In fact, it’s a problem in itself, since storage limitation is a key principle of modern data protection. This includes GDPR. In lay terms, this means you’re not supposed to hold on to data for any longer than you need to.
Beyond this, stale data can cause problems including skewing your analytics, wasting storage space, or inhibiting performance.
Alternatively, stale data could be information that you need, but you just don’t have up-to-date values. Again, the problem here is obvious, as your team will be relying on incorrect data.
The key here is implementing rules and processes to ensure that data does not become stale or out of date.
Human error
Human error is perhaps the trickiest data management challenge. To put it bluntly, it’s hard to anticipate all of the ways that users can do something wrong. With regards to data sources, this might mean providing unreliable inputs, or even mistakenly deleting or overwriting entries.
As such, it’s crucial to build mitigations against human error into all elements of your app, including its data source.
Specific steps you might choose to take include:
- Implementing role-based access control.
- Limiting certain queries to different user groups.
- Optimizing data entry UIs.
- Creating effective validation rules.
- Using effective backup measures.
- Devising approval workflows for changes.
Which of these measures you choose will depend largely on the number of users you have, your desired workflows, and your specific data management needs.
Changing needs
There’s also the issue of your app’s requirements growing and changing over time. For example, you might cease to need certain information. You might also find that you need to source and query entirely new data.
In other words, you might have to add or remove certain attributes, or even entire data sources, within your data model.
Removing attributes from your data model entirely can seriously impact your app’s performance, functionality, and UI. This means any time your app queries affected values, either in processes or in the interface.
Bringing in new data also poses more subtle challenges.
Of course, there’s the issue of actually sourcing the new data you need. If you’re working with external data sources, this might be easy. At least, provided that the new attributes you need are provided, but you’re just not using them.
In this case, you can pretty quickly modify your existing queries to meet your new needs.
Other times, you’ll need to find the data you need elsewhere. This could mean adding an additional external source, or acquiring data and importing it into an internal one.
In either case, you’re likely to encounter the same challenges that we saw earlier in the context of working with multiple data sources.
To recap, these include:
- Inconsistency.
- Discrepancies.
- Incompatibility.
- Redundancy.
Again, we can use the same techniques we already discussed to mitigate and overcome these challenges.
How to set up a data source for your application in 6 steps
We’ve covered an awful lot of ground so far. Let’s have a quick recap to tie together what we’ve learned about setting up an app data source.
A data source is where your app pulls the information it needs to perform your desired functions. Specifically, this might be a database, API, flat file, or web service. Your choice of data sources has a huge impact on the functionality, scalability, and success of your project.
However, this choice is constrained by:
- The availability, quality, and format of existing data.
- Your resources and ability to acquire necessary data.
1. Defining a data model
The key here is devising a clear plan for what data you’ll need, where it will come from, and how it will be used. This means creating an effective data model, a theoretical overview of how data will be structured and used. You can do this by following four steps:
- Gathering and analyzing requirements.
- Defining entities.
- Creating attributes.
- Building relationships.
Once you have this in place, you can begin to decide what sources you’ll leverage. Part of this is whether you can rely on existing sources, or if you’ll need to build your own. For the second option, you’ll need to translate your data model into a database schema.
2. Creating a database schema
This is a set of rules that govern how information is managed in your database, including:
- The fields it contains.
- Their names and types.
- Any rules applied to these fields.
- How values are formatted in each field.
- Relationships between fields.
This can then be built out in a range of database standards, or even flat files, depending on your needs.
3. Storing and hosting data
If you decide to build out a database from scratch, you’ll also need to consider hosting and storage. This is crucial in terms of performance, security, and scalability. Depending on your needs, you might opt for:
- Cloud hosting.
- On-premises storage.
- Local storage.
- Hybrid approaches.
Each of these has its own unique advantages and disadvantages. Key decision factors include security, remote access, ongoing costs, the potential for vendor lock-in, storage capacity, and flexibility.
4. Connecting to external data
When working with external data sources, the next step is actually connecting these to your application. How you go about this will naturally depend on the source itself. This can be configured manually or using dedicated data connectors within app builder tools.
This means defining key information about your data source in the app itself.
There are variations across different kinds of external data. However, across all external sources, need to provide:
- The location of the source.
- Any required authentication credentials.
- The specific tables or entities you want to query.
Different data connections will also require more specific information, in order to be successfully queried from your app.
Budibase offers built-in connections for a range of external data sources, including:
- MySQL, MSSQL & Postgres.
- REST APIs.
- Google Sheets.
- S3.
- Oracle.
- Dynamo.
- MongoDB.
- CouchDB.
- Airtable.
- And more.
Each of these has its own unique connection process. You can check out our docs to find out more.
5. Defining queries and transformations
Once you’ve established a connection to your data, you can begin to define queries. These are instructions that you send to your source, to create, read, update, or delete data. In a traditional database management system, these would be written manually.
However, a large part of the reason web apps exist is so that users don’t need to do this.
For this to work, you’ll need to define the queries that your app can send, triggered by either user actions or system events. In other words, deciding which data different users can access and manipulate, and creating the queries to enable this.
At this stage, you can also think about transformations. These are rules that you apply to query outputs, you more closely match your requirements.
Examples of transformations include:
- Altering the format of values.
- Changing the data type.
- Aggregating or abstracting information from a dataset.
Transformations are particularly useful when working across multiple data sources within a single application. For example, to achieve consistent formatting. Other times, transformations are needed because your goals are simply different from the data source’s original purpose.
6. Binding data to application processes and UI elements
Binding data means creating links between different attributes, in different locations. In other words, a binding is a way of referencing a value, for the purposes of using it elsewhere in your app, either in a separate attribute, process, or UI element.
The most basic examples of this include:
- Displaying values in UI elements.
- Passing values user inputs to the data source.
- Updating or altering one attribute as a function of another.
- Referencing stored values, user inputs, or system data in automations.
Of course, there are more complex variations and combinations of each of these. Bindings are the building blocks of all data processing in web apps.
Using data with low-code development
The rise of low-code tools, like Budibase, is changing the way businesses handle data. More and more organizations are choosing low-code platforms for faster, cheaper builds, and improved developer experiences.
Let’s take a look at what low-code can offer when working with different data sources.
What is low-code development?
Low-code is all about simplifying common development tasks. For example, writing queries, or creating CRUD screens. Instead of manually writing code for each of these tasks, low-code platforms offer simple interfaces, to expedite and simplify the process of building an app.
On the one hand, this saves massive amounts of time and effort for even the most experienced developers. On the other, it democratizes app development, by giving non-technical users to power to build amazing tools.
Why manage data with low-code apps?
Connecting to data is one of the areas where low-code really shines. Not least of all, because this is the part of building apps where non-technical colleagues, and even many developers, struggle the most.
Unfortunately, it’s also the first stage of most app projects.
If you can’t configure a data source, your project will probably never get off the ground.
The best low-code platforms offer better, faster experiences for developers of all levels. For instance, Budibase offers:
- An internal database.
- Autogenerated CRUD screens.
- CSV uploads.
- Extensive external data connectors.
- Incoming and outgoing webhooks.
- Query importing.
- Intuitive bindings.
- JavaScript data transformation.
- And more.
Connect to your data in seconds, and begin building incredible tools, with minimal coding skills.

How do low-code apps access data sources?
Earlier, we talked about how certain development tools offer dedicated connectors, to make it easier to work with external data sources. Low-code platforms are probably the most common example of this.
To refresh your memory, data connectors are simple UIs that eliminate the need to manually set up your data source. Rather than configuring a data source in your app’s source code, you can simply provide the required details, in an intuitive interface.
As we’ve said already, this saves massive amounts of time. Compared to traditional development, this also offers several other advantages:
- Improved troubleshooting - As key aspects of the data source connection are preconfigured, it’s easier to locate problems.
- Better organization when working with multiple data sources - Data connectors provide a simple and delineated overview of each of the sources you’re working with.
- Query importing - Certain data sources will allow you to import all available queries, at the press of a button.
- Intuitive transformations - Apply transformations in the same UI as you configure connections.
- Easy upskilling for new data sources - Since data connectors only require you to input key details, there’s less need to know the required attributes and syntax for setting up a connection manually.
Low-code tools might also offer other ways of connecting to data.
For example, an internal database allows you to quickly build a data source for your app, either by inputting attributes and values or importing them from a flat-file.
You can also use incoming webhooks to access specific data entities, at different stages of your app-building journey. For instance, if you simply needed a single, specific piece of information as part of an automation run.
Configuring data sources with Budibase
Budibase is the fast, easy way to build tools around existing data sources. Alternatively, our low-code platform is perfect for building applications to gather business data. Countless businesses around the world trust Budibase to build secure, effective tools to manage data.
We’re on a mission to change the way businesses build internal tools. Here’s how you can use Budibase to build data-centric applications.
Connect to external data
Budibase makes it easy to query and leverage all kinds of external data. We offer an extensive range of built-in data connectors.
Use our intuitive backend UI to connect to:
- REST API.
- MySQL.
- MSSQL.
- Postgres.
- MongoDB.
- CouchDB.
- S3.
- Airtable.
- Google Sheets.
- Oracle
- DynamoDB.
- And more.
We’ve provided dedicated workflows for connecting to each type of data source. Once you’ve provided the required details, you can quickly start creating queries and applying transformations.

Check out our documentation to find out more about connecting to external data from different sources.
Use our built-in database
We’re biased, but we think BudibaseDB is the fastest way to create a new data source. Our built-in database makes it easy to build a schema from scratch, or import existing flat files. You can create a fully functioning app database, in minutes.
We’ve provided a streamlined UI for creating columns, adding rows, and setting rules.
BudibaseDB offers an extensive range of data types, with simple, user-friendly labels. We even offer advanced data types, including file attachments, long-form text fields, JSON objects, S3 attachments, and more.
Use relationships, formula variables, and more to quickly create a complex data model, with multiple tables for distinct entities.

Manage data with Budibase
Quickly create seamless apps for users to manage and access data. With a range of bindable components, Budibase is the easy way to query, manipulate and view all kinds of data.
Data provider components
One of the key building blocks of any Budibase app is the Data Provider component. This can be configured to any data source you have set up in your app’s back end. Any component which is nested within this can then access the data source, through contextual bindings.
Data Providers can also be modified the components nested inside them. For example, you might create a form within a data provider, to filter entries by an attribute called employee_name.
We can use bindings to make the Data Provider filter entries where employeeName is equal to the input users provide in the form.
You can also use Repeater components within data providers, to iterate through different entries. As the name suggests, any components nested within a Repeater are repeated for each entry.
Any bindings applied to different attributes will be displayed for the relevant values.
Autogenerated CRUD screens
One of the key benefits of using Budibase is cutting development time to an absolute minimum. Our autogenerated CRUD screens are a key part of this.
Once you’ve configured a data source, you can create dedicated screens for creating, reading, updating, or deleting entries, all at the click of a button.
Our autogenerated screens contain intuitive form and table UIs, for reading, inputting, and editing values, across all of the attributes stored in your data source.
Forms
Our incredible forms are the ideal way to build effective data entry UIs. Budibase offers more than 15 different form components, for different data types and user experience goals. Autogenerate simple forms, or build complex, multi-step interfaces from scratch in seconds.
All of our form components can be configured to simplify complex workflows. Apply conditionality rules, set default values, and create validation rules to suit the particular data source you’re working with.
Table and card UIs
Data tables are at the heart of many Budibase apps. Display values to users in a readable, customizable table. With Budibase, you have complete control over which values to present, as well as how they’re formatted.
Other components, including buttons, can also be nested within tables.
Similarly, card components are an effective way to display key values from your data source.
Charts
Budibase offers a range of powerful data visualization tools, including a wide variety of charts and graphs. Bind different attributes to our charts, or use views within your data source to create and visualize aggregate values.
Charts and graphs inherit the properties of their Data Provider. Use user inputs to update filtering and views, to create fully interactive data dashboards.
Automations
Once you’ve configured a data source in Budibase, setting up automated queries is a breeze. We offer a simple step-based UI for creating complex automated processes. Use WebHooks or Zapier to send data to and from your Budibase app.
As we discussed earlier, automated queries are a powerful technique for working across multiple data sources. For instance, you might need to automatically update a value in one entity, when a row is created in another.
Or, automations can be used to notify different stakeholders when particular changes are made to your data from within Budibase.
Creating a data layer in Budibase
Our users choose Budibase to build applications for handling all kinds of data. From simple internal tools to complex integrated workflows, our low-code platform works perfectly with all manner of data sources.
Our built-in database is perfect for creating an entirely new data layer for your project. Create multiple tables, with the exact right schema for your needs, and quickly start inputting data. Use CSV uploads to build your app’s database around existing flat files.
We also offer support for external data sources, with more than 10 built-in connectors, including for SQL, REST API, and Google Sheets.
Create a complex data layer, with multiple data sources, in just a few clicks with our intuitive app builder.
Connect your data and start using Budibase today
Choosing, configuring, or building data sources for web app projects can be a real challenge. Indeed, there are countless technical, operational, and design-related concerns here, that must be understood and balanced for your project to be a success.
In this guide, we’ve covered the key data-related issues you’ll encounter when building an app, including the theory and practical steps you’ll need to take, from deciding what data you’ll need, to creating an effective database schema.
At Budibase, we’re changing the way businesses build apps around data. You don’t need to be an expert in database management to build effective tools. With BudibaseDB and a range of external data connectors, anyone can create professional web apps, with minimal coding skills.
Sign up to Budibase today to get started for free.