What is Form Automation? + Examples and Use Cases
Countless workflows revolve around collecting structured data and applying business logic to it. This includes everything from simple approval requests to triggering complex, in-depth processes.
Today, we’re looking at one of the most important tools we can use to manage these types of workflows by diving deep into form automation.
Form submissions are one of the most common automation triggers. In fact, all sorts of user-facing automated processes rely on these. So, understanding how to build effective solutions of our own is critical.
In particular, we’ll be covering:
- What is form automation?
- How do form automations work?
- Tools for form automations
- How to build form automations in Budibase
Let’s start with the basics.
What is form automation?
Form automation means using structured data interfaces within workflow automation rules. Most often, forms are used as an automation trigger, but they may also be served to users as a subsequent step within an automation.
This serves an important function - enabling users to provide information that we need to execute an automation rule in a defined schema.
A very basic example of this would be a contact sales form on our website, which, when completed, triggers an email automation to notify our team that a new submission needs their attention.
At a broader level, this means using a form completion to trigger a defined sequence of steps and decisions that utilize the submitted data.
As we’ll see a little later, these follow-on actions can be defined in a number of ways, including using code, visual low-code platforms, or automation tools within dedicated form-builder solutions.
You might also like our in-depth guide to AI forms .
Key use cases
To better understand the importance of form automation, we can consider some of the core use cases for what we’ve just described.
To do this, we can think about some of the most common situations where we’d want to automate follow-on tasks after a form submission.
One of these that we’ve touched on already is a simple notification flow, where we alert a defined team or stakeholder that there is a new form submission. This is a highly simple automation, usually consisting of a single action.
However, form automations are also widely utilized for more complex workflows, requiring chained actions and conditional logic.
This enables us to perform more complex sets of actions, including utilizing outputs from previous steps, or only performing certain tasks in particular circumstances.
Many of the most prominent use cases for these kinds of form automations take the form of request and approval workflows. These involve one user submitting a defined request to access a resource or take an action. A separate user then approves or rejects this.
A simple example of how we can utilize automations here is routing the request to different colleagues based on the specific resource the user has requested access to. Or, we might automatically approve routine requests, only routing higher-priority ones to human colleagues.
For many teams, the rise of generative AI has hugely expanded the scope of what’s possible within form automations, especially when dealing with qualitative information.
For instance, performing translation, categorization, data extraction, summarization, and other key tasks. Take a look at our guide to AI data entry to learn more.
Benefits
Before we look in more detail at how this all works at a technical level, we can also consider some of the more concrete benefits of automated forms.
Of course, we already know that the core goal is to enable users to submit structured data to trigger automated workflows.
From a practical point of view, this can have a huge impact in a few key ways.
Firstly, there’s efficiency. Form automations are a crucial component of all kinds of workflow improvement efforts, helping us to cut costs by reducing the need for manual administrative tasks.
They also have a key role to play in ensuring the accuracy and reliability of our automation flows. Effective form UIs reduce the incidence of human error, helping to ensure that we collect the specific data we need in the most accurate way possible.
Similarly, we can greatly enhance user experiences, both by providing a more intuitive way to interact with workflows and by providing faster resolutions than we could with wholly manual processes.
How do form automations work?
Next, we can begin to think about how automated forms actually work.
Depending on our needs, there are a few potential configurations of this.
If a form is built specifically to trigger an automation, we’ll generally either trigger an automation directly when a user hits submit, either via an API request, or using built-in methods in a dedicated form builder platform, if we’re using one.
Alternatively, the form in question might be used in a wider data collection workflow, beyond the scope of the specific automation rule we’re implementing. In this case, it will likely already be connected to a database table, where users can create or save a row.
Here, we still have the option of triggering an automation directly on a form submission, or we might use the database event as our trigger. This option enables us to execute our automation any time the same event occurs, whether or not it involves our form.
So, we can essentially think of an automated form solution as comprising three layers:
- A UI - Our form itself.
- An automation layer - Where we define the specific logic and actions our form triggers.
- A data layer - Including the database our form saves rows to, if applicable, along with any API management tools we use.
For an alternative approach to interacting with automated workflows, take a look at our guide to utilizing AI chat UIs .
Tools for form automations
With a better grasp of how form automation works, we can also think about some of the different platforms that are available on the market that can help us achieve this.
As you might expect, there are a few distinct classes of solutions that we could consider here. Of course, we always have the option to build solutions from scratch using custom code. However, this is usually not the most cost-effective option, unless we have highly specific needs.
For a more streamlined development experience, many teams opt for dedicated form builders, such as JotForm, TypeForm, or Formstack.
Almost all of the prominent platforms here offer automation capabilities. However, it’s worth noting that what’s possible within individual platforms can be quite varied.
Generally speaking, these are a good option for use cases where we need highly professional, attractive form UIs, but they may fall short for more advanced automation tasks, including those that require custom code, connection to external databases, or more complex logic.
Take a look at our guide to the top JotForm alternatives to learn more about some of our options here.
For more sophisticated automation logic, we have the option of using visual automation platforms such as Zapier or n8n. These allow us to build highly advanced automations with optional custom code, including offering streamlined integrations for a huge range of tools.
However, the downside is that we might still need to use a more advanced UI builder solution alongside these kinds of tools, depending on our specific needs.
Budibase is the perfect solution for bridging this gap, offering professional, highly customizable form UIs alongside extensive database connectors and a powerful, visual automation builder.
In the following section, we’ll see how our platform empowers IT teams to build custom form automations for all kinds of use cases.
How to build form automations in Budibase
To put what we’ve learned so far into practice, we’re going to build a simple form automation in Budibase.
Specifically, we’re going to build an automation rule that handles incoming expense submissions.
This will automatically mark any new expenses under $100 as approved. If the expense is over $100, we’ll mark it as pending, so it can be picked up by a human reviewer.
We’re starting with the Expenses table from Budibase’s sample data.

Our table contains attributes, including each submission’s cost, when it’s due, notes from the submitter, an attachment, a status, and timestamps, which will be populated automatically for each form completion.
First, we’ll build a form to create new rows, and then we’ll move on to adding our automation logic.
Autogenerating a form UI
In Budibase, we can autogenerate forms to create or update rows in both internal and external database tables.
From our data table, we’ll choose the option to generate a form.

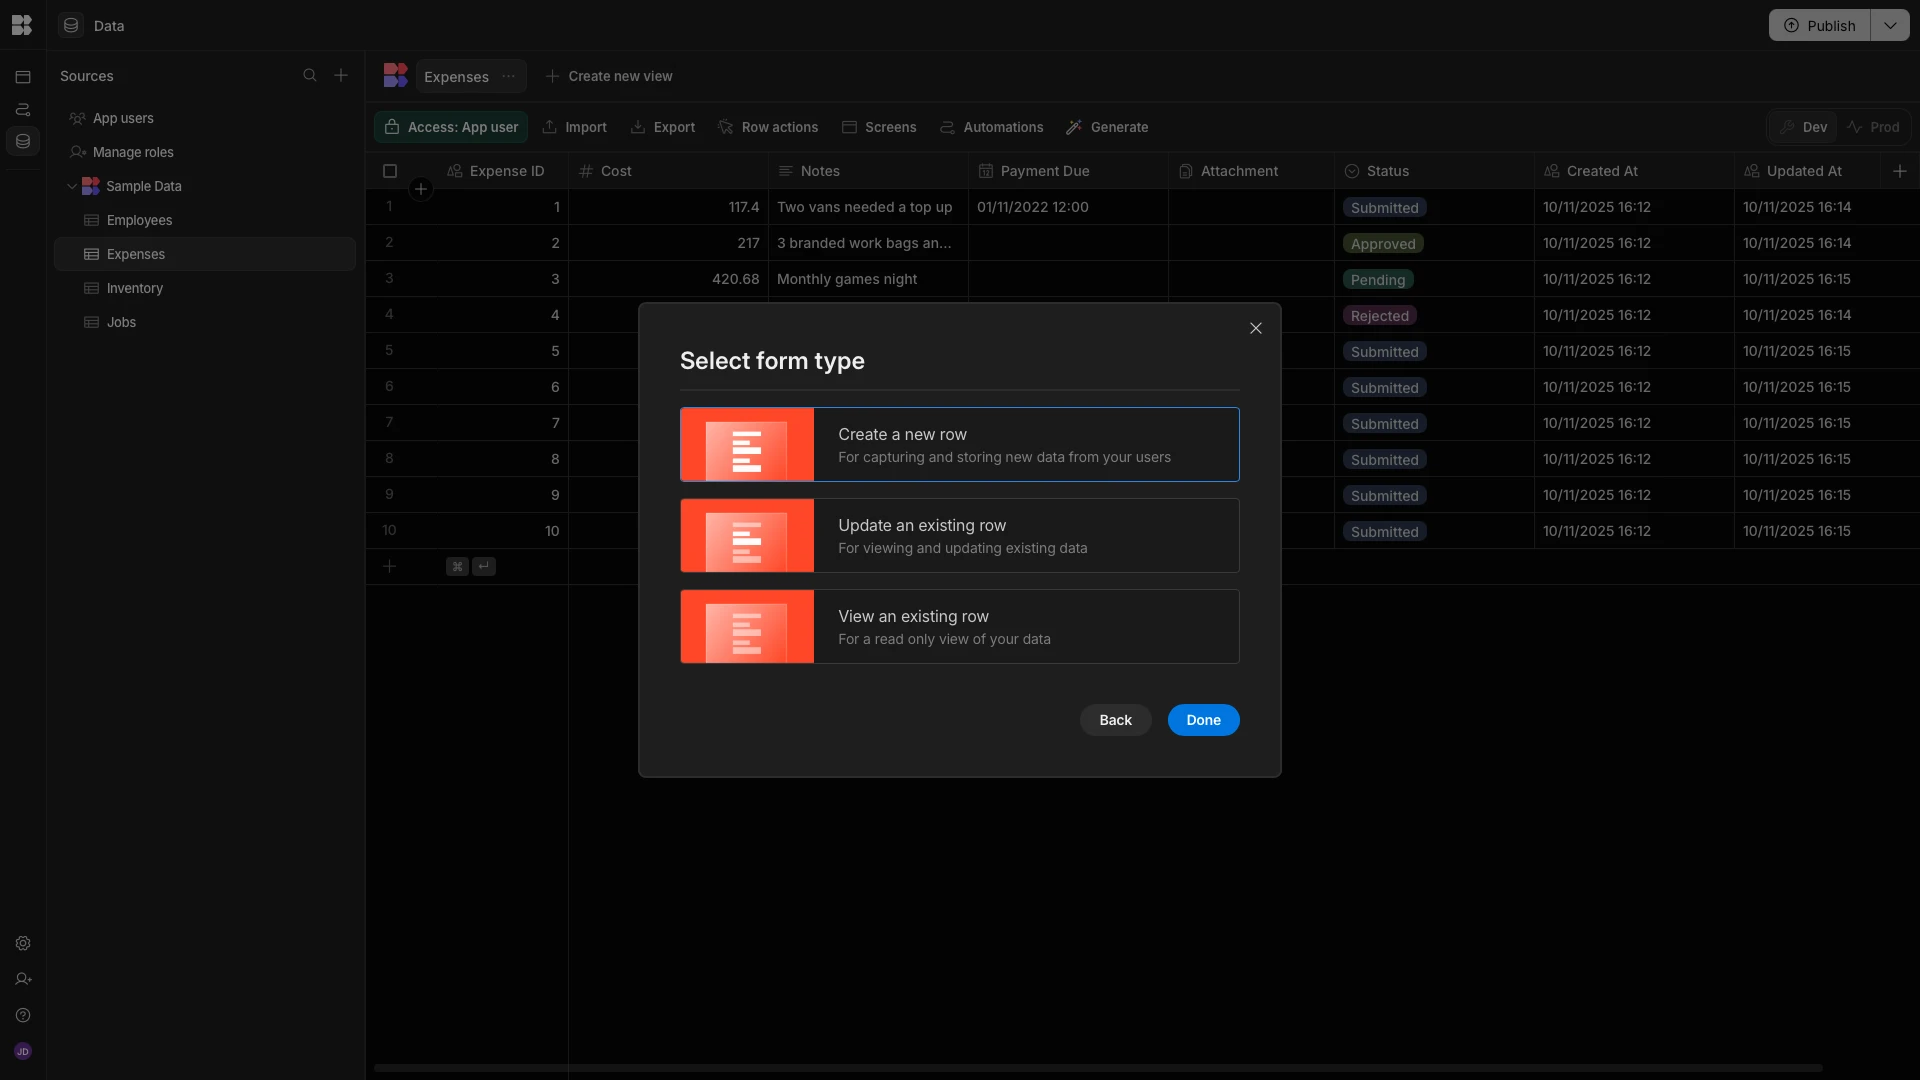
We’ll then be prompted to choose which kind of form we want. We’re picking the option to create a row.
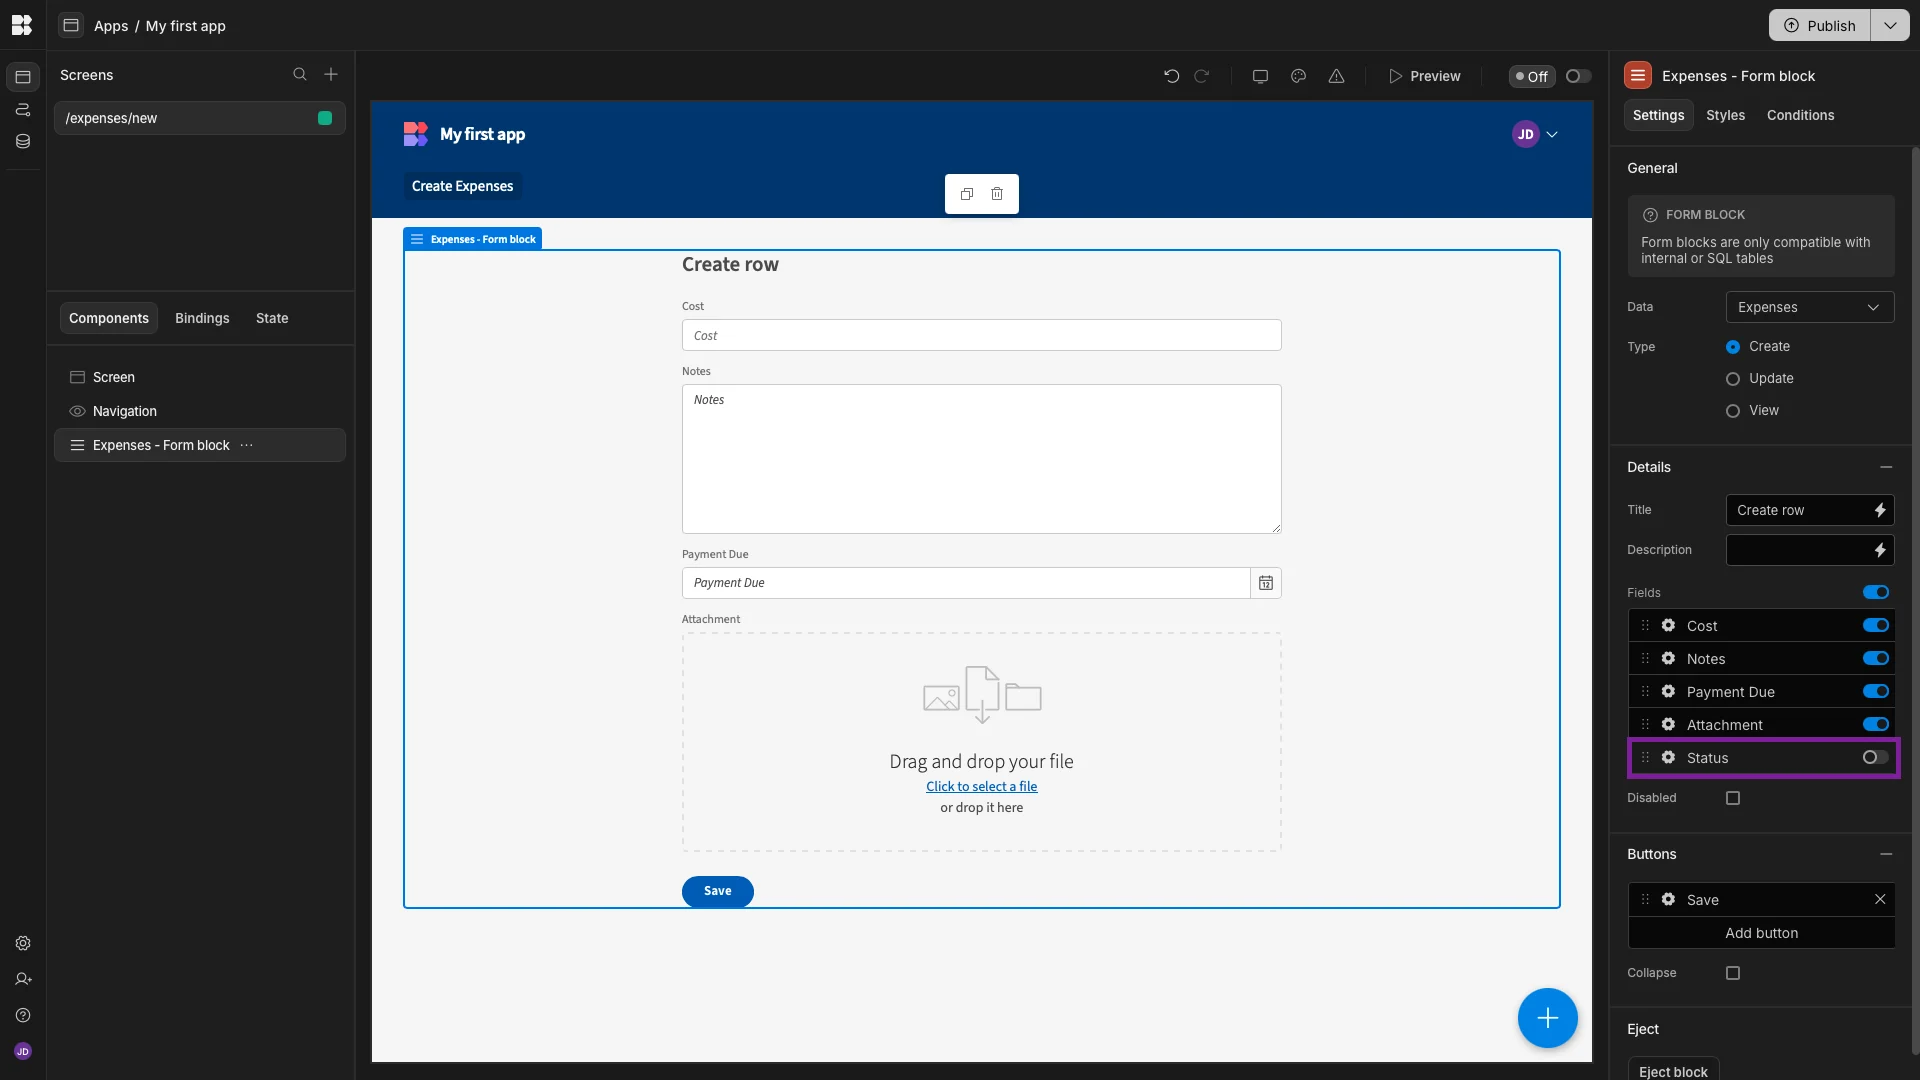
Here’s how the form that’s created looks in the Apps section of our workspace.

We’re only going to make a few minor adjustments to this.
First of all, we’ll use the slider on the right-hand side to deselect the Status field, as this has a default column that we don’t want submitters to overwrite.
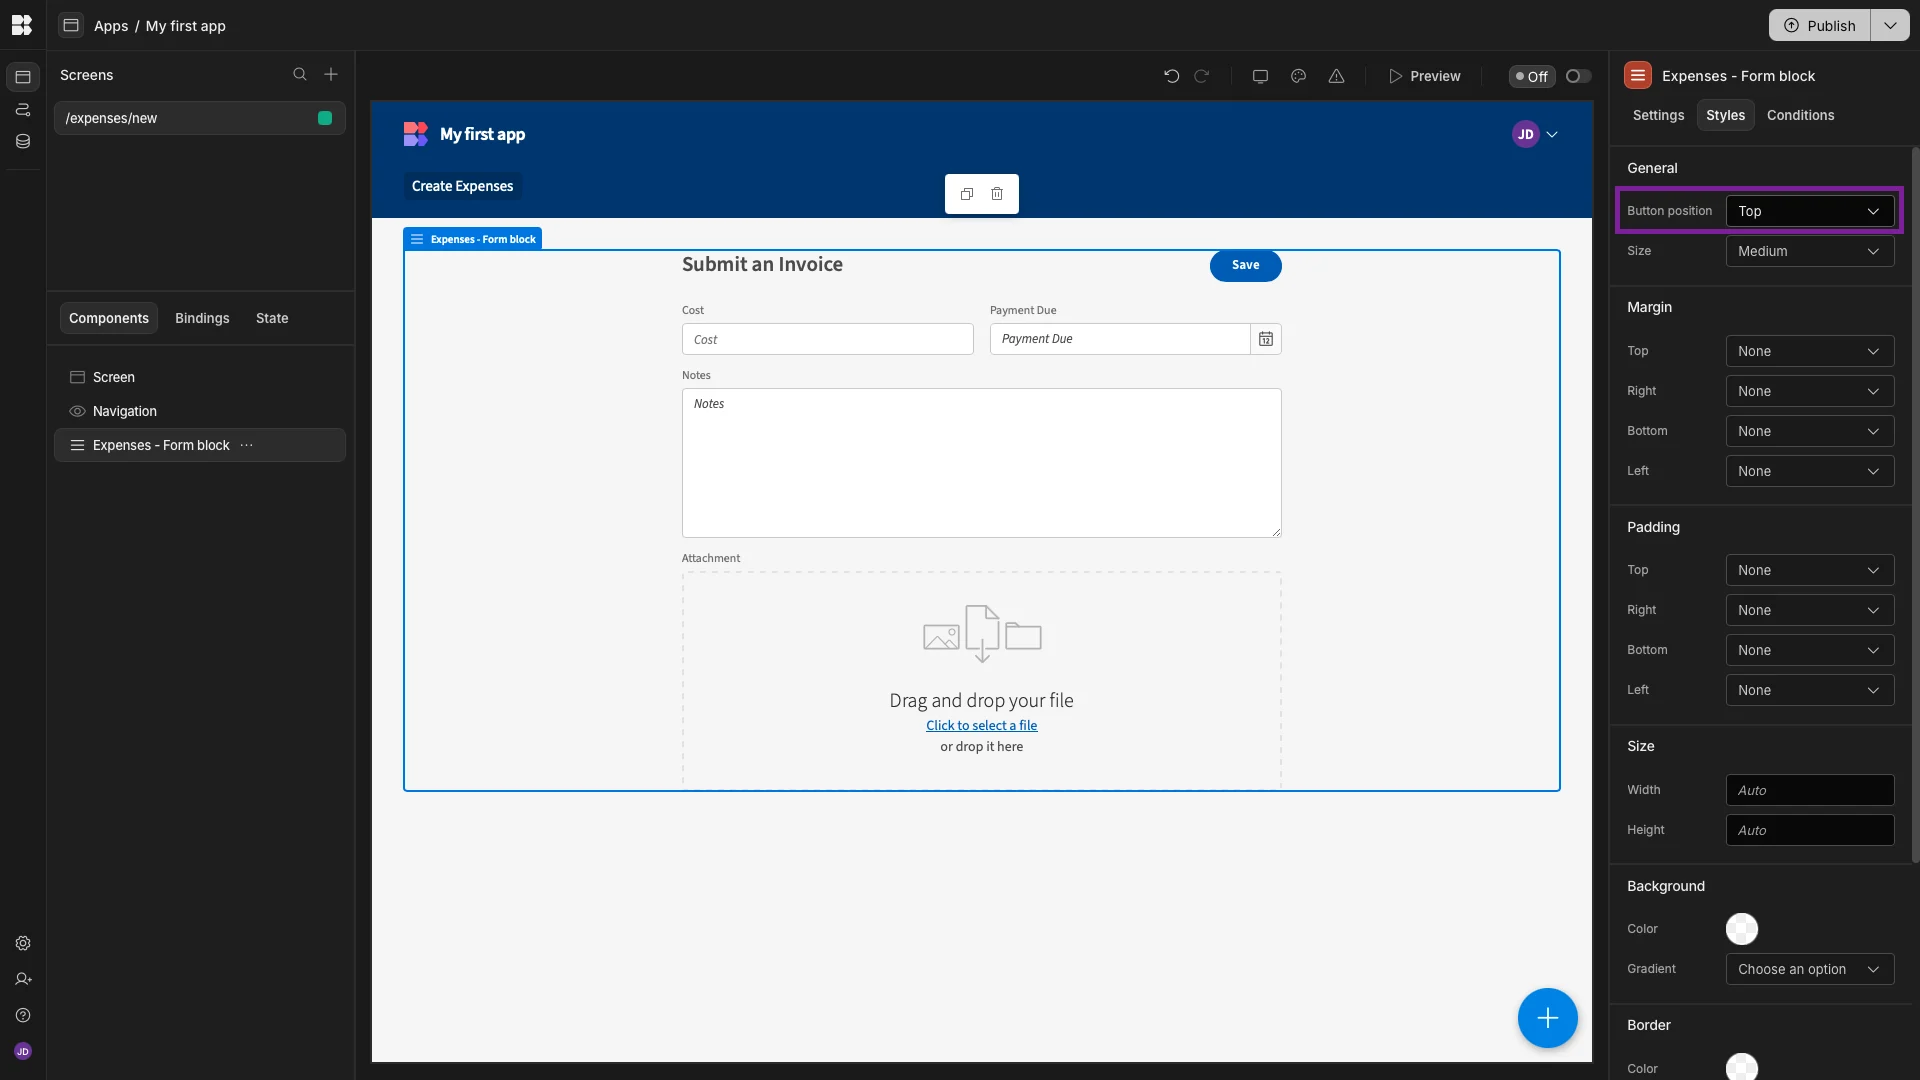
Next, we’re going to update our form’s Title to something a little more descriptive. We’ll also use the field settings to arrange our Cost and Payment Due fields into two columns.

Under Styles, we’ll set our Button Position to Top
And lastly, under Navigation, we’ll remove our only Nav Item and update our app’s Title.

Building our automation rule
With our form in place, we can move on to building our automation logic for submissions. Back in the Data section, we’ll hit Generate again, this time choosing the option for an Automation that triggers when a row is created.
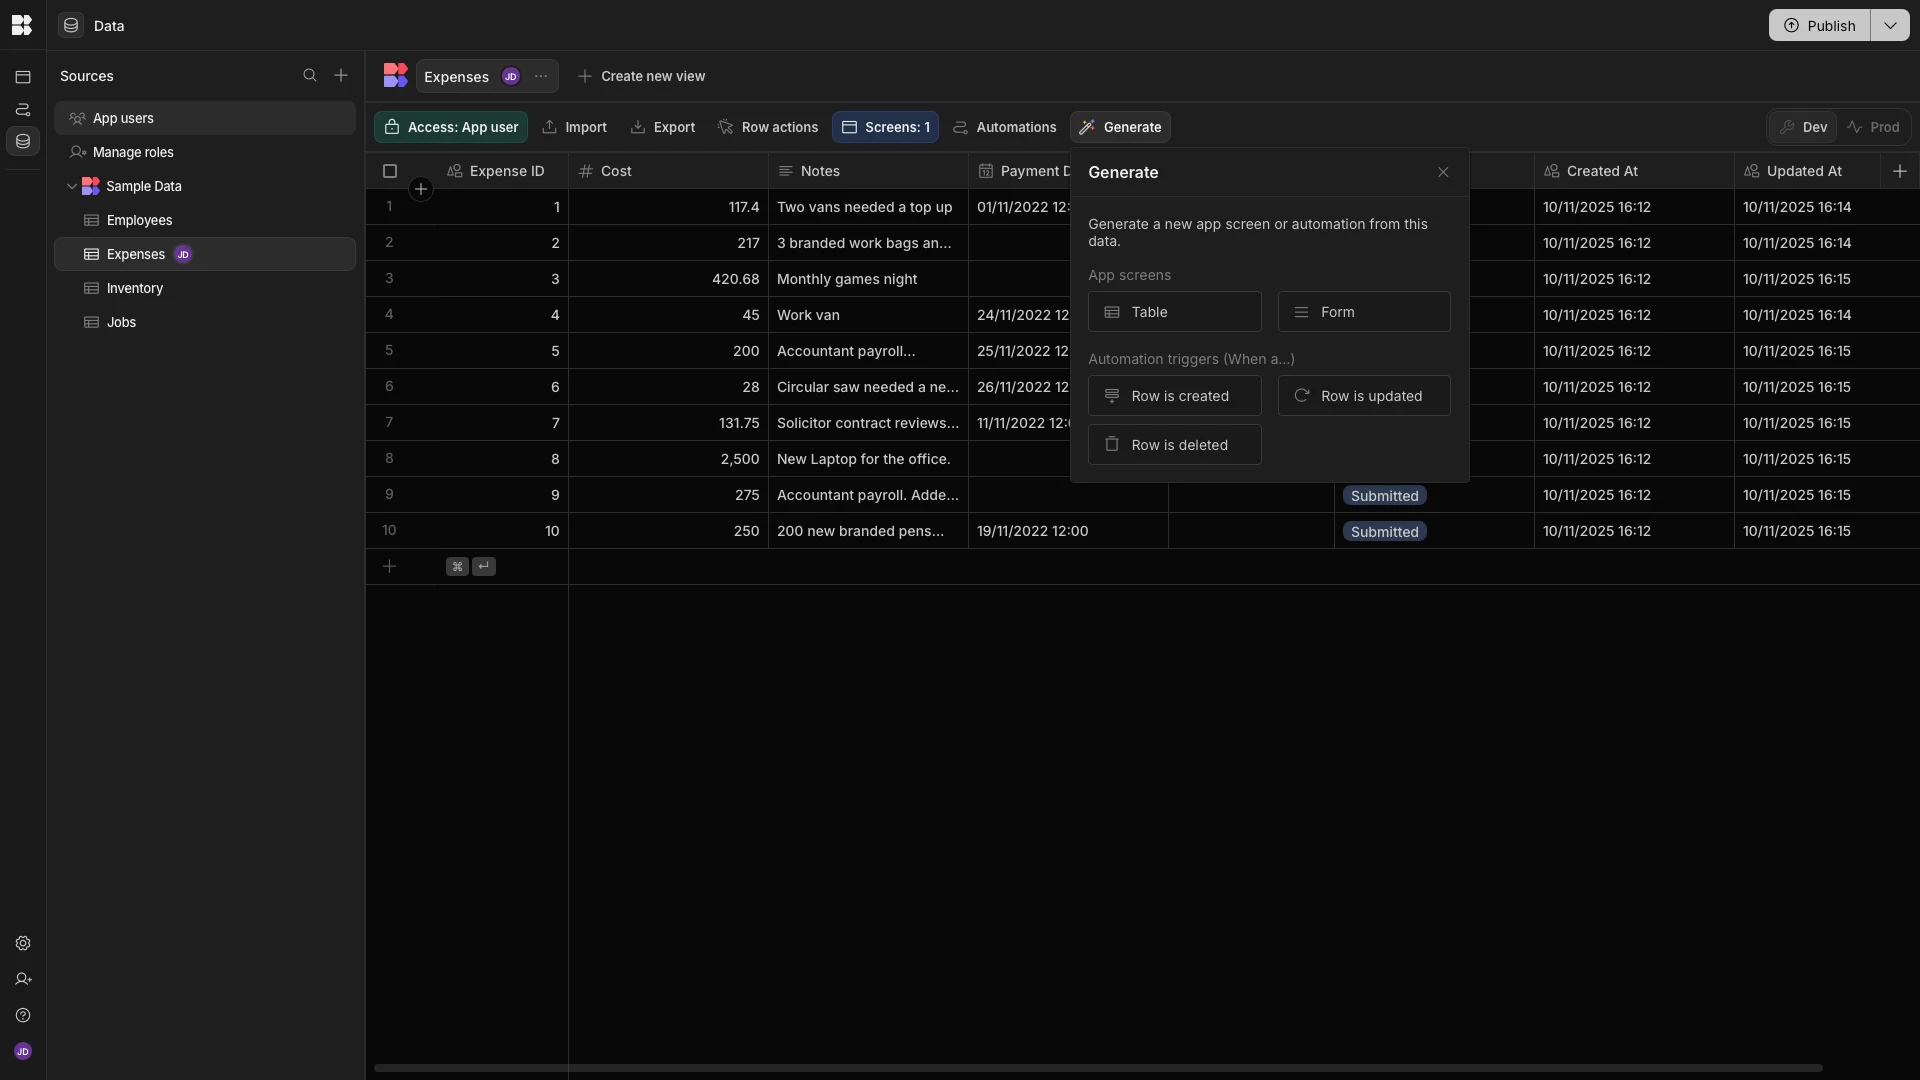
This creates a new automation rule, with a Row Created trigger, pointed at our Expenses table.

Depending on the Cost value in the submitted row, our automation rule will update its Status to either Approved or Pending.
So, the first thing we need to do is add a new Branch.

We can also rename each of our branches.

Each of these accepts a condition. Our branches are then evaluated from left to right. The first one that evaluates to true will be executed.
We’ll start by hitting Add Condition on our first branch. This opens a modal screen where we can start adding condition expressions, consisting of a reference value, an operation, and a comparison value.
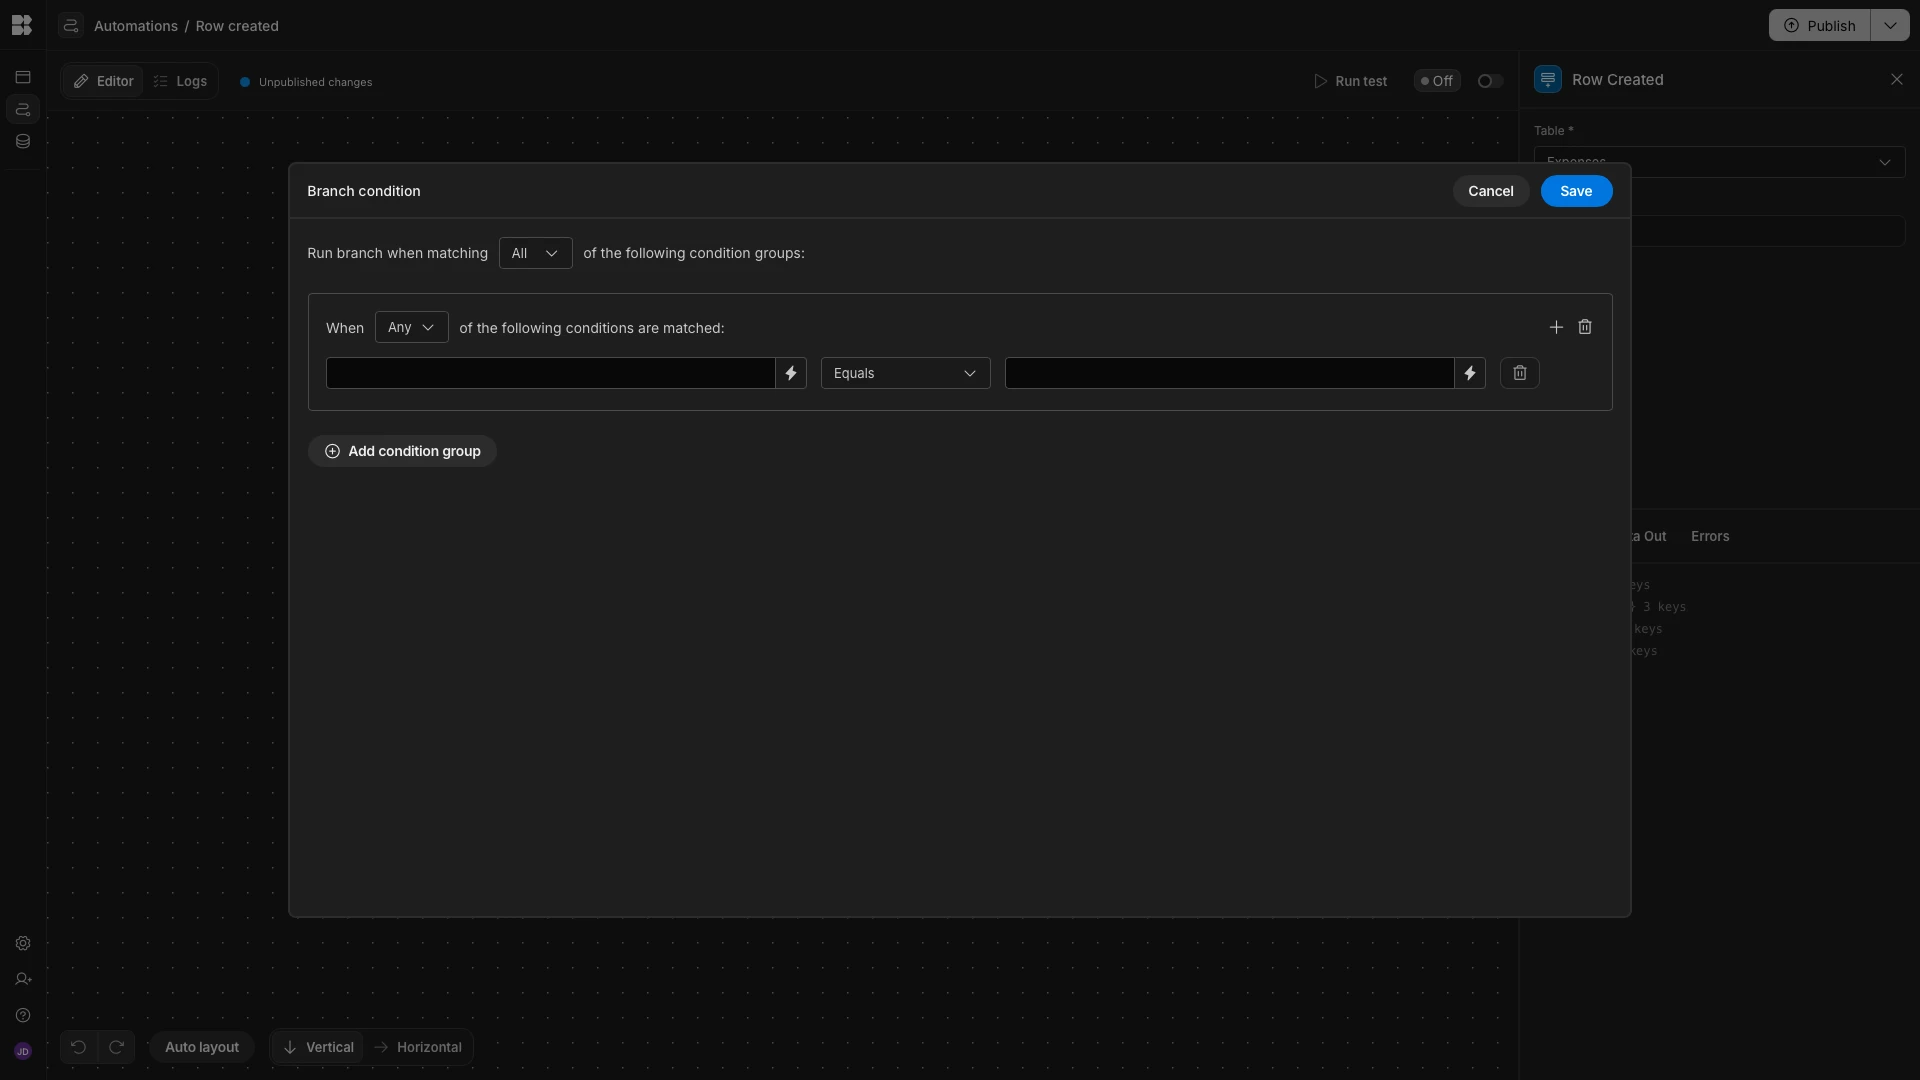
Our operation can be either Equals or Not Equals.
So, for our reference value, we’ll need a function that accepts the Cost value from our trigger row and returns a boolean value based on whether this is over or under 100.
To do this, we’ll hit the lightning bolt icon to open our bindings menu, and then choose the JavaScript tab.

The specific code we’ll use to achieve this is:
1var triggerCost = $("trigger.row.Cost")
2
3if (triggerCost < 100) {
4
5 return true
6
7}
8
9else return false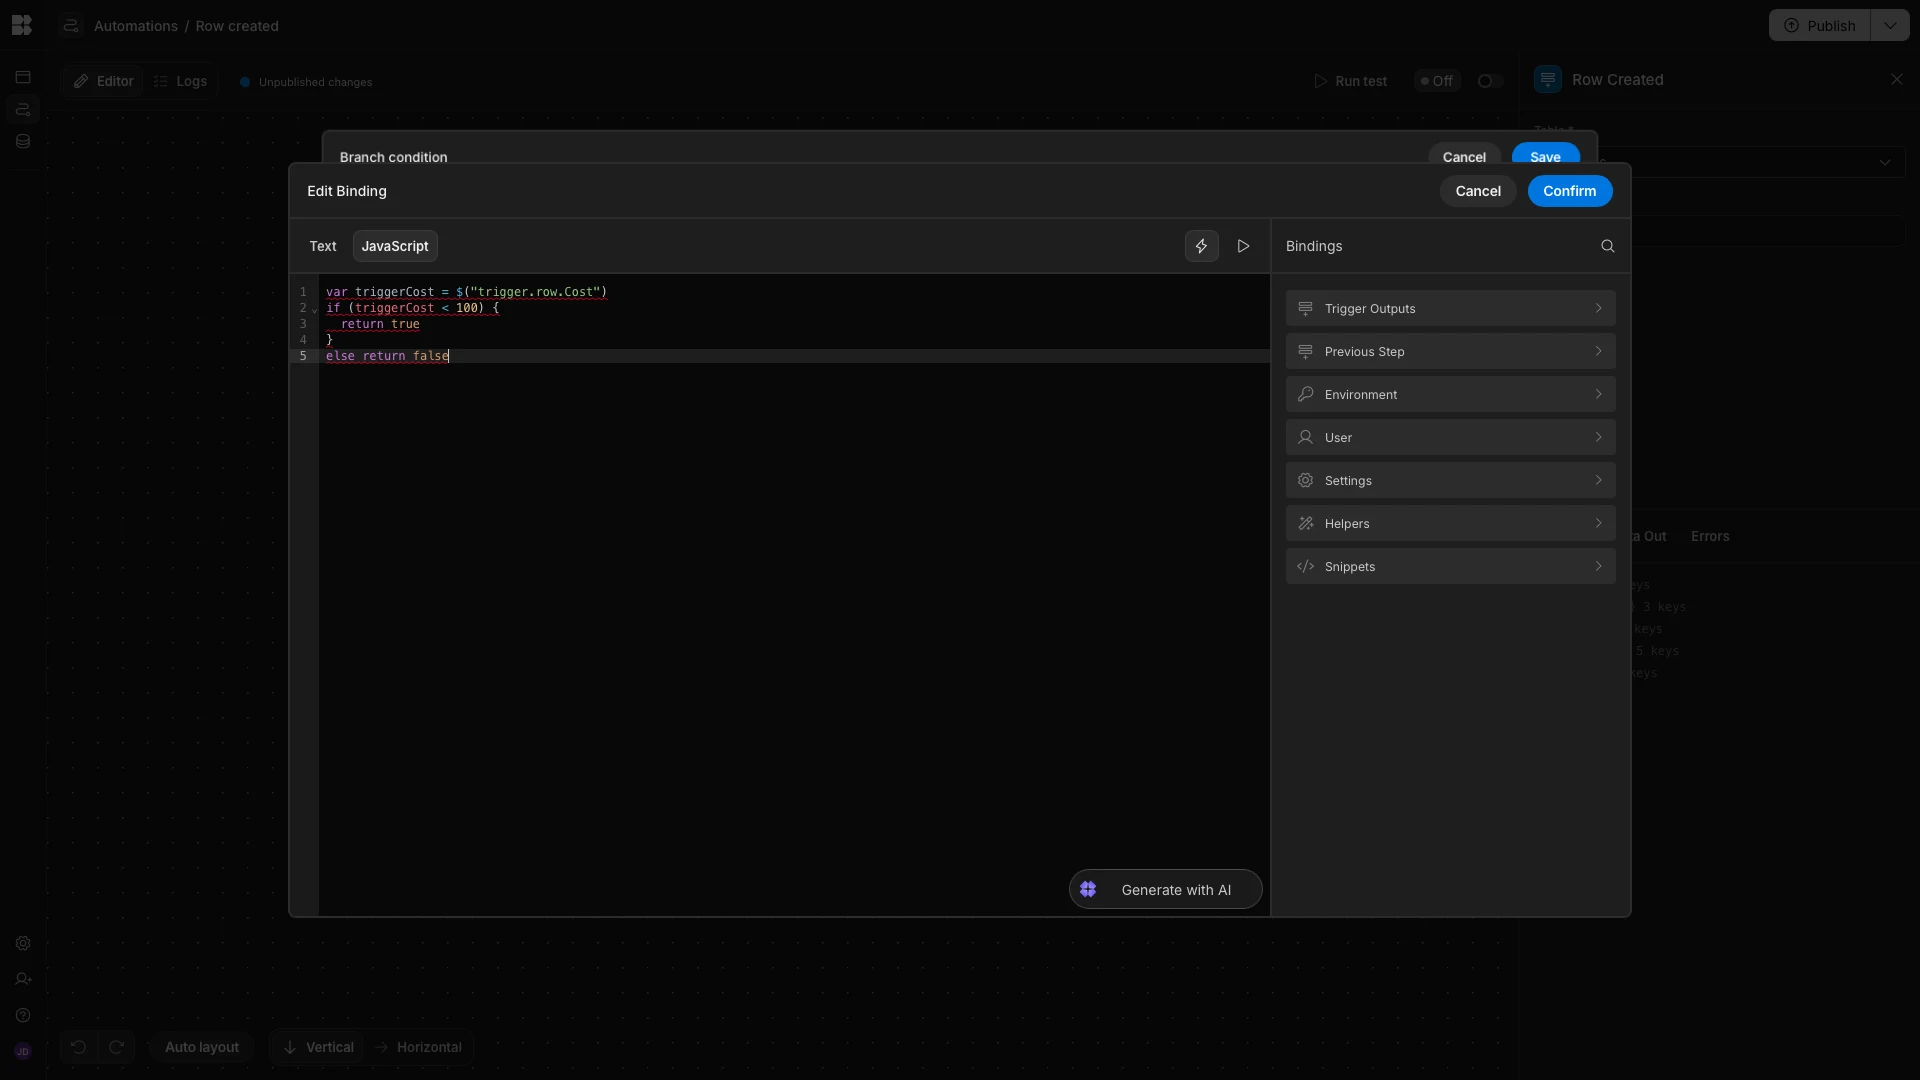
We’ll then use JavaScript to set our comparison value to:
1return true
We’ll leave our operation set to Equals.
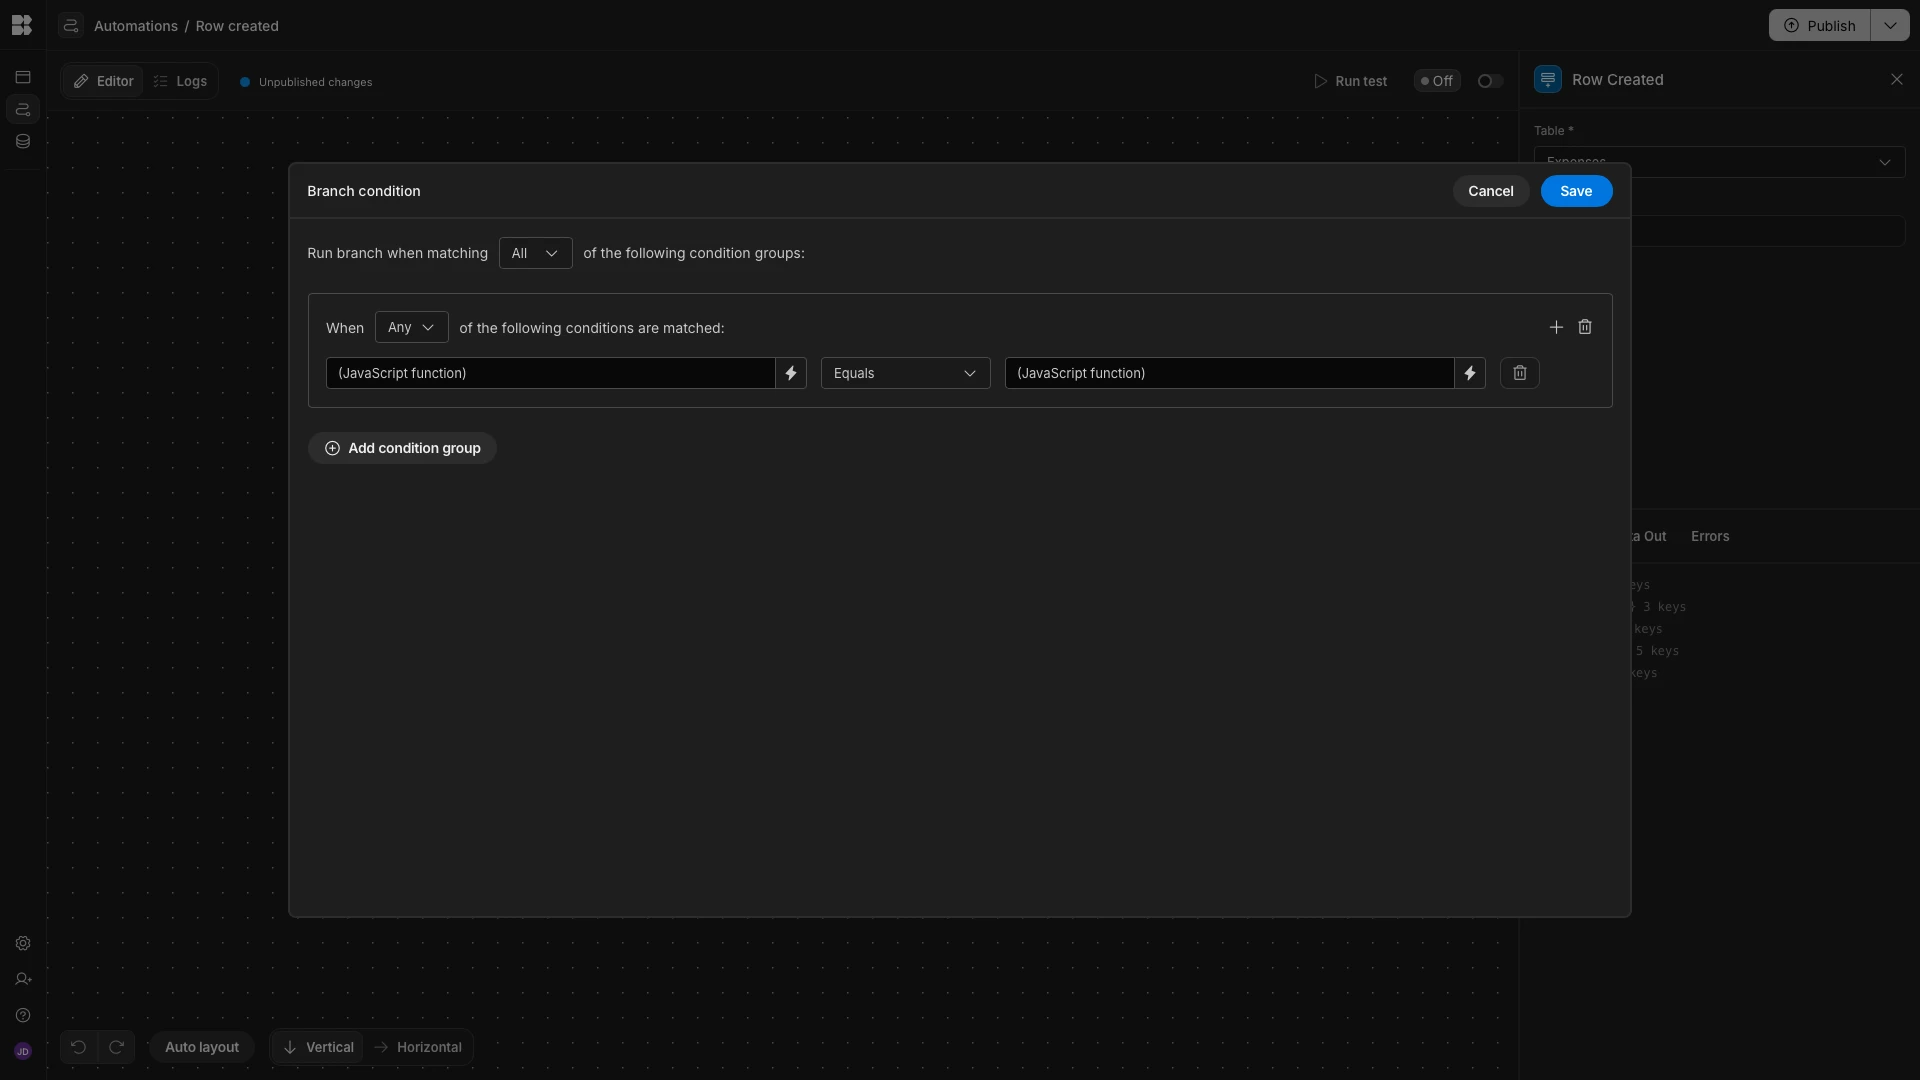
We’ll then use the exact same two JavaScript functions for the condition in our other branch, this time choosing the Not Equals operator.

Now, under each of our branches, we want to add actions to update the Status of our trigger row to the appropriate values, based on the Cost.
To do this, we’ll start by adding an Update Row action under our first branch, pointed at our Expenses table.

We’ll also need to point this at a specific row using the Row ID field.
We can do this with the {{ trigger.id }} binding.
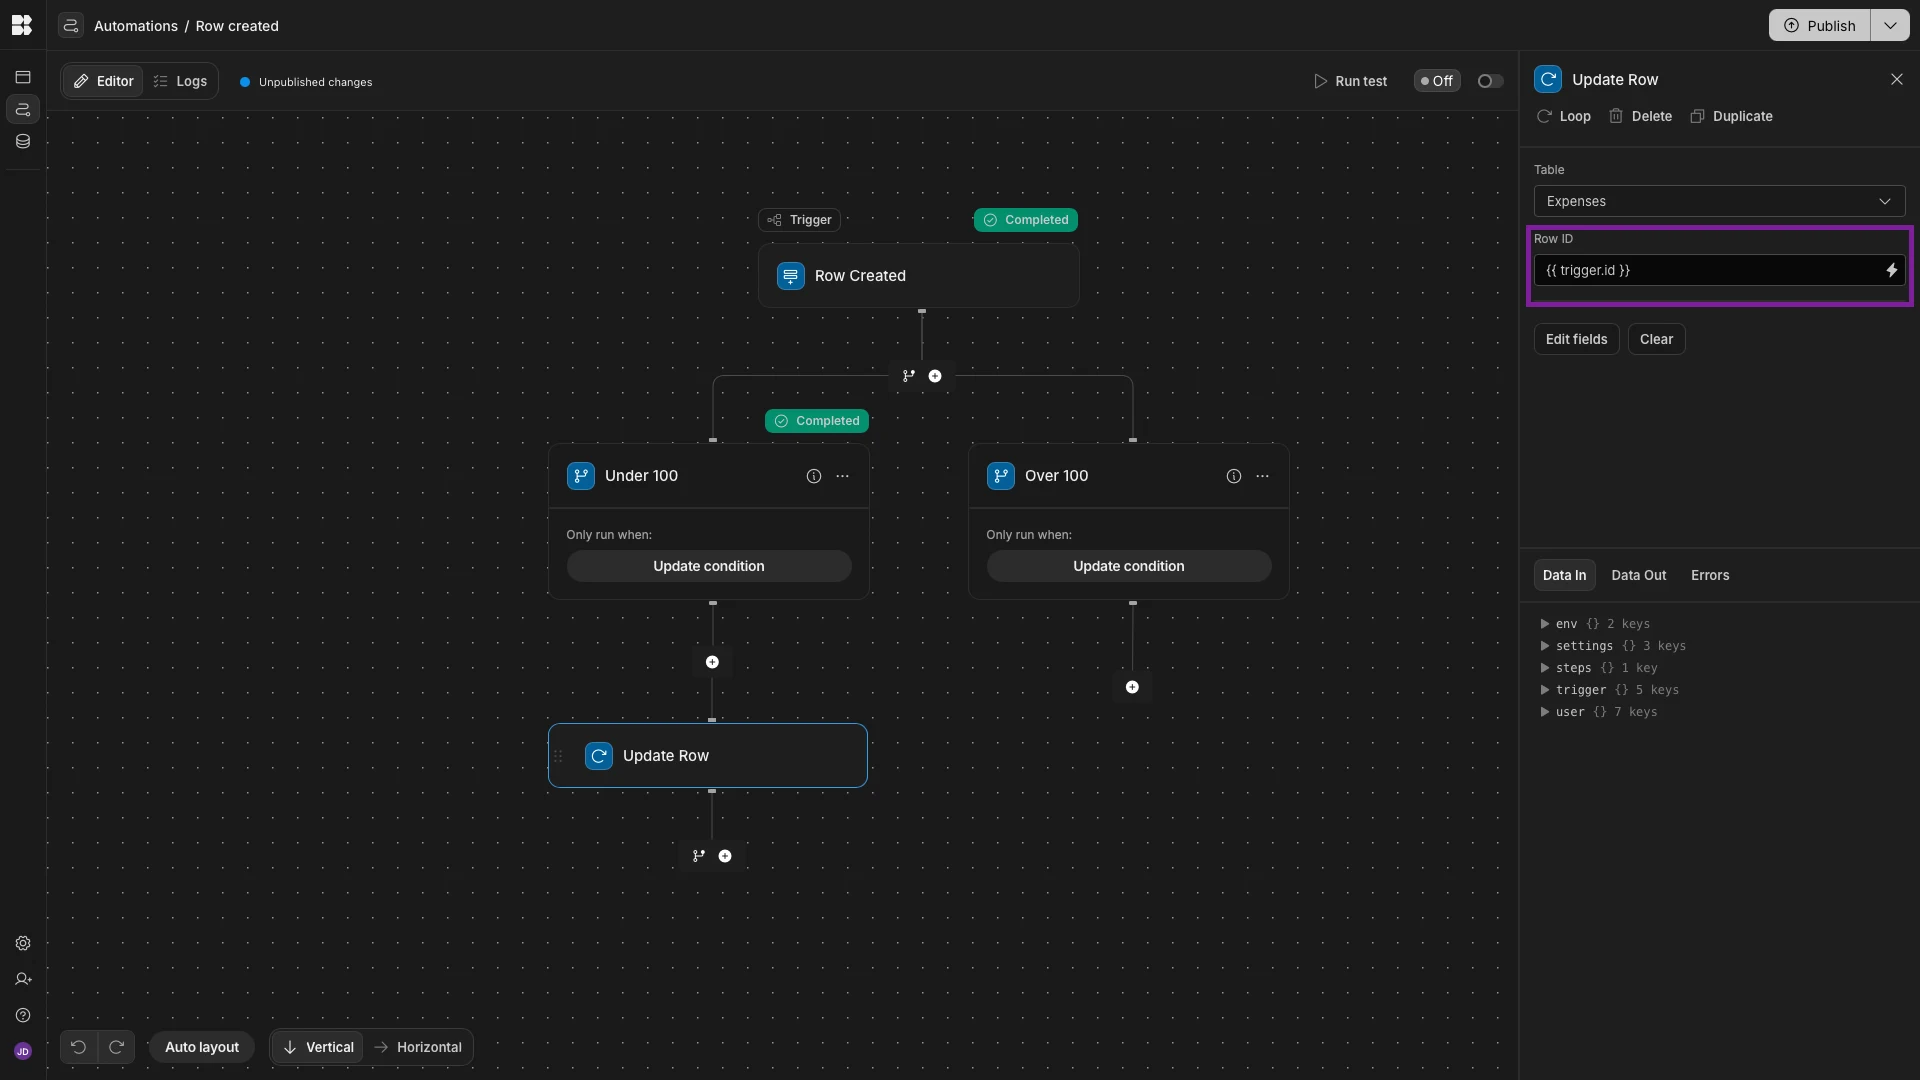
We’ll then hit Edit Fields and set our Status to approved.

Next, we can repeat the exact same process to add an Update Row step to our other branch, setting the Status to Pending.

We can hit Run Test to check that this works, using one of our existing rows.

In our test data, we can see that the correct branch has been executed and the Status has been set to Pending.

When we’re happy, we can publish our workspace, and any form submissions with a cost under $100 will automatically be approved.
Turn data into action with Budibase
Budibase is the open-source, low-code platform that empowers IT teams to turn data into action.
With a range of external data connectors, autogenerated UIs, powerful AI-driven automations, custom RBAC, free SSO, and more, it’s the ideal solution for creating secure, professional workflow tools.
Take a look at our features overview to learn more.