AI-Powered Forms | 5 Use Cases and Examples
AI forms are becoming a more and more prominent part of daily life. By offering more efficient, reliable data collection, they have great potential to transform and enhance a wide range of workflows and processes.
However, this is also a broad category of tools, covering a range of use cases and different AI-powered techniques and functions.
Today, we’re covering everything you need to know in order to roll out effective AI forms. Specifically, we’ll be exploring:
Along the way, we’ll also see how Budibase can be utilized to output professional AI-powered forms with minimal coding skills.
Let’s start with the basics.
What is an AI form?
As the name suggests, an AI form is a form UI that leverages artificial intelligence to carry out specific actions using the submitted data.
Most often, this means performing some kind of processing on the saved data, but we could also use AI to trigger automations or even handle UX tasks.
The goal is to enable us to implement advanced functionality within our forms, boosting the quality, accuracy, and efficiency of our data collection efforts. In turn, this can have a massive impact on follow-on workflows.
To better understand the benefits of this, it’s important to consider the centrality of form UIs to all kinds of applications and workflows.
As one of the primary ways that end users can interact with data, forms are required for any workflow where users need to submit or update information. This applies across a range of internal and external-facing processes.
Therefore, the form solutions we utilize, including any AI enhancements we add to them, can have an outsized impact on a huge range of processes.
To learn more, take a look at our comprehensive guide to AI forms .
How do AI forms work?
Before we start checking out some practical examples of AI forms, it’s worth spending some time considering how this actually works in more detail. In other words, how can we go about connecting forms to AI models?
There are a few key configurations of this.
Many solutions rely on a connection between an LLM and the form app’s underlying database. So, the form carries out a create or update operation on the data as normal, and an AI-powered function is carried out in the back end, similar to how a stored procedure might work.
Alternatively, we might make a call to a connected AI model as part of a wider automation rule, at the point that a form submission is completed.
These methods both apply to situations where we want to take user-submitted values and use them to populate an AI prompt in order to perform some defined action on the data.
For more advanced use cases, especially those more focused on enabling users to interact with AI through forms, we might take a different approach. With websockets and streaming, some AI forms are able to present generated values to users in real time.
For example, enabling an AI tool to fill in certain form values in real time or rewrite them based on human inputs.
In the following section, we’ll explore a range of use cases and examples of how we can utilize AI forms to improve the accuracy, efficiency, and quality of our data collection workflows.
AI-powered forms: 5 use cases and examples
As we’ve hinted at already, use cases for AI forms can touch on a wide range of functions, processes, and workflows.
At the same time, we can consider some of the characteristics of a workflow that will make AI forms suitable. Firstly, the larger the volume of information we need to process, the more likely it is that we can achieve substantial efficiency savings through AI forms.
Beyond this, AI forms can be highly beneficial in situations where traditional automation tools might fall short. For instance, where we’re dealing with non-deterministic or qualitative decisions.
You might also like our guide to AI agentic workflows .
Let’s check out some of the most common types of AI forms, along with how we can build them in Budibase.
1. Autocategorization
First up, we have one of the simplest but most prominent examples of an AI-powered form use case. Autocategorization means analyzing natural language data that’s been submitted by a user, and using this to place the submission into one of a predefined set of categories.
This can be helpful in a wide range of applications, reducing the need for human users to manually specify categories.
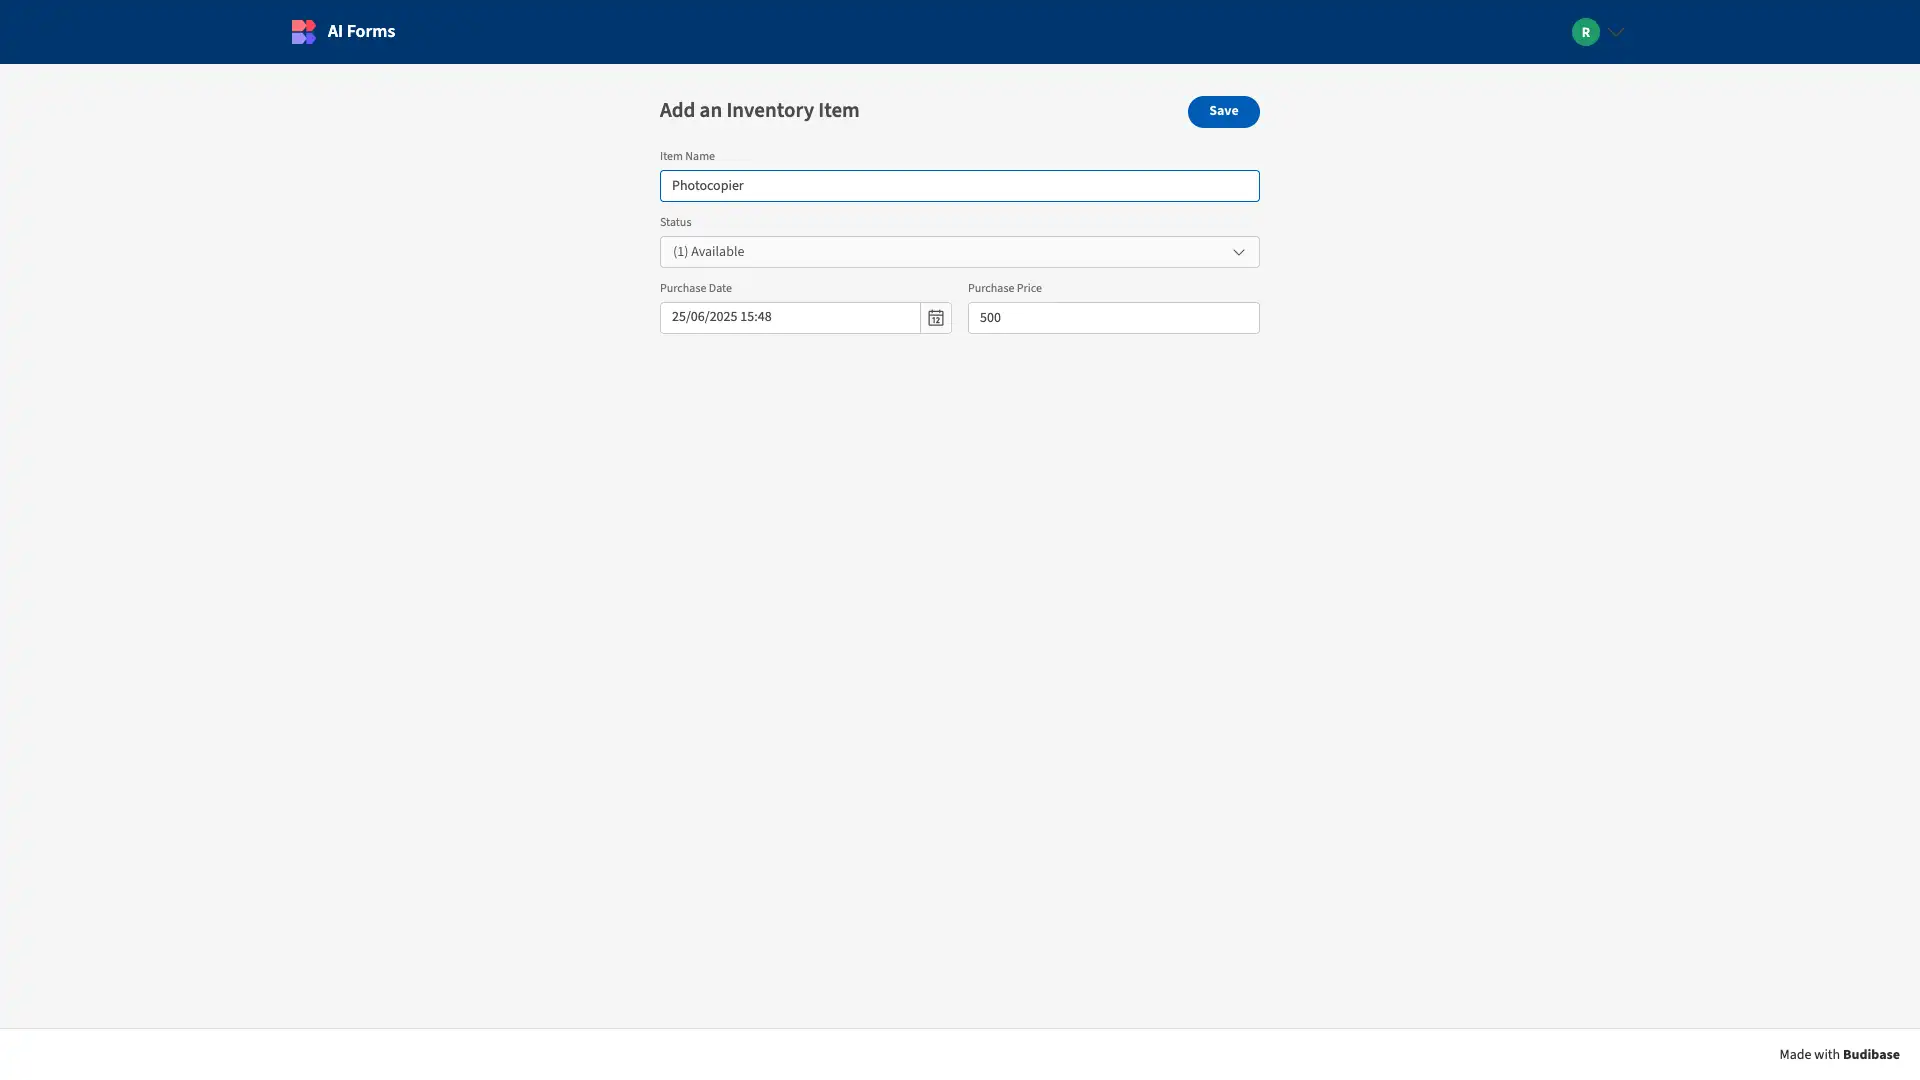
Let’s check out a simple example. Below, you can see a lightweight form that creates records in an inventory database. We’ve generated this from an internal database table in Budibase.
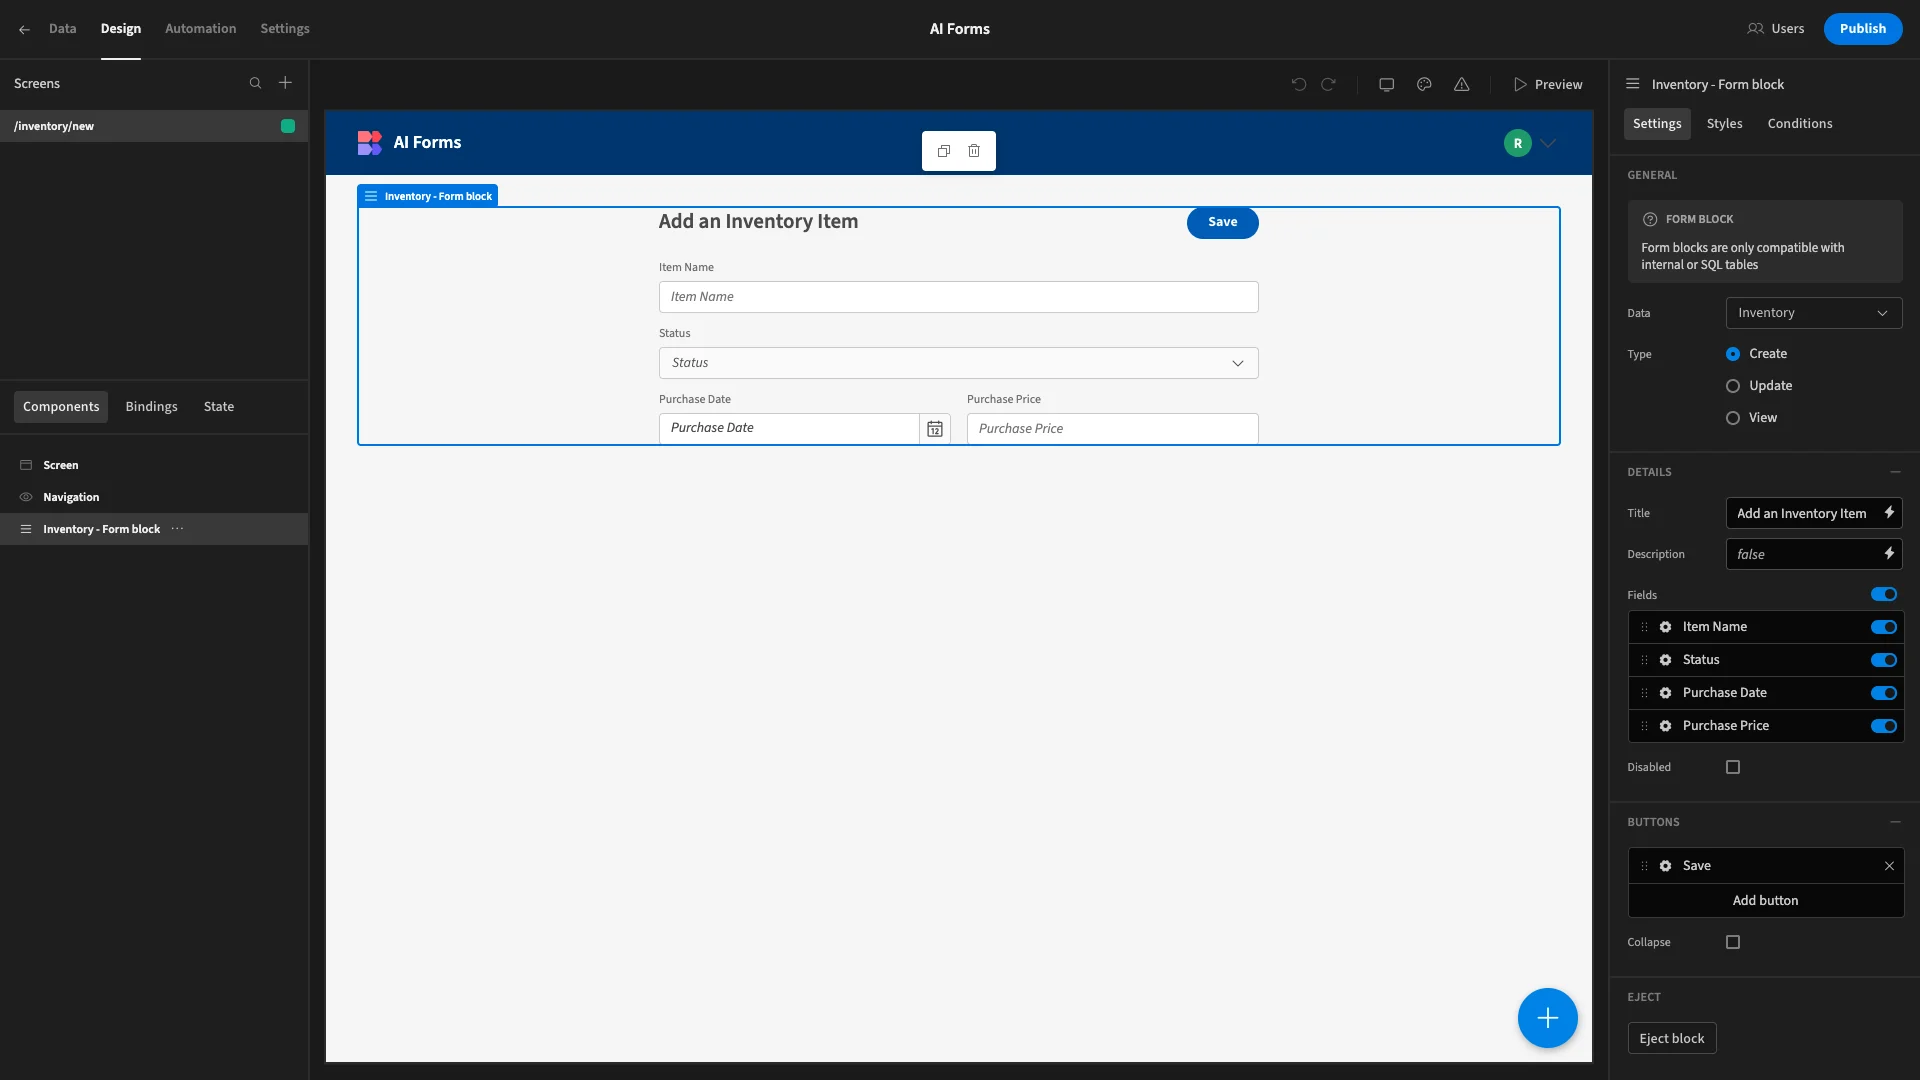
When a user completes this form, it will create a record in our database table.
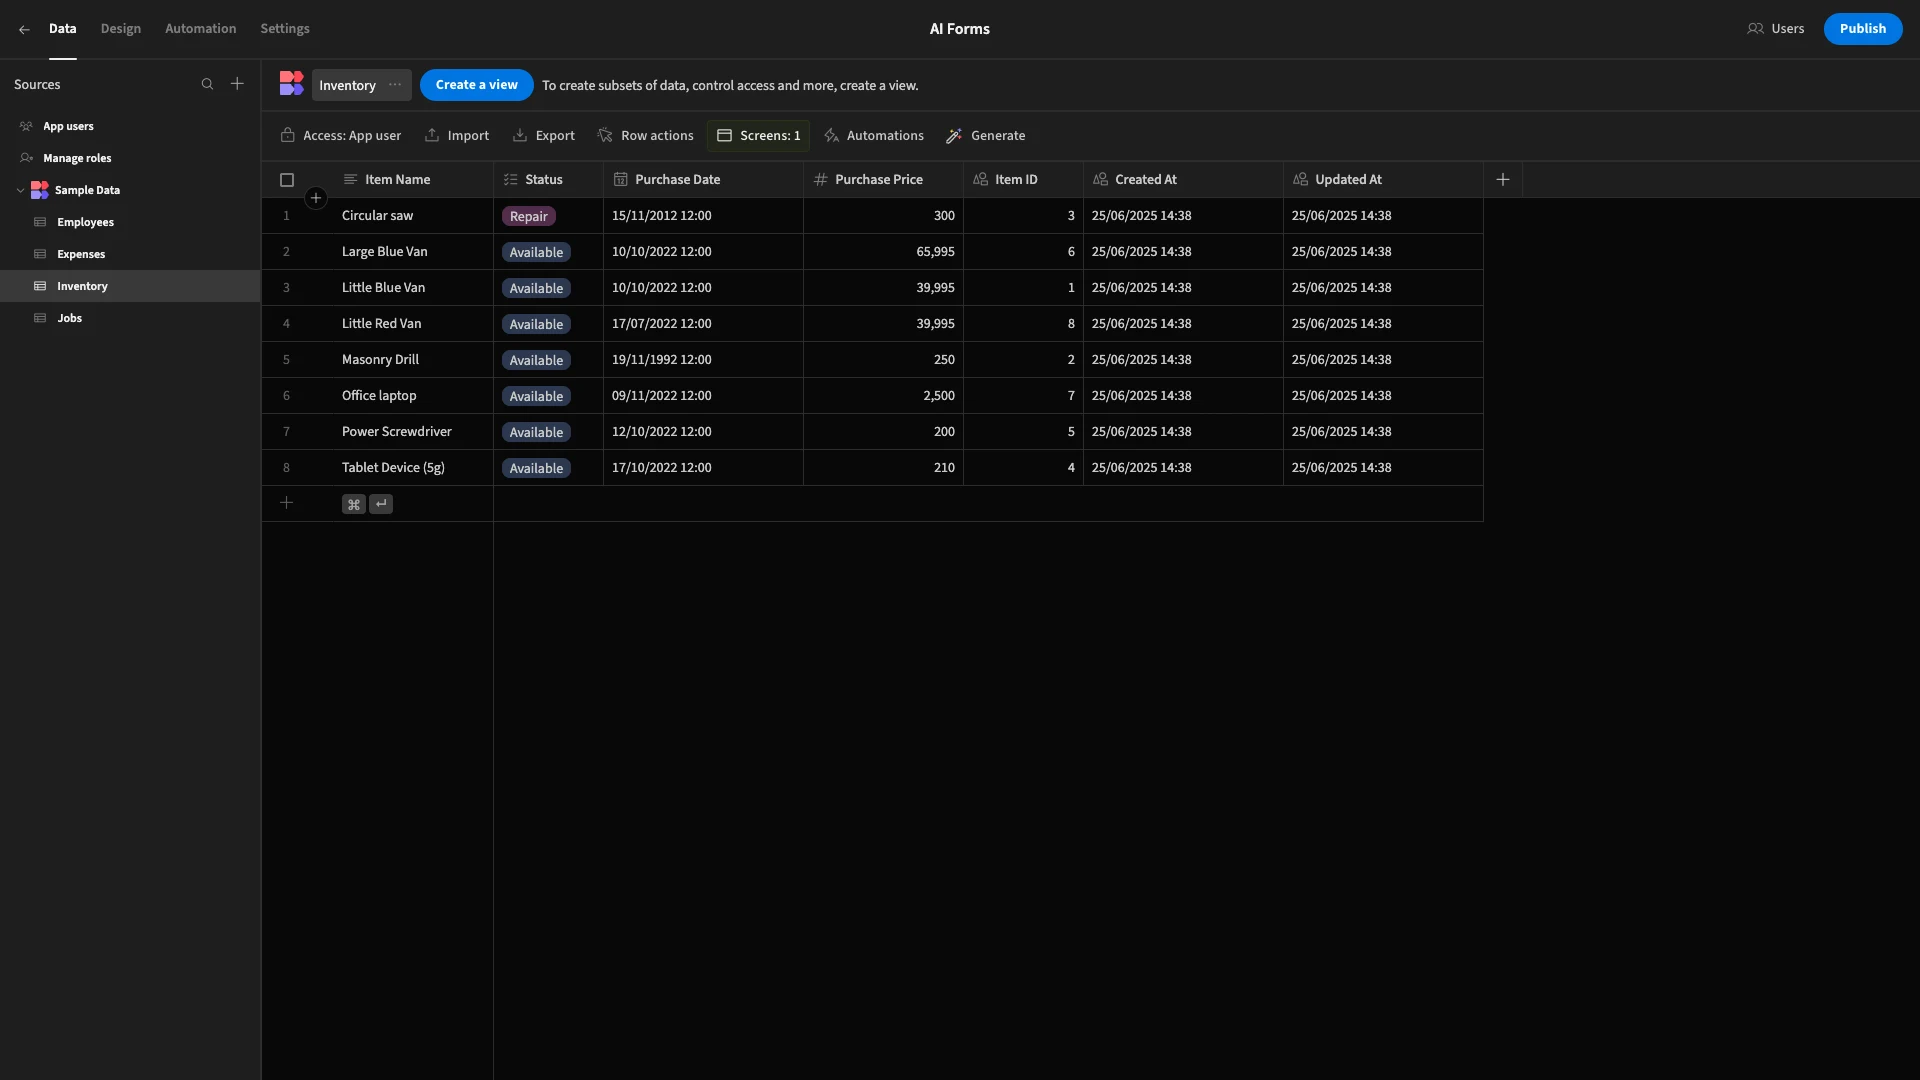
For the purposes of this example, we’re going to use the Item Name value that users provide to determine what category each database row belongs to.
We can achieve this with BudibaseDB’s built-in AI Column. We’ll start by adding a new column, which we’ll call Category, choosing the AI data type.
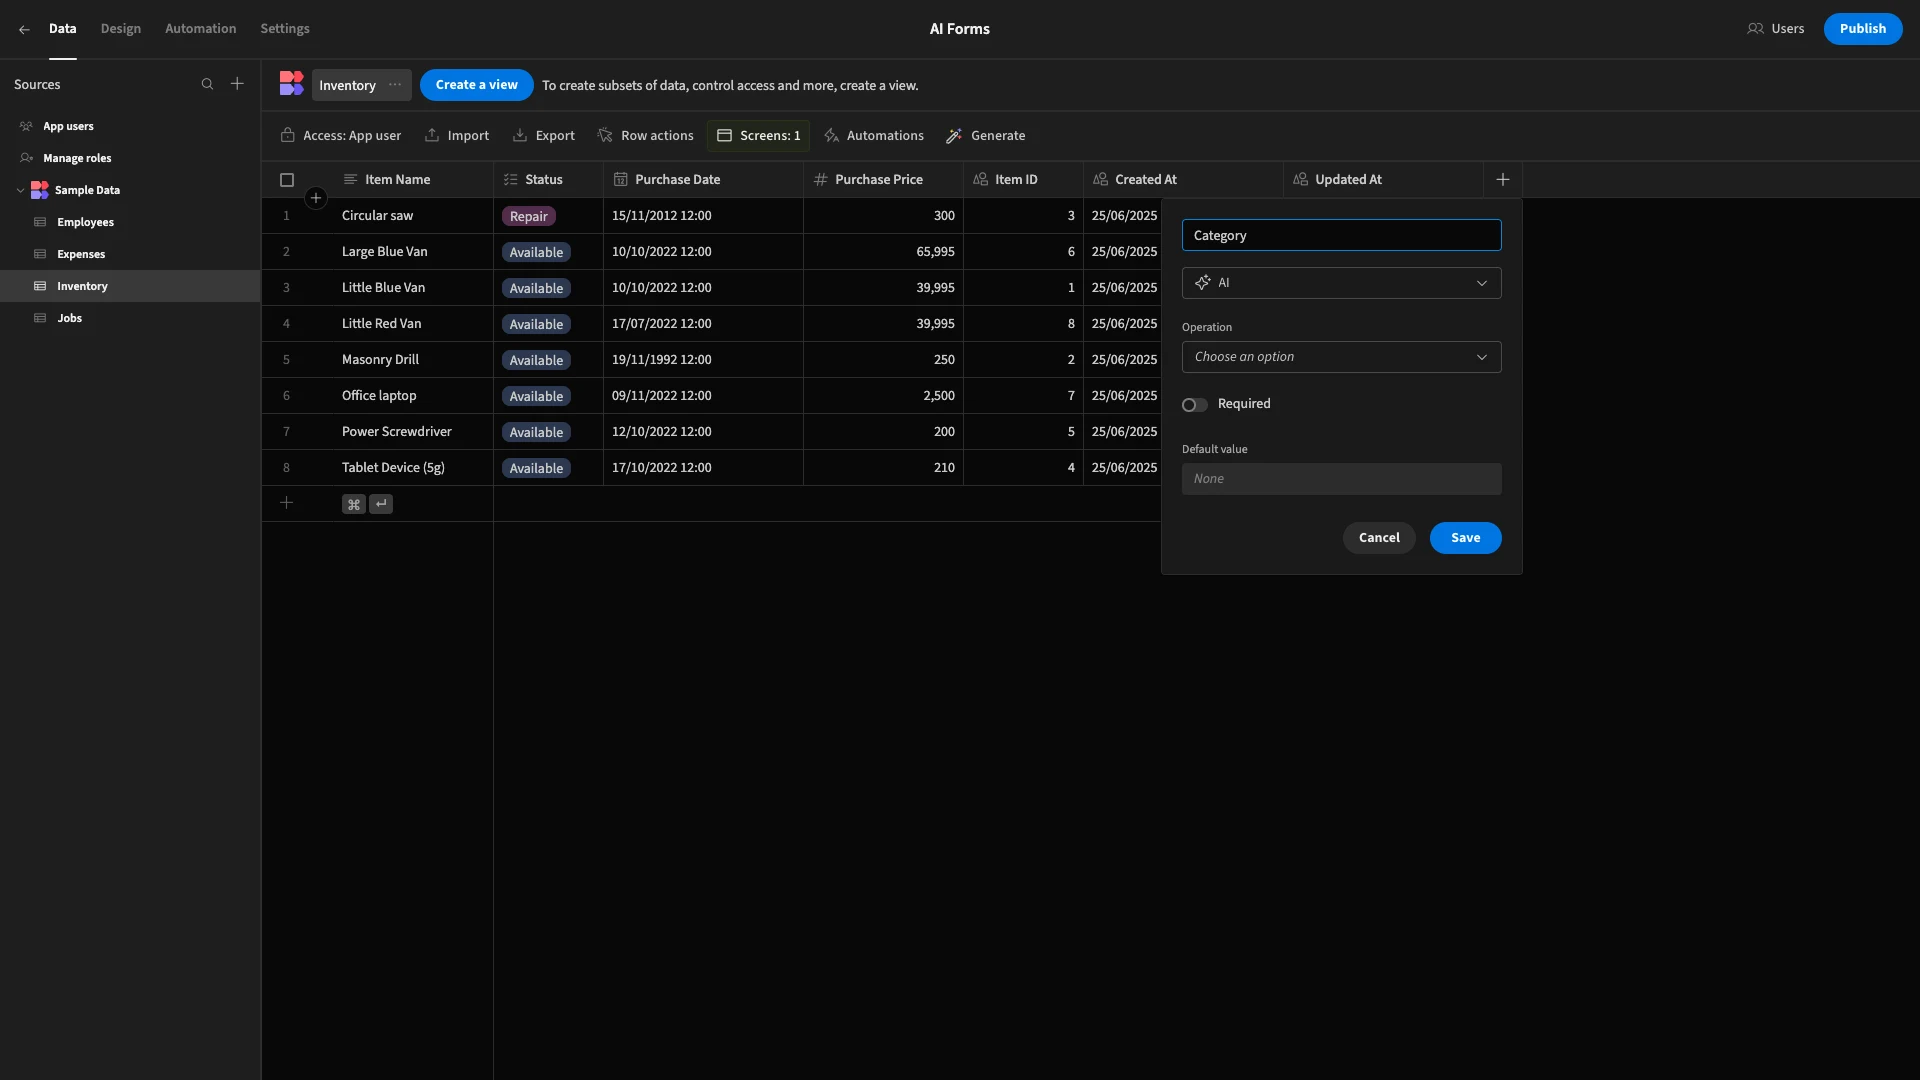
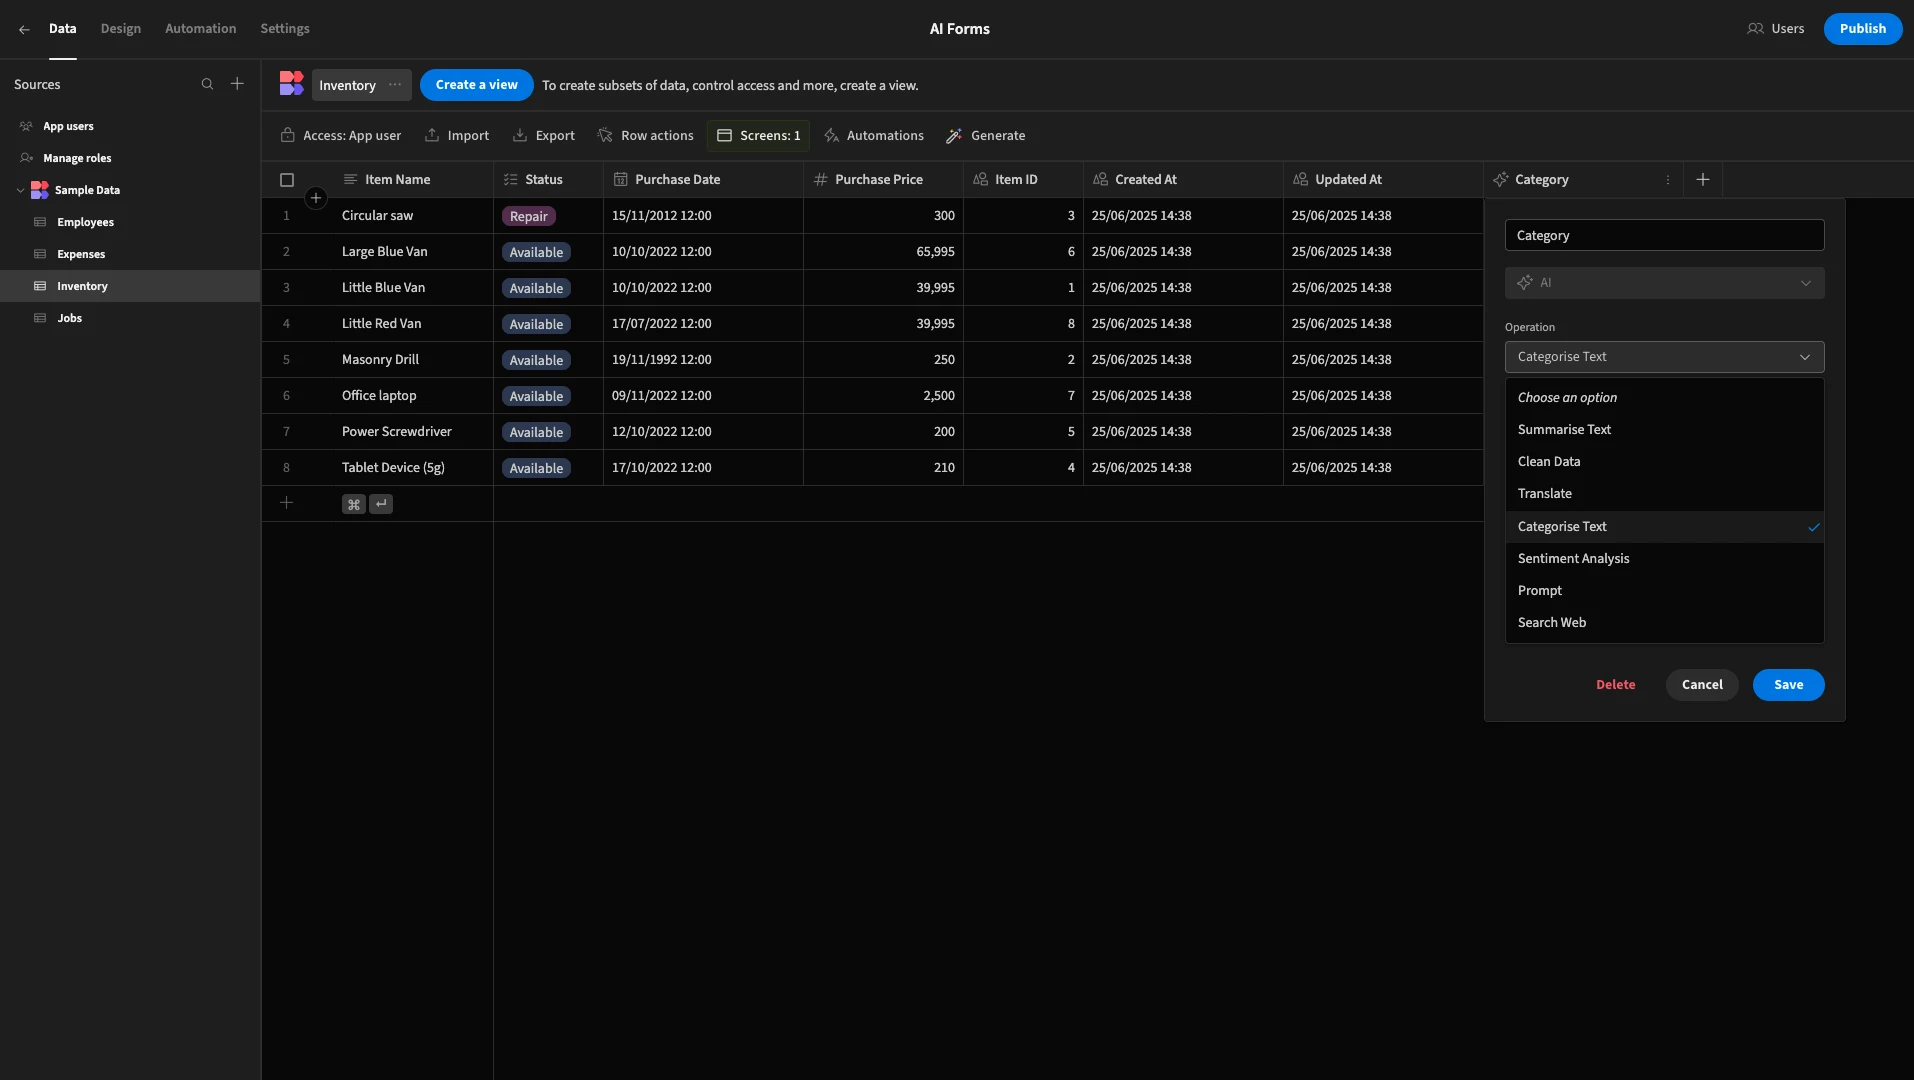
We can choose one of several operations, depending on what we want our AI model to do. We’re going with Categorise Text.
Then, we’ll set Columns to Item Name, meaning we’ll use the value in this column to determine our category.
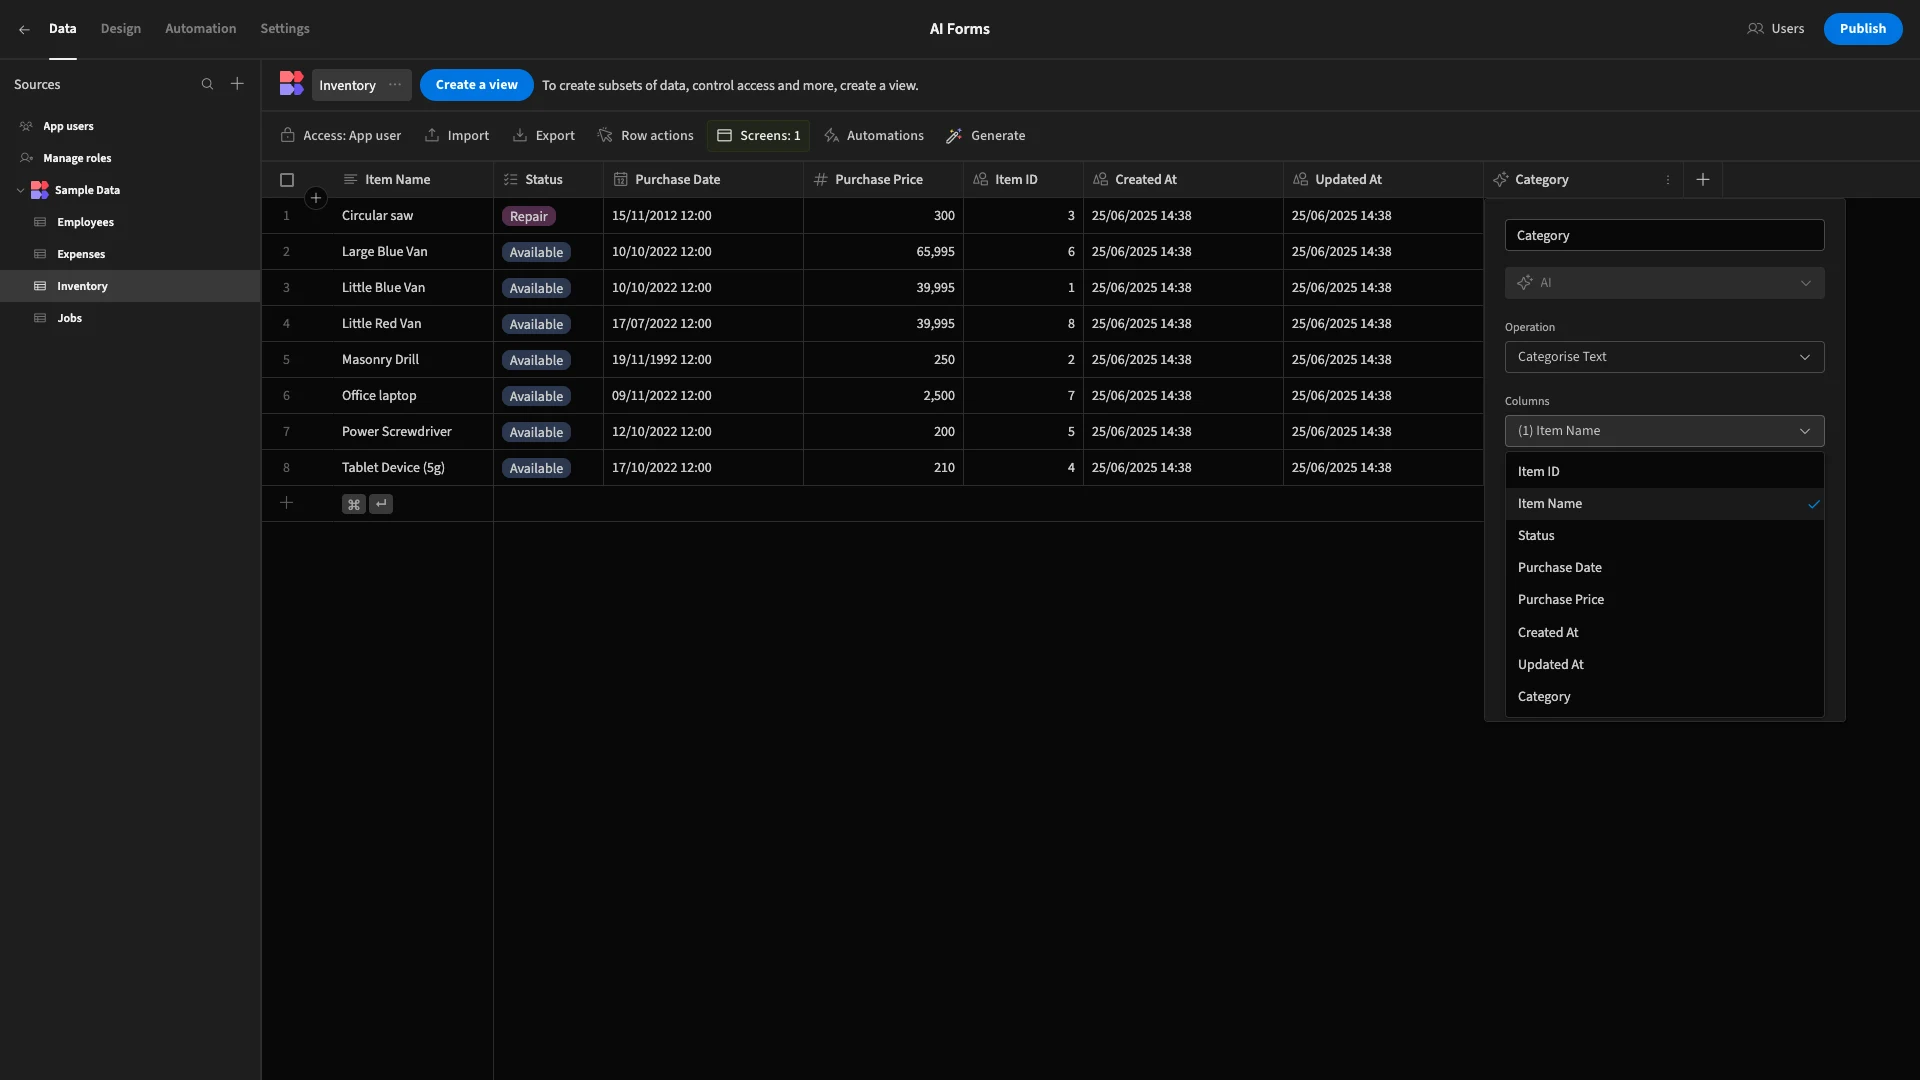
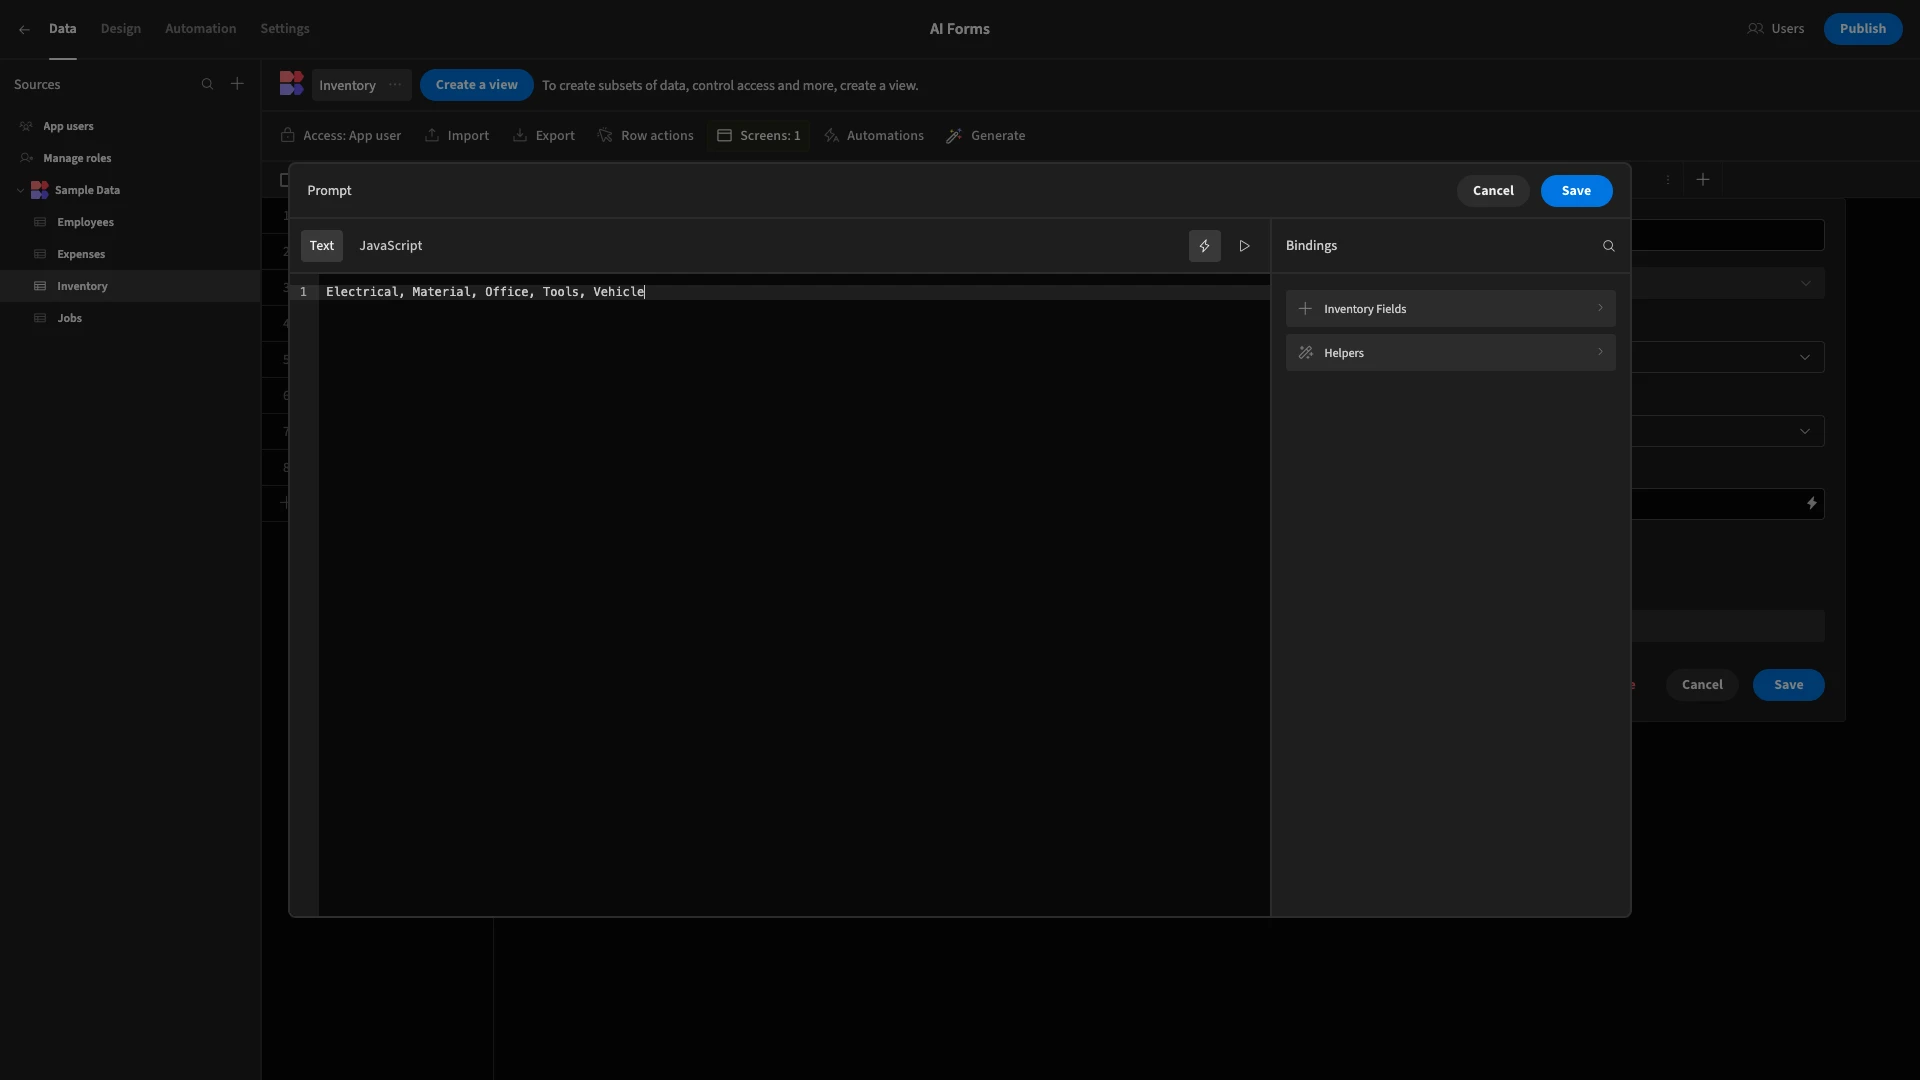
Lastly, we can specify our categories as comma-separated values. We’ll hit the lightning bolt icon to give ourselves a bit more space.
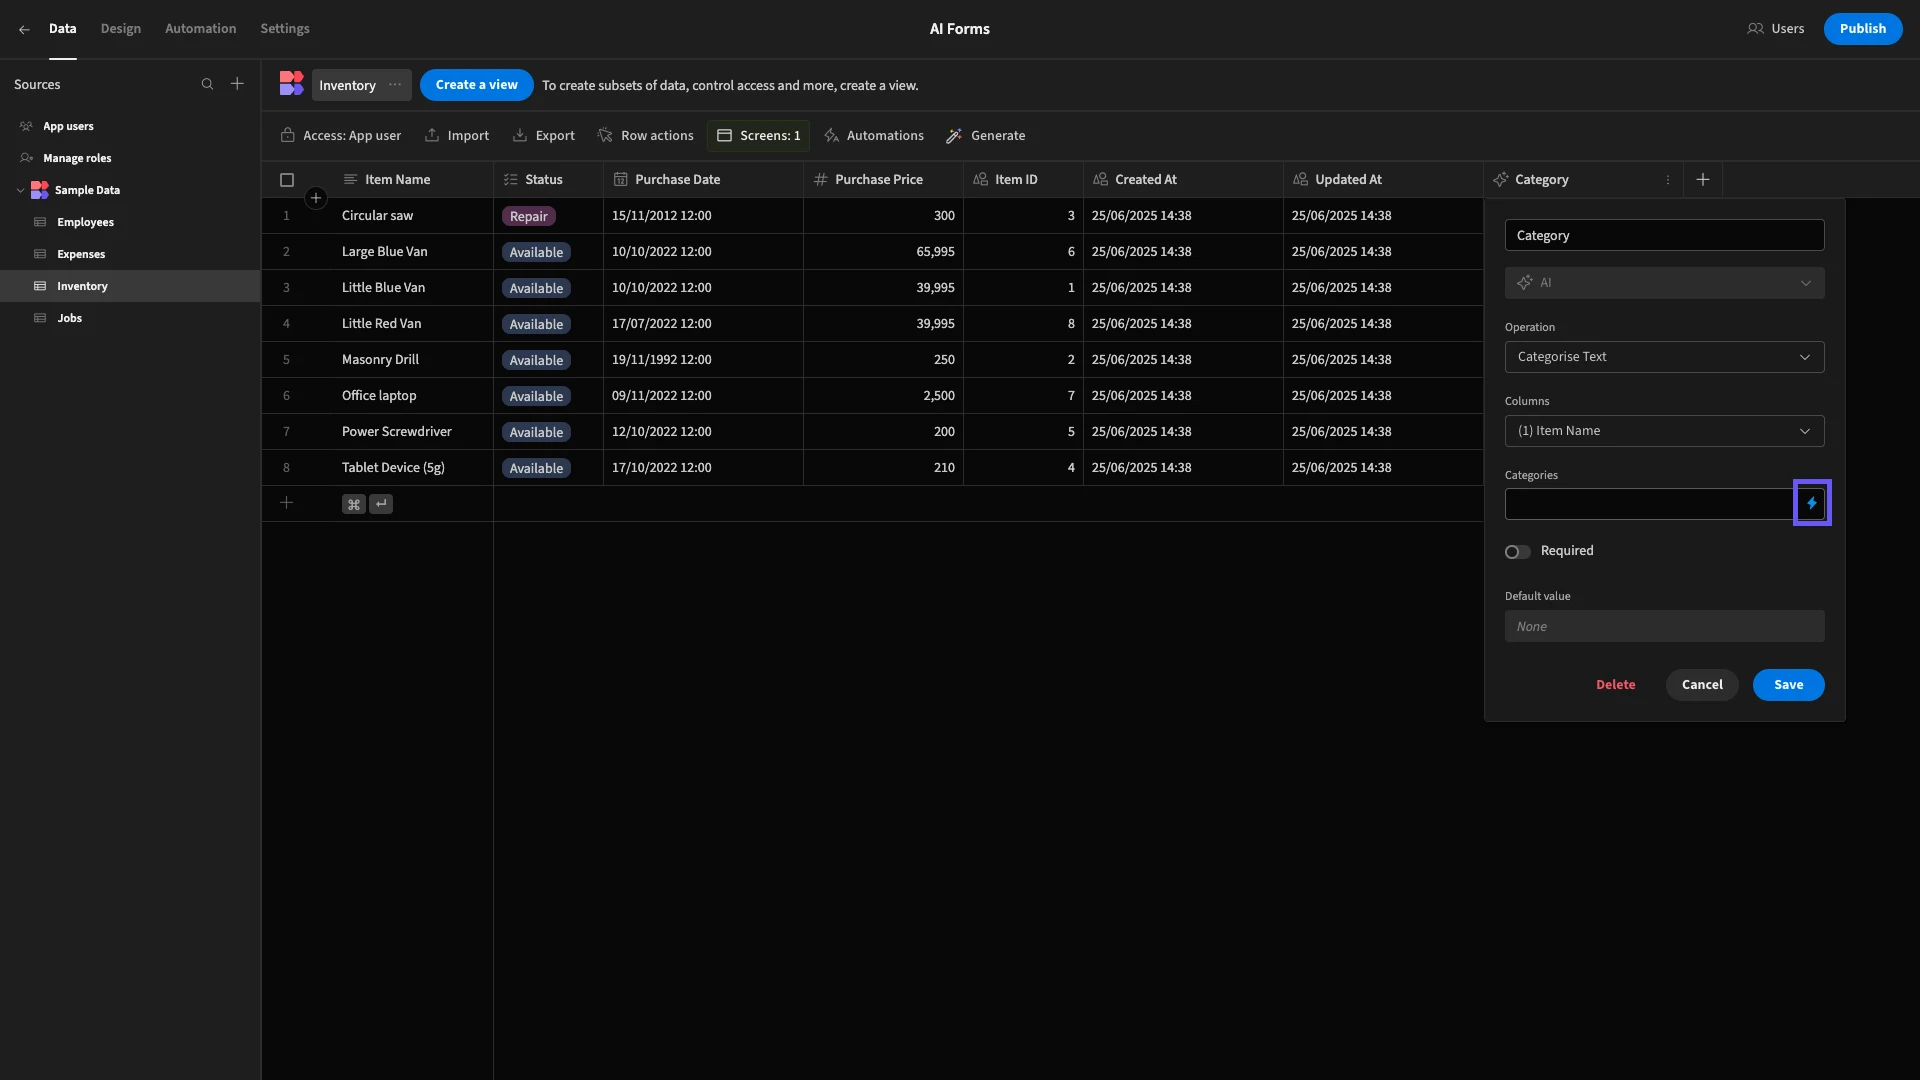
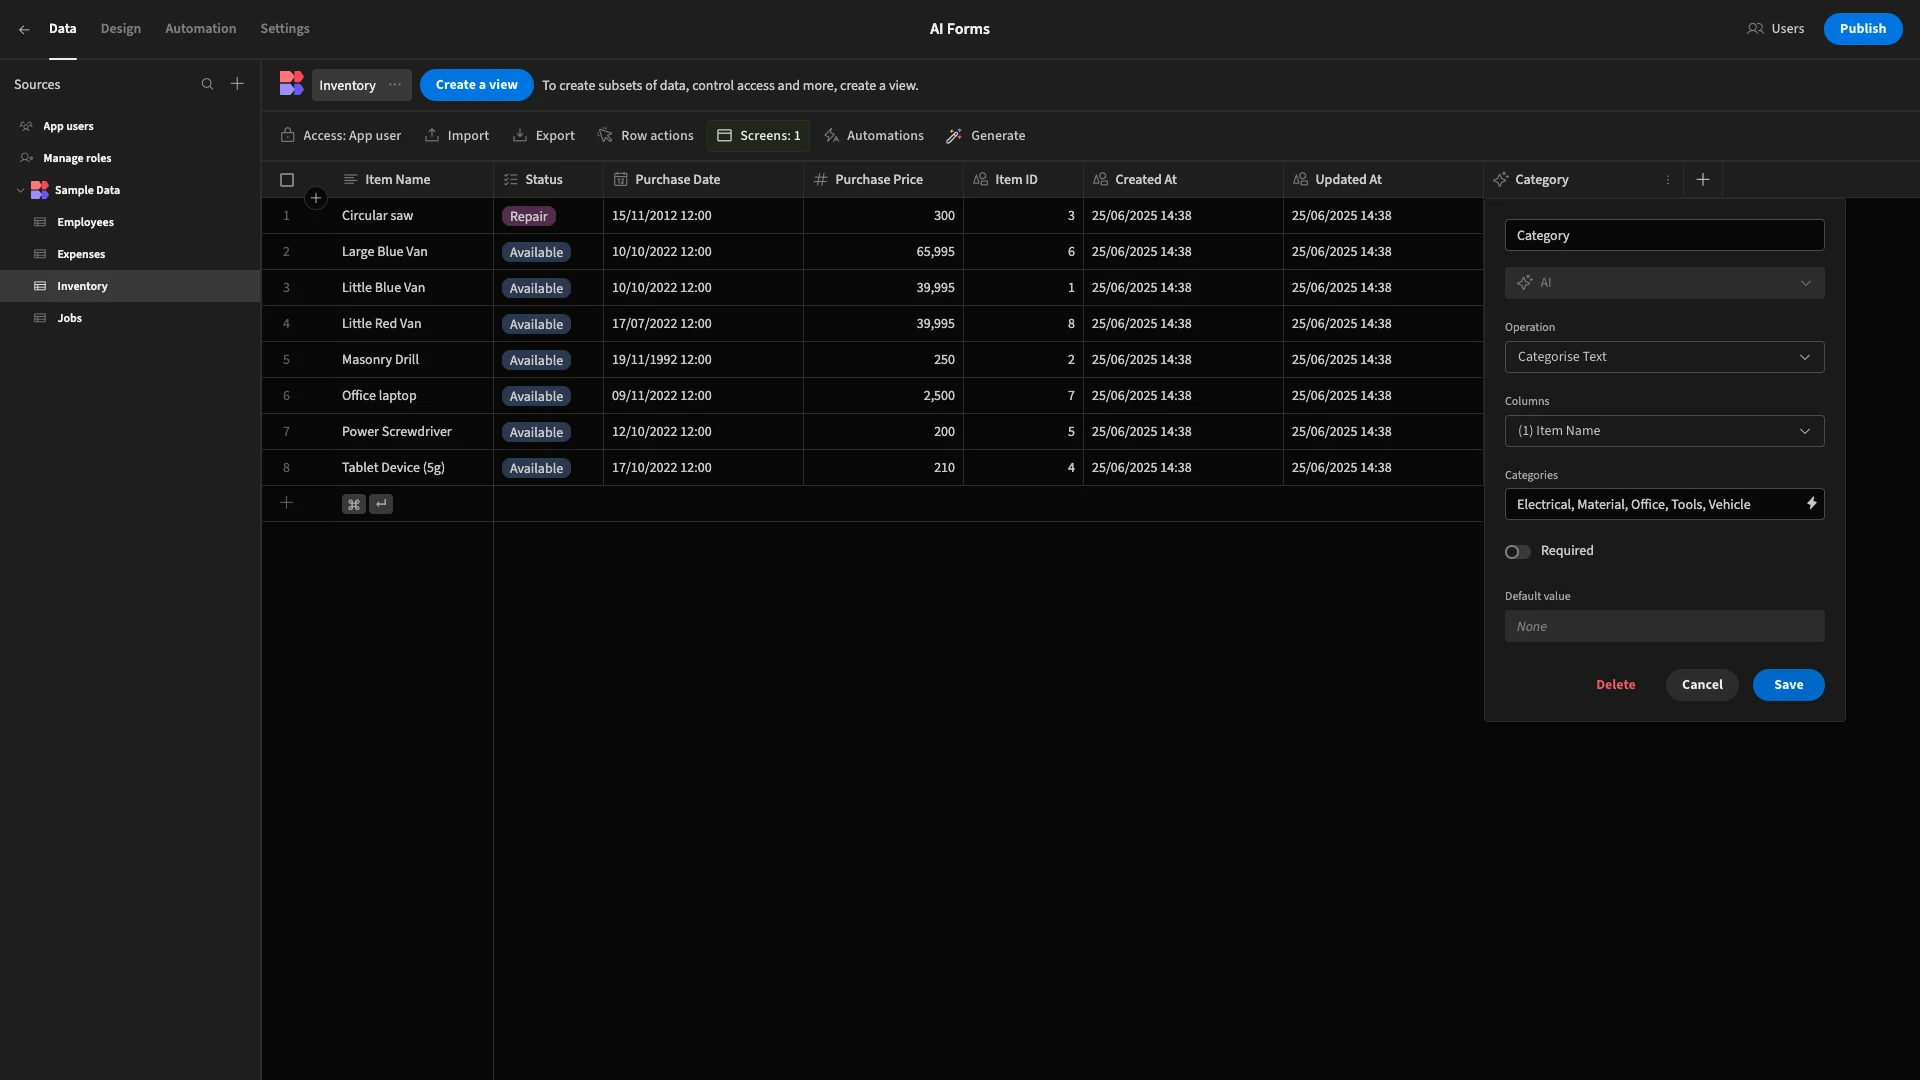
The categories we’re choosing are Electrical, Material, Office, Tools, and Vehicle.
And we’ll hit save.
Now, we can head back to our form and add a row to test this out.
For our example, we’re adding a photocopier.
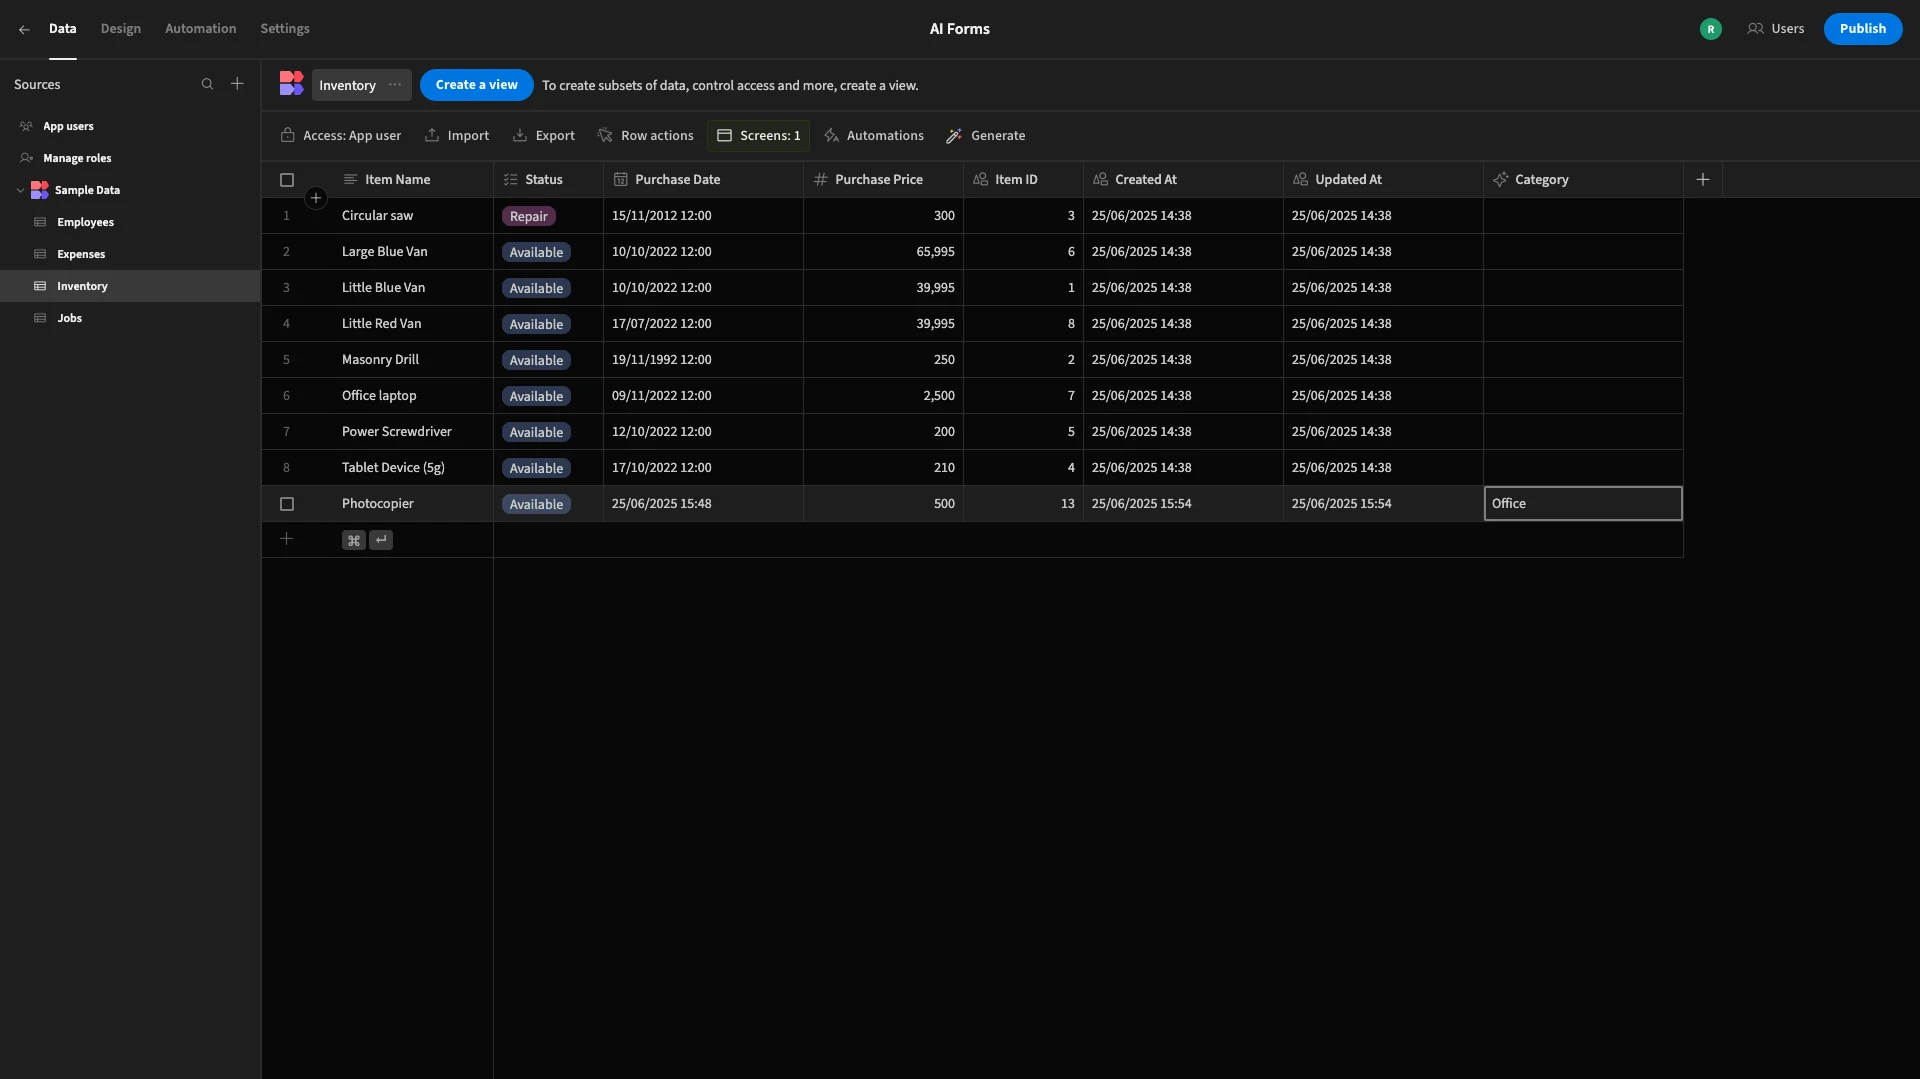
Back in the Data section, we can see that our AI column has successfully categorized this as Office.
You might also like our round-up of the top AI Form Builders .
2. Summarization with AI intake forms
Another common example of how we can use AI within forms is summarizing user-submitted information.
This is particularly useful for more complex or information-dense forms, where human agents might need a summary of the key points in order to determine how to move forward.
This time, our example is a client intake form. Note that we have several long-form text fields.
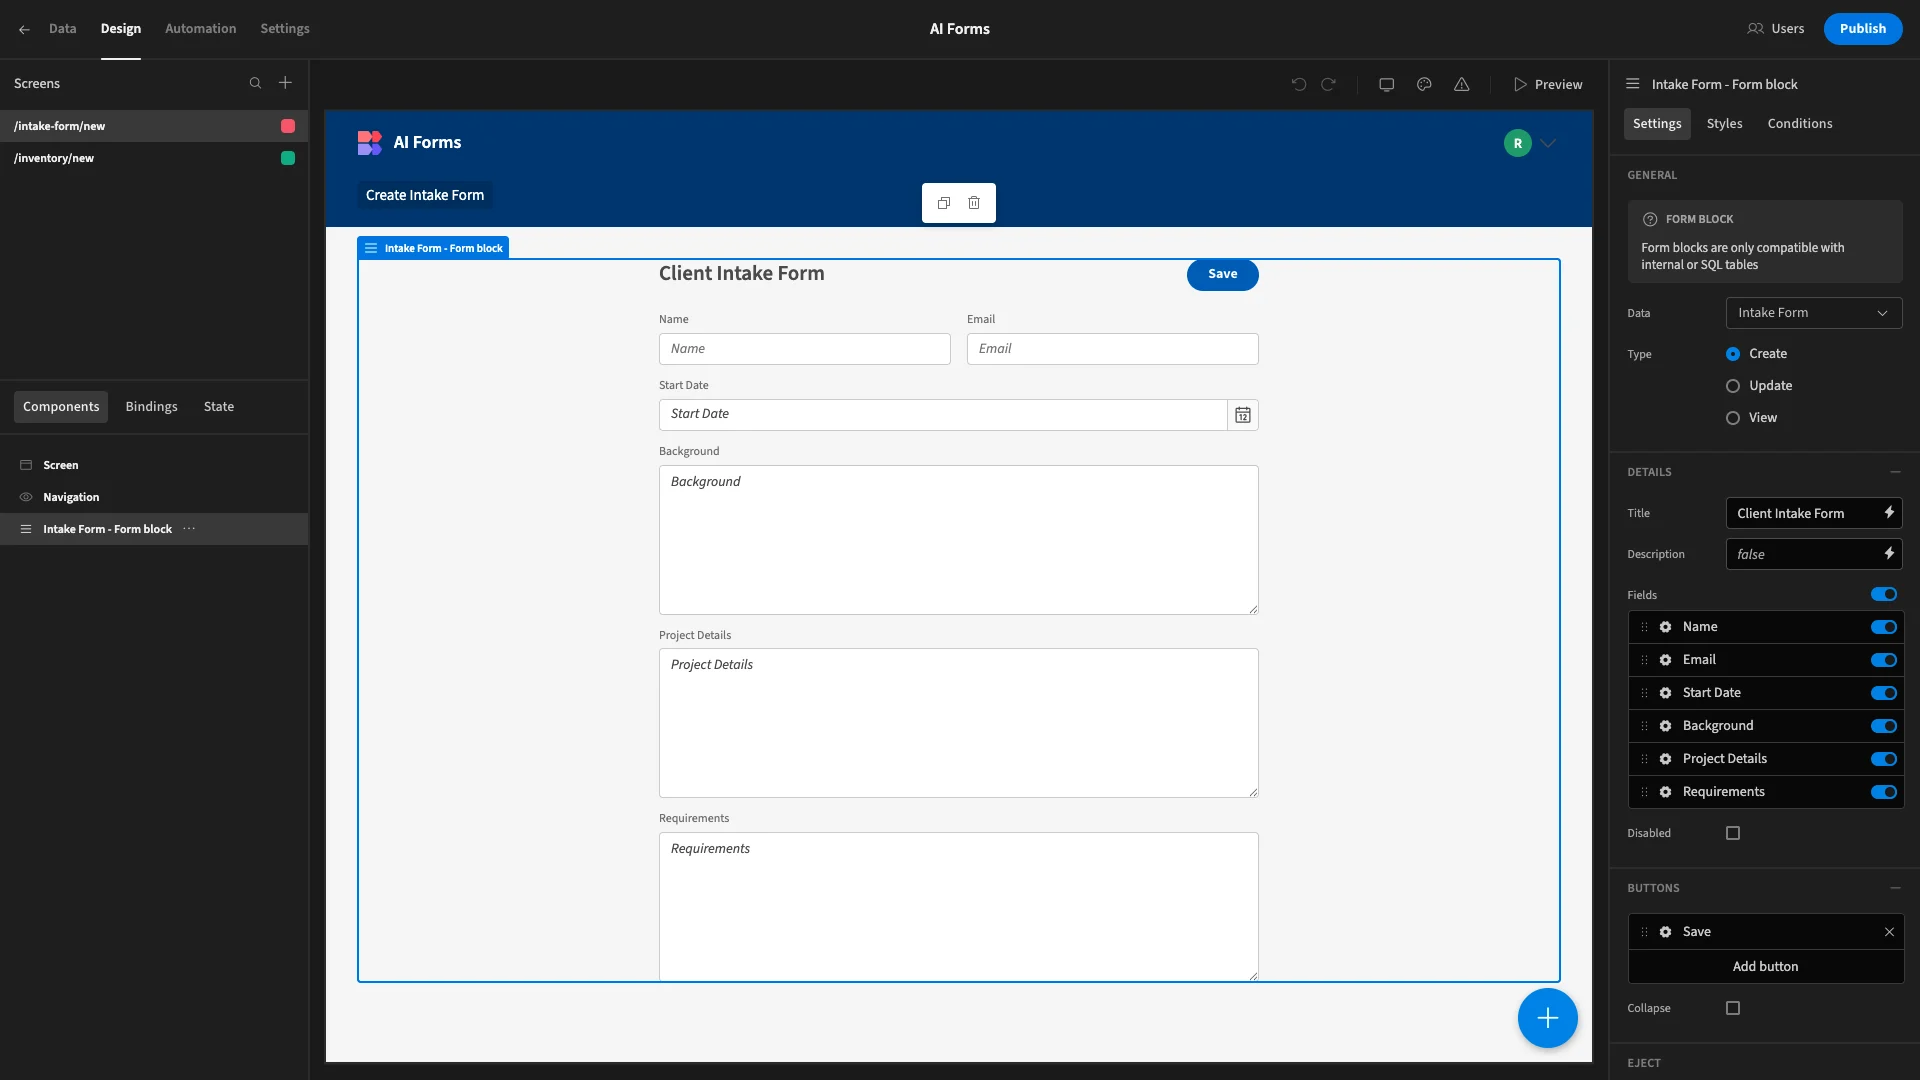
So, we’re going to apply AI summarization to this to highlight the most important information.
Once again, we’ll add an AI column. We’ll set its name to Summary. This time, we’re choosing Summarise Text for our Operation.

This time, we’ll select all of our other columns as inputs.

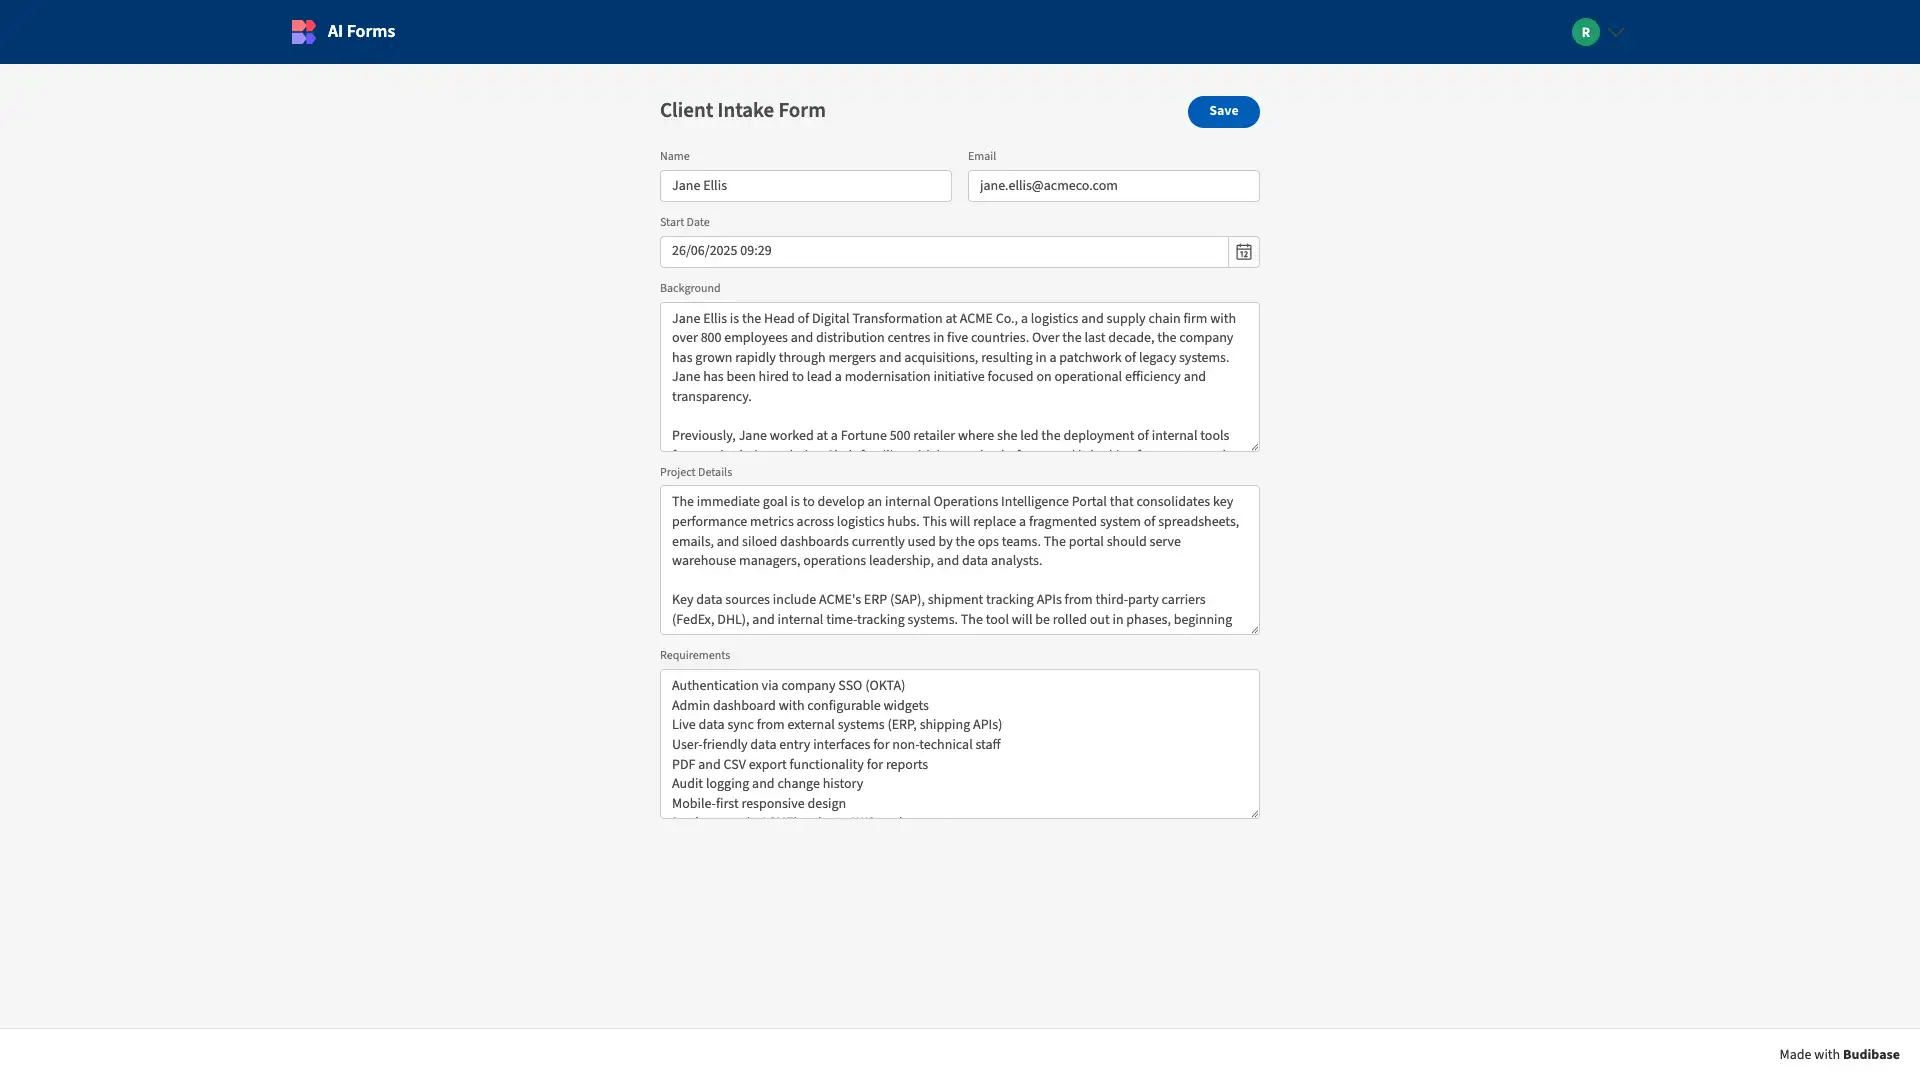
Once again, we can test this out by submitting information to our form.
Here’s how this will look.
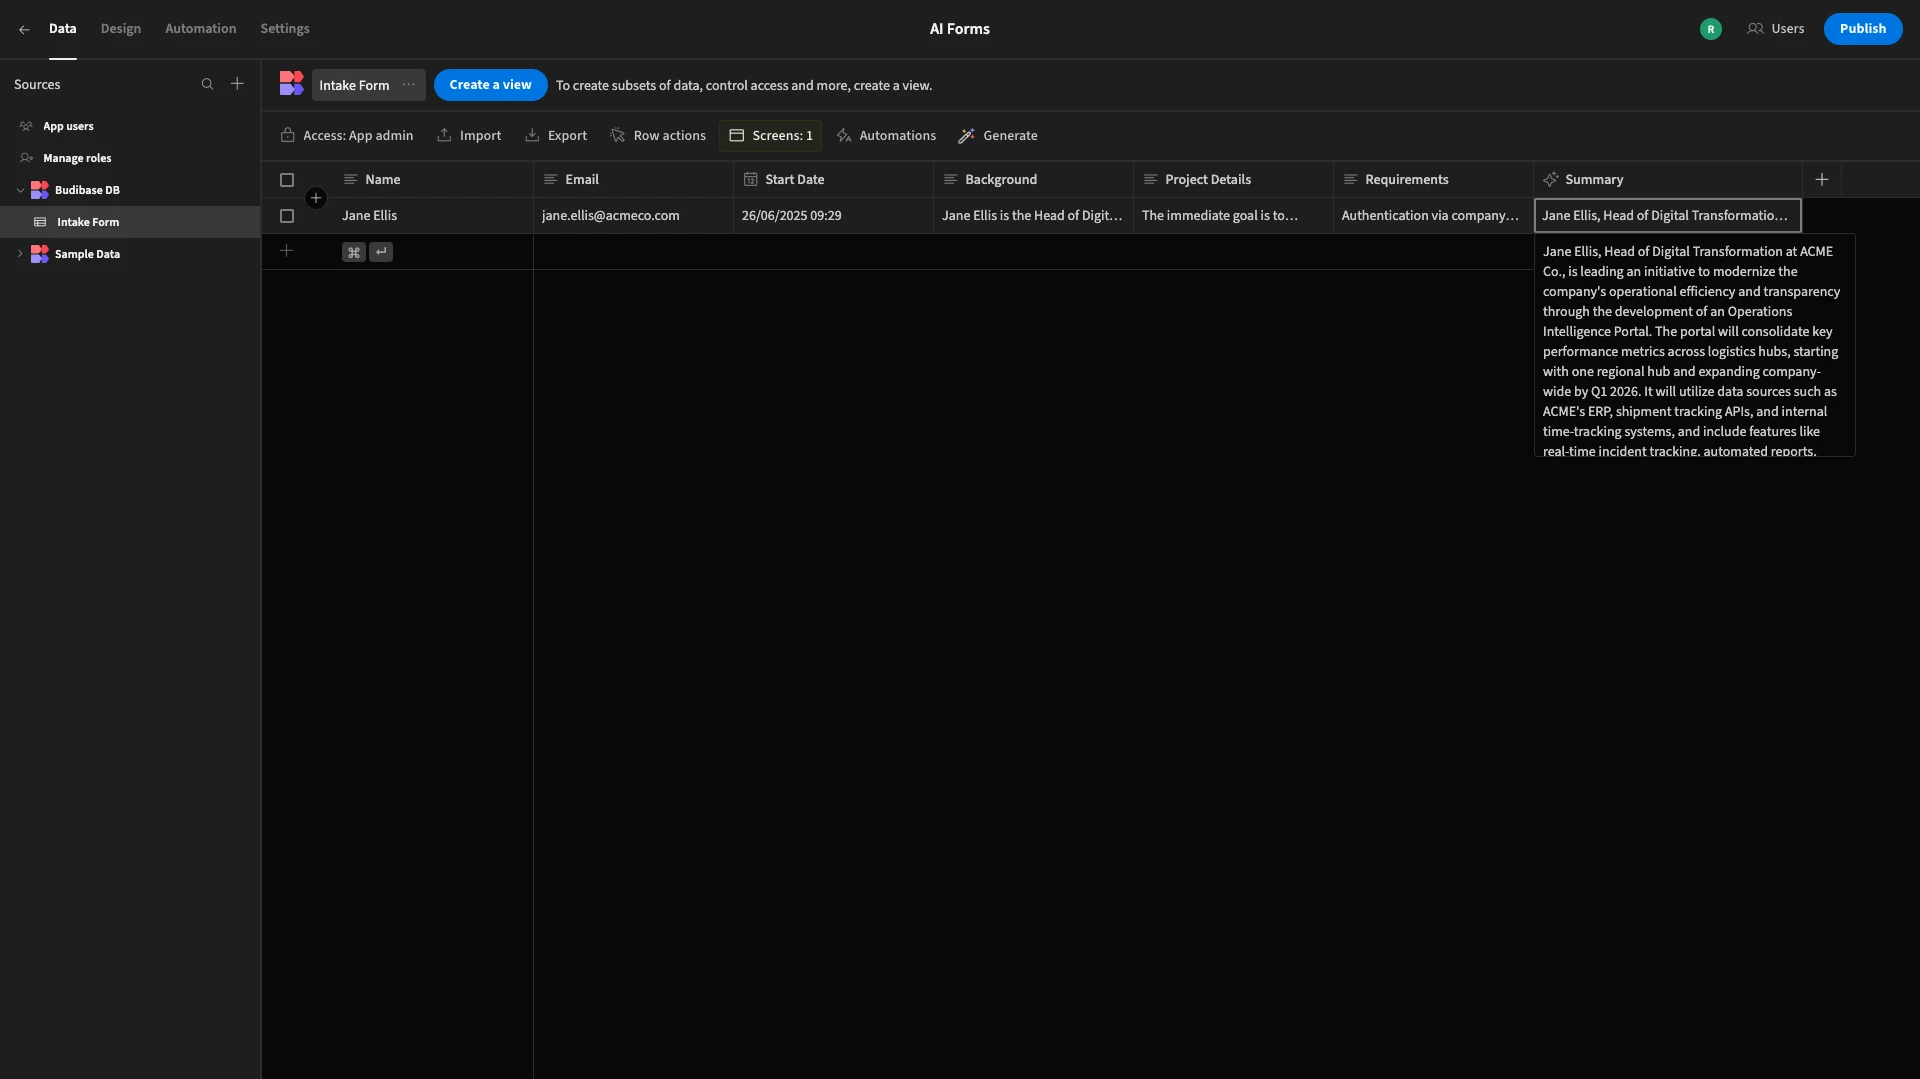
Back in the Data section, we can see that this has worked, with the Summary column populated with a single-paragraph overview of the information provided.
3. Sentiment analysis
Some of the most exciting use cases for AI-powered forms involve dealing with qualitative information. Sentiment analysis is perhaps the most prominent example of this.
Essentially, this means taking user-submitted natural language data and using AI to determine the overall sentiment behind it, whether positive, negative, or neutral. This can be useful in a range of contexts, enabling us to track the overall trends in our customer feedback.
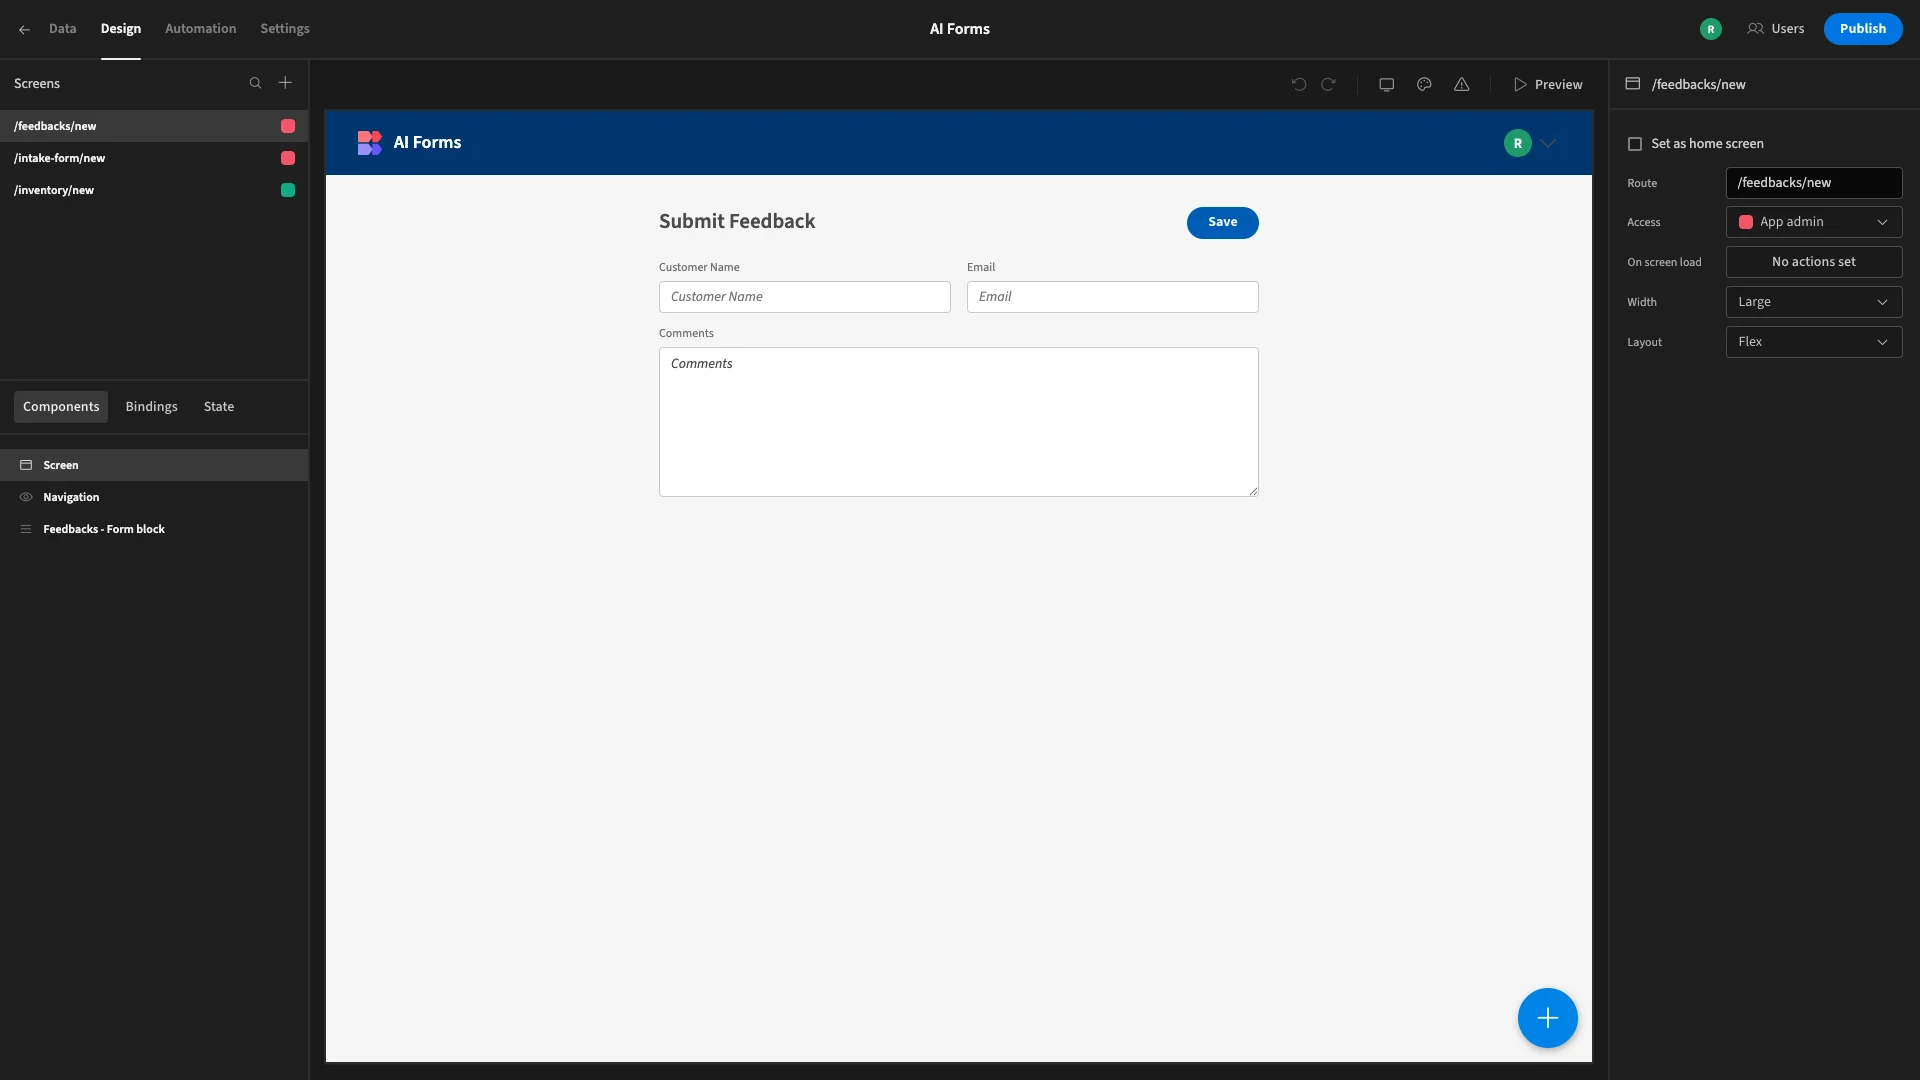
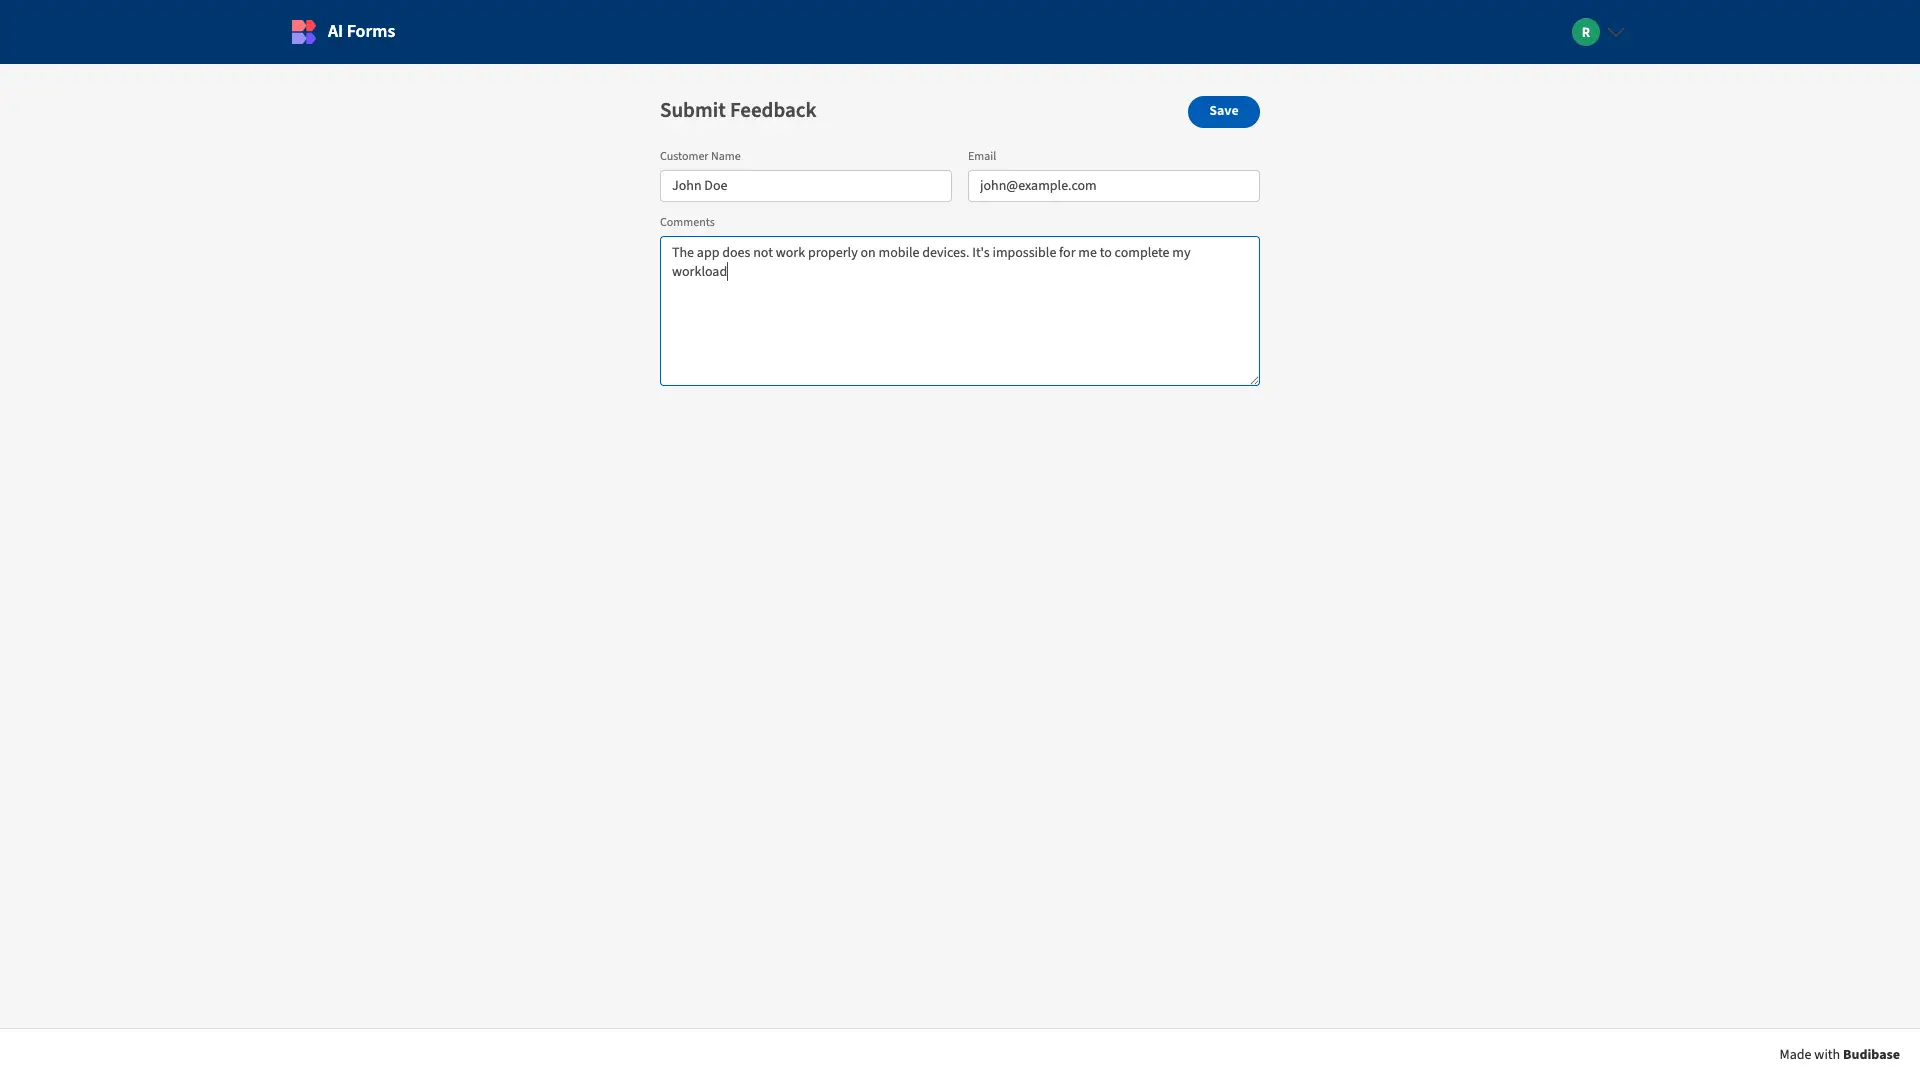
So, in our example, we’re starting with a customer feedback form.
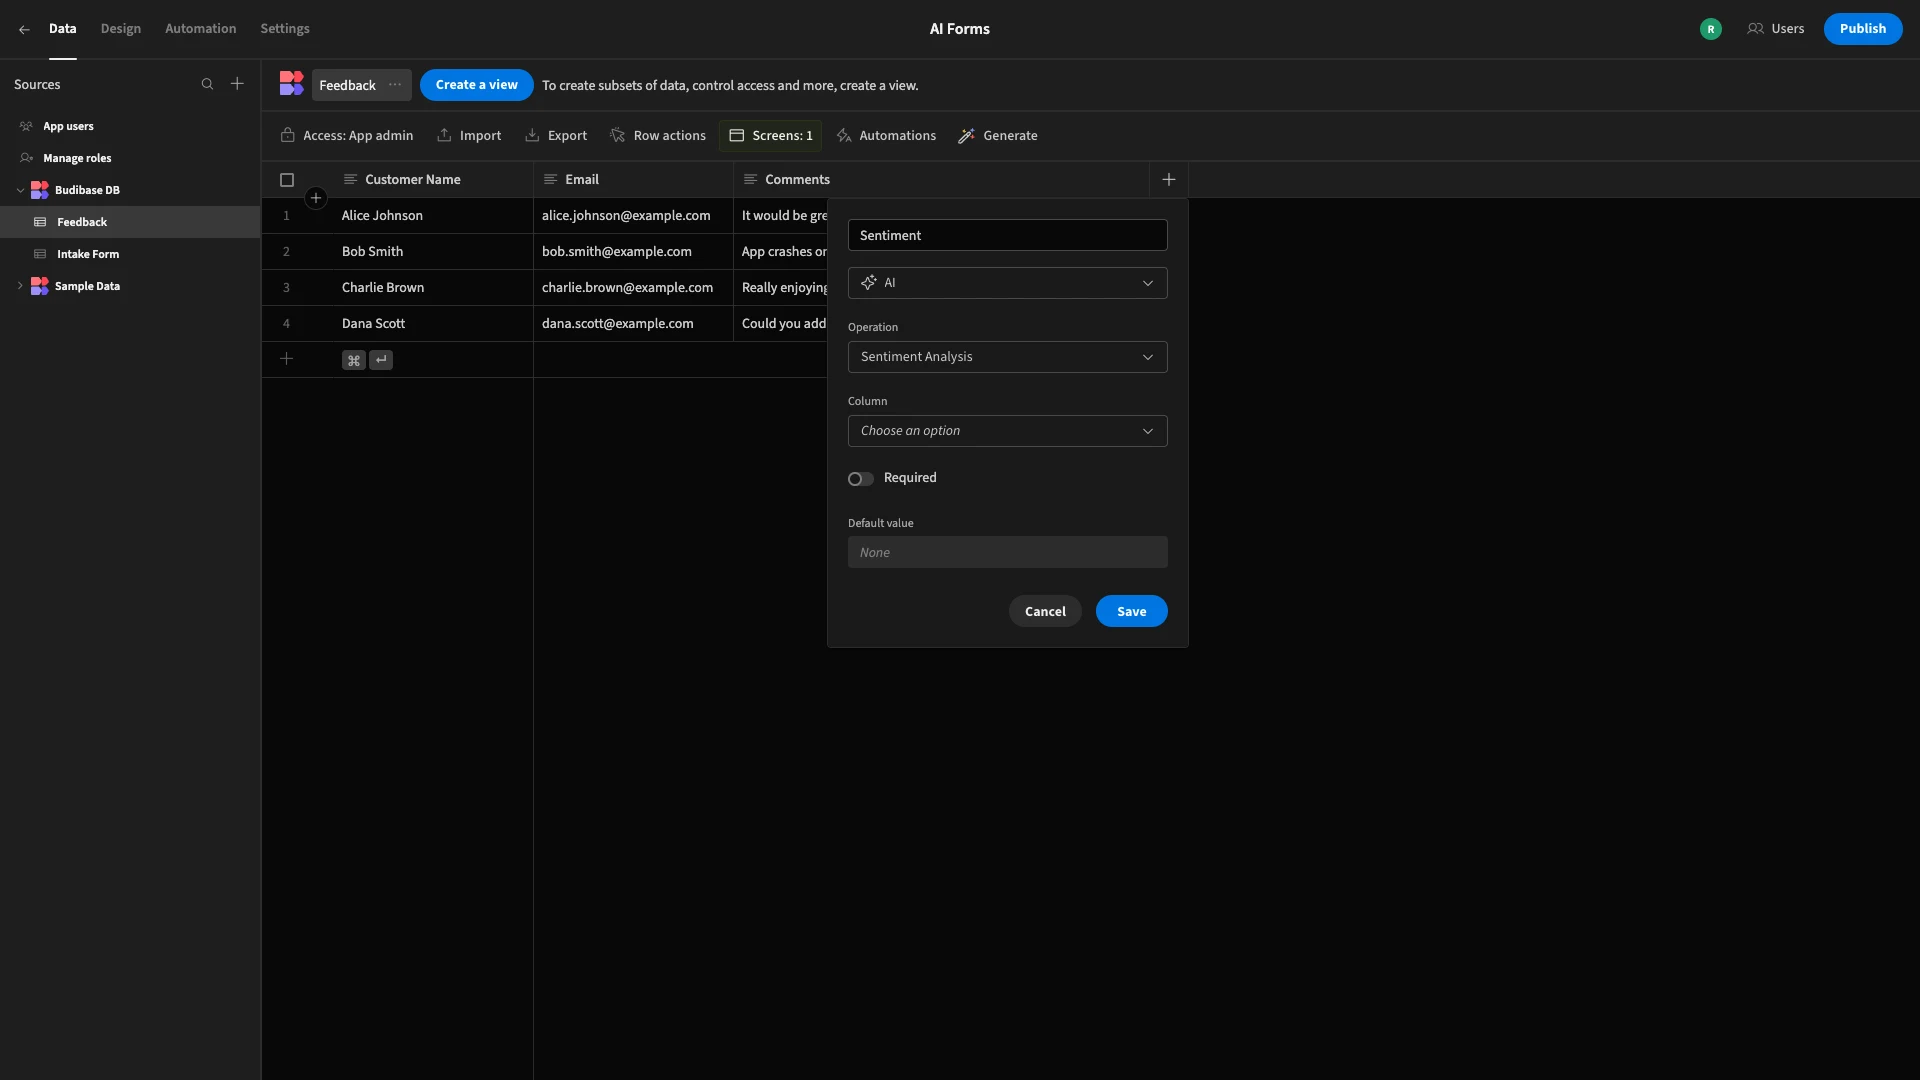
This time, we’ll call our AI Column Sentiment and choose Sentiment Analysis for our operation.
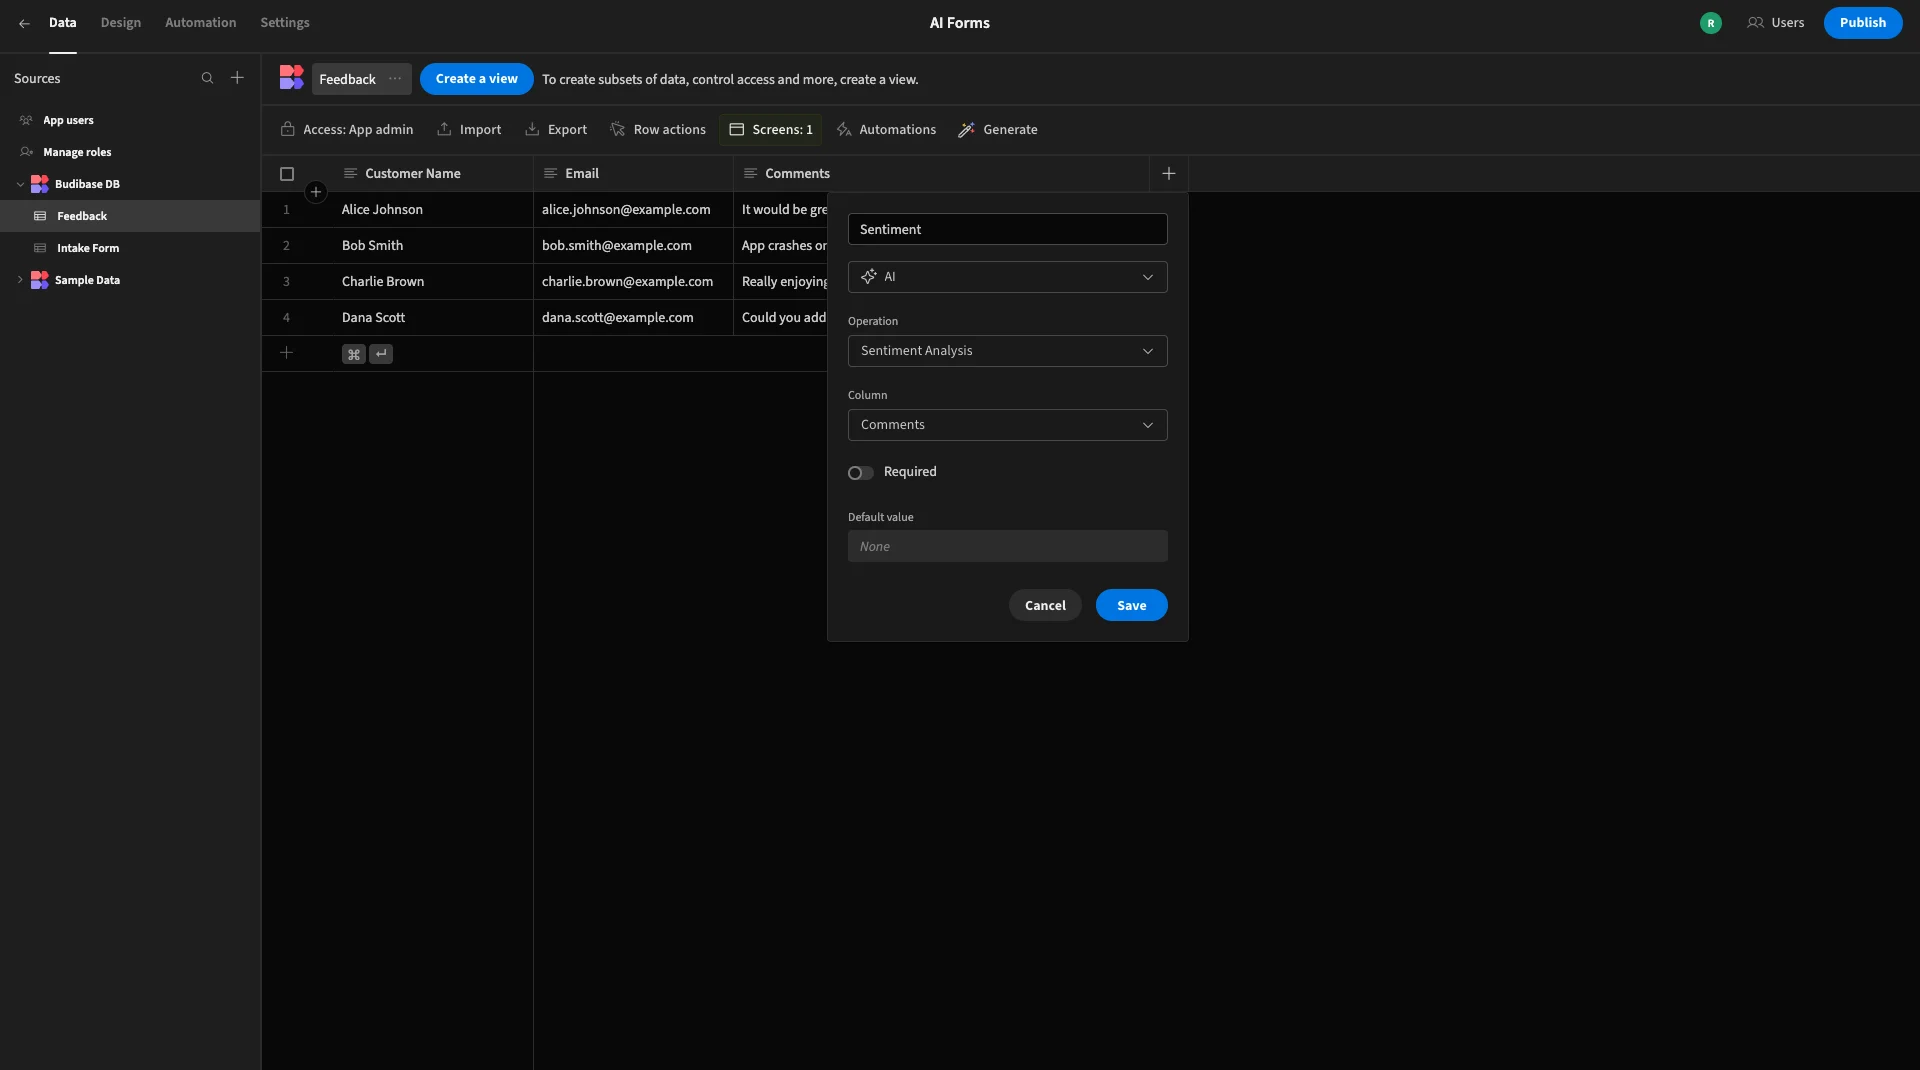
We’re choosing Comments under the Columns dropdown.
We’ll submit some form data to test this out again.
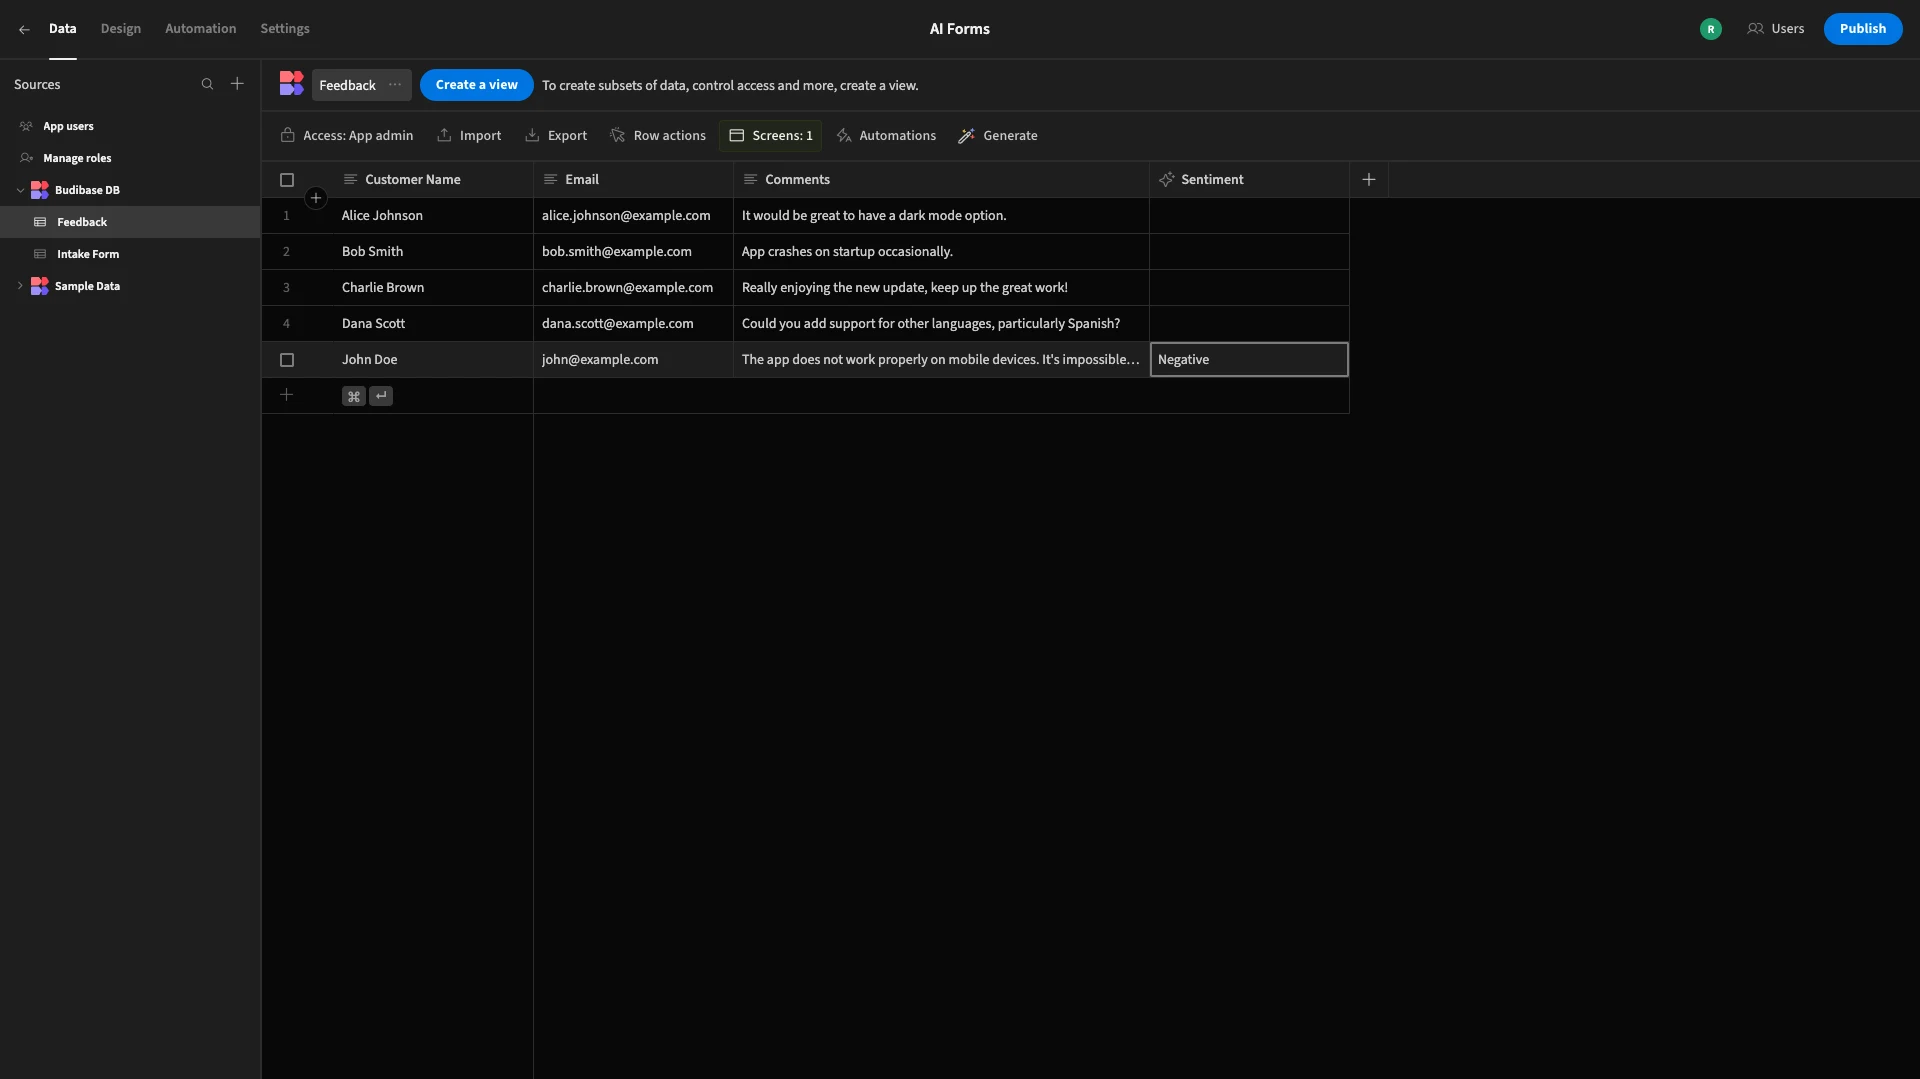
We can see in the Data section of Budibase that our AI form has correctly identified the sentiment behind our comment.
4. Triaging tickets
Ticketing workflows are mission-critical across all sorts of teams and departments. The challenge is that these typically also require a high level of human intervention to respond to submissions.
One key bottleneck is simply determining which team a ticket should be routed to, along with how we should prioritize it.
We’re going to explore one solution to this by building a form that automatically triages tickets with AI.
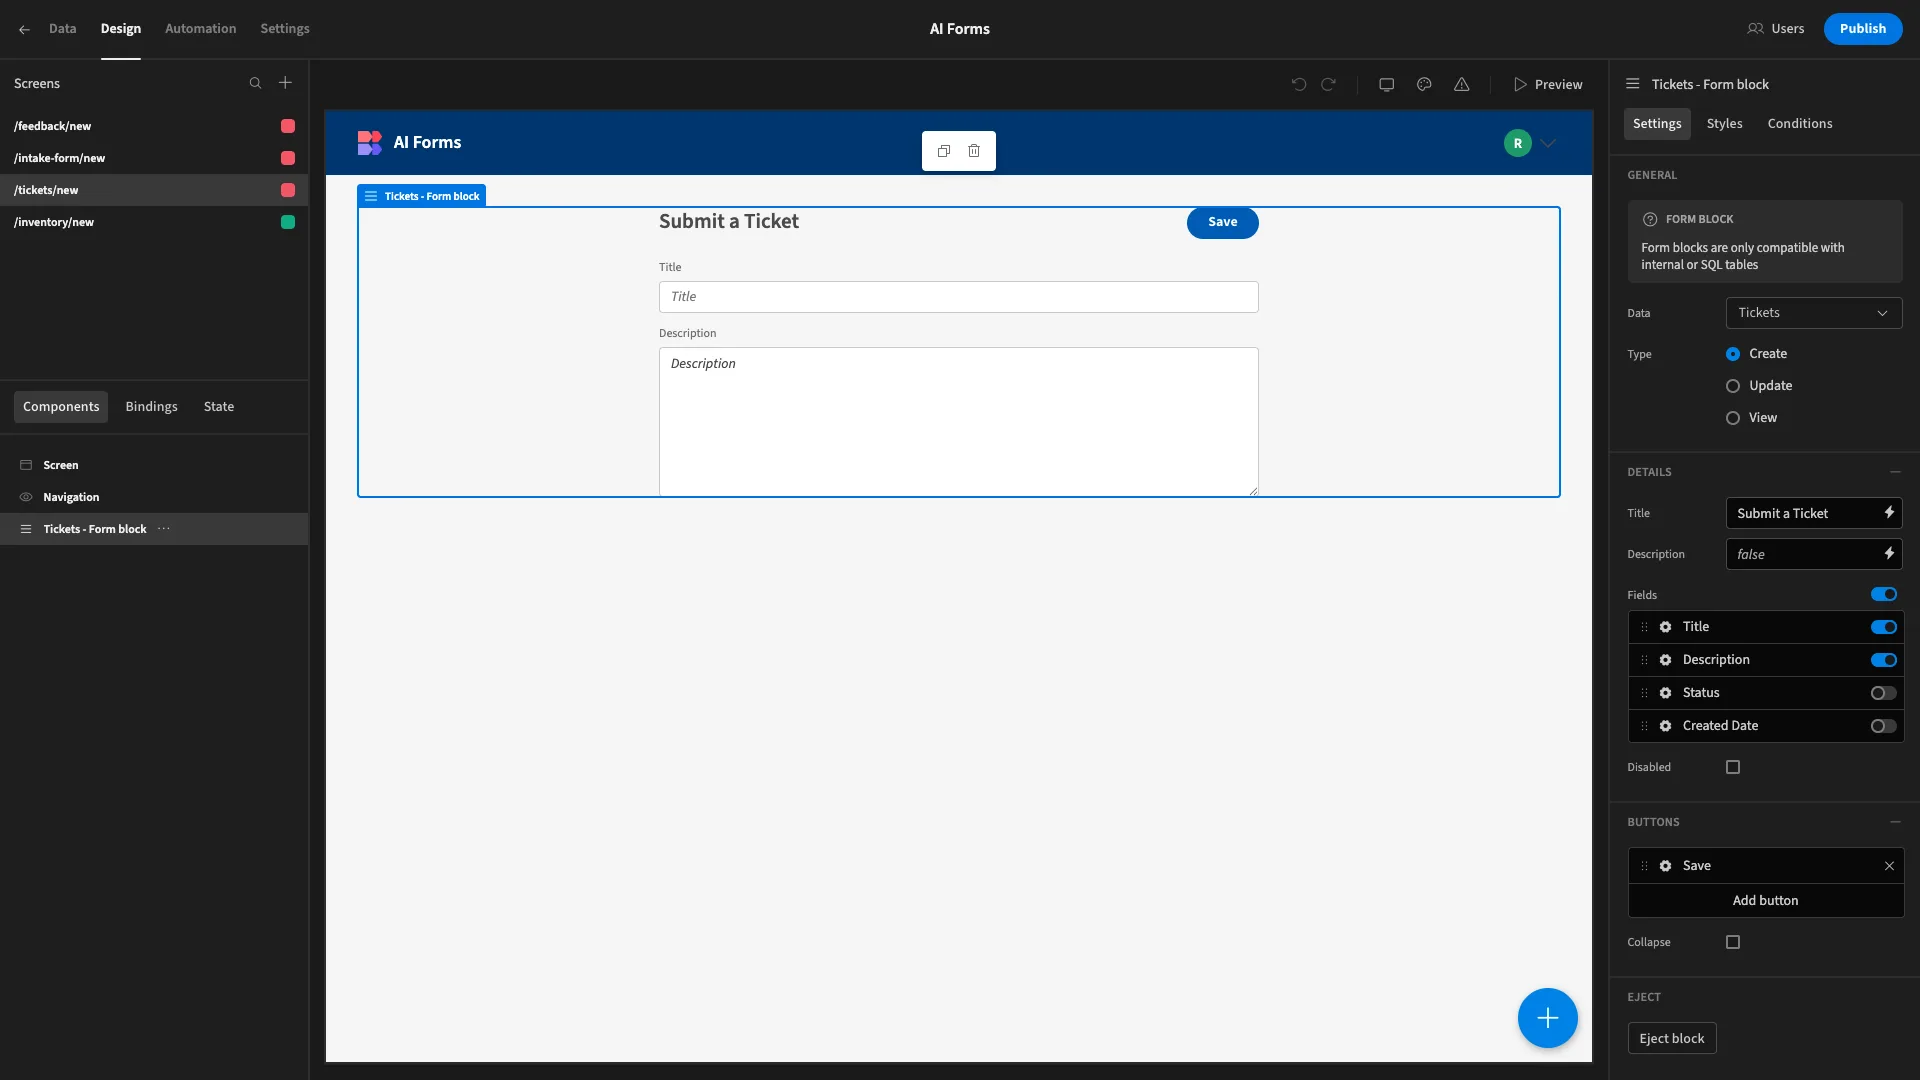
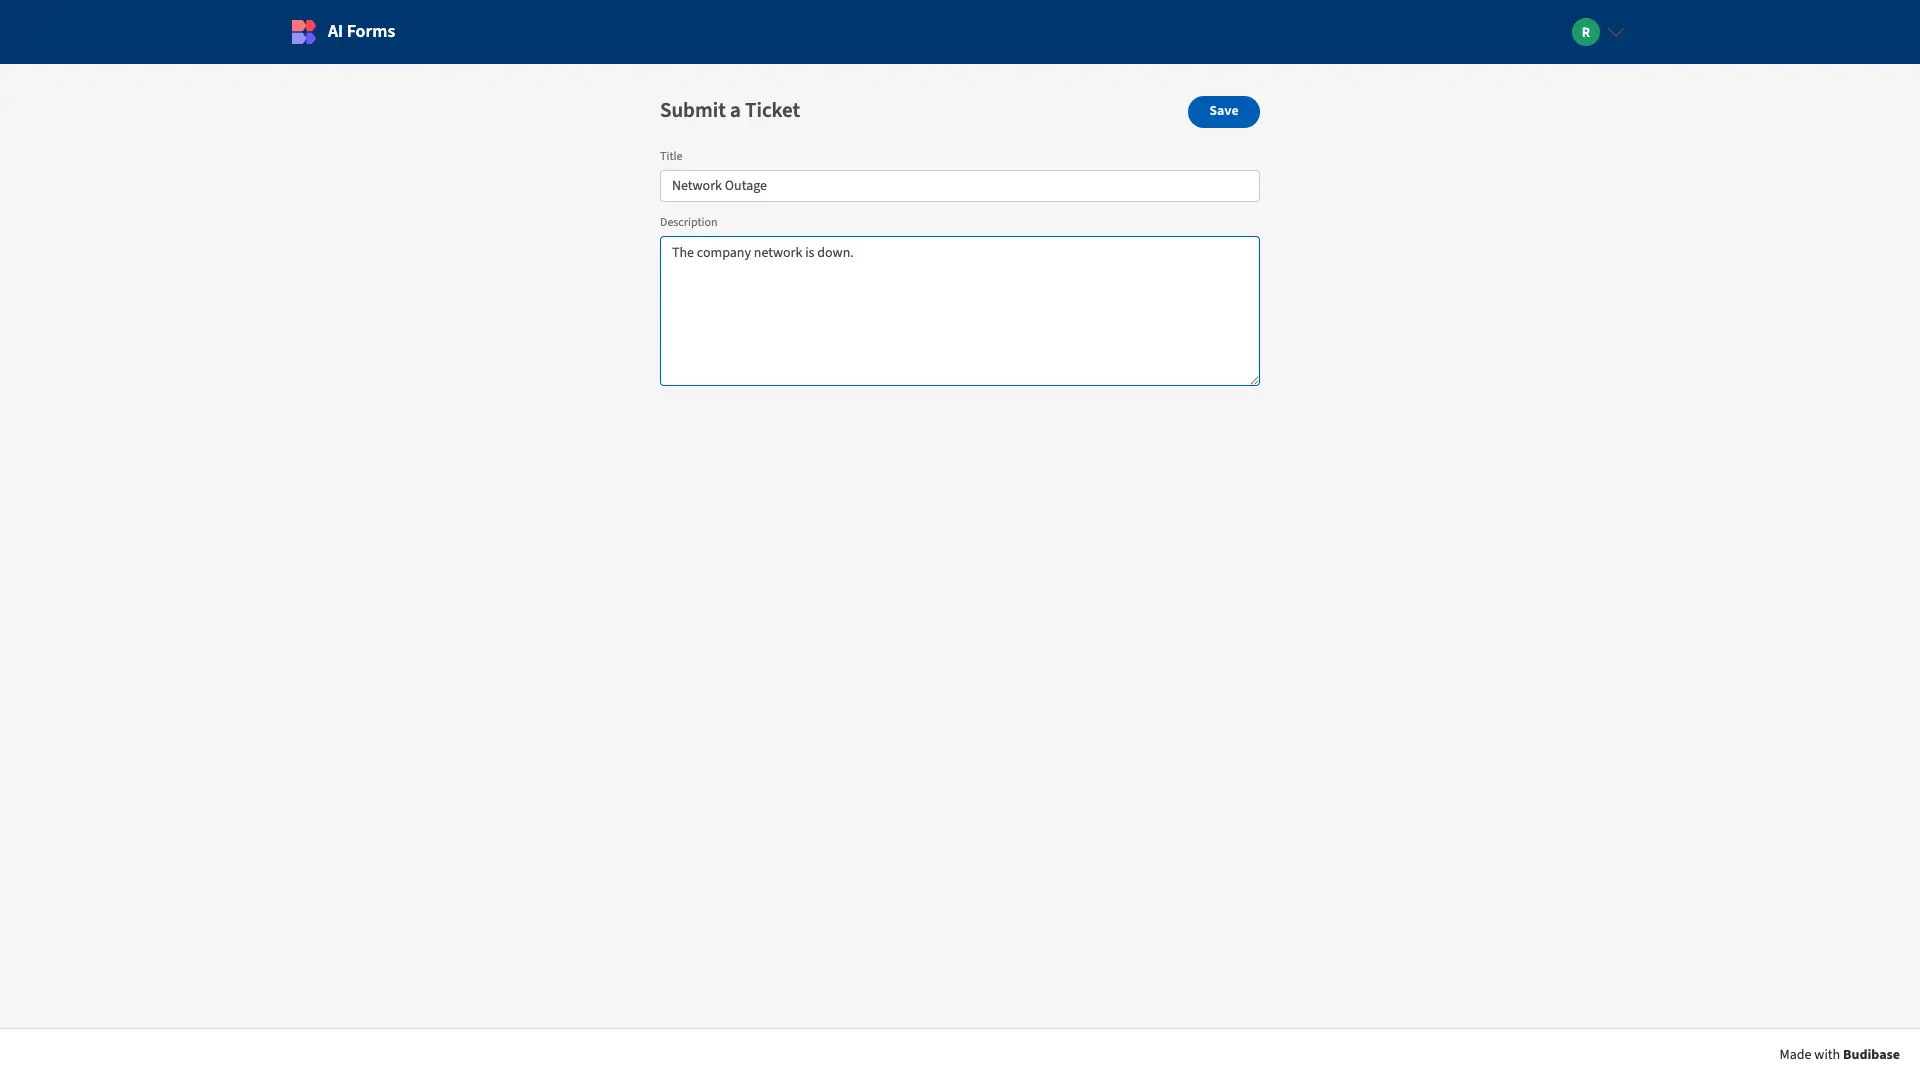
Here’s a simple ticketing form. We’re also automatically populating Date and Status attributes using Budibase’s default values.
The AI function we’re going to use is a little more complex than what we’ve seen so far in our other examples. Specifically, we want the model to analyze our user inputs and provide two values.
We’ll ask it to return this in a single column as a JSON object, which could be used for downstream processing.
To achieve this, we’ll need to write our own prompt from scratch.
We’ve called our AI column Triage and chosen Prompt as the operation.
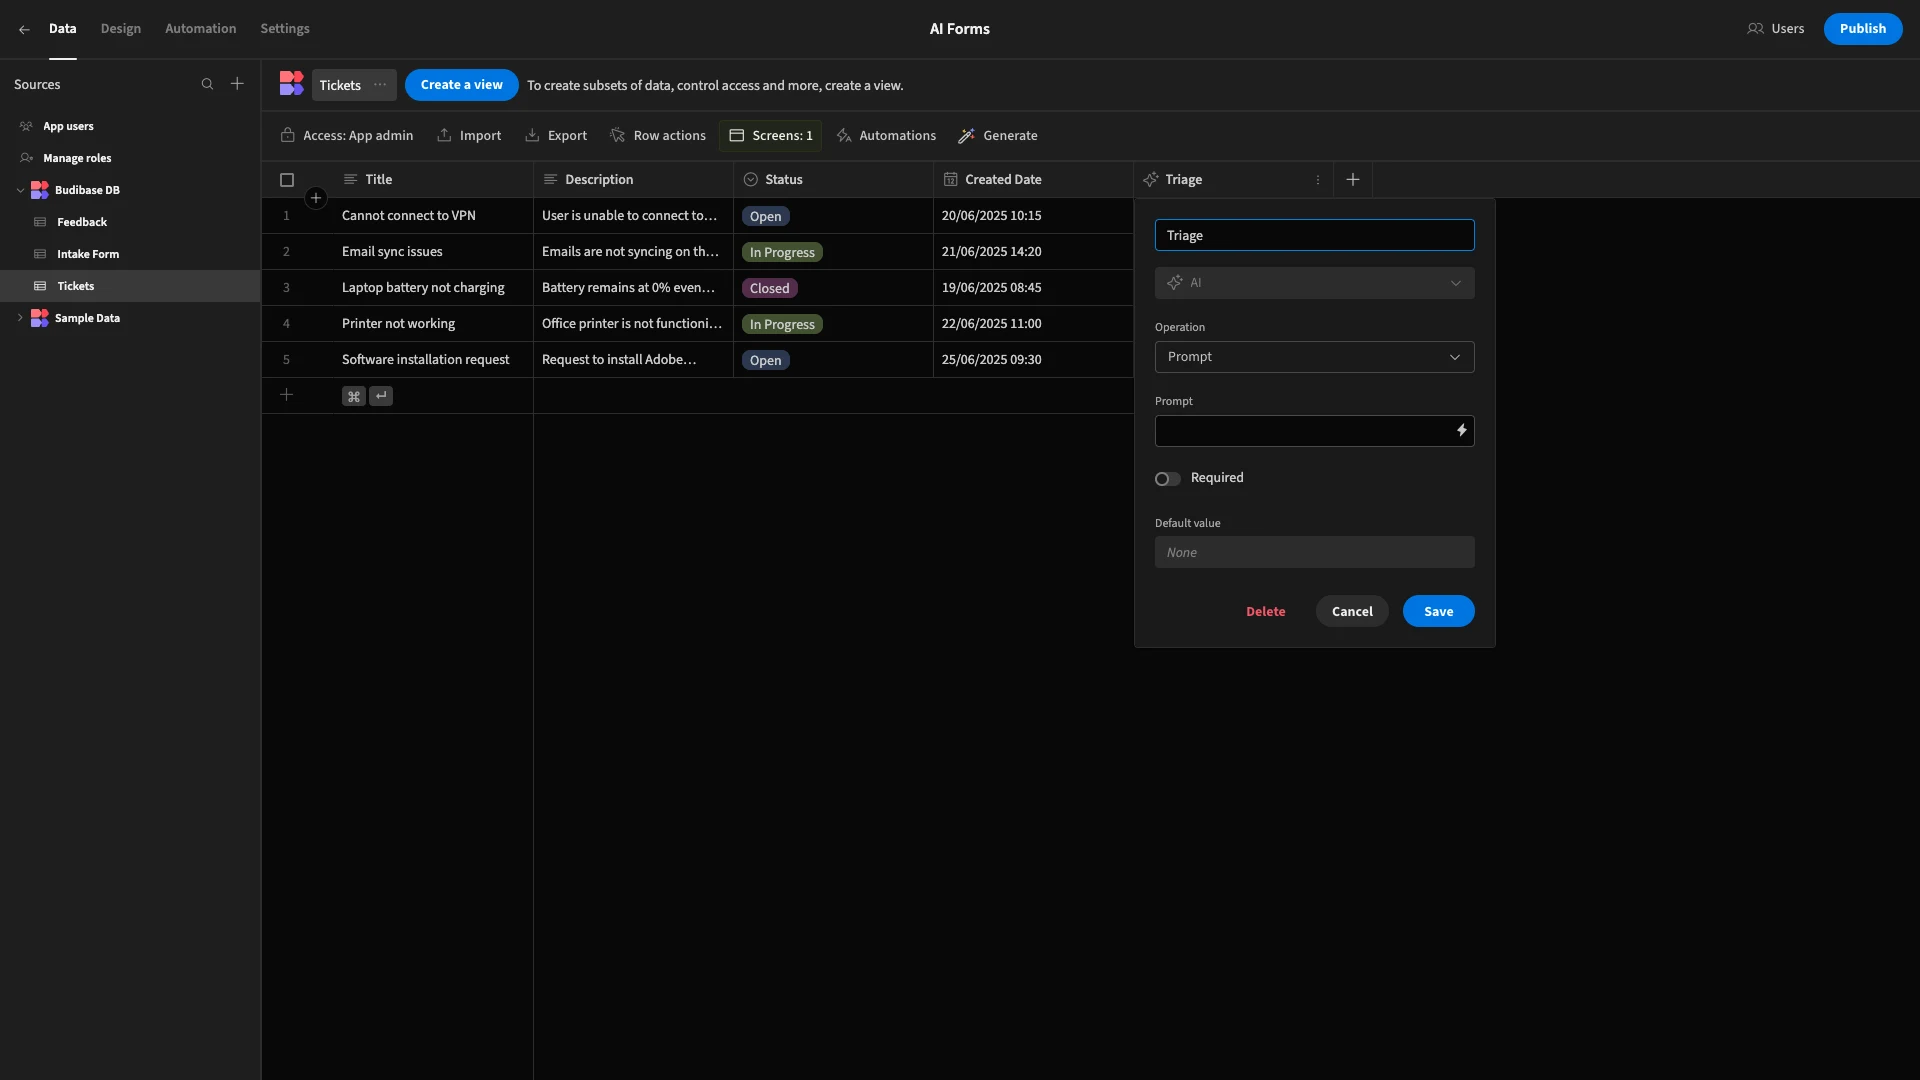
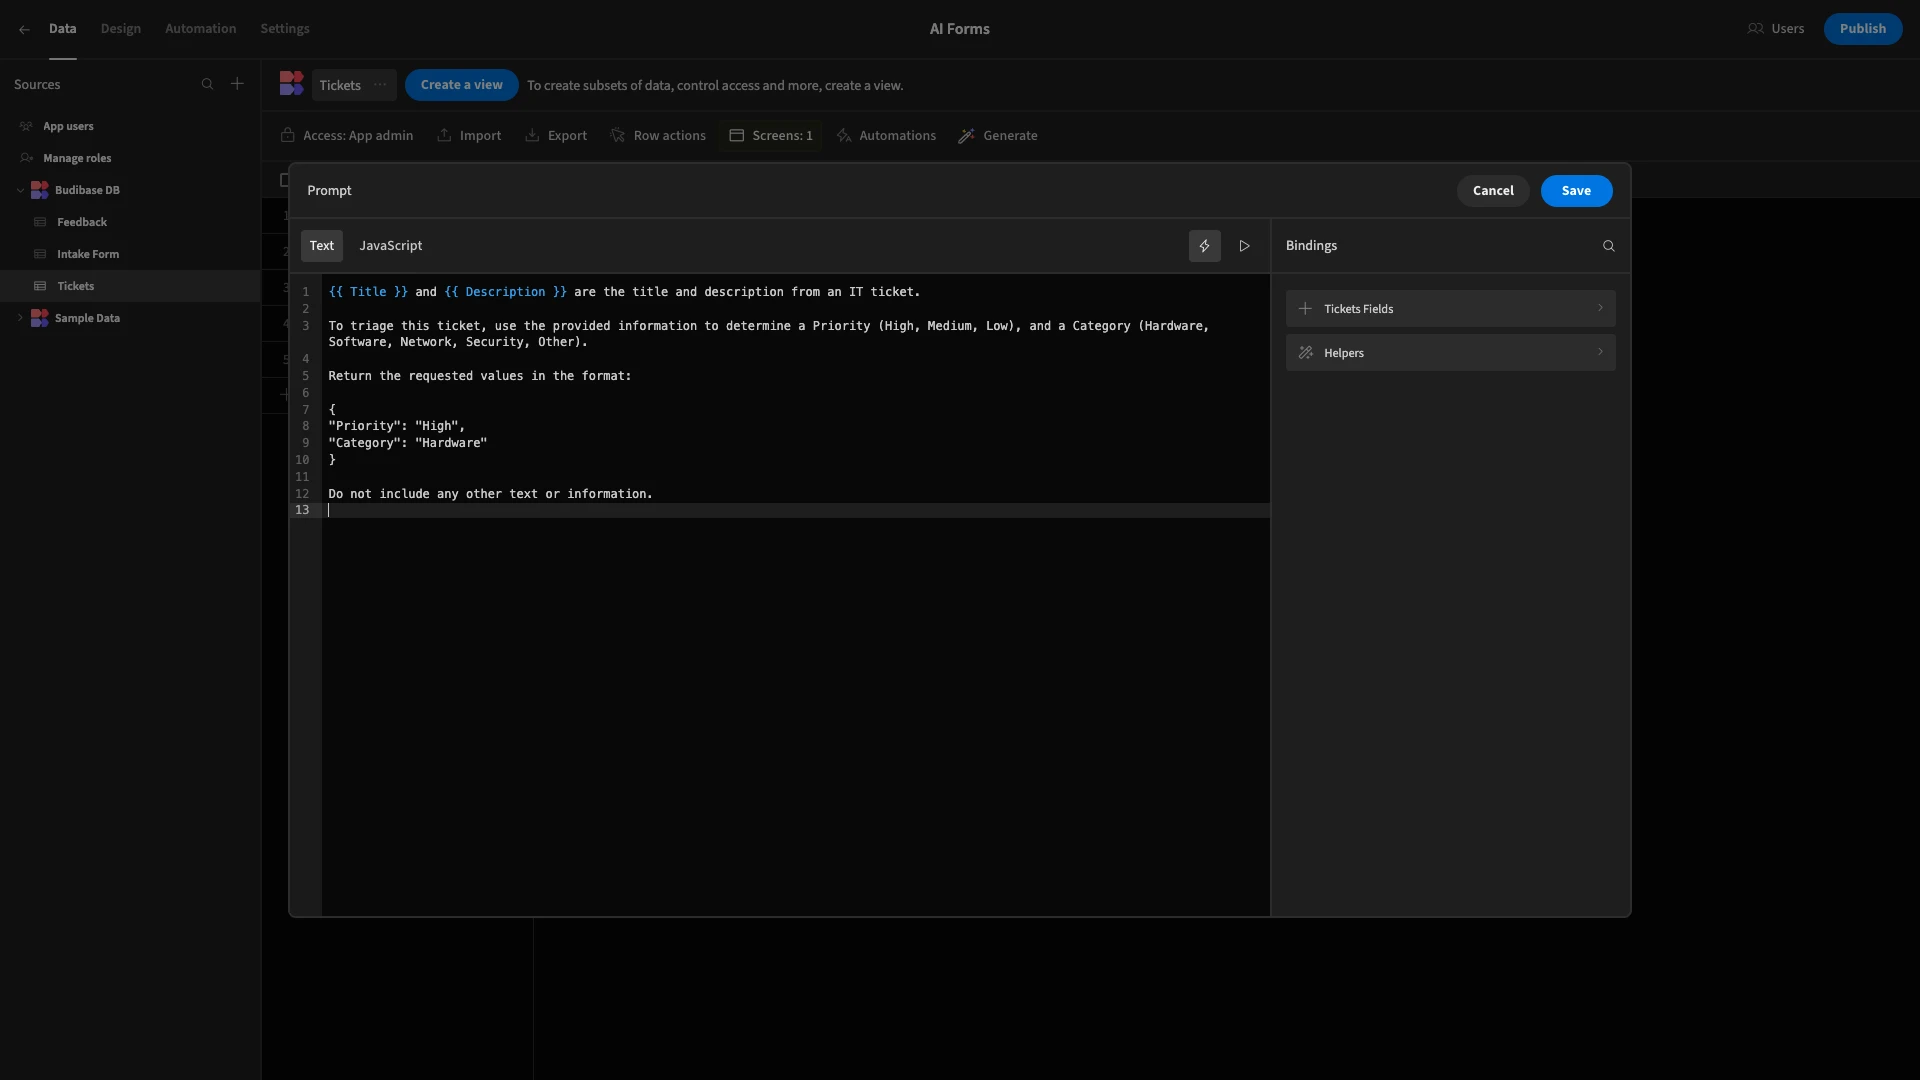
Then, we’ll hit the lightning bolt icon to open the modal to create our prompt.

The first thing we need to do is expose our AI column to the ticket data. We can access the relevant variables under Ticket Fields on the right-hand side of the screen. Our prompt will start with.
1{{ Title }} and {{ Description }} are the title and description from an IT ticket.Next, we want to define the variables that we need in our response. We’ll do this with the following.
1To triage this ticket, use the provided information to determine a Priority (High, Medium, Low), and a Category (Hardware, Software, Network, Security, Other).Finally, we want to specify the exact format we need our response returned in. We want a JSON object with no other text. So, we’ll add.
 1Return the requested values in the format:
 2
 3{
 4
 5"Priority": "High",
 6
 7"Category": "Hardware"
 8
 9}
10
11Do not include any other text or information.
Here’s our completed prompt.
We’ll complete our form to add a new ticket.
In the Data section, we can see that our AI model has returned the correctly formatted data object.
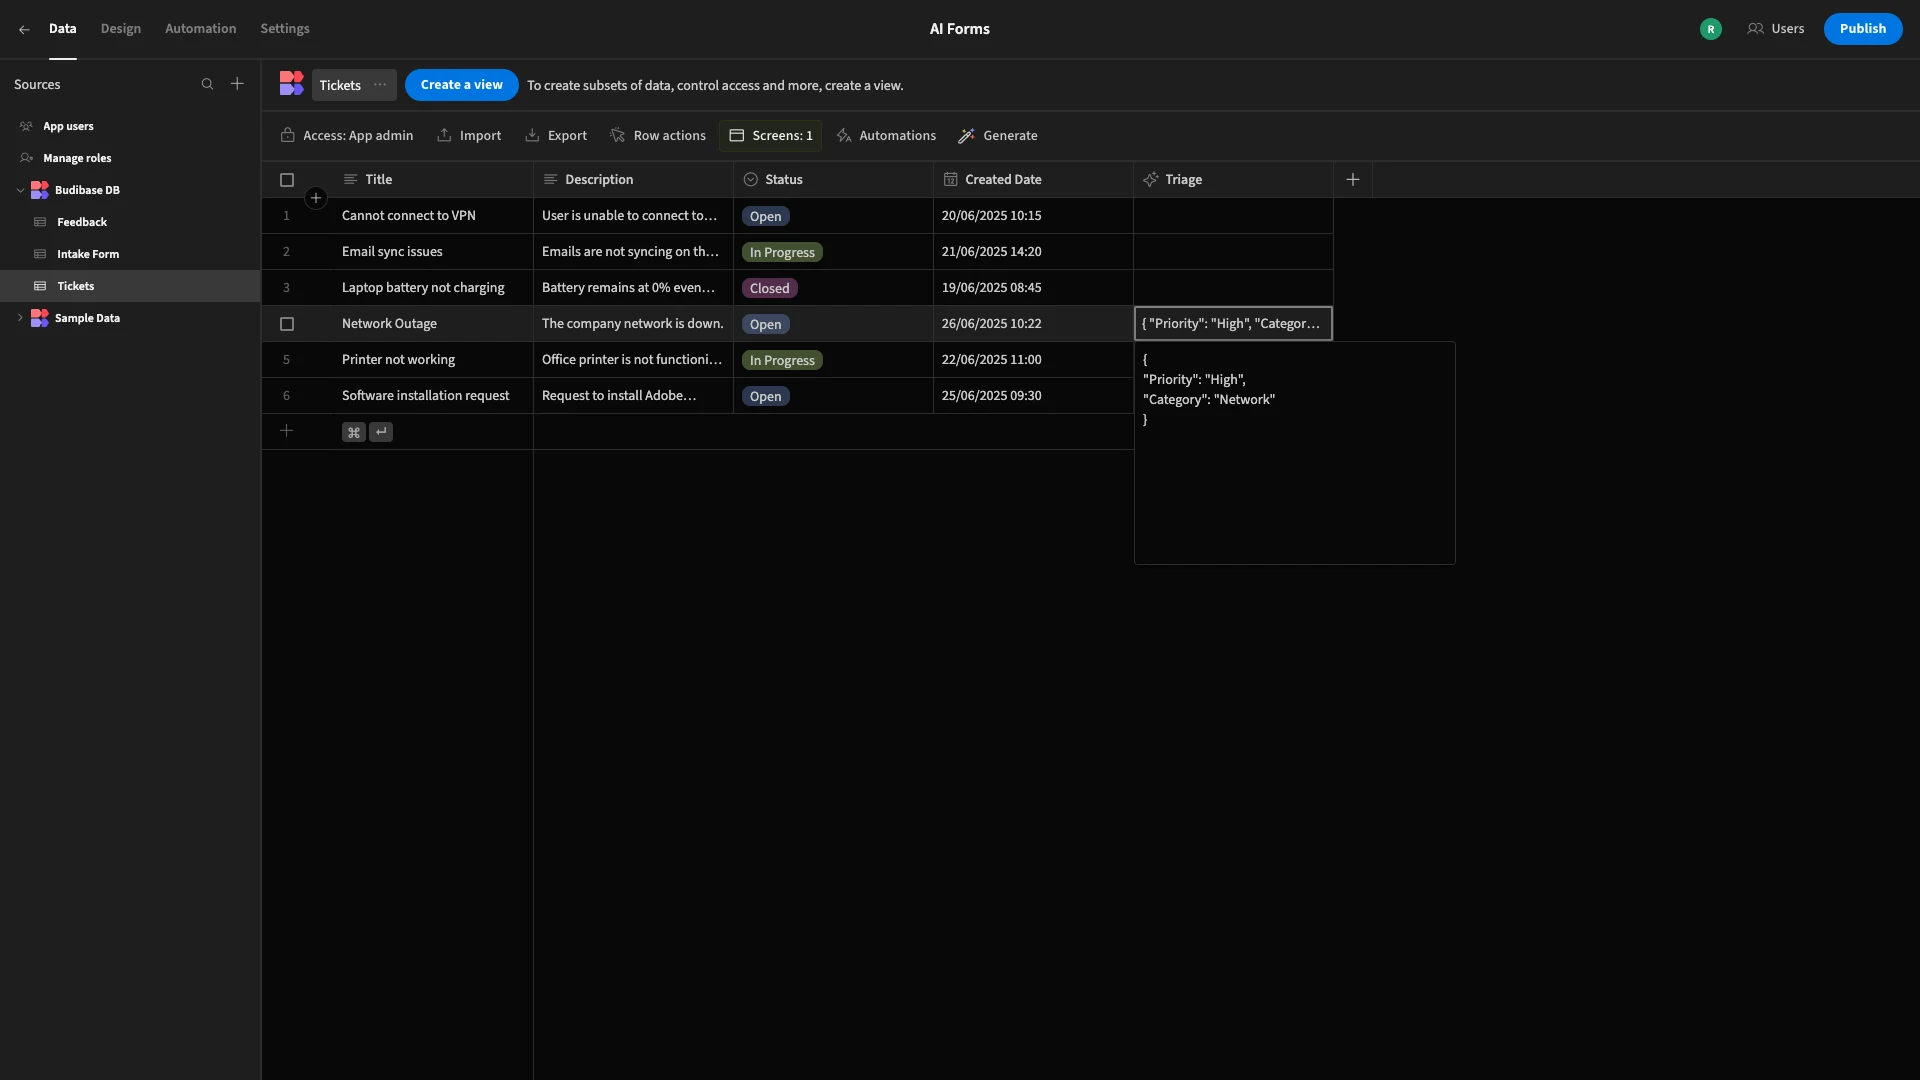
We can then use this JSON object for downstream processing, including placing our ticket in the appropriate queue.
5. Triggering AI automations
Lastly, we said earlier that some AI-powered forms trigger automations leveraging LLMs at the point of submission. We can also achieve this using Budibase’s dedicated AI automation actions, leading to more complex, sophisticated AI forms.
For our example, we’re going to take the information provided by a user in our previous ticketing form, along with the JSON data that our AI column returned. We’ll use this to carry out certain actions only on submissions that have their Priority set to high.
Specifically, we want to create a resolution plan and send this to an API, representing our priority ticketing queue.
We’ll start by creating a new automation rule with Row Created as our trigger, based on our Ticket table.
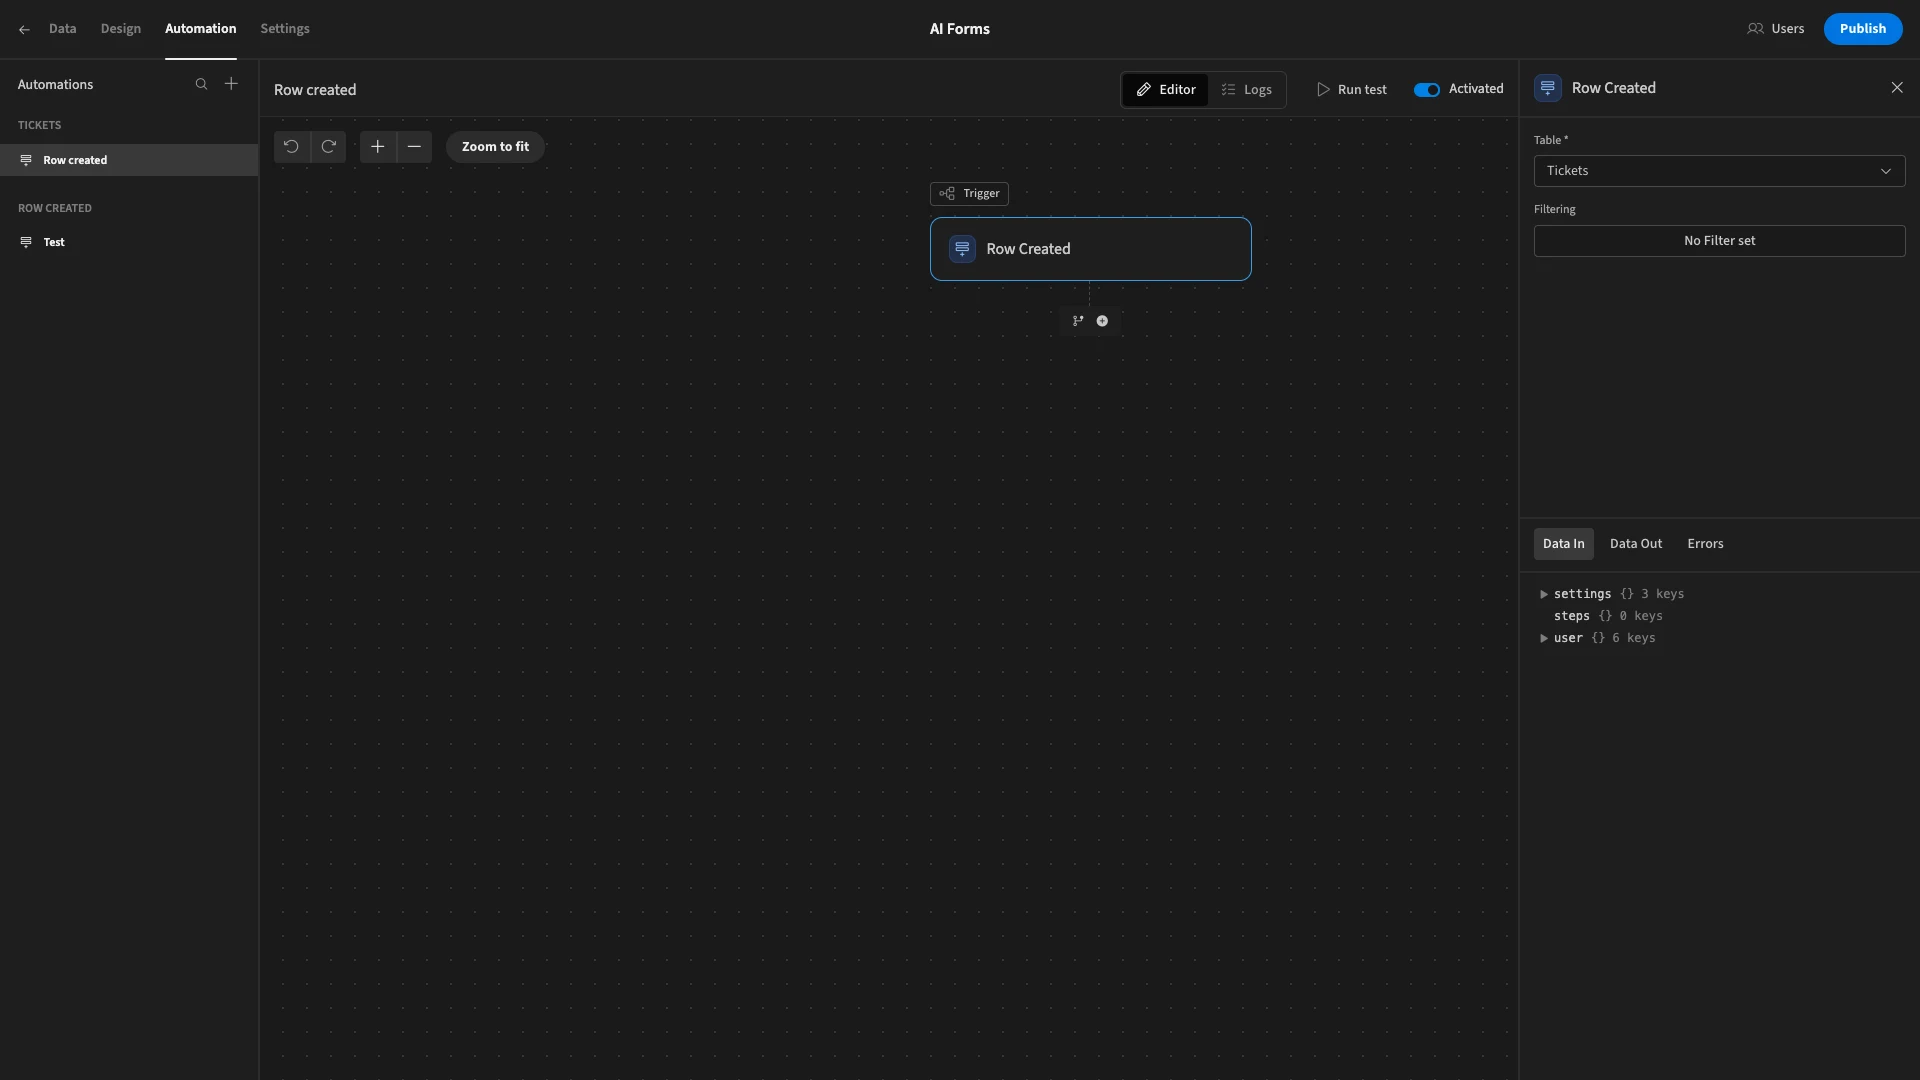
Then, we’ll hit the + icon to access a list of available actions.
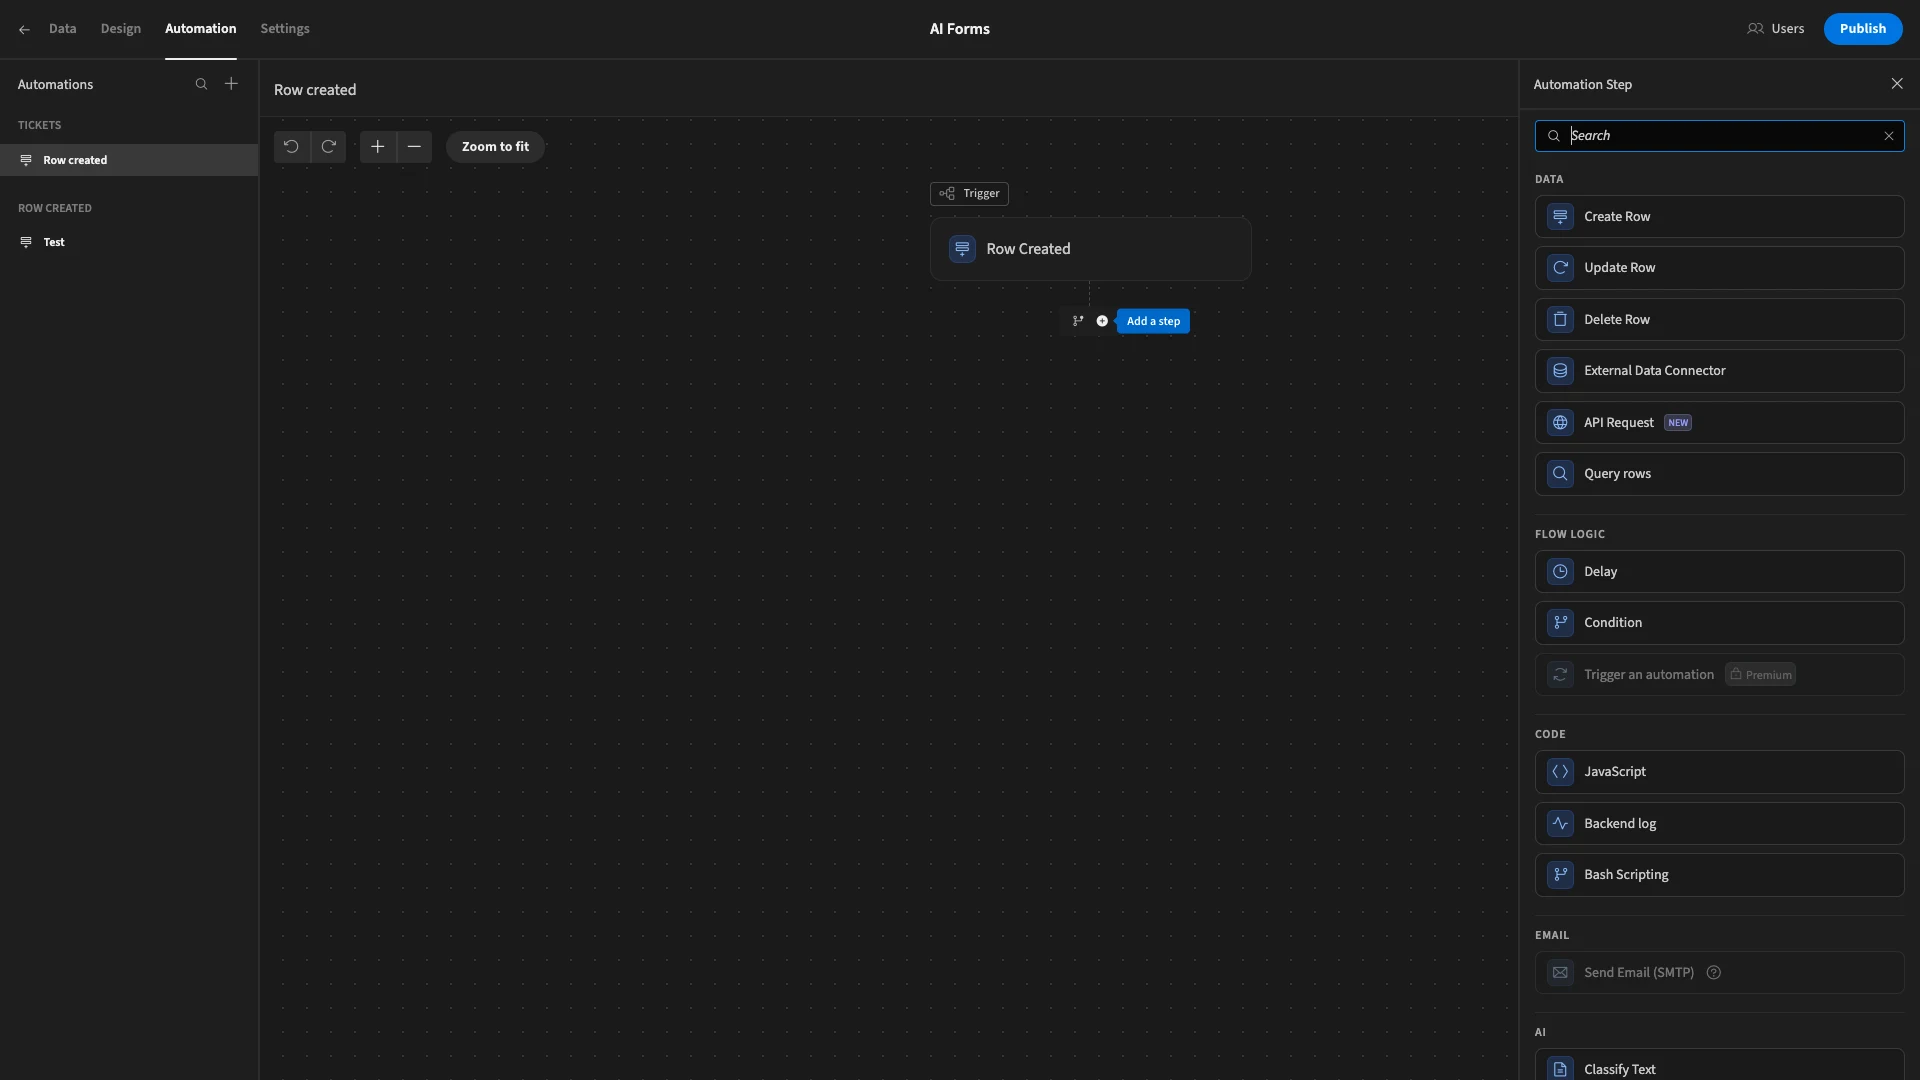
Remember, we only want to proceed with our automation rule if the AI column has set the row’s Priority to High.
To achieve this, we’ll add a Condition action.
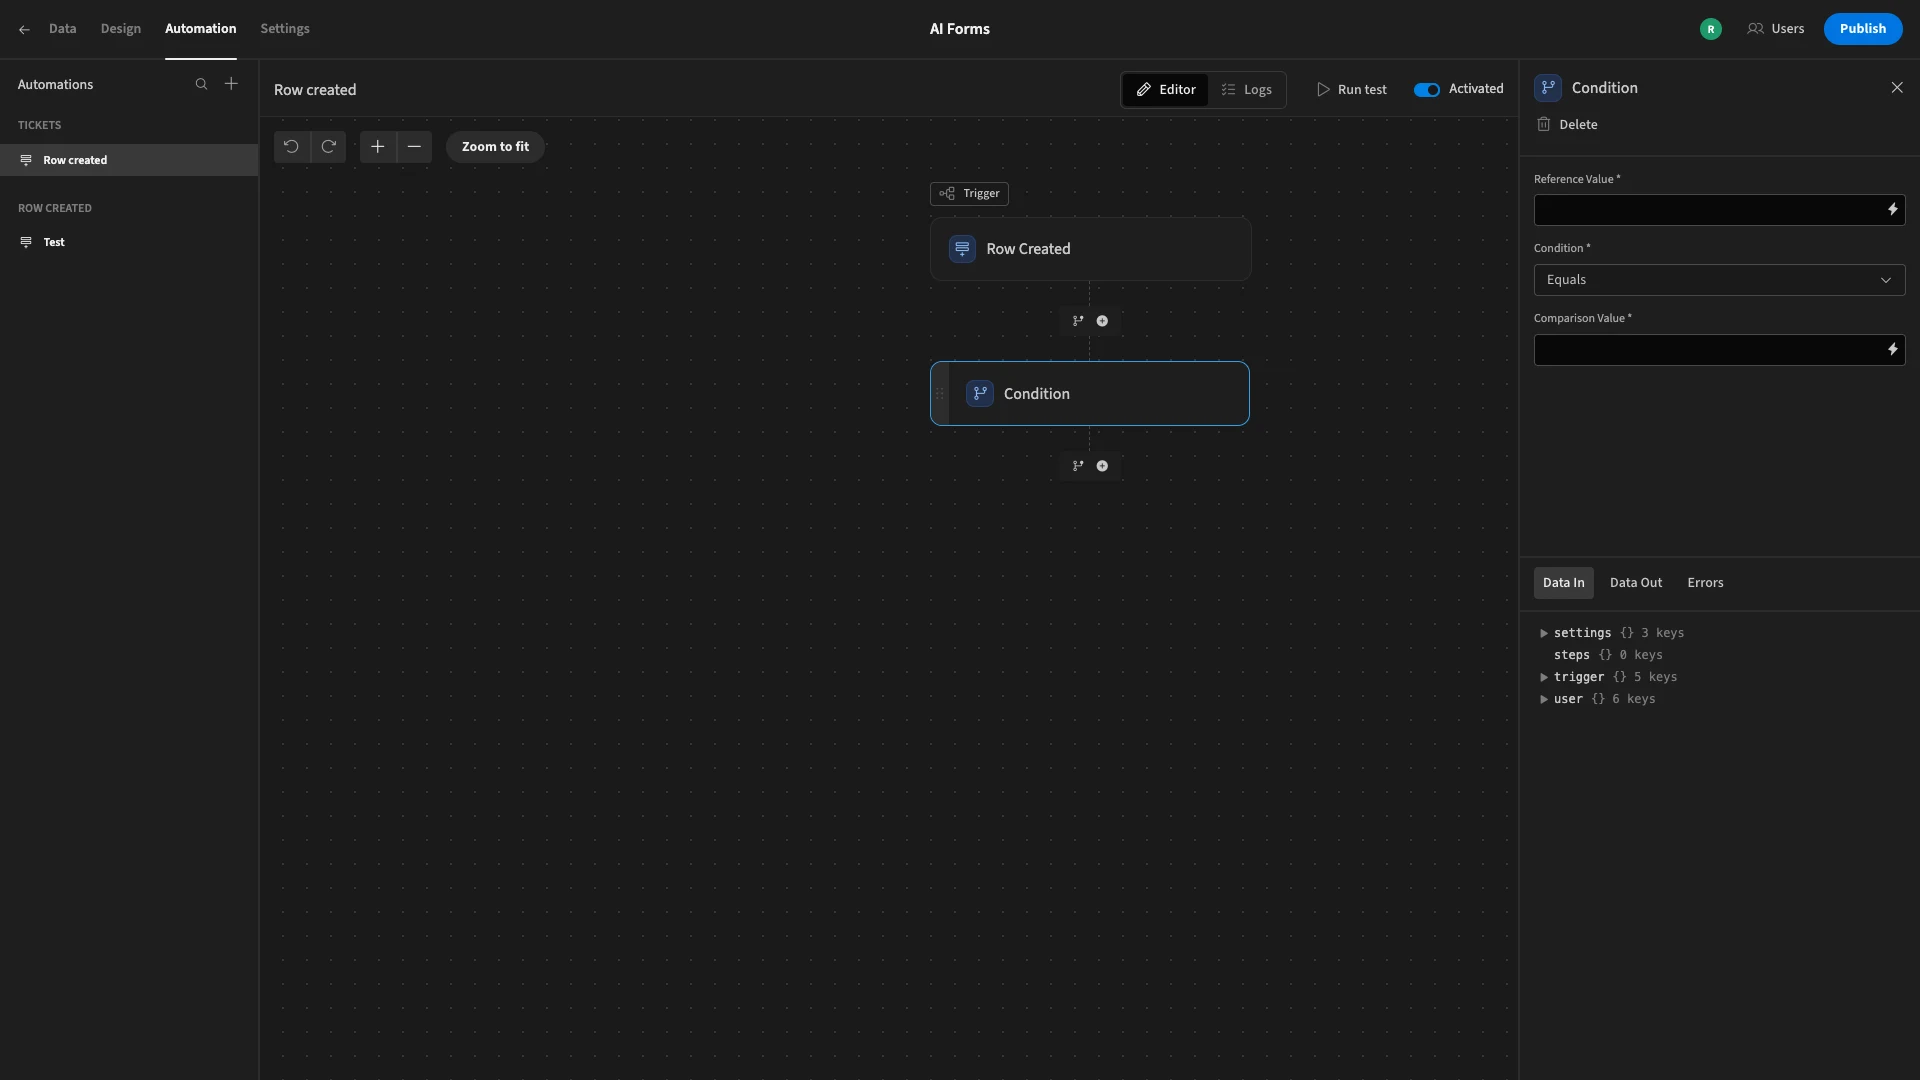
This accepts a Reference Value and allows us to specify a Condition and Comparison Value. If the condition is met, our automation rule will carry on. Otherwise, it’s stopped.
The first thing we need to do is provide our reference value. Remember, we want to use the Priority that our AI column created in the previous example. However, this presents an additional challenge.
The Triage in our database is formatted like a JSON object, but it’s actually stored as a string.
To isolate the data we need for our automation, we’re going to use a little bit of custom JavaScript. Start by hitting the lightning bolt icon beside Reference Value and then selecting the JavaScript editor.
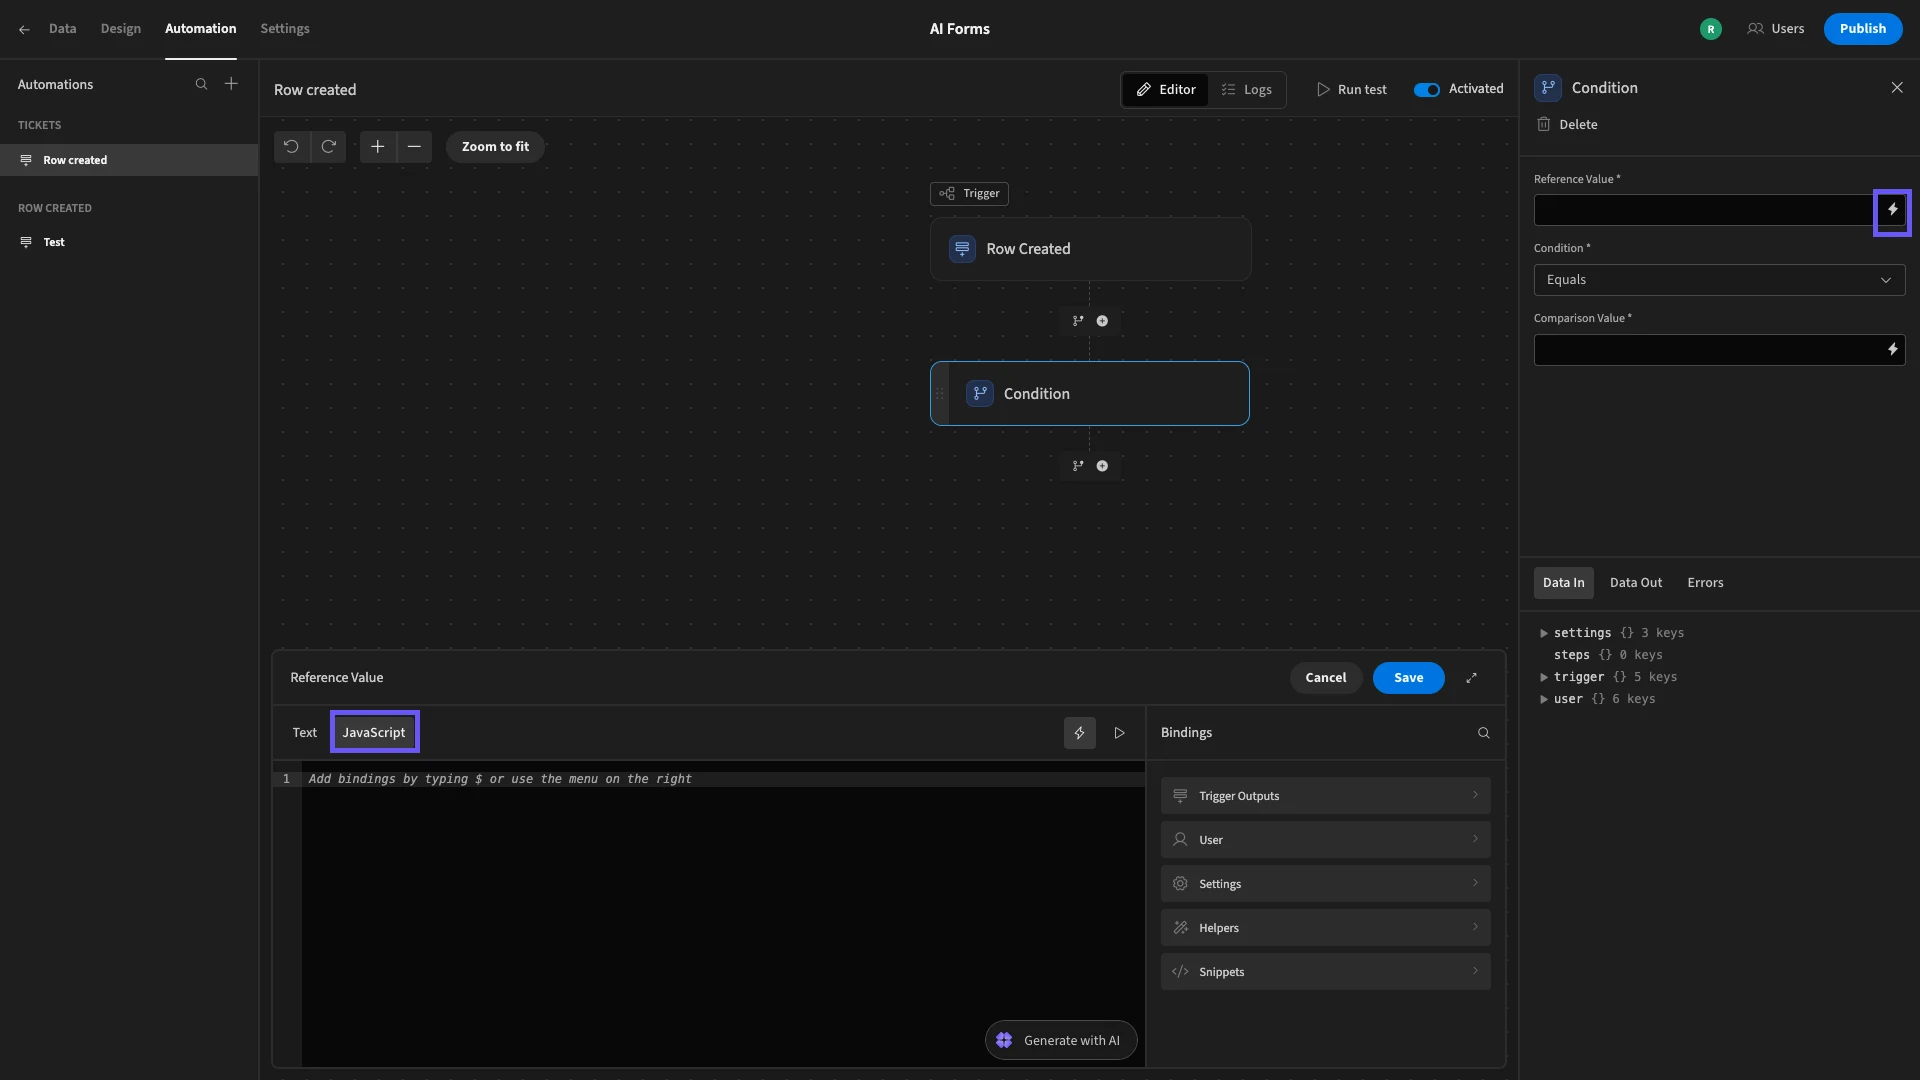
We want to do two things. First, we’ll convert our Triage value to a JSON object. Then, we’ll return the value of Priority within this.
We can achieve this with the following code.
1var triage = JSON.parse($("trigger.row.Triage"))
2
3return triage["Priority"]
We can see that this has worked in the preview window.
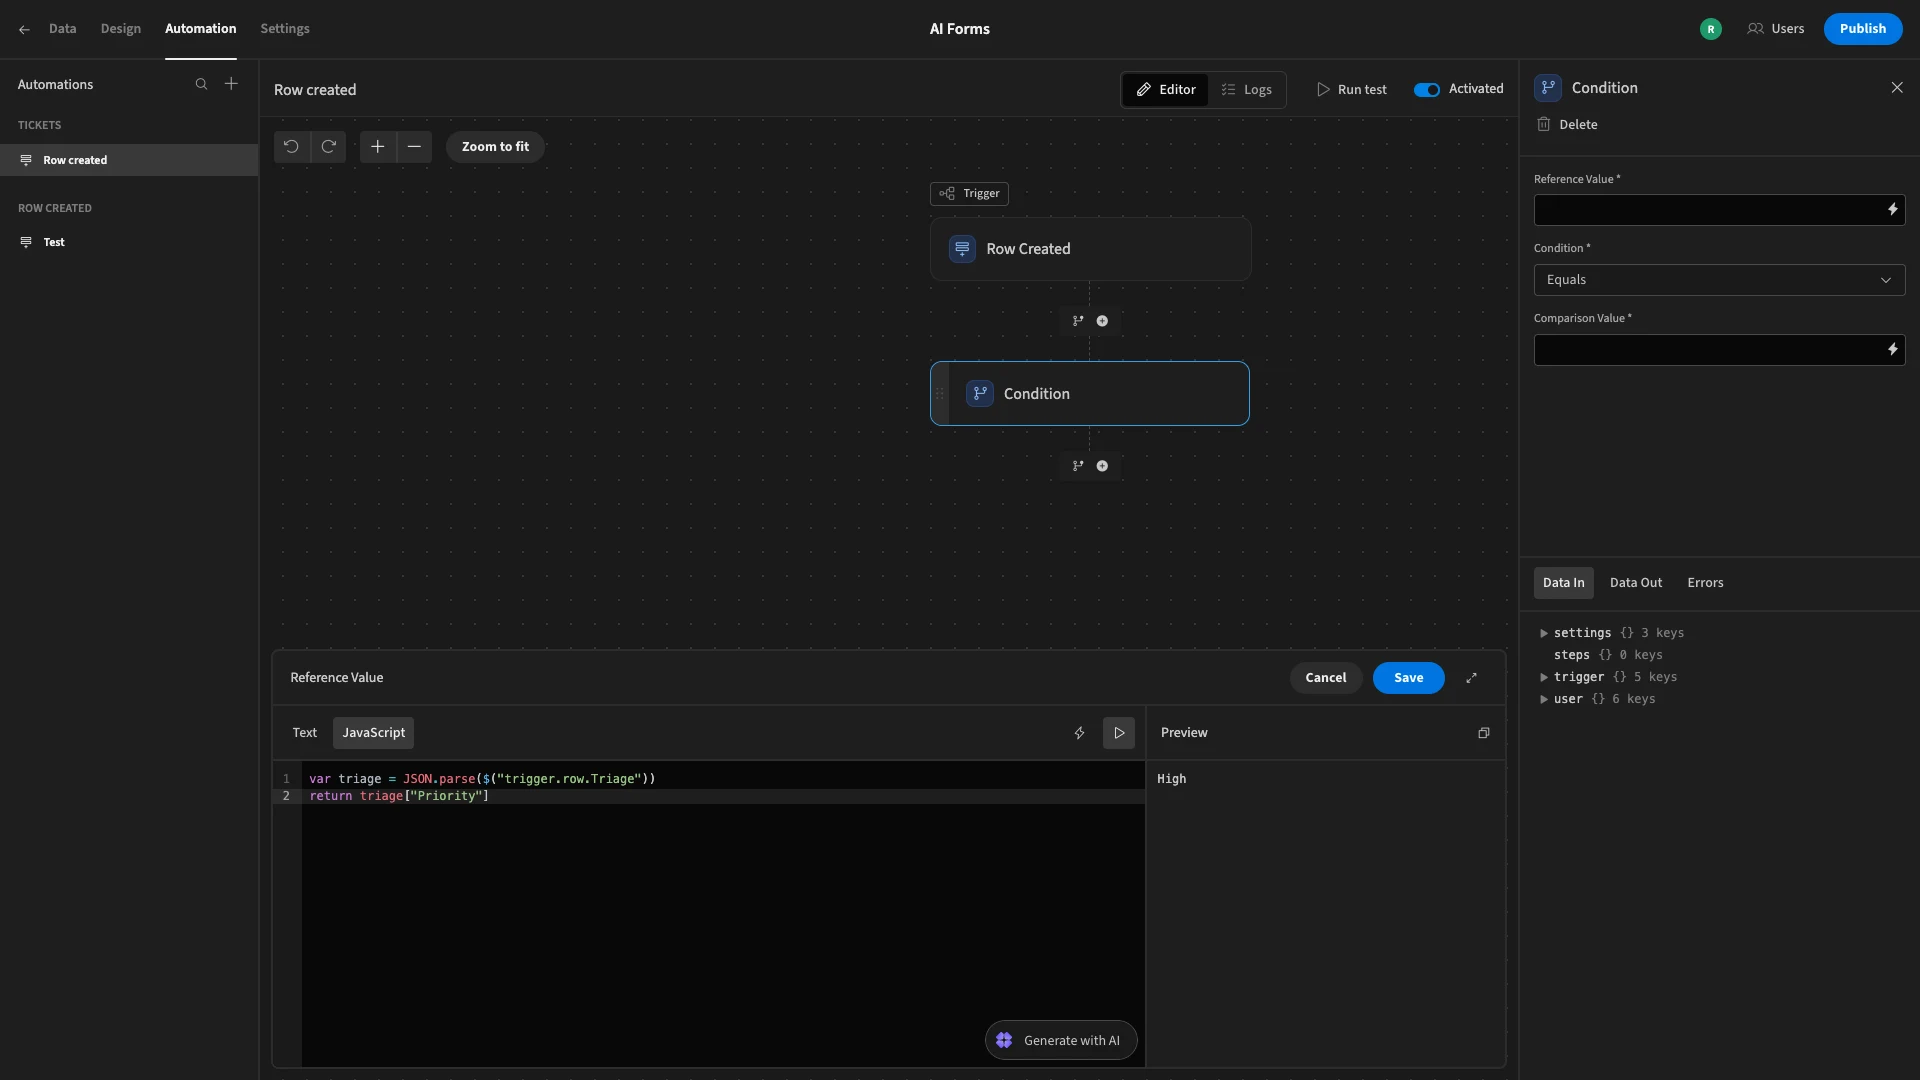
We’ll set our Comparison Value to High.
Next, we want to use an AI action to suggest an action plan that we can send to our priority queue.
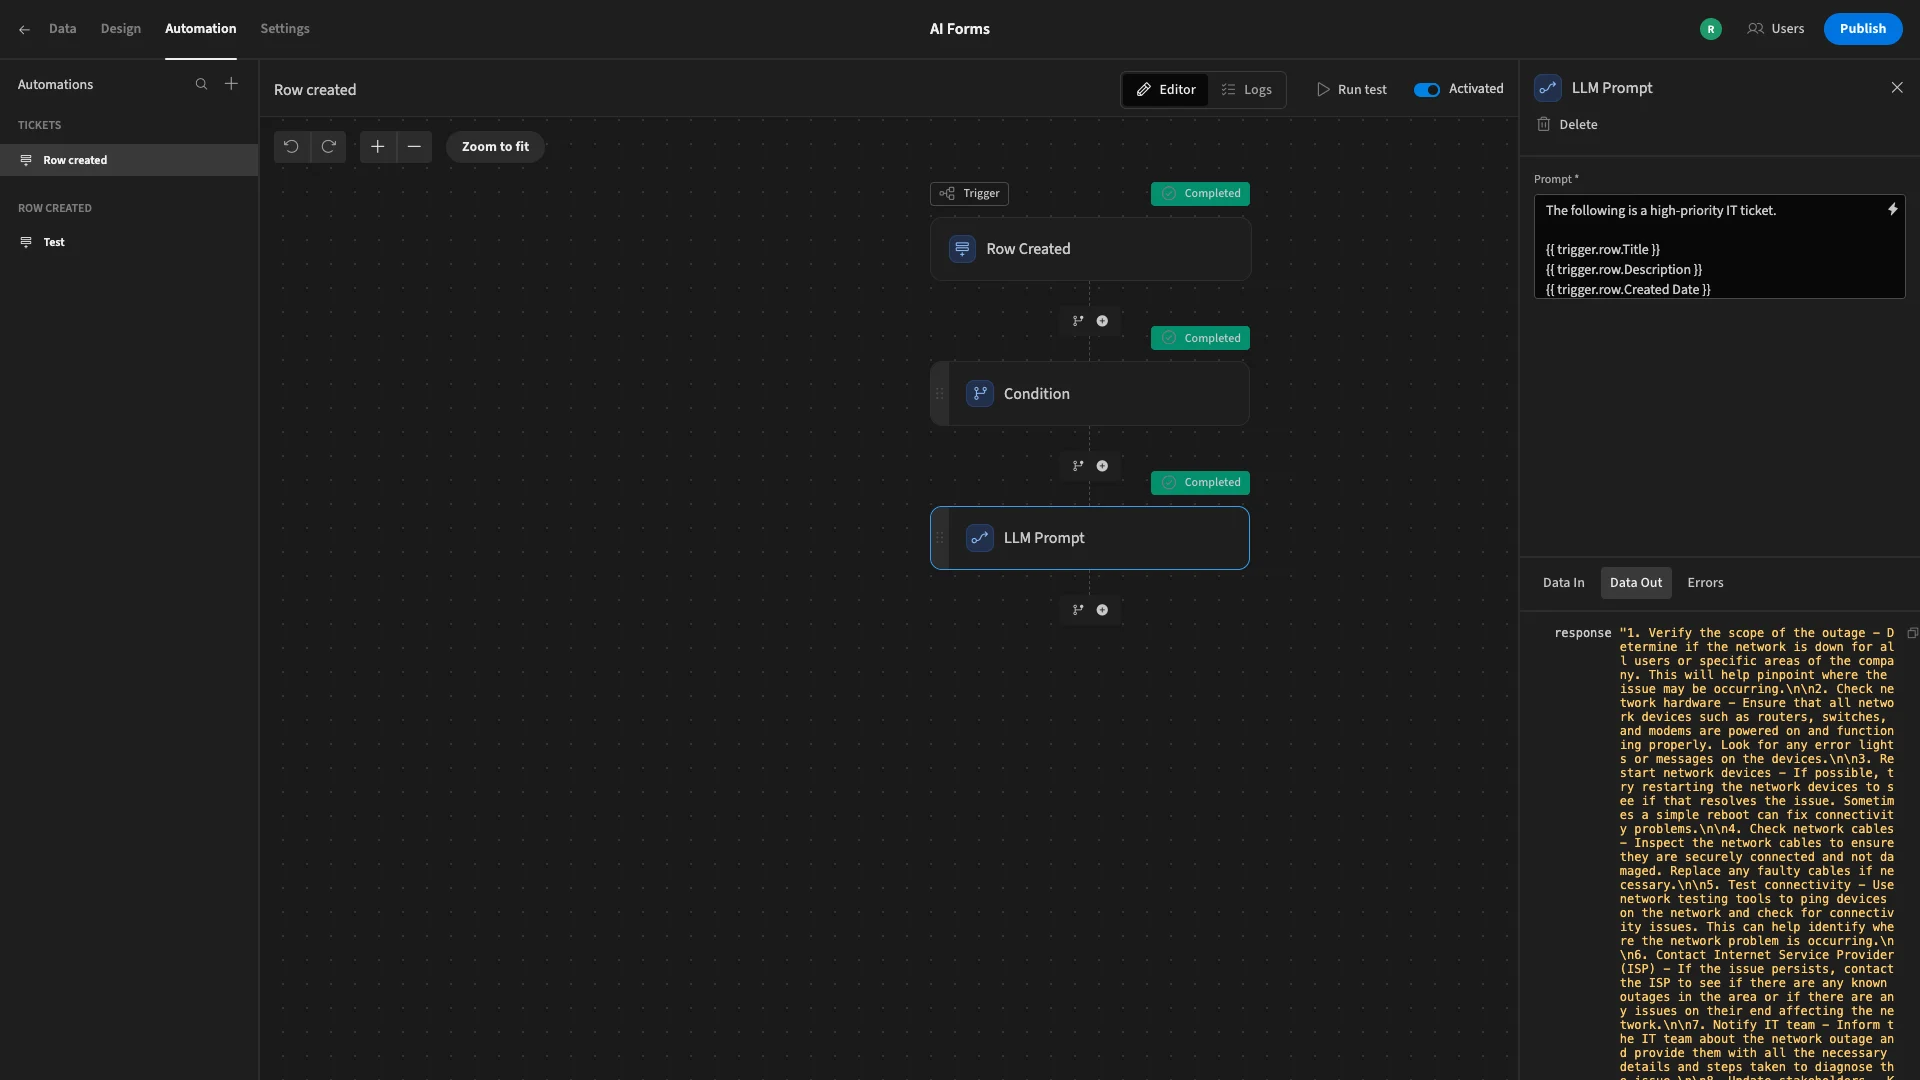
To do this, we’ll use a custom prompt again. Under AI, we’ll choose the LLM Prompt action.
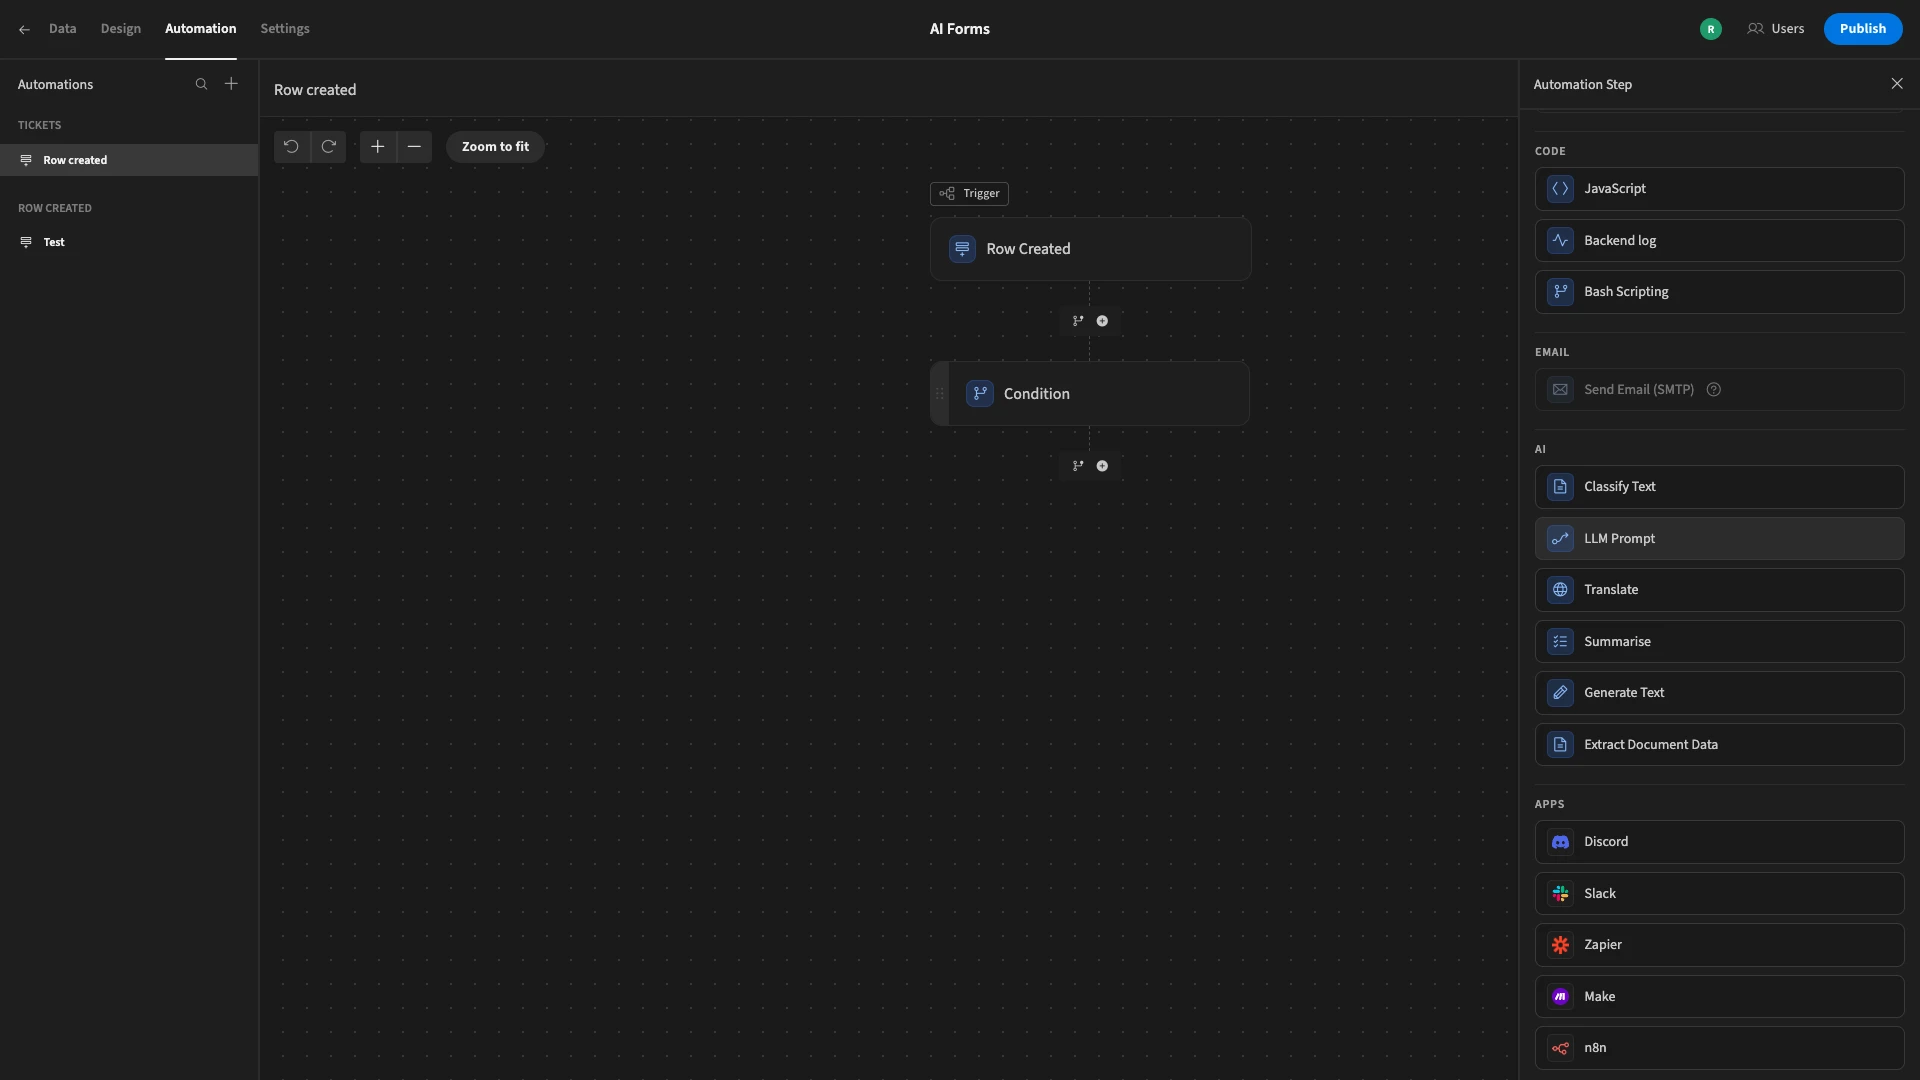
This accepts a single argument, allowing us to specify a prompt, including using whichever data the action itself is exposed to.
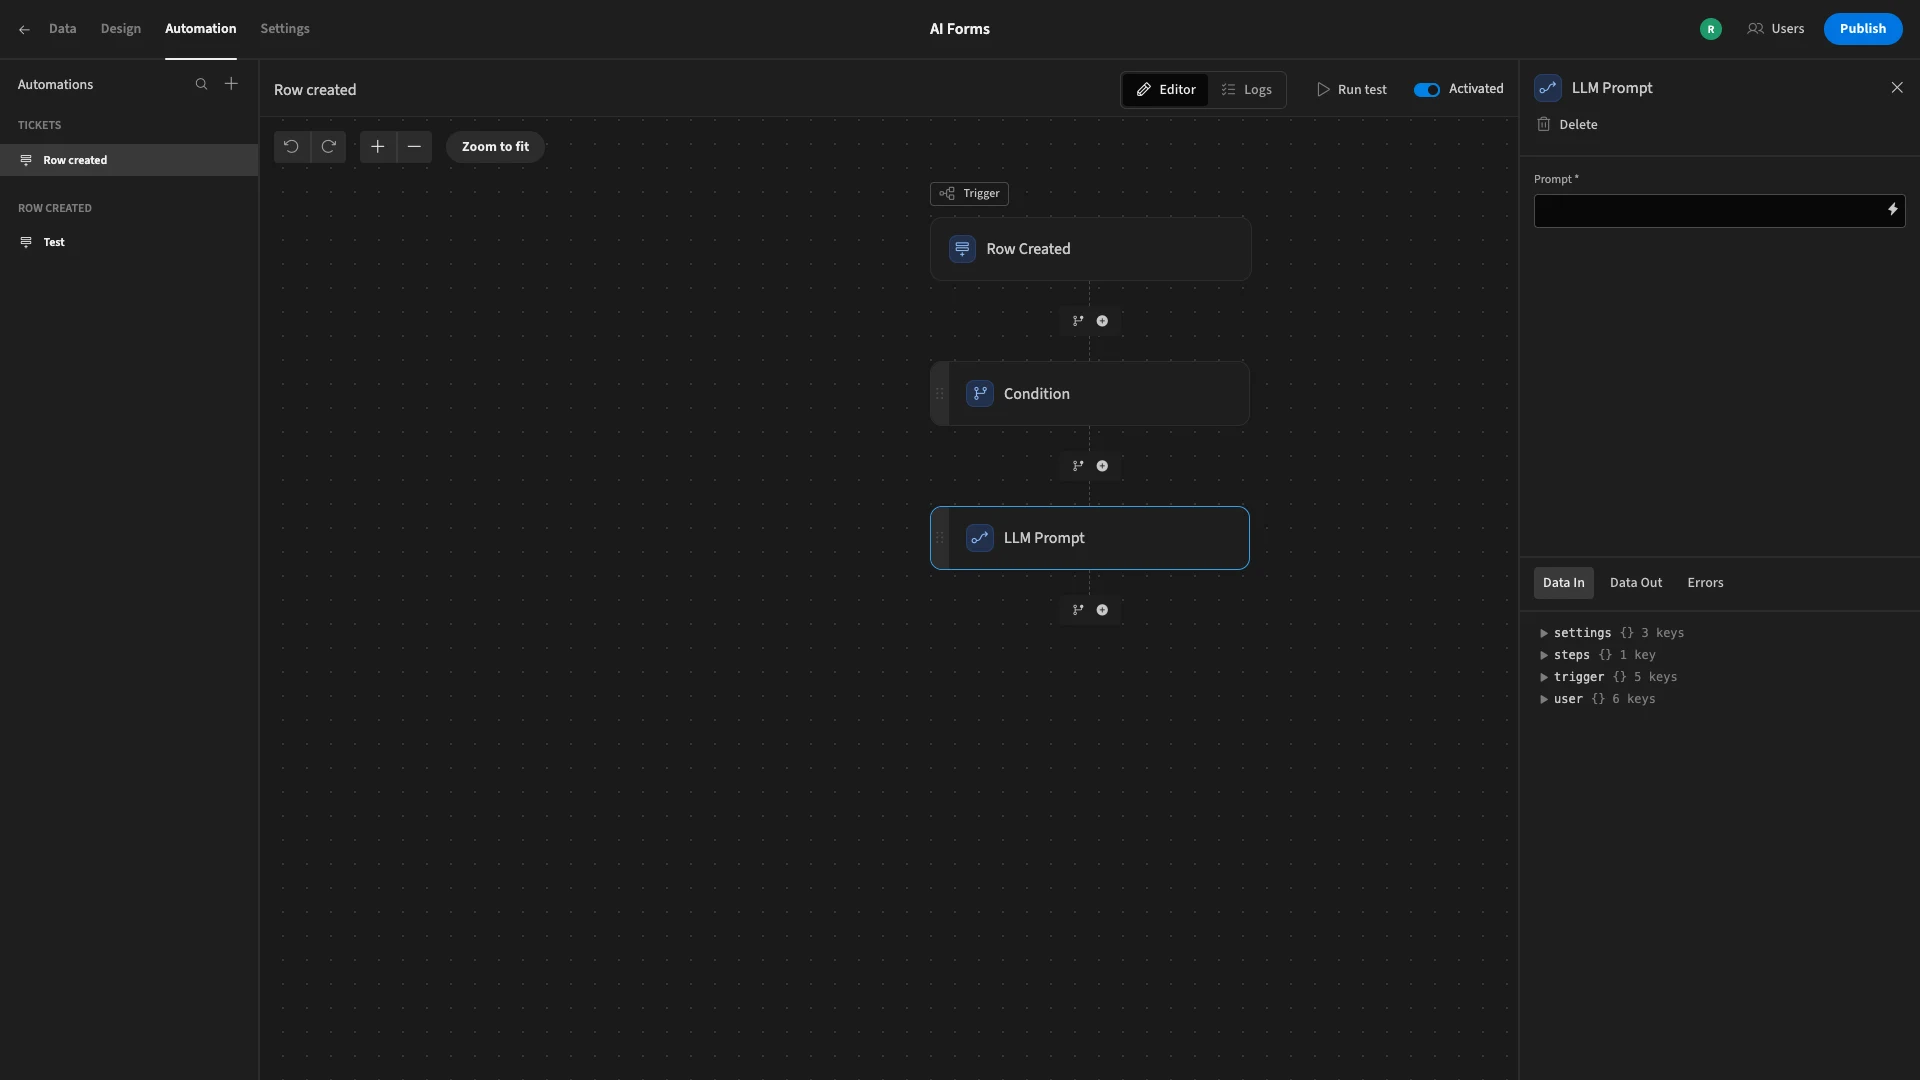
We’ll use the lightning bolt icon to open our prompt window again.
The specific prompt we’ll use is.
1The following is a high-priority IT ticket.
2
3{{ trigger.row.Title }}
4
5{{ trigger.row.Description }}
6
7{{ trigger.row.Created Date }}
8
9Please recommend an action plan to diagnose and resolve this issue.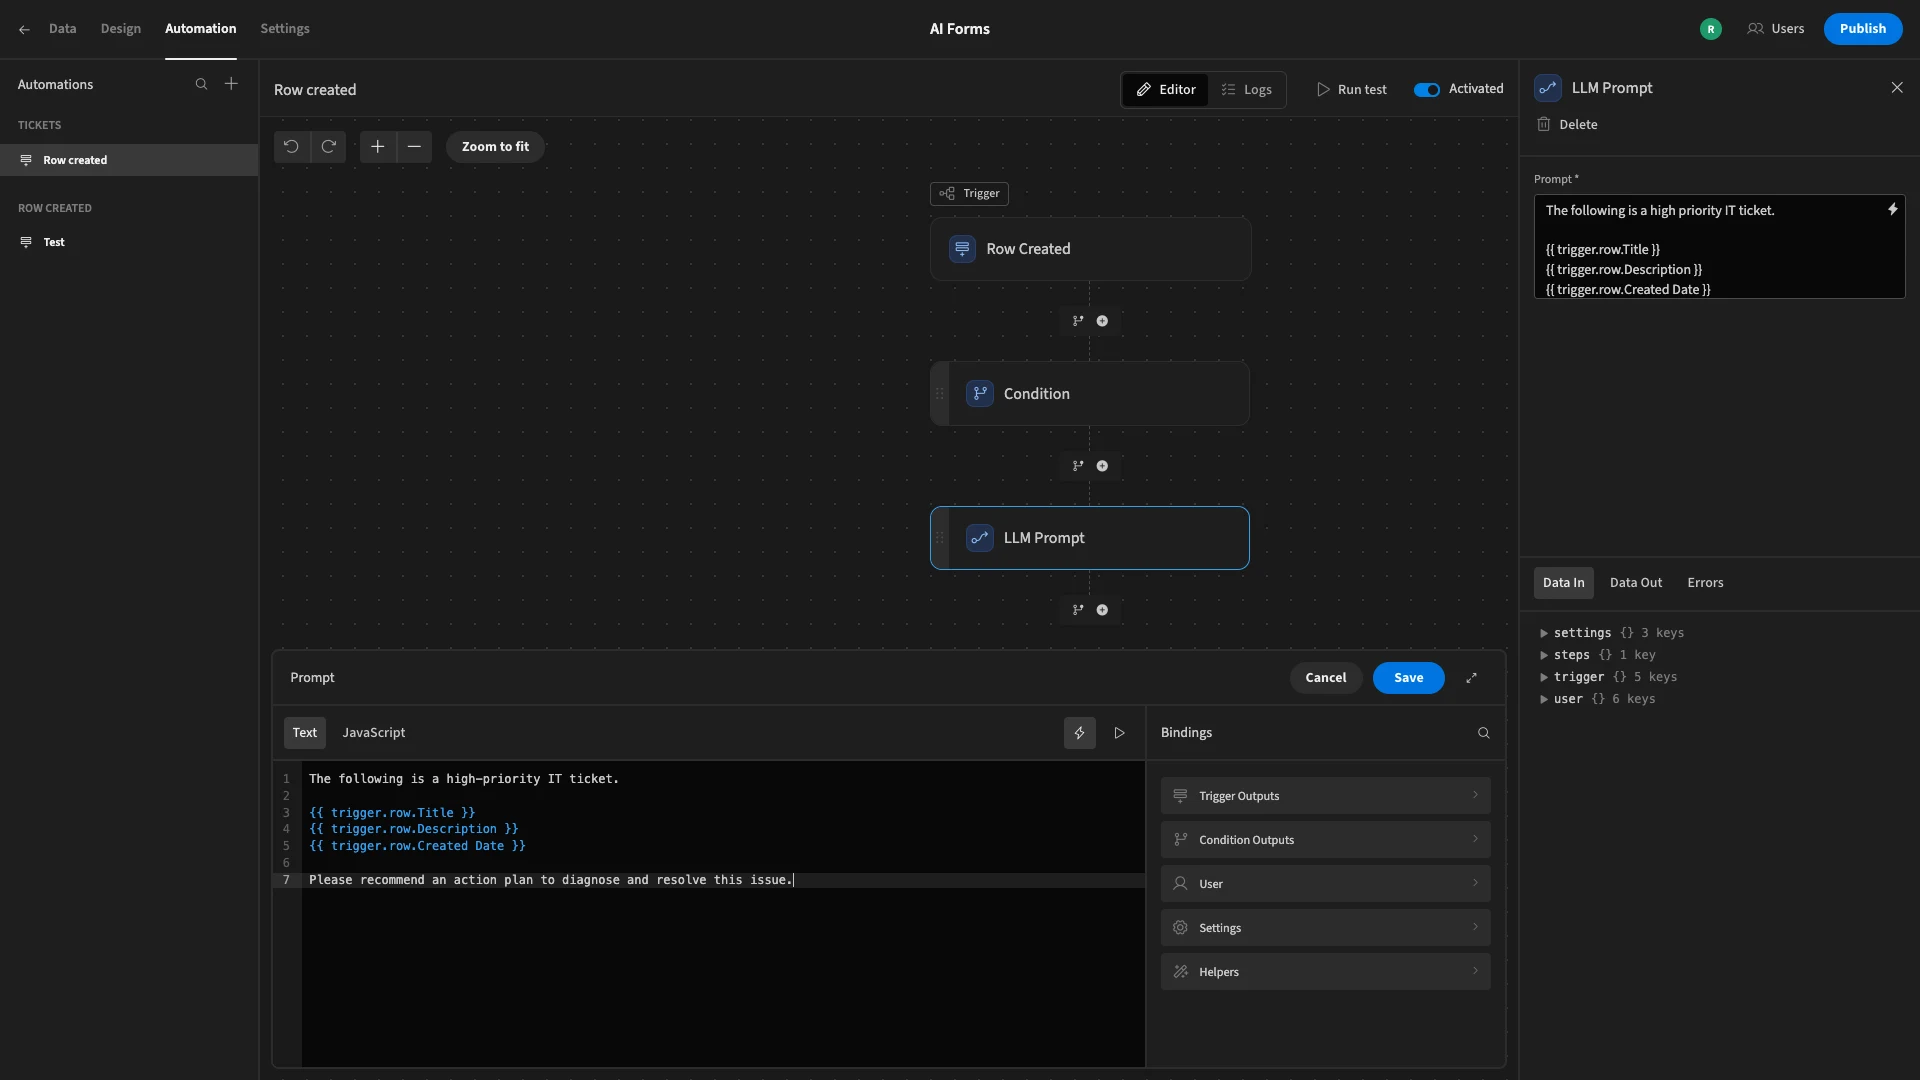
We’ll hit Run Test and select the row we created earlier, as we know it is high-priority.
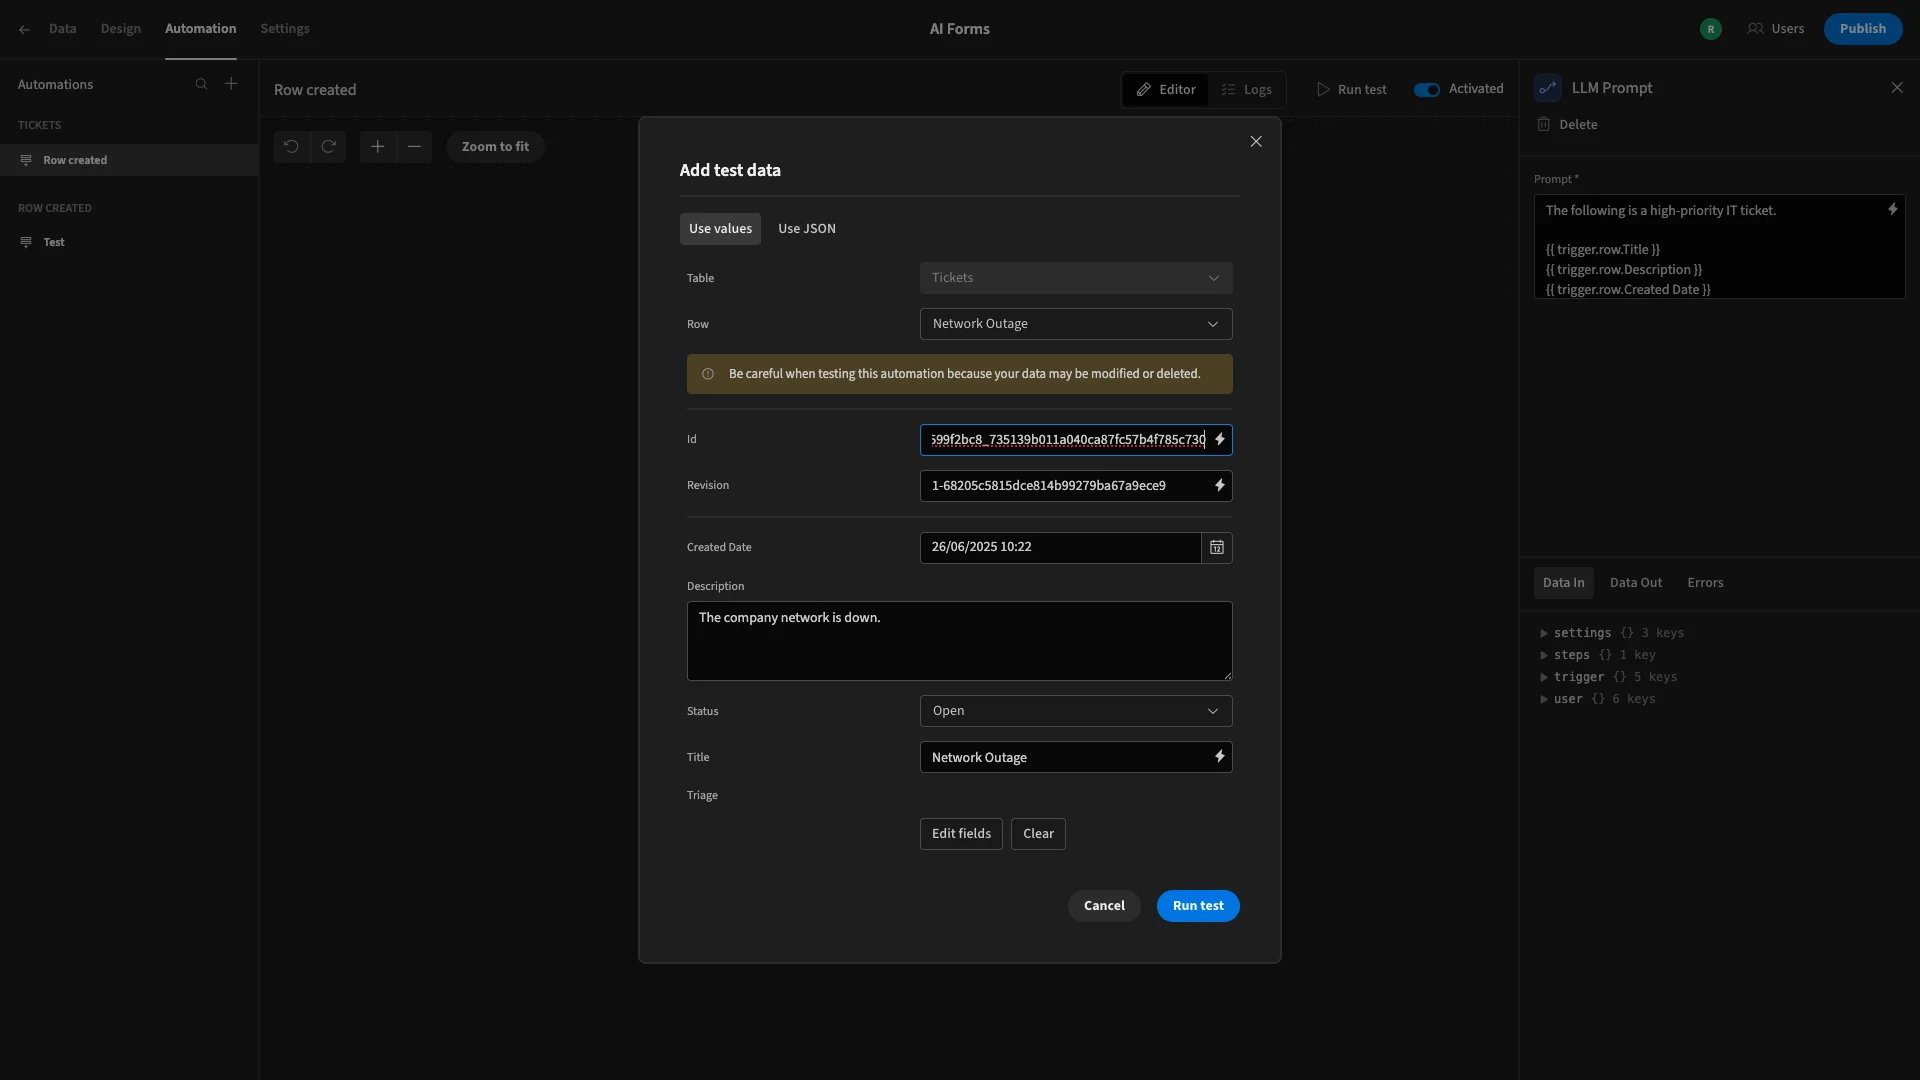
Once our test has completed, we can see our AI-generated action plan as a data output of our action.
Lastly, we want to send this action plan, along with our original row, to an API endpoint, representing our priority ticket queue.
To do this, we’ll add an API Request action. Here, we’re prompted to add a new API request.
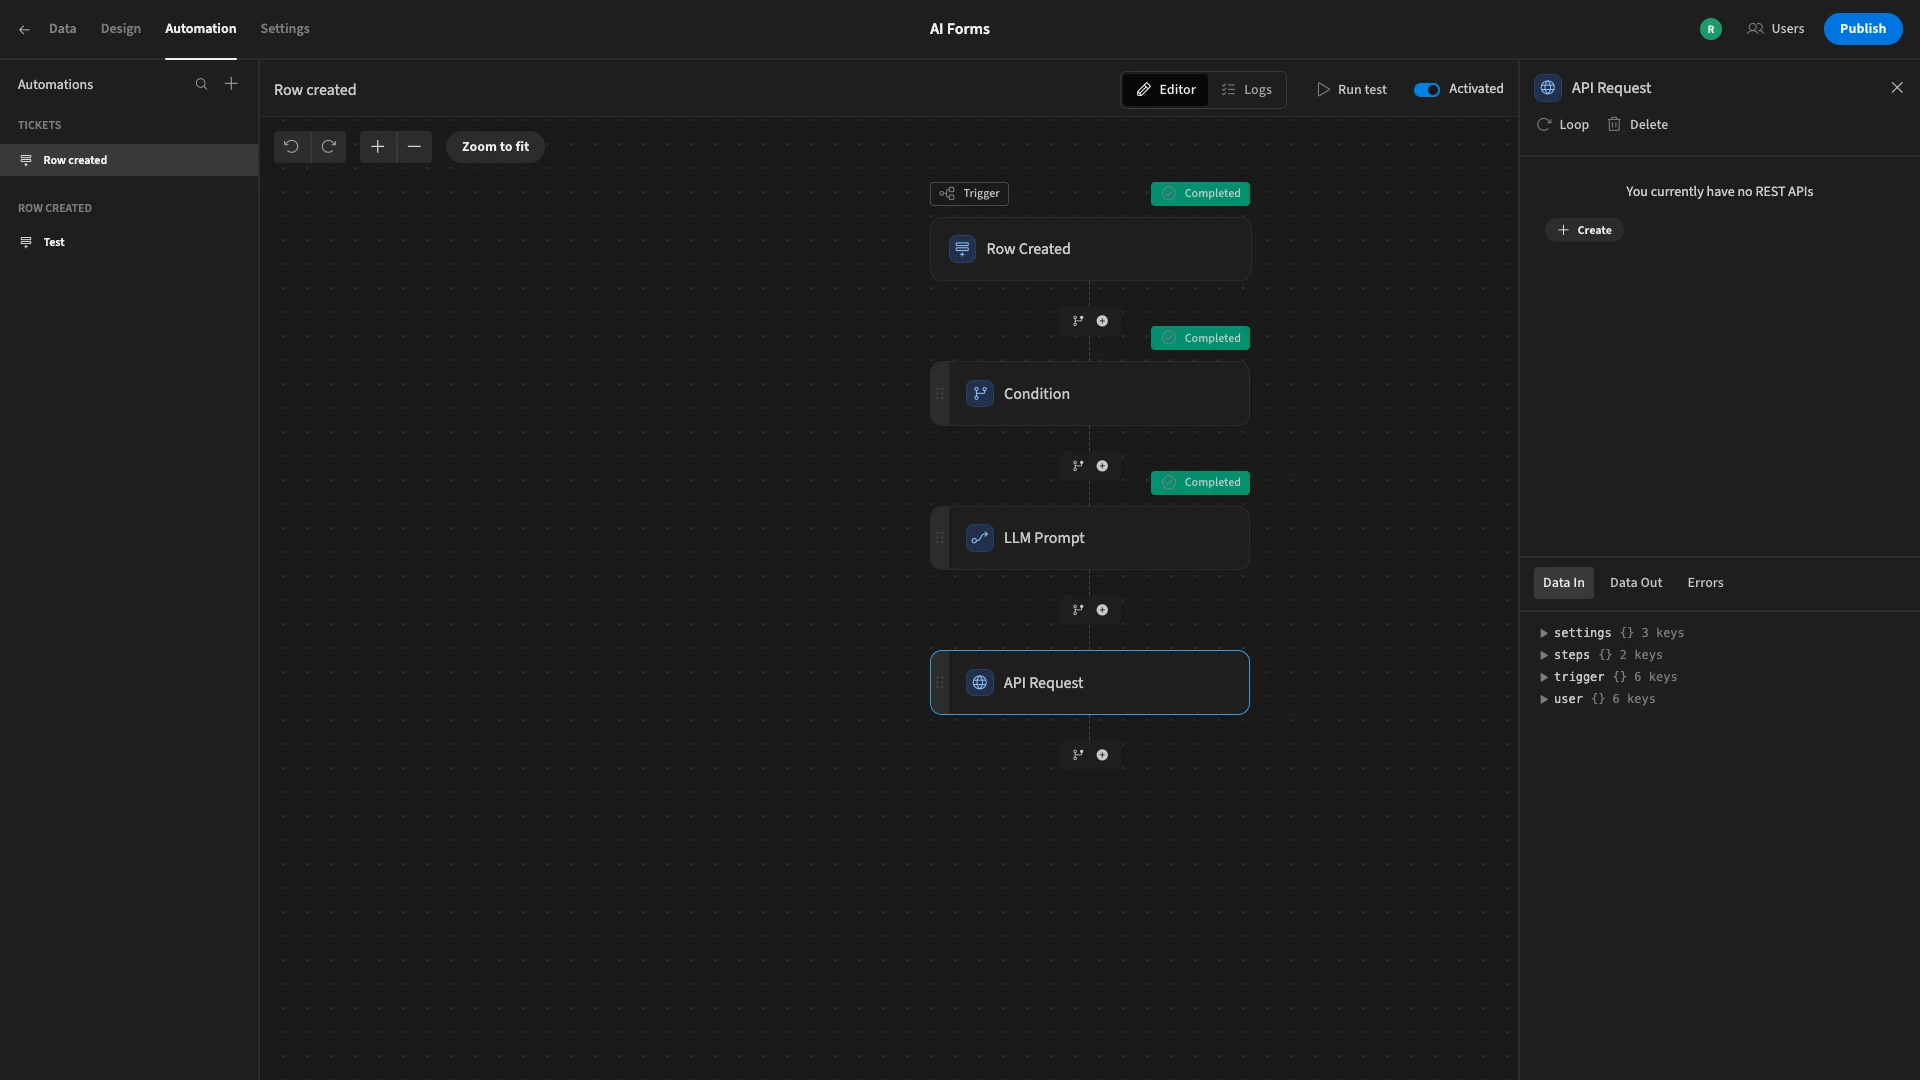
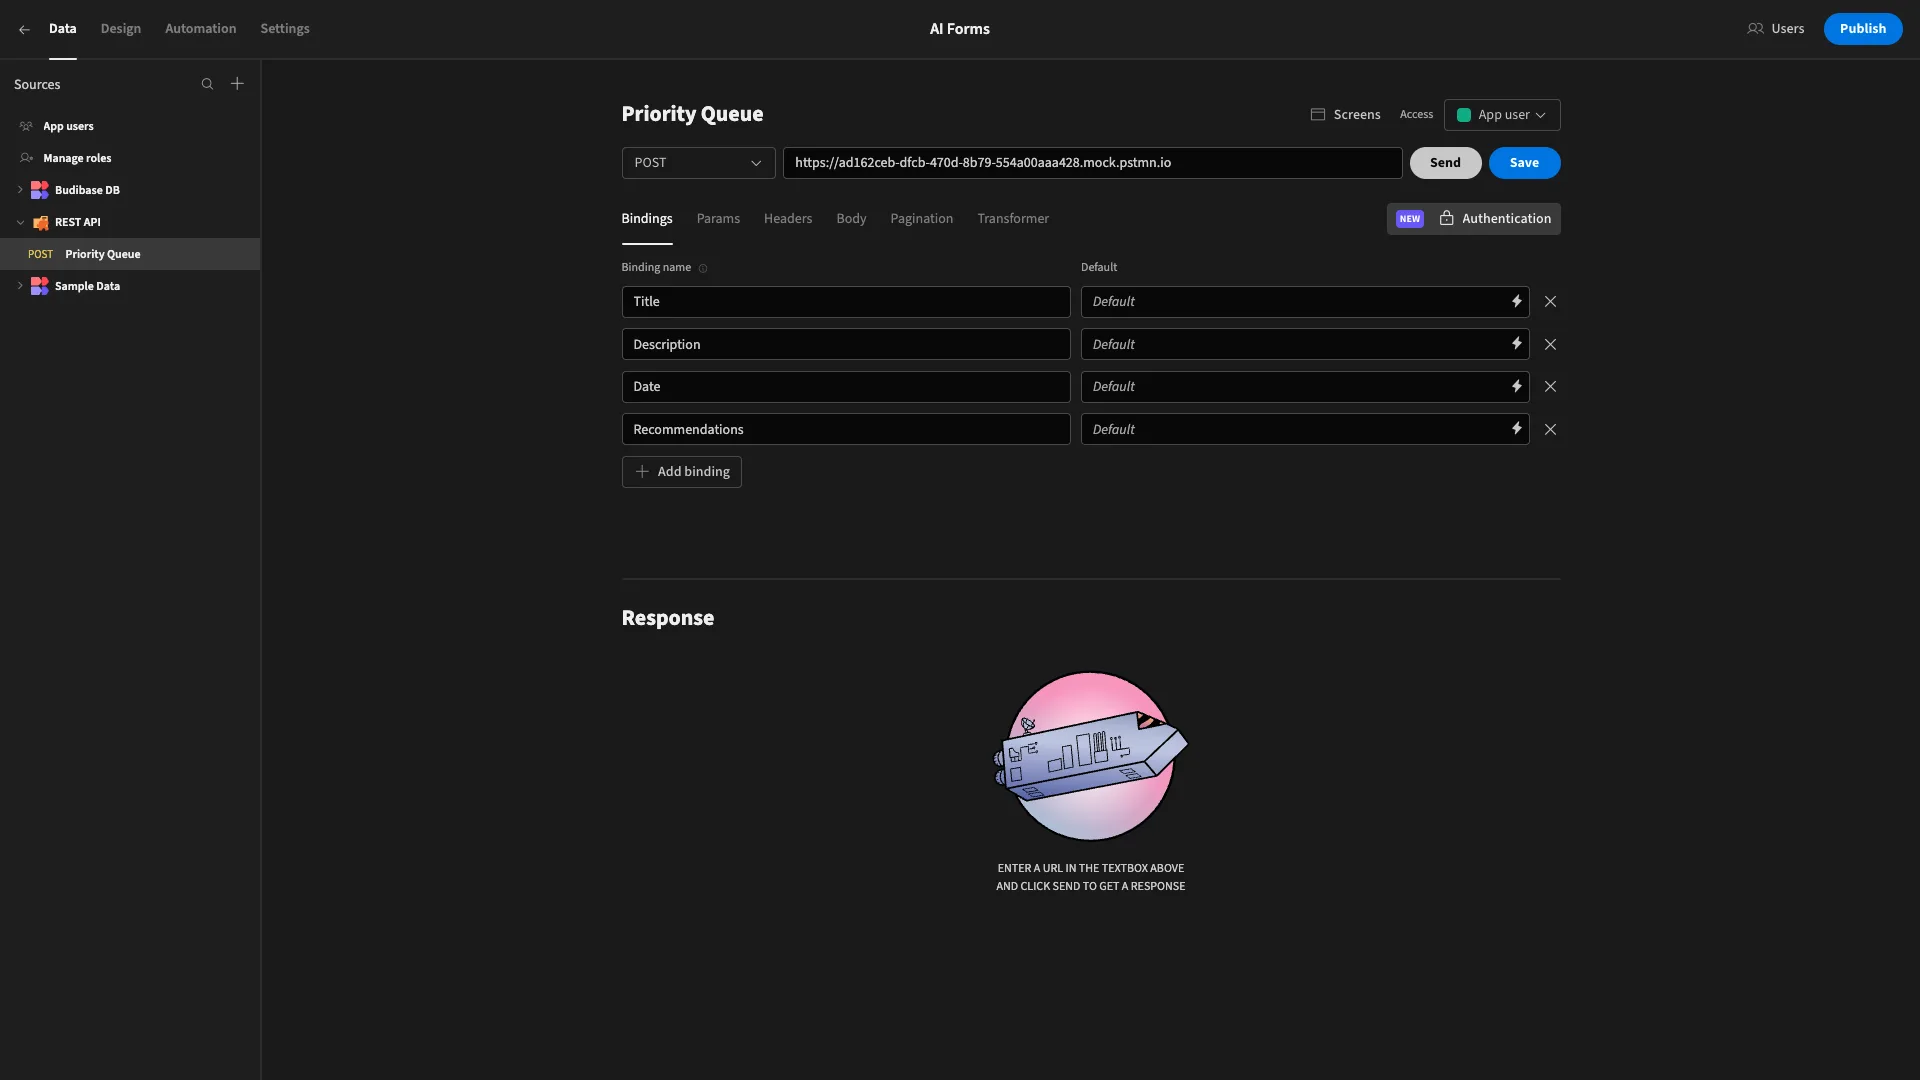
This brings us to the following screen, where we can set up our API request.

We’ll give our request a name and enter the URL for our mock server.

Then, we’ll add four bindings called Title, Description, State, and Recommendations.
Then, we’ll add Params with the same names, setting their values to the bindings we just created.
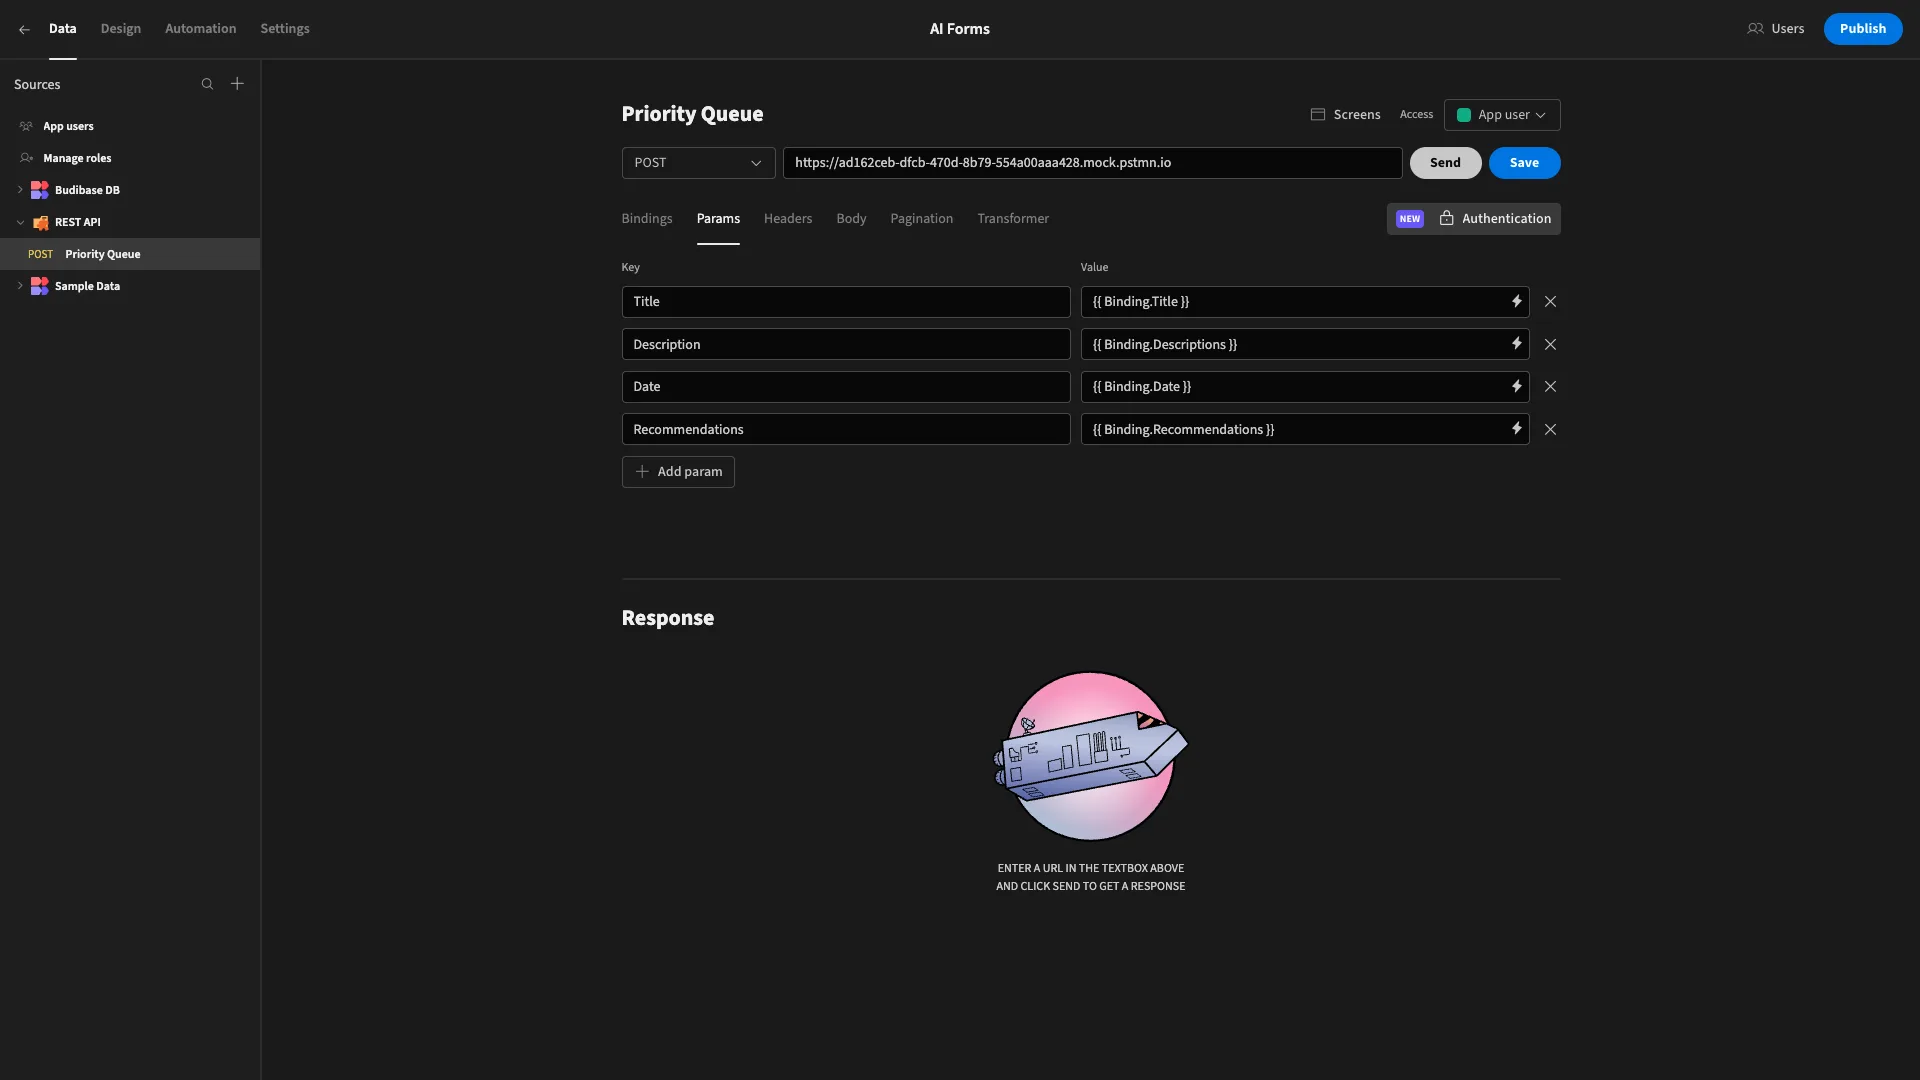
We’ll hit save and head back to our automation rule.
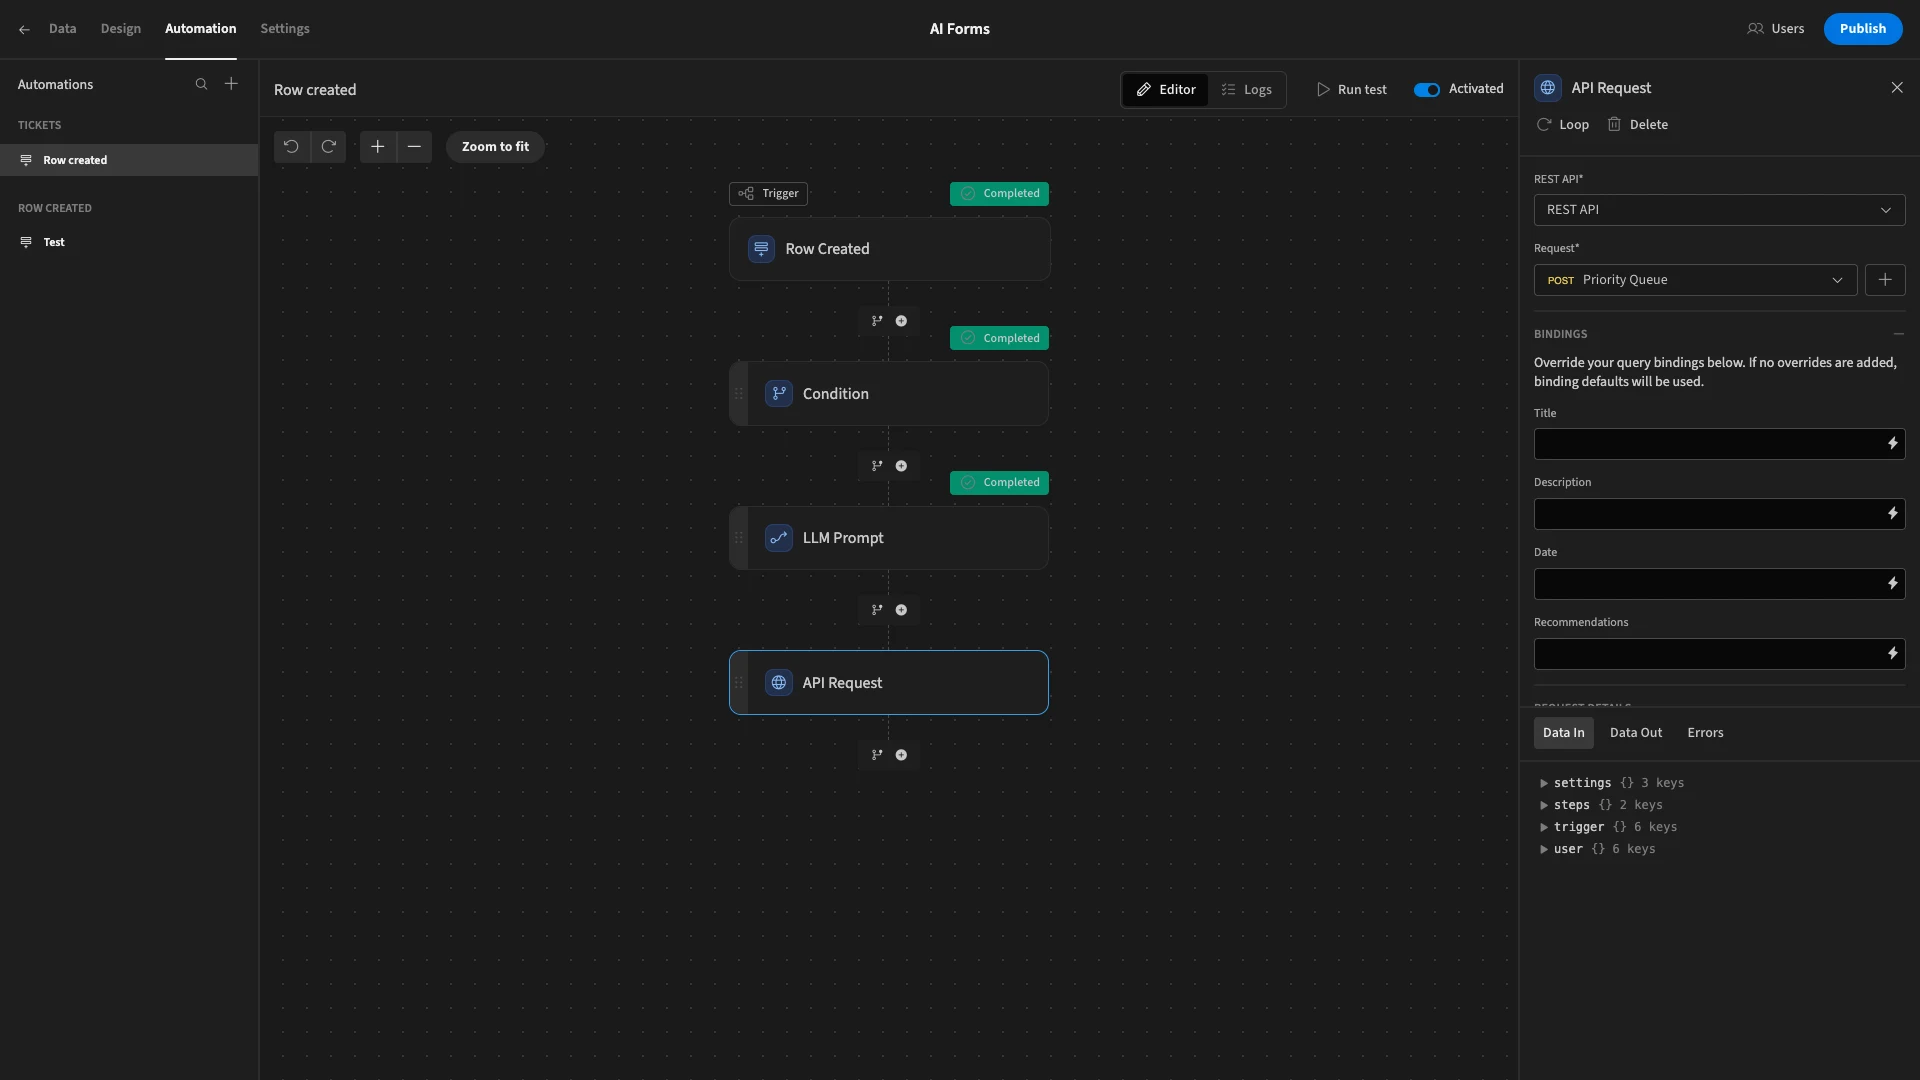
We can use the text boxes on the right-hand side to populate values for our bindings. For Title, Description, and Date, we’ll use the original values from our Row Created trigger. For Recommendations, we’ll use the output from LLM Prompt.
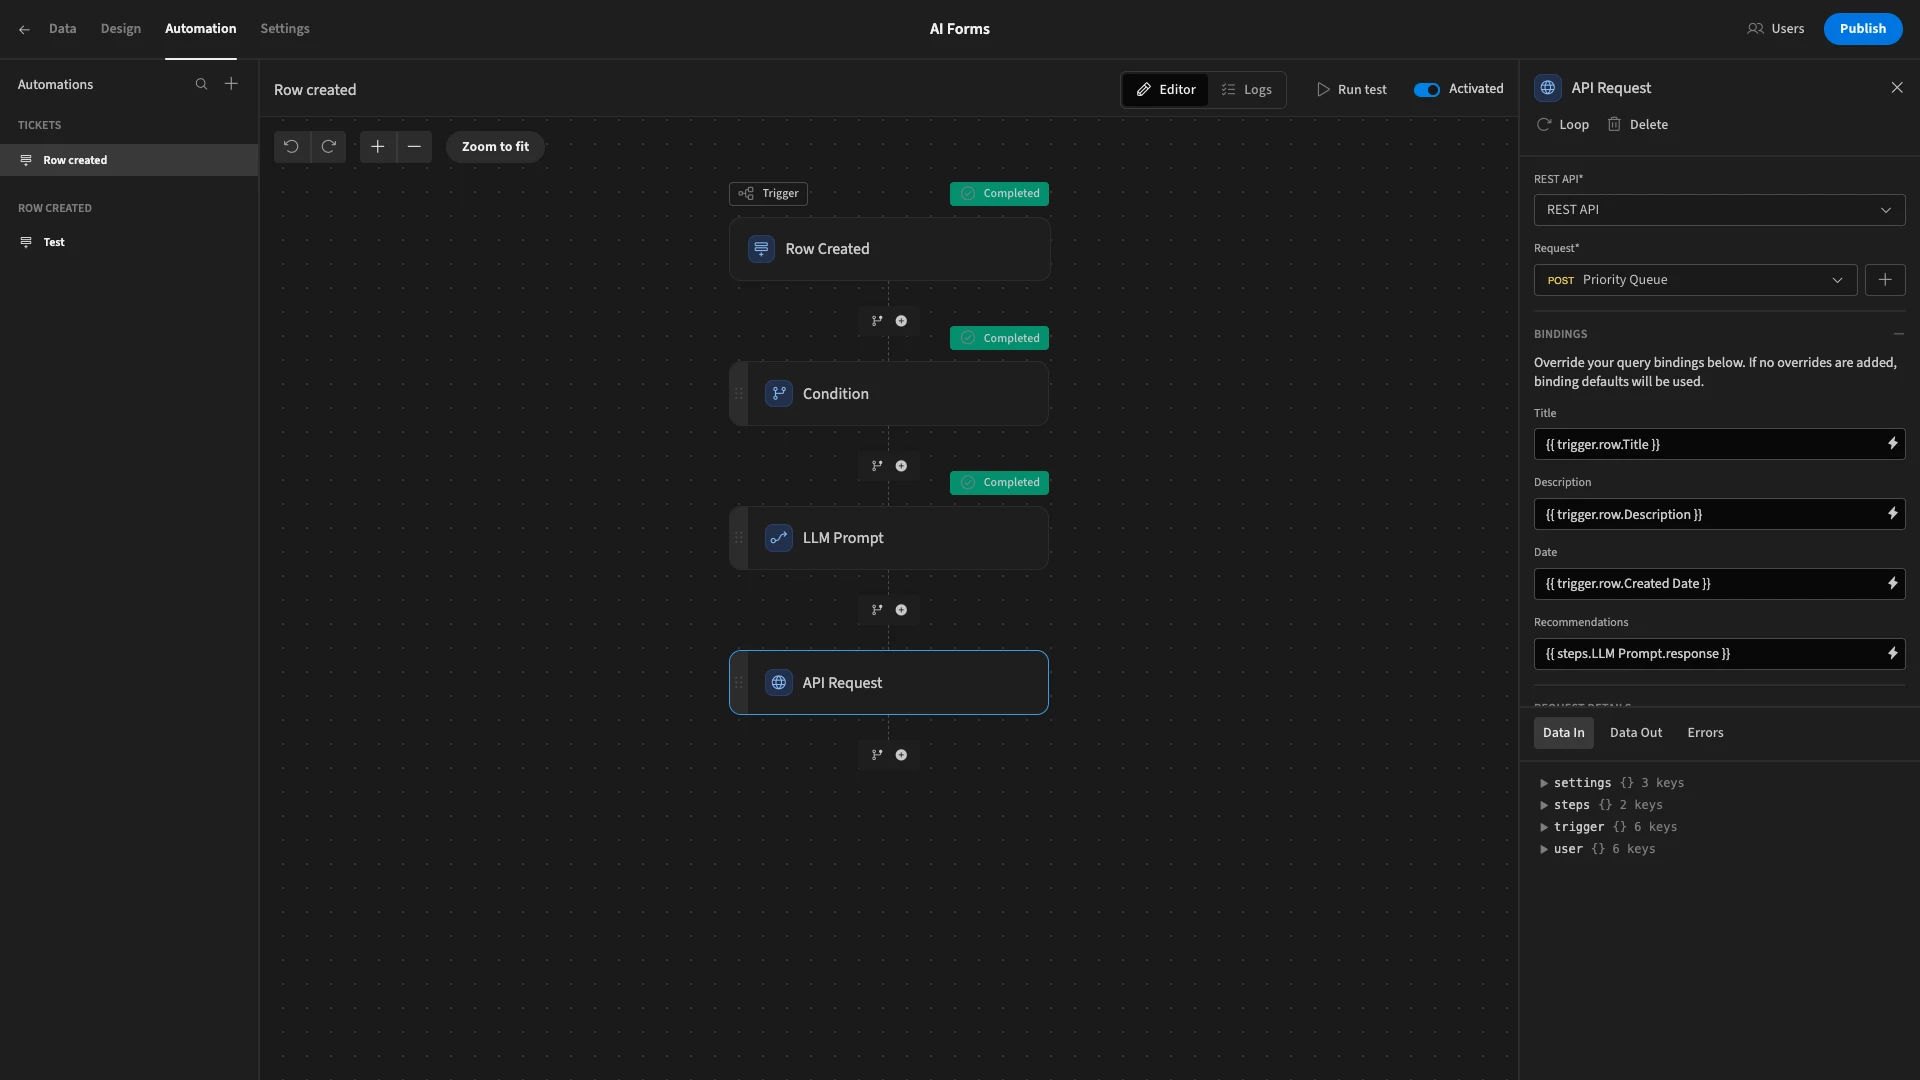
When we run our test again, we can see that our API request has been sent successfully.
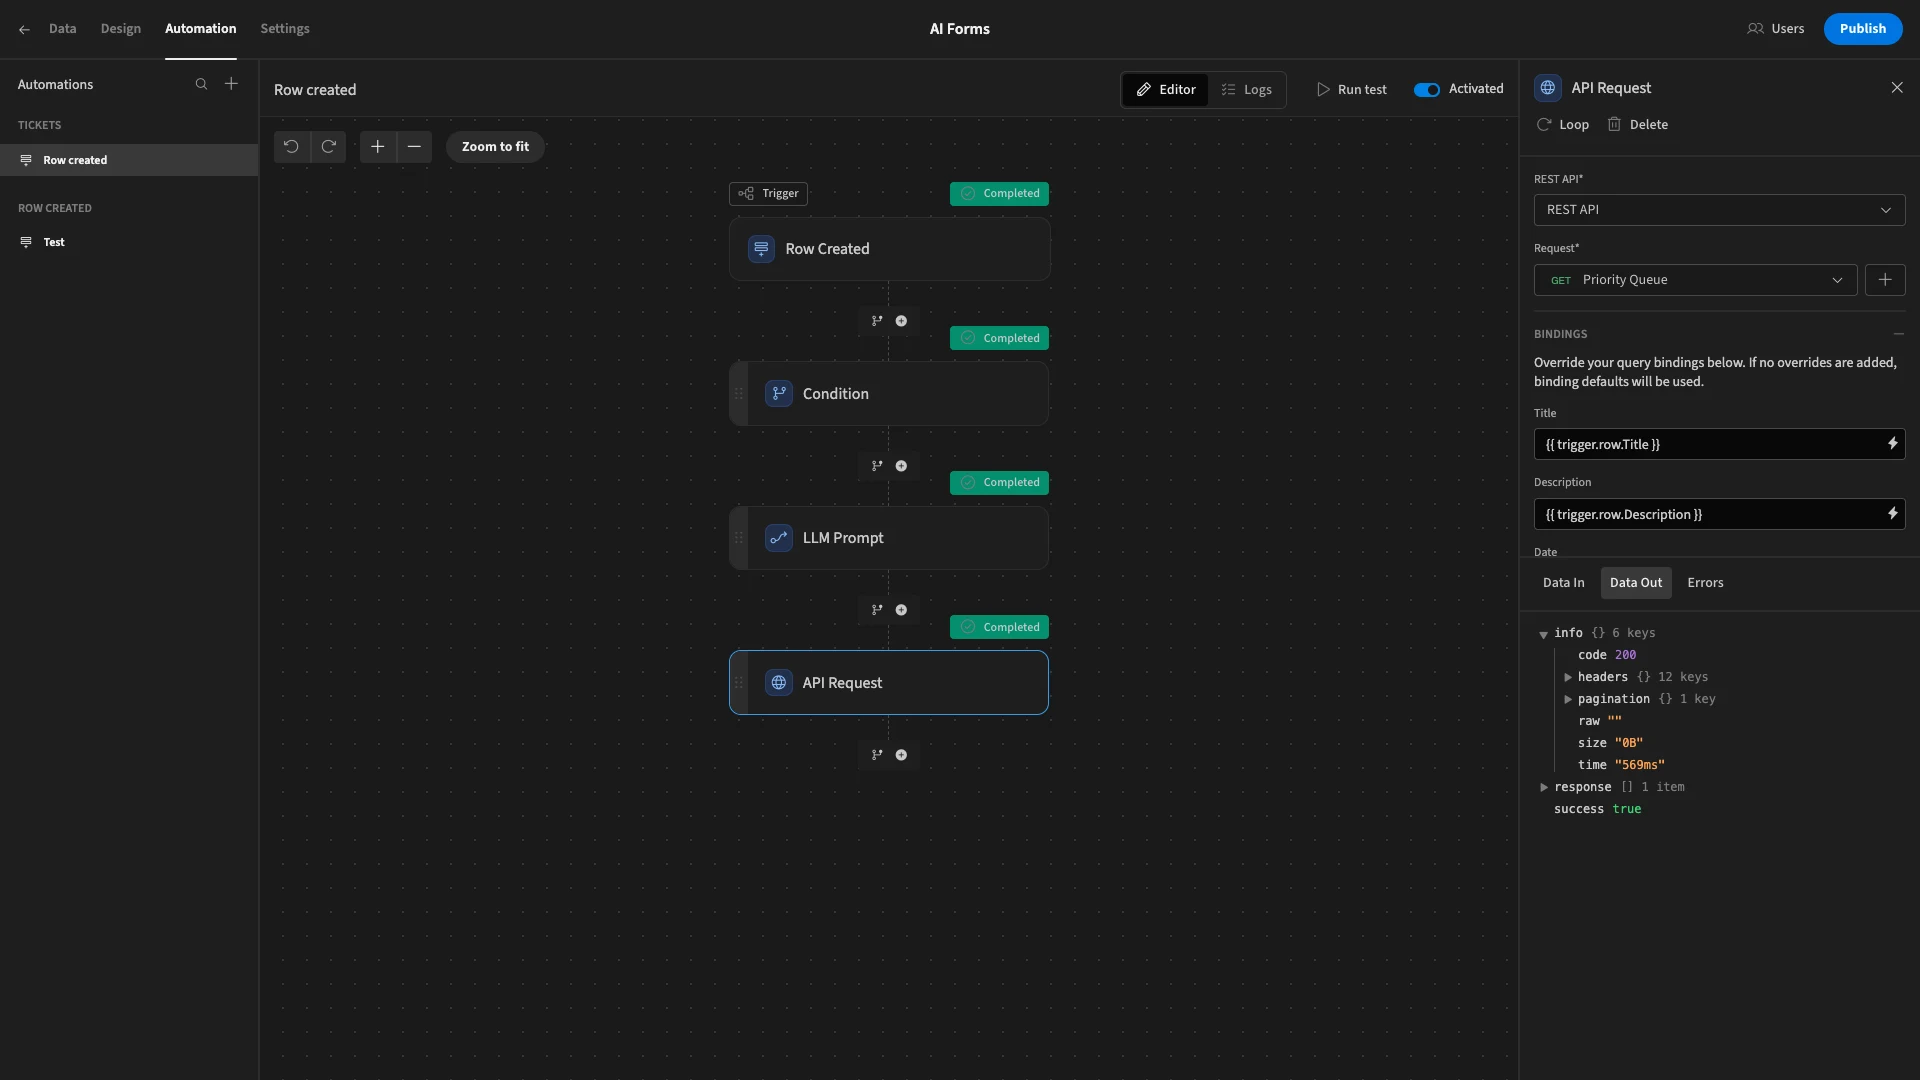
Now, when a new row is added, including using our ticketing form, our automation rule will be triggered, generating recommendations and sending them to our priority queue.
Turn data into action with Budibase
Budibase is the open-source low-code platform that empowers IT teams to turn data into action.
We offer extensive connectivity for LLMs, RDBMSs, APIs, NoSQL tools, and more, along with autogenerated UIs, powerful visual automations, optional self-hosting, and free SSO.
There’s never been a better way to build secure AI-powered applications. Take a look at our features overview to learn more.